

Bixcut IM Reamer System Brochure - Stryker
Bixcut IM Reamer System Brochure - Stryker
Bixcut IM Reamer System Brochure - Stryker

You also want an ePaper? Increase the reach of your titles
YUMPU automatically turns print PDFs into web optimized ePapers that Google loves.
Technical Details<br />
Reaming is commenced with the flexible<br />
shaft equipped with a small size<br />
<strong>Reamer</strong> Head. Continue the procedure<br />
in 0.5mm increments until cortical<br />
contact is appreciated.<br />
Caution:<br />
Where the bone is comminuted,<br />
reaming should be stopped at the<br />
fracture site and the reamers advanced<br />
with the power drill off.<br />
For T2/S2 Nailing <strong>System</strong>s, final<br />
reaming should be 1-1.5mm larger<br />
than the diameter of the nail to be<br />
used (2mm larger for Gamma3/T2<br />
Recon Long Nails).<br />
T2/S2 Nails with diameters larger<br />
than/equal to 9mm do not require<br />
Guide Wire exchange. These nails can<br />
be inserted over the Ball Tip Guide<br />
Wire (Gamma3 Nails as well).<br />
Warning:<br />
• 8mm T2 Femoral and Tibial<br />
Nails cannot be inserted over<br />
the 3mm Ball Tip Guide Wire.<br />
The Ball Tip Guide Wire must<br />
be exchanged for the 3x800mm<br />
Smooth Tip Guide Wire (1806-<br />
0090S) prior to nail insertion.<br />
• All T2 Humeral/PHN Nails<br />
require the exchange of the<br />
2.5x800mm Ball Tip Guide Wire<br />
with a Smooth Tip Guide Wire,<br />
2.2x800mm (1806-0093S) for the<br />
guide wire exchange.<br />
• Use the Teflon Tube (1806-0073S)<br />
for Guide Wire exchange.<br />
Fig. 6<br />
Note:<br />
Use the following Guide Wires with<br />
<strong>Stryker</strong> Nailing <strong>System</strong>s:<br />
•<br />
•<br />
•<br />
T2/S2 Tibia (Fig. 6):<br />
Ball Tip Guide Wire,<br />
3x800mm, sterile<br />
(1806-0080S)<br />
T2 Humerus/PHN (Fig. 7):<br />
Ball Tip Guide Wire,<br />
2.5x800mm, sterile<br />
(1806-0083S)<br />
T2/S2 Femur, T2 Recon,<br />
Gamma3 (Fig. 8):<br />
Ball Tip Guide Wire,<br />
3x1000mm, sterile<br />
(1806-0085S)<br />
Fig. 7<br />
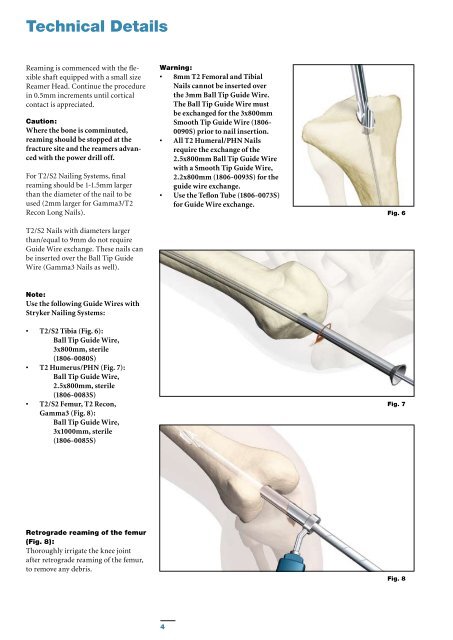
Retrograde reaming of the femur<br />
(Fig. 8):<br />
Thoroughly irrigate the knee joint<br />
after retrograde reaming of the femur,<br />
to remove any debris.<br />
Fig. 8<br />
4


