LION BRAND JAMIE BABY Crocheted Shell Bunting - Crochet Baby ...
LION BRAND JAMIE BABY Crocheted Shell Bunting - Crochet Baby ...
LION BRAND JAMIE BABY Crocheted Shell Bunting - Crochet Baby ...

You also want an ePaper? Increase the reach of your titles
YUMPU automatically turns print PDFs into web optimized ePapers that Google loves.
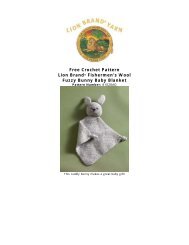
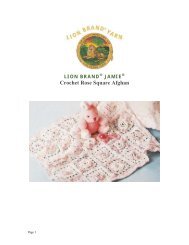
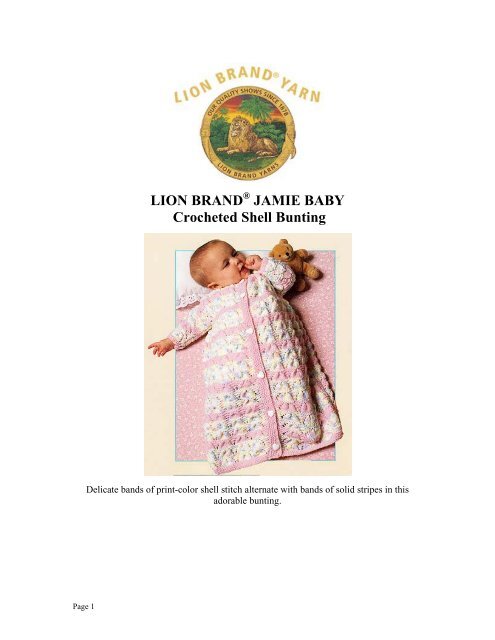
<strong>LION</strong> <strong>BRAND</strong> ® <strong>JAMIE</strong> <strong>BABY</strong><br />
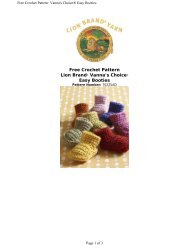
<strong><strong>Crochet</strong>ed</strong> <strong>Shell</strong> <strong>Bunting</strong><br />
Delicate bands of print-color shell stitch alternate with bands of solid stripes in this<br />
adorable bunting.<br />
Page 1
Pattern from Lion Brand Yarn Page 2<br />
Skill Level: Easy+<br />
SIZE<br />
Infant to 6 months<br />
FINISHED MEASUREMENTS<br />
Around chest (buttoned) 28"<br />
Length to shoulder 20"<br />
<strong>LION</strong> <strong>BRAND</strong> ® <strong>JAMIE</strong> <strong>BABY</strong><br />
<strong><strong>Crochet</strong>ed</strong> <strong>Shell</strong> <strong>Bunting</strong><br />
MATERIALS<br />
• <strong>LION</strong> <strong>BRAND</strong> Jamie Pompadour, Art. No. 890 or Jamie 3 Ply <strong>Baby</strong> Sport Yarn, Art<br />
No. 870 (1.75 oz. solid color skeins, 1.5 oz. print skeins)<br />
2 skeins Color No. 201 Pink (A)<br />
4 skeins Color No. 198 Floral Print (B) or colors of your choice<br />
• <strong>Crochet</strong> hooks Sizes F and G OR SIZE NEEDED TO OBTAIN THE CORRECT<br />
GAUGE<br />
• Five ½"-diameter buttons<br />
GAUGE<br />
With larger hook, 4 pattern repeats = 7"<br />
PATTERN STITCH (multiple of 10, plus 1 sc)<br />
Row 1 (RS) Sc in first sc, * sk 4 sc, work 12 dc in next sc (shell made), sk 4 sc, sc in next<br />
sc; repeat from * across. Ch 8, turn.<br />
Row 2 Sc in sp between 6th and 7th dc of first shell, * ch 4, work 2 dc in next sc, ch 4, sc<br />
in sp between 6th and 7th dc of next shell; repeat from * across, ending ch 4, 2 dc in last<br />
sc. Ch 1, turn.<br />
Row 3 Sc in first dc, * sk ch-4, 12 dc in next sc (shell made above shell), sk ch-4, sc in sp<br />
between next 2 dc; repeat from * across, ending last repeat with sc in 5th ch of ch-8. Ch<br />
8, turn. Repeat Rows 2 and 3 for pattern.<br />
BACK<br />
Starting at lower edge with Color A and smaller hook, ch 82.<br />
Border: Row 1 (RS) Sc in 2nd ch from hook and in each remaining ch across (81 sc). Ch<br />
1, turn. Work even for 7 more rows. Change to larger hook and B. Work in pattern,<br />
alternating colors as follows: Work 4 rows of B, 2 rows of A. Work even until piece<br />
measures about 15½" from beg, ending with 4 rows of B.<br />
Bodice Band Change to smaller hook and A.<br />
© 1998-2003 Lion Brand Yarn Company, all rights reserved<br />
34 West 15th Street, New York, New York 10011<br />
Call TOLL-FREE 1-800-258-YARN<br />
No pattern or other material may be reproduced – mechanically, electronically or by any other means, including photocopying –<br />
without written permission of Lion Brand Yarn Company
Pattern from Lion Brand Yarn Page 3<br />
Next Row (Note: To dec, sk 1 ch) Sc across, decreasing 10 sts evenly spaced (71sc).<br />
Work even in sc for 5 more rows. Fasten off.<br />
Shape Armholes Sk first 5 sc (underarm), attach B in next sc and with larger hook, ch 1,<br />
work Row 1 of pattern across center 61 sc, sk last 5 sc (underarm). Continue in pattern,<br />
alternating colors as before until piece measures about 20" from beg, ending with 4 rows<br />
of B. Fasten off.<br />
LEFT FRONT<br />
With A and smaller hook, ch 42. Work on 41 sts in pattern as for back to bodice band.<br />
Bodice Band Change to smaller hook and A.<br />
Next Row Sc across, decreasing 5 sts evenly spaced (36 sc). Work even in sc for 5 more<br />
rows. Fasten off.<br />
Shape Armholes: Next row (RS) Sk first 5 sc (underarm), attach B and with larger<br />
hook, ch 1, work Row 1 of pattern across remaining 31 sc. Continue in pattern,<br />
alternating colors as before until piece measures ½" less than back to shoulder, ending at<br />
arm edge.<br />
Shape Neck: Next Row (RS) Work pattern across first 21 sts. Ch 8, turn. Work 1 row<br />
more. Fasten off.<br />
RIGHT FRONT<br />
Work to correspond to left front, reversing shaping.<br />
SLEEVES<br />
With A and smaller hook, ch 27.<br />
Row 1 Sc in 2nd ch from hook and in each remaing ch across. Work in sc for 3 more<br />
rows, increasing 15 sts evenly spaced across last row (41 sc). Change to larger hook and<br />
B. Work Rows 1 and 2 of pattern. Continue in pattern, alternating colors as before, and<br />
inc 1 st at each end of every row (working added sts as sc on Row 3, as dc on Row 2).<br />
Work until sleeve measures about 6", ending with 2 rows of A. Fasten off.<br />
FINISHING<br />
Sew shoulder seams.<br />
Neckband On RS, with smaller hook and B, crochet 48 sc evenly spaced around neck<br />
edge. Change to A and work 4 more sc rows. Fasten off.<br />
Buttonband On RS, using smaller hook and A, corchet 86 sc evenly spaced along left<br />
front edge. Work 4 more sc rows. Fasten off. Mark position for 5 buttons, the first<br />
© 1998-2003 Lion Brand Yarn Company, all rights reserved<br />
34 West 15th Street, New York, New York 10011<br />
Call TOLL-FREE 1-800-258-YARN<br />
No pattern or other material may be reproduced – mechanically, electronically or by any other means, including photocopying –<br />
without written permission of Lion Brand Yarn Company
Pattern from Lion Brand Yarn Page 4<br />
centered at neckband, the 2nd at bodice band, the last at lower band and the remaining<br />
two evenly spaced between.<br />
Buttonhole Band On RS of right front edge, work first 2 rows as for buttonband.<br />
Next Row (buttonhole row) Sc and work button holes opposite each marker as follows:<br />
Ch 2, sk 2 sc, sc in next sc. On following row, sc in each sc and ch. Sc 1 more row.<br />
Fasten off. Sew top edge of each sleeve to armhole; then sew top 1" along each sleeve<br />
side edge to corresponding underarm. Sew sleeve and side seams. Sew on buttons.<br />
NOTE<br />
If you wish baby to be able to wear <strong>Bunting</strong> while in car seat, do not sew bottom seam.<br />
Bottom hem can be left as is (the stockinette stitch will naturally roll) or you can pick up<br />
stitches along bottom hem and knit a few rows of garter stitch (knit every row if working<br />
Back and Front separately on straight needles or alternate rounds of knit and purl if using<br />
circular needles to work in the round) to flatten it, adding buttonholes evenly spaced, if<br />
desired, along one side and sewing buttons opposite to match. Bottom hem may also be<br />
closed by sewing in a zipper or Velcro.<br />
ABBREVIATIONS:<br />
beg = begin(ning)<br />
ch = chain<br />
dc = double crochet<br />
dec = decrease<br />
inc = increase<br />
RS = right side<br />
sc = single crochet<br />
sk = skip<br />
sp = space<br />
st(s) = stitches<br />
WS = wrong side<br />
Jamie <strong>Baby</strong> (Article #870) solid colors come in 1 3/4 oz/196 yd skeins; prints come in 1 1/2 oz/170 yd skeins<br />
Every effort has been made to have the knitting and crochet instructions accurate and complete. We cannot<br />
be responsible for variance of individual knitters and crocheters, human errors, or typographical mistakes.<br />
© 1998-2003 Lion Brand Yarn Company, all rights reserved<br />
34 West 15th Street, New York, New York 10011<br />
Call TOLL-FREE 1-800-258-YARN<br />
No pattern or other material may be reproduced – mechanically, electronically or by any other means, including photocopying –<br />
without written permission of Lion Brand Yarn Company