
Create successful ePaper yourself
Turn your PDF publications into a flip-book with our unique Google optimized e-Paper software.
4<br />
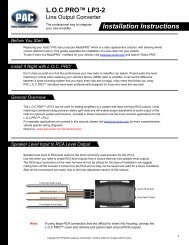
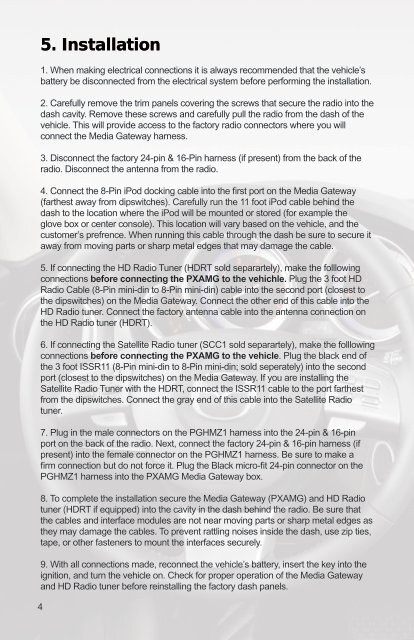
5. Installation<br />
1. When making electrical connections it is always recommended that the vehicle’s<br />
battery be disconnected from the electrical system before performing the installation.<br />
2. <strong>Car</strong>efully remove the trim panels covering the screws that secure the radio into the<br />
dash cavity. Remove these screws and carefully pull the radio from the dash of the<br />
vehicle. This will provide access to the factory radio connectors where you will<br />
connect the Media Gateway harness.<br />
3. Disconnect the factory 24-pin & 16-Pin harness (if present) from the back of the<br />
radio. Disconnect the antenna from the radio.<br />
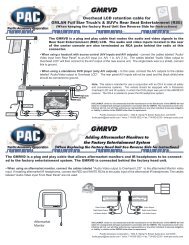
4. Connect the 8-Pin iPod docking cable into the first port on the Media Gateway<br />
(farthest away from dipswitches). <strong>Car</strong>efully run the 11 foot iPod cable behind the<br />
dash to the location where the iPod will be mounted or stored (for example the<br />
glove box or center console). This location will vary based on the vehicle, and the<br />
customer’s prefrence. When running this cable through the dash be sure to secure it<br />
away from moving parts or sharp metal edges that may damage the cable.<br />
5. If connecting the HD Radio Tuner (HDRT sold separartely), make the folllowing<br />
connections before connecting the PXAMG to the vehichle. Plug the 3 foot HD<br />
Radio Cable (8-Pin mini-din to 8-Pin mini-din) cable into the second port (closest to<br />
the dipswitches) on the Media Gateway. Connect the other end of this cable into the<br />
HD Radio tuner. Connect the factory antenna cable into the antenna connection on<br />
the HD Radio tuner (HDRT).<br />
6. If connecting the Satellite Radio tuner (SCC1 sold separartely), make the folllowing<br />
connections before connecting the PXAMG to the vehicle. Plug the black end of<br />
the 3 foot ISSR11 (8-Pin mini-din to 8-Pin mini-din; sold seperately) into the second<br />
port (closest to the dipswitches) on the Media Gateway. If you are installing the<br />
Satellite Radio Tuner with the HDRT, connect the ISSR11 cable to the port farthest<br />
from the dipswitches. Connect the gray end of this cable into the Satellite Radio<br />
tuner.<br />
7. Plug in the male connectors on the PGHMZ1 harness into the 24-pin & 16-pin<br />
port on the back of the radio. Next, connect the factory 24-pin & 16-pin harness (if<br />
present) into the female connector on the PGHMZ1 harness. Be sure to make a<br />
firm connection but do not force it. Plug the Black micro-fit 24-pin connector on the<br />
PGHMZ1 harness into the PXAMG Media Gateway box.<br />
8. To complete the installation secure the Media Gateway (PXAMG) and HD Radio<br />
tuner (HDRT if equipped) into the cavity in the dash behind the radio. Be sure that<br />
the cables and interface modules are not near moving parts or sharp metal edges as<br />
they may damage the cables. To prevent rattling noises inside the dash, use zip ties,<br />
tape, or other fasteners to mount the interfaces securely.<br />
9. With all connections made, reconnect the vehicle’s battery, insert the key into the<br />
ignition, and turn the vehicle on. Check for proper operation of the Media Gateway<br />
and HD Radio tuner before reinstalling the factory dash panels.