How to troubleshoot starting systems - Pirate4x4.Com
How to troubleshoot starting systems - Pirate4x4.Com
How to troubleshoot starting systems - Pirate4x4.Com

You also want an ePaper? Increase the reach of your titles
YUMPU automatically turns print PDFs into web optimized ePapers that Google loves.
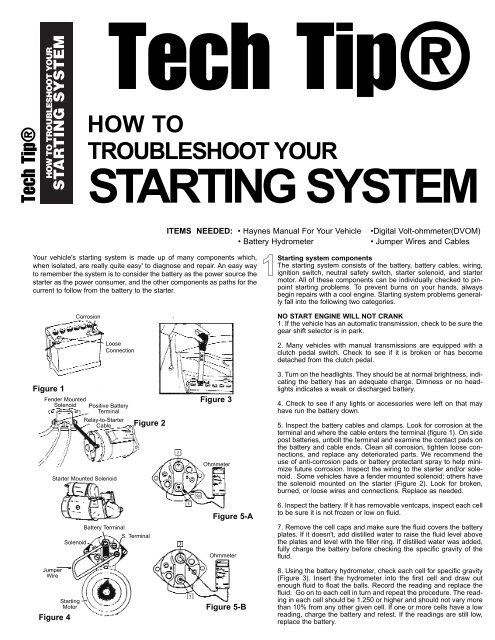
Tech Tip®<br />
HOW TO TROUBLESHOOT YOUR<br />
STARTING SYSTEM<br />
Tech Tip®<br />
HOW TO<br />
TROUBLESHOOT YOUR<br />
STARTING SYSTEM<br />
Your vehicle's <strong>starting</strong> system is made up of many components which,<br />
when isolated, are really quite easy' <strong>to</strong> diagnose and repair. An easy way<br />
<strong>to</strong> remember the system is <strong>to</strong> consider the battery as the power source the<br />
starter as the power consumer, and the other components as paths for the<br />
current <strong>to</strong> follow from the battery <strong>to</strong> the starter.<br />
ITEMS NEEDED: • Haynes Manual For Your Vehicle<br />
• Battery Hydrometer<br />
•Digital Volt-ohmmeter(DVOM)<br />
• Jumper Wires and Cables<br />
1Starting system components<br />
The <strong>starting</strong> system consists of the battery, battery cables, wiring,<br />
ignition switch, neutral safety switch, starter solenoid, and starter<br />
mo<strong>to</strong>r. All of these components can be individually checked <strong>to</strong> pinpoint<br />
<strong>starting</strong> problems. To prevent burns on your hands, always<br />
begin repairs with a cool engine. Starting system problems generally<br />
fall in<strong>to</strong> the following two categories.<br />
Corrosion<br />
NO START ENGINE WILL NOT CRANK<br />
1. If the vehicle has an au<strong>to</strong>matic transmission, check <strong>to</strong> be sure the<br />
gear shift selec<strong>to</strong>r is in park.<br />
Loose<br />
Connection<br />
2. Many vehicles with manual transmissions are equipped with a<br />
clutch pedal switch. Check <strong>to</strong> see if it is broken or has become<br />
detached from the clutch pedal.<br />
Figure 1<br />
Fender Mounted<br />
Solenoid<br />
Positive Battery<br />
Terminal<br />
Relay-<strong>to</strong>-Starter<br />
Cable<br />
Starter Mounted Solenoid<br />
Figure 2<br />
Figure 3<br />
Ohmmeter<br />
3. Turn on the headlights. They should be at normal brightness, indicating<br />
the battery has an adequate charge. Dimness or no headlights<br />
indicates a weak or discharged battery.<br />
4. Check <strong>to</strong> see if any lights or accessories were left on that may<br />
have run the battery down.<br />
5. Inspect the battery cables and clamps. Look for corrosion at the<br />
terminal and where the cable enters the terminal (figure 1). On side<br />
post batteries, unbolt the terminal and examine the contact pads on<br />
the battery and cable ends. Clean all corrosion, tighten loose connections,<br />
and replace any deteriorated parts. We recommend the<br />
use of anti-corrosion pads or battery protectant spray <strong>to</strong> help minimize<br />
future corrosion. Inspect the wiring <strong>to</strong> the starter and/or solenoid.<br />
Some vehicles have a fender mounted solenoid; others have<br />
the solenoid mounted on the starter (Figure 2). Look for broken,<br />
burned, or loose wires and connections. Replace as needed.<br />
Jumper<br />
Wire<br />
Battery Terminal<br />
S. Terminal<br />
Solenoid<br />
Starting<br />
Mo<strong>to</strong>r<br />
Figure 4<br />
Figure 5-A<br />
Ohmmeter<br />
Figure 5-B<br />
6. Inspect the battery. If it has removable ventcaps, inspect each cell<br />
<strong>to</strong> be sure it is not frozen or low on fluid.<br />
7. Remove the cell caps and make sure the fluid covers the battery<br />
plates. If it doesn't, add distilled water <strong>to</strong> raise the fluid level above<br />
the plates and level with the filler ring. If distilled water was added,<br />
fully charge the battery before checking the specific gravity of the<br />
fluid.<br />
8. Using the battery hydrometer, check each cell for specific gravity<br />
(Figure 3). Insert the hydrometer in<strong>to</strong> the first cell and draw out<br />
enough fluid <strong>to</strong> float the balls. Record the reading and replace the<br />
fluid. Go on <strong>to</strong> each cell in turn and repeat the procedure. The reading<br />
in each cell should be 1.250 or higher and should not vary more<br />
than 10% from any other given cell. If one or more cells have a low<br />
reading, charge the battery and retest. If the readings are still low,<br />
replace the battery.
9. Next, by-pass the starter solenoid. This must be done on the vehicle.<br />
A. Starter Mounted Solenoids.<br />
To by-pass the starter solenoid, place the transmission in "park" or "neutral" and set the parking brake.<br />
Connect your jumper wire on the solenoid between the battery and "S" terminals (Figure 4). If engine<br />
cranks, the ignition or neutral safety switches may be at fault (see step 20). If no sound is heard, the<br />
solenoid is defective and must be replaced. A clicking sound indicates that the solenoid is operating<br />
properly, and the problem may lie in the <strong>starting</strong> mo<strong>to</strong>r itself.<br />
To test the solenoid off the car you will need an ohmmeter. Set the meter <strong>to</strong> the lowest scale and connect<br />
one lead <strong>to</strong> the starter terminal "1" and the other <strong>to</strong> the metal housing "G" (Figure 5-A). The reading<br />
should be between .7 and .9 ohms. If you observe a lower reading than .7 ohms, the solenoid has<br />
a short circuit. If a reading higher than .9 ohms is observed, the solenoid has either loose internal connections<br />
or corrosion in the windings. In either case, the solenoid must be replaced. The test for a sticking<br />
internal contact that could cause the starter <strong>to</strong> stay engaged is simple. Connect one ohmmeter lead<br />
<strong>to</strong> the terminal marked (1) and the other lead <strong>to</strong> the terminal marked (2) (Figure 5-B). The reading<br />
should be infinity. If the reading indicates continuity, replace the solenoid.<br />
Figure 6<br />
Jumper<br />
Wire<br />
Testing Wiring & Switches<br />
on Fender Mounted<br />
Solenoid<br />
Ohmmeter<br />
Jumper<br />
Wire<br />
Figure 7<br />
Tesiting Fender<br />
Mounted Solenoid<br />
“S”<br />
Terminal<br />
B. Ford and AMC Fender-mounted Starter Relay<br />
On Ford and AMC vehicles with a fender mounted starter relay, begin by removing the wire attached<br />
<strong>to</strong> the "S" terminal. Connect a jumper wire from this terminal <strong>to</strong> the positive battery terminal on the relay<br />
(Figure 6). If engine now cranks, the problem is in the wiring, ignition, or neutral safety switches. If<br />
engine still will not crank, connect a heavy jumper cable between the positive and starter terminals on<br />
the relay (Figure 7) If the engine now cranks, the relay is defective and must be replaced. If it still doesn’t<br />
crank, the starter may be at fault.<br />
Fender mounted starter solenoids can also be tested off the car using an ohmeter. With the ohmmeter<br />
set at the lowest scale, connect the ohmmeter leads <strong>to</strong> the “S” terminal and the grounded case (Figure<br />
8). The reading should be between 3.4 and 4.5 ohms. If you get a reading lower than 43.4 ohms, the<br />
solenoid has shorted wingdings. If a reading higher than 4.5 ohms is observed, the solenoid either has<br />
a bad internal wingding connection or corrosion in the wingdings. This occurs if the solenoid has been<br />
on the vehicle for along time. Next, check <strong>to</strong> be sure the contact disc inside the solenoid is not stuck<br />
<strong>to</strong> the battery or starter terminals. Referring <strong>to</strong> the dotted line in Figure 8, connect the ohmmeter leads<br />
<strong>to</strong> the large terminals labeled “From Battery” and “To Starter” (Figure 8). The meter should show an<br />
open circuit or infinity reading. If it does not, the contact disc is stuck in the cranking position. If the<br />
solenoid fails any of the above tests, replace it.<br />
C. Chrysler Relays<br />
Chrysler vehicles use a relay <strong>to</strong> transfer power <strong>to</strong> the starter instead of the solenoid. On Chrysler vehicles,<br />
the relay can be found either on the firewall or the inner fender. To test, connect a Jumper wire<br />
between the positive battery and solenoid terminals on the relay (Figure 9). If the engine cranks, the<br />
relay is defective and must be replaced. If the engine still fails <strong>to</strong> crank, then the starter may be defective.<br />
Figure 9<br />
Figure 10<br />
Grounded<br />
Case<br />
Jumper<br />
Wire<br />
Solenoid<br />
Terminal<br />
Battery<br />
Terminal<br />
Nuetral Starter<br />
Switch<br />
Steering<br />
Column<br />
Figure 8<br />
Removed Plug<br />
Jumper Wire<br />
Nuetral Safety<br />
Switch<br />
10. If no sound is heard when the key is turned <strong>to</strong> "start" and the battery and cables are okay, the ignition<br />
switch and neutral safety switch should be checked. To check the neutral safety switch, locate the<br />
two wires going <strong>to</strong> the switch (Figures 10-11). The switch may be mounted on the steering column, in<br />
the center console on some floor shift models and on others, it is threaded in<strong>to</strong> the transmission.<br />
Unplug the wires from the switch and connect your jumper wire between the two wires. Turn the ignition<br />
switch <strong>to</strong> start and if the engine now cranks, the neutral safety switch is defective and must be<br />
replaced. For specific testing procedures on your vehicle, please contact a detailed repair manual.<br />
Note: Ignition switches rarely fail only in the "start" mode. Check the ignition switch after all other components<br />
have been ruled out.<br />
Nuetral Switch<br />
Figure 12<br />
Voltmenter<br />
Figure 11<br />
Column Shift Vehicles<br />
2<br />
HARD START ENGINE CRANKS TOO SLOW<br />
1. Follow instructions contained in 3 through 7 above.<br />
2. Perform a cranking test. If the engine turns over, a voltmeter can be used <strong>to</strong> check the cranking voltage<br />
available from the battery. First, disable the ignition system by grounding the coil high tension lead<br />
or by disconnecting the battery wire at the distribu<strong>to</strong>r cap on GM HEl <strong>systems</strong>. Set the voltmeter <strong>to</strong> 20<br />
volt scale. Attach the black lead of the voltmeter <strong>to</strong> a good engine ground. Connect the red lead <strong>to</strong> the<br />
positive battery terminal (Figure 12). Now turn ignition switch <strong>to</strong> "run" and check the meter reading. The<br />
meter should read at least 12.5 volts. Next crank the engine for 15 seconds while observing the meter<br />
reading. The voltage should not drop below 9.5 volts. If the voltage stays above 9.5 volts, the battery<br />
has sufficient power. If the voltage drops below 9.5 volts, remove the starter and bring it <strong>to</strong> your Au<strong>to</strong><br />
S<strong>to</strong>re. They'll be glad <strong>to</strong> test your battery or starter for free.