User's Manual - Projector Central
User's Manual - Projector Central
User's Manual - Projector Central

You also want an ePaper? Increase the reach of your titles
YUMPU automatically turns print PDFs into web optimized ePapers that Google loves.
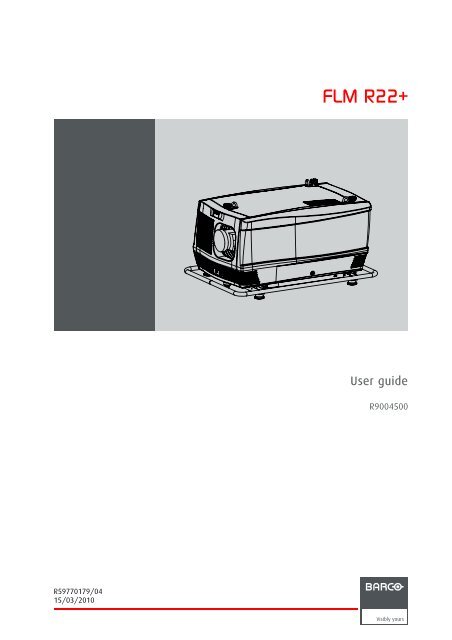
FLM R22+<br />
User guide<br />
R9004500<br />
R59770179/04<br />
15/03/2010
Barco nv Media & Entertainment Division<br />
Noordlaan 5, B-8520 Kuurne<br />
Phone: +32 56.36.82.11<br />
Fax: +32 56.36.883.86<br />
E-mail: sales.events@barco.com<br />
Visit us at the web: www.barco.com<br />
Printed in Belgium
Changes<br />
Barco provides this manual ’as is’ without warranty of any kind, either expressed or implied, including but not limited to the implied warranties<br />
or merchantability and fitness for a particular purpose. Barco may make improvements and/or changes to the product(s) and/or the<br />
program(s) described in this publication at any time without notice.<br />
This publication could contain technical inaccuracies or typographical errors. Changes are periodically made to the information in this<br />
publication; these changes are incorporated in new editions of this publication.<br />
Copyright ©<br />
All rights reserved. No part of this document may be copied, reproduced or translated. It shall not otherwise be recorded, transmitted or<br />
stored in a retrieval system without the prior written consent of Barco.<br />
Trademarks<br />
Brand and product names mentioned in this manual may be trademarks, registered trademarks or copyrights of their respective holders.<br />
All brand and product names mentioned in this manual serve as comments or examples and are not to be understood as advertising for<br />
the products or their manufacturers.<br />
Federal Communications Commission (FCC Statement)<br />
This equipment has been tested and found to comply with the limits for a class A digital device, pursuant to Part 15 of the FCC rules.<br />
These limits are designed to provide reasonable protection against harmful interference when the equipment is operated in a commercial<br />
environment. This equipment generates, uses, and can radiate radio frequency energy and, if not installed and used in accordance with<br />
the instruction manual, may cause harmful interference to radio communications. Operation of this equipment in a residential area may<br />
cause harmful interference, in which case the user will be responsible for correcting any interference at his own expense<br />
EN55022/CISPR22 Class A ITE (Information Technology Equipment)<br />
Class A ITE is a category of all other ITE which satisfies the class A ITE limits but not the class B ITE limits. Such equipment should not<br />
be restricted in its sale but the following warning shall be included in the instructions for use:<br />
Warning : This is a class A product. In a domestic environment this product may cause radio interference in which case the user may be<br />
required to take adequate measures.<br />
Software License Agreement<br />
You should carefully read the following terms and conditions before using this software. Your use of this software indicates your acceptance<br />
of this license agreement and warranty.<br />
Terms and Conditions:<br />
1. No redistribution of the software is allowed.<br />
2. Reverse-Engineering. You may not reverse engineer, decompile, disassemble or alter anyhow this software product.<br />
Disclaimer of Warranty:<br />
This software and the accompanying files are sold “as is” and without warranties as to performance or merchantability or any other warranties<br />
whether expressed or implied. In no event shall Barco be liable for damage of any kind, loss of data, loss of profits, business<br />
interruption or other pecuniary loss arising directly or indirectly. Any liability of the seller will be exclusively limited to replacement of the<br />
product or refund of purchase price.<br />
GNU-GPL code<br />
If you would like a copy of the GPL source code contained in this product shipped to you on CD, please contact Barco. The cost of preparing<br />
and mailing a CD will be charged.<br />
Disposal Information<br />
This equipment has required the extraction and use of natural resources for its production. It may contain hazardous substances for health<br />
and environment. In order to avoid the dissemination of those substances in the environment and to diminish the pressure on natural<br />
resources, we encourage you to use the appropriate take-back systems. Those systems will reuse or recycle most of the materials of your<br />
end of life equipment in a sound way.
The crossed-out wheeled bin symbol invites you to use those systems. If you need more information on the collection, reuse and recycling<br />
systems, please contact your local or regional waste administrator. You can also contact us for more information on the environmental<br />
performances of our products.
Table of contents<br />
TABLE OF CONTENTS<br />
1. Safety................................................................................................................. 5<br />
1.1 General ............................................................................................................................... 5<br />
1.2 Important safety instructions ......................................................................................................... 6<br />
1.3 Important warnings concerning FLM flight cases.................................................................................... 9<br />
2. General..............................................................................................................11<br />
2.1 Installation requirements ............................................................................................................ 11<br />
2.2 Unpacking the projector .............................................................................................................12<br />
2.3 Box content..........................................................................................................................13<br />
2.4 FLM flight case ......................................................................................................................14<br />
2.5 <strong>Projector</strong> configurations .............................................................................................................14<br />
2.6 <strong>Projector</strong> air inlets and outlets.......................................................................................................18<br />
2.7 Free download of <strong>Projector</strong> Toolset.................................................................................................18<br />
3. Physical installation ..............................................................................................19<br />
3.1 Remote control unit (RCU) ..........................................................................................................19<br />
3.1.1 RCU battery installation.......................................................................................................20<br />
3.1.2 RCU rugged case installation ................................................................................................21<br />
3.1.3 RCU XLR adaptor installation ................................................................................................21<br />
3.1.4 Using the XLR adaptor of the RCU... ........................................................................................21<br />
3.1.5 RCU usage possibilities ......................................................................................................22<br />
3.2 Lenses ...............................................................................................................................23<br />
3.2.1 Available lenses...............................................................................................................23<br />
3.2.2 Lens selection.................................................................................................................23<br />
3.2.3 Lens formulas .................................................................................................................24<br />
3.2.4 Lens installation...............................................................................................................24<br />
3.2.5 Lens removal..................................................................................................................26<br />
3.3 Alignment of a table mount FLM projector. .........................................................................................27<br />
3.4 Alignment of a ceiling mount FLM projector ........................................................................................27<br />
3.5 Suspension of the FLM projector with rigging clamps. . ............................................................................28<br />
4. Stacking FLM projectors.........................................................................................31<br />
4.1 Stacking FLM projectors ............................................................................................................31<br />
4.2 Aligning stacked FLM projectors....................................................................................................33<br />
5. Connections........................................................................................................35<br />
5.1 Power connection ...................................................................................................................35<br />
5.2 Input source connections............................................................................................................37<br />
5.3 Communication connections ........................................................................................................38<br />
6. Getting started.....................................................................................................43<br />
6.1 RCU & Local keypad ................................................................................................................43<br />
6.2 Terminology overview ...............................................................................................................43<br />
6.3 Operating the projector..............................................................................................................45<br />
6.3.1 Switching on...................................................................................................................45<br />
6.3.2 Errors, warnings and messages during start up .............................................................................46<br />
6.3.3 Switching to standby ..........................................................................................................46<br />
6.3.4 Switching off...................................................................................................................47<br />
6.4 Using the RCU.......................................................................................................................47<br />
6.5 Quick setup adjustments............................................................................................................49<br />
6.5.1 Text boxes ON or OFF........................................................................................................49<br />
6.5.2 Quick Lens Adjustment .......................................................................................................49<br />
6.5.2.1 Quick Lens Adjustment via LENS key .................................................................................49<br />
6.5.2.2 Direct Lens Adjustment (RCU). ........................................................................................50<br />
6.5.3 Quick picture in picture .......................................................................................................50<br />
6.5.4 Quick layout selection with Rigging key......................................................................................51<br />
6.5.5 Quick language selection . . ...................................................................................................51<br />
6.6 <strong>Projector</strong> Address....................................................................................................................52<br />
6.6.1 Displaying and Programming addresses. ....................................................................................52<br />
6.6.2 Controlling the projector ......................................................................................................53<br />
6.7 Source selection.....................................................................................................................53<br />
6.8 Controlling the <strong>Projector</strong>.............................................................................................................54<br />
7. Start up of the Adjustment Mode...............................................................................55<br />
7.1 About the adjustment mode .........................................................................................................55<br />
7.2 About the use of the remote control and the local keypad.........................................................................55<br />
7.3 Start up the adjustment mode.......................................................................................................55<br />
7.4 Navigation and adjustments.........................................................................................................56<br />
7.5 Shortcut keys to the menus .........................................................................................................56<br />
7.6 On screen menus versus LCD display menus .....................................................................................57<br />
7.7 Test patterns in adjustment mode...................................................................................................57<br />
7.8 Menu memory .......................................................................................................................57<br />
R59770179 FLM R22+ 15/03/2010 1
Table of contents<br />
8. Input menu .........................................................................................................59<br />
8.1 Overview flow........................................................................................................................59<br />
8.2 Slot module type.....................................................................................................................59<br />
8.2.1 About Input Setup.............................................................................................................59<br />
8.2.2 Input configuration ............................................................................................................60<br />
8.3 Input locking .........................................................................................................................61<br />
8.4 Minimum delay.......................................................................................................................63<br />
8.5 Native resolution.....................................................................................................................63<br />
8.6 Source switching ....................................................................................................................65<br />
8.7 No signal .............................................................................................................................65<br />
8.7.1 Background color .............................................................................................................65<br />
8.7.2 Shutdown setting..............................................................................................................66<br />
8.7.3 Shutdown retarding time......................................................................................................66<br />
9. Image menu ........................................................................................................69<br />
9.1 Overview flow........................................................................................................................69<br />
9.2 How to select the image adjustments? .............................................................................................70<br />
9.3 Image Settings.......................................................................................................................70<br />
9.3.1 Contrast .......................................................................................................................71<br />
9.3.2 Brightness.....................................................................................................................71<br />
9.3.3 Saturation .....................................................................................................................72<br />
9.3.4 Tint (hue)......................................................................................................................73<br />
9.3.5 Phase..........................................................................................................................73<br />
9.3.6 Sharpness.....................................................................................................................74<br />
9.3.7 Noise reduction ...............................................................................................................75<br />
9.3.8 Color temperature.............................................................................................................76<br />
9.3.8.1 Predefined color temperature..........................................................................................76<br />
9.3.8.2 Set a custom color temperature .......................................................................................77<br />
9.3.9 Input balance..................................................................................................................78<br />
9.3.9.1 Introduction to Input Balance .. ........................................................................................78<br />
9.3.9.2 Adjusting the input balance ............................................................................................79<br />
9.4 Aspect ratio ..........................................................................................................................82<br />
9.5 Timings...............................................................................................................................83<br />
9.5.1 Source timings ................................................................................................................83<br />
9.5.2 Advanced settings ............................................................................................................84<br />
9.5.3 Advanced settings, film mode detection .....................................................................................86<br />
9.6 Image files services .................................................................................................................88<br />
9.6.1 Files and file manipulations...................................................................................................88<br />
9.6.2 <strong>Manual</strong> Load file ..............................................................................................................88<br />
9.6.3 Delete file......................................................................................................................89<br />
9.6.4 Delete all custom files ........................................................................................................90<br />
9.6.5 Rename a file .................................................................................................................90<br />
9.6.6 Copy a file.....................................................................................................................91<br />
9.6.7 File options....................................................................................................................92<br />
9.7 Save custom settings................................................................................................................93<br />
10. Layout menu .......................................................................................................95<br />
10.1 Overview flow........................................................................................................................95<br />
10.2 Main window .........................................................................................................................95<br />
10.2.1 Source selection ..............................................................................................................96<br />
10.2.2 Size adjustment...............................................................................................................96<br />
10.2.3 Position adjustment...........................................................................................................99<br />
10.3 PIP window . ........................................................................................................................100<br />
10.3.1 Introduction to PIP ...........................................................................................................100<br />
10.3.2 Picture in Picture activation..................................................................................................101<br />
10.3.3 Picture in Picture source selection ..........................................................................................101<br />
10.3.4 Picture in Picture size of the window . .......................................................................................102<br />
10.3.5 Picture in Picture, position window .. . .......................................................................................105<br />
10.4 Layout file services .................................................................................................................106<br />
10.4.1 Load layout...................................................................................................................106<br />
10.4.2 Rename a layout .............................................................................................................107<br />
10.4.3 Delete a layout...............................................................................................................107<br />
10.4.4 Copy / Save as a layout .....................................................................................................108<br />
10.5 Zoom - Focus.......................................................................................................................109<br />
11. Lamp menu........................................................................................................111<br />
11.1 Overview flow.......................................................................................................................111<br />
11.2 Lamp power mode..................................................................................................................111<br />
11.3 Lamp power.........................................................................................................................112<br />
11.4 Constant Light Output mode (CLO mode) .. .......................................................................................113<br />
11.5 CLO target..........................................................................................................................114<br />
11.6 Lamp Identification .................................................................................................................114<br />
11.7 Z-axis adjustment...................................................................................................................115<br />
12. Alignment menu................................................................................................. 117<br />
12.1 Overview flow.......................................................................................................................117<br />
12.2 Orientation..........................................................................................................................118<br />
2 R59770179 FLM R22+ 15/03/2010
Table of contents<br />
12.3 Lens adjustment ....................................................................................................................119<br />
12.4 Side keystone.......................................................................................................................120<br />
12.5 Warp geometry settings ............................................................................................................121<br />
12.5.1 About Warp geometry settings ..............................................................................................121<br />
12.5.2 Warp Status..................................................................................................................122<br />
12.5.3 Horizontal keystone correction ..............................................................................................123<br />
12.5.4 Vertical keystone correction .................................................................................................124<br />
12.5.5 Rotation ......................................................................................................................125<br />
12.5.6 Pincushion - Barrel correction...............................................................................................126<br />
12.5.7 4 corner correction...........................................................................................................127<br />
12.5.8 Reset warp settings..........................................................................................................128<br />
12.5.9 Load warp file ................................................................................................................129<br />
12.6 Contrast enhancement .............................................................................................................130<br />
12.7 Blanking.............................................................................................................................130<br />
12.8 Gamma .............................................................................................................................132<br />
12.9 Internal pattern......................................................................................................................132<br />
12.10 Color space.........................................................................................................................133<br />
12.11 ScenergiX...........................................................................................................................134<br />
12.11.1 Introduction...................................................................................................................134<br />
12.11.2 Preparations..................................................................................................................135<br />
12.11.3 ScenergiX activation .........................................................................................................135<br />
12.11.4 ScenergiX overlap zone (horizontal ScenergiX) . ...........................................................................136<br />
12.11.5 ScenergiX overlap zone (vertical ScenergiX) ...............................................................................137<br />
12.11.6 ScenergiX size adjustment (White level). ...................................................................................139<br />
12.11.7 Adjusting the black level of the images .....................................................................................141<br />
13. <strong>Projector</strong> control ................................................................................................ 145<br />
13.1 Overview flow.......................................................................................................................145<br />
13.2 <strong>Projector</strong> address. . .................................................................................................................146<br />
13.2.1 Individual projector address .................................................................................................146<br />
13.2.2 Common address ............................................................................................................147<br />
13.3 Serial communication...............................................................................................................148<br />
13.3.1 Baud rate setup..............................................................................................................148<br />
13.3.2 Interface standard............................................................................................................148<br />
13.3.3 RS422 termination...........................................................................................................149<br />
13.4 Network .............................................................................................................................149<br />
13.4.1 Introduction to a Network connection .......................................................................................150<br />
13.4.2 DHCP setup ..................................................................................................................150<br />
13.4.3 IP-address set up ............................................................................................................151<br />
13.4.4 Subnet-mask set up..........................................................................................................151<br />
13.4.5 Default Gateway set up......................................................................................................152<br />
13.5 IR control switching.................................................................................................................153<br />
13.6 Art-Net DMX ........................................................................................................................153<br />
13.6.1 DMX address.................................................................................................................154<br />
13.6.2 DMX universe................................................................................................................154<br />
13.6.3 DMX monitor .................................................................................................................155<br />
13.6.4 DMX mode ...................................................................................................................156<br />
13.6.5 Art-Net activation.............................................................................................................157<br />
13.6.6 Home lens at startup.........................................................................................................157<br />
13.7 Buttons..............................................................................................................................158<br />
13.7.1 Standby button ...............................................................................................................158<br />
13.7.2 APA (auto) button............................................................................................................159<br />
13.7.3 Shortcut keys.................................................................................................................159<br />
13.8 Menu position.......................................................................................................................160<br />
13.8.1 On screen menu .............................................................................................................160<br />
13.8.2 Bar scale .....................................................................................................................161<br />
13.9 Local LCD...........................................................................................................................161<br />
13.9.1 Local LCD time out...........................................................................................................161<br />
13.9.2 Local LCD contrast...........................................................................................................162<br />
13.10 Language selection.................................................................................................................162<br />
14. Service menu..................................................................................................... 165<br />
14.1 Overview flow.......................................................................................................................165<br />
14.2 Identification ........................................................................................................................166<br />
14.3 Diagnosis ...........................................................................................................................167<br />
14.3.1 How to start up the diagnosis? ..............................................................................................167<br />
14.3.2 Versions......................................................................................................................167<br />
14.3.3 Voltages ......................................................................................................................168<br />
14.3.4 I²C diagnosis .................................................................................................................169<br />
14.3.5 Temperatures ................................................................................................................169<br />
14.3.6 Fan speeds overview ........................................................................................................170<br />
14.3.7 SPI............................................................................................................................171<br />
14.3.8 Error logging overview.......................................................................................................172<br />
14.4 Convergence .......................................................................................................................172<br />
14.5 Internal service patterns............................................................................................................173<br />
14.6 Restore factory defaults............................................................................................................174<br />
R59770179 FLM R22+ 15/03/2010 3
Table of contents<br />
14.7 Reset formatter .....................................................................................................................175<br />
14.8 Save custom settings...............................................................................................................176<br />
14.9 Refill mode ..........................................................................................................................176<br />
14.10 Broadcast mode ....................................................................................................................177<br />
14.11 USB memory .......................................................................................................................178<br />
15. Maintenance...................................................................................................... 181<br />
15.1 Replacement of the dust filter on the front side ...................................................................................181<br />
15.2 Replacement of the dust filter on the bottom side.................................................................................182<br />
15.3 Replacement of the dust filter on the top side.....................................................................................183<br />
15.4 Pressure verification of the liquid cooling circuit...................................................................................183<br />
15.5 Cleaning the lens ...................................................................................................................184<br />
15.6 Cleaning the exterior of the projector ..............................................................................................184<br />
16. Servicing.......................................................................................................... 185<br />
16.1 Removal of the lamp house ........................................................................................................185<br />
16.2 Removal of the input & communication unit .......................................................................................186<br />
16.3 Removal of an input module .......................................................................................................187<br />
16.4 Installation of the lamp house ......................................................................................................188<br />
16.5 Installation of the input & communication unit .. ...................................................................................189<br />
16.6 Installation of an input module .....................................................................................................190<br />
16.7 Realignment of the lamp in its reflector............................................................................................191<br />
17. Removal of the projector covers ............................................................................. 193<br />
17.1 Removal of the front cover .........................................................................................................193<br />
17.2 Removal of the side cover..........................................................................................................194<br />
17.3 Removal of the lamp cover.........................................................................................................195<br />
17.4 Removal of the input cover.........................................................................................................195<br />
17.5 Installation of the front cover.......................................................................................................196<br />
17.6 Installation of the side cover .......................................................................................................197<br />
17.7 Installation of the lamp cover.......................................................................................................198<br />
17.8 Installation of the input cover.......................................................................................................199<br />
18. Dimensions....................................................................................................... 201<br />
18.1 Dimensions of the FLM R22+......................................................................................................201<br />
18.2 Dimensions of the FLM flight case.................................................................................................202<br />
18.3 Dimensions of the rigging clamps..................................................................................................203<br />
19. Standard Source Files.......................................................................................... 205<br />
19.1 Table overview......................................................................................................................205<br />
20. DMX chart......................................................................................................... 207<br />
20.1 DMX chart, basic ...................................................................................................................207<br />
20.2 DMX chart, Extended...............................................................................................................208<br />
20.3 DMX chart, Full.....................................................................................................................209<br />
21. Troubleshooting ................................................................................................. 213<br />
21.1 Error codes . ........................................................................................................................213<br />
22. Specifications.................................................................................................... 221<br />
22.1 Specifications FLM R22+...........................................................................................................221<br />
22.2 Specifications FLM 5 cable input (multi purpose) .................................................................................224<br />
22.3 Specifications FLM HDSDI – SDI input ............................................................................................225<br />
22.4 Specifications FLM DVI input ......................................................................................................226<br />
22.5 Specifications FLM DVI HDCP input...............................................................................................227<br />
23. Order information ............................................................................................... 229<br />
23.1 Spare part order info ...............................................................................................................229<br />
Glossary ............................................................................................................... 231<br />
Index.................................................................................................................... 233<br />
4 R59770179 FLM R22+ 15/03/2010
1. Safety<br />
1. SAFETY<br />
1.1 General<br />
WARNING: Ensure you understand and follow all the safety guidelines, safety instructions, warnings and<br />
cautions mentioned in this manual.<br />
WARNING: Be aware of suspended loads.<br />
WARNING: Wear a hard hat to reduce the risk of personal injury.<br />
WARNING: Be careful while working with heavy loads.<br />
WARNING: Mind your fingers while working with heavy loads.<br />
CAUTION: High pressure lamp may explode if improperly handled.<br />
Notice on safety<br />
This equipment is built in accordance with the requirements of the international safety standards IEC60950-1, EN60950-1,<br />
UL60950-1 and CAN/CSA C22.2 No.60950-1, which are the safety standards of information technology equipment including<br />
electrical business equipment. These safety standards impose important requirements on the use of safety critical components,<br />
materials and insulation, in order to protect the user or operator against risk of electric shock and energy hazard, and having<br />
access to live parts. Safety standards also impose limits to the internal and external temperature rises, radiation levels, mechanical<br />
stability and strength, enclosure construction and protection against the risk of fire. Simulated single fault condition testing ensures<br />
the safety of the equipment to the user even when the equipment’s normal operation fails.<br />
Restricted access location<br />
The FLM R22+ must be installed in a restricted access location, due to the temperature rise of parts of the equipment (air outlet).<br />
Restricted access location<br />
A location for equipment where both of the following paragraphs apply:<br />
1) Access can only be gained by SERVICE PERSONS or by USERS who have been instructed about the reasons for<br />
the restriction applied to the location and about the precautions that shall be taken.<br />
2) Access is through the use of the tool or lock and key, or other means of security, and is controlled by the authority<br />
responsible for the location.<br />
R59770179 FLM R22+ 15/03/2010 5
1. Safety<br />
1.2 Important safety instructions<br />
To prevent the risk of electrical shock<br />
• This product should be operated from a mono phase AC power source. Power input voltage range must be between 200-240<br />
VAC, 50–60 Hz, 18 amps at 230 VAC.<br />
• The power cord of the FLM R22+ is equipped with a 3-wire grounding plug, a plug having a third (grounding) pin. This plug will<br />
only fit into a grounding-type IEC 60309 power outlet. This is a safety feature. Mains power cord with IEC 60309 plug:<br />
N<br />
L<br />
E<br />
IEC60309<br />
Warning: This apparatus must be grounded (earthed) via the supplied 3 conductor AC power cable. If the supplied power<br />
cable is not the correct one, consult your dealer.<br />
If you are unable to insert the plug into the outlet, contact your electrician to replace your obsolete outlet with respect to the<br />
local regulations. Do not defeat the purpose of the grounding-type plug.<br />
• Do not allow anything to rest on the power cord. Do not locate this product where persons will walk on the cord. To disconnect<br />
the cord, pull it out by the plug. Never pull the cord itself.<br />
• If an extension cord is used with this product, make sure that the total of the ampere ratings on the products plugged into the<br />
extension cord does not exceed the extension cord ampere rating.<br />
• Use only the power cord supplied with your device. While appearing to be similar, other power cords have not been safety<br />
tested at the factory and may not be used to power the device. For a replacement power cord, contact your dealer.<br />
• Never push objects of any kind into this product through cabinet slots as they may touch dangerous voltage points or short out<br />
parts that could result in a risk of fire or electrical shock.<br />
• Never spill liquid of any kind on the product. Should any liquid or solid object fall into the cabinet, unplug the set and have it<br />
checked by qualified service personnel before resuming operations.<br />
• Lightning - For added protection for this video product during a lightning storm, or when it is left unattended and unused for long<br />
periods of time, unplug it from the wall outlet. This will prevent damage to the device due to lightning and AC power-line surges.<br />
6 R59770179 FLM R22+ 15/03/2010
1. Safety<br />
To prevent personal injury<br />
• Isolated electrically before re-lamping. Caution : hot lamp (house).<br />
• Caution: High pressure lamp may explode if improperly handled. Refer servicing to qualified service personnel. The customer<br />
should never attempt to disassemble the lamp casing or to dispose of the lamp casing other than by returning it to Barco.<br />
• To reduce the lamp heat of the projector, switch the projector first to standby and let the projector lamp cool down for at least 5<br />
minutes. Then the projector may be switched off with the power switch.<br />
• To prevent injury and physical damage, always read this manual and all labels on the system before inserting the lamp casing,<br />
connecting to the wall outlet or adjusting the projector.<br />
• To prevent injury, take note of the weight of the projector. Minimum 4 persons are needed to carry the FLM R22+.<br />
• To prevent injury, ensure that the lens and all cover plates are correctly installed. See installation procedures.<br />
• Warning: high intensity light beam. NEVER look into the lens ! High luminance could result in injury to the eye.<br />
• Before attempting to remove any of the projector’s covers, you must disconnect from the wall outlet.<br />
• When performing setup work to a ceiling mounted projector, to prevent injury caused by falling objects or the system, set out<br />
a keep out area.<br />
• Consult a professional structural engineer prior to suspending the projector from a structure not intended for that use. Always<br />
ensure that the working load limit of the structure can handle the load of the projector.<br />
• Never stack more than two (2) FLM projectors in a hanging configuration (truss) and never stack more than three (3) FLM<br />
projectors in a base stand configuration (table mount).<br />
• The power input at the projector side is considered as the disconnect device. When required to switch off the device, to access<br />
parts inside, always disconnect the power cord at the base of the device. In case the power input at the base of the device is<br />
not accessible (e.g. ceiling mount), the socket outlet supplying the device shall be installed nearby the device and be easily<br />
accessible, or a readily accessible general disconnect device shall be incorporated in the fixed wiring.<br />
• Do not place this equipment on an unstable cart, stand, or table. The product may fall, causing serious damage to it and<br />
possible injury to the user.<br />
• When mounting the device to the ceiling or to a rigging system, always mount security chains.<br />
• It is hazardous to operate without lens or shield. Shields, lenses or utra-vilolet screens shall be changed if they have become<br />
visible damaged to such an extent that their effectiveness is impaired. For example by cracks or deep scratches.<br />
• Warning: Protection from ultraviolet radiation: Do not look directly in the light beam. The lamp contained in this product is<br />
an intense source of light and heat. One component of the light emitted from this lamp is ultraviolet light. Potential eye and skin<br />
hazards are present when the lamp is energized due to ultraviolet radiation. Avoid unnecessary exposure. Protect yourself and<br />
your employees by making them aware of the hazards and how to protect themselves. Protecting the skin can be accomplished<br />
by wearing tightly woven garments and gloves. Protecting the eyes from UV can be accomplished by wearing safety glasses<br />
that are designed to provide UV protection. In addition to the UV, the visible light from the lamp is intense and should also be<br />
considered when choosing protective eye wear.<br />
• Exposure to UV radiation: Some medications are known to make individuals extra sensitive to UV radiation. The American<br />
Conference of Governmental Industrial Hygienists (ACGIH) recommends occupational UV exposure for an-8hour day to be<br />
less than 0.1 microwatts per square centimeters of effective UV radiation. An evaluation of the workplace is advised to assure<br />
employees are not exposed to cumulative radiation levels exceeding these government guidelines.<br />
• Cooling liquid circuit. The device head contains a cooling circuit filled with Blue antifreeze diluted (1/3 ethanediol – 2/3 Demi<br />
water).<br />
When the cooling circuit leaks, switch off the device and contact a service technician.<br />
The liquid is not for household use. Keep out of reach of children. Harmful by oral intake. Avoid exposure to pregnant women.<br />
Avoid contact with eyes, skin and clothing. Avoid inhale of the noxious fumes.<br />
To prevent device damage<br />
• The FLM R22+ has been designed for use with a specific lamp (house) type. See installation instructions for its correct type.<br />
• If the air filters are not regularly replaced, the air flow inside the projector could be disrupted, causing overheating. Overheating<br />
may lead to the projector shutting down during operation.<br />
• In order to ensure that correct airflow is maintained, and that the device complies with electromagnetic compatibility (EMC)<br />
requirements, and for safety requirements, it should always be operated with all of it’s covers in place.<br />
• Slots and openings in the cabinet are provided for ventilation. To ensure reliable operation of the product and to protect it from<br />
overheating, these openings must not be blocked or covered. The openings should never be blocked by placing the product<br />
on a bed, sofa, rug, or other similar surface. This product should never be placed near or over a radiator or heat register. The<br />
device should not be placed in a built-in installation or enclosure unless proper ventilation is provided.<br />
• Do not block the projector cooling fans or free air movement under and around the projector. Loose papers or other objects<br />
may not be nearer to the projector than 10 cm (4") on any side.<br />
• The device must always be mounted in a manner which ensures free flow of air into its air inlets and unimpeded evacuation of<br />
the hot air exhausted from its cooling system. Heat sensitive materials should not be placed in the path of the exhausted air.<br />
Leave at least a free safety area of 1 meter (40”) at the rear of the projector.<br />
• Ensure that nothing can be spilled on, or dropped inside the projector. If this does happen, switch off and unplug the mains<br />
supply immediately. Do not operate the projector again until it has been checked by qualified service technicians.<br />
• Consult a professional structural engineer when you have the intention to use this projector as ceiling mounted projector. Always<br />
ensure the working load limit of the structure supporting the projector.<br />
• Do not use this equipment near water.<br />
R59770179 FLM R22+ 15/03/2010 7
1. Safety<br />
• Special Care for Laser Beams: Special care should be used when DLP projectors are used in the same room as high power<br />
laser equipment. Direct or indirect hitting of a laser beam on to the lens can severely damage the Digital Mirror Devices TM in<br />
which case there is a loss of warranty.<br />
• Never place a FLM R22+ in direct sun light. Sun light on the lens can severely damage the Digital Mirror Devices TM in which<br />
case there is a loss of warranty.<br />
• Save the original packing material; they will come in handy if you ever have to ship your equipment. For maximum protection,<br />
repack your set as it was originally packed at the factory.<br />
• Unplug this product from the wall outlet before cleaning. Do not use liquid cleaners or aerosol cleaners. Use a damp cloth for<br />
cleaning. Never use strong solvents, such as thinner or benzine, or abrasive cleaners, since these will damage the cabinet.<br />
Stubborn stains may be removed with a cloth lightly dampened with mild detergent solution.<br />
• To ensure the highest optical performance and resolution, the projection lenses are specially treated with an anti-reflective<br />
coating, therefore, avoid touching the lens. To remove dust on the lens, use a soft dry cloth. Do not use a damp cloth, detergent<br />
solution, or thinner.<br />
• Rated maximum ambient temperature, t a = 40 °C (104°F).<br />
• The lamp house shall be replaced if it has become damaged or thermally deformed.<br />
To prevent battery explosion<br />
• Danger of explosion if battery is incorrectly installed.<br />
• Replace only with the same or equivalent type recommended by the manufacturer.<br />
• Dispose of used batteries according to the manufacturer’s instruction.<br />
To prevent fire hazard<br />
• Warning “Risk of fire”. Do not place flammable or combustible materials near the projector !<br />
This projector radiates heat on its external surfaces and from ventilation ducts during normal operation, which is both normal<br />
and safe. Exposing flammable or combustible materials into close proximity of this projector could result in the spontaneous<br />
ignition of that material, resulting in a fire. For this reason, it is absolutely necessary to leave an “exclusion zone” around all<br />
external surfaces of the projector whereby no flammable or combustible materials are present. The exclusion zone must be not<br />
less than 40 cm (18”). The exclusion zone on the lens side must be at least 2 m (80”).<br />
• Do not cover the projector or the lens with any material while the projector is in operation.<br />
• Mount the device in a well ventilated area away from sources of ignition and out of direct sun light.<br />
• Never expose the projector to rain or moisture.<br />
• In the event of fire, use sand, CO 2 , or dry powder fire extinguishers; never use water on an electrical fire.<br />
• This product should never be placed near or over a radiator or heat register.<br />
• This projector should not be placed in a built-in installation or enclosure unless proper ventilation is provided.<br />
• The operation room must be well ventilated or cooled in order to avoid build up of heat.<br />
On servicing<br />
• Do not attempt to service this product yourself, as opening or removing covers may expose you to dangerous voltage potentials<br />
and risk of electric shock.<br />
• Refer all servicing to qualified service personnel.<br />
• Fence off a restricted area of at least 3 meters around the projector using an eye-catching fence and “KEEP OUT” signs. This<br />
to prevent unauthorized persons coming near the projector during servicing.<br />
• Unplug this product from the wall outlet and refer servicing to qualified service technicians under the following conditions:<br />
- When the power cord or plug is damaged or frayed.<br />
- If liquid has been spilled into the equipment.<br />
- If the product has been exposed to rain or water.<br />
- If the product does not operate normally when the operating instructions are followed. Adjust only those controls that are<br />
covered by the operating instructions since improper adjustment of the other controls may result in damage and will often<br />
require extensive work by a qualified technician to restore the product to normal operation.<br />
- If the product has been dropped or the cabinet has been damaged.<br />
- If the product exhibits a distinct change in performance, indicating a need for service.<br />
• Replacement parts: When replacement parts are required, be sure the service technician has used original Barco replacement<br />
parts. Unauthorized substitutions may result in degraded performance and reliability, fire, electric shock or other hazards.<br />
Unauthorized substitutions may void warranty.<br />
• Safety check: Upon completion of any service or repairs to this device, ask the service technician to perform safety checks to<br />
determine that the product is in proper operating condition.<br />
• Lamp replacement: high pressure lamp may explode if improperly handled.<br />
8 R59770179 FLM R22+ 15/03/2010
1. Safety<br />
1.3 Important warnings concerning FLM flight cases<br />
Important warnings concerning stacking/transporting FLM rental flight cases<br />
• Stack maximum two (2) FLM rental flight cases high. Never higher.<br />
• Surface on which flight case is standing must be level to ensure that the total load is evenly spread out among the four wheels.<br />
The surface must also be able to support the load safely.<br />
• Before stacking or transporting flight cases, check the wheels and their fixation screws for wear or defects.<br />
• Before stacking or transporting flight cases, check that the four lock handles on each flight case are in good working order and<br />
locked securely.<br />
• When stacked, make sure the wheels of the upper flight case are precisely positioned in the stacking dishes of the flight case<br />
below.<br />
• Stacked flight cases may not be moved. Before stacking, the lower flight case must already be in its final resting position before<br />
placing the second upon it.<br />
• Never stack loaded flight cases in a truck or other transport medium, unless each flight case is rigidly strapped tight.<br />
• In the event of a wheel breaking, flight cases must be rigidly strapped tight to prevent a stack collapsing.<br />
• Use an appropriate forklift to raise flight cases and take the necessary precautions to avoid personnel injury.<br />
R59770179 FLM R22+ 15/03/2010 9
1. Safety<br />
10 R59770179 FLM R22+ 15/03/2010
2. General<br />
2. GENERAL<br />
About this chapter<br />
Read this chapter before installing your FLM R22+. It contains important information concerning installation requirements for the<br />
FLM R22+, such as minimum and maximum allowed ambient temperature, humidity conditions, required safety area around the<br />
installed projector, required power net, compatible signal sources, etc.<br />
Furthermore, careful consideration of things such as image size, ambient light level, projector placement and type of screen to use<br />
are critical to the optimum use of the projection system.<br />
Overview<br />
• Installation requirements<br />
• Unpacking the projector<br />
• Box content<br />
• FLM flight case<br />
• <strong>Projector</strong> configurations<br />
• <strong>Projector</strong> air inlets and outlets<br />
• Free download of <strong>Projector</strong> Toolset<br />
2.1 Installation requirements<br />
Ambient temperature conditions<br />
The maximum allowed ambient temperature for an operating Barco FLM R22+ may not exceed +40 ºC (+104 ºF).<br />
The minimum allowed ambient temperature for an operating Barco FLM R22+ may not drop below +10 ºC (+50 ºF).<br />
The projector will not operate if the ambient air temperature falls outside this range (+10 ºC → +40 ºC or +50 ºF → +104 ºF). Be<br />
aware that room heat rises to the ceiling. Check if the temperature near the installation site is not excessive.<br />
The minimum storage temperature is -35 ºC (-31 ºF) and the maximum storage temperature is +65 ºC (+149 ºF).<br />
Humidity conditions<br />
Storage: 0 to 98% relative humidity, non-condensing.<br />
Operation: 0 to 95% relative humidity, non-condensing.<br />
<strong>Projector</strong> weight<br />
Do not underestimate the weight of one Barco FLM R22+, which is about ±100 kg (±225 lb.). Be sure that the table or truss installation<br />
on which the projector(s) has to be installed is capable of handling five (5) times the complete load of the complete system.<br />
Power requirements<br />
One Barco FLM R22+ requires 200-240 VAC, 50–60 Hz, 18 amps at 230 VAC.<br />
Clean air environment<br />
A projector must always be mounted in a manner which ensures the free flow of clean air into the projectors ventilation inlets. For<br />
installations in environments where the projector is subject to airborne contaminants such as that produced by smoke machines or<br />
similar (these deposit a thin layer of greasy residue upon the projectors internal optics and imaging electronic surfaces, degrading<br />
performance), then it is highly advisable and desirable to have this contamination removed prior to it reaching the projectors clean<br />
air supply. Devices or structures to extract or shield contaminated air well away from the projector are a prerequisite, if this is not a<br />
feasible solution then measures to relocate the projector to a clean air environment should be considered.<br />
Only ever use the manufacturer’s recommended cleaning kit which has been specifically designed for cleaning optical parts, never<br />
use industrial strength cleaners on the projector’s optics as these will degrade optical coatings and damage sensitive optoelectronics<br />
components. Failure to take suitable precautions to protect the projector from the effects of persistent and prolonged air contaminants<br />
will culminate in extensive and irreversible ingrained optical damage. At this stage cleaning of the internal optical units will<br />
be noneffective and impracticable. Damage of this nature is under no circumstances covered under the manufacturer’s warranty<br />
and may deem the warranty null and void. In such a case the client shall be held solely responsible for all costs incurred during any<br />
repair. It is the clients responsibility to ensure at all times that the projector is protected from the harmful effects of hostile airborne<br />
particles in the environment of the projector. The manufacturer reserves the right to refuse repair if a projector has been subject to<br />
knowingly neglect, abandon or improper use.<br />
Which screen type ?<br />
There are two major categories of screens used for projection equipment. Those used for front projected images and those for rear<br />
projection applications.<br />
R59770179 FLM R22+ 15/03/2010 11
2. General<br />
Screens are rated by how much light they reflect (or transmit in the case of rear projection systems) given a determined amount<br />
of light projected toward them. The ‘GAIN’ of a screen is the term used. Front and rear screens are both rated in terms of gain.<br />
The gain of screens range from a white matte screen with a gain of 1 (x 1) to a brushed aluminized screen with a gain of 10 (x 10)<br />
or more. The choice between higher and lower gain screens is largely a matter of personal preference and another consideration<br />
called the viewing angle. In considering the type of screen to choose, determine where the viewers will be located and go for the<br />
highest gain screen possible. A high gain screen will provide a brighter picture but reduce the viewing angle. For more information<br />
about screens, contact your local screen supplier.<br />
What image size? How big should the image be?<br />
The projector is designed for projecting an image size : minimum 1 meter (3.3 ft.) to maximum 18 meter (59 ft.) (depending on the<br />
ambient light conditions), with an aspect ratio of 4 to 3 (recommended between 1 m (3.3ft) - 12 m (39.4ft)).<br />
2.2 Unpacking the projector<br />
What has to be done ?<br />
At delivery the projector is packed in a carton box upon a wooden pallet and secured with banding and fastening clips. Furthermore,<br />
to provide protection during transportation, the projector is surrounded with foam. Once the projector is arrived at the installation<br />
site, it has to be removed from the carton box and wooden pallet in a safe manner without damaging the projector.<br />
Necessary tools<br />
• Side cutter.<br />
• 8 mm Allen key.<br />
How to unpack the projector ?<br />
1. Remove the banding around the carton box, by releasing the fastening clips as illustrated, and remove the top cover.<br />
Image 2-1<br />
2. Remove the power cord, which is attached to the packaging with a cable ties, and the two smaller carton boxes, located between<br />
the inner carton sleeve and outer carton box.<br />
Note: The two smaller carton boxes contain the manuals, the remote control unit (RCU), two standard batteries size AA and<br />
four rigging clamps for projector suspension.<br />
Image 2-2<br />
12 R59770179 FLM R22+ 15/03/2010
2. General<br />
3. Remove the carton box, the inner carton sleeve and the foam around the projector. See image 2-2.<br />
Note: The projector is still attached to a wooden plate, which is detached from the below pallet.<br />
4. Gently turn the projector upside down to gain access to the four bolts, which secure the projector. Note that this wooden plate is<br />
detached from the pallet.<br />
Tip: Lay a blanket (or the earlier removed foam) on the floor to protect the projector housing form scratches while turning.<br />
Image 2-3<br />
5. Remove the wooden plate from the projector bottom, by releasing the four bolts. Use an 8 mm Allen key. See image 2-3.<br />
6. Gently turn the projector back on its feet.<br />
7. Remove the foam rubber around the carrying handle.<br />
Save the original shipping carton and packing material, they will be necessary if you ever have to ship your<br />
projector. For maximum protection, repack your projector as it was originally packed at the factory.<br />
A rubber foam inside a plastic bag is placed into the lens opening of the projector. It’s recommended to reuse<br />
this foam and plastic back each time you transport the projector. This to prevent intrusion of dust and foreign<br />
particles.<br />
2.3 Box content<br />
Content<br />
• One Barco FLM R22+, weight ±100 kg (±225 lb.).<br />
• One Remote Control Unit (RCU).<br />
• Two AA size batteries for the RCU.<br />
• One power cord of 2,5 meter with EN60-309 plug.<br />
• Four rigging clamps for projector suspension.<br />
• One user manual.<br />
Initial inspection<br />
Before shipment, the projector was inspected and found to be free of mechanical and electrical defects. As soon as the projector is<br />
unpacked, inspect for any damage that may have occurred in transit. Save all packing material until the inspection is completed. If<br />
damaged is found, file claim with carrier immediately. The Barco sales and service office should be notified as soon as possible.<br />
The packaging of the FLM R22+ is provided with a shock-watch label. If this shock-watch label was triggered<br />
(red colored at arrival) during transport, indicates that the package was possibly roughly handled by the transport<br />
company. In this case, the instructions mentioned on the label, should be followed, which are: adding<br />
a note on the “bill of lading” and informing the transport company and the Barco sales and service office as<br />
soon as possible.<br />
Mechanical check<br />
This check should confirm that there are no broken knobs or connectors, that the cabinet and panel surfaces are free of dents and<br />
scratches, and that the meter face and operating panel are not scratched of cracked. The Barco sales and service office should be<br />
notified as soon as possible.<br />
R59770179 FLM R22+ 15/03/2010 13
2. General<br />
2.4 FLM flight case<br />
Introduction of the FLM flight case<br />
The FLM flight case is designed to transport the FLM R22+ in a safe and secure manner. The four caster wheels, provided with<br />
breaks, and the eight handles make the FLM flight case easy to handle. The floor of the flight case wagon is equipped with two<br />
small covered compartments to store the remote control and the rigging clamps. Furthermore, three Velcro strips are attached to<br />
the bottom for fastening the power cord of the projector.<br />
Image 2-4<br />
FLM flight case (R9854510).<br />
The dimensions of the FLM flight case are optimal for maximum utilization of the floor area of a truck. The cover of the FLM flight<br />
case has four stacking dishes, which allows to stack the flight cases.<br />
2400 mm<br />
1600 mm<br />
Image 2-5<br />
WARNING: Maximum stack two (2) FLM flight cases high. Never higher.<br />
CAUTION: Prior to inserting projector in flight case turn in the adjustable feet and interlocking adapters fully.<br />
2.5 <strong>Projector</strong> configurations<br />
The different configurations<br />
Depending on the installation the projector can be mounted in different ways, the 4 different configurations are:<br />
1. Front / Table (F/T)<br />
2. Front / Ceiling (F/C)<br />
3. Rear / Table (R/T)<br />
4. Rear / Ceiling (R/C)<br />
Front projection<br />
The projector is installed, either in a table mount or ceiling mount configuration, at the same side of the screen as the audience.<br />
14 R59770179 FLM R22+ 15/03/2010
2. General<br />
AUDIENCE<br />
F/C<br />
F/T<br />
SCREEN<br />
FLOOR<br />
Image 2-6<br />
Rear projection<br />
The projector is installed, either in a table mount or ceiling mount configuration, at the other side of the screen opposite the audience.<br />
AUDIENCE<br />
BACKSTAGE<br />
R/C<br />
SCREEN<br />
R/T<br />
FLOOR<br />
Image 2-7<br />
R59770179 FLM R22+ 15/03/2010 15
2. General<br />
Positioning the projector<br />
SW<br />
PD<br />
SCREEN<br />
FLOOR<br />
SCREEN<br />
A<br />
SCREEN<br />
SW<br />
CD<br />
B<br />
SH<br />
B<br />
SH<br />
CD<br />
Image 2-8<br />
The projector should be installed at right angles (horizontally and vertically) to the screen at a distance PD. Note the distance (A)<br />
between lens centre and table surface is slightly variable. This distance (A) is nominal 35 cm in case all feet are turned in completely<br />
and the vertical lens shift is set to zero (0).<br />
On-Axis / Off-Axis projection<br />
The position of the projector with reference to the screen may also be different depending on the installation. Basically the projector<br />
can be positioned in On-Axis or Off-Axis configuration. On-Axis configuration means that the projector is positioned so as to have<br />
the centre of the lens coinciding with the centre of the screen. Off-Axis projection is obtained by shifting the lens up, down, left or<br />
right. Several parameters can be calculated determining the position in any installation.<br />
Formula to calculate the distance CD for On-Axis projection: CD = SH/2 + B - A<br />
Shift range<br />
The lens can be shifted with respect to the DMD (P) which result in a shifted image on the screen (Off-Axis). A 100% shift means that<br />
the centre point of the projected image is shifted by half the screen size. In other words, the centre point of the projected image falls<br />
together with the outline of the image in an On-Axis projection. Due to mechanical and optical limitations it’s recommended to keep<br />
the shift values within the field of view (F) as illustrated below. Within these shift ranges the projector and lens perform excellently.<br />
Configuring the projector outside these shift ranges will result in a slight decline of image quality.<br />
16 R59770179 FLM R22+ 15/03/2010
2. General<br />
U<br />
+90%<br />
-57% +57%<br />
F SIDE VIEW<br />
+90%<br />
U<br />
P<br />
D<br />
-90%<br />
L<br />
R<br />
D<br />
-90%<br />
P<br />
F<br />
P<br />
L<br />
TOP VIEW<br />
-57%<br />
R<br />
Image 2-9<br />
P DMD.<br />
F Field of view.<br />
F<br />
+57%<br />
It’s mechanical possible to shift outside the recommended field of view (±100% UP/DOWN and ±70%<br />
LEFT/RIGHT), but this will result in a slightly decline of image quality depending on the used lens and the<br />
zoom position of the used lens. Furthermore, shifting too much in both directions will result in a blurred<br />
image corner.<br />
Best image quality is projected in the On-Axis configuration.<br />
Horizontal and vertical projector tilt ranges<br />
The projector can be rotated and mounted at any vertical angle. In other words, you can tilt the lens side of the projector as much<br />
as desired for your application. Side to side tile, however, must not exceed ±15°. This limit ensures that the lamp in the projector<br />
operates properly and safely. More tilting within area C is allowed but lamp flicker can happen.<br />
B<br />
MAX<br />
A<br />
A<br />
15° 15°<br />
15° 15°<br />
MAX<br />
360°<br />
C<br />
Image 2-10<br />
A Tilting allowed without problems<br />
B No tilting allowed in this area<br />
C Tilting allowed but lamp flicker possible<br />
CAUTION: Always respect the allowed tilt range of the projector. Neglecting this will result in lamp flicker,<br />
which reduces the light output and the life span of the lamp substantially. Furthermore, in the long term, the<br />
possibility exist that the lamp explodes.<br />
R59770179 FLM R22+ 15/03/2010 17
2. General<br />
2.6 <strong>Projector</strong> air inlets and outlets<br />
Air inlets and outlets<br />
Image 2-11<br />
The FLM R22+ has 5 air inlet channels and one air outlet. The air outlet is located at the rear of the projector. The air inlets are<br />
located at the front, bottom, top and right side of the projector.<br />
2.7 Free download of <strong>Projector</strong> Toolset<br />
About <strong>Projector</strong> Toolset<br />
<strong>Projector</strong> Toolset is a software tool to set up, configure, manage and control Barco projectors.<br />
The concept of this <strong>Projector</strong> Toolset software is modular. The basic package can be extended with several optional device plug-in<br />
modules, now and in the future available.<br />
The <strong>Projector</strong> Toolset software works with configurations that can be loaded. Within a configuration, different snapshots can be<br />
taken. A snapshot represents a current state of a configuration and can be reloaded to return to this typical state. These terms will<br />
be used through the complete software.<br />
<strong>Projector</strong> Toolset is a stand-alone application that runs on a Java Virtual Machine and that does not require extra services to run.<br />
Several configurations can be controlled simultaneously. Even when the configurations are connected via different ways.<br />
<strong>Projector</strong> Toolset is only available in a download version, no CD can be ordered.<br />
Where to find the download file(s)<br />
The program and all necessary plug-ins, as well as the Reference manual can be downloaded for free from Barco’s Partnerzone,<br />
URLhttps:\\my.barco.com. Registration is necessary.<br />
If you are not yet registered, click on Partnerzone registration and follow the instructions. With the created login and password, it is<br />
possible to enter the partnerzone where you can download the <strong>Projector</strong> Toolset software and the device plug-in updates as well as<br />
the corresponding reference manual.<br />
When downloading the complete <strong>Projector</strong> Toolset, this software contains already the latest device plug-ins. When you already have<br />
the latest core version of <strong>Projector</strong> Toolset, it is possible to download only device plug-in updates from the same web site location.<br />
As <strong>Projector</strong> Toolset is a stand alone application, it is not necessary to install any other software. A Java virtual machine is included<br />
with this download.<br />
Installation<br />
Download first the reference manual (Part number: R59770052) and follow the installation instructions as written in this manual.<br />
18 R59770179 FLM R22+ 15/03/2010
3. Physical installation<br />
3. PHYSICAL INSTALLATION<br />
About this chapter<br />
This chapter explains how to install and set up your FLM projector. If you are familiar with the projector and want to quickly set it<br />
up for temporary use, follow the “Quick setup” instructions below. For a more complete setup, follow the instructions and guides<br />
covered in the remaining subsections.<br />
Quick setup<br />
The following steps describe briefly how to setup your FLM projector in a table mount front projection. Note that each step refers to<br />
a corresponding procedure, which is more detailed and illustrated.<br />
1. Install the batteries of the remote control, see "RCU battery installation", page 20.<br />
2. Place the projector on a solid table in front of the screen at the expected throw distance. Ensure that the projector is installed<br />
at right angles (horizontally and vertically) with the screen.<br />
3. Select and install an appropriate lens, which covers the throw ratio ( = screen size / projector screen distance). For more details<br />
see "Lens selection", page 23, and "Lens installation", page 24.<br />
4. Connect the projector with the local power net, see "Power connection", page 35.<br />
5. Connect your source to the appropriate input module, see "Input source connections", page 37.<br />
6. Switch ON the projector, see procedure"Switching on", page 45.<br />
7. Select the input slot at which your source is connected with. Do this by pressing the numeric key “1”, “2”, “3” or “4” on the<br />
remote control unit or on the local keypad, see chapter "Source selection", page 53.<br />
8. Zoom and shift the lens until the image is properly projected on the screen, Do this by using the “ZOOM” and “FOCUS” key on<br />
the remote control unit or on the local keypad, see"Quick Lens Adjustment via LENS key", page 49 or "Direct Lens Adjustment<br />
(RCU)", page 50. If necessary, level the projector from side to side by turning the adjustable feet in or out, see "Alignment of a<br />
table mount FLM projector", page 27.<br />
3.1 Remote control unit (RCU)<br />
Introduction<br />
The remote control unit (A) of the FLM projector is equipped with a rugged case (B) and an XLR adaptor (C). The remote control<br />
unit can be used wired via mini-jack or via rugged XLR. Note that the backlight, of the remote control unit, illuminate continuously<br />
when wire connected.<br />
A<br />
B<br />
C<br />
Image 3-1<br />
A Remote control unit (RCU).<br />
B Rugged case.<br />
C XLR adaptor.<br />
R59770179 FLM R22+ 15/03/2010 19
3. Physical installation<br />
Overview<br />
• RCU battery installation<br />
• RCU rugged case installation<br />
• RCU XLR adaptor installation<br />
• Using the XLR adaptor of the RCU<br />
• RCU usage possibilities<br />
3.1.1 RCU battery installation<br />
Where to find the batteries for the remote control ?<br />
The batteries are not placed in the remote control unit to avoid control operation in its package, resulting in a shorter battery life<br />
time. At delivery the batteries can be found in a separated bag attached to the remote control unit. Before using your remote control,<br />
install the batteries first.<br />
How to install the batteries in the remote control ?<br />
1. Push the battery cover tab with the fingernail a little backwards (1) and pull, at the same time, the cover upwards (2).<br />
1<br />
2<br />
Image 3-2<br />
2. Insert the two AA size batteries, making sure the polarities match the + and - marks inside the battery compartment.<br />
+ -<br />
- +<br />
Image 3-3<br />
3. Insert (1) the lower tab of the battery cover in the gap at the bottom of the remote control, and press (2) the cover until it clicks<br />
in place.<br />
2<br />
+ -<br />
- +<br />
1<br />
Image 3-4<br />
To prevent battery explosion<br />
• Danger of explosion if battery is incorrectly installed.<br />
• Replace only with the same or equivalent type recommended by the manufacturer.<br />
• Disposal of used batteries must be done according to the manufacturer’s instruction.<br />
20 R59770179 FLM R22+ 15/03/2010
3. Physical installation<br />
3.1.2 RCU rugged case installation<br />
How to install the rugged case of the remote control ?<br />
1. Slide the bottom of the RCU into the rugged case and then pull the top of the rugged case over the top of the RCU as illustrated.<br />
Image 3-5<br />
3.1.3 RCU XLR adaptor installation<br />
Install the rugged case before installing the XLR adaptor. Vice-versa, remove the XLR adaptor before removing<br />
the rugged case from the RCU.<br />
Necessary tools<br />
5mmflat screw driver.<br />
How to install the XLR adaptor of the remote control unit ?<br />
1. Push the XLR adaptor (C) upon the rugged case of the remote control unit as illustrated.<br />
Note: Ensure that the text of the XLR adaptor is on top.<br />
C<br />
S<br />
S<br />
Image 3-6<br />
2. Fasten the two screws (S) of the XLR adaptor. Turn each screw repeatedly one or two turns until both screws are tight.<br />
3.1.4 Using the XLR adaptor of the RCU<br />
How to use the XLR adaptor of the remote control unit ?<br />
1. Connect a cable with XLR plug into the XLR adaptor.<br />
2. Connect the other end of the cable with your FLM R22+.<br />
3. Push the XLR adaptor completely against the rugged case of the remote control unit, as illustrated in the left image below, for<br />
wired communication. Pull out the XLR adaptor (about 8 mm) to switch over to wireless communication.<br />
R59770179 FLM R22+ 15/03/2010 21
3. Physical installation<br />
Image 3-7<br />
3.1.5 RCU usage possibilities<br />
Summarized possibilities<br />
Ref. Possibility description<br />
a. RCU not wired<br />
Comment<br />
b. RCU wired (mini-jack) Backlight illuminates continuously when wire is connected. Infra red<br />
disabled.<br />
c. RCU with rugged case not wired<br />
d. RCU with rugged case wired (mini-jack) Backlight illuminates continuously when wire is connected. Infra red<br />
disabled.<br />
e. RCU with rugged case and XLR adaptor<br />
pulled out “REMOTE” and not wired<br />
f. RCU with rugged case and XLR adaptor<br />
pulled out “REMOTE” and wired<br />
g. RCU with rugged case and XLR adaptor<br />
pushed in “WIRED” and wired<br />
The XLR adaptor must be in the pulled out position “REMOTE”, otherwise<br />
the RCU will not function.<br />
The RCU will send the commands via infra red to the projector.<br />
The RCU will send the commands via the cable connected with the XLR<br />
adaptor to the projector. Backlight illuminates continuously when wire<br />
is connected. Infra red disabled.<br />
a b c d e<br />
f g<br />
Image 3-8<br />
22 R59770179 FLM R22+ 15/03/2010
3. Physical installation<br />
3.2 Lenses<br />
3.2.1 Available lenses<br />
Available lenses for the FLM R22+ projector<br />
The TLD HB (High Brightness) lens series can be used on the FLM R22+ projector.<br />
Image 3-9<br />
R9842040: TLDHBfixedlens(0.8:1)<br />
Image 3-10<br />
R9840770: TLDfixedlens(1.2:1)<br />
Image 3-11<br />
R9840775: TLD+ (1.2 : 1) fixed lens<br />
Image 3-12<br />
R9842060: TLD HB zoom lens (1.6 - 2.0 : 1)<br />
Image 3-13<br />
R9842080: TLD HB zoom lens (2.0 - 2.8 : 1)<br />
Image 3-14<br />
R9842100: TLD HB zoom lens (2.8 - 5.0 : 1)<br />
Image 3-15<br />
R9842120: TLD HB zoom lens (5.0 - 8.0 : 1)<br />
3.2.2 Lens selection<br />
How to select the right lens for your application ?<br />
1. Determine the required screen width (SW).<br />
2. Determine the position of the projector in the projection room with regard to the screen and measure the projector-screen distance<br />
(PD).<br />
R59770179 FLM R22+ 15/03/2010 23
3. Physical installation<br />
3. Use the lens formulas to find the best corresponding PD with regard to the measured projector-screen distance for the required<br />
screen width SW.<br />
Tip: Divide PD by SW to determine the approximate throw ratio. Choose a Lens, which captures the calculated throw ratio.<br />
Use the lens formula of the chosen Lens to recalculate exactly.<br />
SCREEN<br />
PD<br />
SW<br />
Image 3-16<br />
3.2.3 Lens formulas<br />
Formulas<br />
Lens<br />
Throw ratio for<br />
FLM HD<br />
Metric formulas (meter)<br />
Inch formulas (inch)<br />
TLD HB (0.8 : 1) 0.7 PD = (0.71 x SW ) + 0.05 PD = (0.71 x SW ) + 1.97<br />
TLD (1.2 : 1) 1.1 PD = (1.03 x SW ) - 0.01 PD = (1.03 x SW ) - 0.39<br />
TLD+(1.2:1) 1.2 PD= (1.14 x SW) + 0.11 PD = (1.14 x SW) + 4.33<br />
TLDHB(1.6–2.0<br />
:1)<br />
TLDHB(2.0–2.8<br />
:1)<br />
TLDHB(2.8–5.0<br />
:1)<br />
TLDHB(5.0–8.0<br />
:1)<br />
TLD+(7.5 – 11.2 :<br />
1)<br />
1.35 – 1.70 PD min = (1.36 x SW ) - 0.09<br />
PD max = (1.71 x SW ) - 0.13<br />
1.70 – 2.42 PD min = (1.71 x SW ) - 0.17<br />
PD max = (2.42 x SW ) - 0.24<br />
2.42 – 4.35 PD min = (2.38 x SW ) - 0.16<br />
PD max = (4.35 x SW ) - 0.38<br />
4.35 – 6.95 PD min = (4.17 x SW ) - 0.01<br />
PD max = (6.95 x SW ) - 0.29<br />
6.93 - 10.34 PD min = (6.93 x SW ) - 0.2<br />
PD max = (10.34 x SW ) - 0.32<br />
PD min = (1.36 x SW ) - 3.54<br />
PD max = (1.71 x SW ) - 5.12<br />
PD min = (1.71 x SW ) - 6.69<br />
PD max = (2.42 x SW ) - 9.45<br />
PD min = (2.38 x SW ) - 6.30<br />
PD max = (4.35 x SW ) - 14.96<br />
PD min = (4.17 x SW ) - 0.39<br />
PD max = (6.95 x SW ) - 11.42<br />
PD min = (6.93 x SW ) - 7.88<br />
PD max = (10.34 x SW ) - 12.60<br />
3.2.4 Lens installation<br />
How to install a lens into the projector lens holder ?<br />
1. Remove the foam rubber in the opening of the lens holder if not removed yet.<br />
2. Take the lens assembly out of its packing material and remove the lens caps on both sides.<br />
3. Place the lens holder in the “unlocked” position by moving the lens lock handle (A) towards the lens power supply socket (B) as<br />
illustrated.<br />
24 R59770179 FLM R22+ 15/03/2010
3. Physical installation<br />
B<br />
A<br />
Image 3-17<br />
4. Ensure that the lens holder stands in the On-Axis position (horizontal and vertical mid position).<br />
Note: The lens holder is placed default in the On-Axis position at factory.<br />
5. Gently insert the lens in such a way that the lens connector matches the socket (B).<br />
Image 3-18<br />
6. Insert the lens until the connector seats into the socket.<br />
Warning: Do not release the Lens yet, as the Lens may fall out of the Lens Holder.<br />
7. Secure the lens in the lens holder by sliding the lens lock handle into the “locked” position, which is away from the lens power<br />
supply socket. Ensure the lens touches the front plate of the lens holder.<br />
Image 3-19<br />
8. Check if the lens is really secured by trying to pull the lens out of the lens holder.<br />
R59770179 FLM R22+ 15/03/2010 25
3. Physical installation<br />
CAUTION: Never transport the projector with a Lens mounted in the Lens Holder. Always remove the Lens<br />
before transporting the projector. Neglecting this can damage the Lens Holder and Prism.<br />
3.2.5 Lens removal<br />
How to remove a lens from the projector lens holder ?<br />
1. Support the lens with one hand while you unlock the lens holder by sliding the lock handle towards the “unlocked” position as<br />
illustrated.<br />
Image 3-20<br />
2. Gently pull the lens out of the lens holder.<br />
Image 3-21<br />
It’s recommended to place the Lens caps of the original Lens packaging, back on both sides of the removed<br />
Lens to protect the optics of the Lens.<br />
It’s recommended to place the foam rubber of the original projector packaging, back in the Lens opening to<br />
prevent intrusion of dust. Note that this foam rubber is packed in a plastic bag to prevent the dust, emitted by<br />
the foam, from entering the projector.<br />
26 R59770179 FLM R22+ 15/03/2010
3. Physical installation<br />
3.3 Alignment of a table mount FLM projector<br />
How to align a table mount FLM projector ?<br />
1. Place the projector in the desired location. Take into account the zoom range of the used lens and the size of the screen.<br />
2. Project one of the internal hatch patterns on the screen.<br />
3. Turn the adjustable feet in or out until the projected hatch pattern is perfectly rectangle shaped and leveled.<br />
Image 3-22<br />
When this is achieved, the projector is set horizontal and vertical at right angles to the screen.<br />
SCREEN<br />
SCREEN<br />
Image 3-23<br />
3.4 Alignment of a ceiling mount FLM projector<br />
Necessary tools<br />
17 mm open ended spanner.<br />
How to align a ceiling mount FLM projector ?<br />
1. Install the projector in the desired location. See installation procedure "Suspension of the FLM projector with rigging clamps",<br />
page 28. Take into account the zoom range of the used lens and the size of the screen.<br />
2. Project one of the internal hatch patterns on the screen.<br />
3. Release the lock nut (ref B image 3-24) of the rigging clamps.<br />
4. Adjust the height of the rigging clamps with respect to the projector, until the projected hatch pattern is perfectly rectangle shaped<br />
and leveled.<br />
B<br />
Image 3-24<br />
R59770179 FLM R22+ 15/03/2010 27
3. Physical installation<br />
When this is achieved, the projector is set horizontal and vertical at right angles to the screen.<br />
SCREEN<br />
SCREEN<br />
Image 3-25<br />
5. Fasten the lock nut (B) of the rigging clamps.<br />
3.5 Suspension of the FLM projector with rigging clamps<br />
Rigging points and rigging clamps<br />
The carrying handle, at the bottom side of the projector, is provided with eight slots. Four slots are longitudinally (A) oriented and<br />
four slots are transversely (B) oriented. Each slot contains a rigging point of which the position in the slot can be adjusted depending<br />
on the size of the truss installation. The rigging clamps (C) can be attached to those rigging points, which allows an easy and fast<br />
physical setup of the projector in a hanging configuration.<br />
A<br />
B<br />
C<br />
Image 3-26<br />
Necessary tools<br />
• 24 mm open ended spanner.<br />
• 17 mm open ended spanner.<br />
Necessary parts<br />
• Four rigging clamps (R820411).<br />
• Safety chains.<br />
How to install and to use the rigging clamps ?<br />
1. Measure the distance, center tube as reference, between the two used support bars of the truss.<br />
X mm<br />
Image 3-27<br />
2. Turn the projector upside down and slide the rigging points on there place in the slots, according the measured distance and<br />
secure this position. To release the nuts of the rigging points use a 24 mm open ended spanner. Ensure that the rigging points<br />
are symmetrically lined up, so that the projector will hang in balance.<br />
Warning: Be careful while working with heavy loads.<br />
Warning: Always secure the rigging points after adjustment.<br />
28 R59770179 FLM R22+ 15/03/2010
3. Physical installation<br />
X mm<br />
N<br />
Image 3-28<br />
3. Turn in the rigging clamps (A) into the rigging points using a 17 mm open ended spanner and secure the rigging clamps by turning<br />
the safety nut (B) on the rigging clamp against the rigging point using a 17 mm open ended spanner.<br />
Warning: Always use four (4) rigging points, equally spread, to suspend the projector.<br />
A<br />
B<br />
B<br />
Image 3-29<br />
4. Place all four rigging clamps in open position as illustrated.<br />
Image 3-30<br />
5. Place the projector (upside down) under the truss installation and lower the truss until the support bars of the truss are nearby<br />
the rigging clamps mounted on the projector.<br />
R59770179 FLM R22+ 15/03/2010 29
3. Physical installation<br />
Image 3-31<br />
6. Lift up the projector and hook the four rigging clamps over the support bars of the truss.<br />
7. Lock all four rigging clamps.<br />
8. Install a safety chain (S) around both sides of the carrying handle and around the truss.<br />
S<br />
S<br />
Image 3-32<br />
9. Lift up the truss with attached projector to the desired height.<br />
Proceed with the alignment procedure, see "Alignment of a ceiling mount FLM projector", page 27.<br />
30 R59770179 FLM R22+ 15/03/2010
4. Stacking FLM projectors<br />
4. STACKING FLM PROJECTORS<br />
General<br />
Three interlocking adapters at the top and at the bottom of the FLM projector allows an easy and fast stacking without using extra<br />
tools or accessories.<br />
WARNING: Maximum stack three (3) FLM projectors in a table mount configuration.<br />
Maximum stack two (2) FLM projectors in a ceiling mount configuration.<br />
Overview<br />
• Stacking FLM projectors<br />
• Aligning stacked FLM projectors<br />
4.1 Stacking FLM projectors<br />
How to stack FLM projectors ?<br />
1. Turn in the four feet of the projector you want to stack.<br />
2. Place the projectors on top of each other. Ensure that all three interlocking pins (A) match with their corresponding interlocking<br />
sockets (B).<br />
Tip: In case of stacking projectors for a ceiling mount configuration, first turn the projectors upside down before placing the<br />
projectors on top of each other.<br />
A<br />
B<br />
Image 4-1<br />
3. Attach the two projectors together by closing all three interlocking adapters as illustrated.<br />
A B C D<br />
Image 4-2<br />
R59770179 FLM R22+ 15/03/2010 31
4. Stacking FLM projectors<br />
4. Are these projectors stacked for a ceiling mount configuration?<br />
If yes, secure the projectors with safety chains as follows:<br />
a) Release the safety hook (H) at both sides of the lowest projector and guide the safety cable around its carrying handle (C) as<br />
illustrated.<br />
C<br />
H<br />
Image 4-3<br />
b) Guide the safety cable around the carrying handle of the projector above and clasp the safety hook around the safety cable<br />
as illustrated.<br />
Image 4-4<br />
WARNING: Always use both safety cables of the lowest projector to secure a stacked projector in a ceiling<br />
mount configuration.<br />
How to open an interlocking adapter ?<br />
1. Open an interlocking adaptor as illustrated.<br />
D<br />
A<br />
B<br />
C<br />
Image 4-5<br />
32 R59770179 FLM R22+ 15/03/2010
4. Stacking FLM projectors<br />
WARNING: Never open an interlocking adapter of a stacked projector which is still suspended. First place<br />
the stacked projectors on the floor.<br />
4.2 Aligning stacked FLM projectors<br />
Necessary tools<br />
8mmAllenkey.<br />
How to align two stacked FLM projectors ?<br />
1. Make sure that the internal hatch pattern projected by the reference projector is sharp and has a perfect rectangle outline. If this<br />
is not the case, readjust the reference projector before aligning the other stacked projector(s) with the reference hatch pattern.<br />
Note: The reference projector in a stacked configuration is the lowest projector in case of table mount and the uppermost<br />
projector in case of ceiling mount.<br />
2. Project with the stacked projector the same internal hatch pattern as the reference projector.<br />
Tip: Use a white colored hatch pattern for the reference projector and e.g. green colored for the stacked projector. This<br />
makes it easier to see the difference between both hatch patterns projected.<br />
3. If necessary, adjust the rotation of the stacked projector with respect to the reference projector by turning in or out the height<br />
adjustment ring of the interlocking adaptors at the rear of the stacked projector. Adjust until the outline of the hatch pattern is<br />
most symmetric with the reference hatch pattern.<br />
Tip: You can increase leverage by using a screw driver in the holes of the adjustment ring<br />
Rotation<br />
Image 4-6<br />
4. If necessary, adjust the inclination of the stacked projector with respect to the reference projector by turning the height adjustment<br />
ring of the interlocking adaptor at the front of the stacked projector in or out. Adjust until the outline of the hatch pattern is most<br />
symmetric with the reference hatch pattern.<br />
Inclination<br />
Image 4-7<br />
5. If necessary, adjust the skew of the stacked projector with respect to the reference projector by turning the screw Q in or out<br />
using a 8 mm Allen key. The screw Q is located behind the cover of the lamp, just above the volt meter. Adjust until the outline<br />
of the hatch pattern is most symmetric with the reference hatch pattern.<br />
Note: See procedure "Removal of the lamp cover", page 195, to access the skew adjustment screw Q.<br />
R59770179 FLM R22+ 15/03/2010 33
4. Stacking FLM projectors<br />
Skew<br />
Q<br />
Image 4-8<br />
6. Shift the hatch pattern horizontally and vertically until the outline of the hatch pattern is most symmetrically placed with respect<br />
to the reference hatch pattern.<br />
Note: Note that the “Shift” function is motorized, which means that you have to access the projector software, via the local<br />
keypad or remote control unit, to operate the “Shift” function.<br />
Shift<br />
Image 4-9<br />
7. Zoom the hatch pattern in or out until the outline of the hatch pattern matches exactly the outline of the reference hatch pattern.<br />
Note: Note that the “Zoom” function is motorized, which means that you have to access the projector software, via the local<br />
keypad or remote control unit, to operate the “Zoom” function.<br />
Zoom<br />
Image 4-10<br />
8. If necessary, repeat from step 2 until the hatch pattern of the stacked projector is perfectly aligned with the hatch pattern of the<br />
reference projector.<br />
In case of a triple stacked table mount projector configuration adjust and align first the bottommost projector<br />
(reference), than the projector in the middle and finally the uppermost projector.<br />
34 R59770179 FLM R22+ 15/03/2010
5. Connections<br />
5. CONNECTIONS<br />
About this chapter<br />
This chapter describes more in detail the power (P), the input source (S) and the communication (C) connections of the FLM R22+.<br />
P C S<br />
Image 5-1<br />
Overview<br />
• Power connection<br />
• Input source connections<br />
• Communication connections<br />
5.1 Power connection<br />
CAUTION: Use only the power cord provided with the projector.<br />
How to connect your projector with the local power net ?<br />
1. Ensure that the power switch (S) stands in the “0” (OFF) position.<br />
2. Connect the power cord (P) with the power input socket of the projector as illustrated below.<br />
3. Secure the power plug by locking the plug holder clamp (H).<br />
4. Connect the other end of the power cord with the local power net.<br />
Caution: Ensure that the power net meets the power requirements of the projector, which are: 200-240 VAC, 50–60 Hz, 18<br />
amps at 230 VAC.<br />
R59770179 FLM R22+ 15/03/2010 35
5. Connections<br />
The voltmeter (M) will immediately indicate the value of the mains voltage as soon as the projector is connected with the power<br />
net.<br />
M<br />
P<br />
S<br />
1<br />
H<br />
2<br />
Image 5-2<br />
WARNING: Do not attempt operation if the AC supply and cord are not within the specified voltage and power<br />
range.<br />
CAUTION: Once the projector is switched to standby, the lamp cooling fans will continue to run for approximately<br />
five minutes to ensure that the projector and lamp have sufficiently cooled, at which point the fans<br />
will automatically decrease to standby. To avoid thermal stress that can lead to premature lamp failure, never<br />
unplug the power cord while the lamp cooling fans are running. Never unplug the power cord to power down<br />
the projector, first switch off the power switch and then unplug the power cord.<br />
Fuses<br />
The projector is protected with an automatic circuit breaker of 35 A which is built in into the power switch.<br />
Volt meter<br />
After starting up the projector (lamp ignition) check if the value indicated by the volt meter is still within the specified power range of<br />
the projector. Note that in case the power net drops significantly during start up, the lamp will fail the ignite. If this is the case, take<br />
the necessary measures to reinforce the power net to the projector before starting up the projector again.<br />
Spare power plug<br />
The projector is delivered with a spare power plug. This spare power plug is attached behind the nameplate of the projector. Remove<br />
the cover of the lamp first to access this spare power plug, see "Removal of the lamp cover", page 195. Note that only qualified<br />
technical personnel may install a new power plug.<br />
N<br />
2 1<br />
L<br />
PE<br />
4 3<br />
HAN Q4/2 +<br />
Image 5-3<br />
Pin configuration power plug HAN Q4/2 + PE.<br />
36 R59770179 FLM R22+ 15/03/2010
5. Connections<br />
5.2 Input source connections<br />
General<br />
The input and communication unit is equipped with four input slots, which accept any type of input module designed for the FLM<br />
projector. The modularity of the input modules makes the FLM projector very flexible regarding input source connectivity. Note that<br />
the slot numbering is done from top to bottom. So, the uppermost slot is slot number “1”, the second is slot number “2”... etc. All<br />
input modules have two status LED’s. The green LED lights up if the input module is selected as the active input module. The yellow<br />
LED lights up if the input module has detected valid input syncs.<br />
1<br />
2<br />
3<br />
G<br />
4<br />
Y<br />
Image 5-4<br />
CAUTION: Always install a cover plate on an unused input slot. This to prevent dust intrusion into the projector.<br />
Available input modules<br />
Image 5-5<br />
5 Cable input (Multi purpose) (R9854430).<br />
Image 5-6<br />
5 Cable input (Multi purpose) (R9854435).<br />
Image 5-7<br />
HDSDI - SDI input (R9854450).<br />
Image 5-8<br />
DVI input (R9854460).<br />
Image 5-9<br />
HDCP DVI input (R9854465).<br />
Image 5-10<br />
Cover plate for unused input slot (R848607).<br />
R59770179 FLM R22+ 15/03/2010 37
5. Connections<br />
The FLM R22+ is standard equipped with one 5 cable input module, one HDSDI - SDI input module and one<br />
DVI input module. Input slot number 4 (lowermost) is covered with a input cover plate.<br />
For more information about the FLM input modules see chapter “Specifications”.<br />
5.3 Communication connections<br />
Communication interface<br />
A<br />
B<br />
C<br />
D<br />
E<br />
DIAGNOSTIC CODE<br />
IR RECEIVER<br />
10/100 BASE-T<br />
PORT 1 PORT 2<br />
STBY / ON<br />
WARNING IR<br />
REMOTE<br />
CTRL IN<br />
REMOTE<br />
CTRL OUT<br />
PUSH<br />
RS232 / 422 OUT<br />
OK<br />
USB<br />
REC<br />
PC CARD<br />
1 2<br />
3<br />
2 1<br />
3<br />
RS232 / 422 IN<br />
F G H I J K L M N O<br />
Image 5-11<br />
A Warning LED.<br />
B <strong>Projector</strong> status LED.<br />
C Two digit LED display for diagnostic code.<br />
D IR-receiver (side).<br />
E RS232/422 loop through output port.<br />
F Ethernet port 1.<br />
G Ethernet port 2.<br />
H USB port.<br />
I IR signal received LED.<br />
J IR signal acknowledged LED.<br />
K PCMCIA card-bus (slot).<br />
L Mini-jack input port for remote control.<br />
M XLR input port for remote control.<br />
N XLR output port for remote control.<br />
O RS232/422 input port.<br />
<strong>Projector</strong> status<br />
The projector “status” LED (B) lights up green while in operation. The same LED lights up red when the projector is switched to<br />
standby.<br />
Besides the projector status LED (B) the communication interface has also a “warning” LED (A) which blinks in case the projector<br />
encounters an internal problem concerning fan speed, temperature, supply voltages, ... etc. These type of problems still allows<br />
the projector to operate (the show can go on) but an action will be required within a short time period. More information about the<br />
involved problem is given on the local LCD display of the projector.<br />
A two character 7-segment display (C) shows, during normal operation, the selected input slot number. If an error has occurred then<br />
an error code appears on this two digit LED display.<br />
IR communication (RC5)<br />
An IR receiver (D) is mounted on the communication interface. Note that there is also an IR receiver mounted at the front and at the<br />
rear of the projector. When using the remote control unit (wired or wireless), the “IR REC” (I) and the “IR OK” (J) LED’s will light up<br />
indicating an IR signal was received and recognized.<br />
Wired remote control<br />
If desired the remote control unit can be wired and plugged in into the 3,5 mm mini jack socket (L) or, when using a rugged wire<br />
with XLR plugs, plugged in into the male XLR port (M) on the communication interface. Besides the XLR input port a female XLR<br />
connector (N) for wired RC5 output is provided. This connector creates a buffered RC5 signal, available for the next projector in<br />
the daisy chain. Whenever the projector has no power, a passive loop through is created from the remote control input port to the<br />
38 R59770179 FLM R22+ 15/03/2010
5. Connections<br />
female XLR output port (N). So, the following projector in the daisy chain will still receive his RC5 code. Note that the RC5 in/out<br />
signals are without carrier.<br />
Mini jack plug XLR – Remote CTRL in XLR – Remote CTRL out<br />
Pin Description Pin Description Pin Description<br />
S GND 1 GND 1 GND<br />
T RC5 in 2 RC5 in 2 RC5 out<br />
R n.c. or GND 3 XLR present sense 3 XLR present sense<br />
A B C<br />
PUSH<br />
S R T<br />
1 2<br />
3<br />
2 1<br />
3<br />
Image 5-12<br />
A Mini stereo jack plug.<br />
B<br />
C<br />
• S : SLeeve (shield)<br />
• R : Ring<br />
• T : Tip<br />
Male XLR socket.<br />
Female XLR socket.<br />
RS232/422 serial communication<br />
The communication interface of the FLM R22+ supports RS232 and RS422 serial communication. You can use the RS232/RS422<br />
input port (O) to connect a local PC to your FLM projector. This way you can configure and control your FLM projector from your<br />
local PC.<br />
Do not forget to set the projector’s baud rate (default = 115200) to match that of the computer.<br />
The communication interface has also an active RS232/RS422 loop through output port (E). Whenever the projector has no power, a<br />
passive loop through is created from the RS232/RS422 input port (O) to the RS232/RS422 output port (E). So, the following projector<br />
in the daisy chain will still receive his RS232/RS422 commands.<br />
Advantages of using RS232/RS422 serial communication:<br />
• easy adjustment of the projector via PC (or MAC).<br />
• allow storage of multiple projector configurations and set ups.<br />
• wide range of control possibilities.<br />
• address range from 0 to 255.<br />
• sending data to the projector (update).<br />
• copying data from the projector (backup).<br />
RS232/422 input port<br />
RS232/422 output port<br />
Pin Description Pin Description<br />
1 DCD : Data Carrier Detect 1 — (not connected) —<br />
2 RXD- : Receive Data 2 RXD- : Receive Data<br />
3 TXD- : Transmitted Data 3 TXD- : Transmitted Data<br />
4 DTR : Data Terminal Ready [RS232]<br />
TXD+ : Transmitted Data [RS422]<br />
4 DTR : Data Terminal Ready [RS232]<br />
TXD+ : Transmitted Data [RS422]<br />
5 GND : Ground 5 GND : Ground<br />
6 DSR : Data Set Ready [RS232]<br />
RXD+ : Received Data [RS422]<br />
6 DSR : Data Set Ready [RS232]<br />
RXD+ : Received Data [RS422]<br />
7 — (not connected) — 7 — (not connected) —<br />
R59770179 FLM R22+ 15/03/2010 39
5. Connections<br />
RS232/422 input port<br />
RS232/422 output port<br />
Pin Description Pin Description<br />
8 CTS : Clear To Send 8 — (not connected) —<br />
9 RI:RingIndicator 9 — (not connected) —<br />
A<br />
B<br />
1 2 3 4 5<br />
5 4 3 2 1<br />
6 7 8 9<br />
9 8 7 6<br />
Image 5-13<br />
A Pin numbering male DB–9 connector.<br />
B Pin numbering female DB-9 connector.<br />
RS232<br />
An Electronic Industries Association (EIA) serial digital interface standard specifying the characteristics of the communication<br />
path between two devices using either D-SUB 9 pins or D-SUB 25 pins connectors. This standard is used for<br />
relatively short-range communications and does not specify balanced control lines. RS-232 is a serial control standard<br />
with a set number of conductors, data rate, word length and type of connector to be used. The standard specifies component<br />
connection standards with regard to computer interface. It is also called RS-232-C, which is the third version<br />
of the RS-232 standard, and is functionally identical to the CCITT V.24 standard. Logical ’0’ is > + 3V, Logical ’1’ is < -<br />
3V. The range between -3V and +3V is the transition zone.<br />
RS422<br />
An EIA serial digital interface standard that specifies the electrical characteristics of balanced (differential) voltage,<br />
digital interface circuits. This standard is usable over longer distances than RS-232. This signal governs the asynchronous<br />
transmission of computer data at speeds of up to 920,000 bits per second. It is also used as the serial port<br />
standard for Macintosh computers. When the difference between the 2 lines is < - 0.2V that equals with a logical ’0’.<br />
When the difference is > +0.2V that equals to a logical ’1’..<br />
Ethernet network communication<br />
The FLM projector can be connected to a LAN (local area network) using port 1 (F) or port 2 (G) on the communication interface.<br />
Once connected to the LAN, users are capable of accessing the projector from any location, inside or outside (if allowed) their<br />
company network using the FLM control software: <strong>Projector</strong> Toolset. This toolset locates the projector on the network in case there<br />
is a DHCP server or the user can insert the correct IP-address of the projector to access the projector. Once accessed, it is possible<br />
to check and manipulate all the projector settings. Remote diagnostics, control and monitoring of the projector can then become a<br />
daily and very simple operation. The network connectivity permits to detect potential errors and consequently improve the time to<br />
servicing.<br />
As there is a need to daisy chain projectors when they are in Ethernet network, an Ethernet switch is build in. the incoming network<br />
is hereby available for the internal PC and for the next device in the chain. In this way a ’star’ network interconnection can be avoid.<br />
The switch used is a stand alone 10/100Mbit Ethernet switch. This assures no influence on the network speed. Whenever a slow<br />
(10Mbit) device is connected the speed between the 100Mbit devices remains 100Mbit.<br />
Both Ethernet ports (F & G) are equipped with a yellow and green a LED. The yellow LED lights up in case the port is connected<br />
with a 100Mbit network. The green LED blinks in case there is network activity.<br />
The connectors used for both Ethernet ports (F & G) are of rugged Neutrik EtherCon RJ45 type, which is<br />
compatible with standard RJ45 cable connector. Straight (most common) as well as cross linked network<br />
cables can be used. The 2 ports are functionally identical. Both ports are connected via the projector hub<br />
(Auto sensing enabled).<br />
10/100 Base-T — RJ45 port<br />
Pin Description<br />
1 TXD+<br />
2 TXD-<br />
3 RXD+<br />
4 —<br />
5 —<br />
6 RXD-<br />
40 R59770179 FLM R22+ 15/03/2010
5. Connections<br />
Pin<br />
10/100 Base-T — RJ45 port<br />
7 —<br />
8 —<br />
USB port<br />
Description<br />
The communication interface is equipped with a master USB port, type “A” connector (H). This USB port will simplify the service<br />
procedures for taking backup files from the projector without network connection. An USB-stick is plugged into the USB port and<br />
files can be transferred from or to the projector using the local or remote control unit. Note that the USB-stick has to be FAT16<br />
compatible.<br />
Card bus connector (PCMCIA)<br />
No cards supported yet.<br />
R59770179 FLM R22+ 15/03/2010 41
5. Connections<br />
42 R59770179 FLM R22+ 15/03/2010
6. Getting started<br />
6. GETTING STARTED<br />
About this chapter<br />
This chapter describes the functions on the remote control and local keypad and gives an overview how to start up the projector. If<br />
gives also a brief overview of the direct adjustment possible with these controls.<br />
Overview<br />
• RCU & Local keypad<br />
• Terminology overview<br />
• Operating the projector<br />
• Using the RCU<br />
• Quick setup adjustments<br />
• <strong>Projector</strong> Address<br />
• Source selection<br />
• Controlling the <strong>Projector</strong><br />
6.1 RCU & Local keypad<br />
How controlling the projector ?<br />
The projector can be controlled by the local keypad or by the remote control unit.<br />
Location of the local keypad ?<br />
The local keypad is located on the input side of the projector.<br />
Remote control functions.<br />
This remote control includes a battery powered infrared (IR) transmitter that allows the user to control the projector remotely. This<br />
remote control is used for source selection, control, adaptation and set up.<br />
Other functions of the remote control are :<br />
• switching between stand by and operational mode.<br />
• switching to "pause" (blanked picture, full power for immediate restarting)<br />
• direct access to all connected sources.<br />
6.2 Terminology overview<br />
Overview<br />
The following table gives an overview of the different functionality of the keys.<br />
R59770179 FLM R22+ 15/03/2010 43
6. Getting started<br />
1 22<br />
2<br />
<br />
21<br />
20<br />
3<br />
MENU<br />
EXIT<br />
19<br />
4<br />
18<br />
10 3 10 19<br />
5<br />
6<br />
ENTER<br />
17<br />
16<br />
1 2 3 4 5<br />
MENU<br />
EXIT<br />
7<br />
PAUSE<br />
LENS<br />
TEXT<br />
15<br />
6 7 8 9 0<br />
8<br />
PHASE<br />
14<br />
RGB<br />
PATTERN WINDOW PIP LENS<br />
9<br />
9 0<br />
SHARPN<br />
STBY PAUSE TEXT<br />
AUTO<br />
RIGGING<br />
ENTER<br />
7 8<br />
TINT<br />
10<br />
5 6<br />
COLOR<br />
13<br />
2<br />
7<br />
1<br />
6<br />
16<br />
20<br />
9<br />
21<br />
8<br />
5<br />
17<br />
3 4<br />
BRIGHTN<br />
1 2<br />
CONTR<br />
LENS<br />
LENS<br />
11<br />
ZOOM<br />
LENS<br />
SHIFT<br />
LENS<br />
12<br />
FOCUS<br />
SHIFT<br />
Image 6-1<br />
Local keypad & remote control<br />
Ind. Key name Description<br />
1 Pattern key Direct access key to the internal pattern selection menu.<br />
or when an on-screen menu was displayed, the pattern is displayed immediately.<br />
2 RGB Toggle key to enable and disable colors in the adjustment mode. Toggle between red,<br />
green, blue and full RGB.<br />
3 MENU Access key to the menu structure and key to quickly quit the adjustment menus.<br />
4 Address key (recessed key), to enter the address of the projector (between 0 and 9) in the remote<br />
control. Press the recessed address key with a pencil, followed by pressing one digit<br />
button between 0 and 9.<br />
5 LENS Direct access key to the lens adjustment menus. Toggling this key will change the<br />
projected pattern.<br />
6 PAUSE To stop projection for a short time, press ’PAUSE’. The image disappears but full power<br />
is retained for immediate restarting. Shutter is closed.<br />
7 STBY Standby function switch off the lamp and lamp electronics. The lamp cooling fans remain<br />
active for about 5 minutes. The speed of the other fans is reduced.<br />
8 Rigging Direct access key to layout selection. Rigging key + sequence number opens directly<br />
the desired layout.<br />
9 Auto image Direct access key to automatically project the correct image.<br />
10 Digit buttons Direct input selection or menu short cuts or numeric entries<br />
11 Lens zoom/focus Zoom and focus controls of the lens<br />
12 Lens shift Shift control of the lens, to shift the lens up/down or left/right<br />
13 Picture controls Use these buttons to obtain the desired picture level.<br />
44 R59770179 FLM R22+ 15/03/2010
6. Getting started<br />
Ind. Key name Description<br />
14 PHASE Used to remove the horizontal instability of the image (usually for RGB source). It adjusts<br />
the phase of the pixel sampling clock relative to the incoming signal.<br />
15 FREEZE To freeze the actual projected image. Freeze sign is displayed in the upper left corner (a<br />
short press on the key).<br />
When pressing for 5 sec, the projector goes into stand-by. The lamp cooling fans remain<br />
active for about 5 minutes. The speed of the other fans is reduced.<br />
16 TEXT Toggle key to activate or deactivate on screen text boxes while adjusting a setting.<br />
When adjusting one of the image controls, e.g.during a meeting, the normally displayed<br />
bar scale can be deactivated by pressing ’TEXT’ key first. To re-display the bar scale<br />
on the screen, press ’TEXT’ key again. When TEXT is ’off’, no adjustment menu’s<br />
will be displayed on the screen when entering the adjustment mode. All menus and<br />
adjustments remain active on the local LCD panel.<br />
17 ENTER Key to confirm an adjustment or selection in the adjustment mode.<br />
18 Cursor keys To make menu selections when in the adjustment mode<br />
19 EXIT Key to go one menu stage higher than the actual position when in the adjustment mode.<br />
20 WINDOW Selection of the active window, also in PIP mode.<br />
21 PIP Direct access key for picture in picture selection.<br />
22 RC Operating indication Lights up when a button on the remote control is pressed. (This is a visual indicator to<br />
check the operation of the remote control)<br />
Table 6-1<br />
6.3 Operating the projector<br />
Overview<br />
• Switching on<br />
• Errors, warnings and messages during start up<br />
• Switching to standby<br />
• Switching off<br />
6.3.1 Switching on<br />
Howtoswitchon.<br />
1. Press the power switch to switch on the projector.<br />
Image 6-2<br />
Switching on<br />
- When ’0’ is visible, the projector is switched off.<br />
- When ’1’ is visible, the projector is switched on.<br />
The projector starts up in standby. The menus are accessible via the local LCD panel.<br />
To display an image, the standby key must be pressed once.<br />
R59770179 FLM R22+ 15/03/2010 45
6. Getting started<br />
The actual input voltage is indicated on the voltmeter just above the power switch.<br />
Starting image projection via the standby key.<br />
1. Press Stand by key once on the local keypad or on the remote control.<br />
<br />
MENU<br />
EXIT<br />
B<br />
ENTER<br />
PAUSE<br />
LENS<br />
TEXT<br />
1 2 3 4 5<br />
6 7 8 9 0<br />
MENU<br />
EXIT<br />
9 0<br />
PHASE<br />
SHARPN<br />
RGB<br />
PATTERN WINDOW PIP LENS<br />
7 8<br />
TINT<br />
STBY PAUSE TEXT<br />
AUTO<br />
RIGGING<br />
ENTER<br />
5 6<br />
COLOR<br />
3 4<br />
BRIGHTN<br />
A<br />
1 2<br />
CONTR<br />
LENS<br />
ZOOM<br />
LENS<br />
SHIFT<br />
LENS<br />
FOCUS<br />
LENS<br />
SHIFT<br />
Image 6-3<br />
Stand by indication<br />
A<br />
B<br />
Stand by indication on local keypad<br />
Stand by indication on remote control<br />
The projector status LED lights up.<br />
The projector starts up on the last saved source.<br />
Some lamp and runtime warnings can be displayed when an image is displayed after a start up.<br />
6.3.2 Errors, warnings and messages during start up<br />
Temperature error DMD<br />
When the temperature of one of the DMD’s is too low or too high the projector is switched automatically to standby. An error code<br />
will be displayed on the local LCD panel. For a list of possible error codes, see "Error codes", page 213.<br />
6.3.3 Switching to standby<br />
How to switch to standby?<br />
1. Press Standby to switch the projector to standby.<br />
A cool-down counter (after cooling) starts counting down for 5 minutes (only visible on the local LCD panel). During this period<br />
the fans are still running.<br />
A restart is possible during this period.<br />
46 R59770179 FLM R22+ 15/03/2010
90<br />
34<br />
6. Getting started<br />
Switching to Standby. When the projector is running and you want to go to standby, press the standby key<br />
for 2 seconds. Do not press any longer on the standby key otherwise the projector will restart.<br />
All custom settings are written to the internal backup device. A message ’Save data ...’ indicates this process.<br />
Never switch off the projector while this message is displayed.<br />
When pressing for at least 5 seconds on the Freeze button, the projector goes to standby without the risk of<br />
restart..<br />
6.3.4 Switching off<br />
How to switch off the projector?<br />
1. Press first Standby.<br />
2. Let cool down the projector until the fans decrease, at least 5 min.<br />
3. Switch off the projector with the power switch.<br />
CAUTION: Never switch off the projector while the message ’Save data ... ’ is displayed !<br />
6.4 Using the RCU<br />
Pointing to the reflective screen<br />
1. Point the front of the RCU to the reflective screen surface.<br />
IR Sensor (C)<br />
Screen (B)<br />
Image 6-4<br />
IR control via the reflective screen<br />
F1F2F3F4F5 ADJ ENTER<br />
EXIT<br />
PAUSE TEXT SHARPN PHASE<br />
TREBLEBALANCE<br />
TINTCOLORBRIGHTNCONTR<br />
BASVOL<br />
7 8<br />
5 6<br />
1 2<br />
Remote Control (A)<br />
A<br />
B<br />
C<br />
Remote control<br />
Screen<br />
Front IR-sensor<br />
Hardwired Remote Input<br />
1. Plug one end of the remote cable in the connector on the bottom of the RCU.<br />
R59770179 FLM R22+ 15/03/2010 47
F2 F3 F4<br />
F1 F5<br />
ADJ EI XT<br />
E NT R E<br />
PUSE<br />
A TXT<br />
E<br />
PHASE<br />
SHARPN<br />
TNT<br />
I<br />
C OL OR<br />
BI RGHT<br />
N<br />
C ONTR<br />
TEBL E R B AL ANCE<br />
B ASS VOL<br />
9 0<br />
7 8<br />
5 6<br />
3 4<br />
1 2<br />
RGB PA TT ERN WINDOWPIP<br />
ST BY PA US ETEX T<br />
10 /1 00 Ba sed -T<br />
Port 1 Port 2<br />
LENS<br />
AUTORIGGING<br />
USB<br />
ME NU<br />
Di agno sti c c ode<br />
Std/ON<br />
Warning IR<br />
EXIT<br />
ENTE R<br />
PC Card<br />
IR rec ei ver<br />
Remote<br />
CT RL in<br />
PUSH<br />
2 1<br />
3<br />
5-cab le inp ut<br />
R/P r G/Y/Vi deo B/Pb H/ S V/ Cs<br />
DV I i np ut<br />
HDSDI - SDI i nput<br />
In pu t 1 In pu t 2 Lo op o ut put<br />
Remote<br />
CT RL o ut<br />
PUSH<br />
2 1<br />
3<br />
F2 F3 F4<br />
F1 F5<br />
ADJ EI XT<br />
E NT R E<br />
PUSE<br />
A TXT<br />
E<br />
PHASE<br />
SHARPN<br />
TNT<br />
I<br />
C OL OR<br />
BI RGHT<br />
N<br />
C ONTR<br />
TEBL E R B AL ANCE<br />
B ASS VOL<br />
9 0<br />
7 8<br />
5 6<br />
3 4<br />
1 2<br />
Sel<br />
Sync OK<br />
Sel<br />
Sync OK<br />
RS 23 2/ 42 2 ou t<br />
RS 23 2/ 422 i n<br />
Sel<br />
Sync OK<br />
1 2 3 4 5 ME NU<br />
6 7 8 9 0<br />
RGBPA TTWINDOW<br />
ERNPIP LENS<br />
ST BYPA USTEXTE<br />
AUTO RIGGING<br />
EXIT<br />
ENTE R<br />
Di agn osti c c ode IR rec ei ve r<br />
10 /1 00 Ba se d-T<br />
Port 1 Port 2 Std/ON<br />
Warning IR<br />
USB<br />
PC Card<br />
F2 F3 F4<br />
F1<br />
F5<br />
ADJ EIX<br />
T<br />
E NT R E<br />
PUSE<br />
A T EXT<br />
PHASE<br />
SHARPN<br />
TNT<br />
I<br />
C OL OR<br />
BI RGHTN<br />
C ONTR<br />
TEBL E R B AL ANCE<br />
B ASS VOL<br />
9 0<br />
7 8<br />
5 6<br />
3 4<br />
1 2<br />
R/P rG/Y/Vi deo B/Pb H/S V/Cs<br />
Sync OK<br />
DV I i np ut<br />
Sel<br />
Input 1Input 2<br />
Remote<br />
CT RL in<br />
PUSH<br />
2 1<br />
3<br />
5-cab le inp ut<br />
HDSDI - SDI i nput<br />
Sel<br />
Remote<br />
CT RL o utRS 23 2/ 42 2 ou t<br />
PUSH<br />
2 1<br />
3<br />
Sel<br />
Sync OK<br />
Loop output Sync OK<br />
RS 23 2/ 422 i n<br />
6. Getting started<br />
1 2 3 4 5<br />
6 7 8 9 0<br />
Image 6-5<br />
2. Plug the other end in the small connector in the input panel of the projector labeled Remote CTRL in.<br />
The Remote connection uses a standard two wire cable terminated on each end with a 3.5 mm male<br />
(mono/stereo) phone jack.<br />
This cable is not delivered but is available in most electronic or audio shops.<br />
Hardwired to the XLR input<br />
1. Plug one end of the remote cable in the connector on the bottom of the RCU<br />
2. Plug the other end in the big connector in the input panel of the projector labelled Remote CTRL in.<br />
Directly to one of the IR sensors<br />
When using the wireless remote control, make sure you are within the effective operating distance (30m, 100ft in a straight line). The<br />
remote control unit will not function properly if strong light strikes the sensor window or if there are obstacles between the remote<br />
control unit and the projector IR sensor.<br />
45° 45° 45° 45° 45° 45°<br />
Image 6-6<br />
RCU to one of the IR sensors<br />
48 R59770179 FLM R22+ 15/03/2010
6. Getting started<br />
6.5 Quick setup adjustments<br />
Overview<br />
• Text boxes ON or OFF<br />
• Quick Lens Adjustment<br />
• Quick picture in picture<br />
• Quick layout selection with Rigging key<br />
• Quick language selection<br />
6.5.1 Text boxes ON or OFF<br />
Text toggle function<br />
The on-screen text boxes can be switched OFF so that an adjustment during the operation of the projector are not visible on the<br />
screen. The adjustment indication remains visible on the local LCD screen.<br />
To toggle Text ON or OFF, press the TEXT key on the remote control or local keypad.<br />
6.5.2 Quick Lens Adjustment<br />
6.5.2.1 Quick Lens Adjustment via LENS key<br />
Quick zoom/focus adjustment<br />
1. Press the LENS key on the remote control or local keypad.<br />
The zoom/focus menu will be displayed.<br />
Image 6-7<br />
2. Push the cursor key ▲ or ▼ to zoom and ◄ or ► to focus the image.<br />
3. When finished, press EXIT key to return or ENTER to continue to the shift adjustment.<br />
Press the LENS key to switch to another pattern. Different patterns are available.<br />
Quick shift adjustment<br />
1. Press the LENS key on the remote control or local keypad.<br />
The zoom/focus menu will be displayed.<br />
Image 6-8<br />
2. Press ENTER.<br />
R59770179 FLM R22+ 15/03/2010 49
6. Getting started<br />
The shift menu will be displayed.<br />
Image 6-9<br />
3. Push the cursor key ▲ or ▼ to shift the image up or down and ◄ or ► to shift the image left or right.<br />
4. When finished, press EXIT key to return or ENTER to continue to zoom/focus.<br />
Press the LENS key to switch to another pattern. Different patterns are available.<br />
6.5.2.2 Direct Lens Adjustment (RCU)<br />
Lens adjustment buttons on the Remote Control<br />
On the Remote Control four buttons with double action are provided, allowing direct alignment for lens ZOOM, FOCUS, HORIZON-<br />
TALSHIFTandVERTICALSHIFT.<br />
1. Press LENS ZOOM button [-] or [+] (A) for correct image size on the screen.<br />
1 2<br />
CONTR<br />
A<br />
LENS<br />
ZOOM<br />
LENS<br />
SHIFT<br />
B<br />
C<br />
LENS<br />
FOCUS<br />
LENS<br />
SHIFT<br />
D<br />
Image 6-10<br />
Direct lens adjustment keys<br />
A<br />
B<br />
C<br />
D<br />
Zoom<br />
Vertical shift<br />
Focus<br />
Horizontal shift<br />
2. Press LENS FOCUS button [-] or [+] (C) for an overall focus of the image.<br />
3. Press ▲ LENS SHIFT ▼ button for correct vertical position of the image on the screen.<br />
4. Press ◄ LENS SHIFT ► button for correct horizontal position of the image on the screen.<br />
6.5.3 Quick picture in picture<br />
Quick On - Off<br />
Press on the PIP key on the remote control or the local keypad to activate the Load layout window.<br />
Use the ▲▼key to scroll to the desired layout and press ENTER to activate.<br />
Select Main full screen to switch off PIP.<br />
50 R59770179 FLM R22+ 15/03/2010
6. Getting started<br />
Image 6-11<br />
6.5.4 Quick layout selection with Rigging key<br />
What can be done ?<br />
When the projector is playing, changing from one layout to another is possible without displaying any on screen selection menu.<br />
The current image is not disturbed as long no selection is made. Press the Rigging key followed by one or two digits to jump to a<br />
new layout.<br />
When Rigging is pressed, an overview of the possible layouts with a sequence number is given on the local LCD panel. That<br />
sequence number is the number that should be pressed after Rigging is pressed to change the layout to the new selection.<br />
How to make a selection<br />
1. Press Rigging followed by one or two digits and wait.<br />
Note: If you press only one digit, the projector wait a few time to check if a second digit will follow. If not, it switches to the<br />
selected layout.<br />
The selected layout is loaded.<br />
Or,<br />
press Rigging.<br />
The layout selection menu is displayed on the local LCD panel.<br />
Image 6-12<br />
2. Enter the digit or the two digits of your choice.<br />
The selected layout is loaded.<br />
Or,<br />
scroll with the arrow keys to the desired layout and press ENTER.<br />
The selected layout is loaded.<br />
When no digit is pressed after Rigging is pressed, the layout selection menu disappears after a few seconds<br />
without a layout change.<br />
6.5.5 Quick language selection<br />
Language selection<br />
1. Press Menu to activate the menus and select with the ▲ or ▼ key <strong>Projector</strong> Control and press ENTER.<br />
2. Select with the ▲ or ▼ key Language and press ENTER.<br />
The language menu opens.<br />
3. Select with the ▲ or ▼ key the desired language and press ENTER to activate.<br />
R59770179 FLM R22+ 15/03/2010 51
6. Getting started<br />
The current active language is indicated with an asterisk (*).<br />
Image 6-15<br />
Image 6-13<br />
Image 6-14<br />
6.6 <strong>Projector</strong> Address<br />
6.6.1 Displaying and Programming addresses<br />
Displaying the <strong>Projector</strong> Address on the Screen.<br />
1. Press Address key (recessed key on the RCU) with a pencil.<br />
The projector’s address is displayed as first item in the Identification screen.<br />
Image 6-16<br />
To continue using the RCU with that specific address, it is necessary to enter the same address with the<br />
digit buttons (address between 0 and 9) within 5 seconds after pushing the address key. For example : if the<br />
Address key displays projector address 003, then press "3" digit button on the RCU to set the RCU’s address<br />
to match the projector’s address. Do not press 003 digits. This will address the remote control to ’0’ and<br />
control all projectors in the room. If the address is not entered within 5 seconds, the RCU returns to its default<br />
address (zero address) and control all projectors in the room.<br />
How to Program an Address into the RCU?<br />
1. Press the Address key (recessed key on the RCU) with a pencil.<br />
2. Enter the address with the digit buttons within 5 seconds after pushing the address key.<br />
Note: That address can be any digit between 0 and 9.<br />
The LED on the remote control must lit up while pressing a digit key. Otherwise the address is not entered in<br />
the remote control.<br />
52 R59770179 FLM R22+ 15/03/2010
6. Getting started<br />
6.6.2 Controlling the projector<br />
<strong>Projector</strong> address<br />
Address installed in the projector to be individually controlled.<br />
Common address<br />
<strong>Projector</strong> will always execute the command coming from a RCU programmed with that common address.<br />
Why a projector address ?<br />
As more than one projector can be installed in a room, each projector should be separately addressable with an RCU or computer.<br />
Therefore each projector has its own address.<br />
Set up an individual <strong>Projector</strong> Address.<br />
The set up of a projector address can be done via the software. See chapter ’<strong>Projector</strong> Control’, ’<strong>Projector</strong> address’.<br />
<strong>Projector</strong> controlling.<br />
Every projector requires an individual address between 0 and 255 which can be set in the Service mode.<br />
When the address is set, the projector can be controlled now:<br />
• RCU for addresses between 0 and 9.<br />
• computer, e.g. IBM PC (or compatible), Apple MAC, etc. for addresses between 0 and 255.<br />
Common Address<br />
Every projector has a common address ’0’ or ’1’. The choice between ’0’ and ’1’ can be selected in <strong>Projector</strong> Control → <strong>Projector</strong><br />
address → Common address.<br />
6.7 Source selection<br />
Source selection when no picture in picture is active<br />
Use the digit keys on the remote control or local keypad to active the desired source.<br />
Source selection when picture in picture is active<br />
Use the Window button on the remote control or the local keypad to select the main window or the picture in picture (PiP) window.<br />
1 2 3 4 5<br />
6 7 8 9 0<br />
MENU<br />
EXIT<br />
<br />
RGB<br />
PATTERN WINDOW PIP LENS<br />
MENU<br />
EXIT<br />
STBY PAUSE TEXT<br />
AUTO<br />
RIGGING<br />
ENTER<br />
ENTER<br />
PAUSE<br />
LENS<br />
TEXT<br />
PHASE<br />
Image 6-17<br />
Window selection button<br />
The outline of the selected window gets a colored rectangle to indicate the selection. For the main window, the color is blue. For the<br />
picture in picture window, the color is orange.<br />
Once the desired window is activated (main window or picture in picture window) all keys on the remote control or local keypad can<br />
now control that selected window.<br />
To select the source for the picture in picture window, press Window button until PiP window is activated and then select the desired<br />
source with the digit keys.<br />
To select the source for the main window, press Window button until the main window is activated and then select the desired source<br />
with the digit keys.<br />
R59770179 FLM R22+ 15/03/2010 53
6. Getting started<br />
6.8 Controlling the <strong>Projector</strong><br />
Picture Controls<br />
When an image control is pressed, a text box with a bar scale, icon and function name of the control, e.g. ’brightness...’ appears on<br />
the screen (only if text is ON). See example screen. The length of the bar scale and the value of the numeric indication indicate the<br />
current memorized setting for this source. The bar scale changes as the control buttons on the RCU are pressed.<br />
Brightness<br />
Contrast<br />
Color<br />
Tint<br />
Sharpness<br />
Phase<br />
A correct ’brightness’ setting is important for good image reproduction.<br />
Use the + button for a higher brightness.<br />
Use the - button for a lower brightness.<br />
A correct ’contrast’ setting is important for good image reproduction. Adjust the contrast to the level<br />
you prefer, according to room lighting conditions.<br />
Use the + button for a higher contrast.<br />
Use the - button for lower contrast.<br />
Color saturation is only active for all type of video sources, such as Video, S-Video, SDI, HDSDI.<br />
Adjust the color intensity of the picture.<br />
Use the + button for richer colors.<br />
Use the - button for lighter colors.<br />
Tint is only active for Video and S-Video when using the NTSC 4.43 or NTSC 3.58 system.<br />
Use the + button for more tint<br />
Use the - button for less tint.<br />
The sharpness function is used to adjust the image sharpness of video signals.<br />
Use the + button for more sharpness<br />
Use the - button for less sharpness<br />
Use the + or - side of the phase control button to adjust the phase.<br />
The Pause Key<br />
When the Pause key is pressed, the image projection is stopped, a black screen will be displayed and the projector remains with full<br />
power for immediate restart. The 7-segment display on the projector will show a "P". The shutter is closed.<br />
To restart the image, press one of the following keys:<br />
• Press Pause key.<br />
• Select a source number.<br />
The Stand-by Key<br />
When the Stand-by key is pressed, the image projection is stopped and the projector goes to stand-by. This situation is used when<br />
a projection stop is planned for a longer period. All custom settings are saved to an internal backup device. A message ’Save data<br />
...’ is displayed during this backup operation.<br />
The Freeze key<br />
When pressing for 5 seconds on the Freeze button, the projector goes to stand-by. This function is very useful when multiple projectors<br />
have to be switched to stand-by. Set the RCU address to the common address and press Freeze for 5 seconds. All projectors<br />
go to stand-by without the risk of restart.<br />
When pressing shortly on Freeze, the current image is frozen.<br />
54 R59770179 FLM R22+ 15/03/2010
7. START UP OF THE ADJUSTMENT MODE<br />
7. Start up of the Adjustment Mode<br />
Overview<br />
• About the adjustment mode<br />
• About the use of the remote control and the local keypad<br />
• Start up the adjustment mode<br />
• Navigation and adjustments<br />
• Shortcut keys to the menus<br />
• On screen menus versus LCD display menus<br />
• Test patterns in adjustment mode<br />
• Menu memory<br />
7.1 About the adjustment mode<br />
Overview<br />
As the adjustment mode is the central place to control and align the projector, the following functions can be done:<br />
• Input setup: the different inputs can be configured for a specific format or input source.<br />
• Image adjustment: these adjustments are organized per image source and contain the aspect ratio, timings and image settings.<br />
• Layout adjustment: set up of the main window and the picture in picture window.<br />
• Lamp: manage the lamp mode, the lamp use, lamp type and history<br />
• Alignment: groups all controls necessary during the setup of the projector onto a screen.<br />
• <strong>Projector</strong> control: contains the accessibility settings of the projector, such as address and communication setup.<br />
• Service: contains information about how the projector is performing. This information will be useful when calling for a service<br />
intervention.<br />
7.2 About the use of the remote control and the local keypad<br />
Overview<br />
All navigations and adjustments can be done either with the remote control or with the local keypad.<br />
Almost all the keys on the remote control have an equivalent on the local keypad.<br />
Exceptions:<br />
• ▲ on the remote control corresponds with the up + key on the local keypad.<br />
• ▼ on the remote control corresponds with the down - key on the local keypad.<br />
• ◄ on the remote control corresponds with the left - key on the local keypad<br />
• ► on the remote control corresponds with the right + key on the local keypad<br />
7.3 Start up the adjustment mode<br />
Start up tools<br />
To start up the adjustment mode, use the remote control or the local keypad.<br />
How to start up?<br />
1. Press Menu on the remote control (RCU) or on the local keypad to start up the Adjustment mode.<br />
R59770179 FLM R22+ 15/03/2010 55
7. Start up of the Adjustment Mode<br />
The main menu of the adjustment mode opens.<br />
Image 7-1<br />
7.4 Navigation and adjustments<br />
How to navigate in the menu structure?<br />
Once in the menu structure, use the ▲ or ▼ keys on the remote control (or the ▲ or ▼ (+ or -) key on the local keypad) to scroll<br />
through the items in the displayed menu. The selected item will get a background color. To activate a selected submenu or function,<br />
press ENTER.<br />
When on a submenu, to return one step to the parent menu, press EXIT.<br />
To escape the menu structure when on a menu, press MENU.<br />
How to make an adjustment?<br />
With the remote control, press the ▲ or ▼ keys until the desired value (setup) is reached. Press EXIT to finalize the adjustment.<br />
With the local keypad, press the ▲ or ▼ (+ or -) keys until the desired value (setup) is reached. Press EXIT to finalize the adjustment.<br />
All adjustments will be indicated with an on-screen box with the name of the adjustment in the title bar, the length of the progress<br />
bar indicates the actual value. The value at the start and at the end of the progress bar indicates the adjustment ranges.<br />
Image 7-2<br />
While a bar scale is displayed, it is also possible to enter the desired value directly with the digit keys. Therefore, press ENTER.<br />
The menu changes to a Enter new value menu with the current value filled out. The first digit is selected.<br />
Image 7-3<br />
Use the ◄ or ► key to jump to the next digit or enter a new value for the selected digit with the digit keys and then the selection will<br />
jump also to the next digit. Repeat this action for all other digits and press ENTER to finalize the input.<br />
If applicable in direct input, toggle between + and - with the left arrow key (◄).<br />
7.5 Shortcut keys to the menus<br />
About a shortcut key<br />
The digit keys 5 to 9 can be customer programmed to directly open a pre-stored menu. That menu can be any independent menu<br />
out of the list of menu. A menu which is built up by the content of a previous menu cannot be stored behind a shortcut.<br />
56 R59770179 FLM R22+ 15/03/2010
7. Start up of the Adjustment Mode<br />
How to use a shortcut key<br />
While in the operational mode, no menu selected, just press on the desired digit key to open the menu behind that shortcut key.<br />
How to create a shortcut key<br />
Scroll to the desired menu. Press the digit key behind which the menu must be stored for 5 seconds. When the creation is successfully,<br />
a confirmation message appears on the screen. E.g. :<br />
Image 7-4<br />
Select Yes to confirm the creation.<br />
To erase the shortcut, navigate to <strong>Projector</strong> Control → Buttons.<br />
7.6 On screen menus versus LCD display menus<br />
Overview<br />
As the projector is equipped with an 8 lines LCD panel, the on-screen menus are also displayed on that LCD panel in the same<br />
structure as the on screen menus. These menus can be used in the same way as the on-screen menus.<br />
The menus on the LCD panel are still reachable even when the projector lamp is not activated and when Text is in the off mode.<br />
When quitting the menu structure, the backlighting of the LCD panel is switched off after a few seconds.<br />
7.7 Test patterns in adjustment mode<br />
Overview<br />
When the adjustment mode is started, a test pattern can be called at any moment just by pressing the Pattern key on the RCU or the<br />
local key path. Press as many times on the Pattern key as necessary to display the desired test pattern. The test pattern remains<br />
on the screen as long as the adjustment mode is selected, even when selecting other menus. When leaving the adjustment mode,<br />
the selected test pattern is cleared and the normal image is displayed again.<br />
7.8 Menu memory<br />
Overview<br />
Each menu with sub menus, remembers its last selected sub item even when leaving the menu structure and that as long as the<br />
projector is running. When restarting the projector from stand-by, the menu memory is reset.<br />
After re-opening the main menu and selecting an item, the previous selected sub item of that selected item is highlighted and can<br />
be opened just by pressing ENTER.<br />
R59770179 FLM R22+ 15/03/2010 57
7. Start up of the Adjustment Mode<br />
58 R59770179 FLM R22+ 15/03/2010
8. Input menu<br />
8. INPUT MENU<br />
Overview<br />
• Overview flow<br />
• Slot module type<br />
• Input locking<br />
• Minimum delay<br />
• Native resolution<br />
• Source switching<br />
• No signal<br />
8.1 Overview flow<br />
Overview<br />
Level 1 Level 2 Level 3<br />
Input<br />
Slot module type<br />
5-cable<br />
HD-SDI - SDI<br />
DVI<br />
DVI HDCP<br />
Input locking<br />
Minimum delay [On/Off]<br />
Native resolution [On/Off]<br />
Source switching<br />
No signal<br />
Free running<br />
Automatic<br />
Input 1 to 4<br />
Effect<br />
Effect time<br />
Color [black/blue]<br />
Shutdown [Off/On]<br />
Shutdown time<br />
8.2 Slot module type<br />
Overview<br />
• About Input Setup<br />
• Input configuration<br />
8.2.1 About Input Setup<br />
Overview<br />
Each input module must be configured before these module can be used. This configuration is necessary so that the projector knows<br />
which type of signal is connected to its input.<br />
The projector has 4 input slots and these slots can be filled up in a random order with the available modules. Identical modules are<br />
allowed.<br />
For more information about the available input modules and how to install, see "Input source connections", page 37.<br />
R59770179 FLM R22+ 15/03/2010 59
8. Input menu<br />
CAUTION: Always install a cover plate on an unused input slot. This to prevent dust intrusion into the projector.<br />
8.2.2 Input configuration<br />
How to change?<br />
1. Press MENU to activate the menus.<br />
2. Use the ▲ or ▼ key to select Input and press ENTER.<br />
The Input menu is displayed.<br />
3. Use the ▲ or ▼ key to select Slot module type and press ENTER.<br />
The slot overview window is displayed with the actual situation filled out.<br />
4. Use the ▲ or ▼ key to select a slot.<br />
Press ENTER to open the selection menu which will be different from input type to input type (except for DVI, see DVI equalization).<br />
Image 8-2<br />
Image 8-3<br />
Image 8-1<br />
For a 5 cable module<br />
When ENTER is pressed on a 5 cable module, the following menu appears:<br />
Image 8-4<br />
Use the ▲ or ▼ key to select the desired configuration and press ENTER to select.<br />
When e.g. RGB AUTO is selected, the projector discovers itself which type of RGB signal is connected to it and loads the correct<br />
settings.<br />
For RGB selections, advanced settings are possible. To adjust these advanced settings, use the ▲ or ▼ key to select Advanced<br />
settings and press ENTER. The advanced settings menu opens:<br />
60 R59770179 FLM R22+ 15/03/2010
8. Input menu<br />
Image 8-5<br />
Press ENTER to toggle between [Analog] and [TTL].<br />
For a HDSDI - SDI module<br />
When ENTER is pressed on a HDSDI or SDI module, the following menu appears:<br />
Image 8-6<br />
Use the ▲ or ▼ key to select the desired configuration and press ENTER to select.<br />
When an input with priority is selected, then if a signal is connected to both inputs the input indicated has the priority. If there is no<br />
signal on the priority input, the signal of the other input is displayed.<br />
DVI equalization<br />
When a DVI module (DVI or DVI HDCP) is selected, press ENTER to go in edit mode. Use ◄ or ► to key to change the equalization<br />
value.<br />
Default value = 13.<br />
For non DVI-compliant transmitter, stronger equalization may be necessary even for shorter cables.<br />
For longer cables adjust between 0 and 13 (more equalization).<br />
For shorter cables adjust between 13 and 15 (least equalization).<br />
8.3 Input locking<br />
What is possible?<br />
The output signal can be locked on an internal sync signal or on the sync signal of one of the input sources. Input locking can avoid<br />
that some windows in the output signal are slowly moving or trembling.<br />
When automatic is selected, the lock will be set on the input signal of the main window.<br />
How to set up?<br />
1. Press MENU to activate the menus.<br />
2. Use the ▲ or ▼ key to select Input and press ENTER.<br />
The Input menu is displayed.<br />
3. Use the ▲ or ▼ key to select Input locking and press ENTER.<br />
The input locking window is displayed. The actual selected locking method is indicated by an arrow.<br />
4. Use the ▲ or ▼ key to select the desired locking and press ENTER.<br />
R59770179 FLM R22+ 15/03/2010 61
8. Input menu<br />
Image 8-8<br />
Image 8-9<br />
Image 8-7<br />
When:<br />
Free run<br />
Output is locked on an internal sync (60 Hz)<br />
Automatic<br />
Output is locked on the selected input for the main window<br />
Input 1 Output is locked on source 1<br />
Input 2 Output is locked on source 2<br />
Input 3 Output is locked on source 3<br />
Input 4 Output is locked on source 4<br />
The options menu changes depending on the selection.<br />
When Input locking is set to Automatic or on a specific input and there is no sync signal available, the locking<br />
will be switched to Free run without changing the user settings. Once the sync is available, it applies again<br />
the user settings.<br />
Options for Free run<br />
When Free run is selected (arrow in front of it) and then the Options are selected, the following menu appears:<br />
Image 8-10<br />
Use the ▲ or ▼ key to select <strong>Manual</strong> lock and press ENTER to toggle between On and Off.<br />
<strong>Manual</strong> lock on :<br />
<strong>Manual</strong> lock off :<br />
locking is done on the indicated vertical frequency which can be changed by the user.<br />
locking is done on an internal sync (60 Hz).<br />
To change the locking frequency for manual lock on, use the ▲ or ▼ key to select Vert freq and press ENTER to activate. The first<br />
digit is selected.<br />
Use the ▲ or ▼ key to select the desired digit and press ◄ or ► key to select the next digit in the address or enter the value with<br />
the digit keys on the remote control or local keypad. The next digit in the value will be automatically selected.<br />
Options for Automatic or specific input<br />
When Automatic or specific input is selected (arrow in front of it) and then the Options are selected, the following menu appears:<br />
Image 8-11<br />
Use the ▲ or ▼ key to select Genlock and press ENTER to toggle between On and Off.<br />
62 R59770179 FLM R22+ 15/03/2010
8. Input menu<br />
Genlock off<br />
Genlock on<br />
(default position) locking done on input source of main window, when automatic was selected or on the<br />
selected input source when a specific input was selected. <strong>Projector</strong> detects automatically the vertical<br />
frequency and clock frequency of the input signal. A slightly difference with the source is possible.<br />
locking done on indicated vertical frequency and clock frequency. This vertical frequency and clock frequency<br />
must be exactly the same as those of the source.<br />
Only use genlock ON for very stable sources and preferable for broadcast sources.<br />
For Genlock on,<br />
to change the locking frequency, use the ▲ or ▼ key to select Vert freq and press ENTER to activate. The first digit is selected.<br />
Use the ▲ or ▼ key to select the desired digit and press ◄ or ► key to select the next digit in the address or enter the value with<br />
the digit keys on the remote control or local keypad. The next digit in the value will be automatically selected.<br />
to change the clock frequency, use the ▲ or ▼ key to select Clock freq and press ENTER to activate. The first digit is selected.<br />
Use the ▲ or ▼ key to select the desired digit and press ◄ or ► key to select the next digit in the address or enter the value with<br />
the digit keys on the remote control or local keypad. The next digit in the value will be automatically selected.<br />
For older custom files, created with software packages older than package 1.5.6, the Genlock function will<br />
be grayed out. If you want to use this genlock function, a new custom file must be created starting from the<br />
standard file. Copying the custom file in a new file do not solve this issue.<br />
8.4 Minimum delay<br />
Purpose<br />
In normal mode, the processing (scaling and de-interlacing) in DLP projectors introduces a few frames delay (from input to screen).<br />
Setting the option Minimum Delay to "ON" disables all scaling and de-interlacing in the processing and reduces frame delay of the<br />
projector (from input to screen) to ONE frame, caused by the formatter board (DLP technology restriction). The intended use of this<br />
option is to apply native and progressive data to the projector and displaying it with minimum delay, using the full resolution of the<br />
projector. Other formats will be displayed either unscaled and/or interlaced.<br />
This feature can be used if additional delay in the projector is not acceptable. For instance if a projector is showing the DVI loop out<br />
of another DLP or if an external scaler/de-interlacer does the processing.<br />
How to toggle the delay?<br />
1. Press MENU to activate the menus.<br />
2. Use the ▲ or ▼ key to select Input and press ENTER.<br />
The Input menu is displayed.<br />
3. Use the ▲ or ▼ key to select Minimum delay and press ENTER to toggle between [On] and [Off].<br />
Image 8-13<br />
Image 8-12<br />
8.5 Native resolution<br />
What can be done<br />
The aim here is to always show the resolution of the source independently of the resolution of the DMD panels.<br />
R59770179 FLM R22+ 15/03/2010 63
8. Input menu<br />
Image 8-14<br />
When the show native resolution function is in the ON position, the projector handles the source as follows:<br />
Source<br />
Projected image<br />
Name Ratio Resolution Ratio Resolution<br />
XGA 4:3 1024x768 4:3 1024x768 image projected with black<br />
borders<br />
SXGA 5:4 1280x1024 5:4 1280x1024 image projected with black<br />
borders<br />
SXGA+ 4:3 1400x1050 4:3 1400x1050 normal image projected<br />
UXGA 4:3 1600x1200 4:3 1600x1200 part of the image displayed,<br />
image scroll possible<br />
How to toggle to native resolution?<br />
1. Press MENU to activate the menus.<br />
2. Use the ▲ or ▼ key to select Input and press ENTER.<br />
The Input menu is displayed.<br />
3. Use the ▲ or ▼ key to select Native resolution and press ENTER to toggle between [On] and [Off].<br />
[On] : images displayed in native resolution<br />
[Off] : images scaled to fill the complete screen<br />
Image 8-16<br />
Image 8-15<br />
When native resolution is on, some other menus such as Aspect ratio, timings are greyed out.<br />
64 R59770179 FLM R22+ 15/03/2010
8. Input menu<br />
8.6 Source switching<br />
Switching from one source to another<br />
To minimize undesired effects when switching from one source to another one can use the switching mode, using the fade effect.<br />
Image 8-17<br />
Example of fade effect<br />
Switching mode set up<br />
1. Press MENU to activate the menus.<br />
2. Use the ▲ or ▼ key to select Input and press ENTER.<br />
The Input menu is displayed.<br />
3. Use the ▲ or ▼ key to select Source switching and press ENTER.<br />
The Source switching menu is displayed.<br />
4. Use the ▲ or ▼ key to select Effect and press ENTER to toggle between No transition and Fade.<br />
No transition<br />
Fade<br />
No source switching effect is activated.<br />
Fade in, fade out effect is activated. Transition time can be set up.<br />
5. Use the ▲ or ▼ key to select Effect time and press ENTER.<br />
6. Enter the desired time with the digit keys<br />
Or,<br />
use the ▲ or ▼ key to scroll until the desired time is reached. Press ENTER to activate.<br />
Image 8-20<br />
Image 8-19<br />
Image 8-18<br />
8.7 No signal<br />
Overview<br />
• Background color<br />
• Shutdown setting<br />
• Shutdown retarding time<br />
Whatcanhappenwhennosignal<br />
When no signal available, a blue or black background color can be displayed or the projector can be shutdown with a certain retarding<br />
time.<br />
8.7.1 Background color<br />
How to change the color<br />
1. Press MENU to activate the menus.<br />
R59770179 FLM R22+ 15/03/2010 65
8. Input menu<br />
2. Use the ▲ or ▼ key to select Input and press ENTER.<br />
The Input menu is displayed.<br />
3. Use the ▲ or ▼ key to select No signal and press ENTER to toggle between [Black] and [Blue].<br />
Image 8-23<br />
Image 8-22<br />
Image 8-21<br />
8.7.2 Shutdown setting<br />
How to change the shutdown setting<br />
1. Press MENU to activate the menus.<br />
2. Use the ▲ or ▼ key to select Input and press ENTER.<br />
The Input menu is displayed.<br />
3. Use the ▲ or ▼ key to select Shutdown and press ENTER to toggle between [On] and [Off].<br />
Image 8-26<br />
Image 8-25<br />
Image 8-24<br />
8.7.3 Shutdown retarding time<br />
Only accessible when Shutdown is set to [On].<br />
How to set the retarding time?<br />
1. Press MENU to activate the menus.<br />
2. Use the ▲ or ▼ key to select Input and press ENTER.<br />
The Input menu is displayed.<br />
3. Use the ▲ or ▼ key to select Shutdown time and press ENTER.<br />
4. Use the ▲ or ▼ key to change the value.<br />
66 R59770179 FLM R22+ 15/03/2010
8. Input menu<br />
Or,<br />
enter the desired value with the keyboard.<br />
When trying to exceed the maximum allowed value, the system will set it back to the maximum value.<br />
Image 8-29<br />
Image 8-28<br />
Image 8-27<br />
R59770179 FLM R22+ 15/03/2010 67
8. Input menu<br />
68 R59770179 FLM R22+ 15/03/2010
9. Image menu<br />
9. IMAGE MENU<br />
Overview<br />
• Overview flow<br />
• How to select the image adjustments?<br />
• Image Settings<br />
• Aspect ratio<br />
• Timings<br />
• Image files services<br />
• Save custom settings<br />
9.1 Overview flow<br />
Overview<br />
Level 1 Level 2 Level 3 Level 4<br />
Image<br />
Image settings<br />
Contrast<br />
Brightness<br />
Saturation<br />
Tint<br />
Phase<br />
Sharpness<br />
Noise reduction<br />
Color temperature<br />
<strong>Projector</strong> white<br />
Computer 9300K<br />
Video 6500K<br />
Film 5400K<br />
Broadcast 3200K<br />
Custom balance<br />
Input balance<br />
Aspect ratio<br />
4/3<br />
16/9<br />
5/4<br />
2.35<br />
1.88<br />
1.78<br />
Custom<br />
Timings<br />
Total pixels<br />
Active pixels<br />
Horizontal start<br />
Period<br />
Total lines<br />
Active lines<br />
R59770179 FLM R22+ 15/03/2010 69
9. Image menu<br />
Level 1 Level 2 Level 3 Level 4<br />
Vertical start<br />
Advanced settings<br />
Clamp delay<br />
Clamp width<br />
Field polarity<br />
Film mode detection<br />
Image file services<br />
<strong>Manual</strong> load<br />
Delete<br />
Delete all<br />
Rename<br />
Copy<br />
Options<br />
Load file<br />
Save custom settings<br />
9.2 How to select the image adjustments?<br />
Start up<br />
1. Use the ▲ or ▼ key to select Image.<br />
2. Press ENTER to select.<br />
The Image menu opens.<br />
Image 9-2<br />
Image 9-1<br />
9.3 Image Settings<br />
Overview<br />
• Contrast<br />
• Brightness<br />
• Saturation<br />
• Tint (hue)<br />
• Phase<br />
• Sharpness<br />
• Noise reduction<br />
• Color temperature<br />
• Input balance<br />
70 R59770179 FLM R22+ 15/03/2010
9. Image menu<br />
9.3.1 Contrast<br />
About Contrast<br />
The contrast function is used to adjust the contrast between the light and dark areas of the displayed image.<br />
How to change the contrast?<br />
1. Press MENU to activate the menus.<br />
2. Use the ▲ or ▼ key to select Image and press ENTER.<br />
3. Use the ▲ or ▼ key to select Image settings and press ENTER.<br />
4. Use the ▲ or ▼ key to select Contrast and press ENTER.<br />
The Contrast progress bar appears.<br />
5. Use ◄ or ► to change the contrast.<br />
The higher the value, the higher the contrast.<br />
Image 9-4<br />
Image 9-3<br />
Image 9-5<br />
Image 9-6<br />
9.3.2 Brightness<br />
About Brightness<br />
The Brightness function is used to adjust the overall light output.<br />
How to change the brightness?<br />
1. Press MENU to activate the menus.<br />
2. Use the ▲ or ▼ key to select Image and press ENTER.<br />
3. Use the ▲ or ▼ key to select Image settings and press ENTER.<br />
4. Use the ▲ or ▼ key to select Brightness and press ENTER.<br />
The Brightness progress bar appears.<br />
5. Use ◄ or ► to change the brightness.<br />
R59770179 FLM R22+ 15/03/2010 71
9. Image menu<br />
The higher the value, the higher the brightness.<br />
Image 9-8<br />
Image 9-7<br />
Image 9-9<br />
Image 9-10<br />
9.3.3 Saturation<br />
About (color) saturation<br />
The color function is used to adjust the color saturation levels.<br />
How to change the saturation?<br />
1. Press MENU to activate the menus.<br />
2. Use the ▲ or ▼ key to select Image and press ENTER.<br />
3. Use the ▲ or ▼ key to select Image settings and press ENTER.<br />
4. Use the ▲ or ▼ key to select Saturation and press ENTER.<br />
The Saturation progress bar appears.<br />
5. Use ◄ or ► to change the color saturation.<br />
The higher the value, the higher the color saturation.<br />
Image 9-12<br />
Image 9-11<br />
Image 9-13<br />
Image 9-14<br />
72 R59770179 FLM R22+ 15/03/2010
9. Image menu<br />
9.3.4 Tint (hue)<br />
About Tint<br />
The Tint function is used to adjust color hue to obtain true color reproduction and is only active for Video and S-Video when the<br />
NTSC color system is used. For PAL and SECAM sources, Tint is not accessible.<br />
How to change the saturation?<br />
1. Press MENU to activate the menus.<br />
2. Use the ▲ or ▼ key to select Image and press ENTER.<br />
3. Use the ▲ or ▼ key to select Image settings and press ENTER.<br />
4. Use the ▲ or ▼ key to select Tint and press ENTER.<br />
The Tint progress bar appears.<br />
5. Use ◄ or ► to change the tint.<br />
The higher the value, the higher the tint.<br />
Image 9-16<br />
Image 9-15<br />
Image 9-17<br />
Image 9-18<br />
9.3.5 Phase<br />
About Phase adjustment<br />
When displaying computer patterns or graphics (RGB or YUV signals) which are very detailed (tilting, vertical stripes, etc. ), jitter<br />
in picture (mis-sampling) may occur, causing horizontal stripes in portions of the screen. When this jitter occurs, adjust ’Phase’ for<br />
optimum image.<br />
Image 9-19<br />
Jittering on image<br />
R59770179 FLM R22+ 15/03/2010 73
9. Image menu<br />
How to change the phase?<br />
1. Press MENU to activate the menus.<br />
2. Use the ▲ or ▼ key to select Image and press ENTER.<br />
3. Use the ▲ or ▼ key to select Image settings and press ENTER.<br />
4. Use the ▲ or ▼ key to select Phase and press ENTER.<br />
The Phase progress bar appears.<br />
5. Use ◄ or ► to change the phase and refine the jitter.<br />
Note: Don’t mix up with wrong number of total pixels. If the jitter doesn’t disappear with the phase adjustment, check the total<br />
number of pixels. (Best image = pixel on pixel off pattern. For example: shut down screen of a PC)<br />
Image 9-21<br />
Image 9-20<br />
Image 9-22<br />
Image 9-23<br />
9.3.6 Sharpness<br />
About Sharpness<br />
The sharpness function is used to adjust the image sharpness of video signals.<br />
How to change the sharpness?<br />
1. Press MENU to activate the menus.<br />
2. Use the ▲ or ▼ key to select Image and press ENTER.<br />
3. Use the ▲ or ▼ key to select Image settings and press ENTER.<br />
4. Use the ▲ or ▼ key to select Sharpness and press ENTER.<br />
The Sharpness progress bar appears.<br />
5. Use ◄ or ► to change the sharpness.<br />
The higher the value, the higher the sharpness.<br />
74 R59770179 FLM R22+ 15/03/2010
9. Image menu<br />
Image 9-25<br />
Image 9-24<br />
Image 9-26<br />
Image 9-27<br />
9.3.7 Noise reduction<br />
About Noise reduction<br />
Reduces noise and pixel jitter in all video sources.<br />
How to change?<br />
1. Press MENU to activate the menus.<br />
2. Use the ▲ or ▼ key to select Image and press ENTER.<br />
3. Use the ▲ or ▼ key to select Image settings and press ENTER.<br />
4. Use the ▲ or ▼ key to select Noise reduction and press ENTER.<br />
The Noise reduction progress bar appears.<br />
5. Use ◄ or ► to change the noise reduction.<br />
The higher the value, the higher the noise reduction.<br />
Image 9-29<br />
Image 9-28<br />
Image 9-30<br />
Image 9-31<br />
R59770179 FLM R22+ 15/03/2010 75
9. Image menu<br />
9.3.8 Color temperature<br />
What can be done ?<br />
The color temperature can be selected according to the type of source:<br />
There are 5 different preset color temperatures:<br />
• <strong>Projector</strong> white<br />
• computer : 9300 K<br />
• Video : 6500 K<br />
• Film : 5400 K<br />
• Broadcast : 3200 K<br />
These calibrated presets can be selected and will provide optimum color tracking, the projector allows however the setting of a<br />
personal color temperature, this is done in custom balance<br />
Color temperature selection is only possible when Color space is OFF<br />
Color temperature<br />
The coloration (reddish, white, bluish, greenish, etc.) of white in an image, measured using the Kelvin (degrees K)<br />
temperature scale. Higher temperatures output more light.<br />
9.3.8.1 Predefined color temperature<br />
<strong>Projector</strong> white will provide maximum projector light output. The calibrated ’Broadcast’, ’Film’, ’Video’ and<br />
’Computer’ presets will provide optimum color tracking.<br />
How to select?<br />
1. Press MENU to activate the menus.<br />
2. Use the ▲ or ▼ key to select Image and press ENTER.<br />
3. Use the ▲ or ▼ key to select Image settings and press ENTER.<br />
4. Use the ▲ or ▼ key to select Color temperature and press ENTER.<br />
5. Use the ▲ or ▼ key to select a predefined color temperature value, e.g. Video, and press ENTER.<br />
The colors of the image is switched to the selected value.<br />
Image 9-33<br />
Image 9-32<br />
Image 9-34<br />
76 R59770179 FLM R22+ 15/03/2010
9. Image menu<br />
Image 9-35<br />
9.3.8.2 Set a custom color temperature<br />
How to enter a custom value?<br />
1. Press MENU to activate the menus.<br />
2. Use the ▲ or ▼ key to select Image and press ENTER.<br />
3. Use the ▲ or ▼ key to select Image settings and press ENTER.<br />
4. Use the ▲ or ▼ key to select Color temperature and press ENTER.<br />
5. Use the ▲ or ▼ key to select Custom balance and press ►.<br />
The Gain adjustment bar scales are displayed.<br />
6. Adjust gain red with ◄ or ► key and gain blue with ▲ or ▼ key. Adjust gain blue in the same way as gain red.<br />
7. When gain adjustment is finished press ENTER.<br />
Image 9-37<br />
Image 9-36<br />
Image 9-38<br />
Image 9-39 Image 9-40<br />
R59770179 FLM R22+ 15/03/2010 77
9. Image menu<br />
9.3.9 Input balance<br />
Overview<br />
• Introduction to Input Balance<br />
• Adjusting the input balance<br />
9.3.9.1 Introduction to Input Balance<br />
Introduction: Unbalanced color signals<br />
When transporting signals, there is always a risk of deterioration of the information contained in the signals.<br />
In case of information contained in the amplitude of the signals which is the case of data color signals (R, G, B),image 9-41 , we are<br />
quite sure that the amplitude of these color signals is subject to alterations.<br />
An example of alteration may be a DC component added to the signal, in the form of a DC offset repositioning the black level, since<br />
this black level (“brightness”) will become crucial later on (clamping circuit) it will result in “black not being black”.<br />
Another value that is subject to alteration is the amplitude of the signal, resulting in an altered “Gain” of the signal (“white level” or<br />
contrast).<br />
The alterations of the three color signals will happen independently i.e. the colors will end to be unbalanced, image 9-42<br />
B<br />
0.7V<br />
Image 9-41<br />
Black level<br />
R<br />
G<br />
B<br />
Image 9-42<br />
ΔR<br />
ΔG<br />
ΔΒ<br />
Black level<br />
One can conclude here that a good color tracking can only be met by using three previously (input) balanced<br />
color signals<br />
Analog Digital Conversion<br />
The analog color signals must pass through an Analog/Digital conversion circuit prior to any digital processing in the PMP.<br />
A typical ADC transforms the analog value into an 8 bit coded digital signal.<br />
The graphic shows that when converting a signal containing a DC offset component the range of the converter is not optimally used.<br />
ADC<br />
R<br />
255<br />
i2 : video information<br />
Image 9-43<br />
Δ<br />
0<br />
i1 : superfluous information<br />
Black level<br />
78 R59770179 FLM R22+ 15/03/2010
9. Image menu<br />
One can conclude here that a good data conversion can only be met by using three previously (input) balanced<br />
color signals<br />
The objective of input balancing<br />
The objective in input balancing is to “set” the same black level and the same white level for the three colors of a particular input<br />
source.<br />
Black level setting : brightness<br />
White level setting : contrast<br />
The same absolute black and white level for the three colors allows the same reference for Brightness and Contrast control of the<br />
picture !<br />
These two references also set the range in which the ADC will work for that particular source (this explains also why each input<br />
balance setting is linked to a particular source and thus saved in the image file).<br />
9.3.9.2 Adjusting the input balance<br />
How can it be done ?<br />
To balance the three color signals of a particular source there are conditions; in fact we must know the black and the white level of<br />
the source i.e. :<br />
1. The source in question must be able to generate a white signal, ideally a 100% white (background) full screen pattern<br />
2. The source in question must be able to generate a black signal, ideally a 100% black (background) full screen pattern<br />
A<br />
B<br />
Image 9-44<br />
White balance : In the projector, we will set the contrast for each color until we get a 100% light output picture when projecting a<br />
100% white image (image A)<br />
Black balance : In the projector, we will set the brightness for each color until we get a 0% light output picture when projecting a<br />
100% black image (image B).<br />
The changeover from min to max is indicated by the apparition of bright spots also called “digital noise”<br />
R59770179 FLM R22+ 15/03/2010 79
9. Image menu<br />
An alternative to a full screen White/black pattern is the standard gray scale pattern, the white bar will be used<br />
for white balance and the black bar for black balance.<br />
Image 9-45<br />
Black balance<br />
1. Press MENU to activate the menus.<br />
2. Use the ▲ or ▼ key to select Image and press ENTER.<br />
3. Use the ▲ or ▼ key to select Image settings and press ENTER.<br />
4. Use the ▲ or ▼ key to select Input balance and press ENTER.<br />
5. Do you want to use an internally generated test pattern ?<br />
If yes, Use the ▲ or ▼ key to select Test pattern and press ENTER to toggle between [on] and [off]<br />
If no, Adjust on the selected source.<br />
6. Use the ▲ or ▼ key to select Black balance and press ENTER.<br />
Depending whether a test pattern is selected or not, the adjustment image is displayed.<br />
7. Toggle with ▲ or ▼ key to select Black balance red.<br />
Image 9-47<br />
Image 9-46<br />
Image 9-48<br />
Image 9-50<br />
Image 9-49<br />
8. Adjust the red black level on a minimal value<br />
9. Toggle with ▲ or ▼ key to Black balance blue and adjust the blue black level on a minimal value.<br />
Note: This minimal value is not necessary , provided that the 2 other colors are not influencing too much the color to be adjusted,<br />
in fact the aim is to minimize the effect of the two other colors since there is a risk of reaching too soon the 50% transition<br />
due to the contribution of these two other colors signals.<br />
10.Toggle with ▲ or ▼ key to Black balance green and adjust the Green black level until bright spots appear on the screen.<br />
11.Toggle with ▲ or ▼ key to Black balance blue adjust the Blue black level until bright spots appear on the screen.<br />
12.Toggle with ▲ or ▼ key to Black balance red adjust the Red black level until bright spots appear on the screen.<br />
80 R59770179 FLM R22+ 15/03/2010
9. Image menu<br />
The projected image should now be noisy full black<br />
If one uses a gray scale pattern, the bright spots should appear in the black bar.<br />
Performing White input balance<br />
1. Connect the source you want to project.<br />
2. Press MENU to activate the menus.<br />
3. Use the ▲ or ▼ key to select Image and press ENTER.<br />
4. Use the ▲ or ▼ key to select Image settings and press ENTER.<br />
5. Use the ▲ or ▼ key to select Input balance and press ENTER.<br />
6. Do you want to use an internally generated test pattern?<br />
If yes, Use the ▲ or ▼ key to select Test pattern and press ENTER to toggle between [on] and [off]<br />
If no, select a white pattern (or gray scale as alternative).<br />
7. Use the ▲ or ▼ key to select White balance and press ENTER.<br />
The white balance bar scale for a typical color is displayed.<br />
8. Toggle with the ▲ or ▼ key to select White balance red.<br />
Image 9-52<br />
Image 9-51<br />
Image 9-53<br />
Image 9-55<br />
Image 9-54<br />
9. Adjust the red white level (gain) on a minimal value<br />
10.Toggle with ▲ or ▼ key to Whitebalanceblueand adjust the blue white level (gain) on a minimal value.<br />
Note: This minimal value is not necessary , provided that the 2 other colors are not influencing too much the color to be adjusted,<br />
in fact the aim is to minimize the effect of the two other colors since there is a risk of reaching too soon the transition<br />
(bright spots) due to the contribution of these two other colors signals.<br />
11.Toggle with ▲ or ▼ key to White balance green and adjust the Green white level (gain) until bright spots appear on the screen.<br />
12.Toggle with ▲ or ▼ key to White balance blue adjust the Blue white level (gain) until bright spots appear on the screen.<br />
13.Toggle with ▲ or ▼ key to White balance red adjust the Red white level (gain) until bright spots appear on the screen.<br />
The projected image should now be noisy neutral gray.<br />
R59770179 FLM R22+ 15/03/2010 81
9. Image menu<br />
9.4 Aspect ratio<br />
Aspect ratio<br />
Relation between the horizontal & vertical dimension in which the window will be displayed, e.g. 4 by 3 or 16 by 9.<br />
Can also be expressed as a decimal number, such as 1.77. The larger the ratio or decimal, the wider are less square<br />
the image.<br />
What can be done?<br />
The aspect ratio setting forces the projector to project an image using a defined aspect ratio<br />
Aspect ratio Description<br />
4:3 Standard television format<br />
16:9 Wide screen television format / anamorphic format<br />
5:4 Workstation format<br />
2.35 Film format<br />
1.88<br />
1.78 Wide screen television format / anamorphic format<br />
Custom<br />
Any custom format can be set up<br />
Type of input signal is indicated above each image row. The image row shows how the image will be projected in the different aspect<br />
ratio settings.<br />
4/3 5/4 16/9<br />
Video Signal Pal/Secam<br />
Video Signal NTSC<br />
Video Signal 16/9<br />
4/3 RGB Signal<br />
Image 9-56<br />
Some examples for aspect ratio<br />
82 R59770179 FLM R22+ 15/03/2010
9. Image menu<br />
How to select an Aspect ratio?<br />
1. Press MENU to activate the menus.<br />
2. Use the ▲ or ▼ key to select Image and press ENTER.<br />
3. Use the ▲ or ▼ key to select Aspect ratio and press ENTER.<br />
The aspect ratio menu will be displayed.<br />
4. Use the ▲ or ▼ key to select the desired aspect ratio and press ENTER.<br />
Image 9-58<br />
Image 9-57<br />
Image 9-59<br />
How to set up a custom aspect ratio?<br />
1. Select first Custom and press ENTER to activate.<br />
The Custom aspect ratio dialog box opens.<br />
2. Use the ▲ or ▼ key to adjust the vertical size of the image.<br />
Use the or key to adjust the horizontal size of the image.<br />
When the desired aspect ratio is obtained, press EXIT.<br />
Image 9-61<br />
Image 9-60<br />
9.5 Timings<br />
9.5.1 Source timings<br />
Adjustable items<br />
• Horizontal start in pixels : number of pixels between the beginning of the input signal and the start of the video information in<br />
the signal.<br />
• Width = Active horizontal pixels : determine the width of the window on the screen. This value is normally given in the source<br />
specifications. If not, adjust until full image is displayed (no missing pixels).<br />
• Vertical start in lines : number of lines between the start of the input signal and start of the image on the screen.<br />
• Height = Active vertical lines : number of horizontal lines determining the height of the projected image. this value is normally<br />
given in the specification of the source. If not, adjust until full image height is displayed (no missing lines).<br />
• Total pixels: Total horizontal pixels in the source. If the value is wrong, sampling mistakes (small vertical bars in the projected<br />
image) will be seen in the image.<br />
• Total lines: Total vertical lines in the source.<br />
R59770179 FLM R22+ 15/03/2010 83
9. Image menu<br />
How to start up?<br />
1. Press MENU to activate the menus.<br />
2. Use the ▲ or ▼ key to select Image and press ENTER.<br />
3. Use the ▲ or ▼ key to select Timings and press ENTER.<br />
The timings menu will be displayed.<br />
Image 9-63<br />
Image 9-62<br />
Image 9-64<br />
4. To change a setting, use the ▲ or ▼ key to select and press ENTER.<br />
The corresponding adjustment box is displayed. E.g. Horizontal total pixels.<br />
Image 9-65<br />
5. Use the ▲ or ▼ key (or ◄ or ► key) to change the value.<br />
6. Press ENTER to activate the new value.<br />
7. If necessary to change other settings, repeat from step 4.<br />
9.5.2 Advanced settings<br />
About the advanced settings<br />
Clamp delay The time between the leading edge of the clamp pulse and the locked edge of the sync pulse. Can be<br />
any value between 0 and 255.<br />
Clamp width The width of the clamp pulse can be any value between 0 and 255.<br />
84 R59770179 FLM R22+ 15/03/2010
9. Image menu<br />
Leading edge<br />
Trailinging edge<br />
Sync<br />
pulse<br />
Clamp<br />
pulse<br />
Clamp Clamp<br />
delay width<br />
Image 9-66<br />
Field polarity<br />
The field polarity function is used for interlaced images. Both rasters of the image could be shifted in a<br />
wrong way (double lines are visible in the image). This can be corrected by forcing the field polarity<br />
to [neg] or [pos].<br />
How to change the clamp delay - clamp width?<br />
1. Press MENU to activate the menus.<br />
2. Use the ▲ or ▼ key to select Image and press ENTER.<br />
3. Use the ▲ or ▼ key to select Timings and press ENTER.<br />
4. Use the ▲ or ▼ key to select Advanced settings and press ENTER.<br />
The Advanced settings menu is displayed.<br />
5. Use the ▲ or ▼ key to select Clamp delay or Clamp width and press ENTER.<br />
A progress bar appears.<br />
6. Use the ▲ or ▼ key to change the setting.<br />
Image 9-68<br />
Image 9-67<br />
Image 9-69<br />
Image 9-70<br />
R59770179 FLM R22+ 15/03/2010 85
9. Image menu<br />
How to change the field polarity?<br />
1. Press MENU to activate the menus.<br />
2. Use the ▲ or ▼ key to select Image and press ENTER.<br />
3. Use the ▲ or ▼ key to select Advanced settings and press ENTER.<br />
The Advanced settings menu is displayed.<br />
4. Use the ▲ or ▼ key to select Field polarity and press ENTER to toggle between [neg] or [pos].<br />
Image 9-72<br />
Image 9-71<br />
Image 9-73<br />
Image 9-74<br />
9.5.3 Advanced settings, film mode detection<br />
About film mode detection<br />
This mode detects whether film or video is displayed.<br />
When enabled, the hardware looks for tell-tale signs of 3:2 or 2:2 pull-down sequences. These are the result of converting cinema<br />
material recorded at 24 frames-per-second to the television frequencies of 60 or 50 interlaced fields per second respectively. When<br />
FILM conversion is detected, the original 24 frames-per-second are restored. This avoids deinterlacing artefacts, and results in a<br />
perfect artefact-free display. Note that in some cases (video clips, scrolling newstickers,...) FILM and VIDEO material are mixed<br />
on one screen. This may confuse the detector and cause it to go into FILM restoration mode. This will cause "jaggies" or motion<br />
artefacts. In such cases, disabling FILM mode processing is the best cure.<br />
Film mode detection is only for interlaced sources.<br />
3:2 pull-down<br />
Method used to map the 24 fps of film onto the 30 fps (60 fields) or 25 fps (50 fields), so that one film frame occupies<br />
three video fields, the next two, etc. It means the two fields of every other video frame come from different film frames<br />
making operations such as rotoscoping impossible, and requiring care in editing. Some sophisticated equipment can<br />
unravel the 3:2 sequence to allow frame-by-frame treatment and subsequently re-compose 3:2. The 3:2 sequence<br />
repeats every five video frames and four film frames, the latter identified as A-D. Only film frame A is fully on a video<br />
frame and so exists at one time code only, making it the editable point of the video sequence.<br />
86 R59770179 FLM R22+ 15/03/2010
9. Image menu<br />
2:2 pull-down<br />
The process of transferring 24-frames/sec film format into video by repeating each frame (used for PAL DVD’s) as two<br />
video fields. ( AD )<br />
Artefacts<br />
Undesirable elements or defects in a video picture. These may occur naturally in the video process and must be<br />
eliminated in order to achieve a high-quality picture. Most common in analog are cross color and cross luminance.<br />
Most common in digital are macroblocks, which resemble pixelation of the video image.<br />
How to set up<br />
1. Press MENU to activate the menus.<br />
2. Use the ▲ or ▼ key to select Image and press ENTER.<br />
3. Use the ▲ or ▼ key to select Advanced settings and press ENTER.<br />
The Advanced settings menu is displayed.<br />
4. Use the ▲ or ▼ key to select Film mode and press ENTER to toggle between [auto] or [off].<br />
Auto<br />
Off<br />
Detects for film and it starts to avoid deinterlacing artefacts, and it results in a perfect artefact-free display.<br />
no detection for film mode.<br />
When film with a banner is projected at the same time, and film mode is auto, the banner will shown possible artefacts as the<br />
software will detect a film.<br />
Image 9-76<br />
Image 9-75<br />
Image 9-77<br />
Image 9-78<br />
R59770179 FLM R22+ 15/03/2010 87
9. Image menu<br />
9.6 Image files services<br />
Overview<br />
• Files and file manipulations<br />
• <strong>Manual</strong> Load file<br />
• Delete file<br />
• Delete all custom files<br />
• Rename a file<br />
• Copy a file<br />
• File options<br />
9.6.1 Files and file manipulations<br />
Connecting a new source.<br />
Before using a new source, a correct file has to be installed. The projector’s memory contains a list of files corresponding to the most<br />
used sources. When the new source corresponds with one of these files, the file can be loaded and saved for future use. When<br />
there is a little difference, the file can also be loaded and then edited until the source specs are reached.<br />
VESA standards and video standards are pre-programmed.<br />
Possible file Manipulations<br />
The following file manipulations are possible :<br />
• Load : installation of a file for a new source.<br />
• Rename : renaming a file.<br />
• Delete : deleting a file (only custom files)<br />
• Delete all : delete all custom files<br />
• Options : way of loading a file when a source is selected.<br />
A loaded file can be edited via the Timings menu. Once a file is edited, it will be saved with the same name as the original file,<br />
followed by a sequence number between rounded brackets.<br />
9.6.2 <strong>Manual</strong> Load file<br />
How to load?<br />
1. Press MENU to activate the menus.<br />
2. Use the ▲ or ▼ key to select Image and press ENTER.<br />
3. Use the ▲ or ▼ key to select File services and press ENTER.<br />
The File service menu is displayed.<br />
4. Use the ▲ or ▼ key to select <strong>Manual</strong> load and press ENTER.<br />
The manual load window opens.<br />
Image 9-80<br />
Image 9-81<br />
Image 9-79<br />
88 R59770179 FLM R22+ 15/03/2010
9. Image menu<br />
Image 9-82<br />
Depending on the filter setup, the following is displayed:<br />
- Fit: only fitting files for the selected source will be in the list<br />
- All: all files in the system will be in the list.<br />
5. Do you want to see only the fitting file in the manual load menu?<br />
If yes, Select Filter and use ► till [FIT] is on the menu.<br />
If no, Select Filter and use ► till [ALL] is on the menu.<br />
6. Use the ▲ or ▼ key to select the appropriate file. While scrolling over the files, a preview is shown on the screen.<br />
7. Press ENTER to select.<br />
The selected file is loaded.<br />
The image is not perfect?<br />
If the displayed image is not correct after selecting the best fitting file,gototheTimings menu and change the file settings.<br />
9.6.3 Delete file<br />
How to delete?<br />
1. Press MENU to activate the menus.<br />
2. Use the ▲ or ▼ key to select Image and press ENTER.<br />
3. Use the ▲ or ▼ key to select File services and press ENTER.<br />
The File service menu is displayed.<br />
4. Use the ▲ or ▼ key to select Delete and press ENTER.<br />
The delete window opens.<br />
5. Use the ▲ or ▼ key to select the file which must be deleted.<br />
Note: Only custom files can be deleted.<br />
6. Press ENTER to delete the selected file.<br />
Image 9-84<br />
Image 9-85<br />
Image 9-83<br />
R59770179 FLM R22+ 15/03/2010 89
9. Image menu<br />
Image 9-86<br />
No recovery possible !<br />
9.6.4 Delete all custom files<br />
How to delete?<br />
1. Press MENU to activate the menus.<br />
2. Use the ▲ or ▼ key to select Image and press ENTER.<br />
3. Use the ▲ or ▼ key to select File services and press ENTER.<br />
The File service menu is displayed.<br />
4. Use the ▲ or ▼ key to select Delete all and press ENTER.<br />
A delete all confirmation window opens.<br />
5. Use the ▲ or ▼ key to select Yes if you are sure to delete all custom files and press ENTER to activate the selection.<br />
Image 9-88<br />
Image 9-89<br />
Image 9-87<br />
Image 9-90<br />
Or,<br />
if you are not sure to delete all custom files, select No and press ENTER to activate the selection.<br />
9.6.5 Rename a file<br />
How to rename?<br />
1. Press MENU to activate the menus.<br />
90 R59770179 FLM R22+ 15/03/2010
9. Image menu<br />
2. Use the ▲ or ▼ key to select Image and press ENTER.<br />
3. Use the ▲ or ▼ key to select File services and press ENTER.<br />
The File service menu is displayed.<br />
4. Use the ▲ or ▼ key to select Rename and press ENTER.<br />
The rename window opens.<br />
5. Use the ▲ or ▼ key to select the file which must be renamed.<br />
Note: Only custom files can be renamed.<br />
6. Press ENTER to select.<br />
The rename window opens. The first character is selected.<br />
7. Use the ▲ or ▼ key to change the selected character.<br />
Use the ◄ or ► key to selected another character.<br />
Note: Digits can be entered with the digit keys on the remote control or on the local keypad. When a digit is entered in that<br />
way, the next character will be selected automatically.<br />
8. Press ENTER to finalize the rename action.<br />
Image 9-92<br />
Image 9-93<br />
Image 9-91<br />
Image 9-95<br />
Image 9-94<br />
9.6.6 Copy a file<br />
How to copy?<br />
1. Press MENU to activate the menus.<br />
2. Use the ▲ or ▼ key to select Image and press ENTER.<br />
3. Use the ▲ or ▼ key to select File services and press ENTER.<br />
The File service menu is displayed.<br />
4. Use the ▲ or ▼ key to select Copy and press ENTER.<br />
The copy window opens.<br />
5. Use the ▲ or ▼ key to select the file which must be copied.<br />
6. Press ENTER to select.<br />
The copy window opens. The first character is selected.<br />
7. Use the ▲ or ▼ key to change the selected character.<br />
Use the ◄ or ► key to selected another character.<br />
Note: Digits can be entered with the digit keys on the remote control or on the local keypad. When a digit is entered in that<br />
way, the next character will be selected automatically.<br />
8. Press ENTER to finalize the copy action.<br />
R59770179 FLM R22+ 15/03/2010 91
9. Image menu<br />
Image 9-97<br />
Image 9-98<br />
Image 9-96<br />
Image 9-100<br />
Image 9-99<br />
9.6.7 File options<br />
How to set the options?<br />
1. Press MENU to activate the menus.<br />
2. Use the ▲ or ▼ key to select Image and press ENTER.<br />
3. Use the ▲ or ▼ key to select Image services and press ENTER.<br />
The Image service menu is displayed.<br />
4. Use the ▲ or ▼ key to select Options and press ENTER.<br />
Image 9-102<br />
Image 9-103<br />
Image 9-101<br />
The options window opens.<br />
5. Use the ▲ or ▼ key to select Load file and press ENTER to toggle between [Automatic], [<strong>Manual</strong>] and [Custom only].<br />
92 R59770179 FLM R22+ 15/03/2010
9. Image menu<br />
- [Automatic]: correct file will be loaded automatically.<br />
- [<strong>Manual</strong>]: correct file has to be loaded manually.<br />
- [Custom only]: correct file will be loaded automatically out of the available custom files.<br />
Image 9-104<br />
6. Use the ▲ or ▼ key to select Auto picture alignment and press ENTER to toggle between [Off], [Always] and [File load].<br />
Image 9-105<br />
- [Off]: no auto picture alignment activated.<br />
- [Always]: always auto picture alignment activated. When sync disappears and comes back, an auto picture alignment is<br />
executed.<br />
- [Load file]: auto picture alignment executed each time a new file is loaded.<br />
9.7 Save custom settings<br />
What is done?<br />
The current custom settings can be saved to the internal backup device in the same way as it would be done when the projector<br />
was switched to standby.<br />
How to save<br />
1. Press MENU to activate the menus.<br />
2. Use the ▲ or ▼ key to select Image and press ENTER.<br />
3. Use the ▲ or ▼ key to select Save custom settings and press ENTER.<br />
The custom settings are written to the internal backup device. A message menu “Save data ...” is displayed during the save<br />
operation.<br />
Image 9-108<br />
Image 9-106 Image 9-107<br />
R59770179 FLM R22+ 15/03/2010 93
9. Image menu<br />
94 R59770179 FLM R22+ 15/03/2010
10. Layout menu<br />
10. LAYOUT MENU<br />
Overview<br />
• Overview flow<br />
• Main window<br />
• PIP window<br />
• Layout file services<br />
• Zoom - Focus<br />
10.1 Overview flow<br />
Overview<br />
Level 1 Level 2 Level 3 Level 4<br />
Layout<br />
Main window<br />
Source<br />
Size<br />
Position<br />
PIP window<br />
PIP window [ON/OFF]<br />
Source<br />
Size<br />
Position<br />
Layout file services<br />
Load<br />
Main full screen<br />
PIP top right<br />
Split top bottom<br />
Rename<br />
Delete<br />
Copy / Save as<br />
Zoom/Focus Same for each layout yes<br />
no<br />
10.2 Main window<br />
Overview<br />
• Source selection<br />
• Size adjustment<br />
• Position adjustment<br />
When active layout is read only<br />
When the active layout is a read only layout, the projector will ask to create a new layout.<br />
Use the ▲ or ▼ key to select Yes or No and press ENTER.<br />
If Yes is selected an Enter layout name window opens.<br />
R59770179 FLM R22+ 15/03/2010 95
10. Layout menu<br />
Image 10-2<br />
Image 10-1<br />
The first character is highlighted. Use the ▲ or ▼ key to select the desired character and press or key to select the next<br />
character in the name.<br />
Press EXIT to return. The new file is generated.<br />
10.2.1 Source selection<br />
What can be done ?<br />
The source of the main window can be selected via the Main window menu.<br />
How to select a source<br />
1. Press MENU to activate the menus.<br />
2. Use the ▲ or ▼ key to select Layout and press ENTER.<br />
3. Use the ▲ or ▼ key to select Main Window and press ENTER.<br />
The main window opens.<br />
4. Use the ▲ or ▼ key to select Source and press ENTER.<br />
The source selection window opens.<br />
5. Use the ▲ or ▼ key to select the desired source and press ENTER to activate.<br />
Image 10-5<br />
Image 10-4<br />
Image 10-3<br />
Image 10-6<br />
10.2.2 Size adjustment<br />
What can be done?<br />
The size of the main window can be adjusted until the desired window dimensions are reached.<br />
96 R59770179 FLM R22+ 15/03/2010
10. Layout menu<br />
Image 10-7<br />
Size adjustment main window<br />
A<br />
B<br />
width adjustment<br />
height adjustment<br />
The size can be changed with respect to the original aspect ratio.<br />
How to adjust with respect to the original aspect ratio?<br />
1. Press MENU to activate the menus.<br />
2. Use the ▲ or ▼ key to select Layout and press ENTER.<br />
3. Use the ▲ or ▼ key to select Main Window and press ENTER.<br />
The main window opens.<br />
4. Use the ▲ or ▼ key to select Size and press ENTER.<br />
The size adjustment window opens.<br />
Image 10-10<br />
Image 10-9<br />
Image 10-8<br />
5. Toggle with ENTER till Lock is set to [x].<br />
R59770179 FLM R22+ 15/03/2010 97
10. Layout menu<br />
Image 10-11<br />
[ ] = no lock between height and width.<br />
[x] = width and height are locked.<br />
6. Use or▲ ▼to adjust the size with respect to the original aspect ratio.<br />
When the desired size is reached, press EXIT.<br />
A Save window opens.<br />
Image 10-12<br />
How to adjust height and width separately?<br />
1. Press MENU to activate the menus.<br />
2. Use the ▲ or ▼ key to select Layout and press ENTER.<br />
3. Use the ▲ or ▼ key to select Main Window and press ENTER.<br />
The main window opens.<br />
4. Use the ▲ or ▼ key to select Size and press ENTER.<br />
The size adjustment window opens.<br />
Image 10-15<br />
Image 10-14<br />
Image 10-13<br />
5. Toggle with ENTER till Lock is set to [ ].<br />
98 R59770179 FLM R22+ 15/03/2010
10. Layout menu<br />
Image 10-16<br />
[ ] = no lock between height and width.<br />
[x] = width and height are locked.<br />
6. Use the ▲ or ▼ key to adjust the height.<br />
Use the ◄ or ► key to adjust the width.<br />
When the desired size is reached, press EXIT.<br />
A Save window opens.<br />
Image 10-17<br />
7. Select with the ▲ or ▼ key Yes and press ENTER.<br />
Select with the ▲ or ▼ key No, when no save is desired and press ENTER.<br />
10.2.3 Position adjustment<br />
What can be done?<br />
The main window can be repositioned on the screen. The upper left corner is the reference.<br />
Image 10-18<br />
Positioning the window<br />
How to position?<br />
1. Press MENU to activate the menus.<br />
2. Use the ▲ or ▼ key to select Layout and press ENTER.<br />
3. Use the ▲ or ▼ key to select Main Window and press ENTER.<br />
The main window opens.<br />
4. Use the ▲ or ▼ key to select Position and press ENTER.<br />
The position adjustment window opens.<br />
5. Use the ▲ or ▼ key to adjust top start point.<br />
R59770179 FLM R22+ 15/03/2010 99
10. Layout menu<br />
Use the ◄ or ► key to adjust left start point.<br />
When the desired size is reached, press EXIT.<br />
A Save window opens.<br />
Image 10-21<br />
Image 10-20<br />
Image 10-19<br />
Image 10-23<br />
Image 10-22<br />
6. Select with the ▲ or ▼ key Save and press ENTER.<br />
Select with the ▲ or ▼ key Delete, when no save is desired and press ENTER.<br />
10.3 PIP window<br />
Overview<br />
• Introduction to PIP<br />
• Picture in Picture activation<br />
• Picture in Picture source selection<br />
• Picture in Picture size of the window<br />
• Picture in Picture, position window<br />
10.3.1 Introduction to PIP<br />
PiP<br />
PiP stands for "Picture in Picture" and allows to display multiple windows containing each of them an image. The<br />
windows may be of the video or data type.<br />
What are the different possibilities within the PiP mode ?<br />
The input section of the projector allows a combinations of different input signals which may be projected in the 2 windows of the<br />
PiP screen. The PiP window can be placed anywhere, with any dimensions, on the screen by changing its position and its size.<br />
100 R59770179 FLM R22+ 15/03/2010
10. Layout menu<br />
Image 10-24<br />
Position of PiP<br />
A<br />
B<br />
Top position<br />
Left position<br />
10.3.2 Picture in Picture activation<br />
How to activate PIP?<br />
1. Press MENU to activate the menus.<br />
2. Use the ▲ or ▼ key to select Layout and press ENTER.<br />
3. Use the ▲ or ▼ key to select PIP Window and press ENTER.<br />
The PIP window opens.<br />
4. Use the ▲ or ▼ key to select On or Off and press ENTER to toggle between [On] and [Off].<br />
Image 10-26 Image 10-27<br />
Image 10-25<br />
5. Press EXIT to quit the menu.<br />
When PIP is activated (ON state), the PIP window becomes the active window. Switching to the main window<br />
is still possible with the window button on the RCU.<br />
10.3.3 Picture in Picture source selection<br />
What can be done ?<br />
The input source for the picture in picture window can be selected.<br />
How to select a source<br />
1. Press MENU to activate the menus.<br />
2. Use the ▲ or ▼ key to select Window and press ENTER.<br />
3. Use the ▲ or ▼ key to select PIP Window and press ENTER.<br />
The PIP window dialog opens.<br />
4. Use the ▲ or ▼ key to select Source and press ENTER.<br />
R59770179 FLM R22+ 15/03/2010 101
10. Layout menu<br />
The source selection window opens.<br />
5. Use the ▲ or ▼ key to select the desired source and press ENTER to activate this source.<br />
Image 10-29 Image 10-30<br />
Image 10-28<br />
Image 10-31<br />
10.3.4 Picture in Picture size of the window<br />
What can be done?<br />
The width and height of the picture in picture window can be changed till the desired dimensions are obtained.<br />
Image 10-32<br />
Size PIP window<br />
A<br />
B<br />
Width PIP window<br />
Height PIP window<br />
The size of the picture in picture window can be changed with respect to the original aspect ratio of the PIP image.<br />
Remark: when e.g. the PIP window is a 4 by 3 window and the projected image has a 16 by 9 format, then it is possible that image<br />
jumps inside the PIP window during a re-scaling. Due to the fact that the re-scale is done on the vertical dimensions of the PIP<br />
window and the image inside it will be re-scaled so that the aspect ratio is still correct.<br />
102 R59770179 FLM R22+ 15/03/2010
10. Layout menu<br />
Image 10-33<br />
Size PIP window remark<br />
How to change the size with respect to the aspect ratio?<br />
1. Press MENU to activate the menus.<br />
2. Use the ▲ or ▼ key to select Window and press ENTER.<br />
3. Use the ▲ or ▼ key to select PIP Window and press ENTER.<br />
The main window opens.<br />
4. Use the ▲ or ▼ key to select Size and press ENTER.<br />
The size adjustment window opens.<br />
Image 10-35 Image 10-36<br />
Image 10-34<br />
5. Toggle with ENTER till Lock is set to [x]].<br />
Image 10-37<br />
[ ] = no lock between height and width.<br />
[x] = width and height are locked.<br />
6. Use the ▲▼or ◄►key to adjust the size with respect to the aspect ratio.<br />
When the desired size is reached, press EXIT.<br />
R59770179 FLM R22+ 15/03/2010 103
10. Layout menu<br />
A Save window opens.<br />
Image 10-38<br />
7. Select with the ▲ or ▼ key Yes and press ENTER.<br />
Select with the ▲ or ▼ key No, when no save is desired and press ENTER.<br />
How to change the height and width separately?<br />
1. Press MENU to activate the menus.<br />
2. Use the ▲ or ▼ key to select Window and press ENTER.<br />
3. Use the ▲ or ▼ key to select PIP Window and press ENTER.<br />
The main window opens.<br />
Image 10-40 Image 10-41<br />
Image 10-39<br />
4. Use the ▲ or ▼ key to select Size and press ENTER.<br />
The size adjustment window opens.<br />
5. Toggle with ENTER till Lock is set to [ ].<br />
Image 10-42<br />
[ ] = no lock between height and width.<br />
[x] = width and height are locked.<br />
6. Use the ▲ or ▼ key to adjust the height.<br />
Use the ◄ or ► key to adjust the width.<br />
When the desired size is reached, press EXIT.<br />
104 R59770179 FLM R22+ 15/03/2010
10. Layout menu<br />
A Save window opens.<br />
Image 10-43<br />
7. Select with the ▲ or ▼ key Yes and press ENTER.<br />
Select with the ▲ or ▼ key No, when no save is desired and press ENTER.<br />
10.3.5 Picture in Picture, position window<br />
What can be done?<br />
The picture in picture window can be position on any place on the display just by changing its start coordinates. The reference is<br />
the upper left corner of the window.<br />
How to position?<br />
1. Press MENU to activate the menus.<br />
2. Use the ▲ or ▼ key to select Window and press ENTER.<br />
3. Use the ▲ or ▼ key to select PIP Window and press ENTER.<br />
The PIP window opens.<br />
4. Use the ▲ or ▼ key to select Position and press ENTER.<br />
The size adjustment window opens.<br />
5. Use the ▲ or ▼ key to adjust Top<br />
Use the ◄ or ► key to adjust Left<br />
When the desired position is reached, press EXIT.<br />
A Save window opens.<br />
Image 10-45 Image 10-46<br />
Image 10-44<br />
Image 10-47<br />
Image 10-48<br />
6. Select with the ▲ or ▼ key Yes and press ENTER.<br />
Select with the ▲ or ▼ key No, when no save is desired and press ENTER.<br />
R59770179 FLM R22+ 15/03/2010 105
10. Layout menu<br />
10.4 Layout file services<br />
Overview<br />
• Load layout<br />
• Rename a layout<br />
• Delete a layout<br />
• Copy / Save as a layout<br />
10.4.1 Load layout<br />
When loading a layout which required two sources, the PIP window On/Off setting will be switched to ON.<br />
How to load?<br />
1. Press MENU to activate the menus.<br />
2. Use the ▲ or ▼ key to select Window and press ENTER.<br />
3. Use the ▲ or ▼ key to select Layout and press ENTER.<br />
The layout services window opens.<br />
4. Use the ▲ or ▼ key to select Load and press ENTER.<br />
The load layout window opens.<br />
Image 10-50<br />
Image 10-51<br />
Image 10-49<br />
Image 10-52<br />
5. Use the ▲ or ▼ key to select the desired layout and press ENTER to select.<br />
The first 4 layouts are default layouts, all others are customer created layouts. The menu shows only the first 10 layouts, but use<br />
the ▼ to scroll through the rest of the layouts until the desired layout is found.<br />
Rigging key + sequence number opens directly the desired layout.<br />
106 R59770179 FLM R22+ 15/03/2010
10. Layout menu<br />
10.4.2 Rename a layout<br />
Only custom created layouts can be renamed.<br />
How to rename?<br />
1. Press MENU to activate the menus.<br />
2. Use the ▲ or ▼ key to select Window and press ENTER.<br />
3. Use the ▲ or ▼ key to select Layout and press ENTER.<br />
The layout services window opens.<br />
4. Use the ▲ or ▼ key to select Rename and press ENTER.<br />
The Rename layout location window opens.<br />
5. Use the ▲ or ▼ key to select the layout to rename and press ENTER.<br />
The edit layout name window opens. The first character is selected.<br />
6. Use the ▲ or ▼ key to change the selected character.<br />
Use the ◄ or ► key to selected another character.<br />
Note: Digits can be entered with the digit keys on the remote control or on the local keypad. When a digit is entered in that<br />
way, the next character is selected automatically.<br />
7. Press ENTER to save the new name.<br />
Image 10-54<br />
Image 10-55<br />
Image 10-53<br />
Image 10-56<br />
10.4.3 Delete a layout<br />
What is possible?<br />
Custom created layouts can be removed from the projector memory.<br />
How to delete?<br />
1. Press MENU to activate the menus.<br />
2. Use the ▲ or ▼ key to select Window and press ENTER.<br />
3. Use the ▲ or ▼ key to select Layout services and press ENTER.<br />
R59770179 FLM R22+ 15/03/2010 107
10. Layout menu<br />
The layout services window opens.<br />
4. Use the ▲ or ▼ key to select Delete and press ENTER.<br />
The Delete window opens.<br />
Image 10-59<br />
Image 10-58<br />
Image 10-57<br />
Image 10-60<br />
The first 3 layouts are default layouts and cannot be delete.<br />
5. Use the ▲ or ▼ key to select the layout that must be deleted.<br />
6. Press ENTER to finalize the delete operation.<br />
10.4.4 Copy / Save as a layout<br />
What is possible,<br />
An existing layout, system layout or custom created layout, can be copied into a new file.<br />
How to copy / save as?<br />
1. Press MENU to activate the menus.<br />
2. Use the ▲ or ▼ key to select Window and press ENTER.<br />
3. Use the ▲ or ▼ key to select Layout and press ENTER.<br />
The layout services window opens.<br />
4. Use the ▲ or ▼ key to select Copy/Save as and press ENTER.<br />
The Save layout location window opens.<br />
5. Use the ▲ or ▼ key to select the layout to copy/save as and press ENTER.<br />
The edit layout name window opens. The first character is selected.<br />
6. Use the ▲ or ▼ key to change the selected character.<br />
Use the ◄ or ► key to selected another character.<br />
Note: Digits can be entered with the digit keys on the remote control or on the local keypad. When a digit is entered in that<br />
way, the next character is selected automatically.<br />
7. Press ENTER to copy to the new name.<br />
The new layout will be added to the list of layouts.<br />
108 R59770179 FLM R22+ 15/03/2010
10. Layout menu<br />
Image 10-63<br />
Image 10-62<br />
Image 10-61<br />
Image 10-64<br />
10.5 Zoom - Focus<br />
What can be done ?<br />
When changing from one layout to another, the zoom/focus settings can be different for each layout or they can be kept the same<br />
for all layouts.<br />
How to set the zoom - focus setting<br />
1. Press MENU to activate the menus.<br />
2. Use the ▲ or ▼ key to select Window and press ENTER.<br />
3. Use the ▲ or ▼ key to select Layout and press ENTER<br />
The layout window opens.<br />
4. Use the ▲ or ▼ key to select Zoom/Focus as and press ENTER.<br />
The Zoom/Focus window opens.<br />
5. Press ENTER to toggle between [No] and [Yes].<br />
[No] = each layout will use its own zoom/focus settings.<br />
[Yes] = each layout will use the same zoom/focus settings. That means that the zoom/focus settings of the previous selected<br />
layout will be applied to the next selected layouts.<br />
R59770179 FLM R22+ 15/03/2010 109
10. Layout menu<br />
Image 10-67<br />
Image 10-66<br />
Image 10-65<br />
110 R59770179 FLM R22+ 15/03/2010
11. Lamp menu<br />
11. LAMP MENU<br />
Overview<br />
• Overview flow<br />
• Lamp power mode<br />
• Lamp power<br />
• Constant Light Output mode (CLO mode)<br />
• CLO target<br />
• Lamp Identification<br />
• Z-axis adjustment<br />
11.1 Overview flow<br />
Overview<br />
Level 1 Level 2 Level 3 Level 4<br />
Lamp<br />
Power<br />
Mode<br />
Normal<br />
Economic<br />
Power<br />
CLO mode [On / Off]<br />
CLO target lumens<br />
Identification<br />
Serial number<br />
Article number<br />
Run time<br />
Remaining run time<br />
Strikes<br />
Version<br />
Z-axis<br />
11.2 Lamp power mode<br />
What can be done?<br />
The lamp power mode can be switched between Normal and Economic. When playing in Economic mode, the lamp life time will<br />
increase.<br />
Normal : maximum allowed powers is fed to the lamp. Maximum light output is reached in this way.<br />
Economic : a reduced wattage is fed to the lamp. Reduced light output but a longer life time for the lamp.<br />
How to switch?<br />
1. Press MENU to activate the menus.<br />
2. Use the ▲ or ▼ key to select Lamp and press ENTER.<br />
3. Use the ▲ or ▼ key to select Power and press ENTER.<br />
4. Use the ▲ or ▼ key to select Mode.<br />
5. Press ENTER to toggle between [Normal] and [Economic].<br />
R59770179 FLM R22+ 15/03/2010 111
11. Lamp menu<br />
Image 11-2<br />
Image 11-3<br />
Image 11-1<br />
Remarks<br />
1. When mode is set to [Normal], then CLO mode can be switched on and off.<br />
2. When switching the power mode to [Economic] while the CLO mode is On, then the CLO mode is switched to Off.<br />
3. When the power mode is [Economic] and the CLO mode is switched to the [On] mode, then the power mode will be switched<br />
to the [Normal] mode.<br />
11.3 Lamp power<br />
What can be done?<br />
Within a certain power mode, the light output of the lamp can be reduced.<br />
How to reduce the lamp power?<br />
1. Press MENU to activate the menus.<br />
2. Use the ▲ or ▼ key to select Lamp and press ENTER.<br />
3. Use the ▲ or ▼ key to select Power and press ENTER.<br />
4. Use the ▲ or ▼ key to select Power and press ENTER.<br />
5. Use the ▲ or ▼ key to change the lamp power.<br />
Image 11-5<br />
Image 11-6<br />
Image 11-4<br />
Image 11-7<br />
112 R59770179 FLM R22+ 15/03/2010
11. Lamp menu<br />
11.4 Constant Light Output mode (CLO mode)<br />
What can be done?<br />
Constant Light Output allows to force a constant light output (set in the CLO Target lumens item) of the projector over a certain<br />
period. This will eliminate uncontrolled light output drop caused by natural aging of the lamp. The light output is checked every 5<br />
minutes, if the target is not met, the lamp power is adjusted.<br />
Setting CLO off means that the lamp will operate at constant power (no power adaptation to meet constant light output).<br />
In the illustration below, a normal light output curve is shown over the first 1000 hours, image 11-8. By using CLO and setting the<br />
target to 60% of the maximum light output, one will be able to operate during approximately 500 hours with a constant light output,<br />
image 11-9.<br />
Relative Light Output (%)<br />
100<br />
80<br />
60<br />
40<br />
20<br />
Image 11-8<br />
200 400 600 800 1000<br />
Runtime (hrs)<br />
Relative Light Output (%)<br />
100<br />
80<br />
60<br />
40<br />
20<br />
Image 11-9<br />
Constant Light Output<br />
working area<br />
200 400 600 800 1000<br />
Runtime (hrs)<br />
How to set the CLO On or Off<br />
1. Press MENU to activate the menus.<br />
2. Use the ▲ or ▼ key to select Lamp and press ENTER.<br />
3. Use the ▲ or ▼ key to select Power and press ENTER.<br />
4. Use the ▲ or ▼ key to select CLO mode and press ENTER to toggle between [On] and [Off]<br />
R59770179 FLM R22+ 15/03/2010 113
11. Lamp menu<br />
Image 11-11<br />
Image 11-12<br />
Image 11-10<br />
11.5 CLO target<br />
What must be done?<br />
The light output target for the CLO is set in this menu item. This value will be forced on the projector provided the CLO mode has<br />
been set On.<br />
How to enter the value<br />
1. Press MENU to activate the menus.<br />
2. Use the ▲ or ▼ key to select Lamp and press ENTER.<br />
3. Use the ▲ or ▼ key to select Power and press ENTER.<br />
4. Use the ▲ or ▼ key to select CLO target lumens and press ENTER to activate the first digit.<br />
5. Use ◄ or ►, the numeric keys on the remote, or the keypad to change the target value.<br />
Image 11-14<br />
Image 11-15<br />
Image 11-13<br />
11.6 Lamp Identification<br />
About<br />
The lamp identification menu gives an overview of the most important parameters of the used lamp.<br />
These parameters are:<br />
• Serial number lamp<br />
• Article number of the used lamp<br />
• Run time since first start up of the lamp<br />
• Remaining run time for a safe operation of the lamp<br />
• Number of strikes since the first start up of the lamp<br />
114 R59770179 FLM R22+ 15/03/2010
11. Lamp menu<br />
These parameters are useful when calling for a service intervention.<br />
How to display?<br />
1. Press MENU to activate the menus.<br />
2. Use the ▲ or ▼ key to select Lamp and press ENTER.<br />
3. Use the ▲ or ▼ key to select Identification and press ENTER.<br />
The identification overview is displayed.<br />
Image 11-17<br />
Image 11-18<br />
Image 11-16<br />
11.7 Z-axis adjustment<br />
What can be done?<br />
This menu item gives the current light output of the projector. This light output indication can be used to readjust the lamp position in<br />
the lamp casing (also called Z-axis adjustment of the lamp). With higher run times, the light output of the lamp will decrease, which<br />
results in a lower light output on the screen. This light output decrease can be compensated by readjusting the position of the lamp.<br />
For the realignment procedure, see "Realignment of the lamp in its reflector", page 191.<br />
How to display the light output<br />
1. Press MENU to activate the menus.<br />
2. Use the ▲ or ▼ key to select Lamp and press ENTER.<br />
3. Use the ▲ or ▼ key to select Z-axis and press ENTER.<br />
The Z-axis dialog box is display and indicates the current light output..<br />
Image 11-21<br />
Image 11-20<br />
Image 11-19<br />
R59770179 FLM R22+ 15/03/2010 115
11. Lamp menu<br />
116 R59770179 FLM R22+ 15/03/2010
12. Alignment menu<br />
12. ALIGNMENT MENU<br />
About this chapter<br />
This chapter describes the alignment of the projector once the physical installation is finished. Via the software, the image will be<br />
perfectly aligned on the screen.<br />
Overview<br />
• Overview flow<br />
• Orientation<br />
• Lens adjustment<br />
• Side keystone<br />
• Warp geometry settings<br />
• Contrast enhancement<br />
• Blanking<br />
• Gamma<br />
• Internal pattern<br />
• Color space<br />
• ScenergiX<br />
12.1 Overview flow<br />
Overview<br />
Level 1 Level 2 Level 3<br />
Alignment<br />
Orientation<br />
Front Table<br />
Front Ceiling<br />
Rear Table<br />
Rear Ceiling<br />
Lens<br />
Zoom/Focus<br />
Shift<br />
Mid position<br />
Side keystone<br />
Warp<br />
Horizontal keystone<br />
Vertical keystone<br />
Rotation<br />
Pincushion / Barrel<br />
4 corners<br />
Load file<br />
Blanking<br />
Top<br />
Bottom<br />
Left<br />
Right<br />
Reset<br />
Contrast enhancement<br />
R59770179 FLM R22+ 15/03/2010 117
12. Alignment menu<br />
Level 1 Level 2 Level 3<br />
Gamma<br />
Internal patterns<br />
Checker board<br />
Color bars<br />
Convergence<br />
Focus<br />
Full screen black<br />
Full screen blue<br />
Full screen green<br />
Full screen red<br />
Full screen white<br />
Hatch<br />
Outline<br />
Color space<br />
<strong>Projector</strong><br />
EBU<br />
SMPTE<br />
Custom<br />
ScenergiX<br />
Status<br />
White level<br />
Black level<br />
Show pattern<br />
Reset<br />
12.2 Orientation<br />
What can be done?<br />
The way of physical installation of the projector can be defined to the projector.<br />
The following installation are possible:<br />
• front/table<br />
• front/ceiling<br />
• rear/table<br />
• rear/ceiling<br />
Set up the correct orientation<br />
1. Press MENU to activate the menus.<br />
2. Use the ▲ or ▼ key to select Alignment and press ENTER.<br />
3. Use the ▲ or ▼ key to select Orientation and press ENTER.<br />
4. Use the ▲ or ▼ key to select the correct orientation and press ENTER.<br />
118 R59770179 FLM R22+ 15/03/2010
12. Alignment menu<br />
Image 12-3<br />
Image 12-1<br />
Image 12-2<br />
For more information about the physical installation, see chapter “General”, “<strong>Projector</strong> configurations”.<br />
12.3 Lens adjustment<br />
Quick way to enter the lens adjustment setting; press the lens button on the local keypad or the remote control.<br />
Access to the lens adjustments<br />
1. Press MENU to activate the menus.<br />
2. Use the ▲ or ▼ key to select Alignment and press ENTER.<br />
3. Use the ▲ or ▼ key to select Lens and press ENTER.<br />
The lens adjustment menu is displayed.<br />
Image 12-6<br />
Image 12-4<br />
Image 12-5<br />
Zoom/focus the lens<br />
1. Use the ▲ or ▼ key to select Zoom/Focus and press ENTER.<br />
Image 12-7<br />
Image 12-8<br />
R59770179 FLM R22+ 15/03/2010 119
12. Alignment menu<br />
2. Use the ▲ or ▼ key to zoom the lens.<br />
Use the ◄ or ► key to focus the lens.<br />
3. Press ENTER to go to the shift adjustments.<br />
Lens shift<br />
1. Use the ▲ or ▼ key to select Shift and press ENTER or when in the Zoom/Focus menu press ENTER to toggle to the Shift menu.<br />
Image 12-9<br />
Image 12-10<br />
2. Use the ▲ or ▼ key to shift the lens upwards or downwards.<br />
Use the ◄ or ► key to shift the lens to the left or to the right.<br />
Mid position<br />
1. Use the ▲ or ▼ key to select Mid position and press ENTER.<br />
The lens will move to its mid position. During this operation, a message is displayed: “Motor running ...”.<br />
Image 12-11<br />
12.4 Side keystone<br />
Only available when the Warp status is Off.<br />
What can be done?<br />
The side keystone adjustment is used to align the image if the projector is mounted at a non standard projection angle.<br />
Image 12-12<br />
Side keystone<br />
A<br />
B<br />
Keystone adjustment with positive values<br />
Keystone adjustment with negative values<br />
Side keystone adjustment<br />
1. Press MENU to activate the menus.<br />
120 R59770179 FLM R22+ 15/03/2010
12. Alignment menu<br />
2. Use the ▲ or ▼ key to select Alignment and press ENTER.<br />
3. Use the ▲ or ▼ key to select Side keystone and press ENTER.<br />
The keystone dialog box appears.<br />
4. Use the ◄ or ► key to adjust the keystone of the image.<br />
When the upper part of the image is wider than the lower part of the image, push the ◄ key. The value below the bar scale will<br />
be negative.<br />
When the upper part of the image is smaller than the lower part of the image, push the ► key. The value below the bar scale<br />
will be positive.<br />
Image 12-15<br />
Image 12-13<br />
Image 12-14<br />
12.5 Warp geometry settings<br />
When the Warp geometry settings are used, the normal side keystone setting is disabled.<br />
Overview<br />
• About Warp geometry settings<br />
• Warp Status<br />
• Horizontal keystone correction<br />
• Vertical keystone correction<br />
• Rotation<br />
• Pincushion - Barrel correction<br />
• 4 corner correction<br />
• Reset warp settings<br />
• Load warp file<br />
12.5.1 About Warp geometry settings<br />
Warping<br />
Image warping is the process of digitally manipulating an image such that any shapes portrayed in the image have been significantly<br />
distorted. Warping is used for correcting image distortion so that a correct image is displayed.<br />
While an image can be transformed in various ways, pure warping means that points are mapped to points without changing the<br />
colors.<br />
Some examples of projected images which need to be corrected with the warp geometry settings:<br />
R59770179 FLM R22+ 15/03/2010 121
12. Alignment menu<br />
Image 12-16<br />
Example 1 : distorted image<br />
Image 12-17<br />
Example 2 : distorted image<br />
The Warp functions can slow down the switching from one source to another when Input locking is set to<br />
automatic and there is a difference in frequency between both sources.<br />
12.5.2 Warp Status<br />
Different modes<br />
The warp distortion can have 3 states:<br />
• Off : no warp distortion can be adjusted. Only the normal Side keystone can be used.<br />
• <strong>Manual</strong> : the distortion functions inside the projector are available. Combinations of these adjustments can be used to correct<br />
the image. When using a setting to correct a part of the image, that can cause that other settings in the menu are grayed out.<br />
E.g. Using the keystone functions will gray out the 4 corners setting.<br />
• File : an external created file is used to correct the image. More precise corrections are possible on a lot of more points in the<br />
image.<br />
When switching the warp status from <strong>Manual</strong> or File to Off and back again, the latest used warp settings will be loaded again.<br />
How to set the status<br />
1. Press MENU to activate the menus.<br />
2. Use the ▲ or ▼ key to select Alignment and press ENTER.<br />
3. Use the ▲ or ▼ key to select Warp and press ENTER.<br />
The warp dialog box appears.<br />
4. Use the ▲ or ▼ key to select Status and press ENTER to toggle between [<strong>Manual</strong>], [File] or [Off]<br />
- [<strong>Manual</strong>] : projector functions for warp are available.<br />
- [File] : Sophisticated warp adjustments can be loaded via a file. The projector warp functions are not available.<br />
- [Off] : No warp adjustments used in the projected image.<br />
Image 12-18<br />
Image 12-19 Image 12-20<br />
122 R59770179 FLM R22+ 15/03/2010
12. Alignment menu<br />
12.5.3 Horizontal keystone correction<br />
What can be done?<br />
Horizontal keystone adjustment is used to align the image if the projector is mounted at a non standard projection angle. In some<br />
cases, horizontal keystone has to be used in combination with vertical keystone. When adjusting the keystone adjustment, the<br />
aspect ratio of the image is not changed.<br />
Image 12-21<br />
Horizontal keystone correction<br />
When the keystone is adjusted, the 4 corners adjustment is disabled.<br />
How to set the status<br />
1. Press MENU to activate the menus.<br />
2. Use the ▲ or ▼ key to select Alignment and press ENTER.<br />
3. Use the ▲ or ▼ key to select Warp and press ENTER.<br />
The warp dialog box appears.<br />
4. Use the ▲ or ▼ key to select Horizontal keystone and press ENTER.<br />
5. Use ◄ or ► to change the horizontal keystone.<br />
Image 12-22<br />
Image 12-23 Image 12-24<br />
R59770179 FLM R22+ 15/03/2010 123
12. Alignment menu<br />
Image 12-25<br />
12.5.4 Vertical keystone correction<br />
What can be done ?<br />
Vertical keystone adjustment is used to align the image if the projector is mounted at a non standard projection angle. In some cases,<br />
vertical keystone has to be used in combination with horizontal keystone. When adjusting the keystone adjustment, the aspect ratio<br />
of the image is not changed.<br />
Image 12-26<br />
Vertical keystone correction<br />
When the keystone is adjusted, the 4 corners adjustment is disabled.<br />
How to set the status<br />
1. Press MENU to activate the menus.<br />
2. Use the ▲ or ▼ key to select Alignment and press ENTER.<br />
3. Use the ▲ or ▼ key to select Warp and press ENTER.<br />
The warp dialog box appears.<br />
4. Use the ▲ or ▼ key to select Vertical keystone and press ENTER.<br />
5. Use ◄ or ► to change the vertical keystone.<br />
124 R59770179 FLM R22+ 15/03/2010
12. Alignment menu<br />
Image 12-27<br />
Image 12-28 Image 12-29<br />
Image 12-30<br />
12.5.5 Rotation<br />
What can be done ?<br />
A rotation is used to turn the image on the projection surface when the projector is slightly rotated around its axes.<br />
Image 12-31<br />
Rotation<br />
How to rotate<br />
1. Press MENU to activate the menus.<br />
2. Use the ▲ or ▼ key to select Alignment and press ENTER.<br />
3. Use the ▲ or ▼ key to select Warp and press ENTER.<br />
The warp dialog box appears.<br />
4. Use the ▲ or ▼ key to select Rotation and press ENTER.<br />
5. Use ◄ or ► to change the rotation angle.<br />
R59770179 FLM R22+ 15/03/2010 125
12. Alignment menu<br />
Image 12-32<br />
Image 12-33 Image 12-34<br />
Image 12-35<br />
12.5.6 Pincushion - Barrel correction<br />
What can be done ?<br />
A barrel distortion or pincushion distortion can adjusted so that a normal image is displayed. Positive adjustments introduce more<br />
barrel distortion. Negative adjustments introduce more pincushion distortion.<br />
Image 12-36<br />
Barrel and pincushion distortion<br />
How to correct the distortion<br />
1. Press MENU to activate the menus.<br />
2. Use the ▲ or ▼ key to select Alignment and press ENTER.<br />
3. Use the ▲ or ▼ key to select Warp and press ENTER.<br />
The warp dialog box appears.<br />
4. Use the ▲ or ▼ key to select Pincushion/Barrel and press ENTER.<br />
5. Use ◄ or ► to adjust the pincushion or the barrel distortion.<br />
126 R59770179 FLM R22+ 15/03/2010
12. Alignment menu<br />
Image 12-37<br />
Image 12-38 Image 12-39<br />
Image 12-40<br />
12.5.7 4 corner correction<br />
What can be done ?<br />
Each corner of the image can be moved individually in the X and Y direction to correct a distortion. Take in account that the aspect<br />
ratio can be changed while moving one of the corners.<br />
The following adjustments are possible:<br />
• Top left X<br />
• Top left Y<br />
• Top right X<br />
• Top right Y<br />
• Bottom left X<br />
• Bottom left Y<br />
• Bottom right X<br />
• Bottom right Y<br />
Image 12-41<br />
Once an adjustment is done in one of the 4 corners, the horizontal and vertical keystone corrections are disabled.<br />
How to move a corner<br />
1. Press MENU to activate the menus.<br />
2. Use the ▲ or ▼ key to select Alignment and press ENTER.<br />
3. Use the ▲ or ▼ key to select Warp and press ENTER.<br />
The warp dialog box appears.<br />
4. Use the ▲ or ▼ key to select 4 corners and press ENTER.<br />
R59770179 FLM R22+ 15/03/2010 127
12. Alignment menu<br />
5. Use the ▲ or ▼ key to select a corner and press ENTER.<br />
6. Use ▲ or ▼ key to move the selected point in the X position and use ◄ or ► key to move the selected point in the Y position.<br />
Image 12-42<br />
Image 12-43 Image 12-44<br />
Image 12-45<br />
Image 12-46<br />
12.5.8 Reset warp settings<br />
What can be done ?<br />
The current warp settings can be reset or returned to zero (0). At that moment all functions within the warping menu are available<br />
again.<br />
How to correct the distortion<br />
1. Press MENU to activate the menus.<br />
2. Use the ▲ or ▼ key to select Alignment and press ENTER.<br />
3. Use the ▲ or ▼ key to select Warp and press ENTER.<br />
The warp dialog box appears.<br />
4. Use the ▲ or ▼ key to select Reset and press ENTER.<br />
All warp settings are reset. The Status is set to [Off].<br />
128 R59770179 FLM R22+ 15/03/2010
12. Alignment menu<br />
Image 12-47<br />
Image 12-48 Image 12-49<br />
12.5.9 Load warp file<br />
What can be done ?<br />
Special corrections which are not possible with the functions inside the projector are possible by loading a file which contains these<br />
corrections. This file should be created on an external computer and then stored on the projector using <strong>Projector</strong> Toolset. For more<br />
information about a free download of <strong>Projector</strong> Toolset, see "Free download of <strong>Projector</strong> Toolset", page 18.<br />
Image 12-50<br />
Howtoloadafile<br />
1. Press MENU to activate the menus.<br />
2. Use the ▲ or ▼ key to select Alignment and press ENTER.<br />
3. Use the ▲ or ▼ key to select Warp and press ENTER.<br />
The warp dialog box appears.<br />
4. Use the ▲ or ▼ key to select Load file and press ENTER.<br />
The load file menu opens<br />
5. Use the ▲ or ▼ key to select the desired file out of the list and press ENTER.<br />
The file is loaded and the corrections are applied.<br />
Image 12-51<br />
Image 12-52 Image 12-53<br />
R59770179 FLM R22+ 15/03/2010 129
12. Alignment menu<br />
Image 12-54<br />
12.6 Contrast enhancement<br />
Purpose<br />
Increase the contrast for all video and data sources.<br />
How to change<br />
1. Press MENU to activate the menus.<br />
2. Use the ▲ or ▼ key to select Alignment and press ENTER.<br />
3. Use the ▲ or ▼ key to select Contrast enhancement and press ENTER.<br />
The current selected contrast setting is indicated with an arrow.<br />
4. Use the ▲ or ▼ key to select the desired setting and press ENTER.<br />
The following settings are possible:<br />
Normal contrast<br />
High contrast<br />
Custom<br />
any value between normal and high contrast can be selected.<br />
Image 12-57<br />
Image 12-55<br />
Image 12-56<br />
5. When Custom is selected, the contrast menu is displayed.<br />
6. Use the ▲ or ▼ key to select the desired adjustment and press ENTER. PressEXIT to return.<br />
Image 12-58<br />
12.7 Blanking<br />
What can be done ?<br />
Blanking adjustments affect only the edges of the projected image and are used to frame the projected image on to the screen and<br />
to hide or black out unwanted information (or noise). A ’0’ on the bar scale indicates no blanking.<br />
130 R59770179 FLM R22+ 15/03/2010
12. Alignment menu<br />
Which blanking adjustments are available ?<br />
• top blanking<br />
• bottom blanking<br />
• left blanking<br />
• right blanking<br />
Image 12-59<br />
Blanking<br />
A<br />
B<br />
C<br />
D<br />
Top blanking<br />
Bottom blanking<br />
Left blanking<br />
Right blanking<br />
The reset function brings all blanking settings back to zero.<br />
How to adjust the blanking?<br />
1. Press MENU to activate the menus.<br />
2. Use the ▲ or ▼ key to select Alignment and press ENTER.<br />
3. Use the ▲ or ▼ key to select Blanking and press ENTER.<br />
4. Use the ▲ or ▼ key to select the desired blanking adjustment and press ENTER.<br />
5. Use the ▲ or ▼ key to adjust until the desired blanking is reached.<br />
6. Press EXIT to return.<br />
Image 12-62<br />
Image 12-60<br />
Image 12-61<br />
R59770179 FLM R22+ 15/03/2010 131
12. Alignment menu<br />
12.8 Gamma<br />
About Gamma<br />
Gamma is an image quality enhancement function that offers a richer image by brightening the already darker portions of the image<br />
without altering the brightness of the brighter portions (contrast feeling enhanced).<br />
How to adjust gamma?<br />
1. Press MENU to activate the menus.<br />
2. Use the ▲ or ▼ key to select Alignment and press ENTER.<br />
3. Use the ▲ or ▼ key to select Gamma and press ENTER.<br />
The Gamma progress bar appears.<br />
4. Use ◄ or ► key to change the gamma setting and press EXIT.<br />
Gamma can be set to one of the 8 available steps.<br />
Image 12-65<br />
Image 12-63<br />
Image 12-64<br />
12.9 Internal pattern<br />
What can be done with these patterns?<br />
The projector is equipped with different internal patterns which can be used for measurement and alignment purposes.<br />
How to select?<br />
1. Press MENU to activate the menus.<br />
2. Use the ▲ or ▼ key to select Alignment and press ENTER.<br />
3. Use the ▲ or ▼ key to select Internal patterns and press ENTER.<br />
The internal patterns menu is displayed.<br />
4. Use the ▲ or ▼ key to scroll through the possible selection and press ENTER to activate the selected pattern.<br />
Select ▲ or ▼ in the menu to display the previous or next page with possible internal patterns.<br />
Image 12-68<br />
Image 12-66<br />
Image 12-67<br />
132 R59770179 FLM R22+ 15/03/2010
12. Alignment menu<br />
6. When custom is selected, use the ► key to view the details. To adjust the custom values, select the desired color point using<br />
the ▲ or ▼ key and change the value with ◄ or ► key until the desired value is reached. When finished, press EXIT to return.<br />
Image 12-72<br />
12.11 ScenergiX<br />
Overview<br />
• Introduction<br />
• Preparations<br />
• ScenergiX activation<br />
• ScenergiX overlap zone (horizontal ScenergiX)<br />
• ScenergiX overlap zone (vertical ScenergiX)<br />
• ScenergiX size adjustment (White level)<br />
• Adjusting the black level of the images<br />
12.11.1 Introduction<br />
Why ScenergiX ?<br />
When working in a multichannel setup the <strong>Projector</strong> Toolset and its Soft Edge possibilities enable an image blending that gives the<br />
appearance of a single view, thus achieving realistic immersion for the majority of wide screen applications.<br />
Image 12-73<br />
Why Soft Edge?<br />
What is the Basic Principal of ScenergiX ?<br />
The principle of edge blending is achieved by linear modulation of the light output in the overlap zone so that the light output in that<br />
zone equals the light output of the rest of the image.<br />
134 R59770179 FLM R22+ 15/03/2010
12. Alignment menu<br />
Adjustable overlapping area<br />
Light output per image<br />
100%<br />
50%<br />
image 1<br />
image 2<br />
Total composite light output<br />
100%<br />
50%<br />
image 1<br />
image 2<br />
Image 12-74<br />
ScenergiX Basic Principle<br />
12.11.2 Preparations<br />
ScenergiX Preparations<br />
To ensure proper ScenergiX adjustment, be sure that the following adjustments are done perfectly on all projectors:<br />
• Convergence<br />
• Geometry<br />
• Color Matching (Color Temperature, Color Standard, Input Balance, Gamma)<br />
12.11.3 ScenergiX activation<br />
How to activate?<br />
1. Press MENU to activate the menus.<br />
2. Use the ▲ or ▼ key to select Alignment and press ENTER.<br />
3. Use the ▲ or ▼ key to select ScenergiX and press ENTER.<br />
4. Use the ▲ or ▼ key to select Status and press ENTER to toggle between [On] and [Off].<br />
On<br />
Off<br />
ScenergiX is active<br />
ScenergiX is not active<br />
Image 12-77<br />
Image 12-75<br />
Image 12-76<br />
R59770179 FLM R22+ 15/03/2010 135
12. Alignment menu<br />
12.11.4 ScenergiX overlap zone (horizontal ScenergiX)<br />
Definitions<br />
Image 12-78<br />
ScenergiX set up<br />
Overlap : number of pixels that overlap<br />
Horizontal resolution of 1 projector<br />
Total horizontal screen resolution : [(horizontal resolution of 1 projector) x 2] minus overlap.<br />
Horizontal Resolution source : number of active pixels of the source.<br />
How to set for the first projector<br />
1. Go to Layout → Main window → Size<br />
2. Enter the value for the Width as follow: Total horizontal screen resolution / 2 - 0.5 x overlap zone.<br />
3. Position remains the same.<br />
Image 12-81<br />
Image 12-80<br />
Image 12-79<br />
Image 12-82<br />
136 R59770179 FLM R22+ 15/03/2010
12. Alignment menu<br />
How to set for the second projector<br />
1. Go to Layout → Main window → Size<br />
2. Enter the value for the Width as follow: Total horizontal screen resolution / 2 - 0.5 x overlap zone.<br />
3. Position = original start + horizontal width of projector 1 - overlap zone<br />
Image 12-85<br />
Image 12-84<br />
Image 12-83<br />
Image 12-87<br />
Image 12-86<br />
12.11.5 ScenergiX overlap zone (vertical ScenergiX)<br />
Definitions<br />
Image 12-88<br />
Scenergix overlap zone vertical<br />
Overlap : number of pixels that overlap<br />
Vertical resolution of 1 projector<br />
Total vertical screen resolution : [(Vertical resolution of 1 projector) x 2] minus (overlap)<br />
Vertical Resolution source : number of active lines of the source<br />
R59770179 FLM R22+ 15/03/2010 137
12. Alignment menu<br />
How to set for the first projector<br />
1. Go to Layout → Main window → Size<br />
2. Enter the value for the Height as follow: Total Vertical screen resolution / 2 - 0.5 x overlap zone.<br />
3. Position remains the same.<br />
Image 12-91<br />
Image 12-90<br />
Image 12-89<br />
Image 12-92<br />
How to set for the second projector<br />
1. Go to Layout → Main window → Size<br />
2. Enter the value for the Width as follow: Total Vertical screen resolution / 2 - 0.5 x overlap zone.<br />
3. Position = original start + Vertical height projector 1 - overlap zone<br />
Image 12-95<br />
Image 12-94<br />
Image 12-93<br />
138 R59770179 FLM R22+ 15/03/2010
12. Alignment menu<br />
Image 12-97<br />
Image 12-96<br />
12.11.6 ScenergiX size adjustment (White level)<br />
What can be done with the white level menu?<br />
The white level menu contains top, bottom, left or right item to set the blending zone.<br />
The ScenergiX menu items are only accessible when status is [On].<br />
How to set the blending zone?<br />
1. Press MENU to activate the menus.<br />
2. Use the ▲ or ▼ key to select Alignment and press ENTER.<br />
3. Use the ▲ or ▼ key to select ScenergiX and press ENTER.<br />
4. Use the ▲ or ▼ key to select White level and press ENTER.<br />
5. Use the ▲ or ▼ key to select one of the four size adjustments and press ENTER.<br />
Image 12-100<br />
Image 12-98<br />
Image 12-99<br />
Image 12-101<br />
R59770179 FLM R22+ 15/03/2010 139
12. Alignment menu<br />
A pattern with the different areas is displayed.<br />
Image 12-102<br />
Width selections<br />
6. Use the cursor keys to move the border of the overlap area to the desired position.<br />
Set first the width for the first projector and repeat for the second one.<br />
Image 12-103<br />
Width set up for projector 1<br />
140 R59770179 FLM R22+ 15/03/2010
12. Alignment menu<br />
Image 12-104<br />
Width set up for projector 2<br />
12.11.7 Adjusting the black level of the images<br />
Why black level adjustment<br />
For dark images, the overlap zone will be brighter then the rest of the images. Typically for DLP projectors, next to the overlap<br />
zone, a brighter area is recognized. This area is known as a DLP leakage area. This area must also be exclude for the black level<br />
adjustment. Therefore we can rise the black level of the remaining image (excluding the overlap zone and the DLP leakage area).<br />
First, the width of the leakage area must be set. The white cursor line indicates the border of the overlap area. The green cursor<br />
line indicates the current installed DLP leakage area border and starts at the position of the white cursor line (no width installed).<br />
This green line can be moved to the border of the DLP leakage area with the cursor keys.<br />
Image 12-105<br />
DLP Leakage area set up<br />
After the area is set, use TEXT key to remove the area border lines when adjusting the black level.<br />
How to set the leakage area width<br />
1. Press MENU to activate the menus.<br />
2. Use the ▲ or ▼ key to select Alignment and press ENTER.<br />
3. Use the ▲ or ▼ key to select ScenergiX and press ENTER.<br />
4. Use the ▲ or ▼ key to select Black level and press ENTER.<br />
R59770179 FLM R22+ 15/03/2010 141
12. Alignment menu<br />
5. Use the ▲ or ▼ key to select one of the four size adjustments and press ENTER.<br />
Image 12-108<br />
Image 12-106<br />
Image 12-107<br />
Image 12-109<br />
Image 12-110<br />
DLP leakage area<br />
1 Overlap area<br />
2 DLP Leakage area<br />
6. Use the cursor keys to move the green border line to the desired position.<br />
142 R59770179 FLM R22+ 15/03/2010
12. Alignment menu<br />
The leakage area for this overlap is defined and will be excluded during black level adjustment.<br />
How to adjust<br />
1. Press MENU to activate the menus.<br />
2. Use the ▲ or ▼ key to select Alignment and press ENTER.<br />
3. Use the ▲ or ▼ key to select ScenergiX and press ENTER.<br />
4. Use the ▲ or ▼ key to select Black level and press ENTER.<br />
Image 12-113<br />
Image 12-111<br />
Image 12-112<br />
Image 12-114<br />
5. Adjust the black level of area A until the black level of area A, B and C are equal. Use the Adjust function All, Red, Green and<br />
Blue in the Black level menu.<br />
A<br />
B<br />
C<br />
R<br />
G<br />
B<br />
RGB<br />
12<br />
13<br />
11<br />
Image 1 Image 2<br />
Image 12-115<br />
Black level adjustment<br />
Use the Reset function to bring all ScenergiX settings back to zero.<br />
R59770179 FLM R22+ 15/03/2010 143
12. Alignment menu<br />
144 R59770179 FLM R22+ 15/03/2010
13. <strong>Projector</strong> control<br />
13. PROJECTOR CONTROL<br />
About this chapter<br />
This chapter explains the setup of the control part of the software such as projector address and all types of communication with the<br />
external world.<br />
Overview<br />
• Overview flow<br />
• <strong>Projector</strong> address<br />
• Serial communication<br />
• Network<br />
• IR control switching<br />
• Art-Net DMX<br />
• Buttons<br />
• Menu position<br />
• Local LCD<br />
• Language selection<br />
13.1 Overview flow<br />
Overview<br />
Level 1 Level 2 Level 3<br />
<strong>Projector</strong> control<br />
<strong>Projector</strong> address<br />
<strong>Projector</strong> address<br />
Common address<br />
Serial communication<br />
Baud rate [115200]<br />
Interface standard [RS232/RS422]<br />
RS422 termination [Off/On]<br />
Network<br />
DHCP [ON/OFF]<br />
IP-address<br />
Subnet mask<br />
Default gateway<br />
IR control<br />
IR Front [On/Off]<br />
IR Back [On/Off]<br />
IR Side [On/Off]<br />
ART DMX<br />
DMX address<br />
DMX universe<br />
DMX monitor<br />
DMX mode [Basic/Extended/Full]<br />
Home lens at startup [No/Yes]<br />
Buttons<br />
Standby<br />
APA<br />
R59770179 FLM R22+ 15/03/2010 145
13. <strong>Projector</strong> control<br />
Level 1 Level 2 Level 3<br />
Shortcut keys<br />
Menu position<br />
Menu<br />
Bar scale<br />
Local LCD<br />
Local LCD time out<br />
Local LCD contrast<br />
Language<br />
English<br />
Français<br />
Deutsch<br />
Español<br />
Italiano<br />
13.2 <strong>Projector</strong> address<br />
Overview<br />
• Individual projector address<br />
• Common address<br />
13.2.1 Individual projector address<br />
About individual projector address<br />
Before a projector, and only this projector, can be controlled via a remote control, an individual address must be entered in the<br />
projector.<br />
This individual projector address can then be used to control the projector via remote control or via a serial connection.<br />
Next to an individual projector address, each projector has also a common address for group control.<br />
How to set an individual address?<br />
1. Press MENU to activate the menus.<br />
2. Use the ▲ or ▼ key to select <strong>Projector</strong> control and press ENTER.<br />
3. Use the ▲ or ▼ key to select <strong>Projector</strong> address and press ENTER.<br />
4. Use the ▲ or ▼ key to select <strong>Projector</strong> Address and press ENTER.<br />
The edit projector address window opens.<br />
5. Use the ▲ or ▼ key to select a new value<br />
Or,<br />
enter a new value with the digit keys on the remote control or local keypad.<br />
6. Use the ◄ or ► key to select the next digit and repeat step 5.<br />
7. When the desired address is entered, press ENTER to store that address.<br />
146 R59770179 FLM R22+ 15/03/2010
13. <strong>Projector</strong> control<br />
Image 13-3<br />
Image 13-1<br />
Image 13-2<br />
Image 13-4<br />
13.2.2 Common address<br />
About common address<br />
A common address can be ’0’ or ’1’.<br />
Any command coming from a remote control programmed with that common address will be executed.<br />
How to change the common address?<br />
1. Press MENU to activate the menus.<br />
2. Use the ▲ or ▼ key to select <strong>Projector</strong> control and press ENTER.<br />
3. Use the ▲ or ▼ key to select <strong>Projector</strong> address and press ENTER.<br />
4. Use the ▲ or ▼ key to select Common address and press ENTER.<br />
The edit common address window opens.<br />
5. Use the ▲ or ▼ key to select ’0’ or ’1’<br />
Or,<br />
enter ’0’ or ’1’ with the digit keys on the remote control or local keypad.<br />
6. When the desired address is entered, press ENTER to store that address.<br />
Image 13-7<br />
Image 13-5<br />
Image 13-6<br />
R59770179 FLM R22+ 15/03/2010 147
13. <strong>Projector</strong> control<br />
Image 13-8<br />
13.3 Serial communication<br />
Overview<br />
• Baud rate setup<br />
• Interface standard<br />
• RS422 termination<br />
13.3.1 Baud rate setup<br />
What can be done?<br />
The baudrate for a serial connection with a computer can be set up.<br />
How to set up?<br />
1. Press MENU to activate the menus.<br />
2. Use the ▲ or ▼ key to select <strong>Projector</strong> control and press ENTER.<br />
3. Use the ▲ or ▼ key to select Serial communication and press ENTER.<br />
The serial communication menu opens.<br />
4. Use the ▲ or ▼ key to select Baudrate and press ENTER to toggle between the available baud rates.<br />
The following baud rates can be selected:<br />
- 9600<br />
- 19200<br />
- 38400<br />
- 57600<br />
- 115200<br />
5. Press EXIT to return.<br />
Image 13-11<br />
Image 13-9<br />
Image 13-10<br />
13.3.2 Interface standard<br />
What can be done?<br />
The communication protocol for the communication between the projector and a computer can be set to RS232 or RS422.<br />
How to set up<br />
1. Press MENU to activate the menus.<br />
2. Use the ▲ or ▼ key to select <strong>Projector</strong> control and press ENTER.<br />
148 R59770179 FLM R22+ 15/03/2010
13. <strong>Projector</strong> control<br />
3. Use the ▲ or ▼ key to select Serial communication and press ENTER.<br />
The serial communication menu opens.<br />
4. Use the ▲ or ▼ key to select Interface standard and press ENTER to toggle between [RS232] or [RS422]..<br />
Default: [RS232]<br />
Image 13-14<br />
Image 13-12<br />
Image 13-13<br />
13.3.3 RS422 termination<br />
What can be done?<br />
When the interface standard is set to RS422, the last projector in a line should be RS422 terminated (ON position). All others in the<br />
line should be in the OFF position.<br />
How to set<br />
1. Press MENU to activate the menus.<br />
2. Use the ▲ or ▼ key to select <strong>Projector</strong> control and press ENTER.<br />
3. Use the ▲ or ▼ key to select Serial communication and press ENTER.<br />
The serial communication menu opens.<br />
4. Use the ▲ or ▼ key to select RS422 termination and press ENTER to toggle between [On] or [Off].<br />
Default: [On]<br />
Image 13-17<br />
Image 13-15<br />
Image 13-16<br />
13.4 Network<br />
Overview<br />
• Introduction to a Network connection<br />
• DHCP setup<br />
• IP-address set up<br />
• Subnet-mask set up<br />
• Default Gateway set up<br />
R59770179 FLM R22+ 15/03/2010 149
13. <strong>Projector</strong> control<br />
13.4.1 Introduction to a Network connection<br />
DHCP<br />
Dynamic host configuration protocol. DHCP is a communications protocol that lets network administrators manage<br />
centrally and automate the assignment of IP addresses in an organization’s network. Using the Internet Protocol, each<br />
machine that can connect to the Internet needs a unique IP address. When an organization sets up its computer users<br />
with a connection to the Internet, an IP address must be assigned to each machine. Without DHCP, the IP address<br />
must be entered manually at each computer and, if computers move to another location in another part of the network,<br />
a new IP address must be entered. DHCP lets a network administrator supervise and distribute IP addresses from<br />
a central point and automatically sends a new IP address when a computer is plugged into a different place in the<br />
network.<br />
IP<br />
Internet Protocol. The network layer of TCP/IP. Required for communication with the internet.<br />
Subnet mask<br />
A number that is used to identify a subnetwork so that IP addresses can be shared on a local area network.<br />
Default Gateway<br />
A router that serves as an entry point into and exit point out of a network. For example, a local network (LAN) may<br />
need a gateway to connect it to a wide area network (WAN) or to the Internet.<br />
MAC address<br />
Media Access Control address. Unique hardware number, used in combination with the IP-address to connect to the<br />
network (LAN or WAN).<br />
What should be set up for an Ethernet address?<br />
2 ways can be used to assign an address:<br />
• use the DHCP setting so that an automatic address will be assigned.<br />
• Assign manually an IP address, Net-mask (subnet-mask), (default) gateway address.<br />
- Set the IP-Address field to the desired value. This must NOT be 0.0.0.0 for static IP-Address assignment. The IP address<br />
identifies a projector’s location on the network in the same way a street address identifies a house on a city block. Just as<br />
a street address must identify a unique residence, an IP address must be globally unique and have a uniform format.<br />
- Set the Subnet-Mask as appropriate for the local subnet.<br />
- Set the Default-Gateway to the IP-Address of the local router (MUST be on the local subnet!) on the same network as this<br />
projector that is used to forward traffic to destinations beyond the local network. This must not be 0.0.0.0. If there is no<br />
router on the projector’s local subnet then just set this field to any IP-Address on the subnet.<br />
13.4.2 DHCP setup<br />
How to switch DHCP setting?<br />
1. Press MENU to activate the menus.<br />
2. Use the ▲ or ▼ key to select <strong>Projector</strong> control and press ENTER.<br />
3. Use the ▲ or ▼ key to select Ethernet and press ENTER.<br />
The Ethernet menu opens.<br />
4. Use the ▲ or ▼ key to select DHCP.<br />
5. Press ENTER to toggle the DHCP setting.<br />
150 R59770179 FLM R22+ 15/03/2010
13. <strong>Projector</strong> control<br />
[ON] = DHCP is activated. Automatic assigning of an address is activated.<br />
[OFF ] = DHCP is deactivated. A fixed address will be used.<br />
Image 13-20<br />
Image 13-18<br />
Image 13-19<br />
13.4.3 IP-address set up<br />
How to set up?<br />
1. Press MENU to activate the menus.<br />
2. Use the ▲ or ▼ key to select <strong>Projector</strong> control and press ENTER.<br />
3. Use the ▲ or ▼ key to select Network and press ENTER.<br />
The Network menu opens.<br />
4. Use the ▲ or ▼ key to select IP-address and press ENTER to select.<br />
Note: An address contains 4 octets with a maximum value of 255.<br />
This must NOT be 0.0.0.0 for static IP-Address assignment.<br />
5. Use the ▲ or ▼ key to select the desired digit and press ◄ or ► key to select the next digit in the address.<br />
Or,<br />
enter the value with the digit keys on the remote control or local keypad. The next digit in the address will be selected automatically.<br />
6. Press EXIT to return.<br />
Image 13-23<br />
Image 13-21<br />
Image 13-22<br />
Image 13-24<br />
13.4.4 Subnet-mask set up<br />
How to set up?<br />
1. Press MENU to activate the menus.<br />
R59770179 FLM R22+ 15/03/2010 151
13. <strong>Projector</strong> control<br />
2. Use the ▲ or ▼ key to select <strong>Projector</strong> control and press ENTER.<br />
3. Use the ▲ or ▼ key to select Network and press ENTER.<br />
The Ethernet menu opens.<br />
4. Use the ▲ or ▼ key to select Subnet mask and press ENTER to select.<br />
Note: An address contains 4 octets with a maximum value of 255.<br />
Fill out the 4 fields as appropriate for the local subnet.<br />
5. Use the ▲ or ▼ key to select the desired digit and press ◄ or ► key to select the next digit in the address.<br />
Or,<br />
enter the value with the digit keys on the remote control or local keypad. The next digit in the address will be selected automatically.<br />
6. Press EXIT to return.<br />
Image 13-27<br />
Image 13-25<br />
Image 13-26<br />
Image 13-28<br />
13.4.5 Default Gateway set up<br />
How to set up?<br />
1. Press MENU to activate the menus.<br />
2. Use the ▲ or ▼ key to select <strong>Projector</strong> control and press ENTER.<br />
3. Use the ▲ or ▼ key to select Network and press ENTER.<br />
The Ethernet menu opens.<br />
4. Use the ▲ or ▼ key to select Default Gateway and press ENTER to select.<br />
Note: An address contains 4 octets with a maximum value of 255.<br />
Set the default gateway to the IP-address of the router (MUST be on the local subnet!). If there is no router on the projector’s<br />
local subnet then just set this field to any IP-address on the subnet.<br />
5. Use the ▲ or ▼ key to select the desired digit and press ◄ or ► key to select the next digit in the address.<br />
Or,<br />
enter the value with the digit keys on the remote control or local keypad. The next digit in the address will be selected automatically.<br />
Note: This must NOT be 0.0.0.0<br />
152 R59770179 FLM R22+ 15/03/2010
13. <strong>Projector</strong> control<br />
Image 13-31<br />
Image 13-29<br />
Image 13-30<br />
Image 13-32<br />
6. Press EXIT to return.<br />
13.5 IR control switching<br />
What can be done?<br />
Each IR receiver inside the projector can be activated or deactivated. When an IR receiver is deactivated, no IR signal send to this<br />
IR receiver will be processed.<br />
How to switch<br />
1. Press MENU to activate the menus.<br />
2. Use the ▲ or ▼ key to select <strong>Projector</strong> control and press ENTER.<br />
3. Use the ▲ or ▼ key to select IR Control and press ENTER.<br />
4. Use the ▲ or ▼ key to select the desired IR receiver and press ENTER to toggle this receiver [on] or [off].<br />
Image 13-35<br />
Image 13-33<br />
Image 13-34<br />
13.6 Art-Net DMX<br />
DMX<br />
DMX-512 Lighting protocol, here used over Ethernet. Carries information of 512 channels from a lighting controller to<br />
lighting devices. Standardized by USITT.<br />
R59770179 FLM R22+ 15/03/2010 153
13. <strong>Projector</strong> control<br />
Overview<br />
• DMX address<br />
• DMX universe<br />
• DMX monitor<br />
• DMX mode<br />
• Art-Net activation<br />
• Home lens at startup<br />
Art-Net DMX<br />
When using a DMX console compatible with Art-Net, the Ethernet network serves as the link for DMX control.<br />
Make sure that your lighting desk and all projectors are within the same IP address range. It can be necessary to set DHCP to [Off]<br />
for each projector and to enter an IP address manually which is in the IP address range of the lighting console.<br />
13.6.1 DMX address<br />
What should be done ?<br />
Before a projector can execute DMX commands, a unique address, called DMX address, should be given to the projector. This<br />
address can vary from to 512.<br />
How to set a DMX address<br />
1. Press MENU to activate the menus.<br />
2. Use the ▲ or ▼ key to select <strong>Projector</strong> control and press ENTER.<br />
3. Use the ▲ or ▼ key to select ART DMX and press ENTER.<br />
4. Use the ▲ or ▼ key to select DMX address and press ENTER.<br />
The edit DMX address window opens.<br />
5. Use the ▲ or ▼ key to select a new value<br />
Or,<br />
enter a value with the digit keys on the remote control or local keypad.<br />
6. Use the ◄ or ► key to select the next digit and repeat step 5.<br />
7. When the desired address is entered, press ENTER to store that address.<br />
Image 13-38<br />
Image 13-36<br />
Image 13-37<br />
Image 13-39<br />
13.6.2 DMX universe<br />
What can be done ?<br />
Depending on the DMX mode, one DMX universe can contain a different number of projectors. E.g. DMX mode = basis, the DMX<br />
universe can contain up to 256 projectors<br />
154 R59770179 FLM R22+ 15/03/2010
13. <strong>Projector</strong> control<br />
How to set a DMX universe<br />
1. Press MENU to activate the menus.<br />
2. Use the ▲ or ▼ key to select <strong>Projector</strong> control and press ENTER.<br />
3. Use the ▲ or ▼ key to select ART DMX and press ENTER.<br />
4. Use the ▲ or ▼ key to select DMX universe and press ENTER.<br />
5. Use the ▲ or ▼ key to select a new value<br />
Or,<br />
enter a value with the digit keys on the remote control or local keypad.<br />
6. Use the ◄ or ► key to select the next digit and repeat step 5.<br />
7. When the desired universe value is entered, press ENTER to store that value.<br />
Image 13-42<br />
Image 13-40<br />
Image 13-41<br />
Image 13-43<br />
13.6.3 DMX monitor<br />
What can be done ?<br />
If a DMX device is connected, the settings per channel can be displayed in an on screen menu.<br />
How to start up the monitoring<br />
1. Press MENU to activate the menus.<br />
2. Use the ▲ or ▼ key to select <strong>Projector</strong> control and press ENTER.<br />
3. Use the ▲ or ▼ key to select ART DMX and press ENTER.<br />
4. Use the ▲ or ▼ key to select DMX monitor and press ENTER.<br />
The DMX monitor window opens. Depending on the DMX mode, a different view of the DMX monitor window opens.<br />
Example in dialog box is Extended mode<br />
R59770179 FLM R22+ 15/03/2010 155
13. <strong>Projector</strong> control<br />
Image 13-46<br />
Image 13-44<br />
Image 13-45<br />
Image 13-47<br />
When selecting DMX monitor and no DMX device is connected, the message “No DMX data, check connection<br />
to display channels” appears on the screen. When ENTER is pressed the same window appears as<br />
DMX Monitor but without values.<br />
13.6.4 DMX mode<br />
What can be done ?<br />
3 modes for DMX are available:<br />
• Basic which has currently 2 channels implemented.<br />
• Extended which has currently 10 channels implemented<br />
• Full which has currently 9 channels implemented and 10th free channel.<br />
Depending on the DMX application the correct mode has to be selected.<br />
For the complete DMX chart of each mode, see "DMX chart", page 207.<br />
How to set the mode<br />
1. Press MENU to activate the menus.<br />
2. Use the ▲ or ▼ key to select <strong>Projector</strong> control and press ENTER.<br />
3. Use the ▲ or ▼ key to select ART DMX and press ENTER.<br />
4. Use the ▲ or ▼ key to select DMX mode and press ENTER to toggle between [basic], [extended] or [full].<br />
156 R59770179 FLM R22+ 15/03/2010
13. <strong>Projector</strong> control<br />
Image 13-50<br />
Image 13-48<br />
Image 13-49<br />
13.6.5 Art-Net activation<br />
What can be done ?<br />
DMX via Art-Net can be activated [On] or blocked [Off].<br />
Default value : off<br />
How to toggle<br />
1. Press MENU to activate the menus.<br />
2. Use the ▲ or ▼ key to select <strong>Projector</strong> control and press ENTER.<br />
3. Use the ▲ or ▼ key to select ART DMX and press ENTER.<br />
4. Use the ▲ or ▼ key to select ArtNet and press ENTER to toggle between [Off] or [On].<br />
Image 13-53<br />
Image 13-51<br />
Image 13-52<br />
13.6.6 Home lens at startup<br />
What can be done ?<br />
At power On the lens will search for its minimum and its maximum position. These minimum and maximum values will be used<br />
during this sessions to control the lens exactly. Once the lens limits are found, the lens returns to original position.<br />
This full process takes about 3 to 4 minutes. During the homing cycle, all functions in the projector are blocked.<br />
How to set<br />
1. Press MENU to activate the menus.<br />
2. Use the ▲ or ▼ key to select <strong>Projector</strong> control and press ENTER.<br />
3. Use the ▲ or ▼ key to select ART DMX and press ENTER.<br />
4. Use the ▲ or ▼ key to select Home lens at startup and press ENTER to toggle between [On] or [Off].<br />
R59770179 FLM R22+ 15/03/2010 157
13. <strong>Projector</strong> control<br />
[On] : home lens will be executed during power on.<br />
[Off] : home lens will not be executed during power on.<br />
Image 13-56<br />
Image 13-54<br />
Image 13-55<br />
13.7 Buttons<br />
Functionality<br />
Some buttons on the RCU or local keypad can have a different functionality depending on the need of the projector owner.<br />
Overview<br />
• Standby button<br />
• APA (auto) button<br />
• Shortcut keys<br />
13.7.1 Standby button<br />
What is possible?<br />
When going to standby by pressing the standby button, the following can happen:<br />
• Only the lamp will be switched off.<br />
• The lamp and the power will be switched off.<br />
How to set<br />
1. Press MENU to activate the menus.<br />
2. Use the ▲ or ▼ key to select <strong>Projector</strong> control and press ENTER.<br />
3. Use the ▲ or ▼ key to select Buttons and press ENTER.<br />
4. Use the ▲ or ▼ key to select Standby and press ENTER to toggle between [Lamp on/off] and [Power up/down].<br />
Image 13-59<br />
Image 13-57<br />
Image 13-58<br />
158 R59770179 FLM R22+ 15/03/2010
13. <strong>Projector</strong> control<br />
13.7.2 APA (auto) button<br />
What can be done?<br />
The function of the APA (auto) button can be configured according the wishes of the user.<br />
The function can be:<br />
• Align only (only aligning of the preview window is executed)<br />
• Auto-image menu. This function opens an auto image menu where the user can make his choice between auto align, auto<br />
contrast/brightness and auto phase.<br />
How to configure the APA (auto) button<br />
1. Press MENU to activate the menus.<br />
2. Use the ▲ or ▼ key to select <strong>Projector</strong> control and press ENTER.<br />
3. Use the ▲ or ▼ key to select Buttons and press ENTER.<br />
4. Use the ▲ or ▼ key to select APA and press ENTER to toggle between [Align only] and [Auto-image menu].<br />
Image 13-62<br />
Image 13-60<br />
Image 13-61<br />
13.7.3 Shortcut keys<br />
What can be done?<br />
An overview of the shortcut allocations with the corresponding menu is given. Those printed in bold are allocated.<br />
The allocated shortcut keys can be cleared within this menu.<br />
How to clear a shortcut key<br />
1. Press MENU to activate the menus.<br />
2. Use the ▲ or ▼ key to select <strong>Projector</strong> control and press ENTER.<br />
3. Use the ▲ or ▼ key to select Buttons and press ENTER.<br />
4. Use the ▲ or ▼ key to select Shortcut keys and press ENTER.<br />
5. Use the ▲ or ▼ key to select a shortcut with allocation and press ENTER to remove the allocation.<br />
The indication becomes No allocation and the key is free again for a new shortcut association.<br />
Image 13-65<br />
Image 13-63<br />
Image 13-64<br />
R59770179 FLM R22+ 15/03/2010 159
13. <strong>Projector</strong> control<br />
Image 13-66<br />
13.8 Menu position<br />
Overview<br />
• On screen menu<br />
• Bar scale<br />
13.8.1 On screen menu<br />
What is possible?<br />
The on screen menu can be positioned on 3 different places on the screen but always vertically centered on the screen.<br />
The horizontal position can be:<br />
• Centered<br />
• Top aligned<br />
• Bottom aligned<br />
Menu position<br />
Menu position<br />
Menu [top]<br />
Barscale [center]<br />
Menu [center]<br />
Barscale [center]<br />
Menu position<br />
Menu [bottom]<br />
Barscale [center]<br />
Image 13-67<br />
Menu position<br />
How to change the position<br />
1. Press MENU to activate the menus.<br />
2. Use the ▲ or ▼ key to select <strong>Projector</strong> control and press ENTER.<br />
3. Use the ▲ or ▼ key to select Menu position and press ENTER.<br />
4. Use the ▲ or ▼ key to select Menu and press ENTER to toggle between [Center], [Top] and [Bottom].<br />
Image 13-70<br />
Image 13-68<br />
Image 13-69<br />
160 R59770179 FLM R22+ 15/03/2010
13. <strong>Projector</strong> control<br />
13.8.2 Bar scale<br />
What is possible?<br />
The bar scale can be positioned on 3 different places on the screen but always vertically on the right side.<br />
The horizontal position can be:<br />
• Centered<br />
• Top aligned<br />
• Bottom aligned<br />
Brightness: 60<br />
0 100<br />
Brightness: 60<br />
0 100<br />
Brightness: 60<br />
Image 13-71<br />
Bar scale position<br />
0 100<br />
How to change the position<br />
1. Press MENU to activate the menus.<br />
2. Use the ▲ or ▼ key to select <strong>Projector</strong> control and press ENTER.<br />
3. Use the ▲ or ▼ key to select Menu position and press ENTER.<br />
4. Use the ▲ or ▼ key to select Menu and press ENTER to toggle between [Center], [Top] and [Bottom].<br />
Image 13-74<br />
Image 13-72<br />
Image 13-73<br />
13.9 Local LCD<br />
Overview<br />
• Local LCD time out<br />
• Local LCD contrast<br />
13.9.1 Local LCD time out<br />
What can be done ?<br />
The backlight time of the local LCD after a command is given can be set.<br />
How to change<br />
1. Press MENU to activate the menus.<br />
2. Use the ▲ or ▼ key to select <strong>Projector</strong> control and press ENTER.<br />
3. Use the ▲ or ▼ key to select Local LCD and press ENTER.<br />
4. Use the ▲ or ▼ key to select Local LCD time out and press ENTER to toggle between [Off], [5sec], [10sec] and [15sec].<br />
R59770179 FLM R22+ 15/03/2010 161
13. <strong>Projector</strong> control<br />
Image 13-77<br />
Image 13-75<br />
Image 13-76<br />
13.9.2 Local LCD contrast<br />
What is possible?<br />
The contrast of the local LCD can be adapted the needs of the environment.<br />
How to change?<br />
1. Press MENU to activate the menus.<br />
2. Use the ▲ or ▼ key to select <strong>Projector</strong> control and press ENTER.<br />
3. Use the ▲ or ▼ key to select Local LCD and press ENTER.<br />
4. Use the ▲ or ▼ key to select Local LCD contrast and press ENTER<br />
5. Use the ▲ or ▼ key to adjust the local contrast.<br />
Image 13-80<br />
Image 13-78<br />
Image 13-79<br />
Image 13-81<br />
13.10 Language selection<br />
What can be done?<br />
The user can change the language of the on screen menus and the local display menus to one of the available languages.<br />
162 R59770179 FLM R22+ 15/03/2010
13. <strong>Projector</strong> control<br />
The following languages are available:<br />
• English<br />
• French<br />
• German<br />
• Spanish<br />
• Italians<br />
All available languages are indicated in the language of the country. The current active language is indicated by an asterisk (*).<br />
How to change the language<br />
1. Press MENU to activate the menus.<br />
2. Use the ▲ or ▼ key to select <strong>Projector</strong> control and press ENTER.<br />
3. Use the ▲ or ▼ key to select Language and press ENTER.<br />
4. Use the ▲ or ▼ key to select the desired language. The change will take effect immediately.<br />
Image 13-84<br />
Image 13-82<br />
Image 13-83<br />
R59770179 FLM R22+ 15/03/2010 163
13. <strong>Projector</strong> control<br />
164 R59770179 FLM R22+ 15/03/2010
14. Service menu<br />
14. SERVICE MENU<br />
About this chapter<br />
This chapter refers to the Service menu in which the customer can find valuable information when calling the Barco help desk.<br />
Overview<br />
• Overview flow<br />
• Identification<br />
• Diagnosis<br />
• Convergence<br />
• Internal service patterns<br />
• Restore factory defaults<br />
• Reset formatter<br />
• Save custom settings<br />
• Refill mode<br />
• Broadcast mode<br />
• USB memory<br />
14.1 Overview flow<br />
Overview<br />
Level 1 Level 2 Level 3<br />
Service<br />
Identification<br />
Diagnosis<br />
Version<br />
Voltages<br />
Temperatures<br />
Fan speeds<br />
I2C<br />
SPI<br />
Error logging<br />
Convergence<br />
Internal service patterns<br />
PNP IN<br />
OSD<br />
PMP OUT<br />
FIB<br />
Formatter<br />
Restore factory defaults<br />
Reset formatter<br />
Save custom settings<br />
Refill mode<br />
Broadcast mode<br />
USB memory<br />
R59770179 FLM R22+ 15/03/2010 165
14. Service menu<br />
14.2 Identification<br />
What can be seen on the identification screen?<br />
The identification screen shows the general information about the projector.<br />
The following items will be displayed:<br />
• <strong>Projector</strong> address<br />
• Type of projector<br />
• Package<br />
• Configuration<br />
• Baud rate<br />
• IP address<br />
• MAC address<br />
• Text<br />
• Serial number of projector: this number can be useful when calling for technical assistance.<br />
• Runtime<br />
• Lamp runtime<br />
• Customer ID<br />
How to display the screen?<br />
1. Press MENU to activate the menus.<br />
2. Use the ▲ or ▼ key to select Service and press ENTER.<br />
The service window opens.<br />
3. Use the ▲ or ▼ key to select Identification and press ENTER.<br />
The identification screen is displayed.<br />
Image 14-1<br />
Image 14-2<br />
Image 14-3<br />
Add a customer ID to identification window<br />
When on the identification window:<br />
1. Use the ▲ or ▼ key to select Customer ID and press ENTER.<br />
The Customer ID input window opens.<br />
Image 14-4<br />
2. Use the ▲ or ▼ key to change the selected character.<br />
Use the ◄ or ► key to selected another character.<br />
Note: Digits can be entered with the digit keys on the remote control or on the local keypad. When a digit is entered in that<br />
way, the next character will be selected automatically.<br />
166 R59770179 FLM R22+ 15/03/2010
14. Service menu<br />
14.3 Diagnosis<br />
What can be seen?<br />
The diagnosis menu gives the possibility to get an overview of the working of the projector.<br />
14.3.1 How to start up the diagnosis?<br />
Start up<br />
1. Press MENU to activate the menus.<br />
2. Use the ▲ or ▼ key to select Service and press ENTER.<br />
The service window opens.<br />
3. Use the ▲ or ▼ key to select Diagnosis and press ENTER.<br />
The diagnosis screen will be displayed.<br />
Image 14-7<br />
Image 14-5<br />
Image 14-6<br />
Those menus who contain measured values, indicate also the limits if these are available.<br />
14.3.2 Versions<br />
How to display an overview?<br />
1. Press MENU to activate the menus.<br />
2. Use the ▲ or ▼ key to select Service and press ENTER.<br />
The service window opens.<br />
3. Use the ▲ or ▼ key to select Diagnosis and press ENTER.<br />
The diagnosis screen is displayed.<br />
4. Use the ▲ or ▼ key to select Versions and press ENTER.<br />
The Versions overview is displayed.<br />
Image 14-10<br />
Image 14-8<br />
Image 14-9<br />
R59770179 FLM R22+ 15/03/2010 167
14. Service menu<br />
Image 14-11<br />
Use the ▲ or ▼ item in the menu to select the previous or next page with information.<br />
14.3.3 Voltages<br />
How to display an overview?<br />
1. Press MENU to activate the menus.<br />
2. Use the ▲ or ▼ key to select Service and press ENTER.<br />
The service window opens.<br />
3. Use the ▲ or ▼ key to select Diagnosis and press ENTER.<br />
The diagnosis screen will be displayed.<br />
4. Use the ▲ or ▼ key to select Voltages and press ENTER.<br />
The Voltage overview menu will be displayed.<br />
Image 14-14<br />
Image 14-12<br />
Image 14-13<br />
Image 14-15<br />
168 R59770179 FLM R22+ 15/03/2010
14. Service menu<br />
Use the ▲ or ▼ item in the menu to select the previous or next page with information.<br />
14.3.4 I²C diagnosis<br />
How to select?<br />
1. Press MENU to activate the menus.<br />
2. Use the ▲ or ▼ key to select Service and press ENTER.<br />
The service window opens.<br />
3. Use the ▲ or ▼ key to select Diagnosis and press ENTER.<br />
The diagnosis screen is displayed.<br />
4. Use the ▲ or ▼ key to select I2C and press ENTER.<br />
The I²C diagnosis overview is displayed.<br />
Image 14-18<br />
Image 14-16<br />
Image 14-17<br />
Image 14-19<br />
14.3.5 Temperatures<br />
How to get an overview?<br />
1. Press MENU to activate the menus.<br />
2. Use the ▲ or ▼ key to select Service and press ENTER.<br />
The service window opens.<br />
3. Use the ▲ or ▼ key to select Diagnosis and press ENTER.<br />
The diagnosis screen will be displayed.<br />
4. Use the ▲ or ▼ key to select Temperatures and press ENTER.<br />
R59770179 FLM R22+ 15/03/2010 169
14. Service menu<br />
The Temperature overview menu will be displayed.<br />
Image 14-22<br />
Image 14-20<br />
Image 14-21<br />
Image 14-23<br />
Use the ▲ or ▼ item in the menu to select the previous or next page with information.<br />
14.3.6 Fan speeds overview<br />
How to get an overview?<br />
1. Press MENU to activate the menus.<br />
2. Use the ▲ or ▼ key to select Service and press ENTER.<br />
The service window opens.<br />
3. Use the ▲ or ▼ key to select Diagnosis and press ENTER.<br />
The diagnosis screen will be displayed.<br />
4. Use the ▲ or ▼ key to select Fan speeds and press ENTER.<br />
The Fan speeds overview menu will be displayed.<br />
170 R59770179 FLM R22+ 15/03/2010
14. Service menu<br />
Image 14-26<br />
Image 14-24<br />
Image 14-25<br />
Image 14-27<br />
Use the ▲ or ▼ item in the menu to select the previous or next page with information.<br />
14.3.7 SPI<br />
How to get an overview<br />
1. Press MENU to activate the menus.<br />
2. Use the ▲ or ▼ key to select Service and press ENTER.<br />
The service window opens.<br />
3. Use the ▲ or ▼ key to select Diagnosis and press ENTER.<br />
The diagnosis screen will be displayed.<br />
4. Use the ▲ or ▼ key to select SPI and press ENTER.<br />
The SPI overview menu will be displayed.<br />
Image 14-30<br />
Image 14-28<br />
Image 14-29<br />
R59770179 FLM R22+ 15/03/2010 171
14. Service menu<br />
Image 14-31<br />
14.3.8 Error logging overview<br />
How to get an overview?<br />
1. Press MENU to activate the menus.<br />
2. Use the ▲ or ▼ key to select Service and press ENTER.<br />
The service window opens.<br />
3. Use the ▲ or ▼ key to select Diagnosis and press ENTER.<br />
The diagnosis screen will be displayed.<br />
4. Use the ▲ or ▼ key to select Error logging and press ENTER.<br />
The Error logging overview menu is displayed.<br />
For more explanation about the stored error message, see chapter "21. Troubleshooting", "Error codes", page 213.<br />
Image 14-34<br />
Image 14-32<br />
Image 14-33<br />
14.4 Convergence<br />
What can be done?<br />
The convergence patterns can be used to check the convergence alignment of red, green and blue. If there is a misalignment of at<br />
least one 1 pixel, an electronic realignment is possible.<br />
Mechanical realignment of the convergence can only be done by a qualified service technician.<br />
How to display the convergence patterns and how to adjust<br />
1. Press MENU to activate the menus.<br />
2. Use the ▲ or ▼ key to select Service and press ENTER.<br />
The service window opens.<br />
3. Use the ▲ or ▼ key to select Convergence and press ENTER.<br />
4. Use the ▲ or ▼ key to select the desired pattern and press ENTER.<br />
172 R59770179 FLM R22+ 15/03/2010
14. Service menu<br />
The convergence pattern is displayed. Press ENTER to toggle to another pattern. Press EXIT to return to the menu.<br />
Image 14-37<br />
Image 14-35<br />
Image 14-36<br />
5. To adjust the convergence of the selected pattern, use the ◄ or ► for a horizontal adjustment and ▲ or ▼ for a vertical adjustment.<br />
Image 14-38<br />
Image 14-39<br />
Adjust until the crossing of the center Green (Red) convergence pattern coincide with the diagonal line of the center Blue convergence<br />
pattern.<br />
14.5 Internal service patterns<br />
How to select<br />
1. Press MENU to activate the menus.<br />
2. Use the ▲ or ▼ key to select Service and press ENTER.<br />
The service window opens.<br />
3. Use the ▲ or ▼ key to select Internal service patterns and press ENTER.<br />
R59770179 FLM R22+ 15/03/2010 173
14. Service menu<br />
The internal service pattern window opens.<br />
4. Use the ▲ or ▼ key to select the desired patterns and press ENTER.<br />
When a pattern is selected, press ENTER to toggle to other patterns of the selected type. Press EXIT to return to the internal<br />
service pattern menu.<br />
Image 14-42<br />
Image 14-40<br />
Image 14-41<br />
14.6 Restore factory defaults<br />
What can be done?<br />
All settings of the projector will be set to the original factory settings with the exception of :<br />
• IP address<br />
• Serial settings<br />
• DMX settings<br />
• Electronic convergence<br />
For these settings the choice exists to exclude them in the reset operation. .<br />
With this operation, all user settings with the exception of the above mentioned are erased.<br />
Howtomakeanexception<br />
1. Press MENU to activate the menus.<br />
2. Use the ▲ or ▼ key to select Service and press ENTER.<br />
The service window opens.<br />
3. Use the ▲ or ▼ key to select Restore factory defaults and press ENTER.<br />
The factory defaults confirmation window opens.<br />
4. Use the ▲ or ▼ key to select the setting to exclude and press ENTER to toggle between [No] and [Yes].<br />
Repeat this step if necessary for the other settings.<br />
Image 14-43<br />
Image 14-44<br />
Image 14-45<br />
174 R59770179 FLM R22+ 15/03/2010
14. Service menu<br />
How to return to the default settings<br />
1. Press MENU to activate the menus.<br />
2. Use the ▲ or ▼ key to select Service and press ENTER.<br />
The service window opens.<br />
3. Use the ▲ or ▼ key to select Restore factory defaults and press ENTER.<br />
The factory defaults confirmation window opens.<br />
4. Use the ▲ or ▼ key to select Yes or No and press ENTER.<br />
If you are sure to restore the factory defaults and to erase the custom settings, select Yes.<br />
If you are not sure, select No.<br />
Image 14-46<br />
Image 14-47<br />
Image 14-48<br />
14.7 Reset formatter<br />
How to reset<br />
1. Press MENU to activate the menus.<br />
2. Use the ▲ or ▼ key to select Service and press ENTER.<br />
The service window opens.<br />
3. Use the ▲ or ▼ key to select Reset formatter and press ENTER.<br />
The formater reset confirmation window opens.<br />
4. Use the ▲ or ▼ key to select Yes or No and press ENTER.<br />
If you want to reset the formatter, select Yes.<br />
If you do not want to reset the formatter, select No.<br />
Image 14-51<br />
Image 14-49<br />
Image 14-50<br />
R59770179 FLM R22+ 15/03/2010 175
14. Service menu<br />
14.8 Save custom settings<br />
What is done?<br />
The current custom settings can be saved to the internal backup device in the same way as it would be done when the projector<br />
was switched to standby.<br />
How to save<br />
1. Press MENU to activate the menus.<br />
2. Use the ▲ or ▼ key to select Service and press ENTER.<br />
The service window opens.<br />
3. Use the ▲ or ▼ key to select Save custom settings and press ENTER.<br />
The custom settings are written to the internal backup device. A message menu “Save data ...” is displayed during the save<br />
operation.<br />
Image 14-52<br />
Image 14-53<br />
14.9 Refill mode<br />
Before selecting Refill mode, take first all preparations necessary to refill the cooling circuit.<br />
What can be done?<br />
When all preparations are taken, the refill mode will automatically activate the refill process.<br />
How to start the refill mode<br />
1. Press MENU to activate the menus.<br />
2. Use the ▲ or ▼ key to select Service and press ENTER.<br />
The service window opens.<br />
3. Use the ▲ or ▼ key to select Refill mode and press ENTER.<br />
Arefill confirmation message is displayed.<br />
4. Use the ▲ or ▼ key to select Yes or No and press ENTER.<br />
176 R59770179 FLM R22+ 15/03/2010
14. Service menu<br />
Yes will switch the projector in refill mode.<br />
When No is selected, the projector stays in normal mode.<br />
Image 14-56<br />
Image 14-54<br />
Image 14-55<br />
CAUTION: Restart of the projector is necessary to terminate the refill mode. Before restarting, switch off the<br />
projector and reinstall first the cooling circuit.<br />
14.10 Broadcast mode<br />
Only accessible for HD projectors<br />
What can be done ?<br />
"Broadcast mode" enables special sequences for the DMD’s to support specific sources such as the Thompson Grass Valley Worldcam.<br />
It shouldn’t be used in any other circumstances as it would cause image flicker and dimmed images with normal sources.<br />
Default position : [Off]<br />
How to set up<br />
1. Press MENU to activate the menus.<br />
2. Use the ▲ or ▼ key to select Service and press ENTER.<br />
The service window opens.<br />
3. Use the ▲ or ▼ key to select Broadcast mode and press ENTER to toggle between [Off] and [On].<br />
Image 14-57<br />
Image 14-58<br />
R59770179 FLM R22+ 15/03/2010 177
14. Service menu<br />
When Broadcast mode ON, switch also Genlock to ON (Input → Input locking → Automatic + Options) and<br />
enter the correct values for this source.<br />
14.11 USB memory<br />
What is possible with an USB device?<br />
An USB device, FAT 16 formatted can be used, to save custom settings from the projector or to load custom settings to the projector.<br />
This function is very handy to clone projectors.<br />
The following settings can be transported via an USB device:<br />
• baudrate<br />
• address<br />
• common address<br />
• orientation<br />
• text on/off<br />
• file load mode<br />
• eco mode & dimming<br />
• rs232 interface & rs232 termination<br />
• no signal setup settings<br />
• IR receiver settings<br />
• native resolution<br />
• min delay<br />
• current language of on screen menus<br />
• customer id<br />
• Network settings (DHCP, IP address, net mask, gateway address)<br />
• blanking & keystone<br />
• ScenergiX<br />
• gamma<br />
• color standard<br />
• source switching<br />
• effect settings<br />
• broadcast mode<br />
• menu position<br />
• button settngs<br />
• locking settings<br />
Saving custom settings<br />
1. Connect a FAT 16 formatted USB device to the USB port.<br />
2. Press MENU to activate the menus.<br />
3. Use the ▲ or ▼ key to select Service and press ENTER.<br />
The service window opens.<br />
4. Use the ▲ or ▼ key to select USB memory and press ENTER.<br />
5. Use the ▲ or ▼ key to select Save custom settings and press ENTER.<br />
178 R59770179 FLM R22+ 15/03/2010
14. Service menu<br />
The custom settings on the projector are stored on the USB device together with the serial number of the projector. Different<br />
saves can be made from different projectors on the same USB device.<br />
When there is no USB device connected to the USB slot, a message, No USB device found, is displayed.<br />
Image 14-61<br />
Image 14-59<br />
Image 14-60<br />
Load custom settings<br />
1. Connect a FAT 16 formatted USB device to the USB port.<br />
2. Press MENU to activate the menus.<br />
3. Use the ▲ or ▼ key to select Service and press ENTER.<br />
The service window opens.<br />
4. Use the ▲ or ▼ key to select USB memory and press ENTER.<br />
5. Use the ▲ or ▼ key to select Load custom settings and press ENTER.<br />
An list of serial numbers is given.<br />
6. Use the ▲ or ▼ key to select the serial number to start from to load the settings.<br />
The settings from the selected projector on the USB device are loaded into the current attached projector. The current projector<br />
settings are overwritten with these settings.<br />
Image 14-64<br />
Image 14-62<br />
Image 14-63<br />
Image 14-65<br />
R59770179 FLM R22+ 15/03/2010 179
14. Service menu<br />
180 R59770179 FLM R22+ 15/03/2010
15. Maintenance<br />
15. MAINTENANCE<br />
About this chapter<br />
This chapter contains detailed maintenance procedures like dust filter replacement, lens cleaning etc. These procedures can easily<br />
be performed by the operator of the projector.<br />
CAUTION: All HEPA filters of the projector must be replaced on a regular basis, depending on the environment<br />
conditions of the projector.<br />
CAUTION: The pressure of the Liquid Cooling Circuit should be checked regularly. This pressure, indicated<br />
on the internal manometer, should be between 0,5 and 1 bar. If not, corrective action should be taken by<br />
qualified technical service personnel.<br />
HEPA<br />
High Efficiency Particulate Absorbing<br />
Overview<br />
• Replacement of the dust filter on the front side<br />
• Replacement of the dust filter on the bottom side<br />
• Replacement of the dust filter on the top side<br />
• Pressure verification of the liquid cooling circuit<br />
• Cleaning the lens<br />
• Cleaning the exterior of the projector<br />
15.1 Replacement of the dust filter on the front side<br />
Necessary parts<br />
New HEPA dust filter for the front side (R9854470).<br />
How to replace the HEPA dust filter on the front side of the projector ?<br />
1. Remove the front cover of the projector, see "Removal of the front cover", page 193.<br />
2. Remove the HEPA dust filter on the front side by pulling the two spring clamps away from the filter and then moving the filter<br />
forwards.<br />
1<br />
2<br />
Image 15-1<br />
3. Insert a new HEPA 1 filter by pulling the two spring clamps away and move the filter into position.<br />
Caution: Make sure that the airflow indicated on the dust filter match with the airflow of the fans.<br />
4. Reinstall the front cover of the projector, see "Installation of the front cover", page 196.<br />
1. High Efficiency Particulate Arrestant<br />
R59770179 FLM R22+ 15/03/2010 181
15. Maintenance<br />
CAUTION: Never install a used HEPA filter. Always install a new HEPA filter.<br />
15.2 Replacement of the dust filter on the bottom side<br />
Necessary parts<br />
• New HEPA dust filter for the bottom side (R9854480).<br />
• 2.5 mm Allen key.<br />
How to replace the HEPA dust filter on the bottom side of the projector ?<br />
1. Remove the side cover of the projector, see "Removal of the side cover", page 194.<br />
2. Release (not remove) the two wedge lock screws (A) using a 2.5 mm Allen key as illustrated.<br />
A<br />
A<br />
Image 15-2<br />
3. Remove the filter (F) on the bottom side by pulling out the filter holder (H) as illustrated.<br />
F<br />
H<br />
H<br />
Image 15-3<br />
4. Place a new HEPA dust filter in the filter holder.<br />
Caution: Make sure that the airflow indicated on the dust filter match with the airflow of the fans.<br />
5. Reinstall the filter holder containing the new HEPA filter.<br />
6. Fasten the two wedge lock screws (A) using a 2.5 mm Allen key as illustrated.<br />
182 R59770179 FLM R22+ 15/03/2010
15. Maintenance<br />
A<br />
A<br />
Image 15-4<br />
7. Reinstall the side cover of the projector, see "Installation of the side cover", page 197.<br />
CAUTION: Never install a used HEPA filter. Always install a new HEPA filter.<br />
15.3 Replacement of the dust filter on the top side<br />
Necessary parts<br />
New HEPA dust filter for the top side (R9854480).<br />
How to replace the HEPA dust filter on the top side of the projector ?<br />
1. Remove the side cover of the projector, see "Removal of the side cover", page 194.<br />
2. Remove the filter (F) on the top side by pulling out the filter holder (H) as illustrated.<br />
F<br />
Image 15-5<br />
H<br />
3. Place a new HEPA dust filter in the filter holder.<br />
Caution: Make sure that the airflow indicated on the dust filter match with the airflow of the fans.<br />
4. Reinstall the filter holder containing the new HEPA filter.<br />
5. Reinstall the side cover of the projector, see "Installation of the side cover", page 197.<br />
CAUTION: Never install a used HEPA filter. Always install a new HEPA filter.<br />
15.4 Pressure verification of the liquid cooling circuit<br />
How to check the pressure of the liquid cooling circuit inside the projector ?<br />
1. Remove the side cover of the projector, see "Removal of the side cover", page 194.<br />
R59770179 FLM R22+ 15/03/2010 183
15. Maintenance<br />
2. Check the pressure indicated on the internal manometer of the liquid cooling circuit.<br />
1<br />
0.5<br />
Image 15-6<br />
3. This pressure should be between 0,5 and 1 bar. If the pressure, indicated on the manometer, is out of range, inform the responsible<br />
and qualified technicians, so they may take necessary corrective action.<br />
4. Reinstall the side cover of the projector, see "Installation of the side cover", page 197.<br />
15.5 Cleaning the lens<br />
To minimize the possibility of damage to optical coatings, or scratches to lens surfaces, we have developed<br />
recommendations for cleaning. FIRST, we recommend you try to remove any material from the lens by blowing<br />
it off with clean, dry deionized air. DO NOT use any liquid to clean the lenses.<br />
Necessary tools<br />
Toraysee TM cloth (delivered together with the lens kit). Order number : R379058.<br />
Howtocleanthelens?<br />
1. Always wipe lenses with a CLEAN Toraysee TM cloth.<br />
2. Wipe lenses in a one single direction.<br />
Warning: Do not wipe back and forwards across the lens surface as this tends to grind dirt into the coating.<br />
3. Do not leave the cleaning cloth in either an open room or lab coat pocket, as doing so can contaminate the cloth.<br />
4. If smears occur when cleaning lenses, replace the cloth. Smears are the first indication of a dirty cloth.<br />
CAUTION: Do not use fabric softener when washing the cleaning cloth or softener sheets when drying the<br />
cloth.<br />
Do not use liquid cleaners on the cloth as doing so will contaminate the cloth.<br />
Other lenses can also be cleaned safely with this Toraysee TM cloth.<br />
15.6 Cleaning the exterior of the projector<br />
How to clean the exterior of the projector ?<br />
1. Switch off the projector and unplug the power cord at the projector side.<br />
2. Clean the housing of the projector with a damp cloth. Stubborn stains may be removed with a cloth lightly dampened with a mild<br />
detergent solution.<br />
184 R59770179 FLM R22+ 15/03/2010
16. Servicing<br />
16. SERVICING<br />
About this chapter<br />
This chapter contains general servicing procedures like lamp replacement, input unit replacement etc. Note that some of these<br />
procedures may only be performed by qualified technical service personnel.<br />
Overview<br />
• Removal of the lamp house<br />
• Removal of the input & communication unit<br />
• Removal of an input module<br />
• Installation of the lamp house<br />
• Installation of the input & communication unit<br />
• Installation of an input module<br />
• Realignment of the lamp in its reflector<br />
Extra service information<br />
Extra service information for qualified service technicians can be found on Barco’s Partnerzone (URL:www.partnerzone.events.barco.com).<br />
Registration is necessary.<br />
If you are not yet registered, click on Partnerzone registration and follow the instructions. With the created login and password, it is<br />
possible to enter the partnerzone where you can find extra service information about the projector.<br />
16.1 Removal of the lamp house<br />
WARNING: This procedure may only be performed by qualified technical service personnel.<br />
CAUTION: Never attempt to disassemble the lamp from its housing or to dispose of it. Return it to Barco.<br />
Due to its high internal pressure, the lamp may explode in either hot or cold states if improperly handled.<br />
Necessary tools<br />
7mmflat screw driver.<br />
How to remove the lamp house of the projector ?<br />
1. Switch off the projector and unplug the power cord at the projector side.<br />
2. Remove the lamp cover, see "Removal of the lamp cover", page 195.<br />
3. Release the three spring lock screws of the lamp house as illustrated.<br />
Image 16-1<br />
R59770179 FLM R22+ 15/03/2010 185
16. Servicing<br />
4. Clasp the lamp house by the handles and pull the lamp house out of the projector.<br />
Image 16-2<br />
While starting up the projector, the electronics detect if a lamp is installed. If no lamp is installed, it is not<br />
possible to start up the projector.<br />
16.2 Removal of the input & communication unit<br />
WARNING: This procedure may only be performed by qualified technical service personnel.<br />
Necessary tools<br />
7mmflat screw driver.<br />
How to remove the input & communication unit from the projector ?<br />
1. Switch off the projector and unplug the power cord at the projector side. See procedure "Switching off", page 47.<br />
2. Ensure that no cables are connected to one of the ports of the input & communication unit.<br />
3. Remove the input cover, see "Removal of the input cover", page 195.<br />
4. Release the four captive screws in the corners of the input and communication unit as illustrated.<br />
Image 16-3<br />
5. Pull the input & communication unit out of its compartment, using the side handles provided.<br />
186 R59770179 FLM R22+ 15/03/2010
16. Servicing<br />
Image 16-4<br />
16.3 Removal of an input module<br />
The procedure below is applicable to all input modules of the input & communication unit of the projector.<br />
Necessary tools<br />
Phillips screw driver PH1.<br />
How to remove an input module out of the input & communication unit of the projector ?<br />
1. Switch off the projector and unplug the power cord at the projector side.<br />
2. Release the two captive screws of the input module using a Phillips screw driver PH1.<br />
Image 16-5<br />
3. Pull the input module out of the input & communication unit, via the two knobs provided.<br />
R59770179 FLM R22+ 15/03/2010 187
16. Servicing<br />
Image 16-6<br />
CAUTION: Ensure that all unused input slots of the input & communication unit are always covered with a<br />
dummy front plate. After removing one of the input modules, immediately replace with an other one or install<br />
a dummy front cover on the unused input slot.<br />
16.4 Installation of the lamp house<br />
WARNING: This procedure may only be performed by qualified technical service personnel.<br />
CAUTION: Never attempt to disassemble the lamp from its housing or to dispose of it. Return it to Barco.<br />
Due to its high internal pressure, the lamp may explode in either hot or cold states if improperly handled.<br />
Necessary tools<br />
7mmflat screw driver.<br />
How to install the lamp house of the projector ?<br />
1. Ensure the projector is switched off and the power cord at the projector side is unplugged.<br />
2. Remove the lamp cover, if not removed yet. See "Removal of the lamp cover", page 195.<br />
3. Clasp the lamp house by its handles and gently slide the lamp house into its socket. Note that the compartment is provided with<br />
guides (G) to position the lamp house correctly.<br />
C<br />
G<br />
Image 16-7<br />
188 R59770179 FLM R22+ 15/03/2010
16. Servicing<br />
4. Push the lamp house forward until it slides fully into the projector.<br />
5. Secure the correct position of the lamp house by tightening all three spring lock screws as illustrated.<br />
Image 16-8<br />
6. Reinstall the lamp cover of the projector, see "Installation of the lamp cover", page 198.<br />
While starting up the projector, the electronics detect if a lamp is installed. If no lamp is installed, it is not<br />
possible to start up the projector.<br />
16.5 Installation of the input & communication unit<br />
WARNING: This procedure may only be performed by qualified technical service personnel.<br />
Necessary tools<br />
7mmflat screw driver.<br />
How to install the input & communication unit of the projector ?<br />
1. Ensure that the projector is switched off and the power cord at the projector side is unplugged.<br />
2. Remove the input cover, if not removed yet. See "Removal of the input cover", page 195.<br />
3. Hold the input & communication unit by its handles and gently slide the unit into the guides at the bottom of the input & communication<br />
socket inside the projector.<br />
R59770179 FLM R22+ 15/03/2010 189
16. Servicing<br />
Image 16-9<br />
4. Push the input & communication unit forward until you feel the connectors of the unit fit in their sockets. The back of the front<br />
plate of the unit must touch the chassis of the projector.<br />
5. Secure the input & communication unit by fastening the four captive screws in the corners of the unit.<br />
Image 16-10<br />
16.6 Installation of an input module<br />
The procedure below is applicable to all input modules of the input & communication unit of the projector.<br />
Necessary tools<br />
Phillips screw driver PH1.<br />
How to install an input module into the input & communication unit of the projector ?<br />
1. Switch off the projector and unplug the power cord at the projector side.<br />
2. Slide the input module into the guides of the input slot.<br />
190 R59770179 FLM R22+ 15/03/2010
16. Servicing<br />
G<br />
Image 16-11<br />
3. Push the input module forward until you feel that the connector of the input module fit inthe socket of the input slot. The back of<br />
the front plate of the module must touch the front plate of the input & communication unit.<br />
4. Secure the input module by fastening both captive screws in the top corners of the module.<br />
Image 16-12<br />
16.7 Realignment of the lamp in its reflector<br />
Why realigning the lamp ?<br />
With longer run times, the light output of the lamp will decrease, which results in a lower light output on the screen. This light output<br />
decrease can be compensated by readjusting the Z-position of the lamp.<br />
WARNING: This procedure may only be performed by qualified technical service personnel.<br />
How to realign the lamp in its reflector ?<br />
1. Remove the cover of the lamp, see "Removal of the lamp cover", page 195.<br />
2. Connect the projector to the local power net, see "Power connection", page 35.<br />
3. Start up the projector, enter the menu structure and select Lamp / Z-axis (for more explanation, see "Z-axis adjustment", page<br />
115)<br />
4. Carefully turn the thumb screw (A) at the rear of the lamp house clockwise for maximum light output. Once over the maximum,<br />
turn slightly counterclockwise to reach the maximum light output again.<br />
R59770179 FLM R22+ 15/03/2010 191
16. Servicing<br />
A<br />
Image 16-13<br />
5. Switch off the projector, wait five minutes and unplug the power cord at the projector side.<br />
6. Reinstall the cover of the lamp, see "Installation of the lamp cover", page 198.<br />
192 R59770179 FLM R22+ 15/03/2010
17. REMOVAL OF THE PROJECTOR COVERS<br />
17. Removal of the projector covers<br />
About this chapter<br />
Most maintenance and servicing procedures demand removing one or more of the projector covers to gain access to the parts to<br />
maintain or to service. To avoid redundancy, all procedures about cover removing or installing are grouped together in this chapter.<br />
The maintenance and servicing procedures also refer to this chapter if required. The procedures in this chapter describe, with<br />
detailed step by step actions and illustrations, how to remove or install the projector covers. Note that some covers may only be<br />
removed by qualified service personnel, see remarks above each procedure.<br />
WARNING: Always switch off the projector and unplug the power cord at the projector side before removing<br />
one of the covers.<br />
Overview<br />
• Removal of the front cover<br />
• Removal of the side cover<br />
• Removal of the lamp cover<br />
• Removal of the input cover<br />
• Installation of the front cover<br />
• Installation of the side cover<br />
• Installation of the lamp cover<br />
• Installation of the input cover<br />
17.1 Removal of the front cover<br />
Necessary tools<br />
7mmflat screw driver.<br />
How to remove the front cover of the projector ?<br />
1. Remove the lens. See chapter "Lens removal", page 26.<br />
2. Remove the rubber dust ring from the lens holder. See image 17-1.<br />
3. Release the captive screw at the middle bottom of the front cover, using a flat screw driver.<br />
Image 17-1<br />
4. Remove the front cover from the projector doing the following:<br />
a) standing in front of the projector, pull the right side of the front cover toward you until the latches release (left side is hinged)<br />
b) then slide the front cover to the right to release it from the hinging points.<br />
R59770179 FLM R22+ 15/03/2010 193
17. Removal of the projector covers<br />
Image 17-2<br />
17.2 Removal of the side cover<br />
CAUTION: Remove the side cover of the projector only in a clean and dust free area. Never remove the side<br />
cover in an area which is subject to airborne contaminants such as that produced by smoke machines or<br />
similar.<br />
Necessary tools<br />
7mmflat screw driver.<br />
How to remove the side cover of the projector ?<br />
1. Release the captive screw at the middle bottom of the side cover, using a flat screw driver.<br />
Image 17-3<br />
2. Remove the side cover from the projector doing the following:<br />
a) gently pull out the bottom corners (A) of the side cover,<br />
b) then gently pull out the top corners (B) of the side cover,<br />
c) then move the side cover away from the projector (C).<br />
Image 17-4<br />
194 R59770179 FLM R22+ 15/03/2010
17. Removal of the projector covers<br />
17.3 Removal of the lamp cover<br />
WARNING: This procedure may only be performed by qualified technical service personnel.<br />
Necessary tools<br />
7mmflat screw driver.<br />
How to remove the lamp cover of the projector ?<br />
1. Release the two captive screws at the top and bottom right side of the lamp cover, using a flat screw driver.<br />
Image 17-5<br />
2. Remove the lamp cover from the projector doing the following:<br />
a) gently pull out the left bottom corner (A) of the lamp cover,<br />
b) then gently pull out the left top corner (B) of the lamp cover,<br />
c) then move the lamp cover away from the projector (C).<br />
Image 17-6<br />
17.4 Removal of the input cover<br />
WARNING: This procedure may only be performed by qualified technical service personnel.<br />
Necessary tools<br />
7mmflat screw driver.<br />
How to remove the input cover of the projector ?<br />
1. Release the two captive screws at the top and bottom left side of the input cover, using a flat screw driver.<br />
R59770179 FLM R22+ 15/03/2010 195
17. Removal of the projector covers<br />
Image 17-7<br />
2. Remove the input cover from the projector doing the following:<br />
a) gently pull out the right bottom corner (A) of the input cover,<br />
b) then gently pull out the right top corner (B) of the input cover,<br />
c) then move the input cover away from the projector (C).<br />
Image 17-8<br />
17.5 Installation of the front cover<br />
Necessary tools<br />
7mmflat screw driver.<br />
How to install the front cover of the projector ?<br />
1. Check if the front filter is present.<br />
2. Ensure that no lens is mounted.<br />
3. Install the front cover of the projector doing the following:<br />
a) first hook in the side of the front cover at the front filter,<br />
b) then gently push the other side of the front cover into position,<br />
c) ensure that the locking studs in the corners click into their receivers.<br />
196 R59770179 FLM R22+ 15/03/2010
17. Removal of the projector covers<br />
Image 17-9<br />
4. Secure the front cover by locking the captive screw in the middle at the bottom of the front cover.<br />
Image 17-10<br />
5. Reinstall the rubber dust ring around the lens holder. See image 17-10.<br />
17.6 Installation of the side cover<br />
Necessary tools<br />
7mmflat screw driver.<br />
How to install the side cover of the projector ?<br />
1. Check if the bottom and top filters are present.<br />
2. Check the pressure indicated on the internal manometer of the liquid cooling circuit. This pressure should be between 0,5 and 1<br />
bar. If the pressure is out of range, inform the responsible and qualified technician, so he may take necessary corrective action.<br />
1<br />
0.5<br />
Image 17-11<br />
3. Install the side cover of the projector doing the following:<br />
a) Bring the side cover towards its final position (A),<br />
b) then gently push the locking studs of the top corners (B) into their receivers,<br />
c) then gently push the locking studs of the bottom corners (C) into their receivers.<br />
R59770179 FLM R22+ 15/03/2010 197
17. Removal of the projector covers<br />
Image 17-12<br />
4. Secure the side cover by locking the captive screw in the middle at the bottom of the side cover.<br />
Image 17-13<br />
17.7 Installation of the lamp cover<br />
Necessary tools<br />
7mmflat screw driver.<br />
How to install the lamp cover of the projector ?<br />
1. Install the lamp cover of the projector doing the following:<br />
a) Bring the lamp cover towards its final position (A),<br />
b) then gently push the locking stud at the left top corner (B) into its receiver,<br />
c) then gently push the locking stud at the left bottom corner (C) into its receiver.<br />
Image 17-14<br />
2. Secure the lamp cover by locking the two captive screws at the right side of the lamp cover.<br />
Image 17-15<br />
198 R59770179 FLM R22+ 15/03/2010
17. Removal of the projector covers<br />
17.8 Installation of the input cover<br />
Necessary tools<br />
7mmflat screw driver.<br />
How to install the input cover of the projector ?<br />
1. Install the input cover of the projector doing the following:<br />
a) Bring the input cover towards its final position (A),<br />
b) then gently push the locking stud at the right top corner (B) into its receiver,<br />
c) then gently push the locking stud at the right bottom corner (C) into its receiver.<br />
Image 17-16<br />
2. Secure the input cover by locking the two captive screws at the left side of the input cover.<br />
R59770179 FLM R22+ 15/03/2010 199
17. Removal of the projector covers<br />
200 R59770179 FLM R22+ 15/03/2010
18. Dimensions<br />
18. DIMENSIONS<br />
Overview<br />
• Dimensions of the FLM R22+<br />
• Dimensions of the FLM flight case<br />
• Dimensions of the rigging clamps<br />
18.1 Dimensions of the FLM R22+<br />
Dimensions<br />
250<br />
730<br />
480<br />
14.8<br />
643<br />
520<br />
130<br />
148 148<br />
485 459<br />
25<br />
483.5<br />
512.6<br />
310.5<br />
47.5<br />
1040<br />
771.1<br />
598.05<br />
47.5<br />
78.05<br />
Image 18-1<br />
Dimensions given in millimeters.<br />
676.1<br />
771.1<br />
485<br />
643<br />
115<br />
43.5 (+9)<br />
R59770179 FLM R22+ 15/03/2010 201
18. Dimensions<br />
Pointofgravity<br />
359<br />
224.5<br />
233<br />
Image 18-2<br />
Dimensions given in millimeters.<br />
18.2 Dimensions of the FLM flight case<br />
Dimensions<br />
1194<br />
1175<br />
819<br />
800<br />
817.5<br />
660<br />
808<br />
Image 18-3<br />
Dimensions given in millimeters.<br />
202 R59770179 FLM R22+ 15/03/2010
18. Dimensions<br />
18.3 Dimensions of the rigging clamps<br />
Dimensions<br />
99<br />
18<br />
50<br />
29.82<br />
120<br />
30<br />
SW17<br />
45<br />
M10<br />
26.5<br />
40<br />
75<br />
30<br />
Image 18-4<br />
Dimensions given in millimeters.<br />
R59770179 FLM R22+ 15/03/2010 203
18. Dimensions<br />
204 R59770179 FLM R22+ 15/03/2010
19. Standard Source Files<br />
19. STANDARD SOURCE FILES<br />
19.1 Table overview<br />
Table overview<br />
The following standard image files are pre-programmed in the projector.<br />
Ptot 6 Pact 7 Ltot 8 Lact 9<br />
Name 2<br />
Fvert<br />
FHor<br />
Fpix<br />
Hz 3<br />
kHz 4<br />
MHz 5<br />
640x350@85 85,079 37,860 31,500 832 640 445 350<br />
640x400@85 85,079 37,860 31,500 832 640 445 400<br />
640x480@60 59,940 31,668 25,175 800 640 525 480<br />
640x480@72 72,888 30,288 19,687 832 640 520 480<br />
640x480@75 74,999 37,500 31,500 840 640 500 480<br />
640x480@85 85,009 43,270 36,000 832 640 509 480<br />
720x400@85 85,040 37,928 35,500 936 720 446 400<br />
800x600@56 56,251 35,157 36,001 1024 800 625 600<br />
800x600@60 60,317 37,879 40,000 1056 800 628 600<br />
800x600@72 72,188 48,077 50,000 1040 800 666 600<br />
800x600@75 75,001 46,876 49,501 1056 800 625 600<br />
800x600@85 85,062 53,674 56,250 1048 800 631 600<br />
848x480@60 60,000 31,020 33,750 1088 848 517 480<br />
1024x768@60 60,004 48,363 65,000 1344 1024 806 768<br />
1024x768@70 70.068 56,475 74,999 1328 1024 806 768<br />
1024x768@75 75,030 60,024 78,751 1312 1024 800 768<br />
1024x768@85 84,996 68,677 94,499 1376 1024 808 768<br />
1152x864@75 74,999 67,499 107,999 1600 1152 900 864<br />
1280x768@60 59,870 47,776 79,499 1664 1280 798 768<br />
1280x768@75 74,992 60,288 102,249 1696 1280 805 768<br />
1280x768@85 84,838 68,634 117,502 1712 1280 809 768<br />
1280x768RB@60 59,994 47,396 68,250 1440 1280 790 768<br />
1280x960@60 59,999 59,999 107,998 1800 1280 1000 960<br />
1280x960@85 85,005 85,940 128,505 1728 1280 1011 960<br />
1280x1024@60 60,018 63,980 107,997 1688 1280 1066 1024<br />
1280x1024@75 75,023 79,974 134,997 1688 1280 1066 1024<br />
1280x1024@85 85,027 91,149 157,506 1728 1280 1072 1024<br />
1360x768@60 59,898 47,619 85,333 1792 1360 795 768<br />
1400x1050@50 50,015 54,517 94,641 1736 1400 1090 1050<br />
1400x1050@60 59,979 65,317 121,751 1864 1400 1089 1050<br />
1400x1050@75 74,866 82,277 155,998 1896 1400 1099 1050<br />
1400x1050@85 84,958 93,879 179,497 1912 1400 1105 1050<br />
2. Name: name of file, contains the settings.<br />
3. Fvert Hz: vertical frame frequency of the source<br />
4. FHor kHz: horizontal frequency of the source<br />
5. Fpix MHz: pixel frequency<br />
6. Ptot : total pixels on one horizontal line.<br />
7. Pact: active pixels on one horizontal line.<br />
8. Ltot: total lines in one field<br />
9. Lact: active lines in one field.<br />
R59770179 FLM R22+ 15/03/2010 205
19. Standard Source Files<br />
Ptot 6 Pact 7 Ltot 8 Lact 9<br />
Name 2<br />
Fvert<br />
FHor<br />
Fpix<br />
Hz 3<br />
kHz 4<br />
MHz 5<br />
1400x1050RB@60 59,946 64,742 100,997 1560 1400 1080 1050<br />
1600x1200@60 60,001 75,002 162,004 2160 1600 1250 1200<br />
1600x1200@65 64,998 81,248 175,496 2160 1600 1250 1200<br />
1600x1200@70 69,997 87,497 188,993 2160 1600 1250 1200<br />
1600x1200@75 74,998 93,747 202,414 2160 1600 1250 1200<br />
1600x1200@85 84,998 106,247 229,494 2160 1600 1250 1200<br />
1792x1344@60 60,000 83,640 204,751 2448 1792 1394 1344<br />
1792x1344@75 74,996 106,270 260,999 2456 1792 1417 1344<br />
1856x1392@60 59,995 86,333 218,251 2528 1856 1439 1392<br />
1920x1140@60 60,001 90,001 234,002 2600 1920 1500 1140<br />
1920x1200@60 59,883 74,555 193,235 2592 1920 1245 1200<br />
1920x1200RB@60 59,952 74,041 154,006 2080 1920 1235 1200<br />
1920x1440@60 60,001 90,001 234,002 2600 1920 1500 1200<br />
hd-1280x720@60p 60,001 45,000 74,251 1650 1280 750 720<br />
hd-1920x1035@30i 60,000 33,720 74,184 2200 1920 562 517<br />
hd-1920x1080@24p 24,000 27,000 74,250 2750 1920 1125 1080<br />
hd-1920x1080@24sf 48,001 54,002 148,504 2750 1920 1125 1080<br />
hd-1920x1080@25i 50,044 28,125 74,249 2640 1920 562 540<br />
hd-1920x1080@25p 25,000 28,125 74,249 2640 1920 1125 1080<br />
hd-1920x1080@30i 60,000 33,720 74,184 2200 1920 562 540<br />
hd-1920x1080@30p 30,000 33,750 74,249 2200 1920 1125 1080<br />
hd-1920x1080@25i 50,000 31.25 74,250 2376 1920 625 540<br />
hd-1920x1080@60p 60,011 67,513 148,528 2200 1920 1125 1080<br />
VIDEO525 62,437 15,734 13,500 858 712 252 242<br />
VIDEO525p 59,940 31,468 27,000 858 712 525 484<br />
VIDEO625 50,080 15,625 13,500 864 702 312 287<br />
VIDEO625p 50,080 31,250 27,000 864 702 625 574<br />
no-signal 100,00 20,000 8,000 400 300 200 100<br />
no-signal-i 100,00 20,000 8,000 400 300 200 100<br />
Table 19-1<br />
206 R59770179 FLM R22+ 15/03/2010
20. DMX chart<br />
20. DMX CHART<br />
Overview<br />
• DMX chart, basic<br />
• DMX chart, Extended<br />
• DMX chart, Full<br />
20.1 DMX chart, basic<br />
Overview<br />
Chan-Functionel Value Action<br />
1 Intensity<br />
0 - 5 Mechanical shutter<br />
0 - 255 Electronic contrast<br />
2 Function selection 0 - 7 no function<br />
8 - 15 Layout 1<br />
16 - 23 Layout 2<br />
24 - 31 Layout 3<br />
32 - 39 Layout 4<br />
40 - 47 Layout 5<br />
48 - 55 Layout 6<br />
56 - 63 Layout 7<br />
64 - 71 Layout 8<br />
72 - 79 Layout 9<br />
80 - 87 Layout 10<br />
88 - 95 Input select 1<br />
96 - 103 Input select 2<br />
104 - 111 Input select 3<br />
112 - 119 Input select 4<br />
120 - 127<br />
128 - 135<br />
136 - 143<br />
144 - 151<br />
152 - 159<br />
160 - 167<br />
168 - 175<br />
176 - 183<br />
184 - 207<br />
208 - 215 Power On / Lamp On<br />
216 - 223 Power Off / Lamp Off<br />
224 - 255<br />
R59770179 FLM R22+ 15/03/2010 207
20. DMX chart<br />
20.2 DMX chart, Extended<br />
Overview<br />
Chan-Functionel Value Default Actions<br />
1 Intensity<br />
0 - 5 Mechanical shutter closed<br />
0-255 Contrast 0 - channel 3<br />
2 Brightness 0 - 255 128 Adjusts the brightness between 0 and 100% (SLM/XLM doesn’t adjust<br />
on DVI)<br />
3 Contrast 0 - 255 128 Adjusts the contrast between 0 and 100% (SLM/XLM doesn’t adjust on DVI)<br />
4 Input selection<br />
5 Lens control<br />
0-7 No function<br />
8-15 Layout 1 (execution takes 5 sec)<br />
16 - 23 Layout 2 (execution takes 5 sec)<br />
24 - 31 Layout 3 (execution takes 5 sec)<br />
32 - 39 Layout 4 (execution takes 5 sec)<br />
40 - 47 Layout 5 (execution takes 5 sec)<br />
48 - 55 Layout 6 (execution takes 5 sec)<br />
56 - 63 Layout 7 (execution takes 5 sec)<br />
64 - 71 Layout 8 (execution takes 5 sec)<br />
72 - 79 Layout 9 (execution takes 5 sec)<br />
80 - 87 Layout 10 (execution takes 5 sec)<br />
88 - 95 Input select 1<br />
96 - 103 Input select 2<br />
104 - 111 Input select 3<br />
112 - 119 Input select 4<br />
120 - 127<br />
128 - 135<br />
136 - 143<br />
144 - 151<br />
152 - 159<br />
160 - 167<br />
168 - 175<br />
176 - 183<br />
184 - 255 No function<br />
0-7 No function<br />
8-15 Lens shift Right<br />
16 - 23 No function<br />
24 - 31 Lens shift Left<br />
32 - 39 No function<br />
40 - 47 Lens shift up<br />
48 - 55 No function<br />
56 - 63 Lens shift down<br />
64 - 231 No function<br />
232 - 239 Return lens to center (if held for 5 seconds)<br />
240 - 247 Calibrate lens zoom + focus (if held for 5 seconds and channel 1 < 6<br />
248 - 255 No function<br />
6 Foxus (MSB) 0-255 Coarse focus adjustment<br />
7 Focus (LSB) 0-255 Fine focus adjustment<br />
8 Zoom (MSB) 0-255 Coarse zoom adjustment<br />
208 R59770179 FLM R22+ 15/03/2010
20. DMX chart<br />
20.3 DMX chart, Full<br />
Overview<br />
Chan-Functionel Value Default Actions<br />
9 Zoom (LSB) 0 - 255 Fine zoom adjustment<br />
10 Control<br />
0 - 7 Lamp power 100%<br />
8 - 15 Lamp power 98%<br />
16 - 23 Lamp power 96%<br />
24 - 31 Lamp power 94%<br />
32 - 39 Lamp power 91%<br />
40 - 47 Lamp power 89%<br />
48 - 55 Lamp power 86%<br />
56 - 63 Lamp power 84%<br />
64 - 71 Lamp power 82%<br />
72 - 79 Lamp power 80%<br />
80 - 87 Lamp power 78%<br />
88 - 95 Lamp power 76%<br />
96 - 103 Lamp power 74%<br />
104 - 111 Lamp power 72%<br />
112 - 119 Lamp power 70%<br />
120 - 127 Lamp power 68%<br />
128 - 135 Lamp power 66%<br />
136 - 143 Lamp power 64%<br />
144 - 151 Lamp power 62%<br />
152 - 159 Lamp power 60%<br />
160 - 167 No function<br />
168 - 175 DMX buffer 4 (Not used)<br />
176 - 183 DMX buffer 8 (Not used)<br />
184 - 191 DMX buffer off (Not used)<br />
192 - 199 DMX buffer clear (Not used)<br />
200 - 207 No function<br />
208 - 215 Power On / Lamp On (if held for 5 seconds)<br />
216 - 223 Stand by / Lamp Off (if held for 5 seconds)<br />
224 - 255 No function<br />
Chan-Functionel Value Default Action<br />
1 Intensity<br />
0 - 5 Mechanical shutter closed<br />
6 - 255 Contrast 0 - channel 3<br />
2 Brightness 0 - 255 128 Adjusts the brightness between 0 and 100% (SLM/XLM doesn’t<br />
adjust on DVI)<br />
3 Contrast 0 - 255 128 Together with channel 1<br />
R59770179 FLM R22+ 15/03/2010 209
20. DMX chart<br />
Chan-Functionel Value Default Action<br />
4 Input selection<br />
0 - 7 No function<br />
5 Function select<br />
6 Motor Go >><br />
7 Motor Go
20. DMX chart<br />
Chan-Functionel Value Default Action<br />
9 Lamp Power<br />
0 - 26 0 Powered at 100%<br />
27 - 52 Powered at 98%<br />
53 - 79 Powered at 96%<br />
80 - 105 Powered at 94%<br />
106 - 131 Powered at 91%<br />
132 - 157 Powered at 89%<br />
158 - 183 Powered at 86%<br />
184 - 209 Powered at 84%<br />
210 - 235 Powered at 82%<br />
236 - 255 Powered at 80%<br />
10 Free 0 - 255<br />
R59770179 FLM R22+ 15/03/2010 211
20. DMX chart<br />
212 R59770179 FLM R22+ 15/03/2010
21. Troubleshooting<br />
21. TROUBLESHOOTING<br />
21.1 Error codes<br />
Overview<br />
When the error code is preceded by a ’-’ sign, then the error means a real error for the projector.<br />
When the error code is preceded by a ’+’ sign, then the error code means a warning. The projector does not fail yet, but take care<br />
for the warning and try to resolve the problem. A warning state can turn into an error state.<br />
Not all error codes can have two states. When the state is available, it is indicated by a Yes in the overview table. When the state<br />
is not available, it is indicated by a No.<br />
Error<br />
code<br />
Description Error Warning Caused by Action<br />
1000<br />
↓<br />
1017<br />
1499<br />
1498<br />
Wrong lamp<br />
parameters<br />
1699 Formatter busy<br />
1698 Formatter<br />
address<br />
1697 Formatter init<br />
failed<br />
1696 Formatter ctrl<br />
init failed<br />
1695 Red form. start<br />
failed<br />
1694 Green form.<br />
start failed<br />
1693 Blue form. start<br />
failed<br />
1692 Form.<br />
PWRGood<br />
Yes - Wrong lamp/ no communication<br />
with lamp<br />
Yes - no communication with formatter<br />
ctrl<br />
Yes - no communication with formatter<br />
ctrl<br />
Yes - no communication with red<br />
formatter<br />
Yes - no communication with green<br />
formatter<br />
Yes - no communication with blue<br />
formatter<br />
Yes - formatter ’Power Good’ signal not<br />
OK<br />
2000 No lps detected Yes - no communication with lamp power<br />
supply<br />
2001 Mains voltage<br />
too low<br />
2002 Lamp start<br />
failed<br />
2003 Main voltage<br />
too high<br />
Yes - mains voltage too low<br />
Yes - Hot restrike<br />
Lamp with many strikes<br />
maximum run time exceeded<br />
Lamp or LPS or SPG failed<br />
Yes - mains voltage too high<br />
Check lamp type<br />
Call a qualified service engineer<br />
Call a qualified service engineer<br />
Call a qualified service engineer<br />
Call a qualified service engineer<br />
Call a qualified service engineer<br />
Call a qualified service engineer<br />
Call a qualified service engineer<br />
Call a qualified service engineer<br />
Let cool down the lamp for at least<br />
5 minutes. Retry a few times.<br />
Replace the lamp with a new one<br />
Replace LPS or SPG or cabling.<br />
2004 Lamp goes out Yes - Call qualified service engineer<br />
2005 Lamp stop<br />
failed<br />
Yes - Call qualified service engineer<br />
2201 PFC start failed Yes - LPS (address 0x20) Replace LPS<br />
2501 PFC start failed Yes - LPS (address 0x22) Replace LPS<br />
2801 PFC start failed Yes - LPS (address 0x28) Replace LPS<br />
2202 LPS start failed Yes - LPS (address 0x20) Replace LPS<br />
2502 LPS start failed Yes - LPS (address 0x22) Replace LPS<br />
R59770179 FLM R22+ 15/03/2010 213
21. Troubleshooting<br />
Error<br />
code<br />
Description Error Warning Caused by Action<br />
2802 LPS start failed Yes - LPS (address 0x28) Replace LPS<br />
2203 BOOST start<br />
failed<br />
2503 BOOST start<br />
failed<br />
2803 BOOST start<br />
failed<br />
Yes - LPS (address 0x20) Replace LPS<br />
Yes - LPS (address 0x22) Replace LPS<br />
Yes - LPS (address 0x28) Replace LPS<br />
2206 Lamp ignition<br />
failed<br />
2506 Lamp ignition<br />
failed<br />
2806 Lamp ignition<br />
failed<br />
2207 Lamp voltage<br />
range<br />
2507 Lamp voltage<br />
range<br />
2807 Lamp voltage<br />
range<br />
2208 Lamp power<br />
range<br />
2508 Lamp power<br />
range<br />
2808 Lamp power<br />
range<br />
4000 Incompatible<br />
hardware<br />
Yes - hot restrike,<br />
lamp with many strikes, maximum<br />
run time exceeded<br />
Yes - hot restrike,<br />
lamp with many strikes, maximum<br />
run time exceeded<br />
Yes - hot restrike,<br />
lamp with many strikes, maximum<br />
run time exceeded<br />
Yes - lamp voltage too high or too low Replace lamp<br />
Yes - lamp voltage too high or too low Replace lamp<br />
Yes - lamp voltage too high or too low Replace lamp<br />
Yes - lamp voltage too high or too low Replace lamp<br />
Yes - lamp voltage too high or too low Replace lamp<br />
Yes - lamp voltage too high or too low Replace lamp<br />
Let cool down the lamp for at least 3<br />
minutes. Replace the lamp or SPG<br />
with a new one If problem persists,<br />
call a qualified service engineer<br />
Let cool down the lamp for at least 3<br />
minutes. Replace the lamp or SPG<br />
with a new one If problem persists,<br />
call a qualified service engineer<br />
Let cool down the lamp for at least 3<br />
minutes. Replace the lamp or SPG<br />
with a new one If problem persists,<br />
call a qualified service engineer<br />
Yes No Incompatible hardware used Change to correct hardware<br />
4199 FIB reset failed Yes - no communication with FIB Call a qualified service engineer<br />
5098 Flash full Yes - Internal Backup device has reached<br />
its maximum capacity<br />
5097 Flash<br />
management<br />
full<br />
5096 Storing<br />
unsuccessful<br />
5095 Restoring<br />
unsuccessful<br />
6099<br />
6098<br />
7698 Light pipe temp<br />
high<br />
7697 Light pipe temp<br />
open<br />
7696 Light pipe temp<br />
short<br />
7695 Red front DMD<br />
temp low<br />
Yes - Internal Backup device has reached<br />
its maximum capacity<br />
Yes - Storing the custom settings into<br />
internal backup device has failed<br />
Yes - Restoring the custom settings from<br />
internal backup device has failed<br />
Call a qualified service engineer<br />
Call a qualified service engineer<br />
If problem persists, call a qualified<br />
service engineer<br />
If problem persists, call a qualified<br />
service engineer<br />
Yes Yes High temperature on light pipe entry If problem persists, call a qualified<br />
service engineer<br />
Yes Yes Temperature sensor on light pipe<br />
not connected<br />
Yes Yes Temperature sensor on light pipe<br />
shorted<br />
Call a qualified service engineer<br />
Call a qualified service engineer<br />
No Yes Low temperature on red DMD Switching on the lamp will heat up<br />
the DMD<br />
214 R59770179 FLM R22+ 15/03/2010
21. Troubleshooting<br />
Error<br />
code<br />
Description Error Warning Caused by Action<br />
7694 Red front DMD<br />
temp high<br />
7693 Red front DMD<br />
temp open<br />
7692 Red front DMD<br />
temp short<br />
7691 Green front<br />
DMD temp low<br />
7690 Green front<br />
DMD temp high<br />
7689 Green front<br />
DMD temp<br />
open<br />
7888 Green front<br />
DMD temp<br />
short<br />
7687 Blue front DMD<br />
temp low<br />
7686 Blue front DMD<br />
temp high<br />
7685 Blue front DMD<br />
temp open<br />
7684 Blue front DMD<br />
temp short<br />
7676 Front block<br />
temp high<br />
7675 Front block<br />
temp open<br />
7674 Front block<br />
temp short<br />
7672 Red block temp<br />
high<br />
7671 Red block temp<br />
open<br />
7670 Red block temp<br />
short<br />
7668 Green block<br />
temp high<br />
7667 Green block<br />
temp open<br />
7666 Green block<br />
temp short<br />
Yes Yes High temperature on red DMD Check if air slots are free.<br />
Clean air filters.<br />
If problem persists, call a qualified<br />
service engineer<br />
Yes Yes Temperature sensor on Red DMD<br />
not connected<br />
Yes Yes Temperature sensor on Red DMD<br />
shorted<br />
Call a qualified service engineer<br />
Call a qualified service engineer<br />
No Yes Low temperature on green DMD Switching on the lamp will heat up<br />
the DMD<br />
Yes Yes High temperature on green DMD Check if air slots are free.<br />
Clean air filters.<br />
If problem persists, call a qualified<br />
service engineer<br />
Yes Yes Temperature sensor on green DMD<br />
not connected<br />
Yes Yes Temperature sensor on green DMD<br />
shorted<br />
Call a qualified service engineer<br />
Call a qualified service engineer<br />
Yes - Low temperature on blue DMD Switching on the lamp will heat up<br />
the DMD<br />
Yes Yes High temperature on blue DMD Check if air slots are free.<br />
Clean air filters.<br />
If problem persists, call a qualified<br />
service engineer<br />
Yes Yes Temperature sensor on blue DMD<br />
not connected<br />
Yes Yes Temperature sensor on blue DMD<br />
shorted<br />
Yes Yes High temperature on front DMD<br />
cooling block<br />
Yes Yes Temperature sensor on front cooling<br />
block not connected<br />
Yes Yes Temperature sensor on front cooling<br />
block shorted<br />
Yes Yes High temperature on red DMD<br />
cooling block<br />
Yes Yes Temperature sensor on red DMD<br />
cooling block not connected<br />
Yes Yes Temperature sensor on red DMD<br />
cooling block shorted<br />
Yes Yes High temperature on green DMD<br />
cooling block<br />
Yes Yes Temperature sensor on green DMD<br />
cooling block not connected<br />
Yes Yes Temperature sensor on green DMD<br />
cooling block shorted<br />
Call a qualified service engineer<br />
Call a qualified service engineer<br />
Check if air slots are free.<br />
Clean air filters.<br />
If problem persists, call a qualified<br />
service engineer<br />
Call a qualified service engineer<br />
Call a qualified service engineer<br />
Check if air slots are free.<br />
Clean air filters.<br />
If problem persists, call a qualified<br />
service engineer<br />
Call a qualified service engineer<br />
Call a qualified service engineer<br />
Check if air slots are free.<br />
Clean air filters.<br />
If problem persists, call a qualified<br />
service engineer<br />
Call a qualified service engineer<br />
Call a qualified service engineer<br />
R59770179 FLM R22+ 15/03/2010 215
21. Troubleshooting<br />
Error<br />
code<br />
Description Error Warning Caused by Action<br />
7664 Blue block<br />
temp high<br />
7663 Blue block<br />
temp open<br />
7662 Blue block<br />
temp short<br />
7660 Engine air temp<br />
high<br />
7659 Engine air temp<br />
open<br />
7658 Engine air temp<br />
short<br />
7999 Fan speed<br />
cathode too<br />
low<br />
7998 Fan speed<br />
cathode high<br />
7997 Fan speed<br />
anode too low<br />
7996 Fan speed<br />
anode high<br />
7995 Fan speed<br />
engine too low<br />
7994 Fan speed<br />
engine high<br />
7993 Fan speed cold<br />
mirror too low<br />
7992 Fan speed cold<br />
mirror high<br />
7991 Fan speed heat<br />
ex. too low<br />
7990 Fan speed heat<br />
ex. high<br />
7989 Fan speed<br />
smps 1 too low<br />
7987 Fan speed<br />
smps 2 too low<br />
7985 Red DMD temp<br />
low<br />
7984 Red DMD temp<br />
high<br />
7983 Green DMD<br />
temp low<br />
7982 Green DMD<br />
temp high<br />
7981 Blue DMD<br />
temp low<br />
Yes Yes High temperature on blue DMD<br />
cooling block<br />
Yes Yes Temperature sensor on blue DMD<br />
cooling block not connected<br />
Yes Yes Temperature sensor on blue DMD<br />
cooling block shorted<br />
Check if air slots are free.<br />
Clean air filters.<br />
If problem persists, call a qualified<br />
service engineer<br />
Call a qualified service engineer<br />
Call a qualified service engineer<br />
Yes Yes High temperature on engine Check if air slots are free.<br />
Clean air filters.<br />
If problem persists, call a qualified<br />
service engineer<br />
Yes Yes Temperature sensor on engine not<br />
connected<br />
Yes Yes Temperature sensor on engine<br />
shorted<br />
Call a qualified service engineer<br />
Call a qualified service engineer<br />
Yes Yes fan is running too slow or not at all If problem persists, call a qualified<br />
service engineer<br />
- Yes<br />
Yes Yes fan is running too slow or not at all If problem persists, call a qualified<br />
service engineer<br />
- Yes<br />
Yes Yes fan is running too slow or not at all If problem persists, call a qualified<br />
service engineer<br />
- Yes<br />
Yes Yes fan is running too slow or not at all If problem persists, call a qualified<br />
service engineer<br />
Yes Yes fan is running too slow or not at all If problem persists, call a qualified<br />
service engineer<br />
- Yes<br />
Yes Yes fan is running too slow or not at all If problem persists, call a qualified<br />
service engineer<br />
Yes Yes fan is running too slow or not at all If problem persists, call a qualified<br />
service engineer<br />
No Yes low temperature on dmd turning on the lamp will heat up the<br />
dmd<br />
Yes Yes high temperature on dmd check if air slot are free; clean air<br />
filters<br />
If problem persists, call a qualified<br />
service engineer<br />
No Yes low temperature on dmd turning on the lamp will heat up the<br />
dmd<br />
Yes Yes high temperature on dmd check if air slot are free; clean air<br />
filters<br />
If problem persists, call a qualified<br />
service engineer<br />
No Yes low temperature on dmd turning on the lamp will heat up the<br />
dmd<br />
216 R59770179 FLM R22+ 15/03/2010
21. Troubleshooting<br />
Error<br />
code<br />
Description Error Warning Caused by Action<br />
7980 Blue DMD<br />
temp high<br />
7978 Lamp temp<br />
high<br />
7976 SMPS HS temp<br />
high<br />
7974 Ambient temp<br />
high<br />
7973 Fan 1 voltage<br />
low<br />
7972 Fan 1 voltage<br />
high<br />
7971 Fan 2 voltage<br />
low<br />
7970 Fan 2 voltage<br />
high<br />
7969 Fan 3 voltage<br />
low<br />
7968 Fan 3 voltage<br />
high<br />
7967 Fan 4 voltage<br />
low<br />
7966 Fan 4 voltage<br />
high<br />
7965 Fan 5 voltage<br />
low<br />
7964 Fan 5 voltage<br />
high<br />
7963 Fan 6 voltage<br />
low<br />
7962 Fan 6 voltage<br />
high<br />
7959 Pump voltage<br />
low<br />
7958 Pump voltage<br />
high<br />
7957 30V voltage<br />
low<br />
7956 30V voltage<br />
high<br />
7955 VTEC voltage<br />
low<br />
Yes Yes high temperature on dmd check if air slot are free; clean air<br />
filters<br />
If problem persists, call a qualified<br />
service engineer<br />
Yes Yes high temperature lamp check if air slot are free; clean air<br />
filters If problem persists, call a<br />
qualified service engineer<br />
Yes Yes high temperature on smps check if air slot are free; clean air<br />
filters If problem persists, call a<br />
qualified service engineer<br />
Yes Yes ambient temperature above<br />
specification<br />
Yes Yes voltage on fan group 1 too low (=<br />
cathode fan)<br />
check ambient conditions<br />
check if air slot are free; clean air<br />
filters<br />
Hardware problem in Fan control<br />
board, call a qualified service<br />
engineer<br />
- Yes voltage on fan group 1 too high Hardware problem in Fan control<br />
board, call a qualified service<br />
engineer<br />
Yes Yes voltage on fan group 2 too low (=<br />
anode fan)<br />
Hardware problem in Fan control<br />
board, call a qualified service<br />
engineer<br />
- Yes voltage on fan group 2 too high Hardware problem in Fan control<br />
board, call a qualified service<br />
engineer<br />
Yes Yes voltage on fan group 3 too low (=<br />
engine fan)<br />
Hardware problem in Fan control<br />
board, call a qualified service<br />
engineer<br />
- Yes voltage on fan group 3 too high Hardware problem in Fan control<br />
board, call a qualified service<br />
engineer<br />
Yes Yes voltage on fan group 4 too low (=<br />
cold mirror + head ex. fan)<br />
- Yes voltage on fan group 4 too high (=<br />
cold mirror + head ex. fan)<br />
Yes Yes voltage on fan group 5 too low (=<br />
mains input fan)<br />
- Yes voltage on fan group 5 too high<br />
mains input fan)<br />
Yes Yes voltage on fan group 6 too low (=<br />
smps fan)<br />
- Yes voltage on fan group 6 too low (=<br />
smps fan)<br />
Hardware problem in Fan control<br />
board, call a qualified service<br />
engineer<br />
Hardware problem in Fan control<br />
board, call a qualified service<br />
engineer<br />
Hardware problem in Fan control<br />
board, call a qualified service<br />
engineer<br />
Hardware problem in Fan control<br />
board, call a qualified service<br />
engineer<br />
Hardware problem in Fan control<br />
board, call a qualified service<br />
engineer<br />
Hardware problem in Fan control<br />
board, call a qualified service<br />
engineer<br />
Yes Yes voltage on pump too low If problem persists, call a qualified<br />
service engineer<br />
- Yes voltage on pump too high If problem persists, call a qualified<br />
service engineer<br />
No Yes supply voltage for fans too low If problem persists, call a qualified<br />
service engineer<br />
No Yes supply voltage for fans too high If problem persists, call a qualified<br />
service engineer<br />
No Yes supply voltage for DMD cooling too<br />
low<br />
If problem persists, call a qualified<br />
service engineer<br />
R59770179 FLM R22+ 15/03/2010 217
21. Troubleshooting<br />
Error<br />
code<br />
Description Error Warning Caused by Action<br />
7954 VTEC voltage<br />
high<br />
7953 VMTR voltage<br />
low<br />
7952 VMTR voltage<br />
high<br />
No Yes supply voltage for DMD cooling too<br />
high<br />
If problem persists, call a qualified<br />
service engineer<br />
No Yes supply voltage for motors too low If problem persists, call a qualified<br />
service engineer<br />
No Yes supply voltage for motors too high If problem persists, call a qualified<br />
service engineer<br />
7945 5V voltage low No Yes supply voltage for electronics too<br />
low<br />
7944 5V voltage high No Yes supply voltage for electronics too<br />
high<br />
7943 5V FIB voltage<br />
low<br />
7942 5V FIB voltage<br />
high<br />
7941 5V PMP<br />
voltage low<br />
7940 5V PMP<br />
voltage high<br />
No Yes supply voltage for engine<br />
electronics too low<br />
No Yes supply voltage for engine<br />
electronics too high<br />
No Yes supply voltage for drawer<br />
electronics too low<br />
No Yes supply voltage for drawer<br />
electronics too high<br />
If problem persists, call a qualified<br />
service engineer<br />
If problem persists, call a qualified<br />
service engineer<br />
If problem persists, call a qualified<br />
service engineer<br />
If problem persists, call a qualified<br />
service engineer<br />
If problem persists, call a qualified<br />
service engineer<br />
If problem persists, call a qualified<br />
service engineer<br />
7939 Prism No Yes projection lens to close to prism move lens away from prism (up<br />
and/or right)<br />
7938 Lamp not<br />
inserted well<br />
Yes No lamp module not correctly inserted reinsert lamp module and screw<br />
firmly<br />
7937 Waterflow Yes No bad or no water flow in cooling<br />
circuit<br />
If problem persists, call a qualified<br />
service engineer<br />
7936 Tilt No Yes tilt angle is out of specifications Correct projection installation.<br />
Change the tilting so that the<br />
tilt angle becomes within the<br />
specifications.<br />
7935 Engine not well<br />
inserted<br />
7934 FIB not<br />
inserted well<br />
7931 PFC HS high<br />
temp<br />
7929 SMPSHShigh<br />
temp<br />
Yes No engine is not correctly inserted If problem persists, call a qualified<br />
service engineer<br />
Yes No formatter interface board is not<br />
correctly inserted<br />
If problem persists, call a qualified<br />
service engineer<br />
Yes Yes high temperature on smps check if air slot are free; clean air<br />
filters If problem persists, call a<br />
qualified service engineer<br />
Yes Yes high temperature on smps check if air slot are free; clean air<br />
filters If problem persists, call a<br />
qualified service engineer<br />
7928 Overtemp Yes No extreme overheating of dmd’s or<br />
lamp<br />
7927 fan speed<br />
mains input<br />
too low<br />
7926 fan speed<br />
mains input<br />
high<br />
8000 Opening<br />
shutter failed<br />
8001 Closing shutter<br />
failed<br />
8002 Lamp<br />
EEPROM<br />
9000 Scaler unit<br />
failed<br />
9198 Scaler pixel<br />
clock too high<br />
Yes Yes fan is not running or is running too<br />
slow<br />
- Yes<br />
If problem persists, call a qualified<br />
service engineer<br />
If problem persists, call a qualified<br />
service engineer<br />
No Yes If problem persists, call a qualified<br />
service engineer<br />
No Yes If problem persists, call a qualified<br />
service engineer<br />
No Yes If problem persists, call a qualified<br />
service engineer<br />
Yes - Initialization of the scaler failed If problem persists, call a qualified<br />
service engineer<br />
Yes - BW or refresh rate of input source<br />
too high<br />
218 R59770179 FLM R22+ 15/03/2010
21. Troubleshooting<br />
Error<br />
code<br />
Description Error Warning Caused by Action<br />
9398 Maximum<br />
image files<br />
reached<br />
Yes No Reaching the maximum allowed<br />
number of files<br />
Delete some unnecessary files<br />
10498 Unsupported<br />
module<br />
Yes No Module with obsolete firmware Call a qualified service engineer<br />
R59770179 FLM R22+ 15/03/2010 219
21. Troubleshooting<br />
220 R59770179 FLM R22+ 15/03/2010
22. Specifications<br />
22. SPECIFICATIONS<br />
Overview<br />
• Specifications FLM R22+<br />
• Specifications FLM 5 cable input (multi purpose)<br />
• Specifications FLM HDSDI – SDI input<br />
• Specifications FLM DVI input<br />
• Specifications FLM DVI HDCP input<br />
22.1 Specifications FLM R22+<br />
Overview<br />
Light Output<br />
22.000 Center Lumen<br />
Resolution<br />
1400 x 1050 (native)<br />
Contrast ratio<br />
1800 : 1 (full field)<br />
High contrast mode:<br />
2400 : 1 (full field)<br />
Lamp<br />
3 kW Xenon<br />
Warranty universal lamphouse: 750 Hrs<br />
Ambient temperature<br />
Max 40°C (104°F)<br />
Power consumption<br />
3600 W<br />
Mains Voltage<br />
200 - 240 V<br />
Weight<br />
99 kg (220 lbs)<br />
Dimensions<br />
WxLxH<br />
707 x 1025 x 548 mm<br />
(27.8 x 40.3 x 21.5 inch)<br />
incl. carrying handle + rigging points<br />
Noise Level<br />
56 dBA (at 40°C)<br />
ScenergiX<br />
Standard horizontal and vertical electronic edge blending<br />
R59770179 FLM R22+ 15/03/2010 221
22. Specifications<br />
Network connection<br />
10/100 base-T<br />
Picture-in-picture<br />
2 sources simultaneous<br />
Input source compatibility<br />
Max. input: up to QXGA (2048 x 1536)<br />
Inputs<br />
Modular Inputs:<br />
• Configurable 5 cable (BNC)<br />
• DVI<br />
• (HD)SDI (+ loop through)<br />
Throw Ratio<br />
Lens<br />
Throw ratio<br />
TLD (HB) 0.8 0.75<br />
TLD (HB) 1.2 1.1<br />
TLD (HB) 1.2+ 1.23<br />
TLD(HB)1.6-2.0 1.45-1.85<br />
TLD(HB)2.0-2.8 1.85 - 2.55<br />
TLD(HB)2.8-5.0 2.55 - 4.55<br />
TLD(HB)5.0-8.0 4.55 - 7.3<br />
Dust filters<br />
Dense, high quality microfilters available as spare kit, in a 6-pack & 24-pack<br />
Order Information<br />
<strong>Projector</strong>: R9004500<br />
Spare lamp (universal lamp house): R9854420<br />
6-pack dust filters: R9454470<br />
24-pack dust filters: R9454480<br />
RGB HV module: R9854440<br />
FLM/SLM adaptor plate: R9854490<br />
FLM carry handle: R9854530<br />
FLM flight case: R9854510<br />
Brightness uniformity<br />
> 90% for the total screen<br />
Display<br />
3 Chip DLP SXGA+ (resolution of 1400 x 1050 pixels (aspect ratio 4:3)).<br />
Lens Shift<br />
Vertical: -10% to +110%<br />
Horizontal: -50% to +50%<br />
(small differences occur per lens type)<br />
(short throw lenses have less shift)<br />
222 R59770179 FLM R22+ 15/03/2010
22. Specifications<br />
On board display server<br />
Ethernet control standard<br />
remote control projector over ethernet via <strong>Projector</strong> Toolset<br />
Outputs<br />
HDSDI/ SDI loop out<br />
Communication<br />
• 1x RS-232C IN (D-9 connector)<br />
• 1x RS-232C OUT (D-9 connector)<br />
• 1x RS-232C IN (XLR connector)<br />
• 2x prop. protocol (RJ45 connector)<br />
• xlr and mini-jack for wired remote control<br />
Compatibility<br />
• All current video sources (PAL, SECAM, NTSC) in Composite, S-VHS, Component or RGB formats<br />
• All current HDTV sources<br />
• All computer graphics formats from VGA, SVGA, XGA, SXGA, full HD, UXGA to QXGA<br />
• Most Macintosh computers<br />
• Electronic workstations with a resolution up to QXGA (2048 x 1536 pixels at 60 Hz)<br />
• Most computer sources with a pixel clock up to 300 MHz<br />
• DVI sources up to DC2K (2048x1080)<br />
Power Dissipation<br />
max 11953BTU/h<br />
Features<br />
• Picture in picture<br />
• Seamless switching with effects<br />
• Standard light shutter<br />
• Rigging point<br />
• Carrying handle<br />
• High contrast mode<br />
• P7 color processing<br />
Screen size<br />
From 1-12m / 3-39ft.recomended<br />
Scan Frequencies<br />
Pixel clock >162Mhz (QXGA 60hz)<br />
Lens encoders<br />
On zoom and focus (with TLD lenses)<br />
Safety Regulations<br />
Compliant with UL1950 and EN60950<br />
Electromagnetic Interference<br />
Complies with FCC rules & regulations, part 15 Class A and CE EN55022 Class A<br />
Lenses<br />
Lens<br />
TLD (HB) 0.8<br />
TLD (HB) 1.2<br />
Order nr<br />
R9842040<br />
R9840770<br />
R59770179 FLM R22+ 15/03/2010 223
22. Specifications<br />
TLD (HB) 1.2+<br />
TLD(HB)1.6-2.0<br />
TLD(HB)2.0-2.8<br />
TLD(HB)2.8-5.0<br />
TLD(HB)5.0-8.0<br />
R9840775<br />
R9842060<br />
R9842080<br />
R9842100<br />
R9842120<br />
Sealed DLP core<br />
Standard<br />
Convergence<br />
Max allowed convergence drift is 0.5 pixel.<br />
This is checked on vertical and horizontal midlines only.<br />
Corners are not applicable for convergence error.<br />
This is measure with TLD 1.2 lens on axis.<br />
Shipping Dimensions<br />
Width: 92 cm<br />
Height: 95 cm<br />
Depth: 123 cm<br />
Floor Space: 1,1316 m²<br />
Volume: 1,075020 m³<br />
Gross Weight: 161 kg<br />
22.2 Specifications FLM 5 cable input (multi purpose)<br />
Front view 5 cable input<br />
5-CABLE INPUT<br />
SEL<br />
R/PR G/Y/VIDEO B/PB H/S V/CR<br />
SYCN OK<br />
Image 22-1<br />
Signal connectivity<br />
Input signal R/P R G/Y/VIDEO B/P B H/S V/C R<br />
RGBHV R G B H V<br />
RGBS R G B S<br />
—<br />
RGsB R Gs<br />
composite sync or VIDEO<br />
as sync<br />
B — —<br />
sync on green<br />
Composite Video — VIDEO — — —<br />
Super Video — Y<br />
— — C<br />
Luma<br />
Chroma<br />
224 R59770179 FLM R22+ 15/03/2010
22. Specifications<br />
Input signal R/P R G/Y/VIDEO B/P B H/S V/C R<br />
Component Video P R /(R-Y) Y P B /(B-Y) S<br />
—<br />
-SS<br />
Component Video<br />
-SOY<br />
composite sync or VIDEO<br />
as sync<br />
P R /(R-Y) Ys P B /(B-Y) — —<br />
Specifications<br />
• Data and HD sources RGB and YUV [HS/VS, CS or SOG(Y)]:<br />
- Pixel clock maximum 275 MHz<br />
- 8 bit digital output<br />
• Video sources CVBS, S-VIDEO, RGB and YUV [CS, CV or SOG(Y)]:<br />
- PAL B/D/I/G/H, PAL60, PAL M, PAL N, PAL Nc<br />
- NTSC M/J, NTSC 4.43<br />
- SECAM B/D/G/K/L<br />
- 525i, 625i, 525p, 625p<br />
- Macrovision copy protection robust<br />
- 10 bit digital output<br />
- Standard images “video525” and “video625”<br />
• Automatic detection of sync inputs but with manual override:<br />
- automatic modes : RGB, YUV, VIDEO<br />
- manual modes : RGB HS/VS - CS, RGB CV, RGB SOG, YUV HS/VS - CS, YUV CV, YUV SOY, CVBS, S-VIDEO<br />
• Possible to disconnect 75 Ohm terminations on HS and VS (TTL sync level selection)<br />
• Signal requirements:<br />
- Component Video (BNC)<br />
o R-Y : 0,7Vpp ±3dB 75 Ohm termination.<br />
o Ys : 1Vpp ±3dB (0,7V Luma +0,3V Sync) 75 Ohm termination.<br />
o B-Y : 0,7Vpp ±3dB 75 Ohm termination.<br />
- RG(s)B<br />
o R : 0,7Vpp ±3dB 75 Ohm termination.<br />
o G(s) : 1Vpp ±3dB (0,7Vpp G + 0,3Vpp Sync) 75 Ohm termination.<br />
o B : 0,7Vpp ±3dB 75 Ohm termination.<br />
• Diagnostic LED’s on front panel:<br />
- Green LED: Lights up in case input module is selected<br />
- Yellow LED: Lights up in case sync detected<br />
22.3 Specifications FLM HDSDI – SDI input<br />
Input front view HDSDI – SDI input<br />
HDSDI - SDI input<br />
Sel<br />
Input 1 Input 2 Loop output<br />
Sync OK<br />
Image 22-2<br />
R59770179 FLM R22+ 15/03/2010 225
22. Specifications<br />
Specifications<br />
• SD SMPTE 259M-C and HD SMPTE 292M input data<br />
• 2 inputs (BNC), 1 active loop-through output (BNC) of selected input<br />
• Automatic selection of active input with manual override<br />
• 10 bit digital output<br />
• Diagnostic LED’s on front panel:<br />
- Green LED: Lights up in case input module is selected<br />
- Yellow LED: Lights up in case sync detected<br />
• SDI: 270 Mbit/s transmission (SMPTE 259M-C).<br />
• SDI: 525/625 interlaced.<br />
• Coax (75 Ohm).<br />
• Supported HDSDI standards:<br />
- Progressive:<br />
o 1280x720/60/1:1/ (SMPTE 296M)<br />
o 1280x720/59.94/1:1/ (SMPTE 296M)<br />
o 1920x1080/30/1:1/ (SMPTE 274M)<br />
o 1920x1080/29.97/1:1/ (SMPTE 274M)<br />
o 1920x1080/25/1:1/ (SMPTE 274M)<br />
o 1920x1080/24/1:1/ (SMPTE 274M)<br />
o 1920x1080/23.98/1:1/ (SMPTE 274M)<br />
- Interlaced:<br />
o 1920x1035/60/2:1/ (SMPTE 260M)<br />
o 1920x1035/59.94/2:1/ (SMPTE 260M)<br />
o 1920x1080/60/2:1/ (SMPTE 274M)<br />
o 1920x1080/59.94/2:1/ (SMPTE 274M)<br />
o 1920x1080/50/2:1/ (SMPTE 274M)<br />
o 1920/1080/50/2:1 (1250)/ (SMPTE 295M)<br />
o 1920x1080/24/Segmented/ (SMPTE 274M)<br />
o 1920x1080//23.98/Segmented/ (SMPTE 274M)<br />
22.4 Specifications FLM DVI input<br />
Input front view<br />
DVI input<br />
Sel<br />
Sync OK<br />
Image 22-3<br />
Specifications<br />
• DVI type: DVI-I (DVI-Integrated), but the analog signals are not supported. Single-link configuration.<br />
• Single link dvi for pixelclocks up to 165MHz<br />
• Vertical frequencies: 24 - 75 Hz<br />
• Horizontal frequencies: 20 - 90 kHz<br />
• Supported resolutions: up to UXGA (1600 x 1200) at 60 Hz.<br />
• Cable lengths: up to 3 meter at UXGA speed.<br />
• Compliance: DDC2B support according to VESA EDID Version 1.2<br />
• Diagnostic LED’s on front panel:<br />
- Green LED: Lights up in case input module is selected<br />
- Yellow LED: Lights up in case sync detected<br />
226 R59770179 FLM R22+ 15/03/2010
22. Specifications<br />
22.5 Specifications FLM DVI HDCP input<br />
Input front view<br />
HDCP DVI input<br />
Sel<br />
Sync OK<br />
Image 22-4<br />
Specifications<br />
• DVI type: DVI-I (DVI-Integrated), but the analog signals are not supported. Single-link configuration.<br />
• Supports UXGA Resolution (1600 x 1200) (Output Pixel Rates up to 165 MHz)<br />
• True-Color, 24 Bits/Pixel, 48-Bit Dual Pixel Output Mode, 16.7M Colors at 1 or 2 Pixels Per Clock<br />
• Digital Visual Interface (DVI) and High-Bandwidth Digital Content Protection (HDCP) Specification Compliant<br />
• Vertical frequencies: 24 - 75 Hz<br />
• Horizontal frequencies: 20 - 90 kHz<br />
• Cable lengths: up to 3 meter at UXGA speed.<br />
• Compliance: DDC2B support according to VESA EDID Version 1.2<br />
• Diagnostic LED’s on front panel:<br />
- Green LED: Lights up in case input module is selected<br />
- Yellow LED: Lights up in case sync detected<br />
R59770179 FLM R22+ 15/03/2010 227
22. Specifications<br />
228 R59770179 FLM R22+ 15/03/2010
23. Order information<br />
23. ORDER INFORMATION<br />
23.1 Spare part order info<br />
Order info:<br />
Order info<br />
Description<br />
R9854490<br />
FLM/SLM adaptor plate (for stacking an SLM projector upon an FLM projector).<br />
R9854420<br />
FLM lamp house (3kW lamp included).<br />
R9854520<br />
FLM lamp house refurbish (3kW lamp included).<br />
R9854430<br />
5 Cable input module.<br />
R9854440<br />
High bandwidth data input module (RGB).<br />
R9854450<br />
HDSDI - SDI input module.<br />
R9854460<br />
DVI input module.<br />
R9854465<br />
DVI HDCP input module<br />
R848607<br />
Cover plate for unused input slot.<br />
R9854470<br />
FLM front, top and bottom filters (6 pieces each).<br />
R9854480<br />
FLM front, top and bottom filters (24 pieces each).<br />
R9854510<br />
FLM flight case.<br />
R764988<br />
FLM remote control unit (RCU)<br />
R820411<br />
One rigging clamp for truss installations.<br />
Z3499178<br />
FLM power cord.<br />
R9842040 TLD HB fixed lens (0.8 : 1)<br />
R9840770 TLD HB fixed lens (1.2 : 1)<br />
R9840775 TLD HB fixed lens (1.2+ : 1)<br />
R9842060 TLD HB zoom lens (1.6 - 2.0 : 1)<br />
R9842080 TLD HB zoom lens (2.0 - 2.8 : 1)<br />
R9842100 TLD HB zoom lens (2.8 - 5.0 : 1)<br />
R9842120 TLD HB zoom lens (5.0 - 8.0 : 1)<br />
R59770179 FLM R22+ 15/03/2010 229
23. Order information<br />
230 R59770179 FLM R22+ 15/03/2010
Glossary<br />
GLOSSARY<br />
2:2 pull-down<br />
The process of transferring 24-frames/sec film format into video by repeating each frame (used for PAL DVD’s) as two video fields.<br />
(AD)<br />
3:2 pull-down<br />
Method used to map the 24 fps of film onto the 30 fps (60 fields) or 25 fps (50 fields), so that one film frame occupies three video<br />
fields, the next two, etc. It means the two fields of every other video frame come from different film frames making operations<br />
such as rotoscoping impossible, and requiring care in editing. Some sophisticated equipment can unravel the 3:2 sequence to<br />
allow frame-by-frame treatment and subsequently re-compose 3:2. The 3:2 sequence repeats every five video frames and four film<br />
frames, the latter identified as A-D. Only film frame A is fully on a video frame and so exists at one time code only, making it the<br />
editable point of the video sequence.<br />
Art-Net DMX<br />
DMX protocol over an Ethernet network.<br />
Artefacts<br />
Undesirable elements or defects in a video picture. These may occur naturally in the video process and must be eliminated in<br />
order to achieve a high-quality picture. Most common in analog are cross color and cross luminance. Most common in digital are<br />
macroblocks, which resemble pixelation of the video image.<br />
Aspect ratio<br />
Relation between the horizontal & vertical dimension in which the window will be displayed, e.g. 4 by 3 or 16 by 9. Can also be<br />
expressed as a decimal number, such as 1.77. The larger the ratio or decimal, the wider are less square the image.<br />
Color space<br />
A color space or color standard is a mathematical representation for a color. For example the RGB color space is based on a<br />
Cartesian coordinate system.<br />
Color temperature<br />
The coloration (reddish, white, bluish, greenish, etc.) of white in an image, measured using the Kelvin (degrees K) temperature<br />
scale. Higher temperatures output more light.<br />
Common address<br />
<strong>Projector</strong> will always execute the command coming from a RCU programmed with that common address.<br />
Default Gateway<br />
A router that serves as an entry point into and exit point out of a network. For example, a local network (LAN) may need a gateway<br />
to connect it to a wide area network (WAN) or to the Internet.<br />
DHCP<br />
Dynamic host configuration protocol. DHCP is a communications protocol that lets network administrators manage centrally and<br />
automate the assignment of IP addresses in an organization’s network. Using the Internet Protocol, each machine that can connect<br />
to the Internet needs a unique IP address. When an organization sets up its computer users with a connection to the Internet,<br />
an IP address must be assigned to each machine. Without DHCP, the IP address must be entered manually at each computer<br />
and, if computers move to another location in another part of the network, a new IP address must be entered. DHCP lets a network<br />
administrator supervise and distribute IP addresses from a central point and automatically sends a new IP address when a computer<br />
is plugged into a different place in the network.<br />
DMX<br />
DMX-512 Lighting protocol, here used over Ethernet. Carries information of 512 channels from a lighting controller to lighting devices.<br />
Standardized by USITT.<br />
Gamma<br />
“Gamma” is a global setting that determines what gray shades are displayed between minimum input (black) and maximum input<br />
(white) for all signals. A good gamma setting helps to optimize blacks and whites while ensuring smooth transitions for the “inbetween”<br />
values utilized in other colors. Thus, unlike “Brightness” and “Contrast” controls, the overall tone of your images can be<br />
lightened or darkened without changing the extremes, and all images will be more vibrant while still showing good detail in dark<br />
areas.<br />
R59770179 FLM R22+ 15/03/2010 231
Glossary<br />
HDCP<br />
High-bandwidth Digital Content Protection (HDCP) is a form of digital copy protection developed by Intel Corporation to protect digital<br />
audio and video content as it travels across DisplayPort, Digital Visual Interface (DVI), High-Definition Multimedia Interface (HDMI),<br />
Gigabit Video Interface (GVIF), or Unified Display Interface (UDI) connections. The specification is proprietary, and implementing<br />
HDCP requires a license.<br />
HEPA<br />
High Efficiency Particulate Absorbing<br />
IP<br />
Internet Protocol. The network layer of TCP/IP. Required for communication with the internet.<br />
MAC address<br />
Media Access Control address. Unique hardware number, used in combination with the IP-address to connect to the network (LAN<br />
or WAN).<br />
PiP<br />
PiP stands for "Picture in Picture" and allows to display multiple windows containing each of them an image. The windows may be<br />
of the video or data type.<br />
<strong>Projector</strong> address<br />
Address installed in the projector to be individually controlled.<br />
Restricted access location<br />
A location for equipment where both of the following paragraphs apply:<br />
1) Access can only be gained by SERVICE PERSONS or by USERS who have been instructed about the reasons for the restriction<br />
applied to the location and about the precautions that shall be taken.<br />
2) Access is through the use of the tool or lock and key, or other means of security, and is controlled by the authority responsible for<br />
the location.<br />
RS232<br />
An Electronic Industries Association (EIA) serial digital interface standard specifying the characteristics of the communication path<br />
between two devices using either D-SUB 9 pins or D-SUB 25 pins connectors. This standard is used for relatively short-range<br />
communications and does not specify balanced control lines. RS-232 is a serial control standard with a set number of conductors,<br />
data rate, word length and type of connector to be used. The standard specifies component connection standards with regard to<br />
computer interface. It is also called RS-232-C, which is the third version of the RS-232 standard, and is functionally identical to the<br />
CCITT V.24 standard. Logical ’0’ is > + 3V, Logical ’1’ is < - 3V. The range between -3V and +3V is the transition zone.<br />
RS422<br />
An EIA serial digital interface standard that specifies the electrical characteristics of balanced (differential) voltage, digital interface<br />
circuits. This standard is usable over longer distances than RS-232. This signal governs the asynchronous transmission of computer<br />
data at speeds of up to 920,000 bits per second. It is also used as the serial port standard for Macintosh computers. When the<br />
difference between the 2 lines is < - 0.2V that equals with a logical ’0’. When the difference is > +0.2V that equals to a logical ’1’..<br />
Subnet mask<br />
A number that is used to identify a subnetwork so that IP addresses can be shared on a local area network.<br />
232 R59770179 FLM R22+ 15/03/2010
Index<br />
INDEX<br />
A<br />
Address 52<br />
Program 52<br />
RCU 52<br />
Adjustment 49–50<br />
Quick set up 49–50<br />
Lens 49<br />
Lens functions 50<br />
Lens key 49<br />
PIP 50<br />
Adjustment mode 55–57<br />
About 55<br />
LCD display menus 57<br />
Local keypad 55<br />
Menu memory 57<br />
Navigation 56<br />
On screen menus 57<br />
RCU 55<br />
Shortcut keys 56<br />
Start up 55<br />
Test patterns 57<br />
Air flow 18<br />
Align 27, 33<br />
Ceiling mount 27<br />
Stacked 33<br />
Table mount 27<br />
Alignment 117–130, 132–137, 139, 141, 145<br />
Blanking 130<br />
Color space 133<br />
Color standard 133<br />
Contrast enhancement 130<br />
Gamma 132<br />
Internal pattern 132<br />
Lens 119<br />
Focus 119<br />
Mid position 119<br />
Shift 119<br />
Zoom 119<br />
Lens adjustment 119<br />
Orientation 118<br />
Overview flow 117, 145<br />
ScenergiX 134–137, 139, 141<br />
Activation 135<br />
Black level 141<br />
Horizontal overlap 136<br />
Introduction 134<br />
Preparations 135<br />
Size adjustment 139<br />
Vertical overlap 137<br />
White level 139<br />
Side keystone 120<br />
Warp 121–129<br />
4 corners 127<br />
About 121<br />
Barrel correction 126<br />
Horizontal keystone 123<br />
Load warp file 129<br />
Pincushion correction 126<br />
Reset 128<br />
Rotation 125<br />
Status 122<br />
Vertical keystone 124<br />
Art-Net activation 157<br />
Art-Net DMX 153–157<br />
Art-Net activation 157<br />
DMX address 154<br />
DMX mode 156<br />
DMX monitor 155<br />
DMX universe 154<br />
Home lens at startup 157<br />
Aspect ratio 82–83<br />
Custom 83<br />
B<br />
Background color 65<br />
No signal 65<br />
Blanking 130<br />
Box content 13<br />
Brightness 71<br />
Broadcast mode 177<br />
Buttons 158–159<br />
APA 159<br />
Auto 159<br />
Shortcut keys 159<br />
Standby 158<br />
C<br />
Card bus 41<br />
Ceiling mount 27<br />
Align 27<br />
cleaning 184<br />
lens 184<br />
Cleaning 184<br />
Exterior 184<br />
CLO mode 113<br />
CLO target 114<br />
Color saturation 72<br />
Color space 133<br />
Color standard 133<br />
Color temperature 76–77<br />
Custom values 77<br />
Predefined values 76<br />
Communication 38<br />
Connection 38<br />
Configurations 14–15<br />
Front projection 14<br />
Rear projection 15<br />
Connection 35, 37–38<br />
Communication 38<br />
Power 35<br />
Source 37<br />
Connections 35, 47<br />
Switching off 47<br />
Contrast 71<br />
Contrast enhancement 130<br />
Convergence 172<br />
Service patterns 172<br />
Cooling circuit 183<br />
Pressure 183<br />
Cooling liquid circuit warning 7<br />
Copy 108<br />
Layout 108<br />
Cover 193<br />
Removal 193<br />
Custom aspect ratio 83<br />
Custom color temperature 77<br />
D<br />
Delete 107<br />
Layout 107<br />
Diagnosis 167, 169–171<br />
Fan speeds 170<br />
SPI 171<br />
Start up 167, 169<br />
Temperatures 169<br />
Dimensions 201–203<br />
Flight case 202<br />
<strong>Projector</strong> 201<br />
Rigging clamps 203<br />
DMX address 154<br />
DMX chart 207–209<br />
Basic 207<br />
Extented 208<br />
R59770179 FLM R22+ 15/03/2010 233
Index<br />
Full 209<br />
DMX mode 156<br />
DMX monitor 155<br />
DMX universe 154<br />
Download plug-in 18<br />
Download <strong>Projector</strong> Toolset 18<br />
Dust filter 181–183<br />
Bottom 182<br />
Front 181<br />
Top 183<br />
E<br />
Error codes 213<br />
Error logging 172<br />
Start up 172<br />
Ethernet 40<br />
Exterior 184<br />
Cleaning 184<br />
F<br />
Fan speeds 170<br />
Diagnosis 170<br />
File services 88<br />
<strong>Manual</strong> load file 88<br />
Film mode detection 86<br />
Flight case 14<br />
Front projection 14<br />
Fuses 36<br />
G<br />
Gamma 132<br />
General 18<br />
Download plug-in 18<br />
Download <strong>Projector</strong> Toolset 18<br />
General info 11<br />
Getting started 43, 45, 49, 52–53<br />
Operating 45<br />
<strong>Projector</strong> address 52<br />
Quick setup 49<br />
Source selection 53<br />
Terminology overview 43<br />
Getting Started 43, 45, 47, 54<br />
Controlling the projector 54<br />
RCU & local keypad 43<br />
Switching on 45<br />
Using the RCU 47<br />
H<br />
Hang up 28<br />
<strong>Projector</strong> 28<br />
Hue 73<br />
I<br />
Identification 114<br />
Lamp 114<br />
Image 69–76, 78–79, 82–84, 86, 88–93<br />
Advanced settings 84, 86<br />
Clamp delay 84<br />
Clamp width 84<br />
Field polarity 84<br />
Film mode detection 86<br />
Aspect ratio 82<br />
File services 88<br />
<strong>Manual</strong> load file 88<br />
Film mode detection 86<br />
Image file services 88<br />
Image services 88–92<br />
Copy file 91<br />
Delete file 89–90<br />
File manipulations 88<br />
File options 92<br />
Files 88<br />
Rename file 90<br />
Image settings 70–76, 78–79<br />
Brightness 71<br />
Color saturation 72<br />
Color temperature 76<br />
Contrast 71<br />
Hue 73<br />
Input balance 78<br />
Input balance adjusting 79<br />
Noise reduction 75<br />
Phase 73<br />
Saturation 72<br />
Sharpness 74<br />
Tint 73<br />
Overview flow 69<br />
Save custom settings 93<br />
Source timings 83<br />
Start up 70<br />
Timings 83–84<br />
Advanced settings 84<br />
Image file services 88<br />
Image files 205<br />
standard 205<br />
Image services 88–93<br />
Copy file 91<br />
Delete file 89–90<br />
File manipulations 88<br />
File options 92<br />
Files 88<br />
Rename file 90<br />
Save custom settings 93<br />
Infra red 38<br />
Input 59–61, 63, 65–66<br />
Configuration 60<br />
Input locking 61<br />
Minimum delay 63<br />
Module type 59<br />
Native resolution 63<br />
No signal 65–66<br />
Background color 65<br />
Shutdown 66<br />
Shutdown retarding time 66<br />
Overview flow 59<br />
Slot module type 59<br />
Source switching 65<br />
Input & communication unit 186, 189<br />
Install 189<br />
Remove 186<br />
Input balance 78–81<br />
Adjusting 79<br />
Black balance 80<br />
Introduction 78<br />
White balance 81<br />
Input module 187, 190<br />
Install 190<br />
Remove 187<br />
Input setup 59<br />
About 59<br />
Install 188–190, 196–199<br />
Front cover 196<br />
Input & communication unit 189<br />
Input cover 199<br />
Input module 190<br />
Lamp cover 198<br />
Lamp house 188<br />
Side cover 197<br />
Installation 11, 19<br />
Requirements 11<br />
Installation requirements 11–12<br />
Ambient temperature 11<br />
Clean air 11<br />
Humidity 11<br />
Image size 12<br />
234 R59770179 FLM R22+ 15/03/2010
Index<br />
<strong>Projector</strong> weight 11<br />
Screen type 11<br />
Internal pattern 132<br />
Selection 132<br />
IR communication 38<br />
IR control 153<br />
K<br />
Keystone 120<br />
L<br />
Lamp 111–115, 191<br />
Identification 114<br />
Overview flow 111<br />
Power 112–114<br />
CLO mode 113<br />
CLO target 114<br />
Power mode 111<br />
Realign 191<br />
Z-axis 115<br />
Lamp house 185, 188<br />
Install 188<br />
Remove 185<br />
Lamp identification 114<br />
Lamp power 112<br />
Lamp power mode 111<br />
Language 51, 162<br />
Selection 51, 162<br />
Laser Beams 8<br />
Layout 95–96, 99, 101–102, 105–109<br />
Copy 108<br />
Delete 107<br />
Layout file services 106<br />
Layout services 106–108<br />
Copy 108<br />
Delete 107<br />
Load 106<br />
Rename 107<br />
Save as 108<br />
Load 106<br />
Main window 95–96, 99<br />
Position 99<br />
Size 96<br />
Source 96<br />
Overview flow 95<br />
PIP 101–102, 105<br />
Activation 101<br />
Position 105<br />
Size 102<br />
Source 101<br />
Rename 107<br />
Save as 108<br />
Zoom - Focus 109<br />
LCD display menus 57<br />
lens 184<br />
cleaning 184<br />
Lens 23–24, 26, 119<br />
Available 23<br />
Focus 119<br />
Formulas 24<br />
Install 24<br />
Mid position 119<br />
Removal 26<br />
Selection 23<br />
Shift 119<br />
Zoom 119<br />
Lens adjustment 119<br />
Lenses 23<br />
Load 106<br />
Layout 106<br />
M<br />
Maintenance 181<br />
Menu memory 57<br />
Menu position 160–161<br />
Bar scale 161<br />
On screen menu 160<br />
Minimum delay 63<br />
N<br />
Native resolution 63<br />
Navigation 56<br />
Adjustment mode 56<br />
Network 149–152<br />
DHCP 150<br />
Gateway 152<br />
Introduction 150<br />
IP-address 151<br />
Subnet-mask 151<br />
No signal 65–66<br />
Background color 65<br />
Shutdown 66<br />
Shutdown retarding time 66<br />
Noise reduction 75<br />
Notice on safety 5<br />
O<br />
Off-Axis 16<br />
On screen menus 57<br />
On-Axis 16<br />
Order information 229<br />
Orientations 14–15<br />
Front projection 14<br />
Rear projection 15<br />
P<br />
PCMCIA 41<br />
Phase 73<br />
Physical installation 23<br />
Lenses 23<br />
PIP 100–102, 105<br />
Activation 101<br />
Introduction 100<br />
Position 105<br />
Size 102<br />
Source 101<br />
Position 99<br />
Main window 99<br />
Positioning 16<br />
Power 35<br />
Connection 35<br />
Preset color temperature 76<br />
Pressure 183<br />
Cooling circuit 183<br />
Prevent 6–8, 20<br />
Battery explosion 8, 20<br />
Device damage 7<br />
Electrical shock 6<br />
Fire hazard 8<br />
Personal injury 7<br />
<strong>Projector</strong> 14, 16–18<br />
Air inlets 18<br />
Air outlets 18<br />
Configurations 14<br />
Orientations 14<br />
Positioning 16<br />
Shift range 16<br />
Tilt range 17<br />
<strong>Projector</strong> address 52–53, 146–147<br />
Address 146<br />
Common address 147<br />
Controlling 53<br />
<strong>Projector</strong> control 145–162<br />
R59770179 FLM R22+ 15/03/2010 235
Index<br />
Art-Net DMX 153–157<br />
Art-Net activation 157<br />
DMX address 154<br />
DMX mode 156<br />
DMX monitor 155<br />
DMX universe 154<br />
Home lens at startup 157<br />
Buttons 158–159<br />
APA 159<br />
Auto 159<br />
Shortcut keys 159<br />
Standby 158<br />
IR control 153<br />
Language 162<br />
Selection 162<br />
Local LCD 161<br />
Local LCD contrast 162<br />
Local LCD time out 161<br />
Menu position 160–161<br />
Bar scale 161<br />
On screen menu 160<br />
Network 149–152<br />
DHCP 150<br />
Gateway 152<br />
Introduction 150<br />
IP-address 151<br />
Subnet-mask 151<br />
<strong>Projector</strong> address 146–147<br />
Address 146<br />
Common address 147<br />
Serial communication 148–149<br />
Baud rate setup 148<br />
Interface standard 148<br />
RS422 termination 149<br />
<strong>Projector</strong> status 38<br />
Q<br />
Quick language 51<br />
Selection 51<br />
Quick layout 51<br />
Rigging key 51<br />
Selection 51<br />
Quick set up 49–50<br />
Lens 49–50<br />
Lens functions 50<br />
LENS key 49<br />
PIP 50<br />
Text on/off 49<br />
Quick setup 19<br />
R<br />
RCU 19, 21–22<br />
Possibilities 22<br />
Rugged case 21<br />
XLR adaptor 21<br />
Realign 191<br />
Lamp 191<br />
Rear projection 15<br />
Refill mode 176<br />
Remote control 19–20, 38<br />
Battery 20<br />
Remote Control 50<br />
Lens functions 50<br />
PIP 50<br />
Remove 185–187, 193–195<br />
Front cover 193<br />
Input & communication unit 186<br />
Input module 187<br />
Lamp cover 195<br />
Lamp house 185<br />
Side cover 194<br />
Rename 107<br />
Layout 107<br />
Replace 181–183<br />
Dust filter 181–183<br />
Bottom 182<br />
Front 181<br />
Top 183<br />
Reset formatter 175<br />
Restore factory defaults 174<br />
Rigging clamps 28<br />
Rigging key 51<br />
Quick layout selection 51<br />
Rigging points 28<br />
RS232 39<br />
RS422 39<br />
S<br />
Safety 5–9, 20<br />
Battery explosion 20<br />
Cooling liquid circuit 7<br />
Device damage 7<br />
Electrical shock 6<br />
Fire hazard 8<br />
Flight cases 9<br />
General 5<br />
Important instructions 6<br />
Personal injury 7<br />
Replacement parts 8<br />
Servicing 8<br />
Saturation 72<br />
Save as 108<br />
Layout 108<br />
Save custom settings 176<br />
ScenergiX 134–137, 139, 141<br />
Activation 135<br />
Black level 141<br />
Horizontal overlap 136<br />
Introduction 134<br />
Preparations 135<br />
Size adjustment 139<br />
Vertical overlap 137<br />
White level 139<br />
Serial communication 39, 148–149<br />
Baud rate setup 148<br />
Interface standard 148<br />
RS422 termination 149<br />
Service 165–178<br />
Broadcast mode 177<br />
Convergence 172<br />
Diagnosis 167, 169–171<br />
Fan speeds 170<br />
SPI 171<br />
Start up 167, 169<br />
Temperatures 169<br />
Error logging 172<br />
Start up 172<br />
Identification 166<br />
Internal service patterns 173<br />
Overview flow 165<br />
Refill mode 176<br />
Reset formatter 175<br />
Restore factory defaults 174<br />
Save custom settings 176<br />
USB memory 178<br />
Versions 167<br />
Start up 167<br />
Voltages 168<br />
Start up 168<br />
Service patterns 173<br />
Internal patterns 173<br />
Servicing 185<br />
Sharpness 74<br />
Shift range 16<br />
Shortcut keys 56<br />
Shutdown, automatic 66<br />
No signal 66<br />
Retarding time 66<br />
236 R59770179 FLM R22+ 15/03/2010
Index<br />
Side keystone 120<br />
Size 96<br />
Main window 96<br />
Source 37<br />
Connection 37<br />
Source files 205<br />
Source selection 53<br />
Source switching 65<br />
Source timings 83<br />
Spare parts 229<br />
Spare power plug 36<br />
Specifications 221, 224–227<br />
5 cable input 224<br />
DVI HDCP 227<br />
DVI input 226<br />
FLM R22+ 221<br />
HDSDI–SDI input 225<br />
SPI 171<br />
Diagnosis 171<br />
Stacked 33<br />
Align 33<br />
Stacking 31<br />
Start up 46, 55<br />
Adjustment mode 55<br />
Errors and warnings 46<br />
Startup errors 46<br />
Startup warnings 46<br />
Suspend 28<br />
<strong>Projector</strong> 28<br />
Switching off 47<br />
Switching to standby 46<br />
T<br />
Table mount 27<br />
Align 27<br />
Temperatures 169<br />
Diagnosis 169<br />
Test patterns 57<br />
Adjustment mode 57<br />
Text on/off 49<br />
Tilt range 17<br />
Timings 83<br />
Tint 73<br />
Troubleshooting 213<br />
Error codes 213<br />
U<br />
Unpacking 12<br />
USB memory 178<br />
USB port 41<br />
V<br />
Versions 167<br />
Start up 167<br />
Volt meter 36<br />
Voltages 168<br />
Start up 168<br />
W<br />
Warnings 7<br />
Cooling liquid circuit 7<br />
Warp geometry settings 121–129<br />
4 corners 127<br />
About 121<br />
Barrel correction 126<br />
Horizontal keystone 123<br />
Load warp file 129<br />
Pincushion correction 126<br />
Reset 128<br />
Rotation 125<br />
Vertical keystone 124<br />
Warp status 122<br />
Window 95, 100<br />
PIP window 100<br />
Z<br />
Z-axis 115<br />
Lamp 115<br />
Z-axis adjustment 115<br />
Zoom - Focus 109<br />
Layout 109<br />
R59770179 FLM R22+ 15/03/2010 237
Index<br />
238 R59770179 FLM R22+ 15/03/2010
Revision Sheet<br />
To:<br />
Barco nv Media & Entertainment Division/Documentation<br />
Noordlaan 5, B-8520 Kuurne<br />
Phone: +32 56.36.82.11, Fax: +32 56.36.88.24<br />
E-mail: service.mne@barco.com, Web: www.barco.com<br />
From:<br />
Date:<br />
Please correct the following points in this documentation (R59770179/04):<br />
page wrong correct<br />
R59770179 FLM R22+ 15/03/2010