Hands On Shirodhara Treatment - Promolife
Hands On Shirodhara Treatment - Promolife
Hands On Shirodhara Treatment - Promolife

You also want an ePaper? Increase the reach of your titles
YUMPU automatically turns print PDFs into web optimized ePapers that Google loves.
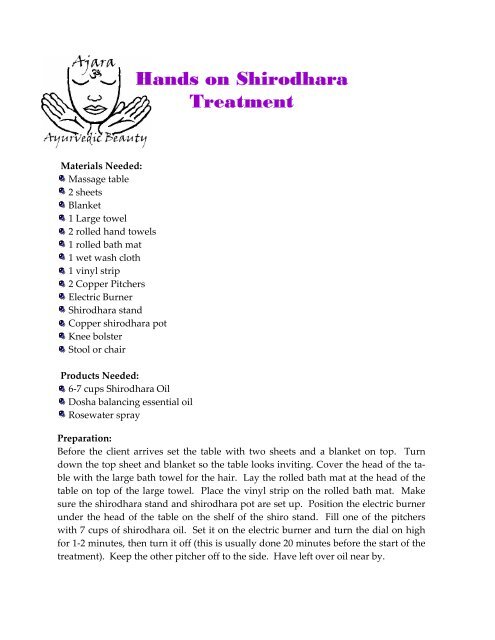
<strong>Hands</strong> on <strong>Shirodhara</strong><br />
<strong>Treatment</strong><br />
Materials Needed:<br />
Massage table<br />
2 sheets<br />
Blanket<br />
1 Large towel<br />
2 rolled hand towels<br />
1 rolled bath mat<br />
1 wet wash cloth<br />
1 vinyl strip<br />
2 Copper Pitchers<br />
Electric Burner<br />
<strong>Shirodhara</strong> stand<br />
Copper shirodhara pot<br />
Knee bolster<br />
Stool or chair<br />
Products Needed:<br />
6‐7 cups <strong>Shirodhara</strong> Oil<br />
Dosha balancing essential oil<br />
Rosewater spray<br />
Preparation:<br />
Before the client arrives set the table with two sheets and a blanket on top. Turn<br />
down the top sheet and blanket so the table looks inviting. Cover the head of the table<br />
with the large bath towel for the hair. Lay the rolled bath mat at the head of the<br />
table on top of the large towel. Place the vinyl strip on the rolled bath mat. Make<br />
sure the shirodhara stand and shirodhara pot are set up. Position the electric burner<br />
under the head of the table on the shelf of the shiro stand. Fill one of the pitchers<br />
with 7 cups of shirodhara oil. Set it on the electric burner and turn the dial on high<br />
for 1‐2 minutes, then turn it off (this is usually done 20 minutes before the start of the<br />
treatment). Keep the other pitcher off to the side. Have left over oil near by.
Procedure:<br />
1. When your client arrives take them into the treatment room. Tell them you will<br />
step out to let them undress. Have them get onto the table and under the sheet and<br />
blanket. Instruct them to lie facing upward with their head on the vinyl strip and<br />
their neck over the towel roll.<br />
2. After the client is on the table enter the room. Before doing anything else, make<br />
sure they are comfortable. Ask them if they are warm enough.<br />
3. Position the client with their head at the edge of the table. Let their hair hang<br />
over the end. Place the towel roll under their neck and tuck the vinyl strip under<br />
their head, but OVER the towel roll. Adjust the vinyl strip so that the edge of it is in<br />
the pitcher below the table. Make sure that the towel roll is set comfortably under<br />
their neck. Place the two rolled hand towels on either side of their head underneath<br />
the vinyl strip. Bring the bottom ends of the vinyl in toward each other to make the<br />
strip form a cone. Make sure the sides of the vinyl do not touch the head, as this<br />
will make the oil run on the outside of the strip.<br />
4. Place a bolster under the client’s knees. Double‐check their comfort.<br />
5. Let the client know that you will spray some rose water over their face and will<br />
then place a cool wet washcloth over their eyes.<br />
6. Test the oil temperature to make sure it is just right. If the oil is too warm, add<br />
some fresh oil from the bottle. If it is too cold, quickly warm it up. A temperature<br />
between 102‐108 degrees is desirable. Now pour half of ht e oil into the empty<br />
pitcher. Replace the other pitcher onto the burner<br />
7. Position the shirodhara pot over the center of the client’s forehead near the hairline.<br />
Make sure the tap on the copper pot is off. Pour the contents of the pitcher<br />
that is not on the electric burner into the shirodhara pot. Adjust the setting on the<br />
burner so it is between the 0 and the 1 on the dial.<br />
8. Before starting the oil, let the client know that you will let the oil run in a few<br />
moments. Tell them that when the treatment is finished you will quietly leave the<br />
room to let them rest and then you will come back to help get them off the table.<br />
Make sure the client understands that they may tell you if the temperature is uncomfortable.<br />
Encourage them to start to focus on their breathing. Turn on the tap<br />
and let the oil run onto their forehead. Ask if the temperature is ok. Take the oil<br />
very slowly around their hairline in order to coat the entire scalp. End with the oil<br />
on the third eye. Make sure the oil is not touching the washcloth or it will start to<br />
run into their eyes. You may ask if the oil temperature is comfortable once again,<br />
but otherwise do not do any talking after this time.
9. Pour the contents of the second pitcher into the shirodhara pot. To do this move the vinyl<br />
strip into the empty pitcher. Take the half‐full pitcher off the electric burner and set it down<br />
on a table next to you. Now, quietly set the empty pitcher on the electric burner. Refill the<br />
copper pot with the warm oil from the pitcher that just came off the burner. Do this as quietly<br />
as possible so as not to disturb the client’s meditation.<br />
10. Keep checking the oil temperature during the treatment. As the pitcher on the burner<br />
fills to the halfway point repeat this process. You will likely need to do this every 3 to 4 minutes<br />
until your treatment is over. Generally a shirodhara treatment will run 20 to 30 minutes.<br />
When finished, let the oil run completely out of the copper pot and cover the hole with your<br />
hand to make sure it does not start to drip. Taking the shirodhara pot and the empty pitcher<br />
with you, quietly leave the room.<br />
11. Wash the shirodhara pot and extra pitcher in a different room. Place a quarter size dollop<br />
of dish soap on a damp sponge. Without wetting any of the equipment, rub everything<br />
down with the soap. Rinse and dry.<br />
12. Re‐enter the room. The client may be asleep. Let them know you are there by removing<br />
the towel rolls from the sides of their head. Straighten out the vinyl strip and remove the<br />
washcloth from their eyes. Now you can talk to them and ask them how they are feeling.<br />
Gently squeeze the oil out of their hair. Have them lift their head so you may remove the<br />
towel roll and vinyl strip. Let the vinyl strip rest in the pitcher until ready for cleanup. Use<br />
the large towel under their head to help absorb the rest of the oil out of their hair<br />
13. Take 5 drops of essential oil into your palm. Spray some rosewater into the oil and close<br />
your palms together. Hold your hands just above the clients’ face and encourage them to inhale<br />
deeply. As they exhale, apply the mixture avoiding eye area.<br />
14. Begin Marma Therapy on the face neck and scalp (see Ayurvedic Facial Massage Sequence)<br />
15. Remove the blanket. Tell the client you will be holding up the sheet over your eyes and<br />
they can sit up facing away from you. Wrap the sheet under their arms and around their<br />
body. Come around the table to help them stand up. They may be a little disoriented. Escort<br />
them into the bathroom for their shower. Advise them that it is preferable to leave the oil in<br />
the hair for some time, but if they must remove it to put the shampoo into their hair before<br />
wetting in order to assist removal of all the oil. Thank them and leave them to their shower.<br />
16. Begin the rest of your clean up. Dispose of shirodhara medium (see options for oil disposal<br />
in Appendix.) Wipe the vinyl strip down with a paper towel. Take the second pitcher<br />
and the vinyl strip to the sink. Wash as before, rinse, and dry. Wipe down the stand and massage<br />
table with a dry towel, and then a moist towel with a cleaner like Citra Solve or Simple<br />
Green.
Electrical <strong>Shirodhara</strong><br />
<strong>Treatment</strong><br />
Materials Needed:<br />
Massage table<br />
2 sheets<br />
Blanket<br />
1 Large towel<br />
2 rolled hand towels<br />
1 rolled bath mat<br />
1 wet wash cloth<br />
1 vinyl strip<br />
1 Copper Pitcher<br />
Pump with tubing<br />
Electric Burner<br />
<strong>Shirodhara</strong> stand<br />
Copper shirodhara pot<br />
Knee bolster<br />
Stool or chair<br />
Optional: an on/off switch to plug the pump into<br />
Products Needed:<br />
6‐8 cups <strong>Shirodhara</strong> Oil<br />
Dosha balancing essential oil<br />
Rosewater spray<br />
Preparation:<br />
Before the client arrives set the table with two sheets and a blanket on top. Turn<br />
down the top sheet and blanket so the table looks inviting. Cover the head of the<br />
table with the large bath towel for the hair. Lay the rolled bath mat at the head of<br />
the table on top of the large towel. Place the vinyl strip on the rolled bath mat.<br />
Make sure the shirodhara stand and shirodhara pot are set up. Position the electric<br />
burner under the head of the table on the shelf of the shiro stand. Fill the pitcher<br />
with 7 cups of shirodhara oil. Set it on the electric burner and turn the dial on high<br />
for 1‐2 minutes, then turn it off (this is usually done 20 minutes before the start of<br />
the treatment). Have any extra oil you have left over near by. Just before your client<br />
arrives, place the pump in the pitcher and situate the vinyl tubing to empty into<br />
your shirodhara vessel. (see tips in appendix)
Procedure:<br />
1. When your client arrives, take them into the treatment room and tell them you will step<br />
out to let them undress. Have them get onto the table and under the sheet and blanket. Instruct<br />
them to lie facing upward with their head on the vinyl strip and their neck over the<br />
towel roll.<br />
2. After the client is on the table enter the room. Before doing anything else, make sure<br />
they are comfortable. Ask them if they are warm enough.<br />
3. Position the client with their head at the edge of the table. Let their hair hang over the<br />
end. Place the towel roll under their neck and tuck the vinyl strip under their head, but<br />
OVER the towel roll. Adjust the vinyl strip so that the edge of it is in the pitcher below the<br />
table. Make sure that the towel roll is set comfortably under their neck. Place the two<br />
rolled hand towels on either side of their head underneath the vinyl strip. Bring the ends of<br />
the vinyl in toward each other to make the strip form a cone. Make sure the sides of the vinyl<br />
do not touch the head, as this will make the oil run on the outside of the strip.<br />
4. Place a bolster under the client’s knees. Double‐check their comfort.<br />
5. Let the client know that you will spray some rose water over their face and will then<br />
place a cool wet washcloth over their eyes.<br />
6. Test the oil temperature to make sure it is just right. If the oil is too warm, add some<br />
fresh oil from the bottle. If it is too cold, quickly warm it up. A temperature between 102‐<br />
108 degrees is desirable.<br />
7. Before starting the oil, let the client know that you will let the oil run in a few moments.<br />
Tell them that when the treatment is finished you will quietly leave the room to let them<br />
rest and then you will come back to help get them off the table. Encourage them to start to<br />
focus on their breathing.<br />
8. Position the shirodhara pot over the center of the client’s forehead near the hairline.<br />
Make sure the tap on the pot is off. Turn on the electric pump. Adjust the setting on the<br />
burner so it is between the 0 and the 1 on the dial.<br />
9. Now let the oil run onto their forehead. Take the oil very slowly around their hairline in<br />
order to coat the entire scalp. End with the oil on the third eye. Make sure the oil is not<br />
touching the washcloth or it will start to run into their eyes. You may ask if the oil temperature<br />
is comfortable only at the beginning, but otherwise do not do any talking.
10.Keep checking the oil temperature during the treatment. Be as quiet as possible so as not<br />
to disturb the client’s meditation.<br />
11.Throughout the treatment, keep an eye on the oil level in the copper pitcher. If the oil<br />
level drops to just above the top of the pump, unplug (or switch off) the pump. This will<br />
make a slight gurgling noise. Restart the pump only after the pitcher has refilled for a moment,<br />
or until the shirodhara vessel has about one cup of oil left in it.<br />
12.At the end of the treatment turn off the tap on the shirodhara vessel and cover the hole<br />
with your hand to make sure it does not start to drip. Turn off the pump. Quietly leave the<br />
room for about five minutes to let the client rest.<br />
13. Re‐enter the room. The client may be asleep. Let them know you are there by removing<br />
the towel rolls from the sides of their head. Straighten out the vinyl strip and remove the<br />
washcloth from their eyes. Now you can talk to them and ask them how they are feeling.<br />
Gently squeeze the oil out of their hair. Have them lift their head so you may remove the<br />
towel roll and vinyl strip. Set the vinyl strip in the pitcher until you are ready for clean up.<br />
Use the large towel under their head to help absorb the rest of the oil out of their hair<br />
14. Take 5 drops of essential oil into your palm. Spray some rosewater into the oil and close<br />
your palms together. Hold your hands just above the clients’ face and encourage them to<br />
inhale deeply. As they exhale, apply the mixture avoiding eye area.<br />
15. Begin Marma Therapy for the head (see Ayurvedic Facial Massage Sequence)<br />
16. Remove the blanket. Tell the client you will be holding up the sheet over your eyes and<br />
they can sit up facing away from you. Wrap the sheet under their arms and around their<br />
body. Come around the table to help them stand up. They may be a little disoriented. Escort<br />
them into the bathroom for their shower. Advise them that it is preferable to leave the<br />
oil in the hair for some time, but if they must remove it, to put the shampoo into their hair<br />
before wetting in order to all of the oil. Thank them and leave them to their shower.<br />
17. Begin clean up. Dispose of shirodhara medium (see options for oil disposal in Appendix.)<br />
Wipe the vinyl strip down with a paper towel. Take the copper pitcher, vinyl strip,<br />
pump and shirodhara vessel to the sink. Allow the pump to drain for a few minutes. Place a<br />
dollop of dish soap on a damp sponge. Without wetting any of the equipment, rub everything<br />
down with the soap. Next, place more soap and a disinfectant in the copper pitcher.<br />
Fill it with water and drop in the pump. Turn the pump on, letting the water run through<br />
the tubing. Keep water running from the faucet into the pitcher as you do this. Empty the<br />
pitcher and refill it with denatured alcohol. Run the pump for one minute, then remove the<br />
tubing from the pump and hang to dry. Set the pump aside to dry. Rinse and dry the vinyl<br />
strip, shirodhara pot, and pitcher. Wipe down the stand and massage table with a towel,<br />
then a moist towel with a cleaner like Citra solve or Simple Green.
Ayurvedic Facial<br />
Massage Sequence<br />
1. Place a teaspoon of oil in hand; apply oil from shoulders to forehead.<br />
2. Start with fingers on upper trapezius and circle 7x both sides at the same time.<br />
3. Bring hands around shoulders and up the back of the neck. Cradle occipital bone<br />
with good pressure. Hand over hand up the back of the neck 7x.<br />
4. Thumbs on front of the neck at both sides glide upward and gently squeeze the sternocleidomastoid<br />
muscle (SCM) alternating sides on each stroke, 7x.<br />
5. Thumb on chin, and index finger under the edge of the mandible glide from chin to<br />
lateral jaw alternating sides on each stroke, 7x.<br />
6. Index finger on chin and thumb above upper lip, glide around lips to the ear alternating<br />
sides on each stroke, 7x.<br />
7. Using index finger, start at either side of the nose, glide under the maxillary arch and<br />
to the ear both sides at the same time 7x.<br />
8. Using both thumbs glide over the top of the maxillary arch to the ear, both sides at<br />
the same time, 7x.<br />
9. Using ring finger, circle the eyes going medial to lateral on eyebrows and continuing<br />
around the orbital ridge gently 7x.<br />
10. Glide up the sides of the nose with your middle finger. You can either alternate fingers<br />
or do both sides at the same time; whichever is more comfortable for you.<br />
11. Bilaterally, press on avarta marma at the very point where the eyebrow meets the<br />
nose. This will probably be sensitive on most people.<br />
12. Squeeze along the eyebrow in 3-4 points moving medial to lateral. Use extra caution<br />
not to poke the eye. Do this with the ring or index finger and thumb, with thumb on<br />
top edge of the brow.<br />
13. Using index, middle, and ring finger on both hands circle 7x at the temporomandibular<br />
joint (TMJ) with firm pressure.<br />
14. Same hand position, glide up sides of face, both hands at the same time and circle at<br />
the temples 7x.<br />
15. Glide back down toward TMJ and back up toward temple (figure 8 style) 7x. Use<br />
light pressure on the down stroke and firmer on the upstroke.
16. Circles on the temples, 7x with firm pressure.<br />
17. Alternating hands, stroke up the forehead using the whole palm, 7x.<br />
18. Hand over hand, stroke medial to lateral on forehead 7x.<br />
19. Circles on temples with index an ring finger, 7x.<br />
20. Run hands down the sides of the face and neck return to the starting position on<br />
trapezius.<br />
21. Repeat the circles on upper traps 7x.<br />
22. Place thumb on the amsa marma point on the joint where the clavicle meets the scapula.<br />
Press and hold for 7 seconds.<br />
23. Glide hands up the back of the neck to the occipital bone; Hold pressure with your<br />
fingertips.<br />
24. Massage the ears, both at the same time. Gently tug down at the lobe, sideways on the<br />
edge, and upward at the top of the ear 3x each point.<br />
25. Squeeze marma point in the center of chin. Hold for 7 seconds. Glide to the point half<br />
way between the chin and TMJ, press and hold 7 seconds. Glide to TMJ, press and hold<br />
7 seconds.<br />
26. Press thumbs above upper lip and hold for 7 seconds. Glide under maxillary arch, press<br />
and hold 7 seconds. Glide next to ear, press and hold 7 seconds.<br />
27. Press on both sides of the nose and hold for 7 seconds, glide to top of maxillary arch,<br />
press and hold for 7 seconds. Glide to temples, press and hold 7 seconds.<br />
28. Using ring finger, press inside corners of the eyes 7 seconds, glide to inferior orbital<br />
ridge, press and hold 7 seconds, glide to outside corner of eyes, press and hold on outer<br />
orbital ridge 7 seconds.<br />
29. Press avarta marmas. Hold 7 seconds.<br />
30. Squeeze along superior orbital ridge in 3-4 points as in step #12. Hold each point 3 seconds.<br />
31. Using thumb massage third eye. Press thumbs up the midline of the forehead to the<br />
crown chakra. Massage the scalp. Gently and slowly remove your hands.
Tips for Setting up and Maintaining Ajara<br />
<strong>Shirodhara</strong> Equipment<br />
• Attach the shelving to the stand before assembling the rest of the unit.<br />
• Tighten the union joints with wrenches as you put each piece together.<br />
• If the arm of the stand is sticking in the joint, wipe it with Vaseline.<br />
• Place the slider and chain on the arm of the shirodhara stand last.<br />
• Be sure the hole in your pot is free from debris by running a pipe cleaner<br />
in the valve before the first use and between each use. Hair can get<br />
caught in the valve during the treatment as well. It is a good idea to have<br />
something rigid nearby to run through the hole in this case.<br />
• If using the shirodhara pump, insert the tubing into the hose clamp provided,<br />
then attach the tubing to the pump. Tighten the hose clamp down<br />
with a screw driver so that the tubing adheres to the pump.<br />
• Place the electric burner on the shelving, and your oil into the pitcher.<br />
Place the oil on the heater approximately 10 minutes before the shirodhara<br />
will begin. If using a pump DO NOT PLACE THE PUMP IN THE<br />
OIL YET. Turn the burner to the highest setting for about 1 minute. The<br />
turn the burner completely off. Wait 10 minutes. Your oil should be to the<br />
proper temperature for a warm shirodhara treatment. You may now place<br />
the pump in the oil.<br />
•If using the pump, wrap the tubing around the stand and insert as shown, avoiding kinks. If your<br />
tubing has kinks in it, pinch the kink and bend it the opposite direction. This will round the hose.<br />
•Make sure the valve on the shirodhara pot is off. The lever should be turned upward. To open<br />
the valve, simply place the lever pointing downward.<br />
•When you start the oil, turn the dial on the burner to between the 0 and 1. Because the burner<br />
has a self regulating thermostat the light may not stay on during the entire treatment.<br />
•When finished, close the valve on the shirodhara pot, unplug the pump, and turn the burner off.<br />
•To keep your burner, pan and shirodhara pot clean, simply place a quarter sized dollop of liquid<br />
dish soap on a lightly damp sponge. Wipe down completely before rinsing with any water. Drain<br />
the pump, then set it in a bath of alcohol for 1-2 minutes to kill germs and remove oil residues.<br />
•To bring your stand back to a shine, scrub with a dry Heavy Duty Green Scotch Brite pad.
Instructions for Assembly of the Ajara <strong>Shirodhara</strong> Stand<br />
Slider<br />
Place the two copper straps together. Put one screw into one adjoining side and attach a nut. Now put the<br />
chain on the bottom of the two straps. Place the two straps onto the arm and insert the second screw. Tighten<br />
both nuts down with a pliers and screw driver.<br />
Top Slider (side view)<br />
Top Slider (front view)<br />
Shelf<br />
Center the shelf on the stand, so that there are holes running along each side of the center pole. Place a screw<br />
into a washer and insert from the top of the shelf into the fourth hole from the front of the shelf, along each side<br />
of the pole. Place the tube strap over the screws, and tighten each one down with a single nut. See picture #1<br />
Do the same thing on the back end of the shelf. This time, insert the screws in the second hole from the back.<br />
See picture #2.<br />
Front underneath<br />
Back underneath with strap and nuts<br />
Complete shelf
How to use the <strong>Shirodhara</strong> Oil Pump<br />
1<br />
Wrap the vinyl hose around the shaft of the shirodhara<br />
stand. <strong>On</strong>ce the tubing reaches the level of the top of<br />
the copper pot, run the tubing through one of the rings<br />
on the chain going from the outside toward the inside.<br />
Next, bring the tubing to the other side of the shirodhara<br />
pot, near the opposite ring. Insert the tubing<br />
into the opposite ring from the OUTSIDE toward<br />
the inside. The end of the tubing should now<br />
be pointing into the shirodhara pot, and the pot<br />
should be hanging mostly level.<br />
2<br />
3<br />
Slide the tubing through both rings until it curls up in<br />
the bottom of the shirodhara pot. Make sure that the<br />
tubing around the stand is not hanging anywhere near<br />
the client’s head or in the way of the shirodhara stream.<br />
Flatten the tubing so the oil will run smoothly. Avoid<br />
kinking the tube anywhere along the way.<br />
Open the intake vent on the pump all the way, so that the lever runs horizontally.<br />
Submerge the pump in the warm oil and adhere the suction cup feet to<br />
the bottom of the pot. Make sure the pump is completely covered with oil, or it<br />
will make noise, and then stop running properly. Turn the pump on by plugging<br />
it into the wall. The pump will make a slight whirring noise at first while<br />
it is getting started, and then will be quiet. <strong>On</strong>ce the oil has been running for a<br />
minute or two, you may choose to close the intake vent slightly so the oil runs<br />
slower. Monitor the oil level throughout the treatment. For someone with very<br />
long or porous hair, more oil may need to be added during the treatment.