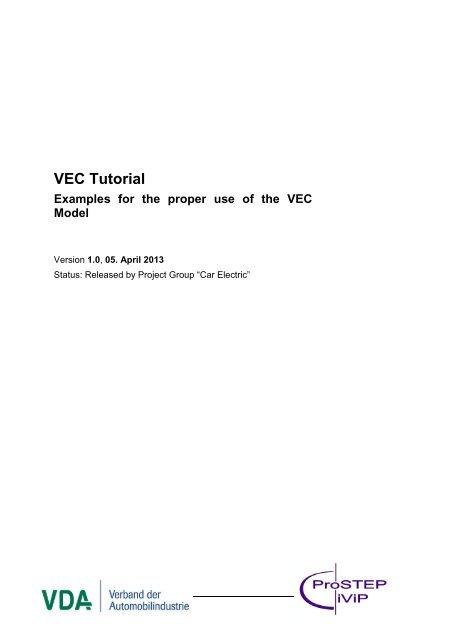
VEC Tutorial
VEC Tutorial
VEC Tutorial

You also want an ePaper? Increase the reach of your titles
YUMPU automatically turns print PDFs into web optimized ePapers that Google loves.
<strong>VEC</strong> <strong>Tutorial</strong><br />
Examples for the proper use of the <strong>VEC</strong><br />
Model<br />
Version 1.0, 05. April 2013<br />
Status: Released by Project Group “Car Electric”<br />
© VDA Project Group “Car Electric”
<strong>VEC</strong> <strong>Tutorial</strong> Version 1.0, 05. April 2013 Page 2 of 27<br />
Abstract<br />
The VDA recommendation 4968 “Vehicle Electric Container (<strong>VEC</strong>)” defines an<br />
information model, a data dictionary, and an XML schema derived from and compliant<br />
to the model.<br />
The intention of the model was to cover a wide range of use cases and application<br />
scenarios. For this reason the specification have to be kept generic in some degree.<br />
To avoid dialects in <strong>VEC</strong> implementations further guidelines or recommendations are<br />
necessary. This document contributes to the unambiguous interpretation of the <strong>VEC</strong><br />
standard. For various wiring harness definition or electrical system aspects the correct<br />
instantion is shown.<br />
© VDA Project Group “Car Electric”
<strong>VEC</strong> <strong>Tutorial</strong> Version 1.0, 05. April 2013 Page 3 of 27<br />
Document History<br />
Version Date Author Description<br />
1.0 05.04.2013 Johannes Becker First release; Compliant to <strong>VEC</strong><br />
model v1.0.5<br />
© VDA Project Group “Car Electric”
<strong>VEC</strong> <strong>Tutorial</strong> Version 1.0, 05. April 2013 Page 4 of 27<br />
Table of content<br />
1 Components & Instantiations ........................................................................................ 5<br />
1.1 Basic Component Description ............................................................................... 5<br />
1.2 PartVersion and their Relationships ...................................................................... 6<br />
1.2.1 Chronological Relationships 6<br />
1.3 Basic Component Instantiation .............................................................................. 6<br />
1.4 Separation of a Part and its Description ................................................................ 7<br />
1.5 Wire Specification .................................................................................................. 8<br />
1.6 ECU / EE Component .......................................................................................... 10<br />
2 Usage Nodes .............................................................................................................. 11<br />
3 Contacting Types ........................................................................................................ 11<br />
3.1 Standard Contact ................................................................................................. 12<br />
3.2 Multicrimp Contact ............................................................................................... 13<br />
3.3 Ringterminal / Splice Contact .............................................................................. 14<br />
3.4 Bridge Terminal ................................................................................................... 14<br />
3.5 Coax Contact ....................................................................................................... 15<br />
3.6 Mating .................................................................................................................. 16<br />
4 Placements ................................................................................................................. 17<br />
4.1 Simple Wire Protection ........................................................................................ 17<br />
4.2 Large Area Wire Protections................................................................................ 18<br />
4.3 Fixed Components (Single Location) ................................................................... 19<br />
4.4 Fixed Components (Multiple Locations) .............................................................. 20<br />
5 Composite Parts ......................................................................................................... 21<br />
5.1 Module ................................................................................................................. 21<br />
5.2 Harness ............................................................................................................... 22<br />
5.3 Assemblies .......................................................................................................... 23<br />
6 Systems Schematic .................................................................................................... 24<br />
6.1 Meta-Information ................................................................................................. 24<br />
6.2 Variant Management for ECU’s ........................................................................... 25<br />
7 Packaging ................................................................................................................... 26<br />
7.1 External Graphics ................................................................................................ 26<br />
7.2 External Installation Instuctions ........................................................................... 27<br />
© VDA Project Group “Car Electric”
<strong>VEC</strong> <strong>Tutorial</strong> Version 1.0, 05. April 2013 Page 5 of 27<br />
1 Components & Instantiations<br />
1.1 Basic Component Description<br />
Figure 1: Basic Component Description<br />
Many of the classes in the <strong>VEC</strong> are used for the defintion of the general properties of a<br />
component (Part Master Data). This is done with specifications (<strong>VEC</strong> Naming<br />
Convention “XXXSpecification”). A specification defines all properties of a component<br />
that are that are independant of a specific usage of the component (e.g. the number of<br />
cavities of connector or the cross section area of a wire). The type of the component,<br />
and thereby the available properties, is defined by the classification of the specification<br />
(e.g. ConnectorHousingSpecification for a connector housing). The PDM Information of<br />
a component (e.g. the part number) is defined by a PartVersion.<br />
Since a component can have properties of different classifications (e.g. a connector can<br />
also have properties of a fixing) it is possible in the <strong>VEC</strong> to define multiple different<br />
specifications for a single part. The attribute “primaryPartType” defines which the<br />
primary character of the component is.<br />
© VDA Project Group “Car Electric”
<strong>VEC</strong> <strong>Tutorial</strong> Version 1.0, 05. April 2013 Page 6 of 27<br />
1.2 PartVersion and their Relationships<br />
1.2.1 Chronological Relationships<br />
Figure 2: PartVersions and chronological Relationships<br />
This example demonstrates how chronological relationships between PartVersion can<br />
be established. The <strong>VEC</strong> offers two types of relationships:<br />
1. Derivation: Derivation means that the successor of the relationship is a newly<br />
developed part (variant) based on an existing part.<br />
2. Sequence: Sequence means that the successor is a replacement for the predecessor.<br />
1.3 Basic Component Instantiation<br />
Figure 3 Component Instantiation with Part Number<br />
If a component should be used in the <strong>VEC</strong> it must be instantiated. This can be done in<br />
two ways. The first way is used if a concrete part number is known (see Figure 3). The<br />
second way is used if a part number is unkown and only requirements for a component<br />
should be defined (see Figure 4).<br />
The first case (see Figure 3) is quite similar to the way how components have been<br />
used in the KBL. The part is identified by a PartVersion with a PartNumber, Version and<br />
the issueing Company. The general properties of the component are defined by a<br />
© VDA Project Group “Car Electric”
<strong>VEC</strong> <strong>Tutorial</strong> Version 1.0, 05. April 2013 Page 7 of 27<br />
specification (a FixingSpecification in the example). The use of the component is<br />
expressed by a “PartOccurrence”. All usage specific properties of component (e.g. the<br />
length of a wire) are defined by a Role. The used role must correspond to a<br />
specification. The <strong>VEC</strong> Naming Convention is XXXRole corresponds to<br />
XXXSpecification.<br />
In object oriented terms, one can say the PartVersion and Specification are defining the<br />
type (or classification) of a component, the PartOccurrence and the Role are defining<br />
the instance of a component.<br />
Figure 4 Component Instantiation without Part Number<br />
As mentioned above, there are use cases where it is necessary to define properties of<br />
component (instance), without having a concrete part number. This is quite common for<br />
example in the elektrological design, where for example the cross section area of a wire<br />
is specified, but the colouring of the wire is not yet known. In these cases the<br />
requirements for component have to be defined without having a concrete<br />
“PartVersion”.<br />
For these cases, the <strong>VEC</strong> offers the concept of PartUsages. A PartUsage behaves like<br />
a PartOccurrence (it has instance specific attributes and can define Roles), but it is not<br />
necessary to reference a PartVersion. Instead it is possible to directly reference the<br />
needed specifications, which represent the requirements on the concrete component,<br />
selected later in the process.<br />
1.4 Separation of a Part and its Description<br />
Figure 5: Part and Description<br />
The figure above illustrates one of the most fundamental concepts of the <strong>VEC</strong> – the<br />
separation of a part and its description. In the <strong>VEC</strong> a part (PartVersion) does not contain<br />
any information about the part, except its PDM Information (PartNumber,<br />
PartVersion…). All the information about the technical properties of a part is expressed<br />
by a subclass of PartOrUsageRelatedSpecifications (e.g. a WireSpecification). The<br />
specifications itsselfes are contained in a DocumentVersion.<br />
This approach enables the <strong>VEC</strong> to address two scenarios properly:<br />
© VDA Project Group “Car Electric”
<strong>VEC</strong> <strong>Tutorial</strong> Version 1.0, 05. April 2013 Page 8 of 27<br />
• The description of a part is changed, but the part itself is not changed (rereleased). This<br />
can happen for example if the actual technical properties of the part stay the same, but<br />
the description is extended or corrected.<br />
• A document and the contained specifications are describing more than one part (e.g. a<br />
drawing for a certain class of terminals). In this case it can happen that the document<br />
and the specifications are changed, but not all of the described parts have to be<br />
changed (rereleased).<br />
In the next sections some examples for the specification of parts are presented. In order<br />
to keep the examples as simple as possible, the described PartVersions and the<br />
containing DocumentVersions are left out. Nevertheless they are needed for a real<br />
instantiation of the <strong>VEC</strong>.<br />
1.5 Wire Specification<br />
Figure 6 Single Core Specification<br />
The figure above illustrates the specification of a single core wire. The WireSpecification<br />
is the PartOrUsageRelatedSpecification describing the PartVersion. In order to make it<br />
possible to reuse the specification of the different WireElements (see Multicore), the<br />
actual definition of the structure of the wire is delegated to a WireElementSpecification.<br />
The WireElement defines the context specific identification of a<br />
WireElementSpecification in the context of a specific WireSpecification (mainly needed<br />
for multicores, but due to a consistent modeling approach also necessary for single<br />
cores). The WireElement is used for reference when a WireSpecification is instantiated<br />
(e.g. by a PartOccurrence).<br />
© VDA Project Group “Car Electric”
<strong>VEC</strong> <strong>Tutorial</strong> Version 1.0, 05. April 2013 Page 9 of 27<br />
The following example describes the specification of a multicore wire (see Figure 7).<br />
The example uses a multicore, which is insulated with a grey insulation, shielded and<br />
which contains two FLRY cores of different colouring that are a twisted pair.<br />
Figure 7 Multicore example<br />
Figure 8: Multi Core Wire<br />
Figure 8 displays the instantiation of the multicore wire example in the <strong>VEC</strong>. The<br />
hierarchy of the wire is highlighted in the figure in green. The specification of the brown<br />
and green FLRY core (0.35-BRGN) is actually the same as the specification in the<br />
single core example (highlighted by the red outline in the figure). It is reused and not<br />
defined redundantly. Since it is the same WireElementSpecification object, the context<br />
specific naming of the WireElement is necessary, as mentioned in single core example<br />
(highlighted in yellow).<br />
The only difference between the two WireElements representing the two cores is the<br />
colouring of the insulation. Therefore the two WireElementSpecifcations share the same<br />
CoreSpecfication, but have individual InsulationSpecifications. In the context of the<br />
displayed WireSpecification the Brown & Green Core is addressed with the identification<br />
© VDA Project Group “Car Electric”
<strong>VEC</strong> <strong>Tutorial</strong> Version 1.0, 05. April 2013 Page 10 of 27<br />
“1”, the second Core is addressed with the identification “2”. The two Cores are grouped<br />
together by a third WireElementSpecification (2x0.35-BRGN-RTBL).<br />
This third WireElementSpecification defines the type of grouping by a<br />
WireGroupSpecification. In the example the Grouping is the definition of a twist of the<br />
two Cores. It also defines the insulation around the two SubWireElements by an<br />
InsulationSpecification. Since the defined wire has a conductive shield as well, the<br />
described WireElementSpecification references a CoreSpecification, too. The<br />
crosssection area in the CoreSpecification defines the nominal corssection area of the<br />
conductive material used in the shield.<br />
1.6 ECU / EE Component<br />
Figure 9 ECU / EE-Component<br />
This example illustrates how an ECU can be defined and instantiated. The left hand<br />
side shows the master data definition of the EE-Component. The right hand side of the<br />
diagram shows the usage of the EE-Component in a concrete place. An EE-Component<br />
is defined by an EEComponentSpecification. An EE-Component can have multiple<br />
HousingComponents, which can be defined more detailed with a<br />
ConnectorHousingSpecification (not shown in the example). These<br />
HousingComponents have PinComponents representing the different electrical pins of<br />
an EE-Component. The PinComponent can carry specific properties of the Pin (e.g. the<br />
Logical Signal). The physical properties of the pin can be defined by an associated<br />
TerminalSpecification (e.g. the maximum current for the pin). A HousingComponent can<br />
have multiple pins with different properties sharing the same TerminalSpecification.<br />
When the EE-Component is used, it must be instantiated. In the example this is done<br />
with a PartUsage (no PartNumber is known for the EE-Component). For each<br />
subelement of the EEComponentSpecification a corresponding element is used for the<br />
instantiation. The doubled instantiation of the pin with a PinComponentReference and a<br />
© VDA Project Group “Car Electric”
<strong>VEC</strong> <strong>Tutorial</strong> Version 1.0, 05. April 2013 Page 11 of 27<br />
TerminalRole is needed, in order to provide a common interface for other areas of the<br />
<strong>VEC</strong>. For example the Mating defines the connection between the sides of an inliner or<br />
between a harness connector and an ECU by using the TerminalRole.<br />
2 Usage Nodes<br />
Figure 10 Usage Nodes<br />
The example illustrates the use of UsageNodes. A UsageNode represents a position in<br />
an abstract vehicle. For example the Head Light Left. UsageNodes belong to the master<br />
data and they are defined on some company wide level. They can be used to enforce<br />
consistent naming over different projects and different development streams (e.g.<br />
between Geometrie and Elektrologic).<br />
A UsageNode can be subdivided into more detailed UsageNodes. For example the<br />
Head Light can be split up into Main Beam, Low Beam and Direction Indicator.<br />
3 Contacting Types<br />
The contacting in the <strong>VEC</strong> defines the relationship between Cavities, WireEnds,<br />
Terminals and Seals. Since there are various types of contactings possible, the different<br />
types are not defined explicitly in the <strong>VEC</strong>. The <strong>VEC</strong> offers a quite generic structure (the<br />
Contacting), which should be able to support all the different possible types. This is<br />
necessary, because the different contacting types are driven by technical requirements<br />
and new contactings might emerge over the time. The downside of the generic structure<br />
is that the structural schema allows constellations that are not sensible from a technical<br />
point of view as well. The following sections show the different contacting types used<br />
today, and how they have to be implemented in the <strong>VEC</strong>.<br />
Since the contacting can be used for different levels of abstraction (Product Definiton or<br />
Elektrological Wiring) only the “Role-Side” of the necessary objects is shown.<br />
Necessary PartOrUsageRelatedSpecifications, PartOccurrences, PartUsages and<br />
PartVersion are omitted.<br />
© VDA Project Group “Car Electric”
<strong>VEC</strong> <strong>Tutorial</strong> Version 1.0, 05. April 2013 Page 12 of 27<br />
3.1 Standard Contact<br />
Figure 11: Standard Contacting<br />
A standard Contacting is the most common case in a wiring harness. For a standard<br />
contact you have one wire end that has one terminal crimped on it, which is placed in<br />
one cavity. It exists in two variants, sealed and unsealed. The example displays the<br />
sealed variant, for the unsealed variant the CavitySeal and the CavityPlug have to be<br />
omitted.<br />
The contacting is defined by a ContactPoint, contained in a ContactingSpecification. It is<br />
possible (and recommended) to define multiple ContactPoints in one<br />
ContactingSpecification. Usally there exists one ContactingSpecification per<br />
DocumentVersion in the scope. So for example if the <strong>VEC</strong>-File represents a 150%-<br />
Harness definition, then you will have on ContactingSpecification for the complete<br />
harness.<br />
A ContactPoint is defined as a point of exactly one electrical potential, which means all<br />
conducting components related to the ContactPoint are short-circuited.<br />
The ContactPoint defines the terminal that is used for the contacting. It is then split up<br />
into two parts, the side of the crimp of the terminal (represented by the WireMounting)<br />
and the side of the terminal, which is placed in the cavity (represented by the<br />
CavityMounting). Since the example is about a sealed standard contact, the<br />
WireMounting displayed references exactly one CavitySeal and one WireEnd, which<br />
means these two components are crimped together onto the terminal. On the other side<br />
the CavityMounting defines the Cavity in which the terminal will be placed. For a sealed<br />
environment it is necessary, that the Cavity is plugged with a CavityPlug, in case the<br />
Cavity is not occupied by a contacting. If the Cavity is occupied, the CavityMounting<br />
defines explicitly, which CavityPlugs are replaced by its existence.<br />
© VDA Project Group “Car Electric”
<strong>VEC</strong> <strong>Tutorial</strong> Version 1.0, 05. April 2013 Page 13 of 27<br />
3.2 Multicrimp Contact<br />
Figure 12 Multicrimp Contact<br />
A Multicrimp is quite similar to the standard contact, with the difference that there is<br />
more than one wire crimped onto the terminal. Therefore the displayed example is quite<br />
the same. The differences are:<br />
• There is no CavityPlug or CavitySeal, since it is not usefull / possible from a technical<br />
point of view to seal a multicrimp.<br />
• There are two (or more) WireEnds associated with the WireMounting.<br />
For clarification of the example the two WireElementReferences reference their Signal.<br />
It is the same, since the two WireEnds are crimped onto one Terminal and therefore<br />
they are set to one single electrical potential. This is only displayed in the example in<br />
order to make it clear, what is meant by “A ContactPoint has one single electrical<br />
potential”. This is not a restriction of the <strong>VEC</strong>, since the development processes might<br />
need (or create) different signal names for the same electrical potential.<br />
© VDA Project Group “Car Electric”
<strong>VEC</strong> <strong>Tutorial</strong> Version 1.0, 05. April 2013 Page 14 of 27<br />
3.3 Ringterminal / Splice Contact<br />
Figure 13 Ringterminal / Splice Contact<br />
The structure displayed in the example applies to ring terminals and splices as well. On<br />
the side of the wire it is the same as a multi crimp. The difference is that no cavity<br />
mounting is used, since a ring terminal / splice has no cavities.<br />
3.4 Bridge Terminal<br />
Figure 14 Bridge Terminal<br />
A bridge terminal is a terminal that has a wire crimped on it and which occupies more<br />
than one cavity (short-circuited). On the side of the wire it is the same as a standard<br />
contact. On the side of the cavities it simply references more than one cavity.<br />
© VDA Project Group “Car Electric”
<strong>VEC</strong> <strong>Tutorial</strong> Version 1.0, 05. April 2013 Page 15 of 27<br />
3.5 Coax Contact<br />
Figure 15 Coax Contact<br />
Figure 15 displays the proper definition of a coax contacting. In the case of coax contact<br />
one single terminal is used, but two different electrical potentials are connected to it.<br />
Therefore two ConcactPoints are required, because one ContactPoint can only be used<br />
for one electrical potential (see the definition of a ConcactPoint).<br />
Both ContactPoints reference the same occurrence of the terminal (TerminalRole) and<br />
use the Cavity. Each ConcatPoint mounts a single WireElement to the TerminalRole. In<br />
this example the two WireElements belong to the same multi-core wire.<br />
In order to make the example more clearly, the next figure displays the definition of such<br />
a “coax-cavity” in an EEComponent.<br />
© VDA Project Group “Car Electric”
<strong>VEC</strong> <strong>Tutorial</strong> Version 1.0, 05. April 2013 Page 16 of 27<br />
Figure 16: Coax Definition for an EEComponent<br />
The HousingComponent of an EEComponent defines on one hand the pins<br />
(elektrological relevant information) in this HousingComponent and on the other hand a<br />
ConnecorHousingSpecification (the layout and design of the HousingComponent). The<br />
PinComponents are then positioned in the cavities. In the case of a coax contact, two<br />
PinComponents (the different electrical potentials) are placed in one cavity.<br />
3.6 Mating<br />
Figure 17 Mating<br />
© VDA Project Group “Car Electric”
<strong>VEC</strong> <strong>Tutorial</strong> Version 1.0, 05. April 2013 Page 17 of 27<br />
The contacting defines in the <strong>VEC</strong> the relation of a terminal, a wire, a seal and a cavity<br />
in a connector on the harness side. The mating can be used to connect the harness<br />
side to another harness (in the case of an inliner) or to an ECU. The figure above shows<br />
a simplified example of the connection between an ECU (highlighted in yellow) and a<br />
wiring connection (highlighted in blue). The MatingPoint simply connects the two<br />
TerminalRoles on each side.<br />
4 Placements<br />
A Placement defines the way how a component is associated to the topology. The<br />
following sections contain examples about the different types of placements.<br />
4.1 Simple Wire Protection<br />
Figure 18 Simple Wire Protection<br />
The Figure above displays the placement of a simple wire protection. The<br />
PartOccurrence is placed with a OnWayPlacement. This means the placed component<br />
covers a linear area of the harness topology. The start and the end of this area is<br />
defined with two Locations. In the shown situation the StartLocation is a<br />
SegmentLocation, which means the start is somewhere in the middle of a<br />
TopologySegment. It is defined to be at 100mm measured from the EndNode of the<br />
Segment. The EndLocation of the WireProtection is located on a TopologyNode with a<br />
NodeLocation. It is not valid to define Location with SegmentLocation, which could be<br />
also expressed by NodeLocations. This means for SegmentLocations an offset of 0 or<br />
equal to the segment length is illegal.<br />
© VDA Project Group “Car Electric”
<strong>VEC</strong> <strong>Tutorial</strong> Version 1.0, 05. April 2013 Page 18 of 27<br />
4.2 Large Area Wire Protections<br />
Figure 19: Large Area Wire Protections<br />
In some cases it is necessary to place a wire protection over a greater area of the<br />
topology, consisting of more than one TopologySegment (e.g. Tubes with a fixed<br />
length). For these cases the OnWayPlacement defines two locations for the start and<br />
the end and a path along which the wire protection is placed. The path is an ordered list<br />
of the segments from the start to the end. If a SegmentLocation is used for the start or<br />
the end the path must contain these segments as well.<br />
For each TopologySegment the use of Start- and End-Node has no semantik relevance.<br />
The names are just used to make it possible to identify the corresponding<br />
TopologyNodes correctly e.g. when defining the anchor for a SegmentLocation.<br />
© VDA Project Group “Car Electric”
<strong>VEC</strong> <strong>Tutorial</strong> Version 1.0, 05. April 2013 Page 19 of 27<br />
4.3 Fixed Components (Single Location)<br />
Figure 20 Fixed Components<br />
Fixed components are elements that are placed on a certain point in the topology, such<br />
as Connectors, Fixings and so on. These components are placed with an<br />
OnPointPlacement as shown in the example. If the Component has to be placed on a<br />
Node (e.g. a Connector) a NodeLocation is used. If the Component has to be placed on<br />
a Segment a SegmentLocation is used. The usage and constraints for the Locations are<br />
the same like the ones for OnWayPlacements.<br />
© VDA Project Group “Car Electric”
<strong>VEC</strong> <strong>Tutorial</strong> Version 1.0, 05. April 2013 Page 20 of 27<br />
4.4 Fixed Components (Multiple Locations)<br />
Figure 21 Fixed Components (Multiple Locations)<br />
Some components, for example channels, may be placed on multiple positions in the<br />
Topology. For example a channel can have two or more reference points (e.g. the<br />
outlets) that must be associated to the topology. In these cases an OnPointPlacement<br />
with more than one location is used. The attribute “matchingId” of the Location can be<br />
used to address the corresponding reference point of the component.<br />
© VDA Project Group “Car Electric”
<strong>VEC</strong> <strong>Tutorial</strong> Version 1.0, 05. April 2013 Page 21 of 27<br />
5 Composite Parts<br />
This section is about the definition of Harnesses, Modules and Assemblies.<br />
5.1 Module<br />
Figure 22 Definition of a Module<br />
The figure shows how a module can be defined in a 150% environment. A module<br />
basically consists of a number of PartOccurrences. In a 150%-Harness the<br />
PartOccurrences can be shared between modules. Therefore a single container is<br />
needed, which defines a PartOccurrences that belong to the Harness, independent from<br />
the Module. This is done by a CompositionSpecification. The PDM information of a<br />
module is stored in the PartVersion. The PartOccurrences belonging to the Module (the<br />
“Bill Of Material”) are defined by a PartStructureSpecification.<br />
© VDA Project Group “Car Electric”
<strong>VEC</strong> <strong>Tutorial</strong> Version 1.0, 05. April 2013 Page 22 of 27<br />
5.2 Harness<br />
Figure 23 Definition of a Harness<br />
In the philosophy of the <strong>VEC</strong> a harness is quite the same as a module. A module is<br />
formed by a set of occurrences of components. A harness is formed by a set of<br />
occurrences of modules. This approach has the advantage that the same module can<br />
be used in different harnesses with for example different VariantConfigurations. The<br />
figure shows a simple configuration of a 150%-harness. The harness has a<br />
PartStructureSpecification, which defines the BOM of the Harness. This BOM contains<br />
the two PartOccurrences of the modules from the previous example. Each<br />
PartOccurrence can carry a VariantConfiguration. Since the two modules share a<br />
component, they are mutually exclusive (see the different VariantConfiguations).<br />
© VDA Project Group “Car Electric”
<strong>VEC</strong> <strong>Tutorial</strong> Version 1.0, 05. April 2013 Page 23 of 27<br />
5.3 Assemblies<br />
Figure 24 Definition of an Assembly<br />
The figure above displays the usage of assemblies in the <strong>VEC</strong>. Assemblies are more<br />
complex components, which are built out of a number of other components (e.g. a<br />
prebuild wire with connectors attached to it). There are multiple reasons, why the inner<br />
structure of an assembly is relevant, but the most important one is that the inner<br />
components are needed to describe the correct usage of the assembly in the harness.<br />
For example in the case of the prebuild wire, the connectors are needed to define their<br />
position in the topology and the wire is needed to define the routing of the assembly<br />
through the topology.<br />
In the upper area of the figure (highlighted in yellow) the master data of the assembly is<br />
shown (for simplification it contains only one PartOccurrence “B”). When the assembly<br />
is used in a Harness it is instantiated (highlighted in blue). In the example the assembly<br />
is instantiated twice (PartOccurrence ASS1 & ASS2), since an assembly can be used<br />
multiple times in the same context. All subcomponents of the the assembly must be<br />
instantiated as well (PartOccurrence B1 & B2). These PartOccurrences carry a<br />
reference to the PartOccurrence in the Part Master Data they represent. The<br />
instantiated PartOccurrences are used to define the concrete usage of the Assembly. It<br />
is also possible, that the concrete usage has properties different to the represented<br />
© VDA Project Group “Car Electric”
<strong>VEC</strong> <strong>Tutorial</strong> Version 1.0, 05. April 2013 Page 24 of 27<br />
occurrence. The most common use case for this is the naming of the PartOccurrence.<br />
Another use case, which is not so obvious, is for example that a prebuild wire can have<br />
only one connector attached to it and the other side is left open. When the wire is used,<br />
it is cut to needed length and then contacted on the open side. In this case the wire<br />
length of the instantatiaded wire would be different to master data definition of the<br />
assembly.<br />
6 Systems Schematic<br />
The following section contains examples for the usage of different parts of the <strong>VEC</strong><br />
required for the mapping of a specific use case, the “Systems Schematic”.<br />
6.1 Meta-Information<br />
Figure 25: DocumentVersion Meta-Information<br />
All information defined in a systems schematic is contained in a single<br />
DocumentVersion. This DocumentVersion carries all the meta-information about the<br />
document. This information is normally shown drawings as a title block.<br />
The DocumentVersion contains the information about the unique naming, a multilingual<br />
description, the DocumentNumber and so on. It has subelements to define the change<br />
history (ChangeDescription), the creation and the different approvals.<br />
© VDA Project Group “Car Electric”
<strong>VEC</strong> <strong>Tutorial</strong> Version 1.0, 05. April 2013 Page 25 of 27<br />
6.2 Variant Management for ECU’s<br />
Figure 26: Variant Management for ECU's<br />
This example demonstrates how the variant management can be handled in the<br />
systems schematic on different levels of abstraction.<br />
The top most element is the usage node. It defines an abstract position / function in the<br />
vehicle. In the example it is the back light on the left hand side (named “MX3”). This<br />
function can be realized by two different electrological variants (interfaces). These<br />
variants are represented by ComponentNodes. In the example there is one variant with<br />
two pins (MX3.1) and one variant with three pins (MX3.2). On a more concrete level<br />
these interfaces can be satisfied by one or more EE-components (alternatives). These<br />
EE-Components are defined by PartVersion with a EEComponentSpecification. In order<br />
to define restrictions a corresponding PartOccurrence with a VariantConfiguration can<br />
be defined.<br />
The PartUsages in the example are needed for two reasons:<br />
1. They serve as a container to group the different possible alternatives<br />
(“realizedPartUsage”).<br />
2. It is necessary to declare one of the EEComponents as the representative of all<br />
alternatives of a variant. This is done by the reference between the PartUsage and the<br />
corresponding EEComponentSpecification.<br />
© VDA Project Group “Car Electric”
<strong>VEC</strong> <strong>Tutorial</strong> Version 1.0, 05. April 2013 Page 26 of 27<br />
7 Packaging<br />
7.1 External Graphics<br />
Figure 27 External Graphics<br />
This example explains how the <strong>VEC</strong> can be packaged with external documents, for<br />
example symbols of the specified components. In this case the <strong>VEC</strong> should be packed<br />
within an archive together with the external documents.<br />
In the <strong>VEC</strong> a DocumentVersion object is created for each external document. This<br />
DocumentVersion references the PartVersion to which it is related. The attribute<br />
dataFormat of the DocumentVersion specifies the format of the external document as a<br />
MIME-Type. The attribute fileName is a path relative to <strong>VEC</strong>-File pointing to the external<br />
document in the archive<br />
© VDA Project Group “Car Electric”
<strong>VEC</strong> <strong>Tutorial</strong> Version 1.0, 05. April 2013 Page 27 of 27<br />
7.2 External Installation Instuctions<br />
Figure 28 External Installation Instructions<br />
The usage of file-based installation instructions is quite similar to the described<br />
approach for external documents. The FileBasedInstruction defines a pointer to the file<br />
packaged together with the <strong>VEC</strong>-file in the container and is referenced by the<br />
PartOccurrence.<br />
The same effect could be achieved if a DocumentBasedInstruction is used, pointing to<br />
an external document (defined as described in the section before).<br />
Important: The difference between the two approaches is that for the<br />
DocumentBasedInstruction a DocumentVersion is required. This means that the<br />
external file must be an official document with a document number, an appropriate<br />
versioning and so on. The FileBasedInstruction can point to any file needed. It is not a<br />
valid approach to use the FileBasedInstruction, if the external file is a valid<br />
document.<br />
© VDA Project Group “Car Electric”