BVP 8759 - ProVu Communications
BVP 8759 - ProVu Communications
BVP 8759 - ProVu Communications

You also want an ePaper? Increase the reach of your titles
YUMPU automatically turns print PDFs into web optimized ePapers that Google loves.
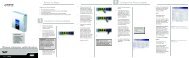
<strong>BVP</strong> <strong>8759</strong><br />
User's Manual
Copyright 2005 Leadtek Research Inc. All rights reserved.<br />
No part of this document may be copied or reproduced in any form or by any means without the prior written<br />
consent of Leadtek Research Inc.<br />
Leadtek makes no warranties with respect to this documentation and disclaims any implied warranties of<br />
merchantability, quality, or fitness for any particular purpose. The information in this document is subject to<br />
change without notice. Leatek reserves the right to make revisions to this publication without obligation to notify<br />
any person or entity of any such changes.<br />
Trademarks or brand names mentioned herein are trademarks or registered trademarks of their respective owners.<br />
International Headquarters<br />
18th Fl., 166, Chien-Yi Rd., Chung Ho, Taipei Hsien, Taiwan (235)<br />
Phone: +886 (0)2 8226 5800 Fax: +886 (0)2 8226 5801<br />
http://www.leadtek.com.tw E-Mail: service@leadtek.com.tw<br />
United States Headquarters<br />
46732 Lakeview Blvd., Fremont, CA 94538, U.S.A.<br />
Phone: +1 510 490 8076 Fax: +1 510 490 7759<br />
http://www.leadtek.com<br />
Europe Headquarters<br />
Antennestraat 16 1322 AB, Almere, The Netherlands<br />
Phone: + 31 (0)36 536 5578 Fax: + 31 (0)36 536 2215<br />
http://www.leadtek.nl<br />
<strong>BVP</strong> <strong>8759</strong> User's Manual<br />
Version A<br />
January 2005<br />
P/N: W0500977
Table of Contents<br />
1 Getting Started ..................................................... 1<br />
2 What's In The Package ........................................ 2<br />
3 Getting to Know Your <strong>BVP</strong> <strong>8759</strong> ......................... 3<br />
Front view ....................................................................... 3<br />
Rear view ........................................................................ 4<br />
Using remote control ...................................................... 5<br />
4 Installation ............................................................ 8<br />
Installing the unit ............................................................ 8<br />
5 System Setup ...................................................... 11<br />
ADSL/Constant ADSL/Single, Public, & Fixed IP ...... 12<br />
When the IP is used exclusively by <strong>BVP</strong> <strong>8759</strong> ........................... 12<br />
When the IP is shared with other devices (with a DHCP<br />
server connected) ....................................................................... 13<br />
When the IP is shared with other devices (without a DHCP<br />
server connected) ....................................................................... 14<br />
ADSL/Constant ADSL/Multiple, Public, & Fixed IP ... 15<br />
When <strong>BVP</strong> <strong>8759</strong> uses one of the IPs (with a DHCP server<br />
connected) .................................................................................. 15<br />
When <strong>BVP</strong> <strong>8759</strong> uses one of the IPs (without a DHCP<br />
server connected) ....................................................................... 16<br />
When one of the IPs is shared with other devices (with<br />
a DHCP server connected) ........................................................ 17<br />
When one of the IPs is shared with other devices (without<br />
a DHCP server connected) ........................................................ 18
Table of Contents<br />
ADSL/Timing ADSL .................................................... 19<br />
When the ADSL is used exclusively by <strong>BVP</strong> <strong>8759</strong> ..................... 19<br />
When the ADSL is shared with other devices (with a DHCP<br />
server connected) ....................................................................... 20<br />
When the ADSL is shared with other devices (without a<br />
DHCP server connected) ........................................................... 21<br />
Cable ............................................................................. 22<br />
When the IP is used exclusively by <strong>BVP</strong> <strong>8759</strong> ........................... 22<br />
When the IP is shared with other devices (with a DHCP<br />
server connected) ....................................................................... 23<br />
When the IP is shared with other devices (without a DHCP<br />
server connected) ....................................................................... 24<br />
LAN/No Firewall or NAT ............................................. 25<br />
With a DHCP server connected ................................................. 25<br />
Without a DHCP server connected ............................................ 26<br />
LAN/NAT ..................................................................... 27<br />
With a DHCP server connected ................................................. 27<br />
Without a DHCP server connected ............................................ 28<br />
LAN/Firewall with Packet Filter .................................. 29<br />
With a DHCP server connected ................................................. 29<br />
Without a DHCP server connected ............................................ 30<br />
LAN/Firewall with NAT & Packet Filter ...................... 31<br />
With a DHCP server connected ................................................. 31<br />
Without a DHCP server connected ............................................ 32<br />
6 Making a Call ...................................................... 33<br />
Before making a video call ........................................... 33<br />
Making a video call ...................................................... 34<br />
Icon explanations ......................................................... 35
Table of Contents<br />
7 Using OSD Menus .............................................. 37<br />
Password Checking ....................................................... 37<br />
Configuration ................................................................ 38<br />
System Setup .................................................................. 38<br />
Network Setup ................................................................. 38<br />
Server Setup ..................................................................... 39<br />
Terminal Setup ................................................................. 40<br />
NTP Setup ........................................................................ 41<br />
Service Setup .................................................................. 42<br />
Call Service Setup ........................................................... 42<br />
Auto Answer Setup .......................................................... 44<br />
Advanced Setup ............................................................... 45<br />
Option .............................................................................. 46<br />
Bandwidth Setup ............................................................. 47<br />
Remote Update ............................................................... 48<br />
Password ....................................................................... 49<br />
Phonebook .................................................................... 50<br />
Add ................................................................................. 50<br />
Search ............................................................................. 51<br />
In Box ............................................................................. 54<br />
Out Box ........................................................................... 55<br />
Copyright Information .................................................. 56<br />
Restore Factory Settings ............................................... 57<br />
8 OSD Menu Tree .................................................. 58<br />
9 Trouble Shooting ............................................... 59<br />
10 Tech Support ..................................................... 60<br />
11 Limited Warranty ............................................... 61<br />
12 FCC Statement ................................................... 62
1 Getting Started<br />
Overview<br />
The <strong>BVP</strong> <strong>8759</strong> is designed to avoid complicated installation. And with the<br />
buttons on the remote control, you are able to access the user-friendly on<br />
screen display menu (OSD), easily control the functions and make<br />
adjustments.<br />
The <strong>BVP</strong> <strong>8759</strong> has a built-in high quality CCD camera. Images are<br />
transmitted through the Internet at up to 24 frames per second (fps) (@ CIF<br />
resolution) . While making a video call, you can enjoy the brilliant real-time<br />
color images of yourself, your correspondents or both. If you do not want<br />
your image to display on the caller or receiver's screen. The <strong>BVP</strong> <strong>8759</strong>'s<br />
private mode can do just that.<br />
The <strong>BVP</strong> <strong>8759</strong> is fully compliant with SIP (Session Initiation Protocol)<br />
international standards for video communication. It can be used with any<br />
video phone that are compatible with this standard.<br />
Feature highlights:<br />
Broadband IP address videophone<br />
Connect the other videophone by simply entering the phone number<br />
Built-in high quality CCD camera<br />
Friendly and easy operation through remote control<br />
Phonebook dialing function<br />
1 A/V input for additional video/audio input<br />
Up to 24 frames per second video display (@ CIF resolution)<br />
Video selectable and picture image up to VHS quality<br />
Echo-cancellation and no delay high quality audio<br />
1 serial port for PTZ camera control<br />
2 USB 1.1 connectors provide USB application extension<br />
1
1<br />
4<br />
GHI<br />
7<br />
PQRS<br />
MENU<br />
2<br />
ABC<br />
5<br />
JKL<br />
8<br />
TUV<br />
0<br />
SOURCE<br />
3<br />
DEF<br />
6<br />
MNO<br />
9<br />
WXYZ<br />
#<br />
C<br />
MIRROR<br />
2 What's In The Package<br />
<strong>BVP</strong> <strong>8759</strong><br />
<strong>BVP</strong> <strong>8759</strong> x1<br />
Remote Control with Batteries x1<br />
User's Manual x1<br />
D-Sub26-2SCART Cable x1or<br />
D-Sub26-3RCA x 2 Cable x 1<br />
Microphone x 1<br />
Microphone Extension Cable x 1<br />
Power Adapter x1<br />
Power Cord x1<br />
Ethernet Cable (RJ-45) x1<br />
Audio/Video Cable x1<br />
MiniDIN-RCA x 4 Cable x 1<br />
Mounting Plate & Screws x 1<br />
Remote Control<br />
with Batteries<br />
Microphone<br />
Microphone<br />
Extension<br />
Cable<br />
Ethernet Cable<br />
Audio/Video Cable<br />
User's Manual<br />
Power Adapter<br />
Power Cord<br />
MiniDIN-RCA x 4<br />
Cable<br />
D-Sub26-SCART x 2<br />
Cable<br />
or<br />
D-Sub26-3RCA x 2<br />
Cable<br />
Mounting Plate<br />
& Screws<br />
Please unpack the product package with caution; inspect<br />
the items closely. If you find any damaged item, please<br />
contact your local distributor immediately. Also, please keep<br />
the box and packing material for future use in the event of<br />
future shipments.<br />
<strong>BVP</strong> <strong>8759</strong> User's Manual 2
3 Getting to Know Your <strong>BVP</strong> <strong>8759</strong><br />
Front view<br />
CCD Camera:<br />
The input source of<br />
local video image. This<br />
is a mini built-in CCD<br />
camera.<br />
Power Indicator:<br />
The LED lights green<br />
when the unit is<br />
powered on.<br />
Message Indicator:<br />
The LED lights red<br />
when a message comes.<br />
Turning Knob:<br />
<strong>BVP</strong> <strong>8759</strong> features a<br />
turning knob that you<br />
can use to adjust the<br />
angle and position the<br />
camera faces.<br />
Built-in Microphone:<br />
This is the built-in<br />
microphone to which<br />
you can input sound.<br />
Video Indicator:<br />
The LED lights<br />
yellow when the unit<br />
is in a video call.<br />
Ringer Indicator:<br />
When there is an<br />
incoming call, the ring<br />
will light up.<br />
Remote Control<br />
Signal Receiver:<br />
Receives the infrared<br />
signal from the remote<br />
control. When using<br />
the remote control,<br />
please aim at this<br />
receiver.<br />
3
Rear view<br />
DC IN<br />
Connect to the<br />
DC output of<br />
power adapter<br />
A/V<br />
Audio and Video<br />
input/output connector<br />
A/V AUX<br />
Audio and Video for<br />
TV and VCR<br />
WAN<br />
Ethernet<br />
connector<br />
Power Switch<br />
For turning<br />
on/off the power<br />
COM<br />
Connect to an<br />
external PTZ<br />
camera<br />
Microphone<br />
Connector<br />
Connect to an<br />
external<br />
microphone<br />
(optional).<br />
USB Connectors<br />
Connect to other<br />
USB devices<br />
Phone<br />
Connect to<br />
a telephone<br />
<strong>BVP</strong> <strong>8759</strong> User's Manual 4
Using remote control<br />
1<br />
4<br />
GHI<br />
7<br />
PQRS<br />
2<br />
ABC<br />
5<br />
JKL<br />
8<br />
TUV<br />
0<br />
3<br />
DEF<br />
6<br />
MNO<br />
9<br />
WXYZ<br />
#<br />
1. Camera<br />
2. Number keys<br />
3. PTZ Camera zoom in<br />
4. Navigation key<br />
5. Navigation key<br />
6. Navigation key<br />
7. Menu<br />
8. Source<br />
9. Phonebook<br />
10. Video key (privacy, view)<br />
11. Mute<br />
12. Soft key 1 (reserved)<br />
13. On-hook / Off-hook<br />
14. PTZ Camera zoom out<br />
15. Navigation key<br />
16. Ok<br />
17. Cancel<br />
18. Outbox<br />
19. Inbox<br />
20. Mirror<br />
21. Soft key 2 (reserved)<br />
5
Using remote control (cont.'d)<br />
Cursor Panel<br />
Used with OSD menus; to move<br />
the cursor left or to go back to<br />
the previous menu. During a<br />
video call, used to reduce the<br />
incoming video bit rate.<br />
Used with OSD menus;<br />
to move the cursor down.<br />
During a call, to turn the<br />
volume of the<br />
speakerphone down.<br />
Hot Keys<br />
MENU:<br />
To bring out the OSD menu.<br />
Phonebook:<br />
To bring out the phonebook<br />
menu. See page 50.<br />
Video Key (Privacy, View):<br />
Privacy:<br />
Stop sending your image to the<br />
other side so that you will not be<br />
seen by the person you talk to.<br />
View:<br />
To select how local and remote<br />
video is displayed on the screen.<br />
The options are: Remote, PIP<br />
upper-left, PIP lower-left, PIP<br />
upper- right, PIP lower-right,<br />
Local. And it switches in that<br />
sequence.<br />
Mute:<br />
During a video call, this button<br />
is used to mute the audio so that<br />
you will not be heard by the<br />
other party on the phone.<br />
Used with OSD menus; to move the<br />
cursor up. During a call, to turn the<br />
volume of the speakerphone up.<br />
Used with OSD menus; to move<br />
the cursor right or to enter the sub<br />
menu. During a video call, used to<br />
raise the incoming video bit rate.<br />
OK: Used with OSD menus; to<br />
enter the sub menu, or to confirm<br />
the selection. During a call,<br />
related to the "Call Waiting"<br />
option (see page 42).<br />
Cancel:<br />
To cancel a selection, or to<br />
function as Backspace when you<br />
input letters or numbers.<br />
IN-BOX:<br />
To bring out the menu that<br />
contains the numbers of the 10<br />
last received calls.<br />
OUT-BOX:<br />
To bring out the menu that<br />
contains the numbers of the 10<br />
last dialed calls.<br />
Source:<br />
Select between the built-in and<br />
the external A/V source.<br />
Mirror:<br />
To toggle mirror video on/off.<br />
Camera:<br />
To switch between STB and<br />
external PTZ camera.<br />
<strong>BVP</strong> <strong>8759</strong> User's Manual 6
Using remote control (cont.'d)<br />
Numeric Keypad<br />
Inputting numbers<br />
Pressing any key on the numeric keypad can input the<br />
correspondent number.<br />
For example, pressing 8 will generate the number "8".<br />
TUV<br />
0 #<br />
Inputting letters<br />
Every button on the numeric keypad has characters printed on Numeric Keypad<br />
it, in addition to the numbers. Number keys from "2"to"9"<br />
have English letters below them, so they can be used to input English letters.<br />
When inputting data, pressing a key consecutively will generate the letters on it.<br />
For example,<br />
7<br />
has the number "7"onitandtheletters " PQRS " below it.<br />
PQRS<br />
Pressing this key once will generate the number "7".<br />
Pressing this key twice consecutively will generate the letter "P".<br />
Pressing this key three times will generate the letter "Q",four times the letter<br />
" R ", and five times the letter "S".<br />
Switching between upper<br />
And it will cycle in such order.<br />
case and lower case letters<br />
Inputting punctuation marks<br />
The keypad provides four punctuation marks:<br />
Press<br />
#<br />
once to switch<br />
. , ;<br />
.<br />
,<br />
" " " " " : " and " ".<br />
" ": Press twice consecutively;<br />
" ": Press three times consecutively.<br />
" : ": Press twice consecutively.<br />
;<br />
" ": Press three times consecutively.<br />
Inputting special characters<br />
The keypad also provides three special characters: " " " " and " # ".<br />
" ": Press 1 twice consecutively; " ": Press once.<br />
#<br />
" ": Press # once.<br />
0<br />
0<br />
1<br />
4<br />
GHI<br />
7<br />
PQRS<br />
between upper and lower case<br />
letters when inputting data.<br />
Speed Dial<br />
When the<br />
pressed, pressing<br />
enable speed dial.<br />
2<br />
ABC<br />
5<br />
JKL<br />
8<br />
TUV<br />
3<br />
DEF<br />
6<br />
MNO<br />
9<br />
WXYZ<br />
button is<br />
# can<br />
7
4 Installation<br />
Installing the unit<br />
Step 1<br />
Pick a good spot<br />
Stability<br />
Place your <strong>BVP</strong> <strong>8759</strong> on top of a counter, desk, or table with the<br />
CCD camera opening in front.<br />
Or you can install <strong>BVP</strong> <strong>8759</strong> on the wall by fixing the included<br />
mounting plate to the wall with screws and sliding the slot on the<br />
back of <strong>BVP</strong> <strong>8759</strong> onto the mounting plate.<br />
Lighting condition<br />
Make sure the lighting is sufficient and does not shine directly<br />
into camera lenses.<br />
View of camera<br />
Avoid using <strong>BVP</strong> <strong>8759</strong> in a room with brightly painted walls or<br />
flamboyant wallpaper. Soft and evenly painted background<br />
provides the best results.<br />
Prolonging the lifespan<br />
Avoid storing or operating <strong>BVP</strong> <strong>8759</strong> in abnormal conditions.<br />
High temperatures or excessive humidity could cause the unit to<br />
malfunction and shorten its useful lifespan.<br />
Step 2<br />
Connect the Ethernet cable<br />
Plug one end of the Ethernet cable in the jack marked " " on<br />
<strong>BVP</strong> <strong>8759</strong>. Plug the other end of the Ethernet cable in the RJ-45<br />
jack of the Internet device (hub, router, or ATU-R).<br />
Connect the<br />
Ethernet cable<br />
to the Internet<br />
device.<br />
<strong>BVP</strong> <strong>8759</strong> User's Manual 8
Installing the unit (cont'd)<br />
Step 3<br />
Plug in for power<br />
Connect the power cord between the wall outlet and the power<br />
adapter. Plug the free end of the power adapter into the power<br />
connector (DC IN) on <strong>BVP</strong> <strong>8759</strong>.<br />
Connect the power adapter.<br />
Connect the power cord<br />
and plug in.<br />
Notes for removing the power cord<br />
The connector on the power adapter has a mechanism which, when<br />
connected to the videophone, will be locked to the power connector. To<br />
remove the power cord from the videophone, follow the steps below:<br />
1. Grab the connector and slide<br />
it outward to loosen the lock.<br />
2. Gently pull the connector until<br />
the cord is fully disconnected.<br />
Note: Do not force the connector or pull the cord abruptly,<br />
or the power adapter may be damaged.<br />
9
Installing the unit (cont'd)<br />
External Microphone (Optional)<br />
or<br />
Video/Audio<br />
Output<br />
Video/Audio<br />
Input<br />
(Optional)<br />
VCR<br />
TV<br />
Television<br />
CCD Camera<br />
VCR<br />
Television<br />
<strong>BVP</strong> <strong>8759</strong> User's Manual 10
5 System Setup<br />
The System Setup section gives instructions on how to set up your <strong>BVP</strong> <strong>8759</strong><br />
system under some mostly used interconnection types. There is a condition bar on<br />
each page (as shown in the figure), indicating what type of connection the setup<br />
guide on that page is for. Look for the type of connection you use with your <strong>BVP</strong><br />
<strong>8759</strong> to find the setup instructions you need.<br />
Condition Bar<br />
System Setup (Cont'd)<br />
Connection LAN Type Firewall NAT Packet Filter<br />
Without DHCP server connected<br />
Internet<br />
11
System Setup (Cont'd)<br />
Connection ADSL Type Constant ADSL IP Single, Public, & Fixed<br />
When the IP is used exclusively by <strong>BVP</strong> <strong>8759</strong><br />
Internet<br />
ATU-R<br />
<strong>BVP</strong> <strong>8759</strong><br />
<strong>BVP</strong> <strong>8759</strong> System Setup<br />
Configuration<br />
Password<br />
Phonebook<br />
System Setup<br />
Service Setup<br />
Bandwidth Setup<br />
Remote Update<br />
Network Setup<br />
Server Setup<br />
Terminal Setup<br />
NTP Setup<br />
(see p. 37)<br />
Connect Type: STATIC<br />
IP address: see note<br />
Subnet Mask: see note<br />
Gateway: see note<br />
PPPoE Username( )<br />
PPPoE Password( )<br />
Note : IP address, Subnet Mask and Gateway are assigned by your ISP, each consisted of 4 sets<br />
of numbers with dots in between them. Check with your ISP for the information.<br />
<strong>BVP</strong> <strong>8759</strong> User's Manual 12
System Setup (Cont'd)<br />
Connection ADSL Type Constant ADSL IP Single, Public, & Fixed<br />
When the IP is shared with other devices (with a DHCP server<br />
connected)<br />
Internet<br />
ATU-R<br />
Router<br />
<strong>BVP</strong> <strong>8759</strong><br />
General PC 1, 2, ...n<br />
DHCP Server<br />
This router has to be able to provide the NAT service<br />
and the following static routes should be set: TCP port<br />
1720-1730 and 7000-7009 and UDP port 8050-8058.<br />
Or you can put <strong>BVP</strong> <strong>8759</strong> into DMZ if your router<br />
supports this function.<br />
The DHCP Server<br />
must be able to<br />
support dynamicfixed<br />
IP allocation.<br />
<strong>BVP</strong> <strong>8759</strong> System Setup<br />
Configuration<br />
Password<br />
Phonebook<br />
System Setup<br />
Service Setup<br />
Bandwidth Setup<br />
Remote Update<br />
Network Setup<br />
Server Setup<br />
Terminal Setup<br />
NTP Setup<br />
(see p. 37)<br />
Connect Type: DHCP<br />
IP address: see note<br />
Subnet Mask: see note<br />
Gateway: see note<br />
PPPoE Username( )<br />
PPPoE Password( )<br />
Note : IP, Subnet Mask and Gateway are assigned by your DHCP server.<br />
13
System Setup (Cont'd)<br />
Connection ADSL Type Constant ADSL IP Single, Public, & Fixed<br />
When the IP is shared with other devices (without a DHCP server<br />
connected)<br />
Internet<br />
ATU-R<br />
Router<br />
<strong>BVP</strong> <strong>8759</strong><br />
General PC 1, 2, ...n<br />
This router has to be able to provide the NAT service and the following static routes<br />
should be set: TCP port 1720-1730 and 7000-7009 and UDP port 8050-8058. Or<br />
you can put <strong>BVP</strong> <strong>8759</strong> into DMZ if your router supports this function.<br />
<strong>BVP</strong> <strong>8759</strong> System Setup<br />
Configuration<br />
Password<br />
Phonebook<br />
System Setup<br />
Service Setup<br />
Bandwidth Setup<br />
Remote Update<br />
Network Setup<br />
Server Setup<br />
Terminal Setup<br />
NTP Setup<br />
(see p. 37)<br />
Connect Type: STATIC<br />
IP address: see note<br />
Subnet Mask: see note<br />
Gateway: see note<br />
PPPoE Username( )<br />
PPPoE Password( )<br />
Note : You can assign your own IP, Subnet Mask and Gateway within your private segment. If<br />
the segment is 172.16.0.0-172.16.0.255, your settings should be:<br />
IP : one chosen from the range between 172.16.0.1 to 172.16.0.254<br />
Subnet mask : 255.255.255.0<br />
Gateway : one chosen from the range between 172.16.0.1 to 172.16.0.254, usually<br />
172.16.0.254, and can't be the same as your IP address.<br />
<strong>BVP</strong> <strong>8759</strong> User's Manual 14
System Setup (Cont'd)<br />
Connection ADSL Type Constant ADSL IP Multiple, Public, & Fixed<br />
When <strong>BVP</strong> <strong>8759</strong> uses one of the IPs (with a DHCP server connected)<br />
Internet<br />
ATU-R<br />
Hub<br />
<strong>BVP</strong> <strong>8759</strong><br />
General PC 1, 2, ...n<br />
DHCP Server<br />
<strong>BVP</strong> <strong>8759</strong> System Setup<br />
Configuration<br />
Password<br />
Phonebook<br />
System Setup<br />
Service Setup<br />
Bandwidth Setup<br />
Remote Update<br />
Network Setup<br />
Server Setup<br />
Terminal Setup<br />
NTP Setup<br />
(see p. 37)<br />
Connect Type: DHCP<br />
IP address: see note<br />
Subnet Mask: see note<br />
Gateway: see note<br />
PPPoE Username( )<br />
PPPoE Password( )<br />
Note : IP, Subnet Mask and Gateway are assigned by your DHCP server.<br />
15
System Setup (Cont'd)<br />
Connection ADSL Type Constant ADSL IP Multiple, Public, & Fixed<br />
When <strong>BVP</strong> <strong>8759</strong> uses one of the IPs (without a DHCP server connected)<br />
Internet<br />
ATU-R<br />
Hub<br />
<strong>BVP</strong> <strong>8759</strong><br />
General PC 1, 2, ...n<br />
<strong>BVP</strong> <strong>8759</strong> System Setup<br />
Configuration<br />
Password<br />
Phonebook<br />
System Setup<br />
Service Setup<br />
Bandwidth Setup<br />
Remote Update<br />
Network Setup<br />
Server Setup<br />
Terminal Setup<br />
NTP Setup<br />
(see p. 37)<br />
Connect Type: STATIC<br />
IP address: see note<br />
Subnet Mask: see note<br />
Gateway: see note<br />
PPPoE Username( )<br />
PPPoE Password( )<br />
Note : IP address, Subnet Mask and Gateway are assigned by your ISP, each consisted of 4 sets<br />
of numbers with dots in between them. Check with your ISP for the information.<br />
<strong>BVP</strong> <strong>8759</strong> User's Manual 16
System Setup (Cont'd)<br />
Connection ADSL Type Constant ADSL IP<br />
Multiple, Public, & Fixed<br />
When one of the IPs is shared with other devices (with DHCP server<br />
connected)<br />
Internet<br />
ATU-R<br />
Hub<br />
Router<br />
<strong>BVP</strong> <strong>8759</strong><br />
General PC 1, 2, ...n<br />
DHCP Server<br />
This router has to be able to provide the NAT service<br />
and the following static routes should be set: TCP port<br />
1720-1730 and 7000-7009 and UDP port 8050-8058.<br />
Or you can put <strong>BVP</strong> <strong>8759</strong> into DMZ if your router<br />
supports this function.<br />
The DHCP Server<br />
must be able to<br />
support dynamicfixed<br />
IP allocation.<br />
<strong>BVP</strong> <strong>8759</strong> System Setup<br />
Configuration<br />
Password<br />
Phonebook<br />
System Setup<br />
Service Setup<br />
Bandwidth Setup<br />
Remote Update<br />
Network Setup<br />
Server Setup<br />
Terminal Setup<br />
NTP Setup<br />
(see p. 37)<br />
Connect Type: DHCP<br />
IP address: see note<br />
Subnet Mask: see note<br />
Gateway: see note<br />
PPPoE Username( )<br />
PPPoE Password( )<br />
Note : IP, Subnet Mask and Gateway are assigned by your DHCP server.<br />
17
System Setup (Cont'd)<br />
Connection ADSL Type Constant ADSL IP Multiple, Public, & Fixed<br />
When one of the IPs is shared with other devices (without a DHCP<br />
server connected)<br />
Internet<br />
ATU-R<br />
Hub<br />
Router<br />
<strong>BVP</strong> <strong>8759</strong><br />
General PC 1, 2, ...n<br />
This router has to be able to provide the NAT service and the following static routes<br />
should be set: TCP port 1720-1730 and 7000-7009 and UDP port 8050-8058. Or<br />
you can put <strong>BVP</strong> <strong>8759</strong> into DMZ if your router supports this function.<br />
<strong>BVP</strong> <strong>8759</strong> System Setup<br />
Configuration<br />
Password<br />
Phonebook<br />
(see p. 37)<br />
System Setup<br />
Service Setup<br />
Bandwidth Setup<br />
Remote Update<br />
Connect Type: STATIC<br />
IP address: see note<br />
Subnet Mask: see note<br />
Gateway: see note<br />
PPPoE Username( )<br />
PPPoE Password( )<br />
Network Setup<br />
Server Setup<br />
Terminal Setup<br />
NTP Setup<br />
Note : You can assign your own IP, Subnet Mask and Gateway within your private segment. If<br />
the segment is 172.16.0.0-172.16.0.255, your settings should be:<br />
IP : one chosen from the range between 172.16.0.1 to 172.16.0.254<br />
Subnet mask : 255.255.255.0<br />
Gateway : one chosen from the range between 172.16.0.1 to 172.16.0.254, usually<br />
172.16.0.254, and can't be the same as your IP address.<br />
<strong>BVP</strong> <strong>8759</strong> User's Manual 18
System Setup (Cont'd)<br />
Connection ADSL Type Timing ADSL IP<br />
Single, Public, & Dynamic<br />
When the ADSL is used exclusively by <strong>BVP</strong> <strong>8759</strong><br />
Internet<br />
ATU-R<br />
<strong>BVP</strong> <strong>8759</strong><br />
<strong>BVP</strong> <strong>8759</strong> System Setup<br />
Configuration<br />
Password<br />
Phonebook<br />
System Setup<br />
Service Setup<br />
Bandwidth Setup<br />
Remote Update<br />
Network Setup<br />
Server Setup<br />
Terminal Setup<br />
NTP Setup<br />
(see p. 37)<br />
Connect Type: PPPoE<br />
IP address: see note<br />
Subnet Mask: see note<br />
Gateway: see note<br />
PPPoE Username( )<br />
PPPoE Password( )<br />
Note : IP, Subnet Mask and Gateway are assigned by PPPoE.<br />
PPPoE Username and Password are assigned by your ISP.<br />
19
System Setup (Cont'd)<br />
Connection ADSL Type Timing ADSL IP<br />
Single, Public, & Dynamic<br />
When the ADSL is shared with other devices (with a DHCP server<br />
connected)<br />
Internet<br />
ATU-R<br />
Router<br />
<strong>BVP</strong> <strong>8759</strong><br />
General PC 1, 2, ...n<br />
DHCP Server<br />
This router has to be able to provide the NAT service<br />
and the following static routes should be set: TCP port<br />
1720-1730 and 7000-7009 and UDP port 8050-8058.<br />
Or you can put <strong>BVP</strong> <strong>8759</strong> into DMZ if your router<br />
supports this function.<br />
The DHCP Server<br />
must be able to<br />
support dynamicfixed<br />
IP allocation.<br />
<strong>BVP</strong> <strong>8759</strong> System Setup<br />
Configuration<br />
Password<br />
Phonebook<br />
System Setup<br />
Service Setup<br />
Bandwidth Setup<br />
Remote Update<br />
Network Setup<br />
Server Setup<br />
Terminal Setup<br />
NTP Setup<br />
(see p. 37)<br />
Connect Type: DHCP<br />
IP address: see note<br />
Subnet Mask: see note<br />
Gateway: see note<br />
PPPoE Username( )<br />
PPPoE Password( )<br />
Note : IP, Subnet Mask and Gateway are assigned by your DHCP server.<br />
<strong>BVP</strong> <strong>8759</strong> User's Manual 20
System Setup (Cont'd)<br />
Connection ADSL Type Timing ADSL IP<br />
Single, Public, & Dynamic<br />
When the ADSL is shared with other devices (without a DHCP server<br />
connected)<br />
Internet<br />
ATU-R<br />
Router<br />
<strong>BVP</strong> <strong>8759</strong><br />
General PC 1, 2, ...n<br />
This router has to be able to provide the NAT service and the following static routes<br />
should be set: TCP port 1720-1730 and 7000-7009 and UDP port 8050-8058. Or<br />
you can put <strong>BVP</strong> <strong>8759</strong> into DMZ if your router supports this function.<br />
<strong>BVP</strong> <strong>8759</strong> System Setup<br />
Configuration<br />
Password<br />
Phonebook<br />
System Setup<br />
Service Setup<br />
Bandwidth Setup<br />
Remote Update<br />
Network Setup<br />
Server Setup<br />
Terminal Setup<br />
NTP Setup<br />
(see p. 37)<br />
Connect Type: STATIC<br />
IP address: see note<br />
Subnet Mask: see note<br />
Gateway: see note<br />
PPPoE Username( )<br />
PPPoE Password( )<br />
Note : You can assign your own IP, Subnet Mask and Gateway within your private segment. If<br />
the segment is 172.16.0.0-172.16.0.255, your settings should be:<br />
IP : one chosen from the range between 172.16.0.1 to 172.16.0.254<br />
Subnet mask : 255.255.255.0<br />
Gateway : one chosen from the range between 172.16.0.1 to 172.16.0.254, usually<br />
172.16.0.254, and can't be the same as your IP address.<br />
21
System Setup (Cont'd)<br />
Connection Cable Type --<br />
IP<br />
Single, Public, & Dynamic<br />
When the IP is used exclusively by <strong>BVP</strong> 8770<br />
Internet<br />
<strong>BVP</strong> <strong>8759</strong><br />
Cable modem<br />
<strong>BVP</strong> <strong>8759</strong> System Setup<br />
Configuration<br />
Password<br />
Phonebook<br />
System Setup<br />
Service Setup<br />
Bandwidth Setup<br />
Remote Update<br />
Network Setup<br />
Server Setup<br />
Terminal Setup<br />
NTP Setup<br />
(see p. 37)<br />
Connect Type: DHCP<br />
IP address: see note<br />
Subnet Mask: see note<br />
Gateway: see note<br />
PPPoE Username( )<br />
PPPoE Password( )<br />
Note : IP, Subnet Mask and Gateway are assigned by the DHCP server of your ISP.<br />
<strong>BVP</strong> <strong>8759</strong> User's Manual 22
System Setup (Cont'd)<br />
Connection Cable Type --<br />
IP<br />
Single, Public, & Dynamic<br />
When the IP is shared with other devices (with a DHCP server<br />
connected)<br />
Internet<br />
Cable modem<br />
Router<br />
<strong>BVP</strong> <strong>8759</strong><br />
General PC 1, 2, ...n<br />
DHCP Server<br />
This router has to be able to provide the NAT service and<br />
the following static routes should be set : TCP port 1720-<br />
1730 and 7000-7009 and UDP port 8050-8058. Or you<br />
can put <strong>BVP</strong> <strong>8759</strong> into DMZ if your router supports this<br />
function.<br />
The DHCP Server<br />
must be able to<br />
support dynamicfixed<br />
IP allocation.<br />
<strong>BVP</strong> <strong>8759</strong> System Setup<br />
Configuration<br />
Password<br />
Phonebook<br />
System Setup<br />
Service Setup<br />
Bandwidth Setup<br />
Remote Update<br />
Network Setup<br />
Server Setup<br />
Terminal Setup<br />
NTP Setup<br />
(see p. 37)<br />
Connect Type: DHCP<br />
IP address: see note<br />
Subnet Mask: see note<br />
Gateway: see note<br />
PPPoE Username( )<br />
PPPoE Password( )<br />
Note : IP, Subnet Mask and Gateway are assigned by your DHCP server.<br />
23
System Setup (Cont'd)<br />
Connection Cable Type --<br />
IP<br />
Single, Public, & Dynamic<br />
When the IP is shared with other devices (without a DHCP server<br />
connected)<br />
Internet<br />
Cable modem Router <strong>BVP</strong> <strong>8759</strong> General PC 1, 2, ...n<br />
This router has to be able to provide the NAT service and the following static routes<br />
should be set: TCP port 1720-1730 and 7000-7009 and UDP port 8050-8058. Or<br />
you can put <strong>BVP</strong> <strong>8759</strong> into DMZ if your router supports this function.<br />
<strong>BVP</strong> <strong>8759</strong> System Setup<br />
Configuration<br />
Password<br />
Phonebook<br />
System Setup<br />
Service Setup<br />
Bandwidth Setup<br />
Remote Update<br />
Network Setup<br />
Server Setup<br />
Terminal Setup<br />
NTP Setup<br />
(see p. 37)<br />
Connect Type: STATIC<br />
IP address: see note<br />
Subnet Mask: see note<br />
Gateway: see note<br />
PPPoE Username( )<br />
PPPoE Password( )<br />
Note : You can assign your own IP, Subnet Mask and Gateway within your private segment. If<br />
the segment is 172.16.0.0-172.16.0.255, your settings should be:<br />
IP : one chosen from the range between 172.16.0.1 to 172.16.0.254<br />
Subnet mask : 255.255.255.0<br />
Gateway : one chosen from the range between 172.16.0.1 to 172.16.0.254, usually<br />
172.16.0.254, and can't be the same as your IP address.<br />
<strong>BVP</strong> <strong>8759</strong> User's Manual 24
System Setup (Cont'd)<br />
Connection LAN Type<br />
Firewall NAT Packet Filter<br />
With a DHCP server connected<br />
Internet<br />
Router<br />
<strong>BVP</strong> <strong>8759</strong><br />
General PC 1, 2, ...n<br />
DHCP Server<br />
<strong>BVP</strong> <strong>8759</strong> System Setup<br />
Configuration<br />
Password<br />
Phonebook<br />
System Setup<br />
Service Setup<br />
Bandwidth Setup<br />
Remote Update<br />
Network Setup<br />
Server Setup<br />
Terminal Setup<br />
NTP Setup<br />
(see p. 37)<br />
Connect Type: DHCP<br />
IP address: see note<br />
Subnet Mask: see note<br />
Gateway: see note<br />
PPPoE Username( )<br />
PPPoE Password( )<br />
Note : IP, Subnet Mask and Gateway are assigned by your DHCP server.<br />
25
System Setup (Cont'd)<br />
Connection LAN Type Firewall NAT Packet Filter<br />
Without a DHCP server connected<br />
Internet<br />
Router<br />
<strong>BVP</strong> <strong>8759</strong><br />
General PC 1, 2, ...n<br />
<strong>BVP</strong> <strong>8759</strong> System Setup<br />
Configuration<br />
Password<br />
Phonebook<br />
System Setup<br />
Service Setup<br />
Bandwidth Setup<br />
Remote Update<br />
Network Setup<br />
Server Setup<br />
Terminal Setup<br />
NTP Setup<br />
(see p. 37)<br />
Connect Type: STATIC<br />
IP address: see note<br />
Subnet Mask: see note<br />
Gateway: see note<br />
PPPoE Username( )<br />
PPPoE Password( )<br />
Note : IP address, Subnet Mask and Gateway are assigned by your ISP. If you are using an IP<br />
segment, which is x.x.x.0-x.x.x.255, your settings should be:<br />
IP : one chosen from the range between x.x.x.1 to x.x.x.254<br />
Subnet mask : 255.255.255.0<br />
Gateway : one chosen from the range between x.x.x.1 to x.x.x.254, usually<br />
x.x.x.254, and can't be the same as your IP address.<br />
<strong>BVP</strong> <strong>8759</strong> User's Manual 26
System Setup (Cont'd)<br />
Connection LAN Type<br />
Firewall NAT Packet Filter<br />
With a DHCP server connected<br />
Internet<br />
Router <strong>BVP</strong> <strong>8759</strong> General PC 1, 2, ...n DHCP Server<br />
This router has to be able to provide the NAT service<br />
and the following static routes should be set: TCP port<br />
1720-1730 and 7000-7009 and UDP port 8050-8058.<br />
Or you can put <strong>BVP</strong> <strong>8759</strong> into DMZ if your router<br />
supports this function.<br />
The DHCP Server<br />
must be able to<br />
support dynamicfixed<br />
IP allocation.<br />
<strong>BVP</strong> <strong>8759</strong> System Setup<br />
Configuration<br />
Password<br />
Phonebook<br />
System Setup<br />
Service Setup<br />
Bandwidth Setup<br />
Remote Update<br />
Network Setup<br />
Server Setup<br />
Terminal Setup<br />
NTP Setup<br />
(see p. 37)<br />
Connect Type: DHCP<br />
IP address: see note<br />
Subnet Mask: see note<br />
Gateway: see note<br />
PPPoE Username( )<br />
PPPoE Password( )<br />
Note : IP, Subnet Mask and Gateway are assigned by your DHCP server.<br />
27
System Setup (Cont'd)<br />
Connection LAN Type Firewall NAT Packet Filter<br />
Without a DHCP server connected<br />
Internet<br />
Router<br />
<strong>BVP</strong> <strong>8759</strong><br />
General PC 1, 2, ...n<br />
This router has to be able to provide the NAT service and the following static<br />
routes should be set: TCP port 1720-1730 and 7000-7009 and UDP port 8050-<br />
8058. Or you can put <strong>BVP</strong> <strong>8759</strong> into DMZ if your router supports this function.<br />
<strong>BVP</strong> <strong>8759</strong> System Setup<br />
Configuration<br />
Password<br />
Phonebook<br />
(see p. 37)<br />
System Setup<br />
Service Setup<br />
Bandwidth Setup<br />
Remote Update<br />
Network Setup<br />
Server Setup<br />
Terminal Setup<br />
NTP Setup<br />
Connect Type: STATIC<br />
IP address: see note<br />
Subnet Mask: see note<br />
Gateway: see note<br />
PPPoE Username( )<br />
PPPoE Password( )<br />
Note : You can assign your own IP, Subnet Mask and Gateway within your private segment. If<br />
the segment is 172.16.0.0-172.16.0.255, your settings should be:<br />
IP : one chosen from the range between 172.16.0.1 to 172.16.0.254<br />
Subnet mask : 255.255.255.0<br />
Gateway : one chosen from the range between 172.16.0.1 to 172.16.0.254, usually<br />
172.16.0.254, and can't be the same as your IP address.<br />
<strong>BVP</strong> <strong>8759</strong> User's Manual 28
System Setup (Cont'd)<br />
Connection LAN Type Firewall NAT Packet Filter<br />
With a DHCP server connected<br />
Internet<br />
Firewall<br />
Router<br />
<strong>BVP</strong> <strong>8759</strong><br />
General PC 1, 2, ...n<br />
DHCP Server<br />
This firewall must be able to enable packets I/O<br />
for TCP port 1720-1730 and 7000-7009 and<br />
UDP port 8050-8058 (for <strong>BVP</strong> <strong>8759</strong> exclusively).<br />
<strong>BVP</strong> <strong>8759</strong> System Setup<br />
Configuration<br />
Password<br />
Phonebook<br />
System Setup<br />
Service Setup<br />
Bandwidth Setup<br />
Remote Update<br />
Network Setup<br />
Server Setup<br />
Terminal Setup<br />
NTP Setup<br />
(see p. 37)<br />
Connect Type: DHCP<br />
IP address: see note<br />
Subnet Mask: see note<br />
Gateway: see note<br />
PPPoE Username( )<br />
PPPoE Password( )<br />
Note : IP, Subnet Mask and Gateway are assigned by your DHCP server.<br />
29
System Setup (Cont'd)<br />
Connection LAN Type Firewall NAT Packet Filter<br />
Without a DHCP server connected<br />
Internet<br />
Firewall<br />
Router<br />
<strong>BVP</strong> <strong>8759</strong><br />
General PC 1, 2, ...n<br />
This firewall must be able to enable packets I/O for TCP port 1720-1730<br />
and 7000-7009 and UDP port 8050-8058 (for <strong>BVP</strong> <strong>8759</strong> exclusively).<br />
<strong>BVP</strong> <strong>8759</strong> System Setup<br />
Configuration<br />
Password<br />
Phonebook<br />
(see p. 37)<br />
System Setup<br />
Service Setup<br />
Bandwidth Setup<br />
Remote Update<br />
Connect Type: STATIC<br />
IP address: see note<br />
Subnet Mask: see note<br />
Gateway: see note<br />
PPPoE Username( )<br />
PPPoE Password( )<br />
Network Setup<br />
Server Setup<br />
Terminal Setup<br />
NTP Setup<br />
Note : IP address, Subnet Mask and Gateway are assigned by your ISP. If you are using an IP<br />
segment, which is x.x.x.0-x.x.x.255, your settings should be:<br />
IP : one chosen from the range between x.x.x.1 to x.x.x.254<br />
Subnet mask : 255.255.255.0<br />
Gateway : one chosen from the range between x.x.x.1 to x.x.x.254, usually<br />
x.x.x.254, and can't be the same as your IP address.<br />
<strong>BVP</strong> <strong>8759</strong> User's Manual 30
System Setup (Cont'd)<br />
Connection LAN Type Firewall NAT Packet Filter<br />
With a DHCP server connected<br />
Internet<br />
Firewall<br />
Router<br />
<strong>BVP</strong> <strong>8759</strong><br />
General PC 1, 2, ...n<br />
DHCP Server<br />
This firewall must be able to enable packets I/O for TCP port 1720-1730<br />
and 7000-7009 and UDP port 8050-8058 (for <strong>BVP</strong> <strong>8759</strong> exclusively).<br />
It must also be able to provide the NAT service, and the following static<br />
routes should be set: TCP port 1720-1730 and 7000-7009 and UDP port<br />
8050-8058. Or you can put <strong>BVP</strong> <strong>8759</strong> into DMZ if your router supports<br />
this function.<br />
The DHCP<br />
Server must be<br />
able to support<br />
dynamic-fixed<br />
IP allocation.<br />
<strong>BVP</strong> <strong>8759</strong> System Setup<br />
Configuration<br />
Password<br />
Phonebook<br />
System Setup<br />
Service Setup<br />
Bandwidth Setup<br />
Remote Update<br />
Network Setup<br />
Server Setup<br />
Terminal Setup<br />
NTP Setup<br />
(see p. 37)<br />
Connect Type: DHCP<br />
IP address: see note<br />
Subnet Mask: see note<br />
Gateway: see note<br />
PPPoE Username( )<br />
PPPoE Password( )<br />
Note : IP, Subnet Mask and Gateway are assigned by your DHCP server.<br />
31
System Setup (Cont'd)<br />
Connection LAN Type Firewall NAT Packet Filter<br />
Without a DHCP server connected<br />
Internet<br />
Firewall<br />
Router<br />
<strong>BVP</strong> <strong>8759</strong><br />
General PC 1, 2, ...n<br />
This firewall must be able to enable packets I/O for TCP port 1720-1730 and 7000-7009 and UDP port<br />
8050-8058 (for <strong>BVP</strong> <strong>8759</strong> exclusively).<br />
It must also be able to provide the NAT service, and the following static routes should be set: TCP port<br />
1720-1730 and 7000-7009 and UDP port 8050-8058. Or you can put <strong>BVP</strong> <strong>8759</strong> into DMZ if your router<br />
supports this function.<br />
<strong>BVP</strong> <strong>8759</strong> System Setup<br />
Configuration<br />
Password<br />
Phonebook<br />
(see p. 37)<br />
System Setup<br />
Service Setup<br />
Bandwidth Setup<br />
Remote Update<br />
Connect Type: STATIC<br />
IP address: see note<br />
Subnet Mask: see note<br />
Gateway: see note<br />
PPPoE Username( )<br />
PPPoE Password( )<br />
Network Setup<br />
Server Setup<br />
Terminal Setup<br />
NTP Setup<br />
Note : You can assign your own IP, Subnet Mask and Gateway within your private segment. If<br />
the segment is 172.16.0.0-172.16.0.255, your settings should be:<br />
IP : one chosen from the range between 172.16.0.1 to 172.16.0.254<br />
Subnet mask : 255.255.255.0<br />
Gateway : one chosen from the range between 172.16.0.1 to 172.16.0.254, usually<br />
172.16.0.254, and can't be the same as your IP address.<br />
<strong>BVP</strong> <strong>8759</strong> User's Manual 32
6 Making a Call<br />
Before making a video call<br />
Here are a few things you need to consider before making a video call.<br />
1 3<br />
Keep a distance of 0.5 meters away<br />
from <strong>BVP</strong> <strong>8759</strong>.<br />
Avoid having lights behind you that<br />
might shine into the camera lens.<br />
0.5 m<br />
2 4<br />
Make sure of the most appropriate<br />
lighting source, preferably from<br />
the front with the beam on your<br />
face.<br />
Do not point the <strong>BVP</strong> <strong>8759</strong> at a<br />
mirror or bright light.<br />
5<br />
6<br />
Avoid having a lot of movement in the background and try not to move<br />
around excessively. Too much movement tends to slow down the frame<br />
rate of the video image, resulting in a jerky picture.<br />
Use the self-view image to get the best shot of yourself.<br />
33
Making a video call<br />
Step 1<br />
Turn on the power of the<br />
unit. The bootup screen is<br />
shown on the TV.<br />
Bootup screen<br />
Step 2 Press the button<br />
on the remote control.<br />
Enter the desired phone<br />
number. When a key is<br />
pressed, the bootup screen<br />
disappears and the<br />
numbers you input are<br />
displayed.<br />
Please input phone number<br />
Press the<br />
button<br />
Step 3<br />
Step 4<br />
Step 5<br />
The other party answers<br />
the phone, and the video<br />
connection is established.<br />
You will be able to see the<br />
person you are talking to.<br />
To end the connection,<br />
simply press the<br />
button.<br />
If there is difficulty in<br />
making connection, please<br />
make sure that the <strong>BVP</strong><br />
<strong>8759</strong> has been properly<br />
installed. Please also<br />
check if the network<br />
settings are correctly<br />
configured.<br />
Bjiot2<br />
Interop.com<br />
Dialing...<br />
Dialing (local view)<br />
<strong>BVP</strong> <strong>8759</strong> User's Manual 34
Icon explanations<br />
When <strong>BVP</strong> <strong>8759</strong> is powered on, a bootup screen will be displayed, as the<br />
figure shown below. There are icons around the screen indicating various<br />
statuses of the unit, as explained below.<br />
SIP Registration Fail<br />
LAN Disconnected<br />
SIP Registration OK<br />
LAN Connected<br />
Privacy On<br />
(Privacy) (Still)<br />
(Register) (Network)<br />
Privacy Off<br />
Still On<br />
(CFW)<br />
MM/DD/YYYY HH:MM<br />
(CW)<br />
Still Off<br />
Note: Date and time will not be<br />
available until <strong>BVP</strong> <strong>8759</strong> gets the<br />
information from NTP server.<br />
CW On<br />
CW Off<br />
CFW Always<br />
CFW No Answer<br />
CFW Busy<br />
CFW Off<br />
35
Icon explanations<br />
After the connection is established, the<br />
Up/Down information is displayed on the<br />
upper left corner of the screen, and it will<br />
disappear in a few seconds.<br />
The antenna icon on the lower right<br />
corner indicates the connection status.<br />
The sun icon means the Ethernet cable is<br />
connected to the unit.<br />
If the sun icon disappears, it means the<br />
Ethernet cable is not connected.<br />
Up: 192kbps<br />
Down: 192kbps<br />
<strong>BVP</strong> <strong>8759</strong> User's Manual 36
7 Using OSD Menus<br />
Password Checking<br />
and<br />
: Item selection<br />
Configuration<br />
Password<br />
Phonebook<br />
You can enter a combination<br />
of up to 64 letters (upper case<br />
or lower case) and numbers<br />
as the password.<br />
: backspace<br />
Please input password:<br />
|<br />
System Setup<br />
Service Setup<br />
Bandwidth Setup<br />
Remote Update<br />
Note:<br />
Only after you enter the correct<br />
password can you change the<br />
settings in the OSD menu.<br />
37
Using OSD menus Configuration System Setup<br />
Network Setup<br />
Connect Type: (note)<br />
IP address: 192.168.1.1<br />
Subnet Mask: 255.255.255.0<br />
Gateway: 192.168.1.254<br />
PPPoE Username ( )<br />
PPPoE Password ( )<br />
Connect Type:<br />
STATIC: IP address/Subnet Mask/Gateway have to be assigned<br />
(Consult your ISP).<br />
DHCP: IP address/Subnet Mask/Gateway will be assigned by DHCP<br />
server.<br />
PPPoE: PPPoE Username/PPPoE Password have to be assigned<br />
(Consult your ISP).<br />
PPPoE User Name:<br />
|Leadtek<br />
PPPoE Password:<br />
|48513793<br />
9<br />
9<br />
There will be a number 9 on the bottom left corner of the screen,<br />
indicating the current input mode. Press # button to cycle through 9<br />
(numbers), A (upper case letters), and a (lower case letters) for your<br />
desired input mode.<br />
<strong>BVP</strong> <strong>8759</strong> User's Manual 38
Using OSD menus<br />
Configuration<br />
System Setup<br />
Server Setup<br />
SIP Server: *********<br />
Port: ****<br />
Domain: *********<br />
Re-Reg.(1~24h): 1<br />
DNS: 172.16.0.2<br />
NTP Server: 204.152.184.72<br />
Update Server: 0.0.0.0<br />
SIP Server:<br />
SIP Server: Please contact your SIP service provider to get the IP of the<br />
SIP server.<br />
Port: Please contact your SIP service provider (the default port number<br />
is 5060).<br />
Domain: Please contact your SIP service provider to get the domain<br />
name.<br />
Re-Reg.(1~24h): Please contact your SIP service provider.<br />
DNS: Please contact your SIP service provider to get the IP of the<br />
Domain Name Server.<br />
NTP Server: Please contact your SIP service provider to get the IP of<br />
the NTP Server. You can also set it to the IP of the Network Time<br />
Protocol (NTP) public time servers.<br />
Update Server: Please contact your SIP service provider to get the IP of<br />
the Update Server.<br />
39
Using OSD menus Configuration System Setup<br />
Terminal Setup<br />
CallerID: ****<br />
Phone No.: Bjiot3<br />
Login Name ( )<br />
Login Password ( )<br />
Phone No.: Consult your SIP Service Provider for Phone No.<br />
Login Name/Login Password: Consult your SIP Service Provider.<br />
<strong>BVP</strong> <strong>8759</strong> User's Manual 40
Using OSD menus Configuration System Setup<br />
NTP Setup<br />
Timer Zone: GMT 00:00<br />
Daylight savings: OFF<br />
Time Zone:<br />
Please set the time zone according to the place you are using the phone.<br />
If there is daylight saving in your area, please set Daylight saving to ON.<br />
41
Using OSD menus<br />
Configuration<br />
Service Setup<br />
Call Service Setup<br />
Call Forward: OFF<br />
Forward No.( )<br />
Call Waiting: OFF<br />
Audio Priority: G.711UA,G.729<br />
Video: ON<br />
Call Forward:<br />
OFF: Forward No. does not have to be assigned.<br />
No Answer: A call will be forwarded after a number of rings (the same<br />
as "Num. Of Rings" in Option menu). Please assign Forward No.<br />
Busy: When you are in a call and another call comes in, it will be<br />
forwarded. Please assign Forward No.<br />
Always: Every call will be forwarded. Please assign Forward No.<br />
9<br />
Forward No.:<br />
|<br />
There will be a number 9 on the<br />
bottom left corner of the screen,<br />
indicating the current input mode.<br />
Press # button to cycle through 9<br />
(numbers), A (upper case letters),<br />
and a (lower case letters) for your<br />
desired input mode.<br />
Call Waiting:<br />
ON: When you are in a call and another call comes in, you will hear a<br />
reminding tone. Press to answer the call and switch between both.<br />
Audio Priority:<br />
There are four options: G.711UA,G.729 / G.711AU,G.729 /<br />
G.729,G.711UA / G.729,G.711AU. We recommend the default setting:<br />
G.711UA,G.729<br />
<strong>BVP</strong> <strong>8759</strong> User's Manual 42
Using OSD menus Configuration Service Setup<br />
Call Service Setup<br />
Video:<br />
ON: <strong>BVP</strong> <strong>8759</strong> can be used to make a video call.<br />
OFF: <strong>BVP</strong> <strong>8759</strong> can only be used to make a voice call.<br />
43
Using OSD menus Configuration Service Setup<br />
Auto Answer Setup<br />
Auto Answer: OFF<br />
Password:<br />
Num. Of Rings: 1<br />
Ringer:<br />
Low<br />
Auto Answer (ON/OFF):<br />
ON: <strong>BVP</strong> <strong>8759</strong> will automatically pick up the phone.<br />
If you set Auto Answer to ON but would like to retain security, please<br />
set a Password. The other party has to enter the password to establish the<br />
connection.<br />
The password is limited to a maximum of eight characters.<br />
Num. Of Rings: (0~9):<br />
When Auto Answer is ON, you can set the number of rings before <strong>BVP</strong><br />
<strong>8759</strong> automatically picks up the phone.<br />
Ringer (High/Low):<br />
You can set the volume of the ringer to High or Low.<br />
<strong>BVP</strong> <strong>8759</strong> User's Manual 44
Using OSD menus Configuration Service Setup<br />
Advanced Setup<br />
QoS Mode( )<br />
Country Tone: Taiwan<br />
Auto Provision: OFF<br />
Timer(1~24h): 1<br />
QoS Mode:<br />
QoS Type (DSCP/TOS/OFF): Please contact your ISP (Internet Service<br />
Provider) to determine which QoS to use.<br />
Country Tone:<br />
Taiwan/HK/China: Please set according to where you are using <strong>BVP</strong><br />
<strong>8759</strong>.<br />
Auto Provision (ON/OFF):<br />
ON: When <strong>BVP</strong> <strong>8759</strong> is turned on and connected to the network, your<br />
SIP service provider will check the information of your <strong>BVP</strong> <strong>8759</strong>,<br />
including user profile and firmware versions, and will update the<br />
firmware to the latest version.<br />
Timer(1~24h): Set the interval for <strong>BVP</strong> <strong>8759</strong> to check for updates.<br />
45
Using OSD menus Configuration Service Setup<br />
Option<br />
Video TX/RX Info: ON<br />
Language:<br />
English<br />
Media Detection: ON<br />
Video TX/RX Info:<br />
ON: In a video call, you can monitor the bandwidth of incoming and<br />
outgoing video.<br />
Language:<br />
English/Traditional Chinese/Simplified Chinese: Choose the language<br />
for the OSD Menu.<br />
Media Detection (ON/OFF):<br />
If you plan to keep <strong>BVP</strong> <strong>8759</strong> connected for a long period of time,<br />
please set to OFF.<br />
<strong>BVP</strong> <strong>8759</strong> User's Manual 46
Using OSD menus Configuration Bandwidth Setup<br />
Bandwidth Setup<br />
Video Bandwidth:<br />
1. 40 Kbps<br />
2. 64 Kbps<br />
3. 90 Kbps<br />
4. 128 Kbps<br />
5. 192 Kbps<br />
6. 256 Kbps<br />
7. 384 Kbps<br />
8. 512 Kbps<br />
Please set the bandwidth according to the bandwidth your ISP provides.<br />
Note: Do not set the bandwidth to higher than what your ISP provides to<br />
avoid the instability of video quality.<br />
47
Using OSD menus Configuration Remote Update<br />
Remote Update<br />
System Setup<br />
Bandwidth Setup<br />
Remote Update<br />
Start the Remote Update<br />
Yes <br />
No <br />
Network software<br />
Update proceeding.<br />
Please wait.<br />
Note: If <strong>BVP</strong> <strong>8759</strong> has the same software version as the Update Server,<br />
the software will not be updated, and <strong>BVP</strong> <strong>8759</strong> will return to the<br />
standby screen.<br />
After the update is completed, <strong>BVP</strong> <strong>8759</strong> will automatically reboot.<br />
<strong>BVP</strong> <strong>8759</strong> User's Manual 48
Using OSD menus<br />
Password<br />
and<br />
: Item selection<br />
Configuration<br />
Password<br />
Phonebook<br />
There will be a<br />
number 9 on the<br />
bottom left corner<br />
of the screen,<br />
indicating the<br />
current input mode.<br />
Press # button<br />
to cycle through 9<br />
(numbers), A<br />
(upper case letters),<br />
and a (lower<br />
case letters) for<br />
your desired input<br />
mode.<br />
9<br />
Old Password:<br />
New Password:<br />
New Password Confirm:<br />
and<br />
: move cursor<br />
: backspace<br />
Change Password?<br />
Yes <br />
No <br />
Incorrect Password<br />
Invalid<br />
Check inputs<br />
Valid<br />
New Password<br />
Saving.<br />
49
Using OSD menus Phonebook Add<br />
Adding to the phonebook<br />
and<br />
: Item selection<br />
and<br />
: Item selection<br />
Configuration<br />
Password<br />
Phonebook<br />
Add<br />
Search<br />
In Box<br />
Out Box<br />
Speed Dial<br />
press **** to clear phonebook<br />
and<br />
and<br />
: backspace<br />
: Item selection<br />
: move cursor<br />
There will be a number 9<br />
on the bottom left corner<br />
of the screen, indicating<br />
the current input mode.<br />
#<br />
Press button to<br />
cycle through 9<br />
(numbers), A (upper<br />
case letters), and a<br />
(lower case letters) for<br />
your desired input mode.<br />
9<br />
Name:<br />
Phone:<br />
Add This Record?<br />
Yes <br />
No <br />
Record Saved<br />
<strong>BVP</strong> <strong>8759</strong> User's Manual 50
Using OSD menus Phonebook Search<br />
Search for a number<br />
and<br />
: Item selection<br />
Add<br />
Search<br />
In Box<br />
Out Box<br />
Speed Dial<br />
press **** to clear phonebook<br />
9<br />
Searching by Name:<br />
Joe<br />
and : move cursor<br />
: backspace<br />
There will be a number 9 on the<br />
bottom left corner of the screen,<br />
indicating the current input mode.<br />
Press # button to cycle through 9<br />
(numbers), A (upper case letters),<br />
and a (lower case letters) for your<br />
desired input mode.<br />
Name:<br />
Joe<br />
Phone:<br />
123456<br />
Dial<br />
Edit<br />
Delete<br />
Add to Speed Dial<br />
(Continued on next page)<br />
51
Using OSD menus<br />
Phonebook<br />
Search<br />
Search for a number (cont'd)<br />
Dial the searched number<br />
and<br />
Dial<br />
Edit<br />
Delete<br />
: Item selection<br />
Add to Speed Dial<br />
Edit the phonebook record<br />
and : Item selection<br />
Dial<br />
Edit<br />
Delete<br />
Add to Speed Dial<br />
123456<br />
Dialing ...<br />
Name:<br />
Joe<br />
Phone:<br />
123456<br />
Call progressing<br />
If you can not dial out with<br />
<strong>BVP</strong> <strong>8759</strong>, press the<br />
button to return to local<br />
view, and try to dial again.<br />
9<br />
and<br />
and<br />
: backspace<br />
There will be a number 9<br />
on the bottom left corner of<br />
the screen, indicating the<br />
current input mode. Press #<br />
button to cycle through 9<br />
(numbers), A (upper case<br />
letters), and a (lower case<br />
letters) for your desired input<br />
mode.<br />
Record updated<br />
: Item selection<br />
: move cursor<br />
<strong>BVP</strong> <strong>8759</strong> User's Manual 52
Using OSD menus<br />
Phonebook<br />
Search<br />
Search for a number (cont'd)<br />
Delete the phonebook record<br />
and : Item selection<br />
Add the record to Speed Dial<br />
and<br />
: Item selection<br />
Dial<br />
Edit<br />
Delete<br />
Add to Speed Dial<br />
Dial<br />
Edit<br />
Delete<br />
Add to Speed Dial<br />
Delete This Record?<br />
Yes <br />
No <br />
0. (None)<br />
1. (None)<br />
2. (None)<br />
3. (None)<br />
4. (None)<br />
and<br />
: Item selection<br />
Press the item number (0-9)<br />
to assign the record to the<br />
number.<br />
Record deleted<br />
Record saved<br />
53
Using OSD menus Phonebook In Box<br />
InBox contains the numbers of<br />
the 30 last received calls.<br />
and<br />
: Item selection<br />
and<br />
: Item selection<br />
Configuration<br />
Password<br />
Phonebook<br />
Add<br />
Search<br />
In Box<br />
Out Box<br />
Speed Dial<br />
press **** to clear phonebook<br />
Received call: 2 of 8<br />
From:Anonymous<br />
Phone:anonymous<br />
Time:09/10/2004 09:59<br />
Duration:0h 0m 55s<br />
Dial Delete<br />
press **** to clear in/out box<br />
Received call: 1 of 8<br />
From:Anonymous<br />
Phone:anonymous<br />
Time:09/10/2004 10:00<br />
Duration:0h 1m 13s<br />
Dial Delete<br />
press **** to clear in/out box<br />
Dial out<br />
Select a desired item and<br />
then press to dial out.<br />
Dial out<br />
Phone No.<br />
Domain<br />
Dialing...<br />
If you can not dial out with <strong>BVP</strong><br />
<strong>8759</strong>, please press the<br />
button to return to local view, and<br />
try to dial again.<br />
<strong>BVP</strong> <strong>8759</strong> User's Manual 54
Using OSD menus<br />
Phonebook<br />
Out Box<br />
OutBox contains the numbers of<br />
the 30 last dialed calls.<br />
and<br />
: Item selection<br />
and<br />
: Item selection<br />
Configuration<br />
Password<br />
Phonebook<br />
Add<br />
Search<br />
In Box<br />
Out Box<br />
Speed Dial<br />
press **** to clear phonebook<br />
Placed call: 2 of 2<br />
To:<br />
Phone:bjiot2<br />
Time:09/10/2004 10:05<br />
Duration:0h 0m 10s<br />
Dial Delete<br />
press **** to clear in/out box<br />
Received call: 1 of 8<br />
To:<br />
Phone:bjiot2<br />
Time:09/10/2004 10:02<br />
Duration:0h 0m 31s<br />
Dial Delete<br />
press **** to clear in/out box<br />
Dial out<br />
Select a desired item and<br />
then press to dial out.<br />
Dial out<br />
Phone No.<br />
Domain<br />
Dialing...<br />
If you can not dial out with <strong>BVP</strong><br />
<strong>8759</strong>, please press the<br />
button to return to local view, and<br />
try to dial again.<br />
55
Using OSD menus<br />
Copyright Information<br />
In local view screen, pressing "0000" will bring out a status screen with some<br />
information displayed, including the company name, copyright statement,<br />
and software version, including main s/w and LAN s/w.<br />
Local view 0000<br />
Copyright (c) 2001-2004<br />
Leadtek Research Inc.<br />
All rights reserved.<br />
VFAST . .<br />
NET . .<br />
LoC <strong>8759</strong>_LR<br />
Any key<br />
<strong>BVP</strong> <strong>8759</strong> User's Manual 56
Using OSD menus<br />
Restore Factory Settings<br />
In local view screen, pressing "********" (eight asterisks) will bring out a<br />
dialog window, asking if you want to restore all settings to factory default<br />
(see below). Press to begin the process. Press to cancel.<br />
Local view<br />
********<br />
Restore all settings<br />
to factory default?<br />
Yes <br />
No <br />
Setting stored.<br />
Please reboot.<br />
Saving complete<br />
rebooting. Please wait...<br />
Reboot.<br />
57
8 OSD Menu Tree<br />
Configuration<br />
Password<br />
System Setup<br />
Service Setup<br />
Bandwidth Setup<br />
Remote Update<br />
Network Setup<br />
Server Setup<br />
Terminal Setup<br />
NTP Setup<br />
Call Service Setup<br />
Auto Answer Setup<br />
Advanced Setup<br />
Option<br />
Phonebook<br />
Add<br />
Search<br />
InBox<br />
OutBox<br />
Speed Dial<br />
<strong>BVP</strong> <strong>8759</strong> User's Manual 58
9 Trouble Shooting<br />
Your <strong>BVP</strong> <strong>8759</strong> is reliable and easy to use. If you encounter any problem<br />
while using this product, please refer to the table below for possible solutions.<br />
Power Indicator OFF<br />
Plug power adapter in the unit.<br />
Plug the power cord in the<br />
power outlet in the wall.<br />
Turn on the power switch.<br />
Video of local view is dark<br />
Increase light on the image<br />
and reduce back lighting.<br />
No image is displayed on TV<br />
screen<br />
Make sure the power indicator<br />
is ON, and select the<br />
appropriate video input for TV.<br />
Video in local view has a red cast<br />
Aim the <strong>BVP</strong> <strong>8759</strong> at a strong<br />
white light source momentarily.<br />
Increase the room light level.<br />
The unit is not responding when<br />
the button is pressed<br />
Be sure the ethernet cable is<br />
plugged into the " " port<br />
directly on the <strong>BVP</strong> <strong>8759</strong>.<br />
Video connection is not<br />
established correctly<br />
Hang up and call again.<br />
Ask the other party call you.<br />
Can not dial a phone number<br />
Plug ethernet cable from the<br />
Ethernet device into the " "<br />
port on the unit.<br />
Green or yellow blocks appear in<br />
the remote picture<br />
Probable cause is bad<br />
connection (noisy line). Hang<br />
up and try again. This time,<br />
ask the other party to call you.<br />
59
10 Tech Support<br />
In the event of not finding the solution to your problem, please contact your local<br />
distributor. You may also contact our technical support staff; E-mail to<br />
with the following information:<br />
Product name:<br />
It will be easier for our staff to answer your question if you know the name of the<br />
product.<br />
Detailed description of your problem:<br />
Please describe in detail all the problems you encountered, including the kind of<br />
software and hardware you are using, and the contents of your system files.<br />
<strong>BVP</strong> <strong>8759</strong> User's Manual 60
11 Limited Warranty<br />
Leadtek warrants to the original purchaser of this product that it shall be free<br />
of defects resulting from workmanship or components for a period of one (1)<br />
year from the date of sale. Defects covered by this Limited Warranty shall be<br />
corrected either by repair or, at Leadtek's discretion by replacement. In the<br />
event of replacement, the replacement unit will be warranted for the<br />
remainder of the original one (1) year period or thirty (30) days, whichever is<br />
longer. THERE ARE NO OTHER ORAL OR WRITTEN WARRANTIES,<br />
EXPRESSED OR IMPLIED, INCLUDING BUT NOT LIMITED TO<br />
THOSE OF MERCHANTABILITY OR FITNESS FOR A PARTICULAR<br />
PURPOSE.<br />
This Limited Warranty is nontransferable and does not apply if the product<br />
has been damaged by negligence, accident, abuse, misuse, modification,<br />
misapplication, shipment to the Manufacturer or service by someone other<br />
than the Leadtek Transportation charges to Leadtek are not covered by this<br />
Limited Warranty. To be eligible for warranty service, a defective product<br />
must be sent to and received by Leadtek within fourteen (14) months of the<br />
date of sale and be accompanied with proof of purchase. Leadtek does not<br />
warrant that this product will meet your requirements; it is your sole<br />
responsibility to determine the suitability of this product for your purposes.<br />
Leadtek does not warrant the compatibility of this product with your<br />
computer or related peripherals, software.<br />
LEADTEK'S SOLE OBLIGATION AND LIABILITY UNDER THIS<br />
WARRANTY IS LIMITED TO THE REPAIR OR REPLACEMENT OF A<br />
DEFECTIVE PRODUCT. THE MANUFACTURER SHALL NOT, IN ANY<br />
EVENT, BE LIABLE TO THE PURCHASER OR ANY THIRD PARTY<br />
FOR ANY INCIDENTAL OR CONSEQUENTIAL DAMAGES OR<br />
LIABILITY IN TORT RELATING TO THIS PRODUCT OR RESULTING<br />
FROM ITS USE OR POSSESSION.<br />
This limited warranty is governed by the laws of Taiwan.<br />
61
12 FCC Statement<br />
This device complies with Part 15 of the FCC Rules. Operation is subject to the<br />
following two conditions:<br />
<br />
<br />
This device may not cause harmful interference.<br />
This device must accept any interference received, including interference that<br />
may cause undesired operation.<br />
This equipment has been tested and found to comply with the limits for a Class B<br />
digital device pursuant to Part 15 of FCC Rules. These limits are designed to<br />
provide reasonable protection against harmful interference in a residential<br />
installation. This equipment generates, uses and can radiate radio frequency<br />
energy and, if not installed and used in accordance with the instructions, may<br />
cause harmful interference to radio communications. However, there is no<br />
guarantee that interference will not occur in a particular installation. If this<br />
equipment does cause harmful interference to radio or television reception, which<br />
can be determined by turning the equipment off and on, the user is encouraged to<br />
try to correct the interference by one or more of the following measures:<br />
<br />
<br />
<br />
<br />
<br />
Reorient or relocate the receiving antenna.<br />
Increase the separation between the equipment and receiver.<br />
Connect the equipment into an outlet on a circuit different from that to which<br />
the receiver is connected.<br />
Consult the dealer or an experienced radio/TV technician for help.<br />
Shielded interface cables must be used in order to comply with emission<br />
limits. Changes or modifications not expressly approved by the party<br />
responsible for compliance could void the user's authority to operate the<br />
equipment.<br />
<strong>BVP</strong> <strong>8759</strong> User's Manual 62