Installation Instructions - Omix-ADA
Installation Instructions - Omix-ADA
Installation Instructions - Omix-ADA

You also want an ePaper? Increase the reach of your titles
YUMPU automatically turns print PDFs into web optimized ePapers that Google loves.
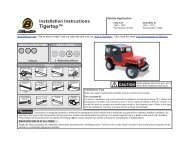
<strong>Installation</strong> <strong>Instructions</strong>: 18676.72<br />
STEP 5: Mark the locations of the rear case half bolts before removing them. Start the<br />
case separation process by using the cast-in pry bar location slots only. Prying anywhere<br />
else on the case halves may create an uneven surface that will not seal properly when<br />
reassembled. Carefully begin to pry the case halves apart. Some models will be able to<br />
remove the pickup tube and pump assembly with the rear case.<br />
NOTE: Inspect the pickup tube o-ring and the front shaft seal in the pump. Do not take<br />
the pump apart it is not serviceable.<br />
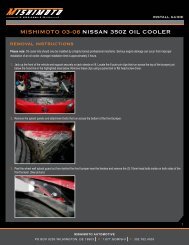
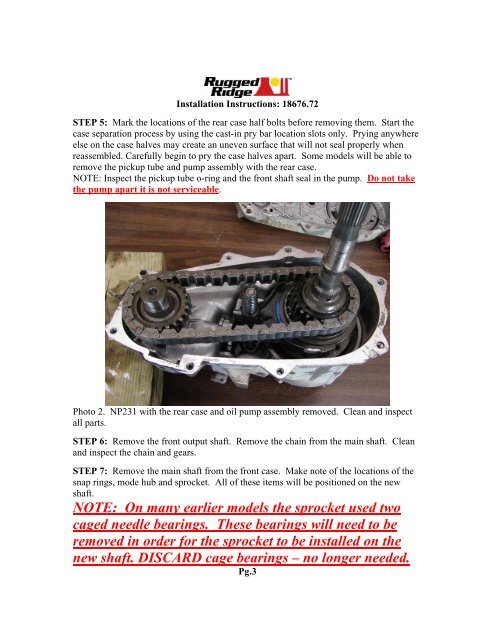
Photo 2. NP231 with the rear case and oil pump assembly removed. Clean and inspect<br />
all parts.<br />
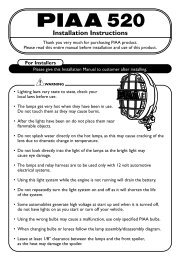
STEP 6: Remove the front output shaft. Remove the chain from the main shaft. Clean<br />
and inspect the chain and gears.<br />
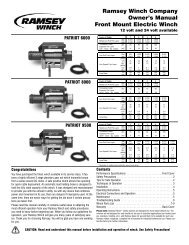
STEP 7: Remove the main shaft from the front case. Make note of the locations of the<br />
snap rings, mode hub and sprocket. All of these items will be positioned on the new<br />
shaft.<br />
NOTE: On many earlier models the sprocket used two<br />
caged needle bearings. These bearings will need to be<br />
removed in order for the sprocket to be installed on the<br />
new shaft. DISCARD cage bearings – no longer needed.<br />
Pg.3