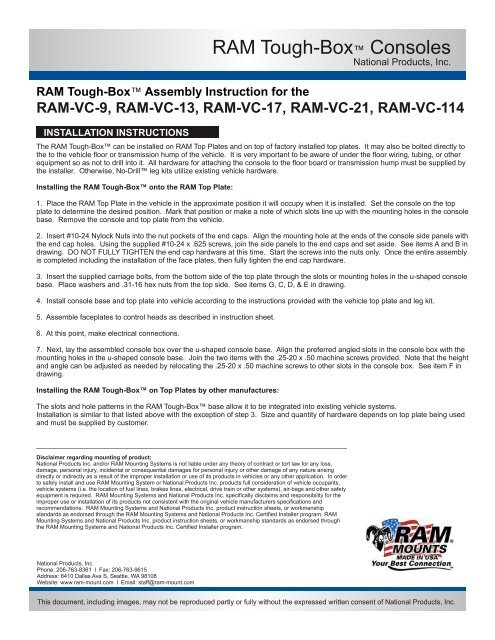
Tough-Box⢠Console Installation Instructions - RAM Mounts
Tough-Box⢠Console Installation Instructions - RAM Mounts
Tough-Box⢠Console Installation Instructions - RAM Mounts

You also want an ePaper? Increase the reach of your titles
YUMPU automatically turns print PDFs into web optimized ePapers that Google loves.
<strong>RAM</strong> <strong>Tough</strong>-Box Assembly Instruction for the<br />
The <strong>RAM</strong> <strong>Tough</strong>-Box can be installed on <strong>RAM</strong> Top Plates and on top of factory installed top plates. It may also be bolted directly to<br />
the to the vehicle floor or transmission hump of the vehicle. It is very important to be aware of under the floor wiring, tubing, or other<br />
equipment so as not to drill into it. All hardware for attaching the console to the floor board or transmission hump must be supplied by<br />
the installer. Otherwise, No-Drill leg kits utilize existing vehicle hardware.<br />
Installing the <strong>RAM</strong> <strong>Tough</strong>-Box onto the <strong>RAM</strong> Top Plate:<br />
1. Place the <strong>RAM</strong> Top Plate in the vehicle in the approximate position it will occupy when it is installed. Set the console on the top<br />
plate to determine the desired position. Mark that position or make a note of which slots line up with the mounting holes in the console<br />
base. Remove the console and top plate from the vehicle.<br />
2. Insert #10-24 Nylock Nuts into the nut pockets of the end caps. Align the mounting hole at the ends of the console side panels with<br />
the end cap holes. Using the supplied #10-24 x .625 screws, join the side panels to the end caps and set aside. See items A and B in<br />
drawing. DO NOT FULLY TIGHTEN the end cap hardware at this time. Start the screws into the nuts only. Once the entire assembly<br />
is completed including the installation of the face plates, then fully tighten the end cap hardware.<br />
3. Insert the supplied carriage bolts, from the bottom side of the top plate through the slots or mounting holes in the u-shaped console<br />
base. Place washers and .31-16 hex nuts from the top side. See items G, C, D, & E in drawing.<br />
4. Install console base and top plate into vehicle according to the instructions provided with the vehicle top plate and leg kit.<br />
5. Assemble faceplates to control heads as described in instruction sheet.<br />
6. At this point, make electrical connections.<br />
7. Next, lay the assembled console box over the u-shaped console base. Align the preferred angled slots in the console box with the<br />
mounting holes in the u-shaped console base. Join the two items with the .25-20 x .50 machine screws provided. Note that the height<br />
and angle can be adjusted as needed by relocating the .25-20 x .50 machine screws to other slots in the console box. See item F in<br />
drawing.<br />
Installing the <strong>RAM</strong> <strong>Tough</strong>-Box on Top Plates by other manufactures:<br />
<strong>RAM</strong> <strong>Tough</strong>-Box <strong>Console</strong>s<br />
National Products, Inc.<br />
<strong>RAM</strong>-VC-9, <strong>RAM</strong>-VC-13, <strong>RAM</strong>-VC-17, <strong>RAM</strong>-VC-21, <strong>RAM</strong>-VC-114<br />
INSTALLATION INSTRUCTIONS<br />
The slots and hole patterns in the <strong>RAM</strong> <strong>Tough</strong>-Box base allow it to be integrated into existing vehicle systems.<br />
<strong>Installation</strong> is similar to that listed above with the exception of step 3. Size and quantity of hardware depends on top plate being used<br />
and must be supplied by customer.<br />
Disclaimer regarding mounting of product:<br />
National Products Inc. and/or <strong>RAM</strong> Mounting Systems is not liable under any theory of contract or tort law for any loss,<br />
damage, personal injury, incidental or consequential damages for personal injury or other damage of any nature arising<br />
directly or indirectly as a result of the improper installation or use of its products in vehicles or any other application. In order<br />
to safely install and use <strong>RAM</strong> Mounting System or National Products Inc. products full consideration of vehicle occupants,<br />
vehicle systems (i.e. the location of fuel lines, brakes lines, electrical, drive train or other systems), air-bags and other safety<br />
equipment is required. <strong>RAM</strong> Mounting Systems and National Products Inc. specifically disclaims and responsibility for the<br />
improper use or installation of its products not consistent with the original vehicle manufacturers specifications and<br />
recommendations. <strong>RAM</strong> Mounting Systems and National Products Inc. product instruction sheets, or workmanship<br />
standards as endorsed through the <strong>RAM</strong> Mounting Systems and National Products Inc. Certified Installer program. <strong>RAM</strong><br />
Mounting Systems and National Products Inc. product instruction sheets, or workmanship standards as endorsed through<br />
the <strong>RAM</strong> Mounting Systems and National Products Inc. Certified Installer program.<br />
National Products, Inc.<br />
Phone: 206-763-8361 l Fax: 206-763-9615<br />
Address: 8410 Dallas Ave S, Seattle, WA 98108<br />
Website: www.ram-mount.com l Email: staff@ram-mount.com<br />
This document, including images, may not be reproduced partly or fully without the expressed written consent of National Products, Inc.
<strong>RAM</strong> <strong>Tough</strong>-Box <strong>Console</strong>s<br />
National Products, Inc.<br />
A<br />
B<br />
C<br />
D<br />
E<br />
F<br />
G<br />
A: 12 QTY. #10-24 NYLOCK HEX NUTS<br />
B: 12 QTY. #10-24 X 5/8” MACHINE SCREWS<br />
C: 4 QTY. 5/16”-18 HEX NUTS<br />
D: 4 QTY. 5/16” LOCK SPLIT WASHERS<br />
E: 4 QTY. 5/16” FLAT WASHERS<br />
F: 4 QTY. 1/4”-20 X ½” MACHINE SCREWS<br />
National Products, Inc.<br />
Phone: 206-763-8361 l Fax: 206-763-9615<br />
Address: 8410 Dallas Ave S, Seattle, WA 98108<br />
Website: www.ram-mount.com l Email: staff@ram-mount.com<br />
This document, including images, may not be reproduced partly or fully without the expressed written consent of National Products, Inc.