XCAPI H.323 TechNote
XCAPI H.323 TechNote
XCAPI H.323 TechNote
You also want an ePaper? Increase the reach of your titles
YUMPU automatically turns print PDFs into web optimized ePapers that Google loves.
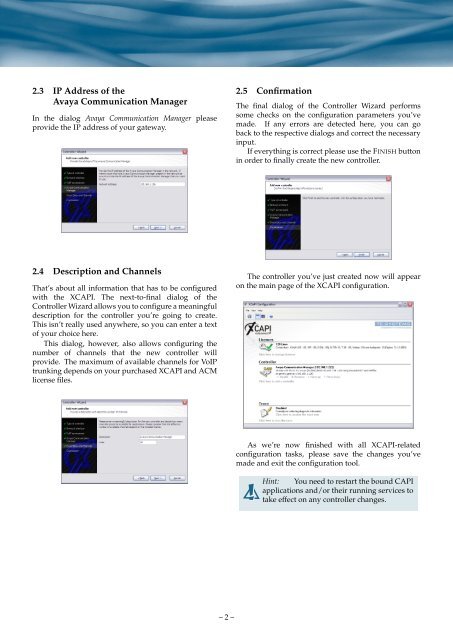
2.3 IP Address of the<br />
Avaya Communication Manager<br />
In the dialog Avaya Communication Manager please<br />
provide the IP address of your gateway.<br />
2.5 Confirmation<br />
The final dialog of the Controller Wizard performs<br />
some checks on the configuration parameters you’ve<br />
made. If any errors are detected here, you can go<br />
back to the respective dialogs and correct the necessary<br />
input.<br />
If everything is correct please use the FINISH button<br />
in order to finally create the new controller.<br />
2.4 Description and Channels<br />
That’s about all information that has to be configured<br />
with the <strong>XCAPI</strong>. The next-to-final dialog of the<br />
Controller Wizard allows you to configure a meaningful<br />
description for the controller you’re going to create.<br />
This isn’t really used anywhere, so you can enter a text<br />
of your choice here.<br />
This dialog, however, also allows configuring the<br />
number of channels that the new controller will<br />
provide. The maximum of available channels for VoIP<br />
trunking depends on your purchased <strong>XCAPI</strong> and ACM<br />
license files.<br />
The controller you’ve just created now will appear<br />
on the main page of the <strong>XCAPI</strong> configuration.<br />
As we’re now finished with all <strong>XCAPI</strong>-related<br />
configuration tasks, please save the changes you’ve<br />
made and exit the configuration tool.<br />
Hint: You need to restart the bound CAPI<br />
applications and/or their running services to<br />
take effect on any controller changes.<br />
– 2 –


