ReVox CD-Player B126 - Revoxsammler
ReVox CD-Player B126 - Revoxsammler
ReVox CD-Player B126 - Revoxsammler

You also want an ePaper? Increase the reach of your titles
YUMPU automatically turns print PDFs into web optimized ePapers that Google loves.
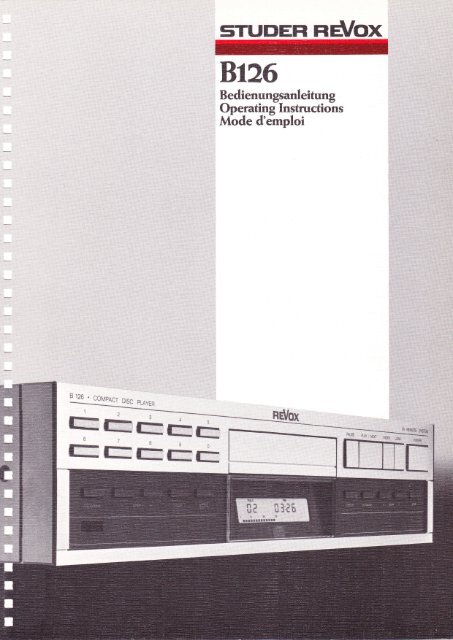
B,126<br />
:, Bedienungsanleitung<br />
Operating Instructions<br />
Mode d'emploi<br />
ä 1:6<br />
IlyfAcT nise pl4y$<br />
--rF<br />
--lh-f._l_<br />
3<br />
,Ftr<br />
I,h-;<br />
,<br />
f'-<br />
f-r.--<br />
r- if---<br />
ry&],'i,,,,'{riii:rg{r
Schützen Sie lhr Gerät vor übermässiger Hitze und Feuchtigkeit.<br />
Stellen Sie es so auf, dass die Lüftungsschlitze nichtverdecktwerden.<br />
GARANTIE<br />
VERPACKUNG<br />
Bitte beachten Sie, dass die Garantie nur im Verkaufsland gültig<br />
ist. Ausserdem machen wir Sie darauf aufmerksam, dass die<br />
Garantie erlischt, wenn am Gerät unsachgemässe Eingriffe oder<br />
nicht fachmännische Reparaturen vorgenommen worden sind.<br />
Für in der Schweiz und in Osterreich gekaufte Geräte gibt der<br />
Fachhändler die Garantiebescheinigung ab.<br />
Bei den in Frankreich gekauften Geräten finden Sie die Garantiekarte<br />
in derVerpackung. Diese Karte mussvon lhrem autorisierten<br />
REVOX-Fachhändler vollständig ausgefüllt und unterschrieben<br />
werden.<br />
ln der Bundesrepublik Deutschland, den USA und den meisten<br />
anderen l!nc!€In liegt den Geräten eine spezielle Garantieanforderungskärtebel<br />
Entweder befindet sich die Karte in derVerpakkung<br />
oder in einer Plastiktasche an derVerpackungsaussenseite.<br />
Sollte diese Karte fehlen, wenden Sie sich an lhr REVOX-Fachgeschäft<br />
oder an lhre REVOX-Landesvertretung.<br />
Bewahren Sie die Originalverpackung auf. Bei einem Transporl ist<br />
diese Spezialverpackung der beste Schutz für lhr werlvolles<br />
Gerät.<br />
Vorsicht:<br />
Attention:<br />
Warning:<br />
Das Gerät ist in ausgeschaltetem Zustand (STANDBY) nicht von der Stromzuführung getrennt.<br />
Cet appareil n'est pas s6par6 du r6seau lorsqu'il est d6clench6 (STANDBY).<br />
This unit is not separated from the mains supply when switched off (STANDBY).<br />
Attenzione: Ouesto apparecchio non ö separato dalla rete quando l'interruttore ö spento (STANDBY).<br />
Precaucidn: Este aparato no estä separado de la red cuando estä apagado (STANDBY).<br />
Waarschuwing: ln uitgeschakelde toestand (STANDBY) is het apparaat niet gescheiden van de netspanning.<br />
Advarsel:<br />
Huomio:<br />
Forsiktig:<br />
Varning:<br />
Apparaten er ogsaa hvis lukket (STANDBY) under strom.<br />
Huolimatta siitä, että virta on katkaistu laitteesta (STANDBY). sitä ei ole eristetty sähköstä.<br />
Selvom strommen ikke er pa i apparatet (STANDBY). sa er det ikke skilt fra strom.<br />
Oaktat om strömmen är avbruten i apparaten (STANDBY), sa är den ända kopplad med ström.
lnhaltsverzeichnis<br />
KAPITEL 1<br />
lnstallation<br />
lnbetriebnahme<br />
Seite<br />
Packungsinhalt 2<br />
Aufstellen<br />
2<br />
Transportsicherung lösen<br />
Sicherheitsbestimm ungen<br />
2<br />
2<br />
Netzspannung<br />
Anschliessen<br />
Einschalten<br />
J<br />
J<br />
I(APITEL 2<br />
Haupt-Tastenfeld<br />
I(APITEL 3<br />
Neben-Tastenfeld<br />
KAPFEL 4<br />
Fehlerquellen<br />
Technischer Anhang<br />
KAPITEL 5<br />
Liste der Tastenfu nktionen<br />
Übersicht der Funktionen<br />
Anwahl von Musikstücken und lndizes<br />
Pausenfunktion<br />
Sonderfunktionen:<br />
Suchbetrieb (SCAN)<br />
AUTOSTOP und STOP<br />
Endlosbetrieb (LOOP)<br />
Anzeigefunktionen (D I SPLAY)<br />
Programmieren:<br />
Funktion der Programmtasten<br />
Programmierbeispiele<br />
- Folge von Stücken (Tracks) programmieren<br />
- Programm verändern<br />
- Programm löschen<br />
- Endlosprogramme<br />
- Pausen programmieren<br />
- Ausschalten des Gerätes programmieren<br />
Programm abarbeiten<br />
Mögliche Fehler und deren Behebung<br />
I nfrarot-Fernbed ienung B20B<br />
Digitalausgänge<br />
Die Compact Disc<br />
Technische Daten<br />
Abmessungen<br />
Kurzbeschreibung aller Funktionen<br />
I ndexierte Gerätezeichnung<br />
Aud io-Blockschaltbild<br />
4<br />
5<br />
5<br />
6<br />
6<br />
6<br />
7<br />
B<br />
9<br />
10<br />
11<br />
12<br />
13<br />
14<br />
15<br />
16<br />
17<br />
1B<br />
19<br />
20<br />
20<br />
21<br />
24<br />
25<br />
Subject to change.<br />
Printed in Switzerland by WILLI STUDER AG<br />
Order number 10 30.0960 (Ed.09BB)<br />
Copyright by WILLI STUDER AG<br />
CH 8105 Regensdorf-Zurich<br />
REVOX is a registered trade mark of<br />
WILLI STUDER AG Regensdorf.
KAPffEL 1<br />
lnstallation<br />
Packungsinha lt, Aufstellen<br />
Packungsinhalt<br />
Nebst dieser Bedienungsanleitung und dem<br />
Gerät mit fest angebrachtem, der Landesnorm<br />
entsprechendem Netzkabel enthält die<br />
Verpackung ein Verbindungskabel mit beid<br />
seitigen Cinch-Buchsen sowie einen Kunststoffeinsatz<br />
zum Abspielen von <strong>CD</strong>-Singles<br />
(mit Bcm Durchmesser). Bei Unstimmigkeiten<br />
wenden Sie sich bitte an lhren Fachhändler.<br />
Aufstellen<br />
Stellen Sie das Gerät so auf. dass zu anderen<br />
Geräten, Wänden, Möbeln usw. ein Lüftungsabstand<br />
von mindestens 10mm eingehalten<br />
wird<br />
Transportsicherung lösen<br />
Um einer Beschädigung des Laufwerkes während<br />
des Transportes vorzubeugen, wurde es<br />
von der Unterseite her mit zwei SicherungSschrauben<br />
fixiert. Diese Schrauben sind entsprechend<br />
gekennzeichnet und müssen vor<br />
der lnbetriebnahme mit einem Schraubendreher<br />
gelöst und entfernt werden. Bei einem<br />
späteren Transport über grössere Distanzen<br />
müssen die beiden Schrauben nach Entfernung<br />
einer allfällig eingelegten Compact Disc<br />
und gegebenenfalls des <strong>CD</strong>-Single-Einsatzes<br />
zur Arretierung des Laufwerks wieder eingesetzt<br />
und angezogen werden. Bei einem mit<br />
Sorgfalt durchgeführten Transport über kurze<br />
Distanz, z. B. in einen anderen Raum, ist diese<br />
Sicherung nicht notwendig.<br />
Sicherheitsbestimmungen<br />
Schliessen Sie das Gerät nur mit dem fest angebrachten<br />
Netzkabel am Stromnetz an.<br />
Halten Sie das Gerät stets trocken und verwenden<br />
Sie es nie in Nassräumen (Badezimmer,<br />
Küche, Waschküche, Keller usw.).<br />
Das Gerät ist im ausgeschalteten Zustand<br />
(Standby) nicht von der Stromzufuhr getrennt.<br />
EinigeTeile im Innern des Gerätsführen immer<br />
Netzspannungl<br />
Das Gerät ist nurfür den Betrieb in Normallage<br />
(waagerecht liegend) konzipiert.<br />
Bei Fehlfunktion oder Defekt ist sofort der<br />
Netzstecker zu ziehen. Bringen Sie das Gerät<br />
einem REVOX-Fachhändler zur Kontrolle.
lnstallation<br />
Netzspannung, Anschliessen,<br />
Einschalten<br />
Netzspannung überprüfen<br />
AC POWER<br />
Der 8126 ist ab Werkfest auf die auf der Rückseite<br />
angegebene Nefzspannung eingestellt.<br />
Vergewissern Sie sich, dass die örtliche Netzspannung<br />
diesem Wert entspricht.<br />
Für die Umrüstung auf andere Netzspannungen<br />
konsultieren Sie bitte lhren Fachhändler.<br />
Gerät ans Netz anschliessen<br />
o<br />
^@<br />
@<br />
"o o<br />
@l<br />
o<br />
Schliessen Sie das Gerät mit dem fest angebrachten<br />
Netzkabel am Netz an.<br />
Anschluss an den Verstärker<br />
Verbinden Sie die beiden Cinchbuchsen<br />
FIXED OUTPUT an der Rückseite des Geräts<br />
[20] mit Hilfe des beigepackten Kabels mit<br />
dem Eingang "<strong>CD</strong>", "Disc" oder 'Aux" lhres<br />
Vor- oder Vollverstärkers.<br />
Gerät einschalten<br />
PAUSE PUY / NEXT<br />
=="*"=== lTt<br />
INDEX LOAD<br />
I<br />
Drücken der Taste POWER [1] auf der Gerätefront<br />
schaltet den <strong>CD</strong>-Spieler ein. Durch nochmaliges<br />
Drücken wird das Gerät wieder ausgeschaltet<br />
(Standby). Sie können den Spieler<br />
auch durch andere Funktionstasten einschalten,<br />
siehe Kapitel 2.<br />
Das ausgeschaltete, aber mit dem Netz verbundene<br />
Gerät befindet sich im Standby-Modus<br />
(Bereitschaft), was durch die Standby-<br />
Leuchtanzeige im Fenster des I nf rarotempfängers<br />
[19] angezeigt wird. Dies macht es möglich,<br />
dass Sie den <strong>CD</strong>-Spieler auch mit der<br />
lnfrarot-Fernbedienung REVOX B20B bequem<br />
vom Hörplatz aus ein- und ausschalten<br />
können.<br />
Der Stromverbrauch im Standby-Betrieb ist<br />
vernachlässigbar gering (etwa 5 Watt), so<br />
dass Sie das Gerät dauernd am Netz belassen<br />
können.
KAPITEL 2<br />
Haupt-Tastenfeld<br />
Ubersicht der Funktionen<br />
I<br />
uu '-rt<br />
151O15202530<br />
rralrrrrralttttraaaaiaalrralir<br />
TME<br />
t-t t-t . t-l l-l<br />
t) l-J'tJ ,)<br />
Schaltet das Gerät ein und bei erneuter Betätigung<br />
wieder aus. Bei eingeschaltetem Gerät<br />
erlischt die Standby-Anzeige und das Anzeigefeld<br />
[13] wird beleuchtet.<br />
LOAD t2l<br />
PAUsE puv r reir<br />
r<br />
l\4it dieser Taste kann das Gerät ebenfalls eingeschaltet<br />
werden. Gleichzeitig wird die Disc-<br />
Schublade [6] ausgefahren.<br />
Legen Sie die Compact-Disc mit der bedruckten<br />
Seite nach oben in die Schublade ein.<br />
Wenn Sie eine <strong>CD</strong>-Single (mit 8cm Durchmesser)<br />
abspielen wollen. legen Sie zuerst<br />
den <strong>CD</strong>-Single-Einsatz so in die Schublade,<br />
dass der Schriftzug REVOX nach vorne zu lhnen<br />
zeigt. Legen Sie dann die <strong>CD</strong>-Single in<br />
den Einsatz.<br />
Wenn Sie nicht sofort mit dem Abspielen beginnen<br />
möchten, können Sie die Schublade<br />
durch erneutes Drücken der Taste LOAD<br />
schl iessen.<br />
O Einlegen in Disc-Schublade:<br />
Compact Disc<br />
<strong>CD</strong>-Single mit Einsaü
Xw]E<br />
Haupt-Tastenfeld<br />
Ubersicht der Funktionen<br />
PLAY/NEXT I4I<br />
E<br />
trll<br />
nt<br />
,JI<br />
510<br />
TRACK<br />
fi 7<br />
t5to15<br />
llalllltllallr<br />
TIME<br />
n -t,t I<br />
t),:.'-t :t -l<br />
15<br />
TME<br />
Ll !,'i' I<br />
Drücken der Taste PLAY/NEXT schliesst die<br />
Disc-Schublade. Das lnhaltsverzeichnis [G]<br />
wird angezeigt und der Abspielvorgang ab<br />
dem ersten Stück (TRACK) unverzüglich begonnen.<br />
Jedes Betätigen der Taste PLAY/NEXT lässt<br />
den Laserabtaster zum nächsten Stuck<br />
(TRACK) auf der <strong>CD</strong> springen und dieses abspielen.<br />
Zifferntasten [7]<br />
12345<br />
II::-I<br />
67490<br />
EE:_:<br />
INDEX LOAD<br />
E<br />
ll '1 !l,l<br />
51015<br />
'5<br />
TFACK<br />
ratll<br />
TIME<br />
Mit den Zifferntasten O bis 9 lässt sich das gewünschte<br />
Stück direkt anwählen. Tippen Sie<br />
die gewünschte Stück- (TRACK-) Nummer<br />
lz.B. 12 mit der Tastenfolge '1-2) ein und<br />
schliessen Sie die Eingabe mit der Taste<br />
PLAY/NEXI [4] ab Sie können bis zu 99 Stukke<br />
direkt anwählen.<br />
rNDEX [3]<br />
(sofern <strong>CD</strong> entsprechend codiert)<br />
[f<br />
TRACK INDEX TIME<br />
rt t.n =t<br />
rt -J.l= t=<br />
t-) r'r__t t_ r_t ,_'_r J<br />
151015<br />
rtllllrllrlltll<br />
TRACK INDEX TME<br />
rt |,t-t -t t-t I t.t-l I<br />
,.J r'l-.l -l t_t -t',) |<br />
I 5 .tO 15<br />
rrallalllllll<br />
Jedes Betätigen derTaste INDEX lässt den Laserabtaster<br />
zum nächsten INDEX auf der <strong>CD</strong><br />
springen.<br />
Mit den Zifferntasten [7] kann ein beliebiger<br />
lndex in einem Stück angewählt werden. Geben<br />
Sie den gewünschten lndex mit den Zifferntasten<br />
ein und drücken Sie anschliessend<br />
die Taste INDEX. Der Laserabtaster springtzur<br />
angegebenen Stelle und setzt den Abspielvorgang<br />
dort fort.<br />
Hinweis:<br />
Eine mit Indizes versehene <strong>CD</strong> bringt diese<br />
erst ab Index 2 zurAnzeige. Diese Eigenschaft<br />
ist systembedingt und tritt bei allen <strong>CD</strong>-Spielern<br />
auf.<br />
PAUSE [5]<br />
PAUSE PüY / NEXT<br />
rI<br />
t-t -t<br />
,-JI<br />
510<br />
TIME<br />
1t_t,l- t:<br />
_t t._t _l<br />
15<br />
PAUSE<br />
Drücken der Taste PAUSE [5] unterbricht den<br />
Abspielvorgang sofort, lässt den Laserabtaster<br />
jedoch auf der erreichten Position stehen.<br />
Drücken der Taste PLAY/NEXT [4] setzt den<br />
Abspielvorgang an der unterbrochenen Stelle<br />
fort.
KAPffEL 3<br />
NebenTastenfeld<br />
Sonderfunktionen<br />
scAN 116117l<br />
E-TII:<br />
rt TFACK<br />
-t 1 t_t.= T ME<br />
,__.1 I :t l.L _l =<br />
151015<br />
al!alltl!a<br />
Mit den Tasten ( [16] und ) [17] kann lede<br />
Stelle auf der <strong>CD</strong> gegen den Anfang resp. das<br />
Ende hin mit um 12 dB gedämpftem Ausgangspegel<br />
angefahen werden. Dies ist auch<br />
dann möglich. wenn sich der Compact Disc-<br />
Spieler in der Betriebsart PAUSE befindet.<br />
AUTOSTOP [15]<br />
=-=".^.==<br />
151015<br />
nn<br />
t_| ,1<br />
510<br />
TRACK<br />
TME<br />
llF., ln<br />
AurosroP<br />
-tLJ,tu<br />
t5<br />
TIME<br />
|--lFt ll t. tn<br />
ü1 -r I'i,:l<br />
talltttl<br />
PAUSE<br />
AUTOSTQP<br />
Diese Funktion wird im Display mit dem<br />
Schriftzug AUTOSTOP ID] angezeigt. Sie<br />
schaltet den Compact Disc-Spieler am Ende<br />
des Stückes auf Pause und bereitet das Abspielen<br />
des nächsten Stückes vor. Nach Betätigen<br />
der Taste PLAY/NEXT [4] wird der Abspielvorgang<br />
unverzüglich fortgesetzt. Die<br />
AUTOSTOP-Funktion bleibt erhalten.<br />
Erneutes Drücken derTaste schaltet die Funktion<br />
wieder aus.<br />
sroP [18]<br />
E--tE-l<br />
TFACK TIME<br />
-<br />
t)u<br />
nn<br />
LJ|-]'iJLJ '_l'_|,,.-lrt<br />
lo t5 2Q 25 30<br />
rtallttllralaar<br />
trrlllrr<br />
Das Drücken der Taste STOP unterbricht den<br />
Abspielvorgang sofort. Der Laserabtaster<br />
kehrt in die Anfangsposition zurück.<br />
LOOP i11l<br />
t-t t-J<br />
- ",."=-=<br />
l-l<br />
r5to<br />
tt=<br />
llrll<br />
IME<br />
t- -t,t I -l<br />
_l :r.-r r '""<br />
15<br />
Der Endlosbetrieb wird mit der Taste LOOP<br />
aktiviert und im Display mit dem Schriftzug<br />
LOOP lFl angezeigt. ln dieser Betriebsart wird<br />
die eingelegte Compact Disc immer wieder<br />
von Anfang bis Ende abgespielt, bis die Taste<br />
STOP [18] oder POWER [1] gedruckt wird.<br />
Erneutes Drücken der Taste LOOP hebt die<br />
Funktion wieder auf; derAbspielvorgang wird<br />
am Ende der <strong>CD</strong> unterbrochen.
|-|_-I-IE<br />
Neben-Tastenfeld<br />
Sonderfunktionen<br />
DTSPLAY [14]<br />
FACI T VF<br />
L-t t-t I-t nr t-t,-tt.<br />
-= ---<br />
ü-) r r.rIE<br />
Drücken dieser Taste schaltet die Zeitanzeige<br />
TIME im Feld [C] um. Vier unterschiedliche<br />
Zeitanzeigen sind möglich:<br />
151015<br />
larlalaaarrr<br />
rll<br />
t-t t-<br />
t) _l<br />
I<br />
rtr<br />
TRACK<br />
r_r :r<br />
t-t [:<br />
t_t _l<br />
lal<br />
10<br />
TIME<br />
rt,t I -l<br />
t_t'-t t=<br />
TIME<br />
-_. lr_l<br />
-f ' r,-l<br />
TIME<br />
-t n,t- -l<br />
_-l :t.:1 ,:<br />
15<br />
a) DISC-TIME : Zeit seit <strong>CD</strong>-Anfang.<br />
b) TRACK-TIN/E : Zeit seit TRACK- (Stück-)<br />
Anfang. Feld [G] des Displays informiert<br />
über die momentane Position des Laserabtasters<br />
innerhalb des Stückes (TRACK)<br />
c) TRACK-REMAINING-TlN/lE : Zeit bis zum<br />
Ende des TRACKS (Stückes). Feld [G] des<br />
Displays informiert über die momentane<br />
Position des Laserabtasters innerhalb des<br />
Stückes (TRACK). Eine INDEX-Anzeige ist<br />
hierbei nicht möglich.<br />
d) DISC-REMAINING-TIME : Zeit bis zum<br />
Ende der <strong>CD</strong>. Eine INDEX-Anzeige ist hierbei<br />
nicht möglich.<br />
Hinweis:<br />
Bei DISC-TIME werden die Pausen zwischen<br />
den Stücken und am Anfang der <strong>CD</strong> mitgerechnet.<br />
während TRACK-TIME die exakte<br />
Spielzeit des Stückes anzeigt.<br />
DISC-TIME und TRACK-TIME werden vom<br />
<strong>CD</strong>-Hersteller definiert und fest auf die Platte<br />
geprägt. Sie sind somit vom Abspielgerät<br />
unabhängig und können nicht verändert werden.
NebenTastenfeld<br />
Programmieren<br />
PROGRAM l8l<br />
IEEI<br />
==<br />
STEP TFACK<br />
rtI-|<br />
I t) t_l<br />
r510152A2530<br />
rrrrtal!lllr!!lllllaa-<br />
larlllll<br />
Mit dieserTaste wird der Programmiermodus<br />
ein- bzw. ausgeschaltet. Bei aktiviertem Programmiermodus<br />
blinkt die Anzeige STEP [A]<br />
im Anzeigefeld; bei ruhenderAnzeigewird ein<br />
Prog ramm abgearbeitet.<br />
Eine Programmeingabe ist grundsätzlich immer<br />
möglich, egal ob gerade eine <strong>CD</strong> abgespielt<br />
wird oder nicht Nur darf im Programmiermodus<br />
keine Laufwerk-Funktionstaste<br />
gedrückt werden (Ausnahmen werden in den<br />
spezifischen Abschnitten erwähnt), da sonst<br />
der Programmablauf gestartet wÜrde.<br />
o STEP +l- llolsl<br />
=-",."-<br />
t-t<br />
--<br />
Lt<br />
SIORE<br />
f-t t-'l<br />
,! l_l ,_l<br />
1510152Q2530<br />
lllrralrlrllaltalallllrlallllr<br />
Diese Tasten erlauben ein Aufwärts- bzw Abwärtsblättern<br />
in den 19 möglichen Programmschritten.<br />
Sie ermöglichen auch das nachträgliche Editieren<br />
eines bestehenden Programmes.<br />
o sToRE l12l<br />
EIEEI<br />
-I 1L]t) '-|11<br />
-<br />
1510152A2530<br />
rrtalll!lllatllllllla!<br />
aa<br />
Speicherlade-Taste. Sie muss nach jeder Programmschritt-Eingabe<br />
gedrückt werden. Damit<br />
wird der Programmschritt in den Speicher<br />
übernommen. Der nächste Programmschritt<br />
(STEP) wird angezeigt und kann eingegeben<br />
oder editiert werden.
Neben-Tastenfeld<br />
Programmierbeispiele<br />
Folge von Stücken (TRACKS) programmieren<br />
(Die angegebene Reihenfolge - Track 4, 9 - ist als Beispiel gedacht)<br />
O Taste PROGRAM [B] drücken<br />
IE=-I E:<br />
STEF TRACK<br />
t-l l-<br />
I t__l ,_l<br />
51o152a2530<br />
rllrllla!lllrlalrrl!allalrllll<br />
Der Compact Disc Spieler wird dadurch in<br />
den Programmiermodus geschaltet. Der<br />
Schriftzug STEP [A] blinkt in derAnzeige, und<br />
da runter steht d ieZiIIer 1f ür den 1. Programmschritt.<br />
O Zifferntaste 4 drücken<br />
12345<br />
:-t:r:<br />
STEP TRACK<br />
t-tt I<br />
lLr-l<br />
151O152A2530<br />
rrlallraal!alrllalaall<br />
Die Track-Anzeige im Feld [B] wechseltvon 00<br />
auf 04.<br />
O Taste STORE [12] drücken<br />
EE<br />
"..==-<br />
STEP TRACK<br />
rt rl<br />
1Äl-]<br />
15101524<br />
allrlllall!laallllll<br />
25 30<br />
Die Eingabe wird abgespeichert. Die Programmschritt-Anzeige<br />
(STEP) springt von 1<br />
auf 2 und zeigt damit an, dass jetzt der zweite<br />
Programmschritt eingegeben werden kann.<br />
O Zifferntaste 9 drücken<br />
67a90<br />
-t-t:rE<br />
STEP TRACK<br />
t-t L-<br />
,:' Ll<br />
15 -l 10 15 20 25 30<br />
rrrrrltlllrr<br />
Die TRACK-Anzeige im Feld lBl wechselt von<br />
00 auf 09.<br />
O Taste STORE [12]<br />
drücken<br />
t-t I-t t-t<br />
- STEP<br />
=t<br />
Fl r-l<br />
1|J')<br />
t5tO152a2530<br />
rrttlalllralllrtlrllaarrlllltr<br />
Die Eingabe wird abgespeichert und die<br />
STEP-Anzeige wechselt von 2 auf 3.<br />
In dieser Weise können bis zu 19 Programmschritte<br />
eingegeben werden, welche einzeln<br />
mit der Taste STORE abzuspeichern sind.<br />
Drücken derTaste PROGRAN/ [B] schaltet den<br />
<strong>CD</strong>-Spieler wieder in den normalen Abspielmodus<br />
zurück. Das eingegebene Programm<br />
bleibt gespeichert.<br />
O Taste PLAY/NEXT [4] drücken<br />
(falls der Programmiermodus nicht<br />
verlassen wurde)<br />
E<br />
STEP TRACK<br />
TME<br />
tE.1 -_1<br />
fttt<br />
r t-J -t | -)'t= ,=<br />
151O15<br />
llrlltalarrrr<br />
Das Programm wird ab STEP 1 bis zum letzten<br />
programmierten Schritt abgearbeitet (Ausnahme:<br />
Endlosprogramme).<br />
O Hinweis<br />
Selbstverständlich kann diese Eingabeart<br />
auch vermischt mit den anderen, nachfolgend<br />
beschriebenen Eingabearten programmiert<br />
werden.
Neben-Tastenfeld<br />
Programmierbeispiele<br />
Programm verändern ( Ed itieren)<br />
O Taste PROGRAM l8l drücken<br />
Itr=-rE=-l<br />
STEP TRACK<br />
r/,tt<br />
L-l -l<br />
r51015202530<br />
llttatl!lalllalalllllltlllllla<br />
Der Compact Disc-Spieler wird in den Programmiermodus<br />
geschaltet. Der Schriftzug<br />
STEP iAl blinkt in der Anzeige. und darunter<br />
steht die ZiIfer 1Iür den 1. Programmschritt.<br />
lm Feld [B] des Anzeigefeldes ist der Inhalt des<br />
Prog rammschrittes sichtbar.<br />
O Tasten STEP +l- l10l9ldrücken<br />
I- r:= I<br />
-l<br />
El<br />
STEP TRACK<br />
l-t l-l<br />
,r Ll _:1<br />
15101520<br />
lllr!alalarlallrrarr<br />
25 30<br />
Mit derTaste "*" im Programm vorwärts "blättern".<br />
bis der Programmschritt in der Anzeige<br />
steht, der verändert werden soll. ln gleicher<br />
Weise kann mit der Taste "-" rückwärts geblättert<br />
werden.<br />
O Mit den Zifferntasten [7]<br />
gewünschtes Stück eintippen<br />
67490<br />
tr-EI:E==<br />
Ft rt<br />
,= t_t n<br />
15tO152A2530<br />
rtlalllltlalitalrrlaal<br />
rlrallat<br />
Die vorherige Eingabe wird überschrieben<br />
O Taste STORE [12] drücken<br />
EEf<br />
-I<br />
ET<br />
STEP TFACK<br />
rl<br />
:,L]t=<br />
-t<br />
151o152A2530<br />
rrrr<br />
rrltllll<br />
Die neue Eingabe wird abgespeichert. Die Anzeige<br />
zeigt den nächsten Programmschritt,<br />
der ebenfalls überschrieben oder mit der Taste<br />
"*" übersprungen werden kann, usw.<br />
O Taste PROGRAM l8l drücken<br />
r-t-r<br />
-l-r<br />
TIME<br />
n'-l.nn<br />
TRACK<br />
t)<br />
rtrt<br />
,) tl u't) tJ<br />
151015242530<br />
tlltlllatlaal!lararrta a!<br />
Drücken der Taste PROGRAM schaltet den<br />
<strong>CD</strong>-Spieler wieder in den normalen Abspielmodus<br />
zurück. Das Programm bleibt in der<br />
veränderten Form gespeichert.<br />
O Taste PLAY/NEXT l4l drücken<br />
(falls der Programmiermodus nicht<br />
verlassen wurde)<br />
tf<br />
PAUSE PUY / NEXT<br />
STEP TFACK<br />
TME<br />
rt Lt t t=.-_t -J<br />
i t--l -t | -)'t= ,=<br />
151015<br />
trlMllrllll<br />
Das Programm wird ab STEP 1 bis zum letzten<br />
programmierten Schritt abgearbeitet (Ausnahme:<br />
Endlosprogramme).<br />
Einzelne Titel im Programm<br />
löschen<br />
Gehen Sie, wie oben beschrieben. zum Programmschritt.<br />
den Sie löschen wollen. Drükken<br />
Sie direktSTORE [12], und derProgrammschritt<br />
wird mit "0" überschrieben. Die mit "0"<br />
überschriebenen Programmschritte werden<br />
beim Abarbeiten übersprungen.<br />
10
Neben-Tastenfeld<br />
Programmierbeispiele<br />
Gesamtes Programm löschen<br />
O Taste PROGRAM [B] drücken<br />
I:-IEE<br />
STEP TRACK<br />
I-|tt<br />
tu-l<br />
1510152A2530<br />
rrtllallalrlllllalllll<br />
llrll-rr<br />
Der Compact Disc-Spieler wird in den Programmiermodus<br />
geschaltet.<br />
O Taste STORE [12]<br />
und PROGRAM l8l<br />
zusammen drücken<br />
II--I EI<br />
STEP TRACK<br />
tt)t)<br />
rt t-<br />
15 10 t5 2A<br />
rrlallrlalrt<br />
25 30<br />
Die Taste STORE drücken und gedrückt halten,<br />
Taste PROGRAM gleichzeitig drücken.<br />
O Taste PROGRAM [B] drücken<br />
I<br />
E=:] EI<br />
-I -I<br />
TRACK<br />
Fr l-l<br />
u u<br />
1510152Q2530<br />
rrtlllrlaiala-lataaall<br />
TME<br />
r-r r-r,r-t t-,<br />
,-l l-l 'Ll ,-J<br />
lralllir<br />
Der <strong>CD</strong>-Spieler wird wieder in den normalen<br />
Abspielmodus zurückgeschaltet.<br />
Hrnwerse:<br />
O Wenn Sie ein neues Programm eingeben<br />
wollen, brauchen Sie das alte nicht zu löschen.<br />
Es wird einfach durch das neue Programm<br />
überschrieben.<br />
O Bei Netzausfall wird ein gespeichertes Programm<br />
eben[alls gelöscht.<br />
11
Neben-Tastenfeld<br />
Programmierbeispiele<br />
Endlosprogramme<br />
OTaste PROGRAM<br />
IT-<br />
I-EII<br />
LJ<br />
-<br />
[8] drücken<br />
Et-r<br />
==<br />
STEP TRACK<br />
t-tt I<br />
lLr-l<br />
15<br />
lltrrll<br />
STEP TRACK<br />
nn<br />
r' l-l l-l<br />
1510152A2530<br />
10 15 2Q 25 30<br />
rrttllrt<br />
rrrrrrfrrtratlllllll<br />
Der Compact Disc-Spieler wird in den Programmiermodus<br />
geschaltet. Der Schriftzug<br />
STEP tAl blinkt in der Anzeige. darunter steht<br />
die Ziffer 1 für den 1. Programmschritt.<br />
O Taste LOOP [11] drücken<br />
t-l<br />
l-l<br />
LI<br />
-<br />
IEI<br />
I<br />
1 t_<br />
151015202530<br />
rttlrltilarlallltllaallallalrl<br />
An jeder Stelle im Programm (sinnvollerweise<br />
jedoch am Programmende) kann der Repetierbefehl<br />
(LOOP) eingegeben werden. Er bewirkt,<br />
dass das Programm vom ersten Programmschritt<br />
an erneut abgearbeitet wird.<br />
Dieser Vorgang wiederholt sich endlos, bis<br />
das Programm abgebrochen wird.<br />
O Taste STORE [12]<br />
_E<br />
l-l l-l l-J<br />
PFOGRAM<br />
drücken<br />
EI<br />
-lrt<br />
:l l-l l-J<br />
1510152a2530<br />
rtrtllra!lllllttlll!ll<br />
Die Eingabe wird abgespeichert. Die Anzeige<br />
zeigt den nächsten Programmschritt.<br />
Drücken derTaste PROGRAM [B] schaltetden<br />
<strong>CD</strong>-Spieler in den normalen Abspielmodus<br />
zurück. Das Programm bleibt gespeichert.<br />
O Taste PLAY/NEXT f4l drücken<br />
(falls der Programmiermodus nicht<br />
verlassen wurde)<br />
tl<br />
STEP TFACK<br />
TIME<br />
:<br />
t-t t_t t t=.-J<br />
Lr -t t:l't= -J<br />
t=<br />
151015<br />
lalrallralilt<br />
Das Programm wird ab STEP 1 abgearbeitet.<br />
Bei Erreichen des LOOP-Befehls springt das<br />
Programm zum STEP 1 zurück und wird erneut<br />
abgearbeitet, bis das Programm durch Drükken<br />
einer derTasten STOP [18], LOAD [2] oder<br />
POWER [1] abgebrochen wird.<br />
12
Neben-Tastenfeld<br />
Programmierbeispiele<br />
Pausen programmieren<br />
O Taste PROGRAM [B] drücken<br />
t="*===<br />
]-EIEEI<br />
STEP TRACK<br />
f-'tt<br />
I t_J -l<br />
15<br />
lllaa<br />
STEP TRACK<br />
rt rt<br />
,= t),)<br />
j51015202530<br />
talrltallll!l!-allllltraraalal<br />
10 15 2a 25 30<br />
Der Compact Disc-Spieler wird in den Programmiermodus<br />
geschaltet. Der Schrif?ug<br />
STEP [A] blinkt in der Anzeige, darunter steht<br />
die Ziffer 1 für den 1. Programmschritt.<br />
O Taste PAUSE [5] drücken<br />
PAUSE PßY / NEXT NDEX LOAD POWER<br />
STEP<br />
i,<br />
151015<br />
ialltlrallrrrrr<br />
rJ<br />
20 25 30<br />
An jeder Stelle im Programm kann der PAU-<br />
SE-Befehl eingegeben werden. Er bewirkt,<br />
dass das Programm an dieser Stelle auf PAU<br />
SE schaltet.<br />
O Taste STORE [12] drücken<br />
E-r-tEtr<br />
STEP<br />
1<br />
t-, f-]<br />
t-J ,__1<br />
151O15202530<br />
rtlllllalrralllltllall<br />
lalrllll<br />
Die Eingabe wird abgespeichert. Die Anzeige<br />
zeigt den nächsten Programmschritt.<br />
Drücken derTaste PROGRAN/ [8] schaltetden<br />
<strong>CD</strong>-Spieler wieder in den normalen Abspielmodus<br />
zurück. Das Programm bleibt gespeichert.<br />
O Taste PLAY/NEXT [4] drücken<br />
(falls der Programmiermodus nicht<br />
verlassen wurde)<br />
PAUSE PSY / NEX]<br />
tI<br />
STEP TFAQK<br />
I<br />
n Lt<br />
Lf -t<br />
51015<br />
tlalllllllrta<br />
TIME<br />
t t_,1 -_l<br />
r 1't:. t:.<br />
Das Programm wird ab STEP'1 abgearbeitet.<br />
Bei Erreichen des PAUSE-Befehls schaltet das<br />
Gerät auf PAUSE.<br />
Drücken der Taste PLAY/NEXT [4] hebt die<br />
PAUSE-Funktion wieder auf. Das Programm<br />
wird weiter abgearbeitet.<br />
13
NebenTastenfeld<br />
Programmierbeispiele<br />
rKttw<br />
Ausschalten des Gerätes programmieren<br />
O Taste PROGRAM [8] drücken<br />
==",.-<br />
II-<br />
E<br />
LJ<br />
LOOP<br />
-lE<br />
l-l<br />
--<br />
LOOP<br />
l-l<br />
SIORE<br />
STEP<br />
1<br />
rlt<br />
l_,tt<br />
r_-l -l<br />
25 5 lo 15 2Q 30<br />
rtllllllrlallllla<br />
STEP TRACK<br />
rt rt<br />
I t) t_J<br />
15 to 15<br />
rrlllll-allllllralrlllr<br />
2a 25 30<br />
Der Compact Disc-Spieler wird in den Programmiermodus<br />
geschaltet. Der SchrifEug<br />
STEP tAl blinkt in der Anzeige. darunter steht<br />
die ZifIer 1 für den 1. Programmschritt.<br />
O Taste POWER [1] drücken<br />
PAUSE PUY / NEXT<br />
NDEX LOAD<br />
I<br />
STEP<br />
1-<br />
l510152a2530 10<br />
rtlalrtail<br />
i5 rrrrttrlllllllr<br />
An jeder Stelle im Programm (sinnvollerweise<br />
jedoch am Programmende) kann der POWER<br />
OFF-Befehl eigegeben werden. Er bewirkt,<br />
dass das Programm an dieser Stelle selbsttätig<br />
ausschaltet (Standby). Während der Programmeingabe<br />
wird das Gerät durch den ersten<br />
Druck auf die Taste POWER [1] nicht<br />
ausgeschaltet. ln diesem Betriebszustand<br />
schaltet erst zweimaliges Drücken der<br />
POWER-Taste das Gerät aus.<br />
O Taste STORE [12] drücken<br />
I-:<br />
-l -lI<br />
STEP TFACK<br />
JLILI<br />
flrl<br />
1510152Q2530<br />
rtlltlrarrrrtrrralaaalrrtlllll<br />
Die Eingabe wird abgespeichert. Die Anzeige<br />
zeigt den nächsten Programmschritt.<br />
Drücken derTaste PROGRAM [8] schaltetden<br />
<strong>CD</strong>-Spieler wieder in den normalen Abspielmodus<br />
zurück. Das Programm bleibt gespeichert.<br />
O Täste PLAY/NEXT [4] drücken<br />
(falls der Programmiermodus nicht<br />
verlassen wurde)<br />
[]<br />
STEP TBACK<br />
TIME<br />
, l-l<br />
Ll I trt'] 1<br />
151015 rrritraalaalr<br />
Das Programm wird ab STEP 1 abgearbeitet.<br />
Bei Erreichen des POWER OFF-Befehls schaltet<br />
sich das Gerät selbst aus (STAND BY). AIle<br />
weiteren Programmschritte werden nicht<br />
mehr berücksichtigt. (Das Gerät kann sich<br />
nicht selbst einschaltenl)<br />
14
ffilE<br />
lll I<br />
Neben-Tastenfeld<br />
Programm abarbeiten<br />
Ein bereits im Speicher vorhandenes Programm kann aufgerufen und abgearbeitet werden<br />
O Taste PROGRAM [8] drücken<br />
IE-I:E<br />
STEP TFACK<br />
l--,tt<br />
i t-J -l<br />
15<br />
ttlralla<br />
ro 15<br />
I<br />
Das gespeicherte Programm wird aufgerufen<br />
O<br />
ffiE<br />
Taste PLAY/NEXT l4l drücken<br />
I rt t t<br />
t-J -t<br />
STEP TRACK<br />
51015<br />
rtaalrlatlll<br />
TIME<br />
t::.1 _-<br />
t -)'t= tr<br />
Das Programm wird ab STEP'l sofort abgearbeitet.<br />
15
KAPFEL 4<br />
Fehlerquellen<br />
Mögliche Fehler und ihre Behebung<br />
_EEEE<br />
rf-rnK<br />
O Keine Funktion<br />
rft<br />
Standby-Anzeige leuchtet nicht, beim Einschalten<br />
leuchtet das Anzeigefeld nicht:<br />
O Kontrollieren Sie das Netzkabel.<br />
O Prüfen Sie. ob die Steckdose in Ordnung ist,<br />
indem Sie zur Probe ein anderes Gerät daran<br />
anschliessen.<br />
O Lassen Sie lhren REVOX-Fachhändler die<br />
Sicherungen lhres Gerätes kontrollieren.<br />
O <strong>CD</strong> wird nicht abgespielt<br />
O Prüfen Sie, ob die Compact Disc richtig, das<br />
heisst mit der bedruckten Seite nach oben.<br />
eingelegt ist.<br />
O Ursache kann auch eine beschmuute, mechanisch<br />
beschädigte oder den <strong>CD</strong>-Spezif i-<br />
kationen nicht entsprechende <strong>CD</strong> (Herstellungsfehler)<br />
sein. Versuchen Sie zuerst, ob<br />
sich eine andere <strong>CD</strong> abspielen lässt.<br />
16
Technischer Anhang<br />
lnfrarot-Fernbedienung B20B (Sonderzubehör)<br />
Mit der REVOX Inf rarot-Fernsteuerung B2OB können alle neueren REVOX-Geräte mit lR-Empfänger<br />
bequem vom Hörplatz aus bedient werden.<br />
Damit der lR-Empfänger des 8126 erkennt, dass ein ausgesendeter Befehl ihm gilt, muss_die<br />
*-Taste gedrückt sein, während eine der anderen Funktionstasten betätigt wird (Ausnahme: Die<br />
Funktion P/NEXT ist direkt anwählbar).<br />
Jeden empfangenen Befehl quittiert der <strong>CD</strong>-Spieler durch Aufleuchten der roten LED im lR-<br />
Empfängerfenster.<br />
lm nebenstehenden Bild sind die zur Bedienung<br />
des <strong>CD</strong>-Spielers benötigten Tasten mit<br />
der gleichen Numerierung versehen wie die<br />
Tasten auf dem Ausklappblattam Ende dieser<br />
Bedienungsanleitung. Tasten. die mit der gleichen<br />
Nummer bezeichnet sind, lösen auch die<br />
gleiche Funktion aus.<br />
O Einschalten:<br />
Der <strong>CD</strong>-Spieler kann durch die Zifferntasten O<br />
bis 9, die Taste P/NEXT oder die Taste $ (Pausenfunktion)<br />
- jeweils bei gedrückterTaste x -<br />
eingeschaltet werden (Ausnahme P/NEXT)<br />
O Stoppen des <strong>CD</strong>-Spielers:<br />
Drücken Sie x und gleichzeitig ENTER.<br />
O Ausschalten der ganzen REVOX-Anlage:<br />
POWER OFF drücken.<br />
O Pause:<br />
Drücken Sie x und gleichzeitig $.<br />
O Suchlauf:<br />
Drücken Sie x und gleichzeitig>oder veranlasst den Laserabtaster, zum<br />
nächsten Index zu springen. lst die eingelegte<br />
<strong>CD</strong> nicht indexiert, erfolgt der Sprung zum<br />
nächsthöheren Stück (Track).<br />
O lndex Direktwahl:<br />
Drücken Sie x und halten Sie diese Taste gedrückt.<br />
Geben Sie den gewünschten Index mit<br />
den Zifferntasten 0 bis 9 ein und drücken Sie<br />
dann SCAN >. Lassen Sie erst jetzt die Taste x<br />
los.<br />
O Titel-Rücksprung:<br />
Gleichzeitiges Drücken der Tasten * und<br />
SCAN < veranlasst den Laserabtaster. zum<br />
letzten Musiktitel (Track) zu springen.<br />
Tasten O-9 [7]<br />
Titelrücksprung<br />
rNDEX t3l<br />
sToP t18l<br />
/NEXT t4l<br />
scAN n7l<br />
PAUSE [5I<br />
scAN n6l<br />
Weitere Angaben über die lR-Fernbedienung REVOX B20B entnehmen Sie bitte der detaillierten<br />
Bedienungsanleitung, die mit der Fernbedienung mitgeliefert wird.<br />
17
Technischer Anhang<br />
Digitale Ausgänge<br />
Die beiden Ausgänge DIGITAL OUTPUT 1 und 2121)stellen die gesamte auf der <strong>CD</strong> gespeicherte<br />
lnformation zur Verfügung. Zusätzlich zu den Musikdaten beider Kanäle werden auch alle Subcode-lnformationen<br />
seriell ausgegeben.<br />
Die beiden Ausgänge sind parallel geschaltet und von der übrigen Schaltung durch einen Trenntransformator<br />
galvanisch getrennt.<br />
COMPUTER<br />
DIGITAL RECORDER<br />
DIGITAL AMPLIFIER<br />
1B
Technischer Anhang<br />
Die Compact Disc<br />
Wissenswertes über die Compact Disc<br />
Die 5 km lange "lnformationsrille" einer Compact Disc enthält ein komplexes Digitalsignal:Alternierend<br />
angeordnete. digitale Werte aus zwei Tonkanälen tragen die Musikinformation. Untergeordnete<br />
lnformationen für die Anzeige der Stücke (Track, Index), Abspielzeit etc. sind ebenfalls<br />
in dieser "lnformationsrille" enthalten.<br />
Auf der Compact Disc sind diese Informationen in einer hauchdünnen Aluminiumschicht<br />
gespeichert. Die digitalen lnformationen sind in Form von Vertiefungen in die Schicht eingeprägt.<br />
Das Abtasten erfolgt mit einem Laserstrahl, dessen reflektiertes Licht von Lichtempfängern<br />
(Fotodioden) in elektrische, digitale Signale umgesetzt wird.<br />
Das gewonnene Gesamtsignal wird in Musik- und Informationsdaten getrennt und überpruft.<br />
Fehlelhafte oder fehlende Daten werden von einem leistungsfähigen Fehlererkennungs-System<br />
korrigiert odör ergänzt. Fehlende Daten (2. B. durch Kratzer verursacht) werden durch lnterpolation<br />
(Mittelwert aüs derAbtastung vor und nach dem Fehler) ersetzt. Treten solche Fehler zu häufig<br />
auf, können sie nicht mehr korrigiert werden. In diesem Fallwird derAusgang stummgeschaltet.<br />
Struktur der Compact Disc<br />
Die maximale Spielzeit einer Compact Disc beträgt 74 Minuten. Um ein einzelnes Stück oder<br />
eine Passage schnell aufzufinden. sind entsprechende lnformationen mit aufgezeichnet.<br />
O EinzelneStücke sind auf der Compact Disc durch kurze Pausen voneinander getrennt und<br />
werden mit TRACK bezeichnet.<br />
O Einzelne Sätze oder Abschnitte (meist bei klassischen Werken) innerhalb eines Stückes werden<br />
von einigen Herstellern mit Indices (INDEX) versehen.<br />
O Jede Compact Disc istzudem in Minuten und Sekunden unterteilt. Eine beliebige Stelle kann<br />
sekundengenau angefahren werden und bleibt jederzeit reproduzierbar.<br />
Es werden zwei Zeiten unterschieden:<br />
DISC-TIME: Abspieldauer in Minuten und Sekunden seit Disc-Anfang.<br />
TRACK-TIME: Abspieldauer in Minuten und Sekunden seit Stück- (TRACK-) Anfang.<br />
Alle diese lnformationsdaten sind vom <strong>CD</strong>-Hersteller definiert und in die "lnformationsrille" mit<br />
eingegeben worden. Sie sind somit vom Abspielgerät unabhängig und können nicht verändert<br />
werden.<br />
Handhabung und Pflege der Compact Disc<br />
Die Handhabung der Compact Disc ist bedeutend einfacher und problemloser als die einer herkömmlichen<br />
Langspielplatte. Trotzdem müssen bei der Handhabung einige Punkte unbedingt<br />
beachtet werden. Dazu ist es notwendig, den Aufbau der Compact Disc zu kennen.<br />
Der eigentliche lnformationsträger. die hauchdünne Aluminiumschicht, wird auf eine relativ star<br />
ke, lichtdurchlässige Trägerschicht aufgetragen. Auf die Aluminiumschicht wird später das<br />
Label (Etikette) aufgedruckt.<br />
Obwohl die Compact Disc durch die Trägerschicht hindurch abgetastet wird, ist die für Kra?er<br />
empfindlichste Seite die bedruckte Seite, da Farbe und Lack hier der einzige Schutz der hauchdünnen<br />
Aluminiumschicht sind. Auf der bedruckten Seite kann ein Kra?er den Abspielvorgang<br />
stören oder gar verunmöglichen, während er sich auf der Abtastseite kaum bemerkbar macht.<br />
DerAbstand der "lnformationsrillen" auf der Compact Disc berägt nur 1,6 prm und die mittlere Bitlänge<br />
ca. 2pm (Tausendstel-Millimeter). Wenn man sich diese Grössenordnung vorstellt (ein<br />
menschliches Haar ist40 bis 60 p m dick), wird klar, dass ein Kratzer in derAluminiumschichtverheerende<br />
Folgen haben kann.<br />
Eine Reinigung der Compact Disc erübrigt sich, wenn sie nur am Rand angefasst und immer<br />
wieder in die Originalverpackung zurückgelegt wird.<br />
Verschmutzte Compact Discs können auf der Abtastseite (spiegelnde Fläche) mit einem fusselfreien,<br />
weichen und trockenen Tuch in gerader Linie vom Zentrum zum Rand abgewischt werden.<br />
Auf keinen Fall irgendein Lösungs- oder Scheuermittel verwendet werden.<br />
19
Technischer Anhang<br />
Technische Daten<br />
Audio-Daten<br />
Anzahl Kanäle:<br />
Frequenzgang:<br />
20H2...20kH2. +0,1d8<br />
Klirrfaktor:<br />
< 0,005 % (20 H2... 20 k1z)<br />
Geräuschspannungsabstand:<br />
lrnea r:<br />
100dB (20Hz. 20kHz)<br />
A bewertel:<br />
106 dB<br />
Übersprechdämpfung: )90d8 (20H2...20kH2)<br />
Ausgangspegel:<br />
ANALOG OUTPUT<br />
2,5V. Ri
KAPITEL 5<br />
Liste der Tastenfunktionen<br />
Kurzbeschreibung<br />
aller Funktionen<br />
3r)) Mit der lR-Fernbedienung REVOX B20B<br />
fernsteuerbare Funktionen<br />
Frontseite:<br />
Bed ienungselement Funktion Seite<br />
t1l PowER<br />
1t)) M it d ieser Taste kann das Gerät ein- und ausgeschaltet werden. Gewisse<br />
Teile des Gerätes bleiben allerdings immer eingeschaltet (STAND BY).<br />
t2l LOAD Durch Betätigen dieser Taste fährt die Disc-Schublade [6] aus resp. ein<br />
t3l INDEX 1r)) lndextaste. Betätigung lässt das Stück ab dem nächsten lndex abspielen.<br />
Drücken nach dem Betätigen der Ziffern-Eingabetasten [7] lässt<br />
den ausgewählten lndex abspielen. lst die <strong>CD</strong> nicht mit lndex versehen,<br />
so wird beim Betätigen dieser Taste immer zum nächsten TRACK<br />
gesprungen.<br />
14) PLAY/NEXT .r)) Abspieltaste. Erneutes Drücken lässt das nächste Stück abspielen.<br />
Drücken nach dem Betätigen der Ziffern-Eingabetasten [7] lässt das<br />
ausgewählte Stück abspielen.<br />
t5l PAUSE .r)) Mit dieser Taste kann der Abspielvorgang jederzeit unterbrochen werden.<br />
Drücken derTaste PLAY/NEXT [4] setzt den Abspielvorgang an der<br />
unterbrochenen Stelle wieder fort.<br />
t6l Disc-Schublade Diese Schublade führt die Compact Disc dem Laufwerk zu. Sie wird<br />
durch Drücken der Taste LOAD [2] aus- und eingefahren.<br />
17l Tasten 0 - 9 .r)) Ziffern-Eingabetasten. Für die direkte Anwahl eines Stückes (TRACK)<br />
oder einer lndexmarke in Verbindung mit der Taste PLAY/NEXT [4] resp.<br />
rNDEX [3]<br />
tBl PROGRAM Mit dieser Taste kann der Programmiermodus ein- und ausgeschaltet<br />
werden.<br />
tel STEP - Diese Taste erlaubtwährend des Programmierens das Abwärtsblättern<br />
im Programm.<br />
t10l STEP +<br />
t11l LOOP<br />
l12l sroRE<br />
Diese Taste erlaubt während des Programmierens das Aufwärtsblättern<br />
im Programm.<br />
Diese Taste bewirkt, dass die <strong>CD</strong> oder ein Programm immerwieder abgespielt<br />
wird (Endlosbetrieb).<br />
Speicherlade-Taste, muss nach der Eingabe jedes Programmschritts<br />
gedrückt werden.<br />
t13l Anzeigefeld (LC-Display) 24<br />
l14l DTSPLAY<br />
t15l AUTOSTOP<br />
Schaltet die Zeitanzeige TIME im Feld [C] um. Vier unterschiedliche<br />
Zeilanzeigen sind mögl ich :<br />
a) DISC-TIME (Zeil seit <strong>CD</strong>-Anfang).<br />
b) TRACK-TIME (Zeit seit TRACK- (Stück-) Anfang.<br />
c) TRACK-REMAININGTIME (Zeit bis zum Ende deSTRACKS (Stückes).<br />
d) DISC REMAINING TIME (Zeit bis zum Ende der <strong>CD</strong>).<br />
Diese Taste unterbricht den Abspielvorgang am Ende des gerade laufenden<br />
Stückes oder Programmschritts (PAUSE). Drücken der Taste<br />
PLAY/NEXT [4] setzt den Abspielvorgang fort.<br />
21
Bed ienungselement Funktion Seite<br />
t16l scAN <<br />
3r)) Suchlauf rückwärts innerhalb eines Stücks (für kontinuierlichen Rücklauf<br />
Taste gedrückt halten).<br />
1171 SCAN > .t)) Suchlauf vorwärts innerhalb eines Stücks (für kontinuierlichen Vorlauf<br />
Taste gedrückt halten).<br />
tlBl sroP<br />
t19l lR-Sensor<br />
il)) Drücken dieser Taste unterbricht den Abspielvorgang und lässt den<br />
Laserabtaster in die Anfangsposition zurückkehren. Bricht auch ein laufendes<br />
Programm ab.<br />
Mit folgenden Tasten kann das Gerät direkt eingeschaltet werden:<br />
I nf ra rot-Empfä nge rfenster. Anzei gelam pe f ü r Sta nd by-M od us.<br />
O Drücken der Taste PLAY/NEXT l4l startet den Abspielvorgang von Stück 1 an. Wenn mit einer Zifferntaste [7]<br />
und PLAY/NEXT t4l eingeschaltet wurde, so werden das vorgewählte Stück und der nachfolgende Rest der<br />
Compact Disc abgespielt.<br />
O Die Taste LOAD [2] schaltet das Gerät ein und lässt die Schublade ausfahren.<br />
O Die Taste STOP t18l schaltet das Gerät nur ein.<br />
O Die Taste PAUSE schaltet das Gerät am Beginn des ersten Musiktitels der <strong>CD</strong> auf Pause.<br />
Anzeigefeld<br />
tAl srEP<br />
tBl TRACK<br />
tcl rME<br />
Nummer des aktuellen Programmschrittes. lm Programmiermodus<br />
blinkt der Schriftzug STEP lm normalen Abspielmodus ist diese Anzeige<br />
nicht sichtbar. 24<br />
ln diesem Feld wird in der ersten und zweiten Stelle das gerade wiedergegebene<br />
Stück (TRACK) und in der dritten und vierten Stelle der dazugehörende<br />
INDEX (wenn vorhanden) angezeigt. 24<br />
ln diesem Feld steht eine dervorstehend unter [14] DISPLAY beschriebenen,<br />
vierstelligen Zeitanzeigen. 24<br />
IDI AUTOSTOP Sichtbar bei aktivrertem AUTOSTOP-Betrieb. 24<br />
lEl PAUSE Anzeige der PAUSE-Funktion. 24<br />
lFl LooP Sichtbar bei aktivierter LOOP-Funktion (Endlosbetrieb) 24<br />
tcl lnhaltsverzeichnis<br />
Fehlende Punkte links bedeuten bereits abgespielte Stücke. die totale<br />
Anzahl Punkte zeigt die Anzahl der Stücke auf der eingelegten <strong>CD</strong> an. 24<br />
22
Rückseite:<br />
l20l FrxED OUTPUT<br />
l21l DTGTTAL OUTPUT<br />
Analog-Audioausgang über Cinch-Buchsen (L und R) zur Verbindung<br />
mit dem Verstärker.<br />
Zwei Digitalausgänge, parallel geschaltet.<br />
l22l AC POWER<br />
Netzkabel<br />
l23l SERIAL LINK Anschluss für das REVOX-Fernsteuersystem. 24<br />
23
Übersichtszeichnung<br />
Anzeigefeld<br />
(LC_DISPLAY)<br />
-l<br />
i-<br />
i<br />
I<br />
i<br />
i<br />
i<br />
i<br />
i<br />
I<br />
i<br />
i<br />
I<br />
I<br />
i<br />
B 126 . COMPACT DISC PUYER<br />
12345<br />
:I-:EE<br />
67890<br />
tr-Etr=I-r-l<br />
I<br />
_l<br />
il<br />
il<br />
'"EE'EE EE,EE<br />
lt<br />
il<br />
a)<br />
_l<br />
t8l net tel<br />
t11l I12l<br />
i<br />
I<br />
I<br />
I<br />
I<br />
AIENTIONI anN oEPREVENF uN cHocELEcrRouE<br />
A ]N :RLURALCUNEPECTPOU!ANTTTFIFTPAREEPAF<br />
LUSAGES COUPER LALIMENTAT<br />
I<br />
@<br />
. CAUTIONI<br />
@<br />
i<br />
I<br />
I<br />
@<br />
. AC POWER<br />
@<br />
I<br />
I<br />
i<br />
I<br />
I<br />
I<br />
i<br />
_l<br />
24
Audio-Blockschaltbild<br />
DECODER BOARD 1,7<br />
IRANSFORI\4ER<br />
BOARD<br />
1 .7 69 .450 / 451<br />
LASER CONTROT<br />
HF AI\IPL FIER<br />
HFL./TL.DtIECIOR<br />
FOCUS.ELECTRONICS<br />
RE1/RE2.ITECTRONICS<br />
_--l<br />
i<br />
tr<br />
DIGITAL<br />
OUTPiJI<br />
I2<br />
I<br />
I<br />
i<br />
I<br />
I<br />
i<br />
I<br />
QDA<br />
QCL SUBCODE<br />
QRA<br />
o----€ R-rtx<br />
i<br />
i<br />
I<br />
I<br />
I<br />
i<br />
EEE-IE<br />
[rTrE<br />
E-IE_E<br />
I<br />
-l<br />
KEYBOARD LEFI 1.769.215<br />
LC.D]SPLAY 1.169.255<br />
KEYBOARD RIGH<br />
__l<br />
i<br />
I<br />
I<br />
I<br />
I<br />
I<br />
DLENI, DLEN2, CLK, DATA<br />
,LOAD'<br />
i<br />
-l<br />
RFF,L<br />
:J---<br />
I<br />
I<br />
I<br />
I<br />
I t'<br />
t'<br />
DRAWER<br />
END SW TCHIS<br />
i<br />
I<br />
.ERTALLTNK@.---1<br />
DRAW POS. F<br />
)<br />
ü<br />
I<br />
i<br />
) 40-2/406-<br />
__l
ENGLISH
Protect your amplifier from exposure to excessive heat and moisture.<br />
WARRANry<br />
PACKING MATERIAL<br />
Please note thatthe warranty is onlyvalid within the country in which<br />
the equipment has been sold.The warranty becomes null and void if<br />
unauthorized modifications or unprofessional repairs are made.<br />
Warranty cards for products sold in Switzerland and Austria are<br />
issued directly by the authorized dealer. Warranty cards for REVOX<br />
products sold in France are located inside the packing. This card<br />
must be completely filled out and signed by your authorized<br />
REVOX dealer.<br />
A special warranty request card is included with all REVOX products<br />
sold within the Federal Republic of Germany, USA, and maior<br />
other countries. This card is either located inside the packing or in a<br />
plastic pouch on the outside of the packing. Should this card be<br />
missing, please consult your REVOX dealer oryour national REVOX<br />
distributor.<br />
Please retain the original box for re-use in case your equipment<br />
ever needs to be transported. The packing material has been especial<br />
ly desi g ned to protect you rva I ua ble eq ui pment f rom mecha n ica I<br />
shock in transit.<br />
Warning:<br />
Vorsicht:<br />
Attention:<br />
This unit is not separated from the mains supply when switched off (STANDBY).<br />
Das Gerät ist in ausgeschaltetem Zustand (STANDBY) nicht von der Stromzuführung getrennt.<br />
Cet appareil n'est pas s6pa16 du r6seau lorsqu'il est d6clench6 (STANDBY).<br />
Attenzione: Ouesto apparecchio non ö separato dalla rete quando I'interruttore ö spento (STANDBY).<br />
Precaucidn: Este aparato no estä separado de la red cuando estä apagado (STANDBY).<br />
Waarschuwing: ln uitgeschakelde toestand (STANDBY) is het apparaat niet gescheiden van de netspanning.<br />
Advarsel:<br />
Huomio:<br />
Forsiktig:<br />
Varning:<br />
Apparaten er ogsaa hvis lukket (STANDBY) under strom.<br />
Huolimatta siitä. että virta on katkaistu laitteesta (STANDBY), sitä ei ole eristetty sähköstä.<br />
Selvom strommen ikke er pa i apparatet (STANDBY), sa er det ikke skilt fra strom.<br />
Oaktat om strömmen är avbruten i apparaten (STANDBY), sa är den ända kopplad med ström.
Table of Gontents<br />
sEcTroN 1<br />
lnstallation<br />
Start-up<br />
Page<br />
Packing content 2<br />
Setup 2<br />
-<br />
Unfastening the transit screws<br />
2<br />
Safety recommendations<br />
2<br />
Line voltage<br />
Connections<br />
Power on procedure<br />
2<br />
SECTION 2<br />
Main Keypad<br />
Function overview<br />
Selection of music pieces and indices<br />
Pause function<br />
J<br />
?<br />
4<br />
Ä<br />
tr<br />
SECTION 3<br />
Auxiliary Keypad<br />
Special Functions:<br />
Scan<br />
Auto stop and stop<br />
Loop mode<br />
Display functions<br />
Programming:<br />
Functions of the program keys<br />
Programming examples<br />
- Programming the sequence of the selections<br />
- Modifying a program<br />
- Erasing a program<br />
- Endless (loop) program<br />
- Programming a pause -<br />
- Programming the shutdown of the <strong>CD</strong> player<br />
Executing the program<br />
6<br />
6<br />
6<br />
7<br />
ö<br />
tf<br />
10<br />
11<br />
12<br />
13<br />
14<br />
15<br />
SECTION 4<br />
Fault Sources<br />
TechnicalAppendix<br />
Troubleshooting<br />
lnfrared remote control B2OB<br />
Digitaloutputs<br />
The compact disc<br />
Technical data<br />
Dimensions<br />
16<br />
1-7<br />
1B<br />
19<br />
20<br />
20<br />
SECTION 5<br />
List of Keypad Functions<br />
21<br />
Ouick-reference description of all functions<br />
lndexed quick-reference diagram<br />
Audio circuit diagram<br />
24<br />
25
SECTION 1<br />
E----<br />
lnstallation<br />
Packing content. Setup<br />
Packing content<br />
ln addition to these operating instructions and<br />
the <strong>CD</strong> player equipped with a non-detachable<br />
power cord that matches the type of power outlet<br />
used in your country, the packing also contains<br />
a connecting cable fitted with cinch terminals<br />
on both ends, as well as a plastic adapter<br />
for playing <strong>CD</strong> singles (diameter B cm). Please<br />
consult your dealer if any of the above items is<br />
missing or incorrect.<br />
Setup<br />
Install your <strong>CD</strong> player in a location where the<br />
ventilation louvers are not obstructed. A ventilation<br />
clearance of at least 1O mm (72") should<br />
be maintained to other equipment. walls and<br />
f urnishings.<br />
Unfastening the transit screws<br />
To protect the player mechanism from damage<br />
in transit, it has been blocked from the underside<br />
by means of two screws.These screws aie<br />
correspondingly marked and must be removed<br />
with a screwdriver before the <strong>CD</strong> player is put<br />
into service. lf the <strong>CD</strong> player subsequently<br />
needs to be transported over longer distances,<br />
thesetwo screws should be reinstalled afterthe<br />
compact disc and the singles adapter have<br />
been removed. This precaution is not necessary<br />
for transporting the unit carefully over short<br />
distances, e.g. into another room.<br />
lmportant safety instructions<br />
Connect the <strong>CD</strong> player to the AC outlet only by<br />
means of the non-detachable power cord.<br />
Always keep the equipment in dry condition. lt<br />
is extremely hazardous to operate it in wet<br />
rooms (bathroom, laundry room, basement,<br />
etc.).<br />
When the <strong>CD</strong> player is switched off (standby),<br />
some of the internal circuits are not disconnected<br />
from the AC power and are still energized<br />
with line voltage!<br />
The <strong>CD</strong> player is designed to be operated in<br />
normal (horizontal) position.<br />
ln case of a malfunction or a defect, immediately<br />
disconnect the power plug and have the<br />
unit inspected by an authorized REVOX dealer.
Start-up<br />
AC Line voltage, connections.<br />
power on<br />
ff-rnx<br />
Checking the line voltage<br />
AC POWER<br />
The B'126 <strong>CD</strong> player is factorysetto operatewith<br />
the line voltage specified on the rear panel.<br />
Make sure that this voltage rating agrees with<br />
yourAC supply system.<br />
The <strong>CD</strong> player can be converted to a different<br />
line voltage but this work should be pedormed<br />
by an authorized REVOX dealer.<br />
Connection to the AC outlet<br />
o<br />
@<br />
^@ -o o<br />
@l<br />
o<br />
Connect the <strong>CD</strong> player to the AC outlet by<br />
means of the non-detachable power cord.<br />
Gonnection to the amplifier<br />
By means of the bypacked cable, connect the<br />
two FIXED OUTPUT [20] cinch sockets on the<br />
rearof the <strong>CD</strong> playerto the "<strong>CD</strong>". "Disc", or'Aux"<br />
input of your preamplifier or integrated amplifier.<br />
Power on procedure<br />
PAUSE PüY / NEXT<br />
I== E<br />
ITI<br />
INDEX LOAD<br />
-t<br />
t-t<br />
-<br />
LOOP<br />
I<br />
t-r<br />
Press the POWER [1] key on the front panel to<br />
switch on the <strong>CD</strong> player. When you press the<br />
POWER ['1 ] key again. the <strong>CD</strong> player switches<br />
off (standby). You can also power on the<br />
<strong>CD</strong> player by means of other keys, referto Section<br />
2.<br />
When the <strong>CD</strong> player is switched off but still connected<br />
to the AC power source, it operates in<br />
standby mode (signalled bythe standby LED in<br />
the window of the infrared receiver [19], which<br />
means that the <strong>CD</strong> player can be conveniently<br />
sv.ritched on and off by means of the REVOX<br />
B20B lR remote control from your listening<br />
position.<br />
Because the power consumption in standby is<br />
negligible (approx. 5 W). you can leave the <strong>CD</strong><br />
player permanently connected.
SECTION 2<br />
lt<br />
ltE<br />
Main keypad<br />
Function overview<br />
POWER ON tl l<br />
r<br />
rt rt<br />
r_J ,_l<br />
TME<br />
_|n.fln<br />
u l)'t) ,)<br />
15 io 15 20 25 30<br />
r!rrrttlrrt<br />
Switches the <strong>CD</strong> player on, or off when this key<br />
is actuated a second time. When the <strong>CD</strong> player<br />
is switched on the standby LED extinguishes<br />
and the display field [13] is illuminated.<br />
mfl<br />
LOAD [2]<br />
PAUSE PUV I NATT<br />
NDEX LOAD<br />
In addition to switching on the <strong>CD</strong> player, this<br />
key opens the disc drawer [6].<br />
Insert the compact disc, printed side up, into<br />
the drawer. lf you intend to play a <strong>CD</strong> single<br />
(B cm diameter), first insert the <strong>CD</strong> singles<br />
adapter into the drawer in such a way that the<br />
wording REVOX points toward you, then insert<br />
the <strong>CD</strong> single.<br />
lf you do not immediately want to play the <strong>CD</strong>.<br />
you can close the drawer by pressing the LOAD<br />
key a second time.<br />
O lnsert disc into disc drawer:<br />
Compact disc<br />
<strong>CD</strong> single with adapter<br />
4
eIE<br />
Main keypad<br />
Function overuiew<br />
PLAY/NEXT[4]<br />
PAUSE PUY / NEXT INDEX LOAD POWEF<br />
ltra<br />
nt<br />
r_J I<br />
510<br />
TME<br />
t-t -t.t t -l<br />
t_t tr'-t :t<br />
TRACK<br />
TIME<br />
fll D\,1 -l<br />
151015<br />
rlllallalrrrrl<br />
15<br />
When you press the PLAY/NEI key the disc<br />
drawer closes.The contents list [G] is displayed<br />
and playing starts immediately with the first<br />
selection (TRACK).<br />
Each time this key is pressed. the laser pickup<br />
jumps to the next selection (TRACK) on the <strong>CD</strong><br />
and plays it.<br />
Numeric keys [7]<br />
12345<br />
IIE-E-I<br />
67a90<br />
E:::E=<br />
PAUSE PUY / NryT<br />
INDEX LOAD<br />
r<br />
ll<br />
TRACK<br />
51015<br />
tal!t<br />
TIME<br />
l!l'58<br />
Any selection on the <strong>CD</strong> can be accessed<br />
directiy by entering the corresponding number<br />
with the numeric keys 0 to 9. Enter the desired<br />
selection (TRACK) number (e.9.'12with the keying<br />
sequence 1-2) and terminate the input by<br />
pressingthe PLAY/NEKI[4] key Upto 99 selections<br />
can be accessed directly in this way.<br />
|NDEX [3]<br />
(Only if the <strong>CD</strong> is correspondingly<br />
tI<br />
coded)<br />
TRACK INDEX TIME<br />
lJ l,ü I l-lr-"5 5<br />
151015<br />
rrtirllllrlllala<br />
15<br />
nt)<br />
i NDEX TIME<br />
t't_J 1<br />
-lo<br />
!tltttatll<br />
t5<br />
t,n -t n t t.t-t I<br />
Lt -r'L] r<br />
Each time this key is pressed, the laser pickup<br />
jumps to the next index on the <strong>CD</strong>.<br />
Any index within a selection can be accessed<br />
directly by means of the numeric keys [7]. Enter<br />
the desired index number with the numeric<br />
keys and pressthe INDEX key.The laser pickup<br />
jumps to the specified location and continues<br />
playing from there.<br />
Note:<br />
A <strong>CD</strong> encoded with indices displays the index<br />
onlyfrom no.2.This characteristic is inherent in<br />
the system and not related to the equipment<br />
design.<br />
PAUSE [5]<br />
PAUSE PUY / NEXT<br />
r<br />
t-t -t<br />
,-J I<br />
1510<br />
TIME<br />
A LI'E.<br />
_t t'_t<br />
I:<br />
_l<br />
PAUSE<br />
The PAUSE [5] key immediately interrupts playback.<br />
but the laser pickup remains in the last<br />
position.<br />
When you press the PIAY/NEKI key [4] the<br />
playing process continues at the interrupted<br />
location.
sEcTroN 3<br />
Auxiliary keypad<br />
Special functions<br />
scAN 116/171<br />
-IEII<br />
AUTOSTOP nsl<br />
E=IT-<br />
I<br />
tr=<br />
Lt t-t<br />
- -<br />
FAc Tlv-<br />
Withthetwo keys(SCAN<br />
^<br />
[16] and)SCAN [17]<br />
Ft -t -J tl ,a _-l<br />
the laser pickup can be positioned at any <strong>CD</strong><br />
location in the forward or reverse direction. The<br />
output level will be attenuated by 12 dB This<br />
feature can also be used while the <strong>CD</strong> player<br />
is in PAUSE mode.<br />
TIME<br />
When this function is selected, the wording<br />
AurosroP<br />
Itrl, lrt AUTOSTOP [D] is shown on the display. lt<br />
-t,_l' I u<br />
switches the <strong>CD</strong> player to pause when the end<br />
15<br />
of the current selection is reached and waits for<br />
the next selection to be played. Playbackcan be<br />
TFACK TIME PAUSE resumed by pressing PLAY/NEKt [4]. however<br />
rt '-f It I, trt ^urocQD<br />
,__t :t -r r' t t1<br />
the AUTOSTOP function remains active.<br />
51o15 In order to cancel it, press this key a second<br />
tarla-tr time.<br />
,__li I _l l'L -J<br />
t5lo15<br />
lrraaalala<br />
t-t Tt<br />
t_t t1<br />
1510<br />
sroP [18]<br />
E-EE-EI<br />
TRACK<br />
T|ME<br />
11 n<br />
,-l ! t) '-'rt,rtr, u'Lt t)<br />
r510152a2530<br />
rrlallllalalllltrlllll<br />
lal<br />
lmmediately interrupts the<br />
causes the laser pickup to<br />
position.<br />
PLAY mode and<br />
return to the start<br />
LOOP [11]<br />
EEEIIE<br />
l-l<br />
t r:.<br />
510<br />
15<br />
ITTIT<br />
TIME<br />
r= _-,u<br />
_t _t. I -, I --<br />
The loop mode is activated by pressing the<br />
LOOPkeyThis function is acknowledged on the<br />
display by the wording LOOP lfl. ln this mode<br />
the inserted compact disc is repetitively played<br />
from the beginning to the end until the STOP<br />
[18] key or POWER [1] key is pressed<br />
The loopwillalso beterminated atthe end of the<br />
<strong>CD</strong> when the LOOP key is pressed a second<br />
time.
ff-rnE<br />
Auxiliary keypad<br />
Special functions<br />
DTSPLAY [14]<br />
TRACK TME<br />
IE-I t-t t-t rt r_<br />
SCAN > STOP<br />
Four time display modes are possible:<br />
a) DISCTIME:time elapsed since starl of <strong>CD</strong>.<br />
b)TRACKTIME:time elapsed since the start of<br />
the TRACK or the selection. Field [G] of the<br />
display provides information on the current<br />
position of the laser pickup within the selection<br />
(TRACK).<br />
c) TRACK REN/AINlNG TIM E : time remaining<br />
totheend of theTRACKorselection. Field [G]<br />
of the display provides information on the<br />
current position of the laser pickup within the<br />
selection (TRACK) ln this mode it is not possible<br />
to display an index.<br />
d)DISC REMAINING TIME:time remaining to<br />
the end of the <strong>CD</strong>. ln this mode it is not poss-<br />
Changes over the TIME indication in field [C].<br />
-t.-J E<br />
D1 t t'Ltl<br />
t5to15 rrlllllllll!<br />
TIME<br />
rtr<br />
rt,t I -l<br />
,-J l),-t t:.<br />
-f<br />
a<br />
TIME<br />
t-t r 1, tn<br />
Ll :r. I rl<br />
-l<br />
I RAL^<br />
T Vl<br />
ri \ 1---,,\ E<br />
ible to display an index.<br />
151015<br />
alrlaalllltt<br />
tl<br />
Note:<br />
ln DISC TIME display mode the pauses between<br />
the selection and atthe start of the <strong>CD</strong> are<br />
included in the computation while in TRACK<br />
TIM E mode the exact playing time of the selection<br />
is displayed.<br />
The DISCTIME and TRACKTIME are encoded<br />
by the <strong>CD</strong> manufacturer directly on the <strong>CD</strong><br />
which means that they are independent of the<br />
player and cannot be altered.
Auxiliary keypad<br />
Programming<br />
PROGRAM [B]<br />
I-IEIEIE<br />
SIEP TRACK<br />
nn<br />
i t_t Ll<br />
151015202530<br />
ltlttllallalllaalr!lllilrrall!<br />
This keyswitches the programming mode on or<br />
off.When the programming mode is active.the<br />
wording STEP [A] in the display field flashes;<br />
when the indication is steady a program is<br />
being executed.<br />
Aprogram can always be entered, regardless of<br />
whether a <strong>CD</strong> is being played or not. Howeve[<br />
no player function key may be pressed in programming<br />
mode (except those specifically<br />
mentioned in the corresponding Sections),<br />
otherwise the program would be executed<br />
immediatelrT<br />
o srEP +l- l10l9l<br />
I-IT<br />
t-l l-t<br />
- -<br />
l_,rt<br />
E u,)<br />
151o15202530<br />
rarll!tl!lllrallallllllll<br />
With these two keys it is possible to page<br />
upward or downward through the program in<br />
19 possible steps.<br />
They can be used for editing an existing program.<br />
o sToRE [12]<br />
==*"=<br />
-tI<br />
t-t t-t<br />
: r-_l ,_l<br />
151O15202530<br />
laalltrallrllllatllltt<br />
Memory load key. lt must be pressed afterthe<br />
entries of each program step have been completed.This<br />
f unction transfers the program step<br />
into the memoryThe next program STEPis subsequently<br />
displayed and can be entered or<br />
edited.
fw-nE<br />
Auxiliary keypad<br />
Programming examples<br />
Reprogramming the sequence of the selections (Tracks)<br />
(The seqüence assumed below - track 4, 9 - serves only as an example)<br />
O Press PROGRAM<br />
I-t-r<br />
tBl<br />
t-t t-t<br />
- -<br />
rtf-l<br />
tuL]<br />
151015202530<br />
tlrrlarallrlllalrallll<br />
tl<br />
The compact disc player enters programming<br />
mode. The message STEP [A] flashes in the<br />
display window and the digit 1 designating the<br />
step number appears below.<br />
O Press numeric key 4<br />
12345<br />
:-tt-r:<br />
t-tt I<br />
iLl-l<br />
15101524<br />
rrlalrralalltllltlal<br />
25 3a<br />
The TRACK indication in field [B] changes from<br />
00 to 04.<br />
O Press STORE [12]<br />
I-EEI<br />
-I<br />
-<br />
l--lrt<br />
1t)u<br />
1510152A2530<br />
lllttlaltllrllaaralallraltllir<br />
The entry is stored in memory The program<br />
STEP indication advances from 1 to 2 and thus<br />
signals that the second program step can be<br />
entered.<br />
O Press numeric key 9<br />
67490<br />
-t-r-rrE=<br />
'-ta<br />
,:' l--J -l<br />
151O152A2530<br />
rrrrralatllllrttllrlllllalllrl<br />
The TRACK indication in field [B] changes from<br />
00 to 09<br />
O Press STORE n2l<br />
EEEI-II<br />
STEP<br />
rlt1 1<br />
t_Jt t__t<br />
151O152a2530<br />
rallltllalaalartrrrrrrralralaa<br />
The entry is stored in memory and the STEP<br />
indication advances from 2 to 3.<br />
Up to 19 program steps can be entered in this<br />
manner. each of which is to be recorded in<br />
memory by pressing the STORE key.<br />
The <strong>CD</strong> player can be switched back to normal<br />
play mode by pressing PROGRAM [8] a second<br />
time. Of course, the program remains stored.<br />
O Press PLAY/NEXT f4l<br />
(lf the programming mode<br />
has not been terminated)<br />
PUY / NEXT<br />
]NDEX<br />
fl<br />
STEP TRACK<br />
t-tt I<br />
lLl-l<br />
15tO<br />
15<br />
TME<br />
I t-,-l -l<br />
r -_r'tr t:<br />
Cancels the programming mode, and the program<br />
is executed starting with STEPl to the last<br />
programmed step (except loop programs).<br />
O Note:<br />
Of course, programming this type of input can<br />
also be intermixed with other program step<br />
types.
Auxiliary keypad<br />
Programming examples<br />
Editing a program<br />
O Press PROGRAM [B]<br />
-="*===<br />
STEP TRACK<br />
t-tt I<br />
lLr-l<br />
t5 10 t5 2A 25 30<br />
rr rrrrlllr<br />
The compact disc player enters programming<br />
mode.The message STEP [A] flashes in the displaywindowand<br />
the digitl designating the step<br />
number appears below Fields [B] and [C]<br />
indicate the content ofthe program step.<br />
O Press STEP +/- l10l9l<br />
==",.-==<br />
nn<br />
lL]1<br />
151015202530<br />
rrrr-rrarllllattrlrirrratllrrr<br />
"Page" up (+) or down (-) through the program<br />
until the program step to be edited is displayed.<br />
O Enter the desired selection<br />
with the numeric keys [7]<br />
67A90<br />
-t:rr:--t<br />
STEP TFACK<br />
_ rt r_t<br />
'.<br />
1510<br />
rttitatrrr<br />
l-J l-l<br />
15 2A 25 3Q<br />
Ittllllaltr<br />
The previous entry will be overwritten.<br />
O Press STORE [12]<br />
: Ef EI<br />
-II<br />
STEP TRACK<br />
_ t-t -J<br />
-i ,_J t_<br />
151015202530<br />
llllllllalllaalrraalrtltrllll-<br />
The new entry is stored in memory and the next<br />
program step is displayed which can either be<br />
overwritten or skipped with the "+" key, etc.<br />
O Press PROGRAM<br />
-="*"=<br />
[B] key<br />
t-t<br />
-<br />
t-t<br />
SIORE<br />
l-frt<br />
f.J ,_t<br />
l5to152a<br />
tllalllllallt!rar-aat<br />
TIME<br />
-''_,.nn<br />
I) t)'t) t_!<br />
25 30<br />
Switches the <strong>CD</strong> player back to normal play<br />
mode. The updated program is retained in<br />
memory.<br />
O Press PLAY/NEXT l4l<br />
(lf the programming mode<br />
has not been terminated)<br />
STEP TFACK<br />
t-tt t<br />
L_l -l<br />
151015<br />
TME<br />
I t-.-l -l<br />
t 1't:. ,-.<br />
The program is executed starting with STEP 1<br />
to the last programmed step (except loop programs).<br />
Erasing individual selections<br />
in the program<br />
Proceed in the same manner as described<br />
above. Overwrite the unwanted selection with<br />
"O" by pressing the numeric key 0. Steps overwritten<br />
with "0" will be skipped when the program<br />
is executed.<br />
10
Auxiliary keypad<br />
Programming examples<br />
Erasing a complete program<br />
O Press PROGRAM [B]<br />
IE:=-IE<br />
O Press STORE n2l<br />
and PROGRAM t8l<br />
concurrently<br />
I:-t:r<br />
LI<br />
-<br />
t-tt I<br />
l l-_l -l<br />
151O15202530<br />
rrralllllllrllraalllllllllllrl<br />
STEP TFACK<br />
rtl-l<br />
l _l Ll<br />
1510<br />
rrltalr-l-<br />
STEP TRACK<br />
O Press PROGRAM [B]<br />
I E:= Et -t -t<br />
TRACK<br />
rt |-l<br />
2A 25 3A<br />
15<br />
rrrrralrr<br />
TME<br />
nrt,nn<br />
t),_t l) [-]'t_1 t)<br />
151015202530<br />
llrllrll!lllllatltltlllf<br />
llllaa<br />
The compact disc player enters programming<br />
mode.<br />
While keeping STORE pressed.also press PRO-<br />
GRAM.<br />
Switches the <strong>CD</strong> player back to normal play<br />
mode.<br />
Note:<br />
O To enter a new program it is not necessary<br />
to first erasethe old one, simplyoverwrite itwith<br />
a new one.<br />
O An existing program is also erased if a power<br />
failure occurs.<br />
11
w-nE<br />
Auxiliary keypad<br />
Programming examples<br />
Programming a LOOP<br />
O Press PROGRAM [B]<br />
IE-I<br />
I-I-r-lEt<br />
l-l<br />
--<br />
LOOP<br />
I-l<br />
STEP TRACK<br />
t-tt t<br />
l t_J -l<br />
STEP TFACK<br />
nn<br />
,1 UU<br />
1510152A2530<br />
rtaallll!latrllat!!!lllallllal<br />
10 15 20 25 30<br />
aiaal!!ltttat!!taaliltl<br />
The compact disc player enters programming<br />
mode.The message STEP [A] flashes in the displaywindowand<br />
the digitl designating the step<br />
number appears below.<br />
O Press LOOP t11l<br />
I-E==EIIE<br />
STEP<br />
I<br />
,: ,_<br />
15 10 15 2A<br />
rr<br />
25<br />
rralallt<br />
30<br />
The LOOP command can be entered in any<br />
position of the program (but it usually makes<br />
sense onlyatthe end).The LOOPcommand has<br />
the effectthatthe program is reexecuted starting<br />
with the first program step. This repetition<br />
continues until the program is interrupted.<br />
O Press STORE n2l<br />
_<br />
E<br />
I-t I-t Lt<br />
=t<br />
STEP TRACK<br />
rt|f<br />
1 t),-)<br />
1510<br />
rrt-ltlrrl<br />
15 20 25 30<br />
The entry is stored in memory and the next program<br />
step is displayed.<br />
The <strong>CD</strong> player can be switched back to normal<br />
play mode by pressing PROGRAM [B] a second<br />
time. The program remains stored.<br />
O Press PLAY/NEXT [4]<br />
(lf the programming mode<br />
has not been terminated)<br />
PAUSE PSY / NEXT<br />
INDEX LOAD<br />
r<br />
STEP TRACK<br />
T ME<br />
t-tu tE.1 1<br />
rr-J-t<br />
l0 15<br />
r:.E,:<br />
The program is executed starting with STEP1.<br />
When the LOOPcommand is reached,the program<br />
jumps back to STEP 1 and is reexecuted<br />
until the program is cancelled either with STOP<br />
[18]. LOAD [2], or POWER ['1]<br />
12
Auxiliary keypad<br />
Programming examples<br />
Programming the pause command<br />
O Press PROGRAM [B]<br />
rE-r-l-l<br />
E]:=E<br />
t-t<br />
--<br />
t-t<br />
STORE<br />
STEP TRACK<br />
t-tI t<br />
l ,-J -l<br />
11 rt<br />
I t)t)<br />
1510152A2530<br />
151015242530<br />
!llrllalllllarlaaatallrllallla<br />
10 15 20 25 30<br />
altrrrrrrrtrrrr<br />
latlllll<br />
The compact disc player enters programming<br />
mode.The message STEP [A] flashes in the displaywindowand<br />
the digitl designating the step<br />
number appears below.<br />
O Press PAUSE t5l<br />
fr<br />
STEP<br />
/t<br />
E<br />
10 15 20 25 30<br />
rrrrrrllarrr<br />
A PAUSE command can be inserted anywhere<br />
in the program. lt has the effect that program<br />
switches to PAUSE at that point.<br />
O Press STORE [12]<br />
L-r l-t<br />
"..==-<br />
t-t<br />
1|J<br />
rt<br />
151O15202530 -]<br />
ttlrritlltlllltllaaal-r<br />
The entry is stored in memory and the next program<br />
step is displayed.<br />
The <strong>CD</strong> player can be switched back to normal<br />
play mode by pressing PROGRAM [B] a second<br />
time.The program remains stored.<br />
O Press PLAY/NEXT [4]<br />
(lf the programming mode<br />
has not been terminated)<br />
PAUSE PüY / NEXT<br />
NDEX LOAD<br />
fl<br />
STEP TRACK<br />
l-lt I<br />
it)-l<br />
151015<br />
TIME<br />
I t=.1 _-<br />
I -I,L<br />
L<br />
The program is executed starting with STEP1.<br />
When the PAUSE command is reached,the <strong>CD</strong><br />
player switches to PAUSE mode.<br />
To cancelthe PAUSE f unction press PLAY/N EXI<br />
[4], the program continues.<br />
13
Auxiliary keypad<br />
Programming examples<br />
EE_EE<br />
l==t:<br />
[E-TIE<br />
Programming the POWER OFF command<br />
O Press PROGRAM [B]<br />
IE-l-lEl<br />
PRoGRAM:srEP+LooP<br />
]-EI-IE<br />
PROGRAM STEP + LOOP<br />
STEP<br />
1<br />
rlt<br />
t-tt I<br />
,J -l<br />
STEP TRACK<br />
rt,-1.<br />
z uu<br />
5 10 15 2A 25 30<br />
rralltllltllaal<br />
tr<br />
151015202530 rrarltalltlltatltalllll<br />
The compact disc player enters programming<br />
mode.The message STEP [A] flashes in the displaywindowand<br />
the digitl designating the step<br />
number appears below.<br />
O Press POWER [1]<br />
PAUSE PUY / NEXJ<br />
NOEX LOAD<br />
r<br />
a-<br />
1510152a2530<br />
rllalrltir<br />
15<br />
rrrrrrr lttlllla<br />
A POWER OFF command can be entered anywhere<br />
in the program (but it generally makes<br />
sense only at the end). lt has the effect that the<br />
<strong>CD</strong> playerswitches off (to STANDBY) automatically<br />
when the program reaches this point. ln<br />
programming mode, the <strong>CD</strong> player is not<br />
switched off when the POWER [1] key is<br />
pressed the first time, only a second pressing of<br />
the POWER key switches the unit off.<br />
O Press STORE n2l<br />
I-E=-r-lI<br />
STEP TFACK<br />
nn<br />
i|fLl<br />
1510152A2530<br />
rtllttr-arrltltlrlarrl<br />
larrlllr<br />
The entry is stored in memory and the next program<br />
step is displayed.<br />
The <strong>CD</strong> player can be switched back to normal<br />
play mode by pressing PROGRAM [B] a second<br />
time.The program remains stored.<br />
O Press PLAY/NEXT f4l<br />
(lf the programming mode<br />
has not been terminated)<br />
r<br />
,n\<br />
STEP TFACK<br />
151015 lalllllrMla<br />
!\'-/ I<br />
T ME<br />
The program is executed starting with STEP1.<br />
When the POWER OFF command is reached,<br />
the <strong>CD</strong> player switches off automatically (to<br />
STANDBY). No further program steps are processed.<br />
(The <strong>CD</strong> player cannot switch itself on<br />
automatically!)<br />
14
Auxiliary keypad<br />
Executing a program<br />
A program that exists in memory can be retrieved and executed<br />
O Press PROGRAM [B]<br />
I: EI E=f E<br />
STEP<br />
l<br />
all<br />
t-tt I<br />
,__t -l<br />
5ro<br />
ttlralr<br />
15<br />
The stored program is retrieved<br />
O Press PLAY/NEXT [4]<br />
PAUSE PUY / NEXT<br />
INDEX LOAD<br />
E<br />
l_ltt<br />
itJ-l<br />
15<br />
llall<br />
10<br />
!llal<br />
15<br />
TIME<br />
t r,-t<br />
|<br />
-l<br />
1't=. t:.<br />
The program is executed immediately starting<br />
with STEPl<br />
15
SECTION 4<br />
Fault sources<br />
Troubleshooting<br />
O No function<br />
Standby pilot lamp is dark,the displayfield does<br />
not light up when the unit is switched on.<br />
O Check the power cord.<br />
O Check that the AC outlet is in order by connecting<br />
another device to this outlet.<br />
O Checkthefuses (referto Section 4,Technical<br />
Appendix).<br />
O <strong>CD</strong> does not play<br />
O Check that the compact disc is correctly<br />
inserted. i.e. that the printed side faces up.<br />
O lt is also possiblethatthe <strong>CD</strong> is dirty. mechanically<br />
damaged, or does not conform to the<br />
<strong>CD</strong> specifications (manufacturing defect).<br />
First try if any other <strong>CD</strong> can be played.<br />
16
Technical appendix<br />
B20B lR REMOTE CONTROL (Optionalaccessory)<br />
The REVOX B20B infrared remote control is designed for convenient control of all newer REVOX<br />
equipment from the listening position.<br />
ToidentifythatthetransmittedcommandisintendedforthelRreceiveroftheBl26,the* button<br />
must be pressed while another function is being actuated. excepted P/NEKl. Each received command<br />
is acknowledged bythe red LED in the lR receiverwindow.<br />
ln the opposite illustration the buttons necessary<br />
for operating the <strong>CD</strong> PLAYER are identified<br />
with the same numbers as on the foldout sheet<br />
located at the end of these operating instructions.<br />
Buttons that have the same number initiate<br />
the same function.<br />
O Switching on the <strong>CD</strong> player:<br />
The <strong>CD</strong> player can be switched on by pressing<br />
the numeric buttons 0 to 9. the P/NEXT button<br />
orthe$ button (pausefunction)- always in conjunctionwiththe<br />
* button (exception: P/NEXI).<br />
O Stopping the <strong>CD</strong> player:<br />
Press x togetherwith ENTER.<br />
O Switching off the entire REVOX system:<br />
Press POWER OFF<br />
O Pause:<br />
Press x together with +.<br />
O Scan:<br />
Press x together with ) or (. lf you keep these<br />
keys pressed, the scan continues forward or<br />
backward.<br />
O lndexjump:<br />
Press x togetherwith SCAN ) The laser pickup<br />
jumps to the next index. lf the inserted <strong>CD</strong> does<br />
not contain any indices, the laser pickup jumps<br />
to the ne),.t higher selection (track).<br />
O Direct index selection:<br />
Press x and while holding this button down,<br />
enter the desired index number with the<br />
numerickeys 0to 9and pressSCAN). Nowrelease<br />
the x button.<br />
O Jump to previous selection<br />
Press x togetherwith SCAN (.The laser pickup<br />
jumps to the preceding title (track).<br />
Keys 0-9 [7]<br />
Jump to previous selection<br />
rNDEX [3]<br />
sroP ll8l<br />
PLAY/NEKr [4]<br />
scAN > [17]<br />
PAUSE [5]<br />
scAN < [16]<br />
For detailed information concerning the REVOX 8208 lR remote control please referto the operating<br />
manual supplied with the remote control unit.<br />
17
Technical appendix<br />
Digitaloutputs<br />
The two outputs DIGITAL OUTPUT 1 and 2 [21] make all digitally stored information of the <strong>CD</strong><br />
available. In addition to the music of the two channels the subcode information is also output in<br />
serial form.<br />
These two outputs are connected in parallel and electrically isolated from the other circuits by<br />
an isolation trarisformer<br />
COMPUTER<br />
6<br />
DIGITAL RECORDER<br />
DIGITAL AMPLIFIER<br />
1B
Technical Appendix<br />
The Compact Disc<br />
Interesting facts about the compact disc<br />
The information "groove"of a compact disc has a length of approximately 5 km and contains a complexdata<br />
signal:alternatinglyarranged digitalvalues from two audio channels carrythe music infor<br />
mation. Ancillary information for displaying the selections (track, index), playing time, etc. are also<br />
encoded in this information "groove".<br />
On compact discs this information is encoded on an ultrathin aluminum layer.The digital information<br />
is embossed in this layer in the form of "pits".The surface is scanned by means of a laser beam,<br />
the reflected light of which is converted by photo diodes to digital electrical signals.<br />
The aggregate signal is separated into music and information data, and checked. Erroneous or<br />
missing dala are corrected or complemented by a powerful error detection system. Missing data<br />
(resulting from scratches) are replaced by interpolation (mean valuesfrom the scanning before and<br />
after the fault). lf errors are too frequent to be correctable, the output is muted.<br />
Structure of the compact disc<br />
The maximum playing time of a compact disc is 74 minutes. Special information has been encoded<br />
on the disc so that individual selections or a passage can be quickly found.<br />
O The individual selections on the compact disc are separated by a brief pause and are designated<br />
as TRACKS.<br />
O Certain disc producers mark individual movements or sections (mostly classical pieces) by<br />
means of indices (INDEX).<br />
O Each compact disc is also subdivided into minutes and seconds. Any position can be accessed<br />
and reproduced with an accuracy of one second.<br />
We distinguish between two types of time:<br />
DISC TIM E: playing time in minutes and seconds since the start of the disc.<br />
TRACKTIME: playing time in minutes and seconds since the start of the selection (TRACK).<br />
All of this informative data are def ined and encoded on the information "groove" bythe <strong>CD</strong> producer<br />
which means that they are independent of the digital audio player and cannot be altered.<br />
Handling and care of the compact discs<br />
Handling of thecompactdiscis much easierand less problematicthan isthecaseforconventional<br />
LP records. Nevertheless ceftain precautions are to be observed. Forthis purpose it is necessary to<br />
know the design of the compact disc.<br />
The medium that holds the information, the ultrathin aluminum layer is deposited on a transparent<br />
substrate.The label is subsequently printed overthis aluminum layer<br />
Although the compact disc is scanned through the transparent substrate. it is the side carrying the<br />
labelthat rs more sensitive to scratches becausethe printing ink and thevarnish are the only protection<br />
for the extremely thin aluminum coating. On the printed side a scratch can intedere with the<br />
reproduction process or even render it impossible. while on the scanning side a scratch goes virtually<br />
unnoticed.<br />
The spacing between the information "grooves"on the compact disc is only1.6 pm and the mean bit<br />
length is approximately 2 pm (two thousandths of a millimeter). lf we consider that a human hair<br />
has a thickness of 40 to 60 ym, it becomes evident that a scratch in the aluminum layer can have<br />
disasterous consequences.<br />
Cleaning of the compact disc is not necessaryas long as it is onlytouched along the rim and always<br />
returned to the original packing sleeve.<br />
Dirty compact discs can be cleaned on the scanning side (specular suface) bywiping it in straight<br />
line f rom the centertoward the rim with a piece of lint-free cloth. Solvents or abrasives must not be<br />
used under any circumstances.<br />
19
TechnicalAppendix<br />
Technicaldata<br />
REVOX 8126 <strong>CD</strong> <strong>Player</strong><br />
E:EE:<br />
rr-rnE<br />
Audio data<br />
General:<br />
Number of channels: Remote control: With hand-held lR transmitter 8208 or via SERIAL<br />
LINK socket of the R EVOX remote control system<br />
Frequency response: 2O Hz...20 kHz. +O'1 dB<br />
Harmonic distortion: < 0 005% (20 Hz ...2O kHz)<br />
Power requirements: 22O Vl\C + 5/- 10a/o. 50. . 60 Hz<br />
Solder strappable to 110 Vor 240 V<br />
Signal-to-noise ratio:<br />
linear:<br />
A-weiohted:<br />
Channel separation:<br />
Output level:<br />
ANALOG OUTPUT<br />
DIGITAL OUTPUT:<br />
100 dB (20 Hz...20k{z)<br />
106 dB<br />
>90 dB (20 Hz...20kHzl<br />
2.5 V. Ri < 500 Q, short-circuit proof<br />
500 mVpp, Ri:75 O, short-circuit-proof<br />
Power fuse:<br />
Power consumption:<br />
Dimensions {Wx H x D):<br />
Weight:<br />
Channel balance:
SECTION 5<br />
List of keypad functions<br />
Ou ick- reference descri ption<br />
of all functions<br />
.t)) Functions that respond<br />
to the B20B lR remote control<br />
Front panel:<br />
Controlelement Function Page<br />
t1l PowER<br />
.))) Switches the <strong>CD</strong> player on, or off. Certain components of the unit are still<br />
energized (STANDBY).<br />
l2l LOAD Opens or closes the disc drawer [6].<br />
t3l INDEX .))) When this key is pressed, the laser pickup jumps to the next lN DEX on the<br />
'<br />
<strong>CD</strong>.When this key is pressed after any inputwith the numeric keys [7],the<br />
corresponding indexwill be played. lf the <strong>CD</strong> is not encoded with indices.<br />
the nextTRACKwill be accessed when this key is pressed.<br />
l4l PLAY/NEKI .))) PLAY key. The next selection is played when this key is pressed a second<br />
' time.When this key is pressed afteran entrywith the numeric keys [7],the<br />
corresponding selection will be played.<br />
t5l PAUSE o))) The play process can be interrupted with this keyatanytime.To continue<br />
playing from the place of interruption, press PLAY/NDCI [4].<br />
t6t DISC DRAWER This drawer feeds the compact disc to the player mechanism. Can be<br />
opened or closed with the LOAD [2] key.<br />
t7l Numeric keys 0-9 .r)) Numeric input key_s. Fol dq.egt sglection of a TRACK or an index marker in<br />
' conjunction with PLAY/NEKI [4] or INDEX [3].<br />
tBl PROGRAM Switches the programming mode on or off.<br />
tel STEP _ Paging backward through the program in programming mode<br />
t10l STEP +<br />
t11l LOOP<br />
l12l sToRE<br />
Paging forward through the program in programming mode.<br />
Causes the <strong>CD</strong> or a program to be repeated until cancelled.<br />
Memory load key. Must be pressed afterthe entries of each program step<br />
have been completed.<br />
tl3l Display field (LC display) 24<br />
l14l DTSPLAY<br />
t15l AUTOSTOP<br />
Changes over the TIME indication in field [C]" Four different time display<br />
modes are possible.<br />
a) DISCTIME (time elapsed since start of <strong>CD</strong>)<br />
b) TRACKTIME (time elapsed since the start of the TRACK or selection)<br />
c) TRACK REMAINING TIME (time remaining to the end of the TRACK<br />
or selection).<br />
d) DISC REMAINING TIME (time remaining to the end of the <strong>CD</strong>)<br />
Switches the <strong>CD</strong> playerto pause when the end of the current selection or<br />
program step is reached (PAUSE). Playback can be resumed by pressing<br />
PLAY/NDCI [4]<br />
21
Controlelement Function Page<br />
116l scAN <<br />
or)) Scan backward within a selection (keep this key pressed for continuous<br />
'<br />
backward scan.<br />
117) SCAN > o))) Scan forward within a selection (keep this key pressed for continuous for-<br />
'<br />
ward scan.<br />
tl8l sToP<br />
t19l lR Sensor<br />
or)) lmmediately interrupts the PLAYmode and causes the laser pickup to re-<br />
'<br />
turn to the4start position. Also cancels a program.<br />
lnfrared receiver window. Pilot lamp for standby mode.<br />
The <strong>CD</strong> player can be switched on directly by pressing one of the following keys:<br />
O PLAY/NEKI [4]. Activates play mode with selection No.1. When the <strong>CD</strong> player is switched on with one of the<br />
numeric keys [7] and PLAY/NDCI [4], the corresponding selection and the rest of the <strong>CD</strong> will be played.<br />
O LOAD l2l. Switches the <strong>CD</strong> player on and causes the drawer to open.<br />
O The STOP [18] only switches on the <strong>CD</strong> player.<br />
O The PAUSE key switches the <strong>CD</strong> player to pause at the beginning of the first selection.<br />
Display field<br />
tAl STEP Number of the current program step. The word STEP flashes in program<br />
mode. This field is not visible in normal play mode. 24<br />
tBl TRACK The currentTRACK number is displayed in the first and second position of<br />
this field, and the corresponding INDEX (if encoded) is displayed in the<br />
third and fourth position. 24<br />
Ic] TIME One of the four time indications described under DISPLAY [14] is indicated<br />
in this field. 24<br />
tDl AUTOSTOP Visible when AUTOSTOP mode is active. 24<br />
tEl PAUSE lndication of the PAUSE function 24<br />
tFl LOOP Visible when the LOOPfunction is active. 24<br />
tGl Contents lisl Missing dots on the left represent selections that have already been<br />
played. the total number of dots indicates the number of selections that<br />
exist on the inserted <strong>CD</strong>. 24<br />
22
_ Rear panel<br />
_ t20l FrxED ourPUT<br />
l21l DTGTTALOUTPUT<br />
l22l AC POWER<br />
Analog cinch output sockets (L and R) for connection to the amplifier.<br />
Two digitaloutputs, connected in parallel.<br />
Power cord.<br />
L23l SERTAL LrNK Connection for the Revox infrared control system. 24<br />
23
Overuiew<br />
Display<br />
;<br />
I<br />
B 126 . COMPACT DISC PUYER<br />
12345<br />
t-t t-t t-t t-t r-J<br />
67490<br />
t-t L-t t-t t-t I-t<br />
,r EE,EE EE,EE.-1331'"<br />
NEpasENLwEFLEcouvEFcLE(aFFEBO rLNEsErFouvE<br />
ÄL1NTEREURAUCUNEPIECEPOUVANTETFEREPAREEPAF<br />
(i)<br />
Y<br />
LAUtto\t 'opc-.!\-..F<br />
FEF SEFVICING TO OUALFIED S<br />
I<br />
____J<br />
24
Audio circuit diagram<br />
DECODER BOARD 1<br />
+5V +10V +l<br />
TRANSFORI\IER<br />
BOARD<br />
1.169.45Q/ 451 6V -10V -15<br />
LASER CONTROL<br />
HF AIVPLIFIER<br />
HFt,/TL.DETECTOR<br />
FOCUS ELECTRONICS<br />
RFI /RF2.FL FCTRONICS<br />
€ L.FIX<br />
"----€ R.rtx<br />
lOVS]BY<br />
l<br />
-tEEEE<br />
T-TNE<br />
EEIE=EE<br />
KIYBOARD LEFT 1.769 215<br />
LC,D SPLAY 1.769,255<br />
KFYBOARD RIGH<br />
PIz, P13, P14<br />
P00 ... P05<br />
I*<br />
DLEN1, DLEN2, CtK, DATA<br />
P00... P05 P10, Pll<br />
SERTALLTNK@<br />
@<br />
*__1<br />
DRAW IN/OUT<br />
DRAW SENSE<br />
DRAW POS. F<br />
)<br />
I vt'<br />
A t'<br />
I<br />
DRAWER<br />
TND,SWITCHES<br />
DRAW POS, B<br />
'9.442/446
FRAN9ATS
Prot6gez votre appareil de la chaleur et de l'humidit6 excessives.<br />
GARANTIE<br />
EMBALLAGE<br />
Veuillez obseruerque les garanties ne sontvalables que dans le pays<br />
d'achat. Nous attirons en outre votre attention sur la perte de validit6<br />
de la garantie qu'entraine toute manipulation ou r6paration effectu6e<br />
par un personnel non qualifi6.<br />
Le bon de garantie des appareils vendus en Suisse ou en Autriche<br />
est d6livr6 par le revendeur. Le bon de garantie des appareils vendus<br />
en France setrouve dans leuremballage.lldoit6tre convenable rempliet<br />
sign6 parvotre revendeurag166 REVOX, Une carte de garantie<br />
sp6ciale est jointe aux appareils vendus en Allemaqne F6d6rale, aux<br />
USAainsi que dans la plupart des autres pavs. Cette carte se trouve,<br />
soit dans l'emballage de l'appareil, soit dans une enveloppe en plastique<br />
plac6e sur un cöt6 de cet emballage. En l'absence d'une telle<br />
carte, veuillez vous adresser ä votre revendeur REVOX ou ä votre<br />
agence 169ionale R EVOX.<br />
Veuillez conserver l'emballage d'origine. En cas de transport, il offre<br />
la meilleure protection pour votre pr6cieux appareil.<br />
Attention;<br />
Vorsicht:<br />
Warning:<br />
Cet appareil n'est pas s6pa16 du r6seau lorsqu'il est d6clench6 (STANDBY).<br />
Das Gerät ist in ausgeschaltetem Zustand (STANDBY) nicht von der Stromzuführung getrennt.<br />
This unit is not separated from the mains supply when switched off (STANDBY).<br />
Attenzione: Ouesto apparecchio non ö separato dalla rete quando l'interruttore ö spento (STANDBY).<br />
Precauci6n: Este aparato no estä separado de la red cuando estä apagado (STANDBY).<br />
Waarschuwing: ln uitgeschakelde toestand (STANDBY) is het apparaat niet gescheiden van de netspanning.<br />
Advarsel:<br />
Huomio:<br />
Forsiktig:<br />
Varning:<br />
Apparaten er ogsaa hvis lukket (STANDBY) under strom.<br />
Huolimatta siitä. että virta on katkaistu laitteesta (STANDBY), sitä ei ole eristetty sähköstä.<br />
Selvom strommen ikke er pa i apparatet (STANDBY). sa er det ikke skilt fra strom.<br />
Oaktat om strömmen är avbruten i apparaten (STANDBY), sa är den ända kopplad med ström.
Table des matiöres<br />
CHAPITRE 1<br />
lnstallation<br />
Mise en selice<br />
Page<br />
Contenu de l'emballage<br />
2<br />
lnstallatron 2<br />
Protection de transport<br />
2<br />
Prescriptions de s6curit6<br />
2<br />
Tension secteur<br />
Raccordement<br />
Mise sous tension<br />
cJ<br />
c<br />
J<br />
J<br />
CHAPITRE 2<br />
Clavier principal<br />
Synoptique des fonctions<br />
S6lectron des titres et des index<br />
Fonction pause<br />
4<br />
5<br />
5<br />
CHAPITRE 3<br />
Clavier secondaire<br />
Fonctions sp6ciales:<br />
Recherche (SCAN)-<br />
Autostop et stop<br />
R6p6tition continue (LOOP)<br />
Fonctions d'affichage (DISPLAY)<br />
Programmation:<br />
Fonction des touches de programmation<br />
Exemples de programmation<br />
- Suite de titres (TRACKS)<br />
- Modification du programme<br />
- Effacement du programme<br />
- Programmes continus<br />
- Programmation de pauses<br />
- Programmation de la mise hors tension<br />
Ex6cution de programme<br />
o<br />
0<br />
o<br />
7<br />
o<br />
ö<br />
o<br />
10<br />
11<br />
12<br />
13<br />
14<br />
15<br />
CHAPITRE 4<br />
D6rangements<br />
Annexe technique<br />
CHAPITRE 5<br />
Liste des fonctions<br />
Problömes 6ventuels et leur solution<br />
T6l6com mande inf rarouge B20B<br />
Sorties num6riques<br />
Le disque compact<br />
Caract6ristiq ues techniques<br />
Dimensions<br />
Description de toutes les fonctions<br />
Dessin de I'appareilavec repöres<br />
Sch6ma-bloc audio<br />
16<br />
17<br />
1B<br />
19<br />
20<br />
20<br />
21<br />
24<br />
25
CHAPITRE 1<br />
lnstallation<br />
Contenu de l'emballage,<br />
installation<br />
E:EEE<br />
-E---tt<br />
trl-----r-TTr---- tttl___l<br />
Contenu de l'emballage<br />
Outre le pr6sent mode d'emploi. l'emballage<br />
contient l'appareil avec un cäble secteur<br />
conforme, un cäble de raccordement avec<br />
fiches Cinch aux deux extr6mit6s et un adaptateur<br />
pour la lecture des <strong>CD</strong>-Single (diamÖtre<br />
B cm). En cas de problömes, veuillez vous<br />
adresser ä votre revendeur sp6cialisö.<br />
lnstallation<br />
Installez l'appareil de maniöre ä maintenir un<br />
6cart de ventilation d'au moins 10 mm par rapport<br />
aux autres appareils. murs, meubles. etc.<br />
Retirer la protection de transport<br />
Afin d'6viter tout dommage pendant le transport.<br />
le mouvement est fix6 par le dessous au<br />
moyen de deux vis de süret6. Ces vis sont rep6-<br />
r6es et doivent ötre desserr6es et retir6es ä<br />
l'aide d'un tournevis avant la mise en service. En<br />
cas de transport ultörieur sur des distances<br />
importantes. les deux vis doivent Ötre remont6es<br />
et serr6es pour bloquer le mouvement<br />
aprös avoir retir6 le disque compact et. 6ventuellement,<br />
I'adaptateur pour <strong>CD</strong>-Single. Cette<br />
protection n'est pas n6cessaire si l'on transporte<br />
l'appareil avec p16cautions sur une courte<br />
distance, par exemple dans une autre piöce.<br />
Prescriptions de s6curit6<br />
Raccordez correctement 'appareil au r6seau<br />
par son cäble secteur<br />
Prot6gez votre appareil des excös de chaleur et<br />
d'humidit6.<br />
L'appareil mis hors tension (Standby) n'est pas<br />
coup6 de l'alimentation 6lectrique. Certaines<br />
parties ä l'int6rieur de l'appareil sont toujours<br />
sous tension I<br />
L'appareil est congu pour fonctionner en position<br />
normale (horizontale) uniquement.<br />
En cas de mauvais fonctionnement ou de<br />
d6faut, retirez imm6diatement la fiche secteur<br />
et faites contröler l'appareil par un revendeur<br />
sp6cialis6 REVOX.
Mise en service<br />
Tension secteur, raccordement,<br />
mise sous tension<br />
Contröle de la tension secteur<br />
AC POWER<br />
Le 8126 est 169l6 d'usine pour la tension indiquöe<br />
sur la face arriöre. Assurez-vous que la<br />
tension secteur locale correspond ä la valeur<br />
indiqu6e.<br />
Pour la transformation ä d'autres tensions,<br />
veuillez consulter votre revendeur sp6cialis6.<br />
Raccordement au secteur<br />
o<br />
o<br />
Reliez l'appareil au secteur au moyen du cäble<br />
secteur fixe.<br />
@<br />
^@ "o o<br />
@l<br />
Raccordement ä I'amplificateu r<br />
Reliez les deux prises Cinch FIXED OUTPUT<br />
[20] au dos de l'appareilä I'entr6e ou<br />
CHAPITRE 2<br />
Clavier principal<br />
Synoptique des fonctions<br />
:<br />
ff-reK<br />
POWER ON t1l<br />
ü<br />
TRACK<br />
nn<br />
t_J u<br />
TME<br />
n rt,t1 n<br />
,_J U,'_1 'J<br />
10 15 2Q 25 30<br />
rilrlllalalaaalttllllll<br />
Met l'appareil sous tension et hors tension.<br />
Lorsque l'appareil est sous tension,le t6moin de<br />
veille est 6teint et l'affichage [13] allum6.<br />
LOAD [2]<br />
PATJSE puv r reit<br />
INDEX<br />
r<br />
Cette touche permet 6galement de mettre l'appareil<br />
sous tension. En mÖme temps. le tiroir ä<br />
disque f6l est sorti.<br />
Placer le disque compact dans le tiroir, face<br />
imprim6e en haut. Pour jouer un <strong>CD</strong>-Single (diamötre<br />
B cm). mettez d'abord I'adaptateur dans<br />
le tiroir de maniöre que le signe REVOX soit<br />
tourn6 vers soi en avant, puis placez le disque<br />
dans l'adaptateur.<br />
Si vous ne d6sirez pas 6couter le disque imm6-<br />
diatement, fermez le tiroir en pressant encore<br />
une fois la touche LOAD.<br />
O Mise en place d'un <strong>CD</strong>:<br />
Disque compact<br />
<strong>CD</strong>-S|ngle et adaptateur
Clavier principal<br />
Synoptique des fonctions<br />
PLAY/NEXT[4]<br />
r<br />
TIME<br />
n t rt -t,t_t 1<br />
ü<br />
15lOl5<br />
llllallalllll!ll<br />
'<br />
,--]F'-t-)<br />
En pressant la touche PLAY/NEXTle tiroir ä disque<br />
se ferme. La table des matiöres [G] est affich6e<br />
et la lecture commence imm6diatement<br />
par le premier morceau ou titre (TRACK).<br />
RAL^<br />
VL<br />
n -t Ft F,-t -t<br />
ü F r-J :'r= |<br />
i51015<br />
llitllllllll!ll<br />
Chaquefois quevous actionnez la touche PLAY/<br />
NEKI, le lecteur laser passe au titre (TRACK)<br />
suivant.<br />
Touches num6rales [7]<br />
12345<br />
II-r--l<br />
67A90<br />
t-t t-t t-t I-t<br />
fr<br />
l-t<br />
l1<br />
IRACK<br />
51015<br />
TIME<br />
Ll<br />
!l'!i E<br />
Les touches num6rales 0-9 permettent de<br />
s6lectionner directement le titre voulu. Composez<br />
le num6ro du titre (TRACK) (parex.12 par les<br />
touches 1 et 2) et terminez l'introduction par la<br />
touche PLAY/NDCI [4]. ll est possible de s6lectionner<br />
jusqu'ä 99 titres.<br />
|NDEX [3]<br />
(si le <strong>CD</strong> est cod6 en cons6quence)<br />
tl<br />
TRACK INDEX TME<br />
r-r t,n -t r-t -,,r- l--<br />
|.-l r'r--r l: Lr ,:': :<br />
10 15<br />
TFACK NDEX T ME<br />
t-t t.Tt -t t-t t I,t-t ,<br />
,__l t'Lr _l t-l -t',-l I<br />
to<br />
r5<br />
Chaque fois que vous actionnez la touche<br />
INDEX, le lecteur laser passe au prochain index<br />
(repöre) sur le disque.<br />
Les touches num6rales [7] permettent de<br />
s6lectionner un repöre quelconque dans un<br />
trtre. ll vous suffit d'introduire le repöre correspondant<br />
et de presserensuite la touche INDEX.<br />
Le lecteur laser passe ä I'endroit en question et<br />
la lecture se poursuit depuis lä.<br />
Remarque:<br />
Un disque <strong>CD</strong> pourvu de repöres n'affiche<br />
ceux-ci qu'ä partir du num6ro 2. Ceci est inh6-<br />
rent au systÖme et concerne tous les lecteurs<br />
<strong>CD</strong><br />
PAUSE [5]<br />
PAUSE PSY / NEXT<br />
NDEX LOAD<br />
r<br />
En pressant la touche PAUSE [5].la lecture s'interrompt<br />
imm6diatement mais le lecteur laser<br />
reste sur place. En pressant la touche PLAY/<br />
NEXT[4],la lecturese poursuitä partirdu m6me<br />
endroit.
CHAPITRE 3<br />
rI-_TnE<br />
Clavier secondaire<br />
Fonctions sp6ciales<br />
scAN 116117l<br />
E:II<br />
l-t<br />
t-l -1<br />
ul<br />
1510<br />
TME<br />
1t-t.-1 1<br />
_r r.L J<br />
r5<br />
Au moyen des touches ( 116l et ) [17] en avant<br />
et en arriöre. vous pouvez trouver n'importe<br />
quelle position sur le disque, avec une diminution<br />
du niveau d'6coute de 12 dB; 6galement<br />
possible en mode PAUSE.<br />
AUTOSTOP 115l<br />
-IIEE-I<br />
151O15<br />
|RA-K<br />
-'MF<br />
A,o(roP<br />
t-tFr llTl. ln<br />
ü r--J -t t-t' I Ll<br />
rtl_l<br />
,__l:t<br />
t5to<br />
llallllll<br />
T ME<br />
I I L lTl<br />
-r r. i,:<br />
15<br />
PAUSE<br />
AurosroP<br />
Cette fonction est affich6e par AUTOSTOP [D].<br />
Elle commute le lecteur <strong>CD</strong> sur PAUSE ä la fin<br />
d'un titre et pr6pare la lecture du prochain titre.<br />
Aprös actionnement de Ia touche PLAY/NEKI<br />
l4l la lecture se poursuit imm6diatement. La<br />
fonction AUTOSTOP reste maintenue<br />
Une nouvelle pression sur cette touche supprime<br />
alors la fonction.<br />
sroP ll8l<br />
EE]:=EI<br />
t5<br />
rrttlar<br />
r|ttJu<br />
TME<br />
_/,,_l.nn<br />
u l)'t-Jt ,J<br />
to 15 20 25 30<br />
rrrrrrrrtaaltlltlllrr<br />
En pressant la touche STOPvous arrÖtez la lecture<br />
imm6diatement et le lecteur laser revient ä<br />
la position de d6part.<br />
LOOP l'l1l (r6p6tition)<br />
I-EEI<br />
IEI<br />
151015<br />
TRACK<br />
TIME<br />
| -t t- -t.t I -l<br />
tE<br />
lltll<br />
-l--l'-t<br />
r<br />
-<br />
Le fonctionnement continu est enclench6 au<br />
moyen de la touche LOOP et affich6 par LOOP<br />
1fl. Dans ce mode.le disque est jou6 continuellement<br />
du d6but ä la fin, jusqu'ä ce que vous<br />
pressiez la touche STOP tl8l ou POWER [1].<br />
En actionnant ä nouveau la touche LOOP la<br />
fonction est supprim6e et la lecture s'arr6te ä la<br />
fin du disque.
tr ttil l<br />
Clavier secondaire<br />
Fonctions sp6ciales<br />
DTSPLAY [14]<br />
IE-IE<br />
t-t<br />
-l<br />
T!ME<br />
En pressant cette touche vous affichez l'indica-<br />
rtr | -t.-J I-<br />
Lr:r t t't_ Ll<br />
10 15<br />
larllllll<br />
TRACK<br />
T ME<br />
rt r rt,Ll -_l<br />
,-J l<br />
L-]'-t E<br />
tl<br />
I<br />
TRAoK<br />
TIME<br />
rt r_<br />
=, t r_t<br />
r__l ,l<br />
I Ll<br />
-|'<br />
ll<br />
TRAoK<br />
TME<br />
n \ !l'!, r-'<br />
n'est pas possible.<br />
151015 lllaiaa-alrl<br />
tion horaire TIME ä la case [C]. Ouatre affichages<br />
horaires sont possibles:<br />
a) DISC-TIME:temps 6cou16 depuis le d6but<br />
du disque.<br />
b)TRACK-TIME:temps 6cou16 depuis le d6but<br />
du titre (TRACK). Le secteur [G] de I'affichage<br />
renseigne sur la position momentan6e du<br />
lecteur dans le titre (TRACK).<br />
c) TRACK-REMAINING-TlN/E : temps restant<br />
jusqu'ä la fin du titre (TRACK) La case [G] de<br />
I'affichaqe indique la position momentan6e<br />
du lecteur laser dans le titre (TRACK). L'affichage<br />
INDEX n'est pas possible.<br />
d) DISC-REMAINING-Tll\1E : temps restant<br />
jusqu'ä la fin du disque. L'affichage INDEX<br />
Remarque:<br />
Pour DISC-TlME,les pauses entre les titres etau<br />
d6but du disque sont prises en compte tandis<br />
queTRACK-TIME indique le temps exact de lecture<br />
du titre.<br />
DISC-TIME et TRACK-TIME sont d6finis par le<br />
fabricant du disque et enregistr6s ä demeure<br />
sur celui-ci. ll sont donc ind6pendants du lecteur<br />
<strong>CD</strong> et ne peuvent ötre modifi6s.
Clavier secondaire<br />
Programmation<br />
PROGRAM [B]<br />
-="*===<br />
rt rt<br />
t t) t_J<br />
51015202530<br />
lalrallalalltlttl-laallrllilla<br />
Cette touche permet d'enclencher et de d6-<br />
clencher le mode de programmation. Lorsque<br />
ce mode est activ6. l'affichage STEP [A]<br />
clignote; si l'affichage ne clignote pas, un programme<br />
est en cours d'ex6cution.<br />
ll est toujours possible d'introduire un programme,<br />
qu'un disque soit en train d'Ötre.1ou6<br />
ou non. Ne pressez pas les touches concernant<br />
le m6canisme en mode de programmation<br />
(les exceptions sont indiquees dans les chapi<br />
tres correspondants). le d6roulement du programme<br />
serait alors initialis6.<br />
o srEP +l- llol9l<br />
T-II<br />
t-l<br />
--<br />
Lt<br />
SfORE<br />
STEP TRACK<br />
nn<br />
i t)t)<br />
1s1o15202530 5i0152025<br />
rrrlltlilalltlalllall<br />
Ces touches permettent de feuilleter en avant<br />
ou en arriöre dans les 19 pas possibles de programme.<br />
Elles permettent 6galement l'6dition<br />
ultörieure d'un programme existant.<br />
o sroRE [12]<br />
=="*"=<br />
:I l_tr'<br />
1 -lt) t5to15202530<br />
altltlalllliallrtlaltttlrlalla<br />
Touche de chargement de m6moire. Celle-ci<br />
doit 6tre actionn6e aprös chaque introduction<br />
de pas de programme. Ainsi, ce dernier est mis<br />
en m6moire. Le pas suivant (STEP) est aff ich6 et<br />
peut Ötre introduil ou 6diL6.
Clavier secondaire<br />
Programmation<br />
Suite de titres (TRACK)<br />
(La suite - Track 4, 9 - est donn6e comme exemple)<br />
O Pressez la touche PROGRAM [B]<br />
IEEI<br />
l-l<br />
--<br />
l-l<br />
STEP<br />
1<br />
t-t t-]<br />
u t_!<br />
5101520<br />
r-tlllllallltllll<br />
25 30<br />
Le lecteur <strong>CD</strong> est mis en mode de programmation.<br />
L'affichage STEP [A] clignote et en<br />
dessous apparait le chiffre 1 du premier pas de<br />
programme.<br />
O Pressez la touche num6rale 4<br />
12345<br />
I==::I-l<br />
STEP TRACK<br />
t-tt I<br />
lLl-l<br />
151015202530<br />
tatlIiIIt!Irl rralItI aalIrllr<br />
L'affichage TRACK du secteur [B] passe de 00<br />
ä04<br />
O Pressez la touche STORE<br />
112l<br />
-tElEl -l<br />
-<br />
STEP TRACK<br />
r/,rl<br />
I LJt-J<br />
i5iO15202530<br />
rrllltlalrrrrrrrrraallrrllaall<br />
L'introduction est enregistr6e. L'affichage du<br />
pas de programme (STEP) passe de 1 ä 2. indiquantque<br />
le deuxiöme pas de programme peut<br />
alors ötre introduit.<br />
O Pressez la touche<br />
676<br />
I-J t-t l-t<br />
num6rale I<br />
90<br />
r-t<br />
STEP TFACK<br />
Ftrl<br />
-': l-t<br />
t5lo152a2530<br />
rrltllll-llrrlattalaaallllllll =<br />
L'affichage TRACK du secteur [B] passe de 00<br />
ä09<br />
O Pressez la touche STORE [12]<br />
I== I-<br />
-t:<br />
r<br />
STEP<br />
1<br />
l_'tt)<br />
t_l<br />
1510152Q2530<br />
tllrralrrrrr!!llllalllraalrlll<br />
L'introduction est enregistr6e et l'aff ichage<br />
STEP passe de 2 ä 3.<br />
De cette maniöre, vous pouvez introduire<br />
jusqu'ä 19 pas de programme qui se m6morisent<br />
individuellement au moyen de la touche<br />
STORE<br />
En pressant la touche PROGRAM [B] vous<br />
remettez le lecteur <strong>CD</strong> en mode lecture. Le programme<br />
donn6 reste enregistr6.<br />
O Pressez la touche PLAY/NEXT [4]<br />
(si vous n'avez pas quitt6 le mode<br />
de programmation)<br />
[]<br />
t-tl I<br />
iLl-l<br />
151015<br />
TME<br />
t t-,-t -l<br />
t 1't:. t=<br />
Le programme est ex6cut6 ä partir de STEP 1<br />
jusqu'au dernier pas programm6 (exception:<br />
programmes continus).<br />
O Remarque:<br />
Bien entendu. ce mode d'introduction peut se<br />
programmer de maniöre mixte avec les autres<br />
modes d'introduction d6crits ci-aprös.
Clavier secondaire<br />
Exem ples de programmation<br />
Modification (6dition) du programme<br />
O Pressez la touche PROGRAM [B]<br />
I:-t-tEt<br />
t-lt t<br />
rLr-l<br />
151015202530<br />
tltrlatalllllllltlllrlrrrlllll<br />
Le lecteur <strong>CD</strong> est mis en mode de programmation.<br />
L'affichage STEP [A] clignote et en-dessous<br />
apparait le chiffre 1 du premier pas de programme.<br />
Le contenu du pas de programme est<br />
visible dans le secteur [B] de l'affichage.<br />
O Pressez les touches de pas +/- l10l9l<br />
]-EI:EI<br />
STEP TRACK<br />
l_,rl<br />
,l t) -J<br />
151O152Q25<br />
lllrllraatllaall-tta-i<br />
aal<br />
30<br />
en avant dans le programme avec la<br />
touche
--rnE<br />
Glavier secondaire<br />
Exemples de programmation<br />
Effacement de tout le programme<br />
O Pressez la touche PROGRAM t8l<br />
I-r-rE-t<br />
STEP TRACK<br />
f-ltt<br />
lLl-l<br />
151O15202530<br />
tllrralrllallrllltllatrrllllal<br />
Le lecteur <strong>CD</strong> est mis en mode de programmation.<br />
O Pressez ensemble<br />
les touches STORE n2l<br />
et PROGRAM [B]<br />
* ="*"= = l-<br />
STEP TFACK<br />
t-t t-l<br />
l r_J ,_t<br />
152A2530 r51015242530<br />
rrrrrartlllltlllllalatrallllll<br />
Pressez et maintenez enfonc6e la touche<br />
STORE, pressez en möme temps la touche<br />
PROGRAN/.<br />
O Pressez la touche PROGRAM [B]<br />
I:-IE:<br />
l5<br />
llltlal<br />
Ft t-l<br />
t) ,)<br />
TME<br />
n n.n r-t<br />
l) t)'tl ,)<br />
to 15 2a 25 30<br />
.r--rrarrrrarrr<br />
Le lecteur <strong>CD</strong> est remis en mode normal de<br />
lecture.<br />
Remarque:<br />
O Pour introduire un nouveau programme,<br />
il n'est pas n6cessaire d'effacer l'ancien. Le<br />
nouveau programme est enregistr6 en surimpressron.<br />
O En cas de panne de courant secteu[ un programme<br />
m6moris6 est 6galement effac6.<br />
11
wilrE<br />
Clavier secondaire<br />
Exemples de programmation<br />
Programmes continus<br />
O Pressez la touche PROGRAM f8l<br />
II-<br />
",."===<br />
STEP TRACK<br />
t-tt t<br />
l t__l -l<br />
1510152A2530<br />
rlllaar-lrrlaltltlllal<br />
lrallaaa<br />
Le lecteur <strong>CD</strong> est mis en mode de programmation.<br />
L'afflchage STEP [A] clignote et endessous<br />
apparait le chiffre'l du premier pas de<br />
programme.<br />
==",.-==<br />
STEP<br />
1<br />
f<br />
TRACK<br />
l_tFl<br />
I-l<br />
510152A2530 '-|<br />
rrtatlttlallllll<br />
llllaaal<br />
O Pressez la touche LOOP n1l<br />
=="*"=-=<br />
STEP<br />
I<br />
,: t_<br />
1510<br />
lllrlallli<br />
15 20 25 30<br />
L'instruction de r6p6tition (LOOP) peut Ötre<br />
donn6e en n'importe quel endroit du programme<br />
(mais de pr6f6rence ä la fin). llfait que<br />
le programme est ex6cut6 ä nouveau ä partirdu<br />
premier pas. Cette op6ration se röpöte ind6finiment<br />
jusqu'ä ce que le programme soit interrompu.<br />
O Pressez la touche STORE [12]<br />
: I- EI<br />
-II<br />
STEF TRACK<br />
rtl-l<br />
r- l-l l-l<br />
1510152A2530<br />
lllttlltlalrlllllllllr<br />
tlllllll<br />
L'introduction est interrompue. L'affichage<br />
indique le prochain pas de programme. En<br />
pressant la touche PROGRAM [B], le lecteur <strong>CD</strong><br />
est remis en mode normal de lecture. Le pro<br />
gramme reste m6moris6.<br />
O Pressez la touche PLAY/NEXT [4]<br />
(si vous n'avez pas quitt6 le mode<br />
de programmation)<br />
E<br />
STEP<br />
TFACK<br />
TiME<br />
t-t LJ tl-,-_7-_l<br />
i ,__.1 -r t 1't:. t=<br />
r5lo15<br />
tlllltalrtlrl<br />
Le programme est ex6cut6 depuis STEP 1. Dös<br />
que l'instruction LOOP est atteinte, le programme<br />
saute ä nouveau au STEPl et est ex6-<br />
cut6 ä nouveau jusqu'ä ce qu'il soit interrompu<br />
en pressant I'une des touches STOP [18], LOAD<br />
[2] ou POWER [11<br />
12
w-nE<br />
Glavier secondaire<br />
Exemples de programmation<br />
Programmation de pauses<br />
O Pressez la touche PROGRAM [B]<br />
IEI-I<br />
t-t<br />
--<br />
l-t<br />
STEP TRACK<br />
t-lI t<br />
I r-l -l<br />
1510152Q2530<br />
lrtrllllllrltllltllllrllrlalrl<br />
Le lecteur <strong>CD</strong> est mis en mode de programmation.<br />
L'affichage STEP [A] clignote et en<br />
dessous apparait le chiffre'1 du premier pas de<br />
programme.<br />
=="..-==<br />
STEP TFACK<br />
t1 fl<br />
I uu<br />
1510152A2530<br />
rrlllllalaalallltlallll<br />
O Pressez la touche PAUSE [5]<br />
PAUSE PUY / NEXT<br />
INDEX LOAO<br />
tl<br />
STEP<br />
t-<br />
1510152A2530<br />
lllrtllalllltltlrlllalllllrllt<br />
1<br />
t-l<br />
L'instruction PAUSF peut Ötre introduite en<br />
n'importe quel point du programme. Elle commute<br />
en cet endroit le programme sur PAUSE.<br />
O Pressez la touche STORE n2l<br />
ET-E:=EI<br />
STEP TRACK<br />
rtl-l<br />
1 A t-.1<br />
1510152A25<br />
Ittrttallrllllltaaaaalllr<br />
30<br />
L'introduction est m6moris6e. L'aff ichage indique<br />
le prochain pas de programme.<br />
En pressant la touche PROGRAM [B],le lecteur<br />
<strong>CD</strong> est remis en mode normal de lecture. Le<br />
programme reste m6moris6.<br />
O Pressez la touche PLAY/NEXT [4]<br />
(si vous n'avez pas quitt6 le mode<br />
de programmation)<br />
fr<br />
SIEP<br />
TFACK<br />
TIME<br />
n Lt t t=.1 1<br />
L_l -t r:l .L ,:<br />
151015<br />
rrrlaatliatlr<br />
Le programme est ex6cut6 depuis STEP'1. En<br />
atteignant l'instruction PAUSE, l'appareil commute<br />
sur PAUSE.<br />
En pressant la touche PLAY/NEXT [4], la fonction<br />
pause est supprim6e. L'ex6cution du programme<br />
continue.<br />
13
fw-Ttw<br />
Glavier secondaire<br />
Exemples de programmation<br />
Programmation de la mise hors tension de l'appareil<br />
O Pressez la touche PROGRAM [B]<br />
IEEIEI<br />
:r=lr<br />
T-T<br />
t-t<br />
-<br />
LJ<br />
LOOP<br />
- -<br />
STEP<br />
1<br />
t-tt I<br />
t-J -l<br />
s101s2025AO<br />
rrralaalalllllaaaa<br />
STEP TRACK<br />
nn<br />
7t)t)<br />
151015202530<br />
rrrrltlllllllllllllttlrlllla<br />
ttalalrl<br />
Le lecteur <strong>CD</strong> est mis en mode de programmation.<br />
L'affichage STEP tAl clignote et en<br />
dessous apparait le chiffre 1 du premier pas de<br />
programme.<br />
O Pressez la touche POWER [1]<br />
PAUSE PUY / NEXT<br />
INDEX LOAD<br />
ü<br />
STEP<br />
a<br />
t5io15202530<br />
rltlltlltrlllaaltlllrlalrlllla<br />
L'instruction POWER OFF peut Ötre donn6e en<br />
n'importe quel point du programme (mais de<br />
pr6f6rence ä la fin). En ce point, le programme<br />
met l'appareil automatiquement hors tension<br />
(STANDBY) Pendant I'introduction du programme.<br />
l'appareil n'est pas mis hors tension<br />
par la premiöre pression sur la touche POWER<br />
[1]. Dans ce mode, il faut presser deux fois la<br />
touche POWER pour mettre I'appareil hors<br />
tension.<br />
O Pressez la touche STORE [12]<br />
l-l l-l l-t<br />
--<br />
=-<br />
STEP TRACK<br />
l_/,rl<br />
:- l.J l-l<br />
151O15202530<br />
r-lllrralrrlllllll!l!aalrrllat<br />
L'introduction est interrompue. L'affichage indique<br />
le pas de programme suivant.<br />
En pressant la touche PROGRAM [B],le lecteur<br />
<strong>CD</strong> est remis en mode normal de lecture. Le<br />
programme reste m6moris6.<br />
O Pressez la touche PLAY/NEXT [4]<br />
(si vous n'avez pas quitt6 le mode<br />
de programmation)<br />
[]<br />
STEP TRACK<br />
l_ltt<br />
lLt-l<br />
t5io<br />
lltlarlr<br />
15<br />
TIME<br />
I t-,-l -l<br />
| --7't=,=<br />
Le programme est ex6cut6 depuis STEP 1. En<br />
atteignant l'instruction POWER OFF. l'appareil<br />
se met automatiquement en veille (Standby).<br />
Tous les autres pas de programme sont ignor6s<br />
(l'appareil ne peut se mettre lui-möme sous<br />
tension).<br />
14
Clavier secondaire<br />
Ex6cution de programmes<br />
EE:EE<br />
t--<br />
I<br />
TrF--lt----<br />
txlilI<br />
Un programme d6jä en m6moire peut 6tre appel6 et ex6cut6<br />
O Pressez la touche PROGRAM [B]<br />
IEtEr<br />
-l-t<br />
STEP<br />
1<br />
ltl<br />
t-tt I<br />
t) -l<br />
5 10 l5<br />
Le programme m6moris6 est appel6<br />
ffit:]<br />
O Pressez la touche PLAY/NEXT l4l<br />
STEP TRACK<br />
r|tt<br />
I t_t -l<br />
5<br />
lll<br />
10 15<br />
TIME<br />
I t-.-l -l<br />
| --_t',=,=<br />
Le programme est<br />
ä partir de STEP1.<br />
ex6cut6 imm6diatement<br />
15
CHAPITRE 4<br />
n--r-rw<br />
D6rangements<br />
Problömes 6ventuels et leur solutions<br />
O L'appareil ne fonctionne pas<br />
\./<br />
rfi<br />
Le t6moin de veille est 6teint. l'affichage ne<br />
s'allume pas ä la mise sous tension:<br />
O Contrölez le cäble secteur.<br />
O V6rifiez que la prise de courant est en ordre<br />
en y reliant un autre appareil.<br />
O Contrölez le fusible (voir chapitre 4, annexe<br />
technique).<br />
O Le disque <strong>CD</strong> n'est pas jou6<br />
O V6rifiez que le disque est plac6 correctement,<br />
c'est-ä-dire avec la face imprim6e<br />
en haut.<br />
O La cause du d6rangement peut 6galement<br />
provenir d'un disque compact encrass6,<br />
endommag6 m6caniquement ou ne correspondant<br />
pas aux sp6cifications <strong>CD</strong> (d6faut<br />
de fabrication). Essayez de jouer un autre disque<br />
compact.<br />
16
Annexe technique T6l6com mande inf rarouge 82OB (accessoi re sp6cial )<br />
La t6l6commande infrarouge REVOX B20B permet de commander confortablement depuis la<br />
place d'6coute tous les appareils REVOX r6cents munis d'un r6cepteur lR.<br />
Pour que le r6cepteur lR du 8126 reconnaisse qu'une instruction 6mise lui est destin6e, il faut<br />
presser la touche rF en möme temps que la touche de fonction, ä l'exception de la touche P/N EKI<br />
qui agit directement. Le lecteur <strong>CD</strong> quittance chaque instruction regue en allumant la LED rouge<br />
dans la fenötre du r6cepteur lR.<br />
Sur Ia figure ci-contre. les touches n6cessaires<br />
ä la commande du lecteur <strong>CD</strong> portent les<br />
mömes num6ros que sur la page rabattable ä la<br />
fin du pr6sent manuel. Les touches portant le<br />
möme num6ro d6clenchent la möme fonction.<br />
O Mise sous tension:<br />
Le lecteur <strong>CD</strong> peut ötre mis sous tension au<br />
moyen des touches 0 ä 9, ou de la touche $<br />
(fonction pause) -en pressanten mÖmetemps<br />
la touche tF ou encore directement par la touche<br />
P/NEXl.<br />
O Arrdt du lecteur <strong>CD</strong>:<br />
Pressez x en m6me temps que ENTER.<br />
O Mise horstension detoute la chaine REVOX:<br />
Pressez POWER OFE<br />
tl Pause:<br />
Pressez x en möme temps que $.<br />
O Recherche:<br />
Pressez x en möme temps que ) ou (. En<br />
maintenant ces touches enfonc6es. vous avez<br />
une recherche continue en avant ou en arriÖre.<br />
il Saut de index:<br />
En pressant simultan6ment les touches x et<br />
SCAN >, vous faites passer le lecteur laser au<br />
index suivant. Si le disque <strong>CD</strong> en n'est pas<br />
pourvu, le lecteur passe au titre (TRACK) suivant.<br />
O S6lection directe d'index:<br />
Pressez * et maintenir cette touche enfonc6e.<br />
Composez I'indexvoulu au moyen des touches<br />
0 ä 9 puis pressez SCAN > Alors seulement<br />
lächer la touche x.<br />
O Retour au dernier titre<br />
En pressant simultanöment les touches x et<br />
SCAN n7l<br />
PAUSE [5]<br />
scAN < 116l<br />
Pour de plus amples renseignements sur la t6l6commande lR REVOX 8208, röt1rez-vous ä l'instruction<br />
d6taill6e livr6e avec la t6l6commande.<br />
17
Annexe technique<br />
Sorties num6riques<br />
Les deux sorties DIGITAL OUTPUTl et 2l21l mettent ä disposition toute l'information du disque<br />
sous forme num6rique. Outre les donn6es musicales des deux canaux, toutes les informations de<br />
sous-code sont donn6es sous forme s6rielle.<br />
Les deux sorties sont en parallöle et s6par6es galvaniquement du reste du circuit par un transformateur<br />
de s6paration.<br />
COMPUTER<br />
DIGITAL RECORDER<br />
DIGITAL AMPLIFIER<br />
1B
Annexe technique<br />
Le disque compacl<br />
lndications concernant le disque compact<br />
La piste en forme de spirale d'un disque compact peut atteindre une longueurde 5 km. Elle contient<br />
des signaux num6riques complexes dont I'information musicale des deux canaux sonores en alternance<br />
Les informations secondaires. pour l'affichage des titres (TRACK, INDEX), le temps de lecture,<br />
etc. sont 6galement contenues dans cette piste.<br />
Cette derniöre est cod6e sur le disque par des creux, plus ou moins longs, grav6s dans le support qui<br />
est recouvert d'une trös mince couche d'aluminium r6fl6chissante. La lecture est assur6e par un<br />
rayon lasel dont la lumiöre r6fl6chie est convertie en signaux 6lectriques. Ces signaux sont s6pa16s<br />
en informations musicales et de contröle.<br />
Les donn6es 6rron6es ou manquantes (par suite de griffures) sont trait6es par un systÖme de<br />
correction performant qui les 1696nöre par interpolation (moyenne de la valeur avant et aprÖs le<br />
d6faut). Lorsque Ies d6fauts sonttrop fr6quents et ne peuvent plus 6tre corrig6s, la sortie audio<br />
est alors coup6e.<br />
Structure du disque compact<br />
Le temps maximum de lecture est de 74 minutes. Pourtrouver rapidement un titre ou un passage,<br />
les informations suivantes sont 6galement enregistr6es.<br />
O Les diff6rents titres sont s6par6s les uns des autres par de brÖves pauses et marqu6s TRACK.<br />
O Lesdiff6rentsmouvements(g6n6ralementdemusiqueclassique) d'untitresontparfoispourvus<br />
d'index.<br />
O Chaque disque compact est divis6 en minutes et secondes. On peut donc trouver un endroit<br />
quelconque ä la seconde prÖs, I'op6ration 6tant tou1ours reproductible.<br />
On distingue deux temps:<br />
DISC-TIME: dur6e de lecture en minutes et secondes depuis le d6but du disque.<br />
TRACK-TIME: dur6e de lecture en minutes et secondes depuis le d6but du titre (TRACK).<br />
Toutes ces informations sont d6finies par le fabricant du disque compact Elles sont donc ind6pendantes<br />
de l'appareil de lecture et ne peuvent ötre modifi6es.<br />
Maniement et entretien des disques compacts<br />
Les disques compacts sont beaucoup plus simples ä manipuler qu'un microsillon conventionnel.<br />
Pourtant, il faut absolument respecter certaines rögles. La couche d'aluminium ultra-mince, d6pos6e<br />
sur un substrat transparent relativement 6pais fait office de miroir. Elle est prot6g6e par une<br />
laque sur laquelle est imprim6 le label. Bien que le disque soit lu au travers du substrat. Ie cöt6<br />
imprim6 est donc le plus sensible. Une griffure de cette couche r6fl6chissante. peut g6nerla lecture<br />
ou m6me la rendre impossible.<br />
Le disque compact comporte les informations dans une piste en spirale dont les spires ne sont<br />
s6par6es que de 1,6 pm. La longueur moyenne des creux grav6s (pits) est d'environ 2 pm (deux milliömes<br />
de millimötre). En comparaison un cheveau n'a que 40 ä 60 pm d'6paisseur ce qui montre<br />
bien qu'une griffure de la surface imprim6e peut avoir des cons6quences catastrophiques.<br />
ll n'est pas n6cessaire de nettoyer le disque compact si l'on ne le saisit que par le bord et qu'on le<br />
replace toujours dans l'emballage d'origrne.<br />
Les disques salis ne doivent ötre essuy6s qu'au moyen d'un chiffon doux et sec non pelucheux sur<br />
le cöt6 de lecture (substrat), en ligne droite du centre vers le bord. Ne jamais utiliser de diluant ni<br />
produit de nettoyage.<br />
19
-E::E EEE-:tt<br />
r-T----T--T-ll-l<br />
tttL_l<br />
Annexe technique<br />
Caract6ristiques techniques<br />
Donn6es audio<br />
G6n6ralit6s:<br />
Nombre de canaux: T6l6commande: Avec 6metteur IRE 8208 ou par la prise SERIAL<br />
LINK du systöme de t6l6commande REVOX<br />
Bande passante:<br />
20 H2...2O kHz.+0.1 dB<br />
Alimentation:<br />
22OVAC + 5l-10010. 50... 60 Hz modifiable pour<br />
Distorsions:<br />
90 dB (20 Hz...20kHz)<br />
2.5V. Ri
CHAPITRE 5<br />
Liste des fonctions<br />
Description succinte de toutes<br />
les fonctions.<br />
[-rnE<br />
.r))<br />
Fonction t6l6com mandable<br />
par la t6l6commande lR.<br />
PIaque frontale:<br />
El6ment de commande Fonction Page<br />
i1l PowER<br />
.))) Cette touche permet de mettre l'appareil sous tension et hors tension.<br />
'<br />
Certaines parties de l'appareil restent cependant toujours sous tension<br />
(STANDBY)<br />
l2l LOAD jr)) En actionnant cette touche, on fait sortir et entrer le tiroir ä disque [6].<br />
t3l INDEX o))) Touche d'index. Une pression fait jouer '<br />
le titre ä partir du prochain index.<br />
En pressant aprös avoir actionn6 les touches d'introduction des chiffres<br />
[7]. on fait jouer ä partir d'index index choisi. Si le disque n'est pas pourvu<br />
d'index. cette touche fait passer au titre suivant (TRACK).<br />
t4) PLAY/NErl o))) Touche de lecture. Une nouvelle pression fait jouer le prochain titre. En<br />
pressant aprös les touches d'introduction de chiffres [7], on fait jouer le titre<br />
choisi.<br />
t5l PAUSE o))) Cette touche permet d'interrompre la lecture ä tout moment. La touche<br />
PLAY/NEKI [4] fait poursuivre la lecture ä l'endroit de l'interruption.<br />
t6l Tiroir ä disque Ce tiroir amöne le disque compact ä I'unit6 ä laser. ll est entr6 et sorti par<br />
pression sur la touche LOAD [2].<br />
17l Touches O-9 o))) Touches d'introduction de chiffres. Pour la s6lection directe d'un titre de<br />
'<br />
musique (TRACK ou INDEX) parallölement ä la touche PLAY/NEKI-l4l ou<br />
INDEX l3l respectivement.<br />
tBl PROGRAM Cette touche permet d'enclencher et de d6clencher le mode d'introduction.<br />
tel STEP - Cettetouche permetde
El6ment de commande Fonction Page<br />
t16l scAN <<br />
l17l scAN ><br />
n8l sroP<br />
o))) Recherche en arriöre dans un titre (pour une recherche continue, mainte-<br />
'<br />
nir la touche enfonc6e).<br />
o r)) Recherche en avant dans un titre (pour une recherche contin ue, maintenir<br />
'<br />
la touche enfonc6e).<br />
o))) Cette touche interrom pt la lecture et ramÖne le lecteur laser en position de<br />
'<br />
d6part. lnterrompt 6galement un programme en cours.<br />
n9l lR-Sensor<br />
Fenötre de r6cepteur infrarouge. Temoin de veille.<br />
Les touches su iva ntes perm ettent d'enclencher l'appa reil d i rectement :<br />
O La touche PLAY/NEKI-l4l met l'appareilen mode de lecture ä partir du premier titre. Si l'on a enclench6 par<br />
une touche num6rique [7] et PLAY/NDCI [4], le titre pr6s6lectionn6 est jou6 ainsi que le reste du disque.<br />
O La touche LOAD [2] enclenche l'appareil et fait sortir le tiroir.<br />
O La touche STOP n8l ne fait qu'enclencher l'appareil.<br />
O La touche PAUSE commute l'appareil sur PAUSE au d6but du premier titre de musique du disque.<br />
Panneau d'affichage<br />
tAl STEP Num6ro du pas de programme actuel. En mode programmation,le mot<br />
STEPclignote. En mode normal de lecture, cet affichage n'est pas visible. 24<br />
lBl TRACK<br />
I I est aff ich6 ici. au prem ier et a u deuxiöme chiff re, le titre (TRACK) en cou rs<br />
de lecture et.au troisiöme et au quatriöme chiffre,l'INDEX correspondant<br />
(s'ilyenaun). 24<br />
Ic] TIN/ E On a ici l'affichage ä quatre chiffres d'un des temps indiqu6s sous [14]<br />
DISPLAY 24<br />
tDl AUTOSTOP Visible lorsque le mode AUTOSTOP est activ6. 24<br />
tEl PAUSE Affichage de la fonction PAUSE. 24<br />
tfl LOOP Visible lorsque la fonction LOOP est activ6e (rdp6tition) 24<br />
tcl Table des matiöres<br />
Les points manquants ä gauche indiquent les titres d6jä jou6s,le nombre<br />
total de points correspond au nombre de titres sur le disque. 24<br />
22
l20l FrxED OUTPUT<br />
Sortie audio analogique par prises Cinch (L et R) pour raccordement<br />
ä l'amplificateur.<br />
121) DTGTTALOUTPUT Deux sorties num6riques en parallÖle. 1B<br />
122) AC POWER Cäble secteur<br />
l23l SERTAL LrNK Raccord pour le systöme de t6l6commande REVOX 24<br />
1Q
Dessin de l'appareil avec repöres<br />
Affichage<br />
(LC-Display)<br />
B 126 . COMPACT DISC PUYER<br />
123<br />
I-t t-t l-t<br />
674<br />
Lt L-t t-t<br />
45<br />
I-t<br />
90<br />
t-t<br />
I-t<br />
I-J<br />
=<br />
A[ENTIONI<br />
A IN EFEUR'..U\L"I EPO ,P!I'TFLF'P'R'LPAA<br />
UUSAGER COUPER L'ALIMENTAT<br />
CAUTIONI ro PFE.rNr LL<br />
FEF sEAvrc NG ro auaLrFED sERvrcE PEFSoNNEL D scoN<br />
o<br />
. AC POWEF<br />
@
Sch6ma-bloc BF<br />
HF AIV]PLIF]ER<br />
0 P.U<br />
LASER CONTROL<br />
HF.A]\lPLIFIER<br />
HFL /TL DETECTOR<br />
FOCUS.ELECTRONICS<br />
RE1/RE2 ELECTRONICS<br />
I _<br />
l\4cRoPRocrssol9qlp rzi<br />
25
_-l<br />
€ rrtx<br />
+-O n.Flx<br />
]I<br />
-t<br />
I<br />
I<br />
l<br />
l<br />
EEE-tE<br />
KEYBOARD LEFI 1,1 69.2T5<br />
ITTNE<br />
E-IEEE<br />
LC,D SPLAY T.169,255<br />
KFYBOARD RIGH<br />
__l<br />
t<br />
_l<br />
RFF,<br />
P12, P13, Pi4<br />
P00 ... P05<br />
DLEN1, DLEN2, CtK, DATA<br />
P00... P05 P10, P11<br />
t<br />
r"---.----.--<br />
).402/406<br />
sERTATLNK@<br />
E<br />
*_J<br />
DRAW POS, B<br />
DRAW IN/OUT<br />
DRAW SENSE<br />
DRAW POS. F<br />
)<br />
)<br />
I vt'<br />
A t'<br />
I<br />
+<br />
T<br />
DRAWER<br />
END.SWITCHES
sruDER nd/ox<br />
Manufacturer<br />
Willi Studer AG<br />
CH-8105 Regensdorf/ Switzerland<br />
Althardstrasse 30<br />
Studer Revox GmbH<br />
D -7 827 Löflingen/G ermany<br />
Tälstrasse 7<br />
Woddwide Distribution<br />
Revox Ela AG<br />
CH-8 105 Regensdorf/ Switzerland<br />
Althardstrasse 146