Red Hat Certified System Administrator (RHCSA) EX200 Study Guide

Create successful ePaper yourself
Turn your PDF publications into a flip-book with our unique Google optimized e-Paper software.
12/ 17/ 12<br />
www. linuxexplor er s. com / r ed- hat - cer t if ied- syst em - adm inist r at or - r hcsa- ex200- st udy- guide/<br />
1/ 11<br />
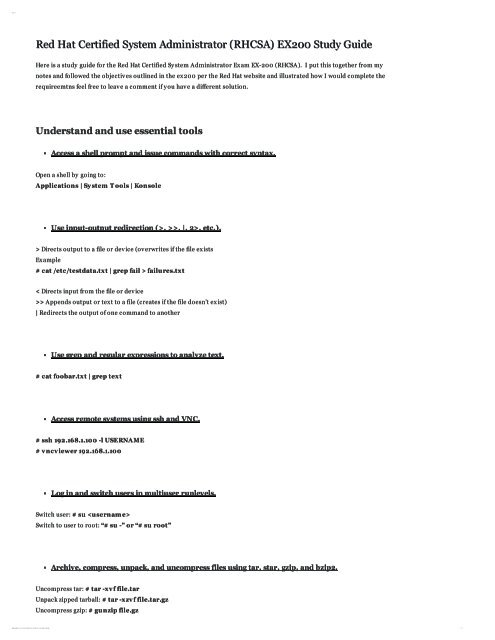
<strong>Red</strong> <strong>Hat</strong> <strong>Certified</strong> <strong>System</strong> <strong>Administrator</strong> (<strong>RHCSA</strong>) <strong>EX200</strong> <strong>Study</strong> <strong>Guide</strong><br />
Here is a study guide for the <strong>Red</strong> <strong>Hat</strong> <strong>Certified</strong> Sy stem <strong>Administrator</strong> Exam EX-200 (<strong>RHCSA</strong>). I put this together from my<br />
notes and followed the objectives outlined in the ex200 per the <strong>Red</strong> <strong>Hat</strong> website and illustrated how I would complete the<br />
requireemtns feel free to leave a comment if y ou have a different solution.<br />
Understand and use essential tools<br />
Access a shell prompt and issue commands with correct syntax.<br />
Open a shell by going to:<br />
Applications | Sy stem T ools | Konsole<br />
Use input-output redirection (>, >>, |, 2>, etc.).<br />
> Directs output to a file or device (overwrites if the file exists<br />
Example<br />
# cat /etc/testdata.txt | grep fail > failures.txt<br />
< Directs input from the file or device<br />
>> Appends output or text to a file (creates if the file doesn’t exist)<br />
| <strong>Red</strong>irects the output of one command to another<br />
Use grep and regular expressions to analyze text.<br />
# cat foobar.txt | grep text<br />
Access remote systems using ssh and VNC.<br />
# ssh 192.168.1.100 -l USERNAME<br />
# v ncv iewer 192.168.1.100<br />
Log in and switch users in multiuser runlevels.<br />
Switch user: # su <br />
Switch to user to root: “# su -” or “# su root”<br />
Archive, compress, unpack, and uncompress files using tar, star, gzip, and bzip2.<br />
Uncompress tar: # tar -xv f file.tar<br />
Unpack zipped tarball: # tar -xzv f file.tar.gz<br />
Uncompress gzip: # gunzip file.gz
12/ 17/ 12<br />
www. linuxexplor er s. com / r ed- hat - cer t if ied- syst em - adm inist r at or - r hcsa- ex200- st udy- guide/<br />
2/ 11<br />
Uncompress bzip2: # bunzip2 file.bz2<br />
Uncompress star: # star -xv f=/tm p/file.star<br />
Create and edit text files.<br />
# nano T EXT FILE<br />
# v i T EXT FILE<br />
Create, delete, copy, and move files and directories.<br />
Delete file: # rm T EST FILE<br />
Copy file: # cp T EST FILE /hom e/testdir/<br />
Move file # m v T EST FILE /hom e/testdir/T EST FILE.bak<br />
Create hard and soft links.<br />
Soft link: # ln -s /test/target /test/softlink<br />
Hard link: # ln /test/target /test/hardlink<br />
List, set, and change standard ugo/rwx permissions.<br />
# chm od ugo+rwx file.test //Ads read write execute privileges to file<br />
# chm od ugo-rwx file.test //Removes read write execute privileges to file<br />
# chm od 7 55 file.test //Ads permissions based on octal format<br />
Locate, read, and use system documentation including man, info, and files in /usr/share/doc.<br />
# m an
12/ 17/ 12<br />
www. linuxexplor er s. com / r ed- hat - cer t if ied- syst em - adm inist r at or - r hcsa- ex200- st udy- guide/<br />
3/ 11<br />
# init 0 (Switches to runlevel 0 which shutdown the sy stem)<br />
# halt<br />
Reboots Com m ands<br />
# reboot<br />
# shutdown -r +<br />
# shutdown -r now<br />
# init 6 //switches to runlevel 6 which reboots the sy stem immediately<br />
Boot systems into different runlevels manually.<br />
1) Boot y our sy stem and press any key within the allotted amount of time to get to the “Grub” bootloader screen.<br />
2) Select y our boot “OS” and press “a” to edit the boot command<br />
3) Add the number of the runlevel y ou would like to use at the end of the command to boot to that runlevel<br />
Example:<br />
roroot=/dev/mapper/vg_centosvm-lv_rootrd_NO_LUKSLANG=en_US.UTF-8rd_NO_MDquiet<br />
SYSFONT=latarcyrheb-sun16rhgbcrashkernel=autord_LVM_LV=vg_centosvm/lv_swapKEYBOARDTYPE=pc<br />
KEYTABLE=usrd_LVM_LV=vg_centosvm/lv_rootrd_NO_DM1<br />
The “1” at the end of the boot string will boot the sy stem to runlevel 1<br />
Use single-user mode to gain access to a system.<br />
Boot the sy stem to runlevel 1 as shown above to gain super user (root) access in run level 1<br />
Identify CPU/memory intensive processes, adjust process priority with renice, and kill<br />
processes.<br />
Y ou can identify process with the following commands<br />
# ps aux<br />
# ps-ef<br />
# ps -u // shows programs running for username<br />
# ps -o user,com m ,pid,nice -u root //Gets the processes PID and Nice value for the root user<br />
top // Shows the stop processes that are using sy stem resources<br />
Y ou can kill processes with the following commands<br />
# kill -9 //hard close of the process<br />
# kill -15 //attempts to kill process gracefully<br />
# killall //kills the parent and all associated child processes<br />
Adjust process priorities<br />
# renice <br />
nice priorities range from -19 to 20 with -19 being the hightest priority and -20 being the lowest.<br />
Locate and interpret system log files.<br />
Y ou can find the sy stem logs in the /var/log directory . The logs can be viewed with text viwer commands such as cat, less
12/ 17/ 12<br />
www. linuxexplor er s. com / r ed- hat - cer t if ied- syst em - adm inist r at or - r hcsa- ex200- st udy- guide/<br />
4/ 11<br />
and tail<br />
Access a virtual machine’s console.<br />
# v irt-v iewer REDHAT VM<br />
Start and stop virtual machines.<br />
# v irsh start REDHAT VM<br />
# v irsh shutdown REDHAT VM (Attempts a “graceful sy stem shutdown)<br />
# v irsh destroy REDHAT VM (Equivalent to turning off the sy stem with the power button unsaved data may be lost<br />
with this option.<br />
Start, stop, and check the status of network services.<br />
# serv ice start //example: service httpd start<br />
# serv ice stop<br />
# serv ice restart<br />
# serv ice status<br />
# checkconfig on //turns on service at boot<br />
# checkconfig off //turns off services at boot<br />
Configure local storage<br />
List, create, delete, and set partition type for primary, extended, and logical partitions.<br />
List partitions: # fdisk -l<br />
Delete: partitions<br />
1) Open the drive with:<br />
# fdisk /dev /sda<br />
2) Press “c” to turn off DOS-compatible mode and the “u” to display units in sectors.<br />
3) Ty pe n for a new partition. Each disk can have 4 primary partitions which are number 1-4. Partition 5 is the extended<br />
partition and partitions 6 – X are logical partitions.<br />
4) Press “w” to write the changes to the disk or “q” to exit without saving changes.<br />
Create and remove physical volumes, assign physical volumes to volume groups, and create and<br />
delete logical volumes.<br />
Create phy sical volume: # pv create -v /dev /sda1 /dev /sda2<br />
Create volume group: # v gcreate -v -s 32 VG01 /dev /sda1 /dev /sda2<br />
Create logical volume: # lv create -v 10g -n LV01 VG01
12/ 17/ 12<br />
www. linuxexplor er s. com / r ed- hat - cer t if ied- syst em - adm inist r at or - r hcsa- ex200- st udy- guide/<br />
5/ 11<br />
# lv create -v 15g -n LV02 VG01<br />
Explanation:<br />
In order to create a logical volume the first thing that needs to be done is to format the partitions so they can be added to a<br />
volume group. This is done with the “pvcreate” command.<br />
The next step is to add the phy sical volumes to the volume group and that is done with the vgcreate command. The “-s 32”<br />
option define the phy sical extent size. The phy sical extent size determines the maximum size of the logical volume and the<br />
default phy sical extent size which 4mb. There are 65,536 phy sical extents available to a volume group with gives y ou a total<br />
size of 262,114mb or 256gb (4mb x 65,536 mb = 262,114mb) for the volume group. By setting the extent size to 32mb the<br />
maximum size of the volume group would be 2,097 ,152mb or approximately 2 teraby tes (32mb x 65,536 = 2,097 ,152mb).<br />
Once the volume group has been defined the next step is to add the logical volumes to the volume group.<br />
The volumes created in the example above will be located in /dev/VG01/LV01 and /dev/VG01/LV02<br />
these logical volumes can now be formatted with a file sy stem, mounted and placed in the fstab so that they are mounted<br />
when the sy stem boots.<br />
Format the Volumes<br />
# m kfs.ext4 /dev /VG01/LV01<br />
# m kfs.ext4 /dev /VG01/LV02<br />
Delete Volumes<br />
In order to remove the volumes y ou will need to run the following sequence of commands.<br />
# lv rem ov e /dev /VG01/LV01<br />
# lv rem ov e /dev /VG01/LV02<br />
# v grem ov e /dev /VG01<br />
# pv rem ov e /dev /sda1 /dev /sda2<br />
Create and configure LUKS-encrypted partitions and logical volumes to prompt for password<br />
and mount a decrypted file system at boot.<br />
The following procedure assumes that the dm_cry pt module has been loaded. For a more detailed explanation please see<br />
# cry ptsetup luksForm at /dev /sda1 //formats the drive and prompts y ou to create a passphrase<br />
# cry ptsetup luksOpen /dev /sda1 luks01 //opens drive /dev/sda1 and maps it to /dev/mapper/luks01<br />
# m kfs.ext4 /dev /m apper/luks01 //formats the volume with the ext4 file sy stem.<br />
Now that the LUKS-encry pted volume has been created and formatted it can be added to the boot process.<br />
Create an “/etc/cry pttab” file.<br />
Add the following line to the file and save it:<br />
luks01 /dev /sda1<br />
the cry pttab file will attempt to open the encry pted volume at boot and will prompt y ou for a password. If the file is<br />
successfully opened its mapped to /dev/mapper/luks01
12/ 17/ 12<br />
www. linuxexplor er s. com / r ed- hat - cer t if ied- syst em - adm inist r at or - r hcsa- ex200- st udy- guide/<br />
6/ 11<br />
next add the mapped volume to the fstab<br />
/dev/mapper/luks01/LUKSext4defaults12<br />
See this article for a more detailed explanation on luks encry ption<br />
http://www.linuxexplorers.com/2012/03/how-to-configure-a-luks-encry pted-partition-in-red-hat-enterprise-linux-rhel-<br />
rhcsa-objective/<br />
Configure systems to mount file systems at boot by Universally Unique ID (UUID) or label.<br />
Add the following line to the /etc/fstab<br />
UUID=6a235116-5447-4c68-b14a-644196d76902/homeext4defaults12<br />
Add new partitions and logical volumes, and swap to a system non-destructively.<br />
Y ou need to be careful when editing the /etc/cry pttab and /etc/fstab files. Errors could cause y ou to have boot problems<br />
which my cost valuable time to troubleshoot during the exam. Double check y our work and make backup copies of the files<br />
in case y ou make a mistake.<br />
Create and configure file systems<br />
Create, mount, unmount, and use ext2, ext3, and ext4 file systems.<br />
Create file sy stems<br />
# ext4: m kfs.ext4 /dev /sda1<br />
# ext3: m kfs.ext3 /dev /sda1<br />
# ext2: m kfs.ext2 /dev /sda1<br />
# m kswap /dev /sda3 //makeswap partition<br />
Mount file sy stem:<br />
# m ount /dev /sda1 /m ountpoint<br />
# m ount -a //mounts all file sy stems in the /etc/fstab file<br />
Unmount file sy stem:<br />
# um ount /m ountpoint<br />
Mount, unmount, and use LUKS-encrypted file systems.<br />
LUKS filesy stems need to be “opened” before they can be mounted once opened it can be mounted with a command such as:<br />
#m ount /dev /m apper/LUKS /hom e/luks_m ount<br />
Mount and unmount CIFS and NFS network file systems.<br />
Mount NFS Volume:<br />
# m ount 192.168.1.67 :/hom e /hom e/nfs_local<br />
Mount CFS Volume
12/ 17/ 12<br />
www. linuxexplor er s. com / r ed- hat - cer t if ied- syst em - adm inist r at or - r hcsa- ex200- st udy- guide/<br />
7/ 11<br />
# m ount -t cifs -o guest //192.168.1.7 0/Share /hom e/win_m ount<br />
Configure systems to mount ext4, LUKS-encrypted, and network file systems automatically.<br />
/etc/fstab entries<br />
/dev/mapper/LUKSext4defaults12<br />
/dev/sda1/homeext4defaults12<br />
//192.168.1.70/Share/home/win_mountcifsguest,_netdev00<br />
192.168.1.67:/home/home/nfs_localnfsdefaults00<br />
Extend existing unencrypted ext4-formatted logical volumes.<br />
# v gextend VG01 /dev /sdb1 //adds partition to volume group VG01<br />
# lv extend -L +5g /dev /VG01/LV011 //adds 5gigs to logical volume LV01<br />
# resize2fs -p /dev /VG01/LV01 //resizes the filesy stem<br />
Create and configure set-GID directories for collaboration.<br />
Create a directory to be shared by a group<br />
# m kdir /hom e/topsecret<br />
# chgrp -R security /hom e/topsecret //changes group owner of the folder to security<br />
# chm od 27 55 /hom e/topsecret // Adds the GUID bit to the directory<br />
# chm od g+s /hom e/topsecret //Adds the GUID bit to the directory<br />
Create and manage Access Control Lists (ACLs).<br />
# setfacl -m u:boss:rwx /hom e/bonus_pay outs.txt //add the user boss to the file<br />
# setfacl -x u:boss /hom e/bonus_pay outs.txt //remove the user boss from the file<br />
# setfacl -b /hom e/bouns_pay outs.txt //removes the acl settings from the file<br />
# getfacl /hom e/bonus_pay outs.txt // lists the acl settings for the directory<br />
Diagnose and correct file permission problems.<br />
Deploy, configure, and maintain systems<br />
Configure networking and hostname resolution statically or dy namically .<br />
DHCP Configuration<br />
nano/etc/sysconfig/network-scripts/ifcfg-eth0<br />
DEVICE="eth0"<br />
BOOTPROTO="dhcp"<br />
HWADDR="00:16:D4:39:5B:6F"<br />
NM_CONTROLLED="yes"<br />
ONBOOT="yes"
12/ 17/ 12<br />
www. linuxexplor er s. com / r ed- hat - cer t if ied- syst em - adm inist r at or - r hcsa- ex200- st udy- guide/<br />
8/ 11<br />
StaticIP<br />
DEVICE="eth0"<br />
IPADDR=192.168.1.100<br />
NETMASK=255.255.255.0<br />
HWADDR="00:16:D4:39:5B:6F"<br />
NM_CONTROLLED="yes"<br />
ONBOOT="yes"<br />
DNS1=192.168.1.254<br />
/etc/sysconfig/network<br />
NETWORKING=yes<br />
HOSTNAME=RH_PC.com<br />
GATEWAY=192.168.1.254<br />
#servicenetworkrestart<br />
Schedule tasks using cron<br />
Username = tigerwoods<br />
# crontab -e<br />
sample entry<br />
default entries must edited with the “vi” editor<br />
*/2 * * * * touch /hom e/tigerwoods/win_m asters{1..10}.txt<br />
this entry creates the files “win_masters1.txt, win_masters2.txt through win_masters10.txt<br />
Sy stem crontab<br />
/etc/crontab<br />
The sy stem crontab consists cron jobs for “sy stem” processes. For example scripts that clean space from users home<br />
directories.<br />
Configure systems to boot into a specific runlevel automatically.<br />
Edit the /etc/inittab and specify the runlevel or exit the etc/grub.conf file<br />
Install <strong>Red</strong> <strong>Hat</strong> Enterprise Linux automatically using Kickstart.<br />
Install a VM with kickstart<br />
#virt-install-nVMGUEST01-r2048–vcpus=1-l/home/RHINSTALL--disk<br />
path=/home/VM/VMGUEST01.img,size=50-x“ks=/home/ks.cfg”<br />
Options<br />
-n Name of the VM Guest<br />
-r Amount of RAM in MB<br />
–v cpus Number of CPUs to be used<br />
-l location of the install files<br />
–disk d efine the location for the disk file and its size. The size is in GB
12/ 17/ 12<br />
www. linuxexplor er s. com / r ed- hat - cer t if ied- syst em - adm inist r at or - r hcsa- ex200- st udy- guide/<br />
9/ 11<br />
-x location of the kickstart file<br />
This can also be done via virt-manager GUI<br />
Configure a physical machine to host virtual guests.<br />
# y um -y groupinstall Virtualization<br />
# y um -y groupinstall “Virtualization Client”<br />
Install <strong>Red</strong> <strong>Hat</strong> Enterprise Linux systems as virtual guests.<br />
Install virtual guests via the virt-manager console or via the virt-install command<br />
Configure systems to launch virtual machines at boot.<br />
Configure this through the virt-manager or virt-viewer console or with the command<br />
# v irsh autostart <br />
Configure network services to start automatically at boot<br />
# chkconfig on<br />
Configure a system to run a default configuration HTTP server.<br />
# y um -y install httpd<br />
# serv ice httpd start<br />
# chkconfig httpd on<br />
Configure a system to run a default configuration FTP server.<br />
# y um -y install v sftpd<br />
# serv ice v sftpd start<br />
# chkconfig v sftpd on<br />
Install and update software packages from <strong>Red</strong> <strong>Hat</strong> Network, a remote repository, or from the<br />
local file system.<br />
Use y um to update and install packages.
12/ 17/ 12<br />
www. linuxexplor er s. com / r ed- hat - cer t if ied- syst em - adm inist r at or - r hcsa- ex200- st udy- guide/<br />
10/ 11<br />
Update the kernel package appropriately to ensure a bootable system.<br />
Install the new kernel side by side and edit the grub bootloader<br />
# y um -y install kernel //installs newest kernel and modifies grub to boot with new kernel<br />
Modify the system bootloader.<br />
Edit the /etc/grub.conf file<br />
Manage users and groups<br />
Create, delete, and modify local user accounts.<br />
useradd <br />
userm od -a -G //add’s user to a group<br />
Change passwords and adjust password aging for local user accounts.<br />
passwd<br />
# chage -M 30 tigerwoods //sets the password to expire evert 30 day s for user tigerwoods<br />
# chage -E “2012-05-31″ tigerwoods //sets the password to expire on 5/31/2012 for user tigerwoods<br />
Create, delete, and modify local groups and group memberships.<br />
Manually edit the /etc/group<br />
file to add groups<br />
groupadd<br />
groupmod<br />
gpasswd<br />
Configure a system to use an existing LDAP directory service for user and group information.<br />
Manage security<br />
Configure firewall settings using system-config-firewall or iptables.<br />
Y ou can open or close ports in the firewall by editing the /etc/sy sconfig/iptables file<br />
Set enforcing and permissive modes for SELinux.<br />
Use sestatus to determine if SELinux is in enforcing or permissive mode.<br />
This can be done by editing the /etc/sy sconfig/selinux file or with the following commands<br />
# setenforce 1 //sets SELinux to run in enforcing mode<br />
# setenforce 0 //sets SELinux to run in permissive move#
12/ 17/ 12<br />
www. linuxexplor er s. com / r ed- hat - cer t if ied- syst em - adm inist r at or - r hcsa- ex200- st udy- guide/<br />
11/ 11<br />
List and identify SELinux file and process context.<br />
# ls -Z //lists SELinux context for directories<br />
# ps -ef -Z //lists SELinux context for processes<br />
# id -Z //List SELinux contexts for users<br />
# cp -Z // directory copy SELinux context for files. If not specified the file inherits the contex for the<br />
destination directory<br />
Restore default file contexts.<br />
# restorecon <br />
Use boolean settings to modify system SELinux settings.<br />
# getsebool -a //lists all SELinux boolean settings<br />
# setsebool -p =1 //turns on SELinux boolean setting<br />
Example:<br />
#setsebool -P sam ba_run_unconfined=1<br />
settings can also be toggled with<br />
# togglesebool <br />
SELinux booleans can also be configured with the sy stem-config-selinux<br />
Diagnose and address routine SELinux policy violations.<br />
# sealert -a /v ar/log/audit/audit.log