Quick Start Guide for the R&S FSP Spectrum ... - Rohde & Schwarz
Quick Start Guide for the R&S FSP Spectrum ... - Rohde & Schwarz
Quick Start Guide for the R&S FSP Spectrum ... - Rohde & Schwarz

Create successful ePaper yourself
Turn your PDF publications into a flip-book with our unique Google optimized e-Paper software.
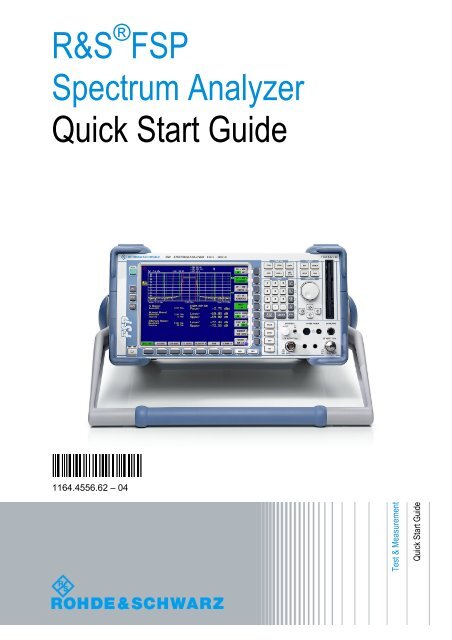
R&S ® <strong>FSP</strong><br />
<strong>Spectrum</strong> Analyzer<br />
<strong>Quick</strong> <strong>Start</strong> <strong>Guide</strong><br />
1164.4556.62 – 04<br />
Test & Measurement<br />
<strong>Quick</strong> <strong>Start</strong> <strong>Guide</strong>
The <strong>Quick</strong> <strong>Start</strong> <strong>Guide</strong> describes <strong>the</strong> following R&S ® <strong>FSP</strong> models and options:<br />
● R&S <strong>FSP</strong>3 (1164.4391K03)<br />
● R&S <strong>FSP</strong>7 (1164.4391K07)<br />
● R&S <strong>FSP</strong>13 (1164.4391K13)<br />
● R&S <strong>FSP</strong>30 (1164.4391K30)<br />
● R&S <strong>FSP</strong>30 (1164.4391K39)<br />
● R&S <strong>FSP</strong>31 (1164.4391K31)<br />
● R&S <strong>FSP</strong>40 (1164.4391K40)<br />
The firmware of <strong>the</strong> instrument makes use of several valuable open source software packages. <strong>the</strong> most<br />
important of <strong>the</strong>m are listed below, toge<strong>the</strong>r with <strong>the</strong>ir corresponding open source license. The<br />
verbatimlicense texts are provided on <strong>the</strong> user documentation CD-ROM (included in delivery).<br />
Package Link License<br />
Xitami http://www.xitami.com 2.5b6<br />
PHP http://www.php.net PHP v 3<br />
DOJO-AJAX http://www.dojotoolkit.org BSD License<br />
BOOST Library http://www.boost.org Boost<br />
Software v.1<br />
ONC/RPC http://www.plt.rwth-aachen.de SUN<br />
TightVnc http://www.tightvnc.com GPL v.3<br />
DemoForgeMirageDriver http://www.demo<strong>for</strong>ge.com/dfmirage.htm GPL v.3<br />
<strong>Rohde</strong>&<strong>Schwarz</strong> would like to thank <strong>the</strong> open source community <strong>for</strong> <strong>the</strong>ir valuable contribution to<br />
embedded computing.<br />
© 2009 <strong>Rohde</strong> & <strong>Schwarz</strong> GmbH & Co. KG<br />
81671 Munich, Germany<br />
Printed in Germany – Subject to change – Data without tolerance limits is not binding.<br />
R&S ® is a registered trademark of <strong>Rohde</strong> & <strong>Schwarz</strong> GmbH & Co. KG.<br />
Trade names are trademarks of <strong>the</strong> owners.<br />
The following abbreviations are used throughout this manual:<br />
R&S ® <strong>FSP</strong> is abbreviated as R&S <strong>FSP</strong>.
R&S <strong>FSP</strong><br />
Contents<br />
Safety Instructions<br />
Safety Regulations <strong>for</strong> Batteries<br />
In<strong>for</strong>mation on Product Disposal<br />
Certificate of Quality<br />
EU Certificate of Con<strong>for</strong>mity<br />
Support Center Address<br />
List of R&S Representatives<br />
Documentation Overview<br />
1 Front and Rear Panel . . . . . . . . . . . . . . . . . . . . . . . . . 1.1<br />
1.1 Front View . . . . . . . . . . . . . . . . . . . . . . . . . . . . . . . . . . . . . . . . 1.2<br />
1.2 Function Keys on <strong>the</strong> Front Panel . . . . . . . . . . . . . . . . . . . . . 1.4<br />
1.3 Front Panel Connections . . . . . . . . . . . . . . . . . . . . . . . . . . . 1.6<br />
1.4 Rear View . . . . . . . . . . . . . . . . . . . . . . . . . . . . . . . . . . . . . . . . 1.10<br />
1.5 Rear Panel Connections . . . . . . . . . . . . . . . . . . . . . . . . . . . 1.12<br />
2 Preparing <strong>for</strong> Use . . . . . . . . . . . . . . . . . . . . . . . . . . . . 2.1<br />
2.1 Preparing <strong>for</strong> Operation . . . . . . . . . . . . . . . . . . . . . . . . . . . . . 2.4<br />
2.1.1 Unpacking <strong>the</strong> Instrument . . . . . . . . . . . . . . . . . . . . . . . . . 2.4<br />
2.1.2 Setting Up <strong>the</strong> Instrument . . . . . . . . . . . . . . . . . . . . . . . . . 2.4<br />
2.1.3 Installation in a 19" Rack . . . . . . . . . . . . . . . . . . . . . . . . . . 2.5<br />
2.1.4 Connecting <strong>the</strong> Instrument to <strong>the</strong> AC Power Supply . . . . . 2.6<br />
2.1.5 Switching On <strong>the</strong> R&S <strong>FSP</strong> . . . . . . . . . . . . . . . . . . . . . . . . 2.6<br />
2.1.6 Functional Test . . . . . . . . . . . . . . . . . . . . . . . . . . . . . . . . . . 2.6<br />
2.1.7 Switching Off <strong>the</strong> R&S <strong>FSP</strong> . . . . . . . . . . . . . . . . . . . . . . . . 2.7<br />
2.1.8 Cleaning <strong>the</strong> Outside . . . . . . . . . . . . . . . . . . . . . . . . . . . . . 2.8<br />
2.2 Instrument Drive Usage . . . . . . . . . . . . . . . . . . . . . . . . . . . . . 2.8<br />
2.3 Connecting External Devices . . . . . . . . . . . . . . . . . . . . . . . . 2.9<br />
2.3.1 Connecting an External Keyboard . . . . . . . . . . . . . . . . . . . 2.9<br />
2.3.2 Connecting a Mouse . . . . . . . . . . . . . . . . . . . . . . . . . . . . 2.11<br />
2.3.3 Connecting an External Monitor . . . . . . . . . . . . . . . . . . . 2.12<br />
2.3.4 Connecting a Printer . . . . . . . . . . . . . . . . . . . . . . . . . . . . 2.13<br />
2.3.5 Connecting USB Devices (e.g. a Power Meter) . . . . . . . . 2.13<br />
<strong>Quick</strong> <strong>Start</strong> <strong>Guide</strong> 1164.4556.62 - 04 1
R&S <strong>FSP</strong><br />
2.3.6 Connecting External Generators . . . . . . . . . . . . . . . . . . .2.15<br />
2.3.6.1 Connecting <strong>the</strong> R&S <strong>FSP</strong> to <strong>the</strong> Generator . . . . . . .2.16<br />
2.3.6.2 Configuring <strong>the</strong> Generator on <strong>the</strong> R&S <strong>FSP</strong> . . . . . . .2.16<br />
2.3.6.3 Activating <strong>the</strong> Generator Configuration and<br />
Setting <strong>the</strong> Output Level . . . . . . . . . . . . . . . . . . . . . . . . . . . .2.17<br />
2.3.6.4 Using an External Generator as a Tracking<br />
Generator . . . . . . . . . . . . . . . . . . . . . . . . . . . . . . . . . . . . . . . .2.18<br />
2.4 Setup . . . . . . . . . . . . . . . . . . . . . . . . . . . . . . . . . . . . . . . . . . . .2.19<br />
2.4.1 Selecting <strong>the</strong> Frequency Reference . . . . . . . . . . . . . . . . .2.19<br />
2.4.2 Setting <strong>the</strong> Date and Time . . . . . . . . . . . . . . . . . . . . . . . .2.19<br />
2.4.3 Setting <strong>the</strong> GPIB Interface . . . . . . . . . . . . . . . . . . . . . . . .2.20<br />
2.4.3.1 GPIB Address . . . . . . . . . . . . . . . . . . . . . . . . . . . . . .2.20<br />
2.4.3.2 GPIB Language . . . . . . . . . . . . . . . . . . . . . . . . . . . .2.21<br />
2.4.3.3 ID Response String . . . . . . . . . . . . . . . . . . . . . . . . . .2.22<br />
2.4.4 Setting <strong>the</strong> Screen Colors . . . . . . . . . . . . . . . . . . . . . . . .2.23<br />
2.4.5 Automatically Switching Off <strong>the</strong> Internal Screen . . . . . . .2.24<br />
2.4.6 File and Path Selection Using <strong>the</strong> Front Panel Keys . . . .2.25<br />
2.4.7 Selecting and Configuring Printers . . . . . . . . . . . . . . . . . .2.27<br />
2.4.7.1 Selecting Alternative Printer Configurations . . . . . . .2.28<br />
2.4.7.2 Selecting Printer Colors . . . . . . . . . . . . . . . . . . . . . .2.28<br />
2.4.8 Installing Plug&Play Printers . . . . . . . . . . . . . . . . . . . . . .2.29<br />
2.4.9 Installing Non-Plug&Play Printers . . . . . . . . . . . . . . . . . .2.30<br />
2.5 Configuring <strong>the</strong> LAN Interface (Option R&S <strong>FSP</strong>-B16<br />
only) . . . . . . . . . . . . . . . . . . . . . . . . . . . . . . . . . . . . . . . . . . . . . . . .2.30<br />
2.5.1 Connecting <strong>the</strong> Instrument to <strong>the</strong> Network . . . . . . . . . . . .2.30<br />
2.5.2 Configuring <strong>the</strong> Network Card . . . . . . . . . . . . . . . . . . . . .2.30<br />
2.5.2.1 Driver Installation . . . . . . . . . . . . . . . . . . . . . . . . . . .2.30<br />
2.5.2.2 Configuring <strong>the</strong> Interface . . . . . . . . . . . . . . . . . . . . . .2.31<br />
2.5.2.3 Configuring Existing Network Protocols (TCP/IP<br />
Protocol) . . . . . . . . . . . . . . . . . . . . . . . . . . . . . . . . . . . . . . . . .2.31<br />
2.5.2.4 Installing Additional Network Protocols and<br />
Services . . . . . . . . . . . . . . . . . . . . . . . . . . . . . . . . . . . . . . . . .2.35<br />
2.5.3 Login . . . . . . . . . . . . . . . . . . . . . . . . . . . . . . . . . . . . . . . .2.35<br />
2.6 LXI Configuration . . . . . . . . . . . . . . . . . . . . . . . . . . . . . . . . .2.36<br />
2.6.1 LXI Configuration Dialog . . . . . . . . . . . . . . . . . . . . . . . . .2.37<br />
2.6.2 LXI Browser Interface . . . . . . . . . . . . . . . . . . . . . . . . . . . .2.37<br />
2.6.3 LAN Configuration website . . . . . . . . . . . . . . . . . . . . . . . .2.38<br />
2.6.4 Ping . . . . . . . . . . . . . . . . . . . . . . . . . . . . . . . . . . . . . . . . . .2.38<br />
2 <strong>Quick</strong> <strong>Start</strong> <strong>Guide</strong> 1164.4556.62 - 04
R&S <strong>FSP</strong><br />
2.7 Operating System Properties . . . . . . . . . . . . . . . . . . . . . . . 2.39<br />
2.7.1 Properties Specific to Windows XP . . . . . . . . . . . . . . . . . 2.39<br />
2.7.1.1 Windows XP Service Packs . . . . . . . . . . . . . . . . . . 2.39<br />
2.7.1.2 Opening <strong>the</strong> Windows XP <strong>Start</strong> Menu . . . . . . . . . . . 2.40<br />
2.7.1.3 Windows XP Software Approved <strong>for</strong> <strong>the</strong><br />
Instrument . . . . . . . . . . . . . . . . . . . . . . . . . . . . . . . . . . . . . . . 2.40<br />
3 Firmware Update and Installation of Firmware<br />
Options . . . . . . . . . . . . . . . . . . . . . . . . . . . . . . . . . . . . . . 3.1<br />
3.1 Firmware Update . . . . . . . . . . . . . . . . . . . . . . . . . . . . . . . . . . . 3.2<br />
3.2 Activating Firmware Options . . . . . . . . . . . . . . . . . . . . . . . . . 3.3<br />
4 Basic Operation . . . . . . . . . . . . . . . . . . . . . . . . . . . . . 4.1<br />
4.1 Diagram Layout . . . . . . . . . . . . . . . . . . . . . . . . . . . . . . . . . . . . 4.2<br />
4.1.1 Displays in <strong>the</strong> Diagram Area . . . . . . . . . . . . . . . . . . . . . . 4.3<br />
4.2 Setting Parameters . . . . . . . . . . . . . . . . . . . . . . . . . . . . . . . . . 4.7<br />
4.2.1 The Keypad . . . . . . . . . . . . . . . . . . . . . . . . . . . . . . . . . . . . 4.7<br />
4.2.2 The Rotary Knob and Arrow Keys . . . . . . . . . . . . . . . . . . . 4.8<br />
4.2.3 Editing Numeric Parameters . . . . . . . . . . . . . . . . . . . . . . . 4.8<br />
4.2.4 Editing Alphanumeric Parameters . . . . . . . . . . . . . . . . . . . 4.9<br />
4.2.4.1 Alphanumeric Editor Type 1: . . . . . . . . . . . . . . . . . . . 4.9<br />
4.2.4.2 Alphanumeric Editor Type 2: . . . . . . . . . . . . . . . . . . 4.10<br />
5 Basic Measurement Examples . . . . . . . . . . . . . . . . . 5.1<br />
5.1 Measuring a Sinusoidal Signal . . . . . . . . . . . . . . . . . . . . . . . 5.3<br />
5.1.1 Measuring <strong>the</strong> Level and Frequency with Markers . . . . . . 5.3<br />
5.1.1.1 Procedure . . . . . . . . . . . . . . . . . . . . . . . . . . . . . . . . . . 5.3<br />
5.1.1.2 Increasing <strong>the</strong> Frequency Resolution . . . . . . . . . . . . . 5.4<br />
5.1.1.3 Setting <strong>the</strong> Reference Level . . . . . . . . . . . . . . . . . . . . 5.5<br />
5.1.2 Measuring <strong>the</strong> Signal Frequency using <strong>the</strong> Frequency<br />
Counter . . . . . . . . . . . . . . . . . . . . . . . . . . . . . . . . . . . . . . . . . . . . 5.6<br />
5.2 Measuring Harmonics of Sinusoidal Signals . . . . . . . . . . . . 5.8<br />
5.2.1 Measuring <strong>the</strong> Suppression of <strong>the</strong> First and Second<br />
Harmonic of an Input Signal . . . . . . . . . . . . . . . . . . . . . . . . . . . . 5.8<br />
5.2.2 Reducing Noise . . . . . . . . . . . . . . . . . . . . . . . . . . . . . . . . . 5.9<br />
5.3 Measuring Signal Spectra with Multiple Signals . . . . . . . 5.11<br />
<strong>Quick</strong> <strong>Start</strong> <strong>Guide</strong> 1164.4556.62 - 04 3
R&S <strong>FSP</strong><br />
5.3.1 Separating Signals by Selecting <strong>the</strong> Resolution<br />
Bandwidth . . . . . . . . . . . . . . . . . . . . . . . . . . . . . . . . . . . . . . . . . .5.11<br />
5.3.1.1 Separating Two Signals with a Level of –30 dBm<br />
each at a Frequency Spacing of 30 kHz . . . . . . . . . . . . . . . .5.12<br />
5.3.1.2 Measuring <strong>the</strong> Modulation Depth of an<br />
AM-Modulated Carrier in <strong>the</strong> Frequency Domain . . . . . . . . .5.16<br />
5.4 Measurements in <strong>the</strong> Time Domain . . . . . . . . . . . . . . . . . . .5.17<br />
5.4.1 Measuring <strong>the</strong> Power Characteristic . . . . . . . . . . . . . . . .5.18<br />
5.4.1.1 Example – Measuring <strong>the</strong> Power of a GSM Burst<br />
During <strong>the</strong> Activation Phase. . . . . . . . . . . . . . . . . . . . . . . . . .5.18<br />
5.4.2 Measuring <strong>the</strong> Power Characteristic of Burst Signals . . .5.20<br />
5.4.2.1 Example - Measuring <strong>the</strong> Edges of a GSM Burst<br />
with High Time Resolution . . . . . . . . . . . . . . . . . . . . . . . . . . .5.20<br />
5.4.3 Measuring <strong>the</strong> Signal-to-Noise Ratio of Burst Signals . .5.23<br />
5.4.3.1 Example - Signal-to-Noise Ratio of a GSM Signal . . .5.23<br />
5.4.4 Measurement of AM-Modulated Signals . . . . . . . . . . . . .5.26<br />
5.4.4.1 Example – Displaying <strong>the</strong> AF of an AM-Modulated<br />
Signal in <strong>the</strong> Time Domain . . . . . . . . . . . . . . . . . . . . . . . . . . .5.26<br />
5.4.5 Measurement of FM-Modulated Signals . . . . . . . . . . . . .5.28<br />
5.4.5.1 Example - Display of <strong>the</strong> AF of an FM-Modulated<br />
Carrier . . . . . . . . . . . . . . . . . . . . . . . . . . . . . . . . . . . . . . . . . .5.28<br />
5.5 Storing and Loading Instrument Settings . . . . . . . . . . . . . .5.31<br />
5.5.1 Storing an Instrument Configuration (without Traces) . . .5.31<br />
5.5.1.1 Storing Traces . . . . . . . . . . . . . . . . . . . . . . . . . . . . . .5.32<br />
5.5.2 Loading an Instrument Configuration . . . . . . . . . . . . . . . .5.32<br />
5.5.2.1 Automatic Loading of a Data Record during<br />
Booting . . . . . . . . . . . . . . . . . . . . . . . . . . . . . . . . . . . . . . . . . .5.33<br />
5.6 Printing Out <strong>the</strong> Measurement Results . . . . . . . . . . . . . . . .5.34<br />
5.6.1 Selecting <strong>the</strong> Color Setting <strong>for</strong> <strong>the</strong> Printout . . . . . . . . . . .5.35<br />
5.7 Additional Measurement Examples . . . . . . . . . . . . . . . . . . .5.35<br />
6 LAN Interface . . . . . . . . . . . . . . . . . . . . . . . . . . . . . . . .6.1<br />
6.1 Installing Additional Network Protocols & Services . . . . . .6.3<br />
6.2 Configuration Examples . . . . . . . . . . . . . . . . . . . . . . . . . . . . .6.6<br />
6.3 Subsequent Changes to <strong>the</strong> Network Configuration . . . . . .6.6<br />
6.4 Configuring <strong>the</strong> Windows XP Firewall . . . . . . . . . . . . . . . . . .6.8<br />
6.5 Operating <strong>the</strong> Instrument without a Network . . . . . . . . . . . .6.9<br />
6.6 Operating <strong>the</strong> Instrument in a Network . . . . . . . . . . . . . . . . .6.9<br />
4 <strong>Quick</strong> <strong>Start</strong> <strong>Guide</strong> 1164.4556.62 - 04
R&S <strong>FSP</strong><br />
6.6.1 Creating Users . . . . . . . . . . . . . . . . . . . . . . . . . . . . . . . . . . 6.9<br />
6.6.2 Changing <strong>the</strong> User Password . . . . . . . . . . . . . . . . . . . . . 6.11<br />
6.6.3 NOVELL Network only: Configure NOVELL Client . . . . . 6.13<br />
6.6.4 Logging On to <strong>the</strong> Network . . . . . . . . . . . . . . . . . . . . . . . 6.14<br />
6.6.5 Deactivating <strong>the</strong> Automatic Login Mechanism . . . . . . . . . 6.14<br />
6.6.6 Reactivating <strong>the</strong> Automatic Login Mechanism . . . . . . . . . 6.14<br />
6.6.7 Using Network Drives . . . . . . . . . . . . . . . . . . . . . . . . . . . 6.15<br />
6.6.8 Installing a Network Printer . . . . . . . . . . . . . . . . . . . . . . . 6.17<br />
6.6.9 Sharing Directories (only with Microsoft Networks) . . . . . 6.21<br />
6.7 Manual Operation of <strong>the</strong> R&S <strong>FSP</strong> with XP Remote<br />
Desktop . . . . . . . . . . . . . . . . . . . . . . . . . . . . . . . . . . . . . . . . . . . . . 6.24<br />
6.7.1 Introduction . . . . . . . . . . . . . . . . . . . . . . . . . . . . . . . . . . . 6.24<br />
6.7.2 Configuring <strong>the</strong> R&S <strong>FSP</strong> <strong>for</strong> Use of XP Remote<br />
Desktop . . . . . . . . . . . . . . . . . . . . . . . . . . . . . . . . . . . . . . . . . . . 6.24<br />
6.7.3 Configuring <strong>the</strong> Controller . . . . . . . . . . . . . . . . . . . . . . . . 6.27<br />
6.7.4 Connection Setup with <strong>the</strong> R&S <strong>FSP</strong> . . . . . . . . . . . . . . . 6.30<br />
6.7.5 Interrupting and Restoring <strong>the</strong> Remote Desktop<br />
Connection with <strong>the</strong> R&S <strong>FSP</strong> . . . . . . . . . . . . . . . . . . . . . . . . . . 6.33<br />
6.7.6 Deactivating <strong>the</strong> R&S <strong>FSP</strong> from <strong>the</strong> Controller . . . . . . . . 6.34<br />
7 Brief Introduction to Remote Control . . . . . . . . . . . . 7.1<br />
7.1 Basic Steps in Programming using <strong>the</strong> VISA Interface . . . . 7.3<br />
7.1.1 Linking <strong>the</strong> VISA Library <strong>for</strong> Visual Basic . . . . . . . . . . . . . 7.3<br />
7.1.1.1 Programming notes: . . . . . . . . . . . . . . . . . . . . . . . . . . 7.3<br />
7.1.2 Initialization and Default State . . . . . . . . . . . . . . . . . . . . . . 7.4<br />
7.1.2.1 Creating Global Variables . . . . . . . . . . . . . . . . . . . . . . 7.4<br />
7.1.2.2 Initializing <strong>the</strong> Controller . . . . . . . . . . . . . . . . . . . . . . . 7.5<br />
7.1.2.3 Initializing <strong>the</strong> Instrument . . . . . . . . . . . . . . . . . . . . . . 7.5<br />
7.1.2.4 Switching <strong>the</strong> Screen Display On and Off . . . . . . . . . 7.5<br />
7.1.2.5 Configuring <strong>the</strong> Power Save Function <strong>for</strong> <strong>the</strong><br />
Display . . . . . . . . . . . . . . . . . . . . . . . . . . . . . . . . . . . . . . . . . . . 7.6<br />
7.1.3 Sending Simple Instrument Setting Commands . . . . . . . . 7.6<br />
7.1.4 Reading Out Instrument Settings . . . . . . . . . . . . . . . . . . . . 7.7<br />
7.1.5 Marker Positioning and Readout . . . . . . . . . . . . . . . . . . . . 7.7<br />
7.1.6 Command Synchronization . . . . . . . . . . . . . . . . . . . . . . . . 7.8<br />
7.1.6.1 Reading Output Buffers . . . . . . . . . . . . . . . . . . . . . . . 7.9<br />
7.1.6.2 Reading Error Messages . . . . . . . . . . . . . . . . . . . . . . 7.9<br />
<strong>Quick</strong> <strong>Start</strong> <strong>Guide</strong> 1164.4556.62 - 04 5
R&S <strong>FSP</strong><br />
Appendix<br />
7.2 Detailed Programming Examples . . . . . . . . . . . . . . . . . . . . .7.9<br />
7.2.1 Default Settings of <strong>the</strong> R&S <strong>FSP</strong> . . . . . . . . . . . . . . . . . . . .7.9<br />
7.2.1.1 Setting <strong>the</strong> IEC Bus Status Registers . . . . . . . . . . . .7.10<br />
7.2.1.2 Default Settings <strong>for</strong> Measurements . . . . . . . . . . . . . .7.10<br />
7.2.2 Using Markers and Delta Markers . . . . . . . . . . . . . . . . . .7.12<br />
7.2.2.1 Marker Search Functions, Restricting <strong>the</strong> Search<br />
Range . . . . . . . . . . . . . . . . . . . . . . . . . . . . . . . . . . . . . . . . . .7.12<br />
7.2.2.2 Frequency Counting . . . . . . . . . . . . . . . . . . . . . . . . .7.13<br />
7.2.2.3 Working with a Fixed Reference Point (Reference<br />
Fixed) . . . . . . . . . . . . . . . . . . . . . . . . . . . . . . . . . . . . . . . . . . .7.14<br />
7.2.2.4 Measuring Noise and Phase Noise . . . . . . . . . . . . . .7.15<br />
7.2.3 Reading Out Trace Data . . . . . . . . . . . . . . . . . . . . . . . . .7.16<br />
7.2.4 Storing and Loading Instrument Settings . . . . . . . . . . . . .7.18<br />
7.2.4.1 Storing Instrument Settings . . . . . . . . . . . . . . . . . . . .7.18<br />
7.2.4.2 Loading Instrument Settings . . . . . . . . . . . . . . . . . . .7.19<br />
7.2.4.3 Setting <strong>the</strong> Data Record <strong>for</strong> <strong>Start</strong>up Recall . . . . . . . .7.20<br />
7.2.5 Configuring and <strong>Start</strong>ing a Printout . . . . . . . . . . . . . . . . .7.20<br />
Appendix A: Printer Interface . . . . . . . . . . . . . . . . . . . . . . . . . . . . . . . A.1<br />
A.1 Installing USB Printers . . . . . . . . . . . . . . . . . . . . . . . . . . . . . A.2<br />
A.2 Installing Non-Plug&Play Printers . . . . . . . . . . . . . . . . . . . . A.6<br />
A.2.1 Local Printer . . . . . . . . . . . . . . . . . . . . . . . . . . . . . . . . . . . A.6<br />
A.2.2 Network Printer . . . . . . . . . . . . . . . . . . . . . . . . . . . . . . . A.12<br />
Appendix B: External Generator Control . . . . . . . . . . . . . . . . . . . . . . B.1<br />
Index<br />
B.1 List of Generator Types Supported by <strong>the</strong> R&S <strong>FSP</strong> . . . . . B.1<br />
6 <strong>Quick</strong> <strong>Start</strong> <strong>Guide</strong> 1164.4556.62 - 04
Basic Safety Instructions<br />
Always read through and comply with <strong>the</strong> following safety instructions!<br />
All plants and locations of <strong>the</strong> <strong>Rohde</strong> & <strong>Schwarz</strong> group of companies make every ef<strong>for</strong>t to keep <strong>the</strong> safety<br />
standards of our products up to date and to offer our customers <strong>the</strong> highest possible degree of safety. Our<br />
products and <strong>the</strong> auxiliary equipment <strong>the</strong>y require are designed, built and tested in accordance with <strong>the</strong><br />
safety standards that apply in each case. Compliance with <strong>the</strong>se standards is continuously monitored by<br />
our quality assurance system. The product described here has been designed, built and tested in<br />
accordance with <strong>the</strong> attached EC Certificate of Con<strong>for</strong>mity and has left <strong>the</strong> manufacturer’s plant in a<br />
condition fully complying with safety standards. To maintain this condition and to ensure safe operation,<br />
you must observe all instructions and warnings provided in this manual. If you have any questions<br />
regarding <strong>the</strong>se safety instructions, <strong>the</strong> <strong>Rohde</strong> & <strong>Schwarz</strong> group of companies will be happy to answer<br />
<strong>the</strong>m.<br />
Fur<strong>the</strong>rmore, it is your responsibility to use <strong>the</strong> product in an appropriate manner. This product is designed<br />
<strong>for</strong> use solely in industrial and laboratory environments or, if expressly permitted, also in <strong>the</strong> field and must<br />
not be used in any way that may cause personal injury or property damage. You are responsible if <strong>the</strong><br />
product is used <strong>for</strong> any intention o<strong>the</strong>r than its designated purpose or in disregard of <strong>the</strong> manufacturer's<br />
instructions. The manufacturer shall assume no responsibility <strong>for</strong> such use of <strong>the</strong> product.<br />
The product is used <strong>for</strong> its designated purpose if it is used in accordance with its product documentation<br />
and within its per<strong>for</strong>mance limits (see data sheet, documentation, <strong>the</strong> following safety instructions). Using<br />
<strong>the</strong> product requires technical skills and a basic knowledge of English. It is <strong>the</strong>re<strong>for</strong>e essential that only<br />
skilled and specialized staff or thoroughly trained personnel with <strong>the</strong> required skills be allowed to use <strong>the</strong><br />
product. If personal safety gear is required <strong>for</strong> using <strong>Rohde</strong> & <strong>Schwarz</strong> products, this will be indicated at<br />
<strong>the</strong> appropriate place in <strong>the</strong> product documentation. Keep <strong>the</strong> basic safety instructions and <strong>the</strong> product<br />
documentation in a safe place and pass <strong>the</strong>m on to <strong>the</strong> subsequent users.<br />
Observing <strong>the</strong> safety instructions will help prevent personal injury or damage of any kind caused by<br />
dangerous situations. There<strong>for</strong>e, carefully read through and adhere to <strong>the</strong> following safety instructions<br />
be<strong>for</strong>e and when using <strong>the</strong> product. It is also absolutely essential to observe <strong>the</strong> additional safety<br />
instructions on personal safety, <strong>for</strong> example, that appear in relevant parts of <strong>the</strong> product documentation. In<br />
<strong>the</strong>se safety instructions, <strong>the</strong> word "product" refers to all merchandise sold and distributed by <strong>the</strong> <strong>Rohde</strong> &<br />
<strong>Schwarz</strong> group of companies, including instruments, systems and all accessories.<br />
Symbols and safety labels<br />
Notice, general<br />
danger location<br />
Observe product<br />
documentation<br />
Caution<br />
when<br />
handling<br />
heavy<br />
equipment<br />
Danger of<br />
electric<br />
shock<br />
Warning!<br />
Hot surface<br />
PE terminal Ground Ground<br />
terminal<br />
Be careful when<br />
handling<br />
electrostatic<br />
sensitive<br />
devices<br />
ON/OFF supply<br />
voltage<br />
Standby<br />
indication<br />
Direct current<br />
(DC)<br />
Alternating current<br />
(AC)<br />
Direct/alternating<br />
current (DC/AC)<br />
Device fully protected by<br />
double (rein<strong>for</strong>ced) insulation<br />
1171.0000.42-05.00 Page 1
Basic Safety Instructions<br />
Tags and <strong>the</strong>ir meaning<br />
The following signal words are used in <strong>the</strong> product documentation in order to warn <strong>the</strong> reader about risks<br />
and dangers.<br />
indicates a hazardous situation which, if not avoided, will result in death or<br />
serious injury.<br />
indicates a hazardous situation which, if not avoided, could result in death or<br />
serious injury.<br />
indicates a hazardous situation which, if not avoided, could result in minor or<br />
moderate injury.<br />
indicates <strong>the</strong> possibility of incorrect operation which can result in damage to<br />
<strong>the</strong> product.<br />
In <strong>the</strong> product documentation, <strong>the</strong> word ATTENTION is used synonymously.<br />
These tags are in accordance with <strong>the</strong> standard definition <strong>for</strong> civil applications in <strong>the</strong> European Economic<br />
Area. Definitions that deviate from <strong>the</strong> standard definition may also exist in o<strong>the</strong>r economic areas or<br />
military applications. It is <strong>the</strong>re<strong>for</strong>e essential to make sure that <strong>the</strong> tags described here are always used<br />
only in connection with <strong>the</strong> related product documentation and <strong>the</strong> related product. The use of tags in<br />
connection with unrelated products or documentation can result in misinterpretation and in personal injury<br />
or material damage.<br />
Operating states and operating positions<br />
The product may be operated only under <strong>the</strong> operating conditions and in <strong>the</strong> positions specified by <strong>the</strong><br />
manufacturer, without <strong>the</strong> product's ventilation being obstructed. If <strong>the</strong> manufacturer's specifications are<br />
not observed, this can result in electric shock, fire and/or serious personal injury or death. Applicable local<br />
or national safety regulations and rules <strong>for</strong> <strong>the</strong> prevention of accidents must be observed in all work<br />
per<strong>for</strong>med.<br />
1. Unless o<strong>the</strong>rwise specified, <strong>the</strong> following requirements apply to <strong>Rohde</strong> & <strong>Schwarz</strong> products:<br />
predefined operating position is always with <strong>the</strong> housing floor facing down, IP protection 2X, pollution<br />
severity 2, overvoltage category 2, use only indoors, max. operating altitude 2000 m above sea level,<br />
max. transport altitude 4500 m above sea level. A tolerance of ±10 % shall apply to <strong>the</strong> nominal<br />
voltage and ±5 % to <strong>the</strong> nominal frequency.<br />
2. Do not place <strong>the</strong> product on surfaces, vehicles, cabinets or tables that <strong>for</strong> reasons of weight or stability<br />
are unsuitable <strong>for</strong> this purpose. Always follow <strong>the</strong> manufacturer's installation instructions when<br />
installing <strong>the</strong> product and fastening it to objects or structures (e.g. walls and shelves). An installation<br />
that is not carried out as described in <strong>the</strong> product documentation could result in personal injury or<br />
death.<br />
3. Do not place <strong>the</strong> product on heat-generating devices such as radiators or fan heaters. The ambient<br />
temperature must not exceed <strong>the</strong> maximum temperature specified in <strong>the</strong> product documentation or in<br />
<strong>the</strong> data sheet. Product overheating can cause electric shock, fire and/or serious personal injury or<br />
death.<br />
1171.0000.42-05.00 Page 2
Basic Safety Instructions<br />
Electrical safety<br />
If <strong>the</strong> in<strong>for</strong>mation on electrical safety is not observed ei<strong>the</strong>r at all to <strong>the</strong> extent necessary, electric shock,<br />
fire and/or serious personal injury or death may occur.<br />
1. Prior to switching on <strong>the</strong> product, always ensure that <strong>the</strong> nominal voltage setting on <strong>the</strong> product<br />
matches <strong>the</strong> nominal voltage of <strong>the</strong> AC supply network. If a different voltage is to be set, <strong>the</strong> power<br />
fuse of <strong>the</strong> product may have to be changed accordingly.<br />
2. In <strong>the</strong> case of products of safety class I with movable power cord and connector, operation is<br />
permitted only on sockets with an earthing contact and protective earth connection.<br />
3. Intentionally breaking <strong>the</strong> protective earth connection ei<strong>the</strong>r in <strong>the</strong> feed line or in <strong>the</strong> product itself is<br />
not permitted. Doing so can result in <strong>the</strong> danger of an electric shock from <strong>the</strong> product. If extension<br />
cords or connector strips are implemented, <strong>the</strong>y must be checked on a regular basis to ensure that<br />
<strong>the</strong>y are safe to use.<br />
4. If <strong>the</strong> product does not have a power switch <strong>for</strong> disconnection from <strong>the</strong> AC supply network, <strong>the</strong> plug of<br />
<strong>the</strong> connecting cable is regarded as <strong>the</strong> disconnecting device. In such cases, always ensure that <strong>the</strong><br />
power plug is easily reachable and accessible at all times (corresponding to <strong>the</strong> length of connecting<br />
cable, approx. 2 m). Functional or electronic switches are not suitable <strong>for</strong> providing disconnection from<br />
<strong>the</strong> AC supply network. If products without power switches are integrated into racks or systems, a<br />
disconnecting device must be provided at <strong>the</strong> system level.<br />
5. Never use <strong>the</strong> product if <strong>the</strong> power cable is damaged. Check <strong>the</strong> power cable on a regular basis to<br />
ensure that it is in proper operating condition. By taking appropriate safety measures and carefully<br />
laying <strong>the</strong> power cable, you can ensure that <strong>the</strong> cable will not be damaged and that no one can be<br />
hurt by, <strong>for</strong> example, tripping over <strong>the</strong> cable or suffering an electric shock.<br />
6. The product may be operated only from TN/TT supply networks fused with max. 16 A (higher fuse<br />
only after consulting with <strong>the</strong> <strong>Rohde</strong> & <strong>Schwarz</strong> group of companies).<br />
7. Do not insert <strong>the</strong> plug into sockets that are dusty or dirty. Insert <strong>the</strong> plug firmly and all <strong>the</strong> way into <strong>the</strong><br />
socket. O<strong>the</strong>rwise, sparks that result in fire and/or injuries may occur.<br />
8. Do not overload any sockets, extension cords or connector strips; doing so can cause fire or electric<br />
shocks.<br />
9. For measurements in circuits with voltages V rms > 30 V, suitable measures (e.g. appropriate<br />
measuring equipment, fusing, current limiting, electrical separation, insulation) should be taken to<br />
avoid any hazards.<br />
10. Ensure that <strong>the</strong> connections with in<strong>for</strong>mation technology equipment, e.g. PCs or o<strong>the</strong>r industrial<br />
computers, comply with <strong>the</strong> IEC60950-1/EN60950-1 or IEC61010-1/EN 61010-1 standards that apply<br />
in each case.<br />
11. Unless expressly permitted, never remove <strong>the</strong> cover or any part of <strong>the</strong> housing while <strong>the</strong> product is in<br />
operation. Doing so will expose circuits and components and can lead to injuries, fire or damage to <strong>the</strong><br />
product.<br />
12. If a product is to be permanently installed, <strong>the</strong> connection between <strong>the</strong> PE terminal on site and <strong>the</strong><br />
product's PE conductor must be made first be<strong>for</strong>e any o<strong>the</strong>r connection is made. The product may be<br />
installed and connected only by a licensed electrician.<br />
13. For permanently installed equipment without built-in fuses, circuit breakers or similar protective<br />
devices, <strong>the</strong> supply circuit must be fused in such a way that anyone who has access to <strong>the</strong> product, as<br />
well as <strong>the</strong> product itself, is adequately protected from injury or damage.<br />
1171.0000.42-05.00 Page 3
Basic Safety Instructions<br />
14. Use suitable overvoltage protection to ensure that no overvoltage (such as that caused by a bolt of<br />
lightning) can reach <strong>the</strong> product. O<strong>the</strong>rwise, <strong>the</strong> person operating <strong>the</strong> product will be exposed to <strong>the</strong><br />
danger of an electric shock.<br />
15. Any object that is not designed to be placed in <strong>the</strong> openings of <strong>the</strong> housing must not be used <strong>for</strong> this<br />
purpose. Doing so can cause short circuits inside <strong>the</strong> product and/or electric shocks, fire or injuries.<br />
16. Unless specified o<strong>the</strong>rwise, products are not liquid-proof (see also section "Operating states and<br />
operating positions", item 1. There<strong>for</strong>e, <strong>the</strong> equipment must be protected against penetration by<br />
liquids. If <strong>the</strong> necessary precautions are not taken, <strong>the</strong> user may suffer electric shock or <strong>the</strong> product<br />
itself may be damaged, which can also lead to personal injury.<br />
17. Never use <strong>the</strong> product under conditions in which condensation has <strong>for</strong>med or can <strong>for</strong>m in or on <strong>the</strong><br />
product, e.g. if <strong>the</strong> product has been moved from a cold to a warm environment. Penetration by water<br />
increases <strong>the</strong> risk of electric shock.<br />
18. Prior to cleaning <strong>the</strong> product, disconnect it completely from <strong>the</strong> power supply (e.g. AC supply network<br />
or battery). Use a soft, non-linting cloth to clean <strong>the</strong> product. Never use chemical cleaning agents such<br />
as alcohol, acetone or diluents <strong>for</strong> cellulose lacquers.<br />
Operation<br />
1. Operating <strong>the</strong> products requires special training and intense concentration. Make sure that persons<br />
who use <strong>the</strong> products are physically, mentally and emotionally fit enough to do so; o<strong>the</strong>rwise, injuries<br />
or material damage may occur. It is <strong>the</strong> responsibility of <strong>the</strong> employer/operator to select suitable<br />
personnel <strong>for</strong> operating <strong>the</strong> products.<br />
2. Be<strong>for</strong>e you move or transport <strong>the</strong> product, read and observe <strong>the</strong> section titled "Transport".<br />
3. As with all industrially manufactured goods, <strong>the</strong> use of substances that induce an allergic reaction<br />
(allergens) such as nickel cannot be generally excluded. If you develop an allergic reaction (such as a<br />
skin rash, frequent sneezing, red eyes or respiratory difficulties) when using a <strong>Rohde</strong> & <strong>Schwarz</strong><br />
product, consult a physician immediately to determine <strong>the</strong> cause and to prevent health problems or<br />
stress.<br />
4. Be<strong>for</strong>e you start processing <strong>the</strong> product mechanically and/or <strong>the</strong>rmally, or be<strong>for</strong>e you take it apart, be<br />
sure to read and pay special attention to <strong>the</strong> section titled "Waste disposal", item 1.<br />
5. Depending on <strong>the</strong> function, certain products such as RF radio equipment can produce an elevated<br />
level of electromagnetic radiation. Considering that unborn babies require increased protection,<br />
pregnant women must be protected by appropriate measures. Persons with pacemakers may also be<br />
exposed to risks from electromagnetic radiation. The employer/operator must evaluate workplaces<br />
where <strong>the</strong>re is a special risk of exposure to radiation and, if necessary, take measures to avert <strong>the</strong><br />
potential danger.<br />
6. Should a fire occur, <strong>the</strong> product may release hazardous substances (gases, fluids, etc.) that can<br />
cause health problems. There<strong>for</strong>e, suitable measures must be taken, e.g. protective masks and<br />
protective clothing must be worn.<br />
7. If a laser product (e.g. a CD/DVD drive) is integrated into a <strong>Rohde</strong> & <strong>Schwarz</strong> product, absolutely no<br />
o<strong>the</strong>r settings or functions may be used as described in <strong>the</strong> product documentation. The objective is to<br />
prevent personal injury (e.g. due to laser beams).<br />
1171.0000.42-05.00 Page 4
Basic Safety Instructions<br />
Repair and service<br />
1. The product may be opened only by authorized, specially trained personnel. Be<strong>for</strong>e any work is<br />
per<strong>for</strong>med on <strong>the</strong> product or be<strong>for</strong>e <strong>the</strong> product is opened, it must be disconnected from <strong>the</strong> AC supply<br />
network. O<strong>the</strong>rwise, personnel will be exposed to <strong>the</strong> risk of an electric shock.<br />
2. Adjustments, replacement of parts, maintenance and repair may be per<strong>for</strong>med only by electrical<br />
experts authorized by <strong>Rohde</strong> & <strong>Schwarz</strong>. Only original parts may be used <strong>for</strong> replacing parts relevant<br />
to safety (e.g. power switches, power trans<strong>for</strong>mers, fuses). A safety test must always be per<strong>for</strong>med<br />
after parts relevant to safety have been replaced (visual inspection, PE conductor test, insulation<br />
resistance measurement, leakage current measurement, functional test). This helps ensure <strong>the</strong><br />
continued safety of <strong>the</strong> product.<br />
Batteries and rechargeable batteries/cells<br />
If <strong>the</strong> in<strong>for</strong>mation regarding batteries and rechargeable batteries/cells is not observed ei<strong>the</strong>r at all or to <strong>the</strong><br />
extent necessary, product users may be exposed to <strong>the</strong> risk of explosions, fire and/or serious personal<br />
injury, and, in some cases, death. Batteries and rechargeable batteries with alkaline electrolytes (e.g.<br />
lithium cells) must be handled in accordance with <strong>the</strong> EN 62133 standard.<br />
1. Cells must not be taken apart or crushed.<br />
2. Cells or batteries must not be exposed to heat or fire. Storage in direct sunlight must be avoided.<br />
Keep cells and batteries clean and dry. Clean soiled connectors using a dry, clean cloth.<br />
3. Cells or batteries must not be short-circuited. Cells or batteries must not be stored in a box or in a<br />
drawer where <strong>the</strong>y can short-circuit each o<strong>the</strong>r, or where <strong>the</strong>y can be short-circuited by o<strong>the</strong>r<br />
conductive materials. Cells and batteries must not be removed from <strong>the</strong>ir original packaging until <strong>the</strong>y<br />
are ready to be used.<br />
4. Keep cells and batteries out of <strong>the</strong> hands of children. If a cell or a battery has been swallowed, seek<br />
medical aid immediately.<br />
5. Cells and batteries must not be exposed to any mechanical shocks that are stronger than permitted.<br />
6. If a cell develops a leak, <strong>the</strong> fluid must not be allowed to come into contact with <strong>the</strong> skin or eyes. If<br />
contact occurs, wash <strong>the</strong> affected area with plenty of water and seek medical aid.<br />
7. Improperly replacing or charging cells or batteries that contain alkaline electrolytes (e.g. lithium cells)<br />
can cause explosions. Replace cells or batteries only with <strong>the</strong> matching <strong>Rohde</strong> & <strong>Schwarz</strong> type (see<br />
parts list) in order to ensure <strong>the</strong> safety of <strong>the</strong> product.<br />
8. Cells and batteries must be recycled and kept separate from residual waste. Rechargeable batteries<br />
and normal batteries that contain lead, mercury or cadmium are hazardous waste. Observe <strong>the</strong><br />
national regulations regarding waste disposal and recycling.<br />
Transport<br />
1. The product may be very heavy. There<strong>for</strong>e, <strong>the</strong> product must be handled with care. In some cases,<br />
<strong>the</strong> user may require a suitable means of lifting or moving <strong>the</strong> product (e.g. with a lift-truck) to avoid<br />
back or o<strong>the</strong>r physical injuries.<br />
1171.0000.42-05.00 Page 5
In<strong>for</strong>maciones elementales de seguridad<br />
2. Handles on <strong>the</strong> products are designed exclusively to enable personnel to transport <strong>the</strong> product. It is<br />
<strong>the</strong>re<strong>for</strong>e not permissible to use handles to fasten <strong>the</strong> product to or on transport equipment such as<br />
cranes, <strong>for</strong>k lifts, wagons, etc. The user is responsible <strong>for</strong> securely fastening <strong>the</strong> products to or on <strong>the</strong><br />
means of transport or lifting. Observe <strong>the</strong> safety regulations of <strong>the</strong> manufacturer of <strong>the</strong> means of<br />
transport or lifting. Noncompliance can result in personal injury or material damage.<br />
3. If you use <strong>the</strong> product in a vehicle, it is <strong>the</strong> sole responsibility of <strong>the</strong> driver to drive <strong>the</strong> vehicle safely<br />
and properly. The manufacturer assumes no responsibility <strong>for</strong> accidents or collisions. Never use <strong>the</strong><br />
product in a moving vehicle if doing so could distract <strong>the</strong> driver of <strong>the</strong> vehicle. Adequately secure <strong>the</strong><br />
product in <strong>the</strong> vehicle to prevent injuries or o<strong>the</strong>r damage in <strong>the</strong> event of an accident.<br />
Waste disposal<br />
1. If products or <strong>the</strong>ir components are mechanically and/or <strong>the</strong>rmally processed in a manner that goes<br />
beyond <strong>the</strong>ir intended use, hazardous substances (heavy-metal dust such as lead, beryllium, nickel)<br />
may be released. For this reason, <strong>the</strong> product may only be disassembled by specially trained<br />
personnel. Improper disassembly may be hazardous to your health. National waste disposal<br />
regulations must be observed.<br />
2. If handling <strong>the</strong> product releases hazardous substances or fuels that must be disposed of in a special<br />
way, e.g. coolants or engine oils that must be replenished regularly, <strong>the</strong> safety instructions of <strong>the</strong><br />
manufacturer of <strong>the</strong> hazardous substances or fuels and <strong>the</strong> applicable regional waste disposal<br />
regulations must be observed. Also observe <strong>the</strong> relevant safety instructions in <strong>the</strong> product<br />
documentation. The improper disposal of hazardous substances or fuels can cause health problems<br />
and lead to environmental damage.<br />
In<strong>for</strong>maciones elementales de seguridad<br />
Es imprescindible leer y observar las siguientes instrucciones e in<strong>for</strong>maciones de seguridad!<br />
El principio del grupo de empresas <strong>Rohde</strong> & <strong>Schwarz</strong> consiste en tener nuestros productos siempre al día<br />
con los estándares de seguridad y de ofrecer a nuestros clientes el máximo grado de seguridad. Nuestros<br />
productos y todos los equipos adicionales son siempre fabricados y examinados según las normas de<br />
seguridad vigentes. Nuestro sistema de garantía de calidad controla constantemente que sean cumplidas<br />
estas normas. El presente producto ha sido fabricado y examinado según el certificado de con<strong>for</strong>midad<br />
adjunto de la UE y ha salido de nuestra planta en estado impecable según los estándares técnicos de<br />
seguridad. Para poder preservar este estado y garantizar un funcionamiento libre de peligros, el usuario<br />
deberá atenerse a todas las indicaciones, in<strong>for</strong>maciones de seguridad y notas de alerta. El grupo de<br />
empresas <strong>Rohde</strong> & <strong>Schwarz</strong> está siempre a su disposición en caso de que tengan preguntas referentes a<br />
estas in<strong>for</strong>maciones de seguridad.<br />
Además queda en la responsabilidad del usuario utilizar el producto en la <strong>for</strong>ma debida. Este producto<br />
está destinado exclusivamente al uso en la industria y el laboratorio o, si ha sido expresamente<br />
autorizado, para aplicaciones de campo y de ninguna manera deberá ser utilizado de modo que alguna<br />
persona/cosa pueda sufrir daño. El uso del producto fuera de sus fines definidos o sin tener en cuenta las<br />
instrucciones del fabricante queda en la responsabilidad del usuario. El fabricante no se hace en ninguna<br />
<strong>for</strong>ma responsable de consecuencias a causa del mal uso del producto.<br />
1171.0000.42-05.00 Page 6
In<strong>for</strong>maciones elementales de seguridad<br />
Se parte del uso correcto del producto para los fines definidos si el producto es utilizado con<strong>for</strong>me a las<br />
indicaciones de la correspondiente documentación del producto y dentro del margen de rendimiento<br />
definido (ver hoja de datos, documentación, in<strong>for</strong>maciones de seguridad que siguen). El uso del producto<br />
hace necesarios conocimientos técnicos y ciertos conocimientos del idioma inglés. Por eso se debe tener<br />
en cuenta que el producto solo pueda ser operado por personal especializado o personas instruidas en<br />
profundidad con las capacidades correspondientes. Si fuera necesaria indumentaria de seguridad para el<br />
uso de productos de <strong>Rohde</strong> & <strong>Schwarz</strong>, encontraría la in<strong>for</strong>mación debida en la documentación del<br />
producto en el capítulo correspondiente. Guarde bien las in<strong>for</strong>maciones de seguridad elementales, así<br />
como la documentación del producto, y entréguelas a usuarios posteriores.<br />
Tener en cuenta las in<strong>for</strong>maciones de seguridad sirve para evitar en lo posible lesiones o daños por<br />
peligros de toda clase. Por eso es imprescindible leer detalladamente y comprender por completo las<br />
siguientes in<strong>for</strong>maciones de seguridad antes de usar el producto, y respetarlas durante el uso del<br />
producto. Deberán tenerse en cuenta todas las demás in<strong>for</strong>maciones de seguridad, como p. ej. las<br />
referentes a la protección de personas, que encontrarán en el capítulo correspondiente de la<br />
documentación del producto y que también son de obligado cumplimiento. En las presentes<br />
in<strong>for</strong>maciones de seguridad se recogen todos los objetos que distribuye el grupo de empresas<br />
<strong>Rohde</strong> & <strong>Schwarz</strong> bajo la denominación de "producto", entre ellos también aparatos, instalaciones así<br />
como toda clase de accesorios.<br />
Símbolos y definiciones de seguridad<br />
Aviso: punto de<br />
peligro general<br />
Observar la<br />
documentación<br />
del producto<br />
Atención en<br />
el manejo de<br />
dispositivos<br />
de peso<br />
elevado<br />
Peligro de<br />
choque<br />
eléctrico<br />
Advertencia:<br />
superficie<br />
caliente<br />
Conexión a<br />
conductor de<br />
protección<br />
Conexión<br />
a tierra<br />
Conexión<br />
a masa<br />
Aviso: Cuidado<br />
en el manejo de<br />
dispositivos<br />
sensibles a la<br />
electrostática<br />
(ESD)<br />
Tensión de<br />
alimentación de<br />
PUESTA EN<br />
MARCHA /<br />
PARADA<br />
Indicación de<br />
estado de<br />
espera<br />
(Standby)<br />
Corriente<br />
continua (DC)<br />
Corriente alterna<br />
(AC)<br />
Corriente<br />
continua /<br />
Corriente alterna<br />
(DC/AC)<br />
El aparato está protegido<br />
en su totalidad por un<br />
aislamiento doble<br />
(re<strong>for</strong>zado)<br />
1171.0000.42-05.00 Page 7
In<strong>for</strong>maciones elementales de seguridad<br />
Palabras de señal y su significado<br />
En la documentación del producto se utilizan las siguientes palabras de señal con el fin de advertir contra<br />
riesgos y peligros.<br />
PELIGRO identifica un peligro inminente con riesgo elevado que<br />
provocará muerte o lesiones graves si no se evita.<br />
ADVERTENCIA identifica un posible peligro con riesgo medio de<br />
provocar muerte o lesiones (graves) si no se evita.<br />
ATENCIÓN identifica un peligro con riesgo reducido de provocar<br />
lesiones leves o moderadas si no se evita.<br />
AVISO indica la posibilidad de utilizar mal el producto y, como<br />
consecuencia, dañarlo.<br />
En la documentación del producto se emplea de <strong>for</strong>ma sinónima el<br />
término CUIDADO.<br />
Las palabras de señal corresponden a la definición habitual para aplicaciones civiles en el área<br />
económica europea. Pueden existir definiciones diferentes a esta definición en otras áreas económicas o<br />
en aplicaciones militares. Por eso se deberá tener en cuenta que las palabras de señal aquí descritas<br />
sean utilizadas siempre solamente en combinación con la correspondiente documentación del producto y<br />
solamente en combinación con el producto correspondiente. La utilización de las palabras de señal en<br />
combinación con productos o documentaciones que no les correspondan puede llevar a interpretaciones<br />
equivocadas y tener por consecuencia daños en personas u objetos.<br />
Estados operativos y posiciones de funcionamiento<br />
El producto solamente debe ser utilizado según lo indicado por el fabricante respecto a los estados<br />
operativos y posiciones de funcionamiento sin que se obstruya la ventilación. Si no se siguen las<br />
indicaciones del fabricante, pueden producirse choques eléctricos, incendios y/o lesiones graves con<br />
posible consecuencia de muerte. En todos los trabajos deberán ser tenidas en cuenta las normas<br />
nacionales y locales de seguridad del trabajo y de prevención de accidentes.<br />
1. Si no se convino de otra manera, es para los productos <strong>Rohde</strong> & <strong>Schwarz</strong> válido lo que sigue:<br />
como posición de funcionamiento se define por principio la posición con el suelo de la caja para<br />
abajo, modo de protección IP 2X, grado de suciedad 2, categoría de sobrecarga eléctrica 2, uso<br />
solamente en estancias interiores, utilización hasta 2000 m sobre el nivel del mar, transporte hasta<br />
4500 m sobre el nivel del mar. Se aplicará una tolerancia de ±10 % sobre el voltaje nominal y de<br />
±5 % sobre la frecuencia nominal.<br />
2. No sitúe el producto encima de superficies, vehículos, estantes o mesas, que por sus características<br />
de peso o de estabilidad no sean aptos para él. Siga siempre las instrucciones de instalación del<br />
fabricante cuando instale y asegure el producto en objetos o estructuras (p. ej. paredes y estantes). Si<br />
se realiza la instalación de modo distinto al indicado en la documentación del producto, pueden<br />
causarse lesiones o incluso la muerte.<br />
3. No ponga el producto sobre aparatos que generen calor (p. ej. radiadores o calefactores). La<br />
temperatura ambiente no debe superar la temperatura máxima especificada en la documentación del<br />
producto o en la hoja de datos. En caso de sobrecalentamiento del producto, pueden producirse<br />
choques eléctricos, incendios y/o lesiones graves con posible consecuencia de muerte.<br />
1171.0000.42-05.00 Page 8
In<strong>for</strong>maciones elementales de seguridad<br />
Seguridad eléctrica<br />
Si no se siguen (o se siguen de modo insuficiente) las indicaciones del fabricante en cuanto a seguridad<br />
eléctrica, pueden producirse choques eléctricos, incendios y/o lesiones graves con posible consecuencia<br />
de muerte.<br />
1. Antes de la puesta en marcha del producto se deberá comprobar siempre que la tensión<br />
preseleccionada en el producto coincida con la de la red de alimentación eléctrica. Si es necesario<br />
modificar el ajuste de tensión, también se deberán cambiar en caso dado los fusibles<br />
correspondientes del producto.<br />
2. Los productos de la clase de protección I con alimentación móvil y enchufe individual solamente<br />
podrán enchufarse a tomas de corriente con contacto de seguridad y con conductor de protección<br />
conectado.<br />
3. Queda prohibida la interrupción intencionada del conductor de protección, tanto en la toma de<br />
corriente como en el mismo producto. La interrupción puede tener como consecuencia el riesgo de<br />
que el producto sea fuente de choques eléctricos. Si se utilizan cables alargadores o regletas de<br />
enchufe, deberá garantizarse la realización de un examen regular de los mismos en cuanto a su<br />
estado técnico de seguridad.<br />
4. Si el producto no está equipado con un interruptor para desconectarlo de la red, se deberá considerar<br />
el enchufe del cable de conexión como interruptor. En estos casos se deberá asegurar que el enchufe<br />
siempre sea de fácil acceso (de acuerdo con la longitud del cable de conexión, aproximadamente<br />
2 m). Los interruptores de función o electrónicos no son aptos para el corte de la red eléctrica. Si los<br />
productos sin interruptor están integrados en bastidores o instalaciones, se deberá colocar el<br />
interruptor en el nivel de la instalación.<br />
5. No utilice nunca el producto si está dañado el cable de conexión a red. Compruebe regularmente el<br />
correcto estado de los cables de conexión a red. Asegúrese, mediante las medidas de protección y<br />
de instalación adecuadas, de que el cable de conexión a red no pueda ser dañado o de que nadie<br />
pueda ser dañado por él, p. ej. al tropezar o por un choque eléctrico.<br />
6. Solamente está permitido el funcionamiento en redes de alimentación TN/TT aseguradas con fusibles<br />
de 16 A como máximo (utilización de fusibles de mayor amperaje solo previa consulta con el grupo de<br />
empresas <strong>Rohde</strong> & <strong>Schwarz</strong>).<br />
7. Nunca conecte el enchufe en tomas de corriente sucias o llenas de polvo. Introduzca el enchufe por<br />
completo y fuertemente en la toma de corriente. La no observación de estas medidas puede provocar<br />
chispas, fuego y/o lesiones.<br />
8. No sobrecargue las tomas de corriente, los cables alargadores o las regletas de enchufe ya que esto<br />
podría causar fuego o choques eléctricos.<br />
9. En las mediciones en circuitos de corriente con una tensión U eff > 30 V se deberán tomar las medidas<br />
apropiadas para impedir cualquier peligro (p. ej. medios de medición adecuados, seguros, limitación<br />
de tensión, corte protector, aislamiento etc.).<br />
10. Para la conexión con dispositivos in<strong>for</strong>máticos como un PC o un ordenador industrial, debe<br />
comprobarse que éstos cumplan los estándares IEC60950-1/EN60950-1 o IEC61010-1/EN 61010-1<br />
válidos en cada caso.<br />
11. A menos que esté permitido expresamente, no retire nunca la tapa ni componentes de la carcasa<br />
mientras el producto esté en servicio. Esto pone a descubierto los cables y componentes eléctricos y<br />
puede causar lesiones, fuego o daños en el producto.<br />
1171.0000.42-05.00 Page 9
In<strong>for</strong>maciones elementales de seguridad<br />
12. Si un producto se instala en un lugar fijo, se deberá primero conectar el conductor de protección fijo<br />
con el conductor de protección del producto antes de hacer cualquier otra conexión. La instalación y<br />
la conexión deberán ser efectuadas por un electricista especializado.<br />
13. En el caso de dispositivos fijos que no estén provistos de fusibles, interruptor automático ni otros<br />
mecanismos de seguridad similares, el circuito de alimentación debe estar protegido de modo que<br />
todas las personas que puedan acceder al producto, así como el producto mismo, estén a salvo de<br />
posibles daños.<br />
14. Todo producto debe estar protegido contra sobretensión (debida p. ej. a una caída del rayo) mediante<br />
los correspondientes sistemas de protección. Si no, el personal que lo utilice quedará expuesto al<br />
peligro de choque eléctrico.<br />
15. No debe introducirse en los orificios de la caja del aparato ningún objeto que no esté destinado a ello.<br />
Esto puede producir cortocircuitos en el producto y/o puede causar choques eléctricos, fuego o<br />
lesiones.<br />
16. Salvo indicación contraria, los productos no están impermeabilizados (ver también el capítulo<br />
"Estados operativos y posiciones de funcionamiento", punto 1). Por eso es necesario tomar las<br />
medidas necesarias para evitar la entrada de líquidos. En caso contrario, existe peligro de choque<br />
eléctrico para el usuario o de daños en el producto, que también pueden redundar en peligro para las<br />
personas.<br />
17. No utilice el producto en condiciones en las que pueda producirse o ya se hayan producido<br />
condensaciones sobre el producto o en el interior de éste, como p. ej. al desplazarlo de un lugar frío a<br />
otro caliente. La entrada de agua aumenta el riesgo de choque eléctrico.<br />
18. Antes de la limpieza, desconecte por completo el producto de la alimentación de tensión (p. ej. red de<br />
alimentación o batería). Realice la limpieza de los aparatos con un paño suave, que no se deshilache.<br />
No utilice bajo ningún concepto productos de limpieza químicos como alcohol, acetona o diluyentes<br />
para lacas nitrocelulósicas.<br />
Funcionamiento<br />
1. El uso del producto requiere instrucciones especiales y una alta concentración durante el manejo.<br />
Debe asegurarse que las personas que manejen el producto estén a la altura de los requerimientos<br />
necesarios en cuanto a aptitudes físicas, psíquicas y emocionales, ya que de otra manera no se<br />
pueden excluir lesiones o daños de objetos. El empresario u operador es responsable de seleccionar<br />
el personal usuario apto para el manejo del producto.<br />
2. Antes de desplazar o transportar el producto, lea y tenga en cuenta el capítulo "Transporte".<br />
3. Como con todo producto de fabricación industrial no puede quedar excluida en general la posibilidad<br />
de que se produzcan alergias provocadas por algunos materiales empleados, los llamados alérgenos<br />
(p. ej. el níquel). Si durante el manejo de productos <strong>Rohde</strong> & <strong>Schwarz</strong> se producen reacciones<br />
alérgicas, como p. ej. irritaciones cutáneas, estornudos continuos, enrojecimiento de la conjuntiva o<br />
dificultades respiratorias, debe avisarse inmediatamente a un médico para investigar las causas y<br />
evitar cualquier molestia o daño a la salud.<br />
4. Antes de la manipulación mecánica y/o térmica o el desmontaje del producto, debe tenerse en cuenta<br />
imprescindiblemente el capítulo "Eliminación", punto 1.<br />
1171.0000.42-05.00 Page 10
In<strong>for</strong>maciones elementales de seguridad<br />
5. Ciertos productos, como p. ej. las instalaciones de radiocomunicación RF, pueden a causa de su<br />
función natural, emitir una radiación electromagnética aumentada. Deben tomarse todas las medidas<br />
necesarias para la protección de las mujeres embarazadas. También las personas con marcapasos<br />
pueden correr peligro a causa de la radiación electromagnética. El empresario/operador tiene la<br />
obligación de evaluar y señalizar las áreas de trabajo en las que exista un riesgo elevado de<br />
exposición a radiaciones.<br />
6. Tenga en cuenta que en caso de incendio pueden desprenderse del producto sustancias tóxicas<br />
(gases, líquidos etc.) que pueden generar daños a la salud. Por eso, en caso de incendio deben<br />
usarse medidas adecuadas, como p. ej. máscaras antigás e indumentaria de protección.<br />
7. En caso de que un producto <strong>Rohde</strong> & <strong>Schwarz</strong> contenga un producto láser (p. ej. un lector de<br />
CD/DVD), no debe usarse ninguna otra configuración o función aparte de las descritas en la<br />
documentación del producto, a fin de evitar lesiones (p. ej. debidas a irradiación láser).<br />
Reparación y mantenimiento<br />
1. El producto solamente debe ser abierto por personal especializado con autorización para ello. Antes<br />
de manipular el producto o abrirlo, es obligatorio desconectarlo de la tensión de alimentación, para<br />
evitar toda posibilidad de choque eléctrico.<br />
2. El ajuste, el cambio de partes, el mantenimiento y la reparación deberán ser efectuadas solamente<br />
por electricistas autorizados por <strong>Rohde</strong> & <strong>Schwarz</strong>. Si se reponen partes con importancia para los<br />
aspectos de seguridad (p. ej. el enchufe, los trans<strong>for</strong>madores o los fusibles), solamente podrán ser<br />
sustituidos por partes originales. Después de cada cambio de partes relevantes para la seguridad<br />
deberá realizarse un control de seguridad (control a primera vista, control del conductor de<br />
protección, medición de resistencia de aislamiento, medición de la corriente de fuga, control de<br />
funcionamiento). Con esto queda garantizada la seguridad del producto.<br />
Baterías y acumuladores o celdas<br />
Si no se siguen (o se siguen de modo insuficiente) las indicaciones en cuanto a las baterías y<br />
acumuladores o celdas, pueden producirse explosiones, incendios y/o lesiones graves con posible<br />
consecuencia de muerte. El manejo de baterías y acumuladores con electrolitos alcalinos (p. ej. celdas de<br />
litio) debe seguir el estándar EN 62133.<br />
1. No deben desmontarse, abrirse ni triturarse las celdas.<br />
2. Las celdas o baterías no deben someterse a calor ni fuego. Debe evitarse el almacenamiento a la luz<br />
directa del sol. Las celdas y baterías deben mantenerse limpias y secas. Limpiar las conexiones<br />
sucias con un paño seco y limpio.<br />
3. Las celdas o baterías no deben cortocircuitarse. Es peligroso almacenar las celdas o baterías en<br />
estuches o cajones en cuyo interior puedan cortocircuitarse por contacto recíproco o por contacto con<br />
otros materiales conductores. No deben extraerse las celdas o baterías de sus embalajes originales<br />
hasta el momento en que vayan a utilizarse.<br />
4. Mantener baterías y celdas fuera del alcance de los niños. En caso de ingestión de una celda o<br />
batería, avisar inmediatamente a un médico.<br />
5. Las celdas o baterías no deben someterse a impactos mecánicos fuertes indebidos.<br />
1171.0000.42-05.00 Page 11
In<strong>for</strong>maciones elementales de seguridad<br />
6. En caso de falta de estanqueidad de una celda, el líquido vertido no debe entrar en contacto con la<br />
piel ni los ojos. Si se produce contacto, lavar con agua abundante la zona afectada y avisar a un<br />
médico.<br />
7. En caso de cambio o recarga inadecuados, las celdas o baterías que contienen electrolitos alcalinos<br />
(p. ej. las celdas de litio) pueden explotar. Para garantizar la seguridad del producto, las celdas o<br />
baterías solo deben ser sustituidas por el tipo <strong>Rohde</strong> & <strong>Schwarz</strong> correspondiente (ver lista de<br />
recambios).<br />
8. Las baterías y celdas deben reciclarse y no deben tirarse a la basura doméstica. Las baterías o<br />
acumuladores que contienen plomo, mercurio o cadmio deben tratarse como residuos especiales.<br />
Respete en esta relación las normas nacionales de eliminación y reciclaje.<br />
Transporte<br />
1. El producto puede tener un peso elevado. Por eso es necesario desplazarlo o transportarlo con<br />
precaución y, si es necesario, usando un sistema de elevación adecuado (p. ej. una carretilla<br />
elevadora), a fin de evitar lesiones en la espalda u otros daños personales.<br />
2. Las asas instaladas en los productos sirven solamente de ayuda para el transporte del producto por<br />
personas. Por eso no está permitido utilizar las asas para la sujeción en o sobre medios de transporte<br />
como p. ej. grúas, carretillas elevadoras de horquilla, carros etc. Es responsabilidad suya fijar los<br />
productos de manera segura a los medios de transporte o elevación. Para evitar daños personales o<br />
daños en el producto, siga las instrucciones de seguridad del fabricante del medio de transporte o<br />
elevación utilizado.<br />
3. Si se utiliza el producto dentro de un vehículo, recae de manera exclusiva en el conductor la<br />
responsabilidad de conducir el vehículo de manera segura y adecuada. El fabricante no asumirá<br />
ninguna responsabilidad por accidentes o colisiones. No utilice nunca el producto dentro de un<br />
vehículo en movimiento si esto pudiera distraer al conductor. Asegure el producto dentro del vehículo<br />
debidamente para evitar, en caso de un accidente, lesiones u otra clase de daños.<br />
Eliminación<br />
1. Si se trabaja de manera mecánica y/o térmica cualquier producto o componente más allá del<br />
funcionamiento previsto, pueden liberarse sustancias peligrosas (polvos con contenido de metales<br />
pesados como p. ej. plomo, berilio o níquel). Por eso el producto solo debe ser desmontado por<br />
personal especializado con <strong>for</strong>mación adecuada. Un desmontaje inadecuado puede ocasionar daños<br />
para la salud. Se deben tener en cuenta las directivas nacionales referentes a la eliminación de<br />
residuos.<br />
2. En caso de que durante el trato del producto se <strong>for</strong>men sustancias peligrosas o combustibles que<br />
deban tratarse como residuos especiales (p. ej. refrigerantes o aceites de motor con intervalos de<br />
cambio definidos), deben tenerse en cuenta las indicaciones de seguridad del fabricante de dichas<br />
sustancias y las normas regionales de eliminación de residuos. Tenga en cuenta también en caso<br />
necesario las indicaciones de seguridad especiales contenidas en la documentación del producto. La<br />
eliminación incorrecta de sustancias peligrosas o combustibles puede causar daños a la salud o<br />
daños al medio ambiente.<br />
1171.0000.42-05.00 Page 12
Qualitätszertifikat<br />
Certificate of quality<br />
Certificat de qualité<br />
Certified Quality System<br />
ISO 9001<br />
Certified Environmental System<br />
ISO 14001<br />
Sehr geehrter Kunde,<br />
Sie haben sich für den Kauf eines<br />
<strong>Rohde</strong> & <strong>Schwarz</strong>-Produktes entschieden.<br />
Hiermit erhalten Sie ein<br />
nach modernsten Fertigungsmethoden<br />
hergestelltes Produkt. Es wurde nach<br />
den Regeln unseres Qualitätsmanagementsystems<br />
entwickelt, gefertigt<br />
und geprüft. Das <strong>Rohde</strong> & <strong>Schwarz</strong>-<br />
Qualitätsmanagementsystem ist u.a.<br />
nach ISO 9001 und ISO 14001<br />
zertifiziert.<br />
Der Umwelt verpflichtet<br />
JJ Energie-effiziente,<br />
RoHS-kon<strong>for</strong>me Produkte<br />
JJ Kontinuierliche Weiterentwicklung<br />
nachhaltiger Umweltkonzepte<br />
JJ ISO 14001-zertifiziertes<br />
Umweltmanagementsystem<br />
Dear Customer,<br />
You have decided to buy a<br />
<strong>Rohde</strong> & <strong>Schwarz</strong> product. You are<br />
thus assured of receiving a product<br />
that is manufactured using <strong>the</strong> most<br />
modern methods available. This<br />
product was developed, manufactured<br />
and tested in compliance with our<br />
quality management system standards.<br />
The <strong>Rohde</strong> & <strong>Schwarz</strong> quality<br />
management system is certified<br />
according to standards such as<br />
ISO 9001 and ISO 14001.<br />
Environmental commitment<br />
JJEnergy-efficient products<br />
JJContinuous improvement in<br />
environmental sustainability<br />
JJISO 14001-certified environmental<br />
management system<br />
Cher client,<br />
Vous avez choisi d’acheter un produit<br />
<strong>Rohde</strong> & <strong>Schwarz</strong>. Vous disposez<br />
donc d’un produit fabriqué d’après les<br />
méthodes les plus avancées. Le développement,<br />
la fabrication et les tests<br />
respectent nos normes de gestion<br />
qualité. Le système de gestion qualité<br />
de <strong>Rohde</strong> & <strong>Schwarz</strong> a été homologué,<br />
entre autres, con<strong>for</strong>mément aux normes<br />
ISO 9001 et ISO 14001.<br />
Engagement écologique<br />
JJProduits à efficience énergétique<br />
JJAmélioration continue de la durabilité<br />
environnementale<br />
JJSystème de gestion de l’environnement<br />
certifié selon ISO 14001<br />
1171.0200.11 V 04.01
Customer Support<br />
Technical support – where and when you need it<br />
For quick, expert help with any <strong>Rohde</strong> & <strong>Schwarz</strong> equipment, contact one of our Customer Support<br />
Centers. A team of highly qualified engineers provides telephone support and will work with you to find a<br />
solution to your query on any aspect of <strong>the</strong> operation, programming or applications of <strong>Rohde</strong> & <strong>Schwarz</strong><br />
equipment.<br />
Up-to-date in<strong>for</strong>mation and upgrades<br />
To keep your instrument up-to-date and to be in<strong>for</strong>med about new application notes related to your<br />
instrument, please send an e-mail to <strong>the</strong> Customer Support Center stating your instrument and your wish.<br />
We will take care that you will get <strong>the</strong> right in<strong>for</strong>mation.<br />
USA & Canada Monday to Friday (except US public holidays)<br />
8:00 AM – 8:00 PM Eastern Standard Time (EST)<br />
Tel. from USA 888-test-rsa (888-837-8772) (opt 2)<br />
From outside USA +1 410 910 7800 (opt 2)<br />
Fax +1 410 910 7801<br />
E-mail<br />
CustomerSupport@rohde-schwarz.com<br />
East Asia Monday to Friday (except Singaporean public holidays)<br />
8:30 AM – 6:00 PM Singapore Time (SGT)<br />
Tel. +65 6 513 0488<br />
Fax +65 6 846 1090<br />
E-mail<br />
CustomerSupport@rohde-schwarz.com<br />
Rest of <strong>the</strong> World Monday to Friday (except German public holidays)<br />
08:00 – 17:00 Central European Time (CET)<br />
Tel. +49 89 4129 13774<br />
Fax +49 (0) 89 41 29 637 78<br />
E-mail<br />
CustomerSupport@rohde-schwarz.com<br />
1171.0200.22-04.00
Customer In<strong>for</strong>mation Regarding Product Disposal<br />
The German Electrical and Electronic Equipment (ElektroG) Act is an implementation of<br />
<strong>the</strong> following EC directives:<br />
• 2002/96/EC on waste electrical and electronic equipment (WEEE) and<br />
• 2002/95/EC on <strong>the</strong> restriction of <strong>the</strong> use of certain hazardous substances in<br />
electrical and electronic equipment (RoHS).<br />
Product labeling in accordance with EN 50419<br />
Once <strong>the</strong> lifetime of a product has ended, this product must not be disposed of<br />
in <strong>the</strong> standard domestic refuse. Even disposal via <strong>the</strong> municipal collection<br />
points <strong>for</strong> waste electrical and electronic equipment is not permitted.<br />
<strong>Rohde</strong> & <strong>Schwarz</strong> GmbH & Co. KG has developed a disposal concept <strong>for</strong> <strong>the</strong><br />
environmental-friendly disposal or recycling of waste material and fully assumes its<br />
obligation as a producer to take back and dispose of electrical and electronic waste<br />
in accordance with <strong>the</strong> ElektroG Act.<br />
Please contact your local service representative to dispose of <strong>the</strong> product.<br />
1171.0200.52-01.01
EC Certificate of Con<strong>for</strong>mity<br />
Certificate No.: 2003-22, Page 1<br />
This is to certify that:<br />
Equipment type Stock No. Designation<br />
<strong>FSP</strong>3 1164.4391.03 <strong>Spectrum</strong> Analyzer<br />
<strong>FSP</strong>7 1164.4391.07<br />
<strong>FSP</strong>13 1164.4391.13<br />
<strong>FSP</strong>30 1164.4391.30<br />
<strong>FSP</strong>31 1164.4391.31<br />
<strong>FSP</strong>40 1164.4391.40<br />
complies with <strong>the</strong> provisions of <strong>the</strong> Directive of <strong>the</strong> Council of <strong>the</strong> European Union on <strong>the</strong><br />
approximation of <strong>the</strong> laws of <strong>the</strong> Member States<br />
- relating to electrical equipment <strong>for</strong> use within defined voltage limits<br />
(2006/95/EC)<br />
- relating to electromagnetic compatibility<br />
(2004/108/EC)<br />
Con<strong>for</strong>mity is proven by compliance with <strong>the</strong> following standards:<br />
EN61010-1 : 2001-12<br />
EN55011 : 1998 + A1 : 1999 + A2 : 2002, Class B<br />
EN61326 : 1997 + A1 : 1998 + A2 : 2001 + A3 : 2003<br />
For <strong>the</strong> assessment of electromagnetic compatibility, <strong>the</strong> limits of radio interference <strong>for</strong> Class B<br />
equipment as well as <strong>the</strong> immunity to interference <strong>for</strong> operation in industry have been used as a basis.<br />
Affixing <strong>the</strong> EC con<strong>for</strong>mity mark as from 2003<br />
ROHDE & SCHWARZ GmbH & Co. KG<br />
Mühldorfstr. 15, D-81671 München<br />
Munich, 2008-03-31<br />
Central Quality Management MF-QZ / Radde<br />
1164.4391.01-s1- CE E-8
EC Certificate of Con<strong>for</strong>mity<br />
Certificate No.: 2003-22, Page 2<br />
This is to certify that:<br />
Equipment type Stock No. Designation<br />
<strong>FSP</strong>-B3 1129.6491.02 Audio Modulator AM/FM<br />
<strong>FSP</strong>-B4 1129.6740.02 OCXO 10 MHz<br />
<strong>FSP</strong>-B6 1129.8594.02 TV-Trigger<br />
<strong>FSP</strong>-B9 1129.6991.02 Tracking Generator<br />
<strong>FSP</strong>-B10 1129.7246.02/.03 External Generator Control<br />
<strong>FSP</strong>-B15 1155.1006.02 Pulse Calibrator<br />
<strong>FSP</strong>-B16 1129.8042.03 Lan Interface 10/1000 Base T<br />
<strong>FSP</strong>-B18 1163.0892.02/.03 Removable Hard Disk<br />
<strong>FSP</strong>-B19 1163.1124.02/.03 Second Hard Disk<br />
<strong>FSP</strong>-B20 1155.1606.02/.06/.10 Extended Environmental Spec<br />
<strong>FSP</strong>-B21 1155.1758.02 LO/IF Connections<br />
<strong>FSP</strong>-B25 1129.7746.02 Electronic Attenuator<br />
<strong>FSP</strong>-B28 1162.9915.02 Trigger Port<br />
<strong>FSP</strong>-B29 1163.0663.07/.30/.40 20 Hz Frequency Extension<br />
<strong>FSP</strong>-B30 1155.1158.02 DC Power Supply<br />
<strong>FSP</strong>-B31 1155.1258.02 NIMH Battery Pack and Charger<br />
<strong>FSP</strong>-B32 1155.1506.02 Spare Battery Pack (NIMH)<br />
<strong>FSP</strong>-B70 1157.0559.02 Demodulator HW and Memory Extension<br />
complies with <strong>the</strong> provisions of <strong>the</strong> Directive of <strong>the</strong> Council of <strong>the</strong> European Union on <strong>the</strong><br />
approximation of <strong>the</strong> laws of <strong>the</strong> Member States<br />
- relating to electrical equipment <strong>for</strong> use within defined voltage limits<br />
(2006/95/EC)<br />
- relating to electromagnetic compatibility<br />
(2004/108/EC)<br />
Con<strong>for</strong>mity is proven by compliance with <strong>the</strong> following standards:<br />
EN61010-1 : 2001-12<br />
EN55011 : 1998 + A1 : 1999 + A2 : 2002, Class B<br />
EN61326 : 1997 + A1 : 1998 + A2 : 2001 + A3 : 2003<br />
For <strong>the</strong> assessment of electromagnetic compatibility, <strong>the</strong> limits of radio interference <strong>for</strong> Class B<br />
equipment as well as <strong>the</strong> immunity to interference <strong>for</strong> operation in industry have been used as a basis.<br />
Affixing <strong>the</strong> EC con<strong>for</strong>mity mark as from 2003<br />
ROHDE & SCHWARZ GmbH & Co. KG<br />
Mühldorfstr. 15, D-81671 München<br />
Munich, 2008-03-31<br />
Central Quality Management MF-QZ / Radde<br />
1164.4391.01-s2- CE E-8
R&S <strong>FSP</strong><br />
Documentation Overview<br />
The documentation of <strong>the</strong> R&S <strong>FSP</strong> consists of base unit manuals and option manuals. All<br />
manuals are provided in PDF <strong>for</strong>mat on <strong>the</strong> CD-ROM delivered with <strong>the</strong> instrument. Each<br />
software option available <strong>for</strong> <strong>the</strong> instrument is described in a separate software manual.<br />
The base unit documentation comprises <strong>the</strong> following manuals and documents:<br />
• <strong>Quick</strong> <strong>Start</strong> <strong>Guide</strong><br />
• Operating Manual<br />
• Service Manual<br />
• Release Notes<br />
Apart from <strong>the</strong> base unit, <strong>the</strong>se manuals describe <strong>the</strong> models and options of <strong>the</strong> R&S <strong>FSP</strong><br />
<strong>Spectrum</strong> Analyzer that are listed in <strong>the</strong> documentation overview of <strong>the</strong> Operating Manual. All<br />
o<strong>the</strong>r options are described in separate manuals. These manuals are provided on <strong>the</strong> CD-<br />
ROM. For an overview of all options available <strong>for</strong> <strong>the</strong> R&S <strong>FSP</strong> visit <strong>the</strong> R&S <strong>FSP</strong> <strong>Spectrum</strong><br />
Analyzer Internet site.<br />
<strong>Quick</strong> <strong>Start</strong> <strong>Guide</strong><br />
This manual is delivered with <strong>the</strong> instrument in printed <strong>for</strong>m and in PDF <strong>for</strong>mat on <strong>the</strong> CD-<br />
ROM. It provides <strong>the</strong> in<strong>for</strong>mation needed to set up and start working with <strong>the</strong> instrument. Basic<br />
operations and basic measurements are described. Also a brief introduction to remote control<br />
is given. More detailed descriptions are provided in <strong>the</strong> Operating Manual. The <strong>Quick</strong> <strong>Start</strong><br />
<strong>Guide</strong> includes general in<strong>for</strong>mation (e.g. Safety Instructions) and <strong>the</strong> following chapters:<br />
Chapter 1 Front and Rear Panel<br />
Chapter 2 Preparing <strong>for</strong> Use<br />
Chapter 3 Firmware-Update and Installation of Firmware Options<br />
Chapter 4 Basic Operation<br />
Chapter 5 Basic Measurement Examples<br />
Chapter 6 LAN Interface<br />
Chapter 7 Brief Introduction to Remote Control<br />
Appendix A Printer Interface<br />
Appendix B External Generator Control<br />
<strong>Quick</strong> <strong>Start</strong> <strong>Guide</strong> 1164.4556.62 - 04 1.1
R&S <strong>FSP</strong><br />
Operating Manual<br />
This manual is a supplement to <strong>the</strong> <strong>Quick</strong> <strong>Start</strong> <strong>Guide</strong> and is available in PDF <strong>for</strong>mat on <strong>the</strong><br />
CD-ROM delivered with <strong>the</strong> instrument. To retain <strong>the</strong> familiar structure that applies to all<br />
Operating Manuals of <strong>Rohde</strong>&<strong>Schwarz</strong> Test & Measurement instruments, <strong>the</strong> chapters 1 and<br />
3 exist, but only in <strong>for</strong>m of references to <strong>the</strong> corresponding <strong>Quick</strong> <strong>Start</strong> <strong>Guide</strong> chapters.<br />
The Operating Manual is subdivided into <strong>the</strong> following chapters:<br />
Chapter 1<br />
Chapter 2<br />
Chapter 3<br />
Chapter 4<br />
Chapter 5<br />
Chapter 6<br />
Chapter 7<br />
Chapter 8<br />
Chapter 9<br />
Index<br />
Putting into Operation<br />
see <strong>Quick</strong> <strong>Start</strong> <strong>Guide</strong> chapters 1 and 2.<br />
Getting <strong>Start</strong>ed<br />
gives an introduction to advanced measurement tasks of <strong>the</strong> R&S <strong>FSP</strong> which<br />
are explained step by step.<br />
Manual Operation<br />
see <strong>Quick</strong> <strong>Start</strong> <strong>Guide</strong> chapter 4<br />
Instrument Functions<br />
<strong>for</strong>ms a reference <strong>for</strong> manual operation of <strong>the</strong> R&S <strong>FSP</strong> and contains a<br />
detailed description of all instrument functions and <strong>the</strong>ir application.<br />
Remote Control - Basics<br />
describes <strong>the</strong> basics <strong>for</strong> programming <strong>the</strong> R&S <strong>FSP</strong>, command processing<br />
and <strong>the</strong> status reporting system.<br />
Remote Control - Description of Commands<br />
lists all <strong>the</strong> remote-control commands defined <strong>for</strong> <strong>the</strong> instrument.<br />
Remote Control - Programming Examples<br />
contains program examples <strong>for</strong> a number of typical applications of <strong>the</strong><br />
R&S <strong>FSP</strong>.<br />
Maintenance and Instrument Interfaces<br />
describes preventive maintenance and <strong>the</strong> characteristics of <strong>the</strong> instrument’s<br />
interfaces.<br />
Error Messages<br />
gives a list of error messages that <strong>the</strong> R&S <strong>FSP</strong> may generate.<br />
contains an index <strong>for</strong> <strong>the</strong> chapters 1 to 9 of <strong>the</strong> Operating Manual.<br />
Service Manual<br />
This manual is available in PDF <strong>for</strong>mat on <strong>the</strong> CD-ROM delivered with <strong>the</strong> instrument. It<br />
in<strong>for</strong>ms on how to check compliance with rated specifications, on instrument function, repair,<br />
troubleshooting and fault elimination. It contains all in<strong>for</strong>mation required <strong>for</strong> repairing <strong>the</strong><br />
R&S <strong>FSP</strong> by <strong>the</strong> replacement of modules. The manual includes <strong>the</strong> following chapters:<br />
Chapter 1<br />
Chapter 2<br />
Chapter 3<br />
Chapter 4<br />
Chapter 5<br />
Per<strong>for</strong>mance Test<br />
Adjustment<br />
Repair<br />
Software Update / Installing Options<br />
Documents<br />
1.2 <strong>Quick</strong> <strong>Start</strong> <strong>Guide</strong> 1164.4556.62 - 04
R&S <strong>FSP</strong><br />
Internet Site<br />
The Internet site at: R&S <strong>FSP</strong> <strong>Spectrum</strong> Analyzer provides <strong>the</strong> most up to date in<strong>for</strong>mation on<br />
<strong>the</strong> R&S <strong>FSP</strong>. The current operating manual at a time is available as printable PDF file in <strong>the</strong><br />
download area. Also provided <strong>for</strong> download are firmware updates including <strong>the</strong> associated<br />
release notes, instrument drivers, current data sheets and application notes.<br />
Release Notes<br />
The release notes describe <strong>the</strong> installation of <strong>the</strong> firmware, new and modified functions,<br />
eliminated problems, and last minute changes to <strong>the</strong> documentation. The corresponding<br />
firmware version is indicated on <strong>the</strong> title page of <strong>the</strong> release notes. The current release notes<br />
are provided in <strong>the</strong> Internet.<br />
<strong>Quick</strong> <strong>Start</strong> <strong>Guide</strong> 1164.4556.62 - 04 1.3
R&S <strong>FSP</strong><br />
1.4 <strong>Quick</strong> <strong>Start</strong> <strong>Guide</strong> 1164.4556.62 - 04
R&S <strong>FSP</strong><br />
Front and Rear Panel<br />
1 Front and Rear Panel<br />
1.1 Front View . . . . . . . . . . . . . . . . . . . . . . . . . . . . . . . . . . . . . . . . . . . . . . . . . . . 1.2<br />
1.2 Function Keys on <strong>the</strong> Front Panel . . . . . . . . . . . . . . . . . . . . . . . . . . . . . . . 1.4<br />
1.3 Front Panel Connections . . . . . . . . . . . . . . . . . . . . . . . . . . . . . . . . . . . . . . . 1.6<br />
1.4 Rear View . . . . . . . . . . . . . . . . . . . . . . . . . . . . . . . . . . . . . . . . . . . . . . . . . . 1.10<br />
1.5 Rear Panel Connections . . . . . . . . . . . . . . . . . . . . . . . . . . . . . . . . . . . . . . 1.12<br />
<strong>Quick</strong> <strong>Start</strong> <strong>Guide</strong> 1164.4556.62 - 04 1.1
R&S <strong>FSP</strong><br />
Front and Rear Panel<br />
Front View<br />
1.1 Front View<br />
1<br />
2<br />
5<br />
3<br />
4<br />
6<br />
7<br />
Fig. 1-1<br />
Number<br />
in Fig. 1-1<br />
Front view<br />
Description<br />
1 PRESET key (see “ Function Keys on <strong>the</strong> Front Panel”)<br />
2 Calibration key (see “ Function Keys on <strong>the</strong> Front Panel”)<br />
3 SETUP key (see “ Function Keys on <strong>the</strong> Front Panel”)<br />
4 HCOPY key (see “ Function Keys on <strong>the</strong> Front Panel”)<br />
5 screen<br />
6 ON/standby switch (see “ Function Keys on <strong>the</strong> Front Panel”)<br />
7 hotkeys<br />
8 softkeys<br />
9 function keys <strong>for</strong> frequency, level, and markers (see “ Function Keys on <strong>the</strong> Front Panel”)<br />
10 numeric keypad, units and entry keys<br />
11 function keys <strong>for</strong> bandwidth, sweep, trigger, and measurement functions<br />
(see “ Function Keys on <strong>the</strong> Front Panel”)<br />
1.2 <strong>Quick</strong> <strong>Start</strong> <strong>Guide</strong> 1164.4556.62 - 04
R&S <strong>FSP</strong><br />
Front and Rear Panel<br />
Front View<br />
9<br />
11<br />
13<br />
8<br />
10<br />
12<br />
19<br />
17<br />
14<br />
20<br />
21<br />
18<br />
16<br />
15<br />
Number<br />
in Fig. 1-1<br />
Description<br />
12 rotary knob with enter function and arrow keys<br />
13 3.5” disk drive, 1.44 MByte (see page 8); option R&S <strong>FSP</strong>-B18 replaces <strong>the</strong> disk drive by a<br />
compact flash card drive (see page 9)<br />
14 PS/2 keyboard (see page 8)<br />
15 RF input (see page 6)<br />
16 external mixer (LO output, IF input), option R&S <strong>FSP</strong>-B21 (see page 6)<br />
17 probe power connector - supply voltage <strong>for</strong> measurement accessories (see page 7)<br />
18 tracking generator output, option R&S <strong>FSP</strong>-B9 (see page 6)<br />
19 AF output with volume control, option R&S <strong>FSP</strong>-B3 (see page 7)<br />
20 TRACE key, LINES key, DISP key, FILE key<br />
(see “ Function Keys on <strong>the</strong> Front Panel”)<br />
21 PREVIOUS key, NEXT key (softkey side menus)<br />
<strong>Quick</strong> <strong>Start</strong> <strong>Guide</strong> 1164.4556.62 - 04 1.3
R&S <strong>FSP</strong><br />
Front and Rear Panel<br />
Function Keys on <strong>the</strong> Front Panel<br />
1.2 Function Keys on <strong>the</strong> Front Panel<br />
A detailed description of <strong>the</strong> corresponding menus and <strong>the</strong> o<strong>the</strong>r function keys is provided in<br />
<strong>the</strong> Operating Manual on CD-ROM.<br />
Function key<br />
ON/STANDBY<br />
PRESET<br />
FREQ<br />
SPAN<br />
AMPT<br />
MKR<br />
MKR-><br />
MKR FCTN<br />
BW<br />
SWEEP<br />
Assigned functions<br />
Switches <strong>the</strong> instrument on and off.<br />
Resets <strong>the</strong> instrument to <strong>the</strong> default state.<br />
Sets <strong>the</strong> center frequency as well as <strong>the</strong> start and stop frequencies <strong>for</strong> <strong>the</strong><br />
frequency band under consideration. This key is also used to set <strong>the</strong> frequency<br />
offset and <strong>the</strong> signal track function.<br />
Sets <strong>the</strong> frequency span to be analyzed.<br />
Sets <strong>the</strong> reference level, <strong>the</strong> displayed dynamic range, <strong>the</strong> RF attenuation and<br />
<strong>the</strong> unit <strong>for</strong> <strong>the</strong> level display. This key is also used to set <strong>the</strong> level offset and <strong>the</strong><br />
input impedance.<br />
Sets and positions <strong>the</strong> absolute and relative measurement markers (markers<br />
and delta markers). In addition, <strong>the</strong> following measurement functions are<br />
assigned under this key:<br />
• Frequency counter (SIGNAL COUNT)<br />
• Fixed reference point <strong>for</strong> relative measurement markers (REFERENCE<br />
FIXED)<br />
• Enlargement of <strong>the</strong> measurement area (MARKER ZOOM)<br />
Used <strong>for</strong> search functions of <strong>the</strong> measurement markers (maximum/minimum of<br />
<strong>the</strong> trace).<br />
Assigns <strong>the</strong> marker frequency to <strong>the</strong> center frequency, and <strong>the</strong> marker level to<br />
<strong>the</strong> reference level.<br />
Restricts <strong>the</strong> search area (SEARCH LIMITS) and characterizes <strong>the</strong> maximum<br />
points and minimum points (PEAK EXCURSION).<br />
Provides additional analysis functions of <strong>the</strong> measurement markers:<br />
• Noise marker (NOISE MEAS)<br />
• Phase noise (PHASE NOISE)<br />
• n dB down function<br />
• AM/FM audio demodulation (with option R&S <strong>FSP</strong>-B3)<br />
• Peak list<br />
Sets resolution bandwidth, video bandwidth and <strong>the</strong> two ratios "resolution<br />
bandwidth/video bandwidth" and "span/resolution bandwidth" in <strong>the</strong> case of<br />
automatic coupling.<br />
Sets <strong>the</strong> sweep time and <strong>the</strong> number of measurement points.<br />
Selects continuous measurement or single measurement.<br />
1.4 <strong>Quick</strong> <strong>Start</strong> <strong>Guide</strong> 1164.4556.62 - 04
R&S <strong>FSP</strong><br />
Front and Rear Panel<br />
Function Keys on <strong>the</strong> Front Panel<br />
Function key<br />
MEAS<br />
TRIG<br />
TRACE<br />
LINES<br />
DISP<br />
FILE<br />
CAL<br />
SETUP<br />
HCOPY<br />
Assigned functions<br />
Used to per<strong>for</strong>m complex measurement functions:<br />
• Measurement of time domain power (TIME DOM POWER)<br />
• Measurement of channel and adjacent channel power (CHAN PWR ACP)<br />
• Measurement of multicarrier adjacent channel power (MULT CARR ACP)<br />
• Occupied bandwidth (OCCUPIED BANDWIDTH)<br />
• Signal statistics (SIGNAL STATISTIC): amplitude probability distribution<br />
(APD) and cumulative complementary distribution function (CCDF)<br />
• Carrier to noise spacing (C/N C/No)<br />
• AM modulation depth (MODULATION DEPTH)<br />
• Spurious emissions (SPURIOUS EMISSIONS)<br />
• Third-order intercept point (TOI)<br />
Sets trigger source, trigger threshold, trigger delay, and gate configuration in <strong>the</strong><br />
case of gated sweep.<br />
Configures measured data acquisition (CLR/WRITE; AVERAGE, MAXHOLD;<br />
MINHOLD, VIEW). Configures <strong>the</strong> analysis of <strong>the</strong> measurement data<br />
(DETECTOR) and <strong>the</strong> ma<strong>the</strong>matical linking of traces (TRACE MATH).<br />
Configures display lines and limit lines.<br />
Configures <strong>the</strong> screen layout (one/two diagrams) and <strong>the</strong> diagram contents. This<br />
key can also be used to configure <strong>the</strong> screen colors.<br />
Provides <strong>the</strong> functions <strong>for</strong> storing/loading instrument settings and <strong>for</strong> managing<br />
stored files.<br />
Used to per<strong>for</strong>m instrument self-calibration.<br />
Used to set or display <strong>the</strong> following <strong>the</strong> default settings of <strong>the</strong> instrument:<br />
• Reference frequency, noise source, preamplifier, level correction values<br />
(TRANSDUCER), date, time, GPIB, RS-232-C interface, LAN interface<br />
• Firmware update and enabling of options<br />
• In<strong>for</strong>mation about instrument configuration (SYSTEM INFO) incl. firmware<br />
version, module data and system error messages<br />
• Service support functions<br />
Configures <strong>the</strong> screen printout, and selects and configures <strong>the</strong> printer.<br />
<strong>Quick</strong> <strong>Start</strong> <strong>Guide</strong> 1164.4556.62 - 04 1.5
R&S <strong>FSP</strong><br />
Front and Rear Panel<br />
Front Panel Connections<br />
1.3 Front Panel Connections<br />
This section describes <strong>the</strong> front connectors and interfaces of <strong>the</strong> R&S <strong>FSP</strong>. Optional<br />
connectors and interfaces are indicated by <strong>the</strong> option name in brackets.<br />
RF INPUT<br />
The RF input is to be connected to <strong>the</strong> DUT via a cable equipped with an appropriate<br />
connector. Be sure not to overload <strong>the</strong> input. The maximum continuous power at <strong>the</strong> RF input<br />
is +30 dBm (1 W).<br />
For R&S <strong>FSP</strong> devices with an upper frequency limit of 8 GHz or less, <strong>the</strong> RF input is ACcoupled.<br />
For all o<strong>the</strong>r R&S <strong>FSP</strong> devices (upper frequency limit > 8 GHz), <strong>the</strong> RF input is<br />
DC-coupled.<br />
For AC-coupling, a DC input voltage of 50 V must never be exceeded. For DC-coupling,<br />
DC voltage must not be applied at <strong>the</strong> input.<br />
In both cases, noncompliance will destroy <strong>the</strong> input mixers.<br />
Connections <strong>for</strong> External Mixers (EXT MIXER, Option R&S <strong>FSP</strong>-B21)<br />
External mixers can be connected at <strong>the</strong> LO OUT/IF IN and IF IN female connectors (option<br />
R&S <strong>FSP</strong>-B21).<br />
Two-port mixers can simply be connected to <strong>the</strong> LO OUT / IF IN female connector. In <strong>the</strong> case<br />
of three-port mixers, <strong>the</strong> LO input of <strong>the</strong> mixer must be connected to <strong>the</strong> LO OUT / IF IN female<br />
connector, and <strong>the</strong> IF output of <strong>the</strong> mixer to <strong>the</strong> IF IN female connector.<br />
Connect <strong>the</strong> remaining mixer connector to <strong>the</strong> DUT.<br />
Tracking Generator Output (GEN OUTPUT 50Ω, Option R&S <strong>FSP</strong>-B9)<br />
The output of <strong>the</strong> tracking generator is to be connected to <strong>the</strong> DUT via a cable equipped with<br />
a male N connector.<br />
In <strong>the</strong> case of DUTs with sensitive HF characteristics with regard to<br />
matching (VSWR) at <strong>the</strong> input, insert a 20 dB attenuator between <strong>the</strong><br />
DUT and <strong>the</strong> tracking generator.<br />
The female connector is available only with <strong>the</strong> tracking generator option (R&S <strong>FSP</strong>-B9).<br />
1.6 <strong>Quick</strong> <strong>Start</strong> <strong>Guide</strong> 1164.4556.62 - 04
R&S <strong>FSP</strong><br />
Front and Rear Panel<br />
Front Panel Connections<br />
AF OUTPUT<br />
Headphones equipped with a miniature jack plug can be connected at <strong>the</strong> AF OUTPUT female<br />
connector.<br />
The internal impedance is 10 Ω. The output voltage can be set by using <strong>the</strong> volume control to<br />
<strong>the</strong> left of <strong>the</strong> female connector. If a plug is connected, <strong>the</strong> internal loudspeaker will<br />
automatically be switched off.<br />
The female connector and volume control are available only with <strong>the</strong> audio demodulator option<br />
(R&S <strong>FSP</strong>-B3).<br />
Check <strong>the</strong> volume setting carefully be<strong>for</strong>e putting on <strong>the</strong> headphones in order to protect<br />
your hearing.<br />
PROBE POWER<br />
To allow you to connect transducers, <strong>the</strong> R&S <strong>FSP</strong> provides two PROBE POWER supply<br />
connectors.<br />
The left-hand connector supplies <strong>the</strong> ±10 V supply voltages and ground, making it suitable <strong>for</strong><br />
attaching R&S transducers.<br />
Pin<br />
Signal<br />
1 GND<br />
2 -10 V, max. 200 mA<br />
3 -<br />
4 +10 V, max. 200 mA<br />
5 -<br />
Fig. 1-2 Pin assignments of left-hand PROBE POWER connector<br />
The right-hand connector supplies <strong>the</strong> +15 V and –12.6 V supply voltages and ground. This<br />
connector is suitable <strong>for</strong> supplying high-impedance probes from Agilent.<br />
<strong>Quick</strong> <strong>Start</strong> <strong>Guide</strong> 1164.4556.62 - 04 1.7
R&S <strong>FSP</strong><br />
Front and Rear Panel<br />
Front Panel Connections<br />
1<br />
3<br />
2<br />
Pin<br />
Signal<br />
1 GND<br />
2 -12.6 V; max. 150 mA<br />
3 +15 V; max. 150 mA<br />
Fig. 1-3<br />
Pin assignments of right-hand PROBE POWER connector<br />
KEYBOARD<br />
The front panel provides a 6-pin PS/2 KEYBOARD female connector <strong>for</strong> connecting a<br />
keyboard.<br />
Pin<br />
Signal<br />
1 KEYBOARDDATA<br />
2 MOUSEDATA<br />
3 GND<br />
4 5V, KEYBOARD<br />
5 KEYBOARDCLK<br />
6 MOUSECLK<br />
Fig. 1-4<br />
Pin assignments of <strong>the</strong> KEYBOARD connection<br />
Disk Drive<br />
The front panel provides a 3.5” disk drive <strong>for</strong> 1.44 MByte floppy disks.<br />
1.8 <strong>Quick</strong> <strong>Start</strong> <strong>Guide</strong> 1164.4556.62 - 04
R&S <strong>FSP</strong><br />
Front and Rear Panel<br />
Front Panel Connections<br />
Removable Hard Disk (CF CARD, Option R&S <strong>FSP</strong>-B18)<br />
The option R&S <strong>FSP</strong>-B18 replaces <strong>the</strong> internal hard disk by a removable compact flash card.<br />
The option (see Fig. 1-5) is installed instead of <strong>the</strong> floppy disk drive. The compact flash card<br />
is inserted at <strong>the</strong> front panel of <strong>the</strong> instrument. Option R&S <strong>FSP</strong>-B19 provides a spare hard<br />
disk.<br />
To ensure failure-free operation, it is recommended to avoid placing external cables close<br />
to <strong>the</strong> compact flash card.<br />
Switch off <strong>the</strong> instrument be<strong>for</strong>e removing <strong>the</strong> compact flash card to avoid malfunctions.<br />
Fig. 1-5<br />
Compact flash card drive, option R&S <strong>FSP</strong>-B18<br />
In <strong>the</strong> Windows Explorer, <strong>the</strong> removable compact flash card is<br />
displayed as C: (operating system) and D: (data) drives. The A: drive is<br />
still displayed, but is no longer available.<br />
<strong>Quick</strong> <strong>Start</strong> <strong>Guide</strong> 1164.4556.62 - 04 1.9
R&S <strong>FSP</strong><br />
Front and Rear Panel<br />
Rear View<br />
1.4 Rear View<br />
2<br />
3<br />
1<br />
4<br />
5<br />
6<br />
7<br />
11 12<br />
8<br />
9 10<br />
Fig. 1-6<br />
Number in<br />
Fig. 1-6<br />
Rear view<br />
Description<br />
1 second GPIB interface <strong>for</strong> external generator control, option R&S <strong>FSP</strong>-B10 (see page 16)<br />
2 LAN interface, option R&S <strong>FSP</strong>-B16 (see page 16)<br />
3 IF output 20.4 MHz (see page 15); with option R&S <strong>FSP</strong>-B6, this output is replaced by <strong>the</strong><br />
switchable CCVS input/output (see page 16)<br />
4 I/Q input <strong>for</strong> tracking generator, option R&S <strong>FSP</strong>-B9 (see page 16)<br />
5 input/output <strong>for</strong> external/internal reference (see page 15)<br />
6 external generator control, option R&S <strong>FSP</strong>-B10 (see page 17)<br />
7 trigger port, option R&S <strong>FSP</strong>-B28 (see page 14)<br />
8 double USB interface (see page 14)<br />
1.10 <strong>Quick</strong> <strong>Start</strong> <strong>Guide</strong> 1164.4556.62 - 04
R&S <strong>FSP</strong><br />
Front and Rear Panel<br />
Rear View<br />
15<br />
13 14<br />
Number in<br />
Fig. 1-6<br />
Description<br />
9 trigger/gate interface (see page 13)<br />
10 noise source supply voltage (see page 13)<br />
11 VGA interface <strong>for</strong> external monitor (see page 13)<br />
12 RS232-C interface (see page 12)<br />
13 LPT printer interface (see page 12)<br />
14 GPIB interface <strong>for</strong> remote control (see page 12)<br />
15 AC power supply connector with on/off switch (see page 12)<br />
<strong>Quick</strong> <strong>Start</strong> <strong>Guide</strong> 1164.4556.62 - 04 1.11
R&S <strong>FSP</strong><br />
Front and Rear Panel<br />
Rear Panel Connections<br />
1.5 Rear Panel Connections<br />
This section describes <strong>the</strong> rear connectors and interfaces of <strong>the</strong> R&S <strong>FSP</strong>. Optional<br />
connectors and interfaces are indicated by <strong>the</strong> option name in brackets.<br />
AC Power Supply Connection and Main Power Switch<br />
An AC power supply connector and main power switch are located in a unit on <strong>the</strong> rear panel<br />
of <strong>the</strong> instrument.<br />
Main power switch function:<br />
Position I<br />
Position O<br />
After being switched on, <strong>the</strong> instrument will be ei<strong>the</strong>r in standby mode or in<br />
operation depending on <strong>the</strong> setting of <strong>the</strong> ON/STANDBY switch on <strong>the</strong> front<br />
panel of <strong>the</strong> instrument.<br />
Switching <strong>the</strong> instrument off disconnects <strong>the</strong> entire instrument from <strong>the</strong> AC<br />
power supply.<br />
GPIB Interface<br />
The instrument comes with a GPIB interface in compliance with IEEE488. A controller <strong>for</strong><br />
remote control can be connected via this interface. Use a shielded cable to set up <strong>the</strong><br />
connection. For fur<strong>the</strong>r in<strong>for</strong>mation refer to <strong>the</strong> Operating Manual, chapter 8.<br />
Printer Interface (LPT)<br />
The 25-pin female LPT connector on <strong>the</strong> rear panel of <strong>the</strong> R&S <strong>FSP</strong> is provided <strong>for</strong> connecting<br />
a printer. The interface is compatible with <strong>the</strong> CENTRONICS interface. For fur<strong>the</strong>r in<strong>for</strong>mation<br />
refer to <strong>the</strong> Operating Manual, chapter 8.<br />
RS-232-C Interface (COM)<br />
The main power switch also interrupts <strong>the</strong> power supply of <strong>the</strong> OCXO<br />
located in <strong>the</strong> instrument. When you switch <strong>the</strong> instrument back on, be<br />
sure to comply with <strong>the</strong> extended warm-up phase specified in <strong>the</strong> data<br />
sheet.<br />
The instrument comes with an RS-232-C interface. The interface can be manually activated<br />
and configured <strong>for</strong> remote control by defining <strong>the</strong> parameters in <strong>the</strong> COM INTERFAC table,<br />
which is accessed from <strong>the</strong> SETUP - GENERAL SETUP menu. For fur<strong>the</strong>r in<strong>for</strong>mation refer<br />
to <strong>the</strong> Operating Manual, chapter 8.<br />
1.12 <strong>Quick</strong> <strong>Start</strong> <strong>Guide</strong> 1164.4556.62 - 04
R&S <strong>FSP</strong><br />
Front and Rear Panel<br />
Rear Panel Connections<br />
R&S Monitor Connection (MONITOR)<br />
The 15-pin VGA monitor connection is used to display <strong>the</strong> screen contents on an external<br />
screen. The procedure <strong>for</strong> putting <strong>the</strong> external monitor into operation is described in <strong>the</strong><br />
section “ Connecting an External Monitor” on page 2.12.<br />
5<br />
1<br />
10<br />
6<br />
15 11<br />
Pin Signal Pin Signal<br />
1 R 9 GND<br />
2 G 10 GND<br />
3 B 11 (NC)<br />
4 (NC) 12 (NC)<br />
5 GND 13 HSYNC<br />
6 GND 14 VSYNC<br />
7 GND 15 (NC)<br />
8 GND<br />
Fig. 1-7<br />
Pin assignments of <strong>the</strong> MONITOR connection<br />
Noise Source Control (NOISE SOURCE)<br />
The NOISE SOURCE female connector is used to switch an external noise source on and off<br />
in order, <strong>for</strong> example, to measure <strong>the</strong> noise figure of DUTs.<br />
Conventional noise sources require a voltage of +28 V in order to be switched on. They are<br />
switched off at 0 V. The female connector supplies <strong>the</strong>se switching voltages. The output<br />
supports a maximum load of 100 mA.<br />
Input <strong>for</strong> External Trigger (EXT TRIG/GATE IN)<br />
The EXT TRIG/GATE IN female connector is used to control <strong>the</strong> measurement by means of<br />
an external signal.<br />
The voltage levels are adjustable (0.5 V to 3.5 V). The typical input impedance is 10 kΩ.<br />
<strong>Quick</strong> <strong>Start</strong> <strong>Guide</strong> 1164.4556.62 - 04 1.13
R&S <strong>FSP</strong><br />
Front and Rear Panel<br />
Rear Panel Connections<br />
USB Interface<br />
The R&S <strong>FSP</strong> provides a USB female connector at <strong>the</strong> rear panel <strong>for</strong> connecting two USB<br />
devices (upper connector USB 1.1, lower connector USB 2.0).<br />
Use suitable double shielded cables. Passive USB connecting cables must not exceed 1 m<br />
in length.<br />
Use only USB devices that keep <strong>the</strong> permissible EMI limits.<br />
Pin<br />
Signal<br />
1 + 5 V USB0<br />
1 2 3 4<br />
2 USBDATA0 -<br />
3 USBDATA0 +<br />
5 6 7 8<br />
4 GND<br />
5 + 5 V USB1<br />
6 USBDATA1 -<br />
7 USBDATA1 +<br />
8 GND<br />
Fig. 1-8<br />
USB connector assignment<br />
Trigger Port (Option R&S <strong>FSP</strong>-B28)<br />
The 25-pin trigger port female connector (option R&S <strong>FSP</strong>-B28) provides a signal at pin 21<br />
that signals that <strong>the</strong> instrument is ready to receive a trigger pulse. This signal takes into<br />
consideration <strong>the</strong> instrument's internal waiting and settling times.<br />
+5 V<br />
GND<br />
13<br />
1<br />
25 14<br />
+12 V<br />
GND<br />
Pin 21<br />
1.14 <strong>Quick</strong> <strong>Start</strong> <strong>Guide</strong> 1164.4556.62 - 04
R&S <strong>FSP</strong><br />
Front and Rear Panel<br />
Rear Panel Connections<br />
Pin Signal Range of values<br />
1 to 11 not used<br />
12 ground<br />
13 +5 V supply voltage 5.2 V ± 0.5 V, max. 30 mA<br />
14 to 20 reserved<br />
21 ready-<strong>for</strong>-trigger output signal HIGH: ≥ 1.4 V, LOW: ≤ 0.7 V<br />
22 to 23 not used<br />
24 ground<br />
25 +12 V supply voltage +12 V ± 0.5 V, max. 10 mA<br />
Reference Input and Output (REF IN and REF OUT)<br />
The REF IN female connector is used as an input <strong>for</strong> a 10 MHz reference signal. The required<br />
input level is 0 to 10 dBm. The REF OUT female connector provides <strong>the</strong> internal 10 MHz<br />
reference signal with a 0 dBm output level <strong>for</strong> o<strong>the</strong>r devices.<br />
The SETUP menu is used to select between <strong>the</strong> internal and external references.<br />
If an external reference is used <strong>for</strong> operation, <strong>the</strong> external reference signal from REF IN is<br />
looped through to REF OUT.<br />
Use suitable double shielded cables.<br />
20.4 MHz IF Output<br />
The 20.4 MHz IF signal of <strong>the</strong> R&S <strong>FSP</strong> is provided at <strong>the</strong> 20.4 MHz OUT female BNC<br />
connector. For resolution bandwidths between 100 kHz and 10 MHz, <strong>the</strong> bandwidth<br />
corresponds to <strong>the</strong> selected bandwidth. For bandwidths ≤100 kHz, <strong>the</strong> bandwidth of <strong>the</strong> output<br />
is equal to 2.6 * resolution bandwidth, where <strong>the</strong> minimum value is 2.6 kHz (non-FFT). In <strong>the</strong><br />
analyzer mode, <strong>the</strong> level at <strong>the</strong> IF output in <strong>the</strong> case of a signal at <strong>the</strong> reference level is 0 dBm<br />
if <strong>the</strong> resolution bandwidth is ≥100 kHz; if <strong>the</strong> resolution bandwidth is
R&S <strong>FSP</strong><br />
Front and Rear Panel<br />
Rear Panel Connections<br />
With option R&S <strong>FSP</strong>-B6, this output is replaced by <strong>the</strong> CCVS IN/ OUT<br />
connector.<br />
CCVS Output and Input (CCVS IN/OUT, Option R&S <strong>FSP</strong>-B6)<br />
The CCVS IN/OUT female BNC connector is a switchable CCVS input/output. If TV triggering<br />
is activated and triggering occurs in response to <strong>the</strong> internal demodulator signal (CCVS INT),<br />
<strong>the</strong> demodulated TV signal is provided <strong>for</strong> operating an CCVS monitors. If triggering occurs in<br />
response to an externally supplied CCVS signal (CCVS EXT), <strong>the</strong> female connector serves as<br />
an input.<br />
TG I / AM IN; TG Q / FM IN (Option R&S <strong>FSP</strong>-B9)<br />
The two female connectors TG I /AM IN and TG Q /FM IN are used to modulate <strong>the</strong> tracking<br />
generator (option R&S <strong>FSP</strong>-B9) by means of an external signal.<br />
The input voltage range is ±0.5 V; <strong>the</strong> input impedance is 50 Ω.<br />
LAN Interface (Option R&S <strong>FSP</strong>-B16)<br />
The LAN interface can be used to connect to a local network. The assignment of <strong>the</strong> RJ-45<br />
connector supports twisted-pair category 5 UTP/STP cables in a star configuration (UTP<br />
stands <strong>for</strong> “unshielded twisted pair”, and STP <strong>for</strong> “shielded twisted pair”).<br />
Second GPIB Interface IEC2 (Option R&S <strong>FSP</strong>-B10)<br />
When equipped with option R&S <strong>FSP</strong>-B10 (external generator control), <strong>the</strong> instrument<br />
provides a second GPIB interface <strong>for</strong> using external generators.<br />
ATN IFC NRFD EOI DIO3 DIO1<br />
SHIELD SRQ NDAC DAV DIO4 DIO2<br />
12 1<br />
13<br />
24<br />
LOGIC GND GND(10) GND(8) GND(6) DIO8 DIO6<br />
GND(11) GND(9) GND(7) REN DIO7 DIO5<br />
Fig. 1-9<br />
Pin assignment of <strong>the</strong> second IEC interface<br />
The R&S <strong>FSP</strong> remote control is not supported via <strong>the</strong> second GPIB<br />
interface.<br />
1.16 <strong>Quick</strong> <strong>Start</strong> <strong>Guide</strong> 1164.4556.62 - 04
R&S <strong>FSP</strong><br />
Front and Rear Panel<br />
Rear Panel Connections<br />
AUX CONTROL (Option R&S <strong>FSP</strong>-B10)<br />
If option R&S <strong>FSP</strong>-B10 (external generator control) is built in, <strong>the</strong> R&S <strong>FSP</strong> provides a female<br />
connector that allows measurement data acquisition to be synchronized with <strong>the</strong> output signal<br />
of a <strong>Rohde</strong> & <strong>Schwarz</strong> generator.<br />
Blank n.c.<br />
n.c. Trigger n.c.<br />
1 2 3 4 5<br />
6 7 8 9<br />
GND GND<br />
GND GND<br />
Pin Signal Description<br />
1 n.c. not connected<br />
2 BLANK Return signalling from <strong>the</strong> signal generator indicating that frequency<br />
setting is completed<br />
3 TRIGGER Trigger signal <strong>for</strong> switching to <strong>the</strong> next frequency<br />
6...9 GND Ground<br />
Fig. 1-10<br />
Pin assignment of <strong>the</strong> AUX CONTROL connector<br />
<strong>Quick</strong> <strong>Start</strong> <strong>Guide</strong> 1164.4556.62 - 04 1.17
R&S <strong>FSP</strong><br />
Front and Rear Panel<br />
Rear Panel Connections<br />
1.18 <strong>Quick</strong> <strong>Start</strong> <strong>Guide</strong> 1164.4556.62 - 04
R&S <strong>FSP</strong><br />
Preparing <strong>for</strong> Use<br />
2 Preparing <strong>for</strong> Use<br />
2.1 Preparing <strong>for</strong> Operation . . . . . . . . . . . . . . . . . . . . . . . . . . . . 2.4<br />
2.1.1 Unpacking <strong>the</strong> Instrument . . . . . . . . . . . . . . . . . . . . . . . . 2.4<br />
2.1.2 Setting Up <strong>the</strong> Instrument . . . . . . . . . . . . . . . . . . . . . . . . 2.4<br />
2.1.3 Installation in a 19" Rack . . . . . . . . . . . . . . . . . . . . . . . . . 2.5<br />
2.1.4 Connecting <strong>the</strong> Instrument to <strong>the</strong> AC Power Supply . . . . 2.6<br />
2.1.5 Switching On <strong>the</strong> R&S <strong>FSP</strong> . . . . . . . . . . . . . . . . . . . . . . . 2.6<br />
2.1.6 Functional Test . . . . . . . . . . . . . . . . . . . . . . . . . . . . . . . . . 2.6<br />
2.1.7 Switching Off <strong>the</strong> R&S <strong>FSP</strong> . . . . . . . . . . . . . . . . . . . . . . . 2.7<br />
2.1.8 Cleaning <strong>the</strong> Outside . . . . . . . . . . . . . . . . . . . . . . . . . . . . 2.8<br />
2.2 Instrument Drive Usage . . . . . . . . . . . . . . . . . . . . . . . . . . . . 2.8<br />
2.3 Connecting External Devices . . . . . . . . . . . . . . . . . . . . . . . 2.9<br />
2.3.1 Connecting an External Keyboard . . . . . . . . . . . . . . . . . . 2.9<br />
2.3.2 Connecting a Mouse . . . . . . . . . . . . . . . . . . . . . . . . . . . 2.11<br />
2.3.3 Connecting an External Monitor . . . . . . . . . . . . . . . . . . 2.12<br />
2.3.4 Connecting a Printer . . . . . . . . . . . . . . . . . . . . . . . . . . . 2.13<br />
2.3.5 Connecting USB Devices (e.g. a Power Meter) . . . . . . . 2.13<br />
<strong>Quick</strong> <strong>Start</strong> <strong>Guide</strong> 1164.4556.62 - 04 2.1
R&S <strong>FSP</strong><br />
Preparing <strong>for</strong> Use<br />
2.3.6 Connecting External Generators . . . . . . . . . . . . . . . . . . 2.15<br />
2.3.6.1 Connecting <strong>the</strong> R&S <strong>FSP</strong> to <strong>the</strong> Generator . . . . . . . 2.16<br />
2.3.6.2 Configuring <strong>the</strong> Generator on <strong>the</strong> R&S <strong>FSP</strong> . . . . . . 2.16<br />
2.3.6.3 Activating <strong>the</strong> Generator Configuration and Setting<br />
<strong>the</strong> Output Level . . . . . . . . . . . . . . . . . . . . . . . . . . . . . . . . . . 2.17<br />
2.3.6.4 Using an External Generator as a Tracking<br />
Generator . . . . . . . . . . . . . . . . . . . . . . . . . . . . . . . . . . . . . . . 2.18<br />
2.4 Setup . . . . . . . . . . . . . . . . . . . . . . . . . . . . . . . . . . . . . . . . . . . 2.19<br />
2.4.1 Selecting <strong>the</strong> Frequency Reference . . . . . . . . . . . . . . . . 2.19<br />
2.4.2 Setting <strong>the</strong> Date and Time . . . . . . . . . . . . . . . . . . . . . . . 2.19<br />
2.4.3 Setting <strong>the</strong> GPIB Interface . . . . . . . . . . . . . . . . . . . . . . . 2.20<br />
2.4.3.1 GPIB Address . . . . . . . . . . . . . . . . . . . . . . . . . . . . . 2.20<br />
2.4.3.2 GPIB Language . . . . . . . . . . . . . . . . . . . . . . . . . . . . 2.21<br />
2.4.3.3 ID Response String . . . . . . . . . . . . . . . . . . . . . . . . . 2.22<br />
2.4.4 Setting <strong>the</strong> Screen Colors . . . . . . . . . . . . . . . . . . . . . . . 2.23<br />
2.4.5 Automatically Switching Off <strong>the</strong> Internal Screen . . . . . . 2.24<br />
2.4.6 File and Path Selection Using <strong>the</strong> Front Panel Keys . . . 2.25<br />
2.4.7 Selecting and Configuring Printers . . . . . . . . . . . . . . . . . 2.27<br />
2.4.7.1 Selecting Alternative Printer Configurations . . . . . . 2.28<br />
2.4.7.2 Selecting Printer Colors . . . . . . . . . . . . . . . . . . . . . . 2.28<br />
2.4.8 Installing Plug&Play Printers . . . . . . . . . . . . . . . . . . . . . 2.29<br />
2.4.9 Installing Non-Plug&Play Printers . . . . . . . . . . . . . . . . . 2.30<br />
2.5 Configuring <strong>the</strong> LAN Interface (Option R&S <strong>FSP</strong>-B16<br />
only) . . . . . . . . . . . . . . . . . . . . . . . . . . . . . . . . . . . . . . . . . . . . . . . 2.30<br />
2.5.1 Connecting <strong>the</strong> Instrument to <strong>the</strong> Network . . . . . . . . . . . 2.30<br />
2.5.2 Configuring <strong>the</strong> Network Card . . . . . . . . . . . . . . . . . . . . 2.30<br />
2.5.2.1 Driver Installation . . . . . . . . . . . . . . . . . . . . . . . . . . . 2.30<br />
2.5.2.2 Configuring <strong>the</strong> Interface . . . . . . . . . . . . . . . . . . . . . 2.31<br />
2.5.2.3 Configuring Existing Network Protocols (TCP/IP<br />
Protocol) . . . . . . . . . . . . . . . . . . . . . . . . . . . . . . . . . . . . . . . . 2.31<br />
2.5.2.4 Installing Additional Network Protocols and<br />
Services . . . . . . . . . . . . . . . . . . . . . . . . . . . . . . . . . . . . . . . . 2.35<br />
2.5.3 Login . . . . . . . . . . . . . . . . . . . . . . . . . . . . . . . . . . . . . . . 2.35<br />
2.6 LXI Configuration . . . . . . . . . . . . . . . . . . . . . . . . . . . . . . . . 2.36<br />
2.6.1 LXI Configuration Dialog . . . . . . . . . . . . . . . . . . . . . . . . 2.37<br />
2.6.2 LXI Browser Interface . . . . . . . . . . . . . . . . . . . . . . . . . . . 2.37<br />
2.2 <strong>Quick</strong> <strong>Start</strong> <strong>Guide</strong> 1164.4556.62 - 04
R&S <strong>FSP</strong><br />
Preparing <strong>for</strong> Use<br />
2.6.3 LAN Configuration website . . . . . . . . . . . . . . . . . . . . . . 2.38<br />
2.6.4 Ping . . . . . . . . . . . . . . . . . . . . . . . . . . . . . . . . . . . . . . . . . 2.38<br />
2.7 Operating System Properties . . . . . . . . . . . . . . . . . . . . . . 2.39<br />
2.7.1 Properties Specific to Windows XP . . . . . . . . . . . . . . . . 2.39<br />
2.7.1.1 Windows XP Service Packs . . . . . . . . . . . . . . . . . . 2.39<br />
2.7.1.2 Opening <strong>the</strong> Windows XP <strong>Start</strong> Menu . . . . . . . . . . . 2.40<br />
2.7.1.3 Windows XP Software Approved <strong>for</strong> <strong>the</strong><br />
Instrument . . . . . . . . . . . . . . . . . . . . . . . . . . . . . . . . . . . . . . 2.40<br />
<strong>Quick</strong> <strong>Start</strong> <strong>Guide</strong> 1164.4556.62 - 04 2.3
R&S <strong>FSP</strong><br />
Preparing <strong>for</strong> Use<br />
Preparing <strong>for</strong> Operation<br />
2.1 Preparing <strong>for</strong> Operation<br />
This section describes how to put <strong>the</strong> instrument into operation.<br />
Be<strong>for</strong>e putting <strong>the</strong> instrument into operation, make sure that <strong>the</strong> following requirements<br />
have been met:<br />
• The air vents are not blocked.<br />
• No signal voltage levels exceeding <strong>the</strong> permitted limits are present at <strong>the</strong> inputs.<br />
• The instrument's outputs are nei<strong>the</strong>r overloaded nor incorrectly connected.<br />
Not complying with <strong>the</strong>se requirements can result in damage to <strong>the</strong> instrument.<br />
2.1.1 Unpacking <strong>the</strong> Instrument<br />
➢ Remove <strong>the</strong> instrument from its packaging and check <strong>the</strong> equipment <strong>for</strong> completeness<br />
using <strong>the</strong> delivery note and <strong>the</strong> accessory lists <strong>for</strong> <strong>the</strong> various items.<br />
➢ First, pull off <strong>the</strong> polyethylene protection pads from <strong>the</strong> instrument's rear feet and <strong>the</strong>n<br />
carefully remove <strong>the</strong> pads from <strong>the</strong> instrument handles at <strong>the</strong> front.<br />
➢ Pull off <strong>the</strong> corrugated cardboard cover that protects <strong>the</strong> rear of <strong>the</strong> instrument.<br />
➢ Carefully unthread <strong>the</strong> corrugated cardboard cover at <strong>the</strong> front that protects <strong>the</strong> instrument<br />
handles and remove it.<br />
➢ Check <strong>the</strong> instrument <strong>for</strong> any damage. If <strong>the</strong>re is damage, immediately contact <strong>the</strong> carrier<br />
who delivered <strong>the</strong> instrument. In this case, make sure not to discard <strong>the</strong> box and packing<br />
material.<br />
It is advisable to keep <strong>the</strong> original packing material in order to prevent control elements and<br />
connectors from being damaged in case <strong>the</strong> instrument is to be transported or shipped at a<br />
later date.<br />
Protective plastic caps <strong>for</strong> <strong>the</strong> front panel and <strong>the</strong> rear panel can be ordered addditionally<br />
(order number 1096.7095.00). Please note that you need to order 2 covers <strong>for</strong> 1 instrument.<br />
2.1.2 Setting Up <strong>the</strong> Instrument<br />
The instrument is intended <strong>for</strong> indoor use. Note <strong>the</strong> following in this regard:<br />
• The ambient temperature must comply with <strong>the</strong> range specified in <strong>the</strong> data sheet.<br />
• Air inflow and outflow via <strong>the</strong> air vents on <strong>the</strong> rear panel and through <strong>the</strong> lateral per<strong>for</strong>ations<br />
must not be obstructed. Clearance from walls must be at least 10 cm.<br />
• The mounting surface must be even.<br />
2.4 <strong>Quick</strong> <strong>Start</strong> <strong>Guide</strong> 1164.4556.62 - 04
R&S <strong>FSP</strong><br />
Preparing <strong>for</strong> Use<br />
Preparing <strong>for</strong> Operation<br />
Risk of damaging electronic components<br />
To avoid damage of electronic components, <strong>the</strong> operational site must be protected against<br />
electrostatic discharge (ESD).<br />
Wrist strap with cord<br />
Floor mat<br />
Building ground<br />
Heel strap<br />
Ground connection<br />
of operational site<br />
The following two methods of ESD protection may be used toge<strong>the</strong>r or separately:<br />
• Wrist strap with cord to ground connection<br />
• Conductive floor mat and heel strap combination<br />
2.1.3 Installation in a 19" Rack<br />
The instrument can be installed in a 19" rack by using a rack adapter (see data sheet <strong>for</strong> order<br />
number). The installation instructions are included with <strong>the</strong> adapter.<br />
When <strong>the</strong> instrument is installed in a rack, make sure that <strong>the</strong> vents <strong>for</strong> air inflow on <strong>the</strong> side<br />
panel and <strong>the</strong> air outlets on <strong>the</strong> rear panel are not obstructed.<br />
<strong>Quick</strong> <strong>Start</strong> <strong>Guide</strong> 1164.4556.62 - 04 2.5
I<br />
R&S <strong>FSP</strong><br />
Preparing <strong>for</strong> Use<br />
Preparing <strong>for</strong> Operation<br />
2.1.4 Connecting <strong>the</strong> Instrument to <strong>the</strong> AC Power Supply<br />
The R&S <strong>FSP</strong> is equipped with a mechanism <strong>for</strong> detecting AC power voltage and<br />
automatically sets itself to use <strong>the</strong> available AC power voltage (range: AC voltage 100 V to<br />
240 V; 50 Hz to 400 Hz). The AC power connector is located on <strong>the</strong> rear panel of <strong>the</strong><br />
instrument.<br />
➢ Connect <strong>the</strong> R&S <strong>FSP</strong> to <strong>the</strong> AC power supply, using <strong>the</strong> power cable that is<br />
supplied.<br />
o<br />
AC power<br />
connector<br />
Since <strong>the</strong> instrument is assembled in line with <strong>the</strong> specifications <strong>for</strong> safety<br />
class EN61010, it may only be connected to an outlet that has a ground<br />
contact.<br />
2.1.5 Switching On <strong>the</strong> R&S <strong>FSP</strong><br />
➢ Press <strong>the</strong> power switch on <strong>the</strong> real panel to change it to position I.<br />
➢ Press <strong>the</strong> ON/STANDBY key on <strong>the</strong> front panel. The green LED will light up.<br />
Do not switch off <strong>the</strong> instrument while it is booting.<br />
Switching it off prematurely can lead to serious data changes on <strong>the</strong> instrument's hard disk.<br />
After being switched on, <strong>the</strong> R&S <strong>FSP</strong> displays <strong>the</strong> following in<strong>for</strong>mation:<br />
<strong>Rohde</strong> & <strong>Schwarz</strong> GmbH & Co. KG<br />
Analyzer BIOS Vx.y<br />
A self test of <strong>the</strong> computer hardware will be carried out. Windows XP <strong>the</strong>n starts, and <strong>the</strong><br />
measurement screen will automatically appear with <strong>the</strong> settings that were present when <strong>the</strong><br />
instrument was last switched off.<br />
If you want <strong>the</strong> instrument to automatically load different settings when<br />
it is switched on, define <strong>the</strong> required configuration in <strong>the</strong> FILE -<br />
STARTUP RECALL menu.<br />
2.1.6 Functional Test<br />
The functional test should only be per<strong>for</strong>med when <strong>the</strong> operating<br />
temperature is reached (approx. 15 minutes after <strong>the</strong> instrument is<br />
switched on).<br />
➢ Call self alignment with <strong>the</strong> CAL key, CAL TOTAL softkey. Once <strong>the</strong> system correction<br />
values have been calculated successfully, <strong>the</strong> message Calibration Passed will appear.<br />
2.6 <strong>Quick</strong> <strong>Start</strong> <strong>Guide</strong> 1164.4556.62 - 04
R&S <strong>FSP</strong><br />
Preparing <strong>for</strong> Use<br />
Preparing <strong>for</strong> Operation<br />
➢ <strong>Start</strong> <strong>the</strong> self test with <strong>the</strong> SETUP key, SERVICE – SELFTEST softkeys. Once <strong>the</strong><br />
instrument modules have been checked successfully, <strong>the</strong> message Selftest Passed will<br />
appear.<br />
Once both steps have been completed successfully, <strong>the</strong> instrument will be ready <strong>for</strong> operation.<br />
The self alignment does not need to be repeated every time <strong>the</strong><br />
instrument is switched on, because <strong>the</strong> instrument saves <strong>the</strong> values<br />
and loads <strong>the</strong>m during booting automatically. A self alignment is<br />
recommended if <strong>the</strong> instrument is used at a temperature that differs<br />
considerable (more than 10°C) from <strong>the</strong> temperature present at <strong>the</strong> last<br />
self alignment.<br />
The self test also does not need to be repeated every time <strong>the</strong><br />
instrument is switched on. It is necessary only when instrument<br />
malfunction is suspected.<br />
2.1.7 Switching Off <strong>the</strong> R&S <strong>FSP</strong><br />
➢ Press <strong>the</strong> ON/STANDBY key on <strong>the</strong> front panel.<br />
The R&S <strong>FSP</strong> will store <strong>the</strong> current settings on <strong>the</strong> hard disk and <strong>the</strong>n shut down <strong>the</strong><br />
software. Once <strong>the</strong> operation has been completed, <strong>the</strong> power supply unit will be switched<br />
to STANDBY and <strong>the</strong> yellow LED will come on.<br />
Shock hazard<br />
In standby mode, <strong>the</strong> AC supply voltage is still present on <strong>the</strong> instrument.<br />
➢ To completely disconnect <strong>the</strong> instrument from <strong>the</strong> AC power supply, change <strong>the</strong> power<br />
switch on <strong>the</strong> rear panel to position O.<br />
• The main power switch on <strong>the</strong> rear panel also interrupts <strong>the</strong> power<br />
supply of <strong>the</strong> OCXO (optional) inside <strong>the</strong> instrument. When you<br />
switch <strong>the</strong> instrument back on, be sure to adhere to <strong>the</strong> extended<br />
warm-up phase.<br />
• If you switch off <strong>the</strong> instrument by using <strong>the</strong> power switch or by<br />
disconnecting <strong>the</strong> power supply connector, it is not possible to save<br />
<strong>the</strong> current instrument settings on <strong>the</strong> hard disk. In this case, <strong>the</strong> last<br />
settings that were stored on <strong>the</strong> hard disk will be loaded when you<br />
switch <strong>the</strong> instrument back on.<br />
<strong>Quick</strong> <strong>Start</strong> <strong>Guide</strong> 1164.4556.62 - 04 2.7
R&S <strong>FSP</strong><br />
Preparing <strong>for</strong> Use<br />
Instrument Drive Usage<br />
2.1.8 Cleaning <strong>the</strong> Outside<br />
The outside of <strong>the</strong> instrument is suitably cleaned using a soft, line-free dust cloth. Make sure<br />
that <strong>the</strong> air vents are not obstructed.<br />
Cleaning agents contain substances that may damage <strong>the</strong> instrument, e.g. solventcontaining<br />
cleaning agents may damage <strong>the</strong> front panel labeling or plastic parts.<br />
Never use cleaning agents such as solvents (thinners, acetone, etc.), acids, bases, or o<strong>the</strong>r<br />
substances.<br />
2.2 Instrument Drive Usage<br />
The harddisk space is divided in 3 logical drives.<br />
C:<br />
Contains <strong>the</strong> operating system Windows XP, printer driver, network driver,…<br />
O<strong>the</strong>r user programs, applications, driver should be stored/installed on drive C:.<br />
D:<br />
Contains instrument's firmware and related data sets (limit lines, transducers,...)<br />
D:\user\config is <strong>the</strong> default location <strong>for</strong> customized instrument settings<br />
D:\R_S\instr\temp is <strong>the</strong> default directory <strong>for</strong> hardcopy files.<br />
O<strong>the</strong>r user data should be stored on drive D:.<br />
E:<br />
Backup storage location <strong>for</strong> Windows XP. Here a copy of <strong>the</strong> operating system is saved.<br />
This drive is used to restore Windows XP using "Analyzer Firmware Backup" function on<br />
Power On. A copy of <strong>the</strong> currently installed update sets are located on this drive, too.<br />
No additional data should be stored on this drive.<br />
2.8 <strong>Quick</strong> <strong>Start</strong> <strong>Guide</strong> 1164.4556.62 - 04
R&S <strong>FSP</strong><br />
Preparing <strong>for</strong> Use<br />
Connecting External Devices<br />
2.3 Connecting External Devices<br />
2.3.1 Connecting an External Keyboard<br />
Do not connect <strong>the</strong> keyboard unless <strong>the</strong> instrument is switched off (STANDBY). O<strong>the</strong>rwise,<br />
proper functioning cannot be ensured due to interactions with <strong>the</strong> firmware.<br />
An external PC keyboard can be connected to <strong>the</strong> 6-pin PS/2 KEYBOARD connector on <strong>the</strong><br />
front panel of <strong>the</strong> R&S <strong>FSP</strong> or to <strong>the</strong> USB interface on <strong>the</strong> rear panel.<br />
USB<br />
The keyboard simplifies instrument operation and <strong>the</strong> entry of comments, file names, etc.<br />
Keyboards and mouse devices con<strong>for</strong>m to USB Standards 1.1 or 2.0 are suitable <strong>for</strong><br />
connection to <strong>the</strong> USB interface.<br />
After being connected, <strong>the</strong> keyboard is automatically detected. The default keyboard language<br />
setting is US English. Special settings such as refresh rate, etc. can be made in <strong>the</strong><br />
Windows XP <strong>Start</strong> menu by selecting START - SETTINGS - CONTROL PANEL -<br />
KEYBOARD.<br />
International Keyboard Support<br />
As of firmware version 4.3x, <strong>the</strong> following international keyboard drivers are supported.<br />
• French Keyboards<br />
• German Keyboards<br />
• Italian Keyboards<br />
• Portuguese Keyboards<br />
• Spanish Keyboards<br />
These drivers are already installed on <strong>the</strong> R&S <strong>FSP</strong>, if it is shipped with firmware version 4.3x<br />
or later. A separate installer file is available on <strong>the</strong> R&S <strong>FSP</strong> internet site.<br />
To change <strong>the</strong> keyboard driver language proceed as follows:<br />
1. <strong>Start</strong> Windows Explorer<br />
2. <strong>Start</strong> <strong>the</strong> installation procedure with double click onto <strong>the</strong> file FsxInternationalKeyboards.msi.<br />
3. Reboot <strong>the</strong> analyzer.<br />
4. Now open <strong>the</strong> windows start menu by pressing <strong>the</strong> windows key or .<br />
<strong>Quick</strong> <strong>Start</strong> <strong>Guide</strong> 1164.4556.62 - 04 2.9
R&S <strong>FSP</strong><br />
Preparing <strong>for</strong> Use<br />
Connecting External Devices<br />
5. Select Settings - Control Panel - Regional and Language Options - Languages.<br />
6. Select Details<br />
7. Select Add and choose one of <strong>the</strong> available languages.<br />
Confirm your selection with OK.<br />
2.10 <strong>Quick</strong> <strong>Start</strong> <strong>Guide</strong> 1164.4556.62 - 04
R&S <strong>FSP</strong><br />
Preparing <strong>for</strong> Use<br />
Connecting External Devices<br />
8. Change <strong>the</strong> Default input language as you like in <strong>the</strong> Default Input Language pane and<br />
close all open dialogs with OK.<br />
9. Reboot <strong>the</strong> R&S <strong>FSP</strong><br />
2.3.2 Connecting a Mouse<br />
To simplify Windows XP operation, <strong>the</strong> R&S <strong>FSP</strong> allows you to connect a mouse to <strong>the</strong> USB<br />
interface on <strong>the</strong> rear panel.<br />
USB<br />
Mouse devices from Microsoft and Logitech are supported.<br />
If you use a keyboard that contains a trackball <strong>for</strong> mouse operations,<br />
connecting an external mouse in addition may lead to malfunctions.<br />
After being connected, <strong>the</strong> mouse is automatically detected. Special settings such as mouse<br />
cursor speed, etc. can be made in <strong>the</strong> Windows XP <strong>Start</strong> menu by selecting START -<br />
SETTINGS - CONTROL PANEL - MOUSE.<br />
<strong>Quick</strong> <strong>Start</strong> <strong>Guide</strong> 1164.4556.62 - 04 2.11
R&S <strong>FSP</strong><br />
Preparing <strong>for</strong> Use<br />
Connecting External Devices<br />
2.3.3 Connecting an External Monitor<br />
Do not connect a monitor unless <strong>the</strong> instrument is switched off (STANDBY). O<strong>the</strong>rwise, you<br />
run <strong>the</strong> risk of damaging <strong>the</strong> monitor.<br />
You can connect an external monitor at <strong>the</strong> MONITOR connector on <strong>the</strong> instrument's rear<br />
panel.<br />
MONITOR<br />
After connecting <strong>the</strong> external monitor, restart <strong>the</strong> instrument to detect <strong>the</strong> monitor. The<br />
measurement display will <strong>the</strong>n appear on both <strong>the</strong> external screen and on <strong>the</strong> instrument. No<br />
fur<strong>the</strong>r settings are necessary.<br />
If <strong>the</strong> external monitor is not recognized by <strong>the</strong> instrument, you have to activate it. This<br />
requires a mouse and an external keyboard (<strong>the</strong> connection is described in sections<br />
“ Connecting a Mouse” on page 2.11 and “ Connecting an External Keyboard” on page 2.9).<br />
➢ Make sure that <strong>the</strong> external monitor is connected.<br />
➢ Press <strong>the</strong> CTRL+ESC key combination to display <strong>the</strong> taskbar.<br />
➢ On <strong>the</strong> right side of <strong>the</strong> taskbar, click <strong>the</strong> monitor icon.<br />
➢ Select Graphics Options - Output To - Intel(R) Dual Display Clone -<br />
Monitor + Digital Display.<br />
When <strong>the</strong> instrument is switched on later without a monitor, <strong>the</strong> activation of <strong>the</strong> external<br />
monitor is reset.<br />
2.12 <strong>Quick</strong> <strong>Start</strong> <strong>Guide</strong> 1164.4556.62 - 04
R&S <strong>FSP</strong><br />
Preparing <strong>for</strong> Use<br />
Connecting External Devices<br />
2.3.4 Connecting a Printer<br />
A printer can be connected during operation.<br />
The R&S <strong>FSP</strong> allows you to create two different printer configurations <strong>for</strong> printing out a<br />
hardcopy of <strong>the</strong> screen and you can toggle between <strong>the</strong>m by pressing a button. The DEVICES<br />
table in <strong>the</strong> HCOPY menu lists <strong>the</strong> available installed printers.<br />
The LPT printer interface is located on <strong>the</strong> rear panel. Alternatively, one of <strong>the</strong> USB interfaces<br />
on <strong>the</strong> front or rear panel can be used.<br />
LPT<br />
USB<br />
2.3.5Connecting USB Devices (e.g. a Power Meter)<br />
The USB interface on <strong>the</strong> rear panel of <strong>the</strong> R&S <strong>FSP</strong> allows you to connect up to two USB<br />
devices directly to <strong>the</strong> R&S <strong>FSP</strong>. This number can be increased as necessary by inserting<br />
USB hubs.<br />
Due to <strong>the</strong> large number of available USB devices, <strong>the</strong>re is almost no limit to <strong>the</strong> expansions<br />
that are possible with <strong>the</strong> R&S <strong>FSP</strong>. The following list shows various USB devices that can be<br />
useful <strong>for</strong> <strong>the</strong> R&S <strong>FSP</strong>:<br />
• Power sensors of <strong>the</strong> R&S NRP-Zxx series<br />
(require adapter cable R&S NRP-Z4)<br />
• Memory stick <strong>for</strong> easy transfer of data to/from a PC<br />
(e.g. firmware updates)<br />
• CD-ROM drives <strong>for</strong> easy installation of firmware applications<br />
• PC keyboard <strong>for</strong> entering comments, file names, etc.<br />
• Mouse <strong>for</strong> easy operation of Windows XP dialog boxes<br />
• Printer <strong>for</strong> printing out measurement results<br />
• Modem <strong>for</strong> remote control of <strong>the</strong> R&S <strong>FSP</strong> over large distances<br />
Installing USB devices is easy under Windows XP, because all USB devices are plug&play.<br />
All USB devices can be connected to or disconnected from <strong>the</strong> R&S <strong>FSP</strong> during operation.<br />
After a device is connected to <strong>the</strong> USB interface of <strong>the</strong> R&S <strong>FSP</strong>, Windows XP automatically<br />
searches <strong>for</strong> a suitable device driver.<br />
If Windows XP does not find a suitable driver, it will prompt you to specify a directory that<br />
contains <strong>the</strong> driver software. If <strong>the</strong> driver software is on a CD, connect a USB CD-ROM drive<br />
to <strong>the</strong> R&S <strong>FSP</strong> be<strong>for</strong>e proceeding.<br />
<strong>Quick</strong> <strong>Start</strong> <strong>Guide</strong> 1164.4556.62 - 04 2.13
R&S <strong>FSP</strong><br />
Preparing <strong>for</strong> Use<br />
Connecting External Devices<br />
When a USB device is subsequently disconnected from <strong>the</strong> R&S <strong>FSP</strong>, Windows XP<br />
immediately detects <strong>the</strong> change in hardware configuration and deactivates <strong>the</strong> corresponding<br />
driver.<br />
Example:<br />
Connect a memory stick to <strong>the</strong> R&S <strong>FSP</strong>:<br />
1. When you connect <strong>the</strong> pendrive at <strong>the</strong> USB interface, Windows XP detects <strong>the</strong> new<br />
hardware:<br />
2. Windows XP installs <strong>the</strong> corresponding driver.<br />
If installation is successful, Windows XP in<strong>for</strong>ms you that <strong>the</strong> device is ready to use:<br />
The memory stick is made available as a new drive and is displayed in <strong>the</strong> Windows<br />
Explorer:<br />
The memory stick can be used like a normal drive to load or store data.<br />
2.14 <strong>Quick</strong> <strong>Start</strong> <strong>Guide</strong> 1164.4556.62 - 04
PRESET<br />
CAL<br />
SETUP<br />
HCOPY<br />
SPECTRUM ANALYZER<br />
.<br />
9kHz<br />
.<br />
. . . 3GHz<br />
.<br />
<strong>FSP</strong><br />
PREV<br />
NEXT<br />
7 8 9<br />
4 5 6<br />
1 2 3<br />
0<br />
FREQ<br />
MKR<br />
ESC<br />
CANCEL<br />
TRACE<br />
LINES<br />
DISP<br />
FILE<br />
SPAN<br />
MKR<br />
. -<br />
ENTER<br />
MAX 0V DC<br />
AMPT<br />
MKR<br />
FCTN<br />
GHz<br />
-dBm<br />
MHz<br />
dBm<br />
kHz<br />
dB<br />
Hz<br />
dB..<br />
BACK<br />
AF OUTPUT<br />
GEN OUTPUT 50<br />
s<br />
V<br />
ms<br />
mV<br />
µs<br />
µV<br />
ns<br />
nV<br />
Ω<br />
BW<br />
MEAS<br />
1093.4495.03<br />
PROBE<br />
EXT MIXER<br />
SWEEP<br />
TRIG<br />
POWER<br />
KEYBOARD<br />
RF INPUT 50 Ω<br />
MAX<br />
+30 dBm / 50V DC<br />
MADE IN GERMANY<br />
R&S <strong>FSP</strong><br />
Preparing <strong>for</strong> Use<br />
Connecting External Devices<br />
3. If you no longer need <strong>the</strong> memory stick or if you want to transfer files to ano<strong>the</strong>r computer,<br />
simply disconnect <strong>the</strong> memory stick. Windows XP will automatically deactivate <strong>the</strong> driver. If<br />
<strong>the</strong> drive is still selected in Explorer, an error message will appear indicating that <strong>the</strong> drive<br />
is no longer available.<br />
2.3.6 Connecting External Generators<br />
The External Generator Control option (R&S <strong>FSP</strong>-B10) allows you to operate a number of<br />
commercially available generators as a tracking generator on <strong>the</strong> R&S <strong>FSP</strong>. When suitable<br />
generators are used, <strong>the</strong> R&S <strong>FSP</strong> thus allows scalar network analysis to be per<strong>for</strong>med also<br />
outside <strong>the</strong> frequency range of <strong>the</strong> internal tracking generator. Appendix “External Generator<br />
Control” provides a list of generators supported by <strong>the</strong> option R&S <strong>FSP</strong>-B10.<br />
The following figure shows <strong>the</strong> test setup:<br />
TTL (optional) TTL (optional)<br />
GPIB<br />
AUX AUX / /<br />
TRIGGER<br />
Reference Frequency<br />
BLANK BLANK<br />
MARKER<br />
IEC-BUS REF<br />
REF IN IEC2<br />
AUX<br />
CONTROL<br />
GEN OUTPUT<br />
RF INPUT<br />
The generator is controlled via <strong>the</strong> – optional – second GPIB interface of <strong>the</strong> R&S <strong>FSP</strong><br />
(= IEC2, supplied toge<strong>the</strong>r with <strong>the</strong> option). With some <strong>Rohde</strong> & <strong>Schwarz</strong> generators, it is also<br />
controlled via <strong>the</strong> TTL synchronization interface that is contained in <strong>the</strong> AUX CONTROL<br />
interface of <strong>the</strong> R&S <strong>FSP</strong>.<br />
DUT<br />
• Using <strong>the</strong> TTL interface allows you to attain significantly higher<br />
speeds than possible with a pure GPIB control, because <strong>the</strong><br />
frequency switching mechanism of <strong>the</strong> R&S <strong>FSP</strong> is directly coupled<br />
to <strong>the</strong> frequency switching mechanism of <strong>the</strong> generator.<br />
• To increase measurement accuracy, use a shared reference<br />
frequency to operate <strong>the</strong> R&S <strong>FSP</strong> and <strong>the</strong> generator. If no<br />
independent 10 MHz reference frequency is available, connect <strong>the</strong><br />
reference output of <strong>the</strong> generator to <strong>the</strong> reference input of <strong>the</strong><br />
R&S <strong>FSP</strong> and use SETUP – REFERENCE EXT to configure <strong>the</strong><br />
R&S <strong>FSP</strong> to implement <strong>the</strong> external reference.<br />
<strong>Quick</strong> <strong>Start</strong> <strong>Guide</strong> 1164.4556.62 - 04 2.15
R&S <strong>FSP</strong><br />
Preparing <strong>for</strong> Use<br />
Connecting External Devices<br />
2.3.6.1 Connecting <strong>the</strong> R&S <strong>FSP</strong> to <strong>the</strong> Generator<br />
To couple <strong>the</strong> frequency setting and level setting of <strong>the</strong> generator to <strong>the</strong> R&S <strong>FSP</strong>, set up <strong>the</strong><br />
following connections:<br />
1. Connect <strong>the</strong> GPIB interface of <strong>the</strong> generator to <strong>the</strong> IEC2 connector on <strong>the</strong> rear panel of <strong>the</strong><br />
R&S <strong>FSP</strong>.<br />
2. (Optional:) Connect <strong>the</strong> TTL interface of <strong>the</strong> generator and <strong>the</strong> R&S <strong>FSP</strong>.<br />
➢ Alternative 1 (R&S SMR, R&S SMU):<br />
Connect <strong>the</strong> AUX CONTROL connector of <strong>the</strong> R&S <strong>FSP</strong> to <strong>the</strong> corresponding AUX<br />
connector on <strong>the</strong> rear panel of <strong>the</strong> generator (<strong>the</strong> connection cable is supplied toge<strong>the</strong>r<br />
with <strong>the</strong> option R&S <strong>FSP</strong>-B10).<br />
➢ Alternative 2 (R&S SME, R&S SMP, R&S SMIQ):<br />
Connect <strong>the</strong> AUX CONTROL connector of <strong>the</strong> R&S <strong>FSP</strong> to <strong>the</strong> TRIGGER, MARKER and<br />
BLANK connectors on <strong>the</strong> rear panel of <strong>the</strong> generator (<strong>the</strong> connection cable is also<br />
supplied toge<strong>the</strong>r with <strong>the</strong> option R&S <strong>FSP</strong>-B10). Note <strong>the</strong> labelling on <strong>the</strong> TRIGGER,<br />
MARKER and BLANK lines.<br />
➢ Alternative 3 (R&S SML, R&S SMG/SMGU, R&S SMH/SMHU, R&S SMX/SMY,<br />
generators from o<strong>the</strong>r manufacturers):<br />
No TTL connection possible.<br />
The generator type determines which one of <strong>the</strong> possible connections is suitable <strong>for</strong> <strong>the</strong><br />
generator. For more in<strong>for</strong>mation, refer to <strong>the</strong> Operating Manual <strong>for</strong> <strong>the</strong> generator.<br />
3. Connect <strong>the</strong> reference frequency output of <strong>the</strong> generator to <strong>the</strong> reference frequency input<br />
(REF IN) of <strong>the</strong> R&S <strong>FSP</strong>.<br />
or<br />
Connect <strong>the</strong> reference frequency inputs of <strong>the</strong> two instruments to an external frequency<br />
standard.<br />
2.3.6.2 Configuring <strong>the</strong> Generator on <strong>the</strong> R&S <strong>FSP</strong><br />
To configure <strong>the</strong> generator, press <strong>the</strong> NETWORK hotkey located in <strong>the</strong> hotkey bar at <strong>the</strong> lower<br />
edge of <strong>the</strong> screen.<br />
Per<strong>for</strong>m <strong>the</strong> following steps:<br />
1. Press <strong>the</strong> EXT SOURCE softkey. The submenu <strong>for</strong> configuring generators will open<br />
2. Select and configure <strong>the</strong> generator:<br />
➢ Press <strong>the</strong> SELECT GENERATOR softkey.<br />
The table containing <strong>the</strong> generator settings will open. The selection bar will be located in<br />
<strong>the</strong> row SRC 1 under <strong>the</strong> column TYPE.<br />
2.16 <strong>Quick</strong> <strong>Start</strong> <strong>Guide</strong> 1164.4556.62 - 04
R&S <strong>FSP</strong><br />
Preparing <strong>for</strong> Use<br />
Connecting External Devices<br />
➢ Press <strong>the</strong> ENTER key.<br />
The list of available generators will open.<br />
➢ Using <strong>the</strong> rotary knob, select <strong>the</strong> desired generator and activate ENTER by pressing <strong>the</strong><br />
rotary knob.<br />
The generator list will close, and <strong>the</strong> selected generator will <strong>the</strong>n appear in <strong>the</strong> SELECT<br />
GENERATOR table. Simultaneously, <strong>the</strong> limits <strong>for</strong> frequency and output power which<br />
you can set on <strong>the</strong> generator will appear in <strong>the</strong> F MIN, F MAX, P MIN and P MAX fields.<br />
➢ Using <strong>the</strong> Ur key, move <strong>the</strong> selection bar to <strong>the</strong> IFC column and press <strong>the</strong> ENTER key.<br />
The list of available control interfaces will appear.<br />
➢ If <strong>the</strong> TTL interfaces from <strong>the</strong> R&S <strong>FSP</strong> and generator are connected, select TTL by<br />
using <strong>the</strong> rotary knob and <strong>the</strong>n activate it by pressing <strong>the</strong> rotary knob.<br />
➢ If no TTL interface is provided or if <strong>the</strong> TTL interfaces are not connected, select GPIB by<br />
using <strong>the</strong> rotary knob and <strong>the</strong>n activate it by pressing <strong>the</strong> rotary knob.<br />
➢ Using <strong>the</strong> Ur key, move <strong>the</strong> selection bar to <strong>the</strong> GPIB ADDR column and press <strong>the</strong><br />
ENTER key.<br />
The entry field <strong>for</strong> <strong>the</strong> GPIB address of <strong>the</strong> generator will open.<br />
➢ Enter <strong>the</strong> GPIB address of <strong>the</strong> generator and confirm with ENTER.<br />
The specified address will be added to <strong>the</strong> table.<br />
3. Select <strong>the</strong> reference frequency <strong>for</strong> <strong>the</strong> generator:<br />
➢ If you want to operate <strong>the</strong> generator using its internal reference, change <strong>the</strong> GEN REF<br />
softkey to <strong>the</strong> state INT.<br />
➢ If you want to operate <strong>the</strong> generator using an external reference, change <strong>the</strong> GEN REF<br />
softkey to <strong>the</strong> state EXT.<br />
This concludes <strong>the</strong> procedure <strong>for</strong> defining <strong>the</strong> default setting <strong>for</strong> <strong>the</strong> generator.<br />
A second generator configuration can be inserted in advance by<br />
repeating <strong>the</strong> settings in <strong>the</strong> line SRC 2. This makes it easy to switch<br />
from one generator type to ano<strong>the</strong>r.<br />
2.3.6.3 Activating <strong>the</strong> Generator Configuration and Setting <strong>the</strong> Output Level<br />
To select <strong>the</strong> active generator configuration, press <strong>the</strong> FREQUENCY SWEEP softkey. The<br />
FREQUENCY SWEEP table will open, and <strong>the</strong> selection bar will be located under <strong>the</strong> STATE<br />
column in <strong>the</strong> SRC 1 row.<br />
➢ If you want to use <strong>the</strong> SRC 1 generator configuration, insert a checkmark in <strong>the</strong> field by<br />
pressing <strong>the</strong> ENTER key.<br />
<strong>Quick</strong> <strong>Start</strong> <strong>Guide</strong> 1164.4556.62 - 04 2.17
R&S <strong>FSP</strong><br />
Preparing <strong>for</strong> Use<br />
Connecting External Devices<br />
➢ If you want to use <strong>the</strong> SRC 2 generator configuration, move <strong>the</strong> selection bar to <strong>the</strong> lower<br />
line of <strong>the</strong> table by using <strong>the</strong> Ud key. Then activate <strong>the</strong> generator configuration by pressing<br />
<strong>the</strong> ENTER key and set <strong>the</strong> checkmark in line 2 under <strong>the</strong> STATE column.<br />
➢ Using <strong>the</strong> Ur key, move <strong>the</strong> selection bar to <strong>the</strong> POWER [dBm] column and press <strong>the</strong><br />
ENTER key.<br />
➢ Enter <strong>the</strong> desired output power and confirm with <strong>the</strong> dBm key. The power you entered will<br />
appear in <strong>the</strong> table.<br />
You can also change <strong>the</strong> output power of <strong>the</strong> generator by using <strong>the</strong><br />
SOURCE POWER softkey located in <strong>the</strong> NETWORK menu.<br />
The remaining columns of <strong>the</strong> table are used to configure frequency-converting<br />
measurements. For more in<strong>for</strong>mation, refer to <strong>the</strong> Operating Manual, section "External<br />
Generator Control - Option R&S <strong>FSP</strong>-B10".<br />
This concludes <strong>the</strong> procedure <strong>for</strong> configuring <strong>the</strong> generator.<br />
2.3.6.4 Using an External Generator as a Tracking Generator<br />
To activate <strong>the</strong> external generator as a tracking generator, do <strong>the</strong> following:<br />
➢ Switch on <strong>the</strong> external generator.<br />
➢ Press <strong>the</strong> NETWORK hotkey on <strong>the</strong> R&S <strong>FSP</strong>.<br />
➢ Press <strong>the</strong> EXT SOURCE softkey.<br />
Tracking generator operation using an external generator will be activated. The external<br />
generator will switch to remote control and can be used like an internal tracking generator. For<br />
more in<strong>for</strong>mation about measurements with an external tracking generator, refer to <strong>the</strong><br />
Operating Manual, section "External Generator Control - Option R&S <strong>FSP</strong>-B10".<br />
Switching off <strong>the</strong> tracking generator:<br />
➢ Press <strong>the</strong> NETWORK hotkey on <strong>the</strong> R&S <strong>FSP</strong>.<br />
➢ Press <strong>the</strong> EXT SOURCE softkey.<br />
➢ Change <strong>the</strong> EXT SRC softkey to OFF by pressing it.<br />
When you switch off tracking generator operation using an external<br />
generator, control on <strong>the</strong> IEC2 is automatically released and <strong>the</strong><br />
generator is returned to LOCAL mode.<br />
2.18 <strong>Quick</strong> <strong>Start</strong> <strong>Guide</strong> 1164.4556.62 - 04
R&S <strong>FSP</strong><br />
Preparing <strong>for</strong> Use<br />
Setup<br />
2.4 Setup<br />
2.4.1 Selecting <strong>the</strong> Frequency Reference<br />
You can switch <strong>the</strong> reference signal <strong>for</strong> frequency processing of <strong>the</strong> R&S <strong>FSP</strong> between <strong>the</strong><br />
internal reference and an external reference signal at 10 MHz as follows:<br />
➢ Press <strong>the</strong> SETUP key.<br />
The SETUP menu will open.<br />
➢ Press <strong>the</strong> REFERENCE INT/EXT softkey until it is in <strong>the</strong> desired state.<br />
If <strong>the</strong> reference signal is missing when switchover to <strong>the</strong> external<br />
reference occurs, EXREF is displayed after a few moments, indicating<br />
that synchronization has not taken place.<br />
When switchover to an internal reference occurs, note that <strong>the</strong> external<br />
reference signal is removed in order to avoid any interactions with <strong>the</strong><br />
internal reference signal.<br />
IEC bus command:<br />
ROSC:SOUR INT<br />
2.4.2 Setting <strong>the</strong> Date and Time<br />
➢ Press <strong>the</strong> SETUP key.<br />
The SETUP menu will open.<br />
➢ Press <strong>the</strong> GENERAL SETUP softkey.<br />
The submenu with general settings will open.<br />
The TIME+DATE softkey activates <strong>the</strong> TIME AND DATE table <strong>for</strong> entering <strong>the</strong> time and<br />
date <strong>for</strong> <strong>the</strong> internal real-time clock.<br />
Entering <strong>the</strong> time<br />
Hours and minutes can be entered independently of each o<strong>the</strong>r in <strong>the</strong> entry field:<br />
IEC bus command: SYST:TIME 12,30<br />
<strong>Quick</strong> <strong>Start</strong> <strong>Guide</strong> 1164.4556.62 - 04 2.19
R&S <strong>FSP</strong><br />
Preparing <strong>for</strong> Use<br />
Setup<br />
Entering <strong>the</strong> date<br />
The day, month and year can be entered independently of each o<strong>the</strong>r in <strong>the</strong> entry field:<br />
To select <strong>the</strong> month, use <strong>the</strong> units key to open a list containing <strong>the</strong> month names. You can<br />
<strong>the</strong>n select <strong>the</strong> month from <strong>the</strong> list.<br />
IEC bus command: SYST:DATE 2002,03,11<br />
2.4.3 Setting <strong>the</strong> GPIB Interface<br />
➢ Press <strong>the</strong> SETUP key.<br />
The SETUP menu will open.<br />
➢ Press <strong>the</strong> GENERAL SETUP softkey.<br />
The submenu with general settings will open.<br />
➢ Press <strong>the</strong> GPIB softkey.<br />
The submenu <strong>for</strong> setting <strong>the</strong> parameters of <strong>the</strong> remote control interface will open.<br />
2.4.3.1 GPIB Address<br />
➢ Press <strong>the</strong> GPIB ADDRESS softkey.<br />
The entry field <strong>for</strong> <strong>the</strong> GPIB address will open.<br />
The setting range is from 0 to 30. The default address is 20 if SCPI is selected as <strong>the</strong> GPIB<br />
language or 18 if an 85xx emulation is selected.<br />
IEC bus command: SYST:COMM:GPIB:ADDR 20<br />
2.20 <strong>Quick</strong> <strong>Start</strong> <strong>Guide</strong> 1164.4556.62 - 04
R&S <strong>FSP</strong><br />
Preparing <strong>for</strong> Use<br />
Setup<br />
2.4.3.2 GPIB Language<br />
➢ Press <strong>the</strong> GPIB LANGUAGE softkey.<br />
The list of available remote control languages will open.<br />
The following languages are available:<br />
• SCPI<br />
• HP mode:<br />
8560E, 8561E, 8562E, 8563E, 8564E, 8565E<br />
8566A, 8566B, 8568A, 8568B, 71100C, 71200C, 71209A<br />
8591E, 8594E<br />
If entries of <strong>the</strong> HP mode are selected, <strong>the</strong> command recognition uses<br />
syntax rules which are different from syntax rules of <strong>the</strong> SCPI mode.<br />
Correspondingly, proper detection of SCPI commands is not ensured<br />
in this mode.<br />
For 8566A/B, 8568A/B and 8594E, command sets A and B are<br />
available. Command sets A and B differ in <strong>the</strong> rules regarding <strong>the</strong><br />
command structure.<br />
Selecting a language different from "SCPI" will set <strong>the</strong> GPIB address to<br />
18 if it was 20 be<strong>for</strong>e.<br />
<strong>Start</strong> / stop frequency, reference level and # of sweep points will be<br />
adapted to <strong>the</strong> selected instrument model.<br />
8568A_DC and 8568B_DC are using DC input coupling as default if it<br />
is supported by <strong>the</strong> instrument.<br />
The HP model 8591E is compatible to HP model 8594E, <strong>the</strong> HP models<br />
71100C, 71200C, and 71209A are compatible to HP models 8566A/B.<br />
When <strong>the</strong> selection is changed, <strong>the</strong> following settings are changed:<br />
SCPI:<br />
• The instrument will per<strong>for</strong>m a preset.<br />
71100C, 71200C, 71209A, 856xA/B, 856xE, 8591E, 8594E:<br />
• The instrument will per<strong>for</strong>m a preset.<br />
The following instrument settings will <strong>the</strong>n be changed:<br />
Model<br />
# of Trace<br />
Points<br />
<strong>Start</strong> Freq. Stop Freq. Ref Level Input Coupling<br />
8560E 601 0 Hz 2.9 GHz 0 dBm AC<br />
8561E 601 0 Hz 6.5 GHz 0 dBm AC<br />
8562E 601 0 Hz 13.2 GHz 0 dBm AC<br />
<strong>Quick</strong> <strong>Start</strong> <strong>Guide</strong> 1164.4556.62 - 04 2.21
R&S <strong>FSP</strong><br />
Preparing <strong>for</strong> Use<br />
Setup<br />
Model<br />
# of Trace<br />
Points<br />
<strong>Start</strong> Freq. Stop Freq. Ref Level Input Coupling<br />
8563E 601 0 Hz 26.5 GHz 0 dBm AC<br />
8564E 601 0 Hz 40 GHz 0 dBm AC<br />
8565E 601 0 Hz 50 GHz 0 dBm AC<br />
8566A/B 1001 2 GHz 22 GHz 0 dBm DC (R&S FSU familiy)<br />
AC (R&S <strong>FSP</strong>)<br />
8568A/B 1001 0 Hz 1.5 GHz 0 dBm AC<br />
8591E 401 0 Hz 3 GHz 0 dBm AC<br />
8594E 401 0 Hz 3 GHz 0 dBm AC<br />
71100C 1001 2 GHz 22 GHz 0 dBm DC (R&S FSU familiy)<br />
AC (R&S <strong>FSP</strong>)<br />
71200C 1001 2 GHz 22 GHz 0 dBm DC (R&S FSU familiy)<br />
AC (R&S <strong>FSP</strong>)<br />
71209A 1001 2 GHz 22 GHz 0 dBm DC (R&S FSU familiy)<br />
AC (R&S <strong>FSP</strong>)<br />
Note regarding <strong>the</strong> selection of 856x <strong>for</strong> <strong>the</strong> R&S <strong>FSP</strong>:<br />
• The # of trace points is not switched over until <strong>the</strong> state changes to<br />
REMOTE. In <strong>the</strong> case of switchover to manual operation (LOCAL<br />
key), <strong>the</strong> number of sweep points is always changed to 501.<br />
• If necessary, <strong>the</strong> stop frequency specified in <strong>the</strong> table is restricted to<br />
<strong>the</strong> corresponding frequency range of <strong>the</strong> R&S <strong>FSP</strong>.<br />
IEC bus command: SYST:LANG "SCPI" | "8560E" |<br />
"8561E" | "8562E" | "8563E" |<br />
"8564E" | "8565E" | "8566A" |<br />
"8566B" | "8568A" | "8568A_DC" |<br />
"8568B" | "8568B_DC" | "8591E" |<br />
"8594E" | "71100C" | "71200C" |<br />
"71209A"<br />
2.4.3.3 ID Response String<br />
➢ The ID STRING FACTORY softkey selects <strong>the</strong> default response to <strong>the</strong> command *IDN?.<br />
IEC bus command: --<br />
➢ The ID STRING USER softkey opens <strong>the</strong> editor <strong>for</strong> entering a user-defined response to <strong>the</strong><br />
command *IDN?. The max. length of <strong>the</strong> output string is 36 characters.<br />
IEC bus command: --<br />
2.22 <strong>Quick</strong> <strong>Start</strong> <strong>Guide</strong> 1164.4556.62 - 04
R&S <strong>FSP</strong><br />
Preparing <strong>for</strong> Use<br />
Setup<br />
2.4.4 Setting <strong>the</strong> Screen Colors<br />
➢ Press <strong>the</strong> DISP key.<br />
The DISPLAY menu will open.<br />
➢ Press <strong>the</strong> CONFIG DISPLAY softkey.<br />
The submenu <strong>for</strong> configuring <strong>the</strong> screen will open.<br />
➢ The DEFAULT COLORS 1 and 2 softkeys set <strong>the</strong> default setting <strong>for</strong> brightness, tint and<br />
color saturation of all screen objects. The color schemes are selected in such a manner that<br />
all screen elements will be optimally visible regardless whe<strong>the</strong>r viewed from above or<br />
below. In <strong>the</strong> instrument's default setting, DEFAULT COLORS 1 is active.<br />
IEC bus command:<br />
DISP:CMAP:DEF1<br />
DISP:CMAP:DEF2<br />
The procedure <strong>for</strong> setting screen colors and brightness is as follows:<br />
➢ Press <strong>the</strong> NEXT key.<br />
The side menu <strong>for</strong> changing <strong>the</strong> screen colors will open.<br />
The SELECT OBJECT softkey activates <strong>the</strong> selection of screen elements <strong>for</strong> which <strong>the</strong><br />
color setting needs to be changed. Once this selection is made, <strong>the</strong> PREDEFINED<br />
COLORS, BRIGHTNESS, TINT and SATURATION softkeys can be used to change <strong>the</strong><br />
overall color or <strong>the</strong> brightness, tint and color saturation of <strong>the</strong> selected element.<br />
SELECT DISPLAY OBJECT<br />
Background<br />
Grid<br />
Function field + status field + data entry text<br />
Function field LED on<br />
Function field LED warn<br />
Enhancement label text<br />
Status field background<br />
Trace 1<br />
Trace 2<br />
Trace 3<br />
Marker<br />
Lines<br />
The BRIGHTNESS softkey activates entry of <strong>the</strong> brightness of <strong>the</strong> selected graphics<br />
element.<br />
The entry value is between 0% and 100%.<br />
IEC bus command:<br />
DISP:CMAP5:HSL ,,<br />
The TINT softkey activates entry of <strong>the</strong> tint <strong>for</strong> <strong>the</strong> selected graphics element. The percent<br />
value that is entered refers to a continuous color spectrum that ranges from red (0%) to blue<br />
(100%).<br />
IEC bus command:<br />
DISP:CMAP5:HSL ,,<br />
<strong>Quick</strong> <strong>Start</strong> <strong>Guide</strong> 1164.4556.62 - 04 2.23
R&S <strong>FSP</strong><br />
Preparing <strong>for</strong> Use<br />
Setup<br />
The SATURATION softkey activates entry of <strong>the</strong> color saturation of <strong>the</strong> selected element.<br />
The entry value is between 0% and 100%.<br />
IEC bus command:<br />
DISP:CMAP5:HSL ,,<br />
The PREDEFINED COLORS softkey opens a list <strong>for</strong> selecting predefined colors <strong>for</strong> <strong>the</strong><br />
screen objects:<br />
COLOR<br />
BLACK<br />
BLUE<br />
BROWN<br />
GREEN<br />
CYAN<br />
RED<br />
MAGENTA<br />
YELLOW<br />
IEC bus command:<br />
DISP:CMAP1 ... 26:PDEF <br />
2.4.5 Automatically Switching Off <strong>the</strong> Internal Screen<br />
The R&S <strong>FSP</strong> provides a feature <strong>for</strong> automatically switching off <strong>the</strong> screen after a userdefined<br />
period of time. The background lighting will be disabled if no entries are made from<br />
<strong>the</strong> front panel after <strong>the</strong> selected response time (key, softkey or hardkey and rotary knob).<br />
To activate automatic switch-off:<br />
➢ Press <strong>the</strong> DISP key.<br />
➢ Press <strong>the</strong> CONFIG DISPLAY softkey.<br />
➢ Press <strong>the</strong> DISPLAY PWR SAVE softkey.<br />
The softkey will have a color background, indicating that <strong>the</strong> power save mode<br />
is active. At <strong>the</strong> same time, <strong>the</strong> input window <strong>for</strong> <strong>the</strong> response time will open.<br />
➢ Enter <strong>the</strong> desired response time in minutes and confirm <strong>the</strong> entry with <strong>the</strong> ENTER key.<br />
The screen will be disabled (turn dark) after <strong>the</strong> selected period of time.<br />
To deactivate automatic switch-off:<br />
➢ Press <strong>the</strong> DISP key.<br />
➢ Press <strong>the</strong> CONFIG DISPLAY softkey.<br />
➢ Press <strong>the</strong> DISPLAY PWR SAVE softkey twice.<br />
The color background of <strong>the</strong> softkey will disappear.<br />
The power save mode is now switched off.<br />
2.24 <strong>Quick</strong> <strong>Start</strong> <strong>Guide</strong> 1164.4556.62 - 04
R&S <strong>FSP</strong><br />
Preparing <strong>for</strong> Use<br />
Setup<br />
2.4.6 File and Path Selection Using <strong>the</strong> Front Panel Keys<br />
As of firmware version 4.3x <strong>the</strong> base system firmware supports new dialog boxes to select a<br />
folder and/or a file, e.g. <strong>for</strong> trace export.<br />
The following section describes <strong>the</strong> usage of <strong>the</strong> instrument's front panel keys using TRACE<br />
EXPORT as an example.<br />
➢ Press <strong>the</strong> TRACE key and <strong>the</strong>n <strong>the</strong> NEXT softkey.<br />
➢ Press <strong>the</strong> ASCII FILE EXPORT softkey to open <strong>the</strong> corresponding dialog box.<br />
The focus is on <strong>the</strong> File Name field so you can directly edit <strong>the</strong> file name using <strong>the</strong> numeric<br />
keys, <strong>the</strong> cursor keys or <strong>the</strong> BACK key.<br />
You can also use alphanumeric characters in <strong>the</strong> file name.<br />
➢ To enter alphanumeric characters, select <strong>the</strong> EDIT FILENAME button. Confirm <strong>the</strong><br />
selection with <strong>the</strong> ENTER key to open an online keyboard.<br />
Select <strong>the</strong> characters with <strong>the</strong> rotary knob or <strong>the</strong> cursor keys and confirm with <strong>the</strong> ENTER<br />
key.<br />
<strong>Quick</strong> <strong>Start</strong> <strong>Guide</strong> 1164.4556.62 - 04 2.25
R&S <strong>FSP</strong><br />
Preparing <strong>for</strong> Use<br />
Setup<br />
➢ Drive usage is checked according to <strong>the</strong> following rules:<br />
• first, <strong>the</strong> R&S <strong>FSP</strong> checks <strong>for</strong> a connected memory stick<br />
• if a memory stick is not recognized, <strong>the</strong>n <strong>the</strong> R&S <strong>FSP</strong> uses <strong>the</strong> floppy drive<br />
• if <strong>the</strong> R&S <strong>FSP</strong> doesn’t recognize a floppy drive or <strong>the</strong>re is no floppy in <strong>the</strong> drive, <strong>the</strong><br />
R&S <strong>FSP</strong> uses <strong>the</strong> internal hard disk.<br />
Note that <strong>the</strong> path and file name are reset to <strong>the</strong>ir default values after an instrument<br />
PRESET.<br />
➢ Change <strong>the</strong> drive by moving <strong>the</strong> rotary knob until <strong>the</strong> focus is on <strong>the</strong> Save In field.<br />
➢ Press <strong>the</strong> CURSOR RIGHT key to open <strong>the</strong> dropdown menu and select <strong>the</strong> drive you want<br />
to save <strong>the</strong> file to with <strong>the</strong> CURSOR UP and CURSOR DOWN keys. Confirm your selection<br />
by pressing <strong>the</strong> ENTER key.<br />
➢ Select a subfolder by moving <strong>the</strong> rotary knob until <strong>the</strong> file / subfolder list is in focus. The<br />
selected file or subfolder in focus is framed by dotted line.<br />
➢ Use <strong>the</strong> CURSOR UP or CURSOR DOWN keys to select a specific folder or file. To change<br />
<strong>the</strong> path or select a file, confirm your selection with <strong>the</strong> ENTER key.<br />
Note that <strong>the</strong> R&S <strong>FSP</strong> overwrites existing files with <strong>the</strong> new data.<br />
2.26 <strong>Quick</strong> <strong>Start</strong> <strong>Guide</strong> 1164.4556.62 - 04
R&S <strong>FSP</strong><br />
Preparing <strong>for</strong> Use<br />
Setup<br />
2.4.7 Selecting and Configuring Printers<br />
➢ Press <strong>the</strong> HCOPY key.<br />
The HARDCOPY menu will open.<br />
➢ Press <strong>the</strong> DEVICE SETUP softkey.<br />
The dialog box <strong>for</strong> selecting <strong>the</strong> file <strong>for</strong>mat and printer will open:<br />
➢ You can select a connected printer (including a pre-configured network printer) by<br />
positioning <strong>the</strong> selection bar on <strong>the</strong> Printer entry by turning <strong>the</strong> rotary knob and <strong>the</strong>n<br />
confirming <strong>the</strong> selection by pressing <strong>the</strong> rotary knob or <strong>the</strong> ENTER key.<br />
After you confirm <strong>the</strong> selection, <strong>the</strong> entries Name, Print to File and Orientation will be made<br />
available and can also be accessed with <strong>the</strong> rotary knob.<br />
➢ To select <strong>the</strong> printer type, open <strong>the</strong> selection list by pressing <strong>the</strong> rotary knob or <strong>the</strong> ENTER<br />
key after you access <strong>the</strong> Name field.<br />
From <strong>the</strong> selection list, you can now select <strong>the</strong> printer you want (in <strong>the</strong> example, this is<br />
Cannon Bubble-Jet BJC800 (A4)) by using <strong>the</strong> rotary knob again and <strong>the</strong>n confirming your<br />
selection with ENTER or by pressing <strong>the</strong> rotary knob. The selection list will <strong>the</strong>n disappear<br />
and <strong>the</strong> entry cursor will return to <strong>the</strong> Name field.<br />
<strong>Quick</strong> <strong>Start</strong> <strong>Guide</strong> 1164.4556.62 - 04 2.27
R&S <strong>FSP</strong><br />
Preparing <strong>for</strong> Use<br />
Setup<br />
➢ You can also redirect <strong>the</strong> output to a file ra<strong>the</strong>r than to a printer. To do this, select <strong>the</strong> field<br />
Print to File by using <strong>the</strong> rotary knob and <strong>the</strong>n mark <strong>the</strong> appropriate selection box or cancel<br />
<strong>the</strong> marking by pressing ei<strong>the</strong>r <strong>the</strong> rotary knob or <strong>the</strong> ENTER key:<br />
➢ You can select orientation <strong>for</strong> paper printout by using <strong>the</strong> Orientation field. To open <strong>the</strong><br />
selection list, press <strong>the</strong> rotary knob or ENTER:<br />
From <strong>the</strong> selection list, you can now select <strong>the</strong> orientation you want (Portrait in <strong>the</strong><br />
preceding figure) by using <strong>the</strong> rotary knob again and <strong>the</strong>n confirm with ENTER or by<br />
pressing <strong>the</strong> rotary knob. The selection list will <strong>the</strong>n close and <strong>the</strong> entry cursor will return to<br />
<strong>the</strong> Orientation field.<br />
You can now close <strong>the</strong> dialog box by pressing <strong>the</strong> ESC key or by selecting and confirming<br />
<strong>the</strong> Close button.<br />
2.4.7.1 Selecting Alternative Printer Configurations<br />
The R&S <strong>FSP</strong> can support two independent hardcopy settings. This allows you to quickly<br />
switch between output to a file and a printer.<br />
➢ To make a selection, use <strong>the</strong> DEVICE 1 / 2 softkey, which simultaneously shows <strong>the</strong><br />
associated setting when <strong>the</strong> Hardcopy Setup dialog box is open.<br />
IEC bus command: -<br />
2.4.7.2 Selecting Printer Colors<br />
➢ The COLORS softkey opens <strong>the</strong> submenu <strong>for</strong> selecting <strong>the</strong> colors <strong>for</strong> <strong>the</strong> printout. To make<br />
it easier <strong>for</strong> you to select colors, <strong>the</strong> selected hardcopy color combination is displayed on<br />
screen when you access <strong>the</strong> menu. When you exit <strong>the</strong> menu, <strong>the</strong> system switches back to<br />
<strong>the</strong> previous color combination.<br />
➢ The COLOR ON OFF softkey switches from color output to black-and-white printout. In this<br />
case, all background colors will be printed out in white and all color lines in black. This<br />
allows you to improve contrast on <strong>the</strong> printout. The basic setting is COLOR ON.<br />
IEC bus command:<br />
HCOP:DEV:COL ON<br />
➢ The SCREEN COLORS softkey selects <strong>the</strong> current screen colors <strong>for</strong> <strong>the</strong> printout.<br />
The background will always be printed out in white and <strong>the</strong> grid in black.<br />
2.28 <strong>Quick</strong> <strong>Start</strong> <strong>Guide</strong> 1164.4556.62 - 04
R&S <strong>FSP</strong><br />
Preparing <strong>for</strong> Use<br />
Setup<br />
IEC bus command:<br />
HCOP:CMAP:DEF1<br />
➢ The OPTIMIZED COLORS softkey selects an optimized color setting <strong>for</strong> <strong>the</strong> printout in<br />
order to improve color clarity on <strong>the</strong> printout.<br />
With this selection, trace 1 will be printed out in blue, trace 2 in black, trace 3 in green and<br />
<strong>the</strong> markers in turquoise.<br />
The o<strong>the</strong>r colors correspond to <strong>the</strong> screen colors of <strong>the</strong> DISP – CONFIG DISPLAY -<br />
DEFAULT COLORS 1 softkey.<br />
The background will always be printed out in white and <strong>the</strong> grid in black.<br />
IEC bus command:<br />
HCOP:CMAP:DEF2<br />
➢ The USER DEFINED softkey opens a submenu <strong>for</strong> user-defined color selection (see <strong>the</strong><br />
USER DEFINED COLORS submenu).<br />
The procedure <strong>for</strong> making <strong>the</strong> settings is similar to that <strong>for</strong> setting <strong>the</strong> screen colors.<br />
IEC bus command:<br />
HCOP:CMAP:DEF3<br />
2.4.8 Installing Plug&Play Printers<br />
Plug&play printers can be easily installed under Windows XP:<br />
After you connect and switch on a printer, Windows XP automatically detects <strong>the</strong> printer and<br />
installs <strong>the</strong> associated driver, provided that <strong>the</strong> driver is contained in <strong>the</strong> Windows XP<br />
installation.<br />
If Windows XP does not find <strong>the</strong> printer driver, it will prompt you to enter a path <strong>for</strong> <strong>the</strong><br />
associated installation files. In addition to <strong>the</strong> pre-installed drivers, a number of additional<br />
printer drivers are found in <strong>the</strong> D:\I386 directory.<br />
You can find a detailed step-by-step procedure in Appendix A, section “ Installing Non-<br />
Plug&Play Printers” on page A.6.<br />
When you install printer drivers that are not pre-installed on <strong>the</strong><br />
instrument, <strong>the</strong> installation process will prompt you to specify <strong>the</strong> path<br />
containing <strong>the</strong> new driver. This can be a disk in drive A. Alternatively,<br />
<strong>the</strong> driver can also be loaded from a memory stick or USB CD-ROM<br />
drive (see <strong>the</strong> section “Connecting USB Devices (e.g. a Power Meter)”<br />
on page 2.13).<br />
<strong>Quick</strong> <strong>Start</strong> <strong>Guide</strong> 1164.4556.62 - 04 2.29
R&S <strong>FSP</strong><br />
Preparing <strong>for</strong> Use<br />
Configuring <strong>the</strong> LAN Interface (Option R&S <strong>FSP</strong>-B16 only)<br />
2.4.9 Installing Non-Plug&Play Printers<br />
The procedure <strong>for</strong> installing non-plug&play printers is described in appendix A, section<br />
“ Installing Non-Plug&Play Printers” on page A.6.<br />
2.5 Configuring <strong>the</strong> LAN Interface (Option R&S <strong>FSP</strong>-B16 only)<br />
The instrument can be connected to an E<strong>the</strong>rnet LAN (local area network) using <strong>the</strong> LAN<br />
interface connector on <strong>the</strong> rear panel. This makes it possible to transfer data over <strong>the</strong> network<br />
and to use network printers. In addition, <strong>the</strong> instrument can be remote-controlled via <strong>the</strong><br />
network. The network card can be operated with a 10 MHz E<strong>the</strong>rnet IEEE 802.3 or a 100 MHz<br />
E<strong>the</strong>rnet IEEE 802.3u interface.<br />
2.5.1 Connecting <strong>the</strong> Instrument to <strong>the</strong> Network<br />
Be<strong>for</strong>e connecting <strong>the</strong> instrument to <strong>the</strong> network, consult your network administrator,<br />
particularly in <strong>the</strong> case of large LAN installations. Connection errors may affect <strong>the</strong> entire<br />
network.<br />
Connect a conventional RJ-45 cable (not supplied) to <strong>the</strong> rear panel of <strong>the</strong> instrument and a<br />
network hub of <strong>the</strong> required LAN segment. Since <strong>the</strong> RJ-45 involves star configuration ra<strong>the</strong>r<br />
than bus cabling, no special measures need to be taken.<br />
Setting up <strong>the</strong> connection does not cause any problems on <strong>the</strong> network. Likewise,<br />
disconnecting <strong>the</strong> instrument from <strong>the</strong> network does not cause any problems as long as no<br />
data traffic to and from <strong>the</strong> instrument is in progress.<br />
2.5.2 Configuring <strong>the</strong> Network Card<br />
2.5.2.1 Driver Installation<br />
Under Windows XP, network card drivers do not need to be installed separately if <strong>the</strong> option<br />
R&S <strong>FSP</strong>-B16 has been factory-installed.<br />
All you need to do is connect <strong>the</strong> network cable to <strong>the</strong> LAN-Interface connector on <strong>the</strong><br />
instrument rear panel. Windows XP automatically detects <strong>the</strong> network connection and<br />
activates <strong>the</strong> required drivers.<br />
2.30 <strong>Quick</strong> <strong>Start</strong> <strong>Guide</strong> 1164.4556.62 - 04
R&S <strong>FSP</strong><br />
Preparing <strong>for</strong> Use<br />
Configuring <strong>the</strong> LAN Interface (Option R&S <strong>FSP</strong>-B16 only)<br />
2.5.2.2 Configuring <strong>the</strong> Interface<br />
To configure <strong>the</strong> interface, do <strong>the</strong> following:<br />
➢ Press <strong>the</strong> SETUP key.<br />
The SETUP menu will open.<br />
➢ Press <strong>the</strong> GENERAL SETUP softkey.<br />
The submenu with all general settings will open.<br />
➢ Press <strong>the</strong> CONFIGURE NETWORK softkey.<br />
The dialog box with <strong>the</strong> network settings will open.<br />
This softkey allows you to change <strong>the</strong> existing network configuration depending on <strong>the</strong><br />
selection of <strong>the</strong> affected registration cards (see section “ Configuring Existing Network<br />
Protocols (TCP/IP Protocol)” on page 2.31).<br />
IEC bus command: -<br />
Be<strong>for</strong>e you can configure network support, a PC keyboard with a<br />
trackball (or an additional mouse ra<strong>the</strong>r than a trackball) must be<br />
connected.<br />
2.5.2.3 Configuring Existing Network Protocols (TCP/IP Protocol)<br />
Be<strong>for</strong>e starting, check whe<strong>the</strong>r your network a DHCP server. If necessary, ask your network<br />
administrator.<br />
• If your network has a DHCP server, <strong>the</strong> IP address is to be requested from a DHCP server<br />
automatically. This is <strong>the</strong> default setting and no change of configuration is necessary.<br />
• If your network has no DHCP server, change <strong>the</strong> settings according to <strong>the</strong> following stepby-step<br />
instructions. Use IP addresses and subnet masks suitable <strong>for</strong> your network. If<br />
necessary, contact your network administrator.<br />
<strong>Quick</strong> <strong>Start</strong> <strong>Guide</strong> 1164.4556.62 - 04 2.31
R&S <strong>FSP</strong><br />
Preparing <strong>for</strong> Use<br />
Configuring <strong>the</strong> LAN Interface (Option R&S <strong>FSP</strong>-B16 only)<br />
➢ Open <strong>the</strong> Windows XP <strong>Start</strong> menu by pressing <strong>the</strong> Windows key or CTRL+ESC.<br />
➢ Click Settings - Network Connections - Local Area Connection.<br />
The Local Area Connection Status dialog box will open.<br />
Windows XP automatically appends numbers to <strong>the</strong> name Local Area<br />
Connection Status (e.g. Local Area Connection Status 8) if <strong>the</strong><br />
configuration is set up using <strong>the</strong> New Connection wizard. These<br />
numbers are not important in <strong>the</strong> following configuration steps and are<br />
<strong>the</strong>re<strong>for</strong>e omitted.<br />
2.32 <strong>Quick</strong> <strong>Start</strong> <strong>Guide</strong> 1164.4556.62 - 04
R&S <strong>FSP</strong><br />
Preparing <strong>for</strong> Use<br />
Configuring <strong>the</strong> LAN Interface (Option R&S <strong>FSP</strong>-B16 only)<br />
➢ Click <strong>the</strong> Properties button.<br />
The window with <strong>the</strong> available network protocols opens.<br />
➢ Click <strong>the</strong> network protocol you want (TCP/IP in <strong>the</strong> example).<br />
➢ Click <strong>the</strong> Properties button.<br />
The dialog box with <strong>the</strong> settings <strong>for</strong> <strong>the</strong> selected network protocol will open. By default,<br />
Obtain an IP address automatically is selected.<br />
➢ Select Use <strong>the</strong> following IP address to enter a predefined IP address.<br />
<strong>Quick</strong> <strong>Start</strong> <strong>Guide</strong> 1164.4556.62 - 04 2.33
R&S <strong>FSP</strong><br />
Preparing <strong>for</strong> Use<br />
Configuring <strong>the</strong> LAN Interface (Option R&S <strong>FSP</strong>-B16 only)<br />
➢ Select IP address and enter <strong>the</strong> IP address.<br />
➢ Select Subnet mask and enter <strong>the</strong> required mask.<br />
➢ Click OK.<br />
Windows XP will check <strong>the</strong> entered settings <strong>for</strong> correctness and <strong>the</strong>n store <strong>the</strong><br />
configuration.<br />
If you have entered an invalid IP address or subnet mask, an error message will appear that<br />
also asks you whe<strong>the</strong>r you want to enter a different address or mask:<br />
➢ Click Yes.<br />
The dialog box <strong>for</strong> entering <strong>the</strong> TCP/IP parameters will open again.<br />
If all settings are correct, you will be prompted to restart <strong>the</strong> instrument if required by <strong>the</strong><br />
changes.<br />
2.34 <strong>Quick</strong> <strong>Start</strong> <strong>Guide</strong> 1164.4556.62 - 04
R&S <strong>FSP</strong><br />
Preparing <strong>for</strong> Use<br />
Configuring <strong>the</strong> LAN Interface (Option R&S <strong>FSP</strong>-B16 only)<br />
➢ Click Yes.<br />
Windows XP will restart <strong>the</strong> system.<br />
2.5.2.4 Installing Additional Network Protocols and Services<br />
The procedure <strong>for</strong> installing additional network protocols and services is provided in <strong>the</strong><br />
chapter “ Installing Additional Network Protocols & Services” on page 6.3.<br />
2.5.3 Login<br />
Windows XP requires that users identify <strong>the</strong>mselves by entering a user name and password<br />
in a login window. The instrument provides a factory-installed auto login function, i.e. login is<br />
carried out automatically in <strong>the</strong> background. The ID used <strong>for</strong> auto login has administrator<br />
rights. As user name and password instrument (lowercase) are set.<br />
For in<strong>for</strong>mation on how to deactivate <strong>the</strong> automatic login, refer to chapter “ LAN Interface”,<br />
section “ Deactivating <strong>the</strong> Automatic Login Mechanism” on page 6.14.<br />
<strong>Quick</strong> <strong>Start</strong> <strong>Guide</strong> 1164.4556.62 - 04 2.35
R&S <strong>FSP</strong><br />
Preparing <strong>for</strong> Use<br />
LXI Configuration<br />
2.6 LXI Configuration<br />
LAN eXtensions <strong>for</strong> Instrumentation (LXI) is an instrumentation plat<strong>for</strong>m <strong>for</strong> measuring<br />
instruments and test systems that is based on standard E<strong>the</strong>rnet technology. LXI is intended<br />
to be <strong>the</strong> LAN-based successor to GPIB, combining <strong>the</strong> advantages of E<strong>the</strong>rnet with <strong>the</strong><br />
simplicity and familiarity of GPIB.<br />
• Class C instruments are characterized by a common LAN implementation, including an<br />
ICMP ping responder <strong>for</strong> diagnostics. The instruments can be configured via a web<br />
browser; a LAN Configuration Initialize (LCI) mechanism resets <strong>the</strong> LAN configuration.<br />
The LXI class C instruments shall also support automatic detection in a LAN via <strong>the</strong> VXI-11<br />
discovery protocol and programming by means of IVI drivers.<br />
• Class B adds IEEE 1588 Precision Time Protocol (PTP) and peer-to-peer communication<br />
to <strong>the</strong> base class. IEEE 1588 allows all instruments on <strong>the</strong> same network to automatically<br />
synchronize to <strong>the</strong> most accurate clock available and <strong>the</strong>n provide time stamps or timebased<br />
synchronization signals to all instruments with exceptional accuracy.<br />
• Class A instruments are additionally equipped with <strong>the</strong> eight-channel hardware trigger bus<br />
(LVDS interface) defined in <strong>the</strong> LXI standard.<br />
Instruments of classes A and B can generate and receive software triggers via LAN messages<br />
and communicate with each o<strong>the</strong>r without involving <strong>the</strong> controller.<br />
The R&S <strong>FSP</strong> complies with LXI class C. In addition to <strong>the</strong> general class C features described<br />
above, it provides <strong>the</strong> following LXI-related functionality:<br />
• Integrated LXI Configuration dialog <strong>for</strong> LXI activation and reset of <strong>the</strong> LAN configuration<br />
(LAN Configuration Initialize, LCI).<br />
The LXI functionality requires a Windows XP operating system that has<br />
been upgraded to service pack 2. Please contact your <strong>Rohde</strong> &<br />
<strong>Schwarz</strong> service representative if your R&S <strong>FSP</strong>'s operating system<br />
needs an upgrade. To check <strong>the</strong> version of your operating system,<br />
open <strong>the</strong> Versions+Options dialog box in <strong>the</strong> General Setup submenu.<br />
After a firmware update, use <strong>the</strong> standby key to shut-down and re-start<br />
<strong>the</strong> instrument in order to enable <strong>the</strong> full LXI functionality.<br />
2.36 <strong>Quick</strong> <strong>Start</strong> <strong>Guide</strong> 1164.4556.62 - 04
R&S <strong>FSP</strong><br />
Preparing <strong>for</strong> Use<br />
LXI Configuration<br />
For in<strong>for</strong>mation about <strong>the</strong> LXI standard refer to <strong>the</strong> LXI website at http://www.lxistandard.org.<br />
See also "News from <strong>Rohde</strong> & <strong>Schwarz</strong>, article 2006/II - 190".<br />
2.6.1 LXI Configuration Dialog<br />
This dialog provides basic LXI in<strong>for</strong>mation <strong>for</strong> <strong>the</strong> R&S <strong>FSP</strong>. Press <strong>the</strong> INFO softkey in <strong>the</strong><br />
General Setup menu to open <strong>the</strong> LXI Configuration dialog box.<br />
Default State of <strong>the</strong> Network Settings<br />
According to <strong>the</strong> LXI standard, LAN reset must place <strong>the</strong> following parameters to a default<br />
state. For details on resetting <strong>the</strong> R&S <strong>FSP</strong> refer to <strong>the</strong> Operating Manual, chapter 4.<br />
Parameter<br />
TCP/IP Mode<br />
Dynamic DNS<br />
Value<br />
DHCP + Auto IP Address<br />
Enabled<br />
ICMP Ping<br />
Enabled<br />
Password <strong>for</strong> LAN configuration LxiWebIfc<br />
The LAN Reset <strong>for</strong> <strong>the</strong> R&S <strong>FSP</strong> also resets <strong>the</strong> following parameters:<br />
Parameter<br />
Description<br />
Negotiation<br />
Value<br />
R&S <strong>Spectrum</strong> Analyzer/<strong>FSP</strong>/<br />
Enabled<br />
VXI-11 Discovery<br />
Enabled<br />
The LAN settings are configured using <strong>the</strong> instrument's LXI Browser Interface.<br />
2.6.2 LXI Browser Interface<br />
The instrument's LXI browser interface works correctly with all W3C compliant browsers.<br />
Typing <strong>the</strong> instrument's host name or IP address in <strong>the</strong> address field of <strong>the</strong> browser on your<br />
PC, e.g. http://10.113.10.203 , opens <strong>the</strong> Instrument Home Page (welcome page).<br />
The instrument home page displays <strong>the</strong> device in<strong>for</strong>mation required by <strong>the</strong> LXI standard<br />
including <strong>the</strong> VISA resource string in read-only <strong>for</strong>mat.<br />
The LAN Status toggle button causes <strong>the</strong> LXI logo in <strong>the</strong> status bar of <strong>the</strong> R&S <strong>FSP</strong> to blink<br />
(if active). A green LXI status symbol indicates that a LAN connection has been established;<br />
a red symbol indicates that no LAN cable is connected. The LAN Status setting is not<br />
password-protected.<br />
The navigation pane of <strong>the</strong> browser interface contains <strong>the</strong> following control elements:<br />
• LAN Configuration opens <strong>the</strong> LAN Configuration page.<br />
• LXI Glossary opens a document with a glossary of terms related to <strong>the</strong> LXI standard.<br />
• Status displays in<strong>for</strong>mation about <strong>the</strong> LXI status of <strong>the</strong> instrument.<br />
<strong>Quick</strong> <strong>Start</strong> <strong>Guide</strong> 1164.4556.62 - 04 2.37
R&S <strong>FSP</strong><br />
Preparing <strong>for</strong> Use<br />
LXI Configuration<br />
2.6.3 LAN Configuration website<br />
The LAN Configuration web page displays all mandatory LAN parameters and allows <strong>the</strong>ir<br />
modification.<br />
The TCP/IP Mode configuration field controls how <strong>the</strong> IP address <strong>for</strong> <strong>the</strong> instrument gets<br />
assigned (see also ). For <strong>the</strong> manual configuration mode, <strong>the</strong><br />
static IP address, subnet mask, and default gateway are used to configure <strong>the</strong> LAN. The<br />
automatic configuration mode uses DHCP server or Dynamic Link Local Addressing<br />
(Automatic IP) to obtain <strong>the</strong> instrument IP address.<br />
Changing <strong>the</strong> LAN configuration is password-protected. The password<br />
reads LxiWebIfc (notice upper and lower case characters).<br />
The links across <strong>the</strong> bottom of <strong>the</strong> LAN Configuration page open o<strong>the</strong>r pages:<br />
Ping Client provides <strong>the</strong> ping utility to verify <strong>the</strong> connection between <strong>the</strong> instrument and o<strong>the</strong>r<br />
devices.<br />
Advanced LAN Configuration provides LAN settings that are not declared mandatory by <strong>the</strong><br />
LXI standard.<br />
The Advanced LAN Configuration parameters are used as follows:<br />
• The Negotiation configuration field provides different E<strong>the</strong>rnet speed and duplex mode<br />
settings. In general, <strong>the</strong> Auto Detect mode is sufficient.<br />
• ICMP Ping must be enabled to use <strong>the</strong> ping utility.<br />
• VXI-11 is <strong>the</strong> protocol that is used <strong>for</strong> discovery of <strong>the</strong> instrument in <strong>the</strong> LAN. According to<br />
<strong>the</strong> standard, LXI devices must use VXI-11 to provide a discovery mechanism; o<strong>the</strong>r<br />
additional discovery mechanisms are permitted.<br />
2.6.4 Ping<br />
Ping is a utility that verifies <strong>the</strong> connection between <strong>the</strong> LXI-compliant instrument and ano<strong>the</strong>r<br />
device. The ping command uses <strong>the</strong> ICMP echo request and echo reply packets to determine<br />
whe<strong>the</strong>r <strong>the</strong> LAN connection is functional. Ping is useful <strong>for</strong> diagnosing IP network or router<br />
failures.<br />
The ping utility is not password-protected. To initiate a ping between <strong>the</strong> LXI-compliant<br />
instrument and a second connected device,<br />
1. Enable ICMP Ping on <strong>the</strong> Advanced LAN Configuration page (enabled after an LCI).<br />
2. Enter <strong>the</strong> IP address of <strong>the</strong> second device without <strong>the</strong> ping command and without any<br />
fur<strong>the</strong>r parameters into <strong>the</strong> Destination Address field (e.g. 10.113.10.203).<br />
3. Click Submit.<br />
2.38 <strong>Quick</strong> <strong>Start</strong> <strong>Guide</strong> 1164.4556.62 - 04
R&S <strong>FSP</strong><br />
Preparing <strong>for</strong> Use<br />
Operating System Properties<br />
2.7 Operating System Properties<br />
2.7.1 Properties Specific to Windows XP<br />
The instrument contains <strong>the</strong> Windows XP operating system. To ensure that <strong>the</strong> instrument<br />
software functions properly, certain rules must be adhered to when using <strong>the</strong> operating<br />
system.<br />
The drivers and programs used under Windows XP have been adapted to <strong>the</strong> instrument.<br />
To avoid impairments to instrument function, use only <strong>the</strong> settings described in <strong>the</strong><br />
Operating Manual and this manual.<br />
Only update software approved by <strong>Rohde</strong> & <strong>Schwarz</strong> may be used to modify existing<br />
instrument software. Likewise, only programs approved by <strong>Rohde</strong> & <strong>Schwarz</strong> <strong>for</strong> use on <strong>the</strong><br />
instrument may be run on <strong>the</strong> instrument.<br />
Login<br />
For details refer to section “ Login” on page 2.35.<br />
Administrator ID<br />
The ID used by <strong>the</strong> instrument to per<strong>for</strong>m auto login has administrator rights.<br />
2.7.1.1 Windows XP Service Packs<br />
The Windows XP operating system on <strong>the</strong> instrument is supplied with pre-installed XP service<br />
packs (SP2 and additional updates/fixes) that are necessary and suitable <strong>for</strong> operating <strong>the</strong><br />
instrument.<br />
Possible impairment of <strong>the</strong> instrument functioning<br />
The instrument is equipped with <strong>the</strong> Windows XP operating system. It is thus possible to<br />
install commercial off-<strong>the</strong>-shelf software on <strong>the</strong> instrument. The use and installation of<br />
commercial software may impair <strong>the</strong> instrument functions. We recommend that you only<br />
execute programs tested by <strong>Rohde</strong> & <strong>Schwarz</strong> with regard to <strong>the</strong>ir compatibility to <strong>the</strong><br />
instrument software. The program packages that have been tested are listed in section<br />
“ Windows XP Software Approved <strong>for</strong> <strong>the</strong> Instrument”.<br />
Install only service packs approved by <strong>Rohde</strong> & <strong>Schwarz</strong> to avoid impairment of instrument<br />
functions that could lead to <strong>the</strong> necessity to repair <strong>the</strong> instrument.<br />
The drivers and programs used on <strong>the</strong> instrument under Windows XP have been adapted<br />
to <strong>the</strong> instrument. Existing instrument software must only be modified with update software<br />
released by <strong>Rohde</strong> & <strong>Schwarz</strong>.<br />
<strong>Quick</strong> <strong>Start</strong> <strong>Guide</strong> 1164.4556.62 - 04 2.39
R&S <strong>FSP</strong><br />
Preparing <strong>for</strong> Use<br />
Operating System Properties<br />
2.7.1.2 Opening <strong>the</strong> Windows XP <strong>Start</strong> Menu<br />
You can open <strong>the</strong> Windows XP <strong>Start</strong> menu by pressing <strong>the</strong> Windows key ( ) or <strong>the</strong> key<br />
combination CTRL+ESC. From <strong>the</strong> start menu, you can navigate to <strong>the</strong> submenus by using<br />
<strong>the</strong> mouse or <strong>the</strong> arrow keys. To return to <strong>the</strong> measurement screen, activate <strong>the</strong> R&S Analyzer<br />
Interface button in <strong>the</strong> task bar.<br />
You can also open <strong>the</strong> Windows <strong>Start</strong> menu with <strong>the</strong> OPEN START MENU softkey in <strong>the</strong><br />
SETUP menu.<br />
2.7.1.3 Windows XP Software Approved <strong>for</strong> <strong>the</strong> Instrument<br />
The driver software that is used and <strong>the</strong> system settings of Windows XP have been fine-tuned<br />
to support <strong>the</strong> measurement functions of <strong>the</strong> R&S <strong>FSP</strong>. Thus, flawless instrument function is<br />
ensured only if software and hardware approved or offered by <strong>Rohde</strong> & <strong>Schwarz</strong> are used.<br />
Using o<strong>the</strong>r software or hardware may cause <strong>the</strong> functions of <strong>the</strong> R&S <strong>FSP</strong> to per<strong>for</strong>m<br />
improperly or fail.<br />
The following program packages have been successfully tested <strong>for</strong> compatibility with <strong>the</strong><br />
measurement instrument software:<br />
• R&S FS-K3 – Software <strong>for</strong> measuring noise factor and gain<br />
• R&S FS-K4 – Software <strong>for</strong> measuring phase noise<br />
• R&S Power Viewer (virtual power meter <strong>for</strong> displaying results of <strong>the</strong> power sensors of <strong>the</strong><br />
R&S NRP-Zxx series)<br />
• Windows XP Remote Desktop<br />
• FileShredder – For reliable deletion of files on <strong>the</strong> hard disk<br />
• Symantec Norton AntiVirus – Virus-protection software<br />
• McAfee Virusscan<br />
2.40 <strong>Quick</strong> <strong>Start</strong> <strong>Guide</strong> 1164.4556.62 - 04
R&S <strong>FSP</strong><br />
Firmware Update and Installation of Firmware Options<br />
3 Firmware Update and Installation of<br />
Firmware Options<br />
3.1 Firmware Update . . . . . . . . . . . . . . . . . . . . . . . . . . . . . . . . . . 3.2<br />
3.2 Activating Firmware Options . . . . . . . . . . . . . . . . . . . . . . . . 3.3<br />
<strong>Quick</strong> <strong>Start</strong> <strong>Guide</strong> 1164.4556.62 - 04 3.1
R&S <strong>FSP</strong><br />
Firmware Update and Installation of Firmware Options<br />
Firmware Update<br />
3.1 Firmware Update<br />
For <strong>the</strong> latest firmware version refer to <strong>the</strong> <strong>Rohde</strong> & <strong>Schwarz</strong> internet site and download <strong>the</strong><br />
most up-to-date firmware.<br />
A detailed description about per<strong>for</strong>ming <strong>the</strong> firmware update in <strong>the</strong> intrument is given in <strong>the</strong><br />
release note, provided on this CD. The release note is also downloadable from <strong>the</strong><br />
<strong>Rohde</strong> & <strong>Schwarz</strong> internet site.<br />
You can install a new firmware version by using <strong>the</strong> built-in disk drive, a memory stick, a USB<br />
CD-ROM, or LAN. The firmware update kit contains several disks whose contents must be<br />
stored in separate directories (Disk1 to Disk) when a memory stick or LAN is used. <strong>Start</strong><br />
<strong>the</strong> installation program from <strong>the</strong> SETUP menu.<br />
➢ Press <strong>the</strong> SETUP key.<br />
The SETUP menu will open.<br />
➢ Press <strong>the</strong> NEXT key.<br />
The side menu will open.<br />
➢ Press <strong>the</strong> FIRMWARE UPDATE softkey.<br />
The subdirectory <strong>for</strong> installing or uninstalling new firmware versions will open.<br />
➢ Press <strong>the</strong> UPDATE PATH softkey (only in <strong>the</strong> case of firmware updates via a memory stick,<br />
CD-ROM or LAN). The entry field <strong>for</strong> <strong>the</strong> path with <strong>the</strong> set of update disks will open.<br />
➢ Enter <strong>the</strong> drive name and directory and confirm with ENTER.<br />
Example:<br />
The firmware update files are stored on a memory stick in <strong>the</strong> Update directory. They are<br />
allocated in <strong>the</strong> Disk1 to Disk subdirectories. After you insert <strong>the</strong> memory stick, it will be<br />
detected as drive E:.<br />
In this case, <strong>the</strong> required path specification is E:\UPDATE.<br />
➢ To start <strong>the</strong> installation program, press <strong>the</strong> FIRMWARE UPDATE softkey in <strong>the</strong> submenu.<br />
➢ Confirm <strong>the</strong> query DO YOU REALLY WANT TO UPDATE THE FIRMWARE? with OK.<br />
The installation program will <strong>the</strong>n guide you through <strong>the</strong> remainder of <strong>the</strong> update procedure.<br />
The instrument will per<strong>for</strong>m several automatic shutdowns, until <strong>the</strong> new base system<br />
firmware is installed properly.<br />
Do not switch <strong>the</strong> instrument off until <strong>the</strong> update process has been finished completely.<br />
IEC bus command:<br />
"SYST:FIRM:UPD 'E:\UPDATE'"<br />
➢ To restore <strong>the</strong> previous firmware version, press <strong>the</strong> RESTORE FIRMWARE softkey.<br />
IEC bus command: --<br />
3.2 <strong>Quick</strong> <strong>Start</strong> <strong>Guide</strong> 1164.4556.62 - 04
R&S <strong>FSP</strong><br />
Firmware Update and Installation of Firmware Options<br />
Activating Firmware Options<br />
3.2 Activating Firmware Options<br />
Firmware options are enabled by entering license keys via <strong>the</strong> following operating sequence:<br />
➢ Press <strong>the</strong> SETUP key.<br />
The SETUP menu will open.<br />
➢ Press <strong>the</strong> GENERAL SETUP softkey.<br />
➢ Press <strong>the</strong> OPTIONS softkey.<br />
The OPTIONS menu will open. Options already available are listed in a table that is<br />
displayed when <strong>the</strong> submenu is opened.<br />
➢ Press <strong>the</strong> INSTALL OPTION softkey.<br />
The field <strong>for</strong> entering <strong>the</strong> license key <strong>for</strong> <strong>the</strong> firmware option now appears.<br />
After you enter a valid license key, OPTION KEY OK will appear in <strong>the</strong> message line and<br />
<strong>the</strong> option will be entered in <strong>the</strong> FIRMWARE OPTIONS table.<br />
If you enter an invalid license key, <strong>the</strong> message OPTION KEY INVALID will appear in <strong>the</strong><br />
message line.<br />
➢ The REMOVE OPTION softkey deletes all existing firmware options. To prevent<br />
unintentional deletion, <strong>the</strong> system asks you to confirm that you really want to per<strong>for</strong>m this<br />
operation.<br />
<strong>Quick</strong> <strong>Start</strong> <strong>Guide</strong> 1164.4556.62 - 04 3.3
R&S <strong>FSP</strong><br />
Firmware Update and Installation of Firmware Options<br />
Activating Firmware Options<br />
3.4 <strong>Quick</strong> <strong>Start</strong> <strong>Guide</strong> 1164.4556.62 - 04
R&S <strong>FSP</strong><br />
Basic Operation<br />
4 Basic Operation<br />
4.1 Diagram Layout . . . . . . . . . . . . . . . . . . . . . . . . . . . . . . . . . . . 4.2<br />
4.1.1 Displays in <strong>the</strong> Diagram Area . . . . . . . . . . . . . . . . . . . . . 4.3<br />
4.2 Setting Parameters . . . . . . . . . . . . . . . . . . . . . . . . . . . . . . . . 4.7<br />
4.2.1 The Keypad . . . . . . . . . . . . . . . . . . . . . . . . . . . . . . . . . . . 4.7<br />
4.2.2 The Rotary Knob and Arrow Keys . . . . . . . . . . . . . . . . . . 4.8<br />
4.2.3 Editing Numeric Parameters . . . . . . . . . . . . . . . . . . . . . . 4.8<br />
4.2.4 Editing Alphanumeric Parameters . . . . . . . . . . . . . . . . . . 4.9<br />
4.2.4.1 Alphanumeric Editor Type 1: . . . . . . . . . . . . . . . . . . . 4.9<br />
4.2.4.2 Alphanumeric Editor Type 2: . . . . . . . . . . . . . . . . . . 4.10<br />
<strong>Quick</strong> <strong>Start</strong> <strong>Guide</strong> 1164.4556.62 - 04 4.1
R&S <strong>FSP</strong><br />
Basic Operation<br />
Diagram Layout<br />
4.1 Diagram Layout<br />
Logo<br />
title/date<br />
Hardware<br />
settings<br />
Marker/Delta<br />
marker<br />
Status<br />
in<strong>for</strong>mation<br />
Trace in<strong>for</strong>mation<br />
Dirty flag<br />
Enhancement<br />
labels<br />
Level axis labelling<br />
Frequency axis labelling<br />
Fig. 4-1<br />
Screen layout of <strong>the</strong> R&S <strong>FSP</strong> during analyzer operation<br />
4.2 <strong>Quick</strong> <strong>Start</strong> <strong>Guide</strong> 1164.4556.62 - 04
R&S <strong>FSP</strong><br />
Basic Operation<br />
Diagram Layout<br />
4.1.1 Displays in <strong>the</strong> Diagram Area<br />
Hardware settings<br />
Ref<br />
Offset<br />
Att<br />
EATT<br />
RBW<br />
VBW<br />
SWT<br />
Marker /<br />
Delta<br />
Display of <strong>the</strong> reference level.<br />
Display of <strong>the</strong> reference level offset.<br />
Display of <strong>the</strong> RF attenuation that has been set.<br />
Display of <strong>the</strong> set RF attenuation when an electronic attenuator is used (only with<br />
option Electronic Attenuator, R&S <strong>FSP</strong>-B25).<br />
Display of <strong>the</strong> resolution bandwidth that has been set.<br />
If <strong>the</strong> bandwidth does not correspond to <strong>the</strong> value <strong>for</strong> automatic coupling, a green<br />
asterisk "*" will appear in front of <strong>the</strong> field.<br />
Display of <strong>the</strong> video bandwidth that has been set.<br />
If <strong>the</strong> bandwidth does not correspond to <strong>the</strong> value <strong>for</strong> automatic coupling, a green<br />
asterisk "*" will appear in front of <strong>the</strong> field.<br />
Display of <strong>the</strong> sweep time that has been set (SWEEP TIME).<br />
If <strong>the</strong> sweep time does not correspond to <strong>the</strong> value <strong>for</strong> automatic coupling, an<br />
asterisk "*" will appear in front of <strong>the</strong> field. The color of <strong>the</strong> asterisk will turn to red if<br />
<strong>the</strong> sweep time is set below <strong>the</strong> value <strong>for</strong> automatic coupling. In this case, <strong>the</strong> sweep<br />
time must be increased.<br />
Contains <strong>the</strong> x and y axis positions of <strong>the</strong> last marker or delta marker that was set<br />
as well as its index. The value in <strong>the</strong> square brackets after <strong>the</strong> index indicates <strong>the</strong><br />
trace to which <strong>the</strong> marker is assigned as well as <strong>the</strong> active measurement function.<br />
The measurement functions of <strong>the</strong> markers are indicated with <strong>the</strong> following<br />
abbreviations:<br />
• FXD Reference fixed marker active<br />
• PHN Phase noise measurement active<br />
• CNT Frequency counter active<br />
• TRK Signal track active<br />
• NOI Noise measurement active<br />
• MOD Measurement of <strong>the</strong> AM modulation depth active<br />
• TOI measurement active<br />
LIMIT<br />
CHECK<br />
Display of <strong>the</strong> results of <strong>the</strong> limit check.<br />
<strong>Quick</strong> <strong>Start</strong> <strong>Guide</strong> 1164.4556.62 - 04 4.3
R&S <strong>FSP</strong><br />
Basic Operation<br />
Diagram Layout<br />
Status displays<br />
The status displays on <strong>the</strong> left side of <strong>the</strong> diagram indicate any irregularities (e.g. UNCAL).<br />
UNCAL Indicates that one of <strong>the</strong> following conditions is present:<br />
• Correction data has been switched off (CAL menu, CAL CORR OFF).<br />
– Switch on <strong>the</strong> correction CAL CORR ON or PRESET.<br />
• No valid correction values are available. This occurs, <strong>for</strong> example, if a firmware<br />
update is per<strong>for</strong>med followed by a cold start of <strong>the</strong> instrument.<br />
– Record <strong>the</strong> correction data (CAL menu, CAL TOTAL).<br />
OVLD Indicates an overload of <strong>the</strong> input mixer.<br />
– Increase <strong>the</strong> RF attenuation.<br />
IFOVL Indicates an overload of <strong>the</strong> IF signal path after <strong>the</strong> input mixer.<br />
– Increase <strong>the</strong> reference level.<br />
LOUNL Indicates that an error was detected in <strong>the</strong> instrument's frequency processing<br />
hardware.<br />
EXREF Is displayed if <strong>the</strong> instrument was set to an external reference but no signal was<br />
detected on <strong>the</strong> reference input.<br />
OVEN Indicates that <strong>the</strong> OCXO reference frequency (option R&S <strong>FSP</strong>-B4) has not yet<br />
reached its operating temperature. The message usually disappears a few minutes<br />
after power-on.<br />
OVTRC Indicates a temporary overload condition of <strong>the</strong> input mixer or IF signal path while<br />
<strong>the</strong> trace is measured with Max Hold, Min Hold or Average (Overload Trace). OVLD<br />
and IFOVL override this indication.<br />
4.4 <strong>Quick</strong> <strong>Start</strong> <strong>Guide</strong> 1164.4556.62 - 04
R&S <strong>FSP</strong><br />
Basic Operation<br />
Diagram Layout<br />
Trace in<strong>for</strong>mation<br />
Trace<br />
number<br />
Trace<br />
ma<strong>the</strong>matics<br />
Detector<br />
1 PK *<br />
CLRWR<br />
1-3<br />
auto /<br />
manual<br />
Trace mode<br />
Trace #<br />
Trace number<br />
Detector<br />
Selected detector:<br />
• AP: AUTOPEAK detector<br />
• PK: MAX PEAK detector<br />
• MI: MIN PEAK detector<br />
• SA: SAMPLE detector<br />
• AV: AVERAGE detector<br />
• RM: RMS detector<br />
• QP: QUASIPEAK detector<br />
auto / manual<br />
The selected detector does not match <strong>the</strong> one <strong>for</strong> automatic<br />
coupling.<br />
Trace Mode<br />
Display of <strong>the</strong> sweep mode:<br />
• CLRWR: CLEAR/WRITE<br />
• MAXH: MAX HOLD<br />
• MINH: MIN HOLD<br />
• AVG: AVERAGE<br />
• VIEW: VIEW<br />
Trace Ma<strong>the</strong>matics<br />
Indicates that <strong>the</strong> trace difference function is activated, e.g. 1-3<br />
in <strong>the</strong> example means that trace 3 is subtracted from trace 1.<br />
<strong>Quick</strong> <strong>Start</strong> <strong>Guide</strong> 1164.4556.62 - 04 4.5
R&S <strong>FSP</strong><br />
Basic Operation<br />
Diagram Layout<br />
Enhancement labels:<br />
The enhancement labels on <strong>the</strong> right-hand side of <strong>the</strong> measurement diagram indicate that <strong>the</strong><br />
user chose instrument settings that affect <strong>the</strong> measurement results even though this is not<br />
immediately apparent from <strong>the</strong> display of <strong>the</strong> measured values.<br />
* (star) The current instrument setting does not match <strong>the</strong> one during which <strong>the</strong> displayed<br />
traces were recorded. This occurs in <strong>the</strong> following cases:<br />
– The instrument setting is changed while a measurement is in progress.<br />
– The instrument setting is changed in <strong>the</strong> SINGLE SWEEP mode after <strong>the</strong> end<br />
of <strong>the</strong> sweep, and a new sweep is not started.<br />
– The instrument setting is changed after a trace has been set to VIEW.<br />
The display remains on screen until <strong>the</strong> user eliminates <strong>the</strong> cause. In some<br />
cases, this involves starting a new sweep (SINGLE SWEEP mode) or switching<br />
<strong>the</strong> affected trace to BLANK.<br />
A/B Designation <strong>for</strong> screen A/B. If screen A/B is activated <strong>for</strong> entering measurement<br />
parameters, <strong>the</strong> label background will be in color.<br />
SGL The sweep is set to SINGLE SWEEP.<br />
GAT The frequency sweep is controlled via <strong>the</strong> EXT TRIG/GATE connector.<br />
TRG Instrument triggering is not free running (≠ FREE RUN).<br />
LVL A level offset ≠ 0 dB is set.<br />
FRQ A frequency offset ≠ 0 Hz is set.<br />
TDF A TRANSDUCER FACTOR is activated.<br />
PRN Printer output is active.<br />
75 Ω The input impedance of <strong>the</strong> instrument is set to 75 Ω.<br />
EXT The instrument is configured <strong>for</strong> operation with an external reference.<br />
PA The RF PREAMPLIFIER is switched on (option R&S <strong>FSP</strong>-B25).<br />
PS The PRESELECTOR is switched on.<br />
3DB Gauss Filter (3 dB)<br />
6DB EMI Filter (6 dB)<br />
FFT FFT Filter<br />
CHN Channel Filter<br />
RRC RRC Filter<br />
4.6 <strong>Quick</strong> <strong>Start</strong> <strong>Guide</strong> 1164.4556.62 - 04
R&S <strong>FSP</strong><br />
Basic Operation<br />
Setting Parameters<br />
4.2 Setting Parameters<br />
4.2.1 The Keypad<br />
The keypad is used to enter numeric parameters. It contains <strong>the</strong> following keys:<br />
• Numeric keys 0...9<br />
• Decimal point<br />
Inserts a decimal point "." at <strong>the</strong> cursor position.<br />
• Sign key<br />
Changes <strong>the</strong> sign of a numeric parameter.<br />
In <strong>the</strong> case of an alphanumeric parameter, inserts a "-" at <strong>the</strong> cursor position.<br />
• Unit keys (GHz/-dBm MHz/dBm, kHz/dB and Hz/dB)<br />
These keys add <strong>the</strong> selected unit to <strong>the</strong> entered numeric value and complete <strong>the</strong> entry.<br />
In <strong>the</strong> case of level entries (e.g. in dB) or dimensionless values, all units have <strong>the</strong> value "1"<br />
as multiplying factor. Thus, <strong>the</strong>y have <strong>the</strong> same function as an ENTER key. The same is<br />
true <strong>for</strong> an alphanumeric entry.<br />
In addition, <strong>the</strong> unit keys open and close selection fields in tables (subtables).<br />
• BACK key<br />
– If a numeric entry has already been started, this key deletes <strong>the</strong> character to <strong>the</strong> left of<br />
<strong>the</strong> cursor.<br />
– If an entry has been completed or not yet started, this key toggles between <strong>the</strong> currently<br />
and previously valid value (UNDO function).<br />
• ESC/CANCEL key<br />
– Closes <strong>the</strong> entry field if an entry has been started or has not yet been made. The original<br />
value is retained.<br />
– Closes <strong>the</strong> entry field if an entry has been completed.<br />
– Closes <strong>the</strong> System Messages dialog box.<br />
• ENTER key<br />
– Concludes dimensionless entries. The new value is accepted.<br />
<strong>Quick</strong> <strong>Start</strong> <strong>Guide</strong> 1164.4556.62 - 04 4.7
R&S <strong>FSP</strong><br />
Basic Operation<br />
Setting Parameters<br />
With frequency entries, <strong>the</strong> ENTER key corresponds to <strong>the</strong> Hz key.<br />
With time data, it corresponds to <strong>the</strong> µs (kHz) key.<br />
4.2.2 The Rotary Knob and Arrow Keys<br />
The rotary knob and arrow keys are located next to <strong>the</strong> keypad.<br />
The rotary knob has several functions:<br />
• Increments (clockwise direction) or decrements (counterclockwise<br />
direction) <strong>the</strong> instrument parameter at a defined step width in <strong>the</strong> case<br />
of a numeric entry.<br />
• Shifts <strong>the</strong> selection bar horizontally or vertically within tables as long as<br />
an entry field is not open. The arrow keys are used to change <strong>the</strong><br />
direction of motion (horizontal/vertical).<br />
• Selects <strong>the</strong> individual letters when <strong>the</strong> alphanumeric editor is used.<br />
• Shifts markers, limit lines, etc. on <strong>the</strong> screen.<br />
• When it is pressed, it concludes an entry.<br />
Within a table, <strong>the</strong> arrow keys move <strong>the</strong> selection bar to <strong>the</strong> desired<br />
position.<br />
Within <strong>the</strong> alphanumeric editor, <strong>the</strong> Ul or Ur arrow keys move <strong>the</strong> cursor<br />
to <strong>the</strong> desired position.<br />
The Uu or Ud arrow keys do <strong>the</strong> following:<br />
• Increase or decrease <strong>the</strong> instrument parameter in <strong>the</strong> case of numeric<br />
entries.<br />
• Switch between <strong>the</strong> editing line and <strong>the</strong> character selection in <strong>the</strong> case<br />
of alphanumeric entries.<br />
4.2.3 Editing Numeric Parameters<br />
Numeric values are always entered in a data entry field that automatically appears after <strong>the</strong><br />
parameter is selected.<br />
Title line with parameter designation<br />
Editing line with parameter value and unit<br />
Status and error messages<br />
The title line shows <strong>the</strong> name of <strong>the</strong> instrument parameter that was selected. The entry is<br />
per<strong>for</strong>med in <strong>the</strong> editing line. After <strong>the</strong> entry field is opened, it will contain <strong>the</strong> currently valid<br />
parameter value and its unit. The optional third and fourth lines show status and error<br />
messages which always refer to <strong>the</strong> current entry.<br />
4.8 <strong>Quick</strong> <strong>Start</strong> <strong>Guide</strong> 1164.4556.62 - 04
R&S <strong>FSP</strong><br />
Basic Operation<br />
Setting Parameters<br />
4.2.4 Editing Alphanumeric Parameters<br />
If an external keyboard is not available, <strong>the</strong> character selection field is automatically opened<br />
<strong>for</strong> entering alphanumeric parameters. Two models of <strong>the</strong> alphanumeric editor are available.<br />
4.2.4.1 Alphanumeric Editor Type 1:<br />
Entry (editing) line<br />
Message line<br />
Character selection line<br />
The Uu or Ud arrow keys switch between <strong>the</strong> editing line and <strong>the</strong> character selection field.<br />
Entering <strong>the</strong> text<br />
➢ Select <strong>the</strong> parameter.<br />
Data entry is automatically activated after <strong>the</strong> data entry field is opened. The cursor is now<br />
located at <strong>the</strong> start of <strong>the</strong> previous entry in <strong>the</strong> editing line.<br />
➢ Using <strong>the</strong> Ud arrow key, place <strong>the</strong> cursor in <strong>the</strong> character selection field.<br />
The cursor now marks <strong>the</strong> first letter of <strong>the</strong> editor.<br />
➢ Using <strong>the</strong> Ul and Ur arrow keys or <strong>the</strong> rotary knob, place <strong>the</strong> cursor on <strong>the</strong> character that<br />
you want to enter in <strong>the</strong> editing line.<br />
➢ Press ei<strong>the</strong>r <strong>the</strong> ENTER key or <strong>the</strong> rotary knob.<br />
The character will be added to <strong>the</strong> editing line.<br />
Correcting <strong>the</strong> entry<br />
➢ Using <strong>the</strong> Uu arrow key, place <strong>the</strong> cursor in <strong>the</strong> editing line.<br />
➢ Using <strong>the</strong> Ul and Ur arrow keys or <strong>the</strong> rotary knob, place <strong>the</strong> cursor after <strong>the</strong> character you<br />
want to delete.<br />
➢ Press <strong>the</strong> BACK key.<br />
The entry to <strong>the</strong> left of <strong>the</strong> cursor will be deleted.<br />
Correcting <strong>the</strong> entry<br />
➢ Using <strong>the</strong> Uu key, place <strong>the</strong> cursor in <strong>the</strong> editing line.<br />
➢ Press one of <strong>the</strong> unit keys or <strong>the</strong> rotary knob.<br />
The data entry field will close, and <strong>the</strong> new entry will be accepted by <strong>the</strong> instrument.<br />
Cancelling <strong>the</strong> entry<br />
➢ Press <strong>the</strong> ESC key.<br />
The data entry field will close, and <strong>the</strong> previous entry will be retained.<br />
<strong>Quick</strong> <strong>Start</strong> <strong>Guide</strong> 1164.4556.62 - 04 4.9
R&S <strong>FSP</strong><br />
Basic Operation<br />
Setting Parameters<br />
4.2.4.2 Alphanumeric Editor Type 2:<br />
The entry area consists of two parts:<br />
• The editing line<br />
• The character selection field<br />
The Uu or arrow keys switch between <strong>the</strong> editing line and <strong>the</strong> character selection field.<br />
Entering <strong>the</strong> text<br />
➢ Select a parameter.<br />
Data entry is automatically activated after <strong>the</strong> data entry field is opened. In tables, <strong>the</strong><br />
character selection field is accessed by using <strong>the</strong> Ud arrow key.<br />
The cursor is now located at <strong>the</strong> start of <strong>the</strong> existing entry in <strong>the</strong> editing line.<br />
➢ Using <strong>the</strong> Ud arrow key, place <strong>the</strong> cursor in <strong>the</strong> character selection field.<br />
The cursor now marks <strong>the</strong> first character of <strong>the</strong> editor.<br />
➢ Using <strong>the</strong> Ul and Ur arrow keys or <strong>the</strong> rotary knob, place <strong>the</strong> cursor on <strong>the</strong> character that<br />
you want to enter in <strong>the</strong> editing line.<br />
➢ Press <strong>the</strong> ENTER key or <strong>the</strong> rotary knob.<br />
The character will be added to <strong>the</strong> editing line.<br />
Correcting <strong>the</strong> entry (alternative 1)<br />
➢ Using <strong>the</strong> rotary knob, go to <strong>the</strong> , place <strong>the</strong> cursor after <strong>the</strong> character you want to<br />
delete.<br />
➢ Using <strong>the</strong> rotary knob, select <strong>the</strong> BACK field and press <strong>the</strong> rotary knob.<br />
The entry to <strong>the</strong> left of <strong>the</strong> cursor in <strong>the</strong> editing line will be deleted.<br />
Correcting <strong>the</strong> entry (alternative 2)<br />
➢ Using <strong>the</strong> Uu arrow key, place <strong>the</strong> cursor in <strong>the</strong> editing line.<br />
➢ Using <strong>the</strong> Ul and Ur arrow keys or <strong>the</strong> rotary knob, place <strong>the</strong> cursor after <strong>the</strong> character you<br />
want to delete.<br />
➢ Press <strong>the</strong> BACK key.<br />
The entry to <strong>the</strong> left of <strong>the</strong> cursor will be deleted.<br />
4.10 <strong>Quick</strong> <strong>Start</strong> <strong>Guide</strong> 1164.4556.62 - 04
R&S <strong>FSP</strong><br />
Basic Operation<br />
Setting Parameters<br />
Completing <strong>the</strong> entry (alternative 1)<br />
➢ Using <strong>the</strong> rotary knob, select <strong>the</strong> EXIT field and <strong>the</strong>n press <strong>the</strong> rotary knob.<br />
The data entry field will close, and <strong>the</strong> new entry will be accepted by <strong>the</strong> instrument.<br />
Completing <strong>the</strong> entry (alternative 2)<br />
➢ Using <strong>the</strong> Uu arrow key, place <strong>the</strong> cursor by <strong>the</strong> editing line.<br />
➢ Press one of <strong>the</strong> unit keys or <strong>the</strong> rotary knob.<br />
The data entry field will close, and <strong>the</strong> new entry will be accepted by <strong>the</strong> instrument.<br />
Cancelling <strong>the</strong> entry<br />
➢ Press <strong>the</strong> ESC key.<br />
The data entry field will close, and <strong>the</strong> previous entry will be retained.<br />
<strong>Quick</strong> <strong>Start</strong> <strong>Guide</strong> 1164.4556.62 - 04 4.11
R&S <strong>FSP</strong><br />
Basic Operation<br />
Setting Parameters<br />
4.12 <strong>Quick</strong> <strong>Start</strong> <strong>Guide</strong> 1164.4556.62 - 04
R&S <strong>FSP</strong><br />
Basic Measurement Examples<br />
5 Basic Measurement Examples<br />
5.1 Measuring a Sinusoidal Signal . . . . . . . . . . . . . . . . . . . . . . 5.3<br />
5.1.1 Measuring <strong>the</strong> Level and Frequency with Markers . . . . . 5.3<br />
5.1.1.1 Procedure . . . . . . . . . . . . . . . . . . . . . . . . . . . . . . . . . 5.3<br />
5.1.1.2 Increasing <strong>the</strong> Frequency Resolution . . . . . . . . . . . . 5.4<br />
5.1.1.3 Setting <strong>the</strong> Reference Level . . . . . . . . . . . . . . . . . . . 5.5<br />
5.1.2 Measuring <strong>the</strong> Signal Frequency using <strong>the</strong> Frequency<br />
Counter . . . . . . . . . . . . . . . . . . . . . . . . . . . . . . . . . . . . . . . . . . . 5.6<br />
5.2 Measuring Harmonics of Sinusoidal Signals . . . . . . . . . . . 5.8<br />
5.2.1 Measuring <strong>the</strong> Suppression of <strong>the</strong> First and Second<br />
Harmonic of an Input Signal . . . . . . . . . . . . . . . . . . . . . . . . . . . 5.8<br />
5.2.2 Reducing Noise . . . . . . . . . . . . . . . . . . . . . . . . . . . . . . . . 5.9<br />
5.3 Measuring Signal Spectra with Multiple Signals . . . . . . 5.11<br />
5.3.1 Separating Signals by Selecting <strong>the</strong> Resolution<br />
Bandwidth . . . . . . . . . . . . . . . . . . . . . . . . . . . . . . . . . . . . . . . . 5.11<br />
5.3.1.1 Separating Two Signals with a Level of –30 dBm<br />
each at a Frequency Spacing of 30 kHz . . . . . . . . . . . . . . . 5.12<br />
5.3.1.2 Measuring <strong>the</strong> Modulation Depth of an<br />
AM-Modulated Carrier in <strong>the</strong> Frequency Domain . . . . . . . . 5.16<br />
5.4 Measurements in <strong>the</strong> Time Domain . . . . . . . . . . . . . . . . . . 5.17<br />
5.4.1 Measuring <strong>the</strong> Power Characteristic . . . . . . . . . . . . . . . 5.18<br />
5.4.1.1 Example – Measuring <strong>the</strong> Power of a GSM Burst<br />
During <strong>the</strong> Activation Phase. . . . . . . . . . . . . . . . . . . . . . . . . 5.18<br />
<strong>Quick</strong> <strong>Start</strong> <strong>Guide</strong> 1164.4556.62 - 04 5.1
R&S <strong>FSP</strong><br />
Basic Measurement Examples<br />
5.4.2 Measuring <strong>the</strong> Power Characteristic of Burst Signals . . 5.20<br />
5.4.2.1 Example - Measuring <strong>the</strong> Edges of a GSM Burst<br />
with High Time Resolution . . . . . . . . . . . . . . . . . . . . . . . . . . 5.20<br />
5.4.3 Measuring <strong>the</strong> Signal-to-Noise Ratio of Burst Signals . 5.23<br />
5.4.3.1Example - Signal-to-Noise Ratio of a GSM Signal . . 5.23<br />
5.4.4 Measurement of AM-Modulated Signals . . . . . . . . . . . . 5.26<br />
5.4.4.1 Example – Displaying <strong>the</strong> AF of an AM-Modulated<br />
Signal in <strong>the</strong> Time Domain . . . . . . . . . . . . . . . . . . . . . . . . . . 5.26<br />
5.4.5 Measurement of FM-Modulated Signals . . . . . . . . . . . . 5.28<br />
5.4.5.1 Example - Display of <strong>the</strong> AF of an FM-Modulated<br />
Carrier . . . . . . . . . . . . . . . . . . . . . . . . . . . . . . . . . . . . . . . . . 5.28<br />
5.5 Storing and Loading Instrument Settings . . . . . . . . . . . . . 5.31<br />
5.5.1 Storing an Instrument Configuration (without Traces) . . 5.31<br />
5.5.1.1 Storing Traces . . . . . . . . . . . . . . . . . . . . . . . . . . . . . 5.32<br />
5.5.2 Loading an Instrument Configuration . . . . . . . . . . . . . . . 5.32<br />
5.5.2.1 Automatic Loading of a Data Record during<br />
Booting . . . . . . . . . . . . . . . . . . . . . . . . . . . . . . . . . . . . . . . . . 5.33<br />
5.6 Printing Out <strong>the</strong> Measurement Results . . . . . . . . . . . . . . . 5.34<br />
5.6.1 Selecting <strong>the</strong> Color Setting <strong>for</strong> <strong>the</strong> Printout . . . . . . . . . . 5.35<br />
5.7 Additional Measurement Examples . . . . . . . . . . . . . . . . . . 5.35<br />
This section provides a brief introduction on operating <strong>the</strong> R&S <strong>FSP</strong> <strong>Spectrum</strong> Analyzer. A<br />
more detailed discussion of <strong>the</strong> basic operating steps, e.g. selecting menus and setting<br />
parameters, plus measurement examples are provided in <strong>the</strong> Operating Manual, chapters 2<br />
and 4.<br />
5.2 <strong>Quick</strong> <strong>Start</strong> <strong>Guide</strong> 1164.4556.62 - 04
R&S <strong>FSP</strong><br />
Basic Measurement Examples<br />
Measuring a Sinusoidal Signal<br />
5.1 Measuring a Sinusoidal Signal<br />
One of <strong>the</strong> most common measurement tasks is determining <strong>the</strong> level and frequency of a<br />
signal. When measuring an unknown signal, you can usually start with <strong>the</strong> preset setting.<br />
In <strong>the</strong> following examples, a signal generator is used as a signal source.<br />
Test setup:<br />
Connect <strong>the</strong> RF output of <strong>the</strong> signal generator to <strong>the</strong> RF input of R&S <strong>FSP</strong>.<br />
Settings on <strong>the</strong> signal generator:<br />
If levels higher than +30 dBm (=1 W) are expected or are possible, a<br />
power attenuator must be inserted be<strong>for</strong>e <strong>the</strong> RF input of <strong>the</strong> R&S <strong>FSP</strong>.<br />
If this is not done, signal levels exceeding 30 dBm can damage <strong>the</strong> RF<br />
attenuator or <strong>the</strong> input mixer. The total power of all signals that are<br />
present must be taken into account.<br />
Frequency:<br />
Level:<br />
128 MHz<br />
-30 dBm<br />
5.1.1 Measuring <strong>the</strong> Level and Frequency with Markers<br />
The level and frequency of a sinusoidal signal can be measured easily by using <strong>the</strong> marker<br />
function. The R&S <strong>FSP</strong> always displays its amplitude and frequency at <strong>the</strong> marker position.<br />
The frequency measurement uncertainty is determined by <strong>the</strong> reference frequency of <strong>the</strong><br />
R&S <strong>FSP</strong>, <strong>the</strong> resolution of <strong>the</strong> marker frequency display and <strong>the</strong> resolution of <strong>the</strong> screen.<br />
5.1.1.1 Procedure<br />
1. Reset <strong>the</strong> instrument.<br />
➢ Press <strong>the</strong> PRESET key.<br />
2. Connect <strong>the</strong> signal to be measured to <strong>the</strong> RF INPUT input on <strong>the</strong> instrument front<br />
panel.<br />
3. Set <strong>the</strong> center frequency to 128 MHz.<br />
➢ Press <strong>the</strong> FREQ key.<br />
The entry field <strong>for</strong> <strong>the</strong> center frequency appears on screen.<br />
➢ Using <strong>the</strong> numeric keypad in <strong>the</strong> input field, enter 128 and confirm <strong>the</strong> entry with <strong>the</strong> MHz<br />
key.<br />
<strong>Quick</strong> <strong>Start</strong> <strong>Guide</strong> 1164.4556.62 - 04 5.3
R&S <strong>FSP</strong><br />
Basic Measurement Examples<br />
Measuring a Sinusoidal Signal<br />
4. Reduce <strong>the</strong> frequency span (SPAN) to 1 MHz.<br />
➢ Press <strong>the</strong> SPAN key.<br />
➢ Using <strong>the</strong> numeric keypad in <strong>the</strong> input field, enter 1 and confirm <strong>the</strong> entry with <strong>the</strong> MHz<br />
key.<br />
When <strong>the</strong> frequency span is defined, <strong>the</strong> resolution bandwidth (RES<br />
BW), <strong>the</strong> video bandwidth (VIDEO BW) and <strong>the</strong> sweep time (SWEEP<br />
TIME) are automatically reset, because <strong>the</strong>se functions are linked in<br />
<strong>the</strong> preset setting.<br />
5. Measure <strong>the</strong> level and frequency using <strong>the</strong> marker and read <strong>the</strong> results from <strong>the</strong><br />
screen.<br />
➢ Press <strong>the</strong> MKR key.<br />
The marker is activated and automatically jumps to <strong>the</strong> maximum of <strong>the</strong> trace.<br />
When a marker is initially activated, it automatically per<strong>for</strong>ms <strong>the</strong> peak<br />
search function (as shown in <strong>the</strong> example).<br />
If a marker is already active, press <strong>the</strong> PEAK key in <strong>the</strong> MKR-> menu<br />
in order to set <strong>the</strong> currently active marker to <strong>the</strong> maximum of <strong>the</strong><br />
displayed signal.<br />
The level and frequency values measured by <strong>the</strong> marker are displayed in <strong>the</strong> marker field<br />
at <strong>the</strong> top edge of <strong>the</strong> screen. They can be taken as <strong>the</strong> measurement result.<br />
The field header indicates <strong>the</strong> number of <strong>the</strong> marker (MARKER 1) and <strong>the</strong> trace on which<br />
<strong>the</strong> marker is located ([T1] = Trace 1).<br />
5.1.1.2 Increasing <strong>the</strong> Frequency Resolution<br />
The frequency resolution of <strong>the</strong> marker is predefined by <strong>the</strong> measurement point resolution of<br />
<strong>the</strong> trace. A trace uses 501 measurement points, i.e. when <strong>the</strong> frequency span is 1 MHz, each<br />
measurement point corresponds to a span of approx. 2 kHz. This corresponds to a maximum<br />
uncertainty of 1 kHz.<br />
You can increase <strong>the</strong> measurement point resolution of <strong>the</strong> trace by reducing <strong>the</strong> frequency<br />
span.<br />
5.4 <strong>Quick</strong> <strong>Start</strong> <strong>Guide</strong> 1164.4556.62 - 04
R&S <strong>FSP</strong><br />
Basic Measurement Examples<br />
Measuring a Sinusoidal Signal<br />
Reduce <strong>the</strong> frequency span (SPAN) to 10 kHz<br />
➢ Press <strong>the</strong> SPAN key.<br />
➢ Using <strong>the</strong> numeric keypad, enter 10 in <strong>the</strong> entry field and confirm <strong>the</strong> entry with <strong>the</strong> kHz<br />
key.<br />
The generator signal is measured using a span of 10 kHz. The measurement point<br />
resolution of <strong>the</strong> trace is now approx. 20 Hz (10 kHz span /501 measurement points), i.e.<br />
<strong>the</strong> precision of <strong>the</strong> marker frequency display increases to approx. ±10 Hz.<br />
5.1.1.3 Setting <strong>the</strong> Reference Level<br />
With analyzers, <strong>the</strong> reference level (REF LEVEL) is <strong>the</strong> level at <strong>the</strong> upper limit of <strong>the</strong> diagram.<br />
To achieve <strong>the</strong> widest dynamic range possible <strong>for</strong> a spectrum measurement, use <strong>the</strong> entire<br />
level span of <strong>the</strong> analyzer. In o<strong>the</strong>r words, <strong>the</strong> highest level that occurs in <strong>the</strong> spectrum must<br />
be located at <strong>the</strong> top edge of <strong>the</strong> diagram (=reference level) or immediately below it.<br />
If <strong>the</strong> reference level that is selected is less than <strong>the</strong> highest signal that<br />
occurs in <strong>the</strong> spectrum, <strong>the</strong> signal path in <strong>the</strong> R&S <strong>FSP</strong> will be<br />
overloaded.<br />
In this case, <strong>the</strong> message IFOVL will appear on <strong>the</strong> left-hand edge of<br />
<strong>the</strong> diagram.<br />
In <strong>the</strong> preset setting, <strong>the</strong> value of <strong>the</strong> reference level is -20 dBm. If <strong>the</strong> input signal is -30 dBm,<br />
<strong>the</strong> reference level can be reduced by 20 dB without causing <strong>the</strong> signal path to be overloaded.<br />
1. Reduce <strong>the</strong> reference level by 10 dB.<br />
➢ Press <strong>the</strong> AMPT key.<br />
The AMPT menu will appear in <strong>the</strong> softkey bar. The REF LEVEL softkey will be<br />
highlighted in red to indicate that it is activated <strong>for</strong> data entry. The entry field <strong>for</strong> <strong>the</strong><br />
reference level is also opened and displays a value of -20 dBm.<br />
➢ Using <strong>the</strong> numeric keypad, enter 30 and confirm <strong>the</strong> entry with <strong>the</strong> -dBm key.<br />
The reference level is now set to -30 dBm. The maximum of <strong>the</strong> trace is near <strong>the</strong><br />
maximum of <strong>the</strong> measurement diagram. However, <strong>the</strong> increase in <strong>the</strong> displayed noise is<br />
not substantial. Thus, <strong>the</strong> distance between <strong>the</strong> signal maximum and <strong>the</strong> noise display<br />
(=dynamic range) has increased.<br />
2. Setting <strong>the</strong> marker level equal to <strong>the</strong> reference level<br />
The marker can also be used to shift <strong>the</strong> maximum value of <strong>the</strong> trace directly to <strong>the</strong> top edge<br />
of <strong>the</strong> diagram. If <strong>the</strong> marker is located at <strong>the</strong> maximum level of <strong>the</strong> trace (as in this<br />
example), <strong>the</strong> reference level can be moved to <strong>the</strong> marker level as follows:<br />
➢ Press <strong>the</strong> MKR−> key.<br />
➢ Press <strong>the</strong> REF LVL = MKR LVL softkey.<br />
The reference level will be set equal to <strong>the</strong> measured level where <strong>the</strong> marker is located.<br />
Thus, setting <strong>the</strong> reference level is reduced to two keystrokes.<br />
<strong>Quick</strong> <strong>Start</strong> <strong>Guide</strong> 1164.4556.62 - 04 5.5
R&S <strong>FSP</strong><br />
Basic Measurement Examples<br />
Measuring a Sinusoidal Signal<br />
5.1.2 Measuring <strong>the</strong> Signal Frequency using <strong>the</strong> Frequency Counter<br />
The built-in frequency counter makes it possible to measure <strong>the</strong> frequency more precisely<br />
than measuring it with <strong>the</strong> marker. The frequency sweep is stopped at <strong>the</strong> marker, and <strong>the</strong><br />
R&S <strong>FSP</strong> measures <strong>the</strong> frequency of <strong>the</strong> signal at <strong>the</strong> marker position.<br />
In <strong>the</strong> following example, <strong>the</strong> frequency of <strong>the</strong> generator at 128 MHz is shown by using <strong>the</strong><br />
marker.<br />
1. Reset <strong>the</strong> instrument.<br />
➢ Press <strong>the</strong> PRESET key.<br />
The R&S <strong>FSP</strong> is in <strong>the</strong> default state.<br />
2. Set <strong>the</strong> center frequency and <strong>the</strong> span.<br />
➢ Press <strong>the</strong> FREQ key and enter 128 MHz.<br />
The center frequency of <strong>the</strong> R&S <strong>FSP</strong> is set to 128 MHz.<br />
➢ Press <strong>the</strong> SPAN softkey and enter 1 MHz.<br />
The frequency span of <strong>the</strong> R&S <strong>FSP</strong>s set to 1 MHz.<br />
3. Activate <strong>the</strong> marker<br />
➢ Press <strong>the</strong> MKR key.<br />
The marker is activated and set to <strong>the</strong> signal maximum. The level and <strong>the</strong> frequency of<br />
<strong>the</strong> marker are displayed in <strong>the</strong> marker in<strong>for</strong>mation field.<br />
4. Activate <strong>the</strong> frequency counter.<br />
➢ Press <strong>the</strong> SIGNAL COUNT softkey in <strong>the</strong> marker menu.<br />
The result of frequency counting is displayed in <strong>the</strong> selected resolution (1 kHz in <strong>the</strong><br />
default state) in <strong>the</strong> marker field at <strong>the</strong> top edge of <strong>the</strong> screen.<br />
5. Set <strong>the</strong> resolution of <strong>the</strong> frequency counter to 1 Hz.<br />
➢ Go to <strong>the</strong> right-hand side menu of <strong>the</strong> marker menu by pressing <strong>the</strong> NEXT key.<br />
➢ Press <strong>the</strong> CNT RESOL 1 Hz softkey.<br />
5.6 <strong>Quick</strong> <strong>Start</strong> <strong>Guide</strong> 1164.4556.62 - 04
R&S <strong>FSP</strong><br />
Basic Measurement Examples<br />
Measuring a Sinusoidal Signal<br />
Fig. 5-1<br />
Measurement of <strong>the</strong> frequency with <strong>the</strong> frequency counter<br />
Obtaining a correct result when measuring <strong>the</strong> frequency with <strong>the</strong><br />
internal frequency counter requires that an RF sinusoidal signal or a<br />
spectral line be present. The marker must be located more than 25 dB<br />
above <strong>the</strong> noise level to ensure that <strong>the</strong> specified measurement<br />
accuracy is adhered to.<br />
For bandwidths between 300 kHz and 10 MHz, <strong>the</strong> time <strong>for</strong> measuring<br />
<strong>the</strong> frequency is inversely proportional to <strong>the</strong> selected resolution, i.e. a<br />
resolution of 1 Hz requires a gate time of 1 second <strong>for</strong> <strong>the</strong> counter.<br />
For digital bandwidths of less than 300 kHz, <strong>the</strong> time <strong>for</strong> measuring <strong>the</strong><br />
frequency is always approx. 30 ms and is not affected by <strong>the</strong> resolution<br />
that is set.<br />
Thus, when measuring <strong>the</strong> frequency of a sinusoidal carrier that has<br />
high resolution, set <strong>the</strong> resolution bandwidth to 100 kHz or less.<br />
<strong>Quick</strong> <strong>Start</strong> <strong>Guide</strong> 1164.4556.62 - 04 5.7
R&S <strong>FSP</strong><br />
Basic Measurement Examples<br />
Measuring Harmonics of Sinusoidal Signals<br />
5.2 Measuring Harmonics of Sinusoidal Signals<br />
Measuring <strong>the</strong> harmonics of a signal is a very common task that can be optimally per<strong>for</strong>med<br />
by using an analyzer.<br />
In <strong>the</strong> following example, <strong>the</strong> generator signal with 128 MHz and -30 dBm is used again.<br />
5.2.1 Measuring <strong>the</strong> Suppression of <strong>the</strong> First and Second Harmonic of an<br />
Input Signal<br />
1. Reset <strong>the</strong> instrument.<br />
➢ Press <strong>the</strong> PRESET key.<br />
The R&S <strong>FSP</strong> is now in <strong>the</strong> default state.<br />
2. Set <strong>the</strong> start frequency to 100 MHz and <strong>the</strong> stop frequency to 400 MHz.<br />
➢ Press <strong>the</strong> FREQ key.<br />
➢ Press <strong>the</strong> START softkey and enter 100 MHz.<br />
➢ Press <strong>the</strong> STOP softkey and enter 400 MHz.<br />
The R&S <strong>FSP</strong> displays <strong>the</strong> fundamental and <strong>the</strong> first and second harmonics of <strong>the</strong> input<br />
signal.<br />
3. For maximum sensitivity, set <strong>the</strong> RF attenuation to 0 dB.<br />
➢ Press <strong>the</strong> AMPT key.<br />
➢ Press <strong>the</strong> RF ATTEN MANUAL softkey and enter 0 dB.<br />
4. To average (suppress) <strong>the</strong> noise, reduce <strong>the</strong> video bandwidth.<br />
➢ Press <strong>the</strong> BW key.<br />
➢ Press <strong>the</strong> COUPLING RATIO softkey.<br />
➢ Using <strong>the</strong> arrow keys, select RBW/VBW NOISE [10].<br />
The video bandwidth (VBW) will now always be set to less than <strong>the</strong> resolution bandwidth<br />
(RBW) by a factor of 10.<br />
5. Activate <strong>the</strong> marker.<br />
➢ Press <strong>the</strong> MKR key.<br />
Marker 1 will be activated and positioned to <strong>the</strong> signal maximum (fundamental at 128<br />
MHz). The level and frequency of <strong>the</strong> marker will be displayed in <strong>the</strong> marker in<strong>for</strong>mation<br />
field.<br />
6. Activate <strong>the</strong> delta marker and measure <strong>the</strong> harmonic suppression.<br />
➢ Press <strong>the</strong> MARKER 2 softkey in <strong>the</strong> marker menu.<br />
Marker 2 will be activated as <strong>the</strong> delta marker (Delta 2 [T1]). It automatically appears on<br />
<strong>the</strong> largest harmonic of <strong>the</strong> signal. The frequency offset and level offset from marker 1<br />
are displayed in <strong>the</strong> marker field at <strong>the</strong> top edge of <strong>the</strong> screen.<br />
5.8 <strong>Quick</strong> <strong>Start</strong> <strong>Guide</strong> 1164.4556.62 - 04
R&S <strong>FSP</strong><br />
Basic Measurement Examples<br />
Measuring Harmonics of Sinusoidal Signals<br />
➢ Press <strong>the</strong> MARKER 3 softkey in <strong>the</strong> marker menu.<br />
Marker 3 is activated as <strong>the</strong> delta marker (Delta 3 [T1]). It automatically appears on <strong>the</strong><br />
next largest harmonic of <strong>the</strong> signal. The frequency offset and level offset from marker 1<br />
on <strong>the</strong> fundamental are displayed in <strong>the</strong> marker field at <strong>the</strong> top edge of <strong>the</strong> screen. (see<br />
Fig. 5-2)<br />
Fig. 5-2<br />
Measuring <strong>the</strong> harmonic suppression of <strong>the</strong> internal reference generator.<br />
Markers delta 2 [T1] and delta 3 [T1] show <strong>the</strong> offset of <strong>the</strong> first and second<br />
harmonics from <strong>the</strong> fundamental.<br />
5.2.2 Reducing Noise<br />
The R&S <strong>FSP</strong> offers three means of effectively differentiating <strong>the</strong> harmonics of a signal from<br />
<strong>the</strong> noise:<br />
• Reducing <strong>the</strong> video bandwidth<br />
• Averaging <strong>the</strong> trace<br />
• Reducing <strong>the</strong> resolution bandwidth<br />
Reducing <strong>the</strong> video bandwidth and averaging <strong>the</strong> traces cause <strong>the</strong> noise from <strong>the</strong> R&S <strong>FSP</strong><br />
or <strong>the</strong> DUT to be reduced, depending on which component is larger. Both averaging methods<br />
reduce <strong>the</strong> measurement uncertainty particularly in <strong>the</strong> case of small signal-to-noise ratios,<br />
because <strong>the</strong> measurement signal is also separated from <strong>the</strong> noise.<br />
<strong>Quick</strong> <strong>Start</strong> <strong>Guide</strong> 1164.4556.62 - 04 5.9
R&S <strong>FSP</strong><br />
Basic Measurement Examples<br />
Measuring Harmonics of Sinusoidal Signals<br />
1. Reducing <strong>the</strong> noise by reducing <strong>the</strong> video bandwidth.<br />
➢ Press <strong>the</strong> BW key.<br />
➢ Press <strong>the</strong> VIDEO BW MANUAL softkey.<br />
➢ Using <strong>the</strong> rotary knob (turning it counterclockwise), reduce <strong>the</strong> video bandwidth to 10<br />
kHz (<strong>for</strong> example), or enter 10 kHz.<br />
This clearly smooths <strong>the</strong> noise, and <strong>the</strong> sweep time will increase to 25 ms. In o<strong>the</strong>r<br />
words, <strong>the</strong> measurement will clearly take more time. The video bandwidth that is shown<br />
in <strong>the</strong> display is marked with an asterisk (*VBW) to indicate that it is no longer coupled<br />
to <strong>the</strong> resolution bandwidth (see Fig. 5-3).<br />
Fig. 5-3<br />
Suppression of noise during harmonics measurement by reducing video<br />
bandwidth<br />
2. Recouple <strong>the</strong> video bandwidth to <strong>the</strong> resolution bandwidth.<br />
➢ Press <strong>the</strong> VIDEO BW AUTO softkey.<br />
3. Reduce <strong>the</strong> noise by averaging <strong>the</strong> curve.<br />
➢ Press <strong>the</strong> TRACE key.<br />
➢ Press <strong>the</strong> AVERAGE softkey.<br />
The noise component of <strong>the</strong> trace will be smoo<strong>the</strong>d by averaging 10 successive traces.<br />
5.10 <strong>Quick</strong> <strong>Start</strong> <strong>Guide</strong> 1164.4556.62 - 04
R&S <strong>FSP</strong><br />
Basic Measurement Examples<br />
Measuring Signal Spectra with Multiple Signals<br />
4. Switch off trace averaging.<br />
➢ Press <strong>the</strong> CLEAR/WRITE softkey.<br />
5. Reduce <strong>the</strong> noise by reducing <strong>the</strong> measurement bandwidth.<br />
The noise is reduced in proportion to <strong>the</strong> bandwidth by reducing <strong>the</strong> resolution bandwidth,<br />
i.e. reducing <strong>the</strong> resolution bandwidth by a factor of 10 also reduces <strong>the</strong> noise by a factor<br />
of 10 (which corresponds to 10 dB). The amplitude of sinusoidal signals is not affected by<br />
reducing <strong>the</strong> resolution bandwidth.<br />
6. Set <strong>the</strong> resolution bandwidth to 10 kHz.<br />
➢ Press <strong>the</strong> BW key.<br />
➢ Press <strong>the</strong> RES BW MANUAL softkey and enter 10 kHz.<br />
The noise decreases by approx. 25 dB with respect to <strong>the</strong> previous setting. Since <strong>the</strong><br />
video bandwidth is coupled to <strong>the</strong> resolution bandwidth, it is reduced to 1 kHz in<br />
proportion to <strong>the</strong> resolution bandwidth. This causes <strong>the</strong> sweep time to increase to 60<br />
seconds.<br />
7. Reset <strong>the</strong> resolution bandwidth (couple it to <strong>the</strong> span)<br />
➢ Press <strong>the</strong> RES BW AUTO softkey.<br />
5.3 Measuring Signal Spectra with Multiple Signals<br />
5.3.1 Separating Signals by Selecting <strong>the</strong> Resolution Bandwidth<br />
A basic feature of an analyzer is being able to separate <strong>the</strong> spectral components of a mixture<br />
of signals. The resolution at which <strong>the</strong> individual components can be separated is determined<br />
by <strong>the</strong> resolution bandwidth. Selecting a resolution bandwidth that is too large may make it<br />
impossible to distinguish between spectral components, i.e <strong>the</strong>y will appear as a single<br />
component.<br />
An RF sinusoidal signal will be shown on <strong>the</strong> screen by means of <strong>the</strong> passband characteristic<br />
of <strong>the</strong> resolution filter (RBW) that has been set. Its specified bandwidth is <strong>the</strong> 3 dB bandwidth<br />
of <strong>the</strong> filter.<br />
Two signals with <strong>the</strong> same amplitude can be resolved if <strong>the</strong> resolution bandwidth is smaller<br />
than or equal to <strong>the</strong> frequency spacing of <strong>the</strong> signals. If <strong>the</strong> resolution bandwidth is equal to<br />
<strong>the</strong> frequency spacing, <strong>the</strong> spectrum display screen will show a level drop of 3 dB precisely in<br />
<strong>the</strong> center of <strong>the</strong> two signals. Decreasing <strong>the</strong> resolution bandwidth makes <strong>the</strong> level drop larger,<br />
which thus makes <strong>the</strong> individual signals clearer.<br />
The trade-off <strong>for</strong> higher spectral resolution at a narrower bandwidth is longer sweep times at<br />
<strong>the</strong> same span. Reducing <strong>the</strong> resolution bandwidth by a factor of 3 increases <strong>the</strong> sweep time<br />
by a factor of 9.<br />
<strong>Quick</strong> <strong>Start</strong> <strong>Guide</strong> 1164.4556.62 - 04 5.11
R&S <strong>FSP</strong><br />
Basic Measurement Examples<br />
Measuring Signal Spectra with Multiple Signals<br />
5.3.1.1 Separating Two Signals with a Level of –30 dBm each at a Frequency Spacing<br />
of 30 kHz<br />
Test setup:<br />
Signal<br />
generator 1<br />
Coupler<br />
R&S <strong>FSP</strong><br />
Signal<br />
generator 2<br />
Setting <strong>the</strong> signal generators:<br />
Level<br />
Frequency<br />
Signal generator 1 -30 dBm 100.00 MHz<br />
Signal generator 2 -30 dBm 100.03 MHz<br />
Operating steps on <strong>the</strong> R&S <strong>FSP</strong>:<br />
1. Reset <strong>the</strong> instrument.<br />
➢ Press <strong>the</strong> PRESET key.<br />
The R&S <strong>FSP</strong> is now in <strong>the</strong> default state.<br />
2. Set <strong>the</strong> center frequency to 100.015 MHz and <strong>the</strong> frequency span (SPAN) to 300 kHz.<br />
➢ Press <strong>the</strong> FREQ key and enter 100.015 MHz.<br />
➢ Press <strong>the</strong> SPAN key and enter 300 kHz.<br />
3. Set <strong>the</strong> resolution bandwidth to 30 kHz and <strong>the</strong> video bandwidth to 1 kHz.<br />
➢ Press <strong>the</strong> BW key.<br />
➢ Press <strong>the</strong> RES BW MANUAL softkey and enter 30 kHz.<br />
➢ Press <strong>the</strong> VIDEO BW MANUAL softkey and enter 1 kHz.<br />
➢ The two signals can be clearly distinguished by a 3 dB level drop in <strong>the</strong> center of <strong>the</strong><br />
screen.<br />
5.12 <strong>Quick</strong> <strong>Start</strong> <strong>Guide</strong> 1164.4556.62 - 04
R&S <strong>FSP</strong><br />
Basic Measurement Examples<br />
Measuring Signal Spectra with Multiple Signals<br />
The video bandwidth is set to 1 kHz in order to make <strong>the</strong> level drop in<br />
<strong>the</strong> center of <strong>the</strong> two signals clearly visible. At larger video bandwidths,<br />
<strong>the</strong> video voltage that results from envelope detection is not sufficiently<br />
suppressed. This produces additional voltages, which are visible in <strong>the</strong><br />
trace, in <strong>the</strong> transition area between <strong>the</strong> two signals.<br />
Fig. 5-4<br />
Measurement of two equally-sized RF sinusoidal signals with <strong>the</strong> resolution<br />
bandwidth which corresponds to <strong>the</strong> frequency spacing of <strong>the</strong> signals.<br />
The level drop is located exactly in <strong>the</strong> center of <strong>the</strong> screen only if <strong>the</strong><br />
generator frequencies exactly match <strong>the</strong> frequency display of <strong>the</strong><br />
R&S <strong>FSP</strong>. To achieve exact matching, <strong>the</strong> frequencies of <strong>the</strong><br />
generators and <strong>the</strong> R&S <strong>FSP</strong> must be synchronized.<br />
<strong>Quick</strong> <strong>Start</strong> <strong>Guide</strong> 1164.4556.62 - 04 5.13
R&S <strong>FSP</strong><br />
Basic Measurement Examples<br />
Measuring Signal Spectra with Multiple Signals<br />
4. Set <strong>the</strong> resolution bandwidth to 100 kHz.<br />
➢ Press <strong>the</strong> RES BW MANUAL softkey and enter 100 kHz.<br />
It is no longer possible to clearly distinguish <strong>the</strong> two generator signals.<br />
Fig. 5-5<br />
Measurement of two equally-sized RF sinusoidal signals with a resolution<br />
bandwidth which is larger than <strong>the</strong>ir frequency spacing.<br />
The resolution bandwidth (RBW) can be reduced again by turning <strong>the</strong> rotary knob<br />
counterclockwise, thus yielding a higher frequency resolution.<br />
5.14 <strong>Quick</strong> <strong>Start</strong> <strong>Guide</strong> 1164.4556.62 - 04
R&S <strong>FSP</strong><br />
Basic Measurement Examples<br />
Measuring Signal Spectra with Multiple Signals<br />
5. Set <strong>the</strong> resolution bandwidth to 1 kHz.<br />
➢ Turn <strong>the</strong> rotary knob counterclockwise until <strong>the</strong> bandwidth indicates 1 kHz.<br />
The two generator signals are shown with high resolution. However, <strong>the</strong> sweep time<br />
becomes noticeably longer (600 ms), since it increases at a rate of 1/RBW 2 . At smaller<br />
bandwidths (10 dB per a bandwidth factor of 10), <strong>the</strong> noise display decreases<br />
simultaneously.<br />
Fig. 5-6<br />
Measurement of two RF equally-sized sinusoidal signals with a resolution<br />
bandwidth (1 kHz) which is clearly smaller than <strong>the</strong>ir frequency spacing.<br />
6. Activate <strong>the</strong> FFT bandwidths.<br />
➢ Using <strong>the</strong> FILTER TYPE softkey in <strong>the</strong> selection list, set <strong>the</strong> filter type to FFT.<br />
IF filtering is now per<strong>for</strong>med using <strong>the</strong> FFT algorithm. The sweep time decreases<br />
significantly from 600 ms to 15 ms (a factor of 40). The display update rate also increases<br />
by almost <strong>the</strong> same ratio.<br />
<strong>Quick</strong> <strong>Start</strong> <strong>Guide</strong> 1164.4556.62 - 04 5.15
R&S <strong>FSP</strong><br />
Basic Measurement Examples<br />
Measuring Signal Spectra with Multiple Signals<br />
5.3.1.2 Measuring <strong>the</strong> Modulation Depth of an AM-Modulated Carrier in <strong>the</strong> Frequency<br />
Domain<br />
In <strong>the</strong> frequency range (scan) display, <strong>the</strong> AM side bands can be resolved with a narrow<br />
bandwidth and measured separately. The modulation depth of a carrier modulated with a<br />
sinusoidal signal can <strong>the</strong>n be measured. Since <strong>the</strong> dynamic range of an analyzer is very large,<br />
extremely small modulation depths can also be measured precisely. For this purpose, <strong>the</strong><br />
R&S <strong>FSP</strong> provides measurement routines that directly output <strong>the</strong> modulation depth<br />
numerically in %.<br />
Test setup:<br />
Signal<br />
generator<br />
R&S <strong>FSP</strong><br />
Settings on <strong>the</strong> signal generator (e.g. R&S SMIQ):<br />
Frequency:<br />
Level:<br />
Modulation:<br />
100 MHz<br />
-30 dBm<br />
50% AM, 1 kHz AF<br />
Measurement with <strong>the</strong> R&S <strong>FSP</strong>:<br />
1. Reset <strong>the</strong> instrument.<br />
➢ Press <strong>the</strong> PRESET key.<br />
The R&S <strong>FSP</strong> is now in <strong>the</strong> default state.<br />
2. Set <strong>the</strong> center frequency to 100 MHz and span to 5 Hz.<br />
➢ Press <strong>the</strong> FREQ key and enter 100 MHz.<br />
➢ Press <strong>the</strong> SPAN key and enter 5 kHz.<br />
3. Activate <strong>the</strong> marker function <strong>for</strong> measuring <strong>the</strong> AM modulation depth.<br />
➢ Press <strong>the</strong> MEAS key.<br />
➢ Press <strong>the</strong> MODULATION DEPTH softkey.<br />
The R&S <strong>FSP</strong> automatically sets a marker to <strong>the</strong> carrier signal in <strong>the</strong> center of <strong>the</strong><br />
diagram and one delta marker each to <strong>the</strong> upper and lower AM sidebands. The R&S <strong>FSP</strong><br />
calculates <strong>the</strong> AM modulation depth from <strong>the</strong> level differences of <strong>the</strong> delta markers to <strong>the</strong><br />
main marker and outputs <strong>the</strong> numeric value in <strong>the</strong> marker in<strong>for</strong>mation field.<br />
5.16 <strong>Quick</strong> <strong>Start</strong> <strong>Guide</strong> 1164.4556.62 - 04
R&S <strong>FSP</strong><br />
Basic Measurement Examples<br />
Measurements in <strong>the</strong> Time Domain<br />
Fig. 5-7<br />
Measurement of <strong>the</strong> AM modulation depth. The modulation depth shown is<br />
MDEPTH. The frequency of <strong>the</strong> AF signal can be obtained from <strong>the</strong> frequency<br />
display of <strong>the</strong> delta marker.<br />
5.4 Measurements in <strong>the</strong> Time Domain<br />
In <strong>the</strong> case of radio transmission systems that use <strong>the</strong> TDMA method (e.g. GSM or IS136),<br />
transmission quality is determined not only by spectral characteristics but also by<br />
characteristics in <strong>the</strong> time domain. However, a timeslot is assigned to each user since several<br />
users share <strong>the</strong> same frequency. Smooth operation is ensured only if all users adhere exactly<br />
to <strong>the</strong>ir assigned timeslots.<br />
Both <strong>the</strong> power during <strong>the</strong> send phase as well as <strong>the</strong> timing and duration of <strong>the</strong> TDMA burst<br />
and rise and fall times of <strong>the</strong> burst are important.<br />
<strong>Quick</strong> <strong>Start</strong> <strong>Guide</strong> 1164.4556.62 - 04 5.17
R&S <strong>FSP</strong><br />
Basic Measurement Examples<br />
Measurements in <strong>the</strong> Time Domain<br />
5.4.1 Measuring <strong>the</strong> Power Characteristic<br />
For measuring power in <strong>the</strong> time domain, <strong>the</strong> R&S <strong>FSP</strong> offers easy-to-use functions that<br />
measure <strong>the</strong> power over a predefined time.<br />
5.4.1.1 Example – Measuring <strong>the</strong> Power of a GSM Burst During <strong>the</strong> Activation Phase.<br />
Test setup:<br />
Signal<br />
generator<br />
R&S <strong>FSP</strong><br />
Settings on <strong>the</strong> signal generator (e.g. R&S SMIQ):<br />
Frequency: 100 MHz<br />
Level: 0 dBm<br />
Modulation: GSM, one timeslot activated<br />
Measurement with <strong>the</strong> R&S <strong>FSP</strong>:<br />
1. Reset <strong>the</strong> instrument.<br />
➢ Press <strong>the</strong> PRESET key.<br />
The R&S <strong>FSP</strong> is now in <strong>the</strong> default state.<br />
2. Set <strong>the</strong> center frequency to 100 MHz, <strong>the</strong> span to 0 Hz and <strong>the</strong> resolution bandwidth<br />
to 1 MHz.<br />
➢ Press <strong>the</strong> FREQ key and enter 100 MHz.<br />
➢ Press <strong>the</strong> SPAN key and enter 0 Hz, or press <strong>the</strong> ZEROSPAN softkey.<br />
3. Set <strong>the</strong> reference level of <strong>the</strong> R&S <strong>FSP</strong> to 10 dBm (= level of <strong>the</strong> signal generator<br />
+10 dB).<br />
➢ Press <strong>the</strong> AMPT key and enter 10 dBm.<br />
4. Set <strong>the</strong> sweep time to 1 ms.<br />
➢ Press <strong>the</strong> SWEEP key and enter 1 ms.<br />
The R&S <strong>FSP</strong> will show <strong>the</strong> GSM burst continuously across <strong>the</strong> display.<br />
5. By using <strong>the</strong> video trigger, elicit triggering on <strong>the</strong> rising edge of <strong>the</strong> burst.<br />
➢ Press <strong>the</strong> TRIG key.<br />
5.18 <strong>Quick</strong> <strong>Start</strong> <strong>Guide</strong> 1164.4556.62 - 04
R&S <strong>FSP</strong><br />
Basic Measurement Examples<br />
Measurements in <strong>the</strong> Time Domain<br />
➢ Press <strong>the</strong> VIDEO softkey and enter 70%.<br />
The R&S <strong>FSP</strong> shows a static image with <strong>the</strong> GSM burst at <strong>the</strong> start of <strong>the</strong> trace. The<br />
trigger level is displayed as a horizontal line labelled with <strong>the</strong> absolute level <strong>for</strong> <strong>the</strong> trigger<br />
threshold in <strong>the</strong> measurement diagram.<br />
6. Configure power measurement in <strong>the</strong> time domain.<br />
➢ Press <strong>the</strong> MEAS key.<br />
➢ Press <strong>the</strong> TIME DOM POWER softkey.<br />
➢ Set <strong>the</strong> LIMITS softkey to ON.<br />
➢ Press <strong>the</strong> START LIMIT softkey.<br />
➢ By turning <strong>the</strong> rotary knob clockwise, move <strong>the</strong> vertical line to <strong>the</strong> start of <strong>the</strong> burst.<br />
➢ Press <strong>the</strong> STOP LIMIT softkey.<br />
➢ By turning <strong>the</strong> rotary knob counterclockwise, set <strong>the</strong> second vertical line to <strong>the</strong> end of <strong>the</strong><br />
burst.<br />
The R&S <strong>FSP</strong> will output on screen <strong>the</strong> average (mean) power during <strong>the</strong> activation<br />
phase of <strong>the</strong> burst.<br />
Fig. 5-8<br />
Measurement of <strong>the</strong> average power during <strong>the</strong> activation phase of a GSM<br />
burst.<br />
<strong>Quick</strong> <strong>Start</strong> <strong>Guide</strong> 1164.4556.62 - 04 5.19
R&S <strong>FSP</strong><br />
Basic Measurement Examples<br />
Measurements in <strong>the</strong> Time Domain<br />
5.4.2 Measuring <strong>the</strong> Power Characteristic of Burst Signals<br />
Because of <strong>the</strong> high time resolution of <strong>the</strong> R&S <strong>FSP</strong> at <strong>the</strong> 0 Hz display range, <strong>the</strong> edges of<br />
TDMA bursts can be measured precisely. The edges can be shifted to <strong>the</strong> screen area by<br />
using <strong>the</strong> trigger offset.<br />
5.4.2.1 Example - Measuring <strong>the</strong> Edges of a GSM Burst with High Time Resolution<br />
Test setup:<br />
Signal<br />
generator<br />
R&S <strong>FSP</strong><br />
Settings on <strong>the</strong> signal generator (e.g. R&S SMIQ):<br />
Frequency:<br />
Level:<br />
Modulation:<br />
100 MHz<br />
0 dBm<br />
GSM, one timeslot activated<br />
Measurement with <strong>the</strong> R&S <strong>FSP</strong>:<br />
The measurement is based on <strong>the</strong> setting in section “ Example – Measuring <strong>the</strong> Power of a<br />
GSM Burst During <strong>the</strong> Activation Phase.” on page 5.18.<br />
1. Switch off <strong>the</strong> power measurement.<br />
➢ Press <strong>the</strong> MEAS key.<br />
➢ Press <strong>the</strong> TIME DOM POWER softkey.<br />
➢ In <strong>the</strong> submenu, set <strong>the</strong> POWER softkey to OFF.<br />
2. Increase <strong>the</strong> time resolution to 100 µs.<br />
➢ Press <strong>the</strong> SWEEP key and enter 100 µs.<br />
3. Using <strong>the</strong> trigger softkey, shift <strong>the</strong> rising edge of <strong>the</strong> GSM burst to <strong>the</strong> center of <strong>the</strong><br />
screen.<br />
➢ Press <strong>the</strong> TRIG key.<br />
➢ Press <strong>the</strong> TRIGGER OFFSET softkey.<br />
➢ By turning <strong>the</strong> rotary knob counterclockwise, move <strong>the</strong> trigger offset until <strong>the</strong> burst edge<br />
can be seen in <strong>the</strong> center of <strong>the</strong> screen, or enter -50 µs.<br />
The R&S <strong>FSP</strong> will show <strong>the</strong> rising edge of <strong>the</strong> GSM burst.<br />
5.20 <strong>Quick</strong> <strong>Start</strong> <strong>Guide</strong> 1164.4556.62 - 04
R&S <strong>FSP</strong><br />
Basic Measurement Examples<br />
Measurements in <strong>the</strong> Time Domain<br />
Fig. 5-9<br />
Rising edge of <strong>the</strong> GSM burst displayed with high time resolution.<br />
4. Using <strong>the</strong> trigger offset, move <strong>the</strong> falling edge of <strong>the</strong> burst to <strong>the</strong> center of <strong>the</strong> screen.<br />
➢ Set <strong>the</strong> POLARITY softkey to NEG.<br />
The R&S <strong>FSP</strong> will show <strong>the</strong> falling edge of <strong>the</strong> GSM burst.<br />
<strong>Quick</strong> <strong>Start</strong> <strong>Guide</strong> 1164.4556.62 - 04 5.21
R&S <strong>FSP</strong><br />
Basic Measurement Examples<br />
Measurements in <strong>the</strong> Time Domain<br />
Fig. 5-10<br />
Falling edge of <strong>the</strong> GSM burst displayed with high time resolution.<br />
5.22 <strong>Quick</strong> <strong>Start</strong> <strong>Guide</strong> 1164.4556.62 - 04
R&S <strong>FSP</strong><br />
Basic Measurement Examples<br />
Measurements in <strong>the</strong> Time Domain<br />
5.4.3 Measuring <strong>the</strong> Signal-to-Noise Ratio of Burst Signals<br />
When TDMA transmission methods are used, <strong>the</strong> signal-to-noise ratio or <strong>the</strong> deactivation<br />
dynamic range can be measured by comparing <strong>the</strong> power values during <strong>the</strong> activation phase<br />
and <strong>the</strong> deactivation phase of <strong>the</strong> transmission burst. For this purpose, <strong>the</strong> R&S <strong>FSP</strong> provides<br />
<strong>the</strong> function <strong>for</strong> measuring absolute and relative power in <strong>the</strong> time domain. In <strong>the</strong> following<br />
example, <strong>the</strong> measurement is per<strong>for</strong>med using a GSM burst.<br />
5.4.3.1Example - Signal-to-Noise Ratio of a GSM Signal<br />
Test setup:<br />
Signal<br />
generator<br />
R&S <strong>FSP</strong><br />
Settings on <strong>the</strong> signal generator (e.g. R&S SMIQ):<br />
Frequency:<br />
Level:<br />
Modulation:<br />
100 MHz<br />
0 dBm<br />
GSM, one timeslot activated<br />
Measurement with <strong>the</strong> R&S <strong>FSP</strong>:<br />
1. Reset <strong>the</strong> instrument.<br />
➢ Press <strong>the</strong> PRESET key.<br />
The R&S <strong>FSP</strong> is now in <strong>the</strong> default state.<br />
2. Set <strong>the</strong> center frequency to 100 MHz, <strong>the</strong> span to 0 Hz and <strong>the</strong> resolution bandwidth<br />
to 1 MHz.<br />
➢ Press <strong>the</strong> FREQ key and enter 100 MHz.<br />
➢ Press <strong>the</strong> SPAN key and enter 0 Hz or<br />
➢ Press <strong>the</strong> ZEROSPAN softkey.<br />
➢ Press <strong>the</strong> BW key and enter 1 MHz.<br />
3. Set <strong>the</strong> reference level of <strong>the</strong> R&S <strong>FSP</strong> to 0 dBm (= level of <strong>the</strong> signal generator) and<br />
RF attenuation to 10 dB <strong>for</strong> maximum sensitivity.<br />
➢ Press <strong>the</strong> AMPT key and enter 0 dBm.<br />
➢ Press <strong>the</strong> RF ATTEN MANUAL softkey and enter 10 dB.<br />
4. Set <strong>the</strong> sweep time to 2 ms.<br />
➢ Press <strong>the</strong> SWEEP key and enter 2 ms.<br />
The R&S <strong>FSP</strong> shows <strong>the</strong> GSM burst continuously across <strong>the</strong> display.<br />
<strong>Quick</strong> <strong>Start</strong> <strong>Guide</strong> 1164.4556.62 - 04 5.23
R&S <strong>FSP</strong><br />
Basic Measurement Examples<br />
Measurements in <strong>the</strong> Time Domain<br />
5. By using <strong>the</strong> video trigger, elicit triggering on <strong>the</strong> rising edge of <strong>the</strong> burst and shift<br />
<strong>the</strong> start of burst to <strong>the</strong> center of <strong>the</strong> screen.<br />
➢ Press <strong>the</strong> TRIG key.<br />
➢ Press <strong>the</strong> VIDEO softkey and enter 70%.<br />
The R&S <strong>FSP</strong> shows a static image with <strong>the</strong> GSM burst at <strong>the</strong> start of <strong>the</strong> trace.<br />
➢ Press <strong>the</strong> TRIGGER OFFSET softkey and enter -1 ms.<br />
The R&S <strong>FSP</strong> shows <strong>the</strong> GSM burst in <strong>the</strong> right-hand half of <strong>the</strong> measurement diagram.<br />
6. Configure <strong>the</strong> power measurement in <strong>the</strong> time domain.<br />
➢ Press <strong>the</strong> MEAS key.<br />
➢ Press <strong>the</strong> TIME DOM POWER softkey.<br />
➢ Set <strong>the</strong> LIMITS softkey to ON.<br />
➢ Press <strong>the</strong> START LIMIT softkey.<br />
➢ Using <strong>the</strong> rotary knob, move <strong>the</strong> vertical line to <strong>the</strong> start of <strong>the</strong> burst.<br />
➢ Press <strong>the</strong> STOP LIMIT softkey.<br />
➢ Using <strong>the</strong> rotary knob, move <strong>the</strong> second vertical line to <strong>the</strong> end of <strong>the</strong> burst.<br />
The R&S <strong>FSP</strong> outputs on screen <strong>the</strong> power during <strong>the</strong> activation phase of <strong>the</strong> burst.<br />
Fig. 5-11<br />
Power measurement during <strong>the</strong> activation phase of <strong>the</strong> burst<br />
5.24 <strong>Quick</strong> <strong>Start</strong> <strong>Guide</strong> 1164.4556.62 - 04
R&S <strong>FSP</strong><br />
Basic Measurement Examples<br />
Measurements in <strong>the</strong> Time Domain<br />
7. Set <strong>the</strong> measured power as <strong>the</strong> reference and activate relative power measurement.<br />
➢ Press <strong>the</strong> NEXT key.<br />
The side menu <strong>for</strong> setting <strong>the</strong> power measurement will open.<br />
➢ Set <strong>the</strong> POWER ABS/REL softkey to REL.<br />
The power relative to <strong>the</strong> power during <strong>the</strong> activation phase of <strong>the</strong> burst is displayed.<br />
➢ Press <strong>the</strong> SET REFERENCE softkey.<br />
The measured power of <strong>the</strong> GSM burst is set as <strong>the</strong> reference.<br />
8. Measure <strong>the</strong> power during <strong>the</strong> deactivation phase of <strong>the</strong> burst.<br />
➢ Press <strong>the</strong> TRIG key.<br />
➢ Set <strong>the</strong> POLARITY POS/NEG softkey to NEG.<br />
The R&S <strong>FSP</strong> initiates triggering in response to <strong>the</strong> falling edge of <strong>the</strong> burst. This shifts<br />
<strong>the</strong> burst to <strong>the</strong> left-hand half of <strong>the</strong> measurement diagram. The power is measured in<br />
<strong>the</strong> deactivation phase. The start of <strong>the</strong> burst is shifted to <strong>the</strong> center of <strong>the</strong> screen and<br />
<strong>the</strong> power during <strong>the</strong> deactivation phase is measured relative to <strong>the</strong> reference power (=<br />
burst power).<br />
Fig. 5-12<br />
Measurement of <strong>the</strong> signal-to-noise ratio of a GSM burst signal in <strong>the</strong> time<br />
domain<br />
<strong>Quick</strong> <strong>Start</strong> <strong>Guide</strong> 1164.4556.62 - 04 5.25
R&S <strong>FSP</strong><br />
Basic Measurement Examples<br />
Measurements in <strong>the</strong> Time Domain<br />
5.4.4 Measurement of AM-Modulated Signals<br />
The R&S <strong>FSP</strong> rectifies <strong>the</strong> RF input signal and displays it as a magnitude spectrum. The<br />
rectification also demodulates AM-modulated signals. The AF voltage can be displayed in <strong>the</strong><br />
time domain if <strong>the</strong> modulation sidebands fall within <strong>the</strong> resolution bandwidth.<br />
5.4.4.1 Example – Displaying <strong>the</strong> AF of an AM-Modulated Signal in <strong>the</strong> Time Domain<br />
Test setup:<br />
Signal<br />
generator<br />
R&S <strong>FSP</strong><br />
Settings on <strong>the</strong> signal generator (e.g. R&S SMIQ):<br />
Frequency:<br />
Level:<br />
Modulation:<br />
100 MHz<br />
0 dBm<br />
50% AM, 1 kHz AF<br />
Measurement with <strong>the</strong> R&S <strong>FSP</strong>:<br />
1. Reset <strong>the</strong> instrument.<br />
➢ Press <strong>the</strong> PRESET key.<br />
The R&S <strong>FSP</strong> is now in <strong>the</strong> default state.<br />
2. Set <strong>the</strong> center frequency to 100 MHz and <strong>the</strong> span to 0 Hz.<br />
➢ Press <strong>the</strong> FREQ key and enter 100 MHz.<br />
➢ Press <strong>the</strong> SPAN key and enter 0 Hz.<br />
3. Set <strong>the</strong> reference level to +6 dBm and <strong>the</strong> display range to linear.<br />
➢ Press <strong>the</strong> AMPT key and enter 6 dBm.<br />
➢ Press <strong>the</strong> RANGE LINEAR softkey.<br />
4. Elicit triggering in response to <strong>the</strong> AF signal by using <strong>the</strong> video trigger to produce a<br />
static image.<br />
➢ Press <strong>the</strong> TRIG key.<br />
➢ Press <strong>the</strong> VIDEO softkey.<br />
At initial activation, <strong>the</strong> video trigger level is set to 50%. The trigger level is displayed as<br />
a horizontal line across <strong>the</strong> entire measurement diagram. R&S <strong>FSP</strong> displays <strong>the</strong> 1 kHz<br />
AF signal as a static image in <strong>the</strong> time domain.<br />
5.26 <strong>Quick</strong> <strong>Start</strong> <strong>Guide</strong> 1164.4556.62 - 04
R&S <strong>FSP</strong><br />
Basic Measurement Examples<br />
Measurements in <strong>the</strong> Time Domain<br />
Fig. 5-13 Measurement of <strong>the</strong> AF signal of a carrier that is AM-modulated with 1 kHz<br />
If <strong>the</strong> option AM/FM demodulator (R&S <strong>FSP</strong>-B3) is implemented in <strong>the</strong> R&S <strong>FSP</strong>, <strong>the</strong> AF<br />
can be listened to by using <strong>the</strong> built-in loudspeaker:<br />
5. Activate <strong>the</strong> internal AM demodulator.<br />
➢ Press <strong>the</strong> MKR FCTN key.<br />
➢ Press <strong>the</strong> MKR DEMOD softkey.<br />
The R&S <strong>FSP</strong> automatically switches on <strong>the</strong> AM audio demodulator.<br />
➢ Turn up <strong>the</strong> loudspeaker volume.<br />
A 1 kHz tone can be heard from <strong>the</strong> internal loudspeaker.<br />
<strong>Quick</strong> <strong>Start</strong> <strong>Guide</strong> 1164.4556.62 - 04 5.27
R&S <strong>FSP</strong><br />
Basic Measurement Examples<br />
Measurements in <strong>the</strong> Time Domain<br />
5.4.5 Measurement of FM-Modulated Signals<br />
Since analyzers can display only <strong>the</strong> magnitude of <strong>the</strong> measurement signal by using <strong>the</strong><br />
envelope detector, <strong>the</strong> modulation of FM-modulated signals cannot be measured directly as<br />
in <strong>the</strong> case of AM-modulated signals. The voltage at <strong>the</strong> output of <strong>the</strong> envelope detector<br />
remains constant <strong>for</strong> FM-modulated signals as long as <strong>the</strong> frequency deviation of <strong>the</strong> signal is<br />
located within <strong>the</strong> flat part of <strong>the</strong> passband characteristic of <strong>the</strong> resolution filter that is used.<br />
Amplitude variation occurs only if <strong>the</strong> instantaneous frequency extends into a falling edge of<br />
<strong>the</strong> filter curve. This behavior can be used to demodulate FM-modulated signals. The center<br />
frequency of <strong>the</strong> R&S <strong>FSP</strong> is set in such a manner that <strong>the</strong> nominal frequency of <strong>the</strong><br />
measurement signal is located on a filter edge (below or above <strong>the</strong> center frequency). The<br />
resolution bandwidth and <strong>the</strong> frequency offset must be selected in such a manner that <strong>the</strong><br />
instantaneous frequency is located in <strong>the</strong> linear part of <strong>the</strong> filter edge. As a result, <strong>the</strong><br />
frequency variation of <strong>the</strong> FM-modulated signal is trans<strong>for</strong>med into an amplitude variation that<br />
can be displayed on screen in <strong>the</strong> time domain.<br />
In <strong>the</strong> case of <strong>the</strong> four-circuit filters from 300 kHz to 3 MHz implemented as analog filters, you<br />
can obtain good linearity of <strong>the</strong> filter edge if <strong>the</strong> frequency of <strong>the</strong> R&S <strong>FSP</strong> is set to 1.2 times<br />
<strong>the</strong> filter bandwidth below or above <strong>the</strong> frequency of <strong>the</strong> transmit signal. The useful range <strong>for</strong><br />
FM demodulation is <strong>the</strong>n approx. equal to <strong>the</strong> resolution bandwidth.<br />
5.4.5.1 Example - Display of <strong>the</strong> AF of an FM-Modulated Carrier<br />
Test setup:<br />
Signal<br />
generator<br />
R&S <strong>FSP</strong><br />
Settings on <strong>the</strong> signal generator (e.g. R&S SMIQ):<br />
Frequency:<br />
Level:<br />
Modulation:<br />
100 MHz<br />
-30 dBm<br />
FM 0 kHz deviation (i.e. FM modulation is deactivated), 1 kHz AF<br />
Measurement with <strong>the</strong> R&S <strong>FSP</strong>:<br />
1. Reset <strong>the</strong> instrument.<br />
➢ Press <strong>the</strong> PRESET key.<br />
The R&S <strong>FSP</strong> is now in <strong>the</strong> default state.<br />
2. Set <strong>the</strong> center frequency to 99.64 MHz and <strong>the</strong> span to 300 kHz.<br />
➢ Press <strong>the</strong> FREQ key and enter 99.64 MHz.<br />
➢ Press <strong>the</strong> SPAN key and enter 300 kHz.<br />
5.28 <strong>Quick</strong> <strong>Start</strong> <strong>Guide</strong> 1164.4556.62 - 04
R&S <strong>FSP</strong><br />
Basic Measurement Examples<br />
Measurements in <strong>the</strong> Time Domain<br />
3. Set <strong>the</strong> resolution bandwidth to 300 kHz.<br />
➢ Press <strong>the</strong> BW key.<br />
➢ Press <strong>the</strong> RES BW MANUAL softkey and enter 300 kHz.<br />
4. Set <strong>the</strong> display range to 20 dB and shift <strong>the</strong> filter trace to <strong>the</strong> center of <strong>the</strong> screen.<br />
➢ Press <strong>the</strong> AMPT key.<br />
➢ Press <strong>the</strong> RANGE LOG MANUAL softkey and enter 20 dB.<br />
➢ Press <strong>the</strong> NEXT key.<br />
➢ Set <strong>the</strong> GRID softkey to REL.<br />
➢ Press <strong>the</strong> PREV key.<br />
➢ Using <strong>the</strong> rotary knob, set <strong>the</strong> reference level such that <strong>the</strong> filter edge at <strong>the</strong> center<br />
frequency intersects <strong>the</strong> –10 dB level line.<br />
The filter edge of <strong>the</strong> 300 kHz filter will appear on screen. This corresponds to <strong>the</strong><br />
demodulator characteristic <strong>for</strong> FM signals with a steepness of approx. 5 dB/100 kHz.<br />
Fig. 5-14<br />
Display of <strong>the</strong> filter edge of <strong>the</strong> 300 kHz filter as an FM discriminator<br />
characteristic.<br />
<strong>Quick</strong> <strong>Start</strong> <strong>Guide</strong> 1164.4556.62 - 04 5.29
R&S <strong>FSP</strong><br />
Basic Measurement Examples<br />
Measurements in <strong>the</strong> Time Domain<br />
5. Set <strong>the</strong> FM deviation to 100 kHz and <strong>the</strong> AF to 1 kHz on <strong>the</strong> signal generator.<br />
6. Set <strong>the</strong> frequency deviation to 0 Hz on <strong>the</strong> R&S <strong>FSP</strong>.<br />
➢ Press <strong>the</strong> SPAN key.<br />
➢ Press <strong>the</strong> ZERO SPAN softkey.<br />
The demodulated FM signal will appear on screen. The signal is continuous across <strong>the</strong><br />
screen.<br />
7. Establish a stable display by using video triggering.<br />
➢ Press <strong>the</strong> TRIG key.<br />
➢ Press <strong>the</strong> VIDEO softkey.<br />
A static image <strong>for</strong> <strong>the</strong> FM AF signal is produced.<br />
Result: (-10 ± 5) dB; this yields a deviation of 100 kHz when <strong>the</strong> steepness of <strong>the</strong><br />
demodulator characteristic is 5 dB/100 kHz.<br />
Fig. 5-15<br />
Display of <strong>the</strong> demodulated FM signal<br />
5.30 <strong>Quick</strong> <strong>Start</strong> <strong>Guide</strong> 1164.4556.62 - 04
R&S <strong>FSP</strong><br />
Basic Measurement Examples<br />
Storing and Loading Instrument Settings<br />
5.5 Storing and Loading Instrument Settings<br />
The R&S <strong>FSP</strong> can store complete instrument settings toge<strong>the</strong>r with instrument configurations<br />
and measurement data internally as a data record. The data is stored on <strong>the</strong> built-in hard disk<br />
or – if selected – on a disk, a network drive, or a removable drive (e.g. a memory stick). The<br />
hard disk and <strong>the</strong> disk drive have <strong>the</strong> following drive names:<br />
• Disk drive A:<br />
• Hard disk D: (drive C: is reserved <strong>for</strong> <strong>the</strong> operating system)<br />
The preset state (= Current Settings) includes that <strong>the</strong> settings of <strong>the</strong> measurement functions,<br />
activated limit lines and <strong>the</strong> active transducer factor are stored.<br />
Use <strong>the</strong> ITEMS TO SAVE/RCL function to store/load traces and to store additional limit lines<br />
and transducer factors.<br />
5.5.1 Storing an Instrument Configuration (without Traces)<br />
You can store an instrument configuration as follows:<br />
➢ Press <strong>the</strong> FILE key and <strong>the</strong>n <strong>the</strong> SAVE softkey.<br />
The selection dialog box <strong>for</strong> instrument configurations will open:<br />
➢ Enter <strong>the</strong> name of <strong>the</strong> data record to be stored (which is a digit from 0 to 9 in <strong>the</strong> simplest<br />
case) and press ENTER. The data record will be stored and <strong>the</strong> dialog box will close.<br />
<strong>Quick</strong> <strong>Start</strong> <strong>Guide</strong> 1164.4556.62 - 04 5.31
R&S <strong>FSP</strong><br />
Basic Measurement Examples<br />
Storing and Loading Instrument Settings<br />
The name of a data record may contain letters and digits. If necessary,<br />
<strong>the</strong> desired directory can be placed in front of <strong>the</strong> name of <strong>the</strong> data<br />
record (<strong>the</strong> directory will <strong>the</strong>n automatically be used <strong>for</strong> any fur<strong>the</strong>r save<br />
and recall operations).<br />
You can enter file names via <strong>the</strong> front panel keypad by using <strong>the</strong><br />
alphanumeric editor, which can be called by pressing <strong>the</strong> arrow key Ud.<br />
The operation of <strong>the</strong> editor is described in <strong>the</strong> section “ Editing<br />
Alphanumeric Parameters” on page 4.9.<br />
The default path <strong>for</strong> <strong>the</strong> instrument configurations is D:\USER\CONFIG. The file names of <strong>the</strong><br />
data records end with ".<strong>FSP</strong>".<br />
5.5.1.1 Storing Traces<br />
Be<strong>for</strong>e you can store traces, you must first select <strong>the</strong> associated partial data record. For this<br />
purpose proceed as follows:<br />
➢ Press <strong>the</strong> FILE key and <strong>the</strong>n <strong>the</strong> SAVE softkey.<br />
➢ Press <strong>the</strong> ITEMS TO SAVE/RCL softkey. The entry cursor jumps to <strong>the</strong> first entry in <strong>the</strong><br />
Items field.<br />
➢ Using <strong>the</strong> rotary knob, move <strong>the</strong> cursor to All Traces in <strong>the</strong> Items field and <strong>the</strong>n select <strong>the</strong><br />
partial data record by pressing <strong>the</strong> rotary knob or ENTER.<br />
You can cancel <strong>the</strong> selection by pressing <strong>the</strong> rotary knob or <strong>the</strong> ENTER<br />
key again.<br />
You can select additional instrument settings to be stored by marking<br />
additional fields.<br />
In addition, <strong>the</strong> ENABLE ALL ITEMS / DISABLE ALL ITEMS softkeys<br />
are available <strong>for</strong> selecting all partial data records or <strong>for</strong> cancelling <strong>the</strong><br />
selection.<br />
➢ Using <strong>the</strong> rotary knob, move <strong>the</strong> cursor to <strong>the</strong> File Name field and activate text entry by<br />
pressing <strong>the</strong> rotary knob.<br />
➢ Enter a file name (or digit from 0 to 9) and store <strong>the</strong> data record by pressing ENTER.<br />
5.5.2 Loading an Instrument Configuration<br />
An instrument configuration can be loaded in ei<strong>the</strong>r of <strong>the</strong> following two ways:<br />
1. By directly entering <strong>the</strong> data record name:<br />
➢ Press <strong>the</strong> FILE key and <strong>the</strong>n <strong>the</strong> RECALL softkey.<br />
➢ Enter <strong>the</strong> name of <strong>the</strong> data record to be loaded (which is a digit from 0 to 9 in <strong>the</strong> simplest<br />
case) and press ENTER. The data record will be loaded.<br />
5.32 <strong>Quick</strong> <strong>Start</strong> <strong>Guide</strong> 1164.4556.62 - 04
R&S <strong>FSP</strong><br />
Basic Measurement Examples<br />
Storing and Loading Instrument Settings<br />
2. By selecting <strong>the</strong> data record from a list:<br />
➢ Press <strong>the</strong> FILE key and <strong>the</strong>n <strong>the</strong> RECALL softkey.<br />
➢ Press <strong>the</strong> ITEMS TO SAVE/RCL softkey.<br />
The list of available data records is shown.<br />
➢ Select <strong>the</strong> data record to be loaded by using <strong>the</strong> rotary knob and confirm by pressing<br />
ENTER twice. The data record will be loaded.<br />
➢ To change <strong>the</strong> instrument configuration path, use <strong>the</strong> EDIT PATH softkey.<br />
To load stored traces, use <strong>the</strong> ITEMS TO SAVE/RCL softkey to select<br />
<strong>the</strong> All Traces field.<br />
During loading, <strong>the</strong> R&S <strong>FSP</strong> detects which parts <strong>the</strong> called data record<br />
contains and, if applicable, ignores any partial data records that were<br />
selected but are not available.<br />
5.5.2.1 Automatic Loading of a Data Record during Booting<br />
If <strong>the</strong> R&S <strong>FSP</strong> is switched on in <strong>the</strong> factory default state, it loads <strong>the</strong> instrument settings that<br />
it had when switched off (provided that it was switched off using <strong>the</strong> STANDBY switch on <strong>the</strong><br />
front panel; see chapter “ Switching Off <strong>the</strong> R&S <strong>FSP</strong>” on page 2.7).<br />
However, <strong>the</strong> R&S <strong>FSP</strong> can also automatically load a data record defined by <strong>the</strong> user. This<br />
requires per<strong>for</strong>ming <strong>the</strong> following procedure:<br />
➢ Press <strong>the</strong> FILE key and <strong>the</strong>n <strong>the</strong> RECALL softkey.<br />
➢ Press <strong>the</strong> STARTUP RECALL softkey.<br />
The list of available data records is shown.<br />
<strong>Quick</strong> <strong>Start</strong> <strong>Guide</strong> 1164.4556.62 - 04 5.33
R&S <strong>FSP</strong><br />
Basic Measurement Examples<br />
Printing Out <strong>the</strong> Measurement Results<br />
➢ Select <strong>the</strong> data record to be loaded by using <strong>the</strong> rotary knob and mark it with ENTER.<br />
➢ Close <strong>the</strong> dialog box by pressing ESC twice.<br />
• The selected data record will also be loaded by pressing <strong>the</strong><br />
PRESET key.<br />
• The FACTORY entry activates factory-default operation, i.e. <strong>the</strong><br />
settings that were present at <strong>the</strong> time of deactivation will be loaded<br />
at activation.<br />
• If you need to change <strong>the</strong> path <strong>for</strong> <strong>the</strong> instrument configuration, do<br />
so by using <strong>the</strong> EDIT PATH softkey.<br />
5.6 Printing Out <strong>the</strong> Measurement Results<br />
➢ Press <strong>the</strong> HCOPY key.<br />
The menu <strong>for</strong> starting and configuring <strong>the</strong> printout will appear.<br />
➢ <strong>Start</strong> <strong>the</strong> print operation by pressing <strong>the</strong> PRINT SCREEN, PRINT TRACE or PRINT TABLE<br />
softkey. The printout is based on <strong>the</strong> settings defined in <strong>the</strong> DEVICE SETUP dialog box and<br />
<strong>the</strong> COLORS submenu.<br />
• If PRINT SCREEN is selected, all diagrams with traces and status<br />
displays will be printed out as <strong>the</strong>y appear on screen. Softkeys, open<br />
tables and data entry fields will not appear on <strong>the</strong> printout.<br />
• If PRINT TRACE is selected, only <strong>the</strong> displayed traces will be printed<br />
out. If PRINT TABLE is selected, only tables that appear on screen<br />
will be printed out.<br />
➢ Select and configure <strong>the</strong> output interface by using <strong>the</strong> DEVICE 1 / 2 softkey.<br />
➢ You can redirect <strong>the</strong> printout to a file by selecting PRINT TO FILE from <strong>the</strong> DEVICE SETUP<br />
dialog box. Once you start <strong>the</strong> print operation by pressing one of <strong>the</strong> print softkeys, you will<br />
be prompted <strong>for</strong> <strong>the</strong> name of <strong>the</strong> file to which <strong>the</strong> output is to be redirected.<br />
➢ The COMMENT softkey is available <strong>for</strong> labelling <strong>the</strong> printout (<strong>the</strong> date and time will<br />
automatically be added to <strong>the</strong> printout).<br />
5.34 <strong>Quick</strong> <strong>Start</strong> <strong>Guide</strong> 1164.4556.62 - 04
R&S <strong>FSP</strong><br />
Basic Measurement Examples<br />
Additional Measurement Examples<br />
5.6.1 Selecting <strong>the</strong> Color Setting <strong>for</strong> <strong>the</strong> Printout<br />
The COLORS submenu allows you to switch between black-and-white and color printouts<br />
(default). You can also select <strong>the</strong> color setting.<br />
• SCREEN: Output using screen colors.<br />
• OPTIMIZED (default): Instead of <strong>the</strong> bright colors <strong>for</strong> traces and markers, dark colors will<br />
be used: blue <strong>for</strong> trace 1, black <strong>for</strong> trace 2, green <strong>for</strong> trace 3, turquoise <strong>for</strong> markers.<br />
• USER DEFINED: You can use this setting to customize <strong>the</strong> colors. The possible settings<br />
correspond to those in <strong>the</strong> DISPLAY – CONFIG DISPLAY – NEXT menu.<br />
• In <strong>the</strong> case of <strong>the</strong> SCREEN and OPTIMIZED settings, <strong>the</strong><br />
background is always printed out in white and <strong>the</strong> grid in black. In <strong>the</strong><br />
case of <strong>the</strong> USER DEFINED setting, <strong>the</strong>se colors can also be<br />
selected.<br />
• When you open <strong>the</strong> submenu, <strong>the</strong> color display will be switched to<br />
<strong>the</strong> selected printout colors. When you exit <strong>the</strong> menu, <strong>the</strong> original<br />
color setting will be restored.<br />
5.7 Additional Measurement Examples<br />
The measurement examples provided in this section are intended as an introduction to<br />
operating <strong>the</strong> R&S <strong>FSP</strong>. For enhanced applications, refer to <strong>the</strong> Operating Manual, chapter 2,<br />
which provides a series of additional examples.<br />
Measurement examples <strong>for</strong> <strong>the</strong> instrument's options are provided in <strong>the</strong> Operating Manuals<br />
<strong>for</strong> <strong>the</strong> individual options.<br />
<strong>Quick</strong> <strong>Start</strong> <strong>Guide</strong> 1164.4556.62 - 04 5.35
R&S <strong>FSP</strong><br />
Basic Measurement Examples<br />
Additional Measurement Examples<br />
5.36 <strong>Quick</strong> <strong>Start</strong> <strong>Guide</strong> 1164.4556.62 - 04
R&S <strong>FSP</strong><br />
LAN Interface<br />
6 LAN Interface<br />
6.1 Installing Additional Network Protocols & Services . . . . . 6.3<br />
6.2 Configuration Examples . . . . . . . . . . . . . . . . . . . . . . . . . . . . 6.6<br />
6.3 Subsequent Changes to <strong>the</strong> Network Configuration . . . . . 6.6<br />
6.4 Configuring <strong>the</strong> Windows XP Firewall . . . . . . . . . . . . . . . . 6.8<br />
6.5 Operating <strong>the</strong> Instrument without a Network . . . . . . . . . . . 6.9<br />
6.6 Operating <strong>the</strong> Instrument in a Network . . . . . . . . . . . . . . . . 6.9<br />
6.6.1 Creating Users . . . . . . . . . . . . . . . . . . . . . . . . . . . . . . . . . 6.9<br />
6.6.2 Changing <strong>the</strong> User Password . . . . . . . . . . . . . . . . . . . . 6.11<br />
6.6.3 NOVELL Network only: Configure NOVELL Client . . . . 6.13<br />
6.6.4 Logging On to <strong>the</strong> Network . . . . . . . . . . . . . . . . . . . . . . 6.14<br />
6.6.5 Deactivating <strong>the</strong> Automatic Login Mechanism . . . . . . . . 6.14<br />
6.6.6 Reactivating <strong>the</strong> Automatic Login Mechanism . . . . . . . . 6.14<br />
6.6.7 Using Network Drives . . . . . . . . . . . . . . . . . . . . . . . . . . 6.15<br />
6.6.8 Installing a Network Printer . . . . . . . . . . . . . . . . . . . . . . 6.17<br />
6.6.9 Sharing Directories (only with Microsoft Networks) . . . . 6.21<br />
6.7 Manual Operation of <strong>the</strong> R&S <strong>FSP</strong> with XP Remote<br />
Desktop . . . . . . . . . . . . . . . . . . . . . . . . . . . . . . . . . . . . . . . . . . . . 6.24<br />
6.7.1 Introduction . . . . . . . . . . . . . . . . . . . . . . . . . . . . . . . . . . 6.24<br />
6.7.2 Configuring <strong>the</strong> R&S <strong>FSP</strong> <strong>for</strong> Use of XP Remote<br />
Desktop . . . . . . . . . . . . . . . . . . . . . . . . . . . . . . . . . . . . . . . . . . 6.24<br />
6.7.3 Configuring <strong>the</strong> Controller . . . . . . . . . . . . . . . . . . . . . . . 6.27<br />
<strong>Quick</strong> <strong>Start</strong> <strong>Guide</strong> 1164.4556.62 - 04 6.1
R&S <strong>FSP</strong><br />
LAN Interface<br />
6.7.4 Connection Setup with <strong>the</strong> R&S <strong>FSP</strong> . . . . . . . . . . . . . . . 6.30<br />
6.7.5 Interrupting and Restoring <strong>the</strong> Remote Desktop<br />
Connection with <strong>the</strong> R&S <strong>FSP</strong> . . . . . . . . . . . . . . . . . . . . . . . . . 6.33<br />
6.7.6 Deactivating <strong>the</strong> R&S <strong>FSP</strong> from <strong>the</strong> Controller . . . . . . . 6.34<br />
In some of <strong>the</strong> following step-by-step instructions, user names and<br />
passwords must be entered. This requires a mouse and an external<br />
keyboard is (<strong>the</strong> connection is described in sections “ Connecting a<br />
Mouse” and “ Connecting an External Keyboard” on page 2.9).<br />
6.2 <strong>Quick</strong> <strong>Start</strong> <strong>Guide</strong> 1164.4556.62 - 04
R&S <strong>FSP</strong><br />
LAN Interface<br />
Installing Additional Network Protocols & Services<br />
6.1 Installing Additional Network Protocols & Services<br />
Your network administrator knows which protocols are necessary. In<br />
<strong>the</strong> case of <strong>the</strong> RSIB protocol and VXI11 support, TCP/IP must always<br />
be installed. In <strong>the</strong> following example, <strong>the</strong> support <strong>for</strong> Novell Network<br />
will also be installed..<br />
➢ Press <strong>the</strong> SETUP key.<br />
The SETUP menu will open.<br />
➢ Press <strong>the</strong> GENERAL SETUP softkey.<br />
The GENERAL SETUP menu will open.<br />
➢ Press <strong>the</strong> CONFIGURE NETWORK softkey.<br />
The Local Area Connection Status dialog box will open.<br />
• Windows XP automatically appends numbers to <strong>the</strong> name Local<br />
Area Connection Status (e.g. Local Area Connection Status 8) if <strong>the</strong><br />
configuration is created using <strong>the</strong> New Connection wizard. Since<br />
<strong>the</strong>se numbers are unimportant in <strong>the</strong> following configuration steps,<br />
<strong>the</strong>y are omitted in <strong>the</strong> description.<br />
• Alternatively it is possible to access <strong>the</strong> dialog using a connected<br />
external keyboard. Proceed as follows:<br />
Open <strong>the</strong> Windows XP <strong>Start</strong> menu with <strong>the</strong> Windows key or<br />
CTRL+ESC. Select Settings - Network Connections - Local Area<br />
Connection.<br />
The Local Area Connection Status dialog box will open.<br />
➢ Click <strong>the</strong> Properties button.<br />
The dialog box containing <strong>the</strong> available network protocols will open.<br />
<strong>Quick</strong> <strong>Start</strong> <strong>Guide</strong> 1164.4556.62 - 04 6.3
R&S <strong>FSP</strong><br />
LAN Interface<br />
Installing Additional Network Protocols & Services<br />
➢ Click <strong>the</strong> Install button.<br />
The list of available network components will open.<br />
➢ Select Client.<br />
➢ Click <strong>the</strong> Add... button.<br />
The list of available network protocols will open.<br />
6.4 <strong>Quick</strong> <strong>Start</strong> <strong>Guide</strong> 1164.4556.62 - 04
R&S <strong>FSP</strong><br />
LAN Interface<br />
Installing Additional Network Protocols & Services<br />
➢ Select Client Service <strong>for</strong> NetWare.<br />
➢ Click <strong>the</strong> OK button.<br />
The network driver <strong>for</strong> Novell Netware will be installed.<br />
• Your network administrator knows which clients, services and<br />
protocols must be installed <strong>for</strong> your network.<br />
• If network components are not included in D:\I386 <strong>the</strong>y have to be<br />
installed e.g. using a disk containing <strong>the</strong> drivers (or a CD that is<br />
replayed via a USB CD-ROM drive).<br />
In this case, click <strong>the</strong> Have Disk button and specify <strong>the</strong> path with <strong>the</strong><br />
corresponding drivers.<br />
After you complete <strong>the</strong> installation, you will be prompted to restart <strong>the</strong> instrument.<br />
➢ Click <strong>the</strong> Yes button.<br />
Windows will restart <strong>the</strong> system.<br />
<strong>Quick</strong> <strong>Start</strong> <strong>Guide</strong> 1164.4556.62 - 04 6.5
R&S <strong>FSP</strong><br />
LAN Interface<br />
Configuration Examples<br />
6.2 Configuration Examples<br />
Network Protocols Services Comments<br />
NOVELL Netware<br />
NWLink IPX/SPX<br />
compatible<br />
transport<br />
Client service <strong>for</strong><br />
NetWare<br />
The frame type used in <strong>the</strong> network must<br />
be set under Protocols - Properties.<br />
IP Networks<br />
(FTP, TELNET,<br />
WWW, GOPHER,<br />
etc.)<br />
TCP/IP<br />
Simple TCP/IP<br />
services<br />
An IP address that is unique in <strong>the</strong><br />
network must be set under Protocols -<br />
Properties.<br />
MICROSOFT<br />
Network<br />
TCP/IP<br />
Workstation<br />
server<br />
A name that is unique in <strong>the</strong> network must<br />
be set under Identification - Computer<br />
Name.<br />
6.3 Subsequent Changes to <strong>the</strong> Network Configuration<br />
This chapter describes changes to <strong>the</strong> network configuration like <strong>the</strong> computer name, <strong>the</strong><br />
doman or <strong>the</strong> workgroup.<br />
After completing <strong>the</strong> installation, you can modify <strong>the</strong> computer name as follows:<br />
➢ Press <strong>the</strong> Windows key or CTRL+ESC.<br />
The Windows <strong>Start</strong> menu will open.<br />
➢ Select Settings - Control Panel - System.<br />
The System Properties dialog will open.<br />
➢ Select <strong>the</strong> Computer Name.<br />
6.6 <strong>Quick</strong> <strong>Start</strong> <strong>Guide</strong> 1164.4556.62 - 04
R&S <strong>FSP</strong><br />
LAN Interface<br />
Subsequent Changes to <strong>the</strong> Network Configuration<br />
You can change <strong>the</strong> o<strong>the</strong>r settings after you select <strong>the</strong> o<strong>the</strong>r tabs.<br />
Be<strong>for</strong>e doing so, however, be sure to check with your network<br />
administrator.<br />
➢ Click <strong>the</strong> Change button.<br />
The dialog box <strong>for</strong> changing <strong>the</strong> computer name, domain and workgroup will open.<br />
➢ Enter a new computer name.<br />
➢ If necessary, enter a Domain or Workgroup.<br />
➢ Confirm changes with OK.<br />
You are prompted to restart <strong>the</strong> instrument:<br />
➢ Click <strong>the</strong> Yes button.<br />
Windows will restart <strong>the</strong> system.<br />
<strong>Quick</strong> <strong>Start</strong> <strong>Guide</strong> 1164.4556.62 - 04 6.7
R&S <strong>FSP</strong><br />
LAN Interface<br />
Configuring <strong>the</strong> Windows XP Firewall<br />
6.4 Configuring <strong>the</strong> Windows XP Firewall<br />
The Windows XP Firewall blocks all network communication which is not initialized by <strong>the</strong><br />
controller itself or which is defined as unwanted. It protects <strong>the</strong> controller from an attack of<br />
hostile users and programs. On <strong>the</strong> instrument, <strong>the</strong> Internet Connection Firewall (ICF) is<br />
activated <strong>for</strong> all network connections by default to enhance protection of <strong>the</strong> instrument.<br />
The default configuration of <strong>the</strong> firewall enables data transfer with o<strong>the</strong>r controllers in a local<br />
network, file and printer sharing and remote control via LAN. To change <strong>the</strong>se settings <strong>for</strong><br />
security reasons, per<strong>for</strong>m <strong>the</strong> following steps:<br />
➢ Using <strong>the</strong> Windows key or <strong>the</strong> key combination CTRL+ESC, call <strong>the</strong> Windows XP <strong>Start</strong><br />
menu.<br />
➢ Click Settings and <strong>the</strong>n Control Panel and Windows Firewall.<br />
The Windows Firewall dialog box is displayed.<br />
6.8 <strong>Quick</strong> <strong>Start</strong> <strong>Guide</strong> 1164.4556.62 - 04
R&S <strong>FSP</strong><br />
LAN Interface<br />
Operating <strong>the</strong> Instrument without a Network<br />
6.5 Operating <strong>the</strong> Instrument without a Network<br />
If you want to operate <strong>the</strong> instrument ei<strong>the</strong>r temporarily or permanently without a network<br />
connection, no special measures are necessary in contrast to Windows NT. Windows XP<br />
automatically detects <strong>the</strong> interruption of <strong>the</strong> network connection and does not set up <strong>the</strong><br />
connection when <strong>the</strong> instrument is switched on.<br />
If you are not prompted to enter <strong>the</strong> user name and password, proceed as described in <strong>the</strong><br />
section “ Reactivating <strong>the</strong> Automatic Login Mechanism” on page 6.14.<br />
6.6 Operating <strong>the</strong> Instrument in a Network<br />
After network support has been installed, data can be exchanged between <strong>the</strong> instrument and<br />
o<strong>the</strong>r computers, and network printers can be used.<br />
Network operation is possible only if you are authorized to use network resources. Typical<br />
resources are file directories of o<strong>the</strong>r computers or even central printers.<br />
Authorization is assigned by <strong>the</strong> network or server administrator. This requires having <strong>the</strong><br />
network names of <strong>the</strong> resources and <strong>the</strong> corresponding authorizations.<br />
6.6.1 Creating Users<br />
After <strong>the</strong> software <strong>for</strong> <strong>the</strong> network has been installed, <strong>the</strong> instrument will issue an error<br />
message <strong>the</strong> next time it is switched on, because <strong>the</strong>re is no user named instrument (= user<br />
ID <strong>for</strong> Windows XP automatic login) in <strong>the</strong> network. Thus, a matching user must be created in<br />
Windows XP and in <strong>the</strong> network, <strong>the</strong> password must be adapted to <strong>the</strong> network password, and<br />
<strong>the</strong> automatic login mechanism must <strong>the</strong>n be deactivated.<br />
The network administrator is responsible <strong>for</strong> creating new users in <strong>the</strong> network. A new user<br />
can be created on <strong>the</strong> instrument by using <strong>the</strong> User Account wizard:<br />
➢ Using <strong>the</strong> Windows key or <strong>the</strong> key combination CTRL+ESC, call <strong>the</strong> Windows XP <strong>Start</strong><br />
menu.<br />
➢ Click Settings and <strong>the</strong>n Control Panel and User Accounts.<br />
The wizard <strong>for</strong> managing <strong>the</strong> user will open with <strong>the</strong> Pick a task... dialog box.<br />
<strong>Quick</strong> <strong>Start</strong> <strong>Guide</strong> 1164.4556.62 - 04 6.9
R&S <strong>FSP</strong><br />
LAN Interface<br />
Operating <strong>the</strong> Instrument in a Network<br />
➢ Select Create a new account.<br />
The dialog box <strong>for</strong> entering a new computer name will open.<br />
➢ Enter <strong>the</strong> name of <strong>the</strong> new user in <strong>the</strong> text field and confirm with Next ->. The Pick an<br />
account type dialog box <strong>for</strong> defining <strong>the</strong> user's rights will open.<br />
➢ Select Computer administrator.<br />
Proper firmware function requires administrator rights.<br />
6.10 <strong>Quick</strong> <strong>Start</strong> <strong>Guide</strong> 1164.4556.62 - 04
R&S <strong>FSP</strong><br />
LAN Interface<br />
Operating <strong>the</strong> Instrument in a Network<br />
➢ Conclude <strong>the</strong> creation of <strong>the</strong> new user by clicking <strong>the</strong> Create Account button.<br />
The new user has now been created.<br />
6.6.2 Changing <strong>the</strong> User Password<br />
After <strong>the</strong> new user has been created on <strong>the</strong> instrument, <strong>the</strong> password must be adapted to <strong>the</strong><br />
network password. This is also done by using <strong>the</strong> User Account wizard.<br />
➢ Using <strong>the</strong> Windows key or <strong>the</strong> key combination CTRL+ESC, call <strong>the</strong> Windows XP <strong>Start</strong><br />
menu.<br />
➢ Click Settings and <strong>the</strong>n Control Panel and User Accounts.<br />
The wizard <strong>for</strong> managing <strong>the</strong> users will open with <strong>the</strong> Pick a task... dialog box.<br />
➢ Click <strong>the</strong> desired user account (in <strong>the</strong> example: user Test).<br />
The dialog box <strong>for</strong> selecting <strong>the</strong> desired action will open.<br />
<strong>Quick</strong> <strong>Start</strong> <strong>Guide</strong> 1164.4556.62 - 04 6.11
R&S <strong>FSP</strong><br />
LAN Interface<br />
Operating <strong>the</strong> Instrument in a Network<br />
➢ Click Create a password.<br />
The dialog box <strong>for</strong> entering a new password will open.<br />
➢ Enter <strong>the</strong> new password in <strong>the</strong> upper text line and repeat it in <strong>the</strong> following line.<br />
➢ Scroll <strong>the</strong> screen contents down.<br />
➢ Conclude <strong>the</strong> entry with <strong>the</strong> Create Password button.<br />
The new password is now active.<br />
6.12 <strong>Quick</strong> <strong>Start</strong> <strong>Guide</strong> 1164.4556.62 - 04
R&S <strong>FSP</strong><br />
LAN Interface<br />
Operating <strong>the</strong> Instrument in a Network<br />
6.6.3 NOVELL Network only: Configure NOVELL Client<br />
➢ Using <strong>the</strong> Windows key or <strong>the</strong> key combination CTRL+ESC, call <strong>the</strong> Windows XP <strong>Start</strong><br />
menu.<br />
➢ Click Settings and <strong>the</strong>n Control Panel and CSNW.<br />
Bindary Login (NOVELL 3.x)<br />
➢ Click Default Tree and Context.<br />
➢ Under Select Preferred Server, select <strong>the</strong> NOVELL server on which <strong>the</strong> user has been<br />
created.<br />
NDS Login (newer NOVELL versions)<br />
➢ Click Default Tree and Context.<br />
➢ Under Tree, enter <strong>the</strong> NDS Tree and, under Context, <strong>the</strong> hierarchical path on which <strong>the</strong> user<br />
has been created.<br />
<strong>Quick</strong> <strong>Start</strong> <strong>Guide</strong> 1164.4556.62 - 04 6.13
R&S <strong>FSP</strong><br />
LAN Interface<br />
Operating <strong>the</strong> Instrument in a Network<br />
➢ If desired, click <strong>the</strong> Run Login Script entry.<br />
You can obtain this in<strong>for</strong>mation from your network administrator.<br />
➢ Conclude <strong>the</strong> login configuration with OK.<br />
6.6.4 Logging On to <strong>the</strong> Network<br />
Network login occurs at <strong>the</strong> same time you log on to <strong>the</strong> operating system. For this to be<br />
possible, <strong>the</strong> user name and <strong>the</strong> password must be identical under Windows XP and on <strong>the</strong><br />
network.<br />
6.6.5 Deactivating <strong>the</strong> Automatic Login Mechanism<br />
When shipped, <strong>the</strong> instrument is already configured to automatically log on under Windows<br />
XP. To deactivate <strong>the</strong> automatic login mechanism, per<strong>for</strong>m <strong>the</strong> following steps:<br />
➢ Open <strong>the</strong> Windows XP <strong>Start</strong> menu with CTRL+ESC.<br />
➢ Select RUN from <strong>the</strong> menu.<br />
An entry field will open.<br />
➢ Enter <strong>the</strong> command D:\USER\NOAUTOLOGIN.REG in <strong>the</strong> entry field and confirm it with<br />
ENTER.<br />
The automatic login mechanism will be deactivated. The next time you switch on <strong>the</strong><br />
instrument, you will be prompted to enter your user name and password be<strong>for</strong>e <strong>the</strong><br />
firmware is started.<br />
6.6.6 Reactivating <strong>the</strong> Automatic Login Mechanism<br />
To reactivate <strong>the</strong> automatic login mechanism, do <strong>the</strong> following:<br />
➢ Open <strong>the</strong> Windows XP <strong>Start</strong> menu with CTRL+ESC.<br />
➢ Select RUN from <strong>the</strong> menu. The entry field will open.<br />
➢ Enter <strong>the</strong> command D:\USER\AUTOLOGIN.REG in <strong>the</strong> entry field and confirm it with<br />
ENTER.<br />
The automatic login mechanism will be reactivated,. It will be applied <strong>the</strong> next time <strong>the</strong><br />
instrument is switched on.<br />
6.14 <strong>Quick</strong> <strong>Start</strong> <strong>Guide</strong> 1164.4556.62 - 04
R&S <strong>FSP</strong><br />
LAN Interface<br />
Operating <strong>the</strong> Instrument in a Network<br />
6.6.7 Using Network Drives<br />
➢ Using <strong>the</strong> Windows key or <strong>the</strong> key combination CTRL+ESC, call <strong>the</strong> Windows XP <strong>Start</strong><br />
menu.<br />
➢ Click Programs, and <strong>the</strong>n Accessories and Windows Explorer.<br />
➢ Under Desktop, click My Network Places and Entire Network<br />
All available network drives will be displayed.<br />
➢ Click Tools and <strong>the</strong>n Map Network Drive.<br />
The Map Network Drive dialog will open:<br />
<strong>Quick</strong> <strong>Start</strong> <strong>Guide</strong> 1164.4556.62 - 04 6.15
R&S <strong>FSP</strong><br />
LAN Interface<br />
Operating <strong>the</strong> Instrument in a Network<br />
➢ Under Drive: click <strong>the</strong> drive.<br />
➢ Using Browse, open <strong>the</strong> list of network paths available in <strong>the</strong> network.<br />
➢ Mark <strong>the</strong> desired network path.<br />
➢ Activate Reconnect at Logon: if you want <strong>the</strong> connection to be set up automatically each<br />
time <strong>the</strong> instrument is started.<br />
➢ Click Finish to connect <strong>the</strong> network path with <strong>the</strong> selected drive.<br />
You will be now prompted to enter your user name and password.<br />
The drive will <strong>the</strong>n appear under All Directories in Explorer.<br />
Only networks authorized in <strong>the</strong> network will be connected.<br />
Terminate <strong>the</strong> connection<br />
➢ In Windows Explorer, click Tools and <strong>the</strong>n Disconnect Network Drive.<br />
➢ Under Drive:, select <strong>the</strong> drive whose connection is to be terminated.<br />
➢ Click OK to terminate <strong>the</strong> connection. You will need to confirm this step with Yes.<br />
6.16 <strong>Quick</strong> <strong>Start</strong> <strong>Guide</strong> 1164.4556.62 - 04
R&S <strong>FSP</strong><br />
LAN Interface<br />
Operating <strong>the</strong> Instrument in a Network<br />
6.6.8 Installing a Network Printer<br />
A new printer is installed using <strong>the</strong> INSTALL PRINTER softkey in <strong>the</strong> HCOPY menu.<br />
➢ Click <strong>the</strong> HCOPY key.<br />
The HCOPY menu will open.<br />
➢ Click <strong>the</strong> NEXT key to go to <strong>the</strong> side menu.<br />
➢ Using INSTALL PRINTER, open <strong>the</strong> Printers and Faxes dialog box<br />
➢ Using <strong>the</strong> rotary knob, go to Add Printer in <strong>the</strong> selection list.<br />
➢ Using right arrow key, mark <strong>the</strong> entry and <strong>the</strong>n confirm by pressing ENTER or <strong>the</strong> rotary<br />
knob.<br />
The Add Printer Wizard will now appear.<br />
<strong>Quick</strong> <strong>Start</strong> <strong>Guide</strong> 1164.4556.62 - 04 6.17
R&S <strong>FSP</strong><br />
LAN Interface<br />
Operating <strong>the</strong> Instrument in a Network<br />
➢ Select Next with <strong>the</strong> rotary knob and <strong>the</strong>n press <strong>the</strong> rotary knob to confirm.<br />
The Local or Network Printer selection will appear.<br />
In this example, an HP Laserjet 5 printer is installed as a network printer.<br />
➢ To select a network printer, activate A network printer or a printer attached to ano<strong>the</strong>r<br />
computer.<br />
➢ Click Next to continue. The Specify a Printer dialog will open.<br />
➢ Click Browse <strong>for</strong> a printer and <strong>the</strong>n Next.<br />
The selection of enabled printers will appear.<br />
6.18 <strong>Quick</strong> <strong>Start</strong> <strong>Guide</strong> 1164.4556.62 - 04
R&S <strong>FSP</strong><br />
LAN Interface<br />
Operating <strong>the</strong> Instrument in a Network<br />
➢ Mark a printer and confirm with OK.<br />
➢ When you are prompted to confirm <strong>the</strong> installation of a suitable printer driver, click OK.<br />
The selection of printer drivers will appear.<br />
The left-hand pane will list <strong>the</strong> manufacturers and <strong>the</strong> right-hand pane <strong>the</strong> available printer<br />
drivers.<br />
➢ Select <strong>the</strong> appropriate manufacturer under Manufacturers and <strong>the</strong>n <strong>the</strong> appropriate printer<br />
driver under Printers.<br />
<strong>Quick</strong> <strong>Start</strong> <strong>Guide</strong> 1164.4556.62 - 04 6.19
R&S <strong>FSP</strong><br />
LAN Interface<br />
Operating <strong>the</strong> Instrument in a Network<br />
If <strong>the</strong> printer you need does not appear in <strong>the</strong> list, <strong>the</strong> driver has not yet<br />
been installed on <strong>the</strong> instrument. In this case, click <strong>the</strong> Have Disk<br />
button. You will <strong>the</strong>n be prompted to insert a disk containing <strong>the</strong><br />
required driver. Then press OK and select <strong>the</strong> printer driver.<br />
➢ Click Next.<br />
The default printer selection dialog is opened.<br />
If one or more printers have already been installed, you will now be asked whe<strong>the</strong>r you want<br />
to use <strong>the</strong> printer you just installed as <strong>the</strong> default printer <strong>for</strong> Windows XP applications. The<br />
default response is No.<br />
➢ After selecting <strong>the</strong> default printer, click Next. The final message of <strong>the</strong> installation wizard is<br />
displayed.<br />
➢ Click <strong>the</strong> Finish button to start installation of <strong>the</strong> printer driver.<br />
6.20 <strong>Quick</strong> <strong>Start</strong> <strong>Guide</strong> 1164.4556.62 - 04
R&S <strong>FSP</strong><br />
LAN Interface<br />
Operating <strong>the</strong> Instrument in a Network<br />
➢ Configure <strong>the</strong> R&S <strong>FSP</strong> <strong>for</strong> printout with this printer using <strong>the</strong> DEVICE SETUP and DEVICE<br />
1/2 softkeys in <strong>the</strong> hardcopy main menu (see section “ Selecting and Configuring Printers”<br />
on page 2.27).<br />
6.6.9 Sharing Directories (only with Microsoft Networks)<br />
Sharing directories makes data on <strong>the</strong> device available <strong>for</strong> use on o<strong>the</strong>r computers. This is<br />
possible only in Microsoft networks.<br />
Sharing is a property of a file or directory. The procedure <strong>for</strong> applying sharing is as follows:<br />
➢ Open <strong>the</strong> Windows <strong>Start</strong> menu with <strong>the</strong> Windows key or CTRL+ESC.<br />
➢ Click Programs - Accessories - Windows Explorer to open Windows Explorer.<br />
<strong>Quick</strong> <strong>Start</strong> <strong>Guide</strong> 1164.4556.62 - 04 6.21
R&S <strong>FSP</strong><br />
LAN Interface<br />
Operating <strong>the</strong> Instrument in a Network<br />
➢ Click <strong>the</strong> desired folder with <strong>the</strong> right mouse button.<br />
➢ Click Sharing and Security.<br />
The dialog <strong>for</strong> sharing <strong>the</strong> directory will open.<br />
6.22 <strong>Quick</strong> <strong>Start</strong> <strong>Guide</strong> 1164.4556.62 - 04
R&S <strong>FSP</strong><br />
LAN Interface<br />
Operating <strong>the</strong> Instrument in a Network<br />
➢ Click Share this folder.<br />
➢ You can change <strong>the</strong> following settings as necessary:<br />
Share name:<br />
Comment:<br />
User Limit:<br />
Permissions:<br />
Caching:<br />
Name under which <strong>the</strong> directory appears in Explorer<br />
Comments regarding <strong>the</strong> shared directory<br />
Maximum number of users who can access <strong>the</strong> directory simultaneously<br />
The user access rights (read only, read and write, all)<br />
Local buffering of <strong>the</strong> directory contents <strong>for</strong> quicker access<br />
➢ Confirm <strong>the</strong> settings with OK.<br />
The drive will be shared and marked with a hand under <strong>the</strong> directory symbol in Explorer:<br />
<strong>Quick</strong> <strong>Start</strong> <strong>Guide</strong> 1164.4556.62 - 04 6.23
R&S <strong>FSP</strong><br />
LAN Interface<br />
Manual Operation of <strong>the</strong> R&S <strong>FSP</strong> with XP Remote Desktop<br />
6.7 Manual Operation of <strong>the</strong> R&S <strong>FSP</strong> with XP Remote Desktop<br />
6.7.1 Introduction<br />
In production test and measurement, a common requirement is central monitoring of <strong>the</strong> T&M<br />
instruments <strong>for</strong> remote maintenance and remote diagnostics. Equipped with <strong>the</strong> Remote<br />
Desktop software of Windows XP, <strong>the</strong> R&S <strong>FSP</strong> ideally meets requirements <strong>for</strong> use in<br />
production:<br />
• Access to <strong>the</strong> control functions via a virtual front panel (soft front panel)<br />
• Printout of measurement results directly from <strong>the</strong> controller<br />
• Storage of measured data on <strong>the</strong> controller's hard disk<br />
The R&S <strong>FSP</strong> is connected via a LAN, in which case Windows XP also supports a connection<br />
via a modem. This section describes <strong>the</strong> configuration of <strong>the</strong> R&S <strong>FSP</strong> and Remote Desktop<br />
Client of <strong>the</strong> control PC. Details on how to set up a modem connection are described in <strong>the</strong><br />
Window XP documentation.<br />
6.7.2 Configuring <strong>the</strong> R&S <strong>FSP</strong> <strong>for</strong> Use of XP Remote Desktop<br />
To enable an external computer to access <strong>the</strong> Remote Desktop software of <strong>the</strong> R&S <strong>FSP</strong>,<br />
proceed as follows:<br />
1. Determine <strong>the</strong> IP configuration of <strong>the</strong> network connection:<br />
➢ Open <strong>the</strong> Windows XP <strong>Start</strong> menu with <strong>the</strong> Windows key or <strong>the</strong> CTRL+ESC key<br />
combination.<br />
➢ Click Settings - Network Connections - Local Area Connection.<br />
The Local Area Connection Status dialog box will open.<br />
6.24 <strong>Quick</strong> <strong>Start</strong> <strong>Guide</strong> 1164.4556.62 - 04
R&S <strong>FSP</strong><br />
LAN Interface<br />
Manual Operation of <strong>the</strong> R&S <strong>FSP</strong> with XP Remote Desktop<br />
➢ Click <strong>the</strong> Support tab.<br />
The current TCP/IP configuration will be displayed.<br />
If Assigned by DHCP appears in <strong>the</strong> Address Type field, go to step 2 (Create a fixed IP<br />
address...). O<strong>the</strong>rwise, simply note <strong>the</strong> IP address and go to step 3 (Enable <strong>the</strong><br />
R&S <strong>FSP</strong>...).<br />
2. Create a fixed IP address <strong>for</strong> <strong>the</strong> TCP/IP protocol as described in <strong>the</strong> section<br />
“ Configuring Existing Network Protocols (TCP/IP Protocol)” on page 2.31<br />
To avoid problems, use a fixed IP address.<br />
When a DHCP server is used, a new IP address is assigned each time<br />
<strong>the</strong> instrument is restarted. This address must first be determined on<br />
<strong>the</strong> instrument itself. Thus, using a DHCP server is not suitable <strong>for</strong><br />
remote operation of <strong>the</strong> R&S <strong>FSP</strong>.<br />
3. Enable <strong>the</strong> R&S <strong>FSP</strong> <strong>for</strong> operation with Remote Desktop<br />
➢ Press <strong>the</strong> Windows key or CTRL+ESC.<br />
The Windows <strong>Start</strong> menu will open.<br />
<strong>Quick</strong> <strong>Start</strong> <strong>Guide</strong> 1164.4556.62 - 04 6.25
R&S <strong>FSP</strong><br />
LAN Interface<br />
Manual Operation of <strong>the</strong> R&S <strong>FSP</strong> with XP Remote Desktop<br />
➢ Select Settings - Control Panel - System.<br />
➢ Select <strong>the</strong> Remote tab.<br />
➢ In <strong>the</strong> Remote Desktop panel, select <strong>the</strong> check box in front of Allow users to connect<br />
remotely to this computer.<br />
6.26 <strong>Quick</strong> <strong>Start</strong> <strong>Guide</strong> 1164.4556.62 - 04
R&S <strong>FSP</strong><br />
LAN Interface<br />
Manual Operation of <strong>the</strong> R&S <strong>FSP</strong> with XP Remote Desktop<br />
➢ If necessary, click Select Remote Users... and select users created on <strong>the</strong> R&S <strong>FSP</strong> who<br />
are to be given access to <strong>the</strong> R&S <strong>FSP</strong> also via Remote Desktop.<br />
The user account under which configuration is carried out is<br />
automatically enabled <strong>for</strong> Remote Desktop.<br />
➢ Confirm <strong>the</strong> setting with OK.<br />
The R&S <strong>FSP</strong> is now ready <strong>for</strong> connection setup with <strong>the</strong> Remote Desktop program of<br />
<strong>the</strong> controller.<br />
6.7.3 Configuring <strong>the</strong> Controller<br />
Be<strong>for</strong>e Remote Desktop can be operated, <strong>the</strong> TCP/IP protocol must be created on <strong>the</strong><br />
controller and Remote Desktop Client must be installed.<br />
With Windows XP, Remote Desktop Client is part of <strong>the</strong> operating<br />
system and can be accessed via <strong>Start</strong> - Programs - Accessories -<br />
Communications - Remote Desktop Connection.<br />
For o<strong>the</strong>r versions of Windows, Microsoft offers <strong>the</strong> Remote Desktop<br />
Client as an add-on.<br />
The settings on <strong>the</strong> Remote Desktop Client of <strong>the</strong> controller must be made be<strong>for</strong>e <strong>the</strong><br />
connection with <strong>the</strong> R&S <strong>FSP</strong> is set up. The procedure is as follows:<br />
➢ Press <strong>the</strong> Windows key or CTRL+ESC.<br />
➢ Select Programs - Accessories - Communications - Remote Desktop Connection.<br />
The Remote Desktop login screen will appear.<br />
<strong>Quick</strong> <strong>Start</strong> <strong>Guide</strong> 1164.4556.62 - 04 6.27
R&S <strong>FSP</strong><br />
LAN Interface<br />
Manual Operation of <strong>the</strong> R&S <strong>FSP</strong> with XP Remote Desktop<br />
➢ Select <strong>the</strong> Options >> button.<br />
The table with <strong>the</strong> configuration data will appear.<br />
➢ Select <strong>the</strong> Experience tab.<br />
These settings are used to select and optimize <strong>the</strong> connection speed.<br />
➢ Click <strong>the</strong> selection list under Choose your connection speed to optimize per<strong>for</strong>mance.<br />
The list of available configurations will appear.<br />
➢ Select <strong>the</strong> appropriate connection (<strong>for</strong> example: LAN (10 Mbps or higher)).<br />
Depending on your selection, various checkboxes will be activated in <strong>the</strong> list located below<br />
(also depends on how powerful <strong>the</strong> connection is).<br />
➢ To improve per<strong>for</strong>mance, you can deactivate Desktop background, Show Contents of<br />
Window while dragging and Menu and Window animation.<br />
➢ Click <strong>the</strong> Local Resources tab.<br />
The tab <strong>for</strong> enabling printers, local drives and serial interfaces will appear.<br />
6.28 <strong>Quick</strong> <strong>Start</strong> <strong>Guide</strong> 1164.4556.62 - 04
R&S <strong>FSP</strong><br />
LAN Interface<br />
Manual Operation of <strong>the</strong> R&S <strong>FSP</strong> with XP Remote Desktop<br />
➢ Click <strong>the</strong> check box in front of Disk drives if you will need to access drives of <strong>the</strong> controller<br />
from <strong>the</strong> R&S <strong>FSP</strong> (e.g. in order to store settings or to copy files from <strong>the</strong> controller to <strong>the</strong><br />
R&S <strong>FSP</strong>):<br />
Windows XP will <strong>the</strong>n map drives of <strong>the</strong> controller to <strong>the</strong> R&S <strong>FSP</strong> like network drives.<br />
➢ Click <strong>the</strong> check box in front of Printers if you want to use printers connected to <strong>the</strong> controller<br />
by accessing <strong>the</strong>m from <strong>the</strong> R&S <strong>FSP</strong>.<br />
➢ Do not change <strong>the</strong> remaining settings.<br />
➢ Click <strong>the</strong> Display tab.<br />
The options <strong>for</strong> configuring <strong>the</strong> R&S <strong>FSP</strong> screen display will appear.<br />
➢ You can set <strong>the</strong> size of <strong>the</strong> R&S <strong>FSP</strong> window on <strong>the</strong> desktop of <strong>the</strong> controller by positioning<br />
<strong>the</strong> pointer in <strong>the</strong> Remote desktop size panel. The default setting is Full Screen.<br />
<strong>Quick</strong> <strong>Start</strong> <strong>Guide</strong> 1164.4556.62 - 04 6.29
R&S <strong>FSP</strong><br />
LAN Interface<br />
Manual Operation of <strong>the</strong> R&S <strong>FSP</strong> with XP Remote Desktop<br />
➢ Do not change <strong>the</strong> Colors setting.<br />
➢ Display <strong>the</strong> connection bar when in full screen mode:<br />
If this option is enabled, a bar showing <strong>the</strong> network address of <strong>the</strong> R&S <strong>FSP</strong> will appear at<br />
<strong>the</strong> top edge of <strong>the</strong> screen. You can use this bar to reduce, minimize or close <strong>the</strong> window.<br />
If this option is disabled, <strong>the</strong> only way you can return to <strong>the</strong> controller desktop from <strong>the</strong><br />
R&S <strong>FSP</strong> screen in full screen mode is to select Disconnect from <strong>the</strong> <strong>Start</strong> menu:<br />
6.7.4 Connection Setup with <strong>the</strong> R&S <strong>FSP</strong><br />
After you configure <strong>the</strong> Remote Desktop Client, you need to set up <strong>the</strong> connection to <strong>the</strong><br />
R&S <strong>FSP</strong>.<br />
➢ Click <strong>the</strong> General tab. You can now enter <strong>the</strong> connection in<strong>for</strong>mation.<br />
➢ Enter <strong>the</strong> IP address of <strong>the</strong> R&S <strong>FSP</strong> in <strong>the</strong> Computer field.<br />
➢ You can save <strong>the</strong> connection in<strong>for</strong>mation <strong>for</strong> later use by clicking <strong>the</strong> Save As...button. You<br />
can use <strong>the</strong> Open... button to load an existing connection configuration.<br />
➢ Press <strong>the</strong> Connect button.<br />
The connection will be set up.<br />
➢ If <strong>the</strong> entry Disk Drives is enabled on <strong>the</strong> Local Resources tab, a warning will appear<br />
indicating that <strong>the</strong> drives are enabled <strong>for</strong> access from <strong>the</strong> R&S <strong>FSP</strong>:<br />
6.30 <strong>Quick</strong> <strong>Start</strong> <strong>Guide</strong> 1164.4556.62 - 04
R&S <strong>FSP</strong><br />
LAN Interface<br />
Manual Operation of <strong>the</strong> R&S <strong>FSP</strong> with XP Remote Desktop<br />
➢ Confirm <strong>the</strong> warning with OK.<br />
Connection setup will be resumed.<br />
After a few moments, <strong>the</strong> screen of <strong>the</strong> R&S <strong>FSP</strong> will appear on <strong>the</strong> controller's screen with<br />
<strong>the</strong> prompt <strong>for</strong> you to log on. To enable remote control of <strong>the</strong> R&S <strong>FSP</strong>, do <strong>the</strong> following:<br />
➢ Enter “instrument” as <strong>the</strong> user name and “123456” as <strong>the</strong> password.<br />
After a few moments, <strong>the</strong> R&S <strong>FSP</strong> screen will appear.<br />
By default, <strong>the</strong> username is “instrument” and <strong>the</strong> password is “123456”.<br />
Prior to firmware version 4.4, <strong>the</strong> username and password both were<br />
“instrument”.<br />
If <strong>the</strong> R&S <strong>FSP</strong> application appears on screen immediately after connection setup,<br />
shutdown and restart are not necessary.<br />
If a dark screen appears or a dark square appears in <strong>the</strong> upper left-hand corner of <strong>the</strong><br />
screen, you must restart <strong>the</strong> R&S <strong>FSP</strong> in order to see <strong>the</strong> modified screen resolution:<br />
<strong>Quick</strong> <strong>Start</strong> <strong>Guide</strong> 1164.4556.62 - 04 6.31
R&S <strong>FSP</strong><br />
LAN Interface<br />
Manual Operation of <strong>the</strong> R&S <strong>FSP</strong> with XP Remote Desktop<br />
In this case, do <strong>the</strong> following:<br />
➢ Press ALT+F4.<br />
The R&S <strong>FSP</strong> firmware will be shut down, which may take a few seconds.<br />
➢ Double-click R&S Analyzer Interface.<br />
The firmware will restart and <strong>the</strong>n automatically open <strong>the</strong> Soft Front Panel, i.e. <strong>the</strong> user<br />
interface on which all front panel controls and <strong>the</strong> rotary knob are mapped to buttons.<br />
After <strong>the</strong> connection is established <strong>the</strong> R&S <strong>FSP</strong> screen is displayed in <strong>the</strong> Remote<br />
Desktop application window.<br />
6.32 <strong>Quick</strong> <strong>Start</strong> <strong>Guide</strong> 1164.4556.62 - 04
R&S <strong>FSP</strong><br />
LAN Interface<br />
Manual Operation of <strong>the</strong> R&S <strong>FSP</strong> with XP Remote Desktop<br />
You can operate all hardkeys, softkeys and hotkeys by using <strong>the</strong> mouse.<br />
The rotary knob is simulated by means of <strong>the</strong> KNOB LEFT, KNOB RIGHT and KNOB<br />
PRESS buttons.<br />
The Windows XP <strong>Start</strong> menu can be made available by expanding <strong>the</strong> Remote Desktop<br />
window to Full Size.<br />
6.7.5 Interrupting and Restoring <strong>the</strong> Remote Desktop Connection with <strong>the</strong><br />
R&S <strong>FSP</strong><br />
The connection to <strong>the</strong> R&S <strong>FSP</strong> can be interrupted at any time by closing <strong>the</strong> Remote Desktop<br />
window on <strong>the</strong> controller.<br />
To restore <strong>the</strong> connection with <strong>the</strong> R&S <strong>FSP</strong>, merely follow <strong>the</strong> instructions provided in <strong>the</strong><br />
section“ Connection Setup with <strong>the</strong> R&S <strong>FSP</strong>” on page 6.30. If <strong>the</strong> connection is interrupted<br />
and <strong>the</strong>n restored, <strong>the</strong> R&S <strong>FSP</strong> remains in <strong>the</strong> same state.<br />
During <strong>the</strong> connection with <strong>the</strong> controller, <strong>the</strong> login entry will appear on <strong>the</strong> R&S <strong>FSP</strong> screen.<br />
If <strong>the</strong> login procedure is completed successfully on <strong>the</strong> instrument, a message will appear on<br />
<strong>the</strong> controller display indicating that ano<strong>the</strong>r user has assumed control of <strong>the</strong> instrument and<br />
that <strong>the</strong> connection was terminated as a result.<br />
<strong>Quick</strong> <strong>Start</strong> <strong>Guide</strong> 1164.4556.62 - 04 6.33
R&S <strong>FSP</strong><br />
LAN Interface<br />
Manual Operation of <strong>the</strong> R&S <strong>FSP</strong> with XP Remote Desktop<br />
6.7.6 Deactivating <strong>the</strong> R&S <strong>FSP</strong> from <strong>the</strong> Controller<br />
The R&S <strong>FSP</strong> can be deactivated via remote control. To do so, proceed as follows:<br />
1. Click <strong>the</strong> R&S <strong>FSP</strong> soft front panel and close <strong>the</strong> application with ALT+F4.<br />
2. Click <strong>the</strong> desktop and press ALT+F4.<br />
A safety query will appear that warns you that <strong>the</strong> instrument cannot be reactivated via<br />
remote control and asks you whe<strong>the</strong>r you want to continue <strong>the</strong> shutdown process.<br />
3. Respond to <strong>the</strong> safety query with YES.<br />
The connection with <strong>the</strong> controller will <strong>the</strong>n be terminated and <strong>the</strong> R&S <strong>FSP</strong> will be<br />
deactivated.<br />
6.34 <strong>Quick</strong> <strong>Start</strong> <strong>Guide</strong> 1164.4556.62 - 04
R&S <strong>FSP</strong><br />
Brief Introduction to Remote Control<br />
7 Brief Introduction to Remote Control<br />
7.1 Basic Steps in Programming using <strong>the</strong> VISA Interface . . . 7.3<br />
7.1.1 Linking <strong>the</strong> VISA Library <strong>for</strong> Visual Basic . . . . . . . . . . . . 7.3<br />
7.1.1.1 Programming notes: . . . . . . . . . . . . . . . . . . . . . . . . . 7.3<br />
7.1.2 Initialization and Default State . . . . . . . . . . . . . . . . . . . . . 7.4<br />
7.1.2.1 Creating Global Variables . . . . . . . . . . . . . . . . . . . . . 7.4<br />
7.1.2.2 Initializing <strong>the</strong> Controller . . . . . . . . . . . . . . . . . . . . . . 7.5<br />
7.1.2.3 Initializing <strong>the</strong> Instrument . . . . . . . . . . . . . . . . . . . . . . 7.5<br />
7.1.2.4 Switching <strong>the</strong> Screen Display On and Off . . . . . . . . . 7.5<br />
7.1.2.5 Configuring <strong>the</strong> Power Save Function <strong>for</strong> <strong>the</strong><br />
Display . . . . . . . . . . . . . . . . . . . . . . . . . . . . . . . . . . . . . . . . . . 7.6<br />
7.1.3 Sending Simple Instrument Setting Commands . . . . . . . 7.6<br />
7.1.4 Reading Out Instrument Settings . . . . . . . . . . . . . . . . . . . 7.7<br />
7.1.5 Marker Positioning and Readout . . . . . . . . . . . . . . . . . . . 7.7<br />
7.1.6 Command Synchronization . . . . . . . . . . . . . . . . . . . . . . . 7.8<br />
7.1.6.1 Reading Output Buffers . . . . . . . . . . . . . . . . . . . . . . . 7.9<br />
7.1.6.2 Reading Error Messages . . . . . . . . . . . . . . . . . . . . . . 7.9<br />
7.2 Detailed Programming Examples . . . . . . . . . . . . . . . . . . . . 7.9<br />
7.2.1 Default Settings of <strong>the</strong> R&S <strong>FSP</strong> . . . . . . . . . . . . . . . . . . . 7.9<br />
7.2.1.1 Setting <strong>the</strong> IEC Bus Status Registers . . . . . . . . . . . 7.10<br />
7.2.1.2 Default Settings <strong>for</strong> Measurements . . . . . . . . . . . . . 7.10<br />
<strong>Quick</strong> <strong>Start</strong> <strong>Guide</strong> 1164.4556.62 - 04 7.1
R&S <strong>FSP</strong><br />
Brief Introduction to Remote Control<br />
7.2.2 Using Markers and Delta Markers . . . . . . . . . . . . . . . . . 7.12<br />
7.2.2.1 Marker Search Functions, Restricting <strong>the</strong> Search<br />
Range . . . . . . . . . . . . . . . . . . . . . . . . . . . . . . . . . . . . . . . . . 7.12<br />
7.2.2.2 Frequency Counting . . . . . . . . . . . . . . . . . . . . . . . . . 7.13<br />
7.2.2.3 Working with a Fixed Reference Point (Reference<br />
Fixed) . . . . . . . . . . . . . . . . . . . . . . . . . . . . . . . . . . . . . . . . . . 7.14<br />
7.2.2.4 Measuring Noise and Phase Noise . . . . . . . . . . . . . 7.15<br />
7.2.3 Reading Out Trace Data . . . . . . . . . . . . . . . . . . . . . . . . 7.16<br />
7.2.4 Storing and Loading Instrument Settings . . . . . . . . . . . . 7.18<br />
7.2.4.1 Storing Instrument Settings . . . . . . . . . . . . . . . . . . . 7.18<br />
7.2.4.2 Loading Instrument Settings . . . . . . . . . . . . . . . . . . 7.19<br />
7.2.4.3 Setting <strong>the</strong> Data Record <strong>for</strong> <strong>Start</strong>up Recall . . . . . . . 7.20<br />
7.2.5 Configuring and <strong>Start</strong>ing a Printout . . . . . . . . . . . . . . . . 7.20<br />
7.3 Installing USB Printers . . . . . . . . . . . . . . . . . . . . . . . . . . . . . A.2<br />
7.4 Installing Non-Plug&Play Printers . . . . . . . . . . . . . . . . . . . . A.6<br />
7.4.1 Local Printer . . . . . . . . . . . . . . . . . . . . . . . . . . . . . . . . . . . A.6<br />
7.4.2 Network Printer . . . . . . . . . . . . . . . . . . . . . . . . . . . . . . . . A.12<br />
7.5 List of Generator Types Supported by <strong>the</strong> R&S <strong>FSP</strong> . . . . . B.1<br />
7.2 <strong>Quick</strong> <strong>Start</strong> <strong>Guide</strong> 1164.4556.62 - 04
R&S <strong>FSP</strong><br />
Brief Introduction to Remote Control<br />
Basic Steps in Programming using <strong>the</strong> VISA Interface<br />
The instrument can be remote controlled via <strong>the</strong> GPIB interface. For details on setting <strong>the</strong><br />
GPIB interface see chapter 2, section “ Setting <strong>the</strong> GPIB Interface” on page 2.20.<br />
Remote control via network (LAN interface) is provided with option R&S <strong>FSP</strong>-B16 only. For<br />
details on configuring <strong>the</strong> LAN interface see chapter 2, section “ Configuring <strong>the</strong> LAN Interface<br />
(Option R&S <strong>FSP</strong>-B16 only)” on page 2.30.<br />
The following programming examples are hierarchical in structure, i.e. <strong>the</strong> later examples are<br />
based on <strong>the</strong> preceding ones. This makes it possible to easily assemble a well-functioning<br />
program by using <strong>the</strong> modules of <strong>the</strong> program examples. More complex examples are<br />
provided in <strong>the</strong> Operating Manual, chapter 7.<br />
The chapter is divided into <strong>the</strong> following sections:<br />
• “ Basic Steps in Programming using <strong>the</strong> VISA Interface” on page 7.3<br />
• “ Detailed Programming Examples” on page 7.9<br />
7.1 Basic Steps in Programming using <strong>the</strong> VISA Interface<br />
The following examples explain how to program <strong>the</strong> instrument and can be used as a basis<br />
<strong>for</strong> solving enhanced programming tasks.<br />
Visual Basic was used as <strong>the</strong> programming language. However, <strong>the</strong> programs can be<br />
implemented in o<strong>the</strong>r languages as well.<br />
In progamming languages as C, C++ or programmes as MATLAB,<br />
NI Interactive Control, a backslash starts an escape sequence (e.g.<br />
“\n” is used to start a new line). In <strong>the</strong>se progamming languages and<br />
programms, two backslashes instead of one must be used in remote<br />
commands, e.g. in “ Storing Instrument Settings” on page 7.18:<br />
instead of MMEM:STOR:STAT 1,'D:\USER\DATA\TEST1'<br />
use MMEM:STOR:STAT 1,'D:\\USER\\DATA\\TEST1'<br />
7.1.1 Linking <strong>the</strong> VISA Library <strong>for</strong> Visual Basic<br />
7.1.1.1 Programming notes:<br />
Outputting texts by using <strong>the</strong> "Print" function<br />
The following programming examples are based on <strong>the</strong> assumption that all subroutines are<br />
created as part of a <strong>for</strong>m (file extension .FRM). In this case, <strong>the</strong> following notation is permitted:<br />
Print "Text"<br />
However, if <strong>the</strong> subroutines are created as a module (file extension .BAS), <strong>the</strong> name of <strong>the</strong><br />
<strong>for</strong>m that contains <strong>the</strong> required print method must be placed in front of <strong>the</strong> print instruction.<br />
Thus, if a <strong>for</strong>m is named "Main", <strong>the</strong> print instruction will be as follows:<br />
Main.Print "Text".<br />
<strong>Quick</strong> <strong>Start</strong> <strong>Guide</strong> 1164.4556.62 - 04 7.3
R&S <strong>FSP</strong><br />
Brief Introduction to Remote Control<br />
Basic Steps in Programming using <strong>the</strong> VISA Interface<br />
Accessing <strong>the</strong> functions of <strong>the</strong> VISA32.DLL<br />
To enable users to create Visual Basic control applications, <strong>the</strong> file dynamic link library<br />
VISA32.DLL has to be added to <strong>the</strong> project using <strong>the</strong> References command in <strong>the</strong> Project<br />
menu. In addition, <strong>the</strong> file VISA32.BAS is being added to <strong>the</strong> project. This file contains<br />
constants and definitions <strong>for</strong> error handling, time-out values, etc.<br />
Declaring <strong>the</strong> DLL functions as procedures<br />
All functions return a status variable that is defined as Long. Thus, all functions are declared<br />
in <strong>the</strong> file VISA32.BAS as follows:<br />
Declare Function xxx Lib "visa32.dll" ( ... ) As Long<br />
Creating a response buffer<br />
Since <strong>the</strong> DLL returns zero-terminated strings in responses, a string of sufficient length must<br />
be created be<strong>for</strong>e <strong>the</strong> viRead() function is called, because Visual Basic inserts a length<br />
specification in front of <strong>the</strong> strings and this specification is not updated by <strong>the</strong> DLL. The<br />
following two means of creating <strong>the</strong> length specification <strong>for</strong> a string are provided:<br />
Dim Rd as String * 100<br />
Dim Rd as String<br />
Rd = Space$(100)<br />
7.1.2 Initialization and Default State<br />
At <strong>the</strong> beginning of each program, <strong>the</strong> VISA resource manager has to be initialized. It opens<br />
a connection to <strong>the</strong> VISA driver itself, which controls <strong>the</strong> interaction with all instruments.<br />
7.1.2.1 Creating Global Variables<br />
In Visual Basic, global variables are stored in modules (data extension .BAS). Thus, at least<br />
one module (e.g. GLOBALS.BAS) must be created that contains <strong>the</strong> variables used by all<br />
subroutines, e.g. <strong>the</strong> variables <strong>for</strong> device handlers used by <strong>the</strong> VISA layer.<br />
For all example programs shown below, <strong>the</strong> file must contain <strong>the</strong> following instructions:<br />
Global analyzer As ViSession<br />
Global defaultRM As ViSession<br />
Const analyzerString = "GPIB0::20::INSTR"<br />
Const analyzerTimeout = 10000<br />
The constant analyzerString, specifies <strong>the</strong> instrument. "GPIB0" specifies <strong>the</strong> control, whereas<br />
"20" specifies a certain instrument connected to <strong>the</strong> controller. Assuming <strong>the</strong> instrument was<br />
connected via a LAN cable and assigned <strong>the</strong> IP address 192.168.1.1, <strong>the</strong> corresponding string<br />
would read as:<br />
Const analyzerString = "TCPIP::192.168.1.1::INSTR"<br />
7.4 <strong>Quick</strong> <strong>Start</strong> <strong>Guide</strong> 1164.4556.62 - 04
R&S <strong>FSP</strong><br />
Brief Introduction to Remote Control<br />
Basic Steps in Programming using <strong>the</strong> VISA Interface<br />
7.1.2.2 Initializing <strong>the</strong> Controller<br />
This procedure first establishes a connection to <strong>the</strong> VISA layer and <strong>the</strong>n to <strong>the</strong> instrument<br />
specified by <strong>the</strong> analyzerString.<br />
REM ------------ Initializing <strong>the</strong> controller -------------------------------<br />
Public SUB InitController()<br />
Dim status As ViStatus<br />
status = viOpenDefaultRM(defaultRM)<br />
status = viOpen(defaultRM, analyzerString, VI_NULL, VI_NULL, analyzer)<br />
'Opens connection to Default Resource Manager and returns a handle to it<br />
END SUB<br />
REM ************************************************************************<br />
7.1.2.3 Initializing <strong>the</strong> Instrument<br />
The instrument is set to its default settings and <strong>the</strong> status register is cleared.<br />
REM ------------ Initializing <strong>the</strong> instrument -------------------------------<br />
Public SUB InitDevice()<br />
Dim status As ViStatus<br />
Dim retCnt As Long<br />
status = viWrite(analyzer, "*CLS", 4, retCnt)<br />
'Reset status register<br />
status = viWrite(analyzer, "*RST", 4, retCnt)<br />
'Reset instrument<br />
END SUB<br />
REM************************************************************************<br />
7.1.2.4 Switching <strong>the</strong> Screen Display On and Off<br />
In <strong>the</strong> default setting, all remote control commands are carried out with <strong>the</strong> screen display<br />
switched off in order to attain optimum measurement speed. During <strong>the</strong> development phase<br />
of remote control programs, however, <strong>the</strong> screen display is required in order to visually check<br />
both <strong>the</strong> programming of <strong>the</strong> settings and <strong>the</strong> measurement results.<br />
The following examples show functions that switch <strong>the</strong> screen display on or off during remote<br />
control.<br />
REM ------------ Switching on <strong>the</strong> screen display --------------------------<br />
Public SUB DisplayOn()<br />
Dim status As ViStatus<br />
Dim retCnt As Long<br />
status = viWrite(analyzer, "SYST:DISP:UPD ON", 16, retCnt)<br />
'Switch on screen display<br />
END SUB<br />
REM************************************************************************<br />
REM ------------ Switching off <strong>the</strong> screen display -------------------------<br />
Public SUB DisplayOff()<br />
Dim status As ViStatus<br />
Dim retCnt As Long<br />
status = viWrite(analyzer, "SYST:DISP:UPD OFF", 17, retCnt)<br />
'Switch off screen display<br />
END SUB<br />
<strong>Quick</strong> <strong>Start</strong> <strong>Guide</strong> 1164.4556.62 - 04 7.5
R&S <strong>FSP</strong><br />
Brief Introduction to Remote Control<br />
Basic Steps in Programming using <strong>the</strong> VISA Interface<br />
REM************************************************************************<br />
7.1.2.5 Configuring <strong>the</strong> Power Save Function <strong>for</strong> <strong>the</strong> Display<br />
During remote operation, it is often unnecessary to display <strong>the</strong> measurement results on<br />
screen. Although <strong>the</strong> SYSTem:DISPlay:UPDate OFF command switches off <strong>the</strong> display of<br />
<strong>the</strong> measurement results, thus significantly improving speed during remote control, <strong>the</strong> display<br />
itself and <strong>the</strong> background lighting in particular remain switched on.<br />
If you also want to switch off <strong>the</strong> display itself, you must use <strong>the</strong> Power Save function by setting<br />
<strong>the</strong> response time in minutes prior to activation.<br />
The display will be immediately reactivated if you press a key on <strong>the</strong><br />
instrument's front panel.<br />
REM -------- Switching on Power Save function -------------------------------<br />
Public SUB PowerSave()<br />
Dim status As ViStatus<br />
Dim retCnt As Long<br />
status = viWrite(analyzer, "DISP:PSAV:HOLD 1", 16, retCnt)<br />
'Set response time to 1 minute<br />
status = viWrite(analyzer, "DISP:PSAV ON", 12, retCnt)<br />
'Switch on Power Save function<br />
END SUB<br />
REM************************************************************************<br />
7.1.3 Sending Simple Instrument Setting Commands<br />
This example shows how <strong>the</strong> center frequency, span and reference level of <strong>the</strong> instrument are<br />
set.<br />
REM -------- Instrument setting commands ----------------------------------<br />
PUBLIC SUB SimpleSettings()<br />
Dim status As ViStatus<br />
Dim retCnt As Long<br />
status = viWrite(analyzer, "FREQENCY:CENTER 128MHz", 22, retCnt)<br />
'Center frequency 128 MHz<br />
status = viWrite(analyzer, "FREQENCY:SPAN 10MHZ", 19, retCnt)<br />
'Set span to 10 MHz<br />
status = viWrite(analyzer, "DISPLAY:TRACE:Y:RLEVEL -10dBm", 29, retCnt)<br />
'Set reference level to -10dBm<br />
END SUB<br />
REM ***********************************************************************<br />
7.6 <strong>Quick</strong> <strong>Start</strong> <strong>Guide</strong> 1164.4556.62 - 04
R&S <strong>FSP</strong><br />
Brief Introduction to Remote Control<br />
Basic Steps in Programming using <strong>the</strong> VISA Interface<br />
7.1.4 Reading Out Instrument Settings<br />
The settings made above can now be read out. To do so, <strong>the</strong> abbreviated commands are<br />
used.<br />
REM --------- Reading out instrument settings -----------------------------<br />
PUBLIC SUB ReadSettings()<br />
Dim status As ViStatus<br />
Dim retCnt As Long<br />
CFfrequenz$ = Space$(20)<br />
'Provide text variable (20 characters)<br />
status = viWrite(analyzer, "FREQ:CENT?", 10, retCnt)<br />
'Request center frequency<br />
status = viRead(analyzer, CFfrequenz$, 20, retCnt)<br />
'Read in value<br />
CFspan$ = Space$(20)<br />
'Provide text variable (20 characters)<br />
status = viWrite(analyzer, "FREQ:SPAN?", 10, retCnt)<br />
'Request span<br />
status = viRead(analyzer, CFspan$, 20, retCnt)<br />
'Read in value<br />
RLpegel$ = Space$(20)<br />
'Provide text variable (20 characters)<br />
status = viWrite(analyzer, "DISP:TRAC:Y:RLEV?", 17, retCnt)<br />
'Request ref level setting<br />
status = viRead(analyzer, RLpegel$, 20, retCnt)<br />
'Read in value<br />
REM -------- Displaying values on <strong>the</strong> screen -----------------------------<br />
Print "Center frequency: "; CFfrequenz$,<br />
Print "Span:<br />
"; CFspan$,<br />
Print "Reference level: "; RLpegel$,<br />
END SUB<br />
REM************************************************************************<br />
7.1.5 Marker Positioning and Readout<br />
REM -------- Example of marker function -----------------------------------<br />
PUBLIC SUB ReadMarker()<br />
status = viWrite(analyzer, "CALC:MARKER ON;MARKER:MAX", 25, retCnt)<br />
'Activate marker 1 and search <strong>for</strong> peak<br />
MKmark$ = Space$(30)<br />
'Provide text variable (30 characters)<br />
status = viWrite(analyzer, "CALC:MARK:X?;Y?", 15, retCnt)<br />
status = viRead(analyzer, MKmark$, 30, retCnt)<br />
'Query frequency and level and read in value<br />
REM -------- Displaying values on <strong>the</strong> screen -----------------------------<br />
Print "Marker frequency/level "; MKmark$,<br />
END SUB<br />
REM **********************************************************************<br />
<strong>Quick</strong> <strong>Start</strong> <strong>Guide</strong> 1164.4556.62 - 04 7.7
R&S <strong>FSP</strong><br />
Brief Introduction to Remote Control<br />
Basic Steps in Programming using <strong>the</strong> VISA Interface<br />
7.1.6 Command Synchronization<br />
The synchronization methods used in <strong>the</strong> following example are described in <strong>the</strong> Operating<br />
Manual, chapter 5, section "Command Sequence and Command Synchronization".<br />
Service requests are only supported by GPIB and VXI instruments.<br />
REM -------- Commands <strong>for</strong> command synchronization ------------------------<br />
PUBLIC SUB SweepSync()<br />
Dim status As ViStatus<br />
Dim retCnt As Long<br />
Dim etype As ViEventType<br />
Dim eevent As ViEvent<br />
Dim stat As Integer<br />
Rem The command INITiate[:IMMediate] starts a single sweep if <strong>the</strong><br />
Rem command INIT:CONT OFF has already been sent. The next command<br />
Rem must not be carried out until a full sweep has been completed.<br />
status = viWrite(analyzer, "INIT:CONT OFF", 13, retCnt)<br />
REM -------- First method: Using *WAI ------------------------------------<br />
status = viWrite(analyzer, "ABOR;INIT:IMM;*WAI", 18, retCnt)<br />
REM -------- Second method: Using *OPC? ----------------------------------<br />
OpcOk$ = Space$(2)<br />
status = viWrite(analyzer, "ABOR;INIT:IMM; *OPC?", 20, retCnt)<br />
'Provide space <strong>for</strong> *OPC? response<br />
REM In this case, <strong>the</strong> controller can use o<strong>the</strong>r instruments:<br />
status = viRead(analyzer, OpcOk$, 2, retCnt)<br />
'Wait <strong>for</strong> "1" from *OPC?<br />
REM -------- Third method: Using *OPC ------------------------------------<br />
Rem In order <strong>for</strong> <strong>the</strong> Service Request function to be used with a GPIB<br />
Rem driver from National Instruments, <strong>the</strong> setting<br />
Rem "Disable Auto Serial Poll" must be set to "yes" with IBCONF!<br />
status = viWrite(analyzer, "*SRE 32", 7, retCnt)<br />
'Enable Service Request <strong>for</strong> ESR<br />
status = viWrite(analyzer, "*ESE 1", 6, retCnt)<br />
'Set event enable bit <strong>for</strong> operation complete bit<br />
status = viEnableEvent(analyzer, VI_EVENT_SERVICE_REQ, VI_QUEUE, VI_NULL)<br />
'Enable SRQ event<br />
status = viWrite(analyzer, "ABOR;INIT:IMM;*OPC", 18, retCnt)<br />
'<strong>Start</strong> sweep with synchronization to OPC<br />
status = viWaitOnEvent(analyzer, VI_EVENT_SERVICE_REQ, 10000, etype, eevent)<br />
'Wait <strong>for</strong> Service Request<br />
status = viReadSTB(analyzer, stat)<br />
status = viClose(eevent)<br />
'Close event handler<br />
status = viDisableEvent(analyzer, VI_EVENT_SERVICE_REQ, VI_QUEUE)<br />
'Disable SRQ Event<br />
REM Resume main program here.<br />
7.8 <strong>Quick</strong> <strong>Start</strong> <strong>Guide</strong> 1164.4556.62 - 04
R&S <strong>FSP</strong><br />
Brief Introduction to Remote Control<br />
Detailed Programming Examples<br />
END SUB<br />
REM ***********************************************************************<br />
7.1.6.1 Reading Output Buffers<br />
REM -------- Subroutine <strong>for</strong> <strong>the</strong> individual STB bits -----------------------<br />
Public SUB Outputqueue()<br />
'Reading <strong>the</strong> output queue<br />
Dim status As ViStatus<br />
Dim retCnt As Long<br />
result$ = Space$(100)<br />
'Create space <strong>for</strong> response<br />
status = viRead(analyzer, result$, 100, retCnt)<br />
Print "Contents of Output Queue : "; result$<br />
END SUB<br />
REM ***********************************************************************<br />
7.1.6.2 Reading Error Messages<br />
REM ------- Subroutine <strong>for</strong> evaluating <strong>the</strong> error queue ---------------------<br />
Public SUB ErrorQueueHandler()<br />
Dim status As ViStatus<br />
Dim retCnt As Long<br />
sError$ = Space$(100)<br />
'Subroutine <strong>for</strong> evaluating <strong>the</strong> error queue<br />
status = viWrite(analyzer, "SYSTEM:ERROR?", 13, retCnt)<br />
status = viRead(analyzer, sError$, 100, retCnt)<br />
Print "Error Description : "; sError$<br />
END SUB<br />
REM ***********************************************************************<br />
7.2 Detailed Programming Examples<br />
7.2.1 Default Settings of <strong>the</strong> R&S <strong>FSP</strong><br />
The following settings provide typical examples of how to change <strong>the</strong> default settings of <strong>the</strong><br />
R&S <strong>FSP</strong>.<br />
Note that only some of <strong>the</strong> settings are necessary depending on <strong>the</strong> application example. In<br />
many cases, it is not necessary to set resolution bandwidth, video bandwidth and sweep time<br />
since <strong>the</strong>se parameters are automatically calculated in <strong>the</strong> default setting when <strong>the</strong> span is<br />
changed. Likewise, <strong>the</strong> input attenuation is automatically calculated in <strong>the</strong> default setting as a<br />
function of <strong>the</strong> reference level. Last of all, <strong>the</strong> level detectors are linked to <strong>the</strong> selected trace<br />
mode in <strong>the</strong> default setting.<br />
The settings automatically calculated in <strong>the</strong> default setting are indicated with an asterisk (*) in<br />
<strong>the</strong> following program example.<br />
<strong>Quick</strong> <strong>Start</strong> <strong>Guide</strong> 1164.4556.62 - 04 7.9
R&S <strong>FSP</strong><br />
Brief Introduction to Remote Control<br />
Detailed Programming Examples<br />
7.2.1.1 Setting <strong>the</strong> IEC Bus Status Registers<br />
REM ************************************************************************<br />
Public Sub SetupStatusReg()<br />
Dim status As ViStatus<br />
Dim retCnt As Long<br />
REM ------ IEEE 488.2 status register --------------------------------------<br />
status = viWrite(analyzer, "*CLS", 4, retCnt)<br />
'Reset status registers<br />
status = viWrite(analyzer, "*SRE 168", 8, retCnt)<br />
'Enable Service Request <strong>for</strong> STAT:OPER-,<br />
'STAT:QUES- and ESR-Register<br />
status = viWrite(analyzer, "*ESE 61", 7, retCnt)<br />
'Set event enable bit <strong>for</strong>:<br />
'operation complete<br />
'command-, execution-,device<br />
'dependent- and query error<br />
REM ------ SCPI status register --------------------------------------------<br />
status = viWrite(analyzer, "STAT:OPER:ENAB 0", 16, retCnt)<br />
'Disable OPERation Status Register<br />
status = viWrite(analyzer, "STAT:QUES:ENAB 0", 16, retCnt)<br />
'Disable QUEStionable Status Register<br />
End Sub<br />
REM ************************************************************************<br />
7.2.1.2 Default Settings <strong>for</strong> Measurements<br />
REM ************************************************************************<br />
Public Sub SetupInstrument()<br />
Dim status As ViStatus<br />
Dim retCnt As Long<br />
REM ------ Default setting of <strong>the</strong> R&S <strong>FSP</strong> ----------------------------------<br />
Call SetupStatusReg<br />
'Configure status registers<br />
status = viWrite(analyzer, "*RST", 4, retCnt)<br />
'Reset instrument<br />
status = viWrite(analyzer, "SYST:DISP:UPD ON", 16, retCnt)<br />
'ON: screen display on, OFF: off(improved per<strong>for</strong>mance)<br />
status = viWrite(analyzer, "DISP:FORM SINGle", 16, retCnt)<br />
'Full screen display<br />
status = viWrite(analyzer, "DISP:WIND1:SEL", 14, retCnt)<br />
'Active Screen A<br />
status = viWrite(analyzer, "INIT:CONT OFF", 13, retCnt)<br />
'Single sweep mode<br />
REM ------ Frequency setting ----------------------------------------------<br />
status = viWrite(analyzer, "FREQUENCY:CENTER 100MHz", 23, retCnt)<br />
'Center frequency<br />
status = viWrite(analyzer, "FREQ:SPAN 1 MHz", 15, retCnt)<br />
'Span<br />
REM ------ Level setting --------------------------------------------------<br />
7.10 <strong>Quick</strong> <strong>Start</strong> <strong>Guide</strong> 1164.4556.62 - 04
R&S <strong>FSP</strong><br />
Brief Introduction to Remote Control<br />
Detailed Programming Examples<br />
status = viWrite(analyzer, "DISP:WIND:TRAC:Y:RLEV -20dBm", 28, retCnt)<br />
'Reference level<br />
status = viWrite(analyzer, "INP:ATT 10dB", 12, retCnt)<br />
'Input attenuation (*)<br />
REM ------ Level scaling --------------------------------------------------<br />
status = viWrite(analyzer, "DISP:WIND:TRAC:Y:SPAC LOG", 25, retCnt)<br />
'Log level axis<br />
status = viWrite(analyzer, "DISP:WIND:TRAC:Y:SCAL 100dB", 27, retCnt)<br />
'Level range<br />
status = viWrite(analyzer, "DISP:WIND:TRAC:Y:SCAL:MODE ABS", 30, retCnt)<br />
'Absolute scaling<br />
status = viWrite(analyzer, "CALC:UNIT:POW DBM", 17, retCnt)<br />
'y meas. unit<br />
REM ------ Trace and detector setting -------------------------------------<br />
status = viWrite(analyzer, "DISP:WIND:TRAC1:MODE AVER", 25, retCnt)<br />
'Trace1 average<br />
status = viWrite(analyzer, "AVER:TYPE VID", 13, retCnt)<br />
'Average mode video; "VID" <strong>for</strong> video<br />
status = viWrite(analyzer, "SWE:COUN 10", 11, retCnt)<br />
'Sweep count<br />
status = viWrite(analyzer, "DISP:WIND:TRAC2:STAT OFF", 24, retCnt)<br />
'Trace2 blank<br />
status = viWrite(analyzer, "DISP:WIND:TRAC3:STAT OFF", 24, retCnt)<br />
'Trace3 blank<br />
status = viWrite(analyzer, "CALC:MATH:STAT OFF", 18, retCnt)<br />
'Trace difference off<br />
status = viWrite(analyzer, "DETECTOR1 RMS", 13, retCnt)<br />
'Detector Trace1 (*)<br />
status = viWrite(analyzer, "DET2:AUTO ON", 12, retCnt)<br />
'Detector Trace2 (*)<br />
status = viWrite(analyzer, "DET3:AUTO ON", 12, retCnt)<br />
'Detector Trace3 (*)<br />
REM ------ Bandwidths and sweep time ---------------------------------------<br />
status = viWrite(analyzer, "BAND:RES 100KHz", 15, retCnt) 'Resolution bandwidth (*)<br />
status = viWrite(analyzer, "BAND:VID 1MHz", 13, retCnt) 'Video bandwidth (*)<br />
status = viWrite(analyzer, "SWE:TIME 100ms", 14, retCnt) 'Sweep time (*)<br />
END SUB<br />
REM ************************************************************************<br />
<strong>Quick</strong> <strong>Start</strong> <strong>Guide</strong> 1164.4556.62 - 04 7.11
R&S <strong>FSP</strong><br />
Brief Introduction to Remote Control<br />
Detailed Programming Examples<br />
7.2.2 Using Markers and Delta Markers<br />
7.2.2.1 Marker Search Functions, Restricting <strong>the</strong> Search Range<br />
The following example is based on an AM-modulated signal at 100 MHz that has <strong>the</strong> following<br />
characteristics:<br />
• Carrier signal level: –30 dBm<br />
• AF frequency: 100 kHz<br />
• Modulation depth: 50%<br />
Marker 1 and <strong>the</strong>n delta marker 2 are set to <strong>the</strong> largest maximum points on <strong>the</strong> trace. The<br />
frequency and level are <strong>the</strong>n read. In <strong>the</strong> following measurements, <strong>the</strong> instrument's default<br />
setting can be used <strong>for</strong> measurements (SetupInstrument).<br />
REM ************************************************************************<br />
Public Sub MarkerSearch()<br />
Dim status As ViStatus<br />
Dim retCnt As Long<br />
result$ = Space$(100)<br />
Call SetupInstrument<br />
'Default Setting<br />
REM ------ Peak search without search range limits--------------------------<br />
status = viWrite(analyzer, "INIT:CONT OFF", 13, retCnt)<br />
'Switch to single sweep<br />
status = viWrite(analyzer, "CALC:MARK:PEXC 6DB", 18, retCnt)<br />
'Define peak excursion<br />
status = viWrite(analyzer, "CALC:MARK:STAT ON", 17, retCnt)<br />
'Enable marker 1<br />
status = viWrite(analyzer, "CALC:MARK:TRAC 1", 16, retCnt)<br />
'Set marker 1 to trace 1<br />
status = viWrite(analyzer, "INIT;*WAI", 9, retCnt)<br />
'Per<strong>for</strong>m sweep with sync<br />
status = viWrite(analyzer, "CALC:MARK:MAX;X?;Y?", 19, retCnt)<br />
'Marker to peak; read frequency and level<br />
status = viRead(analyzer, result$, 100, retCnt)<br />
Print "Marker 1: "; result$<br />
status = viWrite(analyzer, "CALC:DELT2:STAT ON;MAX;MAX:LEFT", 31, retCnt)<br />
'Activate delta marker 2, set to peak and <strong>the</strong>n<br />
'to next peak left<br />
status = viWrite(analyzer, "CALC:DELT2:X?;Y?", 16, retCnt)<br />
'Read delta marker 2 frequency and level<br />
status = viRead(analyzer, result$, 100, retCnt)<br />
Print "Delta 2: "; result$<br />
REM ------ Peak search with search range limit in x direction --------------<br />
status = viWrite(analyzer, "CALC:MARK:X:SLIM:STAT ON;LEFT 0Hz;RIGHt 100.05MHz", 49,<br />
retCnt)<br />
'Activate search limit and set at right below AF<br />
status = viWrite(analyzer, "CALC:DELT3:STAT ON;MAX;MAX:RIGHt", 32, retCnt)<br />
'Activate delta marker 3, 'set to peak and <strong>the</strong>n<br />
'to next peak right<br />
7.12 <strong>Quick</strong> <strong>Start</strong> <strong>Guide</strong> 1164.4556.62 - 04
R&S <strong>FSP</strong><br />
Brief Introduction to Remote Control<br />
Detailed Programming Examples<br />
status = viWrite(analyzer, "CALC:DELT3:X:REL?;:CALC:DELT3:Y?", 32, retCnt)<br />
'Read delta marker 3 frequency and level;<br />
'both must have a value of 0<br />
status = viRead(analyzer, result$, 100, retCnt)<br />
Print "Delta 3: "; result$<br />
REM ------ Peak search with search range limit in y direction --------------<br />
status = viWrite(analyzer, "CALC:THR:STAT ON", 16, retCnt)<br />
status = viWrite(analyzer, "CALC:THR -35DBM", 15, retCnt)<br />
'Activate threshold and set it above <strong>the</strong> AF<br />
status = viWrite(analyzer, "CALC:DELT3:STAT ON;MAX;MAX:NEXT", 31, retCnt)<br />
'Activate delta marker 3, set to peak and <strong>the</strong>n<br />
'to next peak => is not found<br />
status = viWrite(analyzer, "CALC:DELT3:X:REL?;:CALC:DELT3:Y?", 32, retCnt)<br />
'Query and read delta marker 3 frequency and<br />
'level; both must have a value of 0<br />
status = viRead(analyzer, result$, 100, retCnt)<br />
Print "Delta 3: "; result$<br />
REM - Setting center frequency and reference level with markers -----------<br />
status = viWrite(analyzer, "CALC:MARK2:FUNC:CENT", 20, retCnt)<br />
'Delta marker 2 -> marker and center frequency = marker 2<br />
status = viWrite(analyzer, "CALC:MARK2:FUNC:REF", 19, retCnt)<br />
'Ref level = marker 2<br />
status = viWrite(analyzer, "INIT;*WAI", 9, retCnt)<br />
'Sweep with sync<br />
END SUB<br />
REM ************************************************************************<br />
7.2.2.2 Frequency Counting<br />
The following example is based on a signal at 100 MHz with a level of –30 dBm. Also in this<br />
measurement, <strong>the</strong> instrument's default setting can be used (SetupInstrument). The purpose<br />
of frequency counting is to determine <strong>the</strong> exact frequency of <strong>the</strong> signal at 100 MHz.<br />
REM ************************************************************************<br />
Public Sub MarkerCount()<br />
Dim status As ViStatus<br />
Dim retCnt As Long<br />
result$ = Space$(100)<br />
Call SetupInstrument<br />
'Default setting<br />
REM ------ Defining signal frequency with frequency counter ----------------<br />
status = viWrite(analyzer, "INIT:CONT OFF", 13, retCnt)<br />
'Switch to single sweep<br />
status = viWrite(analyzer, "CALC:MARK:PEXC 6DB", 18, retCnt)<br />
'Define peak excursion<br />
status = viWrite(analyzer, "CALC:MARK:STAT ON", 17, retCnt)<br />
'Activate marker 1<br />
<strong>Quick</strong> <strong>Start</strong> <strong>Guide</strong> 1164.4556.62 - 04 7.13
R&S <strong>FSP</strong><br />
Brief Introduction to Remote Control<br />
Detailed Programming Examples<br />
status = viWrite(analyzer, "CALC:MARK:TRAC 1", 16, retCnt)<br />
'Set marker 1 to trace 1<br />
status = viWrite(analyzer, "CALC:MARK:X 100MHz", 18, retCnt)<br />
'Set marker 1 to 100 MHz<br />
status = viWrite(analyzer, "CALC:MARK:COUNT:RES 1HZ", 23, retCnt)<br />
'Set count resolution to 1 Hz<br />
status = viWrite(analyzer, "CALC:MARK:COUNT ON", 18, retCnt)<br />
'Activate frequency counter<br />
status = viWrite(analyzer, "INIT;*WAI", 9, retCnt)<br />
'Per<strong>for</strong>m sweep with sync<br />
status = viWrite(analyzer, "CALC:MARK:COUNT:FREQ?", 21, retCnt)<br />
'Query and read measured frequency<br />
status = viRead(analyzer, result$, 100, retCnt)<br />
Print "Marker Count Freq: "; result$<br />
END SUB<br />
REM ************************************************************************<br />
7.2.2.3 Working with a Fixed Reference Point (Reference Fixed)<br />
The following example is based on a signal at 100 MHz with a level of -20 dBm. Thus, <strong>the</strong><br />
harmonics of <strong>the</strong> signal are located at 200 MHz, 300 MHz, etc. In <strong>the</strong> case of high-quality<br />
signal sources, <strong>the</strong>se harmonics may be located outside <strong>the</strong> dynamic range of <strong>the</strong> R&S <strong>FSP</strong>.<br />
Never<strong>the</strong>less, to measure <strong>the</strong> harmonic suppression, <strong>the</strong> level setting must be changed to<br />
higher sensitivity when measuring <strong>the</strong> harmonics, in which case it may be necessary to<br />
suppress <strong>the</strong> carrier by using a notch filter in order to prevent <strong>the</strong> RF input of <strong>the</strong> R&S <strong>FSP</strong><br />
from being overloaded.<br />
Thus, two measurements with different level settings are per<strong>for</strong>med in <strong>the</strong> following example.<br />
First, a high reference level is used on <strong>the</strong> carrier frequency, and <strong>the</strong>n a low reference level is<br />
used on <strong>the</strong> frequency of <strong>the</strong> third harmonic.<br />
The default setting of <strong>the</strong> R&S <strong>FSP</strong> <strong>for</strong> measurements (SetupInstrument) is also used as a<br />
starting point here, after which adaptations <strong>for</strong> <strong>the</strong> measurement are carried out.<br />
REM ************************************************************************<br />
Public Sub RefFixed()<br />
Dim status As ViStatus<br />
Dim retCnt As Long<br />
result$ = Space$(100)<br />
Call SetupInstrument<br />
'Default setting<br />
REM ------ Measuring <strong>the</strong> reference point -----------------------------------<br />
status = viWrite(analyzer, "INIT:CONT OFF", 13, retCnt)<br />
'Switch to single sweep<br />
status = viWrite(analyzer, "CALC:MARK:PEXC 6DB", 18, retCnt)<br />
'Define peak excursion<br />
status = viWrite(analyzer, "CALC:MARK:STAT ON", 17, retCnt)<br />
'Activate marker 1<br />
7.14 <strong>Quick</strong> <strong>Start</strong> <strong>Guide</strong> 1164.4556.62 - 04
R&S <strong>FSP</strong><br />
Brief Introduction to Remote Control<br />
Detailed Programming Examples<br />
status = viWrite(analyzer, "CALC:MARK:TRAC 1", 16, retCnt)<br />
'Set marker 1 to trace 1<br />
status = viWrite(analyzer, "INIT;*WAI", 9, retCnt)<br />
'Per<strong>for</strong>m sweep with sync<br />
status = viWrite(analyzer, "CALC:MARK:MAX", 13, retCnt)<br />
'Set marker 1 to 100 MHz<br />
status = viWrite(analyzer, "CALC:DELT:FUNC:FIX ON", 21, retCnt)<br />
'Define reference<br />
REM -- Setting frequency, level and bandwidth <strong>for</strong> measuring harmonics -----<br />
status = viWrite(analyzer, "FREQ:CENT 400MHz;Span 1MHz", 26, retCnt)<br />
'Set freq of 3rd harmonic<br />
status = viWrite(analyzer, "BAND:RES 1kHz", 13, retCnt)<br />
'Set suitable RBW<br />
status = viWrite(analyzer, "SWEEP:TIME:AUTO ON", 18, retCnt)<br />
'Couple sweep time<br />
status = viWrite(analyzer, "INP:ATT:AUTO ON", 15, retCnt)<br />
status = viWrite(analyzer, "DISP:WIND:TRAC:Y:RLEV -50dBm", 28, retCnt)<br />
'Select more sensitive level setting<br />
status = viWrite(analyzer, "INIT;*WAI", 9, retCnt)<br />
'Per<strong>for</strong>m sweep with sync<br />
status = viWrite(analyzer, "CALC:DELT:MAX;X:REL?;Y?", 23, retCnt)<br />
'Read delta marker<br />
status = viRead(analyzer, result$, 100, retCnt)<br />
'Read frequency and level<br />
Print "Deltamarker 1: "; result$<br />
END SUB<br />
REM ************************************************************************<br />
7.2.2.4 Measuring Noise and Phase Noise<br />
When phase noise is measured, <strong>the</strong> noise power related to a bandwidth of 1 Hz is set in<br />
relation to <strong>the</strong> power of an adjacent carrier signal. A commonly used offset between <strong>the</strong><br />
measured frequency and <strong>the</strong> carrier frequency is 10 kHz.<br />
When noise is measured, <strong>the</strong> measured absolute level is related to a bandwidth of 1 Hz.<br />
The following example is also based on a signal at 100 MHz with a level of -30 dBm. Two<br />
markers are used to determine both <strong>the</strong> noise and <strong>the</strong> phase noise at a 10 kHz offset from <strong>the</strong><br />
carrier signal.<br />
REM ************************************************************************<br />
Public Sub Noise()<br />
Dim status As ViStatus<br />
Dim retCnt As Long<br />
result$ = Space$(100)<br />
REM ------ Default setting of <strong>the</strong> R&S <strong>FSP</strong> ----------------------------------<br />
Call SetupStatusReg<br />
'Configure status register<br />
status = viWrite(analyzer, "*RST", 4, retCnt)<br />
'Reset instrument<br />
status = viWrite(analyzer, "INIT:CONT OFF", 13, retCnt)'Single sweep mode<br />
<strong>Quick</strong> <strong>Start</strong> <strong>Guide</strong> 1164.4556.62 - 04 7.15
R&S <strong>FSP</strong><br />
Brief Introduction to Remote Control<br />
Detailed Programming Examples<br />
REM ------ Setting <strong>the</strong> frequency -------------------------------------------<br />
status = viWrite(analyzer, "FREQUENCY:CENTER 100MHz", 23, retCnt) 'Center frequency<br />
status = viWrite(analyzer, "FREQ:SPAN 100 kHz", 17, retCnt) 'Span<br />
REM ------ Setting <strong>the</strong> level -----------------------------------------------<br />
status = viWrite(analyzer, "DISP:WIND:TRAC:Y:RLEV -20dBm", 28, retCnt)<br />
'Reference level<br />
status = viWrite(analyzer, "INIT;*WAI", 9, retCnt) 'Per<strong>for</strong>m sweep with sync<br />
REM ------ Setting <strong>the</strong> reference point -------------------------------------<br />
status = viWrite(analyzer, "CALC:MARK:PEXC 6DB", 18, retCnt)<br />
'Define peak excursion<br />
status = viWrite(analyzer, "CALC:MARK:STAT ON", 17, retCnt)<br />
'Activate marker 1<br />
status = viWrite(analyzer, "CALC:MARK:TRAC 1", 16, retCnt)<br />
'Set marker 1 to trace 1<br />
status = viWrite(analyzer, "CALC:MARK:MAX", 13, retCnt)<br />
'Set marker 1 to 100 MHz<br />
status = viWrite(analyzer, "CALC:DELT:FUNC:PNO ON", 21, retCnt)<br />
'Define reference point <strong>for</strong> phase noise<br />
REM ------ Measuring <strong>the</strong> phase noise ---------------------------------------<br />
status = viWrite(analyzer, "CALC:DELT:X 10kHz", 17, retCnt)<br />
'Position delta marker<br />
status = viWrite(analyzer, "CALC:DELT:FUNC:PNO:RES?", 23, retCnt)<br />
'Query phase noise result<br />
status = viRead(analyzer, result$, 100, retCnt)<br />
Print "Phase Noise [dBc/Hz]: "; result$<br />
REM ------ Measuring <strong>the</strong> noise ---------------------------------------------<br />
status = viWrite(analyzer, "CALC:MARK:X 99.96MHz", 20, retCnt)<br />
'Position marker 1<br />
status = viWrite(analyzer, "CALC:MARK:FUNC:NOIS:RES?", 24, retCnt)<br />
'Query and output result<br />
status = viRead(analyzer, result$, 100, retCnt)<br />
Print "Noise [dBm/Hz]: "; result$<br />
END SUB<br />
REM ************************************************************************<br />
7.2.3 Reading Out Trace Data<br />
In <strong>the</strong> following example, <strong>the</strong> trace data obtained with <strong>the</strong> default setting is read from <strong>the</strong><br />
instrument and displayed in a list on screen. Readout occurs first in binary <strong>for</strong>mat and <strong>the</strong>n in<br />
ASCII <strong>for</strong>mat, once with <strong>the</strong> span > 0 and once with <strong>the</strong> span = 0.<br />
In binary <strong>for</strong>mat, <strong>the</strong> header of <strong>the</strong> message with <strong>the</strong> length specification is evaluated and used<br />
to calculate <strong>the</strong> x axis values.<br />
In ASCII <strong>for</strong>mat, merely <strong>the</strong> list of level values is output.<br />
Binary data is read out in three steps:<br />
1. The number of digits in <strong>the</strong> length specification is read out.<br />
2. The length specification itself is read out.<br />
7.16 <strong>Quick</strong> <strong>Start</strong> <strong>Guide</strong> 1164.4556.62 - 04
R&S <strong>FSP</strong><br />
Brief Introduction to Remote Control<br />
Detailed Programming Examples<br />
3. The trace data itself is read out.<br />
The procedure is required in <strong>the</strong> case of programming languages that only support structures<br />
with data types of <strong>the</strong> same type (arrays) (such as with Visual Basic), because <strong>the</strong> data types<br />
of <strong>the</strong> header and data sections are different in binary data.<br />
Note that <strong>the</strong> function viRead32 is not declared in VISA32.BAS and <strong>the</strong>re<strong>for</strong>e needs to be<br />
defined separately:<br />
Declare Function viRead32 Lib "Visa32" Alias "viRead" (ByVal vi As<br />
Long, Values As Any, ByVal count As Long, retCount As Long) As Long<br />
The arrays <strong>for</strong> <strong>the</strong> measured data are dimensioned in such a way that<br />
<strong>the</strong>y provide sufficient space <strong>for</strong> trace data of <strong>the</strong> R&S <strong>FSP</strong> (501<br />
measurement points).<br />
The arrays <strong>for</strong> <strong>the</strong> measured data are dimensioned in such a way that<br />
<strong>the</strong>y provide sufficient space <strong>for</strong> trace data of <strong>the</strong> R&S <strong>FSP</strong> (625<br />
measurement points).<br />
REM ************************************************************************<br />
Public Sub ReadTrace()<br />
Dim status As ViStatus<br />
Dim retCnt As Long<br />
REM ------ Creating variables ---------------------------------------------<br />
Dim traceData(1250) As Single 'Buffer <strong>for</strong> floating point binary data<br />
Dim digits As Byte<br />
'Number of characters in length specification<br />
Dim traceBytes As Integer 'Len. of trace data in bytes<br />
Dim traceValues As Integer 'No. of meas. values in buff.<br />
asciiResult$ = Space$(25000) 'Buffer <strong>for</strong> ASCII trace data<br />
result$ = Space$(100)<br />
'Buffer <strong>for</strong> simple results<br />
startFreq$ = Space$(100)<br />
'Buffer <strong>for</strong> start frequency<br />
span$ = Space$(100)<br />
'Buffer <strong>for</strong> span<br />
REM ------ Default setting of <strong>the</strong> R&S <strong>FSP</strong> ---------------------------------<br />
Call SetupInstrument<br />
'Default setting<br />
status = viWrite(analyzer, "INIT:CONT OFF", 13, retCnt) 'Switch to single sweep<br />
status = viWrite(analyzer, "INIT;*WAI", 9, retCnt) 'Per<strong>for</strong>m sweep with sync<br />
REM ------ Defining <strong>the</strong> frequency range <strong>for</strong> output ------------------------<br />
status = viWrite(analyzer, "FREQ:STARt?", 11, retCnt) 'Read start frequency<br />
status = viRead(analyzer, startFreq$, 100, retCnt)<br />
startFreq = Val(startFreq$)<br />
status = viWrite(analyzer, "FREQ:SPAN?", 10, retCnt) 'Read span<br />
status = viRead(analyzer, span$, 100, retCnt)<br />
span = Val(span$)<br />
REM ------ Reading out in binary <strong>for</strong>mat ------------------------------------<br />
status = viWrite(analyzer, "FORMAT REAL,32", 14, retCnt)<br />
'Set binary <strong>for</strong>mat<br />
status = viWrite(analyzer, "TRAC1? TRACE1", 13, retCnt)<br />
'Read trace 1<br />
<strong>Quick</strong> <strong>Start</strong> <strong>Guide</strong> 1164.4556.62 - 04 7.17
R&S <strong>FSP</strong><br />
Brief Introduction to Remote Control<br />
Detailed Programming Examples<br />
status = viRead(analyzer, result$, 2, retCnt)<br />
'Read and store length spec. <strong>for</strong> number of<br />
digits = Val(Mid$(result$, 2, 1))'characters<br />
result$ = Space$(100)<br />
'Reinitialize buffer<br />
status = viRead(analyzer, result$, digits, retCnt)<br />
'Read and store length specification<br />
traceBytes = Val(Left$(result$, digits))<br />
status = viRead32(analyzer, traceData(0), traceBytes, retCnt)<br />
'Read trace data into buffer<br />
status = viRead(analyzer, result$, 1, retCnt)<br />
'Read in delimiter <br />
REM ------ Outputting binary data as frequency/level pairs -----------------<br />
traceValues = traceBytes / 4 'Single precision = 4 bytes<br />
stepsize = span / traceValues 'Calculate frequency step size<br />
For i = 0 To traceValues - 1<br />
Print "Value["; i; "] = "; startFreq + stepsize * i; ", "; traceData(i)<br />
Next i<br />
REM ------ Default setting of <strong>the</strong> time domain ------------------------------<br />
status = viWrite(analyzer, "FREQ:SPAN 0Hz", 13, retCnt) 'Switch to time domain<br />
status = viWrite(analyzer, "INIT;*WAI", 9, retCnt) 'Per<strong>for</strong>m sweep with sync<br />
REM ------ Reading out in ASCII <strong>for</strong>mat -------------------------------------<br />
status = viWrite(analyzer, "FORMAT ASCII", 12, retCnt) 'Set ASCII <strong>for</strong>mat<br />
status = viWrite(analyzer, "TRAC1? TRACE1", 13, retCnt) 'Read and output<br />
status = viRead(analyzer, asciiResult$, 25000, retCnt)<br />
Print "Contents of Trace1: ", asciiResult$ 'trace 1<br />
END SUB<br />
REM ************************************************************************<br />
7.2.4 Storing and Loading Instrument Settings<br />
7.2.4.1 Storing Instrument Settings<br />
In <strong>the</strong> following example, <strong>the</strong> settings/measured data to be stored are initially defined, in which<br />
case only <strong>the</strong> hardware settings are stored. However, <strong>the</strong> selection commands <strong>for</strong> <strong>the</strong> o<strong>the</strong>r<br />
settings are specified with <strong>the</strong> state "OFF" <strong>for</strong> <strong>the</strong> sake of completeness.<br />
REM ************************************************************************<br />
Public Sub StoreSettings()<br />
Dim status As ViStatus<br />
Dim retCnt As Long<br />
'This subroutine selects <strong>the</strong> settings to be stored and creates <strong>the</strong><br />
'data record "TEST1" in <strong>the</strong> directory D:\USER\DATA. It uses <strong>the</strong> default<br />
'setting and resets <strong>the</strong> instrument after <strong>the</strong> setting is stored.<br />
REM ------ Default settings of <strong>the</strong> R&S <strong>FSP</strong> ---------------------------------<br />
Call SetupInstrument<br />
status = viWrite(analyzer, "INIT:CONT OFF", 13, retCnt) 'Change to single sweep<br />
status = viWrite(analyzer, "INIT;*WAI", 9, retCnt)<br />
'Per<strong>for</strong>m sweep with sync<br />
REM ------ Selection of settings to be stored ------------------------------<br />
7.18 <strong>Quick</strong> <strong>Start</strong> <strong>Guide</strong> 1164.4556.62 - 04
R&S <strong>FSP</strong><br />
Brief Introduction to Remote Control<br />
Detailed Programming Examples<br />
status = viWrite(analyzer, "MMEM:SEL:HWS ON", 15, retCnt)<br />
'Store hardware settings<br />
status = viWrite(analyzer, "MMEM:SEL:TRAC OFF", 17, retCnt)<br />
'Do not store any traces<br />
status = viWrite(analyzer, "MMEM:SEL:LIN:ALL OFF", 20, retCnt)<br />
'Store only <strong>the</strong> activated limit lines<br />
REM ------ Entering comments -----------------------------------------------<br />
status = viWrite(analyzer, "MMEM:COMM 'Test Setup'", 22, retCnt)<br />
REM ------ Storing on <strong>the</strong> instrument ---------------------------------------<br />
status = viWrite(analyzer, "MMEM:STOR:STAT 1,'D:\USER\DATA\TEST1'", 37, retCnt)<br />
REM ------ Resetting <strong>the</strong> instrument ----------------------------------------<br />
status = viWrite(analyzer, "*RST", 4, retCnt)<br />
END SUB<br />
REM ************************************************************************<br />
7.2.4.2 Loading Instrument Settings<br />
In <strong>the</strong> following example, <strong>the</strong> TEST1 data record stored under D:\USER\DATA is reloaded into<br />
<strong>the</strong> instrument:<br />
REM ************************************************************************<br />
Public Sub LoadSettings()<br />
Dim status As ViStatus<br />
Dim retCnt As Long<br />
'This subroutine loads <strong>the</strong> TEST1 data record in <strong>the</strong> directory D:\USER\DATA.<br />
REM ------ Default setting of <strong>the</strong> status register --------------------------<br />
Call SetupStatusReg<br />
'Configure status register<br />
'--------- Loading <strong>the</strong> data record -----------------------------------------<br />
status = viWrite(analyzer, "MMEM:LOAD:STAT 1,'D:\USER\DATA\TEST1'", 37, retCnt)<br />
REM ------ Per<strong>for</strong>ming measurement using loaded data record -----------------<br />
status = viWrite(analyzer, "DISP:TRAC1:MODE WRITE", 21, retCnt)<br />
'Set trace to Clr/Write<br />
status = viWrite(analyzer, "INIT;*WAI", 9, retCnt)<br />
'<strong>Start</strong> sweep<br />
END SUB<br />
REM ************************************************************************<br />
<strong>Quick</strong> <strong>Start</strong> <strong>Guide</strong> 1164.4556.62 - 04 7.19
R&S <strong>FSP</strong><br />
Brief Introduction to Remote Control<br />
Detailed Programming Examples<br />
7.2.4.3 Setting <strong>the</strong> Data Record <strong>for</strong> <strong>Start</strong>up Recall<br />
In <strong>the</strong> following example, <strong>the</strong> first step is to change <strong>the</strong> R&S <strong>FSP</strong> to <strong>the</strong> default state. In <strong>the</strong><br />
next step, <strong>the</strong> TEST1 data record stored under D:\USER\DATA is selected <strong>for</strong> <strong>the</strong> STARTUP<br />
RECALL function, i.e. <strong>the</strong> data record is <strong>the</strong>n set after each *RST, PRESET and each time <strong>the</strong><br />
instrument is started. For demonstration purposes, <strong>the</strong> command *RST is carried out again.<br />
REM ************************************************************************<br />
Public Sub <strong>Start</strong>upRecallSettings()<br />
Dim status As ViStatus<br />
Dim retCnt As Long<br />
REM ------ Resetting <strong>the</strong> R&S <strong>FSP</strong> -------------------------------------------<br />
status = viWrite(analyzer, "*RST", 4, retCnt)<br />
REM ------ Default setting of <strong>the</strong> status register --------------------------<br />
Call SetupStatusReg<br />
'Configure status register<br />
REM ------ Selecting <strong>the</strong> startup recall data record ------------------------<br />
status = viWrite(analyzer, "MMEM:LOAD:AUTO 1,'D:\USER\DATA\TEST1'", 37, retCnt)<br />
REM ------ Activating <strong>the</strong> startup recall data record -----------------------<br />
status = viWrite(analyzer, "*RST", 4, retCnt)<br />
END SUB<br />
REM ************************************************************************<br />
7.2.5 Configuring and <strong>Start</strong>ing a Printout<br />
The following example shows how to configure <strong>the</strong> output <strong>for</strong>mat and output device <strong>for</strong> printing<br />
out a measurement screen.<br />
The procedure is as follows:<br />
1. Set <strong>the</strong> measurement you want <strong>for</strong> <strong>the</strong> printout.<br />
2. Check which output devices are available on <strong>the</strong> instrument.<br />
3. Select an output device.<br />
4. Select <strong>the</strong> output interface.<br />
5. Configure <strong>the</strong> output <strong>for</strong>mat.<br />
6. <strong>Start</strong> <strong>the</strong> printout with synchronization to <strong>the</strong> end.<br />
It is assumed that <strong>the</strong> desired setting is a signal at 100 MHz with a power of –20 dBm. It is also<br />
assumed that <strong>the</strong> sixth printer out of <strong>the</strong> available printers that are listed is <strong>the</strong> one you want.<br />
The printout is first output to <strong>the</strong> selected printer and <strong>the</strong>n to a file.<br />
REM ************************************************************************<br />
Public Sub HCopy()<br />
Dim status As ViStatus<br />
Dim retCnt As Long<br />
Dim Devices(100) As String 'Create buffer <strong>for</strong> printer name<br />
For i = 0 To 49<br />
Devices$(i) = Space$(50) 'Preallocate buffer <strong>for</strong> printer name<br />
Next i<br />
7.20 <strong>Quick</strong> <strong>Start</strong> <strong>Guide</strong> 1164.4556.62 - 04
R&S <strong>FSP</strong><br />
Brief Introduction to Remote Control<br />
Detailed Programming Examples<br />
REM ------ Default setting of <strong>the</strong> R&S <strong>FSP</strong> ----------------------------------<br />
Call SetupStatusReg<br />
'Configure status register<br />
status = viWrite(analyzer, "*RST", 4, retCnt)<br />
'Reset instrument<br />
status = viWrite(analyzer, "INIT:CONT OFF", 13, retCnt) 'Single sweep mode<br />
status = viWrite(analyzer, "SYST:DISP:UPD ON", 16, retCnt)<br />
'Screen display on<br />
REM ------ Measurement settings --------------------------------------------<br />
status = viWrite(analyzer, "FREQ:CENT 100MHz;SPAN 10MHz", 27, retCnt)<br />
'Frequency setting<br />
status = viWrite(analyzer, "DISP:WIND:TRAC:Y:RLEV -10dBm", 28, retCnt)<br />
'Reference Level<br />
status = viWrite(analyzer, "INIT;*WAI", 10, retCnt) 'Per<strong>for</strong>m measurement<br />
REM ------ Querying <strong>the</strong> available output devices --------------------------<br />
status = viWrite(analyzer, "SYST:COMM:PRIN:ENUM:FIRSt?", 26, retCnt)<br />
'Read out and display first output device<br />
status = viRead(analyzer, Devices$(0), 100, retCnt)<br />
Print "Printer 0: " + Devices$(0)<br />
For i = 1 To 99<br />
status = viWrite(analyzer, "SYST:COMM:PRIN:ENUM:NEXT?", 24, retCnt)<br />
'Read out next printer name<br />
status = viRead(analyzer, Devices$(i), 100, retCnt)<br />
If Left$(Devices$(i), 2) = "''" Then GoTo SelectDevice<br />
'Stop at end of list<br />
Print "Printer" + Str$(i) + ": "; Devices$(i)<br />
'Display printer name<br />
Next i<br />
SelectDevice:<br />
REM - Selection of output device, printer language and output interface ----<br />
status = viWrite(analyzer, "SYST:COMM:PRIN:SEL " + Devices(6), 19 + Len(Devices(6)),<br />
retCnt) 'Printer selection #6<br />
status = viWrite(analyzer, "HCOP:DEST 'SYST:COMM:PRIN'", 26, retCnt)<br />
'Configuration: "Printout to printer interface"<br />
status = viWrite(analyzer, "HCOP:DEV:LANG GDI", 17, retCnt)<br />
'Printers require printer language 'GDI'<br />
REM -- Selection of orientation (portrait/landscape) and color/BW ---------<br />
status = viWrite(analyzer, "HCOP:PAGE:ORI PORTrait", 22, retCnt)<br />
'Portrait orientation<br />
status = viWrite(analyzer, "HCOP:DEV:COL OFF", 16, retCnt)<br />
'Black-and-white printout<br />
REM -- Configuring and starting <strong>the</strong> printout -------------------------------<br />
status = viWrite(analyzer, "HCOP:ITEM:ALL", 13, retCnt)<br />
'All screen contents<br />
'status = viWrite(analyzer, "HCOP:ITEM:WIND1:TRACE:STAT ON", 29, retCnt)<br />
'status = viWrite(analyzer, "HCOP:ITEM:WIND2:TRACE:STAT ON", 29, retCnt)<br />
'Alternative: only traces in screen A/B<br />
status = viWrite(analyzer, "*CLS", 4, retCnt)<br />
'Reset status administration<br />
<strong>Quick</strong> <strong>Start</strong> <strong>Guide</strong> 1164.4556.62 - 04 7.21
R&S <strong>FSP</strong><br />
Brief Introduction to Remote Control<br />
Detailed Programming Examples<br />
status = viWrite(analyzer, "HCOP:IMMediate;*OPC?", 19, retCnt)<br />
'<strong>Start</strong> printout<br />
status = viRead(analyzer, result$, 100, retCnt)<br />
REM - Printout in WMF <strong>for</strong>mat (BMP <strong>for</strong>mat) to file --------------------------<br />
status = viWrite(analyzer, "HCOP:DEST 'MMEM'", 16, retCnt)<br />
'Configuration: "Printout to file"<br />
status = viWrite(analyzer, "HCOP:DEV:LANG WMF", 17, retCnt)<br />
'WMF file <strong>for</strong>mat<br />
'status = viWrite(analyzer, "HCOP:DEV:LANG BMP", 17, retCnt)<br />
'BMP file <strong>for</strong>mat<br />
status = viWrite(analyzer, "MMEM:NAME 'D:\USER\DATA\PRINT1.WMF'", 35, retCnt)<br />
'Define file name<br />
status = viWrite(analyzer, "*CLS", 4, retCnt)<br />
'Reset Status administration<br />
status = viWrite(analyzer, "HCOP:IMMediate;*OPC?", 19, retCnt)<br />
'<strong>Start</strong> printout<br />
status = viRead(analyzer, result$, 100, retCnt)<br />
END SUB<br />
REM ************************************************************************<br />
7.22 <strong>Quick</strong> <strong>Start</strong> <strong>Guide</strong> 1164.4556.62 - 04
R&S <strong>FSP</strong><br />
Appendix<br />
Appendix<br />
<strong>Quick</strong> <strong>Start</strong> <strong>Guide</strong> 1164.4556.62 - 04
R&S <strong>FSP</strong><br />
Appendix<br />
<strong>Quick</strong> <strong>Start</strong> <strong>Guide</strong> 1164.4556.62 - 04
R&S <strong>FSP</strong><br />
Appendix<br />
Appendix A: Printer Interface<br />
This appendix describes <strong>the</strong> installation procedure <strong>for</strong> local printers. You can ei<strong>the</strong>r use a<br />
plug&play printer (e.g. via USB) or a non-plug&play printer (e.g. via <strong>the</strong> LPT port).<br />
To install printer drivers that are not preinstalled on <strong>the</strong> instrument, you<br />
can use one of <strong>the</strong> following external devices: LAN, USB device (e.g.<br />
memory stick or CD-ROM).<br />
You can install a local printer via manual or remote control. In <strong>the</strong> following step-by-step<br />
instructions, <strong>the</strong> iinstallation process is described via remote desktop. Alternatively, you can<br />
connect a mouse and keyboard <strong>for</strong> <strong>the</strong> installation instead of using <strong>the</strong> front panel. Also read<br />
<strong>the</strong> documentation of your printer on how to install <strong>the</strong> printer.<br />
After installation, <strong>the</strong> instrument must be configured <strong>for</strong> printing with a printer. Refer to<br />
“ Selecting and Configuring Printers” <strong>for</strong> more in<strong>for</strong>mation on how to select and configure<br />
printers directly on <strong>the</strong> instrument.<br />
A detailed description <strong>for</strong> installing network printers is provided in chapter “ Installing a<br />
Network Printer”.<br />
<strong>Quick</strong> <strong>Start</strong> <strong>Guide</strong> 1164.4556.62 - 04 A.1
R&S <strong>FSP</strong><br />
Appendix<br />
Installing USB Printers<br />
A.1 Installing USB Printers<br />
➢ If you use a USB device <strong>for</strong> driver installation, install <strong>the</strong> USB device on <strong>the</strong> instrument and<br />
connect it to <strong>the</strong> instrument be<strong>for</strong>e starting <strong>the</strong> installation.<br />
➢ If you use a LAN connection <strong>for</strong> driver installation, <strong>the</strong> corresponding network drives must<br />
be mounted be<strong>for</strong>e starting <strong>the</strong> installation.<br />
➢ Connect <strong>the</strong> printer via <strong>the</strong> USB connector on <strong>the</strong> front panel to <strong>the</strong> R&S <strong>FSP</strong>. The first page<br />
of <strong>the</strong> Found New Hardware Wizard dialog box is displayed.<br />
➢ Select <strong>the</strong> No, not this time option to skip <strong>the</strong> Windows update via internet.<br />
You can also per<strong>for</strong>m a Windows update by selecting one of <strong>the</strong> o<strong>the</strong>r options. However,<br />
note that <strong>the</strong> R&S <strong>FSP</strong><br />
– has limited disk space, so make sure that <strong>the</strong>re’s enough disk space available or save<br />
<strong>the</strong> update on an external medium, e.g. a USB stick.<br />
– has to be connected to <strong>the</strong> internet to per<strong>for</strong>m an update.<br />
A.2 <strong>Quick</strong> <strong>Start</strong> <strong>Guide</strong> 1164.4556.62 - 04
R&S <strong>FSP</strong><br />
Appendix<br />
Installing USB Printers<br />
➢ Click Next to get to <strong>the</strong> second Found New Hardware Wizard dialog box.<br />
➢ Select <strong>the</strong> Install <strong>the</strong> software automatically option.<br />
The installation process runs automatically and a dialog box is displayed after <strong>the</strong><br />
installation is completed. Proceed with step 15.<br />
If <strong>the</strong> driver software cannot be found, an error message is displayed.<br />
<strong>Quick</strong> <strong>Start</strong> <strong>Guide</strong> 1164.4556.62 - 04 A.3
R&S <strong>FSP</strong><br />
Appendix<br />
Installing USB Printers<br />
➢ Deactivate <strong>the</strong> Don't prompt me again to install this software option.<br />
➢ Click Finish.<br />
The first page of <strong>the</strong> wizard is displayed again.<br />
➢ Select <strong>the</strong> Install from a list or specific location option.<br />
➢ Click Next.<br />
The third page of <strong>the</strong> wizard is displayed.<br />
➢ Connect <strong>the</strong> USB device containing <strong>the</strong> driver to <strong>the</strong> R&S <strong>FSP</strong> (e.g. <strong>the</strong> CD-ROM drive or<br />
a memory stick)<br />
➢ Activate <strong>the</strong> Include this location in <strong>the</strong> search option.<br />
➢ Click <strong>the</strong> Browse button.<br />
The dialog box to browse <strong>for</strong> a folder is displayed.<br />
➢ On <strong>the</strong> USB device, select <strong>the</strong> folder containing <strong>the</strong> printer drivers.<br />
➢ Click OK. This button is only active, if <strong>the</strong> selected folder contains drivers.<br />
The third page of <strong>the</strong> wizard is displayed again.<br />
A.4 <strong>Quick</strong> <strong>Start</strong> <strong>Guide</strong> 1164.4556.62 - 04
R&S <strong>FSP</strong><br />
Appendix<br />
Installing USB Printers<br />
➢ Click Next.<br />
The selected folder is searched <strong>for</strong> <strong>the</strong> printer driver and <strong>the</strong> printer driver files are copied<br />
to C:. After <strong>the</strong> installation is finished, a dialog box is displayed.<br />
<strong>Quick</strong> <strong>Start</strong> <strong>Guide</strong> 1164.4556.62 - 04 A.5
R&S <strong>FSP</strong><br />
Appendix<br />
Installing Non-Plug&Play Printers<br />
A.2 Installing Non-Plug&Play Printers<br />
The following dialog boxes can be operated ei<strong>the</strong>r from <strong>the</strong> front panel<br />
or via a mouse and keyboard (see sections “ Connecting a Mouse” and<br />
“ Connecting an External Keyboard” on page 2.9).<br />
A new printer is installed using HCOPY - NEXT - INSTALL PRINTER.<br />
A.2.1 Local Printer<br />
➢ Using <strong>the</strong> rotary knob, select Add Printer from <strong>the</strong> list.<br />
➢ Mark <strong>the</strong> selected item with <strong>the</strong> right arrow key, and press ENTER or <strong>the</strong> rotary knob to<br />
confirm <strong>the</strong> selection.<br />
The Add Printer Wizard will appear.<br />
➢ Using <strong>the</strong> rotary knob, select NEXT and confirm by pressing <strong>the</strong> rotary knob.<br />
A.6 <strong>Quick</strong> <strong>Start</strong> <strong>Guide</strong> 1164.4556.62 - 04
R&S <strong>FSP</strong><br />
Appendix<br />
Installing Non-Plug&Play Printers<br />
➢ To install a local printer, select Local printer attached to this computer with <strong>the</strong> rotary knob,<br />
confirm by pressing <strong>the</strong> rotary knob and continue to <strong>the</strong> next step.<br />
➢ To install a network printer, select A network printer or a printer attached to ano<strong>the</strong>r<br />
computer, confirm by pressing <strong>the</strong> rotary knob and continue to <strong>the</strong> next step.<br />
<strong>Quick</strong> <strong>Start</strong> <strong>Guide</strong> 1164.4556.62 - 04 A.7
R&S <strong>FSP</strong><br />
Appendix<br />
Installing Non-Plug&Play Printers<br />
In <strong>the</strong> following example, a local printer of type Star LC24 is installed.<br />
➢ To select a USB connection, open <strong>the</strong> list of available ports by pressing <strong>the</strong> rotary knob.<br />
Using <strong>the</strong> arrow keys or rotary knob, select a printer port and confirm by pressing <strong>the</strong> rotary<br />
knob.<br />
➢ To select an LPT connection, you do need not to open <strong>the</strong> selection list.<br />
➢ Using <strong>the</strong> rotary knob, move <strong>the</strong> focus to <strong>the</strong> Next button and confirm by pressing <strong>the</strong> rotary<br />
knob.<br />
The Install Printer Software dialog panel will open.<br />
➢ Using <strong>the</strong> arrow up/down keys, select <strong>the</strong> required manufacturer (Star) from <strong>the</strong><br />
Manufacturers table.<br />
➢ Using <strong>the</strong> rotary move, go to <strong>the</strong> Printers table.<br />
➢ Using <strong>the</strong> arrow up/down keys, select <strong>the</strong> desired printer type (Star LC24-200 Colour) and<br />
confirm with ENTER.<br />
If <strong>the</strong> desired printer type is not in <strong>the</strong> list, its driver has not yet been<br />
installed. In this case, click <strong>the</strong> Have Disk button with <strong>the</strong> mouse. You<br />
will be prompted to insert a disk containing <strong>the</strong> corresponding printer<br />
driver. Press OK and select <strong>the</strong> desired printer driver.<br />
A.8 <strong>Quick</strong> <strong>Start</strong> <strong>Guide</strong> 1164.4556.62 - 04
R&S <strong>FSP</strong><br />
Appendix<br />
Installing Non-Plug&Play Printers<br />
➢ You can change <strong>the</strong> printer name in <strong>the</strong> Printer Name field to any name you want (max. 60<br />
characters). However, this requires using a PC keyboard.<br />
➢ Using <strong>the</strong> rotary knob, select Default Printer yes / no.<br />
➢ Using <strong>the</strong> arrow up/down keys, select <strong>the</strong> desired status.<br />
➢ Confirm <strong>the</strong> entry with ENTER.<br />
The Printer Sharing dialog panel will open.<br />
➢ Confirm <strong>the</strong> entry with ENTER.<br />
The Printer Sharing dialog panel will open.<br />
➢ Exit <strong>the</strong> dialog panel by pressing ENTER.<br />
The Completing <strong>the</strong> Add Printer Wizard dialog panel will open.<br />
<strong>Quick</strong> <strong>Start</strong> <strong>Guide</strong> 1164.4556.62 - 04 A.9
R&S <strong>FSP</strong><br />
Appendix<br />
Installing Non-Plug&Play Printers<br />
➢ Check <strong>the</strong> displayed settings and exit <strong>the</strong> dialog panel with ENTER.<br />
The printer will be installed. If Windows finds <strong>the</strong> required driver files, <strong>the</strong> installation will be<br />
completed without any fur<strong>the</strong>r queries.<br />
If Windows cannot find <strong>the</strong> required driver files, <strong>the</strong> dialog box <strong>for</strong> entering <strong>the</strong> path <strong>for</strong> files<br />
will open.<br />
➢ Using <strong>the</strong> rotary knob, select <strong>the</strong> Browse button and confirm by pressing <strong>the</strong> rotary knob.<br />
The Locate File dialog box will open.<br />
A.10 <strong>Quick</strong> <strong>Start</strong> <strong>Guide</strong> 1164.4556.62 - 04
R&S <strong>FSP</strong><br />
Appendix<br />
Installing Non-Plug&Play Printers<br />
➢ Select <strong>the</strong> path D:\I386 by turning <strong>the</strong> rotary knob and <strong>the</strong>n pressing it.<br />
If <strong>the</strong> background of <strong>the</strong> selection bar is not blue, <strong>the</strong> selection must be marked with <strong>the</strong><br />
arrow up/down keys be<strong>for</strong>e <strong>the</strong> entry can be selected by pressing <strong>the</strong> rotary knob.<br />
➢ Using <strong>the</strong> rotary knob, select a driver file and confirm by pressing <strong>the</strong> rotary knob.<br />
The file will be added to <strong>the</strong> Files Needed dialog box.<br />
If <strong>the</strong> file is not available in <strong>the</strong> D:\I386 directory, you will need a disk<br />
containing <strong>the</strong> driver file. In this case, exit <strong>the</strong> dialog box with ESC and<br />
repeat <strong>the</strong> selection starting with <strong>the</strong> Files needed dialog box.<br />
➢ Using <strong>the</strong> rotary knob, select OK and confirm by pressing <strong>the</strong> rotary knob.<br />
The installation will be completed.<br />
<strong>Quick</strong> <strong>Start</strong> <strong>Guide</strong> 1164.4556.62 - 04 A.11
R&S <strong>FSP</strong><br />
Appendix<br />
Installing Non-Plug&Play Printers<br />
The instrument must <strong>the</strong>n be configured <strong>for</strong> printout with this printer using <strong>the</strong> DEVICE SETUP<br />
and DEVICE 1/2 softkeys in <strong>the</strong> hardcopy main menu (see section “ Selecting and Configuring<br />
Printers” on page 2.27).<br />
A.2.2 Network Printer<br />
Network printer installation is described in chapter 6, section “ Installing a Network Printer” on<br />
page 6.17.<br />
A.12 <strong>Quick</strong> <strong>Start</strong> <strong>Guide</strong> 1164.4556.62 - 04
R&S <strong>FSP</strong><br />
Appendix<br />
List of Generator Types Supported by <strong>the</strong> R&S <strong>FSP</strong><br />
Appendix B: External Generator Control<br />
B.1 List of Generator Types Supported by <strong>the</strong> R&S <strong>FSP</strong><br />
Generator Interface Type Generator<br />
Min. Freq.<br />
Generator<br />
Max. Freq.<br />
Generator<br />
Min. Power<br />
dBm<br />
Generator<br />
Max. Power<br />
dBm<br />
SME02 TTL 5 kHz 1.5 GHz -144 +16<br />
SME03 TTL 5 kHz 3.0 GHz -144 +16<br />
SME06 TTL 5 kHz 6.0 GHz -144 +16<br />
SMG GPIB 100 kHz 1.0 GHz -137 +13<br />
SMGL GPIB 9 kHz 1.0 GHz -118 +30<br />
SMGU GPIB 100 kHz 2.16 GHz -140 +13<br />
SMH GPIB 100 kHz 2.0 GHz -140 +13<br />
SMHU GPIB 100 kHz 4.32 GHz -140 +13<br />
SMIQ02B TTL 300 kHz 2.2 GHz -144 +13<br />
SMIQ02E GPIB 300 kHz 2.2 GHz -144 +13<br />
SMIQ03B TTL 300 kHz 3.3 GHz -144 +13<br />
SMIQ03E GPIB 300 kHz 3.3 GHz -144 +13<br />
SMIQ04B TTL 300 kHz 4.4 GHz -144 +10<br />
SMIQ06B TTL 300 kHz 6.4 GHz -144 +10<br />
SML01 GPIB 9 kHz 1.1 GHz -140 +13<br />
SML02 GPIB 9 kHz 2.2 GHz -140 +13<br />
SML03 GPIB 9 kHz 3.3 GHz -140 +13<br />
SMR20 TTL 1 GHz 20 GHz -130 2) +11 2)<br />
SMR20B11 1) TTL 10 MHz 20 GHz -130 2) +13 2)<br />
SMR27 TTL 1 GHz 27 GHz -130 2) +11 2)<br />
SMR27B11 1) TTL 10 MHz 27 GHz -130 2) +12 2)<br />
SMR30 TTL 1 GHz 30 GHz -130 2) +11 2)<br />
SMR30B11 1) TTL 10 MHz 30 GHz -130 2) +12 2)<br />
SMR40 TTL 1 GHz 40 GHz -130 2) +9 2)<br />
SMR40B11 1) TTL 10 MHz 40 GHz -130 2) +12 2)<br />
SMR50 TTL 1 GHz 50 GHz -130 2) +9 2)<br />
SMR50B11 1) TTL 10 MHz 50 GHz -130 2) +12 2)<br />
SMR60 TTL 1 GHz 60 GHz -130 2) +9 2)<br />
<strong>Quick</strong> <strong>Start</strong> <strong>Guide</strong> 1164.4556.62 - 04 B.1
R&S <strong>FSP</strong><br />
Appendix<br />
List of Generator Types Supported by <strong>the</strong> R&S <strong>FSP</strong><br />
Generator Interface Type Generator<br />
Min. Freq.<br />
Generator<br />
Max. Freq.<br />
Generator<br />
Min. Power<br />
dBm<br />
Generator<br />
Max. Power<br />
dBm<br />
SMR60B11 1) TTL 10 MHz 60 GHz -130 2) +12 2)<br />
SMP02 TTL 10 MHz 20 GHz -130 3) +17 3)<br />
SMP03 TTL 10 MHz 27 GHz -130 3) +13 3)<br />
SMP04 TTL 10 MHz 40 GHz -130 3) +12 3)<br />
SMP22 TTL 10 MHz 20 GHz -130 3) +20 3)<br />
SMT02 GPIB 5.0 kHz 1.5 GHz -144 +13<br />
SMT03 GPIB 5.0 kHz 3.0 GHz -144 +13<br />
SMT06 GPIB 5.0 kHz 6.0 GHz -144 +13<br />
SMU200A TTL 100 kHz 6.0 GHz -145 +19<br />
SMV03 GPIB 9 kHz 3.3 GHz -140 +13<br />
SMX GPIB 100 kHz 1.0 GHz -137 +13<br />
SMY01 GPIB 9 kHz 1.04 GHz -140 +13<br />
SMY02 GPIB 9 kHz 2.08 GHz -140 +13<br />
HP8340A GPIB 10 MHz 26.5 GHz -110 +10<br />
HP8648 GPIB 9 kHz 4 GHz -136 +10<br />
HP ESG-A Series<br />
1000A, 2000A,<br />
3000A, 4000A<br />
HP ESG-D<br />
SERIES E4432B<br />
GPIB 250 kHz 4 GHz -136 +20<br />
GPIB 250 kHz 3 GHz -136 +10<br />
1) Requires installation of <strong>the</strong> option R&S SMR-B11.<br />
2) Maximum/minimum power depends on <strong>the</strong> presence of <strong>the</strong> option R&S SMR-B15/-B17 and on <strong>the</strong> frequency<br />
range that has been set.<br />
For more in<strong>for</strong>mation, refer to <strong>the</strong> R&S SMR data sheet.<br />
3) Maximum/minimum power depends on <strong>the</strong> presence of <strong>the</strong> option R&S SMP-B15/-B17 and on <strong>the</strong> frequency<br />
range that has been set.<br />
For more in<strong>for</strong>mation, refer to <strong>the</strong> R&S SMP data sheet.<br />
B.2 <strong>Quick</strong> <strong>Start</strong> <strong>Guide</strong> 1164.4556.62 - 04
R&S <strong>FSP</strong><br />
Index<br />
Index<br />
Symbols<br />
* (enhancement label) ............................ 4.6<br />
Numerics<br />
20.4 MHz OUT...................................... 1.15<br />
75 Ohm (enhancement label)................. 4.6<br />
A<br />
A/B (enhancement label)........................ 4.6<br />
AC power supply .................................. 1.12<br />
connecting......................................... 2.6<br />
administrator ID ........................... 2.35, 2.39<br />
advanced measurement examples....... 5.35<br />
AF OUTPUT ........................................... 1.7<br />
AM-modulated signals<br />
measuring ....................................... 5.26<br />
AMPT key............................................... 1.4<br />
AP (detector) .......................................... 4.5<br />
approved software................................ 2.40<br />
arrow keys .............................................. 4.8<br />
Att (hardware setting) ............................. 4.3<br />
automatic login mechanism<br />
activating......................................... 6.14<br />
deactivating..................................... 6.14<br />
AUX CONTROL........................... 1.17, 2.15<br />
AV (detector) .......................................... 4.5<br />
AVG (trace mode)................................... 4.5<br />
B<br />
BACK key ............................................... 4.7<br />
basic measurement examples................ 5.2<br />
booting<br />
loading data record ......................... 5.33<br />
booting <strong>the</strong> instrument............................ 2.6<br />
brightness (screen)............................... 2.23<br />
burst signal<br />
measuring signal-to-noise ratio....... 5.23<br />
BW key ................................................... 1.4<br />
C<br />
CAL key............................................1.5, 2.6<br />
CCVS IN/OUT .......................................1.16<br />
CF CARD ................................................1.9<br />
cleaning <strong>the</strong> outside ................................2.8<br />
CLRWR (trace mode)..............................4.5<br />
color printout .........................................2.28<br />
color saturation (screen) .......................2.24<br />
colors (screen) ......................................2.24<br />
COM......................................................1.12<br />
configuration<br />
different networks ..............................6.6<br />
instrument......................5.31, 5.32, 5.33<br />
network ..............................................6.6<br />
Windows XP Firewall.........................6.8<br />
connector<br />
20.4 MHz OUT.................................1.15<br />
AC power supply..............................1.12<br />
AF OUTPUT ......................................1.7<br />
AUX CONTROL......................1.17, 2.15<br />
CCVS IN/OUT..................................1.16<br />
CF CARD...........................................1.9<br />
COM ................................................1.12<br />
disk drive............................................1.8<br />
EXT MIXER .......................................1.6<br />
EXT TRIG/GATE IN.........................1.13<br />
front panel..........................................1.6<br />
GEN OUTPUT 50 Ohm .....................1.6<br />
GPIB interface .................................1.12<br />
GPIB interface 2 ..............................1.16<br />
KEYBOARD................................1.8, 2.9<br />
LAN..................................................1.16<br />
LPT .........................................1.12, 2.13<br />
MONITOR...............................1.13, 2.12<br />
MOUSE............................................2.11<br />
NOISE SOURCE .............................1.13<br />
PROBE POWER................................1.7<br />
rear panel.........................................1.12<br />
REF IN.............................................1.15<br />
REF OUT .........................................1.15<br />
RF INPUT ..........................................1.6<br />
TG I/AM IN.......................................1.16<br />
TG I/FM IN.......................................1.16<br />
TRIGGER PORT .............................1.14<br />
USB .................................................1.14<br />
<strong>Quick</strong> <strong>Start</strong> <strong>Guide</strong> 1164.4556.62 - 04 1
R&S <strong>FSP</strong><br />
Index<br />
cursor ......................................................4.8<br />
D<br />
date<br />
entering............................................2.20<br />
directory sharing ...................................6.21<br />
disk drive.................................................1.8<br />
DISP key ...............................1.5, 2.23, 2.24<br />
documentation overview .........................1.1<br />
Operating Manual ..............................1.2<br />
<strong>Quick</strong> <strong>Start</strong> <strong>Guide</strong> ..............................1.1<br />
Service Manual..................................1.2<br />
E<br />
EATT (hardware setting).........................4.3<br />
editor<br />
alphanumeric type 1 ..........................4.9<br />
alphanumeric type 2 ........................4.10<br />
enhancement label..................................4.6<br />
* .........................................................4.6<br />
75 Ohm..............................................4.6<br />
A/B.....................................................4.6<br />
EXT....................................................4.6<br />
FRQ ...................................................4.6<br />
GAT ...................................................4.6<br />
LVL ....................................................4.6<br />
PA......................................................4.6<br />
PRN ...................................................4.6<br />
PS......................................................4.6<br />
SGL ...................................................4.6<br />
TDF....................................................4.6<br />
TRG ...................................................4.6<br />
entry<br />
cancel ................................................4.7<br />
conclude .....................................4.7, 4.8<br />
environmental conditions ........................2.4<br />
ESC/CANCEL key ..................................4.7<br />
EXREF (status display)...........................4.4<br />
EXT (enhancement label) .......................4.6<br />
EXT MIXER.............................................1.6<br />
EXT TRIG/GATE IN ..............................1.13<br />
external generator<br />
activating configuration....................2.17<br />
configuring .......................................2.16<br />
connecting ..............................2.15, 2.16<br />
setting output level...........................2.17<br />
supported types.................................B.1<br />
using as tracking generator............. 2.18<br />
external keyboard ................................... 2.9<br />
F<br />
FILE key ................................................. 1.5<br />
firmware<br />
installed options ................................ 3.3<br />
installing options................................ 3.3<br />
uninstalling options............................ 3.3<br />
update ............................................... 3.2<br />
FM-modulated signals<br />
measuring ....................................... 5.28<br />
FREQ key ............................................... 1.4<br />
frequency reference.............................. 2.19<br />
front panel............................................... 1.2<br />
connectors......................................... 1.6<br />
function keys ..................................... 1.4<br />
FRQ (enhancement label) ...................... 4.6<br />
function keys........................................... 1.4<br />
functional test ......................................... 2.6<br />
G<br />
GAT (enhancement label) ...................... 4.6<br />
GEN OUTPUT 50 Ohm .......................... 1.6<br />
generator<br />
external ........................................... 2.15<br />
generator control<br />
external ....................................1.17, B.1<br />
GPIB address ....................................... 2.20<br />
GPIB interface ............................. 1.12, 1.16<br />
GPIB language ..................................... 2.21<br />
H<br />
Hardcopy Setup dialog box .................. 2.27<br />
hardware setting display<br />
Att...................................................... 4.3<br />
EATT ................................................. 4.3<br />
LIMIT CHECK ................................... 4.3<br />
Marker/Delta...................................... 4.3<br />
Offset................................................. 4.3<br />
RBW.................................................. 4.3<br />
Ref..................................................... 4.3<br />
SWT .................................................. 4.3<br />
VBW .................................................. 4.3<br />
2 <strong>Quick</strong> <strong>Start</strong> <strong>Guide</strong> 1164.4556.62 - 04
R&S <strong>FSP</strong><br />
Index<br />
harmonics of sinusoidal signals<br />
measuring ......................................... 5.8<br />
HCOPY key ................................... 1.5, 2.27<br />
hotkey<br />
NETWORK...................................... 2.16<br />
I<br />
ID response string ................................ 2.22<br />
IFOVL (status display)............................ 4.4<br />
installation in a 19" rack.......................... 2.5<br />
instrument configuration<br />
automatic loading............................ 5.33<br />
loading............................................. 5.32<br />
storing ............................................. 5.31<br />
IP address<br />
predefined ....................................... 2.33<br />
K<br />
key<br />
AMPT ................................................ 1.4<br />
BW .................................................... 1.4<br />
CAL ............................................ 1.5, 2.6<br />
DISP................................ 1.5, 2.23, 2.24<br />
FILE................................................... 1.5<br />
FREQ ................................................ 1.4<br />
HCOPY .................................... 1.5, 2.27<br />
LINES................................................ 1.5<br />
MEAS................................................ 1.5<br />
MKR .................................................. 1.4<br />
MKR FCTN........................................ 1.4<br />
MKR->............................................... 1.4<br />
ON/STANDBY............................ 1.4, 2.6<br />
PRESET............................................ 1.4<br />
SETUP ......................... 1.5, 2.7, 3.2, 6.3<br />
SPAN ................................................ 1.4<br />
SWEEP ............................................. 1.4<br />
TRACE.............................................. 1.5<br />
TRIG.................................................. 1.5<br />
KEYBOARD..................................... 1.8, 2.9<br />
keyboard<br />
connecting......................................... 2.9<br />
keypad.................................................... 4.7<br />
BACK key.......................................... 4.7<br />
conclude entry............................ 4.7, 4.8<br />
ESC/CANCEL key............................. 4.7<br />
numeric keys..................................... 4.7<br />
sign key..............................................4.7<br />
unit keys.............................................4.7<br />
keys.........................................................1.4<br />
L<br />
LAN .......................................................1.16<br />
LAN interface ..........................................6.1<br />
configuring .......................................2.30<br />
LIMIT CHECK (hardware setting) ...........4.3<br />
LINES key ...............................................1.5<br />
login<br />
automatic login mechanism .............6.14<br />
network ............................................6.14<br />
Windows XP ....................................2.35<br />
LOUNL (status display) ...........................4.4<br />
LPT...............................................1.12, 2.13<br />
LVL (enhancement label)........................4.6<br />
M<br />
main power switch..........................1.12, 2.6<br />
manual operation<br />
XP Remote Desktop ........................6.24<br />
Marker/Delta (hardware setting)..............4.3<br />
MAXH (trace mode) ................................4.5<br />
MEAS key ...............................................1.5<br />
measurement data<br />
loading .............................................5.31<br />
storing..............................................5.31<br />
measurement example<br />
advanced examples.........................5.35<br />
AM-modulated signals .....................5.26<br />
basic ..................................................5.2<br />
edges of GSM burst.........................5.20<br />
FM-modulated signals .....................5.28<br />
modulation depth of AM-modulated<br />
carrier....................................5.16<br />
power of GSM burst.........................5.18<br />
separating signals............................5.11<br />
signal-to-noise ratio of GSM signal..5.23<br />
sinusoidal signal ................................5.3<br />
suppressing 2. and 3. harmonic.........5.8<br />
measurement results<br />
printing .............................................5.34<br />
memory stick<br />
connecting .......................................2.14<br />
MI (detector)............................................4.5<br />
<strong>Quick</strong> <strong>Start</strong> <strong>Guide</strong> 1164.4556.62 - 04 3
R&S <strong>FSP</strong><br />
Index<br />
MINH (trace mode) .................................4.5<br />
MKR FCTN key.......................................1.4<br />
MKR key .................................................1.4<br />
MKR-> key ..............................................1.4<br />
modulation depth of AM-modulated carrier<br />
measuring........................................5.16<br />
MONITOR ....................................1.13, 2.12<br />
monitor<br />
connecting .......................................2.12<br />
MOUSE.................................................2.11<br />
mouse<br />
connecting .......................................2.11<br />
supported devices ...........................2.11<br />
N<br />
network<br />
changing <strong>the</strong> user password............6.11<br />
configuration ......................................6.6<br />
configuration changes .......................6.6<br />
connecting to ...................................2.30<br />
creating users ....................................6.9<br />
drives ...............................................6.15<br />
installing printer ..................... 6.17, A.12<br />
installing protocols, services..............6.3<br />
login .................................................6.14<br />
NOVELL ..........................................6.13<br />
sharing directories ...........................6.21<br />
network card<br />
configuring .......................................2.30<br />
network card driver ...............................2.30<br />
network configuration............................2.31<br />
NETWORK hotkey ................................2.16<br />
network protocol....................................2.31<br />
additional .........................................2.35<br />
available ..........................................2.33<br />
NOISE SOURCE ..................................1.13<br />
non-plug&play printer............................2.30<br />
installing............................................ A.6<br />
installing local printer ........................ A.6<br />
installing network printer................. A.12<br />
NOVELL................................................6.13<br />
numeric keys...........................................4.7<br />
O<br />
Offset (hardware setting) ........................4.3<br />
ON/STANDBY key ...........................1.4, 2.6<br />
operating system .................................. 2.39<br />
operation<br />
in a network....................................... 6.9<br />
without network ................................. 6.9<br />
option<br />
installed ............................................. 3.3<br />
installing ............................................ 3.3<br />
uninstalling ........................................ 3.3<br />
OVEN (status display) ............................ 4.4<br />
OVLD (status display)............................. 4.4<br />
P<br />
PA (enhancement label) ......................... 4.6<br />
parameter<br />
alphanumeric..................................... 4.9<br />
editing......................................... 4.8, 4.9<br />
numeric ............................................. 4.8<br />
password<br />
Windows XP.................................... 2.35<br />
pendrive<br />
see memory stick<br />
PK (detector) .......................................... 4.5<br />
plug&play printer<br />
installing .......................................... 2.29<br />
power meter<br />
connecting....................................... 2.13<br />
power of GSM burst<br />
measuring ....................................... 5.18<br />
power save mode ................................. 2.24<br />
power supply ........................................ 1.12<br />
predefined IP address .......................... 2.33<br />
preparing <strong>for</strong> operation ........................... 2.4<br />
PRESET key........................................... 1.4<br />
printer<br />
colors............................................... 2.28<br />
configuring....................................... 2.27<br />
connecting....................................... 2.13<br />
connector ............................... 1.12, 2.13<br />
local...................................................A.6<br />
network printer .......................6.17, A.12<br />
non-plug&play ..........................2.30, A.6<br />
output ................................................ 4.6<br />
plug&play ........................................ 2.29<br />
selecting .......................................... 2.27<br />
printout<br />
color setting..................................... 5.35<br />
measurement results....................... 5.34<br />
4 <strong>Quick</strong> <strong>Start</strong> <strong>Guide</strong> 1164.4556.62 - 04
R&S <strong>FSP</strong><br />
Index<br />
printout colors....................................... 2.28<br />
PRN (enhancement label) ...................... 4.6<br />
PROBE POWER .................................... 1.7<br />
protection against electrostatic discharge ...<br />
2.4<br />
protocol<br />
TCP/IP............................................. 2.31<br />
PS (enhancement label)......................... 4.6<br />
Q<br />
QP (detector).......................................... 4.5<br />
R<br />
RBW (hardware setting) ......................... 4.3<br />
rear panel ............................................. 1.10<br />
connectors....................................... 1.12<br />
recall function ......................................... 2.6<br />
Ref (hardware setting)............................ 4.3<br />
REF IN.................................................. 1.15<br />
REF OUT.............................................. 1.15<br />
remote control<br />
introduction........................................ 7.3<br />
VISA interface ................................... 7.3<br />
remote control example<br />
command synchronization ................ 7.8<br />
configuring power save function........ 7.6<br />
controlling marker.............................. 7.7<br />
controlling screen display.................. 7.5<br />
default measurement settings......... 7.10<br />
default settings.................................. 7.9<br />
fixed reference point........................ 7.14<br />
frequency counting.......................... 7.13<br />
initializing <strong>the</strong> controller..................... 7.5<br />
initializing <strong>the</strong> instrument................... 7.5<br />
loading instrument settings ............. 7.19<br />
marker search functions.................. 7.12<br />
measuring noise.............................. 7.15<br />
printout ............................................ 7.20<br />
reading instrument settings............... 7.7<br />
setting status registers .................... 7.10<br />
simple instrument settings................. 7.6<br />
startup recall.................................... 7.20<br />
storing instrument settings .............. 7.18<br />
trace data ........................................ 7.16<br />
Remote Desktop<br />
see XP Remote Desktop<br />
removable hard disk................................1.9<br />
RF INPUT................................................1.6<br />
RM (detector) ..........................................4.5<br />
rotary knob ..............................................4.8<br />
RS-232-C interface ...............................1.12<br />
S<br />
SA (detector) ...........................................4.5<br />
screen<br />
automatically switching off ...............2.24<br />
brightness ........................................2.23<br />
color saturation ................................2.24<br />
colors ...............................................2.24<br />
displays..............................................4.3<br />
layout during analyzer operation........4.2<br />
tint....................................................2.23<br />
screen colors<br />
default setting ..................................2.23<br />
second GPIB interface ..........................1.16<br />
self alignment..........................................2.6<br />
self test.............................................2.6, 2.7<br />
service pack ..........................................2.39<br />
setting up <strong>the</strong> instrument.........................2.4<br />
SETUP key.........................1.5, 2.7, 3.2, 6.3<br />
SGL (enhancement label) .......................4.6<br />
sign key...................................................4.7<br />
signal spectra with multiple signals<br />
measuring ........................................5.11<br />
signal-to-noise ratio<br />
measuring........................................5.23<br />
sinusoidal signal<br />
measuring ..........................................5.3<br />
measuring level and frequency..........5.3<br />
measuring signal frequency...............5.6<br />
softkey<br />
BRIGHTNESS .................................2.23<br />
COLOR ON/OFF .............................2.28<br />
COLORS..........................................2.28<br />
CONFIG DISPLAY...........................2.23<br />
CONFIGURE NETWORK................2.31<br />
DEFAULT COLORS ........................2.23<br />
DEVICE 1/2 .....................................2.28<br />
DEVICE SETUP ..............................2.27<br />
DISPLAY PWR SAVE......................2.24<br />
EXT SOURCE .................................2.16<br />
FIRMWARE UPDATE........................3.2<br />
GENERAL SETUP...........2.19, 2.20, 6.3<br />
<strong>Quick</strong> <strong>Start</strong> <strong>Guide</strong> 1164.4556.62 - 04 5
R&S <strong>FSP</strong><br />
Index<br />
GPIB ................................................2.20<br />
GPIB ADDRESS..............................2.20<br />
GPIB LANGUAGE ...........................2.21<br />
ID STRING FACTORY ....................2.22<br />
ID STRING USER ...........................2.22<br />
INSTALL OPTION .............................3.3<br />
OPTIMIZED COLORS.....................2.29<br />
PREDEFINED COLORS .................2.24<br />
REFERENCE INT/EXT....................2.19<br />
REMOVE OPTION ............................3.3<br />
RESTORE FIRMWARE.....................3.2<br />
SATURATION .................................2.24<br />
SCREEN COLORS .........................2.28<br />
SELECT OBJECT ...........................2.23<br />
TIME+DATE ....................................2.19<br />
TINT.................................................2.23<br />
UPDATE PATH .................................3.2<br />
USER DEFINED..............................2.29<br />
SPAN key................................................1.4<br />
standby mode ..................................2.6, 2.7<br />
<strong>Start</strong> menu (Windows XP).....................2.40<br />
status display ..........................................4.4<br />
EXREF...............................................4.4<br />
IFOVL ................................................4.4<br />
LOUNL...............................................4.4<br />
OVEN ................................................4.4<br />
OVLD.................................................4.4<br />
UNCAL ..............................................4.4<br />
subnet mask..........................................2.34<br />
SWEEP key ............................................1.4<br />
switching off <strong>the</strong> instrument ....................2.7<br />
switching on <strong>the</strong> instrument ....................2.6<br />
SWT (hardware setting) ..........................4.3<br />
T<br />
TCP/IP network protocol .......................2.31<br />
TCP/IP protocol<br />
predefined IP address .....................2.33<br />
subnet mask ....................................2.34<br />
TDF (enhancement label) .......................4.6<br />
test setup<br />
AM-modulated signals .....................5.26<br />
FM-modulated carrier ......................5.28<br />
measuring a sinusoidal signal ...........5.3<br />
modulation depth of AM carrier .......5.16<br />
power of GSM burst.........................5.18<br />
separating two signals .....................5.12<br />
signal-to-noise ratio of GSM signal .5.23<br />
TG I/AM IN............................................ 1.16<br />
TG I/FM IN............................................ 1.16<br />
time<br />
entering ........................................... 2.19<br />
time domain measurements ................. 5.17<br />
tint (screen)........................................... 2.23<br />
trace in<strong>for</strong>mation..................................... 4.5<br />
AP ..................................................... 4.5<br />
AV ..................................................... 4.5<br />
AVG................................................... 4.5<br />
CLRWR ............................................. 4.5<br />
MAXH................................................ 4.5<br />
MI ...................................................... 4.5<br />
MINH ................................................. 4.5<br />
PK ..................................................... 4.5<br />
QP ..................................................... 4.5<br />
RM..................................................... 4.5<br />
SA ..................................................... 4.5<br />
trace ma<strong>the</strong>matics............................. 4.5<br />
VIEW ................................................. 4.5<br />
TRACE key............................................. 1.5<br />
trace ma<strong>the</strong>matics .................................. 4.5<br />
traces<br />
storing ............................................. 5.32<br />
tracking generator<br />
modulation....................................... 1.16<br />
output ................................................ 1.6<br />
transducer<br />
connector .......................................... 1.7<br />
TRG (enhancement label) ...................... 4.6<br />
TRIG key ................................................ 1.5<br />
trigger<br />
connector ........................................ 1.13<br />
TRIGGER PORT .................................. 1.14<br />
U<br />
UNCAL (status display) .......................... 4.4<br />
unit keys ................................................. 4.7<br />
unpacking <strong>the</strong> instrument ....................... 2.4<br />
USB ...................................................... 1.14<br />
USB devices<br />
connecting....................................... 2.13<br />
V<br />
VBW (hardware setting).......................... 4.3<br />
6 <strong>Quick</strong> <strong>Start</strong> <strong>Guide</strong> 1164.4556.62 - 04
R&S <strong>FSP</strong><br />
VIEW (trace mode)................................. 4.5<br />
VISA interface<br />
basic programming steps.................. 7.3<br />
creating global variables ................... 7.4<br />
initialization, default state.................. 7.4<br />
library <strong>for</strong> Visual Basic....................... 7.3<br />
W<br />
Windows XP ......................................... 2.39<br />
administrator ID...................... 2.35, 2.39<br />
approved software........................... 2.40<br />
Firewall.............................................. 6.8<br />
login................................................. 2.35<br />
password......................................... 2.35<br />
service pack .................................... 2.39<br />
<strong>Start</strong> menu....................................... 2.40<br />
X<br />
XP Remote Desktop............................. 6.24<br />
connection....................................... 6.33<br />
connection setup............................. 6.30<br />
controller configuration.................... 6.27<br />
instrument configuration.................. 6.24<br />
instrument deactivation ................... 6.34<br />
<strong>Quick</strong> <strong>Start</strong> <strong>Guide</strong> 1164.4556.62 - 04 7