VS-1680 Frequently Asked Questions - Roland
VS-1680 Frequently Asked Questions - Roland
VS-1680 Frequently Asked Questions - Roland

Create successful ePaper yourself
Turn your PDF publications into a flip-book with our unique Google optimized e-Paper software.
®<br />
ÂØÒňΠ©<br />
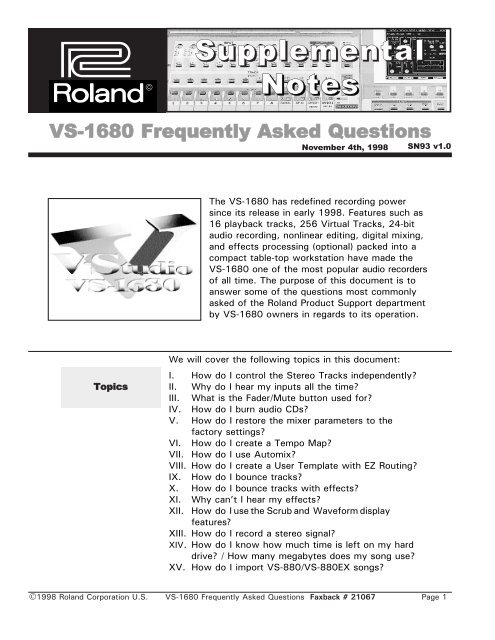
Supplemental<br />
Notes<br />
<strong>VS</strong>-<strong>1680</strong> <strong>Frequently</strong> <strong>Asked</strong> <strong>Questions</strong><br />
November 4th, 1998<br />
SN93 v1.0<br />
The <strong>VS</strong>-<strong>1680</strong> has redefined recording power<br />
since its release in early 1998. Features such as<br />
16 playback tracks, 256 Virtual Tracks, 24-bit<br />
audio recording, nonlinear editing, digital mixing,<br />
and effects processing (optional) packed into a<br />
compact table-top workstation have made the<br />
<strong>VS</strong>-<strong>1680</strong> one of the most popular audio recorders<br />
of all time. The purpose of this document is to<br />
answer some of the questions most commonly<br />
asked of the <strong>Roland</strong> Product Support department<br />
by <strong>VS</strong>-<strong>1680</strong> owners in regards to its operation.<br />
Topics<br />
We will cover the following topics in this document:<br />
I. How do I control the Stereo Tracks independently?<br />
II. Why do I hear my inputs all the time?<br />
III. What is the Fader/Mute button used for?<br />
IV. How do I burn audio CDs?<br />
V. How do I restore the mixer parameters to the<br />
factory settings?<br />
VI. How do I create a Tempo Map?<br />
VII. How do I use Automix?<br />
VIII. How do I create a User Template with EZ Routing?<br />
IX. How do I bounce tracks?<br />
X. How do I bounce tracks with effects?<br />
XI. Why can’t I hear my effects?<br />
XII. How do I use the Scrub and Waveform display<br />
features?<br />
XIII. How do I record a stereo signal?<br />
XIV. How do I know how much time is left on my hard<br />
drive? / How many megabytes does my song use?<br />
XV. How do I import <strong>VS</strong>-880/<strong>VS</strong>-880EX songs?<br />
©1998 <strong>Roland</strong> Corporation U.S. <strong>VS</strong>-<strong>1680</strong> <strong>Frequently</strong> <strong>Asked</strong> <strong>Questions</strong> Faxback # 21067 Page 1
®ÂØÒňΠSupplemental Notes <strong>VS</strong>-<strong>1680</strong> <strong>Frequently</strong> <strong>Asked</strong> <strong>Questions</strong><br />
I. How Do I Control the Stereo Tracks Independently?<br />
Tracks 9-16 on the <strong>VS</strong>-<strong>1680</strong> are configured as Stereo<br />
Tracks but they can be controlled independently. To do<br />
this, the Channel Link function must be turned off.<br />
Tracks 9, 11, 13, and 15 can then be controlled from<br />
the front panel just as tracks 1-8 are. Tracks 10, 12, 14,<br />
and 16 can be controlled by holding the SHIFT button<br />
and adjusting the desired front panel control. For example,<br />
holding SHIFT and moving the 9/10 fader will adjust<br />
the level for track 10 but not track 9. The following procedure<br />
will guide you through the process of recording a<br />
mono signal to track 16.<br />
1) Press the TRACK 15/16 SELECT button so that<br />
“Track Mixer [TR = 15/16]” is displayed (Fig. 1).<br />
2) Use the CURSOR buttons to select “Link” and use<br />
the TIME/VALUE dial to select “OFF.”<br />
Pressing the TRACK 15/16 SELECT buttons<br />
with the link function turned off will alternate<br />
between the Track Mixer screens for tracks 15<br />
and 16<br />
Fig. 1 <strong>VS</strong>-<strong>1680</strong> Track<br />
Mixer Screen<br />
II.<br />
3) Hold the SHIFT and Track 15/16 STATUS buttons<br />
and press the Input SELECT button for the input you<br />
wish to record (it will begin to flash).<br />
4) Hold SHIFT and press the Track 15/16 STATUS<br />
button until it is flashing red.<br />
5) Use the appropriate INPUT SENS knob to set the<br />
recording level as desired.<br />
6) Press REC followed by PLAY to begin recording.<br />
7) Press STOP when you are finished.<br />
8) Press PLAY to hear the results. Hold SHIFT and use<br />
the Channel 15/16 fader to adjust the playback<br />
volume of track 16 as desired.<br />
Why Do I Hear the Inputs All of the Time?<br />
The “PAN ON/OFF” switch is used to determine whether<br />
or not a track or input is sent to the mix buss. This parameter<br />
should be checked when you are either hearing a<br />
track or input that you don’t want to hear or when you<br />
are having trouble hearing a track or input that you<br />
should be hearing. The default setting for this switch is<br />
“ON,” even for the inputs. This is why it is possible to<br />
hear your inputs even if they are not routed anywhere.<br />
©1998 <strong>Roland</strong> Corporation U.S. <strong>VS</strong>-<strong>1680</strong> <strong>Frequently</strong> <strong>Asked</strong> <strong>Questions</strong> Faxback # 21067 Page 2
®ÂØÒňΠSupplemental Notes <strong>VS</strong>-<strong>1680</strong> <strong>Frequently</strong> <strong>Asked</strong> <strong>Questions</strong><br />
Why Do I Hear the Inputs All of the Time (continued)<br />
Use the following procedure to adjust the PAN ON/OFF switch:<br />
1) Press the desired INPUT or TRACK SELECT button.<br />
2) Use the CURSOR buttons to highlight the parameter<br />
beneath PAN (in the upper right corner of the display).<br />
3) Use the TIME/VALUE dial to select “ON or OFF” as<br />
desired. For example. If you are trying to prevent an<br />
input from being heard at the mix outputs, you would<br />
set this switch to “OFF.”<br />
4) Repeat steps 1-3 for any additional tracks or inputs<br />
as desired.<br />
III.<br />
What is the Fader/Mute Button Used For?<br />
Fig.2 The Fader/Mute<br />
Button<br />
IV.<br />
The Fader/Mute button (Fig. 2) is used to determine<br />
whether the faders control the track levels or the input and<br />
effect return levels. When the Fader/Mute button is set to<br />
“IN,” faders 1-8 control the analog input levels, fader<br />
9/10 controls the digital input, fader 11/12 controls the<br />
stereo in level, and faders 13-16 control the effect return<br />
levels. When the Fader/Mute button is set to “TR,”<br />
faders 1-16 will control the levels for tracks 1-16 respectively.<br />
Use the following procedure to set the faders to<br />
control inputs or tracks:<br />
1) Select a song and press PLAY.<br />
2) Press the FADER/MUTE button so that “IN” is lit.<br />
3) Use the faders to adjust the levels of the inputs and<br />
effect returns as desired.<br />
4) Press the FADER/MUTE button so that “TR” is lit.<br />
5) Use the faders to adjust the levels of the tracks as<br />
desired.<br />
How Do I Burn Audio CDs?<br />
The <strong>VS</strong>-<strong>1680</strong> allows you to take a project from its beginning<br />
stages all the way to a finished CD. What steps<br />
need to be taken to produce a finished CD? A general<br />
description of the recording process might be as follows:<br />
Ü Recording Basic Tracks<br />
Ü Editing your Tracks<br />
Ü Mixing your Tracks<br />
Ü Mastering your Tracks to a Final Stereo Mix<br />
Ü Preparing your Stereo Mix for CD<br />
This section covers some of the common questions that<br />
arise during the CD preparation phase of the recording<br />
©1998 <strong>Roland</strong> Corporation U.S. <strong>VS</strong>-<strong>1680</strong> <strong>Frequently</strong> <strong>Asked</strong> <strong>Questions</strong> Faxback # 21067 Page 3
®ÂØÒňΠSupplemental Notes <strong>VS</strong>-<strong>1680</strong> <strong>Frequently</strong> <strong>Asked</strong> <strong>Questions</strong><br />
How Do I Burn Audio CDs? (continued)<br />
process. If you haven’t already, you will need to mix<br />
your songs down to a two track stereo format. You can<br />
do this by recording to an external device such as a<br />
DAT machine or cassette deck or by “bouncing” your<br />
tracks down to a stereo pair within the <strong>VS</strong>-<strong>1680</strong> itself.<br />
If you are unsure of the procedure for bouncing tracks,<br />
refer to section IX on page 11.<br />
How Do I Choose Which Tracks are Burned to the CD?<br />
CDs are a stereo format. This means that you will<br />
always designate two tracks (left and right) to be<br />
burned onto the CD-R. Use the following procedure to<br />
designate a left and right track for creating a CD:<br />
Fig. 3 CD-R Track Select Screen<br />
1) Hold SHIFTand press F1 [SONG] and<br />
the “Song Menu” screen will be displayed.<br />
If it is not, press F6 [EXIT].<br />
2) Press PAGE until CD WT appears<br />
above F3.<br />
3) Press F3 [CD WT] to display the “CD<br />
Write Ready?” screen.<br />
4) Press YES and “Store Current?” will<br />
be displayed. If you have made any<br />
changes to your song that have not<br />
been saved, press YES;otherwise,<br />
press NO.<br />
5) Press F1 [SelTr] to display the<br />
“Select Track” screen (Fig. 3).<br />
6) Use the TIME/VALUE dial to select the track (and<br />
Virtual Track) that will become the left side of the<br />
CD and press F3 [Sel L]. For example, if your stereo<br />
mix is recorded to Tracks 15 and 16, you will highlight<br />
“15-1: V.T 15-1” and press F3 [Sel L] to designate<br />
Track 15 (V-Track 1) as the left track of the CD.<br />
7) Use the TIME/VALUE dial to select the track (and<br />
Virtual Track) that will become the right side of the<br />
CD and press F4 [Sel R].<br />
8) Press F1 [Back] and the tracks you selected will be<br />
displayed under “L-Ch Source Track” and “R-Ch<br />
Source Track.” You can now continue with the CD<br />
Write procedure on page 121 of the <strong>VS</strong>-<strong>1680</strong><br />
Owner’s Manual.<br />
©1998 <strong>Roland</strong> Corporation U.S. <strong>VS</strong>-<strong>1680</strong> <strong>Frequently</strong> <strong>Asked</strong> <strong>Questions</strong> Faxback # 21067 Page 4
®ÂØÒňΠSupplemental Notes <strong>VS</strong>-<strong>1680</strong> <strong>Frequently</strong> <strong>Asked</strong> <strong>Questions</strong><br />
How Do I Burn Audio CDs? (continued)<br />
How Do I Set CD Markers?<br />
When writing multiple songs to the CD at once, it is<br />
important that CD markers are created at the beginning<br />
of each song. Otherwise, your audio will be combined<br />
into one long song on the CD. The <strong>VS</strong>-<strong>1680</strong> automatically<br />
creates the first CD marker at 00h00m00s00f. You<br />
will need to create CD markers for any additional songs.<br />
Use the following procedure to create CD markers:<br />
1) Locate the <strong>VS</strong>-<strong>1680</strong> to the point where the audio<br />
for your second song begins.<br />
2) Hold PLAY/DISPLAY and press TAP.<br />
3) Locate the <strong>VS</strong>-<strong>1680</strong> to the beginning of the third song.<br />
4) Hold PLAY/DISPLAY and press TAP.<br />
5) Continue this procedure for any additional songs.<br />
CD standards require a song to be at least four<br />
seconds in length. If you try to set a CD marker<br />
within four seconds of another CD marker,<br />
the <strong>VS</strong>-<strong>1680</strong> will respond with a “Can’t Set<br />
Marker” message.<br />
Tip<br />
The Scrub and Preview functions can be very<br />
helpful in locating the exact beginning of your<br />
songs. Use the PREVIEW TO command to<br />
make sure that the current time is right before<br />
the audio begins. Also, some CD players will<br />
cut off the beginning of your song if it is too<br />
close to the CD marker. If you set your CD<br />
markers around .5 second (15 frames) before<br />
your song actually begins, it should index correctly<br />
on most CD players.<br />
Why Does my CD Sound Different than the <strong>VS</strong>-<strong>1680</strong>?<br />
If the songs on the CD you burn sounds drastically different<br />
than they do when played on the <strong>VS</strong>-<strong>1680</strong>,<br />
remember that mixer settings such as fader level,<br />
effects, and EQ do not translate to the CD. Use the following<br />
procedure to listen to your song as it will be<br />
recorded to the CD:<br />
1) Solo the tracks that you have selected as the left<br />
and right CD tracks.<br />
2) Press the FADER/MUTE button so that “TR” is lit<br />
and set the faders for the selected tracks to 0dB<br />
(the bold line approximately two-thirds of the way up).<br />
©1998 <strong>Roland</strong> Corporation U.S. <strong>VS</strong>-<strong>1680</strong> <strong>Frequently</strong> <strong>Asked</strong> <strong>Questions</strong> Faxback # 21067 Page 5
®ÂØÒňΠSupplemental Notes <strong>VS</strong>-<strong>1680</strong> <strong>Frequently</strong> <strong>Asked</strong> <strong>Questions</strong><br />
Listening to a Song Before Burning the CD (continued)<br />
3) Press the TRACK SELECT button for the track<br />
selected as the “L-Ch Source Track” so that the<br />
“Track Mixer” screen is displayed.<br />
4) Use the CURSOR buttons to highlight the “Link”<br />
parameter and use the TIME/VALUE dial to select “On.”<br />
5) Use the CURSOR buttons to highlight “Pan”<br />
parameter (under the pan knob icon) and use the<br />
TIME/VALUE dial to select “0.”<br />
6) Use the CURSOR buttons to highlight the “EQ Sw”<br />
parameter and use theTIME/VALUE dial to select “Off.”<br />
7) Use the CURSOR buttons to highlight the “EFX 1”<br />
parameter and use the TIME/VALUE dial to select<br />
“Off.” Do the same for EFX 2, 3, and 4.<br />
8) Use the CURSOR buttons to highlight the “EFX Ins”<br />
parameter and press YES. Use the TIME/VALUE dial<br />
to select “Off” for EFX 1. Do the same for EFX 2, 3,<br />
and 4.<br />
9) Use the CURSOR buttons to highlight the “ATT”<br />
parameter and use the TIME/VALUE dial to select “0dB.”<br />
10) Press AUTOMIX so it is not lit.<br />
11) Press the TRACK STATUS button for the track<br />
selected as the “L-Ch Source Track” until it is in<br />
Play mode (green) and set its fader to 0dB. Bring the<br />
remaining channel faders all the way down.<br />
12) Set the master fader to 0dB. Reset your song to the<br />
beginning and press PLAY to hear your song as it<br />
will sound on the CD.<br />
V. How Do I Restore the Mixer Parameters to the<br />
Factory Settings?<br />
The <strong>VS</strong>-<strong>1680</strong> gives you the ability to revert all your<br />
mixer and system parameters back to their original factory<br />
settings. This is convenient if you want to reset the<br />
mixer and system settings to their original values without<br />
having to adjust each parameter manually. This is<br />
also a good function for troubleshooting when you having<br />
difficulties that appear to be mixer related. Use the<br />
following procedure to initialize the <strong>VS</strong>-<strong>1680</strong> mixer and<br />
system parameters:<br />
1) Hold SHIFT and press F5 [SYSTEM] and the<br />
“System Menu” page should be displayed. If it is<br />
not, press F6 [EXIT].<br />
2) Press PAGE so that INIT is displayed above F1 (if<br />
necessary).<br />
©1998 <strong>Roland</strong> Corporation U.S. <strong>VS</strong>-<strong>1680</strong> <strong>Frequently</strong> <strong>Asked</strong> <strong>Questions</strong> Faxback # 21067 Page 6
®ÂØÒňΠSupplemental Notes <strong>VS</strong>-<strong>1680</strong> <strong>Frequently</strong> <strong>Asked</strong> <strong>Questions</strong><br />
Restoring the Mixer Parameters to the Factory<br />
Settings (continued)<br />
3) Press F1 and “Init Mix/Sys Prm Sure?” will be displayed.<br />
4) Press YES and “Initializing...Please Wait” will be displayed.<br />
5) Press PLAY/DISPLAY to return to the main play screen.<br />
VI.<br />
Fig. 4 The Sync/Tempo<br />
Display<br />
How Do I Create a Tempo Map?<br />
The <strong>VS</strong>-<strong>1680</strong> allows you to create a tempo map<br />
that controls tempo and meter changes throughout<br />
your song. This is very convenient when you are<br />
integrating the <strong>VS</strong>-<strong>1680</strong> with a MIDI sequencer.<br />
Use the following procedure to create a Tempo<br />
Map.<br />
1) Hold SHIFT and press F5 [SYSTEM] and<br />
“System Menu” page should be displayed.<br />
If it is not, press F6 [EXIT].<br />
2) Press F6 [SYNC]. If “SYNC” does not appear above<br />
F6, press PAGE followed by F6. The “Sync/Tempo”<br />
page should be displayed (Fig. 4).<br />
3) Press F3 [Tmap] to display the “Tempo Map” screen<br />
(Fig. 5).<br />
4) CURSOR down to the current tempo setting<br />
(e.g. q=120) and use the TIME/VALUE dial to<br />
select the desired starting tempo for your song.<br />
Tempo Map #1 must always start at measure<br />
one.<br />
Fig. 5 The Tempo Map<br />
Display<br />
5) CURSOR down to the beat setting (e.g. 4/4) and use<br />
the TIME/VALUE dial to select the desired time<br />
signature.<br />
6) Press F2 [NEW].<br />
7) Use the CURSOR buttons to highlight the<br />
tempo setting and the TIME/VALUE dial to<br />
select the new tempo.<br />
8) CURSOR down to the measure setting and use<br />
the TIME/VALUE dial to select the measure<br />
where you want the new tempo to begin.<br />
9) CURSOR down to the beat setting (e.g. 4/4) and use<br />
the TIME/VALUE dial to select the desired time signature.<br />
10) Repeat steps 6-9 for any additional tempo and/or<br />
time signature changes as desired.<br />
©1998 <strong>Roland</strong> Corporation U.S. <strong>VS</strong>-<strong>1680</strong> <strong>Frequently</strong> <strong>Asked</strong> <strong>Questions</strong> Faxback # 21067 Page 7
®ÂØÒňΠSupplemental Notes <strong>VS</strong>-<strong>1680</strong> <strong>Frequently</strong> <strong>Asked</strong> <strong>Questions</strong><br />
Creating Tempo Maps (continued)<br />
Why Doesn’t it Change the Audio?<br />
The Tempo Map can alter the tempo and meter of MIDI<br />
sequences. It can not, however, do the same for audio<br />
recorded on the <strong>1680</strong>. For this reason, it is important to<br />
create your Tempo Map before you begin recording any<br />
acoustic instruments whenever possible and to record<br />
while listening to the metronome. It is possible to alter<br />
the playback speed of recorded audio by using the Vari<br />
Pitch and/or Time Compression/Expansion functions.<br />
VII.<br />
How Do I Use Automix?<br />
The automix function of the <strong>VS</strong>-<strong>1680</strong> allows you to perfect<br />
your final mix before you commit to a master DAT<br />
tape or CD. Instead of manually “riding” the faders while<br />
you are recording to your master tape, automix allows<br />
you to record mixer changes such as level, pan, effects<br />
type, etc. You can even automate the mixer settings for<br />
the inputs which is helpful, for example, when you have<br />
synchronized a keyboard or drum machine and you want<br />
to mix it in with the audio tracks without actually<br />
recording it. There are three main types of automixing<br />
available on the <strong>VS</strong>-<strong>1680</strong>: realtime, snapshot, and gradation.<br />
Realtime<br />
Realtime automix allows you to record fader movements<br />
as you make them. This is very convenient for perfecting<br />
your track mixes before you record them down to<br />
two tracks. Use the following procedure to create a realtime<br />
automix:<br />
You cannot automix a protected song.<br />
Fig.6<br />
The<br />
Automix<br />
Button<br />
1) Press AUTOMIX so it is lit (Fig. 6).<br />
2) Hold AUTOMIX and press the INPUT and/or TRACK<br />
SELECT buttons for any inputs or tracks that you<br />
want to automix so that they are flashing.<br />
3) Reset your song to the beginning and adjust the<br />
faders as desired for the start of the song.<br />
4) Hold SCENE and press REC to enable realtime<br />
automix mode.<br />
5) Press PLAY and adjust the faders as desired.<br />
6) Press STOP when you are finished. Reset your song<br />
to the beginning and press PLAY to hear the results.<br />
©1998 <strong>Roland</strong> Corporation U.S. <strong>VS</strong>-<strong>1680</strong> <strong>Frequently</strong> <strong>Asked</strong> <strong>Questions</strong> Faxback # 21067 Page 8
®ÂØÒňΠSupplemental Notes <strong>VS</strong>-<strong>1680</strong> <strong>Frequently</strong> <strong>Asked</strong> <strong>Questions</strong><br />
Using Automix (continued)<br />
The following procedures assume that you do<br />
not have any existing markers in the current<br />
song and may not work correctly if there are<br />
additional markers present. If you would like to<br />
erase all existing markers, hold SHIFT and<br />
CLEAR and press TAP. Then, press YES.<br />
Snapshot<br />
Snapshot automation allows you to recall settings such<br />
as fader levels, effect send levels, effect types, and panning<br />
at a specific point in time. This is useful, for<br />
instance, when you want to change effects during your<br />
song. Use the following procedure to create a snapshot:<br />
1) Press AUTOMIX so it is lit.<br />
2) Reset your song to the beginning and adjust the settings<br />
as desired for the beginning of your song.<br />
3) Hold SCENE and press TAP to create a snapshot of<br />
your initial settings.<br />
4) Advance the <strong>VS</strong>-<strong>1680</strong> to the point in time where<br />
you want these settings to change and adjust them<br />
as desired. Then, hold SCENE and press TAP.<br />
5) Repeat step #4 to create additional snapshots as<br />
desired.<br />
6) Reset your song to the beginning and press PLAY to<br />
hear the results.<br />
Gradation<br />
Gradation allows you to designate two snapshots and<br />
have the <strong>VS</strong>-<strong>1680</strong> automatically fill in the mixer settings<br />
between those two points to create a smooth transition.<br />
This a very handy tool for creating fades. Use the following<br />
procedure to create a fade out using gradation:<br />
1) Press AUTOMIX so it is lit.<br />
2) Advance your song to the point in time where you<br />
want the fade out to begin and adjust the fader<br />
levels (including the master fader) as desired.<br />
3) Hold SCENE and press TAP.<br />
4) Advance your song to the point in time where the<br />
fade out should end and pull the master fader all the<br />
way down.<br />
5) Hold SCENE and press TAP.<br />
6) Hold SCENE and press PREVIOUS and “Gradation<br />
Marker #000 - #001?” will be displayed.<br />
©1998 <strong>Roland</strong> Corporation U.S. <strong>VS</strong>-<strong>1680</strong> <strong>Frequently</strong> <strong>Asked</strong> <strong>Questions</strong> Faxback # 21067 Page 9
®ÂØÒňΠSupplemental Notes <strong>VS</strong>-<strong>1680</strong> <strong>Frequently</strong> <strong>Asked</strong> <strong>Questions</strong><br />
Creating a Fade Out With Gradation (continued)<br />
7) Press YES and the <strong>VS</strong>-<strong>1680</strong> will create a fade out<br />
between those marker points.<br />
8) Reset your song to a point before the first marker<br />
and press PLAY to hear the fade out.<br />
VIII.<br />
How Do I Create a User Template in EZ Routing?<br />
The User section within EZ Routing can be a huge time<br />
saver. It can greatly simplify the set up process for<br />
recording or mixing configurations that are frequently<br />
used. These user programmable routing configurations<br />
allow you to set up the <strong>VS</strong>-<strong>1680</strong> exactly the way you<br />
need, step by step, for a particular task. Then, when<br />
you need to perform that same task in the future, you<br />
just select that User template and your custom setup<br />
will be recalled automatically. The following example will<br />
show you how to create a User routing template for<br />
recording inputs 1-8 to tracks 1-8 with a compressor<br />
effect inserted on each input.<br />
This procedure requires two <strong>VS</strong>8F-2 Dual<br />
Stereo Effect Expansion Boards.<br />
Fig.7 The Input<br />
Routing Screen in<br />
EZ Routing<br />
1) Press EZ ROUTING so it<br />
is lit.<br />
2) Press PAGE so that<br />
“INPUT” is displayed<br />
above F2.<br />
3) Press F2 [INPUT] to display<br />
the Input Mixer<br />
Settings (Fig. 7).<br />
4) Use the CURSOR buttons<br />
and the<br />
TIME/VALUE dial<br />
to set the “Send” for<br />
inputs 1-8 to tracks 1-8.<br />
For example, the “Send”<br />
for input 1 would appear<br />
as “1/-.”<br />
5) Use the CURSOR buttons and TIME/VALUE dial to<br />
set EFX 1 to “INL” for input 1 and “INR” for input 2.<br />
6) Use the CURSOR buttons and TIME/VALUE dial to<br />
set EFX 2 to “INL” for input 3 and “INR” for input 4.<br />
7) Use the CURSOR buttons and TIME/VALUE dial to<br />
set EFX 3 to “INL” for input 5 and “INR” for input 6.<br />
©1998 <strong>Roland</strong> Corporation U.S. <strong>VS</strong>-<strong>1680</strong> <strong>Frequently</strong> <strong>Asked</strong> <strong>Questions</strong> Faxback # 21067 Page 10
®ÂØÒňΠSupplemental Notes <strong>VS</strong>-<strong>1680</strong> <strong>Frequently</strong> <strong>Asked</strong> <strong>Questions</strong><br />
Creating a User Template with EZ Routing (continued)<br />
Fig. 8 Effects Routing<br />
Screen in EZ Routing<br />
8) Use the CURSOR buttons and TIME/VALUE dial to<br />
set EFX 4 to “INL” for input 7 and “INR” for input 8.<br />
9) Press F3 [TRACK] to display the Track Routing screen.<br />
10) Use the CURSOR buttons and TIME/VALUE dial to<br />
set the Send for tracks 1-8 to “MIX.”<br />
11) Use the CURSOR buttons and TIME/VALUE dial to<br />
set the Status for tracks 1-8 to “REC.”<br />
12) Press F4 [EFX] to display the Effect<br />
Settings screen (Fig. 8).<br />
13) Use the CURSOR buttons and<br />
TIME/VALUE dial to select “P096<br />
Dual Comp/Lim” for Effects 1-4.<br />
14) Press F6 [Save] and the Routing Save<br />
screen will be displayed.<br />
15) Use the CURSOR buttons and<br />
TIME/VALUE dial to enter a name for<br />
this User Template (e.g. 8ins w/comp).<br />
16) Press F5 [Write] and your template will be saved.<br />
17) Press PLAY/DISPLAY to return to the main screen.<br />
Use the following procedure to recall your User Template:<br />
1) Press EZ ROUTING so it is lit.<br />
2) Use the TIME/VALUE dial to highlight your User<br />
Template.<br />
3) Press PAGE so that “EXEC” appears above F4.<br />
4) Press F4 [EXEC] twice. “Apply this Routing?” will be<br />
displayed.<br />
5) Press YES to apply your User Template.<br />
IX.<br />
How Do I Bounce Tracks?<br />
Bouncing tracks is common recording technique used to<br />
free up additional recording tracks or prepare a song for<br />
CD production by combining (“bouncing”) audio recorded<br />
on multiple tracks to a single track or stereo pair of<br />
tracks. Then, new material can be recorded to the original<br />
tracks. On the <strong>VS</strong>-<strong>1680</strong>, you can record new tracks<br />
without recording over the original material by recording<br />
on new Virtual Tracks. Plus, because the bouncing is<br />
performed digitally, you are not adding noise each time<br />
you bounce tracks. Use the following procedure to<br />
bounce tracks 1-14 to tracks 15 and 16.<br />
1) Press the TRACK 15/16 SELECT button.<br />
2) Use the CURSOR buttons to highlight the “Link” icon<br />
and use the TIME/VALUE dial to select “ON.”<br />
©1998 <strong>Roland</strong> Corporation U.S. <strong>VS</strong>-<strong>1680</strong> <strong>Frequently</strong> <strong>Asked</strong> <strong>Questions</strong> Faxback # 21067 Page 11
®ÂØÒňΠSupplemental Notes <strong>VS</strong>-<strong>1680</strong> <strong>Frequently</strong> <strong>Asked</strong> <strong>Questions</strong><br />
Bouncing Tracks (continued)<br />
3) Hold the Track 15/16 STATUS button and press CLEAR.<br />
4) Hold the Track 15/16 STATUS button and press the<br />
TRACK SELECT 1-14 buttons consecutively so that<br />
they are flashing.<br />
5) Press the Track 15/16 STATUS button until it is set<br />
to source mode (orange). Press the STATUS buttons<br />
for tracks 1-14 until they are set to play mode (green).<br />
6) Press PLAY and adjust the level and pan settings for tracks<br />
1-14 as desired. Press STOP when you are finished.<br />
7) Press the Track 15/16 STATUS button until it is set<br />
to record ready mode (flashing red).<br />
8) Reset your song to the beginning and press REC<br />
followed by PLAY.<br />
9) Press STOP when your song is finished playing. Now,<br />
tracks 15 and 16 will contain a stereo mix of tracks 1-14.<br />
10) Reset your song to the beginning, turn off tracks 1-14,<br />
and press PLAY to hear the results. Make sure that the<br />
EQ switch and all effects sends for tracks 15 and 16<br />
are turned off. This will ensure that the “bounced” version<br />
of tracks 1-14 sounds the same as the original.<br />
X. How Do I Bounce Tracks with Effects?<br />
If you are using effects, it can be beneficial to include<br />
the output of the effects processor when you bounce<br />
tracks. This is sometimes referred to as “printing” the<br />
effects. By printing the effects you make them a permanent<br />
part of the audio. By doing this you can free up the<br />
effect processor to be used on a different track, or to<br />
add a different effect on the same track. Use the following<br />
procedure to bounce tracks 1-14 to tracks 15 and<br />
16, with effects.<br />
1) Assign tracks 1-14 to any of the available effects<br />
processors (1-4) as desired.<br />
2) Hold the Track 15/16 STATUS button and press<br />
CLEAR.<br />
3) Hold the Track 15/16 STATUS button and press the<br />
TRACK SELECT 1-14 buttons consecutively so that<br />
they are flashing.<br />
4) Hold the Track 15/16 STATUS button and press the<br />
EFF RTN button for all of the effects processors that<br />
are being used. For example, to record Effect 1 to<br />
tracks 15 and 16, hold the TRACK 15/16 STATUS<br />
button and press EFFECT 1/3 RTN.<br />
©1998 <strong>Roland</strong> Corporation U.S. <strong>VS</strong>-<strong>1680</strong> <strong>Frequently</strong> <strong>Asked</strong> <strong>Questions</strong> Faxback # 21067 Page 12
®ÂØÒňΠSupplemental Notes <strong>VS</strong>-<strong>1680</strong> <strong>Frequently</strong> <strong>Asked</strong> <strong>Questions</strong><br />
Bouncing Tracks with Effects (continued)<br />
XI.<br />
If you are using Effects 3 or 4, you will need to hold<br />
the Track 15/16 STATUS, SHIFT, and EFF 1/3 RTN<br />
or EFFECT 2/4 RTN buttons to assign effects 3<br />
and/or 4 to be recorded on tracks 15 and 16.<br />
5) Press the Track 15/16 STATUS button until it is set<br />
to source mode (orange). Press the STATUS buttons<br />
for tracks 1-14 until they are set to play mode (green).<br />
6) Press PLAY and adjust the level and pan settings for<br />
tracks 1-14 as desired. Press STOP when you are<br />
finished.<br />
7) Press the Track 15/16 STATUS button until it is set<br />
to record ready mode (flashing red).<br />
8) Reset your song to the beginning and press REC<br />
followed by PLAY.<br />
9) Press STOP when your song is finished playing.<br />
Now, tracks 15 and 16 will contain a stereo mix of<br />
tracks 1-14 with the effects included.<br />
Why Can’t I Hear My Effects?<br />
If you have routed a track or input to one of the internal<br />
effects processors (using the optional <strong>VS</strong>8F-2) and are<br />
having difficulty hearing the output of the effects<br />
processor, the problem can usually be traced to one of<br />
three scenarios: Your effects are either inserted on<br />
another track or input, the output of that effects processor<br />
is routed to a record buss instead of the mix buss,<br />
or your master effect return for that effect is set to<br />
zero.<br />
If you have inserted an effect on a certain track or<br />
input, you cannot use that effects processor on any<br />
other track or input. Use the following procedure to<br />
ensure that Effects 1-4 are not being used as insert<br />
effects:<br />
1) Press the INPUT 1 SELECT button to display the<br />
“Input Mixer” screen.<br />
2) Use the CURSOR buttons to highlight the EFX Ins<br />
icon and press F6 [PRM.V].<br />
3) Use the CURSOR buttons and TIME/VALUE dial to<br />
set the Sw parameter to “OFF” for all inputs.<br />
4) Press the TRACK 1 SELECT button to display the<br />
“Track Mixer” screen.<br />
5) Use the CURSOR buttons and TIME/VALUE dial to<br />
set the Sw parameter to “OFF” for all tracks.<br />
©1998 <strong>Roland</strong> Corporation U.S. <strong>VS</strong>-<strong>1680</strong> <strong>Frequently</strong> <strong>Asked</strong> <strong>Questions</strong> Faxback # 21067 Page 13
®ÂØÒňΠSupplemental Notes <strong>VS</strong>-<strong>1680</strong> <strong>Frequently</strong> <strong>Asked</strong> <strong>Questions</strong><br />
Why Can’t I Hear the Effects? (continued)<br />
6) Press the MASTER EDIT/SOLO button to display the<br />
“Master Block” screen.<br />
7) Use the CURSOR buttons to highlight the EFX Ins<br />
icon and press YES. Use the TIME/VALUE dial to<br />
select “Off” for Effects 1-4.<br />
Routing the outputs of the effects processors to a<br />
record buss is common when bouncing tracks. If you do<br />
not return the outputs of the effects processors to the<br />
mix buss, the effects might not be heard the next time<br />
you try and use them. Use the following procedure to<br />
ensure that the outputs of the effects processors are<br />
sent to the mix buss:<br />
1) Hold the TRACK 1 STATUS button. If the EFFECT<br />
1/3 RTN or EFFECT 2/4 RTN buttons begin to flash,<br />
press them so that they stop flashing.<br />
2) Repeat this procedure for tracks 2-16.<br />
Another common reason for being unable to hear an<br />
effects processor is that the master effect return for<br />
that effect is set to “0.” Use the following procedure to<br />
check the master effect returns:<br />
1) Press the MASTER EDIT/SOLO button to display the<br />
“MASTER” screen.<br />
2) Use the CURSOR buttons and the TIME/VALUE dial<br />
to select the desired return level for EFX 1-4 (100 is<br />
the default value).<br />
XII.<br />
How Do I Use the Scrub and Waveform<br />
Display Features?<br />
The Scrub and Waveform Display functions of the<br />
<strong>VS</strong>-<strong>1680</strong> are extremely useful when performing track edits<br />
such as cut, copy, and erase. The Waveform Display helps<br />
you find exact edit points in your audio by providing a<br />
graphic representation of a particular audio waveform. The<br />
Scrub function allows you to hear that edit point by playing<br />
back a loop (with a resolution as fine as 25ms) of your<br />
audio. You can control the audio that is being looped by<br />
selecting the track you want to hear and using the dial to<br />
move the audio back and forth across the now line (the<br />
solid line that runs across the middle of the Waveform display).<br />
To use the Scrub and Waveform Display functions<br />
effectively, it is important that you understand the control<br />
parameters used in each function.<br />
©1998 <strong>Roland</strong> Corporation U.S. <strong>VS</strong>-<strong>1680</strong> <strong>Frequently</strong> <strong>Asked</strong> <strong>Questions</strong> Faxback # 21067 Page 14
®ÂØÒňΠSupplemental Notes <strong>VS</strong>-<strong>1680</strong> <strong>Frequently</strong> <strong>Asked</strong> <strong>Questions</strong><br />
Using Scrub and Waveform Display (continued)<br />
Fig. 9 Scrub Length<br />
Setting the Scrub Length<br />
There are two parameters that can affect the precision<br />
in which you can scrub audio in the <strong>VS</strong>-<strong>1680</strong>: the Scrub<br />
Length and the position of the cursor in the time display<br />
(Fig. 9). The scrub length controls the size (in milliseconds)<br />
of the section of audio that is looped and can set<br />
as low as 25ms or as high as 100ms. The default value<br />
is 45ms and that seems to work best for most applications.<br />
Use the following procedure to adjust the Scrub<br />
Length:<br />
1) Press STOP if the <strong>VS</strong>-<strong>1680</strong> is currently in play mode.<br />
2) Hold SHIFT and press SCRUB and the “Scrub<br />
Length” screen will be displayed.<br />
3) Use the TIME/VALUE dial to adjust the scrub length<br />
as desired.<br />
4) Press PLAY/DISPLAY to return to the play screen.<br />
The position of the cursor in the time display will control<br />
the amount of time advanced with each turn of the<br />
TIME/VALUE dial. You can set the dial to advance in<br />
hour, minute, second, frame, or even subframe increments.<br />
You can also set it to advance by measures,<br />
beats, or markers. Setting the cursor under the frame<br />
portion of the time display will work best for most editing<br />
applications. Use the following procedure to adjust<br />
the position of the cursor in the time display:<br />
1) Press PLAY/DISPLAY so that the main play screen is<br />
displayed.<br />
2) Hold SHIFT and press the UP CURSOR (PANE5)<br />
button until the time portion of the display is selected.<br />
3) Use the LEFT/RIGHT CURSOR buttons to place the<br />
cursor under the desired increment for advancing<br />
the time display. For example, if you want the<br />
<strong>VS</strong>-<strong>1680</strong> to move one frame at a time when the<br />
TIME/VALUE dial is turned, the time display would<br />
be as follows: 00h00m00s00f00.<br />
To advance the time display in subframe increments,<br />
set the cursor under the frame portion<br />
of the time display turn the TIME/VALUE dial.<br />
The counter will move in increments of 10 subframes.<br />
To advance the time display in single<br />
subframe increments, hold SHIFT while you<br />
turn the TIME/VALUE dial.<br />
©1998 <strong>Roland</strong> Corporation U.S. <strong>VS</strong>-<strong>1680</strong> <strong>Frequently</strong> <strong>Asked</strong> <strong>Questions</strong> Faxback # 21067 Page 15
®ÂØÒňΠSupplemental Notes <strong>VS</strong>-<strong>1680</strong> <strong>Frequently</strong> <strong>Asked</strong> <strong>Questions</strong><br />
Using Scrub and Waveform Display (continued)<br />
Fig. 10 The<br />
Waveform Display<br />
What do the X and Y Parameters do?<br />
The <strong>VS</strong>-<strong>1680</strong> allows you to zoom in and out on both<br />
the amplitude (level) and time values of the Waveform<br />
display. The default zoom values for amplitude and time<br />
are 1 and 16 respectively. These values work well for<br />
most editing applications. Use the following procedure<br />
to adjust the zoom controls on the Waveform display:<br />
1) Press PLAY/DISPLAY so that the main play screen is<br />
displayed.<br />
2) Use the UP/DOWN CURSOR buttons to select the<br />
track to be viewed in the Waveform display and<br />
advance the song to a point where there is audio<br />
present on that track.<br />
3) Press F5 [WAVE] to view the<br />
Waveform display (Fig. 10).<br />
4) Use the F1 [ZOOM+] and F2<br />
[ZOOM-] buttons to zoom in<br />
and out on the amplitude (level)<br />
portion of the display (vertical).<br />
5) Use the F3 [←→] and F4 [→ ←]<br />
buttons to zoom in and out on<br />
the time portion of the display<br />
(horizontal).<br />
6) Press F5 [WAVE] when you are finished to close the<br />
Waveform display.<br />
XIII.<br />
How Do I Record a Stereo Signal?<br />
Recording a stereo signal is nearly identical to recording<br />
a mono signal with the exception that you will need to<br />
use two inputs and two tracks. The easiest way to<br />
record a stereo signal is to link the source (inputs and/or<br />
tracks) and the destination tracks. Tracks 9-16 are set<br />
up from the factory as stereo linked tracks so, if you are<br />
recording to these tracks, all you will need to do is to<br />
link the source inputs (or tracks). Use the following procedure<br />
to link tracks 3 and 4:<br />
1) Press the Track 3 SELECT button.<br />
2) Use the CURSOR buttons to highlight the “Link”<br />
icon.<br />
3) Use the TIME/VALUE dial to select “ON.”<br />
4) Press PLAY/DISPLAY to return to the main play<br />
screen. You can now use the Track 3 fader to con<br />
trol the volume of tracks 3 and 4.<br />
©1998 <strong>Roland</strong> Corporation U.S. <strong>VS</strong>-<strong>1680</strong> <strong>Frequently</strong> <strong>Asked</strong> <strong>Questions</strong> Faxback # 21067 Page 16
®ÂØÒňΠSupplemental Notes <strong>VS</strong>-<strong>1680</strong> <strong>Frequently</strong> <strong>Asked</strong> <strong>Questions</strong><br />
XIV.<br />
How Do I Know How Much Time I Have Left On<br />
My Hard Drive?/ How Many Megabytes Does My Song Use?<br />
While you are recording with the <strong>VS</strong>-<strong>1680</strong>, it will be<br />
important to know exactly how much recording time is<br />
available to you on the current hard drive (or, more<br />
accurately, the current partition of that drive). The<br />
<strong>VS</strong>-<strong>1680</strong> will allow you to view this information in one<br />
of the following forms:<br />
Fig. 11<br />
The Remaining Time<br />
Display<br />
Remaining Time - The amount of available time shown<br />
in minutes and seconds.<br />
Capacity MB - The amount of available space shown<br />
in megabytes.<br />
Capacity % - The amount of available space shown<br />
in percentage.<br />
Capacity Event - The amount of events available for<br />
recording/automix.<br />
Use the following procedure to select the format for<br />
showing the amount of available space on the current<br />
drive:<br />
1) Hold SHIFT and press F5 [SYSTEM]. The “System<br />
Menu” should be displayed. If it is not, press F6 [Exit].<br />
2) Press F1 [SYSPM] followed by F2 [Prm 2].<br />
3) Use the CURSOR buttons to highlight the “Remain<br />
Display” icon and use the TIME/VALUE dial to select<br />
the desired format (time, megabytes, percentage, or<br />
events).<br />
4) Press PLAY/DISPLAY to return to the main screen.<br />
5) Hold SHIFT and press PLAY/DISPLAY until the name<br />
of the current song is displayed. The amount of<br />
space left on the drive will be indicated next to<br />
“REMAIN” in the format selected in step #3<br />
(Fig. 11).<br />
How Do I Know How Big My Song Is?<br />
In addition to viewing the remaining space on your hard<br />
drive, it will also be important to know how many<br />
megabytes your songs use. Use the following procedure<br />
to view the size of the current song in megabytes:<br />
1) Press PLAY/DISPLAY.<br />
2) Hold SHIFT and press PLAY/DISPLAY until the name<br />
of the current song is displayed (Fig. 12). The size<br />
of the current song will be displayed in megabytes<br />
next to “Size:” under the song name.<br />
©1998 <strong>Roland</strong> Corporation U.S. <strong>VS</strong>-<strong>1680</strong> <strong>Frequently</strong> <strong>Asked</strong> <strong>Questions</strong> Faxback # 21067 Page 17
®ÂØÒňΠSupplemental Notes <strong>VS</strong>-<strong>1680</strong> <strong>Frequently</strong> <strong>Asked</strong> <strong>Questions</strong><br />
Fig. 12<br />
The “Song<br />
Name” Display<br />
XV.<br />
How Do I Import <strong>VS</strong>-880/<strong>VS</strong>-880EX Songs?<br />
If you have songs created on a <strong>VS</strong>-880 or <strong>VS</strong>-880EX<br />
that you would like to edit on the <strong>VS</strong>-<strong>1680</strong>, you will<br />
need to convert them to the <strong>VS</strong>-<strong>1680</strong>’s format using the<br />
Song Import function. If your <strong>VS</strong>-880 or <strong>VS</strong>-880EX<br />
backup is not in a playable form (e.g. DAT, CD-R, or on<br />
a Zip disk in archive format), you will need to recover<br />
that material on to a <strong>VS</strong>-<strong>1680</strong> formatted drive first. Use<br />
the following procedure to recover a <strong>VS</strong>-880 or<br />
<strong>VS</strong>-880EX DAT backup:<br />
1) Connect the digital output of your DAT machine to<br />
the <strong>VS</strong>-<strong>1680</strong>’s digital input (DIGIN1 for coaxial or<br />
DIGIN 2 for optical).<br />
2) Load the DAT tape that contains the desired song<br />
and set the tape to playback from the beginning of<br />
that song backup.<br />
3) Hold SHIFT and press F6 [Utility] to display the<br />
Utility Menu.<br />
4) Press PAGE so that “DATRc” appears above F1 (if<br />
necessary). Press F1 [DATRc] to display the DAT<br />
Recover screen.<br />
5) Use the CURSOR buttons and TIME/VALUE dial to<br />
select the appropriate “Digital In Source” (DIGIN 1<br />
for coaxial or DIGIN 2 for optical).<br />
6) Use the CURSOR buttons and TIME/VALUE dial to<br />
select the song to be recovered under “Source Song.”<br />
!<br />
WARNING<br />
If you have any songs on the <strong>VS</strong>-<strong>1680</strong>’s internal<br />
drive that you do not want erased, make sure<br />
that “Off” is selected under “Erase All Songs.”<br />
©1998 <strong>Roland</strong> Corporation U.S. <strong>VS</strong>-<strong>1680</strong> <strong>Frequently</strong> <strong>Asked</strong> <strong>Questions</strong> Faxback # 21067 Page 18
®ÂØÒňΠSupplemental Notes <strong>VS</strong>-<strong>1680</strong> <strong>Frequently</strong> <strong>Asked</strong> <strong>Questions</strong><br />
Importing <strong>VS</strong>-880/<strong>VS</strong>-880EX Songs (continued)<br />
7) Press F4 [Exec] and “Store Current?” will be dis<br />
played. If you have any changes in the current song<br />
that have not been saved, press YES. Otherwise, press<br />
NO.<br />
8) When “Please Play DAT” is displayed, start playing<br />
your DAT machine.<br />
9) When “Please Stop DAT” is displayed, stop your<br />
DAT machine and press YES on the <strong>VS</strong>-<strong>1680</strong>.<br />
10) Press PLAY/DISPLAY to return to the main play screen.<br />
In order to edit a <strong>VS</strong>-880 or <strong>VS</strong>-880EX song on the<br />
<strong>VS</strong>-<strong>1680</strong>, you must use the Song Import function to<br />
convert it to a <strong>VS</strong>-<strong>1680</strong> formatted song. Use the following<br />
procedure to import a <strong>VS</strong>-880 or <strong>VS</strong>-880EX song<br />
into the <strong>VS</strong>-<strong>1680</strong>:<br />
1) Hold SHIFT and press F1 [SONG]. The “Song Menu”<br />
should be displayed. If it is not, press F6 [Exit].<br />
2) Press PAGE until IMPORT is displayed above F4.<br />
3) Press F4.<br />
4) Use the CURSOR buttons to highlight the <strong>VS</strong>-880 or<br />
<strong>VS</strong>-880EX song you wish to convert and press<br />
F4 [MARK].<br />
5) Repeat step #3 for any additional <strong>VS</strong>-880 songs<br />
that you wish to convert.<br />
6) Press F4 [EXECUTE]. A new copy of the selected<br />
song(s) will be created in the <strong>VS</strong>-<strong>1680</strong> format. At<br />
this point, you can erase the <strong>VS</strong>-880 version of that<br />
song(s) if desired.<br />
Get Connected!<br />
For the latest info on new products, support documents, upcoming<br />
<strong>Roland</strong> events and more, visit our Website, www.rolandus.com or<br />
www.rolandgroove.com.<br />
☎<br />
24 hours a day, 7 days a week, you can receive a library of support<br />
materials and product information on your fax machine - and it’s all<br />
FREE! Just call (323) 685-5141 ext. 2271.<br />
If it’s a real-live person you want, we’ve got a team of Product<br />
Specialists that can’t be beat. They’re on call from 8:30am to<br />
5:00pm PST Monday through Friday at (323) 685-5141 ext. 2770.<br />
©1998 <strong>Roland</strong> Corporation U.S. <strong>VS</strong>-<strong>1680</strong> <strong>Frequently</strong> <strong>Asked</strong> <strong>Questions</strong> Faxback # 21067 Page 19