External Sequencing with the MC-505 (PDF) - Roland
External Sequencing with the MC-505 (PDF) - Roland
External Sequencing with the MC-505 (PDF) - Roland

Create successful ePaper yourself
Turn your PDF publications into a flip-book with our unique Google optimized e-Paper software.
®<br />
ÂØÒňΠ©<br />
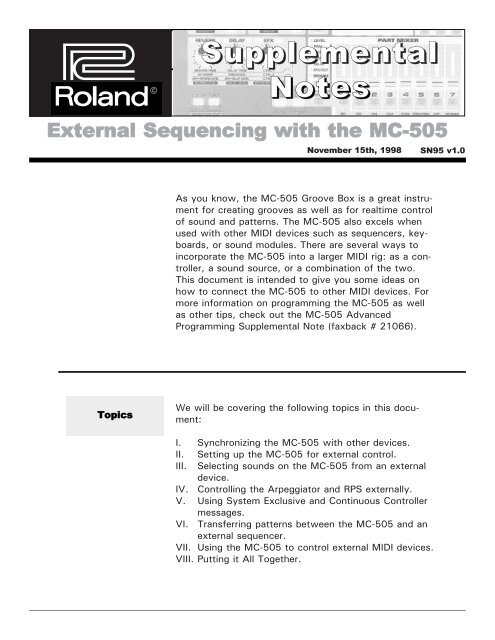
Supplemental<br />
Notes<br />
<strong>External</strong> <strong>Sequencing</strong> <strong>with</strong> <strong>the</strong> <strong>MC</strong>-<strong>505</strong><br />
November 15th, 1998<br />
SN95 v1.0<br />
As you know, <strong>the</strong> <strong>MC</strong>-<strong>505</strong> Groove Box is a great instrument<br />
for creating grooves as well as for realtime control<br />
of sound and patterns. The <strong>MC</strong>-<strong>505</strong> also excels when<br />
used <strong>with</strong> o<strong>the</strong>r MIDI devices such as sequencers, keyboards,<br />
or sound modules. There are several ways to<br />
incorporate <strong>the</strong> <strong>MC</strong>-<strong>505</strong> into a larger MIDI rig: as a controller,<br />
a sound source, or a combination of <strong>the</strong> two.<br />
This document is intended to give you some ideas on<br />
how to connect <strong>the</strong> <strong>MC</strong>-<strong>505</strong> to o<strong>the</strong>r MIDI devices. For<br />
more information on programming <strong>the</strong> <strong>MC</strong>-<strong>505</strong> as well<br />
as o<strong>the</strong>r tips, check out <strong>the</strong> <strong>MC</strong>-<strong>505</strong> Advanced<br />
Programming Supplemental Note (faxback # 21066).<br />
Topics<br />
We will be covering <strong>the</strong> following topics in this document:<br />
I. Synchronizing <strong>the</strong> <strong>MC</strong>-<strong>505</strong> <strong>with</strong> o<strong>the</strong>r devices.<br />
II. Setting up <strong>the</strong> <strong>MC</strong>-<strong>505</strong> for external control.<br />
III. Selecting sounds on <strong>the</strong> <strong>MC</strong>-<strong>505</strong> from an external<br />
device.<br />
IV. Controlling <strong>the</strong> Arpeggiator and RPS externally.<br />
V. Using System Exclusive and Continuous Controller<br />
messages.<br />
VI. Transferring patterns between <strong>the</strong> <strong>MC</strong>-<strong>505</strong> and an<br />
external sequencer.<br />
VII. Using <strong>the</strong> <strong>MC</strong>-<strong>505</strong> to control external MIDI devices.<br />
VIII. Putting it All Toge<strong>the</strong>r.
®ÂØÒňΠSupplemental Notes <strong>External</strong> <strong>Sequencing</strong> <strong>with</strong> <strong>the</strong> <strong>MC</strong>-<strong>505</strong><br />
I. Synchronization<br />
When you are using <strong>the</strong> <strong>MC</strong>-<strong>505</strong> <strong>with</strong> a sequencer or<br />
drum machine, you will probably want to synchronize<br />
<strong>the</strong> clocks of <strong>the</strong> two devices. The first decision you<br />
need to make is which device will be <strong>the</strong> master.<br />
Using <strong>the</strong> <strong>MC</strong>-<strong>505</strong> to Control a Sequencer<br />
If <strong>the</strong> <strong>MC</strong>-<strong>505</strong> is set to be <strong>the</strong> master, you will control<br />
playback of both devices from <strong>the</strong> Play, Stop, FF, and<br />
RR buttons on <strong>the</strong> Groove Box. Use <strong>the</strong> following procedure<br />
to make this setting:<br />
1) Connect a MIDI cable from <strong>the</strong> MIDI OUT of <strong>the</strong><br />
<strong>MC</strong>-<strong>505</strong> to <strong>the</strong> MIDI IN of <strong>the</strong> sequencer.<br />
2) While holding SHIFT, press KEYPAD 11 (fig. 1).<br />
3) Use <strong>the</strong> PAGE buttons to select “Sync Out =.”<br />
4) Use <strong>the</strong> VALUE dial to select “Sync Out = ON.”<br />
5) Press EXIT.<br />
Using <strong>the</strong> <strong>MC</strong>-<strong>505</strong> as a Slave to a Sequencer<br />
Use <strong>the</strong> following procedure to set up <strong>the</strong> <strong>MC</strong>-<strong>505</strong> to follow<br />
<strong>the</strong> MIDI clock of a sequencer. In this type of setup<br />
<strong>the</strong> sequencer will be used to start and stop <strong>the</strong> <strong>MC</strong>-<strong>505</strong>:<br />
1) Connect a MIDI cable from <strong>the</strong> MIDI OUT of <strong>the</strong><br />
sequencer to <strong>the</strong> MIDI IN of <strong>the</strong> <strong>MC</strong>-<strong>505</strong>.<br />
2) While holding SHIFT, press KEY PAD 11 (fig. 1).<br />
3) Use <strong>the</strong> VALUE dial to select “Sync Mode =<br />
SLAVE,” <strong>the</strong>n press EXIT.<br />
Fig.1<br />
<strong>MC</strong>-<strong>505</strong> Front Panel<br />
SHIFT + KEY PAD 11
®ÂØÒňΠSupplemental Notes <strong>External</strong> <strong>Sequencing</strong> <strong>with</strong> <strong>the</strong> <strong>MC</strong>-<strong>505</strong><br />
II.<br />
Setup<br />
Part MIDI Channel<br />
Part 1 Ch. 1<br />
Part 2 Ch. 2<br />
Part 3 Ch. 3<br />
Part 4 Ch. 4<br />
Part 5 Ch. 5<br />
Part 6 Ch. 6<br />
Part 7 Ch. 7<br />
Rhythm Part Ch. 10<br />
Fig.2<br />
<strong>MC</strong>-<strong>505</strong> MIDI channel<br />
assignments<br />
The next four sections will deal <strong>with</strong> using <strong>the</strong> <strong>MC</strong>-<strong>505</strong><br />
as a slave to an external MIDI sequencer. In this type of<br />
setup you will normally be sequencing from a hardware<br />
or computer-based sequencer. The <strong>MC</strong>-<strong>505</strong> will be used<br />
as a sound module <strong>with</strong> up to 8 MIDI channels available.<br />
You can select sounds from your sequencer (section III)<br />
and trigger <strong>the</strong> arpeggiator or <strong>the</strong> RPS function (section<br />
IV). You can also control o<strong>the</strong>r aspects of your sound<br />
from <strong>the</strong> sequencer using o<strong>the</strong>r types of MIDI messages<br />
(section V).<br />
You should first set <strong>the</strong> <strong>MC</strong>-<strong>505</strong> to be a slave (see previous<br />
section ’Using <strong>the</strong> <strong>MC</strong>-<strong>505</strong> as a Slave to a<br />
Sequencer’). The next step will be to select an empty<br />
pattern. Use <strong>the</strong> following procedure:<br />
1) Press PTN/SONG so it is lit and use <strong>the</strong> VALUE dial<br />
to select “U:001 EMPTY PATTERN.” If U:001 is not<br />
empty, use <strong>the</strong> VALUE dial to select a user pattern<br />
that is empty.<br />
Next you should check to make sure that <strong>the</strong> Remote<br />
Keyboard Switch is OFF. If this switch is ON, you will<br />
not be able to access different sounds on different MIDI<br />
channels. You should also make sure that <strong>the</strong> MIDI<br />
reception (Rx) switches are ON so your external<br />
sequencer can properly control <strong>the</strong> <strong>MC</strong>-<strong>505</strong>. Use <strong>the</strong> following<br />
procedure:<br />
1) While holding SHIFT press KEY PAD 12.<br />
2) Use <strong>the</strong> VALUE dial to select “Remote Kbd = OFF.”<br />
3) Use <strong>the</strong> PAGE buttons to select “MIDI Rx SW.”<br />
4) Use <strong>the</strong> PART SELECT buttons and <strong>the</strong> VALUE dial<br />
to set <strong>the</strong>se all to “+” (On).<br />
5) Press EXIT.<br />
You are now ready to begin sequencing. There are eight<br />
parts available in <strong>the</strong> <strong>MC</strong>-<strong>505</strong> that are assigned to MIDI<br />
channels as shown in figure 2.
®ÂØÒňΠSupplemental Notes <strong>External</strong> <strong>Sequencing</strong> <strong>with</strong> <strong>the</strong> <strong>MC</strong>-<strong>505</strong><br />
III.<br />
CC0 CC32 Bank Select<br />
81 0 = 10368<br />
81 1 = 10369<br />
81 2 = 10370<br />
81 3 = 10371<br />
85 0 = 10880<br />
85 1 = 10881<br />
86 0 = 11008<br />
86 1 = 11009<br />
86 2 = 11010<br />
86 3 = 11011<br />
Fig.3<br />
Alternative Bank<br />
Select messages<br />
Group CC0 CC32 PC#<br />
Preset - A 81 0 1-128<br />
Preset - B 81 1 1-128<br />
Preset - C 81 2 1-128<br />
Preset - D 81 3 1-128<br />
User - A 85 0 1-128<br />
User - B 85 1 1-128<br />
Card - A 86 0 1-128<br />
Card - B 86 1 1-128<br />
Card - C 86 2 1-128<br />
Card - D 86 3 1-128<br />
Fig.4<br />
Patch Bank Select<br />
Assignments<br />
Group CC0 CC32 PC#<br />
Preset 81 0 1-26<br />
User 85 0 1-20<br />
Card 86 0 1-20<br />
Fig.5<br />
Rhythm Set Bank<br />
Select Assignments<br />
Selecting Sounds<br />
The sounds in <strong>the</strong> <strong>MC</strong>-<strong>505</strong> can be selected via MIDI by<br />
using bank select and program change messages. Some<br />
computer based sequencers have patch lists or ‘templates’<br />
available for various products. These ‘templates’<br />
allow you to select from a list of patch names, and will<br />
<strong>the</strong>n send out <strong>the</strong> appropriate messages for you. You<br />
should check <strong>with</strong> <strong>the</strong> manufacturer of your particular<br />
sequencer to see if <strong>the</strong>y have a <strong>MC</strong>-<strong>505</strong> template available.<br />
If not, you must enter <strong>the</strong> proper bank select and<br />
program change messages manually to choose a sound.<br />
Selecting Different Banks of Sounds<br />
Bank select messages are comprised of 2 Continuous<br />
Controller (CC) messages. A continuous controller is a<br />
message that is defined in <strong>the</strong> MIDI specification -<br />
Volume (CC7), Panning (CC10), Modulation (CC1), and<br />
Hold (CC64) are common CCs. Controller 0 and 32 are<br />
used to select banks of sounds. Some sequencers combine<br />
<strong>the</strong>se controllers into a single bank select number.<br />
See figure 3 for <strong>the</strong>se values.<br />
Selecting Patches via MIDI<br />
If you look at <strong>the</strong> Patch Listing on pages 192-195 of <strong>the</strong><br />
Owner’s Manual, you will notice that each patch has an<br />
associated PC, CC0, and CC32 value. You can usually<br />
insert <strong>the</strong>se messages in <strong>the</strong> event list editor of your<br />
sequencer to be played back <strong>with</strong> your song. If you use<br />
this method, insert some space between each message<br />
(a few clock pulses should be fine). Use <strong>the</strong> chart in figure<br />
4 to determine <strong>the</strong> correct Bank Select values for<br />
selecting patches in <strong>the</strong> <strong>MC</strong>-<strong>505</strong>. Here is an example:<br />
To select "P A:071 Robo Voice" send:<br />
Message: CC00 <strong>the</strong>n CC32 <strong>the</strong>n PC<br />
Value: 81 0 71<br />
Selecting Rhythm Sets via MIDI<br />
The rhythm sets in <strong>the</strong> <strong>MC</strong>-<strong>505</strong> are assigned to MIDI<br />
channel 10. There is a list of <strong>the</strong> rhythm sets on pages<br />
196-202 in your Owner’s Manual. Use <strong>the</strong> chart in figure<br />
5 to select rhythm kits. Here is an example:<br />
To select "P:05 Techno 1" send:<br />
Message: CC00 <strong>the</strong>n CC32 <strong>the</strong>n PC<br />
Value: 81 0 5
®ÂØÒňΠSupplemental Notes <strong>External</strong> <strong>Sequencing</strong> <strong>with</strong> <strong>the</strong> <strong>MC</strong>-<strong>505</strong><br />
IV.<br />
Controlling <strong>the</strong> Arpeggiator and RPS<br />
The Arpeggiator and <strong>the</strong> RPS function can be controlled<br />
on separate MIDI channels. One application of this is to<br />
apply <strong>the</strong> arpeggiator to a sequenced part. You can also<br />
trigger RPS Phrases externally from a drum machine or<br />
keyboard. It is recommended that you set <strong>the</strong>se MIDI<br />
channels to a channel o<strong>the</strong>r than 1-7 or 10. This way<br />
<strong>the</strong>y will not interfere <strong>with</strong> your sequencing of <strong>the</strong> voices<br />
in <strong>the</strong> <strong>MC</strong>-<strong>505</strong>. Use <strong>the</strong> following procedure to make<br />
<strong>the</strong>se settings:<br />
1) While holding SHIFT, press KEY PAD 11.<br />
2) Use <strong>the</strong> PAGE buttons to select “Aprg Sync.”<br />
3) Use <strong>the</strong> VALUE dial to select “Aprg Sync = ON.”<br />
4) While holding SHIFT, press KEY PAD 12.<br />
5) Use <strong>the</strong> PAGE buttons to select “Arpg Ctrl<br />
Ch=.”<br />
6) Use <strong>the</strong> VALUE dial to select “Arpg Ctrl Ch=16.”<br />
7) Use <strong>the</strong> PAGE buttons to select “RPS Ctrl<br />
Ch=.”<br />
8) Use <strong>the</strong> VALUE dial to select “RPS Ctrl Ch=15.”<br />
Use <strong>the</strong> following procedure to trigger an arpeggio:<br />
1) Connect a MIDI cable from <strong>the</strong> MIDI OUT of a keyboard<br />
or MIDI sequencer to <strong>the</strong> MIDI IN of <strong>the</strong> <strong>MC</strong>-<strong>505</strong>.<br />
2) Set <strong>the</strong> external MIDI device to MIDI channel 16 and<br />
play several notes. The <strong>MC</strong>-<strong>505</strong> will play an arpeggio<br />
using <strong>the</strong> currently selected Part.<br />
3) To change <strong>the</strong> sound that is being arpeggiated, you<br />
will need to send <strong>the</strong> appropriate Bank Select and<br />
Program Change messages on <strong>the</strong> MIDI channel that<br />
corresponds to <strong>the</strong> currently selected Part (see<br />
Section III).<br />
If <strong>the</strong> Aprg Sync switch is ON, <strong>the</strong> Arpeggios<br />
can be played back in time <strong>with</strong> your song.<br />
Use <strong>the</strong> following procedure to trigger a RPS Phrase:<br />
1) Connect a MIDI cable from <strong>the</strong> MIDI OUT of a keyboard<br />
or MIDI sequencer to <strong>the</strong> MIDI IN of <strong>the</strong> <strong>MC</strong>-<strong>505</strong>.<br />
2) Set <strong>the</strong> external MIDI device to MIDI channel 15 and<br />
play a note on <strong>the</strong> keyboard to trigger <strong>the</strong> corresponding<br />
RPS Phrase.
®ÂØÒňΠSupplemental Notes <strong>External</strong> <strong>Sequencing</strong> <strong>with</strong> <strong>the</strong> <strong>MC</strong>-<strong>505</strong><br />
V. Using Controllers and System Exclusive<br />
You can automate almost any function of <strong>the</strong> <strong>MC</strong>-<strong>505</strong><br />
through MIDI messages called Continuous Controllers<br />
(CC) and System Exclusive messages (SysEx). If you are<br />
new to this type of control, you may want to read <strong>the</strong><br />
SoundCanvas MIDI Depths Supplemental Note (Faxback<br />
# 21007) which has a very complete section on how to<br />
construct and use <strong>the</strong>se messages. Some of <strong>the</strong> more<br />
useful CCs are listed in figure 6:<br />
Fig.6<br />
Some MIDI Controllers<br />
used in <strong>the</strong> <strong>MC</strong>-<strong>505</strong><br />
Cutoff<br />
Resonance<br />
Envelope - Attack<br />
Envelope - Release<br />
Portamento ON/OFF<br />
Portamento Time<br />
Solo<br />
Level<br />
Pan<br />
Reverb Amount<br />
Delay Amount<br />
CC#74<br />
CC#71<br />
CC#73<br />
CC#72<br />
CC#65 (0-63=OFF, 64-127=ON)<br />
CC#5<br />
CC#126/127 (126=ON, 127=OFF)<br />
CC#7<br />
CC#10<br />
CC#91<br />
CC#94<br />
Remember that Controller messages are sent<br />
on specific MIDI channels, so you can have<br />
completely different settings for each Part on<br />
<strong>the</strong> <strong>MC</strong>-<strong>505</strong>.<br />
Tip<br />
SysEx messages are a bit more complicated but if you<br />
look at <strong>the</strong> MIDI implementation section of your Owner’s<br />
Manual (pgs 234-251), you will quickly see that almost<br />
anything in <strong>the</strong> <strong>MC</strong>-<strong>505</strong> can be controlled using <strong>the</strong>se<br />
messages. One of <strong>the</strong> many good uses for SysEx messages<br />
is to choose <strong>the</strong> effects in <strong>the</strong> <strong>MC</strong>-<strong>505</strong>. Use <strong>the</strong><br />
messages in figure 7 on <strong>the</strong> following page to select different<br />
effects.<br />
Many software-based sequencers allow you to<br />
create faders or controllers on <strong>the</strong> screen of<br />
your computer that can be set to transmit<br />
Continuous Controller or System Exclusive<br />
messages. Using this type of setup, you can<br />
create a customized environment on your<br />
screen to control <strong>the</strong> <strong>MC</strong>-<strong>505</strong> in <strong>the</strong> way that<br />
best suits you.
®ÂØÒňΠSupplemental Notes <strong>External</strong> <strong>Sequencing</strong> <strong>with</strong> <strong>the</strong> <strong>MC</strong>-<strong>505</strong><br />
Using Controllers and System Exclusive (cont.)<br />
Fig.7<br />
MIDI SysEx<br />
messages used in <strong>the</strong><br />
<strong>MC</strong>-<strong>505</strong><br />
EFX TYPES:<br />
4 BAND-EQ F0 41 10 00 0B 12 01 00 00 0D 00 72 F7<br />
SPECTRUM<br />
F0 41 10 00 0B 12 01 00 00 0D 01 71 F7<br />
ENHANCER<br />
F0 41 10 00 0B 12 01 00 00 0D 02 70 F7<br />
OVERDRIVE<br />
F0 41 10 00 0B 12 01 00 00 0D 03 6F F7<br />
DISTORTION F0 41 10 00 0B 12 01 00 00 0D 04 6E F7<br />
LO-FI<br />
F0 41 10 00 0B 12 01 00 00 0D 05 6D F7<br />
NOISE<br />
F0 41 10 00 0B 12 01 00 00 0D 06 6C F7<br />
RADIO-TUNING F0 41 10 00 0B 12 01 00 00 0D 07 6B F7<br />
PHONOGRAPH F0 41 10 00 0B 12 01 00 00 0D 08 6A F7<br />
COMPRESSOR F0 41 10 00 0B 12 01 00 00 0D 09 69 F7<br />
LIMITER<br />
F0 41 10 00 0B 12 01 00 00 0D 0A 68 F7<br />
SLICER<br />
F0 41 10 00 0B 12 01 00 00 0D 0B 67 F7<br />
TREMOLO<br />
F0 41 10 00 0B 12 01 00 00 0D 0C 66 F7<br />
PHASER<br />
F0 41 10 00 0B 12 01 00 00 0D 0D 65 F7<br />
CHORUS<br />
F0 41 10 00 0B 12 01 00 00 0D 0E 64 F7<br />
SPACE-D<br />
F0 41 10 00 0B 12 01 00 00 0D 0F 63 F7<br />
TETRA-CHORUS F0 41 10 00 0B 12 01 00 00 0D 10 62 F7<br />
FLANGER<br />
F0 41 10 00 0B 12 01 00 00 0D 11 61 F7<br />
STEP FLANGER F0 41 10 00 0B 12 01 00 00 0D 12 60 F7<br />
SHORT DELAY F0 41 10 00 0B 12 01 00 00 0D 13 5F F7<br />
AUTO PAN<br />
F0 41 10 00 0B 12 01 00 00 0D 14 5E F7<br />
FDBK PTCH-SHIFT F0 41 10 00 0B 12 01 00 00 0D 15 5D F7<br />
REVERB<br />
F0 41 10 00 0B 12 01 00 00 0D 16 5C F7<br />
GATE-REVERB F0 41 10 00 0B 12 01 00 00 0D 17 5B F7<br />
DELAY TYPES:<br />
SHORT<br />
F0 41 10 00 0B 12 01 00 00 23 00 5C F7<br />
LONG<br />
F0 41 10 00 0B 12 01 00 00 23 01 5B F7<br />
REVERB TYPES:<br />
ROOM 1<br />
F0 41 10 00 0B 12 01 00 00 28 00 57 F7<br />
ROOM 2<br />
F0 41 10 00 0B 12 01 00 00 28 01 56 F7<br />
STAGE 1<br />
F0 41 10 00 0B 12 01 00 00 28 02 55 F7<br />
STAGE 2<br />
F0 41 10 00 0B 12 01 00 00 28 03 54 F7<br />
HALL 1<br />
F0 41 10 00 0B 12 01 00 00 28 04 53 F7<br />
HALL 2<br />
F0 41 10 00 0B 12 01 00 00 28 05 52 F7<br />
System Exclusive messages require a fairly indepth<br />
knowledge of MIDI. For more information<br />
on Sysex, you might want to read “The Next<br />
MIDI Book” from Alexander Publishing (available<br />
from <strong>the</strong> <strong>Roland</strong> Supershop at 800-386-<br />
7575).
®ÂØÒňΠSupplemental Notes <strong>External</strong> <strong>Sequencing</strong> <strong>with</strong> <strong>the</strong> <strong>MC</strong>-<strong>505</strong><br />
VI.<br />
Transferring Patterns<br />
Many times you may want to copy a pattern or part of a<br />
pattern from <strong>the</strong> <strong>MC</strong>-<strong>505</strong> to your sequencer (or vice<br />
versa).<br />
Copying a Pattern from <strong>the</strong> <strong>MC</strong>-<strong>505</strong> to a Sequencer<br />
1) Connect a MIDI cable from <strong>the</strong> MIDI Out of <strong>the</strong><br />
<strong>MC</strong>-<strong>505</strong> to <strong>the</strong> MIDI In of <strong>the</strong> sequencer.<br />
2) Set your sequencer’s clock to external sync mode<br />
(consult <strong>the</strong> Owner’s Manual of <strong>the</strong> sequencer for<br />
information on this setting).<br />
3) Set <strong>the</strong> <strong>MC</strong>-<strong>505</strong> to Internal Clock and also to transmit<br />
clock (see section I: Using <strong>the</strong> <strong>MC</strong>-<strong>505</strong> to Control<br />
a Sequencer).<br />
4) While holding SHIFT, press KEY PAD 8.<br />
5) Use <strong>the</strong> PART SELECT buttons and <strong>the</strong> VALUE dial to<br />
set all of <strong>the</strong> parts to “BOTH.”<br />
6) If possible, enable your sequencer to “Multi-Record”<br />
to route <strong>the</strong> MIDI data to separate tracks. You should<br />
also turn <strong>the</strong> auto-channelize and <strong>the</strong> MIDI thru func<br />
tions off (if applicable).<br />
7) Set <strong>the</strong> sequencer to record and press PLAY on <strong>the</strong><br />
<strong>MC</strong>-<strong>505</strong>.<br />
8) Press STOP on <strong>the</strong> <strong>MC</strong>-<strong>505</strong> when <strong>the</strong> pattern is finished.<br />
You can now edit <strong>the</strong> MIDI data in your sequencer and<br />
use it to trigger <strong>the</strong> <strong>MC</strong>-<strong>505</strong>.<br />
Copying Data from a Sequencer to <strong>the</strong> <strong>MC</strong>-<strong>505</strong><br />
1) Connect a MIDI cable from <strong>the</strong> MIDI OUT of <strong>the</strong><br />
sequencer to <strong>the</strong> MIDI IN of <strong>the</strong> <strong>MC</strong>-<strong>505</strong>.<br />
2) Set <strong>the</strong> <strong>MC</strong>-<strong>505</strong> to slave to MIDI clock (see section I:<br />
Using <strong>the</strong> <strong>MC</strong>-<strong>505</strong> as a Slave to a Sequencer).<br />
3) Select an empty User Pattern and press RECORD on<br />
<strong>the</strong> <strong>MC</strong>-<strong>505</strong>.<br />
4) Use <strong>the</strong> PAGE buttons and <strong>the</strong> VALUE dial to<br />
set <strong>the</strong> Beat (usually 4/4), Pattern Length, Count in<br />
(try 0), Loop Rest, and Input Quantize.<br />
5) Start <strong>the</strong> external sequencer and <strong>the</strong> data will automatically<br />
be recorded into <strong>the</strong> corresponding parts of<br />
<strong>the</strong> <strong>MC</strong>-<strong>505</strong> (as shown in figure 2 on page 3).<br />
6) Stop <strong>the</strong> sequencer when <strong>the</strong> pattern is finished.<br />
If you have data on MIDI channels o<strong>the</strong>r than<br />
1-7 and 10, it will not be recorded by <strong>the</strong><br />
<strong>MC</strong>-<strong>505</strong>.
®ÂØÒňΠSupplemental Notes <strong>External</strong> <strong>Sequencing</strong> <strong>with</strong> <strong>the</strong> <strong>MC</strong>-<strong>505</strong><br />
VII.<br />
Using <strong>the</strong> <strong>MC</strong>-<strong>505</strong> as a Controller<br />
The <strong>MC</strong>-<strong>505</strong> can function as an 8 track sequencer for<br />
external devices as well as its internal sounds. The 8<br />
tracks of <strong>the</strong> <strong>MC</strong>-<strong>505</strong> can be set to trigger Internal<br />
Sounds, <strong>External</strong> Sounds, or both. Use <strong>the</strong> following<br />
procedure to set track 3 (MIDI channel 3) to trigger an<br />
external sound only:<br />
1) Hold SHIFT and press KEY PAD 8.<br />
2) Press PART SELECT and press <strong>the</strong> PART 3 Select<br />
button.<br />
3) Use <strong>the</strong> VALUE dial to select “EXT.”<br />
4) Press EXIT.<br />
Now track 3 will play an external MIDI device that is set<br />
to MIDI channel 3.<br />
DBeam* Control<br />
The DBeam can be set to transmit several different MIDI<br />
messages. The most useful will probably be Modulation<br />
(CC1). Use <strong>the</strong> following procedure to make this setting:<br />
1) While holding <strong>the</strong> DBEAM CONTROLLER ON button,<br />
use <strong>the</strong> VALUE dial to select “01:Modulation-A.”<br />
2) Press <strong>the</strong> DBEAM CONTROLLER ON button so it is<br />
lit.<br />
Now <strong>the</strong> DBeam will have <strong>the</strong> same function as <strong>the</strong><br />
modulation lever of a MIDI keyboard.<br />
Realtime Control Section and Part Mixer<br />
The realtime control section and Part Mixer will also<br />
transmit CC and SysEx messages that can be used to<br />
control many MIDI devices. Some of <strong>the</strong>se messages<br />
may be interpreted automatically by your o<strong>the</strong>r MIDI<br />
gear, but some will require you to do some set up on<br />
<strong>the</strong> external devices.<br />
Check out figure 8 on <strong>the</strong> next page to get an idea of<br />
how controllers are mapped to <strong>the</strong> different areas of <strong>the</strong><br />
<strong>MC</strong>-<strong>505</strong>.<br />
*D-Beam controller technology has been licensed from<br />
Interactive Light Inc.
®ÂØÒňΠSupplemental Notes <strong>External</strong> <strong>Sequencing</strong> <strong>with</strong> <strong>the</strong> <strong>MC</strong>-<strong>505</strong><br />
Using <strong>the</strong> <strong>MC</strong>-<strong>505</strong> as a Controller (cont.)<br />
DBeam<br />
Assignable output (see<br />
steps on previous page)<br />
Envelope Section<br />
A<br />
CC#73<br />
D<br />
CC#75<br />
S<br />
SysEx<br />
R<br />
CC#72<br />
(<strong>with</strong> “AMP” setting)<br />
Realtime Section<br />
Cutoff<br />
Resonance<br />
LFO Depth<br />
Portamento Time<br />
CC#74<br />
CC#71<br />
CC#80<br />
CC#5<br />
Fig.8<br />
MIDI messages transmitted<br />
and received by <strong>the</strong> <strong>MC</strong>-<strong>505</strong><br />
Part Mixer<br />
Level<br />
Pan<br />
Key Shift<br />
Reverb<br />
Delay<br />
EFX/OUT<br />
CC#7<br />
CC#10<br />
SysEx<br />
CC#91<br />
CC#94<br />
SysEx<br />
Consult page 233 in <strong>the</strong> <strong>MC</strong>-<strong>505</strong> Owner’s<br />
Manual for a more complete listing of <strong>the</strong><br />
available controllers.
®ÂØÒňΠSupplemental Notes <strong>External</strong> <strong>Sequencing</strong> <strong>with</strong> <strong>the</strong> <strong>MC</strong>-<strong>505</strong><br />
VIII.<br />
Putting it All Toge<strong>the</strong>r<br />
Here are a few ways you can use <strong>the</strong> <strong>MC</strong>-<strong>505</strong> <strong>with</strong><br />
external MIDI devices:<br />
If you use a computer-based sequencer, you can connect<br />
<strong>the</strong> <strong>MC</strong>-<strong>505</strong> as a slave and control everything from<br />
your computer. You can also use <strong>the</strong> <strong>MC</strong>-<strong>505</strong> as an<br />
input device and take advantage of <strong>the</strong> extensive realtime<br />
controls to add expressiveness to your performances.<br />
You can compose grooves on <strong>the</strong> <strong>MC</strong>-<strong>505</strong> and transfer<br />
<strong>the</strong>m to your sequencer for storage or editing. You can<br />
<strong>the</strong>n transfer <strong>the</strong> finished sequences back to <strong>the</strong> Groove<br />
Box for performances so you don’t have to pack up your<br />
computer and bring it to gigs.<br />
The <strong>MC</strong>-<strong>505</strong> can be used as a very powerful stand-alone<br />
sequencer at <strong>the</strong> heart of your MIDI setup. You can control<br />
MIDI modules, drum machines, or any o<strong>the</strong>r MIDI<br />
device directly from <strong>the</strong> 8 tracks as well as <strong>the</strong> front<br />
panel controls.<br />
Now that you have seen <strong>the</strong> different ways <strong>the</strong> <strong>MC</strong>-<strong>505</strong><br />
can be integrated into a MIDI system. It is time to put<br />
<strong>the</strong> Groove Box to work for you. Have fun and don’t be<br />
afraid to try something new⎯you’ll probably like <strong>the</strong><br />
result!<br />
Get Connected!<br />
For <strong>the</strong> latest info on new products, support documents,<br />
upcoming <strong>Roland</strong> events and more, visit our Website,<br />
www.rolandus.com or www.rolandgroove.com.<br />
☎<br />
24 hours a day, 7 days a week, you can receive a<br />
library of support materials and product information on<br />
your fax machine - and it’s all FREE! Just call (323)<br />
685-5141 ext. 2271.<br />
If it’s a real-live person you want, we’ve got a team of<br />
Product Specialists that can’t be beat. They’re on call<br />
from 8:30am to 5:00pm PST Monday through Friday at<br />
(323) 685-5141 ext. 2770.