
Create successful ePaper yourself
Turn your PDF publications into a flip-book with our unique Google optimized e-Paper software.
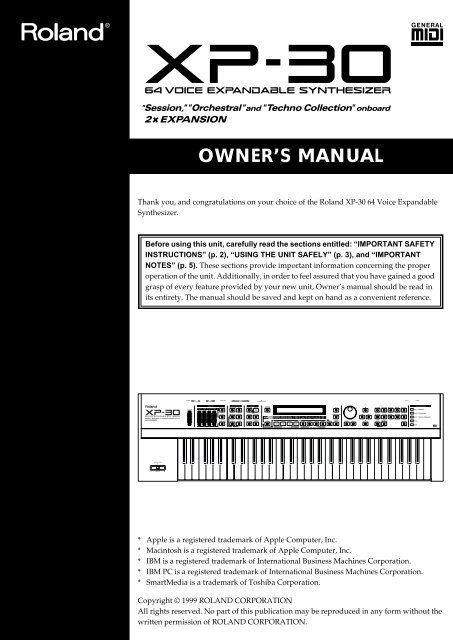
OWNER’S MANUAL<br />
Thank you, and congratulations on your choice of the <strong>Roland</strong> XP-30 64 Voice Expandable<br />
Synthesizer.<br />
Before using this unit, carefully read the sections entitled: “IMPORTANT SAFETY<br />
INSTRUCTIONS” (p. 2), “USING THE UNIT SAFELY” (p. 3), and “IMPORTANT<br />
NOTES” (p. 5). These sections provide important information concerning the proper<br />
operation of the unit. Additionally, in order to feel assured that you have gained a good<br />
grasp of every feature provided by your new unit, Owner’s manual should be read in<br />
its entirety. The manual should be saved and kept on hand as a convenient reference.<br />
* Apple is a registered trademark of Apple Computer, Inc.<br />
* Macintosh is a registered trademark of Apple Computer, Inc.<br />
* IBM is a registered trademark of International Business Machines Corporation.<br />
* IBM PC is a registered trademark of International Business Machines Corporation.<br />
* SmartMedia is a trademark of Toshiba Corporation.<br />
Copyright © 1999 ROLAND CORPORATION<br />
All rights reserved. No part of this publication may be reproduced in any form without the<br />
written permission of ROLAND CORPORATION.
CAUTION<br />
RISK OF ELECTRIC SHOCK<br />
DO NOT OPEN<br />
ATTENTION: RISQUE DE CHOC ELECTRIQUE NE PAS OUVRIR<br />
CAUTION: TO REDUCE THE RISK OF ELECTRIC SHOCK,<br />
DO NOT REMOVE COVER (OR BACK).<br />
NO USER-SERVICEABLE PARTS INSIDE.<br />
REFER SERVICING TO QUALIFIED SERVICE PERSONNEL.<br />
The lightning flash with arrowhead symbol, within an<br />
equilateral triangle, is intended to alert the user to the<br />
presence of uninsulated “dangerous voltage” within the<br />
product’s enclosure that may be of sufficient magnitude to<br />
constitute a risk of electric shock to persons.<br />
The exclamation point within an equilateral triangle is<br />
intended to alert the user to the presence of important<br />
operating and maintenance (servicing) instructions in the<br />
literature accompanying the product.<br />
INSTRUCTIONS PERTAINING TO A RISK OF FIRE, ELECTRIC SHOCK, OR INJURY TO PERSONS.<br />
IMPORTANT SAFETY INSTRUCTIONS<br />
SAVE THESE INSTRUCTIONS<br />
WARNING - When using electric products, basic precautions should always be followed, including the following:<br />
1. Read these instructions.<br />
2. Keep these instructions.<br />
3. Heed all warnings.<br />
4. Follow all instructions.<br />
5. Do not use this apparatus near water.<br />
6. Clean only with a dry cloth.<br />
7. Do not block any of the ventilation openings. Install in<br />
accordance with the manufacturers instructions.<br />
8. Do not install near any heat sources such as radiators,<br />
heat registers, stoves, or other apparatus (including<br />
amplifiers) that produce heat.<br />
9. Do not defeat the safety purpose of the polarized or<br />
grounding-type plug. A polarized plug has two blades with<br />
one wider than the other. A grounding type plug has two<br />
blades and a third grounding prong. The wide blade or the<br />
third prong are provided for your safety. When the provided<br />
plug does not fit into your outlet, consult an electrician for<br />
replacement of the obsolete outlet.<br />
10. Protect the power cord from being walked on or pinched<br />
particularly at plugs, convenience receptacles, and the<br />
point where they exit from the apparatus.<br />
11. Only use attachments/accessories specified by the<br />
manufacturer.<br />
12. Never use with a cart, stand, tripod, bracket,<br />
or table except as specified by the<br />
manufacturer, or sold with the apparatus.<br />
When a cart is used, use caution when<br />
moving the cart/apparatus combination to<br />
avoid injury from tip-over.<br />
13. Unplug this apparatus during lightning storms or when<br />
unused for long periods of time.<br />
14. Refer all servicing to qualified service personnel. Servicing<br />
is required when the apparatus has been damaged in any<br />
way, such as power-supply cord or plug is damaged, liquid<br />
has been spilled or objects have fallen into the apparatus,<br />
the apparatus has been exposed to rain or moisture, does<br />
not operate normally, or has been dropped.<br />
For the U.K.<br />
IMPORTANT: THE WIRES IN THIS MAINS LEAD ARE COLOURED IN ACCORDANCE WITH THE FOLLOWING CODE.<br />
BLUE:<br />
BROWN:<br />
NEUTRAL<br />
LIVE<br />
As the colours of the wires in the mains lead of this apparatus may not correspond with the coloured markings identifying<br />
the terminals in your plug, proceed as follows:<br />
The wire which is coloured BLUE must be connected to the terminal which is marked with the letter N or coloured BLACK.<br />
The wire which is coloured BROWN must be connected to the terminal which is marked with the letter L or coloured RED.<br />
Under no circumstances must either of the above wires be connected to the earth terminal of a three pin plug.<br />
CAUTION: Danger of explosion if battery is incorrectly replaced.<br />
Replace only with same or equivalent type.<br />
2
Used for instructions intended to alert<br />
the user to the risk of death or severe<br />
injury should the unit be used<br />
improperly.<br />
Used for instructions intended to alert<br />
the user to the risk of injury or material<br />
damage should the unit be used<br />
improperly.<br />
* Material damage refers to damage or<br />
other adverse effects caused with<br />
respect to the home and all its<br />
furnishings, as well to domestic<br />
animals or pets.<br />
The symbol alerts the user to important instructions<br />
or warnings.The specific meaning of the symbol is<br />
determined by the design contained within the<br />
triangle. In the case of the symbol at left, it is used for<br />
general cautions, warnings, or alerts to danger.<br />
The symbol alerts the user to items that must never<br />
be carried out (are forbidden). The specific thing that<br />
must not be done is indicated by the design contained<br />
within the circle. In the case of the symbol at left, it<br />
means that the unit must never be disassembled.<br />
The ● symbol alerts the user to things that must be<br />
carried out. The specific thing that must be done is<br />
indicated by the design contained within the circle. In<br />
the case of the symbol at left, it means that the powercord<br />
plug must be unplugged from the outlet.<br />
001<br />
• Before using this unit, make sure to read the<br />
instructions below, and the Owner’s Manual.<br />
..........................................................................................................<br />
002b<br />
• Do not open or perform any internal modifications<br />
on the unit. (The only exception would be where<br />
this manual provides specific instructions which<br />
should be followed in order to put in place userinstallable<br />
options; see p. 17, 21.)<br />
..........................................................................................................<br />
006<br />
• When using the unit with a rack or stand recommended<br />
by <strong>Roland</strong>, the rack or stand must be<br />
carefully placed so it is level and sure to remain<br />
stable. If not using a rack or stand, you still need to<br />
make sure that any location you choose for placing<br />
the unit provides a level surface that will properly<br />
support the unit, and keep it from wobbling.<br />
..........................................................................................................<br />
008e<br />
• Use only the attached power-supply cord.<br />
..........................................................................................................<br />
009<br />
• Avoid damaging the power cord. Do not bend it<br />
excessively, step on it, place heavy objects on it,<br />
etc. A damaged cord can easily become a shock or<br />
fire hazard. Never use a power cord after it has<br />
been damaged.<br />
..........................................................................................................<br />
013<br />
• In households with small children, an adult<br />
should provide supervision until the child is<br />
capable of following all the rules essential for the<br />
safe operation of the unit.<br />
..........................................................................................................<br />
014<br />
• Protect the unit from strong impact.<br />
(Do not drop it!)<br />
..........................................................................................................<br />
015<br />
• Do not force the unit’s power-supply cord to share<br />
an outlet with an unreasonable number of other<br />
devices. Be especially careful when using<br />
extension cords—the total power used by all<br />
devices you have connected to the extension cord’s<br />
outlet must never exceed the power rating (watts/<br />
amperes) for the extension cord. Excessive loads<br />
can cause the insulation on the cord to heat up and<br />
eventually melt through.<br />
..........................................................................................................<br />
016<br />
• Before using the unit in a foreign country, consult<br />
with your retailer, the nearest <strong>Roland</strong> Service<br />
Center, or an authorized <strong>Roland</strong> distributor, as<br />
listed on the “Information” page.<br />
..........................................................................................................<br />
022a<br />
• Always turn the unit off and unplug the power<br />
cord before attempting installation of the circuit<br />
board (SR-JV80 series).<br />
..........................................................................................................<br />
023<br />
• DO NOT play a CD-ROM disc on a conventional<br />
audio CD player. The resulting sound may be of a<br />
level that could cause permanent hearing loss.<br />
Damage to speakers or other system components<br />
may result.<br />
..........................................................................................................<br />
3
USING THE UNIT SAFELY<br />
102b<br />
• Always grasp only the plug on the power-supply<br />
cord when plugging into, or unplugging from, an<br />
outlet or this unit.<br />
..........................................................................................................<br />
104<br />
• Try to prevent cords and cables from becoming<br />
entangled. Also, all cords and cables should be<br />
placed so they are out of the reach of children.<br />
..........................................................................................................<br />
106<br />
• Never climb on top of, nor place heavy objects on<br />
the unit.<br />
..........................................................................................................<br />
107b<br />
• Never handle the power cord or its plugs with wet<br />
hands when plugging into, or unplugging from,<br />
an outlet or this unit.<br />
..........................................................................................................<br />
108a<br />
• Before moving the unit, disconnect the power plug<br />
from the outlet, and pull out all cords from<br />
external devices.<br />
..........................................................................................................<br />
109a<br />
• Before cleaning the unit, turn off the power and<br />
unplug the power cord from the outlet.<br />
..........................................................................................................<br />
110a<br />
• Whenever you suspect the possibility of lightning<br />
in your area, pull the plug on the power cord out<br />
of the outlet.<br />
..........................................................................................................<br />
115a<br />
• Install only the specified circuit board(s) (SR-JV80<br />
series). Remove only the specified screws (p. 17,<br />
21).<br />
..........................................................................................................<br />
4
Important Notes<br />
In addition to the items listed under “IMPORTANT SAFETY<br />
INSTRUCTIONS” and “USING THE UNIT SAFELY” on<br />
pages 2 and 3, please read and observe the following:<br />
Power Supply<br />
• Do not use this unit on the same power circuit with any<br />
device that will generate line noise (such as an electric<br />
motor or variable lighting system).<br />
• Before connecting this unit to other devices, turn off the<br />
power to all units. This will help prevent malfunctions<br />
and/or damage to speakers or other devices.<br />
Placement<br />
• Using the unit near power amplifiers (or other equipment<br />
containing large power transformers) may induce hum. To<br />
alleviate the problem, change the orientation of this unit;<br />
or move it farther away from the source of interference.<br />
• This device may interfere with radio and television<br />
reception. Do not use this device in the vicinity of such<br />
receivers.<br />
• Do not expose the unit to direct sunlight, place it near<br />
devices that radiate heat, leave it inside an enclosed<br />
vehicle, or otherwise subject it to temperature extremes.<br />
Excessive heat can deform or discolor the unit.<br />
• To avoid possible breakdown, do not use the unit in a wet<br />
area, such as an area exposed to rain or other moisture.<br />
Maintenance<br />
• For everyday cleaning wipe the unit with a soft, dry cloth<br />
or one that has been slightly dampened with water. To<br />
remove stubborn dirt, use a cloth impregnated with a<br />
mild, non-abrasive detergent. Afterwards, be sure to<br />
wipe the unit thoroughly with a soft, dry cloth.<br />
• Never use benzine, thinners, alcohol or solvents of any kind,<br />
to avoid the possibility of discoloration and/or deformation.<br />
Repairs and Data<br />
• Please be aware that all data contained in the unit’s<br />
memory may be lost when the unit is sent for repairs.<br />
Important data should always be backed up memory<br />
card, or written down on paper (when possible). During<br />
repairs, due care is taken to avoid the loss of data.<br />
However, in certain cases (such as when circuitry related<br />
to memory itself is out of order), we regret that it may not<br />
be possible to restore the data, and <strong>Roland</strong> assumes no<br />
liability concerning such loss of data.<br />
Memory Backup<br />
• This unit contains a battery which powers the unit’s<br />
memory circuits while the main power is off. When this<br />
battery becomes weak, the message shown below will<br />
appear in the display. Once you see this message, have<br />
the battery replaced with a fresh one as soon as possible<br />
to avoid the loss of all data in memory. To have the<br />
battery replaced, consult with your retailer, the nearest<br />
<strong>Roland</strong> Service Center, or an authorized <strong>Roland</strong><br />
distributor, as listed on the “Information” page.<br />
“Battery Low”<br />
Additional Precautions<br />
• Please be aware that the contents of memory can be<br />
irretrievably lost as a result of a malfunction, or the<br />
improper operation of the unit. To protect yourself against<br />
the risk of loosing important data, we recommend that<br />
you periodically save a backup copy of important data<br />
you have stored in the unit’s memory on a memory card.<br />
• Unfortunately, it may be impossible to restore the<br />
contents of data that was stored in the unit’s memory, a<br />
memory card or another MIDI device (e.g., a sequencer)<br />
once it has been lost. <strong>Roland</strong> Corporation assumes no<br />
liability concerning such loss of data.<br />
• Use a reasonable amount of care when using the unit’s<br />
buttons, sliders, or other controls; and when using its<br />
jacks and connectors. Rough handling can lead to<br />
malfunctions.<br />
• Never strike or apply strong pressure to the display.<br />
• When connecting / disconnecting all cables, grasp the<br />
connector itself—never pull on the cable. This way you<br />
will avoid causing shorts, or damage to the cable’s<br />
internal elements.<br />
• A small amount of heat will radiate from the unit during<br />
normal operation.<br />
• To avoid disturbing your neighbors, try to keep the unit’s<br />
volume at reasonable levels. You may prefer to use<br />
headphones, so you do not need to be concerned about<br />
those around you (especially when it is late at night).<br />
• When you need to transport the unit, package it in the box<br />
(including padding) that it came in, if possible. Otherwise,<br />
you will need to use equivalent packaging materials.<br />
• Use only the specified expression pedal (EV-5; sold<br />
separately). By connecting any other expression pedals,<br />
you risk causing malfunction and/or damage to the unit.<br />
Before Using Memory Cards<br />
Using Memory Cards<br />
• Carefully insert the Memory card all the way in—until it<br />
is firmly in place.<br />
• Never touch the terminals of the Memory card. Also,<br />
avoid getting the terminals dirty.<br />
Handling CD-ROMs<br />
• Avoid touching or scratching the shiny underside<br />
(encoded surface) of the disc. Damaged or dirty CD-ROM<br />
discs may not be read properly. Keep your discs clean<br />
using a commercially available CD cleaner.<br />
5
How to Read This Owner’s Manual<br />
This owner’s manual is organized as follows.<br />
Quick Start<br />
This section is intended for those using the XP-30 for the first<br />
time, and explains how to use various functions in a simple<br />
way. Please read Quick Start and follow along by actually<br />
operating the XP-30. This will help you understand most of<br />
what you need to know for basic operations. More advanced<br />
ways of using the XP-30 or details of other operations are<br />
explained the Advanced Use section.<br />
Advanced Use<br />
The Advanced Use section is divided into 6 chapters. But<br />
before you start reading it, we’d like to suggest going<br />
through the Quick Start section.<br />
Chapter 1. Overview of the XP-30<br />
This chapter covers XP-30 sound source section<br />
configurations, as well as basic operation. Please be sure to<br />
read this chapter in order to fully understand the XP-30.<br />
Chapter 2. Playing<br />
This chapter explains how to use the XP-30 in Patch,<br />
Performance and Rhythm Set modes. Reading it is essential<br />
for understanding XP-30 operational procedures.<br />
Chapter 3. Creating Your Own Sounds<br />
This chapter covers creating sounds, the parameters that make<br />
up a Patch, Performance, or Rhythm Set, and the System<br />
parameters that determine global XP-30 operation, as well as<br />
their functions. Comprehending the information in the<br />
chapter is an essential prerequisite before creating your own<br />
sounds.<br />
Chapter 4. Memory Settings<br />
(Utility/Card Mode)<br />
This chapter goes over the various Utility functions such as<br />
storing Patch, Performance or Rhythm Set data, clearing the<br />
internal memory, etc. Being familiar with these will<br />
streamline operation procedures.<br />
Chapter 6. Getting the Full Potential of<br />
the XP-30<br />
This chapter includes various techniques that expand the XP-<br />
30’s operational scope. It includes use with external MIDI<br />
devices, live performance applications and others.<br />
Appendices<br />
This chapter contains a troubleshooting section for use when<br />
the XP-30 is not functioning as expected. There is also a list of<br />
error messages that you can refer to if an error message<br />
appears on the display. A list of parameters and MIDI<br />
implementation chart are also provided.<br />
■ Notation Used in This Owner’s<br />
Manual<br />
To make operation procedures easy to understand, the<br />
following notation system is adopted:<br />
Characters and numbers in square brackets [ ] indicate<br />
buttons on the front panel. For example, [PATCH] represents<br />
the PATCH button and [ENTER] the ENTER button.<br />
An asterisk (*) at the beginning of a paragraph indicates a<br />
note or precaution. These should not be ignored. In the Quick<br />
Start section, such material is indicated by ( ).<br />
(p. **) refers to pages within the manual.<br />
In this manual, when any particular parameter is referred to,<br />
the name of the parameter is given, and this is then followed<br />
(in parenthesis) by information detailing its mode, display<br />
group, and display. For example: Key Mode parameter<br />
(PERFORM/COMMON/PERFORM COMMON).<br />
* The display screens printed in this owner’s manual are based on<br />
the factory settings. However, please be aware that in some cases<br />
they may differ from the actual factory settings.<br />
Chapter 5. Using the XP-30 as the GM<br />
Sound Module<br />
This chapter explains needed procedures and parameters for<br />
using the XP-30 as a General MIDI System-compatible sound<br />
source. Read this chapter before attempting to play back<br />
commercial General MIDI System score data.<br />
6
Contents<br />
Main Features........................................................................................11<br />
Front and Rear Panel............................................................................12<br />
Quick Start ........................................................ 15<br />
Getting Ready........................................................................................16<br />
Installing the Wave Expansion Board ................................................................................................... 16<br />
Cautions When Installing an Wave Expansion Board............................................................. 16<br />
Installation de la carte d’extension Wave (French language for Canadian Safety Standard)....... 20<br />
Precautions lors de l’installation de la carte d’extension Wave ............................................. 20<br />
Making Connections ................................................................................................................................ 24<br />
Turning On the Power ............................................................................................................................. 26<br />
Turning Off the Power ................................................................................................................. 26<br />
Reset to Default Factory Settings (Factory Reset)................................................................................ 27<br />
Listening to the Demo Song ................................................................28<br />
Profile of the Composer ............................................................................................................... 29<br />
Playing the Sounds...............................................................................30<br />
Selecting Patches and Playing the Sounds............................................................................................ 30<br />
Selecting Wave Expansion Patches........................................................................................................ 31<br />
Selecting Patches by Category (Patch Search Function) ..................................................................... 32<br />
Auditioning the Patches (Phrase Preview)........................................................................................... 33<br />
Try Out Performance Functions............................................................................................................. 34<br />
Velocity/Aftertouch ..................................................................................................................... 34<br />
Pitch Bend/Modulation Lever.................................................................................................... 34<br />
C1–C4 Slider................................................................................................................................... 34<br />
Hold Pedal...................................................................................................................................... 35<br />
Expression Pedal ........................................................................................................................... 35<br />
Solo.................................................................................................................................................. 35<br />
Portamento..................................................................................................................................... 35<br />
Sound Palette ................................................................................................................................. 36<br />
Play Arpeggios (Arpeggiator) ................................................................................................................ 36<br />
Play Percussion Sounds from the Keyboard ........................................................................................38<br />
Advanced Use ................................................... 39<br />
Chapter 1. Overview of the XP-30........................................................40<br />
XP-30 Configuration................................................................................................................................. 40<br />
Basic Configuration....................................................................................................................... 40<br />
Classification of XP-30 Sound Types.......................................................................................... 40<br />
Number of Simultaneous Voices ................................................................................................ 42<br />
Basic Operation......................................................................................................................................... 42<br />
Switching Modes........................................................................................................................... 42<br />
About the Function Buttons ........................................................................................................ 43<br />
About the Cursor Buttons............................................................................................................ 44<br />
Modifying a Value ........................................................................................................................ 45<br />
Assigning a Name......................................................................................................................... 46<br />
7
Contents<br />
Chapter 2. Playing.................................................................................47<br />
Playing in Patch Mode............................................................................................................................. 47<br />
Selecting a Patch............................................................................................................................ 47<br />
Using Phrase Preview to Play Patches....................................................................................... 49<br />
Making a Patch Sound Thick or Thin (Turning a Tone On/Off)........................................... 50<br />
Playing Single Notes (Solo) ......................................................................................................... 50<br />
Creating Smooth Pitch Changes (Portamento)......................................................................... 50<br />
Using the Sliders to Modify the Sound in Realtime (Sound Palette Function).................... 50<br />
Playing in Performance Mode ................................................................................................................ 51<br />
Selecting a Performance ............................................................................................................... 51<br />
Playing Fatter and Richer Sounds by Combining Patches (Layer)........................................ 52<br />
Splitting the Keyboard to Play Separate Patches in Different Sections (Split)..................... 52<br />
Playing Along with a Song Playback (XP-30 Used as a Multitimbral Sound Source)........ 53<br />
Assigning a Different Patch to a Part ......................................................................................... 54<br />
Using the Sliders to Modify the Sound in Realtime (Sound Palette Function).................... 54<br />
Playing in Rhythm Set Mode.................................................................................................................. 55<br />
Selecting a Rhythm Set ................................................................................................................. 55<br />
Playing Percussion Instruments ................................................................................................. 56<br />
Playing an Arpeggio ................................................................................................................................ 56<br />
Playing an Arpeggio Over a Preset Keyboard Area ................................................................ 57<br />
Holding an Arpeggio.................................................................................................................... 58<br />
Simulating a Guitar Cutting Technique..................................................................................... 58<br />
Playing an Arpeggio from an External MIDI Device............................................................... 58<br />
Creating an Arpeggio Pattern ..................................................................................................... 58<br />
Convenient Functions for Performance ................................................................................................ 59<br />
Transposing the Keyboard in Octave Units (Octave Shift)..................................................... 59<br />
Transposing the Keyboard in Semitone Steps (Transpose) .................................................... 60<br />
If “Stuck” Notes Occur or a Note Does Not Sound (Panic) .................................................... 60<br />
Chapter 3. Creating Your Own Sounds...............................................61<br />
Regarding Effects...................................................................................................................................... 61<br />
How Effects Units Work in Different Modes............................................................................ 61<br />
Turning Effects On/Off................................................................................................................ 62<br />
Sound Editing Procedures....................................................................................................................... 62<br />
Editing a Patch............................................................................................................................... 62<br />
Editing a Performance.................................................................................................................. 65<br />
Editing a Rhythm Set.................................................................................................................... 66<br />
Keeping Edited Sound............................................................................................................................. 67<br />
Memory and Data Storage........................................................................................................... 67<br />
Storing a Sound You Modify into User Memory ..................................................................... 68<br />
Functions of Patch Parameters ............................................................................................................... 68<br />
Settings Common to the Entire Patch (COMMON)................................................................. 68<br />
Setting Effects for a Patch (EFFECTS) ........................................................................................ 71<br />
Using Controllers to Change How Sounds Are Played (CONTROL)................................... 73<br />
Modifying Waveform (WAVE)................................................................................................... 76<br />
Modulating Sounds (LFO)........................................................................................................... 78<br />
Modifying Pitch (PITCH)............................................................................................................. 79<br />
Modifying the Brightness of Sound with a Filter (TVF).......................................................... 80<br />
Changing the Sound’s Volume and Stereo Location (TVA) ................................................... 81<br />
Functions of Performance Parameters................................................................................................... 83<br />
Settings Common to the Entire Performance (COMMON).................................................... 83<br />
Setting Effects for a Performance (EFFECTS) ........................................................................... 84<br />
Making MIDI Settings for a Part (MIDI).................................................................................... 86<br />
Making Settings for Each Part (PART)....................................................................................... 87<br />
Confirming MIDI Information for Each Part (INFO) .............................................................. 87<br />
Functions of Rhythm Set Parameters .................................................................................................... 88<br />
Naming a Rhythm Set (COMMON)........................................................................................... 88<br />
8
Contents<br />
Setting Effects for a Rhythm Tone (EFFECTS).......................................................................... 88<br />
Controlling How a Rhythm Tone will Sound with Controllers (CONTROL) ..................... 90<br />
Modifying Waveform of a Rhythm Tone (WAVE) .................................................................. 90<br />
Modifying Pitch of a Rhythm Tone (PITCH)............................................................................ 91<br />
Changing the Tone (Filter) of a Rhythm Tone (TVF)............................................................... 91<br />
Changing the Volume and Stereo Location of a Rhythm Tone (TVA).................................. 92<br />
Multi-Effects Types (EFX Parameter) .................................................................................................... 93<br />
XP-30 Operating Environment Setup (System Parameters and Their Functions) ........................ 108<br />
Display Screen Contrast and Clock Settings (SETUP)........................................................... 108<br />
Arpeggio Settings (ARPEGGIO)............................................................................................... 108<br />
Keyboard and Controllers Settings (CONTROL)................................................................... 110<br />
MIDI Settings (MIDI).................................................................................................................. 112<br />
Phrase Preview Settings (PREVIEW) ....................................................................................... 113<br />
Adjusting Tuning (TUNE) ......................................................................................................... 113<br />
Program Change (PGM CHNG) ............................................................................................... 114<br />
Checking Things Such as the Installation Status of Wave Expansion Boards (INFO)...... 114<br />
Chapter 4. Memory Settings (Utility/Card Mode) .............................115<br />
About Utility/Card Mode..................................................................................................................... 115<br />
Basic Procedure in Utility/Card Mode ............................................................................................... 115<br />
Storing Sound Data in User Memory (WRITE).................................................................................. 116<br />
Performance Write ...................................................................................................................... 116<br />
Patch Write................................................................................................................................... 116<br />
Rhythm Set Write........................................................................................................................ 116<br />
Copying Sound Source Settings (COPY) ............................................................................................ 117<br />
Performance Copy ...................................................................................................................... 117<br />
Patch Copy ................................................................................................................................... 117<br />
Rhythm Set Copy ........................................................................................................................ 118<br />
Initializing Sound Source Settings (INIT) ........................................................................................... 119<br />
Performance Initialize................................................................................................................. 119<br />
Patch Initialize ............................................................................................................................. 119<br />
Rhythm Set Initialize .................................................................................................................. 119<br />
Transmitting Sound Settings (XFER)................................................................................................... 119<br />
Transmitting Data to an External MIDI Device...................................................................... 119<br />
Transmitting Data to User Memory ......................................................................................... 120<br />
Preventing User Memory Writing Operation (PROTECT) .............................................................. 121<br />
Memory Card-Related Settings (CARD)............................................................................................. 121<br />
Formatting the Memory Card for the XP-30 (FORMAT) ...................................................... 122<br />
Renaming a File (RENAME)...................................................................................................... 122<br />
Deleting Unwanted Files (DELETE)......................................................................................... 122<br />
Checking the Contents Memory Card (INFO)........................................................................ 122<br />
Loading a File from Memory Card into the XP-30 (LOAD)............................................................. 122<br />
Saving Data to Memory Card (SAVE)................................................................................................. 122<br />
Recalling Factory Default Settings (FACTORY RESET) ................................................................... 123<br />
Chapter 5. Using the XP-30 as the GM Sound Module ....................124<br />
Entering GM Mode................................................................................................................................. 124<br />
Initializing the Sound Source for GM System Basic Settings ............................................... 124<br />
Playing Back a GM Score ........................................................................................................... 124<br />
Modifying GM Mode Settings.............................................................................................................. 125<br />
Making Effects Settings in GM Mode (EFFECTS) .................................................................. 125<br />
Setting a Part (PART).................................................................................................................. 127<br />
Confirming MIDI Information of Each Part (INFO) .............................................................. 127<br />
Convenient Functions in GM Mode (GM Utility) ............................................................................. 127<br />
Copying Effects Settings (COPY).............................................................................................. 128<br />
Initializing GM Mode (INIT)..................................................................................................... 128<br />
Transmitting GM Mode Settings (XFER)................................................................................. 128<br />
9
Contents<br />
Chapter 6. Getting the Full Potential of the XP-30 ...........................129<br />
Techniques for Using Patches............................................................................................................... 129<br />
Reinforcing Filter Characteristics ............................................................................................. 129<br />
Making the Up-Beat Note Sound at the Same Time You Play a Down-Beat Note ........... 129<br />
Holding a Note with Modulation Retained ............................................................................ 129<br />
Syncing the LFO Cycle to System Tempo ............................................................................... 129<br />
Modifying Multi-Effects to Match the System’s Tempo........................................................ 130<br />
Using a Pedal Switch to Modify the Rotary Speed of the Rotary Effect ............................. 130<br />
Playing Phrase Loops at a System’s Tempo............................................................................ 130<br />
Using the Slider to Pan Sounds in Real Time ......................................................................... 131<br />
Using the XP-30 to Play Live ................................................................................................................ 131<br />
Changing Multiple Sounds of an External MIDI Device Simultaneously.......................... 131<br />
Changing Sounds with a Pedal Switch.................................................................................... 131<br />
Using External MIDI Devices ............................................................................................................... 132<br />
Using the XP-30 to Control External MIDI Devices............................................................... 132<br />
Playing the XP-30’s Sound Source from an External MIDI Device ..................................... 132<br />
Selecting XP-30 Sounds from an External MIDI Device........................................................ 132<br />
Enjoying Desktop Music ....................................................................................................................... 134<br />
Connecting to Your Computer.................................................................................................. 134<br />
Disconnecting the Keyboard from the Internal Sound Source (Local OFF)....................... 137<br />
Appendices...................................................... 139<br />
Troubleshooting..................................................................................140<br />
Error Messages ...................................................................................142<br />
Quick Reference of Procedures ........................................................143<br />
Parameter List .....................................................................................147<br />
Waveform List .....................................................................................160<br />
Patch List.............................................................................................168<br />
Rhythm Set List...................................................................................177<br />
Performance List.................................................................................181<br />
Arpeggio Style List .............................................................................182<br />
MIDI Implementation...........................................................................183<br />
Specifications......................................................................................207<br />
Computer Cable Wiring Diagrams.....................................................208<br />
Index.....................................................................................................209<br />
10
Main Features<br />
■ High-Performance Synthesizer<br />
Sound Source<br />
64-Voice Polyphony and 16-Part<br />
Multitimbrality<br />
The XP-30 is a 16-part multitimbral sound source that<br />
produces up to 64 simultaneous polyphonic notes.<br />
Effectively used with an external sequencer or computer, the<br />
XP-30’s true creative potential for music production becomes<br />
apparent (p. 41).<br />
Powerful Onboard Effects<br />
Advanced DSP (Digital Signal Processor) technology<br />
provides a wide array of studio quality effects. In addition to<br />
the Multi-Effects (EFX) section that features 40 different<br />
types of effects, the XP-30 also features an independent<br />
chorus unit and reverb unit (p. 61).<br />
Extensive Tone Structure Range<br />
Ten different Structures are available for combining basic<br />
sound elements for more flexible sound making. A ring<br />
modulator and booster enhance creating sounds (p. 70).<br />
An Array of Arpeggio and Cutting<br />
Options<br />
With the [ARPEGGIO] on, you can create various arpeggios<br />
and simulate cutting techniques simply by pressing a chord.<br />
You can even specify the rhythmical “feel” you want (p. 56).<br />
General MIDI System Compatibility<br />
The XP-30 provides a mode compatible with the General<br />
MIDI System, the standard format for desktop music (DTM)<br />
systems, and can play back commercially available General<br />
MIDI System compatible song data (p. 124).<br />
General MIDI System<br />
The General MIDI system is a set of recommendations<br />
which seeks to provide a way to go beyond the<br />
limitations of proprietary designs, and standardize the<br />
MIDI capabilities of sound generating devices. Sound<br />
generating devices and music files that meets the<br />
General MIDI standard bears the General MIDI logo<br />
( ). Music files bearing the General MIDI logo can be<br />
played back using any General MIDI sound generating<br />
unit to produce essentially the same musical<br />
performance.<br />
■ Expandability<br />
Allows Two Wave Expansion Boards<br />
to be Installed at the Same Time<br />
Up to two SR-JV80 series Wave Expansion Boards can be<br />
installed simultaneously, allowing you to expand the range<br />
of available sounds (p. 16, 20).<br />
Data from Popular Wave Expansion<br />
Boards Already Onboard<br />
The data of the three popular Wave Expansion Boards, the<br />
SR-JV80-02 “Orchestral,” SR-JV80-09 “Session,” and SR-JV80-<br />
11 “Techno Collection” is onboard.<br />
This means that for practical purposes, you can have<br />
simultaneous access to the sounds of up to five Wave<br />
Expansion Boards, and can draw on a vast quantity of<br />
waveform data as material for creating your sounds.<br />
■ Quick and Intuitive Operation<br />
Enhanced Operational Ease<br />
Dedicated buttons are provided for each function to simplify<br />
operation. The group of function buttons located below the<br />
display allow intuitive editing (p. 43).<br />
Featuring the Patch Search and Phrase<br />
Preview Functions that were Popular<br />
on the JV-2080<br />
The Patch Search function (p. 32, 48) lets you rapidly find the<br />
patch you want simply by specifying a patch category. By<br />
pressing [PHRASE PREVIEW], you can then hear the<br />
selected patch play a phrase suitable for that type of patch.<br />
(Phrase Preview function, p. 33, 49)<br />
Use the Sound Palette Sliders to Make<br />
Quick Changes in the Sound<br />
The four sliders in the PALETTE section let you make<br />
realtime changes in tone and volume while you play (p. 36,<br />
50, 54).<br />
■ Computer Interface Connector<br />
A special computer cable makes it easy for you to connect the<br />
XP-30 to your computer, so that you can enjoy ensemble<br />
playing (p. 134).<br />
11
Front and Rear Panel<br />
A<br />
B<br />
C D E<br />
H<br />
■ Front Panel<br />
A<br />
Volume Slider<br />
This slider adjusts the overall volume that is output from the<br />
rear panel OUTPUT jacks and PHONES jack. →p. 26<br />
B PALETTE Section<br />
Use the four sliders to modify sounds in real time.<br />
[FILTER/ENV]<br />
Press this button ON when modifying filter and/or envelope<br />
settings in real time using the four sliders (CUTOFF/RESO./<br />
ATTACK/DECAY). →p. 36, 51, 54<br />
[LEVEL]<br />
Press this button ON when adjusting volume balance in real<br />
time using the four sliders (1/2/3/4). →p. 36, 51, 54<br />
[CONTROLLER]<br />
Can be switched on when you wish to assign various<br />
parameters to the four sliders, and modify the sound as you<br />
play (C1/C2/C3/C4). →p. 34<br />
C KEY EFFECTS Section<br />
The buttons in this section allow you to assign various<br />
functions to the keys of the XP-30’s keyboard.<br />
[PORTAMENTO]<br />
Switches Portamento on/off. →p. 35, 50<br />
[SOLO]<br />
Specifies playing a single note at a time. →p. 35, 50<br />
[TRANSPOSE]<br />
Specifies transposing the keyboard in semitone steps. →p. 60<br />
[ARPEGGIO]<br />
Switches Arpeggiator on/off. →p. 36, 56<br />
[+OCT], [-OCT]<br />
These buttons adjust the pitch of the keyboard in octave steps. →p. 59<br />
Pressing either of these buttons while holding down [TRANSPOSE]<br />
allows you to set the desired amount of transposition. →p. 60<br />
D MODE Section<br />
The buttons in this section select modes. The button indicator<br />
of the selected mode will light. →p. 42<br />
[PERFORM]/[GM]<br />
Pressed to get into Performance mode. Hold down [SHIFT]<br />
while you press [PERFORM] to select GM mode. →p. 51, 124<br />
[PATCH]/[PART]<br />
Pressed to get into Patch mode. By holding down [PERFORM]<br />
and pressing [PATCH], you can modify the settings of the patch<br />
that is assigned to each part of the performance. →p. 47, 54, 66<br />
[SYSTEM]<br />
This selects System mode. →p. 108<br />
[RHYTHM]<br />
This selects Rhythm Set mode. →p. 55<br />
[UTIL/CARD]<br />
This selects Utility/Card mode. →p. 115<br />
[EFFECTS ON/OFF]<br />
This button turns the internal effects (Multi-Effects, Chorus,<br />
Reverb) on/off. →p. 62<br />
E<br />
Display<br />
Shows various information for the currently selected<br />
function or operation.<br />
[PHRASE PREVIEW]<br />
Press this when you wish to use phrases to audition a patch.<br />
→p. 33, 49<br />
12
Front and Rear Panel<br />
F<br />
G<br />
[INC], [DEC]<br />
Use these buttons to modify values. If you keep on holding<br />
down one button and pressing the other, the value change<br />
accelerates. If you press one of these buttons while holding down<br />
[SHIFT], the value will change in bigger increments. →p. 45<br />
[ ], [ ] (Cursor Buttons)<br />
Move the cursor (underline) with these.<br />
[ ], [ ] (Page Buttons)<br />
When the left edge of the display shows a or symbol,<br />
use these buttons to move to other parameter displays<br />
[0]–[9] (Numeric Keys)<br />
Use these to set a value. They can be used to enter numeric<br />
values as well as alphabetical characters. →p. 45<br />
When [CATEGORY] is on, this becomes the button for choosing<br />
a category group using the Patch Search function. →p. 32, 48<br />
[EDIT]<br />
Press this button when you wish to adjust various settings.<br />
Use the function buttons to select the display screen for the<br />
parameter you wish to modify.<br />
Function Buttons<br />
The function of these buttons will depend on the operational<br />
mode and the status of the [EDIT] indicator. →p. 43<br />
[1–8/9–16]<br />
Use this button to select the group (1–8/9–16) of Parts to be<br />
selected by the function buttons. →p. 43<br />
[EXIT]/[PANIC]<br />
EXIT: Press this button when you wish to return to the Play<br />
display of a mode, or to cancel an operation without executing.<br />
PANIC: If for some reason notes are stuck and continue<br />
sounding, hold down the SHIFT button and press this button<br />
to clear the stuck notes. →p. 60<br />
[UNDO/COMPARE]<br />
The function of these buttons will depend on the operation<br />
being performed.<br />
UNDO: Press this button to restore a modified value to the<br />
original value. →p. 63, 65, 66<br />
COMPARE: When saving or copying Tone settings, press this to check<br />
the sound at the save destination, or at the copy source. →p. 116, 118<br />
[PALETTE EDIT]<br />
Press this button when you wish to use the Palette display to<br />
modify Patch or Performance settings. →p. 63, 65<br />
F<br />
VALUE Dial<br />
This dial is used to modify values. If you hold down [SHIFT]<br />
as you turn the VALUE dial, the value will change in greater<br />
increments. →p. 45<br />
[SHIFT]<br />
This is used in combination with other buttons. Some buttons<br />
on the front panel include grey-printed characters. They<br />
indicate the button’s function when [SHIFT] is held down.<br />
[ENTER]/[DIGIT HOLD]<br />
ENTER: Use this button to finalize a value or execute an operation.<br />
DIGIT HOLD: Press this button while holding down [SHIFT] to turn<br />
the Digit Hold function on/off. With the Digit Hold on, the 100’s<br />
place and 10’s place will be fixed and only the 1’s place will change.<br />
This means that you can select Patches simply by pressing the<br />
numeric key for the 1’s place, without having to press [ENTER]. The<br />
same applies when selecting Performances or Rhythm set. →p. 48<br />
[CATEGORY]/[DEMO]<br />
CATEGORY: Use the Patch Search function to select a patch.<br />
→p. 32, 48<br />
DEMO: To hear the demo playback, hold down [SHIFT] and<br />
press this button. →p. 28<br />
G WAVE EXPANSION Section<br />
Here you can select sounds from a Wave Expansion. →p. 31<br />
[EXP A], [EXP B], [EXP C]<br />
Select sounds from the internal Wave Expansion.<br />
EXP-A: “Session”<br />
EXP-B: “Orchestral”<br />
EXP-C: “Techno Collection”<br />
[EXP D], [EXP E]<br />
Select sounds from the Wave Expansion Board slots (EXP-D and E).<br />
H<br />
Pitch Bend/Modulation Lever<br />
This allows you to control pitch bend or apply vibrato.<br />
Depending on the settings, other specified parameters can<br />
also be controlled. →p. 34, 75<br />
13
Front and Rear Panel<br />
■ Rear Panel<br />
Power Switch<br />
Press to turn the power on/off. →p. 26<br />
AC Inlet<br />
Connect the AC power cable (included) to this inlet. →p. 24<br />
* With units rated for 117V operation, the AC cable is already<br />
connected to the unit.<br />
fig.0-02a<br />
CONTROL PEDAL Jack<br />
You can connect optional expression pedals to these jacks. By<br />
assigning a desired function to a pedal, you can use it to<br />
select or modify sound or perform various other control. You<br />
can also connect optional pedal switches to sustain sound.<br />
→p. 24, 110<br />
HOLD PEDAL Jack<br />
An optional pedal switch can be connected to this jack for<br />
use as a hold pedal. →p. 24, 110<br />
fig.0-02e<br />
MEMORY CARD Slot<br />
An optional memory card (SmartMedia) can be inserted here.<br />
→p. 115<br />
fig.0-02b<br />
MIDI Connectors (IN, OUT, THRU)<br />
These connectors can be connected to other MIDI devices to<br />
receive and transmit MIDI messages. →p. 24, 119, 132<br />
OUTPUT Jacks (L (MONO), R)<br />
These jacks output the audio signal to the connected mixer/<br />
amplifier system in stereo. For mono output, use the L jack.<br />
→p. 24<br />
PHONES Jack<br />
An optional set of headphones can be connected to this jack.<br />
→p. 24<br />
fig.0-02f<br />
fig.0-02c<br />
COMPUTER Switch<br />
Set this switch depending on the type of computer connected<br />
to Computer connector, or the software you are using. Turn<br />
the power off before changing the setting of this switch. If<br />
you wish to use the MIDI connectors, set this switch to MIDI.<br />
→p. 134<br />
COMPUTER Connector<br />
A special Computer cable (sold separately) can be connected<br />
here. The type of cable required will depend on your computer.<br />
When the Computer switch located at the left is set to MIDI,<br />
this connector cannot be used. →p. 134<br />
fig.0-02d<br />
14
Quick Start<br />
Quick Start<br />
15
Getting Ready<br />
Installing the Wave Expansion Board<br />
Up to two Wave Expansion Boards (SR-JV80 series; sold separately) can be<br />
installed in EXP-D and E Slots in the XP-30. Wave Expansion Boards contain<br />
Wave data, as well as Patches and Rhythm Sets that use this Wave data,<br />
which can be called directly into the temporary area and played.<br />
■ Cautions When Installing an Wave Expansion Board<br />
● To avoid the risk of damage to internal components that can be caused by<br />
static electricity, please carefully observe the following whenever you<br />
handle the board.<br />
• Before you touch the board, always first grasp a metal object (such as<br />
a water pipe), so you are sure that any static electricity you might<br />
have been carrying has been discharged.<br />
• When handling the board, grasp it only by its edges. Avoid touching<br />
any of the electronic components or connectors.<br />
• Save the bag in which the board was originally shipped, and put the<br />
board back into it whenever you need to store or transport it.<br />
● Use a Philips screwdriver that is suitable for the size of the screw (a<br />
number 2 screwdriver). If an unsuitable screwdriver is used, the head of<br />
the screw may be stripped.<br />
● To remove a screw, rotate the screwdriver<br />
counter-clockwise. To tighten a screw, rotate loosen<br />
tighten<br />
the screwdriver clockwise.<br />
● When installing Wave Expansion Boards,<br />
remove only the specified screws.<br />
● Be careful that the screws you remove do not drop into the interior of the<br />
XP-30.<br />
● Do not leave the bottom cover in a detached state. Be sure to reattach it<br />
after the Wave Expansion Boards have been installed.<br />
● Do not touch any of the printed circuit pathways or connection terminals.<br />
● Be careful not to cut your hand on the edge of the installation bay.<br />
● Never use excessive force when installing a circuit board. If it doesn’t fit<br />
properly on the first attempt, remove the board and try again.<br />
● When circuit board installation is complete, double-check your work.<br />
When playing a Patch or<br />
Rhythm Set that use the<br />
Wave data from a Wave<br />
Expansion Board, the<br />
appropriate Wave<br />
Expansion Board must be<br />
installed in the XP-30 for<br />
the sound to play correctly.<br />
To install an optional Wave Expansion Board (SR-JV80 series; sold<br />
separately), the unit’s bottom cover must be removed. There are two slots<br />
(EXP-D and E) into which a board can be installed. Slots EXP-D and E<br />
correspond to the group (XP-D and E) you need to select in order to use a<br />
Wave, Patch or Rhythm Set from the Wave Expansion Board.<br />
16
Getting Ready<br />
1<br />
Before installing the Wave Expansion Board, turn off the<br />
power of the XP-30 and all connected devices, and disconnect<br />
all cables from the XP-30.<br />
2<br />
Turn the XP-30 on its back, and remove only the screws shown<br />
in the following diagram.<br />
fig.Q-02a.e<br />
Screws to be removed<br />
If the same type of Wave<br />
Expansion Board is<br />
installed in the EXP-D slot<br />
and the EXP-E slot, it will<br />
only be possible to select<br />
data from the Wave<br />
Expansion Board that was<br />
installed in the EXP-D slot.<br />
Also, the XP-30 already<br />
contains the data of the<br />
following three Wave<br />
Expansion Boards, so if one<br />
of these Wave Expansion<br />
Boards is installed, only the<br />
internal data (XP-A–C) can<br />
be selected.<br />
SR-JV80-09 “Session”<br />
(XP-A)<br />
SR-JV80-02 “Orchestral”<br />
(XP-B)<br />
SR-JV80-11 “Techno<br />
Collection” (XP-C)<br />
Quick Start<br />
3<br />
Inside, there are two connectors and six board holders. Insert<br />
the connectors of the Wave Expansion Board into the internal<br />
connectors, and simultaneously insert the board holders into<br />
the holes of the Wave Expansion Board.<br />
fig.Q-02b.e<br />
Wave Expansion Board<br />
Board holder<br />
Connector<br />
EXP E<br />
EXP D<br />
17
Getting Ready<br />
4<br />
Use the Installation Tool supplied with the Wave Expansion<br />
Board to turn the holders in the LOCK direction, so the board<br />
will be fastened in place.<br />
fig.Q-02c.e<br />
Installation tool<br />
LOCK<br />
5<br />
Use the screws that you removed in step 2 to fasten the cover<br />
back in place.<br />
This completes installation of the Wave Expansion Board.<br />
6<br />
Connect the cables that you disconnected earlier.<br />
7<br />
Turn on the power, as described in “Turning On the Power” (p.<br />
26).<br />
8<br />
Press [PATCH] to access the PATCH PLAY display.<br />
fig.Q-03<br />
18
Getting Ready<br />
9<br />
Press [EXP D] or [EXP E], and verify that you can select<br />
patches from Wave Expansion Boards D or E. [EXP D] or [EXP<br />
E] indicator will light, and the following display will appear.<br />
fig.Q-04<br />
Quick Start<br />
The example here depicts<br />
what you would see if the<br />
SR-JV80-13 “Vocal<br />
Collection” Wave<br />
Expansion Board were<br />
installed in the EXP-D slot.<br />
If you can’t choose any<br />
Wave Expansion Board<br />
patches, it’s possible that<br />
the installed Wave<br />
Expansion Board is not<br />
being recognized correctly.<br />
Turn off the power as<br />
described in “Turning Off<br />
the Power” (p. 26), and<br />
re-install the Wave<br />
Expansion Board correctly.<br />
19
Getting Ready<br />
Installation de la carte d’extension Wave<br />
(French language for Canadian Safety Standard)<br />
Vous pouvez installer jusqu’à 2 cartes d’extension Wave (en option dans la<br />
série SR-JV80) dans les créneaux EXP-D et E du XP-30. Les cartes d’extension<br />
Wave contiennent des données Wave, aussi bien que des morceaux<br />
musicaux et des ensembles rythmiques utilisant ces données, auxquelles on<br />
peut directement accéder dans la zone temporaire et les faire jouer.<br />
■ Precautions lors de l’installation de la carte<br />
d’extension Wave<br />
● Pour éviter tout dommage des composants internes pouvant provenir de<br />
l’électricité statique, veuillez suivre les conseils suivants quand vous<br />
installez la carte.<br />
• Avant de toucher la carte, saisissez toujours un objet métallique<br />
(tuyau d’eau ou autre) pour être sûr que l’électricité statique se<br />
décharge.<br />
• Quand vous saisissez la carte, prenez-la par les bords. Evitez de<br />
toucher les composants électroniques ou les connecteurs.<br />
• Conservez le sac dans lequel la carte était emballée et remettez la carte<br />
dedans pour l’expédier ou l’entreposer.<br />
● Utiliser un tournevis cruciforme correspondant à la taille de la vis (un<br />
tournevis numéro 2). En cas d’utilisation d’un tournevis inapproprié, la<br />
tête de la vis pourrait être endommagée.<br />
● Pour enlever les vis, tourner le tournevis<br />
dans le sens contraire des aiguilles d’une desserrer<br />
resserrer<br />
montre. Pour resserrer, tourner dans le<br />
sens des aiguilles d’une montre.<br />
● Lors de l’insertion de la carte d’extension Wave, enlevez seulement les vis<br />
indiquées dans les instructions.<br />
● Veillez à ne pas laisser tomber de vis dans le châssis du XP-30.<br />
● Ne pas laisser le panneau de protection avant détaché. S’assurer de<br />
l’avoir rattacher après avoir installé le disque dur.<br />
● Ne touchez aucun des circuits imprimés ni les bornes de connexion.<br />
● Veillez à ne pas vous couper les doitgs sur le bord de l’ouverture<br />
d’installation.<br />
● Ne jamais forcer quand vous installez une carte de circuits. Si la carte ne<br />
rentre pas correctement, ressortez-la et ressayez.<br />
● Quand la carte est installée, vérifiez si l’installation est correcte.<br />
Quand vous faites jouer un<br />
morceau ou un ensemble<br />
rythmique qui utilise des<br />
données Wave de la carte<br />
d’extension, une carte<br />
d’extension appropriée doit<br />
être installée dans le XP-30<br />
afin que le son sorte<br />
correctement.<br />
Pour installer une carte d’extension Wave optionnelle (série SR-JV80), le<br />
panneau du bas de l’appareil doit être enlevé. Vous trouverez 2 créneaux<br />
(EXP-D et E) dans lesquels vous pourrez installer une carte. Les créneaux<br />
EXP-D et E correspondent au groupe (XP-D et E) que vous devez<br />
sélectionner pour pouvoir utiliser une donnée Wave, un morceau musical<br />
ou un ensemble rythmique de la carte d’extension.<br />
20
Getting Ready<br />
1<br />
Éteindre le XP-30 et tous les appareils qui y sont reliés et<br />
débrancher tous les câbles du XP-30.<br />
2<br />
Retournez le XP-30 et enlevez seulement les vis indiquées sur<br />
la figure.<br />
fig.Q-02a.f<br />
Vis à enlever<br />
Si la même sorte de carte<br />
d’extension Wave est<br />
installée dans les créneaux<br />
EXP-D et EXP-E, il ne sera<br />
possible de sélectionner<br />
que les données de la carte<br />
d’extension Wave installée<br />
dans le créneau EXP-D. De<br />
plus, le XP-30 contient déjà<br />
les données des 3 cartes<br />
d’extension Wave<br />
suivantes si bien que si une<br />
de ces 3 cartes est installée,<br />
seules les données internes<br />
(XP-A–C) pourront être<br />
sélectionnées.<br />
SR-JV80-09 “Session”<br />
(XP-A)<br />
SR-JV80-02 “Orchestral”<br />
(XP-B)<br />
SR-JV80-11 “Techno<br />
Collection” (XP-C)<br />
Quick Start<br />
3<br />
À l’intérieur, il y a 2 connecteurs et 6 supports à carte. Insérer<br />
les connecteurs de la carte d’extension Wave dans les<br />
connecteurs internes tout en insérant simultanément les<br />
supports à carte dans les trous de celle-ci.<br />
fig.Q-02b.f<br />
Carte d'extension Wave<br />
Support à carte<br />
Connecteur<br />
EXP E<br />
EXP D<br />
21
Getting Ready<br />
4<br />
Pour tourner les supports en position LOCK (verrouillé),<br />
utilisez l’outil d’installation de la carte d’extension fournie à<br />
cet effet. De cette façon, la carte sera bien fixée à sa place.<br />
fig.Q-02c.f<br />
Outil d'installation<br />
LOCK<br />
5<br />
Reposez le couvercle en remettant les vis enlevées (comme<br />
spécifié) à l’étape 2.<br />
L’installation de la carte d’extension Wave est terminée.<br />
6<br />
Rabranchez les câbles.<br />
7<br />
Mettez le XP-30 sous tension en procédant comme indiqué<br />
dans “Turning On the Power” (p. 26).<br />
8<br />
Appuyer sur [PATCH] pour accéder à la page PATCH PLAY.<br />
fig.Q-03<br />
22
Getting Ready<br />
9<br />
Appuyer sur [EXP D] ou [EXP E] et vérifier si vous pouvez<br />
sélectionner les morceaux musicaux des cartes d’extension<br />
Wave D ou E. L’indicateur [EXP D] ou [EXP E] s’allumera et<br />
l’affichage suivant apparaîtra.<br />
Quick Start<br />
fig.Q-04<br />
Ceci est un exemple<br />
d’affichage lorsque la carte<br />
d’extension Wave SR-JV80-<br />
13 “Vocal Collection” est<br />
installée dans le créneau<br />
EXP-D.<br />
Si vous ne pouvez choisir<br />
aucun des morceaux<br />
musicaux de la carte<br />
d’extension Wave, il est<br />
possible que la carte<br />
installée ne soit pas<br />
reconnue correctement.<br />
Éteignez l’appareil comme<br />
indiqué dans “Turning<br />
Off the Power” (p. 26) et<br />
réinstaller la carte<br />
correctement.<br />
23
Getting Ready<br />
Making Connections<br />
fig.Q-05.e<br />
The XP-30 does not contain an amp or speakers. In order to hear sound, you<br />
will need to connect it to a keyboard amp, audio system, or headphones.<br />
Refer to the following diagram and connect the XP-30 to the external<br />
equipment you are using.<br />
to Power outlet<br />
External MIDI device<br />
<strong>Roland</strong><br />
Stereo headphones<br />
Pedal switch<br />
Expression pedal (EV-5) or pedal switch<br />
Stereo set, etc.<br />
Speaker with built-in amp,<br />
keyboard amp, etc.<br />
1<br />
Before you make connections, make sure that power is turned<br />
off for all devices.<br />
To prevent malfunction<br />
and/or damage to speakers<br />
or other devices, always<br />
turn down the volume, and<br />
turn off the power on all<br />
devices before making any<br />
connections.<br />
24
Getting Ready<br />
2<br />
Connect supplied AC power cable to the XP-30, and plug the<br />
other end into an AC power outlet.<br />
On 117V models the AC<br />
cable is permanently<br />
attached to the unit.<br />
Quick Start<br />
3<br />
Connect audio cables and MIDI cables as shown in the<br />
diagram. If you are using headphones, plug them into the<br />
PHONES jack. Connect pedal switches or expression pedals as<br />
necessary.<br />
In order to take full<br />
advantage of the XP-30’s<br />
performance, we<br />
recommend using a stereo<br />
amp/speaker system, If<br />
you are using a mono<br />
system, make you<br />
connections to the<br />
OUTPUT jack L (MONO).<br />
CONTROL PEDAL jack<br />
can also accommodate<br />
pedal switches.<br />
Use only the specified<br />
expression pedal (EV-5;<br />
sold separately). By<br />
connecting any other<br />
expression pedals, you risk<br />
causing malfunction and/<br />
or damage to the unit.<br />
For information on making<br />
the connection with the<br />
computer, take a look at<br />
“Connecting to Your<br />
Computer” (p. 134).<br />
25
Getting Ready<br />
Turning On the Power<br />
1<br />
Before you turn the power on, check to make sure that:<br />
• All external devices are correctly connected to the XP-30.<br />
• The volume controls of the XP-30 and the amp/mixer system are turned<br />
down all the way.<br />
2<br />
Turn on the power switch located on the rear panel of the XP-<br />
30.<br />
fig.Q-06<br />
Once the connections have<br />
been completed (p. 24),<br />
turn on power to your<br />
various devices in the order<br />
specified. By turning on<br />
devices in the wrong order,<br />
you risk causing<br />
malfunction and/or<br />
damage to speakers and<br />
other devices.<br />
3<br />
Turn the power on of your amp or audio system.<br />
This unit is equipped with<br />
a protection circuit. A brief<br />
interval (a few seconds)<br />
after power up is required<br />
before the unit will operate<br />
normally.<br />
4<br />
Play the XP-30 and gradually raise the volume controls of the<br />
XP-30, your amp or mixer to an appropriate volume level.<br />
fig.Q-07<br />
Be careful not to raise the<br />
VOLUME slider of the XP-<br />
30 too much. Excessive<br />
volume may damage your<br />
amp/speaker system or<br />
could cause hearing<br />
■ Turning Off the Power<br />
1<br />
Before you turn power off, check to make sure that:<br />
• The volume controls of the XP-30 and the amp/mixer system are turned<br />
down all the way.<br />
• Important data has been saved to a memory card (p. 122).<br />
2<br />
Turn off your amp/mixer system.<br />
3<br />
Turn off the XP-30 power.<br />
26
Getting Ready<br />
Reset to Default Factory Settings<br />
(Factory Reset)<br />
Before using XP-30 for the first time, reset it to its default factory settings<br />
using Factory Reset. Different settings may result in unexpected effects.<br />
Quick Start<br />
fig.Q-08<br />
1 2 3 4<br />
1<br />
Press [UTIL/CARD] to make the indicator blink.<br />
fig.Q-09<br />
The UTIL 1 display will appear.<br />
2<br />
Press [ ].<br />
The UTIL 2 display will appear.<br />
Factory Reset operation<br />
resets all data in the<br />
internal memory and user<br />
memory to factory presets.<br />
Save any important data to<br />
a memory card before<br />
executing this operation (p.<br />
122).<br />
fig.Q-09a<br />
3<br />
Press the numeric key [4].<br />
fig.Q-10<br />
The FACTORY RESET display will appear.<br />
4<br />
Press [ENTER].<br />
If “Internal Write Protect= ON” message is displayed, press [DEC] to turn<br />
the setting OFF. After pressing [ENTER] to clear the message, press<br />
[ENTER] again to reset to the factory preset settings.<br />
For more information<br />
about the Internal Write<br />
Protect, please refer to<br />
“Preventing User<br />
Memory Writing<br />
Operation (PROTECT)”<br />
(p. 121).<br />
27
Listening to the Demo Song<br />
The XP-30 contains 9 demo songs and you use Demo Play to play it. It’s the<br />
easiest introduction to the XP-30’s exceptional sounds and effects.<br />
Demo Song<br />
TRANSFERENCE<br />
CHANTERELLE<br />
VECTORIAL<br />
All In Good Time<br />
TEKKNO MILLENNIUM<br />
A Shadow’s March<br />
Guitars Forever<br />
Rude99<br />
Overtime<br />
Composer/Copyright<br />
Scott Tibbs © 1999 <strong>Roland</strong> Corporation<br />
Scott Tibbs © 1999 <strong>Roland</strong> Corporation<br />
Scott Tibbs © 1999 <strong>Roland</strong> Corporation<br />
Scott Wilkie © 1999 Scott Wilkie Media (ASCAP)<br />
MASA © 1999 COPYRIGHT CONTROL<br />
Steve Lu © 1999 Stephen Lu<br />
Gundy Keller © 1999 Gundy Keller / A-TOWN recordings<br />
Hans-Joerg Scheffler © 1999 Hans Scheffler<br />
Hans-Joerg Scheffler © 1999 Hans Scheffler<br />
All rights reserved.<br />
Unauthorized use of this<br />
material for purposes other<br />
than private, personal<br />
enjoyment is a violation of<br />
applicable laws.<br />
fig.Q-11<br />
4<br />
2<br />
1 3<br />
1<br />
Hold down [SHIFT] and press [CATEGORY].<br />
fig.Q-12<br />
The DEMO PLAY display will appear.<br />
2<br />
Turn the VALUE dial or press [INC]/[DEC] to select the song<br />
that you wish to hear.<br />
If you select “CHAIN-PLAY,” the songs will playback successively,<br />
beginning from the first.<br />
3<br />
Press [ENTER] to start demo song playback.<br />
fig.Q-13<br />
When a demo song plays all the way to the end, it automatically returns to<br />
the start of the song, and playback is repeated. To interrupt playback, press<br />
[EXIT].<br />
No data for the music that<br />
is played will be output<br />
from MIDI OUT.<br />
4<br />
To return to the previous display, press [EXIT].<br />
28
Listening to the Demo Song<br />
■ Profile of the Composer<br />
Scott Tibbs<br />
Scott Tibbs has performed and conducted for several orchestral groups, including the Atlanta Symphony<br />
Orchestra, throughout the United States, Canada, Latin America, and Japan. His diverse compositional output<br />
ranges from numerous film, theater and television projects to the symphonic concert stage. For the past four years,<br />
he has been teaching music composition and theory at UCLA where he has received a Ph.D. degree in composition.<br />
He has performed with well-known artists Dizzy Gillespie, Bill Cosby, Jerry Sienfeld, and Bobby Shew, amongst<br />
numerous others.<br />
Quick Start<br />
Gundy Keller<br />
Steve Lu<br />
Scott Wilkie<br />
Gundy Keller, a Germany-based guitarist, songwriter and producer, has been an international demonstrator for<br />
<strong>Roland</strong> since 1986. Gundy focuses mainly on the GR synthesizers and the V-Guitar, for international music<br />
conventions as well as recording sessions requesting completely unusual guitar sounds. Besides creating his own<br />
production company, he’s the founder and director of Rocksound Music School, a private institute for music<br />
instruction. Check out some of his other work on the <strong>Roland</strong> VG-8 Demo CD, or the <strong>Roland</strong> GR-30 Video.<br />
Steve Lu is a recent graduate of Berklee College of Music, majoring in Music Production & Engineering. His recent<br />
musical efforts include a soundtrack album, featuring synthesized re-creations of movie themes such as “Titanic”<br />
and “The Rock,” as well as production and arrangements for saxophonist Jimmy Reid’s self-titled album. He is<br />
currently working with artists Brandy and Ray-J on future projects.<br />
Scott Wilkie is a contemporary jazz recording artist, based in southern California. He tours frequently with his own<br />
band, and also appears as an artist for <strong>Roland</strong> in the U.S., Japan, Europe and South America. His debut solo album,<br />
Boundless, was released worldwide in 1999 on Narada/Virgin Records. You can find him on-line at<br />
www.scottwilkie.com.<br />
Hans-Joerg Scheffler<br />
MASA<br />
Born and raised in the Ruhr valley, the biggest industrial area in Germany, Hans’s attraction to noise and rhythm<br />
came naturally.<br />
Today he runs his own company, DIGITAL AUDIO DESIGN, which produces sampling CDs and CD ROMs.<br />
He works for <strong>Roland</strong> as a pro audio product specialist, as a sound designer for expansion boards, and as a<br />
composer of demo songs. He has released several CDs that use the <strong>Roland</strong> RSS system.<br />
Soundclips of his work can be downloaded at: http://www.united-sound.com/usmaster/cell2downde.htm<br />
Masa has performed live, mainly at psychedelic-trance parties since the early 90’s.<br />
In the spring of 1996, he released the album “Just Inside” from East-West. Interest in his work is increasing, and<br />
new releases are appearing under a variety of labels, including Tokyo Tekno Tribe Records and Psy-Harmonics.<br />
Web site: www.ifnet.or.jp/~masa-k/<br />
29
Playing the Sounds<br />
Selecting Patches and Playing the Sounds<br />
fig.Q-14<br />
The XP-30 contains a large number of sounds ready for you to play. The<br />
sounds that you select and play on the XP-30 are generally called Patches.<br />
Here’s how to select and play Patches.<br />
1 3 4<br />
1<br />
Press [PATCH] to make the indicator light.<br />
fig.Q-15<br />
The PATCH PLAY display will appear.<br />
2<br />
Play the keyboard and listen to the sound.<br />
3<br />
To select a different Patch, turn the VALUE dial or press<br />
[INC]/[DEC].<br />
4<br />
To change the Patch Group, hold down [SHIFT] and press any<br />
key from [1] through [6] on the numeric keypad.<br />
By using the Phrase<br />
Preview function, you can<br />
audition patches by<br />
listening to a preset phrase<br />
suitable for the selected<br />
type of patch (p. 33).<br />
[SHIFT] + [1]: PR-A (Preset A)<br />
[SHIFT] + [2]: PR-B (Preset B)<br />
[SHIFT] + [3]: PR-C (Preset C)<br />
[SHIFT] + [4]: PR-D (GM (General MIDI))<br />
[SHIFT] + [5]: PR-E (Preset E)<br />
[SHIFT] + [6]: USER (User)<br />
30
Playing the Sounds<br />
Selecting Wave Expansion Patches<br />
The XP-30 contains the patches of the following popular Wave Expansion<br />
Boards:<br />
• SR-JV80-09 “Session”<br />
• SR-JV80-02 “Orchestral”<br />
• SR-JV80-11 “Techno Collection”<br />
Quick Start<br />
Here’s how to select and play these patches.<br />
fig.Q-16<br />
1 4 2<br />
1<br />
Press [PATCH] to make the indicator light.<br />
fig.Q-15<br />
The PATCH PLAY display will appear.<br />
2<br />
Press [EXP A]–[EXP C] to select the Wave Expansion Patch<br />
that you wish to hear.<br />
[EXP A]: “Session”<br />
[EXP B]: “Orchestral”<br />
[EXP C]: “Techno Collection”<br />
fig.Q-17<br />
When a Wave Expansion<br />
Board of the SR-JV80 series<br />
(sold separately) is<br />
installed in the EXP-D or<br />
EXP-E Wave Expansion<br />
Board slot, you can press<br />
[EXP D] or [EXP E] to<br />
choose the corresponding<br />
patches.<br />
3<br />
Play the keyboard and listen to the sound.<br />
4<br />
To select a different Patch, turn the VALUE dial or press<br />
[INC]/[DEC].<br />
By using the Phrase<br />
Preview function, you can<br />
audition patches by<br />
listening to a preset phrase<br />
suitable for the selected<br />
type of patch (p. 33).<br />
31
Playing the Sounds<br />
Selecting Patches by Category<br />
(Patch Search Function)<br />
fig.Q-18<br />
The JV-2080 provides a Patch Search Function that allows you to quickly<br />
find Patches of the specified type (Category). The 38 categories are<br />
organized into 10 groups.<br />
Here’s an example of how to find organ-type Patches.<br />
1 5 2,6 3 4<br />
1<br />
Press [PATCH] to make the indicator light.<br />
fig.Q-15<br />
The PATCH PLAY display will appear.<br />
2<br />
Press [CATEGORY] to make the indicator light.<br />
fig.Q-19<br />
The Patch Search function will be turned on, and the patch number display<br />
will change to the category display.<br />
Now you can select patches<br />
within the specified<br />
category, either by rotating<br />
the VALUE dial, or by<br />
using [INC] or [DEC]. To<br />
change the category group,<br />
use the numeric keys.<br />
3<br />
Select the category. Hold down [CATEGORY] and press [2<br />
(KEY&ORG)].<br />
fig.Q-20<br />
4<br />
For this example, select the Organ category (ORG) by pressing<br />
numeric key [4].<br />
Organ-type patches can now be selected.<br />
For details on the<br />
categories you can select,<br />
refer to page 49.<br />
32
Playing the Sounds<br />
5<br />
Turn the VALUE dial or press [INC]/[DEC] to select a patch.<br />
6<br />
Press [CATEGORY] to make the indicator go dark.<br />
The Patch Search function will be turned off, and the normal PATCH PLAY<br />
display will reappear.<br />
By using the Phrase<br />
Preview function, you can<br />
audition patches by<br />
listening to a preset phrase<br />
suitable for the selected<br />
type of patch (p. 33).<br />
Quick Start<br />
Auditioning the Patches (Phrase Preview)<br />
fig.Q-21<br />
The XP-30 allows you to preview Patches by hearing a phrase appropriate<br />
for each type of Patch.<br />
1 2,3<br />
1<br />
Press [PATCH] to make the indicator light.<br />
fig.Q-15<br />
The PATCH PLAY display will appear.<br />
2<br />
Press and hold [PHRASE PREVIEW].<br />
If the factory settings have just been restored, the USER: 001 Temple of XP<br />
Patch will sound.<br />
3<br />
Release your finger from [PHRASE PREVIEW], and the phrase<br />
will stop playing.<br />
You can change the phrase<br />
that is played by the Phrase<br />
Preview, and modify the<br />
way in which the phrase is<br />
played. For details, refer to<br />
“Using Phrase Preview<br />
to Play Patches” (p. 49),<br />
and “Phrase Preview<br />
Settings (PREVIEW)”<br />
(p. 113).<br />
33
Playing the Sounds<br />
Try Out Performance Functions<br />
The XP-30 provides various controllers that can modify the sound. While<br />
playing patches, try out these controllers and listen to effects they can<br />
produce.<br />
■ Velocity/Aftertouch<br />
The force with which you play the keyboard (velocity) can affect the volume<br />
or timbre of the sound. Aftertouch (pressure you apply to a key after playing<br />
a note) can also affect the sound.<br />
The effect that the<br />
controllers have will<br />
depend on the settings of<br />
the selected Patch. If the<br />
effects of the controllers are<br />
difficult to detect, select<br />
another Patch.<br />
■ Pitch Bend/Modulation Lever<br />
fig.Q-22.e<br />
While playing the keyboard, move the lever to the left to lower the pitch, or<br />
to the right to raise the pitch. This is known as Pitch Bend. You can also<br />
apply vibrato by manipulating the lever away from you. This is known as<br />
Modulation.<br />
If you move the lever away from you and at the same time move it to the<br />
right or left, you can apply both effects simultaneously.<br />
Modulation<br />
Pitch Bend<br />
■ C1–C4 Slider<br />
fig.Q-23<br />
By moving the sliders up and down while fingering the keyboard, you can<br />
control the various functions assigned to the sliders.<br />
To control them, press [CONTROLLER] to make the indicators light up,<br />
then move the sliders.<br />
Additionally, if you hold down [CONTROLLER] while moving one of the<br />
C1–C4 sliders, you can go to the ASSIGN display for that slider. There you<br />
can check and make settings for the function that is to be controlled with the<br />
slider. Make changes in the settings while holding down [CONTROLLER].<br />
At the factory default<br />
settings, you can use the C1<br />
through C4 sliders to<br />
control the functions<br />
described below.<br />
C1: AFTERTAUCH<br />
C2: BREATH<br />
C3: PORTA-TIME<br />
(Portamento time)<br />
C4: MODULATION<br />
How sound varies depends<br />
on the current setting. For<br />
details, refer to “C1/C2/<br />
C3/C4 ASSIGN (C1/C2/<br />
C3/C4 Slider Assign)”<br />
(p. 111).<br />
34
Playing the Sounds<br />
■ Hold Pedal<br />
If an optional pedal switch is connected to the rear panel HOLD PEDAL<br />
jack, pressing the pedal switch will sustain (hold) the sound even if the keys<br />
are released.<br />
■ Expression Pedal<br />
■ Solo<br />
If an optional expression pedal is connected to any of the rear panel<br />
CONTROL PEDAL jack, you can use the pedal to control the volume or<br />
timbre of sound.<br />
You can play using single notes, by pressing [SOLO] (indicator lights). This<br />
function is especially effective when playing a sax, flute or other<br />
monophonic instrument.<br />
Using [PORTAMENTO] with [SOLO] ON allows you to simulate<br />
performance techniques like violin glissandos.<br />
How sound varies depends<br />
on the current setting. For<br />
details, refer to “CONTROL<br />
PEDAL” (p. 110).<br />
Quick Start<br />
fig.Q-24<br />
For details, refer to<br />
“Playing Single Notes<br />
(Solo)” (p. 50).<br />
■ Portamento<br />
fig.Q-25<br />
As you play the keyboard, you can make pitch slide smoothly from one key<br />
to another, by pressing [PORTAMENTO] (indicator lights).<br />
For details, refer to<br />
“Creating Smooth<br />
Pitch Changes<br />
(Portamento)” (p. 50).<br />
35
Playing the Sounds<br />
■ Sound Palette<br />
fig.Q-26<br />
While playing the keyboard, you can move the sliders up or down to modify<br />
volume level or sound character.<br />
To change sound character, press [FILTER/ENV] to light the indicator and<br />
move the sliders.<br />
To change the volume level, press [LEVEL] to light the indicator and move<br />
the sliders.<br />
For details, refer to “Using<br />
the Sliders to Modify<br />
the Sound in Realtime<br />
(Sound Palette<br />
Function)” (p. 50, 54).<br />
Play Arpeggios (Arpeggiator)<br />
fig.Q-27<br />
You can play a broken chord (arpeggio) automatically, by simply pressing a<br />
chord. For example, if you press a C major chord, the XP-30 plays an<br />
arpeggio such as C → E → G → C → E → G...<br />
6 2,4,5,7<br />
1<br />
5<br />
1<br />
Press [PATCH] to make the indicator light.<br />
fig.Q-15<br />
The PATCH PLAY display will appear.<br />
2<br />
Press [ARPEGGIO] to make the indicator light.<br />
36
Playing the Sounds<br />
3<br />
Play a chord.<br />
XP-30 will play an arpeggio, according to the notes forming the chord you<br />
have just voiced.<br />
Quick Start<br />
4<br />
Continue holding down [ARPEGGIO], and the ARP SELECT<br />
display will appear.<br />
fig.Q-28<br />
In this page you can change the Style, Accent Rate, Octave Range and<br />
Tempo of the arpeggio. Here’s how to change the Style.<br />
5<br />
Hold down [ARPEGGIO], and press [ ] or [ ] to move the<br />
cursor (underline) to the Style parameter. Then rotate the<br />
VALUE dial to select various settings.<br />
Depending on the value you enter, the way arpeggios play will vary.<br />
For details regarding<br />
playing arpeggios, refer to<br />
“Playing an Arpeggio”<br />
(p. 56) and “Arpeggio<br />
Settings (ARPEGGIO)”<br />
(p. 108).<br />
6<br />
Hold down [ARPEGGIO] and press [TRANSPOSE]. The<br />
[ARPEGGIO] indicator will begin blinking, and the arpeggio<br />
will continue sounding even after you take your hand off the<br />
keyboard (Hold).<br />
To stop the arpeggio from being sounded by the Hold function, hold down<br />
[ARPEGGIO] again and press [TRANSPOSE]. The indicator changes from<br />
blinking to lit.<br />
7<br />
To finish playing arpeggios, press [ARPEGGIO] again so the<br />
indicator turns off.<br />
37
Playing the Sounds<br />
Play Percussion Sounds from the Keyboard<br />
fig.Q-29<br />
The XP-30’s Rhythm Sets contain a wide variety of percussion sounds and<br />
special effects. Here’s how to select a Rhythm Set and play percussion<br />
sounds.<br />
1<br />
3<br />
1<br />
Press [RHYTHM] to make the indicator light.<br />
fig.Q-30<br />
The RHYTHM PLAY display will appear.<br />
2<br />
Press different keys to play different percussion instruments.<br />
The display will indicate the last-pressed key (Note name) and the<br />
percussion instrument name (Rhythm Tone name) assigned to that key.<br />
3<br />
To select another Rhythm Set, turn the VALUE dial or press<br />
The percussion instrument<br />
played by each key will<br />
depend on the selected<br />
Rhythm Set. For details,<br />
refer to “Rhythm Set<br />
List” (p. 177).<br />
[INC]/[DEC].<br />
38
Chapter 2<br />
Chapter 1<br />
Advanced Use<br />
Chapter 6<br />
Chapter 3<br />
Chapter 5<br />
Chapter 4<br />
39
Chapter 1. Overview of the XP-30<br />
XP-30 Configuration<br />
■ Basic Configuration<br />
The XP-30 consists of a sound source and controllers.<br />
fig.1-01.e<br />
Sound source<br />
section<br />
Play<br />
■ Classification of XP-30 Sound<br />
Types<br />
XP-30 sounds are made up of the following types:<br />
Tones<br />
In the XP-30, the Tone is the smallest class of sound. Each<br />
Tone consists of one sound. But when you play the XP-30<br />
you will mostly play a Patch, which is made up of several<br />
Tones. Tones therefore are the elements which collectively<br />
form a Patch.<br />
Tone configuration:<br />
fig.1-02.e<br />
Tone<br />
LFO 1 LFO 2<br />
Controller section (controllers such as<br />
keyboard, pitch bend lever, etc.)<br />
Sound Source<br />
The XP-30 sound source produces sound by responding to<br />
WG<br />
TVF<br />
TVA<br />
commands in the form of MIDI messages received from its<br />
controllers. It will also produce sound by responding to<br />
commands received from various external devices it can be<br />
Pitch<br />
Envelope<br />
TVF<br />
Envelope<br />
TVA<br />
Envelope<br />
connected to.<br />
Controllers<br />
Controllers include the keyboard, front panel sliders and<br />
pedals which are connected to their respective rear panel<br />
jacks. Adjusting these controllers enable you to produce or<br />
modify sound.<br />
audio signal control signal<br />
WG (Wave Generator)<br />
Using the Wave Generator, you select a waveform and set its<br />
pitch.<br />
TVF (Time Variant Filter)<br />
With the Time Variant Filter, you modify the waveform’s<br />
frequency characteristics.<br />
TVA (Time Variant Amplifier)<br />
With the Time Variant Amplifier, you set volume level and<br />
set the sound’s position in a stereo soundfield.<br />
Envelope<br />
You use Envelope to initiate changes to occur to a sound over<br />
time. There are separate Envelopes for the WG (pitch), TVF<br />
(filter) and TVA (volume). For example, to modify a sound’s<br />
attack and decay time, you would use TVA Envelope to<br />
adjust volume changes to the sound over time.<br />
LFO (Low Frequency Oscillator)<br />
Use the LFO to create cyclic changes (modulation) in a<br />
sound. The XP-30 has two LFOs. Either one or both can be<br />
applied to effect the WG (pitch), TVF (filter) and/or TVA<br />
(volume). To illustrate this control’s action, you can apply an<br />
LFO to modify the WG (pitch) to create vibrato. If the LFO is<br />
used to modify the TVA (volume), you’ll get tremolo.<br />
40
Chapter 1. Overview of the XP-30<br />
Patches<br />
Patches are the basic sound configurations that you play<br />
during a performance. Each Patch can be configured by<br />
combining up to four Tones. How the four Tones are<br />
combined is determined on the STRUCT display (PATCH/<br />
COMMON).<br />
fig.1-03.e<br />
Patch<br />
Tone 4<br />
Tone 3<br />
Tone 2<br />
Tone 1<br />
LFO 1 LFO 2<br />
Rhythm Sets<br />
A Rhythm Set is a grouping of percussion instruments<br />
(Rhythm Tones). Since percussion instruments generally do<br />
not play melodies, there is no need for a percussion<br />
instrument sound to be able to play a scale on the keyboard.<br />
It is however, more important that as many as possible<br />
percussion instruments be available to you at the same time.<br />
Therefore, each key (Note number) of a Rhythm Set will<br />
produce a different percussion instrument.<br />
fig.1-05.e<br />
Rhythm Set<br />
Note Number 98 (D7)<br />
Note Number 97 (C#7)<br />
Chapter 1<br />
Note Number 36 (C2)<br />
Note Number 35 (B1)<br />
Rhythm Tone (Percussion instrument sound)<br />
WG<br />
TVF<br />
TVA<br />
WG<br />
Pitch<br />
Envelope<br />
TVF<br />
TVF<br />
Envelope<br />
TVA<br />
TVA<br />
Envelope<br />
Performances<br />
The next level in sound configuration. A single Performance<br />
groups 15 Patches and one Rhythm Set so that they can be<br />
combined to play ensembles or produce fabulously rich,<br />
thick sounds. One Performance allows a single XP-30 to<br />
control up to 16 instrument sounds. Because the XP-30 sound<br />
source can control multiple sounds (instruments) it is called a<br />
“multitimbral sound source.”<br />
fig.1-04.e<br />
Pitch<br />
Envelope<br />
TVF<br />
Envelope<br />
TVA<br />
Envelope<br />
Parts<br />
When the XP-30 is used as a multitimbral sound source,<br />
another sound configuration called a Part comes into play. A<br />
Part contains a Patch or Rhythm Set. For multitimbral<br />
applications, the Performance consists of 16 Parts. A specific<br />
Patch can be assigned to each Part except Part 10 because<br />
Part 10 is universally set as the Drum Part to which a Rhythm<br />
Set (discussed above) is assigned. In a multitimbral context, it<br />
helps to think of a Performance as an orchestra, each Part in<br />
it being a musician, and the Patch or Rhythm Set that<br />
musician’s instrument.<br />
Performance<br />
Part 16 (MIDI receive ch.)<br />
Part 11 (MIDI receive ch.)<br />
Patch<br />
For details regarding following items, please refer to each<br />
corresponding page.<br />
About the Memory (p. 67)<br />
About the Effects (p. 61)<br />
Keyboard,<br />
MIDI<br />
Part 10 (MIDI receive ch.)<br />
Rhythm Set<br />
Sound<br />
Part 9 (MIDI receive ch.)<br />
Part 1 (MIDI receive ch.)<br />
Patch<br />
41
Chapter 1. Overview of the XP-30<br />
■ Number of Simultaneous Voices<br />
The XP-30 is able to produce up to 64 voices simultaneously.<br />
The following paragraphs discuss what this means, and what<br />
will happen when more than 64 simultaneous voices are<br />
requested from the XP-30.<br />
Calculating the Number of Voices<br />
Being Used<br />
The XP-30 is able to produce up to 64 simultaneous voices.<br />
However this number is not simply the number of notes<br />
being played, but depends on the number of Tones used in<br />
each Patch. If you are playing one Patch which uses 4 Tones,<br />
you will be able to play 16 simultaneous notes. If you are<br />
using the XP-30 in Performance mode to play an ensemble,<br />
count the total number of Tones used by all the Parts using<br />
the following formula.<br />
(currently sounding notes) x (number of Tones used in the<br />
Patch being played)<br />
How a Patch Uses Notes<br />
When the XP-30 is requested to play more than 64 voices<br />
simultaneously, a currently-sounding note will be turned off<br />
to make room for the newly requested note. The note with<br />
the lowest priority will be turned off first. The order of<br />
priority is determined by the Voice Priority setting.<br />
Voice Priority can be set either to Last or Loudest. When Last<br />
is selected, a newly requested note that exceeds the 64 voice<br />
limit will cause the first-played of the currently sounding<br />
notes to be turned off. When Loudest is selected, the quietest<br />
of the currently sounding notes will be turned off.<br />
Normally you will set Voice Priority to Last.<br />
Note Priority in Performance Mode<br />
Since Performance mode is usually used to play an ensemble<br />
consisting of several Patches, it is important to decide which Parts<br />
take priority. Priority is specified by the Voice Reserve settings.<br />
When a note within a Patch needs to be turned off to make room<br />
for a new note, the Voice Priority setting of the Patch will apply.<br />
Voice Reserve<br />
The XP-30 has a Voice Reserve function that lets you reserve<br />
a minimum number of notes that will always be available for<br />
each Part. For example if Voice Reserve is set to 10 for Part<br />
16, Part 16 will always have 10 notes of sound-producing<br />
capacity available to it even if a total of more than 64 notes<br />
(total for all Parts) are being requested. When you make<br />
Voice Reserve settings, you need to take into account the<br />
number of notes you want to play on each Part as well as the<br />
number of Tones used by the selected Patch.<br />
* It is not possible to make Voice Reserve settings that would<br />
cause the total of all Parts to be greater than 64 voices.<br />
Basic Operation<br />
■ Switching Modes<br />
The XP-30 contains a large number of functions. In order to<br />
organize these functions for easy access, they are grouped<br />
into the following modes. The mode that is selected will<br />
affect the way in which the sound source operates, how data<br />
is shown in the display, and how the function buttons work.<br />
Use the Mode buttons to select the mode. The indicator of the<br />
selected button will light/blink, and the display will change<br />
according to the selected mode.<br />
fig.1-06<br />
Sound Source<br />
Selecting Patch mode, Performance mode, Rhythm Set mode,<br />
and GM mode will determine sound source operation. One<br />
mode always has to be selected.<br />
Patch Mode<br />
In this mode, you can play an individual Patch from the<br />
keyboard or modify Patch settings. If you’re using an<br />
external MIDI device to control the XP-30 in this mode, it will<br />
function as a single-patch sound source.<br />
Performance Mode<br />
This mode makes the XP-30 function as a multitimbral sound<br />
source, and Performance settings can be modified. If you’re<br />
using an external MIDI device to control the XP-30 in this<br />
mode, it will function as a multitimbral sound source.<br />
To modify the settings of a Patch that’s assigned to a Part,<br />
hold down [PERFORM] and press [PATCH]. Both button<br />
indicators will light.<br />
Rhythm Set Mode<br />
This is how you can play a Rhythm Set from the keyboard<br />
and modify the Rhythm Set settings. In this mode, the<br />
keyboard will play the Rhythm Set, but the XP-30 continues<br />
to function as a multitimbral sound source. So your effects<br />
settings of the currently selected Performance will be heard<br />
as you play the Rhythm Set. Rhythm Sets are assigned to Part<br />
10 of the Performance. If you’re using an external MIDI<br />
device to control the XP-30 in this mode, it will still function<br />
as a multitimbral sound source.<br />
42
Chapter 1. Overview of the XP-30<br />
GM Mode<br />
This special mode makes the XP-30 function as a GM<br />
compatible sound source. You should select this mode when<br />
you want to play back a GM score (music files created for<br />
GM sound source).<br />
To set GM mode, hold down [SHIFT] and press [PERFORM].<br />
[PERFORM], [PATCH] and [RHYTHM] indicators will not<br />
light.<br />
■ About the Function Buttons<br />
Function buttons are buttons that perform a variety of<br />
functions. The function they perform will depend on the<br />
current mode, and on whether [EDIT] is on (lit) or off (dark).<br />
[EDIT] will turn on or off each time you press it.<br />
fig.1-07<br />
System Mode<br />
This mode is for determining global XP-30 settings such as<br />
tuning, display contrast and how MIDI messages are<br />
received.<br />
* Some System mode parameters relate to an entire Patch or an<br />
entire Performance. To set these parameters, press [SYSTEM]<br />
in the selected mode (Patch or Performance).<br />
Utility/Card Mode<br />
Here you can save and transmit settings for the sound<br />
generator, and make settings related to memory cards.<br />
* [EDIT] switches the function of the function buttons, but<br />
pressing [EDIT] will not make the display change. If you wish<br />
to modify a setting, press the [EDIT] to make the indicator light,<br />
and then press a function button to select the display group and<br />
switch the display. When you finish making settings, press<br />
[EXIT] or a mode button to switch the display.<br />
In Performance Mode<br />
([EDIT] Indicator is Dark)<br />
fig.1-08<br />
Chapter 1<br />
* Some Utility/Card mode parameters relate to an entire Patch,<br />
Performance or Rhythm Set. To set these parameters, press<br />
[UTIL/CARD] in the selected mode (Patch, Performance or<br />
Rhythm Set).<br />
The function buttons will act as Part buttons ([PART]) that<br />
switch Parts on (lit) or off (dark). Since 16 Parts are being<br />
controlled using only 8 buttons, use [1-8/9-16] to select<br />
which set of Parts you are controlling. When [1-8/9-16]<br />
indicator is dark, you can switch Parts 1–8 on/off. When it is<br />
lit, you can switch Parts 9–16 on/off.<br />
If the [EDIT] indicator is turned off in the Part setting<br />
display, the function buttons will act as PART buttons that<br />
select the Part to be edited.<br />
* The function of the Part on/off setting will depend on the setting<br />
of the Key Mode parameter (PERFORM/COMMON/<br />
PERFORM COMMON) (p. 83).<br />
43
Chapter 1. Overview of the XP-30<br />
In Patch Mode ([EDIT] Indicator is Dark)<br />
fig.1-09<br />
■ About the Cursor Buttons<br />
The cursor buttons are used to move between display pages<br />
or to move the cursor.<br />
fig.1-12<br />
The function buttons will act as Tone Switch buttons ([TONE<br />
SWITCH]) and Tone Select buttons ([TONE SELECT]).<br />
[TONE SWITCH] allow you to turn each Tone in the Patch<br />
on (lit) or off (dark). When a Tone is turned on, it can be<br />
heard.<br />
Use [TONE SELECT] to select the Tone you wish to modify.<br />
To select a Tone to modify, turn off [EDIT] indicator in the<br />
Tone setting display. To select two or more Tones<br />
simultaneously, hold down one of [TONE SELECT] and<br />
press the other [TONE SELECT]. In this case, the numbers of<br />
Tones other than the first-selected Tone will be displayed as *<br />
symbols.<br />
In Rhythm Set Mode<br />
([EDIT] Indicator is Dark)<br />
fig.1-10<br />
The function buttons (TONE SELECT section) will select the<br />
key shown in the display.<br />
If the [EDIT] indicator is turned off in the Rhythm Set setting<br />
display (the setting display for individual keys), the function<br />
buttons will select the key to be edited.<br />
[TONE SELECT 1]: move to an octave lower key<br />
[TONE SELECT 2]: move to the semitone below<br />
[TONE SELECT 3]: move to the semitone above<br />
[TONE SELECT 4]: move to an octave higher key<br />
When [EDIT] Indicator is Lit<br />
Each mode contains a large number of settable items, and<br />
these items are organized into groups. When [EDIT]<br />
indicator is lit, the function buttons are used to select display<br />
groups. The displays that appear will depend on the current<br />
mode. The groups that can be selected in each mode are<br />
printed on the front panel above the buttons.<br />
fig.1-11<br />
Moving Between Display Pages<br />
The various displays are grouped by function button, and<br />
each group contains several display pages. Use the cursor<br />
buttons to move between these display pages and groups.<br />
Moving Between Pages<br />
An upward-pointing arrow ( ) shown in the display<br />
indicates that one or more pages exist before this page. A<br />
downward-pointing arrow ( ) shown in the display<br />
indicates that one or more pages exist after this page. Press<br />
[ ] to move to the previous page, or [ ] to move to the next<br />
page. Pressing [ ] while holding [SHIFT] will jump to the<br />
first page. Pressing [ ] while holding [SHIFT] will jump to<br />
the last page.<br />
fig.1-13<br />
Moving Between Groups<br />
From one of the Play displays, hold down [SHIFT] and press<br />
[ ] to access the left-most function button group display.<br />
In group displays that you select using the function buttons,<br />
you can hold down [SHIFT] and press [ ] to move to the<br />
group of the function button to the left, or hold down<br />
[SHIFT] and press [ ] to move to the group of the function<br />
button to the right.<br />
Whenever you are in any group display, you can move to<br />
another group even if [EDIT] indicator is dark. In other<br />
words, this procedure allows you to move to a different<br />
group without having to turn on [EDIT] indicator, and is a<br />
faster and more efficient way to get around.<br />
* For information on what the function buttons do in GM mode,<br />
please see “Chapter 5. Using the XP-30 as the GM Sound<br />
Module” (p. 124).<br />
44
Chapter 1. Overview of the XP-30<br />
Moving the Cursor (underline)<br />
When two or more items are shown in a single display page,<br />
move the cursor (underline) to the item whose value you<br />
wish to set. Press [ ] to move the cursor to the left, or [ ]<br />
to move it to the right.<br />
fig.1-14<br />
[0]–[9] (Numeric Keys)<br />
[0]–[9] (Numeric Keys) lets you directly specify a numerical<br />
value. When you enter the number, the value will blink. This<br />
indicates that the value has not yet been finalized. To finalize<br />
the value press the ENTER button. To reverse the sign of the<br />
number (+/-), hold down [SHIFT] and press [0].<br />
A symbol appearing in the upper right of the display<br />
indicates that there are other items in this page that the<br />
screen has no room to show. Press [ ] to see these items,<br />
and press [ ] to return to the previous display.<br />
fig.1-15<br />
* Some parameters do not require you to press [ENTER] to<br />
finalize the value.<br />
< Example 1: To enter a value of 38 ><br />
Press [3] → press [8] → press [ENTER]<br />
< Example 2: To enter a value of -60 ><br />
While holding down [SHIFT] press [0] → press [6] → press<br />
[0] → press [ENTER]<br />
Chapter 1<br />
■ Modifying a Value<br />
To modify a value, use the VALUE dial, [INC]/[DEC] or [0]–<br />
[9] (numeric keys).<br />
fig.1-16<br />
* Each parameter has a specific range, so you cannot set any value<br />
smaller than the minimum value or greater than the maximum<br />
value.<br />
VALUE Dial<br />
Rotating the VALUE dial clockwise increases the value,<br />
counterclockwise decreases the value. Holding down<br />
[SHIFT] as you move the VALUE dial increases value<br />
increments so you can make large value changes faster.<br />
[INC] and [DEC]<br />
Pressing [INC] increases the value, and [DEC] decreases it.<br />
Keep [INC] or [DEC] pressed for continuous adjustment. For<br />
faster value increases, keep [INC] pressed down and press<br />
[DEC]. For decreasing value faster, keep [DEC] pressed<br />
down and press [INC].<br />
If you press [INC] or [DEC] while holding down [SHIFT], the<br />
value increments will get bigger.<br />
* You can switch from a positive to negative numerical value<br />
anytime before you press [ENTER].<br />
Special Functions of the Numeric Keys<br />
You can use the numeric keys to specify non-numerical<br />
settings for some parameters.<br />
* For the procedure of using the Numeric Keys to enter the<br />
characters or symbols in a name, refer to “Assigning a<br />
Name” (p. 46).<br />
Performance/Patch/Rhythm Set Group<br />
In the PLAY displays of Performance mode/Patch mode/<br />
Rhythm Set mode, you can use the numeric keys to specify<br />
groups. To specify the group, hold down [SHIFT] and press<br />
numeric keys to specify groups.<br />
Buttons<br />
Group<br />
[SHIFT]+[1] PR-A (preset A)<br />
[SHIFT]+[2] PR-B (preset B)<br />
[SHIFT]+[3] PR-C (preset C)<br />
[SHIFT]+[4]<br />
PR-D (GM (General MIDI))<br />
[SHIFT]+[5] PR-E (preset E)<br />
[SHIFT]+[6]<br />
USER (user)<br />
Restoring a Previous Value (Undo)<br />
If you wish to restore a value to its immediate previous<br />
value, press [UNDO/COMPARE] to return the value to its<br />
pre-modified state.<br />
The Undo function can be used when modifying sound<br />
source settings.<br />
45
Chapter 1. Overview of the XP-30<br />
■ Assigning a Name<br />
The XP-30 lets you assign names to Patches, Performances, and<br />
Rhythm Sets. The procedure is the same for any type of data.<br />
To assign a name, use [ ]/[ ] to move the cursor to the<br />
location where you wish to input a character. Then use the<br />
VALUE dial or [INC]/[DEC] or the Numeric Keys to input a<br />
character.<br />
Available characters/symbols:<br />
space, A—Z, a—z, 0—9, + - * / | = ! ? < > ( ) [ ] : ; . , “ ‘ ` # %<br />
& $ ¥ @ ^ _<br />
Using the Numeric Keys<br />
The numeric keys are used to input the numerals printed on<br />
each key as well as the characters assigned to each key (see<br />
the table below). Each time you press a numeric key, the<br />
display will cycle through the numeral and characters<br />
printed above the key. To specify a lowercase character, hold<br />
down [SHIFT] as you press the numeric key.<br />
Numeric Key Character<br />
[1] A B C<br />
[2] D E F<br />
[3] G H I<br />
[4] J K L<br />
[5] M N O<br />
[6] P Q R<br />
[7] S T U<br />
[8] V W X<br />
[9] Y Z !<br />
[0] space<br />
Convenient Functions<br />
While you are holding down [SHIFT], the screen will show<br />
three functions that are convenient when entering a name. To<br />
use each function, hold down [SHIFT] and press the<br />
appropriate function button.<br />
fig.1-17<br />
A a: switch between uppercase/lowercase characters<br />
INS: insert a space at the cursor location<br />
DEL: delete the character at the cursor location<br />
46
Chapter 2. Playing<br />
Playing in Patch Mode<br />
Patches are what you normally play during a performance.<br />
Select a Patch before playing.<br />
1. Press [PATCH] to call up the PATCH PLAY display.<br />
fig.2-01.e<br />
Patch number<br />
Patch group Patch name<br />
■ Selecting a Patch<br />
The 768 patches of the XP-30 are organized into six groups of<br />
128 patches: User, and Preset A–E. In addition, the patches of<br />
three popular Wave Expansion Boards (“Session,”<br />
“Orchestral,” and “Techno Collection”) are also stored<br />
onboard. Furthermore, you can install up to two separately<br />
available Wave Expansion Boards, which will allow you to<br />
choose from as many as 2044 patches.<br />
USER<br />
The XP-30’s user memory contains 128 Patches that can be<br />
rewritten to create your own Patches.<br />
PR-A–C, E (Presets A–C, E)<br />
The XP-30 includes 512 preset Patches that are not userrewritable.<br />
But you can call up preset Patch settings into the<br />
temporary area, modify them, and then store them in User<br />
memory.<br />
PR-D (GM (General MIDI))<br />
GM Patches are for instruments compatible with the GM<br />
System. The aim of this system is to standardize MIDI<br />
specifications among different equipment makers or models.<br />
The XP-30 contains 128 GM Patches that are not userrewritable.<br />
But you can call up GM Patch settings into the<br />
temporary area, modify them, and then store them in User<br />
memory.<br />
XP-A–C (Internal Wave Expansion)<br />
The patches of three Wave Expansion Boards (766 patches)<br />
are already built into the XP-30, and cannot be rewritten.<br />
However you may modify the settings of the currently<br />
selected patch, and then store the modified patch in User<br />
memory.<br />
2. Rotate the VALUE dial or press [INC]/[DEC] to select a<br />
Patch.<br />
Selecting a Patch Using Numeric Keys<br />
You can use numeric keys to directly select a desired Patch.<br />
1. Press [PATCH] to call up the PATCH PLAY display.<br />
2. Press the following buttons to select a Patch group.<br />
Button<br />
Patch Group<br />
[SHIFT] + [1] PR-A (Preset A)<br />
[SHIFT] + [2] PR-B (Preset B)<br />
[SHIFT] + [3] PR-C (Preset C)<br />
[SHIFT] + [4]<br />
PR-D (GM (General MIDI))<br />
[SHIFT] + [5] PR-E (Preset E)<br />
[SHIFT] + [6]<br />
USER (User)<br />
[EXP A]<br />
XP-A (“Session”)<br />
[EXP B]<br />
XP-B (“Orchestral”)<br />
[EXP C]<br />
XP-C (“Techno Collection”)<br />
[EXP D] XP-D (Wave Expansion Board D)<br />
[EXP E] XP-E (Wave Expansion Board E)<br />
3. Use numeric keys to input a Patch number.<br />
The patch number and name will blink. At this time, the<br />
Patch selection has not yet been finalized.<br />
4. Press [ENTER] to finalize the entry.<br />
Chapter 2<br />
XP-D, E (Wave Expansion Boards installed in<br />
EXP-D, E Slots)<br />
The Patches included in optional Wave Expansion Boards are<br />
not user-rewritable. But you can call up those Patch settings<br />
into the temporary area, modify them, and then store them in<br />
User memory.<br />
* A Patch XP-D, E cannot be accessed if the Wave Expansion<br />
Board it belongs to has not been installed.<br />
47
Chapter 2. Playing<br />
Express Patch Select (Digit Hold)<br />
With the Digit Hold function turned on, the 100’s<br />
position and 10’s position will be fixed when the<br />
numeric keys are used to select a Patch. This means that<br />
the numeric keys will only change the 1’s position, and<br />
you won’t have to press [ENTER] for each selection.<br />
The same applies to selecting Performances and<br />
Rhythm Sets.<br />
1. Hold down [SHIFT] and press [ENTER] to turn on<br />
Digit Hold.<br />
fig.2-02<br />
The numbers in the 100’s position and 10’s position will<br />
be displayed in a smaller size to indicate Digit Hold is<br />
on.<br />
2. When you enter a numeric key number, the 1’s<br />
position will change immediately without having<br />
to press [ENTER].<br />
3. To turn off Digit Hold, hold down [SHIFT] and<br />
press [ENTER] once again.<br />
Selecting Patches by Category<br />
(Patch Search Function)<br />
The XP-30 provides a Patch Search function which allows<br />
you to specify a type (category) of Patch so that you can<br />
quickly find the desired Patch. There are a total of 38<br />
categories.<br />
1. Press [PATCH] to call up the PATCH PLAY display.<br />
2. Press [CATEGORY] to turn the Patch Search function is<br />
on.<br />
The patch number display will change to the category<br />
display.<br />
* Now you can select patches within the currently selected<br />
category either by rotating the VALUE dial or by using [INC]/<br />
[DEC]. To change the category group, use the numeric keys.<br />
If you wish to select patches from a different category,<br />
continue with the following procedure.<br />
3. Hold down [CATEGORY] and press a key [0]–[9]<br />
(numeric keys) to select the category group.<br />
fig.2-03<br />
4. Rotate the VALUE dial or press [INC]/[DEC] to select a<br />
Category.<br />
The selected category display will blink. At this time, the<br />
selected category has not yet been finalized.<br />
* Now if you press [ ] the following display will appear, and you<br />
can select patches while viewing the number of patches (a)<br />
included in the currently selected category, and the order of this<br />
patch among the patches (b) that were selected after the search.<br />
To change the category, use the numeric keys.<br />
fig.2-04<br />
(b)<br />
(a)<br />
5. Press [ENTER] to finalize the entry.<br />
* In step 4, you can also select a category directly by pressing the<br />
corresponding numeric key.<br />
6. Rotate the VALUE dial or press [INC]/[DEC] to select a<br />
Patch.<br />
7. Press [CATEGORY] to turn the Patch Search function is<br />
off.<br />
You will return to the normal PATCH PLAY screen.<br />
48
Chapter 2. Playing<br />
The following categories can be selected.<br />
Category<br />
Group Category Contents<br />
--- NO ASSIGN No assign<br />
Piano<br />
PNO AC.PIANO Acoustic Piano<br />
EP EL.PIANO Electric Piano<br />
Keys&Organ<br />
KEY KEYBOARDS Other Keyboards<br />
(Clav, Harpsichord etc.)<br />
BEL BELL Bell, Bell Pad<br />
MLT MALLET Mallet<br />
ORG ORGAN Electric and Church Organ<br />
ACD ACCORDION Accordion<br />
HRM HARMONICA Harmonica, Blues Harp<br />
Guitar<br />
AGT AC.GUITAR Acoustic Guitar<br />
EGT EL.GUITAR Electric Guitar<br />
DGT DIST.GUITAR Distortion Guitar<br />
Bass<br />
BS BASS Acoustic & Electric Bass<br />
SBS SYNTH BASS Synth Bass<br />
Orchestral<br />
STR STRINGS Strings<br />
ORC ORCHESTRA Orchestra Ensemble<br />
HIT HIT&STAB Orchestra Hit, Hit<br />
WND WIND Winds (Oboe, Clarinet etc.)<br />
FLT FLUTE Flute, Piccolo<br />
Brass<br />
BRS AC.BRASS Acoustic Brass<br />
SBR SYNTH BRASS Synth Brass<br />
SAX SAX Sax<br />
Synth<br />
HLD HARD LEAD Hard Synth Lead<br />
SLD SOFT LEAD Soft Synth Lead<br />
TEK TECHNO SYNTH Techno Synth<br />
PLS PULSATING Pulsating Synth<br />
FX SYNTH FX Synth FX (Noise etc.)<br />
SYN OTHER SYNTH Poly Synth<br />
Pad<br />
BPD BRIGHT PAD Bright Pad Synth<br />
SPD SOFT PAD Soft Pad Synth<br />
VOX VOX Vox, Choir<br />
Ethnic<br />
PLK PLUCKED Plucked (Harp etc.)<br />
ETH ETHNIC Other Ethnic<br />
FRT FRETTED Fretted Inst<br />
(Mandolin etc.)<br />
Rhythm&SFX<br />
PRC PERCUSSION Percussion<br />
SFX SOUND FX Sound FX<br />
BTS BEAT&GROOVE Beat and Groove<br />
DRM DRUMS Drum Set<br />
CMB COMBINATION Other Patches which<br />
use Split and Layer<br />
■ Using Phrase Preview to Play<br />
Patches<br />
The XP-30 allows you to preview Patches by hearing a<br />
phrase appropriate for each type of Patch.<br />
1. Select a Patch (p. 47).<br />
2. Press and hold [PHRASE PREVIEW].<br />
* When a Performance is selected, the Patch of the Part for which<br />
settings are being made will sound. When a Rhythm Set is<br />
selected, a drum phrase will sound.<br />
* Patches of the USER group or from an optional Wave<br />
Expansion Board (SR-JV80 series) may not sound at the<br />
appropriate pitch range. In this case, use [+OCT] or [-OCT]<br />
(the Octave Shift function) to set an appropriate pitch range.<br />
* If the range of the phrase is wider than the range of the Tones<br />
within the Patch (p. 70), or wider than the range of the Parts<br />
within the Performance (p. 83), the portion of the phrase that<br />
exceeds the range will not sound.<br />
3. The phrase will stop playing when you take your finger<br />
off [PHRASE PREVIEW].<br />
4. Hold down [SHIFT] and press [PHRASE PREVIEW], and<br />
the PREVIEW SELECT display will appear. Here you can<br />
specify how the phrase will be played (Mode), and select<br />
the phrase that will play (Patch Category).<br />
fig.2-05<br />
5. To specify how the phrase will be played, use the cursor<br />
buttons to move the cursor to the Mode parameter.<br />
6. Rotate the VALUE dial or press [INC]/[DEC] to make<br />
the setting.<br />
Mode (Preview Sound Mode)<br />
SINGLE: The notes specified by Note 1–4 parameter<br />
(SYSTEM/PREVIEW/PREVIEW KEY) will<br />
sound successively one by one.<br />
CHORD: The notes specified by Note 1–4 parameter<br />
(SYSTEM/PREVIEW/PREVIEW KEY) will<br />
sound simultaneously.<br />
PHRASE: The phrase prepared for the Patch type (category)<br />
will sound.<br />
* This setting is linked with the Mode parameter (SYSTEM/<br />
PREVIEW/PREVIEW MODE).<br />
7. If you set the Mode parameter to PHRASE, you can<br />
specify the phrase that will sound. Use the cursor<br />
buttons to move the cursor to the Patch Category<br />
parameter.<br />
Chapter 2<br />
* If a rhythm set is selected, this will be fixed at DRUMS, and it<br />
will not be possible to change the phrase that is played.<br />
49
Chapter 2. Playing<br />
8. Rotate the VALUE dial or press [INC]/[DEC] to make<br />
the setting. For details on the available categories, refer to<br />
page 49.<br />
* This setting is linked with the Category parameter (PATCH/<br />
COMMON/PATCH CATEGORY).<br />
■ Making a Patch Sound Thick or<br />
Thin (Turning a Tone On/Off)<br />
Since a Patch is a combination of up to four Tones, you can<br />
switch unwanted (Tones out of the four) off and get just the<br />
sound of a specific Tone.<br />
* This setting is linked with the Switch parameter (PATCH/<br />
WAVE/WAVE). If you want just one or two Tones to sound in<br />
a Patch, turn the others off and store that setting on a Patch.<br />
This cuts nonessential use of the XP-30’s simultaneous voices.<br />
1. Make sure that the PATCH PLAY display is showing.<br />
2. Make sure that [EDIT] indicator is dark. If it is lit, press<br />
[EDIT].<br />
At this time, the on/off setting of each Tone in the displayed<br />
Patch will be shown by the indicators of TONE SWITCH [1]–<br />
[4]. Those that are lit are on, and those that are dark are off.<br />
3. Use TONE SWITCH [1]–[4] to switch Tones on/off.<br />
■ Playing Single Notes (Solo)<br />
Normally, the XP-30 allows you to play chords. Pressing<br />
[SOLO] allows performance using single notes. This function<br />
is effective when performing a solo using single-note Patches<br />
like sax and flute.<br />
1. Make sure that the PATCH PLAY display is showing.<br />
2. Press [SOLO] so its indicator lights.<br />
Now you can play a solo.<br />
* This setting is linked with the Assign parameter (PATCH/<br />
CONTROL/KEY MODE & BENDER). When the [SOLO]<br />
indicator is turned on, the Assign parameter will be set to<br />
SOLO. When the indicator is dark, it will be set to POLY.<br />
3. Play the XP-30 keyboard.<br />
* If you press [SOLO] when Single Performance is selected, the<br />
Solo function can be switched on or off for the current Part.<br />
When Layer Performance is selected, the Solo function can be<br />
switched on or off for the Parts with the Local parameter<br />
(PERFORM/MIDI/MIDI) set ON. If a Rhythm Set is selected,<br />
[SOLO] cannot be turned on.<br />
■ Creating Smooth Pitch Changes<br />
(Portamento)<br />
Portamento ensures a smooth pitch changeover from one<br />
note to the next note played. When [SOLO] is on (indicator<br />
lights), you can simulate techniques like violin glissandos.<br />
1. Make sure that the PATCH PLAY display is showing.<br />
2. Press [PORTAMENTO]. Its indicator lights.<br />
You’re ready to play portamento.<br />
* This setting is linked with the Sw parameter (PATCH/<br />
CONTROL/PORTAMENTO).<br />
3. To change the portamento settings, press [EDIT] to make<br />
the indicator light. Then press the [CONTROL] function<br />
button, and press [ ] or [ ] to access the<br />
PORTAMENTO display.<br />
fig.2-06<br />
4. Move the cursor over to Time, Mode, Type or Start<br />
parameter.<br />
See p. 73 for each parameter’s functions.<br />
5. Rotate the VALUE dial or press [INC]/[DEC] to get the<br />
value you want.<br />
6. Press [EXIT] to return to the PATCH PLAY display and<br />
play.<br />
* If you press [PORTAMENTO] when Single Performance is<br />
selected, the Portamento function can be switched on or off for<br />
the current Part. When Layer Performance is selected, the<br />
Portamento function can be switched on or off for the Parts with<br />
the Local parameter (PERFORM/MIDI/MIDI) set ON. If a<br />
Rhythm Set is selected, [PORTAMENTO] cannot be turned on.<br />
■ Using the Sliders to Modify the<br />
Sound in Realtime<br />
(Sound Palette Function)<br />
With the four sliders in the PALETTE section, you can create<br />
sound variations or volume changes in real time.<br />
* Sound variations or volume changes made with the Sound<br />
Palette affect only the performance. They have no effect on<br />
current Patch settings. Change the Patch and these Sound<br />
Palette settings will be lost.<br />
* The sound character and volume changes created using the<br />
Sound Palette will also be transmitted to the external MIDI<br />
devices.<br />
50
Chapter 2. Playing<br />
Changing Sound Characters<br />
1. Make sure that the PATCH PLAY display is showing.<br />
2. Press [FILTER/ENV] and its indicator lights.<br />
3. Move the sliders while you play to vary the sound.<br />
To modify the brightness, move the CUTOFF slider.<br />
To change resonance, move the RESO. slider.<br />
To change attack time, move the ATTACK slider.<br />
To change decay time, move the DECAY slider.<br />
Changing the Volume of Each Tone<br />
1. Make sure that the PATCH PLAY display is showing.<br />
2. Press [LEVEL] and its indicator lights.<br />
3. Move the LEVEL slider as you play the keyboard to<br />
adjust volume as desired.<br />
Sliders 1, 2, 3, and 4 are used to change the volume of Tones<br />
1, 2, 3, and 4, respectively.<br />
■ Selecting a Performance<br />
The XP-30 offers three groups of Performances (User, Presets<br />
A and B) with each group having 32 Performances. A total of<br />
96 Performances is available.<br />
USER<br />
The XP-30 user memory includes 32 Performances that can<br />
be rewritten to produce your own Performances.<br />
PR-A–B (Preset A–B)<br />
The XP-30 contains 64 preset Performances that cannot be<br />
rewritten. But you can call up preset Performance settings<br />
into the temporary area, modify them, and then store them in<br />
user memory.<br />
1. Press [PERFORM] to call up the 52<br />
PERFORM PLAY display.<br />
fig.2-07.e<br />
Performance number<br />
Performance group Performance name<br />
Chapter 2<br />
Playing in Performance Mode<br />
There are two types of performances: Layer performances<br />
and Single performances. The upper right of the display<br />
will indicate “LAYER p* “ (* is the part number) for a layer<br />
performance, and “part=* “ (* is the part number) for a single<br />
performance.<br />
Layer Performance allows playing two or more Parts<br />
simultaneously on the keyboard. Select Layer Performance if<br />
you want fat, rich sounds of two or more Patches, or play<br />
different Patches in a split keyboard’s different sections.<br />
Single Performance plays only the Part shown in the display<br />
(current Part). Select Single Performance for playing a song<br />
using two or more instruments.<br />
* Make your Performance type selection with the Key Mode<br />
parameter (PERFORM/COMMON/PERFORM COMMON).<br />
The Key Mode parameter determines how the XP-30 keyboard<br />
will play the internal sound source. It has no effect on how the<br />
XP-30 sound source is played from the built-in sequencer or an<br />
external MIDI device.<br />
* You can toggle between SINGLE and LAYER directly from the<br />
PERFORM PLAY display by pressing [SOLO] while holding<br />
down [SHIFT].<br />
2. Rotate the VALUE dial or press [INC]/[DEC] to select a<br />
Performance.<br />
Selecting a Performance Using<br />
Numeric Keys<br />
You can choose a Performance with direct numeric key<br />
input.<br />
1. Press [PERFORM] to call up the PERFORM PLAY<br />
display.<br />
2. Use the following buttons to select the Performance<br />
group.<br />
Button<br />
Performance Group<br />
[SHIFT] + [1] PR-A (Preset A)<br />
[SHIFT] + [2] PR-B (Preset B)<br />
[SHIFT] + [6]<br />
USER (User)<br />
3. Use numeric keys to input the Performance number.<br />
The performance number and name will blink. At this time<br />
the Performance has not yet been finalized.<br />
4. Press [ENTER] to finalize the entry.<br />
* Using Digit Hold, a Performance can be selected simply by<br />
specifying the 1’s place number (p. 48).<br />
51
Chapter 2. Playing<br />
■ Playing Fatter and Richer<br />
Sounds by Combining Patches<br />
(Layer)<br />
If a Layer Performance is selected, you can play all Parts with<br />
the Local parameter ON. Combining the Parts will produce,<br />
thicker, fatter sounds.<br />
fig.2-08.e<br />
Part 1 Part 2 Part 15 Part 16<br />
Local parameters<br />
■ Splitting the Keyboard to Play<br />
Separate Patches in Different<br />
Sections (Split)<br />
If you’ve selected a Layer Performance, you can split the<br />
keyboard to play separate Patches with different sections of<br />
the keyboard. As the note range that plays each Part can be<br />
specified individually, you can split the keyboard into a<br />
maximum of 16 sections.<br />
For instance, you can play strings in the lower note section,<br />
piano in the higher note section and both sounds in the<br />
middle note section.<br />
fig.2-09.e<br />
1. Make sure that PERFORM PLAY display is showing.<br />
2. Make sure that the upper right of the display indicates<br />
“LAYER p* ”(* is the part number). If the display<br />
indicates “part=* ” (* is the part number), the<br />
performance is a “single performance,” so hold down<br />
[SHIFT] and press [SOLO] to change to a layer<br />
performance.<br />
* The setting here is linked to the Key Mode parameter<br />
(PERFORM/COMMON/PERFORM COMMON).<br />
3. Press the function button for the part that you wish to<br />
play, to make the indicator light. When the [1-8/9-16]<br />
indicator is dark, parts 1–8 can be selected, and when the<br />
[1-8/9-16] indicator is lit, parts 9–16 can be selected.<br />
The Local parameter of the selected part will be ON.<br />
* This setting is linked with the Local parameter (PERFORM/<br />
MIDI/MIDI).<br />
4. Repeat step 3 to turn the Local parameter ON for each<br />
part that you wish to play.<br />
Part 1: Strings<br />
Part 1 + Part 2:<br />
(Strings + Piano)<br />
Part 2: Piano<br />
* If a KEY RANG display (PATCH/COMMON) has been set,<br />
sounds are produced in the overlapping sections between the key<br />
ranges specified for the Patch and Performance.<br />
1. Make sure that the PERFORM PLAY display is showing.<br />
2. Make sure that the upper right of the display indicates<br />
“LAYER p* ”(* is the part number). If the display<br />
indicates “part=* ” (* is the part number), the<br />
performance is a “single performance,” so hold down<br />
[SHIFT] and press [SOLO] to change to a layer<br />
performance.<br />
* The setting here is linked to the Key Mode parameter<br />
(PERFORM/COMMON/PERFORM COMMON).<br />
3. Press the function button for the part that you wish to<br />
play, to make the indicator light. When the [1-8/9-16]<br />
indicator is dark, parts 1–8 can be selected, and when the<br />
[1-8/9-16] indicator is lit, parts 9–16 can be selected.<br />
The Local parameter of the selected part will be ON.<br />
* This setting is linked with the Local parameter (PERFORM/<br />
MIDI/MIDI).<br />
4. Repeat step 3 to turn the Local parameter ON for each<br />
part that you wish to play.<br />
5. Press [EDIT] to make the indicator light. Then press the<br />
[COMMON] function button, and press [ ] or [ ] to<br />
access the PERFORM COMMON display.<br />
52
Chapter 2. Playing<br />
6. Make sure that the Key Range parameter is ON. If it is<br />
OFF, use the cursor buttons to move the cursor to the<br />
Key Range parameter, and rotate the VALUE dial or<br />
press [INC]/[DEC] to turn it ON.<br />
* If the Key Range parameter is OFF, the keyboard cannot be split<br />
even when you set the key range.<br />
7. Press [ ] to access the KEY RANG display.<br />
fig.2-10<br />
■ Playing Along with a Song<br />
Playback (XP-30 Used as a<br />
Multitimbral Sound Source)<br />
When a Single Performance is selected, the XP-30’s keyboard<br />
will play only the Part you selected from the keyboard,<br />
convenient when you play the keyboard along with a song<br />
playback.<br />
fig.2-11.e<br />
Part 1 Part 2 Part 15 Part 16<br />
8. Press [EDIT] to make the indicator go dark.<br />
9. Press a function button to select the part whose Local<br />
parameter you wish to turn ON. When the [1-8/9-16]<br />
indicator is dark, you can select parts 1–8. When the [1-<br />
8/9-16] indicator is lit, you can select parts 9–16.<br />
10. Specify the range of notes for which the part will sound.<br />
Use the cursor buttons to move the cursor to the Lower<br />
parameter and set the lowest note of the range. Move the<br />
cursor to the Upper parameter and set the highest note of<br />
the range.<br />
Selecting a Part You Want to Play on<br />
the Keyboard<br />
If a Single Performance is selected, press [ ] or [ ] to<br />
select the Part you want to play. The selected Part is called<br />
the Current Part.<br />
Chapter 2<br />
11. Rotate the VALUE dial or press [INC]/[DEC] to specify<br />
the range of notes.<br />
* By specifying sections for different Parts so that they overlap<br />
each other, you can combine two or more Patches only in a<br />
specific section.<br />
12. When you are finished making settings, press [EXIT] to<br />
return to the PERFORM PLAY display, and begin<br />
playing.<br />
1. Make sure that the PERFORM PLAY display is showing.<br />
2. Press [ ] or [ ] to choose the Part to be played.<br />
The part number shown in the upper right of the display will<br />
change.<br />
fig.2-12<br />
* You can also press a function button to select the part that you<br />
wish to play. At this time, the function button indicator of the<br />
selected part will light.<br />
Muting a Specific Part<br />
(Turning Receive Channel On/Off)<br />
While you play along with the playback of a song, you can<br />
turn on/off any specific Part. This allows you to turn off the<br />
melody Part for karaoke applications or for practicing the<br />
muted Part.<br />
1. Make sure that [EDIT] indicator is dark. If it is lit, press<br />
[EDIT] to turn it off.<br />
At this time, the function button indicators will indicate the on/<br />
off status of each Part. When [1-8/9-16] indicator is dark, the<br />
function button indicators will indicate the status of Parts 1-8.<br />
When [1-8/9-16] indicator is lit, the function button indicators<br />
will indicate the status of Parts 9-16. Lit is on, and dark is off.<br />
2. Hold down [SHIFT] and press the function button to<br />
switch Parts on/off.<br />
* This setting is linked with the Rx parameter (PERFORM/<br />
MIDI/MIDI).<br />
53
Chapter 2. Playing<br />
■ Assigning a Different Patch to a<br />
Part<br />
The Patch assigned to each Part can be stored as a<br />
Performance parameter.<br />
1. Make sure that the PERFORM PLAY display is showing.<br />
2. Press [ ] or [ ] to choose the Part to which you want<br />
to assign a different Patch.<br />
3. While holding down [PERFORM], press [PATCH] to call<br />
up the PLAY display (PART PLAY) of the Patch assigned<br />
to a specific Part.<br />
fig.2-13<br />
The upper right of the display will indicate the number of the<br />
currently selected part (the current part).<br />
4. Use the same procedure as in Patch mode to select a<br />
Patch (p. 47).<br />
* This setting is linked with the Group parameter and Number<br />
parameter (PERFORM/PART/PATCH).<br />
5. Press [PERFORM] or [EXIT] to return to the PERFORM<br />
PLAY display.<br />
3. Move the sliders while you play the XP-30’s keyboard to<br />
vary the sound.<br />
To change brightness, move the CUTOFF slider.<br />
To change resonance, move the RESO slider.<br />
To change attack time, move the ATTACK slider.<br />
To change decay time, move the DECAY slider.<br />
Changing the Level (Volume) of Each Part<br />
1. Make sure that the PERFORM PLAY display is showing.<br />
2. Press [LEVEL] to light its indicator.<br />
3. Press [ ] or [ ] to select the Part whose level (volume)<br />
you want to change.<br />
If you’ve selected any of Parts 1–4, sliders 1, 2, 3, and 4 adjust<br />
Parts 1, 2, 3, and 4, respectively.<br />
If you’ve selected any of Parts 5–8, sliders 1, 2, 3, and 4 adjust<br />
Parts 5, 6, 7, and 8, respectively.<br />
If you’ve selected any of Parts 9–12, sliders 1, 2, 3, and 4<br />
adjust Parts 9, 10, 11, and 12, respectively.<br />
If you’ve selected any of Parts 13–16, sliders 1, 2, 3, and 4<br />
adjust Parts 13, 14, 15, and 16, respectively.<br />
4. Move the slider as you play to adjust the level (volume)<br />
of each Part as desired.<br />
■ Using the Sliders to Modify the<br />
Sound in Realtime<br />
(Sound Palette Function)<br />
Using the Sound Palette function, you can modify sound<br />
characters of the Patch assigned to a Part or adjust the<br />
volume level of each Part.<br />
* Sound variations or volume changes made with the Sound<br />
Palette function affect only the performance. They have no effect<br />
on the currently selected Performance, so the Sound Palette<br />
settings cannot be saved. If you change the Performance, these<br />
settings will be lost.<br />
* The sound character and volume changes created using the<br />
Sound Palette will also be transmitted to the external MIDI<br />
devices.<br />
Changing Sound Characters<br />
* If Single Performance is selected, the effect applies only to the<br />
current Part. With Layer Performance selected, this affects only<br />
the Parts with Local parameter (PERFORM/MIDI/MIDI) set<br />
ON.<br />
1. Make sure that the PERFORM PLAY display is showing.<br />
2. Press [FILTER/ENV] to light its indicator.<br />
54
Chapter 2. Playing<br />
Playing in Rhythm Set Mode<br />
In Rhythm Set mode, you can play percussion instruments<br />
(Rhythm Tones) on the keyboard. As the Rhythm Tone<br />
assigned to each key varies by the Rhythm Set selected, you<br />
can play a wide range of percussion instruments.<br />
1. Press [RHYTHM] to call up the RHYTHM PLAY display.<br />
fig.2-14.e<br />
Rhythm Set number<br />
Rhythm Set group Rhythm Set name<br />
■ Selecting a Rhythm Set<br />
The XP-30 contains a total of twelve rhythm sets, organized<br />
into six groups (User and Preset A–E) with two rhythm sets<br />
in each group. In addition, the rhythm sets of two popular<br />
Wave Expansion Boards (“Session” and “Techno Collection”)<br />
are onboard. Furthermore, you can install up to two<br />
separately sold Wave Expansion Boards, giving you access to<br />
an even larger number of percussion instruments.<br />
USER<br />
The XP-30’s user memory contains two Rhythm Sets that can<br />
be rewritten to make up your own Rhythm Sets.<br />
PR-A–C, E (Preset A–C, E)<br />
The XP-30 includes eight preset Rhythm Sets that are not<br />
user-rewritable. But you can call up preset Rhythm Set<br />
settings into the temporary area, modify them, and then store<br />
them in user memory.<br />
PR-D (GM (General MIDI))<br />
GM Rhythm Sets are for instruments compatible with the<br />
General MIDI System intended to standardize MIDI<br />
specifications among different equipment makers or models.<br />
The XP-30 offers two GM Rhythm Sets that are not userrewritable.<br />
But you can call up GM Rhythm Set settings into<br />
the temporary area, modify them, and then store them in<br />
user memory.<br />
XP-A and C (Internal Wave Expansion)<br />
The rhythm sets of two Wave Expansion Boards (16 rhythm<br />
sets) are already built-in, and cannot be rewritten. However,<br />
you can modify the settings of the currently selected rhythm<br />
set, and then save the modified settings in User memory.<br />
2. Rotate the VALUE dial or press [INC]/[DEC] to select a<br />
Rhythm Set.<br />
* Here, pressing [0] (on the numeric key) while holding down<br />
[CATEGORY] takes you to the display shown below, where you<br />
can verify the total number of selectable Rhythm Sets (a), and<br />
the number within the sequence of the currently selected<br />
Rhythm Set (b), and choose a Rhythm Set.<br />
fig.2-14a<br />
Selecting a Rhythm Set Using Numeric<br />
Keys<br />
Using numeric keys, you can direct input a desired Rhythm<br />
Set.<br />
1. Press [RHYTHM] to call up the RHYTHM PLAY display.<br />
2. Press the following buttons to select a Rhythm Set group.<br />
Button<br />
Rhythm Set Group<br />
[SHIFT] + [1] PR-A (Preset A)<br />
[SHIFT] + [2] PR-B (Preset B)<br />
[SHIFT] + [3] PR-C (Preset C)<br />
[SHIFT] + [4]<br />
PR-D (GM (General MIDI))<br />
[SHIFT] + [5] PR-E (Preset E)<br />
[SHIFT] + [6]<br />
USER (User)<br />
[EXP A]<br />
XP-A (“Session”)<br />
[EXP C]<br />
XP-C (“Techno Collection”)<br />
[EXP D] XP-D (Wave Expansion Board D)<br />
[EXP E] XP-E (Wave Expansion Board E)<br />
(b)<br />
(a)<br />
Chapter 2<br />
XP-D, E (Wave Expansion Boards installed in<br />
EXP-D, E Slots)<br />
These Rhythm Sets are included in optional Wave Expansion<br />
Boards and are not user-rewritable. But you can call up<br />
Rhythm Set settings into the temporary area, modify them,<br />
and then store them in user memory.<br />
* A Patch XP-D, E cannot be accessed if the Wave Expansion<br />
Board it belongs to has not been installed.<br />
3. Use numeric keys to input a Rhythm Set number.<br />
The rhythm set number and name will blink. At this point<br />
the Rhythm Set has not yet been finalized.<br />
4. Press [ENTER] to finalize the entry.<br />
* Using Digit Hold, a Rhythm Set can be selected simply by<br />
specifying the 1’s place number (p. 48).<br />
55
Chapter 2. Playing<br />
■ Playing Percussion Instruments<br />
1. Press [RHYTHM] to call up the RHYTHM PLAY display.<br />
2. Select a desired Rhythm Set.<br />
3. Press a key on the keyboard to play a percussion<br />
instrument.<br />
The key (Note name) you press and its percussion<br />
instrument name (Rhythm Tone name, the same as the Wave<br />
it uses) will be displayed below the Rhythm Set name.<br />
fig.2-15.e<br />
Note name Rhythm Tone name<br />
You can also use the TONE SELECT buttons to select the<br />
displayed key.<br />
[TONE SELECT 1]: move to an octave lower key<br />
[TONE SELECT 2]: move to the semitone below<br />
[TONE SELECT 3]: move to the semitone above<br />
[TONE SELECT 4]: move to an octave higher key<br />
* When you want to play the percussive instrument sound<br />
assigned to the B1 key, first push [-OCT] once, then press the<br />
B2 key. Similarly, push [+OCT] once then press the C#6 or D6<br />
key to play the percussive instrument sound assigned to the C#7<br />
or D7 key. (On the XP-30, the leftmost white key is C2, and<br />
rightmost white key is C7.)<br />
For details, refer to “Transposing the Keyboard in Octave<br />
Units (Octave Shift)” (p. 59).<br />
Playing an Arpeggio<br />
The XP-30’s Arpeggiator lets you produce an arpeggio<br />
(broken chord) simply by playing a chord. In addition to<br />
normal arpeggios, you can also accurately simulate guitar<br />
cutting or strumming techniques depending on the<br />
Arpeggiator settings. The Arpeggiator can in fact be used as<br />
a handy automatic arranger.<br />
By pressing [ARPEGGIO], the indicator lights and allows<br />
playing arpeggios from the XP-30 keyboard.<br />
* If you press [ARPEGGIO] to turn this function on when Single<br />
Performance is selected, the current Part will play arpeggios.<br />
When a Layer Performance is selected, an arpeggio will sound<br />
for the Part specified by the Part parameter (SYSTEM/<br />
ARPEGGIO/ARPEGGIO).<br />
* The arpeggios played by the arpeggiator are also transmitted<br />
from the MIDI OUT connector to external MIDI devices.<br />
1. Make sure that the PLAY display of the sound source<br />
mode (PERFORM, PATCH, RHYTHM, GM) is<br />
displayed.<br />
2. Press [ARPEGGIO] to turn the Arpeggiator on.<br />
3. If you wish to change how the arpeggio is played, hold<br />
down [ARPEGGIO] to access the ARP SELECT display,<br />
move the cursor to the Style parameter, and change the<br />
setting.<br />
fig.2-16<br />
* The selection you make here will also affect the Style parameter<br />
(SYSTEM/ARPEGGIO/ARPEGGIO) settings.<br />
There are 43 arpeggio styles available. For selection, refer to<br />
the following guideline.<br />
Playing an Arpeggio According to the Timing<br />
Interval of a Note<br />
1/4–1/32<br />
Playing a Glissando<br />
GLISSANDO<br />
Playing a Bass Part<br />
SYNTH BASS, SLAP BASS A, SLAP BASS B, WALK BASS<br />
Playing a Guitar<br />
RHYTHM GTR A, RHYTHM GTR B, RHYTHM GTR C,<br />
RHYTHM GTR D, RHYTHM GTR E, 3FINGER GTR,<br />
STRUMMING GTR<br />
Playing a Keyboard Instrument<br />
KBD COMPING A, KBD COMPING B<br />
Playing a Waltz<br />
KBD COMPING C, KBD COMPING D<br />
56
Chapter 2. Playing<br />
Playing in Reggae Style<br />
KBD COMPING E<br />
Playing Percussion Instruments<br />
PERCUSSION<br />
* There are also other styles besides the above, including those<br />
used for random play and for creating your own styles. For<br />
details regarding each style, refer to “Arpeggio Settings<br />
(ARPEGGIO)” (p. 108).<br />
4. To change the “groove” feel of the arpeggio, hold down<br />
[ARPEGGIO] to access the ARP SELECT display, move the<br />
cursor to the Accent parameter, and change the setting.<br />
fig.2-16a<br />
■ Playing an Arpeggio Over a<br />
Preset Keyboard Area<br />
As soon as you press [ARPEGGIO] to turn the Arpeggiator<br />
on, the keyboard will be set to play arpeggios so<br />
conventional keyboard playing is no longer possible.<br />
If you split the keyboard into two different areas, you can use<br />
one area for normal playing and the other for playing<br />
arpeggios. This setting, for instance, allows you to play<br />
arpeggios with the left hand and a melody with the right<br />
hand.<br />
1. Press [PERFORM] to call up the PERFORM PLAY<br />
display.<br />
A setting of 100% will produce the most pronounced groove<br />
feel.<br />
* This setting will also affect the Accent Rate parameter<br />
(SYSTEM/ARPEGGIO/ARPEGGIO) settings.<br />
5. To change the range in which the arpeggio is played,<br />
hold down [ARPEGGIO] to access the ARP SELECT<br />
display, move the cursor to the Oct parameter, and<br />
change the setting.<br />
fig.2-17<br />
2. If you have selected a Single Performance, set the Key<br />
Mode parameter (PERFORM/COMMON/PREFROM<br />
COMMON) to LAYER (p. 52).<br />
3. Make sure that the Key Range parameter (PERFORM/<br />
COMMON/PERFORM COMMON) is ON. If it is OFF,<br />
turn it ON (p. 53).<br />
4. Set the Local parameter (PERFORM/MIDI/MIDI) ON<br />
for the Part you want to hear (p. 52).<br />
5. After pressing [SYSTEM] to make the indicator light up,<br />
press the [ARPEGGIO] function button followed by [ ]<br />
to display an Arpeggio screen like the one shown below.<br />
Chapter 2<br />
If you want the arpeggio to sound using only the notes that<br />
you actually play, set this to 0. With a +1 setting, arpeggio will<br />
take place over a range up to 1 octave higher than the notes<br />
you play. A -1 setting will result in arpeggio occurring over<br />
the range down to 1 octave lower than the notes you play.<br />
* This setting will also affect the Octave Range parameter<br />
(SYSTEM/ARPEGGIO/ARPEGGIO) settings.<br />
6. To change the tempo in which the arpeggio is played,<br />
hold down [ARPEGGIO] to access the ARP SELECT<br />
display, move the cursor to the Tempo parameter, and<br />
change the setting.<br />
fig.2-17a<br />
* This setting will also affect the Tempo parameter (SYSTEM/<br />
ARPEGGIO/ARPEGGIO) settings.<br />
7. Play a chord to produce an arpeggio.<br />
8. To stop the arpeggio, press [ARPEGGIO] to turn off the<br />
indicator.<br />
* If you hold down [SHIFT] when you press [ARPEGGIO], the<br />
ARP SELECT display will continue being displayed, without<br />
you having to hold down [ARPEGGIO]. To go back to the<br />
previous display, press [EXIT].<br />
fig.2-18<br />
6. Use the cursor buttons to move the cursor to the Part<br />
parameter.<br />
7. Rotate the VALUE dial or press [INC]/[DEC] to set the<br />
part that will play the arpeggio.<br />
8. Set the Lower or Upper parameter (PERFORM/<br />
COMMON/KEY RANG) to specify the note range of the<br />
part that will play the arpeggio (p. 53).<br />
9. Set the key range of parts other than the arpeggio part so<br />
that they do not overlap the range in which the arpeggio<br />
is played.<br />
10. After you finish settings, press [EXIT] to call up the<br />
PERFORM PLAY display again and play a chord.<br />
* If you play an arpeggio using Layer Performance but without<br />
setting key range, the chords will sound for all Parts except for<br />
the specified Part.<br />
57
Chapter 2. Playing<br />
■ Holding an Arpeggio<br />
If you hold down [ARPEGGIO] and press [TRANSPOSE],<br />
and get the indicator to start blinking, the arpeggio will<br />
continue to be played even if you release the chord.<br />
1. Hold down [ARPEGGIO] and press [TRANSPOSE] to<br />
make the indicator blink.<br />
2. Play a chord.<br />
3. If you play a different chord or notes while the arpeggio<br />
is being held, the arpeggio will change accordingly.<br />
4. To cancel Arpeggio Hold, hold down [ARPEGGIO] and<br />
press [TRANSPOSE] simultaneously once again.<br />
Using a Hold Pedal<br />
If you play an arpeggio while pressing the hold pedal, the<br />
arpeggio will continue to be played even if you release the<br />
chord.<br />
1. Connect an optional pedal switch to the HOLD PEDAL<br />
jack.<br />
2. Play a chord while pressing the hold pedal.<br />
3. To play another chord, release the pedal, press it again as<br />
you play the next chord.<br />
■ Simulating a Guitar Cutting<br />
Technique<br />
You can simulate a guitar cutting technique by following the<br />
procedure below. By using the Sound Palette, it is also<br />
possible to apply a wah effect as you play.<br />
1. Select a guitar Patch.<br />
2. Set the Style parameter (SYSTEM/ARPEGGIO/<br />
ARPEGGIO) to RHYTHM GTR B, RHYTHM GTR C,<br />
RHYTHM GTR D or RHYTHM GTR E.<br />
3. Press [FILTER/ENV] so the indicator lights.<br />
4. Move the CUTOFF slider or RESO slider while you play<br />
a chord.<br />
■ Playing an Arpeggio from an<br />
External MIDI Device<br />
The XP-30 can also produce arpeggios with incoming Note<br />
messages from an external MIDI device.<br />
1. Connect the XP-30’s MIDI IN connector and the MIDI<br />
OUT connector of an external MIDI device with a MIDI<br />
cable.<br />
2. Press [PERFORM] to call up the PERFORM PLAY<br />
display.<br />
3. Press [SYSTEM] to make the indicator lit, press the<br />
[MIDI] function button, and then press [ ] to access the<br />
PERFORM MIDI display.<br />
fig.2-19<br />
4. Use the cursor buttons to move the cursor to the Remote<br />
parameter.<br />
5. Rotate the VALUE dial or press [INC]/[DEC] to turn the<br />
setting ON.<br />
6. Play the external MIDI device.<br />
■ Creating an Arpeggio Pattern<br />
There are a total of 9 parameters that can be set for the<br />
Arpeggiator, but the most important is the Style parameter<br />
setting. The arpeggio pattern is largely determined by this<br />
setting.<br />
When you set the Style parameter, the Motif, Beat Pattern,<br />
Accent Rate and Shuffle Rate parameters will automatically<br />
be set to optimum settings. After selecting the style, you can<br />
also set Octave Range and Key Velocity parameters, etc.<br />
If this selection does not provide the pattern you want,<br />
modify the settings of the Motif, Beat Pattern, Accent Rate<br />
and Shuffle Rate parameters to add variations to the style as<br />
desired.<br />
* Motif, Beat Pattern, Accent Rate and Shuffle Rate settings will<br />
be lost if you select another style and then turn the power off.<br />
* The values you can set with the Motif or Beat Pattern<br />
parameters are normally limited by the selected style. Only<br />
when the Style parameter is set to LIMITLESS will all values be<br />
acceptable.<br />
58
Chapter 2. Playing<br />
1. Press [SYSTEM] to make the indicator lit, and then press<br />
the [ARPEGGIO] function button to access the<br />
ARPEGGIO display.<br />
fig.2-20<br />
* For details regarding each parameter, refer to “Arpeggio<br />
Settings (ARPEGGIO)” (p. 108)<br />
2. Move the cursor to “Style” and specify the style you<br />
want.<br />
Convenient Functions for<br />
Performance<br />
■ Transposing the Keyboard in<br />
Octave Units (Octave Shift)<br />
The Octave Shift function transposes the pitch of the<br />
keyboard in 1 octave units (-3– +3 octaves).<br />
For playing a bass part more easily using your right hand,<br />
transpose the keyboard down by 1 or 2 octaves.<br />
3. Move the cursor to “Octave Range” and specify the key<br />
range over which you want arpeggio.<br />
4. Press [ ], move the cursor to “Motif,” and specify the<br />
order in which the notes of the chord will be sounded.<br />
* The available choices depend on the Style parameter setting. For<br />
details, refer to “Arpeggio Style List” (p. 182).<br />
5. Move the cursor to “Beat Pattern” to change the beat<br />
(rhythm).<br />
1. Press [+OCT] or [-OCT] and its indicator will light.<br />
Pressing [+OCT] once will raise the keyboard 1 octave and<br />
pressing [-OCT] once will lower it 1 octave.<br />
The specified Octave Shift setting will be shown in the<br />
“center=C4” indication of each Play screen. For example if<br />
you press [+OCT] once to raise the keyboard one octave, the<br />
display will indicate “center=C5.” This means that when you<br />
press the C4 key, the C5 note will sound.<br />
fig.2-21<br />
Chapter 2<br />
* The available choices depend on the Style parameter setting. For<br />
details, refer to “Arpeggio Style List” (p. 182).<br />
6. Press [ ], move the cursor to “Accent Rate,” and specify<br />
the groove ratio.<br />
A 100% setting will result in the most pronounced “groove”<br />
feel.<br />
7. Move the cursor to “Shuffle Rate” and specify the swing<br />
rate.<br />
With a setting of 50%, the notes will be spaced evenly. As the<br />
value increases, the note timing will have more of a “swing”<br />
feel.<br />
8. Press [ ], move the cursor to “Key Velocity,” and specify<br />
the strength with which the notes of the chord will be<br />
sounded.<br />
Move the cursor to “Key Velocity” and specify the force of<br />
the chord.<br />
When REAL is selected, the velocity at which the notes are<br />
actually played will be used. With a setting of 1–127, the<br />
specified velocity value will be used regardless of the force<br />
with which you play the chord.<br />
9. If you want to play an arpeggio using Layer<br />
Performance, move the cursor to “Part” and specify the<br />
Part for which you want arpeggio.<br />
* Parts other than that specified here will not sound as arpeggios,<br />
and the notes of the chord will sound as you play.<br />
10. Move the cursor to “Tempo” and specify the speed of an<br />
arpeggio.<br />
11. After you finish settings, press [EXIT].<br />
* There is only one Octave Shift setting in the XP-30 so it remain<br />
valid even if you select a different Patch, Performance or<br />
Rhythm Set or turn power off.<br />
2. To turn off the Octave Shift function, press the other<br />
button [+OCT] or [-OCT] of that pressed in step 1 the<br />
same number of times. The indicator will go off.<br />
59
Chapter 2. Playing<br />
■ Transposing the Keyboard in<br />
Semitone Steps (Transpose)<br />
Transpose changes keyboard pitch in units of semitones (-5–<br />
+6 semitones).<br />
This function is useful when you play transposed<br />
instruments such as trumpet or clarinet following a printed<br />
score.<br />
1. Press [TRANSPOSE] to light indicator.<br />
This turns Transpose on.<br />
2. While holding down [TRANSPOSE], press [+OCT] or [-<br />
OCT] to transpose the keyboard.<br />
Pressing [+OCT] once while holding down [TRANSPOSE]<br />
will raise the keyboard one semitone. Pressing [-OCT] once<br />
while holding down [TRANSPOSE] will lower the keyboard<br />
one semitone.<br />
The specified Transpose setting will be added to the Octave<br />
Shift value. For example, if you hold down [TRANSPOSE]<br />
and press [+OCT] once to raise the keyboard a semitone, the<br />
display will indicate “center=C#4.” So when C4 is pressed,<br />
the C#4 note will sound.<br />
3. To turn off Transpose, press [TRANSPOSE] once again<br />
so that its indicator goes off.<br />
The Transpose setting you make will be maintained.<br />
* The Transpose setting you make here will also change the<br />
Transpose parameter (SYSTEM/CONTROL/KEYBOARD).<br />
■ If “Stuck” Notes Occur or a<br />
Note Does Not Sound (Panic)<br />
If a note played on the XP-30 or from an external device<br />
“locks” or keeps sounding and you can’t shut it off, hit the<br />
Panic button. Do the same if a note does not sound.<br />
When “Stuck” Notes Occur<br />
1. Hold down [SHIFT] and press [EXIT].<br />
MIDI messages for Note Off and Hold Off will be<br />
transmitted to the Parts (MIDI channels) receiving Note On/<br />
Hold On messages.<br />
2. The display will indicate “Panic! Now Muting.” while<br />
the Panic function is being executed. When this message<br />
goes off, you can start playing.<br />
When a Note Does Not Sound<br />
1. Hold down [SHIFT] and press [EXIT] for more than a<br />
second.<br />
MIDI messages for Volume (127), All Note Off, Pitch Bend<br />
(center), Channel Aftertouch (0), Modulation (0), and Hold 1<br />
(0) will be transmitted to all Parts (MIDI channels).<br />
2. The display will indicate “Panic! Now Transmitting.”<br />
while the Panic function is being executed. When this<br />
message goes off, you can start playing.<br />
* The setting you make will be maintained even if you select a<br />
different Patch, Performance or Rhythm Set, or turn the power<br />
off.<br />
60
Chapter 3. Creating Your Own Sounds<br />
Regarding Effects<br />
The XP-30 contains three independent effects units.<br />
Multi-Effects (EFX)<br />
The Multi-Effects offers 40 different effects ranging from<br />
single effects such as distortion and delay to powerful<br />
combination effects. The Multi-Effects also includes chorus<br />
and reverb effects which are independent of the Chorus and<br />
Reverb outlined below.<br />
Chorus<br />
Chorus adds depth and spaciousness to the sound.<br />
Reverb<br />
Reverb adds reverberation characteristics of hall or<br />
auditorium ambiences.<br />
Connection of the three effects units depend on the mode<br />
you’ve selected.<br />
In Performance Mode/GM Mode<br />
The Multi-Effects, Chorus and Reverb effects can be set<br />
individually for each Performance and GM mode. The<br />
intensity of each effect will be set for each Part (Fig. 1), but<br />
the Send Level setting for each Tone can also influence effect<br />
intensity (Fig. 2). Effects settings of the Patch assigned to<br />
each Part will be ignored, but Multi-Effects applied to a Patch<br />
assigned to a given Part can also be applied to the entire<br />
Performance.<br />
fig.3-02.e<br />
Fig.1 – When Output Assign is set to “EFX” in the Performance<br />
mode (the output settings for Tone are ignored)<br />
Performance<br />
Part16<br />
Part 1<br />
Patch<br />
TONE<br />
Multi-Effects<br />
Chorus<br />
■ How Effects Units Work in<br />
Different Modes<br />
In Patch Mode<br />
The Multi-Effects, Chorus and Reverb effects can be set<br />
individually for each Patch. Adjusting the signal level to be<br />
sent to each effects unit (Send Level) provides control over<br />
the effect intensity that’s applied to each Tone.<br />
fig.3-03.e<br />
Fig.2 – When Output Assign is set to “PATCH” in the Performance<br />
mode (the output settings for Tone are valid)<br />
Performance<br />
Reverb<br />
Chapter 3<br />
fig.3-01<br />
Part 1<br />
Patch<br />
Part16<br />
Patch<br />
TONE<br />
Multi-Effects<br />
TONE<br />
Multi-Effects<br />
Chorus<br />
Reverb<br />
Chorus<br />
Reverb<br />
In Rhythm Set Mode<br />
Because in Rhythm Set mode, only Part 10 of a Performance<br />
is called up, the effects settings of a Performance in the<br />
temporary area will be used.<br />
61
Chapter 3. Creating Your Own Sounds<br />
■ Turning Effects On/Off<br />
Built-in effects units (Multi-Effects, Chorus and Reverb) can<br />
be turned on/off for the XP-30 as a whole. Turn them off if<br />
you want to edit sound while listening to the original sound<br />
or if you want to use external effects units.<br />
1. Press [EFFECTS ON/OFF] to call up the EFFECTS ON/<br />
OFF display.<br />
fig.3-04<br />
2. Press [ ] or [ ] to move the cursor to the effect that<br />
you wish to modify.<br />
3. Rotate the VALUE dial or press [INC]/[DEC] to switch it<br />
on/off.<br />
4. When you finish making settings, press [EFFECTS ON/<br />
OFF] or [EXIT] to return to the previous display.<br />
* When the EFX (multi-effects), Chorus, and Reverb processors<br />
are all off, the [EFFECTS ON/OFF] indicator goes out, showing<br />
that the onboard effects processors are not used.<br />
Sound Editing Procedures<br />
With the XP-30, you have total control over various settings.<br />
Each item to be set is a parameter. Editing refers to<br />
modifying any parameter value. This section goes over<br />
editing procedures for Patches, Performances and Rhythm<br />
Sets.<br />
■ Editing a Patch<br />
Start by editing a preexisting Patch to create a new one. Since<br />
a Patch is a combination of up to any four Tones, you should<br />
listen to how the individual Tones sound before you edit.<br />
Four Tips for Editing Patches<br />
Start with a Patch that’s somewhat familiar sounding<br />
It’s hard to create a new sound that’s exactly what you<br />
want if you just select a Patch and modify its<br />
parameters at random. It makes sense to start with a<br />
Patch whose sound is related to what you have in mind.<br />
Deciding on the Tone to use<br />
When creating a Patch, deciding on the Tones you’ll use<br />
is crucial. For each Tone, use the TONE SWITCH [1]–[4]<br />
to decide whether to turn it on (have it sound) or off.<br />
Turn off Tones you don’t need to avoid using more<br />
voices than required. A Tone switches on/off each time<br />
its respective button is pressed. When a Tone’s<br />
indicator lights, it’ll sound.<br />
Check the Structure setting<br />
The important Type parameter (PATCH/COMMON/<br />
STRUCT) determines how the four Tones combine.<br />
Before editing Tones, make sure you really understand<br />
how they work together.<br />
Turn off effects<br />
Since XP-30 effects really influence the sound, turn<br />
them off to listen to the sound itself so you can better<br />
evaluate the changes you’re making. Sometimes just<br />
changing effects settings can give you the sound you<br />
want.<br />
62
Chapter 3. Creating Your Own Sounds<br />
1. Press [PATCH] to access the PATCH PLAY display, and<br />
select the Patch whose settings you wish to modify (p.<br />
47).<br />
An asterisk (*) will be displayed at the left of the Patch group.<br />
This shows Patch settings have been modified.<br />
fig.3-07<br />
2. Press [EDIT] to make the indicator light.<br />
3. Use the function buttons to select the display group.<br />
The button indicator of the selected display group will blink.<br />
fig.3-05<br />
* If you select another Patch in the group with an asterisk (*), the<br />
modified Patch settings will be lost. If you wish to keep these<br />
modified settings, you must write them into user memory (p. 68).<br />
4. Use [ ] or [ ] to select a display page.<br />
5. If you have selected a parameter display that can be set<br />
independently for each Tone, the number of the Tone<br />
selected for editing will be shown in the display. To<br />
select a different Tone, press [EDIT] to temporarily turn<br />
off the indicator, and use TONE SELECT [1]–[4] (located<br />
in the row of function buttons) to select a Part.<br />
fig.3-06<br />
For simultaneously modifying the same parameter for two or<br />
more Tones, hold down one of TONE SELECT [1]–[4]<br />
buttons and press another TONE SELECT [1]–[4] button,<br />
then another if so desired. An asterisk (*) will be indicated for<br />
Tones other than the first-selected Tone.<br />
* To switch Tones on/off, turn off [EDIT] indicator and then use<br />
the TONE SWITCH [1]–[4] located in the row of function<br />
buttons.<br />
6. Use [ ] or [ ] to move the cursor to the parameter<br />
you wish to modify.<br />
7. Use the VALUE dial, [INC]/[DEC] or numeric keys and<br />
modify the parameter value.<br />
* If you’ve selected two or more Tones, your editing will modify<br />
the parameter values for all selected Tones by the same amount.<br />
* If you’ve made a mistake in setting the parameter value or you<br />
don’t like the changes, just press [UNDO/COMPARE] to<br />
restore the value to what it was.<br />
8. If you wish to move to another display group, press<br />
[EDIT] to make the indicator light, and use the function<br />
buttons.<br />
* You can also move to another display group by holding down<br />
[SHIFT] and using [ ] or [ ]. Since this can be done even<br />
when [EDIT] indicator is dark, it is a faster way to get around<br />
because you don’t have to turn on [EDIT] indicator each time.<br />
9. Repeat steps 3–8 to complete a Patch.<br />
10. When you finish making settings, press [EXIT] or<br />
[PATCH] to return to the PATCH PLAY display.<br />
Editing Patches Using the Palette Display<br />
When editing a Tone in a Patch, the parameter values of the<br />
four Tones can be displayed together on a single display called<br />
the Palette display. Use it when you want to modify<br />
parameter values as you compare the settings of the four Tones.<br />
1. When modifying a Tone, use [ ] or [ ] to move the<br />
cursor to the parameter you wish to modify.<br />
2. Press [PALETTE EDIT] to call up the Palette display.<br />
fig.3-08<br />
3. Press a TONE SELECT [1]–[4] buttons, [ ] or [ ] to<br />
choose the Tone to modify.<br />
The button indicator for the selected Tone will light and the<br />
Tone number and Wave name appear in the display.<br />
For modifying the same parameter of two or more Tones<br />
simultaneously, hold down one of TONE SELECT [1]–[4]<br />
buttons and press another.<br />
4. Use the VALUE dial, [INC]/[DEC] or numeric keys to<br />
change the parameter value.<br />
If you’ve selected two or more Tones, your editing will<br />
modify the parameter values for all selected Tones by the<br />
same amount.<br />
If you want to set all selected Tones to the same value, select<br />
the Tone having that value by pressing [ ] or [ ] and<br />
while holding down [SHIFT], press [ENTER].<br />
* If you’ve made a mistake in setting the parameter value or you<br />
don’t like the changes, press [UNDO/COMPARE] to restore<br />
the value to what it was.<br />
5. If you wish to edit other parameters, press [ ] or [ ] to<br />
select the parameter that you wish to edit.<br />
6. Repeat steps 3–5 to complete a Patch.<br />
7. To cancel the palette display, press [PALETTE EDIT] to<br />
make the button indicator go dark.<br />
Chapter 3<br />
63
Chapter 3. Creating Your Own Sounds<br />
Note on Tone Editing<br />
Because the XP-30 is designed to create wholly realistic<br />
sounds, editing necessarily affects the complex PCM<br />
waveforms sound are based on. So if you try to create a<br />
sound which is totally different from the original waveform,<br />
the results may not be what you want. XP-30 waveforms are<br />
divided into:<br />
One-Shot: These waveforms contain sounds that have short<br />
decays. A one-shot waveform records the initial<br />
rise and fall of the sound. Some of the XP-30’s<br />
one-shot waveforms are sounds that are<br />
complete in themselves, such as percussive<br />
instrument sounds. The XP-30, however,<br />
contains many other one-shot waveforms that<br />
are only partial elements of sounds. These<br />
include attack components such as piano<br />
hammer sounds and guitar fret noises.<br />
Looped: These waveforms contain sounds with long<br />
decays or sustained sounds. With looped<br />
waveforms, the latter part of the sound is<br />
generated repeatedly over a specified portion of<br />
the waveform for as long as the note is held<br />
(allowing wave memory to be used more<br />
efficiently). The XP-30’s looped waveforms<br />
include such sound components as piano string<br />
vibrations and hollow sounds of brass<br />
instruments.<br />
The following diagram shows an example of sound (electric<br />
organ) that combines one-shot and looped waveforms.<br />
fig.3-09.e<br />
TVA ENV for looped Organ<br />
waveform (sustain portion)<br />
Key-off<br />
TVA ENV for one-shot Keyclick<br />
waveform (attack portion)<br />
+ =<br />
Resulting TVA ENV change<br />
Key-off<br />
Notes for Editing One-Shot Waveforms<br />
An envelope cannot be used for giving a one-shot waveform<br />
a longer decay than the original waveform’s, or make it a<br />
sustaining sound. Even if you were to make such envelope<br />
settings, you would simply be controlling a non-existent<br />
portion of the sound, so such settings would have no<br />
meaning.<br />
Notes for Editing Looped Waveforms<br />
With many acoustic instruments like piano and sax, radical<br />
timbral changes occur during the first few moments of the<br />
note. This initial attack is what defines much of the<br />
instrument’s character. The XP-30 provides a variety of<br />
waveforms containing realistic acoustic instrument attacks.<br />
To obtain the maximum realism when using these<br />
waveforms, it is best to leave the filter wide open during the<br />
attack. This way, all the complex timbral changes can be<br />
heard. For the decay portion of the sound, you can use the<br />
envelope to produce the desired changes. If you use the<br />
envelope to modify the attack portion as well, the natural<br />
attack contained in the waveform itself will not be heard to<br />
full advantage, and you may not achieve the result you want.<br />
fig.3-10.e<br />
Tone change stored<br />
with the wave<br />
Envelope<br />
for the TVF filter<br />
Resulting tone change<br />
Looped Portion<br />
If you try to make just the attack brighter and subdue just the<br />
decay using the TVF filter, you need to keep in mind the<br />
timbral characters of the original waveform. And particularly<br />
if you’re making a part of the sound brighter than the<br />
original waveform, you should first generate upper<br />
harmonics (not present in the original waveform) using<br />
Color and Depth parameters (PATCH/WAVE/FXM) before<br />
filtering. If you don’t, the results will be disappointing. To<br />
make the entire sound brighter than the original waveform,<br />
try adjusting effects such as enhancer and equalizer before<br />
modifying the TVF parameter (PATCH/TVF).<br />
64
Chapter 3. Creating Your Own Sounds<br />
■ Editing a Performance<br />
Start with an existing Performance and edit it to create a new<br />
Performance. But before you do, try to envision what the<br />
entire Performance will sound like and decide which Patch to<br />
assign to each of 16 Parts.<br />
1. Press [PERFORM] to access the PERFORM PLAY<br />
display, and select the Performance whose settings you<br />
wish to modify (p. 51).<br />
An asterisk (*) will be displayed at the left of the Performance<br />
group. This shows Performance settings have been modified.<br />
fig.3-13<br />
* If you select another Performance in the group with an asterisk<br />
(*), the modified Performance settings will be lost. If you wish to<br />
keep these modified settings, you must write them into user<br />
memory (p. 68).<br />
2. Press [EDIT] to make the indicator light.<br />
3. Use the function buttons to select the display group.<br />
The button indicator of the selected display group will blink.<br />
fig.3-11<br />
4. Use [ ] or [ ] to select a display page.<br />
5. If you have selected a parameter display that can be set<br />
independently for each Part, the number of the Part<br />
selected for editing will be shown in the display. To<br />
select a different Part, press [EDIT] to temporarily turn<br />
off the indicator, and use [1-8/9-16] and the function<br />
buttons to select a Part.<br />
fig.3-12<br />
Editing Performance Using the Palette<br />
Display<br />
You can also edit a Performance using the Palette display in<br />
Performance mode. When modifying Part settings for a<br />
Performance, the values for eight Parts (Part 1–8 or Part 9–16)<br />
will be displayed together on a single display. This is useful<br />
when you wish to change parameter values while comparing<br />
each Part settings.<br />
1. When modifying a Part, use [ ] or [ ] to move the<br />
cursor to the parameter you wish to modify.<br />
2. Press [PALETTE EDIT] to call up the Palette display.<br />
fig.3-14<br />
Chapter 3<br />
6. Use [ ] or [ ] to move the cursor to the parameter<br />
you wish to modify.<br />
7. Use the VALUE dial, [INC]/[DEC] or numeric keys and<br />
modify the parameter value.<br />
* If you’ve selected two or more Tones, your editing will modify<br />
the parameter values for all selected Tones by the same amount.<br />
* If you’ve made a mistake in setting the parameter value or you<br />
don’t like the changes, just press [UNDO/COMPARE] to<br />
restore the value to what it was.<br />
8. If you wish to move to another display group, press<br />
[EDIT] to make the indicator light, and use the function<br />
buttons.<br />
* You can also move to another display group by holding down<br />
[SHIFT] and using [ ] or [ ]. Since this can be done even<br />
when [EDIT] indicator is dark, it is a faster way to get around<br />
because you don’t have to turn on [EDIT] indicator each time.<br />
9. Repeat steps 3–8 to complete a Performance.<br />
10. When you finish making settings, press [EXIT] or<br />
[PERFORM] to return to the PERFORM PLAY display.<br />
3. Press [ ] or [ ] to choose the Part to modify.<br />
The Part number and the Patch name assigned to the Part<br />
will be shown in the display.<br />
* To switch between the palette page for parts 1–8 and the palette<br />
page for parts 9–16, press [1-8/9-16].<br />
4. Use the VALUE dial, [INC]/[DEC] or numeric keys to<br />
change the parameter value.<br />
* If you’ve made a mistake in setting the parameter value or you<br />
don’t like the changes, press [UNDO/COMPARE] to restore<br />
the value to what it was.<br />
5. If you wish to edit other parameters, press [ ] or [ ] to<br />
select the parameter that you wish to edit.<br />
6. Repeat steps 3–5 to complete a Performance.<br />
7. To cancel the palette display, press [PALETTE EDIT] to<br />
make the button indicator go dark.<br />
65
Chapter 3. Creating Your Own Sounds<br />
Modifying the Patch Assigned to a Part<br />
When using Patches in Performance mode, some settings<br />
such as effects settings will be affected by Performance<br />
settings. If you wish to edit a Patch while hearing how it will<br />
sound in the Performance, use this procedure:<br />
1. Make sure that the PERFORM PLAY display is showing.<br />
2. Press [ ] or [ ] to select the Part to which the selected<br />
Patch is assigned.<br />
3. While holding down [PERFORM], press [PATCH].<br />
Both button indicators will light. This will call up the PLAY<br />
display of the Patch assigned to the currently selected Part.<br />
fig.3-15<br />
4. The following steps are the same as when you modify a<br />
Patch in Patch mode.<br />
5. When you finish making settings, press [EXIT] to call up<br />
the PLAY display of the Patch assigned to the Part.<br />
An asterisk (*) will be displayed at the left of the Patch group.<br />
This indicates the Patch settings have been modified.<br />
6. To return to the PERFORM PLAY display, press<br />
[PERFORM] or [EXIT].<br />
* If you select another Patch in the group with an asterisk (*), the<br />
modified Patch settings will be lost. To keep these modified<br />
settings, you must write them into user memory (p. 68).<br />
■ Editing a Rhythm Set<br />
You can change the percussion instrument assigned to each<br />
key. As each percussion instrument consists of a single<br />
Rhythm Tone, there is no Palette display.<br />
1. Press [RHYTHM] to access the RHYTHM PLAY display,<br />
and select the Rhythm Set whose settings you wish to<br />
modify (p. 55).<br />
2. Press [EDIT] to make the indicator light.<br />
3. Use the function buttons to select the display group.<br />
The button indicator of the selected display group will blink.<br />
fig.3-16<br />
4. Use [ ] or [ ] to select a display page.<br />
5. If you have selected a parameter display that can be set<br />
independently for each key, the key selected for editing<br />
will be shown in the display. To select a different key,<br />
play the desired key on the keyboard.<br />
fig.3-17<br />
* If [EDIT] indicator is turned off, you can also use the TONE<br />
SELECT [1]–[4] (located in the row of function buttons) to<br />
select the displayed key.<br />
TONE SELECT [1]: move to an octave lower key<br />
TONE SELECT [2]: move to the semitone below<br />
TONE SELECT [3]: move to the semitone above<br />
TONE SELECT [4]: move to an octave higher key<br />
6. Use [ ] or [ ] to move the cursor to the parameter<br />
you wish to modify.<br />
7. Use the VALUE dial, [INC]/[DEC] or numeric keys and<br />
modify the parameter value.<br />
* If you’ve made a mistake in setting the parameter value or you<br />
don’t like the changes, just press [UNDO/COMPARE] to<br />
restore the value to what it was.<br />
8. If you wish to move to another display group, press<br />
[EDIT] to make the indicator light, and use the function<br />
buttons.<br />
* You can also move to another display group by holding down<br />
[SHIFT] and using [ ] or [ ]. Since this can be done even<br />
when [EDIT] indicator is dark, it is a faster way to get around<br />
because you don’t have to turn on [EDIT] indicator each time.<br />
9. Repeat steps 3–8 to complete a Rhythm Set.<br />
10. When you finish making settings, press [EXIT] or<br />
[RHYTHM] to return to the RHYTHM PLAY display.<br />
An asterisk (*) will be displayed at the left of the Rhythm Set<br />
group. This shows Rhythm Set settings have been modified.<br />
fig.3-18<br />
* If you select another Rhythm Set in the group with an asterisk<br />
(*), the modified Rhythm Set settings will be lost. If you wish to<br />
keep these modified settings, you must write them into user<br />
memory (p. 68).<br />
* Since Rhythm Sets do not have an LFO, it will not be possible to<br />
select the LFO group.<br />
66
Chapter 3. Creating Your Own Sounds<br />
Keeping Edited Sound<br />
■ Memory and Data Storage<br />
The location where Patch and Performance settings, etc. are<br />
stored is Memory. There are three memory types: temporary<br />
memory, rewritable memory and non-rewritable memory.<br />
fig.3-19.e<br />
Preset E (PR-E)<br />
Preset D (GM)<br />
Preset C (PR-C)<br />
Preset B (PR-B)<br />
Preset A (PR-A)<br />
Performance<br />
32<br />
Patch<br />
128<br />
Rhythm Set<br />
2<br />
Load<br />
Data File (.SVD)<br />
Performance<br />
32<br />
Patch<br />
128<br />
Rhythm Set<br />
2<br />
System<br />
XP-C<br />
XP-B<br />
XP-A<br />
Patch<br />
Rhythm Set<br />
Temporary Area<br />
Save<br />
XP-30 Sound<br />
User (USER)<br />
Performance<br />
32<br />
Patch<br />
128<br />
Rhythm Set<br />
2<br />
EXP-E Slot (XP-E)<br />
EXP-D Slot (XP-D)<br />
Patch<br />
Rhythm Set<br />
Write<br />
Expansion Board<br />
Rewritable Memory<br />
System Memory<br />
System memory stores system parameter settings that<br />
determine how the XP-30 functions. When you modify these<br />
settings, the system memory settings are rewritten directly.<br />
These settings are non-volatile, being retained even when the<br />
power is turned off.<br />
User Memory<br />
User memory contains data for 32 Performances, 128 Patches<br />
and two Rhythm Sets.<br />
Memory Card (optional: SmartMedia)<br />
These are read/write cards which can store data from<br />
internal system memory and user memory. You can use<br />
memory cards to store data for which there is no room in<br />
internal user memory, or data which you wish to use on<br />
another XP-30.<br />
Before a memory card can be used, it must be formatted (p.<br />
122).<br />
* Either “S2M-5” or “S4M-5” memory cards can be used.<br />
Memory cards are not included, but may be purchased from<br />
your dealer.<br />
Non-Rewritable Memory<br />
Preset Memory<br />
Data in Preset memory (Patch: PR-A–C, E, GM, XP-A–C,<br />
Performance: PR-A, B, Rhythm Set: PR-A–C, E, GM, XP-A, C)<br />
cannot be rewritten. However, you can call up settings from<br />
preset memory into the temporary area, modify them and<br />
then store the modified data in rewritable memory.<br />
Chapter 3<br />
Memory Card<br />
Temporary Memory<br />
Temporary Area<br />
This area holds data for the Performance, Patch, and Rhythm<br />
Set you select using the front panel buttons, etc. When you<br />
play the keyboard or play back an external sequence, sound<br />
is produced based on data in the temporary area. When you<br />
modify a Performance, Patch or Rhythm Set, you are<br />
modifying the data that has been called into the temporary<br />
area instead of the data in memory.<br />
Settings in the temporary area are temporary, and will be lost<br />
when the power is turned off or when you select another<br />
Performance/Patch/Rhythm Set. To keep the settings you<br />
have modified, you must write them into rewritable<br />
memory.<br />
Wave Expansion Boards<br />
(optional: SR-JV80 Series)<br />
Up to four Wave Expansion Boards can be installed in EXP-<br />
D, E Slots in the XP-30. Wave Expansion Boards contain<br />
Wave data, as well as Patches and Rhythm Sets that use this<br />
Wave data, which can be called directly into the temporary<br />
area and played.<br />
67
Chapter 3. Creating Your Own Sounds<br />
■ Storing a Sound You Modify<br />
into User Memory<br />
The modified settings you make are only temporary, and will<br />
be lost if you turn the power off or select another Patch,<br />
Performance or Rhythm Set. To keep the modified settings,<br />
you must write them into user memory.<br />
1. In Patch mode (when storing a Patch), Performance<br />
mode (when storing a Performance) or in Rhythm Set<br />
mode (when storing a Rhythm Set), press [UTIL/CARD].<br />
The UTIL 1 display will appear.<br />
fig.3-20<br />
2. Use [ ] or [ ] to make “1: WRITE” blink. Then press<br />
[ENTER].<br />
The WRITE display will appear.<br />
fig.3-21.e<br />
3. Use the VALUE dial, [INC]/[DEC] or numeric keys to<br />
specify the Patch, Performance or Rhythm Set number of<br />
the destination of writing.<br />
4. Press [ENTER].<br />
If Internal Write Protect is turned off, the specified writing<br />
destination Patch, Performance or Rhythm Set will be<br />
overwritten.<br />
5. If Internal Write Protect (p. 121) is turned on, the<br />
following display will appear. Change the ON setting to<br />
OFF, and press [ENTER]. Internal Write Protect will be<br />
turned off, and you will return to the display of step 2.<br />
Press [ENTER] once again and the selected Patch will be<br />
overwritten.<br />
fig.3-22<br />
Writing destination<br />
* Internal Write Protect is automatically turned ON when the<br />
XP-30’s power is turned on.<br />
Functions of Patch Parameters<br />
fig.3-05<br />
■ Settings Common to the Entire<br />
Patch (COMMON)<br />
On this display you can assign a name to a Patch and set the<br />
volume and pan of the entire Patch.<br />
PATCH NAME<br />
You can assign a name of up to 12 characters to the Patch.<br />
* For details on assigning names, refer to “Assigning a Name”<br />
(p. 46).<br />
PATCH CATEGORY<br />
Category<br />
Specify the type (category) of the Patch.<br />
The Patch Search function uses this setting. This setting also<br />
determines the phrase that will be sounded by the Phrase<br />
Preview function.<br />
* For details on the category names, refer to p. 49.<br />
PATCH CLOCK<br />
Some parameters allow you to set a time value in terms of a<br />
note length which is determined by a tempo setting or tempo<br />
source you specify; Rate parameters (PATCH/ LFO/ LFO1,<br />
2), Time parameter (PATCH/WAVE/TONE DELAY), and<br />
some Multi-Effects parameters. This Patch Clock setting sets<br />
the tempo which can be used by these parameters.<br />
* When using a Patch in Performance mode, the setting of this<br />
parameter will be ignored, and the setting of the PERFORM<br />
CLOCK display (PERFORM/COMMON) will be used instead.<br />
Source (Patch Clock Source)<br />
Select the source of the Patch Clock.<br />
PATCH: Synchronize to the Patch Tempo setting.<br />
SYSTEM: Synchronize to the tempo clock of the sequencer.<br />
* The Patch Clock does not transmit clock messages from MIDI<br />
OUT connector.<br />
Tempo (Patch Tempo)<br />
Set the Patch Tempo setting.<br />
* When Source (Patch Clock Source) is set to SYSTEM,<br />
synchronization will be according to the tempo clock of the<br />
system, so it will not be possible to set the tempo value. The<br />
tempo of the system will be displayed in parentheses ( ).<br />
PATCH COMMON<br />
Level<br />
Adjust the volume level of the Patch.<br />
68
Chapter 3. Creating Your Own Sounds<br />
Pan<br />
Adjust the stereo position of the Patch. A setting of L64 is far<br />
left, 0 is center, and 63R is far right.<br />
Analog Feel (Analog Feel Depth)<br />
Adjust the depth at which 1/f modulation is applied to the Patch.<br />
1/f Modulation<br />
“1/f” is a mathematical ratio that expresses the amount<br />
of “predictable randomness” occurring in natural<br />
sounds that the human ear finds pleasing, such as soft<br />
breezes or gentle brooks. The XP-30 is able to modulate<br />
the pitch and volume of sounds by this ratio to create<br />
the warmth characteristic of early analog synthesizers.<br />
Priority (Voice Priority)<br />
Specify which currently-sounding notes will take priority<br />
when notes are turned off to make room for newly-requested<br />
notes that would exceed the limit of 64 simultaneous voices.<br />
LAST: Notes played later will take priority. When the<br />
65th voice is requested, the first-played of the<br />
currently sounding notes will be turned off.<br />
LOUDEST: Louder notes will take priority. When the 65th<br />
voice is requested, the softest of the currently<br />
sounding notes will be turned off.<br />
VelRang (Velocity Range Switch)<br />
Specify whether the Velocity Range setting (see following<br />
display) will be used or not. The Velocity Range setting will<br />
be used when the VelRange parameter is ON.<br />
Octave (Octave Shift)<br />
Specify the transposition of the Patch when played on the<br />
keyboard, in units of one octave (-3–+3 octaves).<br />
Stretch (Stretch Tuning Depth)<br />
Select the stretch tuning curve. The selected curve will affect the<br />
way in which notes of a chord sound with each other. The diagram<br />
below shows the tuning curves which can be selected. In the<br />
“tuning curve,” the horizontal axis represents the scale, and the<br />
vertical axis represents pitch difference relative to equal<br />
temperament. When OFF is selected for this parameter, the notes of<br />
the keyboard will be in mathematically equal temperament. With a<br />
setting of 3, the high and low note ranges will be stretched the most.<br />
fig.3-23.e<br />
Pitch difference from<br />
equal temperament<br />
OFF<br />
1<br />
2<br />
3<br />
Low note range<br />
Parameter value<br />
3<br />
2<br />
1<br />
OFF<br />
High note range<br />
VELOCITY (Velocity Range)<br />
These parameters specify the range of velocities that will<br />
play the Tone. This can be used to make notes of different<br />
strengths play different Tones.<br />
* To make Velocity Range settings, the Velocity Range Switch in<br />
the previous display must be turned ON.<br />
Lower (Velocity Range Lower)<br />
Specify the lower velocity limit. Although it also depends on<br />
the Cross Fade settings, notes played softer than this limit will<br />
not sound the Tone, or will produce extremely quiet sounds.<br />
Upper (Velocity Range Upper)<br />
Specify the upper velocity limit. Although it also depends on<br />
the Cross Fade settings, notes played more strongly than this<br />
limit will not sound the Tone, or will produce extremely<br />
quiet sounds.<br />
* It is not possible to set Lower to a value greater than Upper, nor<br />
Upper to a value less than Lower. If you attempt to do so, the<br />
two values will change together.<br />
Cross Fade (Velocity Cross Fade)<br />
Specify the way in which the volume of the Tone will change<br />
when the velocity of a note falls outside of the specified Velocity<br />
Range. Higher settings will result in a more gradual change in<br />
volume. If you do not want the Tone to sound at all for<br />
velocities outside the specified range, set this parameter to 0.<br />
fig.3-24.e<br />
Level<br />
Chapter 3<br />
Stretched Tuning<br />
Acoustic pianos are normally tuned so that the high note<br />
range is a bit sharper and the low note range is a bit flatter<br />
than a mathematically calculated equal temperament (i.e.,<br />
where each octave would be precisely double the<br />
frequency of the previous octave). This is done simply<br />
because pianos sound better when tuned this way.<br />
1<br />
Lower<br />
parameter value<br />
Upper<br />
parameter value<br />
Velocity<br />
69
Chapter 3. Creating Your Own Sounds<br />
KEY RANG (Key Range)<br />
These parameters specify the range of notes that will play the<br />
Tone. This can be used to make notes in different areas of the<br />
keyboard play different Tones.<br />
Lower (Key Range Lower)<br />
Specify the lowest note that will play the Tone.<br />
Upper (Key Range Upper)<br />
Specify the highest note that will play the Tone.<br />
* It is not possible to set Lower to a value greater than Upper, nor<br />
Upper to a value less than Lower. If you attempt to do so, the<br />
two values will change together.<br />
* If you have used Octave Shift (System) or the Transpose<br />
parameter (SYSTEM/CONTROL/KEYBOARD) to transpose<br />
the pitch of the XP-30’s keyboard, the keyboard area specified by<br />
Key Range will also be shifted.<br />
STRUCT (Structure)<br />
Type (Structure Type)<br />
The Structure parameter determines how Tones 1 and 2 (and<br />
3 and 4) are connected.<br />
fig.3-25a<br />
TYPE 1<br />
fig.3-25e<br />
fig.3-25f<br />
fig.3-25g<br />
fig.3-25h<br />
TYPE 5<br />
TONE 1 (3)<br />
TONE 2 (4)<br />
TYPE 6<br />
TONE 1 (3)<br />
TONE 2 (4)<br />
TYPE 7<br />
TONE 1 (3)<br />
TONE 2 (4)<br />
TYPE 8<br />
WG TVA TVF<br />
R<br />
WG TVF TVA<br />
WG TVA TVF<br />
R<br />
WG TVF TVA<br />
WG TVF TVA<br />
R<br />
WG TVF TVA<br />
TONE 1 (3)<br />
WG<br />
TVF<br />
TVA<br />
TONE 1 (3)<br />
WG<br />
TVF<br />
TVA<br />
TONE 2 (4)<br />
WG TVF TVA<br />
TONE 2 (4)<br />
R<br />
WG TVF TVA<br />
fig.3-25b<br />
TYPE 2<br />
fig.3-25i<br />
TYPE 9<br />
TONE 1 (3)<br />
WG<br />
TVA<br />
TVF<br />
TONE 1 (3)<br />
WG<br />
TVF<br />
TVA<br />
TONE 2 (4)<br />
WG TVF TVA<br />
TONE 2 (4)<br />
R<br />
WG TVF TVA<br />
fig.3-25c<br />
TYPE 3<br />
fig.3-25j<br />
TYPE 10<br />
TONE 1 (3)<br />
TONE 2 (4)<br />
WG TVA TVF<br />
B<br />
WG TVF TVA<br />
TONE 1 (3)<br />
TONE 2 (4)<br />
WG TVF TVA<br />
R<br />
WG TVF TVA<br />
fig.3-25d<br />
TYPE 4<br />
TONE 1 (3)<br />
WG<br />
TVA<br />
TVF<br />
B<br />
TONE 2 (4)<br />
WG TVF TVA<br />
70
Chapter 3. Creating Your Own Sounds<br />
The display will graphically indicate the selected Structure.<br />
The symbols displayed have the following meanings.<br />
W1 (WG1), W2 (WG2), F1 (TVF1), F2 (TVF2), A1 (TVA1), A2<br />
(TVA2), B (booster), R (ring modulator)<br />
* If you select a Tone while in the Structure display, the Tone that<br />
is paired with the selected Tone will also be selected.<br />
* If a Structure 2–10 is selected, turning off one Tone will cause<br />
the other Tone to be connected in the simple order of WG/TVF/<br />
TVA.<br />
Booster (Booster Gain)<br />
If the Type parameter has been set to 3 or 4, you can adjust<br />
how strongly the Booster will function. The Booster amplifies<br />
the incoming signal, causing it to distort. This creates an<br />
effect similar to the distortion often used on an electric<br />
guitar.<br />
■ Setting Effects for a Patch<br />
(EFFECTS)<br />
This group contains settings for the Multi-Effects/Chorus/<br />
Reverb effects used by a Patch.<br />
* If an “x” mark is displayed at the right of the display name, the<br />
effect for that display has been turned off. Turn the<br />
corresponding effect on before you make settings (p. 62).<br />
OUTPUT<br />
These parameters specify how the output of each Tone will<br />
be sent to the effects.<br />
* When the Type parameter (PATCH/COMMON/STRUCT) has<br />
a setting of 2–10, the outputs of Tones 1 (3) and 2 (4) will be<br />
combined with Tone 2 (4). This means that the setting for Tone<br />
1 (3) will be ignored.<br />
Ring Modulator<br />
The Ring Modulator multiplies two Tones together,<br />
creating a new sound that includes overtones<br />
(inharmonic overtones) that were not present in either<br />
of the two original Tones. Since the pitch difference<br />
between the two Tones will change the overtone<br />
structure, the result will be an unpitched metallic<br />
sound. This is especially suitable for creating bells and<br />
other metallic sounds.<br />
fig.3-26<br />
Output Assign (Output Assign/Output Level)<br />
Select whether or not the output of each Tone will be sent<br />
through Multi-Effects, and adjust the volume of each Tone.<br />
MIX: Output the Tone to the OUTPUT jack without passing<br />
through Multi-Effects.<br />
EFX: Output the Tone to the OUTPUT jack through Multi-<br />
Effects.<br />
* If you select MIX, the settings in the PATCH EFX OUT<br />
display (PATCH/EFFECTS) will be ignored.<br />
Chorus (Chorus Send Level)<br />
Adjust the amount of Chorus for each Tone.<br />
Chapter 3<br />
Reverb (Reverb Send Level)<br />
Adjust the amount of Reverb for each Tone.<br />
PATCH EFX TYPE<br />
Specify the Patch Multi-Effects.<br />
Type (EFX Type)<br />
Select the type of Multi-Effects. For details refer to “Multi-<br />
Effects Types (EFX Parameter)” (p. 93).<br />
PATCH EFX PRM (Patch EFX Parameters)<br />
Set the various parameters of the selected EFX type. For<br />
details refer to “Multi-Effects Types (EFX Parameter)” (p.<br />
93).<br />
71
Chapter 3. Creating Your Own Sounds<br />
PATCH EFX OUT (Patch EFX Output)<br />
These parameters specify the output for the Tone for which<br />
EFX was selected in Output Assign.<br />
* For Tones which have an Output Assign setting of MIX, the<br />
settings of this display will be ignored.<br />
Mix Out (EFX Output Level)<br />
Adjust the volume level of the original sound and the Multi-<br />
Effects sound.<br />
Chorus (Chorus Send Level)<br />
Adjust the amount of Chorus for the sound that passes<br />
through Multi-Effects.<br />
Reverb (Reverb Send Level)<br />
Adjust the amount of Reverb for the sound that passes<br />
through Multi-Effects.<br />
PATCH EFX CTRL (Patch EFX Control)<br />
Use this setting when you wish to use a specific controller to<br />
control an EFX parameter. The EFX parameters available for<br />
control will depend on the selected EFX type. For details<br />
refer to “Multi-Effects Types (EFX Parameter)” (p. 93). The<br />
upper line of the display will show the EFX parameters that<br />
can be controlled. For each EFX parameter, you can specify<br />
the EFX Control Source and the EFX Control Depth.<br />
EFX Control Source 1, 2<br />
The following MIDI controllers can be used. If you wish to<br />
use a controller that will apply to all Patches, or a controller<br />
that cannot be directly specified here, select SYS-CTRL1 or<br />
SYS-CTRL2, and then select the controller using the Control<br />
1/2 parameter (SYSTEM/CONTROL/SYS-CTRL ASSIGN).<br />
OFF:<br />
controller not used<br />
SYS-CTRL1: System controller (control 1)<br />
SYS-CTRL2: System controller (control 2)<br />
MODULATION: Modulation (MIDI controller number 1)<br />
BREATH: Breath (MIDI controller number 2)<br />
FOOT: Foot (MIDI controller number 4)<br />
VOLUME: Volume (MIDI controller number 7)<br />
PAN: Pan (MIDI controller number 10)<br />
EXPRESSION: Expression (MIDI controller number 11)<br />
BENDER: Pitch bend<br />
AFTERTOUCH: Aftertouch<br />
EFX Control Depth 1, 2<br />
Adjust the amount of change that will occur in response to<br />
controller movements. Higher settings will result in greater<br />
change. Negative (-) settings will reverse the direction of<br />
change.<br />
PATCH CHORUS<br />
These parameters control the Chorus effect of the Patch.<br />
Rate (Chorus Rate)<br />
Adjust the speed of modulation for the Chorus effect.<br />
Depth (Chorus Depth)<br />
Adjust the depth of modulation for the Chorus effect.<br />
Delay (Chorus Pre Delay)<br />
Adjust the time delay after the original sound begins until<br />
the Chorus effect begins to apply. Higher settings result in a<br />
more spacious effect.<br />
Fbk (Chorus Feedback Level)<br />
Adjust the amount of sound from the Chorus output that is<br />
returned (fed back) to the Chorus. Higher settings result in a<br />
more intense effect.<br />
Level (Chorus Level)<br />
Adjust the volume of the Chorus effect.<br />
Out (Chorus Output Assign)<br />
Select the way in which the Chorus and Reverb are<br />
connected.<br />
MIX:<br />
fig.3-27.e<br />
Chorus input<br />
Reverb input<br />
The Chorus sound and the Reverb sound are mixed.<br />
REV:Apply reverb to the chorus sound.<br />
fig.3-28.e<br />
Chorus<br />
input<br />
Reverb<br />
input<br />
M+R: Mix the chorus sound to which reverb is not applied<br />
and the chorus sound to which reverb is applied.<br />
fig.3-29.e<br />
Reverb<br />
input<br />
Chorus<br />
input<br />
Reverb<br />
Chorus<br />
Chorus<br />
Chorus<br />
Reverb<br />
Reverb<br />
OUTPUT<br />
OUTPUT<br />
OUTPUT<br />
72
Chapter 3. Creating Your Own Sounds<br />
PATCH REVERB<br />
These parameters control the Reverb effect of the Patch.<br />
Type (Reverb/Delay Type)<br />
Select the type of Reverb effect.<br />
ROOM1: dense reverb with short decay<br />
ROOM2: sparse reverb with short decay<br />
STAGE1: reverb with greater late reverberation<br />
STAGE2: reverb with strong early reflections<br />
HALL1: reverb with clear reverberance<br />
HALL2: reverb with rich reverberance<br />
DELAY: a conventional delay<br />
PAN-DLY: a delay with echoes that move left and right<br />
Time (Reverb/Delay Time)<br />
Adjust the time of reverberation. If you have selected DELAY<br />
or PAN-DLY, this parameter will adjust the time delay from<br />
the original sound until the first echo will sound.<br />
Fbk (Delay Feedback Level)<br />
Adjust the amount of delayed sound that is returned (fed<br />
back) to the delay. Higher values result in more delay<br />
repeats.<br />
* If you have selected any one of the Reverb types (ROOM1–<br />
HALL2), this parameter has no effect.<br />
HF Damp (Reverb/Delay HF Damp)<br />
Adjust the frequency above which the reverberant sound will<br />
be cut. As the frequency is set lower, more of the high<br />
frequencies will be cut, resulting in a softer and more muted<br />
reverberance. If you do not want the high frequencies to be<br />
cut, set this parameter to BYPASS.<br />
Level (Reverb/Delay Level)<br />
Adjust the volume of the reverberant (or delayed) sound.<br />
■ Using Controllers to Change How<br />
Sounds Are Played (CONTROL)<br />
The parameters in this group determine how the controllers<br />
will function.<br />
KEY MODE & BENDER<br />
(Key Assign Mode & Bender)<br />
Assign (Key Assign Mode)<br />
Specify how notes will be played. When playing a solo instrument<br />
Patch (such as sax or flute) it is effective to use a setting of SOLO.<br />
POLY: Two or more notes can be played simultaneously.<br />
SOLO: Only one note will sound at a time.<br />
Legato (Solo Legato Switch)<br />
Turn this parameter ON when you use Solo Legato, and OFF when<br />
you do not. Solo Legato is a function that works only when the Key<br />
Assign Mode is SOLO. When Solo Legato is ON, pressing a key<br />
while a previous key is already pressed will cause the note to<br />
change pitch to the pitch of the newly pressed key while continuing<br />
to sound. This is effective when you wish to simulate performance<br />
techniques such as a guitarist’s hammering on and pulling off.<br />
Bend Range<br />
Specify the amount of pitch change that will occur when you<br />
move the Pitch Bend Lever. The left value specifies the pitch<br />
change that will occur when the lever is moved fully left. The<br />
right value specifies the pitch change that will occur when the<br />
lever is moved fully right. The left value has a range of -48–0 (-4–<br />
0 octaves), and the right value has a range of 0–+12 (0–1 octaves).<br />
PORTAMENTO<br />
Portamento is a function that causes the pitch to change<br />
smoothly from one note to the next played note. When the<br />
Key Assign Mode is SOLO, this is effective when simulating<br />
performance techniques such as a violinist’s glissando.<br />
Chapter 3<br />
Sw (Portamento Switch)<br />
Set this to ON when you wish to use Portamento.<br />
Time (Portamento Time)<br />
Adjust the time over which the pitch will change to the new pitch.<br />
Mode (Portamento Mode)<br />
Select the way in which Portamento will be applied.<br />
NORMAL: Portamento will always be applied.<br />
LEGATO: Portamento will be applied only for notes played<br />
legato (i.e., when you press the next key before<br />
releasing the previous key.<br />
Type (Portamento Type)<br />
Select the way in which the pitch difference between the two<br />
notes will be related to the time of movement.<br />
RATE: Time of movement will change in relation to the<br />
pitch difference.<br />
TIME: Time of movement will be constant, regardless of the<br />
pitch difference.<br />
73
Chapter 3. Creating Your Own Sounds<br />
Start (Portamento Start Pitch)<br />
Portamento will begin anew if you press another key during<br />
a pitch movement. This setting specifies how the new<br />
portamento will start.<br />
PITCH: Pitch will begin changing when the new key is<br />
pressed.<br />
fig.3-30.e<br />
Pitch<br />
C5<br />
D4<br />
C4<br />
NOTE: Pitch will begin changing from the destination of the<br />
current movement.<br />
fig.3-31.e<br />
Pitch<br />
C5<br />
D4<br />
C4<br />
press D4 key<br />
press C5 key<br />
press C4 key<br />
press D4 key<br />
press C5 key<br />
press C4 key<br />
RxSWITCH (Receive Switch)<br />
Time<br />
Time<br />
These parameters determine how Volume/Pan/Pitch Bend<br />
MIDI messages will be received by each Tone.<br />
* In general, Volume messages control the volume, Pan messages<br />
control the stereo location, and Pitch Bend messages control the<br />
pitch of. However the XP-30 allows you to use these MIDI<br />
messages to control other parameters that you specify. Thus, if<br />
you are using a message to control another (i.e., a non-standard)<br />
parameter, you should turn off reception for that MIDI message.<br />
If reception is turned on, that MIDI message will control its<br />
standard function in addition to the special assignment you<br />
have made.<br />
Pan (Receive Pan Control Switch)<br />
Specify how Pan messages will be received.<br />
OFF: Not received.<br />
CONT: Whenever a Pan message is received, it will<br />
immediately change the stereo location of the<br />
sound.<br />
KEY-ON: The stereo location of the sound will be changed<br />
when the next note is played. If a Pan message is<br />
received while a note is sounding, the current<br />
stereo location will not change until the next note.<br />
In this case, the stereo location will change only<br />
for the note played later, and the currently<br />
sounding note will not move.<br />
Pitch Bend (Receive Pitch Bend Switch)<br />
If you want Pitch Bend messages to be received, turn this<br />
parameter ON. If not, turn it OFF.<br />
DAMPER<br />
Specify how Hold 1 (sustain pedal) messages will be received<br />
by each Tone.<br />
Hold-1 RxSwitch (Receive Hold 1 Switch)<br />
If you want Hold 1 messages to be received, turn this<br />
parameter ON. If not, turn it OFF.<br />
Redamper (Redamper Switch)<br />
If a Hold 1 message is received during the time between a<br />
note-off (when you release the key) until when the sound<br />
disappears, the currently sounding sounds will be sustained<br />
if this Redamper setting is ON. If you use this function, you<br />
must also turn on the Receive Hold 1 switch.<br />
PEAK & HOLD<br />
Hold messages (Hold 1, Hold 2, Sostenuto, Soft) are used to<br />
sustain the sound. The XP-30 allows you to use these Hold<br />
messages to hold the values of specific parameters.<br />
* If you use this function, you must also turn on the Receive Hold<br />
1 switch for the Patch (previous screen).<br />
* If you select HOLD for the following parameters, you must also<br />
set the Hold parameter (SYSTEM/CONTROL/CONTROL<br />
SOURCE) to the type of Hold message being controlled.<br />
* If you select PEAK for the following parameters, you must also<br />
set the Peak parameter (SYSTEM/CONTROL/CONTROL<br />
SOURCE) to the type of Hold message being controlled.<br />
Volume (Receive Volume Switch)<br />
If you want Volume messages to be received, turn this<br />
parameter ON. If not, turn it OFF.<br />
74
Chapter 3. Creating Your Own Sounds<br />
EfxCtrl (EFX Control Peak/Hold)<br />
Specify how Hold messages will affect the parameters you<br />
specify in the PATCH EFX CTRL display (PATCH/<br />
EFFECTS).<br />
OFF: Parameter values will not be held even if Hold<br />
messages are received.<br />
HOLD: Parameter values will be held when Hold messages<br />
are received.<br />
PEAK: Parameter values will be held when Hold messages<br />
are received. However if a parameter value higher<br />
than the current one is received while Hold is still<br />
on, that new value will be held.<br />
Ctrl 1 (Control 1 Peak/Hold)<br />
Specify how Hold messages will affect the parameters<br />
controlled by Control Source 1 (Modulation: MIDI controller<br />
number 1). The settings are the same as for EFX Control.<br />
Ctrl 2 (Control 2 Peak/Hold)<br />
This parameter specifies the way in which Hold messages<br />
will control the parameter selected as Control Source 2 in the<br />
following display. The range of values is the same as for EFX<br />
control.<br />
Ctrl 3 (Control 3 Peak/Hold)<br />
This parameter specifies the way in which Hold messages<br />
will control the parameter selected as Control Source 3 in the<br />
following display. The range of values is the same as for EFX<br />
control.<br />
CONTROL SOURCE<br />
If you wish to use controllers to control a specific Tone<br />
parameter, select the controller in this display. Each Patch<br />
can have up to 3 control source assigned to it, but the<br />
function of control source 1 is fixed at Modulation (MIDI<br />
controller number 1).<br />
Control 2 (Control Source 2)<br />
Assign one of the following controllers to Control Source 2. If<br />
you want to use a controller that will be common to all<br />
Patches, or to use a controller that is not available for<br />
selection here, first select SYS-CTRL 1 or SYS-CTRL 2 then set<br />
the Control 1/2 parameter (SYSTEM/CONTROL/SYS-CTRL<br />
ASSIGN) to select the controller.<br />
OFF:<br />
a controller will not be used<br />
SYS-CTRL1: System controller (Control 1)<br />
SYS-CTRL2: System controller (Control 2)<br />
MODULATION: Modulation (MIDI controller number 1)<br />
BREATH: Breath (MIDI controller number 2)<br />
FOOT: Foot (MIDI controller number 4)<br />
VOLUME: Volume (MIDI controller number 7)<br />
PAN: Pan (MIDI controller number 10)<br />
EXPRESSION: Expression (MIDI controller number 11)<br />
BENDER: Pitch bend<br />
AFTERTOUCH: Aftertouch<br />
LFO1: LFO1 rate<br />
LFO2: LFO2 rate<br />
VELOCITY: Velocity<br />
KEYFOLLOW: Key follow (adjust the parameter value<br />
depending on the keyboard location, relative<br />
to a standard value (0) at the C4 key)<br />
PLAYMATE: Playmate (adjust the parameter value<br />
depending on the time length that the key is<br />
pressed)<br />
Control 3 (Control Source 3)<br />
Assign a controller to Control Source 3. The controllers<br />
available for selection are the same as for Control Source 2.<br />
CONTROL 1–3<br />
Specify the parameters to be controlled by Control Sources 1–3<br />
and the depth of each parameter. The upper line of the display<br />
will show the Control Source selected in the previous display.<br />
* From the PATCH PLAY display you can switch directly to the<br />
CONTROL1 display by pressing [CONTROLLER] while<br />
holding down [SHIFT].<br />
Destination 1–4<br />
Select the parameters to be controlled. Up to four parameters can<br />
be specified for each controller, and controlled simultaneously.<br />
OFF: no control<br />
PCH: WG Pitch<br />
CUT: TVF Cutoff Frequency<br />
RES: TVF Resonance<br />
LEV: TVA Level<br />
PAN: TVA Pan<br />
MIX: Output level of Tone<br />
CHO: Chorus Send level of Tone<br />
REV: Reverb Send level of Tone<br />
PL1: LFO1 depth of WG Pitch<br />
PL2: LFO2 depth of WG Pitch<br />
FL1: LFO1 depth of TVF Cutoff Frequency<br />
FL2: LFO2 depth of TVF Cutoff Frequency<br />
AL1: LFO1 depth of TVA Level<br />
AL2: LFO2 depth of TVA Level<br />
pL1: LFO1 depth of TVA Pan<br />
pL2: LFO2 depth of TVA Pan<br />
L1R: LFO1 rate<br />
L2R: LFO2 rate<br />
Depth 1–4<br />
Adjust the amount of change that will occur in response to<br />
controller movement. Higher value will cause greater<br />
change. Negative (-) values will reverse the direction of the<br />
change. For LFO rates, negative (-) values will lengthen the<br />
period (causing slower modulation), and positive (+) values<br />
will shorten the period (causing faster modulation).<br />
Chapter 3<br />
75
Chapter 3. Creating Your Own Sounds<br />
■ Modifying Waveform (WAVE)<br />
This group contains parameters related to the basic<br />
waveform (Wave) of the Tone.<br />
WAVE<br />
Group (Wave Group)<br />
Select the Group of the Wave.<br />
INT-A, B: Internal A, B<br />
EXP-A–E: Wave Expansion Boards A–E<br />
* It is not possible to select a Group of a Wave Expansion Board<br />
that is not installed.<br />
Number (Wave Number)<br />
Select the Wave number. The name of the Wave will be<br />
displayed in parentheses ( ).<br />
Gain (Wave Gain)<br />
Adjust the gain (volume boost) of the Wave. The setting<br />
range is -6–+12 dB, in steps of 6 dB. An increase of 6 dB<br />
doubles the gain. When using the Booster to distort the<br />
sound, it is effective to use the maximum Gain setting.<br />
Switch (Tone Switch)<br />
When you wish to use the Tone, set this ON. When not using<br />
the Tone, set this OFF. In order to make best use of the<br />
available number of simultaneous voices, unused Tones<br />
should be turned off.<br />
* When you use TONE SWITCH [1]–[4] to turn Tones on/off,<br />
this is the parameter that is being set.<br />
FXM (Frequency cross modulation)<br />
FXM is a function that uses frequency modulation to add<br />
new harmonic components to the sound. It can be used as a<br />
simple ring modulator in order to add a metallic flavor.<br />
Switch (FXM Switch)<br />
When you wish to use FXM turn this ON. If not, turn it OFF.<br />
Color (FXM Color)<br />
Select one of four ways in which FXM will use frequency<br />
modulation.<br />
Depth (FXM Depth)<br />
Adjust the depth of the frequency modulation created by<br />
FXM.<br />
TONE DELAY<br />
This parameter produces a time delay from the moment the<br />
key is pressed (or released) until when the Tone begins to<br />
sound. Since you can adjust the timing of each Tone, you can<br />
create effects in which pressing a single key produces two or<br />
more sounds at different times.<br />
* If you do not wish to use Tone Delay, set Mode to NORMAL<br />
and Delay Time to 0.<br />
Mode (Tone Delay Mode)<br />
Select the way in which the Tone will sound.<br />
NORMAL: The Tone will sound after the specified<br />
Delay Time.<br />
fig.3-32.e<br />
press key<br />
HOLD:<br />
fig.3-33.e<br />
Delay Time<br />
Delay Time<br />
press key<br />
release key<br />
If the key is pressed for longer than the<br />
specified Delay Time, the Tone will sound after<br />
the Delay Time. If the key is released earlier<br />
than the Delay Time, the Tone will not sound.<br />
Delay<br />
Time<br />
release key press key<br />
Tone does<br />
not sound<br />
release key<br />
PLAYMATE: If 2 seconds or more pass before the next key is<br />
pressed, the Tone will sound after the Delay<br />
Time. If less than 2 seconds pass before the next<br />
key is pressed, that interval will become the<br />
Delay Time after which the Tone will sound.<br />
CLOCK-SYNC: Synchronize the Delay Time to either the Patch<br />
Tempo (PATCH/COMMON/PATCH<br />
CLOCK), the Performance Tempo<br />
(PERFORM/COMMON/PERFORM CLOCK),<br />
or the tempo clock of the XP-30’s system.<br />
If you want to use a fixed tempo in Patch<br />
mode (Tempo parameter setting), set the<br />
Source parameter (PATCH/COMMON/<br />
PATCH CLOCK) to PATCH and set the<br />
desired tempo.<br />
If you want to use the system’s tempo clock<br />
in Patch mode, set the Source parameter<br />
(PATCH/COMMON/PATCH CLOCK) to<br />
SYSTEM.<br />
If you want to use a fixed tempo in<br />
Performance mode (Tempo parameter<br />
setting), set the Source parameter<br />
(PERFORM/COMMON/PERFORM<br />
CLOCK) to PERFORM and set the desired<br />
tempo.<br />
If you want to use the system’s tempo clock<br />
in Performance mode, set the Source<br />
parameter (PERFORM/COMMON/<br />
PERFORM CLOCK) to SYSTEM.<br />
76
Chapter 3. Creating Your Own Sounds<br />
KEY-OFF-N:<br />
fig.3-34.e<br />
press key<br />
KEY-OFF-D:<br />
fig.3-35.e<br />
The Tone will not sound while the key is<br />
being pressed, but will sound after the<br />
Delay Time when the key is released.<br />
Delay<br />
Time<br />
release key<br />
The Tone will not sound while the key is<br />
being pressed, but will sound after the<br />
Delay Time when the key is released.<br />
However for this setting, the TVA envelope<br />
of the Tone will begin when the key is<br />
pressed, so in most cases only the decay<br />
portion of the sound will be heard.<br />
Time (Tone Delay Time)<br />
Specify the time after when the Tone will sound when using<br />
Tone Delay.<br />
If PLAYMATE has been selected in Tone Delay mode, a<br />
setting of 64 will mean that the delay time will be set to the<br />
interval between the previous Note On and the current Note<br />
On. A setting of 127 will result in a time that is twice as long<br />
as for a setting of 64, and a setting of 32 will result in a time<br />
that is 1/2 as long.<br />
If the Tone Delay Mode is set to CLOCK-SYNC, the setting<br />
will be in quarter-note steps, and the corresponding note<br />
value symbol will also be displayed. This lets you specify the<br />
delay time in note lengths relative to the synchronization<br />
tempo.<br />
* If the Type parameter (PATCH/COMMON/STRUCT) is set to<br />
a selection of 2–10, the outputs of Tone 1 (3) and 2 (4) will be<br />
combined into Tone 2 (4). This means that the settings of Tone 1<br />
(3) will be ignored.<br />
press key<br />
Delay<br />
Time<br />
release key<br />
* If you have selected a Wave that is a decay-type sound (i.e., a<br />
sound that fades away naturally even if the key is not released),<br />
selecting KEY-OFF-N or KEY-OFF-D may result in no sound<br />
being heard.<br />
TEMPO-SYNC: If you select a Wave with tempo (BPM)<br />
being displayed, the Tone will synchronize<br />
to the tempo clock of the system regardless<br />
of which key is pressed. This is most<br />
effective when playing phrase loops in sync<br />
with the tempo of a song (p. 130).<br />
If you want to sync to the tempo of a system<br />
in Patch mode, set the Source parameter<br />
(PATCH/COMMON/PATCH CLOCK) to<br />
SYSTEM.<br />
If you want to sync to the tempo of a system<br />
in Performance mode, set the Source<br />
parameter (PERFORM/COMMON/<br />
PERFORM CLOCK) to SYSTEM.<br />
Chapter 3<br />
* When TEMPO-SYNC is selected, pitch and FXM settings will<br />
be ignored.<br />
* When selecting TEMPO-SYNC, also set the Time parameter to<br />
0. If other values are set, Tone Delay will be activated.<br />
77
Chapter 3. Creating Your Own Sounds<br />
■ Modulating Sounds (LFO)<br />
The LFO (Low Frequency Oscillator) creates cyclic change.<br />
Each Tone has two LFOs, and these can be used to apply<br />
change to the WG Pitch/TVF Cutoff Frequency/TVA Level/<br />
TVA Pan.<br />
How to Use the LFO<br />
Applying LFO to the Pitch creates vibrato, applying it to<br />
TVF Cutoff Frequency creates wah, and applying it to TVA<br />
Level creates tremolo. When LFO is applied to the TVA<br />
Pan, the stereo location of the sound will change cyclically.<br />
Depending on the settings, LFO can be used to cyclically<br />
exchange two Tones. For example if you wish to shift<br />
back and forth between Tones 1 and 2, select the same<br />
LFO settings for both, but make LFO Depth settings of<br />
opposite polarity (+/-) for their TVA Level settings.<br />
LFO1/LFO2<br />
Since both LFOs have the same parameters, there are<br />
explained here together.<br />
Form (LFO Form)<br />
Select the waveform of the LFO.<br />
fig.3-36.e<br />
TRI SIN SAW SQR<br />
triangle wave sine wave sawtooth wave square wave<br />
TRP S&H RND CHS<br />
ExtSync (LFO External Sync)<br />
Select how the LFO will be synchronized.<br />
OFF: Unsynchronized<br />
CLOCK: Synchronize the LFO to the Patch Tempo,<br />
Performance Tempo, or the tempo clock of the XP-<br />
30’s system.<br />
If you want to use a fixed tempo in Patch mode<br />
(Tempo parameter setting), set the Source<br />
parameter (PATCH/COMMON/PATCH<br />
CLOCK) to PATCH and set the desired tempo.<br />
If you want to use the system’s tempo clock in<br />
Patch mode, set the Source parameter (PATCH/<br />
COMMON/PATCH CLOCK) to SYSTEM.<br />
If you want to use a fixed tempo in Performance<br />
mode (Tempo parameter setting), set the Source<br />
parameter (PERFORM/COMMON/PERFORM<br />
CLOCK) to PERFORM and set the desired tempo.<br />
If you want to use the system’s tempo clock in<br />
Performance mode, set the Source parameter<br />
(PERFORM/COMMON/PERFORM CLOCK) to<br />
SYSTEM.<br />
Mode (LFO Fade Mode)<br />
Select how the LFO will be applied.<br />
ON-IN: The LFO will fade in after the key is pressed.<br />
fig.3-37.e<br />
high (more)<br />
WG Pitch /<br />
TVF Cutoff Frequency /<br />
TVA Level / TVA Pan<br />
low (less)<br />
Delay<br />
Time<br />
key is<br />
pressed<br />
Fade<br />
Time<br />
Depth<br />
ON-OUT: The LFO will be immediately applied when the<br />
key is pressed, and will then fade out.<br />
fig.3-38.e<br />
high (more)<br />
Delay Time<br />
Fade Time<br />
trapezoidal wave<br />
sample &<br />
hold wave<br />
random wave<br />
chaos wave<br />
Key Sync (LFO Key Sync)<br />
Specifies whether you want the LFO cycle to start in sync<br />
with the timing of a key press (ON) or not (OFF).<br />
Rate (LFO Rate)<br />
Adjust the modulation rate of the LFO.<br />
* If you have set the External Sync value to CLOCK, this<br />
parameter will indicate a note value in multiples of a quarter<br />
note, and the corresponding note value symbol will also be<br />
displayed. This allows you to set the LFO rate in terms of a note<br />
length in the synchronization tempo.<br />
WG Pitch /<br />
TVF Cutoff Frequency /<br />
TVA Level / TVA Pan<br />
OFF-IN:<br />
fig.3-39.e<br />
low (less)<br />
key is<br />
pressed<br />
The LFO will fade in after the key is released.<br />
high (more)<br />
WG Pitch /<br />
TVF Cutoff Frequency /<br />
TVA Level / TVA Pan<br />
low (less)<br />
key is<br />
pressed<br />
Delay<br />
Time<br />
key is<br />
released<br />
Fade<br />
Time<br />
Depth<br />
Depth<br />
* The Chaos waveform has no wavelength. When the Chaos<br />
waveform is selected, the Rate setting has no effect.<br />
78
Chapter 3. Creating Your Own Sounds<br />
OFF-OUT:The LFO will be immediately applied when the<br />
key is pressed, and will begin fading out when the<br />
key is released.<br />
fig.3-40.e<br />
high (more)<br />
WG Pitch /<br />
TVF Cutoff Frequency /<br />
TVA Level / TVA Pan<br />
low (less)<br />
Delay (LFO Delay Time)<br />
Adjust the time from when the key is pressed (or released)<br />
until the LFO begins to take effect. (Refer to the diagrams for<br />
Fade Mode.)<br />
Fade (LFO Fade Time)<br />
Adjust the time over which the LFO rises to its full effect (or<br />
diminishes). (Refer to the diagrams for Fade Mode.)<br />
Offset (LFO Offset)<br />
Adjust the basic value of the LFO waveform upward or<br />
downward.<br />
LFO DEPTH 1:2<br />
key is<br />
pressed<br />
Delay<br />
Time<br />
key is<br />
released<br />
Fade<br />
Time<br />
These parameters adjust the way in which the LFO affects<br />
each parameter. Two values are displayed for each<br />
parameter. The left one is for LFO1, and the right one is for<br />
LFO2.<br />
Pitch (Pitch LFO Depth 1, 2)<br />
Adjust how much the LFO will affect the WG Pitch.<br />
TVF (TVF LFO Depth 1, 2)<br />
Adjust how much the LFO will affect the TVF Cutoff<br />
Frequency.<br />
TVA (TVA LFO Depth 1, 2)<br />
Adjust how much the LFO will affect the TVA Level.<br />
Pan (Pan LFO Depth 1, 2)<br />
Adjust how much the LFO will affect the TVA Pan.<br />
Depth<br />
■ Modifying Pitch (PITCH)<br />
The parameters in this group affect the WG Pitch of each<br />
Tone.<br />
PITCH<br />
Specify the basic pitch of each Tone.<br />
Coarse (Coarse Tune)<br />
Adjust the pitch in semitone steps (-4–+4 octaves).<br />
Fine (Fine Tune)<br />
Adjust the pitch in 1-cent steps (-50–+50 cents).<br />
* One cent is 1/100th of a semitone.<br />
Random (Random Pitch Depth)<br />
If you want the pitch of the Tone to change randomly each<br />
time the key is pressed, set the desired amount of pitch<br />
change here. If you do not want the pitch to change<br />
randomly, set this to 0. The value is in units of 1 cent.<br />
Keyfollow (Pitch Key Follow)<br />
This parameter sets the amount of pitch change that will<br />
occur when you move one octave on the keyboard. If you<br />
want the pitch to change 1 octave when the keyboard position<br />
rises 1 octave (as on normal keyboard instruments), set this<br />
parameter to +100. If you want the pitch to rise 2 octaves<br />
when the keyboard position rises 1 octave, set this parameter<br />
to +200. Negative (-) settings will make the pitch become<br />
lower as you play up the keyboard. If you want all keys of the<br />
keyboard to produce the same pitch, set this parameter to 0.<br />
fig.3-41.e<br />
Pitch<br />
+200<br />
+150<br />
+120<br />
+100<br />
+70<br />
+50<br />
+40<br />
+30<br />
+20<br />
+10<br />
0<br />
–10<br />
–30<br />
–50<br />
–70<br />
–100<br />
C2 C3 C4 C5 C6 C7<br />
Keyboard position<br />
Chapter 3<br />
PCH ENVELOPE (Pitch Envelope)<br />
These parameters determine how the Pitch Envelope affects<br />
the pitch.<br />
Envelope Depth (Pitch Envelope Depth)<br />
Adjust the amount of the Pitch Envelope. Higher settings<br />
will result in greater change. Negative (-) settings will invert<br />
the direction of the envelope.<br />
79
Chapter 3. Creating Your Own Sounds<br />
Velocity Sens (Pitch Envelope Velocity Sensitivity)<br />
Set this parameter when you want your keyboard playing dynamics<br />
to affect the amount of pitch change. For higher settings, there will<br />
be a greater difference between softly and strongly played notes.<br />
Negative (-) settings will invert the direction of change.<br />
PCH TIME ENV (Pitch Time Envelope)<br />
These parameters determine how keyboard playing<br />
dynamics will affect the times of the Pitch Envelope.<br />
V-T1 (Pitch Envelope Time 1 Velocity Sensitivity)<br />
Use this parameter when you want keyboard playing<br />
dynamics (velocity) to affect T1 (time) of the Pitch Envelope.<br />
For higher settings, there will be a greater difference between<br />
softly and strongly played notes. For positive (+) settings,<br />
keyboard velocity will speed up the T1 time. For negative (-)<br />
settings, keyboard velocity will slow down the T1 time.<br />
V-T4 (Pitch Envelope Time 4 Velocity Sensitivity)<br />
Use this parameter when you want keyboard playing<br />
dynamics (velocity) to affect T4 (time) of the Pitch Envelope.<br />
For higher settings, there will be a greater difference between<br />
softly and strongly played notes. For positive (+) settings,<br />
keyboard velocity will speed up the T4 time. For negative (-)<br />
settings, keyboard velocity will slow down the T4 time.<br />
Time Keyfollow (Pitch Envelope Time Key Follow)<br />
Use this parameter when you want the keyboard location of the<br />
note to affect the times (T2–T4) of the Pitch Envelope. Higher<br />
settings of this parameter will cause greater time change<br />
relative to the envelope time at middle C (C4). Positive (+)<br />
settings will cause the time change to become shorter for notes<br />
to the right of middle C. Negative (-) settings will cause the<br />
time change to become longer for notes to the right of middle C.<br />
PCH ENVELOPE (Pitch Envelope)<br />
These parameters set the Pitch Envelope (the shape of the<br />
pitch change over time).<br />
fig.3-42.e<br />
Pitch<br />
key is<br />
pressed<br />
T1 T2 T3 T4<br />
L1<br />
T1–4 (Pitch Envelope Time 1–4)<br />
L2<br />
Set the times over which the pitch will change from one point<br />
to the next.<br />
L1–L4 (Pitch Envelope Level 1–4)<br />
L3<br />
key is<br />
released<br />
Set the amount of pitch change (relative to the basic pitch) for<br />
each point.<br />
L4<br />
Time<br />
■ Modifying the Brightness of<br />
Sound with a Filter (TVF)<br />
The parameters in this group allow you to use the TVF (Time<br />
Variant Filter) to modify the frequency characteristics of the sound.<br />
FILTER<br />
These parameters are the TVF filter settings.<br />
Type (Filter Type)<br />
Select the filter type.<br />
OFF:<br />
filter not used.<br />
LPF (Low Pass Filter): Cut the frequencies above the<br />
Cutoff Frequency. This is the most<br />
common type of filter used in<br />
synthesizers.<br />
BPF (Band Pass Filter): Pass only the frequencies in the<br />
area of the Cutoff Frequency.<br />
HPF (High Pass Filter): Cut the frequencies below the<br />
Cutoff Frequency.<br />
PKG (Peaking Filter): Emphasize the frequencies in the<br />
area of the Cutoff Frequency.<br />
Cut (Cutoff Frequency)<br />
Set the frequency of the filter.<br />
Res (Resonance)<br />
Emphasize the frequencies in the area of the Cutoff<br />
Frequency. For some settings, excessive levels can cause<br />
oscillation and distortion.<br />
fig.3-43.e<br />
LPF BPF HPF PKG<br />
Level<br />
High<br />
parameter value<br />
Low<br />
Frequency<br />
Cutoff frequency<br />
Keyfollow (Cutoff Frequency Key Follow)<br />
Use this parameter when you want the Cutoff Frequency to<br />
be affected by the keyboard position.<br />
Higher values will result in greater change relative to middle<br />
C (C4). Positive (+) settings will make the Cutoff Frequency<br />
rise as you play further the right of the keyboard. Negative (-<br />
) settings will make the Cutoff Frequency fall.<br />
EnvDepth (TVF Envelope Depth)<br />
Adjust the depth of the TVF envelope. Higher settings will<br />
result in greater change. Negative (-) values will invert the<br />
envelope.<br />
80
Chapter 3. Creating Your Own Sounds<br />
TVF VELOCITY<br />
These parameters determine how keyboard velocity will<br />
affect TVF Envelope/Cutoff Frequency/Resonance.<br />
TVF ENVELOPE<br />
These parameters set the TVF envelope (the way in which the<br />
cutoff frequency will change over time).<br />
V-Sens (TVF Envelope Velocity Sensitivity)<br />
Use this parameter when you want velocity to affect the TVF<br />
Envelope. Higher settings will result in a greater difference<br />
between strongly and softly played notes. Negative (-)<br />
settings will invert the effect.<br />
V-Curve (TVF Envelope Velocity Curve)<br />
Select one of 7 types of curve with which velocity will affect<br />
the Cutoff Frequency. The curve is displayed graphically at<br />
the right of the value.<br />
V-Resonance (Resonance Velocity Sensitivity)<br />
Use this parameter when you want velocity to affect the<br />
Resonance. Higher settings will result in a greater difference<br />
between strongly and softly played notes. Negative (-)<br />
settings will invert the effect.<br />
TVF TIME ENV (TVF Time Envelope)<br />
These parameters determine how keyboard velocity will<br />
affect the times of the TVF envelope.<br />
V-T1 (TVF Envelope Time 1 Velocity Sensitivity)<br />
Use this parameter when you want velocity to affect T1<br />
(time) of the TVF envelope. Higher settings will result in a<br />
greater difference between strongly and softly played notes.<br />
If you want higher keyboard velocities to speed up the T1<br />
time, use positive (+) settings. To slow down the T1 time, use<br />
negative (-) settings.<br />
fig.3-44.e<br />
Cutoff<br />
Frequency<br />
T1–T4 (TVF Envelope Time 1–4)<br />
Set the times over which the cutoff frequency will move from<br />
one point to the next.<br />
L1–L4 (TVF Envelope Level 1–4)<br />
Set the cutoff frequency levels for each point, relative to the<br />
basic<br />
cutoff frequency.<br />
■ Changing the Sound’s Volume<br />
and Stereo Location (TVA)<br />
The TVA (Time Variant Amplifier) controls volume changes<br />
and stereo location.<br />
TVA<br />
Level<br />
T1 T2 T3 T4<br />
L1<br />
L2<br />
key is pressed<br />
Adjust the basic volume of the Tone. Use this parameter to<br />
adjust the volume balance between Tones.<br />
L3<br />
L4<br />
Time<br />
key is released<br />
Chapter 3<br />
V-T4 (TVF Envelope Time 4 Velocity Sensitivity)<br />
Use this parameter when you want Key Off Velocity (the<br />
speed at which you release a key) to affect T4 (time) of the<br />
TVF envelope. Higher settings will result in a greater<br />
difference between quickly and slowly released notes. If you<br />
want a quicker release to speed up the T4 time, use positive<br />
(+) settings. To slow down the T4 time, use negative (-)<br />
settings.<br />
Time Keyfollow (TVF Envelope Time Key Follow)<br />
Use this parameter when you want keyboard position to<br />
affect the times (T2–T4) of the TVF envelope. Higher settings<br />
will result in greater changes relative to middle C (C4).<br />
Positive (+) settings will result in shorter times as you play<br />
toward the right of the keyboard. Negative (-) settings will<br />
conversely result in longer times.<br />
Pan<br />
Adjust the pan (stereo location) of the Tone. L64 is full left, 0<br />
is center, and 63R is full right.<br />
V-Sens (TVA Envelope Velocity Sensitivity)<br />
Use this parameter when you want keyboard velocity to<br />
affect the amount of change produced by the TVA envelope.<br />
Higher settings will result in a greater difference between<br />
strongly and softly played notes. Negative (-) settings will<br />
invert the effect.<br />
V-Curve (TVA Envelope Velocity Curve)<br />
Select one of 7 curves that will determine how keyboard<br />
playing dynamics will affect the TVA envelope. The selected<br />
curve will be displayed at the right of the numerical value.<br />
81
Chapter 3. Creating Your Own Sounds<br />
BIAS<br />
Use the Bias parameter when you want keyboard position to<br />
affect the TVA level.<br />
fig.3-45.e<br />
LOWER<br />
UPPER<br />
Level +<br />
Level<br />
0<br />
–<br />
Key<br />
Key<br />
C-1 Bias Point G9 C-1 Bias Point G9<br />
LOWER&UPPER<br />
Level +<br />
0<br />
0<br />
–<br />
+<br />
Key<br />
Key<br />
C-1 Bias Point G9 C-1 Bias Point G9<br />
Bias (Bias Level)<br />
Adjust the angle of the volume change that will occur in the<br />
selected Bias Direction. Higher settings will result in greater<br />
change. Negative (-) values will invert the change.<br />
Point (Bias Point)<br />
Select the key at which the volume will begin to change.<br />
Direction (Bias Direction)<br />
Select the direction in which change will occur starting from<br />
the Bias Point.<br />
LOWER: the range below the Bias Point<br />
UPPER:<br />
the range above the Bias Point<br />
LOWER&UPPER: the ranges both above and below the Bias<br />
Point<br />
ALL:<br />
the entire keyboard will be biased at the<br />
angle determined by the Bias Level,<br />
relative to the Bias Point<br />
PAN MODULATE<br />
–<br />
0<br />
+<br />
ALL<br />
–<br />
Level<br />
Use these parameters to affect the location of the TVA Pan.<br />
Keyfollow (Pan Key Follow)<br />
Use this parameter when you want the keyboard position to<br />
change the stereo location. Higher values will result in<br />
greater change relative to middle C (C4). Positive (+) settings<br />
will cause notes played toward the right of the keyboard to<br />
be panned right. Negative (-) settings will cause the opposite.<br />
Random (Random Pan Depth)<br />
Use this parameter when you want the stereo location to<br />
change randomly each time you press a key. Higher values<br />
will result in a greater width of change.<br />
Alternate (Alternate Pan Depth)<br />
Use this parameter when you want the stereo location to<br />
alternate between left and right each time you press a key.<br />
Higher values will result in a greater width of change.<br />
–<br />
0<br />
+<br />
–<br />
0<br />
+<br />
L or R values can be set, and this will reverse the left/right<br />
order of the panning. If you want to alternate the pan<br />
position of two Tones, set them to opposite L and R settings.<br />
TVA TIME ENV (TVA Time Envelope)<br />
These parameters determine how the keyboard will affect the<br />
time changes of the TVA envelope.<br />
V-T1 (TVF Envelope Time 1 Velocity Sensitivity)<br />
Use this parameter when you want velocity to affect T1<br />
(time) of the TVA envelope. Higher settings will result in a<br />
greater difference between strongly and softly played notes.<br />
If you want higher velocities to speed up T1 time, use<br />
positive (+) values. If you want higher velocities to slow<br />
down T1 time, use negative (-) values.<br />
V-T4 (TVA Envelope Time 4 Velocity Sensitivity)<br />
Use this parameter when you want Key Off Velocity (the<br />
speed at which you release a key) to affect T4 (time) of the<br />
TVA envelope. Higher settings will result in a greater<br />
difference between quickly and slowly released notes. If you<br />
want a quicker release to speed up the T4 time, use positive<br />
(+) settings. If you want a quicker release to slow down the<br />
T4 time, use negative (-) settings.<br />
Time Keyfollow (TVA Envelope Time Key Follow)<br />
Use this parameter when you want keyboard position to<br />
affect TVA envelope times (T2–T4). Higher values will result<br />
in a greater change relative to middle C (C4). Positive (+)<br />
settings will result in shorter times as you play toward the<br />
right of the keyboard. Negative (-) settings will result in<br />
longer times as you play toward the right of the keyboard.<br />
TVA ENVELOPE (TVA Envelope)<br />
These parameters make settings for the TVA envelope<br />
(changes over time in the TVA level).<br />
fig.3-46.e<br />
T1 T2 T3 T4<br />
Level<br />
L1<br />
L2<br />
L3<br />
Time<br />
key is pressed<br />
key is released<br />
T1–T4 (TVA Envelope 1–4)<br />
Adjust the time over which the volume changes from one<br />
point to the next.<br />
L1–L3 (TVA Envelope 1–3)<br />
Adjust the volume level of each point relative to the basic<br />
TVA level.<br />
82
Chapter 3. Creating Your Own Sounds<br />
Functions of Performance<br />
Parameters<br />
fig.3-11<br />
■ Settings Common to the Entire<br />
Performance (COMMON)<br />
This display is used when setting parameters that are not part of<br />
other groups. These include Performance Name and Key Mode.<br />
SINGLE: When you play the keyboard, only the specified<br />
Part (the Part shown in the display) will sound.<br />
MIDI messages will be transmitted from the<br />
controller section to the external MIDI devices<br />
even if the Local parameter and Tx parameter<br />
settings for each Part (PERFORM/MIDI/MIDI)<br />
are turned off.<br />
* If you have selected a Layer-type Performance, the upper right of<br />
the PERFORM PLAY display will indicate “LAYER p*” (* is<br />
the part number). If you have selected a Single-type<br />
Performance, the number of the Part that can be played from the<br />
keyboard will be displayed.<br />
PERFORM NAME (Performance Name)<br />
You can assign a name to the Performance of up to 12 characters.<br />
* For details on assigning names, refer to “Assigning a Name”<br />
(p. 46).<br />
PERFORM CLOCK<br />
Some parameters allow you to set a time value in terms of a<br />
note length which is determined by a specified tempo; Rate<br />
parameters (PATCH/LFO/LFO1, 2), Time parameter<br />
(PATCH/WAVE/TONE DELAY), and some Multi-Effects<br />
parameters. The specified tempo used by these parameters<br />
can be set for each Patch. However when a Patch is used in<br />
Performance mode, the Patch settings will be ignored, and<br />
the settings of this display will be used instead.<br />
Source (Performance Clock Source)<br />
Select the source of the Performance Clock.<br />
PERFORM: Synchronize to the Performance Tempo setting.<br />
SYSTEM: Synchronize to the tempo clock of the ststem.<br />
* The Performance Clock does not transmit clock messages from<br />
MIDI OUT connector.<br />
Tempo (Performance Tempo)<br />
Set the Performance Tempo setting.<br />
* When Source (Performance Clock Source) is set to SYSTEM,<br />
synchronization will be according to the tempo clock of the<br />
system, so it will not be possible to set the tempo value. The<br />
tempo of the system will be displayed in parentheses ( ).<br />
PERFORM COMMON<br />
Key Mode<br />
This parameter determines how the sound source will be<br />
played from the XP-30’s keyboard.<br />
LAYER: When you play the keyboard, all Parts whose Local<br />
parameter (PERFORM/MIDI/MIDI) is turned on<br />
will sound. Transmission of MIDI messages from<br />
the controller section to external MIDI devices will<br />
be determined by the Tx parameter setting<br />
(PERFORM/MIDI/MIDI) of each Part.<br />
* If LAYER has been selected and you try to play Patches of all<br />
Parts, you probably won’t be able to play many simultaneous<br />
voices. When layering Patches, be aware of the number of voices<br />
available and turn off unnecessary Parts. Making Key Range<br />
settings for each Part allows you to split the keyboard to play<br />
different Parts in separate sections.<br />
* To switch between SINGLE and LAYER from the PERFORM<br />
PLAY display, hold down [SHIFT] while you press [SOLO].<br />
Key Range (Key Range Switch)<br />
This parameter determines whether or not the Key Range<br />
settings (next display) will be applied or not. If you want<br />
them to be applied, turn this ON.<br />
KEY RANG (Key Range)<br />
Set the range in which each Part will sound. Use this when<br />
you wish to play different Patches in different areas of the<br />
keyboard.<br />
Lower (Key Range Lower)<br />
Set the lowest note that the Part will play.<br />
Upper (Key Range Upper)<br />
Set the highest note that the Part will play.<br />
* If Key Range settings have been made for the Patch, only the<br />
notes for which the Key Range settings of the Patch and<br />
Performance overlap will play.<br />
* It is not possible to set Lower to a value greater than Upper, nor<br />
Upper to a value less than Lower. If you attempt to do so, both<br />
values will change together.<br />
* If you have used Octave Shift (System) or the Transpose<br />
parameter (SYSTEM/CONTROL/KEYBOARD) to transpose<br />
the pitch of the XP-30’s keyboard, the keyboard area specified by<br />
Key Range will also be shifted.<br />
KEYBOARD<br />
Octave Shift<br />
This parameter adjusts the pitch of each Part in units of an<br />
octave (-3–+3 octaves).<br />
Chapter 3<br />
83
Chapter 3. Creating Your Own Sounds<br />
■ Setting Effects for a<br />
Performance (EFFECTS)<br />
This group contains settings for the Multi-Effects/Chorus/<br />
Reverb effects used by a Performance.<br />
OUTPUT<br />
Specify how each Part will be output.<br />
Output Assign (Output Assign/Output Level)<br />
Select whether the output of each Part will be sent through<br />
Multi-Effects, and adjust the volume level of each Part.<br />
MIX: output to the OUTPUT jack without passing<br />
through Multi-Effects.<br />
EFX: output to the OUTPUT jack through Multi-Effects.<br />
PATCH: use the Output Assign settings (for each Tone) of<br />
the Patch assigned to each Part.<br />
* If you select MIX or EFX, the setting of the Output Assign<br />
parameter (PATCH/EFFECTS/OUTPUT) will be ignored.<br />
Chorus (Chorus Send Level)<br />
Adjust the amount of Chorus that is applied to each Part.<br />
Reverb (Reverb Send Level)<br />
Adjust the amount of Reverb that is applied to each Part.<br />
PERFORM EFX TYPE<br />
(Performance EFX TYPE)<br />
These parameters set the Performance Multi-Effects.<br />
* If EFX Source has been set to use the EFX settings of the Patch<br />
assigned to one of the Parts, the Part number will be shown in<br />
the upper left of the display.<br />
fig.3-47<br />
Type (EFX Type)<br />
Select the type of Multi-Effects. For details refer to “Multi-<br />
Effects Types (EFX Parameter)” (p. 93).<br />
* If you have selected the EFX parameter settings of one of the<br />
Patches assigned to a Part as the EFX Source, the EFX Type of<br />
that Patch will be displayed.<br />
Source (EFX Source)<br />
Select the EFX parameter settings that will be used by the<br />
Performance. If you wish to use the EFX parameter settings<br />
of the Performance, select PERFORM. If you wish to use the<br />
EFX parameter settings of the Patch assigned to one of the<br />
Parts, select the Part number. Since the Rhythm Set does not<br />
have EFX parameter settings, it is not possible to select Part<br />
10.<br />
When the EFX Parameter Settings of a<br />
Patch Are Selected<br />
When the EFX parameter settings of a Patch are<br />
selected, those settings will be displayed in the EFX<br />
parameter setting display of the Performance, and you<br />
will be able to modify them. If you wish to keep the<br />
Patch EFX parameter settings that you modify, rewrite<br />
the Patch settings. The modified Patch EFX parameter<br />
settings will be lost if you select a different Patch.<br />
PERFORM EFX PRM<br />
(Performance EFX Parameters)<br />
The EFX parameters for the selected EFX Type will be<br />
displayed. For details refer to “Multi-Effects Types (EFX<br />
Parameter)” (p. 93).<br />
* If EFX Source has been set to use the EFX parameter settings of<br />
the Patch assigned to one of the Parts, the Part number will be<br />
shown in the upper left of the display.<br />
PERFORM EFX OUT<br />
(Performance EFX Output)<br />
These parameters specify the output for the Part for which<br />
EFX was selected in Output Assign.<br />
* For Parts which have an Output Assign setting of MIX, the<br />
settings of this display will be ignored.<br />
* For Parts which have an Output Assign setting of PATCH, the<br />
Output Assign settings of each Tone of the Patch will be used.<br />
In other words, the settings of this display will apply only to<br />
Tones for which EFX is selected.<br />
Mix Out (EFX Output Level)<br />
Adjust the volume of the direct sound and Multi-Effects sound.<br />
Chorus (Chorus Send Level)<br />
Adjust the amount of Chorus applied to the sound that<br />
passes through Multi-Effects.<br />
Reverb (Reverb Send Level)<br />
Adjust the amount of Reverb applied to the sound that<br />
passes through Multi-Effects.<br />
PERFORM EFX CTRL<br />
(Performance EFX Control)<br />
Use this parameter when you wish to use a specific controller<br />
to control an EFX parameter. The types of EFX parameters<br />
available for control will depend on the EFX type. For details<br />
refer to “Multi-Effects Types (EFX Parameter)” (p. 93).<br />
The upper line of the display will show the EFX parameter to<br />
be controlled. For each EFX parameter you can specify the<br />
EFX Control Source and the EFX Control Depth.<br />
84
Chapter 3. Creating Your Own Sounds<br />
EFX Control Source 1, 2<br />
The MIDI controllers that can be used are shown below. If<br />
you wish to use a controller that is common to all Patches, or<br />
a controller that cannot be selected here, first select SYS-<br />
CTRL1 or SYS-CTRL2, and then use the Control 1/2<br />
parameter (SYSTEM/CONTROL/SYS-CTRL ASSIGN) to<br />
select the controller.<br />
OFF:<br />
a controller will not be used<br />
SYS-CTRL1: System controller (Control 1)<br />
SYS-CTRL2: System controller (Control 2)<br />
MODULATION: Modulation (MIDI controller number 1)<br />
BREATH: Breath (MIDI controller number 2)<br />
FOOT: Foot (MIDI controller number 4)<br />
VOLUME: Volume (MIDI controller number 7)<br />
PAN: Pan (MIDI controller number 10)<br />
EXPRESSION: Expression (MIDI controller number 11)<br />
PITCH BEND: Pitch bend<br />
AFTERTOUCH: Aftertouch<br />
EFX Control Depth 1, 2<br />
Adjust the amount of change that will occur in response to<br />
controller movement. Higher values will result in greater<br />
change. Negative (-) values will invert the direction of the<br />
change.<br />
PERFORM CHORUS<br />
Make settings for the Chorus effect of the Performance.<br />
* In Performance mode, the Chorus settings of the Patches used<br />
by each Part will be ignored (except for the Send Level<br />
parameter).<br />
Rate (Chorus Rate)<br />
Adjust the speed of modulation for the chorus.<br />
Depth (Chorus Depth)<br />
Adjust the depth of modulation for the chorus.<br />
Delay (Chorus Pre Delay)<br />
Adjust the time delay from when the direct sound begins<br />
until the chorus sound is heard. Higher values will create a<br />
more spacious sound.<br />
Fbk (Chorus Feedback Level)<br />
Adjust the amount of chorus sound that is returned (fed<br />
back) into the chorus. Higher values will create a more<br />
intense effect.<br />
Level (Chorus Level)<br />
Adjust the volume level of the chorus sound.<br />
Out (Chorus Output Assign)<br />
Select the way in which the Chorus and Reverb are<br />
connected.<br />
MIX:<br />
fig.3-27.e<br />
Chorus input<br />
Reverb input<br />
The Chorus sound and the Reverb sound are mixed.<br />
REV:Apply reverb to the chorus sound.<br />
fig.3-28.e<br />
Chorus<br />
input<br />
Reverb<br />
input<br />
M+R: Mix the chorus sound to which reverb is not applied<br />
and the chorus sound to which reverb is applied.<br />
fig.3-29.e<br />
Reverb<br />
input<br />
Chorus<br />
input<br />
Reverb<br />
Chorus<br />
Chorus<br />
Chorus<br />
PERFORM REVERB<br />
Make settings for the Reverb effect of the Performance.<br />
* In Performance mode, the Reverb settings of the Patches used by<br />
each Part will be ignored (except for the Send Level parameter).<br />
Type (Reverb/Delay Type)<br />
Select the type of Reverb effect.<br />
ROOM1: dense reverb with short decay<br />
ROOM2: sparse reverb with short decay<br />
STAGE1: reverb with greater late reverberation<br />
STAGE2: reverb with strong early reflections<br />
HALL1: reverb with clear reverberance<br />
HALL2: reverb with rich reverberance<br />
DELAY: a conventional delay<br />
PAN-DLY: a delay with echoes that move left and right<br />
Time (Reverb/Delay Time)<br />
Reverb<br />
Reverb<br />
OUTPUT<br />
OUTPUT<br />
OUTPUT<br />
Adjust the time of reverberation. If you have selected DELAY<br />
or PAN-DLY, this parameter will adjust the time delay from<br />
the original sound until the first echo will sound.<br />
Chapter 3<br />
85
Chapter 3. Creating Your Own Sounds<br />
Fbk (Delay Feedback Level)<br />
Adjust the amount of delayed sound that is returned (fed<br />
back) to the delay. Higher values result in more delay repeats.<br />
* If you have selected any one of the Reverb types (ROOM1–<br />
HALL2), this parameter has no effect.<br />
HF Damp (Reverb/Delay HF Damp)<br />
Adjust the frequency above which the reverberant sound will<br />
be cut. As the frequency is set lower, more of the high<br />
frequencies will be cut, resulting in a softer and more muted<br />
reverberance. If you do not want the high frequencies to be<br />
cut, set this parameter to BYPASS.<br />
Level (Reverb/Delay Level)<br />
Adjust the volume of the reverberant (or delayed) sound.<br />
■ Making MIDI Settings for a Part<br />
(MIDI)<br />
MIDI<br />
These parameters determine how each Part will transmit and<br />
receive MIDI messages.<br />
Channel (MIDI Channel)<br />
Set the MIDI channel of each Part.<br />
* If this is set to the same channel as the Control Channel<br />
parameter (SYSTEM/MIDI/PERFORM MIDI), attempting to<br />
use MIDI messages (Program Change and Bank Select) from an<br />
external device to select Patches will select Performances<br />
instead. If you want to select Patches, change the Control<br />
Channel to a different setting.<br />
Rx (Receive Switch)<br />
Specify whether or not you want each Part to receive MIDI<br />
messages from the external MIDI devices.<br />
Normally you will leave this ON, but you can turn it OFF<br />
when you do not want a specific Part to be playing during a<br />
song playback.<br />
* To switch between ON and OFF from the PERFORM PLAY<br />
display, hold down [SHIFT] while you press the function button<br />
for the Part you want to alter.<br />
Tx (Transmit Switch)<br />
This determines, for each Part, whether or not data generated<br />
by the controller section is sent as MIDI messages from the<br />
MIDI OUT connector when the Key Mode parameter<br />
(PERFORM/COMMON/PERFORM COMMON) is set to<br />
LAYER.<br />
Normally you will leave this ON, but you can turn it OFF when<br />
you do not want the XP-30 to control external sound sources.<br />
* When the Key Mode parameter (PERFORM/COMMON/<br />
PERFORM COMMON) is set to SINGLE, the setting for the<br />
Tx parameter is deactivated, and only the MIDI messages of the<br />
current Part are sent from the MIDI OUT connector.<br />
Local (Local Switch)<br />
Specify for each Part whether or not you want to disconnect<br />
the controller section from the internal sound source when<br />
the Key Mode parameter (PERFORM/COMMON/<br />
PERFORM COMMON) is set to LAYER..<br />
Normally you will leave this ON, but you can turn it OFF<br />
when you want to use the XP-30 only to control an external<br />
sound source.<br />
* To switch between ON and OFF from the PERFORM PLAY<br />
display, press the function button for the Part you want to alter.<br />
* When the Key Mode parameter (PERFORM/COMMON/<br />
PERFORM COMMON) is at SINGLE, the setting for the<br />
Local parameter is deactivated, and when you finger the<br />
keyboard, only the patch for the current Part sounds.<br />
RxSWITCH (Receive Switch)<br />
Specify whether each Part will receive certain MIDI messages<br />
or not.<br />
Volume (Receive Volume Switch)<br />
If you want the Part to receive Volume messages, turn this<br />
ON. If not, turn this OFF.<br />
Hold-1 (Receive Hold 1 Switch)<br />
If you want the Part to receive Hold 1 messages, turn this<br />
ON. If not, turn this OFF.<br />
Program Change<br />
(Receive Program Change Switch)<br />
If you want the Part to receive Program Change messages,<br />
turn this ON. If not, turn this OFF.<br />
* If you want a Part to receive Program Change messages, you<br />
must also turn the Program Change parameter ON (SYSTEM/<br />
MIDI/RECEIVE MIDI).<br />
TRANSMIT (Transmit Bank Select)<br />
BankSelectGroup (Transmit Bank Select Group)<br />
When you select a Performance, Bank Select and Program<br />
Change messages will be transmitted for the Patch or Rhythm<br />
Set assigned to each Part as determined by this setting.<br />
PATCH: When you select a Performance, Bank Select<br />
messages and Program Change messages for the<br />
Patch/Rhythm Set that is assigned to each Part will<br />
not be transmitted.<br />
BS1-7: When you select a Performance, Bank Select and<br />
Program Change messages will be transmitted for<br />
the Patch/Rhythm Set that is assigned to each Part.<br />
In this case, the Bank Select Number that is<br />
transmitted will be determined by the Bank Select<br />
Group (BS1–7) setting. In the BANK SEL GROUP<br />
display (SYSTEM/MIDI) you can set the Bank<br />
Select number for each Bank Select Group.<br />
86
Chapter 3. Creating Your Own Sounds<br />
* Bank Select and Program Change messages will not be<br />
transmitted for Parts whose Tx parameter (PERFORM/MIDI/<br />
MIDI) is turned off.<br />
Transmit Volume<br />
If you want Volume messages to also be transmitted when you<br />
select a Performance, specify the desired volume here. If you do<br />
not want Volume messages to be transmitted, set this to OFF.<br />
■ Making Settings for Each Part<br />
(PART)<br />
PATCH<br />
Select the Patch for each Part.<br />
Group (Patch Group)<br />
Select the group of the Patch (or Rhythm Set for Part 10).<br />
USER: User memory<br />
PR-A–C, E: Preset memory A–C, E<br />
GM: Preset memory GM<br />
XP-A–E: Wave Expansion Board A–E<br />
* It is not possible to select a group for a Wave Expansion Board<br />
that has not been installed.<br />
Number (Patch Number)<br />
Specify the number of the Patch. The Patch name will be<br />
displayed in parentheses ( ).<br />
SETTING<br />
Make volume, pan, and pitch settings for each Part.<br />
Level<br />
Adjust the volume of each Part. Use this parameter to adjust<br />
the volume balance between Parts.<br />
Pan<br />
Adjust the stereo location of the Part. L64 is full left, 0 is<br />
center, and 63R is full right.<br />
Coarse (Coarse Tune)<br />
Adjust the pitch of the Part in semitone steps (-4–+4 octaves).<br />
Fine (Fine Tune)<br />
Adjust the pitch of the Part in 1-cent steps (-50–+50 cents).<br />
* One cent is 1/100th of a semitone.<br />
RESERVE (Voice Reserve)<br />
Voice Reserve<br />
This setting determine how many voices will be reserved for<br />
each Part when more than 64 simultaneous voices are<br />
requested.<br />
■ Confirming MIDI Information<br />
for Each Part (INFO)<br />
INFO (Part Information)<br />
The displays in this group allow you to check various<br />
settings such as MIDI message reception status for each Part.<br />
This is convenient when you need to check that the sound<br />
source is responding correctly to messages from the<br />
keyboard or external MIDI controller.<br />
Mod (Modulation Information)<br />
Breath (Breath Information)<br />
Foot (Foot Information)<br />
Vol (Volume Information)<br />
Pan (Pan Information)<br />
Exp (Expression Information)<br />
Hold (Hold 1 Information)<br />
Bend (Bender Information)<br />
Aft (Aftertouch Information)<br />
Sys1 (System Controller 1 Information)<br />
The MIDI message specified as the Control 1 parameter<br />
(SYSTEM/CONTROL/SYS-CTRL ASSIGN)<br />
Sys2 (System Controller 2 Information)<br />
The MIDI message specified as the Control 2 parameter<br />
(SYSTEM/CONTROL/SYS-CTRL ASSIGN)<br />
Voices (Voice Information)<br />
The number of voices used<br />
MIDI Message Transmission<br />
When you modify a value (other than Voice) in the<br />
INFO display, the MIDI message of the modified value<br />
will be transmitted to the internal sound source and to<br />
external MIDI devices. The way in which the message<br />
will be transmitted will depend on the settings of the<br />
currently selected Performance.<br />
If you have selected a Single-type Performance, the<br />
MIDI message will be transmitted to the specified Part,<br />
and will simultaneously be transmitted to external<br />
MIDI devices on the MIDI channel of that Part.<br />
If you have selected a Layer-type Performance, the<br />
MIDI message will be transmitted to all Parts whose Tx<br />
parameter (PERFORM/MIDI/MIDI) is turned on, and<br />
will also be transmitted to external MIDI devices on the<br />
MIDI channel of each of these Parts.<br />
Chapter 3<br />
* It is not possible to make Voice Reserve settings that would cause<br />
the total of all Parts to be greater than 64 voices. The number of<br />
remaining voices available is indicated at the right of the<br />
parameter name (rest=). Keep this in mind as you make settings.<br />
87
Chapter 3. Creating Your Own Sounds<br />
Functions of Rhythm Set<br />
Parameters<br />
fig.3-16<br />
■ Naming a Rhythm Set<br />
(COMMON)<br />
RHYTHM NAME (Rhythm Set Name)<br />
You can assign a name of up to 12 characters to a Rhythm<br />
Set.<br />
* For details on assigning names, refer to “Assigning a Name”<br />
(p. 46).<br />
■ Setting Effects for a Rhythm Tone<br />
(EFFECTS)<br />
* Rhythm Sets use the effect settings of the Performance currently<br />
selected in Performance mode. You can modify the Performance<br />
effect settings from inside Rhythm Set mode, but they are not<br />
stored as Rhythm Set settings. If you wish to keep the effect<br />
settings, you need to store them as Performance settings.<br />
OUTPUT<br />
Specify the output for each key.<br />
Output Assign (Output Assign/Output Level)<br />
For the output of each key, specify whether or not it will be<br />
sent through Multi-Effects, and adjust the volume level.<br />
MIX: output to the OUTPUT jack without passing through<br />
Multi-Effects.<br />
EFX: output to the OUTPUT jack after passing through<br />
Multi-Effects.<br />
Chorus (Chorus Send Level)<br />
Adjust the amount of Chorus for each key.<br />
Reverb (Reverb Send Level)<br />
Adjust the amount of Reverb for each key.<br />
PERFORM EFX TYPE<br />
(Performance EFX Type)<br />
* If EFX Source has been set to use the EFX parameter settings of<br />
the Patch assigned to one of the Parts, the Part number will be<br />
shown in the upper left of the display.<br />
Type (EFX Type)<br />
Select the type of EFX. For details refer to “Multi-Effects<br />
Types (EFX Parameter)” (p. 93).<br />
* If you have selected the EFX parameter settings of one of the<br />
Patches assigned to a Part as the EFX Source, the EFX Type of<br />
that Patch will be displayed.<br />
Source (EFX Source)<br />
Select the EFX parameter settings that will be used by the<br />
Performance. If you wish to use the EFX parameter settings<br />
of the Performance, select PERFORM. If you wish to use the<br />
EFX parameter settings of the Patch assigned to one of the<br />
Parts, select the Part number.<br />
When the EFX Parameter Settings of a<br />
Patch Are Selected<br />
When the EFX parameter settings of a Patch are<br />
selected, those settings will be displayed in the EFX<br />
parameter setting display of the Performance, and you<br />
will be able to modify them. If you wish to keep the<br />
Patch EFX parameter settings that you modify, rewrite<br />
the Patch settings. The modified Patch EFX parameter<br />
settings will be lost if you select a different Patch.<br />
PERFORM EFX PRM<br />
(Performance EFX Parameters)<br />
The EFX parameters for the selected EFX Type will be<br />
displayed. For details refer to “Multi-Effects Types (EFX<br />
Parameter)” (p. 93).<br />
* If EFX Source has been set to use the EFX parameter settings of<br />
the Patch assigned to one of the Parts, the Part number will be<br />
shown in the upper left of the display.<br />
PERFORM EFX OUT<br />
(Performance EFX Output)<br />
These parameters specify the output for the keys for which<br />
EFX was selected in Output Assign.<br />
* For keys which have an Output Assign setting of MIX, the<br />
settings of this display will be ignored.<br />
Mix Out (EFX Output Level)<br />
Adjust the volume of the direct sound and Multi-Effects<br />
sound.<br />
Chorus (Chorus Send Level)<br />
Adjust the amount of Chorus applied to the sound that<br />
passes through Multi-Effects.<br />
Reverb (Reverb Send Level)<br />
Adjust the amount of Reverb applied to the sound that<br />
passes through Multi-Effects.<br />
88
Chapter 3. Creating Your Own Sounds<br />
PERFORM EFX CTRL<br />
(Performance EFX control)<br />
Use this parameter when you wish to use a specific controller<br />
to control an EFX parameter. The types of EFX parameters<br />
available for control will depend on the EFX type. For details<br />
refer to “Multi-Effects Types (EFX Parameter)” (p. 93).<br />
The upper line of the display will show the EFX parameter to<br />
be controlled. For each EFX parameter you can specify the<br />
EFX Control Source and the EFX Control Depth.<br />
EFX Control Source 1, 2<br />
The MIDI controllers that can be used are shown below. If<br />
you wish to use a controller that is common to all Patches, or<br />
a controller that cannot be selected here, first select SYS-<br />
CTRL1 or SYS-CTRL2, and then use the Control 1/2<br />
parameter (SYSTEM/CONTROL/SYS-CTRL ASSIGN) to<br />
select the controller.<br />
OFF:<br />
a controller will not be used<br />
SYS-CTRL1: System controller (Control 1)<br />
SYS-CTRL2: System controller (Control 2)<br />
MODULATION: Modulation (MIDI controller number 1)<br />
BREATH: Breath (MIDI controller number 2)<br />
FOOT: Foot (MIDI controller number 4)<br />
VOLUME: Volume (MIDI controller number 7)<br />
PAN: Pan (MIDI controller number 10)<br />
EXPRESSION: Expression (MIDI controller number 11)<br />
PITCH BEND: Pitch bend<br />
AFTERTOUCH: Aftertouch<br />
EFX Control Depth 1, 2<br />
Adjust the amount of change that will occur in response to<br />
controller movement. Higher values will result in greater<br />
change. Negative (-) values will invert the direction of the<br />
change.<br />
Level (Chorus Level)<br />
Adjust the volume level of the chorus sound.<br />
Out (Chorus Output Assign)<br />
Select the way in which the Chorus and Reverb are<br />
connected.<br />
MIX:<br />
fig.3-27.e<br />
Chorus input<br />
Reverb input<br />
The Chorus sound and the Reverb sound are mixed.<br />
REV:Apply reverb to the chorus sound.<br />
fig.3-28.e<br />
Chorus<br />
input<br />
Reverb<br />
input<br />
M+R: Mix the chorus sound to which reverb is not applied<br />
and the chorus sound to which reverb is applied.<br />
fig.3-29.e<br />
Reverb<br />
input<br />
Chorus<br />
input<br />
Reverb<br />
Chorus<br />
Chorus<br />
Chorus<br />
PERFORM REVERB<br />
Reverb<br />
Reverb<br />
OUTPUT<br />
Make settings for the Reverb effect of the Performance.<br />
OUTPUT<br />
OUTPUT<br />
Chapter 3<br />
PERFORM CHORUS<br />
Make settings for the Chorus effect of the Performance.<br />
Rate (Chorus Rate)<br />
Adjust the speed of modulation for the chorus.<br />
Depth (Chorus Depth)<br />
Adjust the depth of modulation for the chorus.<br />
Delay (Chorus Pre Delay)<br />
Adjust the time delay from when the direct sound begins<br />
until the chorus sound is heard. Higher values will create a<br />
more spacious sound.<br />
Fbk (Chorus Feedback Level)<br />
Adjust the amount of chorus sound that is returned (fed back)<br />
into the chorus. Higher values will create a more intense<br />
effect.<br />
Type (Reverb/Delay Type)<br />
Select the type of Reverb effect.<br />
ROOM1: dense reverb with short decay<br />
ROOM2: sparse reverb with short decay<br />
STAGE1: reverb with greater late reverberation<br />
STAGE2: reverb with strong early reflections<br />
HALL1: reverb with clear reverberance<br />
HALL2: reverb with rich reverberance<br />
DELAY: a conventional delay<br />
PAN-DLY: a delay with echoes that move left and right<br />
Time (Reverb/Delay Time)<br />
Adjust the time of the reverberation. If you have selected<br />
DELAY or PAN-DLY, this parameter will adjust the time<br />
delay from the original sound until the first echo will sound.<br />
89
Chapter 3. Creating Your Own Sounds<br />
Fbk (Delay Feedback Level)<br />
Adjust the amount of delayed sound that is returned (fed<br />
back) to the delay. Higher values result in more delay repeats.<br />
* If you have selected any one of the Reverb types (ROOM1–<br />
HALL2), this parameter has no effect.<br />
HF Damp (Reverb/Delay HF Damp)<br />
Adjust the frequency above which the reverberant sound will<br />
be cut. As the frequency is set lower, more of the high<br />
frequencies will be cut, resulting in a softer and more muted<br />
reverberance. If you do not want the high frequencies to be<br />
cut, set this parameter to BYPASS.<br />
Level (Reverb/Delay Level)<br />
Adjust the volume of the reverberant (or delayed) sound.<br />
■ Controlling How a Rhythm<br />
Tone will Sound with<br />
Controllers (CONTROL)<br />
The parameters in this group determine how the controllers<br />
function and how instruments in a Rhythm Set will sound.<br />
CONTROL<br />
These parameters determine how each note is controlled.<br />
Bend Range<br />
Specify the amount of pitch change (in semitones) that will occur<br />
when the Pitch Bend Lever is moved (maximum +1 octave).<br />
Env Mode (Envelope Mode)<br />
When a loop-type Wave is selected, it will normally continue<br />
to sound as long as the key is pressed. If you want it to decay<br />
naturally even if the key remains pressed, set this to NO-SUS.<br />
* If a one-shot type Wave is selected, it will not sustain even if<br />
this parameter is set to SUSTAIN.<br />
Mute Group<br />
The Mute Group function lets you specify that certain Rhythm<br />
Tones not be allowed to sound simultaneously. Taking the<br />
example of an acoustic drum set, it is obviously impossible for<br />
an open hi-hat and a closed hi-hat sound to occur<br />
simultaneously. To simulate this type of situation on the XP-<br />
30, set each hi-hat sound to the same Mute Group number.<br />
Up to 31 Mute Groups can be used. If you do not want a<br />
Rhythm Tone to use a Mute Group, turn it OFF.<br />
RxSWITCH (Receive Switch)<br />
These parameters determine how each key will receive<br />
Volume / Pan / Hold 1 MIDI messages.<br />
Volume (Receive Volume Switch)<br />
If you want Volume messages to be received, turn this<br />
parameter ON. If not, turn it OFF.<br />
* In order for Volume messages to be received, the Volume<br />
parameter (PERFORM/MIDI/RxSWITCH) must also be<br />
turned ON for Part 10 of the currently selected Performance.<br />
Pan (Receive Pan Control Switch)<br />
Specify how Pan messages will be received.<br />
OFF: Not received.<br />
CONT: Whenever a Pan message is received, it will<br />
immediately change the stereo location of the sound.<br />
KEY-ON: The stereo location of the sound will be changed<br />
when the next note is played. If a Pan message is<br />
received while a note is sounding, the current<br />
stereo location will not change until the next note.<br />
In this case, the stereo location will change only<br />
for the note played later, and the currently<br />
sounding note will not move.<br />
Hold-1 (Receive Hold 1 Switch)<br />
If you want Hold 1 messages to be received, turn this<br />
parameter ON. If not, turn it OFF.<br />
* In order for Hold 1 messages to be received, the Hold-1<br />
parameter (PERFORM/MIDI/RxSWITCH) must also be<br />
turned ON for Part 10 of the currently selected Performance.<br />
■ Modifying Waveform of a<br />
Rhythm Tone (WAVE)<br />
Make settings for the basic waveform (Wave) of the Rhythm<br />
Tone assigned to each key.<br />
WAVE<br />
Group (Wave Group)<br />
Select the Group of the Wave.<br />
INT-A, B: Internal A, B<br />
EXP-A–E: Wave Expansion Boards A–E<br />
* It is not possible to select a Group of a Wave Expansion Board<br />
that is not installed.<br />
Number (Wave Number)<br />
Select the Wave number. The name of the Wave will be<br />
displayed in parentheses ( ).<br />
Gain (Wave Gain)<br />
Adjust the gain (volume boost) of the Wave. The setting<br />
range is -6–+12 dB, in steps of 6 dB. An increase of 6 dB<br />
doubles the gain.<br />
Switch (Key Switch)<br />
Turn this ON for keys you wish to sound, and OFF for keys<br />
you do not wish to sound.<br />
90
Chapter 3. Creating Your Own Sounds<br />
■ Modifying Pitch of a Rhythm<br />
Tone (PITCH)<br />
This group contains parameters that affect the pitch of the<br />
Rhythm Tone for each key.<br />
PITCH<br />
Specify the basic pitch for the Rhythm Tone.<br />
Coarse (Coarse Tune)<br />
Select the key corresponding to the pitch at which you wish<br />
to sound the Rhythm Tone.<br />
Fine (Fine Tune)<br />
Adjust the pitch in 1-cent steps (-50–+50 cents).<br />
* One cent is 1/100th of a semitone.<br />
T1–4 (Pitch Envelope Time 1–4)<br />
Specify the time over which the pitch will change from one<br />
point to the next.<br />
L1–4 (Pitch Envelope Level 1–4)<br />
Specify the pitch change for each point relative to the basic<br />
pitch.<br />
■ Changing the Tone (Filter) of a<br />
Rhythm Tone (TVF)<br />
The TVF (Time Variant Filter) uses a filter to modify the<br />
frequency characteristics of the sound.<br />
FILTER<br />
Make TVF filter settings.<br />
Random (Random Pitch Depth)<br />
If you want the pitch to change randomly each time you<br />
press a key, specify the width of the change. If you do not<br />
want random pitch change, set this parameter to 0. The value<br />
is in units of 1 cent.<br />
Env Depth (Pitch Envelope Depth)<br />
Adjust the effect of the Pitch Envelope. Higher settings will result<br />
in greater change. Negative (-) settings will invert the envelope.<br />
PCH VELOCITY<br />
Specify how key velocity will change the effect of the Pitch<br />
Envelope.<br />
Velocity Sens (Pitch Envelope Velocity Sensitivity)<br />
Use this parameter if you want key velocity to change the<br />
effect of the Pitch Envelope. Higher settings will result in a<br />
greater difference between strongly and softly played notes.<br />
Negative (-) settings will invert the change.<br />
Velocity Time<br />
(Pitch Envelope Time Velocity Sensitivity)<br />
Use this parameter if you want key velocity to change the<br />
overall time of the Pitch Envelope. Higher settings will result<br />
in a greater time difference between strongly and softly<br />
played notes. Negative (-) settings will invert the change.<br />
PCH ENVELOPE<br />
Make settings for the Pitch Envelope (changes in pitch over time).<br />
fig.3-42.e<br />
T1 T2 T3 T4<br />
L1<br />
Type (Filter Type)<br />
Select the filter type.<br />
OFF:<br />
filter not used.<br />
LPF (Low Pass Filter): Cut the frequencies above the<br />
Cutoff Frequency. This is the most<br />
common type of filter used in<br />
synthesizers.<br />
BPF (Band Pass Filter): Pass only the frequencies in the<br />
area of the Cutoff Frequency.<br />
HPF (High Pass Filter): Cut the frequencies below the<br />
Cutoff Frequency.<br />
PKG (Peaking Filter): Emphasize the frequencies in the<br />
area of the Cutoff Frequency.<br />
Cutoff (Cutoff Frequency)<br />
Set the basic frequency of the filter.<br />
Resonance<br />
Emphasize the frequencies in the area of the Cutoff<br />
Frequency. For some settings, excessive levels can cause<br />
oscillation and distortion.<br />
fig.3-43.e<br />
LPF BPF HPF PKG<br />
Level<br />
High<br />
Frequency<br />
parameter value<br />
Cutoff frequency<br />
Chapter 3<br />
L3<br />
Low<br />
Pitch<br />
key is<br />
pressed<br />
L2<br />
key is<br />
released<br />
L4<br />
Time<br />
Env Depth (TVF Envelope Depth)<br />
Adjust the depth of the TVF envelope. Higher settings will<br />
result in greater change. Negative (-) values will invert the<br />
envelope.<br />
91
Chapter 3. Creating Your Own Sounds<br />
TVF VELOCITY<br />
V-Sens (TVF Envelope Velocity Sensitivity)<br />
Use this parameter when you want velocity to affect the TVF<br />
Envelope. Higher settings will result in a greater difference<br />
between strongly and softly played notes. Negative (-)<br />
settings will invert the effect.<br />
V-Time (TVF Envelope Time Velocity Sensitivity)<br />
Use this parameter when you want velocity to affect the time<br />
of the TVF envelope. Higher settings will result in a greater<br />
time difference between strongly and softly played notes.<br />
Negative (-) settings will invert the effect.<br />
V-Resonance (Resonance Velocity Sensitivity)<br />
Use this parameter when you want velocity to affect the<br />
Resonance. Higher settings will result in a greater difference<br />
between strongly and softly played notes. Negative (-)<br />
settings will invert the effect.<br />
TVF ENVELOPE<br />
These parameters set the TVF envelope (the way in which the<br />
cutoff frequency will change over time).<br />
fig.3-44.e<br />
Cutoff<br />
Frequency<br />
T1–T4 (TVF Envelope Time 1–4)<br />
Set the times over which the cutoff frequency will move from<br />
one point to the next.<br />
L1–L4 (TVF Envelope Level 1–4)<br />
Set the cutoff frequency levels for each point, relative to the<br />
basic cutoff frequency.<br />
■ Changing the Volume and<br />
Stereo Location of a Rhythm<br />
Tone (TVA)<br />
The TVA (Time Variant Amplifier) controls volume changes<br />
and stereo location.<br />
TVA<br />
Level<br />
T1 T2 T3 T4<br />
L1<br />
key is pressed<br />
L2<br />
Adjust the basic volume of the Rhythm Tone. Use this<br />
parameter to adjust the volume balance between Rhythm<br />
Tones.<br />
L3<br />
L4<br />
Time<br />
key is released<br />
Pan<br />
Adjust the pan (stereo location) of the Rhythm Tone. L64 is<br />
full left, 0 is center, and 63R is full right.<br />
Random (Random Pan Depth)<br />
Use this parameter when you want the stereo location to<br />
change randomly each time you press a key. If you do not<br />
want the stereo location to change randomly, set this to 0.<br />
Alternate (Alternate Pan Depth)<br />
Use this parameter when you want the stereo location to<br />
alternate between left and right each time you press a key.<br />
Higher values will result in a greater width of change. L or R<br />
values can be set, and this will reverse the left/right order of<br />
the panning. If you want to alternate the pan position of two<br />
Rhythm Tones, set them to opposite L and R settings.<br />
TVA VELOCITY<br />
Specify how keyboard velocity will affect the time of the<br />
TVA envelope.<br />
Velocity Sens (TVA Envelope Velocity Sensitivity)<br />
Use this parameter when you want velocity to affect the TVA<br />
Envelope. Higher settings will result in a greater difference<br />
between strongly and softly played notes. Negative (-)<br />
settings will invert the effect.<br />
Velocity Time<br />
(TVA Envelope Time Velocity Sensitivity)<br />
Use this parameter when you want velocity to affect the time<br />
of the TVA envelope. Higher settings will result in a greater<br />
time difference between strongly and softly played notes.<br />
Negative (-) settings will invert the effect.<br />
TVA ENVELOPE<br />
These parameters make settings for the TVA envelope<br />
(changes over time in the TVA level).<br />
fig.3-46.e<br />
Level<br />
T1 T2 T3 T4<br />
L1<br />
key is pressed<br />
T1–T4 (TVA Envelope Time 1–4)<br />
Adjust the time over which the volume changes from one<br />
point to the next.<br />
L1–L3 (TVA Envelope Level 1–3)<br />
L2<br />
Adjust the volume level of each point relative to the basic<br />
TVA level.<br />
L3<br />
key is released<br />
Time<br />
92
Chapter 3. Creating Your Own Sounds<br />
Multi-Effects Types<br />
(EFX Parameter)<br />
Multi-Effects provides 40 types of effect. Some of these<br />
consist of two different effects connected in series or parallel.<br />
* Parameters marked with a sharp “#” can be controlled using a<br />
specified controller (Two setting items will change<br />
simultaneously for “#1” and “#2”). Settings in the Patch or<br />
Performance EFX Control display (PATCH/EFFECTS/PATCH<br />
EFX CTRL or PERFORM/EFFECTS/PERFORM EFX CTRL)<br />
will determine how these parameters are controlled.<br />
1: STEREO-EQ (Stereo Equalizer)<br />
This is a four-band stereo equalizer (low, mid x 2, high).<br />
fig.3-48<br />
L in<br />
4-Band EQ<br />
L out<br />
P2 Gain (Peaking 2 Gain)<br />
Adjust the gain for the area specified by the Peaking 2<br />
Frequency and Q settings.<br />
Level (Output Level) #<br />
Adjust the output level.<br />
2: OVERDRIVE<br />
This effect creates a soft distortion similar to that produced<br />
by vacuum tube amplifiers.<br />
fig.3-49<br />
L in<br />
R in<br />
Over<br />
drive<br />
Amp<br />
Simulator<br />
2-Band<br />
EQ<br />
L out<br />
Pan L<br />
Pan R<br />
R out<br />
Drive #<br />
Adjust the degree of distortion. The volume will change<br />
together with the degree of distortion.<br />
R in<br />
4-Band EQ<br />
R out<br />
LowFreq (Low Frequency)<br />
Select the frequency of the low range (200 Hz/400 Hz).<br />
LowGain (Low Gain)<br />
Adjust the gain of the low frequency.<br />
Hi Freq (High Frequency)<br />
Select the frequency of the high range (4000 Hz/8000 Hz).<br />
Hi Gain (High Gain)<br />
Adjust the gain of the high frequency.<br />
P1 Freq (Peaking 1 Frequency)<br />
Adjust the frequency of Peaking 1 (mid range).<br />
P1 Q (Peaking 1 Q)<br />
This parameter adjusts the width of the area around the<br />
Peaking 1 Frequency that will be affected by the Gain setting.<br />
Higher values of Q will result in a narrower area being<br />
affected.<br />
P1 Gain (Peaking 1 Gain)<br />
Adjust the gain for the area specified by the Peaking 1<br />
Frequency and Q settings.<br />
P2 Freq (Peaking 2 Frequency)<br />
Adjust the frequency of Peaking 2 (mid range).<br />
P2 Q (Peaking 2 Q)<br />
This parameter adjusts the width of the area around the<br />
Peaking 2 Frequency that will be affected by the Gain setting.<br />
Higher values of Q will result in a narrower area being<br />
affected.<br />
Level (Output Level)<br />
Adjust the output level.<br />
LowGain (Low Gain)<br />
Adjust the gain of the low frequency range.<br />
Hi Gain (High Gain)<br />
Adjust the gain of the high frequency range.<br />
Amp Type (Amp Simulator Type)<br />
Select the type of guitar amp.<br />
SMALL: small amp<br />
BUILT-IN: single-unit type amp<br />
2-STACK: large double stack amp<br />
3-STACK: large triple stack amp<br />
Pan (Output Pan) #<br />
Adjust the stereo location of the output sound. L64 is far left,<br />
0 is center, and 63R is far right.<br />
3: DISTORTION<br />
This effect produces a more intense distortion than<br />
Overdrive.<br />
fig.3-50<br />
L in<br />
R in<br />
Distortion<br />
Drive #<br />
Adjust the degree of distortion. The volume will change<br />
together with the degree of distortion.<br />
Level (Output Level)<br />
Adjust the output level.<br />
Amp<br />
Simulator<br />
2-Band<br />
EQ<br />
L out<br />
Pan L<br />
Pan R<br />
R out<br />
Chapter 3<br />
LowGain (Low Gain)<br />
Adjust the gain of the low frequency range.<br />
93
Chapter 3. Creating Your Own Sounds<br />
Hi Gain (High Gain)<br />
Adjust the gain of the high frequency range.<br />
Amp Type (Amp Simulator Type)<br />
Select the type of guitar amp.<br />
SMALL: small amp<br />
BUILT-IN: single-unit type amp<br />
2-STACK: large double stack amp<br />
3-STACK: large triple stack amp<br />
Pan (Output Pan) #<br />
Adjust the stereo location of the output sound. L64 is far left,<br />
0 is center, and 63R is far right.<br />
4: PHASER<br />
A phaser adds a phase-shifted sound to the original sound,<br />
producing a twisting modulation that creates spaciousness<br />
and depth.<br />
fig.3-51<br />
L in<br />
R in<br />
Phaser<br />
Manual #<br />
Adjust the basic frequency from which the sound will be<br />
modulated.<br />
Rate #<br />
Adjust the frequency (period) of modulation.<br />
Depth<br />
Adjust the depth of modulation.<br />
Res (Resonance)<br />
Adjust the amount of feedback for the phaser.<br />
Mix (Mix Level)<br />
Adjust the ratio with which the phase-shifted sound is<br />
combined with the direct sound.<br />
Pan (Output Pan)<br />
Adjust the stereo location of the output sound. L64 is far left,<br />
0 is center, and 63R is far right.<br />
Level (Output Level)<br />
Adjust the output level.<br />
Resonance<br />
Mix<br />
L out<br />
Pan L<br />
Pan R<br />
R out<br />
5: SPECTRUM<br />
Spectrum is a type of filter which modifies the timbre by<br />
boosting or cutting the level at specific frequencies. It is<br />
similar to an equalizer, but has 8 frequency points fixed at<br />
locations most suitable for adding character to the sound.<br />
fig.3-52<br />
L in<br />
R in<br />
Band 1 (Band 1 Gain)<br />
Adjust the 250 Hz level.<br />
Band 2 (Band 2 Gain)<br />
Adjust the 500 Hz level.<br />
Band 3 (Band 3 Gain)<br />
Adjust the 1000 Hz level.<br />
Band 4 (Band 4 Gain)<br />
Adjust the 1250 Hz level.<br />
Band 5 (Band 5 Gain)<br />
Adjust the 2000 Hz level.<br />
Band 6 (Band 6 Gain)<br />
Adjust the 3150 Hz level.<br />
Band 7 (Band 7 Gain)<br />
Adjust the 4000 Hz level.<br />
Band 8 (Band 8 Gain)<br />
Adjust the 8000 Hz level.<br />
Q<br />
Simultaneously adjust the width of the adjusted areas for all<br />
the frequency bands.<br />
Pan (Output Pan) #<br />
Adjust the stereo location of the output sound. L64 is far left,<br />
0 is center, and 63R is far right.<br />
Level (Output Level) #<br />
Adjust the output level.<br />
6: ENHANCER<br />
The Enhancer controls the overtone structure of the high<br />
frequencies, adding sparkle and tightness to the sound.<br />
fig.3-53<br />
Spectrum<br />
L out<br />
Pan L<br />
Pan R<br />
R out<br />
L in<br />
Enhancer<br />
Mix<br />
2-Band<br />
EQ<br />
L out<br />
R in<br />
Enhancer<br />
Mix<br />
2-Band<br />
EQ<br />
R out<br />
Sens (Sensitivity) #<br />
Adjust the sensitivity of the enhancer.<br />
94
Chapter 3. Creating Your Own Sounds<br />
Mix (Mix Level) #<br />
Adjust the ratio with which the overtones generated by the<br />
enhancer are combined with the direct sound.<br />
LowGain (Low Gain)<br />
Adjust the gain of the low frequency range.<br />
Hi Gain (High Gain)<br />
Adjust the gain of the high frequency range.<br />
Level (Output Level)<br />
Adjust the output level.<br />
7: AUTO-WAH<br />
The Auto Wah cyclically controls a filter to create cyclic<br />
change in timbre.<br />
fig.3-54<br />
L in<br />
L out<br />
Auto Wah<br />
R in<br />
R out<br />
Filter (Filter Type)<br />
Select the type of filter.<br />
LPF: The wah effect will be applied over a wide frequency<br />
range.<br />
BPF: The wah effect will be applied over a narrow<br />
frequency range.<br />
Sens<br />
Adjust the sensitivity with which the filter is controlled.<br />
Manual #<br />
Adjust the center frequency from which the effect is applied.<br />
Peak<br />
Adjust the amount of the wah effect that will occur in the<br />
area of the center frequency. Lower settings will cause the<br />
effect to be applied in a broad area around the center<br />
frequency. Higher settings will cause the effect to be applied<br />
in a more narrow range.<br />
Rate #<br />
Adjust the frequency of the modulation.<br />
Depth<br />
Adjust the depth of the modulation.<br />
Level (Output Level)<br />
Adjust the output level.<br />
8: ROTARY<br />
The Rotary effect simulates the sound of the rotary speakers<br />
often used with the electric organs of the past. Since the<br />
movement of the high range and low range rotors can be set<br />
independently, the unique type of modulation characteristic<br />
of these speakers can be simulated quite closely. This effect is<br />
most suitable for electric organ Patches.<br />
fig.3-55<br />
L in<br />
L out<br />
Rotary<br />
R in<br />
R out<br />
LowSlow (Low Frequency Slow Rate)<br />
Adjust the slow speed (SLOW) of the low frequency rotor.<br />
LowFast (Low Frequency Fast Rate)<br />
Adjust the fast speed (FAST) of the low frequency rotor.<br />
LowAccl (Low Frequency Acceleration)<br />
Adjust the time it takes the low frequency rotor to reach the<br />
newly selected speed when switching from fast to slow (or<br />
slow to fast) speed. Lower values will require longer times.<br />
Low Lvl (Low Frequency Level)<br />
Adjust the volume of the low frequency rotor.<br />
Hi Slow (High Frequency Slow Rate)<br />
Adjust the slow speed (SLOW) of the high frequency rotor.<br />
Hi Fast (High Frequency Fast Rate)<br />
Adjust the fast speed (FAST) of the high frequency rotor.<br />
Hi Accl (High Frequency Acceleration)<br />
Adjust the time it takes the high frequency rotor to reach the<br />
newly selected speed when switching from fast to slow (or<br />
slow to fast) speed. Lower values will require longer times.<br />
Hi Lvl (High Frequency Level)<br />
Adjust the volume of the high frequency rotor.<br />
Separation<br />
Adjust the spatial dispersion of the sound.<br />
Speed #<br />
Simultaneously switch the rotational speed of the low<br />
frequency rotor and high frequency rotor.<br />
SLOW: Slow down the rotation to the specified speed (the<br />
Low Slow / Hi Slow values).<br />
FAST: Speed up the rotation to the specified speed (the<br />
Low Fast / Hi Fast values).<br />
Chapter 3<br />
Level (Output Level) #<br />
Adjust the output level.<br />
95
Chapter 3. Creating Your Own Sounds<br />
9: COMPRESSOR<br />
The Compressor flattens out high levels and boosts low<br />
levels, smoothing out unevenness in volume.<br />
fig.3-56<br />
L in<br />
R in<br />
Attack<br />
Adjust the attack time of an input sound.<br />
Sustain<br />
Adjust the time over which low level sounds are boosted<br />
until they reach the specified volume.<br />
Post Gain<br />
Adjust the output gain.<br />
LowGain<br />
Adjust the low frequency gain.<br />
Hi Gain<br />
Adjust the high frequency gain.<br />
Pan (Output Pan) #<br />
Adjust the stereo location of the output sound. L64 is far left,<br />
0 is center, and 63R is far right.<br />
Level (Output Level) #<br />
Adjust the output level.<br />
10: LIMITER<br />
The Limiter compresses signals that exceed a specified<br />
volume level, preventing distortion from occurring.<br />
fig.3-57<br />
L in<br />
R in<br />
Compressor<br />
Limiter<br />
Thresh (Threshold Level)<br />
Adjust the volume at which compression will begin.<br />
Ratio (Compression Ratio)<br />
Adjust the compression ratio.<br />
Release (Release Time)<br />
Adjust the time from when the volume falls below the<br />
Threshold Level until compression is no longer applied.<br />
Gain (Post Gain)<br />
Adjust the output gain.<br />
LowGain<br />
Adjust the low frequency gain.<br />
2-Band<br />
EQ<br />
2-Band<br />
EQ<br />
L out<br />
Pan L<br />
Pan R<br />
R out<br />
L out<br />
Pan L<br />
Pan R<br />
R out<br />
Pan (Output Pan) #<br />
Adjust the stereo location of the output sound. L64 is far left,<br />
0 is center, and 63R is far right.<br />
Level (Output Level) #<br />
Adjust the output level.<br />
11: HEXA-CHORUS<br />
Hexa-chorus uses a six-phase chorus (six layers of chorused<br />
sound) to give richness and spatial spread to the sound.<br />
fig.3-58<br />
L in<br />
L out<br />
Balance D<br />
Balance W<br />
Hexa Chorus<br />
Balance W<br />
R in<br />
R out<br />
Balance D<br />
Pre Dly (Pre Delay Time)<br />
Adjust the time delay from when the direct sound begins<br />
until the chorus sound is heard.<br />
Rate #<br />
Adjust the rate of modulation.<br />
Depth<br />
Adjust the depth of modulation.<br />
Dly Dev (Pre Delay Deviation)<br />
Pre Delay determines the time from when the direct sound<br />
begins until the processed sound is heard. Pre Delay<br />
Deviation adjusts the differences in Pre Delay between each<br />
chorus sound.<br />
Dpt Dev (Depth Deviation)<br />
Adjust the difference in modulation depth between each<br />
chorus sound.<br />
Pan Dev (Pan Deviation)<br />
Adjust the difference in stereo location between each chorus<br />
sound. With a setting of 0, all chorus sounds will be in the<br />
center. With a setting of 20, each chorus sound will be spaced<br />
at 60 degree intervals relative to the center.<br />
Balance (Effect Balance) #<br />
Adjust the volume balance between the direct sound and the<br />
chorus sound. With a setting of D100:0W only the direct<br />
sound will be output, and with a setting of D0:100W only the<br />
chorus sound will be output.<br />
Level (Output Level)<br />
Adjust the output level.<br />
Hi Gain<br />
Adjust the high frequency gain.<br />
96
Chapter 3. Creating Your Own Sounds<br />
12: TREMOLO-CHORUS<br />
Tremolo Chorus is a chorus effect with added Tremolo<br />
(cyclic modulation of volume).<br />
fig.3-59<br />
L in<br />
L out<br />
Balance D<br />
Balance W<br />
Tremolo Chorus<br />
Balance W<br />
R in<br />
R out<br />
Balance D<br />
Pre Dly (Pre Delay Time)<br />
Adjust the time delay from when the direct sound begins<br />
until the chorus sound is heard.<br />
ChoRate (Chorus Rate)<br />
Adjust the modulation speed of the chorus effect.<br />
ho Dpt (Chorus Depth)<br />
Adjust the modulation depth of the chorus effect.<br />
Phase (Tremolo Phase)<br />
Adjust the spread of the tremolo effect.<br />
TrmRate (Tremolo Rate) #<br />
Adjust the modulation speed of the tremolo effect.<br />
Trm Sep (Tremolo Separation)<br />
Adjust the spread of the tremolo effect.<br />
Balance (Effect Balance) #<br />
Adjust the volume balance between the direct sound and the<br />
tremolo chorus sound. With a setting of D100:0W only the<br />
direct sound will be output, and with a setting of D0:100W<br />
only the tremolo chorus sound will be output.<br />
Level (Output Level)<br />
Adjust the output level.<br />
Phase<br />
Adjust the spatial spread of the sound.<br />
LowGain<br />
Adjust the gain of the low frequency range.<br />
Hi Gain<br />
Adjust the gain of the high frequency range.<br />
Balance (Effect Balance) #<br />
Adjust the volume balance between the direct sound and the<br />
chorus sound. With a setting of D100:0W only the direct<br />
sound will be output, and with a setting of D0:100W only the<br />
chorus sound will be output.<br />
Level (Output Level)<br />
Adjust the output level.<br />
14: STEREO-CHORUS<br />
This is a stereo chorus. A filter is provided so that you can<br />
adjust the timbre of the chorus sound.<br />
fig.3-61<br />
L in<br />
R in<br />
Chorus<br />
Chorus<br />
Balance D<br />
Balance D<br />
Pre Dly (Pre Delay Time)<br />
Adjust the time delay from when the direct sound begins<br />
until the processed sound is heard.<br />
Rate #<br />
Adjust the rate of modulation.<br />
Depth<br />
Adjust the depth of modulation.<br />
Balance W<br />
Balance W<br />
2-Band<br />
EQ<br />
2-Band<br />
EQ<br />
L out<br />
R out<br />
Chapter 3<br />
13: SPACE-D<br />
Space-D is a multiple chorus that applies two-phase<br />
modulation in stereo. It gives no impression of modulation,<br />
but produces a transparent chorus effect.<br />
fig.3-60<br />
L in<br />
R in<br />
Space D<br />
Space D<br />
Balance D<br />
Balance D<br />
Pre Dly (Pre Delay Time)<br />
Adjust the time delay from when the direct sound begins<br />
until the processed sound is heard.<br />
Rate #<br />
Adjust the rate of modulation.<br />
Depth<br />
Adjust the depth of modulation.<br />
Balance W<br />
Balance W<br />
2-Band<br />
EQ<br />
2-Band<br />
EQ<br />
L out<br />
R out<br />
Phase<br />
Adjust the spatial spread of the sound.<br />
Filter (Filter Type)<br />
Select the type of filter.<br />
OFF: a filter will not be used<br />
LPF: cut the frequency range above the cutoff frequency<br />
HPF: cut the frequency range below the cutoff frequency<br />
Cutoff (Cutoff Frequency)<br />
Adjust the basic frequency of the filter.<br />
LowGain<br />
Adjust the gain of the low frequency range.<br />
Hi Gain<br />
Adjust the gain of the high frequency range.<br />
Balance (Effect Balance) #<br />
Adjust the volume balance between the direct sound and the<br />
chorus sound. With a setting of D100:0W only the direct<br />
sound will be output, and with a setting of D0:100W only the<br />
chorus sound will be output.<br />
97
Chapter 3. Creating Your Own Sounds<br />
Level (Output Level)<br />
Adjust the output level.<br />
15: STEREO-FLANGER<br />
This is a stereo flanger. (The LFO has the same phase for left<br />
and right.) It produces a metallic resonance that rises and falls<br />
like a jet airplane taking off or landing. A filter is provided so<br />
that you can adjust the timbre of the flanged sound.<br />
fig.3-62<br />
L in<br />
R in<br />
Pre Dly (Pre Delay Time)<br />
Adjust the time delay from when the direct sound begins<br />
until the flanger sound is heard.<br />
Rate #<br />
Adjust the rate of modulation.<br />
Depth<br />
Adjust the depth of modulation.<br />
Fbk (Feedback Level) #<br />
Adjust the amount (%) of the processed sound that is<br />
returned (fed back) into the input. Positive (+) settings will<br />
return the sound in phase, and negative (-) settings will<br />
return the sound in reverse phase.<br />
Phase<br />
Adjust the spatial spread of the sound.<br />
Filter Type<br />
Select the type of filter.<br />
OFF: a filter will not be used<br />
LPF: cut the frequency range above the cutoff frequency<br />
HPF: cut the frequency range below the cutoff frequency<br />
Cutoff (Cutoff Frequency)<br />
Adjust the basic frequency of the filter.<br />
LowGain<br />
Adjust the gain of the low frequency range.<br />
Hi Gain<br />
Flanger<br />
Feedback<br />
Feedback<br />
Flanger<br />
Balance D<br />
Adjust the gain of the high frequency range.<br />
Balance (Effect Balance)<br />
Adjust the volume balance between the direct sound and the<br />
flanger sound. With a setting of D100:0W only the direct<br />
sound will be output, and with a setting of D0:100W only the<br />
flanger sound will be output.<br />
Level (Output Level)<br />
Adjust the output level.<br />
Balance D<br />
2-Band<br />
EQ<br />
Balance W<br />
Balance W<br />
2-Band<br />
EQ<br />
L out<br />
R out<br />
16: STEP-FLANGER<br />
The Step Flanger effect is a flanger in which the flanger pitch<br />
changes in steps. The speed at which the pitch changes can<br />
also be specified in terms of a note-value of a specified tempo.<br />
fig.3-62a<br />
L in<br />
R in<br />
Step Flanger<br />
Feedback<br />
Feedback<br />
Step Flanger<br />
Balance D<br />
Balance D<br />
2-Band<br />
EQ<br />
Balance W<br />
Balance W<br />
2-Band<br />
EQ<br />
L out<br />
R out<br />
Pre Dly (Pre Delay Time)<br />
Adjust the time delay from when the direct sound begins<br />
until the flanger sound is heard.<br />
Rate<br />
Adjust the rate of modulation.<br />
Depth<br />
Adjust the depth of modulation.<br />
Fbk (Feedback Level) #<br />
Adjust the amount (%) of the flanger sound that is returned<br />
(fed back) into the input. Negative (-) settings will invert the<br />
phase.<br />
Phase<br />
Adjust the spatial spread of the sound.<br />
Step Rate #<br />
Adjust the rate (period) of pitch change. This parameter can<br />
be set as a note-value of a specified tempo. In this case,<br />
specify the value of the desired note.<br />
When Step Rate is Set as a Note Value<br />
As the specified tempo, you may use either the Patch<br />
Tempo, Performance Tempo, or the tempo clock of the<br />
XP-30’s system.<br />
If you want to use a fixed tempo in Patch mode (Tempo<br />
parameter setting), set the Source parameter (PATCH/<br />
COMMON/PATCH CLOCK) to PATCH and set the<br />
desired tempo.<br />
If you want to use the system’s tempo clock in Patch<br />
mode, set the Source parameter (PATCH/COMMON/<br />
PATCH CLOCK) to SYSTEM.<br />
If you want to use a fixed tempo in Performance mode<br />
(Tempo parameter setting), set the Source parameter<br />
(PERFORM/COMMON/PERFORM CLOCK) to<br />
PERFORM and set the desired tempo.<br />
If you want to use the system’s tempo clock in<br />
Performance mode, set the Source parameter (PERFORM/<br />
COMMON/PERFORM CLOCK) to SYSTEM.<br />
98
Chapter 3. Creating Your Own Sounds<br />
LowGain<br />
Adjust the gain of the low frequency range.<br />
Hi Gain<br />
Adjust the gain of the high frequency range.<br />
Balance (Effect Balance)<br />
Adjust the volume balance between the direct sound and the<br />
flanger sound. With a setting of D100:0W only the direct<br />
sound will be output, and with a setting of D0:100W only the<br />
chorus sound will be output.<br />
Level (Output Level)<br />
Adjust the output level.<br />
17: STEREO-DELAY<br />
This is a stereo delay.<br />
When Feedback Mode is NORMAL:<br />
fig.3-63a<br />
L in<br />
R in<br />
Balance D<br />
When Feedback Mode is CROSS:<br />
fig.3-63b<br />
L in<br />
R in<br />
Delay<br />
Feedback<br />
Feedback<br />
Delay<br />
Delay<br />
Feedback<br />
Feedback<br />
Delay<br />
Balance D<br />
Balance D<br />
Balance D<br />
2-Band<br />
EQ<br />
Balance W<br />
Balance W<br />
2-Band<br />
EQ<br />
2-Band<br />
EQ<br />
Balance W<br />
Balance W<br />
2-Band<br />
EQ<br />
L out<br />
R out<br />
L out<br />
R out<br />
Delay L (Delay Time Left)<br />
Adjust the time from the original sound until when the left<br />
delay sound is heard.<br />
Delay R (Delay Time Right)<br />
Adjust the time from the original sound until when the right<br />
delay sound is heard.<br />
Fbk (Feedback Level) #<br />
Adjust the proportion (%) of the delay sound that is fed back<br />
into the effect. Negative (-) settings will invert the phase.<br />
Mode (Feedback Mode)<br />
Select the way in which delay sound is fed back into the<br />
effect.<br />
NORMAL: The left delay sound will be fed back into the left<br />
delay, and the right delay sound into the right delay.<br />
CROSS: The left delay sound will be fed back into the right<br />
delay, and the right delay sound into the left delay.<br />
Phase L (Feedback Phase Left)<br />
Select the phase of the left delay sound.<br />
NORMAL: Phase is not changed.<br />
INVERT: Phase is inverted.<br />
Phase R (Feedback Phase Right)<br />
Select the phase of the right delay sound.<br />
NORMAL: Phase is not changed.<br />
INVERT: Phase is inverted.<br />
HF Damp<br />
Adjust the frequency above which sound fed back to the<br />
effect will be cut. If you do not want to cut the high<br />
frequencies of the feedback, set this parameter to BYPASS.<br />
LowGain<br />
Adjust the gain of the low frequency range.<br />
Hi Gain<br />
Adjust the gain of the high frequency range.<br />
Balance (Effect Balance) #<br />
Adjust the volume balance between the direct sound and the<br />
delay sound. With a setting of D100:0W only the direct sound<br />
will be output, and with a setting of D0:100W only the delay<br />
sound will be output.<br />
Level (Output Level)<br />
Adjust the output level.<br />
18: MODULATION-DELAY<br />
This effect adds modulation to the delayed sound, producing<br />
an effect similar to a flanger.<br />
When Feedback Mode is NORMAL:<br />
fig.3-63c<br />
L in<br />
R in<br />
Balance D<br />
When Feedback Mode is CROSS:<br />
fig.3-63d<br />
L in<br />
R in<br />
Delay<br />
Feedback<br />
Feedback<br />
Delay<br />
Delay<br />
Feedback<br />
Feedback<br />
Delay<br />
Balance D<br />
Modulation<br />
Modulation<br />
Balance D<br />
Modulation<br />
Modulation<br />
Balance D<br />
2-Band<br />
EQ<br />
Balance W<br />
Balance W<br />
2-Band<br />
EQ<br />
2-Band<br />
EQ<br />
Balance W<br />
Balance W<br />
2-Band<br />
EQ<br />
L out<br />
R out<br />
L out<br />
R out<br />
Delay L (Delay Time Left)<br />
Adjust the time from the original sound until when the left<br />
delay sound is heard.<br />
Chapter 3<br />
99
Chapter 3. Creating Your Own Sounds<br />
Delay R (Delay Time Right)<br />
Adjust the time from the original sound until when the right<br />
delay sound is heard.<br />
Fbk (Feedback Level)<br />
Adjust the proportion (%) of the delay sound that is fed back<br />
into the effect. Negative (-) settings will invert the phase.<br />
Mode (Feedback Mode)<br />
Select the way in which delay sound is fed back into the<br />
effect.<br />
NORMAL: The left delay sound will be fed back into the left<br />
delay, and the right delay sound into the right delay.<br />
CROSS: The left delay sound will be fed back into the right<br />
delay, and the right delay sound into the left delay.<br />
Rate #<br />
Adjust the speed of the modulation.<br />
Depth<br />
Adjust the depth of the modulation.<br />
Phase<br />
Adjust the spatial spread of the sound.<br />
HF Damp<br />
Adjust the frequency above which sound fed back to the<br />
effect will be cut. If you do not want to cut the high<br />
frequencies of the feedback, set this parameter to BYPASS.<br />
LowGain<br />
Adjust the gain of the low frequency range.<br />
Hi Gain<br />
Adjust the gain of the high frequency range.<br />
Balance (Effect Balance) #<br />
Adjust the volume balance between the direct sound and the<br />
modulation delay sound. With a setting of D100:0W only the<br />
direct sound will be output, and with a setting of D0:100W<br />
only the modulation delay sound will be output.<br />
Level (Output Level)<br />
Adjust the output level.<br />
19: TRIPLE-TAP-DELAY<br />
The Triple Tap Delay produces three delay sounds; center,<br />
left and right. The center delay time can be specified as a note<br />
value of a specified tempo.<br />
fig.3-64<br />
L in<br />
R in<br />
Triple Tap Delay<br />
Feedback<br />
Left Tap<br />
Right Tap<br />
Balance D<br />
Center Tap<br />
Balance D<br />
2-Band<br />
EQ<br />
Balance W<br />
Balance W<br />
2-Band<br />
EQ<br />
L out<br />
R out<br />
Delay C (Delay Time Center)<br />
Delay L (Delay Time Left)<br />
Delay R (Delay Time Right)<br />
Adjust the time delay from the direct sound until when the<br />
delay sound is heard. This parameter can be set as a notevalue<br />
of a specified tempo. In this case, specify the value of<br />
the desired note.<br />
When Step Rate is Set as a Note Value<br />
As the specified tempo, you may use either the Patch<br />
Tempo, Performance Tempo, or the tempo clock of the<br />
XP-30’s system.<br />
If you want to use a fixed tempo in Patch mode (Tempo<br />
parameter setting), set the Source parameter (PATCH/<br />
COMMON/PATCH CLOCK) to PATCH and set the<br />
desired tempo.<br />
If you want to use the system’s tempo clock in Patch<br />
mode, set the Source parameter (PATCH/COMMON/<br />
PATCH CLOCK) to SYSTEM.<br />
If you want to use a fixed tempo in Performance mode<br />
(Tempo parameter setting), set the Source parameter<br />
(PERFORM/COMMON/PERFORM CLOCK) to<br />
PERFORM and set the desired tempo.<br />
If you want to use the system’s tempo clock in<br />
Performance mode, set the Source parameter<br />
(PERFORM/COMMON/PERFORM CLOCK) to<br />
SYSTEM.<br />
Fbk (Feedback Level) #<br />
Adjust the proportion (%) of the delay sound that is fed back<br />
into the effect. Negative (-) settings will invert the phase.<br />
Level C (Center Level)<br />
Level L (Left Level)<br />
Level R (Right Level)<br />
Adjust the volume of each delay sound.<br />
HF Damp<br />
Adjust the frequency above which sound fed back to the<br />
effect will be cut. If you do not want to cut the high<br />
frequencies of the feedback, set this parameter to BYPASS.<br />
LowGain<br />
Adjust the gain of the low frequency range.<br />
Hi Gain<br />
Adjust the gain of the high frequency range.<br />
Balance (Effect Balance) #<br />
Adjust the volume balance between the direct sound and the<br />
delay sound. With a setting of D100:0W only the direct sound<br />
will be output, and with a setting of D0:100W only the delay<br />
sound will be output.<br />
100
Chapter 3. Creating Your Own Sounds<br />
Level (Output Level)<br />
Adjust the output level.<br />
20: QUADRUPLE-TAP-DELAY<br />
The Quadruple Tap Delay has four delays. Each of the Delay<br />
Time parameters can be specified as a note length of the<br />
selected tempo.<br />
fig.3-65a<br />
L in<br />
Delay 3<br />
Balance W<br />
Delay 4<br />
R in<br />
R out<br />
Balance D<br />
The stereo location of each delay sound is as follows.<br />
fig.3-65b<br />
1<br />
L<br />
2 3<br />
Feedback<br />
Delay 1<br />
Delay 2<br />
Quadruple Tap Delay<br />
R<br />
4<br />
Balance D<br />
L out<br />
Balance W<br />
Delay 1 (Delay Time 1)<br />
Delay 2 (Delay Time 2)<br />
Delay 3 (Delay Time 3)<br />
Delay 4 (Delay Time 4)<br />
Adjust the time delay from the direct sound until when each<br />
delay sound is heard. These parameters can be set as a notevalue<br />
of a specified tempo. In this case, specify the value of<br />
the desired note.<br />
When Step Rate is Set as a Note Value<br />
As the specified tempo, you may use either the Patch<br />
Tempo, Performance Tempo, or the tempo clock of the<br />
XP-30’s system.<br />
If you want to use a fixed tempo in Patch mode (Tempo<br />
parameter setting), set the Source parameter (PATCH/<br />
COMMON/PATCH CLOCK) to PATCH and set the<br />
desired tempo.<br />
If you want to use the system’s tempo clock in Patch<br />
mode, set the Source parameter (PATCH/COMMON/<br />
PATCH CLOCK) to SYSTEM.<br />
If you want to use a fixed tempo in Performance mode<br />
(Tempo parameter setting), set the Source parameter<br />
(PERFORM/COMMON/PERFORM CLOCK) to<br />
PERFORM and set the desired tempo.<br />
If you want to use the system’s tempo clock in<br />
Performance mode, set the Source parameter<br />
(PERFORM/COMMON/PERFORM CLOCK) to<br />
SYSTEM.<br />
Level 1<br />
Level 2<br />
Level 3<br />
Level 4<br />
Adjust the volume of each delay sound.<br />
Fbk (Feedback Level) #<br />
Adjust the proportion (%) of the delay sound that is fed back<br />
into the effect. Negative (-) settings will invert the phase.<br />
HF Damp<br />
Adjust the frequency above which sound fed back to the<br />
effect will be cut. If you do not want to cut the high<br />
frequencies of the feedback, set this parameter to BYPASS.<br />
Balance (Effect Balance) #<br />
Adjust the volume balance between the direct sound and the<br />
delay sound. With a setting of D100:0W only the direct sound<br />
will be output, and with a setting of D0:100W only the delay<br />
sound will be output.<br />
Level (Output Level)<br />
Adjust the output level.<br />
21: TIME-CONTROL-DELAY<br />
This effect allows you to use a specified controller (the<br />
controller selected in EFX Control Source) to control the<br />
delay time and pitch in realtime. Lengthening the delay will<br />
lower the pitch, and shortening it will raise the pitch.<br />
fig.3-66<br />
L in<br />
R in<br />
Balance D<br />
Time Control Delay<br />
Feedback<br />
Balance D<br />
2-Band<br />
EQ<br />
Balance W<br />
Balance W<br />
2-Band<br />
EQ<br />
L out<br />
R out<br />
Delay (Delay time) #<br />
Adjust the time delay from the direct sound until when each<br />
delay sound is heard.<br />
Accel (Acceleration)<br />
This parameter adjusts the time over which the Delay Time<br />
will change from the current setting to a newly specified<br />
setting. The rate of change for the Delay Time directly affects<br />
the rate of pitch change.<br />
Fbk (Feedback Level) #<br />
Adjust the proportion (%) of the delay sound that is fed back<br />
into the effect. Negative (-) settings will invert the phase.<br />
HF Damp<br />
Adjust the frequency above which sound fed back to the<br />
effect will be cut. If you do not want to cut the high<br />
frequencies of the feedback, set this parameter to BYPASS.<br />
Pan (Output Pan)<br />
Adjust the stereo location of the delay sound. L64 is far left, 0<br />
is center, and 63R is far right.<br />
Chapter 3<br />
101
Chapter 3. Creating Your Own Sounds<br />
LowGain<br />
Adjust the gain of the low frequency range.<br />
Hi Gain<br />
Adjust the gain of the high frequency range.<br />
Balance (Effect Balance)<br />
Adjust the volume balance between the direct sound and the<br />
delay sound. With a setting of D100:0W only the direct sound<br />
will be output, and with a setting of D0:100W only the delay<br />
sound will be output.<br />
Level (Output Level)<br />
Adjust the output level.<br />
22: 2VOICE-PITCH-SHIFTER<br />
A Pitch Shifter shifts the pitch of the original sound. This 2-<br />
voice pitch shifter has two pitch shifters, and can add two<br />
pitch shifted sounds to the original sound.<br />
fig.3-67<br />
L in<br />
Level Balance A<br />
2Voice Pitch Shifter<br />
Level Balance B<br />
R in<br />
Balance D<br />
L out<br />
PanA L Balance W<br />
PanA R<br />
PanB L<br />
PanB R Balance W<br />
R out<br />
Balance D<br />
CoarseA (Coarse Pitch A) #1<br />
Adjust the pitch of Pitch Shift A in semitone steps (-2–+1<br />
octaves).<br />
Fine A (Fine Pitch A) #1<br />
Make fine adjustments to the pitch of Pitch Shift A in 2-cent<br />
steps (-100–+100 cents).<br />
* One cent is 1/100th of a semitone.<br />
Pan A (Output Pan A)<br />
Adjust the stereo location of the Pitch Shift A sound. L64 is<br />
far left, 0 is center, and 63R is far right.<br />
PreDlyA (Pre Delay Time A)<br />
Adjust the time delay from when the direct sound begins<br />
until the Pitch Shift A sound is heard.<br />
CoarseB (Coarse Pitch B) #2<br />
Adjust the pitch of Pitch Shift B in semitone steps (-2–+1<br />
octaves).<br />
Fine B (Fine Pitch B) #2<br />
Make fine adjustments to the pitch of Pitch Shift B in 2-cent<br />
steps (-100–+100 cents).<br />
* One cent is 1/100th of a semitone.<br />
Pan B (Output Pan B)<br />
Adjust the stereo location of the Pitch Shift B sound. L64 is<br />
far left, 0 is center, and 63R is far right.<br />
PreDlyB (Pre Delay Time B)<br />
Adjust the time delay from when the direct sound begins<br />
until the Pitch Shift A sound is heard.<br />
Mode (Pitch Shifter Mode)<br />
Higher settings of this parameter will result in slower<br />
response, but steadier pitch.<br />
Lvl Bal (Level Balance)<br />
Adjust the volume balance between the Pitch Shift A and<br />
Pitch Shift B sounds.<br />
Balance (Effect Balance)<br />
Adjust the volume balance between the direct sound and the<br />
pitch shift sound. With a setting of D100:0W only the direct<br />
sound will be output, and with a setting of D0:100W only the<br />
pitch shift sound will be output.<br />
Level (Output Level)<br />
Adjust the output level.<br />
23: FBK-PITCH-SHIFTER<br />
(Feedback Pitch Shifter)<br />
This pitch shifter allows the pitch shifted sound to be fed<br />
back into the effect.<br />
fig.3-68<br />
L in<br />
R in<br />
Pitch Shifter<br />
Feedback<br />
Coarse (Coarse Pitch) #1<br />
Adjust the pitch of the pitch shifted sound in semitone steps<br />
(-2–+1 octaves).<br />
Fine (Fine Pitch) #1<br />
Balance D<br />
Balance D<br />
Make fine adjustments to the pitch of the pitch shifted sound<br />
in 2-cent steps (-100–+100 cents).<br />
* One cent is 1/100th of a semitone.<br />
Fbk (Feedback Level) #<br />
Adjust the proportion (%) of the processed sound that is fed<br />
back into the effect. Negative (-) settings will invert the phase.<br />
Pre Dly (Pre Delay Time)<br />
Adjust the time delay from when the direct sound begins<br />
until the pitch shifted sound is heard.<br />
Mode (Pitch Shifter Mode)<br />
Higher settings of this parameter will result in slower<br />
response, but steadier pitch.<br />
Pan (Output Pan)<br />
Adjust the stereo location of the pitch shifted sound. L64 is<br />
far left, 0 is center, and 63R is far right.<br />
LowGain<br />
Adjust the gain of the low frequency range.<br />
2-Band<br />
EQ<br />
Balance W<br />
Balance W<br />
2-Band<br />
EQ<br />
L out<br />
R out<br />
102
Chapter 3. Creating Your Own Sounds<br />
Hi Gain<br />
Adjust the gain of the high frequency range.<br />
Balance (Effect Balance)<br />
Adjust the volume balance between the direct sound and the<br />
pitch shift sound. With a setting of D100:0W only the direct<br />
sound will be output, and with a setting of D0:100W only the<br />
pitch shift sound will be output.<br />
Level (Output Level)<br />
Adjust the output level.<br />
24: REVERB<br />
The Reverb effect adds reverberation to the sound,<br />
simulating an acoustic space.<br />
fig.3-69<br />
L in<br />
R in<br />
Balance D<br />
Reverb<br />
Balance D<br />
Type (Reverb Type)<br />
Select the type of Reverb effect.<br />
ROOM1:dense reverb with short decay<br />
ROOM2:sparse reverb with short decay<br />
STAGE1:reverb with greater late reverberation<br />
STAGE2:reverb with strong early reflections<br />
HALL1:reverb with clear reverberance<br />
HALL2:reverb with rich reverberance<br />
Pre Dly (Pre Delay Time)<br />
2-Band<br />
EQ<br />
Balance W<br />
Balance W<br />
2-Band<br />
EQ<br />
Adjust the time delay from when the direct sound begins<br />
until the reverb sound is heard.<br />
Time (Reverb Time) #<br />
Adjust the time length of reverberation.<br />
HF Damp<br />
Adjust the frequency above which the reverberant sound will<br />
be cut. As the frequency is set lower, more of the high<br />
frequencies will be cut, resulting in a softer and more muted<br />
reverberance. If you do not want the high frequencies to be<br />
cut, set this parameter to BYPASS.<br />
LowGain<br />
Adjust the gain of the low frequency range.<br />
L out<br />
R out<br />
25: GATE-REVERB<br />
Gate Reverb is a special type of reverb in which the<br />
reverberant sound is cut off before its natural length.<br />
fig.3-70<br />
L in<br />
R in<br />
Type (Gate Reverb Type)<br />
Select the type of reverb.<br />
NORMAL: conventional gate reverb<br />
REVERSE: backwards reverb<br />
SWEEP1: the reverberant sound moves from right to left<br />
SWEEP2: the reverberant sound moves from left to right<br />
Pre Dly (Pre Delay Time)<br />
Adjust the time delay from when the direct sound begins<br />
until the reverb sound is heard.<br />
Gate Time<br />
Adjust the time from when the reverb is heard until when it<br />
disappears.<br />
LowGain<br />
Adjust the gain of the low frequency range.<br />
Hi Gain<br />
Adjust the gain of the high frequency range.<br />
Balance (Effect Balance) #<br />
Adjust the volume balance between the direct sound and the<br />
reverb sound. With a setting of D100:0W only the direct<br />
sound will be output, and with a setting of D0:100W only the<br />
reverb sound will be output.<br />
Level (Output Level) #<br />
Adjust the output level.<br />
26: OVERDRIVE→CHORUS<br />
This effect connects an overdrive and a chorus in series.<br />
fig.3-71<br />
L in<br />
R in<br />
Gate Reverb<br />
Overdrive<br />
Balance D<br />
Balance D<br />
Balance D<br />
Chorus<br />
Balance D<br />
2-Band<br />
EQ<br />
Balance W<br />
Balance W<br />
2-Band<br />
EQ<br />
L out<br />
Balance W<br />
Balance W<br />
R out<br />
L out<br />
R out<br />
Chapter 3<br />
Hi Gain<br />
Adjust the gain of the high frequency range.<br />
Balance (Effect Balance) #<br />
Adjust the volume balance between the direct sound and the<br />
reverb sound. With a setting of D100:0W only the direct<br />
sound will be output, and with a setting of D0:100W only the<br />
reverb sound will be output.<br />
Level (Output Level)<br />
Adjust the output level.<br />
OD Drive<br />
Adjust the degree of overdrive distortion. The volume will<br />
change together with the degree of distortion.<br />
OD Pan (Overdrive Pan) #<br />
Adjust the stereo location of the overdrive sound. L64 is far<br />
left, 0 is center, and 63R is far right.<br />
Cho Dly (Chorus Pre Delay Time)<br />
Adjust the time delay from when the direct sound begins<br />
until the chorus sound is heard.<br />
103
Chapter 3. Creating Your Own Sounds<br />
ChoRate (Chorus Rate)<br />
Adjust the modulation speed of the chorus effect.<br />
Chorus Depth<br />
Adjust the modulation depth of the chorus effect.<br />
Chorus Balance #<br />
Adjust the volume balance between the overdrive sound that<br />
is sent through the chorus and the overdrive sound that is<br />
not sent through the chorus. With a setting of “D100: 0W,”<br />
only the overdrive sound will be output. With a setting of<br />
“D0: 100W,” only the overdrive sound that is sent through<br />
the chorus will be output.<br />
Level (Output Level)<br />
Adjust the output level.<br />
27: OVERDRIVE→FLANGER<br />
This effect connects an overdrive and a flanger in series.<br />
fig.3-72<br />
Balance D<br />
L in<br />
Overdrive<br />
R in<br />
Feedback<br />
L out<br />
Balance W<br />
Flanger<br />
Balance W<br />
R out<br />
Balance D<br />
OD Drive<br />
Adjust the degree of overdrive distortion. The volume will<br />
change together with the degree of distortion.<br />
OD Pan (Overdrive Pan) #<br />
Adjust the stereo location of the overdrive sound. L64 is far<br />
left, 0 is center, and 63R is far right.<br />
Flg Dly (Flanger Pre Delay Time)<br />
Adjust the time delay from when the direct sound begins<br />
until the flanger sound is heard.<br />
FlgRate (Flanger Rate)<br />
Adjust the modulation speed of the flanger effect.<br />
Flg Dpt (Flanger Depth)<br />
Adjust the modulation depth of the flanger effect.<br />
Flg Fbk (Flanger Feedback Level)<br />
Adjust the proportion (%) of the flanger sound that is fed<br />
back into the effect. Negative (-) settings will invert the phase.<br />
Flanger Balance #<br />
Adjust the volume balance between the overdrive sound that<br />
is sent through the flanger and the overdrive sound that is<br />
not sent through the flanger. With a setting of “D100: 0W,”<br />
only the overdrive sound will be output. With a setting of<br />
“D0: 100W,” only the overdrive sound that is sent through<br />
the flanger will be output.<br />
Level (Output Level)<br />
Adjust the output level.<br />
28: OVERDRIVE→DELAY<br />
This effect connects an overdrive and a delay in series.<br />
fig.3-73<br />
L in<br />
L out<br />
Balance D<br />
Balance W<br />
Overdrive<br />
Delay<br />
Balance W<br />
Feedback<br />
R in<br />
R out<br />
Balance D<br />
OD Drive<br />
Adjust the degree of overdrive distortion. The volume will<br />
change together with the degree of distortion.<br />
OD Pan (Overdrive Pan) #<br />
Adjust the stereo location of the overdrive sound. L64 is far<br />
left, 0 is center, and 63R is far right.<br />
DlyTime (Delay Time)<br />
Adjust the time delay from when the direct sound begins<br />
until the delay sound is heard.<br />
Dly Fbk (Delay Feedback Level)<br />
Adjust the proportion (%) of the delay sound that is fed back<br />
into the effect. Negative (-) settings will invert the phase.<br />
Delay HF Damp<br />
Adjust the frequency above which delayed sound fed back to<br />
the effect will be cut. If you do not want to cut the high<br />
frequencies of the feedback, set this parameter to BYPASS.<br />
Delay Balance (Delay Balance) #<br />
Adjust the volume balance between the overdrive sound that<br />
is sent through the delay and the overdrive sound that is not<br />
sent through the delay. With a setting of “D100: 0W,” only<br />
the overdrive sound will be output. With a setting of “D0:<br />
100W,” only the overdrive sound that is sent through the<br />
delay will be output.<br />
Level (Output Level)<br />
Adjust the output level.<br />
29: DISTORTION→CHORUS<br />
This effect connects distortion and chorus in series. The<br />
parameters are essentially the same as “26:<br />
OVERDRIVE→CHORUS,” with the exception of the<br />
following two.<br />
OD Drive → Dist Drive (Specify the amount of distortion.)<br />
OD Pan → Dist Pan (Specify the stereo location of the<br />
distortion sound.)<br />
fig.3-74<br />
L in<br />
L out<br />
Balance D<br />
Balance W<br />
Distortion Chorus<br />
Balance W<br />
R in<br />
R out<br />
Balance D<br />
104
Chapter 3. Creating Your Own Sounds<br />
30: DISTORTION→FLANGER<br />
This effect connects distortion and flanger in series. The<br />
parameters are essentially the same as in “27:<br />
OVERDRIVE→FLANGER,” with the exception of the<br />
following two.<br />
OD Drive → Dist Drive (Specify the amount of distortion.)<br />
OD Pan → Dist Pan (Specify the stereo location of the<br />
distortion sound.)<br />
fig.3-75<br />
Balance D<br />
L in<br />
Distortion<br />
R in<br />
Feedback<br />
31: DISTORTION→DELAY<br />
L out<br />
Balance W<br />
Flanger<br />
Balance W<br />
R out<br />
Balance D<br />
This effect connects distortion and delay in series. The<br />
parameters are essentially the same as in “28:<br />
OVERDRIVE→DELAY,” with the exception of the following<br />
two.<br />
OD Drive → Dist Drive (Specify the amount of distortion.)<br />
OD Pan → Dist Pan (Specify the stereo location of the<br />
distortion sound.)<br />
Chorus Depth<br />
Adjust the modulation depth of the chorus effect.<br />
Chorus Balance #<br />
Adjust the volume balance between the enhancer sound that<br />
is sent through the chorus and the enhancer sound that is not<br />
sent through the chorus. With a setting of “D100: 0W,” only<br />
the enhancer sound will be output. With a setting of “D0:<br />
100W,” only the enhancer sound that is sent through the<br />
chorus will be output.<br />
Level (Output Level)<br />
Adjust the output level.<br />
33: ENHANCER→FLANGER<br />
This effect connects an enhancer and a flanger in series.<br />
fig.3-78<br />
Balance D<br />
L in Enhancer<br />
L out<br />
Mix<br />
Feedback<br />
Balance W<br />
Flanger<br />
Balance W<br />
R in Enhancer<br />
R out<br />
Mix<br />
Balance D<br />
Enhancer Sens #<br />
Adjust the sensitivity of the enhancer.<br />
Chapter 3<br />
fig.3-76<br />
L in<br />
L out<br />
Balance D<br />
Balance W<br />
Distortion<br />
Delay<br />
Balance W<br />
Feedback<br />
R in<br />
R out<br />
Balance D<br />
32: ENHANCER→CHORUS<br />
This effect connects an enhancer and a chorus in series.<br />
fig.3-77<br />
L in Enhancer<br />
L out<br />
Mix<br />
Balance D<br />
Balance W<br />
Chorus<br />
Balance W<br />
R in Enhancer<br />
R out<br />
Mix<br />
Balance D<br />
Enhancer Sens #<br />
Adjust the sensitivity of the enhancer.<br />
Enhancer Mix (Enhancer Mix Level)<br />
Adjust the ratio with which the overtones generated by the<br />
enhancer are combined with the direct sound.<br />
Cho Dly (Chorus Pre Delay Time)<br />
Adjust the time delay from when the direct sound begins<br />
until the chorus sound is heard.<br />
ChoRate (Chorus Rate)<br />
Adjust the modulation speed of the chorus effect.<br />
Enhancer Mix (Enhancer Mix Level)<br />
Adjust the ratio with which the overtones generated by the<br />
enhancer are combined with the direct sound.<br />
Flg Dly (Flanger Pre Delay Time)<br />
Adjust the time delay from when the direct sound begins<br />
until the flanger sound is heard.<br />
FlgRate (Flanger Rate)<br />
Adjust the modulation speed of the flanger effect.<br />
Flg Dpt (Flanger Depth)<br />
Adjust the modulation depth of the flanger effect.<br />
Flg Fbk (Flanger Feedback Level)<br />
Adjust the proportion (%) of the flanger sound that is fed<br />
back into the effect. Negative (-) settings will invert the<br />
phase.<br />
Flanger Balance #<br />
Adjust the volume balance between the enhancer sound that<br />
is sent through the flanger and the enhancer sound that is not<br />
sent through the flanger. With a setting of “D100: 0W,” only<br />
the enhancer sound will be output. With a setting of “D0:<br />
100W,” only the enhancer sound that is sent through the<br />
flanger will be output.<br />
Level (Output Level)<br />
Adjust the output level.<br />
105
Chapter 3. Creating Your Own Sounds<br />
34: ENHANCER→DELAY<br />
This effect connects an enhancer and a delay in series.<br />
fig.3-79<br />
Enhancer Sens #<br />
Adjust the sensitivity of the enhancer.<br />
Enhancer Mix (Enhancer Mix Level)<br />
Adjust the ratio with which the overtones generated by the<br />
enhancer are combined with the direct sound.<br />
DlyTime (Delay Time)<br />
Adjust the time delay from when the direct sound begins<br />
until the delay sound is heard.<br />
Dly Fbk (Delay Feedback Level)<br />
Adjust the proportion (%) of the delay sound that is fed back<br />
into the delay input. Negative (-) settings will invert the phase.<br />
Delay HF Damp<br />
Adjust the frequency above which delayed sound fed back to<br />
the delay input will be cut. If you do not want to cut the high<br />
frequencies of the delay feedback, set this parameter to BYPASS.<br />
Delay Balance #<br />
Adjust the volume balance between the enhancer sound that<br />
is sent through the delay and the enhancer sound that is not<br />
sent through the delay. With a setting of “D100: 0W,” only<br />
the enhancer sound will be output. With a setting of “D0:<br />
100W,” only the enhancer sound that is sent through the<br />
delay will be output.<br />
Level (Output Level)<br />
Adjust the output level.<br />
35: CHORUS→DELAY<br />
This effect connects a chorus and a delay unit in series.<br />
fig.3-80<br />
L in<br />
R in<br />
L in<br />
R in<br />
Enhancer<br />
Enhancer<br />
Mix<br />
Mix<br />
Balance D<br />
Balance W<br />
Chorus<br />
Balance W<br />
Balance D<br />
Balance D<br />
Delay<br />
Feedback<br />
Balance D<br />
Balance D<br />
Delay<br />
Feedback<br />
Balance D<br />
Cho Dly (Chorus Pre Delay Time)<br />
Adjust the time delay from when the direct sound begins<br />
until the chorus sound is heard.<br />
ChoRate (Chorus Rate)<br />
Adjust the modulation speed of the chorus effect.<br />
Cho Dpt (Chorus Depth)<br />
Adjust the modulation depth of the chorus effect.<br />
L out<br />
Balance W<br />
Balance W<br />
R out<br />
L out<br />
Balance W<br />
Balance W<br />
R out<br />
Cho Bal (Chorus Balance) #<br />
Adjust the volume balance between the direct sound and the<br />
chorus sound. With a setting of “D100: 0W,” only the direct<br />
sound will be output. With a setting of “D0: 100W,” only the<br />
chorus sound will be output.<br />
DlyTime (Delay Time)<br />
Adjust the time delay from when the direct sound begins<br />
until the delay sound is heard.<br />
Dly Fbk (Delay Feedback Level)<br />
Adjust the proportion (%) of the delay sound that is fed back<br />
into the delay input. Negative (-) settings will invert the phase.<br />
Delay HF Damp<br />
Adjust the frequency above which delayed sound fed back to<br />
the delay input will be cut. If you do not want to cut the high<br />
frequencies of the feedback, set this parameter to BYPASS.<br />
Delay Balance #<br />
Adjust the volume balance between the chorus sound that is<br />
sent through the delay and the chorus sound that is not sent<br />
through the delay. With a setting of “D100: 0W,” only the<br />
chorus sound will be output. With a setting of “D0: 100W,” only<br />
the chorus sound that is sent through the delay will be output.<br />
Level (Output Level)<br />
Adjust the output level.<br />
36: FLANGER→DELAY<br />
This effect connects a flanger and a delay in series.<br />
fig.3-81<br />
L in<br />
R in<br />
Balance D<br />
Feedback<br />
Flanger<br />
Balance D<br />
Balance W<br />
Balance W<br />
Balance D<br />
Delay<br />
Feedback<br />
Balance D<br />
L out<br />
Balance W<br />
Balance W<br />
R out<br />
Flg Dly (Flanger Pre Delay Time)<br />
Adjust the time delay from when the direct sound begins<br />
until the flanger sound is heard.<br />
FlgRate (Flanger Rate)<br />
Adjust the modulation speed of the flanger effect.<br />
Flg Dpt (Flanger Depth)<br />
Adjust the modulation depth of the flanger effect.<br />
Flg Fbk (Flanger Feedback Level)<br />
Adjust the proportion (%) of the flanger sound that is fed<br />
back into the effect. Negative (-) settings will invert the phase.<br />
Flg Bal (Flanger Balance) #<br />
Adjust the volume balance between the direct sound and the<br />
flanger sound. With a setting of “D100: 0W,” only the direct<br />
sound will be output. With a setting of “D0: 100W,” only the<br />
flanger sound will be output.<br />
DlyTime (Delay Time)<br />
Adjust the time delay from when the direct sound begins<br />
until the delay sound is heard.<br />
106
Chapter 3. Creating Your Own Sounds<br />
Dly Fbk (Delay Feedback Level)<br />
Adjust the proportion (%) of the delay sound that is fed back<br />
into the delay input. Negative (-) settings will invert the phase.<br />
HF Damp<br />
Adjust the frequency above which delayed sound fed back to<br />
the delay input will be cut. If you do not want to cut the high<br />
frequencies of the delay feedback, set this parameter to BYPASS.<br />
Delay Balance #<br />
Adjust the volume balance between the flanger sound that is<br />
sent through the delay and the flanger sound that is not sent<br />
through the delay. With a setting of “D100: 0W,” only the<br />
flanger sound will be output. With a setting of “D0: 100W,” only<br />
the flanger sound that is sent through the delay will be output.<br />
Level (Output Level)<br />
Adjust the output level.<br />
Flanger Balance #<br />
Adjust the volume balance between the chorus sound and<br />
the chorus sound that is passed through the flanger. With a<br />
setting of “D100: 0W,” only the chorus sound will be output.<br />
With a setting of “D0: 100W,” only the chorus sound that<br />
passes through the flanger will be output.<br />
Level (Output Level)<br />
Adjust the output level.<br />
38: CHORUS/DELAY<br />
This effect connects a chorus and a delay in parallel. The<br />
parameters are the same as for “35: CHORUS→DELAY.”<br />
However, the Delay Balance parameter adjusts the volume<br />
balance between the direct sound and the delay sound.<br />
fig.3-83<br />
Balance D<br />
L in<br />
L out<br />
37: CHORUS→FLANGER<br />
This effect connects a chorus and a flanger in series.<br />
fig.3-82<br />
L in<br />
R in<br />
Balance D<br />
Balance W<br />
Chorus<br />
Balance W<br />
Balance D<br />
Balance D<br />
Feedback<br />
Flanger<br />
Balance D<br />
Cho Dly (Chorus Pre Delay Time)<br />
Adjust the time delay from when the direct sound begins<br />
until the chorus sound is heard.<br />
ChoRate (Chorus Rate)<br />
Adjust the modulation speed of the chorus effect.<br />
Cho Dpt (Chorus Depth)<br />
Adjust the modulation depth of the chorus effect.<br />
Cho Bal (Chorus Balance) #<br />
Adjust the volume balance between the direct sound and the<br />
chorus sound. With a setting of “D100: 0W,” only the direct<br />
sound will be output. With a setting of “D0: 100W,” only the<br />
chorus sound will be output.<br />
Flg Dly (Flanger Pre Delay Time)<br />
Adjust the time delay from when the direct sound begins<br />
until the flanger sound is heard.<br />
FlgRate (Flanger Rate)<br />
Adjust the modulation speed of the flanger effect.<br />
Flg Dpt (Flanger Depth)<br />
Adjust the modulation depth of the flanger effect.<br />
L out<br />
Balance W<br />
Balance W<br />
R out<br />
R in<br />
39: FLANGER/DELAY<br />
This effect connects a flanger and a delay in parallel. The<br />
parameters are the same as for “36: FLANGER→DELAY.”<br />
However, the Delay Balance parameter adjusts the volume<br />
balance between the direct sound and the delay sound.<br />
fig.3-84<br />
L in<br />
R in<br />
40: CHORUS/FLANGER<br />
This effect connects a chorus and a flanger in parallel. The<br />
parameters are the same as for “37: CHORUS→FLANGER.”<br />
However, the Flanger Balance parameter adjusts the volume<br />
balance between the direct sound and the flanger sound.<br />
fig.3-85<br />
L in<br />
Chorus<br />
Feedback<br />
Delay<br />
Flanger<br />
Feedback<br />
Feedback<br />
Delay<br />
Chorus<br />
Feedback<br />
Flanger<br />
Balance D<br />
Balance D<br />
Balance D<br />
Balance D<br />
Balance W<br />
Balance W<br />
R out<br />
L out<br />
Balance W<br />
Balance W<br />
R out<br />
L out<br />
Balance W<br />
Balance W<br />
Chapter 3<br />
Flg Fbk (Flanger Feedback Level)<br />
Adjust the proportion (%) of the flanger sound that is fed<br />
R in<br />
Balance D<br />
R out<br />
back into the effect. Negative (-) settings will invert the phase.<br />
107
Chapter 3. Creating Your Own Sounds<br />
XP-30 Operating Environment<br />
Setup (System Parameters<br />
and Their Functions)<br />
fig.3-86<br />
■ Display Screen Contrast and<br />
Clock Settings (SETUP)<br />
SYSTEM SETUP<br />
LCD Contrast<br />
Adjust the contrast (brighthess) of the display.<br />
Power Up Mode<br />
Select the condition that the XP-30 will be in when the power<br />
is turned on.<br />
LAST-SET: The XP-30 will be in the condition it was in<br />
when power was last turned off.<br />
DEFAULT: The XP-30 will be ready to play Patch<br />
“USER:001.”<br />
Patch Remain (Patch Remain Switch)<br />
If you want currently-sounding notes to be turned off when a<br />
new Patch (Rhythm Set) is selected, set this parameter OFF.<br />
* Effects settings change as soon as you switch to a new Patch or<br />
Rhythm Set, without being influenced by the Patch Remain<br />
setting. Because of this, certain effects settings can cause notes<br />
that were until then sounding to no longer be heard, even<br />
though Patch Remain has been set to on.<br />
Clock Source<br />
Specify the tempo clock of the system.<br />
INT: The internal clock will be the tempo clock for the<br />
system.<br />
MIDI: An external clock will be the tempo clock for the<br />
system.<br />
System Tempo<br />
Set the system tempo.<br />
* When Clock Source is set to MIDI, the tempo will synchronize<br />
to the clock messages received from an external MIDI device, so<br />
it will not be possible to set the tempo value. The tempo of the<br />
external clock will be displayed in parentheses.<br />
Category Select Mode<br />
When searching for patches, specify the patch that will be<br />
selected when you press the numeric key.<br />
LAST-SET: The patch last-selected during the previous<br />
patch search will be selected.<br />
DEFAULT: The patch specified as the factory default will be<br />
selected.<br />
■ Arpeggio Settings (ARPEGGIO)<br />
This is where to set Arpeggiator parameters.<br />
ARPEGGIO<br />
Style<br />
Sets the style of the arpeggio. Select from the following 43<br />
options. For creating your own style, choose LIMITLESS.<br />
1/4: The rhythm will be divided in quarter notes.<br />
1/6: The rhythm will be divided in quarter note triplets.<br />
1/8: The rhythm will be divided in eighth notes.<br />
1/12: The rhythm will be divided in eighth note triplets.<br />
1/16: The rhythm will be divided in 16th notes.<br />
1/32: The rhythm will be divided in 32nd notes.<br />
PORTAMENTO A, B: A style using the portamento effect.<br />
GLISSANDO: A glissando style.<br />
SEQUENCE A–D: Styles for sequenced patterns.<br />
ECHO: An echo-like style.<br />
SYNTH BASS, SLAP BASS A, SLAP BASS B, WALK BASS:<br />
Styles appropriate for bass playing.<br />
RHYTHM GTR A–E: Styles for guitar cutting. Styles B–E are<br />
effective when 3–4 notes are held.<br />
3 FINGER GTR: Three-finger guitar style.<br />
STRUMMING GTR: A style simulating a guitar chord<br />
strummed upward (downward).<br />
Effective when 5–6 notes are held.<br />
KBD COMPING A, B: Styles for keyboard instrument<br />
backing.<br />
KBD COMPING C, D: Styles in triple meter.<br />
KBD COMPING E: A reggae-type style. Effective when 3<br />
notes are held.<br />
PERCUSSION: A style suitable for percussive instrument<br />
sounds.<br />
HARP: The playing style of a harp.<br />
SHAMISEN: The playing style of a Shamisen.<br />
BOUND BALL: A style suggestive of a bouncing ball.<br />
RANDOM: A style in which the notes sound in random order.<br />
BOSSANOVA: A style with bossanova guitar cutting. Hold<br />
3–4 notes for best results. You can increase<br />
the tempo and use this as a Samba.<br />
SALSA: Typical salsa style. Hold 3–4 notes for best results.<br />
MAMBO: Typical mambo style. Hold 3–4 notes for best<br />
results.<br />
LATIN PERCUSION: A rhythm style with Latin percussion<br />
instruments such as Clave, Cowbell,<br />
Clap, Bongo, Conga, Agogo etc.<br />
SAMBA: Typical samba style. Use for rhythm patterns or<br />
bass lines.<br />
TANGO: Typical tango rhythm style. Hold the root, 3rd and<br />
5th of a triad etc. for best results.<br />
HOUSE: A style for house piano backing. Hold 3–4 notes for<br />
best results.<br />
108
Chapter 3. Creating Your Own Sounds<br />
LIMITLESS: The settings of all parameters can be freely<br />
combined without restriction.<br />
* Choices can be set for the Motif, Beat Pattern, Shuffle Rate and<br />
Accent Rate parameters for each style. Refer to the “Arpeggio<br />
Style List” (p. 182).<br />
Octave Range<br />
Sets the key range in octaves over which arpeggio will take<br />
place. If you want the arpeggio to sound using only the notes<br />
that you actually play, set this parameter to 0. To have the<br />
arpeggio sound using the notes you play and notes 1 octave<br />
higher, set this parameter to +1. A setting of -1 will make the<br />
arpeggio sound using the notes you play and notes l octave<br />
lower.<br />
Motif<br />
Sets the order in which notes of the chord will sound. Some<br />
settings will not be available depending on the Style<br />
parameter setting.<br />
SINGLE UP: Notes will sound singly, starting<br />
from the lowest key pressed.<br />
SINGLE DOWN: Notes will sound singly, starting<br />
from the highest key pressed.<br />
SINGLE UP&DOWN: Notes will sound singly, starting<br />
from the lowest key pressed, going<br />
up and then back down.<br />
SINGLE RANDOM: Notes will sound singly in random<br />
order.<br />
DUAL UP:<br />
Notes will sound in pairs, starting<br />
from the lowest key pressed.<br />
DUAL DOWN: Notes will sound in pairs, starting<br />
from the highest key pressed.<br />
DUAL UP&DOWN: Notes will sound in pairs, starting<br />
from the lowest key pressed, going<br />
up and then back down.<br />
DUAL RANDOM: Notes will sound in pairs, in random<br />
order.<br />
TRIPLE UP: Notes you press will sound three at a<br />
time, from low to high.<br />
TRIPLE DOWN: Notes you press will sound three at a<br />
time, from high to low.<br />
TRIPLE UP&DOWN: Notes you press will sound three at a<br />
time, from low to high and then back<br />
down from high to low.<br />
TRIPLE RANDOM: Notes you press will sound three at a<br />
time, in random order.<br />
NOTE ORDER: Notes will sound in the order that<br />
they were pressed. Up to 32 notes can<br />
be stored, so you can create melody<br />
lines by pressing keys in the<br />
appropriate order.<br />
GLISSANDO:<br />
CHORD:<br />
BASS+CHORD1–5:<br />
BASS+UP1–8:<br />
Notes will be played in an ascending<br />
and descending chromatic scale<br />
between the lowest and the highest<br />
keys that are pressed. Simply press<br />
two notes, the lowest and highest.<br />
All notes that are pressed will sound<br />
simultaneously.<br />
The lowest note that is pressed and<br />
other notes will sound as a chord.<br />
The lowest note that is pressed and<br />
other notes will sound as an<br />
arpeggio.<br />
BASS+RANDOM1–3: The lowest note that is pressed and<br />
TOP+UP1–6:<br />
BASS+UP+TOP:<br />
Beat Pattern<br />
other notes will sound randomly.<br />
The highest note that is pressed and<br />
other notes will sound as an<br />
arpeggio.<br />
Simulated fingering of folk guitar’s<br />
three-finger picking technique.<br />
Select the beat pattern from the choices below. This setting<br />
will affect the location of the accent and length of the notes to<br />
determine the beat (rhythm).<br />
Some settings will not be available depending on the Style<br />
parameter setting.<br />
1/4, 1/6, 1/8, 1/12, 1/16 1–3, 1/32 1–3, PORTA-A 01–11,<br />
PORTA-B 01–15, SEQ-A 1–7, SEQ-B 1–5, SEQ-C 1–2,<br />
SEQ-D 1–8, ECHO 1–3, MUTE 01–16, STRUM1–8,<br />
REGGAE1–2, REFRAIN1–2, PERC1–4, WALKBS, HARP,<br />
BOUND, RANDOM, BOSSA NOVA, SALSA 1–4, MAMBO<br />
1–2, CLAVE, REV CLA, GUIRO, AGOGO, SAMBA, TANGO<br />
1–4, HOUSE 1–2<br />
Accent Rate<br />
Modifies the strength of accents and the length of the notes to<br />
adjust the “groove” feel of the arpeggio. A setting of 100%<br />
will produce the most pronounced groove feel.<br />
Shuffle Rate<br />
This parameter allows you to modify the timing of an upbeat<br />
between two down-notes next to each other, to create<br />
shuffle rhythms. With a setting of 50%, the notes will be<br />
spaced evenly. Higher values will give more of a “dotted”<br />
(shuffle) feel.<br />
Key Velocity<br />
Sets the force of the chord. If you wish to use the velocity at<br />
which the notes are actually played, set this parameter to<br />
REAL. To use a constant velocity regardless of the force with<br />
which you play the keyboard, choose a desired value from 1–<br />
127.<br />
Chapter 3<br />
109
Chapter 3. Creating Your Own Sounds<br />
Part (Arpeggio Part)<br />
When using a Layer performance, you can use this parameter<br />
to specify the Part for playing an arpeggio. Parts other than<br />
that you specify will sound as you play on the keyboard.<br />
* This setting will be invalid if Single performance, Patch mode or<br />
Rhythm Set mode is selected.<br />
Tempo<br />
Sets the speed of the arpeggio. This setting is the same as the<br />
tempo of the song. Changing this setting will also affect the<br />
song’s playback tempo.<br />
When the Clock Source parameter (SYSTEM/SETUP/<br />
SYSTEM SETUP) is set to INT, the display will indicate<br />
Tempo(=SYS), and this will be the same value as the system<br />
tempo. With a setting of MIDI, the display will indicate<br />
Tempo(=EXT), and you will be synchronized to the clock of<br />
the external MIDI device.<br />
■ Keyboard and Controllers<br />
Settings (CONTROL)<br />
KEYBOARD<br />
Transpose (Transpose Switch/Value)<br />
If you wish to transpose the range of the keyboard, turn this<br />
switch ON and set the desired amount of transposition (in<br />
semitone steps). Tonic is indicated in parentheses ( ).<br />
* The transposed note name will be shown in the lower right of the<br />
Performance/Patch/Rhythm Set play display.<br />
* When transposing the keyboard range, press [TRANSPOSE]<br />
and indicator lights.<br />
* To change transpose amount on a PLAY display, hold down<br />
[TRANSPOSE] and press [-OCT] or [+OCT].<br />
Sens (Keyboard Sensitivity)<br />
Select the keyboard sensitivity.<br />
LIGHT: light<br />
MEDIUM: normal<br />
HEAVY: heavy<br />
Vel (Keyboard Velocity)<br />
Specify the velocity value that will be transmitted when you<br />
play the keyboard. If you want the actual keyboard velocity<br />
to be transmitted, set this to REAL. If you want a fixed<br />
velocity value to be transmitted regardless of how you play,<br />
specify the desired value.<br />
Aft (Aftertouch Sensitivity)<br />
Specify the Aftertouch sensitivity. Higher values will allow<br />
Aftertouch to be applied more easily. Normally you should<br />
leave this set to 100.<br />
HOLD PEDAL<br />
Set the function of the pedal connected to the HOLD PEDAL<br />
jack.<br />
Output (Pedal Output)<br />
Select the sound source(s) (the internal sound source and/or<br />
external sound sources connected to MIDI OUT connector)<br />
which will be controlled by the pedal.<br />
OFF: Neither will be controlled.<br />
INT: Only the internal sound source will be controlled.<br />
MIDI: Only external sound sources will be controlled.<br />
BOTH: Both the internal sound source and external sound<br />
sources will be controlled.<br />
Polarity (Pedal Polarity)<br />
This parameter switches the polarity of the Hold pedal. On<br />
some pedals, the electrical signal output by the pedal when it<br />
is pressed or released is the opposite of other pedals. If your<br />
pedal has an effect opposite of what you expect, set this<br />
parameter to REVERSE. If you are using a <strong>Roland</strong> pedal (that<br />
has no polarity switch), set this parameter to STANDARD.<br />
CONTROL PEDAL<br />
Assign the function of the pedals connected to the<br />
CONTROL PEDAL jack.<br />
Assign (Pedal Assign)<br />
Select the function controlled by the pedal.<br />
CC01–95: Controller numbers 1–95 (except for 6, 32–63).<br />
PITCH BEND: Pitch bend<br />
AFTERTOUCH: Aftertouch<br />
PROG-UP: Every press of the pedal selects the next<br />
Performance number, Patch number, or<br />
Rhythm Set.<br />
PROG-DOWN: Every press of the pedal selects the<br />
previous Performance number, Patch<br />
number, or Rhythm Set.<br />
TAP-TEMPO: Tap tempo (a tempo specified by the<br />
interval at which you press the pedal).<br />
OCT-UP: Each pedal press raises the key range in<br />
octave steps (up to 3 octaves higher).<br />
OCT-DOWN: Each pedal press lowers the key range in<br />
octave steps (up to 3 octaves lower).<br />
Output (Pedal Output)<br />
Select the sound source(s) (the internal sound source and/or<br />
external sound sources connected to MIDI OUT connector)<br />
which will be controlled by the pedals.<br />
OFF: Neither will be controlled.<br />
INT: Only the internal sound source will be controlled.<br />
MIDI: Only external sound sources will be controlled.<br />
BOTH: Both the internal sound source and external sound<br />
sources will be controlled.<br />
110
Chapter 3. Creating Your Own Sounds<br />
Polarity (Pedal Polarity)<br />
This parameter switches the polarity of the pedals. On some<br />
pedals, the electrical signal output by the pedal when it is<br />
pressed or released is the opposite of other pedals. If your<br />
pedal has an effect opposite of what you expect, set this<br />
parameter to REVERSE. If you are using a <strong>Roland</strong> pedal (that<br />
has no polarity switch), set this parameter to STANDARD.<br />
C1/C2/C3/C4 ASSIGN<br />
(C1/C2/C3/C4 Slider Assign)<br />
These parameters set the functions controlled by the C1–C4<br />
sliders.<br />
Assign (C1/C2/C3/C4 Slider Assign)<br />
Select the function controlled by each slider.<br />
CC01–95: Controller numbers 1–95 (except for 6, 32–63).<br />
PITCH BEND: Pitch bend<br />
AFTERTOUCH: Aftertouch<br />
* Depending on the functions being controlled, the value may<br />
remain unchanged when the slider is moved, even if the Patch or<br />
Performance is switched.<br />
Output (C1/C2/C3/C4 Slider Output)<br />
Select the sound source(s) (the internal sound source and/or<br />
external sound sources connected to MIDI OUT connector)<br />
which will be controlled by the sliders.<br />
OFF: Neither will be controlled.<br />
INT: Only the internal sound source will be controlled.<br />
MIDI: Only external sound sources will be controlled.<br />
BOTH: Both the internal sound source and external sound<br />
sources will be controlled.<br />
SYS-CTRL ASSIGN (System Control Assign)<br />
Control 1/2 (System Control Assign 1/2)<br />
These settings allow you to choose two controllers for<br />
common use when controlling the parameters of a Patch or<br />
Performance. The settings in each Patch (or Performance)<br />
will determine whether the two controllers you choose here<br />
will actually be used. You will also need to specify for each<br />
Patch (or Performance) the parameters that will be<br />
controlled.<br />
CC01–95: Controller numbers 1–95 (except for 6, 32–63).<br />
PITCH BEND: Pitch bend<br />
AFTERTOUCH: Aftertouch<br />
CONTROL SOURCE<br />
Select the type of MIDI message that will be used to control<br />
each of the following functions.<br />
Hold (Hold Control Source)<br />
Select the type of pedal message that will be used to hold the<br />
current parameter values.<br />
OFF: not used<br />
HOLD1: Hold 1 (controller number 64)<br />
SOST: Sostenuto (controller number 66)<br />
SOFT: Soft pedal (controller number 67)<br />
HOLD2: Hold 2 (controller number 69)<br />
Peak (Peak Control Source)<br />
Select the type of pedal message that will used to hold the<br />
highest received parameter values.<br />
OFF: not used<br />
HOLD1: Hold 1 (controller number 64)<br />
SOST: Sostenuto (controller number 66)<br />
SOFT: Soft pedal (controller number 67)<br />
HOLD2: Hold 2 (controller number 69)<br />
Volume (Volume Control Source)<br />
Specify whether or not Expression messages (controller<br />
number 11) will affect the volume of a Patch or Part as well<br />
as Volume messages (controller number 7).<br />
VOLUME: Only Volume messages and not Expression<br />
messages will affect the volume.<br />
VOL&EXP: Both Volume messages and Expression<br />
messages will affect the volume.<br />
Aftertouch (Aftertouch Control Source)<br />
Specify the type(s) of aftertouch message that will affect the<br />
internal sound source.<br />
CHANNEL: Channel pressure<br />
(the aftertouch that applies equally to all keys)<br />
POLY: Polyphonic key pressure (the aftertouch that<br />
applies independently to each key)<br />
CH&POLY: Channel pressure and Polyphonic key pressure<br />
* The XP-30’s keyboard is not able to transmit Polyphonic Key<br />
Pressure messages.<br />
Chapter 3<br />
* To use the selected controllers, you need to make System<br />
settings and Patch/Performance settings so that the MIDI<br />
messages transmitted by the selected controllers will be received.<br />
* For many control change messages, the function performed by<br />
each number is defined in the MIDI specification. These settings<br />
allow you to use control change messages without regard to<br />
their officially defined function, so please be aware of what you<br />
are doing.<br />
111
Chapter 3. Creating Your Own Sounds<br />
■ MIDI Settings (MIDI)<br />
These parameters determine MIDI channel settings and how<br />
exclusive data is handled.<br />
* The first display of the MIDI group will be different depending<br />
on the mode you were in when you pressed [SYSTEM] (Patch<br />
mode/Performance mode/GM mode).<br />
PERFORM MIDI (Performance MIDI)<br />
Make MIDI settings for Performance mode. To make these<br />
settings, press [SYSTEM] when you are in Performance mode,<br />
and then press [MIDI] located in the row of function buttons.<br />
Control Channel (Performance Control Channel)<br />
Select the receive channel used for selecting Performances via<br />
MIDI (Program Change and Bank Select messages). If you do<br />
not wish to use MIDI messages to select Performances, turn<br />
this OFF. If you set this to the same channel as the receive<br />
channel of a Part, Performance selection will take priority and<br />
it will not be possible to select Patches on that Part via MIDI.<br />
* The MIDI Receive Channel of each Part is set independently for<br />
each Performance.<br />
Local (Local Switch)<br />
Specify whether or not the controller section will be<br />
connected to the internal sound source (all Parts). Normally<br />
you will leave this ON, but if you wish to use the XP-30’s<br />
keyboard and controllers to control only external sound<br />
sources, turn this OFF.<br />
* If you want the keyboard controller section to be disconnected<br />
only from a specific Part or Parts, use the Local parameter<br />
(PERFORM/MIDI/MIDI).<br />
Remote (Remote Keyboard Switch)<br />
Turn this parameter on when you want to use an external<br />
MIDI keyboard in place of the XP-30’s keyboard. In this case,<br />
the transmit channel of the external MIDI keyboard can be set<br />
to any channel. Normally you will leave this parameter off.<br />
* Set this parameter ON if you want performance using the<br />
Arpeggiator to be controlled by an external MIDI device.<br />
* When the Remote keyboard switch is on, all messages that arrive<br />
at MIDI IN are output from MIDI OUT.<br />
PATCH MIDI<br />
Make MIDI settings for Patch mode. To make these settings,<br />
press [SYSTEM] when you are in Patch mode, and then press<br />
[MIDI] located in the row of function buttons.<br />
Rx-Ch (Patch Mode Receive Channel)<br />
Select the channel on which MIDI messages will be received<br />
in Patch mode.<br />
Tx-Ch (Patch Mode Transmit Channel)<br />
This parameter selects the transmit channel for MIDI<br />
messages in Patch mode. If you do not want to transmit<br />
MIDI messages to external MIDI devices, turn this parameter<br />
off. If you want the transmit channel to always match the<br />
Patch Mode Receive Channel, set this parameter to Rx-Ch.<br />
Local (Local Switch)<br />
Specify whether or not the controller section will be<br />
connected to the internal sound source (all Parts). Normally<br />
you will leave this ON, but if you wish to use the XP-30’s<br />
keyboard and controllers to control only external sound<br />
sources, turn this OFF.<br />
Remote (Remote Keyboard Switch)<br />
Turn this parameter on when you want to use an external<br />
MIDI keyboard in place of the XP-30’s keyboard. In this case,<br />
the transmit channel of the external MIDI keyboard can be<br />
set to any channel. Normally you will leave this parameter<br />
off.<br />
GM MIDI<br />
Make MIDI settings for GM mode. To make these settings,<br />
press [SYSTEM] when you are in GM mode, and then press<br />
[MIDI] located in the row of function buttons.<br />
Local (Local Switch)<br />
Specify whether or not the controller section will be<br />
connected to the internal sound source (all Parts). Normally<br />
you will leave this ON, but if you wish to use the XP-30’s<br />
keyboard and controllers to control only external sound<br />
sources, turn this OFF.<br />
RECEIVE MIDI<br />
Select whether or not to receive MIDI messages to select<br />
Patches, Rhythm Sets, or Performances.<br />
Program Change<br />
(Receive Program Change Switch)<br />
If you want Program Change messages to be received, turn<br />
this ON. If not, turn it OFF.<br />
Bank Select (Receive Bank Select Switch)<br />
If you want Bank Select messages to be received, turn this<br />
ON. If not, turn it OFF.<br />
TRANSMIT MIDI<br />
Specify how MIDI messages will be transmitted.<br />
Program (Transmit Program Change Switch)<br />
If you want Program Change messages to be transmitted,<br />
turn this ON. If not, turn it OFF.<br />
Bank Sel (Transmit Bank Select Switch)<br />
If you want Bank Select messages to be transmitted, turn this<br />
ON. If not, turn it OFF.<br />
112
Chapter 3. Creating Your Own Sounds<br />
Active Sensing (Transmit Active Sensing Switch)<br />
If you want Active Sensing messages to be transmitted, turn<br />
this ON. If not, turn it OFF.<br />
SYS-EXC MIDI (Exclusive MIDI)<br />
Specify how Exclusive messages will be transmitted and<br />
received.<br />
Device# (Exclusive Device ID Number)<br />
When you want to transmit or receive Exclusive messages,<br />
set this parameter to match the Device ID number of the<br />
other MIDI device.<br />
Rx.Exc (Receive Exclusive Switch)<br />
If you want Exclusive messages to be received, turn this ON.<br />
If not, turn it OFF.<br />
Tx.Edit (Transmit Edit Data Switch)<br />
If you want Exclusive messages to be transmitted for each<br />
change you make while editing a Patch, Performance, or<br />
Rhythm Set, turn this ON. If not, turn it OFF.<br />
Rx.GM (Receive GM Exclusive Switch)<br />
If you want GM-related Exclusive messages to be received,<br />
turn this ON. If not, turn it OFF.<br />
* For details on the GM MIDI messages, refer to “Chapter 5.<br />
Using the XP-30 as the GM Sound Module” (p. 124).<br />
BANK-SEL GROUP (Bank Select Group)<br />
Each Performance has a Bank Select Group setting<br />
(PERFORM/MIDI/TRANSMIT). The Bank Select Group<br />
parameter of each Performance specifies how Bank Select<br />
messages are transmitted when the Performance is selected.<br />
Here, you can specify the actual Bank Select Number that is<br />
transmitted for each of the BS1–7 selections that were made<br />
in Performance mode.<br />
Number (Bank Select Group Number)<br />
Select the Bank select group you wish to set. The contents of<br />
each BS number are determined by the following settings for<br />
Switch, MSB and LSB.<br />
Switch (Back Select Transmit Switch)<br />
If you want the selected Bank select group to transmit its<br />
assigned Bank Select number, turn this ON. If you do not<br />
want the selected BS number to transmit a Bank Select<br />
message, turn this OFF.<br />
MSB (Bank Select MSB)<br />
Specify the MSB of the Bank Select number transmitted by<br />
the selected BS number.<br />
LSB (Bank Select LSB)<br />
Specify the LSB of the Bank Select number transmitted by the<br />
selected BS number.<br />
■ Phrase Preview Settings<br />
(PREVIEW)<br />
Specify how the phrase will play when you press [PHRASE<br />
PREVIEW].<br />
PREVIEW MODE<br />
Mode (Preview Sound Mode)<br />
SINGLE:<br />
The notes specified by Note 1–4 will sound<br />
successively one by one.<br />
CHORD: The notes specified by Note 1–4 will sound<br />
simultaneously.<br />
PHRASE: The phrase prepared for the Patch type (category)<br />
will sound.<br />
PREVIEW KEY<br />
Note 1–4 (Preview Note Set 1–4)<br />
Specify the pitch (C-1–G9) of the four notes that will sound<br />
when Mode (Preview Sound Mode) is set to either SINGLE<br />
or CHORD.<br />
* If PHRASE is selected for Mode, these settings will have no<br />
effect.<br />
PREVIEW VELOCITY<br />
Specify the velocity (0–127) of the four notes that will sound<br />
when Mode (Preview Sound Mode) is set to either SINGLE<br />
or CHORD.<br />
* If PHRASE is selected for Mode, these settings will have no<br />
effect.<br />
■ Adjusting Tuning (TUNE)<br />
Parameters in this group adjust the tuning of the internal<br />
sound source, or change the temperament of the keyboard.<br />
* The SCALE display of TUNE group will be different depending<br />
on the mode you were in when you pressed [SYSTEM].<br />
TUNE<br />
Master (Master Tune)<br />
This parameter tunes the internal sound source. The<br />
displayed value indicates the pitch (frequency) of the A4 key.<br />
Key Shift<br />
Adjust the pitch of the internal sound source in semitone<br />
steps.<br />
Scale Tune (Scale Tune Switch)<br />
Turn this ON when you wish to play a scale other than equal<br />
temperament. You can specify one scale for Patch mode and<br />
one scale for Performance mode/GM mode. To set the tuning<br />
of each note in the scale, use the following SCALE display.<br />
* The selected scale is used even for MIDI messages received from<br />
an external MIDI device.<br />
Chapter 3<br />
113
Chapter 3. Creating Your Own Sounds<br />
PATCH SCALE<br />
KEY SCALE<br />
If you wish to define a scale for use in Patch mode, press<br />
[SYSTEM] while in Patch mode, and then press [TUNE] located<br />
in the row of function buttons. to access the PATCH SCALE<br />
display. If you wish to define a scale for use in Performance<br />
mode/GM mode, press [SYSTEM] while in Performance mode,<br />
and then press [TUNE] located in the row of function buttons<br />
to access the KEY SCALE display. To make settings for another<br />
Part, use the cursor buttons to select the desired Part.<br />
Define a scale by specifying how much the pitch will differ<br />
from the equal tempered pitch (in steps of 1 cent). In Patch<br />
mode there are separate screens for the white keys and black<br />
keys, and the settings for one octave (C–G) will determine<br />
the tuning for all octaves. In Performance mode/GM mode,<br />
you can make settings for each key in each Part.<br />
* One cent is 1/100th of a semitone.<br />
Equal Temperament<br />
This scale divides an octave into 12 equal parts for the<br />
tuning system that is most widely used in Western<br />
music. The XP-30 employs equal temperament when<br />
the Scale Tune Switch is set OFF.<br />
Pure Temperament (Tonic is C)<br />
With this tuning, the three fundamental chords sound richer<br />
compared to equal temperament. This effect only applies to<br />
one key, and transposition makes the chord ambiguous.<br />
Arabian Scale<br />
In this scale, E and B are a quarter-note lower and C#, F#<br />
and G# are quarter-note higher compared to equal<br />
temperament. The intervals between G and B, C and E, F<br />
and G#, A# and C#, and D# and F# have a natural third (the<br />
interval between a major third and a minor third). With the<br />
XP-30, you can play Arabian scale in G, C and F keys.<br />
<br />
Note Equal Pure temperament Arabian scale<br />
name temperament (tonic C)<br />
C 0 0 -6<br />
C# 0 -8 +45<br />
D 0 +4 -2<br />
Eb 0 +16 -12<br />
E 0 -14 -51<br />
F 0 -2 -8<br />
F# 0 -10 +43<br />
G 0 +2 -4<br />
G# 0 +14 +47<br />
A 0 -16 0<br />
Bb 0 +14 -10<br />
B 0 -12 -49<br />
■ Program Change (PGM CHNG)<br />
TRANSMIT P.C<br />
(Transmit Program Change)<br />
When you want to transmit MIDI messages (Program<br />
Change and Bank Select) to select sounds on an external<br />
MIDI device, make settings in this display and then press the<br />
ENTER button.<br />
Channel (Transmit MIDI Channel)<br />
Select the channel on which the MIDI message will be<br />
transmitted.<br />
P.C# (Transmit Program Change)<br />
Select the Program Number you wish to transmit.<br />
Bnk-MSB (Transmit Bank Select MSB)<br />
Select the MSB (control number 0) of the Bank Select number<br />
you wish to transmit.<br />
Bnk-LSB (Transmit Bank Select LSB)<br />
Select the LSB (control number 32) of the Bank Select number<br />
you wish to transmit.<br />
■ Checking Things Such as the<br />
Installation Status of Wave<br />
Expansion Boards (INFO)<br />
INFO EXP (Information Expansion Board)<br />
The names of Wave Expansion Boards installed in slots EXP-<br />
D and E are displayed. Slots without any boards installed are<br />
indicated “----------------.”<br />
* If for both Expansion D: and Expansion E: an identically named<br />
Wave Expansion Board is displayed, it will be possible to select<br />
data only from the Wave Expansion Board installed in the EXP-<br />
D slot. Also, the XP-30 already contains the data of the three<br />
Wave Expansion Boards listed below, and if the names of any of<br />
these Wave Expansion Boards are displayed, it will be possible<br />
to select only the onboard data (XP-A–C).<br />
- SR-JV80-09 “Session” (XP-A)<br />
- SR-JV80-02 “Orchestral” (XP-B)<br />
- SR-JV80-11 “Techno Collection” (XP-C)<br />
BATTERY CHECK<br />
The XP-30 contains a battery that backs up the data in<br />
internal memory. This display allows you to check the<br />
battery voltage. If the display indicates OK, there is sufficient<br />
battery voltage. If the display indicates LOW, the battery<br />
voltage has run down. Contact your nearby <strong>Roland</strong> service<br />
station to have the battery replaced.<br />
114
Chapter 4. Memory Settings (Utility/Card Mode)<br />
The Utility mode allows you to store Patch/Performance/<br />
Rhythm Set settings (Write), and transmit data (Data<br />
Transfer), as well as other global XP-30 memory settings.<br />
About Utility/Card Mode<br />
The XP-30 goes into Utility/Card mode if you press [UTIL/<br />
CARD]. The indicator will blink.<br />
Utility/Card mode offers nine functions categorized into two<br />
groups—UTIL 1 and UTIL 2.<br />
Basic Procedure in Utility/<br />
Card Mode<br />
* In order to use a memory card, you must first turn off the<br />
power, and then insert a memory card into the card slot.<br />
fig.4-02<br />
UTIL 1 (Utility 1)<br />
fig.3-20<br />
WRITE<br />
This function writes Patch, Performance or Rhythm Set<br />
settings you’ve modified into user memory (p. 116).<br />
COPY<br />
This function copies data from a Patch, Performance or<br />
Rhythm Set into the current Patch, Performance or Rhythm<br />
Set (p. 117).<br />
INIT (Initialize)<br />
This resets parameters of the current Patch, Performance or<br />
Rhythm Set to default factory settings (p. 119).<br />
XFER (Data Transfer)<br />
This function transmits Patch, Performance, Rhythm Set or<br />
System settings to an external MIDI device (p. 119).<br />
PROTECT (User Memory Protect)<br />
This function prevents user memory from being accidentally<br />
rewritten (p. 121).<br />
UTIL 2 (Utility 2)<br />
1. Press [UTIL/CARD] so its indicator blinks.<br />
The XP-30 will switch to Utility/Card mode.<br />
fig.3-20<br />
* The type of data that will be written, copied and initialize<br />
depends on the mode you are in when you press [UTIL/CARD].<br />
2. Press [ ] or [ ] to select the group (UTIL 1, UTIL 2)<br />
containing the function you want.<br />
3. Use [ ] or [ ] to select the desired function (the<br />
function name will blink), and press [ENTER].<br />
The display of the function you’ve selected will appear.<br />
* You can also access the desired function display by using the<br />
numeric keys or function buttons to specify the number of the<br />
function.<br />
* If you selected the UTIL 2 group function “1: CARD,” the<br />
CARD display will appear. Here you can once again select the<br />
desired function.<br />
Chapter 4<br />
fig.4-01<br />
CARD<br />
Here you can make settings related to memory cards (p. 121).<br />
LOAD<br />
This function loads data from memory card into the XP-30’s<br />
memory (p. 122).<br />
SAVE<br />
This function saves data to memory card (p. 122).<br />
FACTORY RESET<br />
This function resets all the settings stored in the XP-30 to the<br />
factory default settings (p. 123).<br />
4. Set parameters as necessary on each function’s display.<br />
* To cancel the operation, press [EXIT].<br />
5. Press [ENTER] to execute the function.<br />
When the operation is completed, the display will briefly<br />
indicate “COMPLETED.”<br />
6. To return to the UTIL 1 or UTIL 2 displays, press [EXIT].<br />
To return to the display of the previous mode, press<br />
[UTIL/CARD] to make the indicator go dark.<br />
115
Chapter 4. Memory Settings (Utility/Card Mode)<br />
Storing Sound Data in User<br />
Memory (WRITE)<br />
If you turn the power off or select another Patch,<br />
Performance, or Rhythm Set after you have modified a Patch,<br />
Performance, or Rhythm Set settings, the modified data will<br />
be lost. If you wish to keep the data, store it into user<br />
memory.<br />
Internal Write Protect<br />
An Internal Write Protect setting is provided to<br />
prevent the settings in user memory from being<br />
overwritten accidentally. When rewriting user memory<br />
settings, you need to turn off Internal Write Protect. If<br />
you attempt to write data when Internal Write Protect is<br />
on, the following display will appear.<br />
fig.3-22<br />
Change the displayed ON to OFF and press [ENTER] to<br />
turn Internal Write Protect off. Press [ENTER] once<br />
again, and the data will be written into user memory.<br />
Once you turn Internal Write Protect off, it will remain<br />
off until the XP-30’s power is turned off.<br />
■ Performance Write<br />
The settings of the current Performance will be written into<br />
user memory. Press [UTIL/CARD] in Performance mode,<br />
and perform Write operation.<br />
fig.4-03.e<br />
The Compare Function<br />
The Compare function allows you to play the Patch<br />
currently occupying the writing destination, so that you<br />
can check whether you really want to overwrite it. To<br />
play the Patch of the writing destination, press<br />
[UNDO/COMPARE] to access the PATCH COMPARE<br />
display. You can select the writing destination Patch in<br />
this display as well. After selecting the writing<br />
destination Patch, press [EXIT] to return to the previous<br />
display.<br />
fig.4-05.e[<br />
Writing destination Patch (group, number, name)<br />
* Please be aware that when the Compare function is used to<br />
play a Patch, it may sound slightly different than when it<br />
is played normally.<br />
■ Rhythm Set Write<br />
The settings of the current Rhythm Set will be written into<br />
user memory. Press [UTIL/CARD] in Rhythm Set mode,<br />
then perform Write operation.<br />
fig.4-06.e<br />
Writing destination Rhythm Set (group, number, name)<br />
* By holding down [SHIFT] and pressing [UTIL/CARD], you<br />
can move directly to the RHYTHM WRITE display.<br />
Writing destination Performance (group, number, name)<br />
* By holding down [SHIFT] and pressing [UTIL/CARD], you<br />
can move directly to the PERFORM WRITE display.<br />
■ Patch Write<br />
The settings of the current Patch will be written into user<br />
memory. Press [UTIL/CARD] in Patch mode, then perform<br />
Write operation.<br />
fig.4-04.e<br />
The Compare Function<br />
The Compare function allows you to play the Rhythm<br />
Set currently occupying the writing destination, so that<br />
you can check whether you really want to overwrite it.<br />
To play the Rhythm Set of the writing destination, press<br />
[UNDO/COMPARE] to access the RHYTHM<br />
COMPARE display. You can select the writing<br />
destination Rhythm Set in this display as well. After<br />
selecting the writing destination Rhythm Set, press<br />
[EXIT] to return to the previous display.<br />
fig.4-07.e<br />
Writing destination Patch (group, number, name)<br />
* By holding down [SHIFT] and pressing [UTIL/CARD], you<br />
can move directly to the PATCH WRITE display.<br />
Writing destination Rhythm Set (group, number, name)<br />
* Please be aware that when the Compare function is used to<br />
play a Rhythm Set, it may sound slightly different than<br />
when it is played normally.<br />
116
Chapter 4. Memory Settings (Utility/Card Mode)<br />
Copying Sound Source<br />
Settings (COPY)<br />
Performance Name Copy<br />
The name of a Performance will be copied to the current<br />
Performance.<br />
This function lets you copy data of any Patch, Performance,<br />
or Rhythm Set into the current Patch, Performance, or<br />
Rhythm Set. Using this function effectively makes editing<br />
easier.<br />
fig.4-11.e<br />
Copy source Performance (group, number, name)<br />
■ Performance Copy<br />
To copy the settings of a Performance, press [UTIL/CARD]<br />
in Performance mode, then perform Copy operation.<br />
Performance Part Copy<br />
The Part settings of a Performance will be copied to the Part<br />
you specify of the current Performance.<br />
fig.4-08.e<br />
■ Patch Copy<br />
When you want to copy Patch settings to the current Patch,<br />
press [UTIL/CARD] in Patch mode and perform Copy<br />
operation.<br />
Patch Tone Copy<br />
Tone settings of a Patch will be copied to the Tone you<br />
specify of the current Patch.<br />
fig.4-12.e<br />
Copy source Performance<br />
(group, number)<br />
Copy source Part Copy destination Part<br />
* To specify the currently selected Performance as the copy source,<br />
set Source to TEMP.<br />
* When the Copy operation is executed, an “*” will be displayed<br />
in front of the copy-destination part name.<br />
Performance Effects Copy<br />
The effects settings of a Performance or Patch will be copied<br />
to the current Performance.<br />
fig.4-09.e<br />
Copy source<br />
Performance name<br />
Copy source Patch Copy source Patch name<br />
(group, number)<br />
Copy destination Tone<br />
Copy source Tone<br />
* To specify the currently selected Patch as the copy source, set<br />
Source to TEMP.<br />
* When the Copy operation is executed, an “*” will be displayed<br />
in front of the copy-destination tone.<br />
Patch Effects Copy<br />
The effects settings of a Patch or Performance will be copied<br />
to the current Patch.<br />
Chapter 4<br />
fig.4-13.e<br />
Copy source Copy source Patch/Performance<br />
(group, number, name)<br />
Press [ ] to move to the next display, and then select the<br />
contents of the effect that you wish to copy.<br />
fig.4-10.e<br />
Copy source Copy source Patch/Performance<br />
(group, number, name)<br />
Press [ ] to move to the next display, and then select the<br />
contents of the effect that you wish to copy.<br />
fig.4-14.e<br />
Copy type<br />
ALL: Multi-effects, chorus, and reverb settings<br />
EFX: Multi-effects settings<br />
CHORUS: Chorus settings<br />
REVERB: Reverb settings<br />
CHO&REV: Chorus and reverb settings<br />
Copy type<br />
ALL: Multi-effects, chorus, and reverb settings<br />
EFX: Multi-effects settings<br />
CHORUS: Chorus settings<br />
REVERB: Reverb settings<br />
CHO&REV: Chorus and reverb settings<br />
117
Chapter 4. Memory Settings (Utility/Card Mode)<br />
The Compare Function<br />
For the Patch Tone Copy and Patch Effect Copy<br />
operations, you can use the Compare function.<br />
The Compare function allows you to play the Patch<br />
currently occupying the copy source. To play the Patch<br />
of the copy source, press [UNDO/COMPARE] to access<br />
the PATCH COMPARE display. The copy-source Patch<br />
can be changed in this display as well, but it is not<br />
possible to select patches from XP-A–E. After selecting<br />
the copy source Patch, press [EXIT] to return to the<br />
previous display.<br />
fig.4-15.e<br />
Copy source Patch (group, number, name)<br />
* The Compare function cannot be used with Patch Tone<br />
Copy if either TEMP or an XP-A–E patch is selected as<br />
the copy source patch (Source).<br />
* The Compare function cannot be used with Patch Effect<br />
Copy if PERFORM is selected as the copy source (Source).<br />
* Please be aware that when the Compare function is used to<br />
play a Patch, it may sound slightly different than when it<br />
is played normally.<br />
Patch Name Copy<br />
The name of a Patch will be copied to the current Patch.<br />
fig.4-16.e<br />
Copy source Patch (group, number, name)<br />
■ Rhythm Set Copy<br />
When you want to copy Rhythm Set settings to the current<br />
Rhythm Set, press [UTIL/CARD] in Rhythm Set mode and<br />
perform Copy operation.<br />
Rhythm Key Copy<br />
Individual key settings in a Rhythm Set will be copied to<br />
each key in the current Rhythm Set.<br />
fig.4-17.e<br />
Copy source Rhythm Set<br />
(group, number)<br />
Copy source<br />
Rhythm Set name<br />
Copy source Key Copy destination Key<br />
* The copy source and copy destination Key parameters can also<br />
be set by pressing a key on the keyboard.<br />
* When the Copy operation is executed, an “*” will be displayed<br />
in front of the copy-destination key.<br />
The Compare Function<br />
The Compare function can be used during the Rhythm<br />
Key Copy operation.<br />
The Compare function allows you to play the Rhythm<br />
Set currently occupying the copy source. To play the<br />
Rhythm Set of the copy source, press [UNDO/<br />
COMPARE] to access the RHYTHM COMPARE<br />
display. The copy-source Rhythm Set can be changed in<br />
this display as well, but it is not possible to select<br />
patches from XP-A–E. After selecting the copy source<br />
Rhythm Set, press [EXIT] to return to the previous<br />
display.<br />
fig.4-18.e<br />
Copy source Rhythm Set (group, number, name)<br />
* If one of the XP-A–E Rhythm Sets is selected as the copysource<br />
Rhythm Set (Source), the Compare function is not<br />
available.<br />
* Please be aware that when the Compare function is used to<br />
play a Rhythm Set, it may sound slightly different than<br />
when it is played normally.<br />
Rhythm Set Name Copy<br />
The name of a Rhythm Set will be copied to the current<br />
Rhythm Set.<br />
fig.4-19.e<br />
Copy source Rhythm Set (group, number, name)<br />
118
Chapter 4. Memory Settings (Utility/Card Mode)<br />
Initializing Sound Source<br />
Settings (INIT)<br />
This function resets settings of the current Patch,<br />
Performance, or Rhythm Set to a standard value or to factory<br />
default settings.<br />
* Only current data will be initialized, and data resident in user<br />
memory will not be rewritten. To reset all settings to factory<br />
defaults, execute Factory Reset (UTILITY/UTIL 2/FACTORY<br />
RESET).<br />
Data can be initialized in two ways depending on the<br />
application.<br />
■ Rhythm Set Initialize<br />
To initialize Rhythm Set settings, press [UTIL/CARD] in<br />
Rhythm Set mode and execute initialization.<br />
The Rhythm Set Initialize operation can also be used to<br />
initialize the settings of only an individual percussion<br />
instrument sound (key) that you specify. In this case, move<br />
the cursor to Key, and select the percussion instrument<br />
sound that you wish to initialize. You can specify the<br />
percussion instrument sound either from the keyboard, or by<br />
pressing TONE SELECT [1]–[4].<br />
fig.4-22<br />
Mode (Initialize Mode)<br />
DEFAULT: Resets current data to the standard values called<br />
“Initial data” (INIT PATCH, INIT PERFORM or<br />
INIT SET). This mode is selected when creating<br />
sound from scratches.<br />
PRESET: Resets the current data in user memory to the<br />
factory settings.<br />
* If the current data is a Patch, Performance or Rhythm Set in<br />
preset memory (PR-A–PR-C, E, GM), and initialization is<br />
performed with PRESET specified, the data will be reset to the<br />
value of the correspondingly numbered user memory.<br />
■ Performance Initialize<br />
To initialize Performance settings, press [UTIL/CARD] in<br />
Performance mode and execute initialization.<br />
fig.4-20<br />
■ Patch Initialize<br />
To initialize Patch settings, press [UTIL/CARD] in Patch<br />
mode and execute initialization.<br />
Transmitting Sound Settings<br />
(XFER)<br />
This function lets you transmit sound source or System<br />
settings that are in the XP-30’s memory or stored on memory<br />
card to an external MIDI device or User memory.<br />
■ Transmitting Data to an<br />
External MIDI Device<br />
The process of transmitting Patch, Performance, Rhythm Set<br />
or System data to an external MIDI device is called Bulk<br />
dump. This process is used when two XP-30s with the same<br />
Patch, Performance and/or Rhythm Set settings are<br />
connected for performance or when recording Patch,<br />
Performance, Rhythm Set or System data into an external<br />
MIDI device as a backup for accidental data deletion.<br />
fig.4-23.e<br />
Chapter 4<br />
fig.4-21<br />
Data type<br />
Source block<br />
Destination<br />
While data is being transmitted, the following display will<br />
appear.<br />
fig.4-24<br />
* To cancel data transmission, press [EXIT].<br />
* If you expect to successfully use settings that stipulate the use of<br />
XP-A/B/C waves and patches after they’ve been sent to another<br />
unit (XP-50/60/80; or JV-1010/1080/2080), you first need to<br />
make sure that the relevant Wave Expansion Boards are<br />
installed in the other unit.<br />
119
Chapter 4. Memory Settings (Utility/Card Mode)<br />
Specifies the data to be transmitted through the combinations<br />
as shown below.<br />
For example, if you wish to transmit the USER group Patches<br />
001–020, you would specify “PATCH USER:001-020.”<br />
Type<br />
Block<br />
ALL<br />
USER<br />
TEMP<br />
PERFORM USER 01–32<br />
TEMP -PATCH *1<br />
+PATCH *2<br />
CTRL<br />
PATCH USER 001–128<br />
TEMP<br />
RHYTHM USER 001–002<br />
SYSTEM<br />
TEMP<br />
USER<br />
*1 The current Performance<br />
*2 The current Performance and the Patch or Rhythm Set<br />
assigned to each Part of the Performance<br />
Type (Data Type)<br />
Specify the type of data to be transmitted.<br />
ALL: Performance, Patch, and Rhythm Set<br />
PERFORM: Performance<br />
PATCH: Patch<br />
RHYTHM: Rhythm Set<br />
SYSTEM: System<br />
Block (Source Block)<br />
Specify the source of the data to be transmitted.<br />
USER: Transmit the data from user memory.<br />
TEMP: Transmit the data from the temporary area.<br />
CTRL: Transmit messages for Performance bank select,<br />
Performance program change, and Volume and Pan<br />
messages for the Parts whose Rx parameter<br />
(PERFORM/MIDI/MIDI) is turned ON.<br />
Destination<br />
Set the transmission destination to MIDI.<br />
■ Transmitting Data to User<br />
Memory<br />
You can transmit Patch, Performance or Rhythm Set settings<br />
to the user memory and System settings to the system<br />
memory. By loading sound data from memory card or Wave<br />
Expansion Boards to user memory, you can add many<br />
different sounds to your performance.<br />
Specifies the data to be transmitted through the combinations<br />
as shown below.<br />
For example if you wish to transmit only the PR-A group<br />
Patch 001, specify “PATCH PR-A:001-001”<br />
* If the specified data will not fit completely into the transmission<br />
destination, as much of the data as will fit will be transmitted,<br />
starting at the first number of the specified transmission<br />
destination.<br />
(Example)<br />
Block PATCH PR-A:001—005<br />
Destination User:127<br />
If the above settings are made and transmission is<br />
executed, only the two PR-A group Patches 01 and 02 will<br />
be transmitted to USER group Patches 127 and 128.<br />
Type Block<br />
ALL PR-A<br />
PR-B<br />
PERFORM USER 01–32<br />
PR-A, B 01–32<br />
CARD ** *1<br />
PATCH USER 001–128<br />
PR-A–C, GM, PR-E 001–128<br />
XP-A, B 001–255<br />
XP-C 001–256<br />
XP-D, E 001–*** *2<br />
CARD ** *1<br />
RHYTHM USER 001–002<br />
PR-A–C, GM, PR-E 001–002<br />
XP-A, C 001–008<br />
XP-D, E 001–*** *2<br />
CARD ** *1<br />
SYSTEM Card ** *1<br />
*1 Specified by file number<br />
*2 Depends on the Wave Expansion Board installed<br />
Type (Data Type)<br />
Specify the type of data to be transmitted.<br />
ALL: Performance, Patch, and Rhythm Set<br />
PERFORM: Performance<br />
PATCH: Patch<br />
RHYTHM: Rhythm Set<br />
SYSTEM: System (other than sequencer section)<br />
fig.4-27.e<br />
Data type<br />
Source block<br />
Destination<br />
120
Chapter 4. Memory Settings (Utility/Card Mode)<br />
Block (Source Block)<br />
Specify the source of the data to be transmitted.<br />
USER: Data from user memory will be transmitted.<br />
PR-A–C, E: Preset A/B/C/E data will be transmitted.<br />
GM: GM data will be transmitted.<br />
XP-A–E: Data from an Wave Expansion Board will be<br />
transmitted.<br />
* XP-D, E can be selected only if the corresponding Wave<br />
Expansion Board is installed.<br />
CARD: Performance/Patch/Rhythm Set/System data<br />
stored on memory card will be transmitted.<br />
fig.4-29.e<br />
Memory Card-Related<br />
Settings (CARD)<br />
XP-30 can use an optional memory card (S2M-5 (2MByte) or<br />
S4M-5 (4MByte)).<br />
Use this card when you wish to save data for which there is<br />
no more space in the internal USER group, or so that the data<br />
you created can be used on another XP-30.<br />
Memory card must be formatted before they can be used.<br />
* When you select “1: CARD” in the UTIL 2 group, the following<br />
CARD display will appear. Select the function you wish to<br />
execute.<br />
fig.4-31<br />
File number<br />
File name<br />
Destination<br />
Set the transmission destination to USER.<br />
* If the Type parameter has been set to PERFORM, PATCH, or<br />
RHYTHM, specify the first number of the transmission<br />
destination.<br />
Before Using a Memory Card<br />
* The power of the XP-30 must be turned off before inserting or<br />
removing a memory card. If a memory card is inserted when the<br />
power is turned on, the data in the memory card may be<br />
destroyed, or the memory card may become unusable.<br />
Preventing User Memory<br />
Writing Operation (PROTECT)<br />
This function prevents user memory from being rewritten to<br />
ensure Patch, Performance or Rhythm Set data will not<br />
accidentally be lost.<br />
fig.4-30<br />
Internal (Internal Write Protect)<br />
The Internal write Protect setting prevents the Write<br />
operation from rewriting user memory. When this setting is<br />
ON, the data cannot be rewritten. When this is OFF, the data<br />
can be rewritten. When the XP-30’s power is turned on, this<br />
setting is always turned ON, so you will need to turn it OFF<br />
before rewriting user memory settings. It is also possible to<br />
turn this setting OFF as part of the Write procedure.<br />
* Be sure to insert the memory card all the way into the slot.<br />
* Do not touch the contacts of the memory card, or allow them to<br />
become soiled.<br />
* Never remove the memory card or turn off the power while an<br />
operation (formatting, or data read/write) is being performed on<br />
the memory card. Doing so will destroy the data in the memory<br />
card and/or render the memory card unusable.<br />
* If you affix the write protect label to the write protect area of the<br />
memory card, it will be impossible to format the card or write<br />
data to it. If you wish to format the card or write data to it, do so<br />
without the label affixed. For details on the write protect label,<br />
refer to the instruction included with your memory card.<br />
If you attempt to format the card or write data to it when the<br />
write protect label is affixed, the following message will<br />
appear.<br />
fig.4-32<br />
Chapter 4<br />
Exclusive (Exclusive Protect)<br />
The Exclusive Protect setting prevents System Exclusive<br />
messages received from an external MIDI device from<br />
rewriting user memory settings. When this setting is ON, the<br />
data cannot be rewritten. When this is OFF, the data can be<br />
rewritten by an incoming exclusive message, even if the<br />
Internal Write Protect setting is ON.<br />
121
Chapter 4. Memory Settings (Utility/Card Mode)<br />
■ Formatting the Memory Card<br />
for the XP-30 (FORMAT)<br />
This function initializes (formats) a memory card so that XP-<br />
30 data can be saved to it. Before a new memory card or a<br />
memory card used on another device can be used on the XP-<br />
30, it must be formatted on the XP-30.<br />
* Please be aware that formatting will erase all the data already<br />
resident on the memory card.<br />
fig.4-33<br />
Loading a File from Memory<br />
Card into the XP-30 (LOAD)<br />
A data file containing Patch, Performance, Rhythm Set<br />
settings and System settings will be loaded into internal<br />
memory.<br />
* Loading a new file will rewrite data currently resident in<br />
memory. To keep existing data, save it to memory card before<br />
loading new data.<br />
fig.4-38<br />
■ Renaming a File (RENAME)<br />
This function changes the name of a file on the memory card.<br />
* A file name of up to eight characters can be assigned. For details<br />
on assigning a name, refer to “Assigning a Name” (p. 46).<br />
* File name extensions cannot be changed.<br />
fig.4-34.e<br />
■ Deleting Unwanted Files<br />
(DELETE)<br />
Use this function to delete unwanted files from memory<br />
card.<br />
fig.4-35<br />
■ Checking the Contents Memory<br />
Card (INFO)<br />
This function displays the number of files on the memory<br />
card, the free area of the disk, and the size of each file.<br />
fig.4-36.e<br />
File number<br />
Original file name<br />
New file name<br />
File name<br />
File size<br />
* If you wish to load only a portion of data from the file, refer to<br />
“Transmitting Data to User Memory” (p. 120).<br />
Saving Data to Memory Card<br />
(SAVE)<br />
The Patch, Performance, Rhythm Set, and System settings in<br />
internal memory will be saved as a single file to memory<br />
card, with the name you specify.<br />
To overwrite a previously existing file on the memory card,<br />
select the file number of that file.<br />
fig.4-39<br />
* Data files contain an entire set of parameter settings for the<br />
sound source. It is not possible to save individual Patches or<br />
Performances to memory card.<br />
* A file name of up to eight characters can be assigned. For details<br />
on assigning a name, refer to “Assigning a Name” (p. 46).<br />
The number of files that can be saved will depend on the<br />
memory card you use.<br />
S2M-5 (2MB type): approximately 29 files<br />
S4M-5 (4MB type): approximately 59 files<br />
Number of files on memory card<br />
Free area<br />
122
Chapter 4. Memory Settings (Utility/Card Mode)<br />
Recalling Factory Default<br />
Settings (FACTORY RESET)<br />
This operation will restore all the data in the XP-30 to the<br />
factory settings.<br />
* If the XP-30 internal memory already contains important data<br />
that you have created, this operation will cause all of this data to<br />
be lost. If you wish to keep the data, you must save it on an<br />
optional memory card (p. 122) or on an external MIDI<br />
sequencer (p. 119).<br />
fig.4-40<br />
* If Internal Write Protect is turned ON, the following display<br />
will appear, and the Factory Reset operation will not be<br />
executed.<br />
fig.3-22<br />
Change the displayed ON to OFF and press [ENTER] to turn<br />
Internal Write Protect off.<br />
“Are You Sure?” will be displayed, press [ENTER].<br />
Chapter 4<br />
123
Chapter 5. Using the XP-30 as the GM Sound Module<br />
The XP-30 features a GM mode—a convenient way to play<br />
back or create GM score data (music files for GM sound<br />
module). You’re able to play back commercial GM score data<br />
releases and even modify various parameter settings for<br />
enhanced musical expression.<br />
Entering GM Mode<br />
Use GM mode to place the XP-30’s sound source in GM<br />
System compatible mode. Basically GM mode is similar to a<br />
special kind of Performance in which a GM System Rhythm<br />
Set is assigned to Part 10, and GM System Patches are<br />
assigned to other Parts. But however, you can’t store GM<br />
mode settings in user memory.<br />
fig.5-01.e<br />
GM Patch/Rhythm Set (number, group)<br />
The GM PLAY display shows a Patch or Rhythm Set<br />
assigned to each Part. Each time you enter GM mode, the GM<br />
Drum Set is assigned to Part 10, and Piano 1 is assigned to<br />
other Parts. You can also select other GM Patches and GM<br />
Drum Sets for each Part to match the performance.<br />
1. Hold down [SHIFT] and press [PERFORM] to call up the<br />
GM PLAY display.<br />
When you switch the XP-30 into GM mode, the sound source<br />
initializes itself for basic GM System settings.<br />
2. To change the current Part, press [ ] or [ ].<br />
Part number<br />
3. To change the GM Patch or GM Rhythm Set assigned to<br />
the Part, perform the same procedure as you do when<br />
you select a Patch or Rhythm Set.<br />
■ Initializing the Sound Source<br />
for GM System Basic Settings<br />
To play back a GM score correctly, the sound source must<br />
first be initialized to basic GM system settings. The XP-30’s<br />
sound source is initialized in the following situations:<br />
- When the XP-30 is switched to GM mode<br />
- When it receives a GM System On message from an<br />
external MIDI device<br />
- When a GM System On message is encountered in the<br />
song data being played back<br />
At power on<br />
- When you execute the GM Initialize function (p. 128).<br />
GM System On Message<br />
The GM System On message puts the unit in a state that<br />
conforms to the GM System and initializes a GMcompatible<br />
sound module.<br />
* If the Rx GM parameter (SYSTEM/MIDI/SYS-EXC<br />
MIDI) is set OFF, GM System On messages cannot be<br />
received.<br />
■ Playing Back a GM Score<br />
When the XP-30 is in GM mode, it plays back GM scores<br />
correctly. But beyond this, the XP-30 provides many<br />
extended features not defined in GM System specifications,<br />
and if you create music files using these extended features,<br />
your song may not play back correctly on other GMcompatible<br />
sound modules.<br />
* The XP-30 is not compatible with the GS format (standard<br />
format for multitimbral sound sources advocated by <strong>Roland</strong>).<br />
Music files bearing the GS logo (GS music data) may therefore<br />
not play back correctly on the XP-30.<br />
* The beginning of a GM score normally contains a GM System<br />
On message. So if you play back a GM score starting in the top<br />
of a song, XP-30 will switch itself to GM mode. But if you play<br />
back a GM score starting in the middle of a song, XP-30 may<br />
not switch itself to GM mode, and the GM score may not play<br />
back correctly. So to be safe, it’s recommended to manually set<br />
the XP-30 to GM mode before playing back a GM score.<br />
Muting a Specific Part<br />
When you switch over to GM mode, all Parts will be set to<br />
receive MIDI messages. To turn off a specific Part so that it<br />
will not sound, set the Recieve Switch to OFF for the Part.<br />
1. Make sure that [EDIT] indicator is dark. If it is lit, press<br />
[EDIT] to turn it off.<br />
At this time, the function button indicators will indicate the<br />
on/off status of each Part. When [1-8/9-16] indicator is dark,<br />
the function button indicators will indicate the status of Parts<br />
1-8. When [1-8/9-16] indicator is lit, the function button<br />
indicators will indicate the status of Parts 9-16. Lit is on, and<br />
dark is off.<br />
2. Press the function button to switch Parts on/off.<br />
* Because effects settings are not defined in the GM System, they<br />
will not initialize to factory settings unless the GM Initialize<br />
(DEFAULT) or Factory Reset is executed.<br />
124
Chapter 5. Using the XP-30 as the GM Sound Module<br />
Modifying GM Mode Settings<br />
GM mode also offers parameters that you can modify for<br />
each Part. You can modify settings like effects, pan and level<br />
to customize a GM score playback to your preference.<br />
* When GM mode is initialized (p. 128), all these settings will be<br />
lost.<br />
1. Hold down [SHIFT] and press [PERFORM] to call up the<br />
GM PLAY display.<br />
2. Press [EDIT] to make the indicator light.<br />
3. Use the function buttons to select a display group.<br />
The button indicator of the selected display group will blink.<br />
fig.5-02<br />
* In GM mode, you can press the function buttons [2/<br />
10(EFFECTS)], [4/12(PART)], and [8/16(INFO)].<br />
4. Use [ ] or [ ] to select a display page.<br />
5. If you have selected a parameter display that can be set<br />
independently for each Part, the number of the Part<br />
selected for editing will be shown in the display. To<br />
select a different Part, press [EDIT] to temporarily turn<br />
off the indicator, and use [1-8/9-16] and the function<br />
buttons to select a Part.<br />
6. Use [ ] or [ ] to move the cursor to the parameter<br />
you wish to modify.<br />
■ Making Effects Settings in GM<br />
Mode (EFFECTS)<br />
Parameter configurations of GM effects and Performance<br />
effects are almost the same. For details refer to “Setting<br />
Effects for a Performance (EFFECTS)” (p. 84).<br />
Make settings for the Multi-Effects/Chorus/Reverb effects<br />
used in GM mode.<br />
* If an “x” mark is displayed at the right of the display name, the<br />
effect for that display has been turned off. Turn the<br />
corresponding effect on before you make settings (p. 62).<br />
OUTPUT<br />
Make settings to specify how each Part will be output.<br />
Output Assign (Output Assign/Output Level)<br />
When the Output Assign parameter is set to MIX, the output<br />
of each Part will be sent to the OUTPUT jacks without<br />
passing through Multi-Effects. If this parameter is set to EFX,<br />
the output will be passed through Multi-Effects. If PATCH is<br />
selected, the output assign settings of the GM Patch assigned<br />
to the Part will be used.<br />
The Output Level parameter adjusts the volume of each Part.<br />
Chorus (Chorus Send Level)<br />
Adjust the amount of chorus for each Part.<br />
Reverb (Reverb Send Level)<br />
Adjust the amount of reverb for each Part.<br />
GM EFX TYPE (EFX Type)<br />
Specify the type of Multi-Effects that will be used in GM mode.<br />
7. Use the VALUE dial, [INC]/[DEC] or numeric keys and<br />
modify the parameter value.<br />
* If you’ve made a mistake in setting the parameter value or you<br />
don’t like the changes, just press [UNDO/COMPARE] to<br />
restore the value to what it was.<br />
8. If you wish to move to another display group, press<br />
[EDIT] to make the indicator light, and use the function<br />
buttons.<br />
* You can also move to another display group by holding down<br />
[SHIFT] and using [ ] or [ ]. Since this can be done even<br />
when [EDIT] indicator is dark, it is a faster way to get around<br />
because you don’t have to turn on [EDIT] indicator each time.<br />
9. Repeat steps 3–8 to complete a GM mode settings.<br />
10. When you finish making settings, press [EXIT] to return<br />
to the GM PLAY display.<br />
* You can also use the Palette display in the same manner when<br />
you edit in Performance mode (p. 65).<br />
Type (EFX Type)<br />
Select the type of Multi-Effects. For details refer to “Multi-<br />
Effects Types (EFX Parameter)” (p. 93).<br />
GM EFX PRM (GM EFX Parameters)<br />
Make parameter settings for the EFX type selected by the<br />
Type parameter. For details refer to “Multi-Effects Types<br />
(EFX Parameter)” (p. 93).<br />
GM EFX OUT (GM EFX Output)<br />
Specify the output routing for Parts whose Output Assign is<br />
set to EFX.<br />
* The settings in this display have no effect on Parts whose<br />
Output Assign is set to MIX.<br />
Mix Out (EFX Output Level)<br />
Adjust the volume balance of the direct sound and the Multi-<br />
Effects sound.<br />
Chorus (Chorus Send Level)<br />
Adjust the amount of chorus applied to the sound that<br />
passed through Multi-Effects.<br />
Chapter 5<br />
125
Chapter 5. Using the XP-30 as the GM Sound Module<br />
Reverb (Reverb Send Level)<br />
Adjust the amount of reverb applied to the sound that<br />
passed through Multi-Effects.<br />
GM CHORUS<br />
Make settings for the chorus effect used in GM mode.<br />
* In GM mode, the chorus effect settings for the GM Patch assigned<br />
to each Part will be ignored (except for the Send Level parameter).<br />
Rate (Chorus Rate)<br />
Adjust the speed of modulation for the chorus sound.<br />
Depth (Chorus Depth)<br />
Adjust the depth of modulation for the chorus sound.<br />
Delay (Chorus Pre Delay)<br />
Adjust the time delay from the original sound until when the<br />
chorus sound is heard. Higher settings will create a more<br />
spacious sound.<br />
Fbk (Chorus Feedback Level)<br />
Adjust the amount of sound from the chorus that is returned<br />
(fed back) to the input of the chorus. Higher settings will<br />
result in a more intense effect.<br />
Level (Chorus Level)<br />
Adjust the volume of the chorus sound.<br />
Out (Chorus Output Assign)<br />
Select the way in which the Chorus and Reverb are connected.<br />
MIX: The Chorus sound and the Reverb sound are mixed.<br />
fig.3-27.e<br />
Chorus input<br />
Reverb input<br />
REV:<br />
fig.3-28.e<br />
Chorus<br />
input<br />
Reverb<br />
input<br />
Apply reverb to the chorus sound.<br />
M+R: Mix the chorus sound to which reverb is not applied<br />
and the chorus sound to which reverb is applied.<br />
fig.3-29.e<br />
Reverb<br />
input<br />
Reverb<br />
Chorus<br />
Chorus<br />
Chorus<br />
Reverb<br />
Reverb<br />
OUTPUT<br />
OUTPUT<br />
OUTPUT<br />
GM REVERB<br />
Make GM mode reverb settings.<br />
* In GM mode, the reverb effect settings for the GM Patch<br />
assigned to each Part will be ignored (except for the Send Level<br />
parameter).<br />
Type (Reverb/Delay Type)<br />
Select the type of Reverb effect.<br />
ROOM1: dense reverb with short decay<br />
ROOM2: sparse reverb with short decay<br />
STAGE1: reverb with greater late reverberation<br />
STAGE2: reverb with strong early reflections<br />
HALL1: reverb with clear reverberance<br />
HALL2: reverb with rich reverberance<br />
DELAY: a conventional delay<br />
PAN-DLY: a delay with echoes that move left and right<br />
Time (Reverb/Delay Time)<br />
Adjust the time of reverberation. If the Type parameter is set<br />
to DELAY or PAN-DLY, this parameter will adjust the time<br />
delay from the original sound until when the first echo will<br />
sound.<br />
Fbk (Delay Feedback Level)<br />
Adjust the amount of delayed sound that is returned (fed<br />
back) to the delay. Higher values result in more delay<br />
repeats.<br />
* If you have selected any one of the Reverb types (ROOM1–<br />
HALL2), this parameter has no effect.<br />
HF Damp (Reverb/Delay HF Damp)<br />
Adjust the frequency above which the reverberant sound will<br />
be cut. As the frequency is set lower, more of the high<br />
frequencies will be cut, resulting in a softer and more muted<br />
reverberance. If you do not want the high frequencies to be<br />
cut, set this parameter to BYPASS.<br />
Level (Reverb/Delay Level)<br />
Adjust the volume of the reverberant (or delayed) sound.<br />
About Effects for GM-Compatible Sound<br />
Modules<br />
Most GM-compatible sound sources provide effects<br />
such as reverb and chorus, but the use of effects is not<br />
included in the GM System Level 1 guidelines. This<br />
means that song data created for the XP-30’s GM mode<br />
that uses Multi-Effects/Reverb/Chorus may not<br />
playback correctly on other GM-compatible sound<br />
sources.<br />
Chorus<br />
input<br />
126
Chapter 5. Using the XP-30 as the GM Sound Module<br />
■ Setting a Part (PART)<br />
PATCH<br />
Select the GM Patch assigned to each Part.<br />
Number (GM Patch Number)<br />
Select the number (001–128) of the GM Patch.<br />
* In GM mode it is not possible to select USER or PRESET A/B/<br />
C/E Patches.<br />
SETTING<br />
Make settings for the volume, pan, and pitch of each Part.<br />
Volume<br />
Adjust the volume of each Part.<br />
Convenient Functions in GM<br />
Mode (GM Utility)<br />
In the GM mode, you can copy effects settings, initialize GM<br />
mode, and transmit GM mode settings, using the Utility<br />
functions.<br />
Basic Procedure<br />
1. In the GM mode, press [UTIL/CARD] so its indicator<br />
blinks.<br />
The XP-30 will switch to Utility/Card mode.<br />
2. Press [ ] or [ ] to select the UTIL 1 group.<br />
fig.5-03<br />
Pan<br />
Adjust the stereo position of each Part. L64 is full left, 0 is<br />
center, and 63R is full right.<br />
* If you modify the settings of the Volume parameter or Pan parameter,<br />
they will be reflected in the following INFO group displays.<br />
Coarse (Coarse Tune)<br />
Adjust the pitch of each Part in semitone steps (-4–+4 octaves).<br />
Fine (Fine Tune)<br />
Make fine adjustments in 1-cent steps to the pitch specified in<br />
Coarse Tune. (-50–+50 cents)<br />
* 1 cent is 1/100th of a semitone.<br />
■ Confirming MIDI Information of<br />
Each Part (INFO)<br />
In this display you can check the receive status of various<br />
types of MIDI message for each Part. This is a convenient<br />
way to check that the sound source is responding correctly to<br />
messages from the keyboard or external MIDI controllers.<br />
For items other than Voice, you may modify the values.<br />
When you do so, a MIDI message will be transmitted, and<br />
can be recorded on the sequencer, etc.<br />
* The functions of the UTIL 2 group can also be executed from<br />
GM mode. The operation is the same as in other modes.<br />
3. Press [ ] or [ ] to select the desired function (the<br />
function name will blink), and press [ENTER].<br />
The display of the function you’ve selected will appear.<br />
* You can also access the desired function display by using the<br />
numeric keys or function buttons to specify the number of the<br />
function.<br />
4. Set parameters as necessary on each function’s display.<br />
* To cancel the operation, press [EXIT].<br />
5. Press [ENTER] to execute the function.<br />
When the operation is completed, the display will briefly<br />
indicate “COMPLETED.”<br />
6. To return to the UTIL 1 display, press [EXIT]. To return<br />
to the GM PLAY display, press [UTIL/CARD] to make<br />
the indicator go dark.<br />
Chapter 5<br />
Mod (Modulation Information)<br />
Breath (Breath Information)<br />
Foot (Foot Information)<br />
Vol (Volume Information)<br />
Pan (Pan Information)<br />
Exp (Expression Information)<br />
Hold (Hold 1 Information)<br />
Bend (Pitch Bend Information)<br />
Aftertouch (Aftertouch Information)<br />
Voices (Voice Information)<br />
The number of voices used.<br />
127
Chapter 5. Using the XP-30 as the GM Sound Module<br />
■ Copying Effects Settings (COPY)<br />
This function copies effects settings from a Patch or<br />
Performance to the GM mode.<br />
fig.5-04.e<br />
■ Transmitting GM Mode Settings<br />
(XFER)<br />
fig.5-07<br />
Copy source Copy source Patch/Performance<br />
(group, number, name)<br />
Press [ ] to move to the next display, and then select the<br />
contents of the effect that you wish to copy.<br />
fig.5-05.e<br />
Copy type<br />
ALL: Multi-effects, chorus, and reverb settings<br />
EFX: Multi-effects settings<br />
CHORUS: Chorus settings<br />
REVERB: Reverb settings<br />
CHO&REV: Chorus and reverb settings<br />
■ Initializing GM Mode (INIT)<br />
fig.5-06<br />
It is not possible to store GM mode settings in user memory.<br />
If you wish to keep your GM mode settings, you can transmit<br />
them as a MIDI message to an external MIDI device.<br />
Prepare the external MIDI device to record data, and press<br />
[ENTER].<br />
The following GM mode settings for each Part are<br />
transmitted.<br />
- Program number of the GM Patch<br />
- Volume (control number 7)<br />
- Pan (control number 10)<br />
- Reverb send level (control number 91)<br />
- Chorus send level (control number 93)<br />
- Pitch bend sensitivity<br />
- Fine tune<br />
- Coarse tune<br />
* If you do not want the settings of a specific Part to be<br />
transmitted, turn off the Recieve Switch for that Part (p. 124).<br />
* As GM Initialize initializes only GM mode data, data stored in<br />
user memory will not be initialized. To initialize all settings to<br />
factory settings, use Factory Reset (UTILITY/UTIL 2/<br />
FACTORY RESET) (p. 27).<br />
There are two initialize methods.<br />
GM-ON: Initializes GM mode settings using a GM System<br />
On message.<br />
DEFAULT: Initializes all GM mode settings including effects<br />
settings to factory settings.<br />
128
Chapter 6. Getting the Full Potential of the XP-30<br />
This section discusses various techniques for effectively<br />
using the XP-30 for specific applications. The more you use<br />
the XP-30, the faster you’ll appreciate the real power of this<br />
unit.<br />
Techniques for Using Patches<br />
■ Reinforcing Filter Characteristics<br />
If you want to reinforce filter characteristics, set the Type<br />
parameter (PATCH/COMMON/STRUCT) to 2, and seriesconnect<br />
the TVFs of Tones 1 and 2.<br />
This example shows how to boost the effectiveness of the<br />
filter for “PR-C:014 MKS-80 Brass.”<br />
1. Select PR-C:014 MKS-80 Brass on the Play display<br />
(PATCH).<br />
2. Press [FILTER/ENV] to light the indicator.<br />
3. Move the CUTOFF and RESO. sliders while you play<br />
notes and hear how sound changes.<br />
4. Set the Type parameter (PATCH/COMMON/STRUCT)<br />
to 2.<br />
5. Again, move the CUTOFF and RESO. sliders and hear<br />
how the sound changes.<br />
Notice the effectiveness of the filter has changed.<br />
* If the result is difficult to hear, press [EFFECTS ON/OFF] to<br />
turn off each effect unit (Multi-Effects, Chorus, Reverb) (p. 62).<br />
■ Making the Up-Beat Note<br />
Sound at the Same Time You<br />
Play a Down-Beat Note<br />
1. Select PR-A:087 Music Bells on the PATCH PLAY<br />
display and listen to the sound.<br />
■ Holding a Note with<br />
Modulation Retained<br />
In general, pressing the Hold pedal makes a note continue to<br />
sound. However, other effects will go off. To keep other<br />
effects effective as well, perform the following procedure.<br />
1. Connect an optional pedal switch to the HOLD PEDAL<br />
jack.<br />
2. Select a Patch (PR-C:110 Crash Pad, etc.) to which an<br />
effect will be applied when the modulation lever is<br />
moved on the PATCH PLAY display.<br />
3. Set the Hold parameter (SYSTEM/CONTROL/<br />
CONTROL SOURCE) to HOLD1.<br />
4. Call up the PEAK & HOLD display (PATCH/<br />
CONTROL) and set Ctrl 1 parameter to HOLD.<br />
5. Press a note and press the pedal switch as you move the<br />
modulation lever forward.<br />
6. When the note and modulation lever are released, both<br />
the note and the effect produced by the modulation lever<br />
will be held.<br />
■ Syncing the LFO Cycle to<br />
System Tempo<br />
1. Select PR-B:052 Blade Racer on the PATCH PLAY<br />
display.<br />
2. Set the Source parameter (PATCH/COMMON/PATCH<br />
CLOCK) to SYSTEM.<br />
3. Make sure that each Tone’s EXTSync parameter<br />
(PATCH/LFO/LFO 1, 2) is set to CLOCK. If not, reset.<br />
4. Set the Clock Source parameter (SYSTEM/SETUP/<br />
SYSTEM SETUP) to INT.<br />
2. Call up the TONE DELAY display (PATCH/WAVE).<br />
3. Select Tone 1.<br />
4. Set Tone 1’s Mode parameter to PLAYMATE and the<br />
Time parameter to 32.<br />
5. Play the XP-30’s keyboard keeping a constant tempo.<br />
Tones 1 and 2 sound alternately. Tone 1 will sound at the<br />
timing point exactly between a note you press and the<br />
following note. Try various settings, for instance use<br />
different wave or modify the pitch.<br />
* Tone 1 will not sound if the two keys are pressed at an interval<br />
of 2 seconds or longer.<br />
* When the Clock Source parameter is set to MIDI, you can<br />
achieve synchronization with the tempo of an external MIDI<br />
device.<br />
5. Try playing the keyboard while you change the System<br />
Tempo parameter (SYSTEM/SETUP/SYSTEM SETUP)<br />
to various values.<br />
6. Set the modulation depth as desired using LFO<br />
DEPTH1:2 display (PATCH/LFO) of each Tone.<br />
* When you have selected PR-B:047, 049, 051–056, 069, PR-<br />
C:034, 093, 097, 099, or 123, it is also possible to synchronize<br />
the LFO to the system’s tempo clock by setting the Source<br />
parameter (PATCH/COMMON/PATCH CLOCK) to<br />
SYSTEM. Try it.<br />
Chapter 6<br />
129
Chapter 6. Getting the Full Potential of the XP-30<br />
■ Modifying Multi-Effects to<br />
Match the System’s Tempo<br />
1. Select PR-C:094 Albion on the PATCH PLAY display.<br />
2. Set the Source parameter (PATCH/COMMON/PATCH<br />
CLOCK) to SYSTEM.<br />
3. Make sure that the Type parameter (PATCH/EFFECTS/<br />
PATCH EFX TYPE) is set to STEP-FLANGER. If not, reset.<br />
4. Make sure that the Step Rate parameter (PATCH/<br />
EFFECTS/PATCH EFX PRM) is set as a note value. If<br />
not, reset using a note value.<br />
5. Set the Clock Source parameter (SYSTEM/SETUP/<br />
SYSTEM SETUP) to INT.<br />
6. Try playing the keyboard while you change the System<br />
Tempo parameter (SYSTEM/SETUP/SYSTEM SETUP)<br />
to various values.<br />
You’ll notice that the tempo of the Patch’s modulation<br />
changes in accordance to the tempo clock of the XP-30’s<br />
system.<br />
You can modify EFX parameter values in accordance to the<br />
system’s tempo clock, when you have selected the following<br />
types for the EFX Type parameter.<br />
Type<br />
EFX Parameter<br />
16: STEP-FLANGER Step Rate parameter<br />
19: TRIPLE-TAP-DELAY Delay L–R parameter<br />
20: QUADRUPLE-TAP-DELAY Delay 1–4 parameter<br />
* When you have selected PR-B:057, 065, 068, PR-C:094, 096, and<br />
098, it is also possible to sync the EFX parameter variations of the<br />
sequencer’s tempo clock by setting the Source parameter (PATCH/<br />
COMMON/PATCH CLOCK) to SYSTEM. Try it and see.<br />
■ Using a Pedal Switch to Modify<br />
the Rotary Speed of the Rotary<br />
Effect<br />
■ Playing Phrase Loops at a<br />
System’s Tempo<br />
The internal wave expansion XP-C group contains Patches<br />
derived from waveforms with tempo (BPM) indication<br />
(phrase loops). You can play these phrase loops in sync with<br />
the system’s tempo.<br />
1. Select XP-C:001 Teknoperator on the PATCH PLAY<br />
display.<br />
2. Set the Source parameter (PATCH/COMMON/PATCH<br />
CLOCK) to SYSTEM.<br />
3. Call up the WAVE display (PATCH/WAVE).<br />
4. Change the Tone by pressing TONE SELECT [1]–[4] and<br />
look for the Tone that uses waveforms with BPM<br />
indication.<br />
The wave name will appear in parentheses ( ) below the<br />
Number parameter. You’ll notice that for this example, Patch<br />
Tone 1 uses a phrase loop called 132:Detroit.<br />
5. Call up the TONE DELAY display (PATCH/WAVE).<br />
6. Set the Tone 1’s Mode parameter to TEMPO-SYNC.<br />
7. Set the Clock Source parameter (SYSTEM/SETUP/<br />
SYSTEM SETUP) to INT.<br />
8. Try playing the keyboard while you change the System<br />
Tempo parameter (SYSTEM/SETUP/SYSTEM SETUP)<br />
to various values.<br />
The phrase loop speed will change in accordance to the<br />
system’s tempo clock.<br />
* The phrase loop will sound with the system’s tempo regardless<br />
of which key you press. The settings for pitch and FXM will be<br />
ignored.<br />
1. Call up the CONTROL PEDAL display (SYSTEM/<br />
CONTROL) and set the Assign parameter to<br />
CC04:FOOT-TYPE.<br />
2. Select PR-A:054 Rocker Spin on the PATCH PLAY<br />
display.<br />
This Patch uses ROTARY as the EFX type.<br />
3. Call up the PATCH EFX CTRL display (PATCH/<br />
EFFECTS), then set the Speed parameter to FOOT:+63.<br />
4. Connect an optional pedal switch to the CONTROL<br />
PEDAL jack.<br />
5. When you wish to speed up the rotary effect, press the<br />
pedal switch. Releasing the pedal switch will slow down<br />
the rotary effect.<br />
130
Chapter 6. Getting the Full Potential of the XP-30<br />
■ Using the Slider to Pan Sounds<br />
in Real Time<br />
You can assign various functions to the C1 slider. In this<br />
example, the stereo location (pan position) of a Patch will<br />
change by moving the C1 sliders up or down.<br />
1. Call up the C1 ASSIGN display (SYSTEM/CONTROL).<br />
2. Set the Assign parameter to CC10:PANPOT.<br />
* With other Assign parameter settings, you can try different<br />
variations.<br />
3. Select a Patch on the PATCH PLAY display.<br />
4. Press [CONTROLLER] to light the indicator.<br />
5. Move the C1 slider while you play the keyboard.<br />
You’ll notice that sound will pan right and left.<br />
* If the stereo location of the sound is difficult to hear, press<br />
[EFFECTS ON/OFF] to turn off each effect unit (Multi-Effects,<br />
Chorus, Reverb) (p. 62).<br />
Using the XP-30 to Play Live<br />
■ Changing Multiple Sounds of<br />
an External MIDI Device<br />
Simultaneously<br />
When a different Performance is selected, the sound<br />
corresponding to the Bank Select number and Program<br />
number of the selected Performance will usually be chosen<br />
on the external MIDI device.<br />
Once you have set the Bank Select number and Program<br />
number for each Part to match the desired sound of the<br />
external MIDI device, you can select several sounds on the<br />
external MIDI device by changing the Performance.<br />
6. Call up the PATCH display (PERFORM/PART) and set<br />
the Number parameter to the same number as the<br />
Program number of the sound you wish to play from the<br />
external MIDI device.<br />
* If the Program number of the external MIDI device reads 0–127,<br />
set the P.C Number parameter by adding 1 to the external MIDI<br />
device’s value.<br />
7. Save the Performance.<br />
8. Try changing from another Performance to the<br />
Performance just saved, and see if the sound of the<br />
external MIDI device changes to what you want. If not,<br />
check your settings and the external MIDI device.<br />
■ Changing Sounds with a Pedal<br />
Switch<br />
You can change Patch/Performance/Rhythm Set in<br />
succession using a pedal switch.<br />
1. Connect a pedal switch to a CONTROL PEDAL jack.<br />
2. Call up the CONTROL PEDAL display (SYSTEM/<br />
CONTROL) and set the Assign parameter to 98:PROG-<br />
UP.<br />
3. Call up the PLAY display of a sound source.<br />
4. Each time you press the pedal, you call up the next Patch,<br />
Performance or Rhythm Set.<br />
1. Select the Part to be used to control the external MIDI<br />
device.<br />
2. Call up the BANK-SEL GROUP display (SYSTEM/<br />
MIDI).<br />
3. Set the Number parameter to select the appropriate bank<br />
select group to match the bank select of your external<br />
MIDI device, turn the Switch parameter ON for that<br />
group, and set the LSB and MSB parameters.<br />
Chapter 6<br />
4. After switching to the MIDI display (PERFORM/MIDI)<br />
for the part that will control the external MIDI device, set<br />
the Channel parameter to match the receive channel of<br />
the external MIDI device, and turn the Tx parameter ON.<br />
5. Select the TRANSMIT (PERFORM/MIDI) display, and<br />
set the Bank Select Group parameter to the bank select<br />
group that you selected in step 3.<br />
131
Chapter 6. Getting the Full Potential of the XP-30<br />
Using External MIDI Devices<br />
■ Using the XP-30 to Control<br />
External MIDI Devices<br />
1. Use a MIDI cable to connect the MIDI OUT connector of the<br />
XP-30 to the MIDI IN connector of the external MIDI device.<br />
fig.6-01.e<br />
MIDI OUT<br />
* If you “daisy-chain” three or more MIDI devices using IN →<br />
THRU → IN → THRU ..., the MIDI signal may become<br />
garbled, and data errors may occur. In such cases, use a MIDI<br />
Thru Box. MIDI Thru Boxes are devices that allow a single<br />
stream of MIDI data to be sent to a large number of MIDI<br />
devices without causing data errors.<br />
■ Playing the XP-30’s Sound<br />
Source from an External MIDI<br />
Device<br />
XP-30<br />
MIDI IN<br />
1. Use a MIDI cable to connect the external MIDI device’s<br />
MIDI OUT connector to the XP-30’s MIDI IN connector.<br />
fig.6-03.e<br />
MIDI IN<br />
MIDI Keyboard<br />
2. Set the XP-30’s transmit channel to match the external<br />
MIDI device’s receive channel.<br />
The transmit channel is determined by the following<br />
parameters.<br />
- Patch mode<br />
Tx-Ch parameter (SYSTEM/MIDI/PATCH MIDI)<br />
- Performance mode<br />
Channel parameter (PERFORM/MIDI/MIDI)<br />
Turn the Tx parameter (PERFORM/MIDI/MIDI) to ON.<br />
3. If you want to play only the sound source of the external<br />
MIDI device, set the Local parameter (SYSTEM/MIDI/<br />
PATCH MIDI) / (SYSTEM/MIDI/PERFORM MIDI) to OFF.<br />
If you wish to connect two or more external MIDI devices,<br />
use the MIDI THRU connector of the external MIDI device.<br />
fig.6-02.e<br />
MIDI OUT<br />
XP-30<br />
MIDI IN<br />
MIDI Keyboard<br />
MIDI IN<br />
MIDI<br />
THRU<br />
XP-30<br />
MIDI Keyboard<br />
MIDI OUT<br />
2. Set the XP-30’s receive channel to match the external<br />
MIDI device’s transmit channel.<br />
The receive channel is determined by the following<br />
parameters.<br />
- Patch mode<br />
Rx-Ch parameter (SYSTEM/MIDI/PATCH MIDI)<br />
- Performance mode<br />
Channel parameter (PERFORM/MIDI/MIDI)<br />
Turn the Rx parameter (PERFORM/MIDI/MIDI) to ON.<br />
■ Selecting XP-30 Sounds from<br />
an External MIDI Device<br />
By transmitting Bank Select messages (controller number 0<br />
and 32) and Program Change messages from the external<br />
MIDI device to the XP-30, you can select Patches,<br />
Performances, or Rhythm Sets. In other words, when you<br />
select sounds on an external MIDI keyboard, the<br />
corresponding MIDI message will be transmitted to the XP-<br />
30, causing the XP-30 to select the appropriate Patch, etc.<br />
* If the XP-30 receives only Program Change messages without<br />
receiving Bank Select messages, it will select sounds only from<br />
the currently selected group such as PR-A or USER.<br />
MIDI Keyboard<br />
132
Chapter 6. Getting the Full Potential of the XP-30<br />
Selecting Patches<br />
The MIDI messages transmitted by the external MIDI device<br />
will be received by the XP-30 to select Patches as shown in<br />
the following table.<br />
Group Number Bank Select Program Number<br />
MSB LSB<br />
USER 1–128 80 0 1–128<br />
PR-A 1–128 81 0 1–128<br />
PR-B 1–128 81 1 1–128<br />
PR-C 1–128 81 2 1–128<br />
PR-D (GM) 1–128 81 3 1–128<br />
PR-E 1–128 81 4 1–128<br />
XP-A 1–128 84 0 1–128<br />
XP-A 129–255 84 1 1–127<br />
XP-B 1–128 84 2 1–128<br />
XP-B 129–255 84 3 1–127<br />
XP-C 1–128 84 4 1–128<br />
XP-C 129–256 84 5 1–128<br />
XP-D 1–128 84 6 1–128<br />
XP-D 129–256 84 7 1–128<br />
XP-E 1–128 84 8 1–128<br />
XP-E 129–256 84 9 1–128<br />
<br />
Selecting PR-B Patch number 10 from an external MIDI<br />
device<br />
Transmit data to the XP-30 in the following order. (Values<br />
are in decimal.)<br />
Controller number 0 (Bank Select MSB button), value 81<br />
Controller number 32 (Bank Select LSB button), value 1<br />
Program number 10<br />
Selecting Rhythm Sets<br />
The MIDI messages transmitted by the external MIDI device<br />
will be received by the XP-30 to select Rhythm Sets as shown<br />
in the following table.<br />
Group Number Bank Select Program Number<br />
MSB LSB<br />
USER 1, 2 80 0 1, 2<br />
PR-A 1, 2 81 0 1, 2<br />
PR-B 1, 2 81 1 1, 2<br />
PR-C 1, 2 81 2 1, 2<br />
PR-D (GM) 1, 2 81 3 1, 2<br />
PR-E 1, 2 81 4 1, 2<br />
XP-A 1–8 84 0 1–8<br />
XP-C 1–8 84 4 1–8<br />
XP-D 1–128 84 6 1–128<br />
XP-D 129–256 84 7 1–128<br />
XP-E 1–128 84 8 1–128<br />
XP-E 129–256 84 9 1–128<br />
In order to select Rhythm Sets, the MIDI channel of the<br />
transmitting device must match the receive channel of Part<br />
10 of the Performance. When the XP-30 is shipped, Part 10 is<br />
set to MIDI channel 10.<br />
Selecting Performances<br />
The MIDI messages transmitted by the external MIDI device<br />
will be received by the XP-30 to select Performances as<br />
shown in the following table.<br />
Group Number Bank Select Program Number<br />
MSB LSB<br />
USER 1–32 80 0 1–32<br />
PR-A 1–32 81 0 1–32<br />
PR-B 1–32 81 1 1–32<br />
In order to select a Performance, the MIDI channel of the<br />
transmitting device must match the XP-30’s Control Channel<br />
parameter (SYSTEM/MIDI/PERFORM MIDI). In order to<br />
select the Patch or Rhythm Set of a Part, the transmit channel<br />
must match the receive channel of the Part. However if the<br />
Control Channel parameter and the receive channel of a Part<br />
have the same setting, the Control Channel parameter setting<br />
will take priority so that messages received on this channel<br />
will select Performances.<br />
Chapter 6<br />
133
Chapter 6. Getting the Full Potential of the XP-30<br />
Enjoying Desktop Music<br />
The XP-30 can be controlled by music software running on a<br />
computer. This will allow you to create your own songs, and<br />
also to select sounds or edit sounds from the computer<br />
display. The features available to you when using a<br />
computer will vary greatly, depending on the software you<br />
use, so it is important that you choose software suited to<br />
your needs.<br />
■ Connecting to Your Computer<br />
Two Connection Methods<br />
There are two ways to connect the XP-30 to your computer:<br />
by means of the Computer connector, or by using the MIDI<br />
connectors.<br />
To make connections via the Computer connector, use a<br />
Computer cable to connect the serial port (RS-232C<br />
connector) of your computer to the Computer connector of<br />
the XP-30.<br />
To make connections via MIDI, you will need a MIDI<br />
interface (such as the <strong>Roland</strong> Super MPU64, etc.). Use MIDI<br />
cables to connect the XP-30’s MIDI connectors to the MIDI<br />
connectors of the MIDI interface, after it has been connected<br />
to your computer.<br />
Connect the XP-30 to your computer using the method that is<br />
appropriate for your setup.<br />
If you are making connections using MIDI, read from p. (p.<br />
135).<br />
* This setting determines the transmission speed (baud rate)<br />
between your computer and the MIDI sound module (the XP-<br />
30), and the setting used by the computer must match the<br />
setting on the XP-30. Here we explained how to make the<br />
setting on the XP-30. To make settings on your computer, you<br />
will need to make settings for your software. If you are using<br />
Windows, settings may be different than the above, depending<br />
on your driver settings. If so, carefully read the owner’s manual<br />
that was included with your driver.<br />
* The PC-1 baud rate is 31.25 (kbit/sec), and the PC-2 baud rate is<br />
38.4 (kbit/sec).<br />
In step 3, the connections will be slightly different depending<br />
on the type of computer you are using, so read the section<br />
(3a, 3b) that applies to you.<br />
3a. If you’re using a PC, connect the computer cable to the<br />
serial port (RS-232C) connector on the rear of the<br />
computer.<br />
Computer cable: RSC-15AT (sold separately)<br />
This is a 9 pin cable. If you need a 25 pin cable, refer to<br />
“Computer Cable Wiring Diagrams” (p. 208) and purchase<br />
an appropriate cable.<br />
3b. If you’re using an Apple Macintosh computer, connect<br />
the computer cable to the modem port or printer port on<br />
the rear of the computer.<br />
Computer cable: RSC-15APL (sold separately)<br />
Connecting with Computer Connector<br />
1. Turn off the XP-30, your computer and all peripheral<br />
devices.<br />
* To prevent malfunction and/or damage to speakers or other<br />
devices, always turn down the volume, and turn off the power<br />
on all devices before making any connections.<br />
2. Set the COMPUTER switch on the rear panel of the XP-30<br />
as the following figure.<br />
In general, set the switch to PC-2 for PC, and to Mac for<br />
Apple Macintosh series.<br />
fig.6-04.e<br />
Apple Macintosh<br />
PC<br />
* Before changing the setting of the Computer switch, you must<br />
first turn off the power on the XP-30.<br />
134
Chapter 6. Getting the Full Potential of the XP-30<br />
fig.6-05.e<br />
4. Connect the other end of the Computer cable to the COMPUTER connector on the left side of the<br />
XP-30.<br />
Apple Macintosh<br />
Modem Port or<br />
Printer Port<br />
XP-30 Rear Panel<br />
PC<br />
Optional computer cable<br />
RSC-15APL<br />
Serial Port (|O|O|)<br />
Optional computer cable<br />
RSC-15AT<br />
* In order to hear the sounds of the XP-30, you will also need to connect an AC cord, and audio cables or<br />
headphones. If you have not yet made connections, please read “Making Connections” (p. 24). If you are<br />
finished making connections, read from the “Turning On the Power” (p. 26).<br />
Connecting with MIDI Connectors<br />
If a MIDI interface (<strong>Roland</strong> Super MPU64, etc.) is connected to your computer, or if a MIDI interface<br />
adaptor is connected, you can use the MIDI connectors to make connections.<br />
* For details on how to install the MIDI interface, refer to the owner’s manual for your MIDI interface.<br />
1. Turn off the XP-30, your computer and all peripheral devices.<br />
* To prevent malfunction and/or damage to speakers or other devices, always turn down the volume, and turn<br />
off the power on all devices before making any connections.<br />
2. Set the COMPUTER switch on the rear panel of the XP-30 to MIDI.<br />
fig.6-06<br />
* Before changing the setting of the Computer switch, you must first turn off the power on the XP-30.<br />
Chapter 6<br />
135
Chapter 6. Getting the Full Potential of the XP-30<br />
3. Use a MIDI cable (sold separately) to connect the MIDI OUT connector of the MIDI interface to<br />
the MIDI IN connector of the XP-30.<br />
4. Use a MIDI cable to connect the MIDI IN connector on the MIDI interface to the MIDI OUT<br />
connector on the XP-30.<br />
* This connection is necessary in order to use the controller section (keyboard section) of the XP-30.<br />
fig.6-07.e<br />
Apple Macintosh<br />
XP-30 Rear Panel<br />
Modem or<br />
Printer Port<br />
MIDI<br />
OUT<br />
IN<br />
MIDI Interface Adapter<br />
The setting<br />
is MIDI<br />
PC<br />
Super MPU64<br />
XP-30 Rear Panel<br />
USB<br />
Connector<br />
The setting<br />
is MIDI<br />
USB<br />
Cable<br />
136
Chapter 6. Getting the Full Potential of the XP-30<br />
■ Disconnecting the Keyboard<br />
from the Internal Sound Source<br />
(Local OFF)<br />
The XP-30 contains a controller section (keyboard section)<br />
and sound generating section, packaged as a single unit. This<br />
means that you can make a setting (Local Control) that<br />
specifies whether or not the performance data from the<br />
keyboard will be transmitted directly to the sound source.<br />
When you use the XP-30 by itself, you will normally set it to<br />
Local ON. However, when you are using it as a sound<br />
generator for a DTM (desktop music) system, you should set<br />
the Local parameter (SYSTEM/MIDI/PERFORM MIDI) to<br />
OFF so that the keyboard will be disconnected from the<br />
internal sound generator.<br />
fig.6-08.e<br />
Recording<br />
Set to Thru<br />
Function On.<br />
Sequencer<br />
All performance data<br />
that arrives at MIDI IN<br />
will be output from<br />
MIDI OUT.<br />
Turn on the Thru Function of Your<br />
Sequencer Software<br />
In order for the musical data received by the computer from<br />
the XP-30 to be transmitted back to the XP-30, the Thru<br />
function of the sequencing program must be turned on.<br />
When the Thru function of the sequencing program is turned<br />
on, MIDI messages received at MIDI IN will be retransmitted<br />
without change from MIDI OUT.<br />
For details on whether or not your sequencing program has a<br />
Thru function, and how to set the Thru function, refer to the<br />
owner’s manual for your sequencing program.<br />
* If your sequencing program does not have a Thru function, set<br />
the XP-30’s Local Control to ON.<br />
* For some sequencing programs, System Exclusive messages are<br />
not transmitted by the Thru function. If you are using such<br />
software and wish to record System Exclusive messages, turn<br />
the XP-30’s Local Control setting ON.<br />
MIDI IN<br />
MIDI OUT<br />
MIDI OUT<br />
MIDI IN<br />
Sound Generating<br />
Section<br />
Set to<br />
Local Off.<br />
Keyboard Controller<br />
Section<br />
XP-30<br />
While at this setting,<br />
the XP-30’s keyboard<br />
and controllers are<br />
disconnected from<br />
the sound generating<br />
section, so they will not<br />
directly control it.<br />
Chapter 6<br />
137
138
Appendices<br />
Appendices<br />
139
Troubleshooting<br />
If the this unit does not function in the way you expect, first<br />
check the following points. If this does not resolve the<br />
problem, consult your dealer or a nearby <strong>Roland</strong> Service<br />
Station (listed at the end of this manual).<br />
* If a message appears during operation, consult the following<br />
section “Error Messages” (p. 142)<br />
Cannot Turn the Power On<br />
- Is the power cable correctly plugged into an outlet?<br />
No Sound<br />
- Is the power turned on for the other devices connected to<br />
the this unit?<br />
- Is the VOLUME slider turned all the way down?<br />
- Are the connections correct?<br />
When using the XP-30 by itself, connect audio cables or<br />
headphones (p. 24).<br />
When using the XP-30 with a computer, use a Computer<br />
cable or MIDI cables to connect it to the computer (p. 134).<br />
You will also need to connect audio cables or headphones (p.<br />
24).<br />
- Can you hear sound through headphones?<br />
If you can hear sound through headphones, the problem may<br />
be that the audio cable transmitting the sound to the other<br />
devices is broken or incorrectly connected, or that there is a<br />
problem with your mixer/amp/speaker system.<br />
- If you do not hear sound when you play the keyboard,<br />
check whether the Local Switch, a System parameter, is<br />
turned OFF.<br />
Set the Local parameter (SYSTEM/MIDI/PATCH MIDI,<br />
PERFORM MIDI, GM MIDI) to ON (p. 112).<br />
- If a layer-type performance is selected, has the Local<br />
switch of the part been turned off?<br />
Set the Local parameter (PERFORM/MIDI/MIDI) to ON (p.<br />
86).<br />
- Have all tones in the patch been turned off?<br />
Press the TONE SWITCH [1]–[4] buttons to make the<br />
indicators light.<br />
- If you have selected settings that use an XP-D or E Wave,<br />
Patch, or Rhythm Set, is the specified Wave Expansion<br />
Board installed correctly? (p. 16, 20)<br />
- Has the volume been lowered by pedal operations or by<br />
MIDI messages (volume messages or expression<br />
messages) received from an external MIDI device?<br />
Use the Panic function to raise the volume (p. 60).<br />
If you are in Performance mode, access the INFO display<br />
(PERFORM/INFO) to check the settings of the Volume<br />
message (Vol) and Expression message (Exp) parameters,<br />
and make the appropriate settings.<br />
- Is the rear panel COMPUTER switch set to the correct<br />
position?<br />
If you are using the XP-30 while connected to a computer,<br />
make settings as appropriate for the connection method, the<br />
type of computer, and the settings of the driver (p. 134).<br />
* Turn off the XP-30’s power before changing the position of the<br />
COMPUTER switch.<br />
Song Does Not Playback Correctly<br />
- Are you playing a GS format song?<br />
The XP-30 is compatible with the General MIDI System, but<br />
not with the GS format, so a GS format song will not play<br />
back correctly on the XP-30.<br />
- When playing back a GM score, is the sound source set to<br />
GM mode?<br />
Enter GM Mode (p. 124).<br />
- Has the Receive GM Exclusive switch been turned ON?<br />
Set the Rx.GM parameter (SYSTEM/MIDI/SYS-EXC MIDI)<br />
to ON (p. 113).<br />
A Specific Part Does Not Sound<br />
- Has the volume level of the part been lowered?<br />
Adjust the Level parameter (PERFORM/PART/SETTING) to<br />
raise the volume of the part that is not heard (p. 87).<br />
- Is the instrument set to receive MIDI messages?<br />
Set the Rx parameter (PERFORM/MIDI/MIDI) to ON (p.<br />
86).<br />
- Does the MIDI Receive channel of the Part match the<br />
MIDI Transmit channel of the connected MIDI device?<br />
Set the Channel parameter (PERFORM/MIDI/MIDI) to<br />
specify the MIDI receive channel (p. 86).<br />
No Sound from Connected MIDI Device<br />
- Is the instrument set to transmit MIDI messages?<br />
In the Patch mode, make the setting for the Tx-Ch parameter<br />
(SYSTEM/MIDI/PATCH MIDI) (p. 112).<br />
In the Performance mode, set the Tx parameter (PERFORM/<br />
MIDI/MIDI) to ON (p. 86).<br />
140
Troubleshooting<br />
- Does the MIDI send channel for the XP-30’s controller<br />
match the MIDI receive channel for the connected MIDI<br />
instrument?<br />
In the Patch mode, make the setting for the Tx-Ch parameter<br />
(SYSTEM/MIDI/PATCH MIDI) (p. 112).<br />
In the Performance mode, set the MIDI send channel with the<br />
Channel parameter (PERFORM/MIDI/MIDI) (p. 86).<br />
A Specific Keyboard Area Does Not<br />
Sound<br />
- Has a restricted range of notes been set?<br />
If a specific range of notes does not sound, check the Key<br />
Range settings for the patch and performance in the KEY<br />
RANG display (PATCH/COMMON) and KEY RANG<br />
display (PERFORM/COMMON). If both key ranges have<br />
been set, only the notes specified in both settings will sound.<br />
Sound Is Distorted<br />
- Is an effect which distorts the sound being applied? (p. 93)<br />
- If the sound is distorted for specific patches or parts,<br />
lower the volume level of those patches or parts (p. 81, 87).<br />
- If all sounds are distorted, use the VOLUME slider to<br />
lower the volume level.<br />
Pitch Is Incorrect<br />
- Is the tuning of the XP-30 incorrect?<br />
Check the Master parameter (SYSTEM/TUNE/TUNE) (p.<br />
113).<br />
- Has the pitch been changed by pedal operations or by<br />
pitch change messages received from an external MIDI<br />
device?<br />
Use the Panic function to reset the original values (p. 60).<br />
If you are in Performance mode, access the INFO display<br />
(PERFORM/INFO) to check the settings of the Pitch Bend<br />
Message parameter (Bend), and make the appropriate<br />
settings (p. 87).<br />
Sounds Are Interrupted<br />
- If you attempt to play more than 64 voices at once, sounds<br />
will be interrupted (p. 42).<br />
Reduce the number of Tones that you are using (p. 50, 76).<br />
Increase the Voice Reserve setting for parts that must not<br />
drop out (p. 87).<br />
Exclusive Messages Are Not Received<br />
- Does the Device ID number of the transmitted exclusive<br />
message match the Device ID number of this unit?<br />
Check the Device# parameter (SYSTEM/MIDI/SYS-EXC<br />
MIDI) (p. 113).<br />
This Unit Does Not Transmit MIDI Data<br />
- If you wish to transmit this unit data via the Computer<br />
connector, set the COMPUTER switch to PC-1, PC-2 or<br />
Mac, depending on the computer or software you are<br />
using (p. 134).<br />
- When the rear panel COMPUTER switch is set to MIDI,<br />
this unit will not transmit data from the COMPUTER<br />
connector. In this case, data will be transmitted from the<br />
MIDI OUT connector.<br />
When Using Sequencing Software,<br />
Operating the Sliders or Other<br />
Controls Does Not Affect the Sound<br />
- Some sequencer software does not “soft-thru” system<br />
exclusive messages. If you are using this type of sequencer<br />
software and wish to record system exclusive messages,<br />
turn the XP-30’s Local parameter ON (p. 112).<br />
- Have the Coarse Tune or Fine Tune parameters been set<br />
for specific parts?<br />
Check the Coarse parameter and Fine parameter<br />
(PERFORM/PART/SETTING) (p. 87).<br />
Effects Do Not Apply<br />
- Is the effect switch turned OFF for Multi-Effects, Chorus,<br />
or Reverb?<br />
To check these settings, press [EFFECTS ON/OFF] (p. 62).<br />
Appendices<br />
141
Error Messages<br />
If there has been a mistake in operation, or if the XP-30 is<br />
unable to continue processing as you directed, an error<br />
message will appear in the display. Take the appropriate<br />
action for the displayed error message. This section gives the<br />
error messages in alphabetical order.<br />
Battery Low<br />
Situation: The internal backup battery that is preserving<br />
the contents of user memory has run down.<br />
Action: Consult your dealer or a nearby <strong>Roland</strong> service<br />
station to have the battery replaced.<br />
File Format Error<br />
Situation: The XP-30 cannot handle this file.<br />
File I/O Error<br />
Situation: It was not possible to save/load a file.<br />
Action: Try the operation once again. If the same<br />
message appears, that file has been damaged.<br />
Delete the damaged file.<br />
File Name Duplicate<br />
Situation: A file of the same name exists on the memory<br />
card.<br />
Action: Use a different file name.<br />
File Name Format Error<br />
Situation: A file name has not been assigned.<br />
Action: Assign a file name.<br />
File not Found<br />
Situation: The specified file was not found.<br />
Action: Insert the memory card that contains the<br />
specified file, and try the operation once again.<br />
Memory Card Full<br />
Situation: There is insufficient space available on the<br />
memory card to save the data.<br />
Action: Either insert a different memory card, or delete<br />
unnecessary data and try the operation once<br />
again.<br />
Memory Card I/O Error<br />
Situation: It is possible that the memory card has been<br />
scratched or otherwise damaged.<br />
Action: If the memory card has been damaged, do not<br />
use that memory card. If the same error message<br />
appears repeatedly, consult your dealer or a<br />
nearby <strong>Roland</strong> service station.<br />
Memory Card not Ready<br />
Situation: A memory card is not inserted in the MEMORY<br />
CARD slot.<br />
Action: Turn off the power, and insert a memory card.<br />
Memory Card Write Protected<br />
Situation: Since a write protect sticker is affixed to the<br />
memory card, data cannot be saved to the card<br />
bank.<br />
Action: Remove the write protect sticker from the<br />
memory card.<br />
MIDI Buffer Full<br />
Situation: Due to an inordinate volume of MIDI messages<br />
received, the XP-30 has failed to process them<br />
properly.<br />
Action: Reduce the amount of MIDI messages to be<br />
transmitted.<br />
MIDI Communication Error<br />
Situation: A problem has occurred with the MIDI cable<br />
connections.<br />
Action: Check that MIDI cables are not broken or pulled<br />
out.<br />
Receive Data Error<br />
Situation: A MIDI message was received incorrectly.<br />
Action: If the same error message is displayed<br />
repeatedly, there is a problem with the MIDI<br />
messages that are being transmitted to the XP-<br />
30.<br />
Unformatted Memory Card<br />
Situation: This memory card cannot be used by the XP-30.<br />
Action: Format the memory card on the XP-30.<br />
User Memory Damaged<br />
Situation: The data in user memory has been lost.<br />
Action: Use the Factor Reset function (UTILITY/UTIL<br />
2/FACTORY RESET) to initialize the memory to<br />
the factory settings.<br />
User Memory Write Protected<br />
Situation 1: The Internal parameter (UTILITY/UTIL 1/<br />
PROTECT/WRITE PROTECT) is turned ON.<br />
Action 1: Turn the Internal parameter OFF.<br />
Situation 2: The Exclusive parameter (UTILITY/UTIL 1/<br />
PROTECT/WRITE PROTECT) is turned ON,<br />
and Exclusive messages cannot be received.<br />
Action 2: Turn the Exclusive parameter OFF.<br />
142
Quick Reference of Procedures<br />
The XP-30 has a large number of functions. This section gives<br />
the procedures for using some of the frequently-used<br />
functions. For functions that are used simply by setting the<br />
applicable parameter, only the “Parameter name (mode/<br />
display group/display)” is listed.<br />
* “[A] + [B]” indicates that you are to hold down [A] and press<br />
[B].<br />
7. Use the VALUE dial, [INC]/[DEC], or the numeric keys<br />
to modify the value.<br />
* If you wish to move to a different parameter group, turn on the<br />
[EDIT] indicator.<br />
Changing the Patch Assigned to a<br />
Performance<br />
■ Patch Mode<br />
Selecting the Patch Mode PLAY Display<br />
Press [PATCH].<br />
Selecting a Patch<br />
Use the VALUE dial, [INC]/[DEC], or numeric keys to select.<br />
Using the Numeric Keys to Select the<br />
Patch Group<br />
Press [SHIFT] + numeric keys.<br />
Selecting Patches Using the Digit Hold<br />
Function<br />
1. Press [SHIFT] + [ENTER] (turn on the Digit Hold<br />
function).<br />
2. Use the numeric keys to specify the number of the one’s<br />
place.<br />
* To turn off the Digit Hold function, press [SHIFT] + [ENTER]<br />
once again.<br />
Transposing the Keyboard by Octave<br />
Press [-OCT] or [+OCT].<br />
Transposing the Keyboard in Semitone<br />
Steps<br />
Transpose on/off:<br />
Lower the keyboard:<br />
Raise the keyboard:<br />
press [TRANSPOSE]<br />
press [TRANSPOSE] + [-OCT]<br />
press [TRANSPOSE] + [+OCT]<br />
Modifying a Patch (basic procedure)<br />
1. Make the [EDIT] indicator light.<br />
2. Use the function buttons to select the display group.<br />
3. Use [ ]/[ ] to select the desired display page.<br />
4. Turn off the [EDIT] indicator.<br />
5. Use TONE SELECT [1]–[4] (function buttons) to select<br />
the Tone.<br />
6. Use [ ]/[ ] to select a parameter.<br />
1. Press [PERFORM] + [PATCH].<br />
2. Use [ ]/[ ] to select a Part.<br />
3. Use the VALUE dial, [INC]/[DEC], or the numeric keys<br />
to select a Patch.<br />
The rest is the same as for the basic procedure listed above.<br />
Simultaneously Modifying the Values<br />
of Two or More Tones<br />
In a Tone setting display, hold down the TONE SELECT [1]–<br />
[4] (function button) for one Tone, and press the button(s) for<br />
the other Tone(s) you want to edit.<br />
Adjusting the Volume of a Patch<br />
Level parameter (PATCH/COMMON/PATCH COMMON)<br />
Adjusting the Pan Position of a Patch<br />
Pan parameter (PATCH/COMMON/PATCH COMMON)<br />
■ Performance Mode<br />
Selecting the Performance Mode PLAY<br />
Display<br />
Press [PERFORM].<br />
Selecting a Part to Play from the<br />
Keyboard (for a Single-Type<br />
Performance)<br />
Use [ ]/[ ].<br />
Changing the Patch/Rhythm Set<br />
Assigned to a Part<br />
1. Press [PERFORM] + [PATCH].<br />
2. Use [ ]/[ ] to select a Part.<br />
3. Use the VALUE dial, [INC]/[DEC], or the numeric keys<br />
to select a Patch or Rhythm Set.<br />
Using the Numeric Keys to Select the<br />
Performance/Patch/Rhythm Set Group<br />
Press [SHIFT] + numeric keys.<br />
Appendices<br />
143
Quick Reference of Procedures<br />
Selecting Performances Using the Digit<br />
Hold Function<br />
1. Press [SHIFT] + [ENTER] (turn on the Digit Hold<br />
function).<br />
2. Use the numeric keys to specify the number of the one’s<br />
place.<br />
* To turn off the Digit Hold function, press [SHIFT] + [ENTER]<br />
once again.<br />
Modifying a Performance (basic<br />
procedure)<br />
1. Make the [EDIT] indicator light.<br />
2. Use the function buttons to select the display group.<br />
3. Use [ ]/[ ] to select the desired display page.<br />
4. Turn off the [EDIT] indicator.<br />
5. Use [PART] (function button) to select the Tone.<br />
6. Use [ ]/[ ] to select a parameter.<br />
7. Use the VALUE dial, [INC]/[DEC], or the numeric keys<br />
to modify the value.<br />
* If you wish to move to a different parameter group, turn on the<br />
[EDIT] indicator.<br />
Adjusting the Volume of a Part<br />
1. Turn on the [EDIT] indicator.<br />
2. Press [PART] (function button).<br />
3. Use [ ]/[ ] to select the PART SETTING display.<br />
4. Set the Level parameter.<br />
Adjusting the Pan Position of a Part<br />
1. Turn on the [EDIT] indicator.<br />
2. Press [PART] (function button).<br />
3. Use [ ]/[ ] to select the PART SETTING display.<br />
4. Set the Pan parameter.<br />
Modifying a Rhythm Set (basic<br />
procedure)<br />
1. Press [PERFORM] + [PATCH].<br />
2. Use [ ]/[ ] to select Part 10.<br />
3. Use the VALUE dial, [INC]/[DEC], or the numeric keys<br />
to select a Rhythm Set.<br />
4. Make the [EDIT] indicator light.<br />
6. Use [ ]/[ ] to select the desired display page.<br />
7. Use [ ]/[ ] to select a parameter.<br />
8. Use the keyboard to select a rhythm instrument.<br />
9. Use the VALUE dial, [INC]/[DEC], or the numeric keys<br />
to modify the value.<br />
■ Controller Settings<br />
Changing the Range of the Pitch Bend<br />
Lever (for each Patch)<br />
Bend Range parameter (PATCH/CONTROL/KEY<br />
MODE&BENDER)<br />
Selecting the MIDI Messages<br />
Controlled by the C1–C4 Sliders<br />
Assign parameter (SYSTEM/CONTROL/C1–C4 ASSIGN)<br />
Selecting the MIDI Messages<br />
Controlled by the CONTROL PEDAL<br />
Polarity parameter (SYSTEM/CONTROL/CONTROL PEDAL)<br />
Reversing the Polarity of CONTROL<br />
PEDAL (when using a pedal of another<br />
manufacturer whose polarity is<br />
reversed)<br />
Polarity parameter (SYSTEM/CONTROL/CONTROL PEDAL)<br />
Controlling Patch Parameters with a<br />
Slider or Pedal<br />
You can specify up to three control sources (MIDI messages<br />
used for control). However control source 1 is fixed at<br />
“modulation”. For each control source, you can specify up to<br />
four control destinations (parameters to be controlled).<br />
1. Specify the MIDI message to be controlled by each<br />
controller (C1–C4, CONTROL PEDAL) (see above).<br />
2. Select the control source.<br />
Control 2/3 parameter (PATCH/CONTROL/CONTROL<br />
SOURCE)<br />
3. Specify the control destination (the parameter to be<br />
controlled).<br />
Destination parameter (PATCH/CONTROL/CONTROL1–3)<br />
* If you do not need to set different control sources for each Patch,<br />
set the Control 2/3 parameters (PPATCH/CONTROL/<br />
CONTROL SOURCE) to “SYS-CTRL1” or “SYS-CTRL2,”<br />
and set the Control 1/2 parameters (SYSTEM/CONTROL/<br />
SYS-CTRL ASSIGN) to the MIDI messages that you wish to<br />
use for control.<br />
5. Use the function buttons to select the parameter group.<br />
144
Quick Reference of Procedures<br />
Adjusting the Keyboard Response<br />
Sens parameter (SYSTEM/CONTROL/KEYBOARD)<br />
Set the Keyboard to Produce a Fixed<br />
Velocity<br />
Vel parameter (SYSTEM/CONTROL/KEYBOARD)<br />
■ Saving and Loading Data<br />
* After completing these procedures, press [UTIL/CARD] to<br />
return to the PLAY display.<br />
Formatting a Memory Card<br />
1. Press [UTIL/CARD].<br />
2. Select “1: CARD” on the UTIL 2 display.<br />
3. Select “1: FORMAT.”<br />
4. Press [ENTER].<br />
Saving Patch Settings<br />
1. In Patch mode, press [UTIL/CARD].<br />
2. Select “1: WRITE” on the UTIL 1 display.<br />
3. Specify the writing destination.<br />
4. Press [ENTER].<br />
If a message of “Internal Write Protect=ON” appears, change<br />
it to “OFF” and press [ENTER] twice.<br />
* If you wish to hear the sound of the Patch in the selected writing<br />
destination, press [UNDO/COMPARE]. Press it once again to<br />
return to the previous display.<br />
Saving User Memory Settings and System<br />
Settings to Memory Card as a Unit<br />
1. Press [UTIL/CARD].<br />
2. Select “3: SAVE” on the UTIL 2 display.<br />
3. Assign a file name.<br />
4. Press [ENTER].<br />
Deleting a File from Memory Card<br />
1. Press [UTIL/CARD].<br />
2. Select “1: CARD” on the UTIL 2 display.<br />
3. Select “3: DELETE.”<br />
4. Select the file that you wish to delete.<br />
5. Press [ENTER].<br />
Checking the Free Area of a Memory<br />
Card, etc.<br />
1. Press [UTIL/CARD].<br />
2. Select “1: CARD” on the UTIL 2 display.<br />
3. Select “4: INFO.”<br />
■ Controlling External MIDI<br />
Devices<br />
Changing the Transmit Channel for<br />
Patch Mode<br />
Tx-Ch parameter (SYSTEM/MIDI/PATCH MIDI)<br />
Saving Performance Settings<br />
1. In Performance mode, press [UTIL/CARD].<br />
2. Select “1: WRITE” on the UTIL 1 display.<br />
3. Specify the writing destination.<br />
4. Press [ENTER].<br />
If a message of “Internal Write Protect=ON” appears, change<br />
it to “OFF” and press [ENTER] twice.<br />
Saving Rhythm Set Settings<br />
1. In Rhythm Set mode, press [UTIL/CARD].<br />
2. Select “1: WRITE” on the UTIL 1 display.<br />
3. Specify the writing destination.<br />
4. Press [ENTER].<br />
If a message of “Internal Write Protect=ON” appears, change<br />
it to “OFF” and press [ENTER] twice.<br />
Changing the Transmit Channel for<br />
Performance Mode (for each Part)<br />
Channel parameter (PERFORM/MIDI/MIDI)<br />
* Keyboard and controller movements (MIDI messages) from the<br />
controller section are transmitted differently depending on<br />
whether a single-type Performance or a layer-type Performance<br />
is selected. If a single-type Performance is selected, MIDI<br />
messages will be transmitted on the MIDI channel of the Part<br />
that is being played by the keyboard. If a layer-type Performance<br />
is selected, MIDI messages will be transmitted on the MIDI<br />
channel of the Parts whose Tx parameter (PERFORM/MIDI/<br />
MIDI) is turned ON.<br />
Appendices<br />
145
Quick Reference of Procedures<br />
Turning Off Transmission of Program<br />
Change/Bank Select MIDI Messages<br />
(System)<br />
TRANSMIT MIDI display (SYSTEM/MIDI)<br />
Transmitting Bank Select Messages for<br />
the Patch Assigned to a Specific Part<br />
when a Performance is Selected<br />
1. Set the Bank Select Group parameter (PERFORM/MIDI/<br />
TRANSMIT) to the desired Bank Select Group number<br />
(BS1–BS7).<br />
2. Save the Performance.<br />
3. In the BANK SEL-GROUP display (SYSTEM/MIDI/<br />
BANK SEL-GROUP), select the Bank Select Group that<br />
you specified in step 1.<br />
4. Turn the Switch parameter ON, and specify the MSB and<br />
LSB.<br />
■ Controlling the XP-30 from an<br />
External MIDI Device<br />
Changing the Receive Channel on<br />
which Performances will be Selected<br />
Control Channel parameter (SYSTEM/MIDI/PERFORM<br />
MIDI)<br />
Changing the Receive Channel of a<br />
Part (Performance)<br />
Channel parameter (PERFORM/MIDI/MIDI)<br />
Changing the Receive Channel (Patch)<br />
Rx-Ch parameter (SYSTEM/MIDI/PATCH MIDI)<br />
Turning Off Reception of Program<br />
Change/Bank Select MIDI Messages<br />
(System)<br />
RECEIVE MIDI display (SYSTEM/MIDI)<br />
Checking the MIDI Message Reception<br />
Status (Performance mode)<br />
INFO display (PERFORM/INFO)<br />
■ Other<br />
Using the Panic Function<br />
Press [SHIFT] + [PANIC].<br />
Adjusting the Tuning<br />
Master parameter (SYSTEM/TUNE/TUNE)<br />
Adjusting the Display Contrast<br />
LCD Contrast parameter (SYSTEM/SETUP/SYSTEM<br />
SETUP)<br />
Restoring the Temporary<br />
Performance/Patch/Rhythm Set to the<br />
Factory Setting<br />
1. Select a Performance, Patch, or Rhythm Set.<br />
2. Press [UTIL/CARD].<br />
3. Select “3: INIT” on the UTIL 1 display.<br />
4. Select “PRESET”.<br />
5. Press [ENTER].<br />
Restoring the XP-30 to the Factory<br />
Settings<br />
1. Select a Performance, Patch, or Rhythm Set.<br />
2. Press [UTIL/CARD].<br />
3. Select “4: FACTORY RESET” on the UTIL 2 display.<br />
4. Press [ENTER].<br />
Turning Reception of Volume/Hold 1/<br />
Program Change MIDI Messages ON/<br />
OFF for Each Part (Performance)<br />
Rx SWITCH display (PERFORM/MIDI)<br />
Turning Reception of Volume/Pan/Pitch<br />
Bend/Hold 1/Redamper MIDI Messages<br />
ON/OFF for Each Tone (Patch)<br />
Rx SWITCH/DAMPER display (PATCH/CONTROL)<br />
146
Parameter List<br />
■ Patch Parameters<br />
* Parameters that can be set independently for each Tone are indicated by “T.”<br />
COMMON Group (p. 68)<br />
Display Parameter Value<br />
PATCH NAME — Patch name ASCII Characters (max. 12)<br />
PATCH CATEGORY Category Patch category (*1)<br />
PATCH CLOCK Source Patch clock source PATCH, SYSETEM<br />
Tempo Patch tempo 20–250<br />
PATCH COMMON Level Level 0–127<br />
Pan Pan L64–0–63R<br />
Analog Feel Analog feel depth 0–127<br />
Octave Octave shift -3–0–+3<br />
Stretch Stretch tune depth OFF, 1, 2, 3<br />
Priority Voice priority LAST, LOUDEST<br />
VelRang Velocity range switch OFF, ON<br />
VELOCITY Lower Velocity range lower 1–Upper T<br />
Upper Velocity range upper Lower–127 T<br />
Cross Fade Velocity cross fade 0–127 T<br />
KEY RANG Lower Key range lower C-1–Upper T<br />
Upper Key range upper Lower–G9 T<br />
STRUCT Type Structure type 1–10 T<br />
Booster Booster gain 0, +6, +12, +18 dB T<br />
*1: NO ASSIGN, AC.PIANO, EL.PIANO, KEYBOARDS, BELL, MALLET, ORGAN, ACCORDION, HARMONICA, AC.GUITAR, EL.GUITAR, DIST.GUITAR, BASS,<br />
SYNTH BASS, STRINGS, ORCHESTRA, HIT&STAB, WIND, FLUTE, AC.BRASS, SYNTH BRASS, SAX, HARD LEAD, SOFT LEAD, TECHNO SYNTH,<br />
PULSATING, SYNTH FX, OTHER SYNTH, BRIGHT PAD, SOFT PAD, VOX, PLUCKED, ETHNIC, FRETTED, PERCUSSION, SOUND FX, BEAT&GROOVE,<br />
DRUMS, COMBINATION<br />
EFFECTS Group (p. 71)<br />
Display Parameter Value<br />
OUTPUT Output Assign Output assign MIX, EFX T<br />
Output level 0–127 T<br />
Chorus Chorus send level 0–127 T<br />
Reverb Reverb send level 0–127 T<br />
PATCH EFX TYPE Type EFX type (*1)<br />
PATCH EFX PRM (*1) Patch EFX parameter<br />
PATCH EFX OUT Mix Out EFX output level 0–127<br />
Chorus Chorus send level 0–127<br />
Reverb Reverb send level 0–127<br />
PATCH EFX CTRL — EFX control source1, 2 (*2)<br />
— EFX control depth1, 2 -63–+63<br />
PATCH CHORUS Rate Chorus rate 0–127<br />
Depth Chorus depth 0–127<br />
Delay Chorus pre delay 0–127<br />
Fbk Chorus feedback level 0–127<br />
Level Chorus level 0–127<br />
Out Chorus output assign MIX, REV, M+R<br />
PATCH REVERB Type Reverb/Delay type ROOM1, ROOM2, STAGE1, STAGE2, HALL1, HALL2, DELAY, PAN-DLY<br />
Time Reverb/Delay time 0–127<br />
Fbk Delay feedback level 0–127<br />
HF Damp Reverb/Delay HF damp (*3)<br />
Level Reverb/Delay level 0–127<br />
*1: Refer to EFX parameters.<br />
*2: OFF, SYS-CTRL1, SYS-CTRL2, MODULATION, BREATH, FOOT, VOLUME, PAN, EXPRESSION, PITCH BEND, AFTERTOUCH<br />
*3: 200, 250, 315, 400, 500, 630, 800, 1000, 1250, 1600, 2000, 2500, 3150, 4000, 5000, 6300, 8000 Hz, BYPASS<br />
Appendices<br />
147
Parameter List<br />
CONTROL Group (p. 73)<br />
Display Parameter Value<br />
KEY MODE&BENDER Assign Key assign mode POLY, SOLO<br />
Legato Solo legato switch OFF, ON<br />
Bend Range Bend range down -48–0 semitone<br />
Bend range up<br />
0–+12 semitone<br />
PORTAMENTO Sw Portamento switch OFF, ON<br />
Time Portamento time 0–127<br />
Mode Portamento mode NORMAL, LEGATO<br />
Type Portamento type RATE, TIME<br />
Start Portamento start pitch PITCH, NOTE<br />
RxSWITCH Volume Receive volume switch OFF, ON T<br />
Pan Receive pan control switch OFF, CONT, KEY-ON T<br />
Pitch Bend Receive pitch bend switch OFF, ON T<br />
DAMPER Hold-1 RxSwitch Receive hold-1 switch OFF, ON T<br />
Redamper Redamper switch OFF, ON T<br />
PEAK & HOLD EfxCtrl EFX control peak/hold OFF, HOLD, PEAK<br />
Ctrl 1 Control1 peak/hold OFF, HOLD, PEAK<br />
Ctrl 2 Control2 peak/hold OFF, HOLD, PEAK<br />
Ctrl 3 Control3 peak/hold OFF, HOLD, PEAK<br />
CONTROL SOURCE Control 2 Control source 2 (*1)<br />
Control 3 Control source 3 (*1)<br />
CONTROL 1 Destination Control destination 1–4 (*2) T<br />
Depth Control depth 1–4 -63–+63 T<br />
CONTROL 2 Destination Control destination 1–4 (*2) T<br />
Depth Control depth 1–4 -63–+63 T<br />
CONTROL 3 Destination Control destination 1–4 (*2) T<br />
Depth Control depth 1–4 -63–+63 T<br />
*1: OFF, SYS-CTRL1, SYS-CTRL2, MODULATION, BREATH, FOOT, VOLUME, PAN, EXPRESSION, PITCH BEND, AFTERTOUCH, LFO1, LFO2, VELOCITY,<br />
KEYFOLLOW, PLAYMATE<br />
*2: OFF, PCH, CUT, RES, LEV, PAN, MIX, CHO, REV, PL1, PL2, FL1, FL2, AL1, AL2, pL1, pL2, L1R, L2R<br />
WAVE Group (p. 76)<br />
Display Parameter Value<br />
WAVE Group Wave group INT-A, INT-B, XP-A, XP-B, XP-C, XP-D, XP-E T<br />
Number Wave number 001–255 T<br />
Gain Wave gain -6, 0, +6, +12 dB T<br />
Switch Tone switch OFF, ON T<br />
FXM Switch Frequency cross modulation switch OFF, ON T<br />
Color Frequency cross modulation color 1–4 T<br />
Depth Frequency cross modulation depth 1–16 T<br />
TONE DELAY Mode Tone delay mode (*1) T<br />
Time Tone delay time 0–127/0–880/0–5000 (*2) T<br />
*1: NORMAL, HOLD, PLAYMATE, CLOCK-SYNC, KEY-OFF-N, KEY-OFF-D, TEMPO-SYNC<br />
*2: When the Tone Delay Mode parameter is set to “CLOCK-SYNC” this is set as a Note value.<br />
LFO Group (p. 78)<br />
Display Parameter Value<br />
LFO1 Form LFO form TRI, SIN, SAW, SQR, TRP, S&H, RND, CHS T<br />
Key Sync LFO key Sync OFF, ON T<br />
Rate LFO rate 0–127, 0–880 (*1) T<br />
ExtSync LFO external sync OFF, CLOCK T<br />
Mode LFO fade mode ON-IN, ON-OUT, OFF-IN, OFF-OUT T<br />
Delay LFO delay time 0–127 T<br />
Fade LFO fade time 0–127 T<br />
Offset LFO offset -100, -50, 0, +50, +100 T<br />
LFO2 (*2) T<br />
LFO DEPTH1:2 Pitch Pitch LFO depth 1, 2 -63–+63 T<br />
TVF TVF LFO depth 1, 2 -63–+63 T<br />
TVA TVA LFO depth 1, 2 -63–+63 T<br />
Pan Pan LFO depth 1, 2 -63–+63 T<br />
*1: When the LFO External Sync parameter is set to “CLOCK” this is set as a Note value.<br />
*2: Same as LFO1.<br />
148
Parameter List<br />
PITCH Group (p. 79)<br />
Display Parameter Value<br />
PITCH Coarse Coarse tune -48–+48 semitone T<br />
Fine Fine tune -50–+50 cent T<br />
Random Random pitch depth 0–1200 cent (*1) T<br />
Keyfollow Pitch keyfollow -100–+200 (*2) T<br />
PCH ENVELOPE Envelope Depth Pitch envelope depth -12–+12 T<br />
Velocity Sens Pitch envelope velocity sens -100–+150 T<br />
PCH TIME ENV V-T1 Pitch envelope time1 velocity sens -100–+100 (*3) T<br />
V-T4 Pitch envelope time4 velocity sens -100–+100 (*3) T<br />
Time Keyfollow Pitch envelope time keyfollow -100–+100 (*3) T<br />
PCH ENVELOPE T1, T2, T3, T4 Pitch envelope time 1–4 0–127 T<br />
L1, L2, L3, L4 Pitch envelope level 1–4 -63–+63 T<br />
*1: 0, 1, 2, 3, 4, 5, 6, 7, 8, 9, 10, 20, 30, 40, 50, 60, 70, 80, 90, 100, 200, 300, 400, 500, 600, 700, 800, 900, 1000, 1100, 1200<br />
*2: -100, -70, -50, -30, -10, 0, +10, +20, +30, +40, +50, +70, +100, +120, +150, +200<br />
*3: -100, -70, -50, -40, -30, -20, -10, 0, +10, +20, +30, +40, +50, +70, +100<br />
TVF Group (p. 80)<br />
Display Parameter Value<br />
FILTER Type Filter type OFF, LPF, BPF, HPF, PKG T<br />
Cut Cutoff frequency 0–127 T<br />
Res Resonance 0–127 T<br />
Keyfollow Cutoff frequency keyfollow -100–+200 (*1) T<br />
Env Depth TVF envelope depth -63–+63 T<br />
TVF VELOCITY V-Sens TVF envelope velocity sens -100–+150 T<br />
V-Curve TVF envelope velocity curve 1–7 T<br />
V-Resonance Resonance velocity sens -100–+150 T<br />
TVF TIME ENV V-T1 TVF envelope time1 velocity sens -100–+100 (*2) T<br />
V-T4 TVF envelope time4 velocity sens -100–+100 (*2) T<br />
Time Keyfollow TVF envelope time keyfollow -100–+100 (*2) T<br />
TVF ENVELOPE T1, T2, T3, T4 TVF envelope time 1–4 0–127 T<br />
L1, L2, L3, L4 TVF envelope level 1–4 0–127 T<br />
*1:-100, -70, -50, -30, -10, 0, +10, +20, +30, +40, +50, +70, +100, +120, +150, +200<br />
*2: -100, -70, -50, -40, -30, -20, -10, 0, +10, +20, +30, +40, +50, +70, +100<br />
TVA Group (p. 81)<br />
Display Parameter Value<br />
TVA Level Level 0–127 T<br />
Pan Pan L64–0–63R T<br />
V-Sens TVA envelope velocity sens -100–+150 T<br />
V-Curve TVA envelope velocity curve 1–7 T<br />
BIAS Bias Bias level -100–+100 (*1) T<br />
Point Bias point C-1–G9 T<br />
Direction Bias direction LOWER, UPPER, LOWER&UPPER, ALL T<br />
PAN MODULATE Keyfollow Pan keyfollow -100–+100 (*1) T<br />
Random Random pan depth 0–63 T<br />
Alternate Alternate pan depth L63–0–63R T<br />
TVA TIME ENV V-T1 TVA envelope time1 velocity sens -100–+100 (*1) T<br />
V-T4 TVA envelope time4 velocity sens -100–+100 (*1) T<br />
Time Keyfollow TVA envelope time keyfollow -100–+100 (*1) T<br />
TVA ENVELOPE T1, T2, T3, T4 TVA envelope time 1–4 0–127 T<br />
L1, L2, L3 TVA envelope level 1–3 0–127 T<br />
*1: -100, -70, -50, -40, -30, -20, -10, 0, +10, +20, +30, +40, +50, +70, +100<br />
Appendices<br />
149
Parameter List<br />
■ Performance Parameters<br />
* Parameters that can be set independently for each Part are indicated by “P.”<br />
COMMON Group (p. 83)<br />
Display Parameter Value<br />
PERFORM NAME — Performance name ASCII Characters (max. 12)<br />
PERFORM CLOCK Source Performance clock source PERFORM, SYSTEM<br />
Tempo Performance tempo 20–250<br />
PERFORM COMMON Key Mode Key mode LAYER, SINGLE<br />
Key Range key range switch OFF, ON<br />
KEY RANG Lower Key range lower C-1–Upper P<br />
Upper Key range upper Lower–G9 P<br />
KEYBOARD Octave Shift Octave shift -3–+3 P<br />
EFFECTS Group (p. 84)<br />
Display Parameter Value<br />
OUTPUT Output Assign Output assign MIX, EFX, PATCH P<br />
Output level 0–127 P<br />
Chorus Chorus send level 0–127 P<br />
Reverb Reverb send level 0–127 P<br />
PERFORM EFX TYPE Type EFX type (*1)<br />
Source EFX source PERFORM, 1–9, 11–16<br />
PERFORM EFX PRM (*1) Performance EFX parameters<br />
PERFORM EFX OUT Mix Out EFX output level 0–127<br />
Chorus Chorus send level 0–127<br />
Reverb Reverb send level 0–127<br />
PERFORM EFX CTRL EFX control source 1 (*2)<br />
EFX control depth 1 -63–+63<br />
EFX control source 2 (*2)<br />
EFX control depth 2 -63–+63<br />
PERFORM CHORUS Rate Chorus rate 0–127<br />
Depth Chorus depth 0–127<br />
Delay Chorus pre delay 0–127<br />
Fbk Chorus feedback level 0–127<br />
Level Chorus level 0–127<br />
Out Chorus output assign MIX, REV, M+R<br />
PERFORM REVERB Type Reverb/Delay type ROOM1, ROOM2, STAGE1, STAGE2, HALL1, HALL2, DELAY, PAN-DLY<br />
Time Reverb/Delay time 0–127<br />
Fbk Delay feedback level 0–127<br />
HF Damp Reverb/Delay HF damp (*3)<br />
Level Reverb/Delay level 0–127<br />
*1: Refer to EFX parameters.<br />
*2: OFF, SYS-CTRL1, SYS-CTRL2, MODULATION, BREATH, FOOT, VOLUME, PAN, EXPRESSION, PITCH BEND, AFTERTOUCH<br />
*3: 200, 250, 315, 400, 500, 630, 800, 1000, 1250, 1600, 2000, 2500, 3150, 4000, 5000, 6300, 8000 Hz, BYPASS<br />
MIDI Group (p. 86)<br />
Display Parameter Value<br />
MIDI Channel MIDI channel 1–16 P<br />
Rx Receive switch OFF, ON P<br />
Tx Transmit switch OFF, ON P<br />
Local Local switch OFF, ON P<br />
RxSWITCH Volume Receive volume switch OFF, ON P<br />
Hold-1 Receive hold-1 switch OFF, ON P<br />
Program Change Receive program change switch OFF, ON P<br />
TRANSMIT BankSelectGroup Transmit bank select group PATCH, BS1–BS7 P<br />
Transmit Volume Transmit volume 0–127, OFF P<br />
150
Parameter List<br />
PART Group (p. 87)<br />
Display Parameter Value<br />
PATCH Group Patch group USER, PR-A, PR-B, PR-C, GM, PR-E,<br />
XP-A, XP-B, XP-C, XP-D, XP-E<br />
P<br />
Number Patch number 001–256 P<br />
SETTING Level Level 0–127 P<br />
Pan Pan L64–0–63R P<br />
Coarse Coarse tune -48–+48 semitone P<br />
Fine Fine tune -50–+50 cent P<br />
RESERVE Voice Reserve Voice reserve 0–64 P<br />
INFORMATION Group (p. 87)<br />
Display Parameter Value<br />
INFO Mod Modulation information 0–127 P<br />
Breath Breath information 0–127 P<br />
Foot Foot information 0–127 P<br />
Vol Volume information 0–127 P<br />
Pan Pan information L64–0–63R P<br />
Exp Expression information 0–127 P<br />
Hold Hold1 information 0–127 P<br />
Bend Pitch bend information -128–+127 P<br />
Aft Aftertouch information 0–127 P<br />
Sys1 System control 1 information 0–127/-128–+127 P<br />
Sys2 System control 2 information 0–127/-128–+127 P<br />
Voices Voice information 0–64 P<br />
■ Rhythm Set Parameters<br />
COMMON Group (p. 88)<br />
Display Parameter Value<br />
RHYTHM NAME — Rhythm set name ASCII Characters (max. 12)<br />
EFFECTS Group (p. 88)<br />
Display Parameter Value<br />
OUTPUT Output Assign Output assign MIX, EFX<br />
Output level 0–127<br />
Chorus Chorus send level 0–127<br />
Reverb Reverb send level 0–127<br />
PERFORM EFX TYPE Type EFX type (*1)<br />
Source EFX source PERFORM, 1–9, 11–16<br />
PERFORM EFX PRM (*1) Performance EFX parameters<br />
PERFORM EFX OUT Mix Out EFX output level 0–127<br />
Chorus Chorus send level 0–127<br />
Reverb Reverb send level 0–127<br />
PERFORM EFX CTRL EFX control source 1 (*2)<br />
EFX control depth 1 -63–+63<br />
EFX control source 2 (*2)<br />
EFX control depth 2 -63–+63<br />
PERFORM CHORUS Rate Chorus rate 0–127<br />
Depth Chorus depth 0–127<br />
Delay Chorus pre delay 0–127<br />
Fbk Chorus feedback level 0–127<br />
Level Chorus level 0–127<br />
Out Chorus output assign MIX, REV, M+R<br />
PERFORM REVERB Type Reverb/Delay type ROOM1, ROOM2, STAGE1, STAGE2, HALL1, HALL2, DELAY, PAN-DLY<br />
Time Reverb/Delay time 0–127<br />
Fbk Delay feedback level 0–127<br />
HF Damp Reverb/Delay HF damp (*3)<br />
Level Reverb/Delay level 0–127<br />
*1: Refer to EFX parameters.<br />
*2: OFF, SYS-CTRL1, SYS-CTRL2, MODULATION, BREATH, FOOT, VOLUME, PAN, EXPRESSION, PITCH BEND, AFTERTOUCH<br />
*3: 200, 250, 315, 400, 500, 630, 800, 1000, 1250, 1600, 2000, 2500, 3150, 4000, 5000, 6300, 8000 Hz, BYPASS<br />
Appendices<br />
151
Parameter List<br />
CONTROL Group (p. 90)<br />
Display Parameter Value<br />
CONTROL Bend Range Bend range 0–12<br />
Env Mode Envelope mode NO-SUS, SUSTAIN<br />
Mute Group Mute group OFF, 1–31<br />
RxSWITCH Volume Receive volume switch OFF, ON<br />
Pan Receive pan control switch OFF, CONT, KEY-ON<br />
Hold-1 Receive hold-1 switch OFF, ON<br />
WAVE Group (p. 90)<br />
Display Parameter Value<br />
WAVE Group Wave group INT-A, INT-B, XP-A, XP-B, XP-C, XP-D, XP-E<br />
Number Wave number 001–255<br />
Gain Wave gain -6, 0, +6, +12 dB<br />
Switch Key switch OFF, ON<br />
PITCH Group (p. 91)<br />
Display Parameter Value<br />
PITCH Coarse Coarse tune C-1–G9<br />
Fine Fine tune -50–+50 cent<br />
Random Random pitch depth 0–1200 cent (*1)<br />
Env Depth Pitch envelope depth -12–+12<br />
PCH VELOCITY Velocity Sens Pitch envelope velocity sens -100–+150<br />
Velocity Time Pitch envelope time velocity sens -100–+100 (*2)<br />
PCH ENVELOPE T1, T2, T3, T4 Pitch envelope time 1–4 0–127<br />
L1, L2, L3, L4 Pitch envelope level 1–4 -63–+63<br />
*1: 0, 1, 2, 3, 4, 5, 6, 7, 8, 9, 10, 20, 30, 40, 50, 60, 70, 80, 90, 100, 200, 300, 400, 500, 600, 700, 800, 900, 1000, 1100, 1200<br />
*2: -100, -70, -50, -40, -30, -20, -10, 0, +10, +20, +30, +40, +50, +70, +100<br />
TVF Group (p. 91)<br />
Display Parameter Value<br />
FILTER Type Filter type OFF, LPF, BPF, HPF, PKG<br />
Cutoff Cutoff frequency 0–127<br />
Resonance Resonance 0–127<br />
Env Depth TVF Envelope depth -63–+63<br />
TVF VELOCITY V-Sens TVF envelope velocity sens -100–+150<br />
V-Time TVF envelope time velocity sens -100–+100 (*1)<br />
V-Resonance Resonance velocity sens -100–+150<br />
TVF ENVELOPE T1–4 TVF envelope time 1–4 0–127<br />
L1–4 TVF envelope level 1–4 0–127<br />
*2: -100, -70, -50, -40, -30, -20, -10, 0, +10, +20, +30, +40, +50, +70, +100<br />
TVA Group (p. 92)<br />
Display Parameter Value<br />
TVA Level Level 0–127<br />
Pan Pan L64–0–63R<br />
Random Random pan depth 0–63<br />
Alternate Alternate pan depth L63–0–63R<br />
TVA VELOCITY Velocity Sens TVA envelope velocity sens -100–+150<br />
Velocity Time TVA envelope time velocity sens -100–+100 (*1)<br />
TVA ENVELOPE T1–4 TVA envelope time 1–4 0–127<br />
L1–3 TVA envelope level 1–3 0–127<br />
*1: -100, -70, -50, -40, -30, -20, -10, 0, +10, +20, +30, +40, +50, +70, +100<br />
152
Parameter List<br />
■ GM Mode Parameters<br />
* Parameters that can be set independently for each Part are indicated by “P.”<br />
EFFECTS Group (p. 125)<br />
Display Parameter Value<br />
OUTPUT Output Assign Output assign MIX, EFX P<br />
Output level 0–127 P<br />
Chorus Chorus send level 0–127 P<br />
Reverb Reverb send level 0–127 P<br />
GM EFX TYPE Type EFX type (*1)<br />
GM EFX PRM (*1) GM EFX parameters<br />
GM EFX OUT Mix Out EFX output level 0–127<br />
Chorus Chorus send level 0–127<br />
Reverb Reverb send level 0–127<br />
GM CHORUS Rate Chorus rate 0–127<br />
Depth Chorus depth 0–127<br />
Delay Chorus pre delay time 0–127<br />
Fbk Chorus feedback level 0–127<br />
Level Chorus level 0–127<br />
Out Chorus output assign MIX, REV, M+R<br />
GM REVERB Type Reverb/Delay type ROOM1, ROOM2, STAGE1, STAGE2, HALL1, HALL2, DELAY, PAN-DLY<br />
Time Reverb/Delay time 0–127<br />
Fbk Delay Feedback level 0–127<br />
HF Damp Reverb/Delay HF damp (*2)<br />
Level Reverb/Delay level 0–127<br />
*1: Refer to EFX parameters.<br />
*2: 200, 250, 315, 400, 500, 630, 800, 1000, 1250, 1600, 2000, 2500, 3150, 4000, 5000, 6300, 8000 Hz, BYPASS<br />
PART Group (p. 127)<br />
Display Parameter Value<br />
PATCH Number GMPatch number 001–128 P<br />
SETTING Volume Volume 0–127 P<br />
Pan Pan L64–0–63R P<br />
Coarse Coarse tune -48–+48 semitone P<br />
Fine Fine tune -50–+50 cent P<br />
INFORMATION Group (p. 127)<br />
Display Parameter Value<br />
INFO Mod Modulation information 0–127 P<br />
Breath Breath information 0–127 P<br />
Foot Foot information 0–127 P<br />
Vol Volume information 0–127 P<br />
Pan Pan information L64–0–63R P<br />
Exp Expression information 0–127 P<br />
Hold Hold1 information 0–127 P<br />
Bend Pitch bend information -128–+127 P<br />
Aftertouch Aftertouch information 0–127 P<br />
Voices Voice information 0–64 P<br />
Appendices<br />
153
Parameter List<br />
■ EFX Parameters<br />
1: STEREO-EQ (p. 93)<br />
Parameter<br />
Value<br />
LowFreq Low frequency 200, 400 Hz<br />
LowGain Low gain -15–+15 dB<br />
Hi Freq High frequency 4000, 8000 Hz<br />
Hi Gain Hi gain -15–+15 dB<br />
P1 Freq Peaking1 frequency 200–8000Hz (*1)<br />
P1 Q Peaking1 Q 0.5, 1.0, 2.0, 4.0, 8.0<br />
P1 Gain Peaking1 gain -15–+15 dB<br />
P2 Freq Peaking2 frequency 200–8000 Hz (*1)<br />
P2 Q Peaking2 Q 0.5, 1.0, 2.0, 4.0, 8.0<br />
P2 Gain Peaking2 gain -15–+15 dB<br />
Level Output level 0–127<br />
*1: 200, 250, 315, 400, 500, 630, 800, 1000, 1250, 1600, 2000, 2500, 3150,<br />
4000, 5000, 6300, 8000 Hz<br />
2: OVERDRIVE (p. 93)<br />
Parameter<br />
Value<br />
Drive Drive 0–127<br />
Level Output level 0–127<br />
LowGain Low gain -15–+15 dB<br />
Hi Gain High gain -15–+15 dB<br />
AmpType Amp simulator type SMALL, BUILT-IN,<br />
2-STACK, 3-STACK<br />
Pan Output pan L64–0–63R<br />
3: DISTORTION (p. 93)<br />
Parameter<br />
Value<br />
Drive Drive 0–127<br />
Level Output level 0–127<br />
LowGain Low gain -15–+15 dB<br />
Hi Gain High gain -15–+15 dB<br />
AmpType Amp simulator type SMALL, BUILT-IN,<br />
2-STACK, 3-STACK<br />
Pan Output pan L64–0–63R<br />
4: PHASER (p. 94)<br />
Parameter<br />
Value<br />
Manual Manual 100–8000 Hz<br />
Rate Rate 0.05–10.00 Hz<br />
Depth Depth 0–127<br />
Res Resonance 0–127<br />
Mix Mix level 0–127<br />
Pan Output pan L64–0–63R<br />
Level Output level 0–127<br />
5: SPECTRUM (p. 94)<br />
Parameter<br />
Value<br />
Band 1 Band1 gain -15–+15 dB<br />
Band 2 Band2 gain -15–+15 dB<br />
Band 3 Band3 gain -15–+15 dB<br />
Band 4 Band4 gain -15–+15 dB<br />
Band 5 Band5 gain -15–+15 dB<br />
Band 6 Band6 gain -15–+15 dB<br />
Band 7 Band7 gain -15–+15 dB<br />
Band 8 Band8 gain -15–+15 dB<br />
Q Q 0.5, 1.0, 2.0, 4.0, 8.0<br />
Pan Output pan L64–0–63R<br />
Level Output level 0–127<br />
6: ENHANCER (p. 94)<br />
Parameter<br />
Value<br />
Sens Sens 0–127<br />
Mix Mix level 0–127<br />
Low Gain Low gain -15–+15 dB<br />
Hi Gain High gain -15–+15 dB<br />
Level Output level 0–127<br />
7: AUTO-WAH (p. 95)<br />
Parameter<br />
Value<br />
Filter Filter type LPF, BPF<br />
Sens Sens 0–127<br />
Manual Manual 0–127<br />
Peak Peak 0–127<br />
Rate Rate 0.05–10.00 Hz<br />
Depth Depth 0–127<br />
Level Output level 0–127<br />
8: ROTARY (p. 95)<br />
Parameter<br />
Value<br />
LowSlow Low frequency slow rate 0.05–10.00 Hz<br />
LowFast Low frequency fast rate 0.05–10.00 Hz<br />
LowAccl Low frequency acceleration 0–15<br />
Low Lvl Low frequency level 0–127<br />
Hi Slow High frequency slow rate 0.05–10.00 Hz<br />
Hi Fast High frequency fast rate 0.05–10.00 Hz<br />
Hi Accl High frequency acceleration 0–15<br />
Hi Lvl High frequency level 0–127<br />
Separation Separation 0–127<br />
Speed Speed SLOW, FAST<br />
Level Output level 0–127<br />
9: COMPRESSOR (p. 96)<br />
Parameter<br />
Value<br />
Attack Attack 0–127<br />
Sustain Sustain 0–127<br />
Post Gain Post gain 0, +6, +12, +18 dB<br />
LowGain Low gain -15–+15 dB<br />
Hi Gain High gain -15–+15 dB<br />
Pan Output pan L64–0–63R<br />
Level Output level 0–127<br />
10: LIMITER (p. 96)<br />
Parameter<br />
Value<br />
Thresh Threshold level 0–127<br />
Ratio Compression ratio 1.5:1, 2:1, 4:1, 100:1<br />
Release Release time 0–127<br />
Gain Post gain 0, +6, +12, +18 dB<br />
LowGain Low gain -15–+15 dB<br />
Hi Gain High gain -15–+15 dB<br />
Pan Output pan L64–0–63R<br />
Level Output level 0–127<br />
11: HEXA-CHORUS (p. 96)<br />
Parameter<br />
Value<br />
Pre Dly Pre delay time 0.0–100.0 ms<br />
Rate Rate 0.05–10.00 Hz<br />
Depth Depth 0–127<br />
Dly Dev Pre delay deviation 0–20<br />
Dpt Dev Depth deviation -20–+20<br />
Pan Dev Pan deviation 0–20<br />
Balance Effect balance D100:0W–D0:100W<br />
Level Output level 0–127<br />
154
Parameter List<br />
12: TREMOLO-CHORUS (p. 97)<br />
Parameter<br />
Value<br />
Pre Dly Pre delay time 0.0–100.0 ms<br />
ChoRate Chorus rate 0.05–10.00 Hz<br />
Cho Dpt Chorus depth 0–127<br />
Phase Tremolo phase 0–180 degree<br />
TrmRate Tremolo rate 0.05–10.00 Hz<br />
Trm Sep Tremolo separation 0–127<br />
Balance Effect balance D100:0W–D0:100W<br />
Level Output level 0–127<br />
13: SPACE-D (p. 97)<br />
Parameter<br />
Value<br />
Pre Dly Pre delay time 0.0–100.0 ms<br />
Rate Rate 0.05–10.00 Hz<br />
Depth Depth 0–127<br />
Phase Phase 0–180 degree<br />
LowGain Low gain -15–+15 dB<br />
Hi Gain High gain -15–+15 dB<br />
Balance Effect balance D100:0W–D0:100W<br />
Level Output level 0–127<br />
14: STEREO-CHORUS (p. 97)<br />
Parameter<br />
Value<br />
Pre Dly Pre delay time 0.0–100.0 ms<br />
Rate Rate 0.05–10.00 Hz<br />
Depth Depth 0–127<br />
Phase Phase 0–180 degree<br />
Filter Type Filter type OFF, LPF, HPF<br />
Cutoff Cutoff frequency 200–8000 Hz (*1)<br />
LowGain Low gain -15–+15 dB<br />
Hi Gain High gain -15–+15 dB<br />
Balance Effect balance D100:0W–D0:100W<br />
Level Output level 0–127<br />
*1: 200, 250, 315, 400, 500, 630, 800, 1000, 1250, 1600, 2000, 2500, 3150,<br />
4000, 5000, 6300, 8000 Hz<br />
15: STEREO-FLANGER (p. 98)<br />
Parameter<br />
Value<br />
Pre Dly Pre delay time 0.0–100.0 ms<br />
Rate Rate 0.05–10.00 Hz<br />
Depth Depth 0–127<br />
Fbk Feedback level -98–+98%<br />
Phase Phase 0–180 degree<br />
Filter Type Filter type OFF, LPF, HPF<br />
Cutoff Cutoff frequency 200–8000 Hz (*1)<br />
LowGain Low gain -15–+15 dB<br />
Hi Gain High gain -15–+15 dB<br />
Balance Effect balance D100:0W–D0:100W<br />
Level Output level 0–127<br />
*1: 200, 250, 315, 400, 500, 630, 800, 1000, 1250, 1600, 2000, 2500, 3150,<br />
4000, 5000, 6300, 8000 Hz<br />
17: STEREO-DELAY (p. 99)<br />
Parameter<br />
Value<br />
Delay L Delay time left 0.0–500.0 ms<br />
Delay R Delay time right 0.0–500.0 ms<br />
Fbk Feedback level -98–+98%<br />
Mode Feedback mode NORMAL, CROSS<br />
Phase L Feedback phase left NORMAL, INVERT<br />
Phase R Feedback phase right NORMAL, INVERT<br />
HF Damp HF damp 200–8000 Hz,<br />
BYPASS (*1)<br />
LowGain Low gain -15–+15 dB<br />
Hi Gain High gain -15–+15 dB<br />
Balance Effect balance D100:0W–D0:100W<br />
Level Output level 0–127<br />
*1: 200, 250, 315, 400, 500, 630, 800, 1000, 1250, 1600, 2000, 2500, 3150,<br />
4000, 5000, 6300, 8000 Hz, BYPASS<br />
18: MODULATION-DELAY (p. 99)<br />
*ParameterValue<br />
Delay L Delay time left 0.0–500.0 ms<br />
Delay R Delay time right 0.0–500.0 ms<br />
Fbk Feedback level -98–+98%<br />
Mode Feedback mode NORMAL, CROSS<br />
Rate Rate 0.05–10.00 Hz<br />
Depth Depth 0–127<br />
Phase Phase 0–180 degree<br />
HF Damp HF damp 200–8000 Hz,<br />
BYPASS (*1)<br />
LowGain Low gain -15–+15 dB<br />
Hi Gain High gain -15–+15 dB<br />
Balance Effect balance D100:0W–D0:100W<br />
Level Output level 0–127<br />
*1: 200, 250, 315, 400, 500, 630, 800, 1000, 1250, 1600, 2000, 2500, 3150,<br />
4000, 5000, 6300, 8000 Hz, BYPASS<br />
19: TRIPLE-TAP-DELAY (p. 100)<br />
Parameter<br />
Value<br />
Delay C Delay time center 200–1000 ms, note<br />
Delay L Delay time left 200–1000 ms, note<br />
Delay R Delay time right 200–1000 ms, note<br />
Fbk Feedback level -98–+98%<br />
Level C Center level 0–127<br />
Level L Left level 0–127<br />
Level R Right level 0–127<br />
HF Damp HF damp 200–8000 Hz,<br />
BYPASS (*1)<br />
LowGain Low gain -15–+15 dB<br />
Hi Gain High gain -15–+15 dB<br />
Balance Effect balance D100:0W–D0:100W<br />
Level Output level 0–127<br />
*1: 200, 250, 315, 400, 500, 630, 800, 1000, 1250, 1600, 2000, 2500, 3150,<br />
4000, 5000, 6300, 8000 Hz, BYPASS<br />
16: STEP-FLANGER (p. 98)<br />
Parameter<br />
Value<br />
Pre Dly Pre delay time 0.0–100.0 ms<br />
Rate Rate 0.05–10.00 Hz<br />
Depth Depth 0–127<br />
Fbk Feedback level -98–+98%<br />
Phase Phase 0–180 degree<br />
Step Rate Step rate 0.10–20.00 Hz, note<br />
LowGain Low gain -15–+15 dB<br />
Hi Gain High gain -15–+15 dB<br />
Balance Effect balance D100:0W–D0:100W<br />
Level Output level 0–127<br />
Appendices<br />
155
Parameter List<br />
20: QUADRUPLE-TAP-DELAY (p. 101)<br />
Parameter<br />
Value<br />
Delay 1 Delay time 1 200–1000 ms, note<br />
Delay 2 Delay time 2 200–1000 ms, note<br />
Delay 3 Delay time 3 200–1000 ms, note<br />
Delay 4 Delay time 4 200–1000 ms, note<br />
Level 1 Level 1 0–127<br />
Level 2 Level 2 0–127<br />
Level 3 Level 3 0–127<br />
Level 4 Level 4 0–127<br />
Fbk Feedback level -98–+98%<br />
HF Damp HF damp 200–8000 Hz,<br />
BYPASS (*1)<br />
Balance Effect balance D100:0W–D0:100W<br />
Level Output level 0–127<br />
*1: 200, 250, 315, 400, 500, 630, 800, 1000, 1250, 1600, 2000, 2500, 3150,<br />
4000, 5000, 6300, 8000 Hz, BYPASS<br />
21: TIME-CONTROL-DELAY (p. 101)<br />
Parameter<br />
Value<br />
Delay Delay time 200–1000 ms<br />
Accel Acceleration 0–15<br />
Fbk Feedback level -98–+98%<br />
HF Damp HF damp 200–8000 Hz,<br />
BYPASS (*1)<br />
Pan Output pan L64–0–63R<br />
LowGain Low gain -15–+15 dB<br />
Hi Gain High gain -15–+15 dB<br />
Balance Effect balance D100:0W–D0:100W<br />
Level Output level 0–127<br />
*1: 200, 250, 315, 400, 500, 630, 800, 1000, 1250, 1600, 2000, 2500, 3150,<br />
4000, 5000, 6300, 8000 Hz, BYPASS<br />
22: 2 VOICE-PITCH-SHIFTER (p. 102)<br />
Parameter<br />
Value<br />
CoarseA Coarse pitch A -24–+12 semitone<br />
Fine A Fine pitch A -100–+100 cent<br />
Pan A Output pan A L64–0–63R<br />
PreDlyA Pre delay time A 0.0–500.0 ms<br />
CoarseB Coarse pitch B -24–+12 semitone<br />
Fine B Fine pitch B -100–+100 cent<br />
Pan B Output pan B L64–0–63R<br />
PreDlyB Pre delay time B 0.0–500.0 ms<br />
Mode Pitch shifter mode 1, 2, 3, 4, 5<br />
Lvl Bal Level balance A100:0B–A0:100B<br />
Balance Effect balance D100:0W–D0:100W<br />
Level Output level 0–127<br />
23: FBK-PITCH-SHIFTER (p. 102)<br />
Parameter<br />
Value<br />
Coarse Coarse pitch -24–+12 semitone<br />
Fine Fine pitch -100–+100 cent<br />
Fbk Feedback level -98–+98%<br />
Pre Dly Pre delay time 0.0–500.0 ms<br />
Mode Pitch shifter mode 1, 2, 3, 4, 5<br />
Pan Output pan L64–0–63R<br />
LowGain Low gain -15–+15 dB<br />
Hi Gain High gain -15–+15 dB<br />
Balance Effect balance D100:0W–D0:100W<br />
Level Output level 0–127<br />
24: REVERB (p. 103)<br />
Parameter<br />
Value<br />
Type Reverb type ROOM1, ROOM2,<br />
STAGE1, STAGE2,<br />
HALL1, HALL2<br />
Pre Dly Pre delay time 0.0–100.0 ms<br />
Time Gate time 0–127<br />
HF Damp HF damp 200–8000 Hz,<br />
BYPASS (*1)<br />
LowGain Low gain -15–+15 dB<br />
Hi Gain High gain -15–+15 dB<br />
Balance Effect balance D100:0W–D0:100W<br />
Level Output level 0–127<br />
*1: 200, 250, 315, 400, 500, 630, 800, 1000, 1250, 1600, 2000, 2500, 3150,<br />
4000, 5000, 6300, 8000 Hz, BYPASS<br />
25: GATE-REVERB (p. 103)<br />
Parameter<br />
Value<br />
Type Gate-Reverb type NORMAL, REVERSE,<br />
SWEEP1, SWEEP2<br />
Pre Dly Pre delay time 0.0–100.0 ms<br />
Gate Time Gate time 5–500 ms<br />
LowGain Low gain -15–+15 dB<br />
Hi Gain High gain -15–+15 dB<br />
Balance Effect balance D100:0W–D0:100W<br />
Level Output level 0–127<br />
26: OVERDRIVE→CHORUS (p. 103)<br />
Parameter<br />
Value<br />
OD Drive Drive 0–127<br />
OD Pan Over drive pan L64–0–63R<br />
Cho Dly Chorus pre delay time 0.0–100.0 ms<br />
ChoRate Chorus Rate 0.05–10.00 Hz<br />
Chorus Depth Chorus depth 0–127<br />
Chorus Balance Chorus balance<br />
D100:0W–D0:100W<br />
Level Output level 0–127<br />
27: OVERDRIVE→FLANGER (p. 104)<br />
Parameter<br />
Value<br />
OD Drive Drive 0–127<br />
OD Pan Over drive pan L64–0–63R<br />
Flg Dly Flanger pre delay time 0.0–100.0 ms<br />
FlgRate Flanger rate 0.05–10.00 Hz<br />
Flg Dpt Flanger depth 0–127<br />
Flg Fbk Flanger feedback level -98–+98%<br />
Flanger Balance Flanger balance<br />
D100:0W–D0:100W<br />
Level Output level 0–127<br />
28: OVERDRIVE→DELAY (p. 104)<br />
Parameter<br />
Value<br />
OD Drive Drive 0–127<br />
OD Pan Over drive pan L64–0–63R<br />
DlyTime Delay time 0.0–500.0 ms<br />
Dly Fbk Delay feedback level -98–+98%<br />
Delay HF Damp Delay HF damp 200–8000 Hz,<br />
BYPASS (*1)<br />
Delay Balance Delay balance D100:0W–D0:100W<br />
Level Output level 0–127<br />
*1: 200, 250, 315, 400, 500, 630, 800, 1000, 1250, 1600, 2000, 2500, 3150,<br />
4000, 5000, 6300, 8000 Hz, BYPASS<br />
156
Parameter List<br />
29: DISTORTION→CHORUS (p. 104)<br />
The parameters are essentially the same as "26: OVERDRIVE →CHORUS,"<br />
with the exception of the following two.<br />
OD Drive→Dist Drive, OD Pan →Dist Pan<br />
30: DISTORTION→FLANGER (p. 105)<br />
The parameters are essentially the same as "27: OVERDRIVE →FLANGER,"<br />
with the exception of the following two.<br />
OD Drive→Dist Drive, OD Pan →Dist Pan<br />
31: DISTORTION→DELAY (p. 105)<br />
The parameters are essentially the same as "28: OVERDRIVE →DELAY," with<br />
the exception of the following two.<br />
OD Drive→Dist Drive, OD Pan →Dist Pan<br />
32: ENHANSER→CHORUS (p. 105)<br />
Parameter<br />
Value<br />
Enhancer Sens Enhancer sens 0–127<br />
Enhancer Mix Enhancer mix level 0–127<br />
Cho Dly Chorus pre delay time 0.0–100.0 ms<br />
ChoRate Chorus rate 0.05–10.00 Hz<br />
Chorus Depth Chorus depth 0–127<br />
Chorus Balance Chorus balance<br />
D100:0W–D0:100W<br />
Level Output level 0–127<br />
33: ENHANSER→FLANGER (p. 105)<br />
Parameter<br />
Value<br />
Enhancer Sens Enhancer sens 0–127<br />
Enhancer Mix Enhancer mix level 0–127<br />
Flg Dly Flanger pre delay time 0.0–100.0 ms<br />
FlgRate Flanger rate 0.05–10.00 Hz<br />
Flg Dpt Flanger depth 0–127<br />
Flg Fbk Flanger feedback level -98–+98%<br />
Flanger Balance Flanger balance<br />
D100:0W–D0:100W<br />
Level Output level 0–127<br />
34: ENHANSER→DELAY (p. 106)<br />
Parameter<br />
Value<br />
Enhancer Sens Enhancer sens 0–127<br />
Enhancer Mix Enhancer mix level 0–127<br />
Delay Delay time 0.0–500.0 ms<br />
Dly Fb Delay feedback level -98–+98%<br />
Delay HF Damp Delay HF damp 200–8000 Hz,<br />
BYPASS (*1)<br />
Delay Balance Delay balance D100:0W–D0:100W<br />
Level Output level 0–127<br />
*1: 200, 250, 315, 400, 500, 630, 800, 1000, 1250, 1600, 2000, 2500, 3150,<br />
4000, 5000, 6300, 8000 Hz, BYPASS<br />
36: FLANGER→DELAY (p. 106)<br />
Parameter<br />
Value<br />
Flg Dly Flanger pre delay time 0.0–100.0 ms<br />
FlgRate Flanger rate 0.05–10.00 Hz<br />
Flg Dpt Flanger depth 0–127<br />
Flg Fbk Flanger feedback level -98–+98%<br />
Flg Bal Flanger balance D100:0W–D0:100W<br />
DlyTime Delay time 0.0–500.0 ms<br />
Dly Fbk Delay feedback level -98–+98%<br />
HF Damp HF damp 200–8000 Hz,<br />
BYPASS (*1)<br />
Delay Balance Delay balance D100:0W–D0:100W<br />
Level Output level 0–127<br />
*1: 200, 250, 315, 400, 500, 630, 800, 1000, 1250, 1600, 2000, 2500, 3150,<br />
4000, 5000, 6300, 8000 Hz, BYPASS<br />
37: CHORUS→FLANGER (p. 107)<br />
Parameter<br />
Value<br />
Cho Dly Chorus pre delay time 0.0–100.0 ms<br />
ChoRate Chorus rate 0.05–10.00 Hz<br />
Cho Dpt Chorus depth 0–127<br />
Cho Bal Chorus balance D100:0W–D0:100W<br />
Flg Dly Flanger pre delay time 0.0–100.0 ms<br />
FlgRate Flanger rate 0.05–10.00 Hz<br />
Flg Dpt Flanger depth 0–127<br />
Flg Fbk Flanger feedback level -98–+98%<br />
Flanger Balance Flanger balance<br />
D100:0W–D0:100W<br />
Level Output level 0–127<br />
38: CHORUS/DELAY (p. 107)<br />
Refer to “35: CHORUS→DELAY.”<br />
39: FLANGER/DELAY (p. 107)<br />
Refer to “36: FLANGER→DELAY.”<br />
40: CHORUS/FLANGER (p. 107)<br />
Refer to “37: CHORUS→FLANGER.”<br />
35: CHORUS→DELAY (p. 106)<br />
Parameter<br />
Value<br />
Cho Dly Chorus pre delay time 0.0–100.0 ms<br />
ChoRate Chorus rate 0.05–10.00 Hz<br />
Cho Dpt Chorus depth 0–127<br />
Cho Bal Chorus balance D100:0W–D0:100W<br />
DlyTime Delay time 0.0–500.0 ms<br />
Dly Fbk Delay Feedback level -98–+98%<br />
Delay HF Damp Delay HF damp 200–8000 Hz,<br />
BYPASS (*1)<br />
Delay Balance Delay balance D100:0W–D0:100W<br />
Level Output level 0–127<br />
*1: 200, 250, 315, 400, 500, 630, 800, 1000, 1250, 1600, 2000, 2500, 3150,<br />
4000, 5000, 6300, 8000 Hz, BYPASS<br />
Appendices<br />
157
Parameter List<br />
■ System Parameters<br />
SETUP Group (p. 108)<br />
Display Parameter Value<br />
SYSTEM SETUP LCD LCD contrast 1–10<br />
Power Up Mode Power up mode LAST-SET, DEFAULT<br />
Patch Remain Patch remain switch OFF, ON<br />
Clock Source Clock source INT, MIDI<br />
System Tempo System tempo 20–250<br />
Category Select Mode Category select mode LAST-SET, DEFAULT<br />
ARPEGGIO Group (p. 108)<br />
Display Parameter Value<br />
ARPEGGIO Style Style (*1)<br />
Octave Range Octave range -3–+3<br />
Motif Motif (*2)<br />
Beat Pattern Beat pattern (*3)<br />
Accent Rate Accent rate 0–100%<br />
Shuffle Rate Shuffle rate 50–90%<br />
Key Velocity Key velocity REAL, 1–127<br />
Part Arpeggio part 1–16<br />
Tempo Tempo 20–250<br />
*1: 1/4, 1/6, 1/8, 1/12, 1/16, 1/32, PORTAMENTO A, PORTAMENTO B, GLISSANDO, SEQUENCE A, SEQUENCE B, SEQUENCE C, SEQUENCE D, ECHO, SYNTH<br />
BASS, SLAP BASS A, SLAP BASS B, WALK BASS, RHYTHM GTR A, RHYTHM GTR B, RHYTHM GTR C, RHYTHM GTR D, RHYTHM GTR E, 3 FINGER GTR,<br />
STRUMMING GTR, KBD COMPING A, KBD COMPING B, KBD COMPING C, KBD COMPING D, KBD COMPING E, PERCUSSION, HARP, SHAMISEN, BOUND<br />
BALL, RANDOM, BOSSA NOVA, SALSA, MAMBO, LATIN PERCUSSION, SAMBA, TANGO, HOUSE, LIMITLESS<br />
*2: SINGLE UP, SINGLE DOWN, SINGLE UP&DOWN, SINGLE RANDOM, DUAL UP, DUAL DOWN, DUAL UP&DOWN, DUAL RANDOM, TRIPLE UP, TRIPLE<br />
DOWN, TRIPLE UP&DOWN, TRIPLE RANDOM, NOTE ORDER, GLISSANDO, CHORD, BASS+CHORD1–5, BASS+UP1–8, BASS+RANDOM1–3, TOP+UP1–6,<br />
BASS+UP+TOP<br />
*3: 1/4, 1/6, 1/8, 1/12, 1/16 1–3, 1/32 1–3, PORTA-A 01–11, PORTA-B 01–15, SEQ-A 1–7, SEQ-B 1–5, SEQ-C 1–2, SEQ-D 1–8, ECHO 1–3, MUTE 01–16, STRUM<br />
1–8, REGGAE1–2, REFRAIN 1–2, PERC1–4, WALKBS, HARP, BOUND, RANDOM, BOSSA NOVA, SALSA 1–4, MAMBO 1–2, CLAVE, REV CLA, GUIRO,<br />
AGOGO, SAMBA, TANGO 1–4, HOUSE 1–2<br />
CONTROL Group (p. 110)<br />
Display Parameter Value<br />
KEYBOARD Transpose Transpose switch OFF, ON<br />
Transpose value<br />
-5 (G)–+6 (F#)<br />
Sens Keyboard sens LIGHT, MEDIUM, HEAVY<br />
Vel Keyboard velocity REAL, 1–127<br />
Aft Aftertouch sens 0–100<br />
HOLD PEDAL Output Pedal output OFF, INT, MIDI, BOTH<br />
Polarity Pedal polarity STANDARD, REVERSE<br />
CONTROL PEDAL Assign Pedal assign (*1)<br />
Output Pedal output OFF, INT, MIDI, BOTH<br />
Polarity Pedal polarity STANDARD, REVERSE<br />
C1/2/3/4 ASSIGN Assign C1/C2/C3/C4 slider assign (*2)<br />
Output C1/C2/C3/C4 slider output OFF, INT, MIDI, BOTH<br />
SYS-CTRL ASSIGN Control 1/2 System control assign 1/2 (*2)<br />
CONTROL SOURCE Hold Hold control source OFF, HOLD1, SOST, SOFT, HOLD2<br />
Peak Peak control source OFF, HOLD1, SOST, SOFT, HOLD2<br />
Volume Volume control source VOLUME, VOL&EXP<br />
Aftertouch Aftertouch control source CHANNEL, POLY, CH&POLY<br />
*1: CC00–95 (except for 6, 32-63), PITCH BEND, AFTERTOUCH, PROG-UP, PROG-DOWN, TAP-TEMPO, OCT-UP, OCT-DOWN<br />
*2: CC00–95 (except for 6, 32-63), PITCH BEND, AFTERTOUCH<br />
158
Parameter List<br />
MIDI Group (p. 112)<br />
Display Parameter Value<br />
PERFORM MIDI Control Channel Performance control channel 1–16, OFF<br />
Local Local switch OFF, ON<br />
Remote Remote keyboard switch OFF, ON<br />
PATCH MIDI Rx-Ch Patch mode receive channel 1–16<br />
Tx-Ch Patch mode transmit channel 1–16, Rx-Ch, OFF<br />
Local Local switch OFF, ON<br />
Remote Remote keyboard switch OFF, ON<br />
GM MIDI Local Switch Local switch OFF, ON<br />
RECEIVE MIDI Program Change Receive program change switch OFF, ON<br />
Bank Select Receive bank select switch OFF, ON<br />
TRANSMIT MIDI Program Transmit program change switch OFF, ON<br />
Bank Sel Transmit bank select switch OFF, ON<br />
Active Sensing Transmit active sensing switch OFF, ON<br />
SYS-EXC MIDI Device# Exclusive device ID number 17–32<br />
Rx.Exc Receive exclusive switch OFF, ON<br />
Tx.Edit Transmit edit data switch OFF, ON<br />
Rx.GM Receive GM exclusive switch OFF, ON<br />
BANK-SEL GROUP Number Bank select group number 1–7<br />
Switch Bank select transmit switch OFF, ON<br />
MSB Bank select MSB 0–127<br />
LSB Bank select LSB 0–127<br />
PREVIEW Group (p. 113)<br />
Display Parameter Value<br />
PREVIEW MODE Mode Preview sound mode SINGLE, CHORD, PHRASE<br />
PREVIEW KEY Note 1–4 Preview Note Set 1–4 C-1–G9<br />
PREVIEW VELOCITY Note 1–4 Preview velocity 0–127<br />
TUNE Group (p. 113)<br />
Display Parameter Value<br />
TUNE Master Master tune 427.4–452.6 Hz<br />
Key Shift Key shift -12–+12 semitone<br />
Scale Tune Scale tune switch OFF, ON<br />
PATCH SCALE C–B Scale tune C–B -64–+63 cent<br />
KEY SCALE C–B Scale tune C–B -64–+63 cent<br />
PGM CHNG Group (p. 114)<br />
Display Parameter Value<br />
TRANSMIT P.C Channel Transmit MIDI channel 1–16<br />
P.C# Transmit program change 1–128<br />
Bnk-MSB Transmit bank select MSB 0–127<br />
Bnk-LSB Transmit bank select LSB 0–127<br />
INFO Group (p. 114)<br />
Display Parameter Value<br />
INFO EXP Expansion D Expansion board name D<br />
Expansion E Expansion board name E<br />
BATTERY CHECK Internal Battery Battery check LOW, OK<br />
Appendices<br />
159
Waveform List<br />
INT-A (Internal A)<br />
No. Name<br />
001 Ac Piano1 A<br />
002 Ac Piano1 B<br />
003 Ac Piano1 C<br />
004 Ac Piano2 pA<br />
005 Ac Piano2 pB<br />
006 Ac Piano2 pC<br />
007 Ac Piano2 fA *<br />
008 Ac Piano2 fB *<br />
009 Ac Piano2 fC *<br />
010 Piano Thump *<br />
011 Piano Up TH *<br />
012 MKS-20 P3 A<br />
013 MKS-20 P3 B<br />
014 MKS-20 P3 C<br />
015 SA Rhodes 1A<br />
016 SA Rhodes 1B<br />
017 SA Rhodes 1C<br />
018 SA Rhodes 2A<br />
019 SA Rhodes 2B<br />
020 SA Rhodes 2C<br />
021 E.Piano 1A<br />
022 E.Piano 1B<br />
023 E.Piano 1C<br />
024 E.Piano 2A<br />
025 E.Piano 2B<br />
026 E.Piano 2C<br />
027 E.Piano 3A<br />
028 E.Piano 3B<br />
029 E.Piano 3C<br />
030 MK-80 EP A<br />
031 MK-80 EP B<br />
032 MK-80 EP C<br />
033 D-50 EP A<br />
034 D-50 EP B<br />
035 D-50 EP C<br />
036 Celesta<br />
037 Music Box<br />
038 Clav 1A<br />
039 Clav 1B<br />
040 Clav 1C<br />
041 Organ 1<br />
042 Jazz Organ 1<br />
043 Jazz Organ 2<br />
044 Organ 2<br />
045 Organ 3<br />
046 Organ 4<br />
047 Rock Organ<br />
048 Dist. Organ<br />
049 Rot.Org Slw<br />
050 Rot.Org Fst<br />
051 Pipe Organ<br />
No. Name<br />
052 Nylon Gtr A<br />
053 Nylon Gtr B<br />
054 Nylon Gtr C<br />
055 6-Str Gtr A<br />
056 6-Str Gtr B<br />
057 6-Str Gtr C<br />
058 Gtr Harm A<br />
059 Gtr Harm B<br />
060 Gtr Harm C<br />
061 Comp Gtr A<br />
062 Comp Gtr B<br />
063 Comp Gtr C<br />
064 Comp Gtr A+<br />
065 Mute Gtr 1<br />
066 Mute Gtr 2A<br />
067 Mute Gtr 2B<br />
068 Mute Gtr 2C<br />
069 Pop Strat A<br />
070 Pop Strat B<br />
071 Pop Strat C<br />
072 Jazz Gtr A<br />
073 Jazz Gtr B<br />
074 Jazz Gtr C<br />
075 JC Strat A<br />
076 JC Strat B<br />
077 JC Strat C<br />
078 JC Strat A+<br />
079 JC Strat B+<br />
080 JC Strat C+<br />
081 Clean Gtr A<br />
082 Clean Gtr B<br />
083 Clean Gtr C<br />
084 Stratus A<br />
085 Stratus B<br />
086 Stratus C<br />
087 OD Gtr A<br />
088 OD Gtr B<br />
089 OD Gtr C<br />
090 OD Gtr A+<br />
091 Heavy Gtr A<br />
092 Heavy Gtr B<br />
093 Heavy Gtr C<br />
094 Heavy Gtr A+<br />
095 Heavy Gtr B+<br />
096 Heavy Gtr C+<br />
097 PowerChord A<br />
098 PowerChord B<br />
099 PowerChord C<br />
100 EG Harm<br />
101 Gt.FretNoise *<br />
102 Syn Gtr A<br />
No. Name<br />
103 Syn Gtr B<br />
104 Syn Gtr C<br />
105 Harp 1A<br />
106 Harp 1B<br />
107 Harp 1C<br />
108 Banjo A<br />
109 Banjo B<br />
110 Banjo C<br />
111 Sitar A<br />
112 Sitar B<br />
113 Sitar C<br />
114 Dulcimer A<br />
115 Dulcimer B<br />
116 Dulcimer C<br />
117 Shamisen A<br />
118 Shamisen B<br />
119 Shamisen C<br />
120 Koto A<br />
121 Koto B<br />
122 Koto C<br />
123 Pick Bass A<br />
124 Pick Bass B<br />
125 Pick Bass C<br />
126 Fingerd Bs A<br />
127 Fingerd Bs B<br />
128 Fingerd Bs C<br />
129 E.Bass<br />
130 Fretless A<br />
131 Fretless B<br />
132 Fretless C<br />
133 UprightBs 1<br />
134 UprightBs 2A<br />
135 UprightBs 2B<br />
136 UprightBs 2C<br />
137 Slap Bass 1<br />
138 Slap & Pop<br />
139 Slap Bass 2<br />
140 Slap Bass 3<br />
141 Jz.Bs Thumb<br />
142 Jz.Bs Slap 1<br />
143 Jz.Bs Slap 2<br />
144 Jz.Bs Slap 3<br />
145 Jz.Bs Pop<br />
146 Syn Bass A<br />
147 Syn Bass C<br />
148 Mini Bs 1A<br />
149 Mini Bs 1B<br />
150 Mini Bs 1C<br />
151 Mini Bs 2<br />
152 Mini Bs 2+<br />
153 MC-202 Bs A<br />
No. Name<br />
154 MC-202 Bs B<br />
155 MC-202 Bs C<br />
156 Flute 1A<br />
157 Flute 1B<br />
158 Flute 1C<br />
159 Blow Pipe<br />
160 Bottle<br />
161 Shakuhachi<br />
162 Clarinet A<br />
163 Clarinet B<br />
164 Clarinet C<br />
165 Oboe mf A<br />
166 Oboe mf B<br />
167 Oboe mf C<br />
168 Sop.Sax mf A<br />
169 Sop.Sax mf B<br />
170 Sop.Sax mf C<br />
171 Alto Sax 1A<br />
172 Alto Sax 1B<br />
173 Alto Sax 1C<br />
174 Tenor Sax A<br />
175 Tenor Sax B<br />
176 Tenor Sax C<br />
177 Bari.Sax f A<br />
178 Bari.Sax f B<br />
179 Bari.Sax f C<br />
180 Harmonica A<br />
181 Harmonica B<br />
182 Harmonica C<br />
183 Chanter<br />
184 Tpt Sect. A<br />
185 Tpt Sect. B<br />
186 Tpt Sect. C<br />
187 Trumpet 1A<br />
188 Trumpet 1B<br />
189 Trumpet 1C<br />
190 Trumpet 2A<br />
191 Trumpet 2B<br />
192 Trumpet 2C<br />
193 HarmonMute1A<br />
194 HarmonMute1B<br />
195 HarmonMute1C<br />
196 Trombone 1<br />
197 French 1A<br />
198 French 1C<br />
199 F.Horns A<br />
200 F.Horns B<br />
201 F.Horns C<br />
202 Violin A<br />
203 Violin B<br />
204 Violin C<br />
No. Name<br />
205 Cello A<br />
206 Cello B<br />
207 Cello C<br />
208 ST.Strings-R<br />
209 ST.Strings-L<br />
210 MonoStringsA<br />
211 MonoStringsC<br />
212 Pizz *<br />
213 JP Strings1A<br />
214 JP Strings1B<br />
215 JP Strings1C<br />
216 JP Strings2A<br />
217 JP Strings2B<br />
218 JP Strings2C<br />
219 Soft Pad A<br />
220 Soft Pad B<br />
221 Soft Pad C<br />
222 Fantasynth A<br />
223 Fantasynth B<br />
224 Fantasynth C<br />
225 D-50 HeavenA<br />
226 D-50 HeavenB<br />
227 D-50 HeavenC<br />
228 Fine Wine<br />
229 D-50 Brass A<br />
230 D-50 Brass B<br />
231 D-50 Brass C<br />
232 D-50 BrassA+<br />
233 DualSquare A<br />
234 DualSquare C<br />
235 DualSquareA+<br />
236 Pop Voice<br />
237 Syn Vox 1<br />
238 Syn Vox 2<br />
239 Voice Aahs A<br />
240 Voice Aahs B<br />
241 Voice Aahs C<br />
242 Voice Oohs1A<br />
243 Voice Oohs1B<br />
244 Voice Oohs1C<br />
245 Voice Oohs2A<br />
246 Voice Oohs2B<br />
247 Voice Oohs2C<br />
248 Voice Breath<br />
249 Male Ooh A<br />
250 Male Ooh B<br />
251 Male Ooh C<br />
252 Org Vox A<br />
253 Org Vox B<br />
254 Org Vox C<br />
255 Vox Noise<br />
*: Waveform marked “*” are One-shot type waveforms (non-sustaining).<br />
160
Waveform List<br />
INT-B (Internal B)<br />
No. Name<br />
001 Kalimba<br />
002 Marimba Wave<br />
003 Log Drum<br />
004 Vibes<br />
005 Bottle Hit<br />
006 Glockenspiel<br />
007 Tubular<br />
008 Steel Drums<br />
009 Fanta Bell A<br />
010 Fanta Bell B<br />
011 Fanta Bell C<br />
012 FantaBell A+<br />
013 Org Bell<br />
014 Agogo<br />
015 DIGI Bell 1<br />
016 DIGI Bell 1+<br />
017 DIGI Chime<br />
018 Wave Scan<br />
019 Wire String<br />
020 2.2 Bellwave<br />
021 2.2 Vibwave<br />
022 Spark VOX<br />
023 MMM VOX<br />
024 Lead Wave<br />
025 Synth Reed<br />
026 Synth Saw 1<br />
027 Synth Saw 2<br />
028 Syn Saw 2inv<br />
029 Synth Saw 3<br />
030 JP-8 Saw A<br />
031 JP-8 Saw B<br />
032 JP-8 Saw C<br />
033 P5 Saw A<br />
034 P5 Saw B<br />
035 P5 Saw C<br />
036 D-50 Saw A<br />
037 D-50 Saw B<br />
038 D-50 Saw C<br />
039 Synth Square<br />
040 JP-8 SquareA<br />
041 JP-8 SquareB<br />
042 JP-8 SquareC<br />
043 Synth Pulse1<br />
044 Synth Pulse2<br />
045 Triangle<br />
046 Sine<br />
047 Org Click *<br />
048 White Noise<br />
049 Pink Noise<br />
050 Metal Wind<br />
051 Wind Agogo<br />
No. Name<br />
052 Feedbackwave<br />
053 Spectrum<br />
054 BreathNoise *<br />
055 Rattles<br />
056 Ice Rain<br />
057 Tin Wave<br />
058 Anklungs<br />
059 Wind Chimes<br />
060 Orch. Hit *<br />
061 Tekno Hit *<br />
062 Back Hit *<br />
063 Philly Hit *<br />
064 Scratch 1 *<br />
065 Scratch 2<br />
066 Scratch 3 *<br />
067 Natural SN1 *<br />
068 Natural SN2 *<br />
069 Piccolo SN *<br />
070 Ballad SN *<br />
071 SN Roll *<br />
072 808 SN *<br />
073 Brush Slap *<br />
074 Brush Swish *<br />
075 Brush Roll<br />
076 Dry Stick *<br />
077 Side Stick *<br />
078 Lite Kick *<br />
079 Hybrid Kick1 *<br />
080 Hybrid Kick2 *<br />
081 Old Kick *<br />
082 Verb Kick *<br />
083 Round Kick *<br />
084 808 Kick<br />
085 Verb Tom Hi *<br />
086 Verb Tom Lo *<br />
087 Dry Tom Hi<br />
088 Dry Tom Lo<br />
089 Cl HiHat 1 *<br />
090 Cl HiHat 2 *<br />
091 Op HiHat<br />
092 Pedal HiHat *<br />
093 606 HiHat Cl *<br />
094 606 HiHat Op<br />
095 808 Claps *<br />
096 Hand Claps *<br />
097 Finger Snaps *<br />
098 Ride 1<br />
099 Ride 2<br />
100 Ride Bell 1<br />
101 Crash 1<br />
102 China Cym<br />
No. Name<br />
103 Cowbell 1 *<br />
104 Wood Block *<br />
105 Claves *<br />
106 Bongo Hi *<br />
107 Bongo Lo *<br />
108 Cga Open Hi *<br />
109 Cga Open Lo *<br />
110 Cga Mute Hi *<br />
111 Cga Mute Lo *<br />
112 Cga Slap *<br />
113 Timbale *<br />
114 Cabasa Up *<br />
115 Cabasa Down *<br />
116 Cabasa Cut *<br />
117 Maracas *<br />
118 Long Guiro *<br />
119 Tambourine *<br />
120 Open Triangl<br />
121 Cuica *<br />
122 Vibraslap<br />
123 Timpani<br />
124 Applause<br />
125 REV Orch.Hit *<br />
126 REV TeknoHit *<br />
127 REV Back Hit *<br />
128 REV PhillHit *<br />
129 REV Steel DR<br />
130 REV Tin Wave<br />
131 REV NatrlSN1 *<br />
132 REV NatrlSN2 *<br />
133 REV PiccloSN *<br />
134 REV BalladSN *<br />
135 REV Side Stk *<br />
136 REV SN Roll *<br />
137 REV Brush 1 *<br />
138 REV Brush 2 *<br />
139 REV Brush 3<br />
140 REV LiteKick *<br />
141 REV HybridK1 *<br />
142 REV HybridK2 *<br />
143 REV Old Kick *<br />
144 REV Timpani *<br />
145 REV VerbTomH *<br />
146 REV VerbTomL *<br />
147 REV DryTom H<br />
148 REV DryTom M<br />
149 REV ClHiHat1 *<br />
150 REV ClHiHat2 *<br />
151 REV Op HiHat *<br />
152 REV Pedal HH *<br />
153 REV 606HH Cl *<br />
No. Name<br />
154 REV 606HH Op *<br />
155 REV Ride<br />
156 REV Cup<br />
157 REV Crash 1 *<br />
158 REV China *<br />
159 REV DrySick *<br />
160 REV RealCLP *<br />
161 REV FingSnap *<br />
162 REV Cowbell *<br />
163 REV WoodBlck *<br />
164 REV Clve *<br />
165 REV Conga *<br />
166 REV Tamb *<br />
167 REV Maracas *<br />
168 REV Guiro *<br />
169 REV Cuica *<br />
170 REV Metro *<br />
171 Loop 1<br />
172 Loop 2<br />
173 Loop 3<br />
174 Loop 4<br />
175 Loop 5<br />
176 Loop 6<br />
177 Loop 7<br />
178 R8 Click *<br />
179 Metronome 1<br />
180 Metronome 2 *<br />
181 MC500 Beep 1 *<br />
182 MC500 Beep 2 *<br />
183 Low Saw<br />
184 Low Saw inv<br />
185 Low P5 Saw<br />
186 Low Pulse 1<br />
187 Low Pulse 2<br />
188 Low Square<br />
189 Low Sine<br />
190 Low Triangle<br />
191 Low White NZ<br />
192 Low Pink NZ<br />
193 DC<br />
*: Waveform marked “*” are One-shot type waveforms (non-sustaining).<br />
Appendices<br />
161
Waveform List<br />
XP-A (WAVE EXPANSION A: Session)<br />
No. Name<br />
001 StGrand L pA<br />
002 StGrand L pB<br />
003 StGrand L pC<br />
004 StGrand R pA<br />
005 StGrand R pB<br />
006 StGrand R pC<br />
007 StGrand L fA<br />
008 StGrand L fB<br />
009 StGrand L fC<br />
010 StGrand R fA<br />
011 StGrand R fB<br />
012 StGrand R fC<br />
013 OrcStrings A<br />
014 OrcStrings B<br />
015 OrcStrings C<br />
016 Choir Aah A<br />
017 Choir Aah B<br />
018 Choir Aah C<br />
019 Choir Mmh A<br />
020 Choir Mmh B<br />
021 Choir Mmh C<br />
022 D.Solo Gtr A<br />
023 D.Solo Gtr B<br />
024 D.Solo Gtr C<br />
025 D.MuteGt p A<br />
026 D.MuteGt p B<br />
027 D.MuteGt p C<br />
028 D.MuteGt mpA<br />
029 D.MuteGt mpB<br />
030 D.MuteGt mpC<br />
031 D.MuteGt mfA<br />
032 D.MuteGt mfB<br />
033 D.MuteGt mfC<br />
034 Clean TC 1 A<br />
035 Clean TC 1 B<br />
036 Clean TC 1 C<br />
037 Clean TC2 pA<br />
038 Clean TC2 pB<br />
039 Clean TC2 pC<br />
040 Clean TC2 fA<br />
041 Clean TC2 fB<br />
042 Clean TC2 fC<br />
No. Name<br />
043 NylonGt2 p A<br />
044 NylonGt2 p B<br />
045 NylonGt2 p C<br />
046 NylonGt2 mfA<br />
047 NylonGt2 mfB<br />
048 NylonGt2 mfC<br />
049 NylonGt2 f A<br />
050 NylonGt2 f B<br />
051 NylonGt2 f C<br />
052 P.Bass 3 A<br />
053 P.Bass 3 B<br />
054 P.Bass 3 C<br />
055 Jazz Bass3 A<br />
056 Jazz Bass3 B<br />
057 Jazz Bass3 C<br />
058 Muted Bass A<br />
059 Muted Bass B<br />
060 Muted Bass C<br />
061 Blow Sax A<br />
062 Blow Sax B<br />
063 Blow Sax C<br />
064 T.Sax hrd A<br />
065 T.Sax hrd B<br />
066 T.Sax hrd C<br />
067 Flute Vib A<br />
068 Flute Vib B<br />
069 Flute Vib C<br />
070 R&R Horns A<br />
071 R&R Horns B<br />
072 R&R Horns C<br />
073 Solo Tpt. A<br />
074 Solo Tpt. B<br />
075 Solo Tpt. C<br />
076 F.AccordionA<br />
077 F.AccordionB<br />
078 F.AccordionC<br />
079 Vibraphone A<br />
080 Vibraphone B<br />
081 Vibraphone C<br />
082 VocalWave2 A<br />
083 VocalWave2 B<br />
084 VocalWave2 C<br />
No. Name<br />
085 JP Hollo A<br />
086 JP Hollo B<br />
087 JP Hollo C<br />
088 Hard 5ths A<br />
089 Hard 5ths B<br />
090 Hard 5ths C<br />
091 Blaster A<br />
092 Blaster B<br />
093 Blaster C<br />
094 Juno Rave A<br />
095 Juno Rave B<br />
096 Juno Rave C<br />
097 Wah Gtr MENU *<br />
098 Wah Down 1<br />
099 Wah Up 1<br />
100 Wah Down 2<br />
101 Wah Up 2<br />
102 Gtr FX MENU *<br />
103 Gtr Feedback<br />
104 Gtr Scrap<br />
105 Gtr Slid Nz<br />
106 Gtr Cut Nz<br />
107 Gtr Slap<br />
108 FX MENU *<br />
109 Sm.Club<br />
110 Sm.Club fw<br />
111 Sm.Club lp<br />
112 FX Bell 1<br />
113 FX Bell 1fw<br />
114 FX Bell 2<br />
115 FX Bell 2fw<br />
116 Auhvox<br />
117 Tekno Hit 2<br />
118 Tekno Hit 3<br />
119 Tekno Loop<br />
120 FX Bomb<br />
121 Kick MENU *<br />
122 Deep Kick 3<br />
123 TD7 Kick<br />
124 Dance Kick 2<br />
125 Dance Kick 3<br />
126 Mix Kick<br />
No. Name<br />
127 Kick Ghost<br />
128 Snr&Tom MENU *<br />
129 Loose Snr<br />
130 Ring Snr<br />
131 808 Snr 2<br />
132 909 Snr 2<br />
133 909 Snr 3<br />
134 90’s Snare<br />
135 Solo Snr<br />
136 Rap Snr<br />
137 Talk Snr<br />
138 Jingle Snr<br />
139 House Snr<br />
140 Snr Buzz<br />
141 Tiny Snr 2<br />
142 Mute Snr<br />
143 909 Rim 2<br />
144 909 Tom 2<br />
145 Clp&Snp MENU *<br />
146 909 Claps 2<br />
147 HC2 Claps 1<br />
148 707 Claps<br />
149 HC2 Claps 2<br />
150 FingerSnaps2<br />
151 FingerSnap 3<br />
152 Bongo3 MENU *<br />
153 Bongo3 Low<br />
154 Bongo3 High<br />
155 Tambrin MENU *<br />
156 Tamb.Short<br />
157 Tamb.Long<br />
158 CR78 Tamb.<br />
159 Shaker MENU2 *<br />
160 626 Shaker<br />
161 Shaker 3<br />
162 Shaker 4<br />
163 Shaker 5<br />
164 REV Gt Scrap<br />
165 REV Gt SldNz<br />
166 REV Gt CutNz<br />
167 REV Gt Slap<br />
168 REV TeknHit2<br />
No. Name<br />
169 REV TeknHit3<br />
170 REV Deep K 3<br />
171 REV TD7 Kick<br />
172 REV Dance K2<br />
173 REV Dance K3<br />
174 REV Mix Kick<br />
175 REV K.Ghost<br />
176 REV LooseSnr<br />
177 REV Ring Snr<br />
178 REV 808 Snr2<br />
179 REV 909 Snr2<br />
180 REV 909 Snr3<br />
181 REV 90’s Snr<br />
182 REV Solo Snr<br />
183 REV Rap Snr<br />
184 REV Talk Snr<br />
185 REV JinglSnr<br />
186 REV HouseSnr<br />
187 REV Snr Buzz<br />
188 REV TinySnr2<br />
189 REV Mute Snr<br />
190 REV 909 Rim2<br />
191 REV 909 Tom2<br />
192 REV 909 Clp2<br />
193 REV HC2 Clp1<br />
194 REV 707 Clps<br />
195 REV HC2 Clp2<br />
196 REV F.Snaps2<br />
197 REV F.Snap 3<br />
198 REV Bongo3 L<br />
199 REV Bongo3 H<br />
200 REV Tamb.Sht<br />
201 REV Tamb.Lng<br />
202 REV CR78Tamb<br />
203 REV 626Shakr<br />
204 REV Shaker 3<br />
205 REV Shaker 4<br />
206 REV Shaker 5<br />
*:These are Menu Waveforms. Many different Waveforms are provided, each one assigned to a different key.<br />
162
Waveform List<br />
● XP-A Menu Waveforms<br />
Menu Waveforms provide multiple Waveforms, with each one assigned to a different key.<br />
97 Wah Gtr MENU<br />
Key No. Name<br />
C 4 98 Wah Down 1<br />
D 4 99 Wah Up 1<br />
E 4 100 Wah Down 2<br />
F 4 101 Wah Up 2<br />
102 Gtr FX MENU<br />
Key No. Name<br />
C 4 103 Gtr Feedback<br />
D 4 104 Gtr Scrap<br />
E 4 105 Gtr Slid Nz<br />
F 4 106 Gtr Cut Nz<br />
G 4 107 Gtr Slap<br />
108 FX MENU<br />
Key No. Name<br />
C 4 116 Auhvox<br />
D 4 109 Sm.Club<br />
E 4 110 Sm.Club fw<br />
F 4 111 Sm.Club lp<br />
G 4 112 FX Bell 1<br />
A 4 113 FX Bell 1fw<br />
B 4 114 FX Bell 2<br />
C 5 115 FX Bell 2fw<br />
D 5 117 Tekno Hit 2<br />
E 5 118 Tekno Hit 3<br />
F 5 119 Tekno Loop<br />
G 5 120 FX Bomb<br />
121 Kick MENU<br />
Key No. Name<br />
C 4 122 Deep Kick 3<br />
D 4 123 TD7 Kick<br />
E 4 124 Dance Kick 2<br />
F 4 125 Dance Kick 3<br />
G 4 126 Mix Kick<br />
A 4 127 Kick Ghost<br />
128 Snr&Tom MENU<br />
Key No. Name<br />
C 4 129 Loose Snr<br />
D 4 130 Ring Snr<br />
E 4 131 808 Snr 2<br />
F 4 132 909 Snr 2<br />
G 4 133 909 Snr 3<br />
A 4 134 90’s Snare<br />
B 4 135 Solo Snr<br />
C 5 136 Rap Snr<br />
D 5 137 Talk Snr<br />
E 5 138 Jingle Snr<br />
F 5 139 House Snr<br />
G 5 140 Snr Buzz<br />
A 5 141 Tiny Snr 2<br />
B 5 142 Mute Snr<br />
C 6 143 909 Rim 2<br />
D 6 144 909 Tom 2<br />
145 Clp&Snp MENU<br />
Key No. Name<br />
C 4 146 909 Claps 2<br />
D 4 147 HC2 Claps 1<br />
E 4 148 707 Claps<br />
F 4 149 HC2 Claps 2<br />
G 4 150 FingerSnaps2<br />
A 4 151 FingerSnap 3<br />
152 Bongo3 MENU<br />
Key No. Name<br />
C 4 153 Bongo3 Low<br />
D 4 154 Bongo3 High<br />
155 Tambrin MENU<br />
Key No. Name<br />
C 4 156 Tamb.Short<br />
D 4 157 Tamb.Long<br />
E 4 158 CR78 Tamb.<br />
159 Shaker MENU2<br />
Key No. Name<br />
C 4 160 626 Shaker<br />
D 4 161 Shaker 3<br />
E 4 162 Shaker 4<br />
F 4 163 Shaker 5<br />
Appendices<br />
163
Waveform List<br />
XP-B (WAVE EXPANSION B: Orchestral)<br />
No. Name<br />
001 Vl Sect A<br />
002 Vl Sect B<br />
003 Vl Sect C<br />
004 Va Sect A<br />
005 Va Sect B<br />
006 Va Sect C<br />
007 Vc Sect A<br />
008 Vc Sect B<br />
009 Vc Sect C<br />
010 Cb Sect<br />
011 Multi STR A<br />
012 Multi STR B<br />
013 Multi STR C<br />
014 Vl Sect Lp<br />
015 Va Sect Lp<br />
016 Vc Sect Lp<br />
017 Cb Sect Lp<br />
018 Multi STR Lp<br />
019 Vl Solo A<br />
020 Vl Solo B<br />
021 Vl Solo C<br />
022 Va Solo A<br />
023 Va Solo B<br />
024 Va Solo C<br />
025 Vc Solo A<br />
026 Vc Solo B<br />
027 Vc Solo C<br />
028 Cb Solo<br />
029 Multi Solo 1<br />
030 Multi Solo 2<br />
031 Vls Spicc A<br />
032 Vls Spicc B<br />
033 Vls Spicc C<br />
034 Vas Spicc A<br />
035 Vas Spicc B<br />
No. Name<br />
036 Vas Spicc C<br />
037 Vcs Spicc A<br />
038 Vcs Spicc B<br />
039 Vcs Spicc C<br />
040 Cbs Spicc A<br />
041 Cbs Spicc B<br />
042 Cbs Spicc C<br />
043 Multi Spicc<br />
044 VlSolo Spicc<br />
045 VcSolo Spicc<br />
046 MultSl Spicc<br />
047 STR Attack<br />
048 Pizzicato 1<br />
049 Pizzicato 2<br />
050 Piccolo<br />
051 Oboe 1A<br />
052 Oboe 1B<br />
053 Oboe 1C<br />
054 Oboe 2A<br />
055 Oboe 2B<br />
056 Oboe 2C<br />
057 Eng.Horn A<br />
058 Eng.Horn B<br />
059 Eng.Horn C<br />
060 Clarinet<br />
061 Bs Clarinet<br />
062 Multi Cla<br />
063 Bassoon<br />
064 Multi Reed<br />
065 Tnr.Recorder<br />
066 F.Horn Solo<br />
067 F.Horn Sect1<br />
068 F.Horn Sect2<br />
069 F.Horn Mute<br />
070 Trumpet 2<br />
No. Name<br />
071 Flugelhorn<br />
072 Cornet<br />
073 HarmonMute2A<br />
074 HarmonMute2B<br />
075 HarmonMute2C<br />
076 Solo Tb A<br />
077 Solo Tb B<br />
078 Solo Tb C<br />
079 Bass Tb<br />
080 Tb Sect<br />
081 Tuba<br />
082 BRS Ensemble<br />
083 Brass ff<br />
084 Full Orch.<br />
085 Orch Hit Maj<br />
086 Orch Hit Min<br />
087 Orch Hit Dim<br />
088 Choir A<br />
089 Choir B<br />
090 Choir C<br />
091 F.Hrn Sc1 Lp<br />
092 F.Hrn Sc2 Lp<br />
093 F.Hrn MuteLp<br />
094 Tb Sect Lp<br />
095 BRS Ens Lp<br />
096 ff Brass Lp<br />
097 Full Orch Lp<br />
098 Breath Wind<br />
099 Breath Atack<br />
100 Breath Whisl<br />
101 Breath Hrmon<br />
102 EuroPiano pA<br />
103 EuroPiano pB<br />
104 EuroPiano pC<br />
105 EuroPiano fA<br />
No. Name<br />
106 EuroPiano fB<br />
107 EuroPiano fC<br />
108 Harpsichord<br />
109 Celesta A<br />
110 Celesta B<br />
111 Celesta C<br />
112 Harp A<br />
113 Harp B<br />
114 Harp C<br />
115 Glockenspiel<br />
116 Xylophone<br />
117 Bass Marimba<br />
118 TubularBells<br />
119 Church Bells<br />
120 Timpani p<br />
121 Timpani f<br />
122 Timp Roll p<br />
123 Timp Roll f<br />
124 Concert SNR1<br />
125 Concert SNR2<br />
126 Concert SNR3<br />
127 SNR Roll<br />
128 Concert BD 1<br />
129 Concert BD 2<br />
130 Concert BD 3<br />
131 BD Roll<br />
132 Crash Cymbal<br />
133 Crash Cym Lp<br />
134 Cymbal Hit<br />
135 Tam Tam<br />
136 Gong<br />
137 Perc Hit 1<br />
138 Perc Hit 2<br />
139 Triangle<br />
140 Castanets 1<br />
No. Name<br />
141 Castanets 2<br />
142 Slapstick<br />
143 Ratchet<br />
144 Sleigh Bell<br />
145 Tambourine<br />
146 Wind Chime 2<br />
147 REV Hit Maj<br />
148 REV Hit Min<br />
149 REV Hit Dim<br />
150 REV Bell<br />
151 REV Timp 1<br />
152 REV Timp 2<br />
153 REV SNR 1<br />
154 REV SNR 2<br />
155 REV SNR 3<br />
156 REV BD 1<br />
157 REV BD 2<br />
158 REV BD 3<br />
159 REV BD Roll<br />
160 REV Crash<br />
161 REV Cym Hit<br />
162 REV Tam Tam<br />
163 REV Gong<br />
164 REV PercHit1<br />
165 REV PercHit2<br />
166 REV Casta 1<br />
167 REV Casta 2<br />
168 REV S.Stick<br />
169 REV Sleigh<br />
170 REV Tamb<br />
171 SNR Set<br />
172 Perc Set 1<br />
173 Perc Set 2<br />
174 Perc Set 3<br />
164
Waveform List<br />
XP-C (WAVE EXPANSION C: Techno Collection)<br />
No. Name<br />
001 PHRASE MENU *<br />
002 120:House 1 **<br />
003 120:House 2 **<br />
004 120:House 3 **<br />
005 120:TeknoBNG **<br />
006 144:Tekno BD **<br />
007 144:TeknoHAT **<br />
008 160:Drum’nBs **<br />
009 184:Gabba **<br />
010 132:Detroit **<br />
011 132:Agogo **<br />
012 116:Elect’80 **<br />
013 120:Electro1 **<br />
014 138:Electro2 **<br />
015 TB Dst Saw<br />
016 TB Dst Sqr 1<br />
017 TB Dst Sqr 2<br />
018 TB Reso Sqr1<br />
019 TB Reso Sqr2<br />
020 TB Reso Sqr3<br />
021 TB Saw<br />
022 TB Solid Saw<br />
023 TB Reso Saw<br />
024 TB Square 1<br />
025 TB Square 2<br />
026 TB Square 3<br />
027 Octa Bass<br />
028 Rave Bass<br />
029 FM Pluck Bs<br />
030 FM Slide Bs<br />
031 Solid Bass<br />
032 JUNO-60 Bass<br />
033 SH-5 Bass<br />
034 Dirty Bass<br />
035 Sub Bass<br />
036 Jungle Bass<br />
037 JP8000 Saw 1<br />
038 JP8000 Saw 2<br />
039 JP-6 Saw<br />
040 Techno Saw<br />
041 SH-1 Square<br />
042 SH-1 Pulse<br />
043 JP8000 PWM<br />
044 JP8000 FBK<br />
045 260 Sub OSC<br />
046 Dist Synth<br />
047 Dist Square<br />
048 P5 Pipe<br />
049 FM Garage<br />
050 JUNO Pluck<br />
051 Funky Synth<br />
No. Name<br />
052 JUNO Bowing<br />
053 JUNO Synth<br />
054 JX Synth<br />
055 Alpha Wave<br />
056 Killer<br />
057 Detuned Saw<br />
058 Fat JP-6<br />
059 Euro Dance<br />
060 Noisy 101<br />
061 Daft Wave<br />
062 Pizzy Techno<br />
063 Organ Pizz<br />
064 Garage Org<br />
065 FM Club Org<br />
066 Org Chord<br />
067 Dist TekGtr1<br />
068 Dist TekGtr2<br />
069 GTR FX MENU *<br />
070 JP Siren<br />
071 Cold Dress<br />
072 HIT MENU 1 *<br />
073 HIT MENU 2 *<br />
074 Beam HiQ<br />
075 Analog Bird<br />
076 ElectronFall<br />
077 Retro UFO<br />
078 Jungle Beep<br />
079 PC-2 Machine<br />
080 Dr.Beat<br />
081 Mental Perc<br />
082 May Day Perc<br />
083 PC-2 Spacers<br />
084 Techno Scene<br />
085 Pure Psycho<br />
086 TAO Hit<br />
087 Thin Beef<br />
088 Organ Hit 2<br />
089 INDUST. MENU *<br />
090 PCM Press<br />
091 ElectricDunk<br />
092 Thrill<br />
093 Drill Hit<br />
094 MachineShout<br />
095 Air Gun<br />
096 Emergency<br />
097 Buzzer<br />
098 Tonality<br />
099 Aah Formant<br />
100 Eeh Formant<br />
101 Iih Formant<br />
102 Ooh Formant<br />
No. Name<br />
103 Uuh Formant<br />
104 Dist Ooh Vox<br />
105 Talkbox<br />
106 VOCODER MENU *<br />
107 TOM MENU *<br />
108 TR909 Tom<br />
109 TR909 DstTom<br />
110 TR808 Tom<br />
111 TR606 Tom<br />
112 TR606 CmpTom<br />
113 TR707 Tom<br />
114 TR707 CmpTom<br />
115 Deep Tom<br />
116 Kick Tom<br />
117 Natural Tom<br />
118 Can Tom<br />
119 PERCUSS MENU *<br />
120 TR808 Conga1<br />
121 TR808 Conga2<br />
122 Surdo mute<br />
123 Surdo open<br />
124 TMB&SKR MENU *<br />
125 Tambourine 2<br />
126 Rattle Tamb<br />
127 TechnoShaker<br />
128 Dance Shaker<br />
129 COW&RIM MENU *<br />
130 TR808Cowbell<br />
131 TR707Cowbell<br />
132 CR78 Cowbell<br />
133 TR727 Agogo<br />
134 TR909 Rim<br />
135 TR808 Rim<br />
136 TR808 RimLng<br />
137 TR808 Claves<br />
138 CHH MENU 1 *<br />
139 CHH MENU 2 *<br />
140 TR909 CHH 1<br />
141 TR909 CHH 2<br />
142 TR909 CHH 3<br />
143 TR808 CHH 1<br />
144 TR808 CHH 2<br />
145 TR606 CHH<br />
146 TR707 CHH<br />
147 CR78 CHH<br />
148 Pop CHH<br />
149 Bristol CHH<br />
150 PHH MENU *<br />
151 TR909 PHH 1<br />
152 TR909 PHH 2<br />
153 TR808 PHH<br />
No. Name<br />
154 TR606 PHH<br />
155 TR707 PHH<br />
156 OHH MENU *<br />
157 TR909 OHH 1<br />
158 TR909 OHH 2<br />
159 TR909 OHH 3<br />
160 TR909 DstOHH<br />
161 TR808 OHH<br />
162 TR606 DstOHH<br />
163 TR707 OHH<br />
164 CR78 OHH<br />
165 R8 OHH<br />
166 Cym OHH<br />
167 CYMBAL MENU *<br />
168 TR606 Cym 1<br />
169 TR606 Cym 2<br />
170 TR606 DstCym<br />
171 TR909 Ride<br />
172 TR909DstRide<br />
173 TR707 Ride<br />
174 TR909 Crash<br />
175 TR909DsCrash<br />
176 CLAP MENU *<br />
177 TR909 Clap<br />
178 TS Clap<br />
179 Clap Stop<br />
180 TR707 Clap<br />
181 HC2 Dry Clap<br />
182 Scratch Clap<br />
183 Comp Clap<br />
184 Claptail<br />
185 SNR MENU 1 *<br />
186 SNR MENU 2 *<br />
187 SNR MENU 3 *<br />
188 SNR MENU 4 *<br />
189 SNR MENU 5 *<br />
190 TR909 Snr 1<br />
191 TR909 Snr 2<br />
192 TR909 Snr 3<br />
193 TR909 Snr 4<br />
194 TR909 Snr 5<br />
195 TR909 Snr 6<br />
196 TR909 Snr 7<br />
197 TR808 Snr 1<br />
198 TR808 Snr 2<br />
199 TR808 Snr 3<br />
200 TR808 Snr 4<br />
201 TR606 Snr 1<br />
202 TR606 Snr 2<br />
203 TR606 Snr 3<br />
204 TR707 Snr 1<br />
No. Name<br />
205 TR707 Snr 2<br />
206 CR78 Snare<br />
207 Headz Snare<br />
208 Deep Snare<br />
209 Fat Snare<br />
210 Antigua Snr<br />
211 MC Snare<br />
212 DJ Snare<br />
213 Macho Snare<br />
214 Clap Snare<br />
215 Rage Snare<br />
216 Indus Snare<br />
217 TekRok Snare<br />
218 Jungle Snr 1<br />
219 Jungle Snr 2<br />
220 Jungle Snr 3<br />
221 Jungle Snr 4<br />
222 SideStiker<br />
223 Ragga Snr 2<br />
224 Lo-Fi Snare<br />
225 Jungle Snr 5<br />
226 Urban Snare<br />
227 Sim Snare<br />
228 Roll Snare<br />
229 KICK MENU 1 *<br />
230 KICK MENU 2 *<br />
231 TR909 Kick 1<br />
232 TR909 Kick 2<br />
233 Plastic BD 1<br />
234 Plastic BD 2<br />
235 TR808 Kick 1<br />
236 TR808 Kick 2<br />
237 TR808 Kick 3<br />
238 TR606 Kick 1<br />
239 TR606 Kick 2<br />
240 TR707 Kick 1<br />
241 TR707 Kick 2<br />
242 Culture Kick<br />
243 Optic Kick<br />
244 Lo-Fi BD<br />
245 Wet Kick<br />
246 Video Kick<br />
247 JungleKick 1<br />
248 Street Kick<br />
249 Turbo Kick<br />
250 JungleKick 2<br />
251 Tekno Kick<br />
252 Sim Kick<br />
253 Amsterdam BD<br />
254 TR909 Dst BD<br />
255 Roll Kick<br />
*: These are Menu Waveforms. Many different Waveforms are provided, each one assigned to a different key.<br />
**: These are the phrase loop waveforms. The numbers (116–184) included in the wave name represent the B.P.M. (tempo) when played at the C4 key. And these<br />
waveforms can be synchronized to a device such as a sequencer.<br />
Appendices<br />
165
Waveform List<br />
● XP-C Menu Waveforms<br />
Menu Waveforms provide multiple Waveforms, with each one assigned to a different key.<br />
*: This waveform is used only in the MENU WAVEFORM.<br />
1 PHRASE MENU<br />
73 HIT MENU 2<br />
106 VOCODER MENU<br />
119 PERCUSS MENU<br />
138 CHH MENU 1<br />
Key No. Name<br />
C 4 2 120:House 1<br />
C# 4 3 120:House 2<br />
D 4 4 120:House 3<br />
D# 4 5 120:TeknoBNG<br />
E 4 6 144:Tekno BD<br />
F 4 7 144:TeknoHat<br />
F# 4 8 160:Drum’nBs<br />
G 4 9 184:Gabba<br />
G# 4 10 132:Detroit<br />
A 4 11 132:Agogo<br />
A# 4 12 116:Elect’80<br />
B 4 13 120:Electro1<br />
C 5 14 138:Electro2<br />
Key No. Name<br />
C 4 84 Techno Scene<br />
C# 1 85 Pure Psycho<br />
D 4 86 TAO Hit<br />
D# 4 87 Thin Beef<br />
E 4 Techno Tone *<br />
F 4 88 Organ Hit 2<br />
F# 4 Scratch 4 *<br />
G 4 Scratch PUSH *<br />
G# 4 Scratch PULL *<br />
A 4 Tape RWD *<br />
A# 4 Reel Stop *<br />
Key No. Name<br />
C 4 VP “ei” *<br />
C# 4 VP “ii” *<br />
D 4 VP “ai” *<br />
D# 4 VP “ou” *<br />
E 4 VP “ju” *<br />
F 4 VP “one” *<br />
F# 4 VP “two” *<br />
G 4 VP “three” *<br />
G# 4 VP “four” *<br />
A 4 VP “music” *<br />
A# 4 VP “techno” *<br />
B 4 VP “groove” *<br />
C 5 VP “dance” *<br />
C# 5 VP “funky” *<br />
D 5 VP “rhythm” *<br />
D# 5 VP “machine” *<br />
Key No. Name<br />
C 4 120 TR808 Conga1<br />
C# 4 TR808 Conga3*<br />
D 4 121 TR808 Conga2<br />
D# 4 Hi Bongo L.F *<br />
E 4 Lo Bongo L.F *<br />
F 4 Mute CGA L.F *<br />
F# 4 Hi Conga L.F *<br />
G 4 Lo Conga L.F *<br />
G# 4 122 Surdo mute<br />
A 4 123 Surdo open<br />
A# 4 H Timbal L.F *<br />
B 4 L Timbal L.F *<br />
C 5 Tabla Comp *<br />
Key No. Name<br />
C 4 140 TR909 CHH 1<br />
C# 4 141 TR909 CHH 2<br />
D 4 142 TR909 CHH 3<br />
D# 4 143 TR808 CHH 1<br />
E 4 TR808 CHH 3 *<br />
F 4 144 TR808 CHH 2<br />
F# 4 TR808 CHH 3 *<br />
G 4 145 TR606 CHH<br />
G# 4 TR606 CHH 2 *<br />
A 4 TR606 CHH 3 *<br />
A# 4 146 TR707 CHH<br />
B 4 147 CR78 CHH<br />
C 5 DM CHH *<br />
69 GTR FX MENU<br />
Key No. Name<br />
C 4 GTR FX 1 *<br />
C# 4 GTR FX 2 *<br />
72 HIT MENU 1<br />
Key No. Name<br />
C 4 74 Beam Hiq<br />
C# 4 Noise Click *<br />
D 4 Electro Prc *<br />
D# 4 75 Anaolog Bird<br />
E 4 76 ElectronFall<br />
F 4 77 Retro UFO<br />
F# 4 78 Jungle Beep<br />
G 4 79 PC-2 Machine<br />
G# 4 Dance Prc *<br />
A 4 80 Dr.Beat<br />
A# 4 CR78 Beat *<br />
B 4 81 Mental Perc<br />
C 5 82 May Day Perc<br />
# 5 83 PC-2 Spacers<br />
89 INDUST MENU<br />
Key No. Name<br />
C 4 Indust Bomb *<br />
C# 4 Door Comp *<br />
D 4 90 PCM Press<br />
D# 4 91 ElectricDunk<br />
E 4 92 Thrill<br />
F 4 93 Drill Hit<br />
F# 4 94 MachineShout<br />
G 4 95 Air Gun<br />
G# 4 Swish *<br />
A 4 96 Emergency<br />
A# 4 97 Buzzer<br />
B 4 TB reso *<br />
C 5 98 Tonality<br />
107 TOM MENU<br />
Key No. Name<br />
C 4 108 TR909 Tom<br />
C# 4 109 TR909 DstTom<br />
D 4 110 TR808 Tom<br />
D# 4 111 TR606 Tom<br />
E 4 112 TR606<br />
CmpTom<br />
F 4 113 TR707 Tom<br />
F# 4 114 TR707<br />
CmpTom<br />
G 4 115 Deep Tom<br />
G# 4 116 Kick Tom<br />
A 4 117 Natural Tom<br />
A# 4 118 Can Tom<br />
124 TMB&SKR MENU<br />
Key No. Name<br />
C 4 125 Tambourine 2<br />
C# 4 126 Battle Tamb<br />
D 4 127 TechnoShaker<br />
D# 4 128 Dance Shaker<br />
E 4 TR808 Maracas<br />
*<br />
F 4 CR78 Guiro *<br />
129 COW&RIM MENU<br />
Key No. Name<br />
C 4 130 TR808Cowbell<br />
C# 4 131 TR707Cowbell<br />
D 4 132 CR78 Cowbell<br />
D# 4 133 TR727 Agogo<br />
E 4 134 TR909 Rim<br />
F 4 TR909 Dst Rim*<br />
F# 4 135 TR808 Rim<br />
G 4 136 TR808 RimLng<br />
G# 4 TR707 Rim *<br />
A 4 Ragga Rim *<br />
A# 4 137 TR808 Claves<br />
139 CHH MENU 2<br />
Key No. Name<br />
C 4 148 Pop CHH<br />
C# 4 Pop CHH 2 *<br />
D 4 149 Bristol CHH<br />
D# 4 Lithe CHH *<br />
E 4 R8 CHH *<br />
150 PHH MENU<br />
Key No. Name<br />
C 4 151 TR909 PHH 1<br />
C# 4 152 TR909 PHH 2<br />
D 4 153 TR808 PHH<br />
D# 4 TR808 PHH 2 *<br />
E 4 154 TR606 PHH<br />
F 4 TR606 PHH 2 *<br />
F# 4 155 TR707 PHH<br />
G 4 HH Pedal *<br />
166
Waveform List<br />
156 OHH MENU<br />
176 CLAP MENU<br />
186 SNR MENU 2<br />
188 SNR MENU 4<br />
229 KICK MENU 1<br />
Key No. Name<br />
C 4 157 TR909 OHH 1<br />
C# 4 158 TR909 OHH 2<br />
D 4 TR909 OHH 4 *<br />
D# 4 159 TR909 OHH 3<br />
E 4 160 TR909 DstOHH<br />
F 4 TR808 OHH 2 *<br />
F# 4 161 TR808 OHH<br />
G 4 TR808 OHH 3 *<br />
G# 4 162 TR606 DstOHH<br />
A 4 TR707 HH *<br />
A# 4 163 TR707 OHH<br />
B 4 164 CR78 OHH<br />
C 5 DM OHH *<br />
C# 5 Hop OHH *<br />
D 5 165 R8 OHH<br />
D# 5 166 Cym OHH<br />
167 CYMBAL MENU<br />
Key No. Name<br />
C 4 168 TR606 Cym 1<br />
C# 4 169 TR606 Cym 2<br />
D 4 170 TR606 DstCym<br />
D# 4 171 TR909 Ride<br />
E 4 172 TR909DstRide<br />
F 4 173 TR707 Ride<br />
F# 4 174 TR909 Crash<br />
G 4 175 TR909DsCrash<br />
Key No. Name<br />
C 4 177 TR909 Clap<br />
C# 4 178 TS Clap<br />
D 4 TR909 Clap 2 *<br />
D# 4 179 Clap Stop<br />
E 4 808 Comp Clp *<br />
F 4 180 TR707 Clap<br />
F# 4 181 HC2 Dry Clap<br />
G 4 DM Clap *<br />
G# 4 182 Scratch Clap<br />
A 4 Real Clap *<br />
A# 4 Groove Clap *<br />
B 4 183 Comp Clap<br />
C 5 184 Claptail<br />
C# 5 909 Clp Fuzz *<br />
185 SNR MENU 1<br />
Key No. Name<br />
C 4 190 TR909 Snr 1<br />
C# 4 191 TR909 Snr 2<br />
D 4 192 TR909 Snr 3<br />
D# 4 193 TR909 Snr 4<br />
E 4 194 TR909 Snr 5<br />
F 4 TR909 Snr 8 *<br />
F# 4 195 TR909 Snr 6<br />
G 4 196 TR909 Snr 7<br />
G# 4 909 Snr Dst *<br />
A 4 909 Snr Fuzz *<br />
A# 4 TR808 Snr 5 *<br />
B 4 197 TR808 Snr 1<br />
C 5 198 TR808 Snr 2<br />
C# 5 199 TR808 Snr 3<br />
D 5 200 TR808 Snr 4<br />
D# 5 TR808 Snr 6 *<br />
Key No. Name<br />
C 4 201 TR606 Snr 1<br />
C# 4 202 TR606 Snr 2<br />
D 4 606 Snr Dst *<br />
D# 4 203 TR606 Snr 3<br />
E 4 204 TR707 Snr 1<br />
F 4 TR707 Snr 3 *<br />
F# 4 205 TR707 snr 2<br />
G 4 206 CR78 Snare<br />
G# 4 Clap Snare 2 *<br />
A 4 Jungle Snr 9 *<br />
A# 4 Rage Snare 2 *<br />
B 4 Clap Snare 3 *<br />
C 5 Clap Snare 4 *<br />
187 SNR MENU 3<br />
Key No. Name<br />
C 4 207 Headz Snare<br />
C# 4 208 Deep Snare<br />
D 4 209 Fat Snare<br />
D# 4 R&B Snare *<br />
E 4 210 Antigua Snr<br />
F 4 211 MC Snare<br />
F# 4 212 DJ Snare<br />
G 4 213 Macro Snare<br />
G# 4 Lofi Snare *<br />
A 4 Pistol Snr *<br />
A# 4 214 Clap Snare<br />
B 4 215 Rage Snare<br />
C 5 216 Indus Snare<br />
C# 5 217 TekRok Snare<br />
D 5 Indus Snare *<br />
Key No. Name<br />
C 4 218 Jungle Snr 1<br />
C# 4 219 Jungle Snr 2<br />
D 4 220 Jungle Snr 3<br />
D# 4 Jungle Snr 6 *<br />
E 4 221 Jungle Snr 4<br />
F 4 Jungle Snr 7 *<br />
F# 4 222 SideStickr<br />
G 4 Cross Snr *<br />
G# 4 Jungle Rim *<br />
A 4 223 Ragga Snr 2<br />
A# 4 224 Lo-fi Snare<br />
189 SNR MENU 5<br />
Key No. Name<br />
C 4 Jungle Snr 10 *<br />
C# 4 225 Jungle Snr 5<br />
D 4 Jungle Snr 8 *<br />
D# 4 226 Urban Snare<br />
E 4 Lite Snare *<br />
F 4 227 Sim Snare<br />
F# 4 Electro Snr *<br />
G 4 228 Roll Snare<br />
Key No. Name<br />
C 4 231 TR909 Kick 1<br />
C# 4 232 TR909 Kick 2<br />
D 4 TR909 Kick 3 *<br />
D# 4 233 Plastic BD 1<br />
E 4 234 Plastic BD 2<br />
F 4 TR909 Kick 4 *<br />
F# 4 235 TR808 Kick 1<br />
G 4 236 TR808 Kick 2<br />
G# 4 237 TR808 Kick 3<br />
A 4 238 TR606 Kick 1<br />
A# 4 239 TR606 Kick 2<br />
B 4 606 Dst Kick *<br />
C 5 240 TR707 Kick 1<br />
C# 5 241 TR707 Kick 1<br />
D 5 242 Culture Kick<br />
230 KICK MENU 2<br />
Key No. Name<br />
C 4 Hop Kick *<br />
C# 4 243 Optic Kick<br />
D 4 244 Lo-Fi BD<br />
D# 4 245 Wet Kick<br />
E 4 DR Cmp Kick *<br />
F 4 246 Video Kick<br />
F# 4 247 JungleKick 1<br />
G 4 248 Street Kick<br />
G# 4 249 Turbo Kick<br />
A 4 250 JungleKick 2<br />
A# 4 251 Tekno KIck<br />
B 4 252 Sim Kick<br />
C 5 Dance Kick 2 *<br />
C# 5 253 Amsterdam BD<br />
D 5 254 TR909 Dst BD<br />
D# 5 255 Roll Kick<br />
Appendices<br />
167
Patch List<br />
USER (User Group)<br />
No. Name Voice Key Assign<br />
001 Temple of XP 4 POLY<br />
002 Power Split 4 POLY<br />
003 Symphonique2 4 POLY<br />
004 Robot Voice 4 POLY<br />
005 St.Concert 4 POLY<br />
006 ViennaStrgs2 4 POLY<br />
007 R&R Brass 3 POLY<br />
008 Disto Stack 4 POLY<br />
009 Tone Wh.Solo 3 POLY<br />
010 Combing Slow 3 POLY<br />
011 SessionNyln2 3 POLY<br />
012 Celestial 2 4 POLY<br />
013 Poly Brs 4 POLY<br />
014 DanceStack 1 3 POLY<br />
015 303 Ow Bass 1 SOLO<br />
016 Flying Waltz 4 POLY<br />
017 Silky Way 2 POLY<br />
018 Simply June 1 POLY<br />
019 Solo Vln 1 / 4 POLY<br />
020 Super Tenor 3 POLY<br />
021 Metal Solo 4 POLY<br />
022 Creator 3 POLY<br />
023 Amsterdamer 2 POLY<br />
024 Techno Pizz 1 POLY<br />
025 SA Rhodes 3 3 POLY<br />
026 Dim Hit 1 4 POLY<br />
027 Pan Pipes 2 POLY<br />
028 JP-8 Str 1 2 POLY<br />
029 Pretty Bells 2 POLY<br />
030 Aurora 4 POLY<br />
031 Breathy Humz 2 POLY<br />
032 Full Orch.2 4 POLY<br />
033 Clean Tele 4 POLY<br />
034 Dunes 4 POLY<br />
035 Cyber-Trance 3 POLY<br />
036 RiversOfTime 4 POLY<br />
037 F.Hrn Sect5/ 3 POLY<br />
038 DreamVoices2 2 POLY<br />
039 HeavenlyPad 2 POLY<br />
040 Sop.Sax mf 2 POLY<br />
041 Sweep Clav 2 3 POLY<br />
042 Cold JX 1 POLY<br />
043 Solo Vc 1 / 3 POLY<br />
044 RichStrings2 4 POLY<br />
045 Techno Dream 3 POLY<br />
046 StateXLChord 4 SOLO<br />
047 Delicate EP 2 POLY<br />
048 Bassic Needs 2 SOLO<br />
049 Perky B 2 POLY<br />
050 SquareLead 2 2 POLY<br />
051 Earth Blow 2 POLY<br />
052 BassMarimba1 2 POLY<br />
053 Morning Lite 2 POLY<br />
054 Raggatronic 4 POLY<br />
055 Brass ff 1 2 POLY<br />
056 Acc.de Paris 2 POLY<br />
057 Oboe 1 2 POLY<br />
058 Velo Power 4 POLY<br />
059 Vintage Call 4 POLY<br />
060 Steel Away 3 POLY<br />
061 Spectrum Mod 4 POLY<br />
062 Raverborg 4 POLY<br />
063 Poly Saws 4 POLY<br />
064 Adrenaline 4 POLY<br />
No. Name Voice Key Assign<br />
065 Heirborne 4 POLY<br />
066 Trumpet 2 POLY<br />
067 Glistening 4 POLY<br />
068 Banded Jupe 1 POLY<br />
069 Singing’Mini 1 SOLO<br />
070 Chamber Ens2 2 POLY<br />
071 DanceStack 5 4 POLY<br />
072 SA Rhodes 4 4 POLY<br />
073 Breathy Brs 3 POLY<br />
074 Atmos Harp 4 POLY<br />
075 303 Bass 2 POLY<br />
076 Flute 1 POLY<br />
077 Perc Hit 2 / 4 POLY<br />
078 Oldies Organ 2 POLY<br />
079 Dulcimer 2 POLY<br />
080 Warmer Pad 2 2 POLY<br />
081 ARPsychea 4 POLY<br />
082 Choir 1 3 POLY<br />
083 Agitato Str2 4 POLY<br />
084 Pure Tibet 1 POLY<br />
085 Flugelhorn 1 2 POLY<br />
086 D-50 Stack 4 POLY<br />
087 Noiz Mania 4 POLY<br />
088 Slap Bass 2 1 SOLO<br />
089 Amazing Echo 4 POLY<br />
090 Moving Glass 1 POLY<br />
091 BluesHarp 1 POLY<br />
092 Tria Bells 4 POLY<br />
093 DirtyOrgan 2 2 POLY<br />
094 Dawn 2 Dusk 3 POLY<br />
095 Just Lovely 1 POLY<br />
096 SquareKeys 2 1 POLY<br />
097 Natural Vlns 2 POLY<br />
098 Arasian Morn 4 POLY<br />
099 Euro-Dance 2 3 POLY<br />
100 5th Pad 4 POLY<br />
101 Liquid Sky 4 POLY<br />
102 Sci-Fi Bells 3 POLY<br />
103 Nomad Perc 3 POLY<br />
104 Orn.Recorder 3 POLY<br />
105 FXM Saw Lead 4 SOLO<br />
106 Atlantis 2 4 POLY<br />
107 Taj Mahal 1 POLY<br />
108 X-hale 4 POLY<br />
109 Stacc.Heaven 4 POLY<br />
110 Altamira 2 POLY<br />
111 Hit House 4 POLY<br />
112 Solo F.Horn1 1 POLY<br />
113 Celesta 1 1 POLY<br />
114 ORBit Pad 2 POLY<br />
115 SessionBrass 4 POLY<br />
116 Sugar Bell 4 POLY<br />
117 ChristmasFlt 2 POLY<br />
118 Strobe Mode 4 POLY<br />
119 Cave 4 POLY<br />
120 TenorExprss2 2 POLY<br />
121 Impact 4 POLY<br />
122 X-Tronic Jam 4 SOLO<br />
123 WarmViolins2 4 POLY<br />
124 Rain Forest 4 POLY<br />
125 Brass Ens 4 3 POLY<br />
126 Perelandra 4 POLY<br />
127 Teknoperator 4 POLY<br />
128 Crowds 4 POLY<br />
PR-A (Preset A Group)<br />
No. Name Voice Key Assign<br />
001 64voicePiano 1 POLY<br />
002 Bright Piano 1 POLY<br />
003 Classique 2 POLY<br />
004 Nice Piano 3 POLY<br />
005 Piano Thang 3 POLY<br />
006 Power Grand 3 POLY<br />
007 House Piano 2 POLY<br />
008 E.Grand 1 POLY<br />
009 MIDIed Grand 3 POLY<br />
010 Piano Blend 3 POLY<br />
011 West Coast 4 POLY<br />
012 PianoStrings 4 POLY<br />
013 Bs/Pno+Brs 4 POLY<br />
014 Waterhodes 2 POLY<br />
015 S.A.E.P. 3 POLY<br />
016 SA Rhodes 1 4 POLY<br />
017 SA Rhodes 2 2 POLY<br />
018 Stiky Rhodes 3 POLY<br />
019 Dig Rhodes 2 POLY<br />
020 Nylon EPiano 4 POLY<br />
021 Nylon Rhodes 4 POLY<br />
022 Rhodes Mix 3 POLY<br />
023 PsychoRhodes 2 POLY<br />
024 Tremo Rhodes 4 POLY<br />
025 MK-80 Rhodes 1 POLY<br />
026 MK-80 Phaser 1 POLY<br />
027 Delicate EP 2 POLY<br />
028 Octa Rhodes1 4 POLY<br />
029 Octa Rhodes2 4 POLY<br />
030 JV Rhodes+ 4 POLY<br />
031 EP+Mod Pad 4 POLY<br />
032 Mr.Mellow 4 POLY<br />
033 Comp Clav 1 POLY<br />
034 Klavinet 4 POLY<br />
035 Winger Clav 4 POLY<br />
036 Phaze Clav 1 2 POLY<br />
037 Phaze Clav 2 1 POLY<br />
038 Phuzz Clav 2 POLY<br />
039 Chorus Clav 1 POLY<br />
040 Claviduck 2 POLY<br />
041 Velo-Rez Clv 1 POLY<br />
042 Clavicembalo 4 POLY<br />
043 Analog Clav1 1 POLY<br />
044 Analog Clav2 1 POLY<br />
045 Metal Clav 3 POLY<br />
046 Full Stops 2 POLY<br />
047 Ballad B 3 POLY<br />
048 Mellow Bars 4 POLY<br />
049 AugerMentive 3 POLY<br />
050 Perky B 2 POLY<br />
051 The Big Spin 3 POLY<br />
052 Gospel Spin 3 POLY<br />
053 Roller Spin 3 POLY<br />
054 Rocker Spin 3 POLY<br />
055 Tone Wh.Solo 3 POLY<br />
056 Purple Spin 4 POLY<br />
057 60’s LeadORG 2 POLY<br />
058 Assalt Organ 3 POLY<br />
059 D-50 Organ 2 POLY<br />
060 Cathedral 4 POLY<br />
061 Church Pipes 4 POLY<br />
062 Poly Key 3 POLY<br />
063 Poly Saws 4 POLY<br />
064 Poly Pulse 4 POLY<br />
No. Name Voice Key Assign<br />
065 Dual Profs 3 POLY<br />
066 Saw Mass 4 POLY<br />
067 Poly Split 4 POLY<br />
068 Poly Brass 3 POLY<br />
069 Stackoid 4 POLY<br />
070 Poly Rock 4 POLY<br />
071 D-50 Stack 4 POLY<br />
072 Fantasia JV 4 POLY<br />
073 Jimmee Dee 4 POLY<br />
074 Heavenals 4 POLY<br />
075 Mallet Pad 4 POLY<br />
076 Huff N Stuff 3 POLY<br />
077 Puff 1080 2 POLY<br />
078 BellVox 1080 4 POLY<br />
079 Fantasy Vox 4 POLY<br />
080 Square Keys 2 POLY<br />
081 Childlike 4 POLY<br />
082 Music Box 3 POLY<br />
083 Toy Box 2 POLY<br />
084 Wave Bells 4 POLY<br />
085 Tria Bells 4 POLY<br />
086 Beauty Bells 4 POLY<br />
087 Music Bells 2 POLY<br />
088 Pretty Bells 2 POLY<br />
089 Pulse Key 3 POLY<br />
090 Wide Tubular 4 POLY<br />
091 AmbienceVibe 4 POLY<br />
092 Warm Vibes 2 POLY<br />
093 Dyna Marimba 1 POLY<br />
094 Bass Marimba 4 POLY<br />
095 Nomad Perc 3 POLY<br />
096 Ethno Metals 4 POLY<br />
097 Islands Mlt 4 POLY<br />
098 Steelin Keys 3 POLY<br />
099 Steel Drums 1 POLY<br />
100 Voicey Pizz 3 POLY<br />
101 Sitar 2 POLY<br />
102 Drone Split 4 POLY<br />
103 Ethnopluck 4 POLY<br />
104 Jamisen 2 POLY<br />
105 Dulcimer 2 POLY<br />
106 East Melody 2 POLY<br />
107 MandolinTrem 4 POLY<br />
108 Nylon Gtr 1 POLY<br />
109 Gtr Strings 3 POLY<br />
110 Steel Away 3 POLY<br />
111 Heavenly Gtr 4 POLY<br />
112 12str Gtr 1 2 POLY<br />
113 12str Gtr 2 3 POLY<br />
114 Jz Gtr Hall 1 POLY<br />
115 LetterFrmPat 4 POLY<br />
116 Jazz Scat 3 POLY<br />
117 Lounge Gig 3 POLY<br />
118 JC Strat 1 POLY<br />
119 Twin Strats 3 POLY<br />
120 JV Strat 2 POLY<br />
121 Syn Strat 2 POLY<br />
122 Rotary Gtr 2 POLY<br />
123 Muted Gtr 1 POLY<br />
124 SwitchOnMute 2 POLY<br />
125 Power Trip 2 POLY<br />
126 Crunch Split 4 POLY<br />
127 Rezodrive 2 SOLO<br />
128 RockYurSocks 4 SOLO<br />
Voice: number of voice<br />
168
Patch List<br />
PR-B (Preset B Group)<br />
No. Name Voice Key Assign<br />
001 Dist Gtr 1 3 POLY<br />
002 Dist Gtr 2 3 POLY<br />
003 R&R Chunk 4 POLY<br />
004 Phripphuzz 1 SOLO<br />
005 Grungeroni 3 POLY<br />
006 Black Widow 4 POLY<br />
007 Velo-Wah Gtr 1 POLY<br />
008 Mod-Wah Gtr 2 POLY<br />
009 Pick Bass 1 SOLO<br />
010 Hip Bass 2 POLY<br />
011 Perc.Bass 3 SOLO<br />
012 Homey Bass 2 SOLO<br />
013 Finger Bass 1 SOLO<br />
014 Nylon Bass 2 POLY<br />
015 Ac.Upright 1 SOLO<br />
016 Wet Fretls 1 SOLO<br />
017 Fretls Dry 2 POLY<br />
018 Slap Bass 1 2 POLY<br />
019 Slap Bass 2 1 SOLO<br />
020 Slap Bass 3 1 SOLO<br />
021 Slap Bass 4 2 POLY<br />
022 4 Pole Bass 1 SOLO<br />
023 Tick Bass 4 SOLO<br />
024 House Bass 3 SOLO<br />
025 Mondo Bass 3 SOLO<br />
026 Clk AnalogBs 2 SOLO<br />
027 Bass In Face 2 POLY<br />
028 101 Bass 2 SOLO<br />
029 Noiz Bass 2 SOLO<br />
030 Super Jup Bs 2 POLY<br />
031 Occitan Bass 3 POLY<br />
032 Hugo Bass 4 SOLO<br />
033 Multi Bass 2 POLY<br />
034 Moist Bass 2 SOLO<br />
035 BritelowBass 4 SOLO<br />
036 Untamed Bass 3 SOLO<br />
037 Rubber Bass 3 SOLO<br />
038 Stereoww Bs 3 SOLO<br />
039 Wonder Bass 3 SOLO<br />
040 Deep Bass 2 POLY<br />
041 Super JX Bs 2 SOLO<br />
042 W-Bass 4 POLY<br />
043 HI-Ring Bass 3 POLY<br />
044 Euro Bass 2 SOLO<br />
045 SinusoidRave 1 SOLO<br />
046 Alternative 2 SOLO<br />
047 Acid Line 1 SOLO<br />
048 Auto TB-303 3 SOLO<br />
049 Hihat Tekno 2 POLY<br />
050 Velo Tekno 1 3 SOLO<br />
051 Raggatronic 4 POLY<br />
052 Blade Racer 4 POLY<br />
053 S&H Pad 1 POLY<br />
054 Syncrosonix 3 POLY<br />
055 Fooled Again 1 POLY<br />
056 Alive 3 POLY<br />
057 Velo Tekno 2 2 POLY<br />
058 Rezoid 4 POLY<br />
059 Raverborg 4 POLY<br />
060 Blow Hit 4 POLY<br />
061 Hammer Bell 3 POLY<br />
062 Seq Mallet 2 POLY<br />
063 Intentions 3 POLY<br />
064 Pick It 3 POLY<br />
No. Name Voice Key Assign<br />
065 Analog Seq 2 POLY<br />
066 Impact Vox 4 POLY<br />
067 TeknoSoloVox 2 POLY<br />
068 X-Mod Man 2 POLY<br />
069 Paz Zap 1 SOLO<br />
070 4 Hits 4 You 4 POLY<br />
071 Impact 4 POLY<br />
072 Phase Hit 3 POLY<br />
073 Tekno Hit 1 2 POLY<br />
074 Tekno Hit 2 2 POLY<br />
075 Tekno Hit 3 4 POLY<br />
076 Reverse Hit 3 POLY<br />
077 SquareLead 1 3 POLY<br />
078 SquareLead 2 2 POLY<br />
079 You and Luck 2 SOLO<br />
080 Belly Lead 4 POLY<br />
081 WhistlinAtom 2 POLY<br />
082 Edye Boost 2 SOLO<br />
083 MG Solo 4 SOLO<br />
084 FXM Saw Lead 4 SOLO<br />
085 Sawteeth 3 SOLO<br />
086 Smoothe 2 SOLO<br />
087 MG Lead 2 SOLO<br />
088 MG Interval 4 SOLO<br />
089 Pulse Lead 1 3 POLY<br />
090 Pulse Lead 2 4 SOLO<br />
091 Little Devil 4 SOLO<br />
092 Loud SynLead 4 SOLO<br />
093 Analog Lead 2 SOLO<br />
094 5th Lead 2 SOLO<br />
095 Flute 2 POLY<br />
096 Piccolo 1 POLY<br />
097 VOX Flute 4 POLY<br />
098 Air Lead 2 POLY<br />
099 Pan Pipes 2 POLY<br />
100 Airplaaane 4 POLY<br />
101 Taj Mahal 1 POLY<br />
102 Raya Shaku 3 POLY<br />
103 Oboe mf 1 POLY<br />
104 Oboe Express 2 POLY<br />
105 Clarinet mp 1 POLY<br />
106 ClariExpress 2 POLY<br />
107 Mitzva Split 4 POLY<br />
108 ChamberWinds4 POLY<br />
109 ChamberWoods3 POLY<br />
110 Film Orch 4 POLY<br />
111 Sop.Sax mf 2 POLY<br />
112 Alto Sax 3 POLY<br />
113 AltoLead Sax 3 POLY<br />
114 Tenor Sax 3 POLY<br />
115 Baritone Sax 3 POLY<br />
116 Take A Tenor 4 POLY<br />
117 Sax Section 4 POLY<br />
118 Bigband Sax 4 POLY<br />
119 Harmonica 2 POLY<br />
120 Harmo Blues 2 POLY<br />
121 BluesHarp 1 POLY<br />
122 Hillbillys 4 POLY<br />
123 French Bags 4 POLY<br />
124 Majestic Tpt 1 SOLO<br />
125 Voluntare 2 POLY<br />
126 2Trumpets 2 POLY<br />
127 Tpt Sect 4 POLY<br />
128 Mute TP mod 4 POLY<br />
PR-C (Preset C Group)<br />
No. Name Voice Key Assign<br />
001 Harmon Mute 1 POLY<br />
002 Tp&Sax Sect 4 POLY<br />
003 Sax+Tp+Tb 3 POLY<br />
004 Brass Sect 4 POLY<br />
005 Trombone 1 POLY<br />
006 Hybrid Bones 4 POLY<br />
007 Noble Horns 4 POLY<br />
008 Massed Horns 3 POLY<br />
009 Horn Swell 4 POLY<br />
010 Brass It! 4 POLY<br />
011 Brass Attack 3 POLY<br />
012 Archimede 3 POLY<br />
013 Rugby Horn 3 POLY<br />
014 MKS-80 Brass 2 POLY<br />
015 True ANALOG 2 POLY<br />
016 Dark Vox 2 POLY<br />
017 RandomVowels 4 POLY<br />
018 Angels Sing 2 POLY<br />
019 Pvox Oooze 3 POLY<br />
020 Longing... 3 POLY<br />
021 Arasian Morn 4 POLY<br />
022 Beauty Vox 3 POLY<br />
023 Mary-AnneVox 4 POLY<br />
024 Belltree Vox 4 POLY<br />
025 Vox Panner 2 POLY<br />
026 Spaced Voxx 4 POLY<br />
027 Glass Voices 3 POLY<br />
028 Tubular Vox 4 POLY<br />
029 Velo Voxx 2 POLY<br />
030 Wavox 3 POLY<br />
031 Doos 1 POLY<br />
032 Synvox Comps 4 POLY<br />
033 Vocal Oohz 3 POLY<br />
034 LFO Vox 1 POLY<br />
035 St.Strings 2 POLY<br />
036 Warm Strings 4 POLY<br />
037 Somber Str 4 POLY<br />
038 Marcato 2 POLY<br />
039 Bright Str 2 POLY<br />
040 String Ens 4 POLY<br />
041 TremoloStrng 2 POLY<br />
042 Chambers 3 POLY<br />
043 ViolinCello 4 POLY<br />
044 Symphonique 4 POLY<br />
045 Film Octaves 4 POLY<br />
046 Film Layers 4 POLY<br />
047 Bass Pizz 4 POLY<br />
048 Real Pizz 3 POLY<br />
049 Harp On It 3 POLY<br />
050 Harp 2 POLY<br />
051 JP-8 Str 1 2 POLY<br />
052 JP-8 Str 2 3 POLY<br />
053 E-Motion Pad 4 POLY<br />
054 JP-8 Str 3 4 POLY<br />
055 Vintage Orch 4 POLY<br />
056 JUNO Strings 3 POLY<br />
057 Gigantalog 4 POLY<br />
058 PWM Strings 3 POLY<br />
059 Warmth 2 POLY<br />
060 ORBit Pad 2 POLY<br />
061 Deep Strings 2 POLY<br />
062 Pulsify 4 POLY<br />
063 Pulse Pad 4 POLY<br />
064 Greek Power 4 POLY<br />
No. Name Voice Key Assign<br />
065 Harmonicum 2 POLY<br />
066 D-50 Heaven 2 POLY<br />
067 Afro Horns 3 POLY<br />
068 Pop Pad 4 POLY<br />
069 Dreamesque 4 POLY<br />
070 Square Pad 4 POLY<br />
071 JP-8 Hollow 4 POLY<br />
072 JP-8Haunting 4 POLY<br />
073 Heirborne 4 POLY<br />
074 Hush Pad 4 POLY<br />
075 Jet Pad 1 2 POLY<br />
076 Jet Pad 2 2 POLY<br />
077 Phaze Pad 3 POLY<br />
078 Phaze Str 4 POLY<br />
079 Jet Str Ens 2 POLY<br />
080 Pivotal Pad 4 POLY<br />
081 3D Flanged 1 POLY<br />
082 Fantawine 4 POLY<br />
083 Glassy Pad 3 POLY<br />
084 Moving Glass 1 POLY<br />
085 Glasswaves 3 POLY<br />
086 Shiny Pad 4 POLY<br />
087 ShiftedGlass 2 POLY<br />
088 Chime Pad 3 POLY<br />
089 Spin Pad 2 POLY<br />
090 Rotary Pad 4 POLY<br />
091 Dawn 2 Dusk 3 POLY<br />
092 Aurora 4 POLY<br />
093 Strobe Mode 4 POLY<br />
094 Albion 2 POLY<br />
095 Running Pad 4 POLY<br />
096 Stepped Pad 4 POLY<br />
097 Random Pad 4 POLY<br />
098 SoundtrkDANC 4 POLY<br />
099 Flying Waltz 4 POLY<br />
100 Vanishing 1 POLY<br />
101 5th Sweep 4 POLY<br />
102 Phazweep 4 POLY<br />
103 Big BPF 4 POLY<br />
104 MG Sweep 4 POLY<br />
105 CeremonyTimp 3 POLY<br />
106 Dyno Toms 4 POLY<br />
107 Sands ofTime 4 POLY<br />
108 Inertia 4 POLY<br />
109 Vektogram 4 POLY<br />
110 Crash Pad 4 POLY<br />
111 Feedback VOX4 POLY<br />
112 Cascade 1 POLY<br />
113 Shattered 2 POLY<br />
114 NextFrontier 2 POLY<br />
115 Pure Tibet 1 POLY<br />
116 Chime Wash 4 POLY<br />
117 Night Shade 4 POLY<br />
118 Tortured 4 POLY<br />
119 Dissimilate 4 POLY<br />
120 Dunes 4 POLY<br />
121 Ocean Floor 1 POLY<br />
122 Cyber Space 3 POLY<br />
123 Biosphere 2 POLY<br />
124 Variable Run 4 POLY<br />
125 Ice Hall 2 POLY<br />
126 ComputerRoom 4 POLY<br />
127 Inverted 4 POLY<br />
128 Terminate 3 POLY<br />
Appendices<br />
Voice: number of voice<br />
169
Patch List<br />
PR-D (GM Group)<br />
No. Name Voice Key Assign<br />
001 Piano 1 2 POLY *1<br />
002 Piano 2 2 POLY *2<br />
003 Piano 3 2 POLY<br />
004 Honky-tonk 2 POLY<br />
005 E.Piano 1 2 POLY<br />
006 E.Piano 2 4 POLY<br />
007 Harpsichord 1 POLY *2<br />
008 Clav. 2 POLY<br />
009 Celesta 1 POLY *2<br />
010 Glockenspiel 2 POLY *2<br />
011 Music Box 1 POLY<br />
012 Vibraphone 1 POLY<br />
013 Marimba 1 POLY *2<br />
014 Xylophone 2 POLY *2<br />
015 Tubular-bell 2 POLY *2<br />
016 Santur 2 POLY<br />
017 Organ 1 1 POLY<br />
018 Organ 2 1 POLY<br />
019 Organ 3 2 POLY<br />
020 Church Org.1 2 POLY<br />
021 Reed Organ 1 POLY<br />
022 Accordion Fr 1 POLY *1<br />
023 Harmonica 1 POLY<br />
024 Bandoneon 2 POLY<br />
025 Nylon-str.Gt 1 POLY *1<br />
026 Steel-str.Gt 1 POLY<br />
027 Jazz Gt. 1 POLY<br />
028 Clean Gt. 1 POLY *1<br />
029 Muted Gt. 1 POLY<br />
030 Overdrive Gt 1 POLY<br />
031 DistortionGt 1 POLY *1<br />
032 Gt.Harmonics 3 POLY<br />
033 Acoustic Bs. 3 POLY<br />
034 Fingered Bs. 1 POLY<br />
035 Picked Bs. 1 POLY *1<br />
036 Fretless Bs. 1 POLY<br />
037 Slap Bass 1 1 POLY<br />
038 Slap Bass 2 2 POLY<br />
039 Synth Bass 1 1 POLY<br />
040 Synth Bass 2 1 POLY<br />
041 Violin 1 POLY *2<br />
042 Viola 2 POLY *2<br />
043 Cello 2 POLY *2<br />
044 Contrabass 2 POLY *2<br />
045 Tremolo Str 1 POLY<br />
046 PizzicatoStr 1 POLY *2<br />
047 Harp 1 POLY *2<br />
048 Timpani 2 POLY *2<br />
049 Strings 2 POLY<br />
050 Slow Strings 1 POLY<br />
051 Syn.Strings1 2 POLY<br />
052 Syn.Strings2 2 POLY<br />
053 Choir Aahs 1 POLY *1<br />
054 Voice Oohs 1 POLY<br />
055 SynVox 1 POLY<br />
056 OrchestraHit 2 POLY *2<br />
057 Trumpet 1 POLY *1<br />
058 Trombone 2 POLY *2<br />
059 Tuba 2 POLY *2<br />
060 MutedTrumpet 1 POLY *2<br />
061 French Horn 2 POLY *2<br />
062 Brass 1 1 POLY *2<br />
063 Synth Brass1 1 POLY<br />
064 Synth Brass2 2 POLY<br />
*1: Uses XP-A (Session) waves.<br />
*2: Uses XP-B (Orchestral) waves.<br />
170<br />
No. Name Voice Key Assign<br />
065 Soprano Sax 1 POLY<br />
066 Alto Sax 1 POLY<br />
067 Tenor Sax 1 POLY *1<br />
068 Baritone Sax 2 POLY<br />
069 Oboe 1 POLY *2<br />
070 English Horn 1 POLY *2<br />
071 Bassoon 2 POLY *2<br />
072 Clarinet 1 POLY<br />
073 Piccolo 1 POLY *2<br />
074 Flute 1 POLY<br />
075 Recorder 2 POLY *2<br />
076 Pan Flute 2 POLY<br />
077 Bottle Blow 2 POLY<br />
078 Shakuhachi 1 POLY<br />
079 Whistle 1 POLY<br />
080 Ocarina 2 POLY<br />
081 Square Wave 2 POLY<br />
082 Saw Wave 2 POLY<br />
083 Syn.Calliope 2 POLY<br />
084 Chiffer Lead 2 POLY<br />
085 Charang 3 POLY<br />
086 Solo Vox 2 POLY<br />
087 5th Saw Wave 3 POLY<br />
088 Bass & Lead 2 POLY<br />
089 Fantasia 3 POLY<br />
090 Warm Pad 2 POLY<br />
091 Polysynth 2 POLY<br />
092 Space Voice 2 POLY<br />
093 Bowed Glass 3 POLY<br />
094 Metal Pad 2 POLY<br />
095 Halo Pad 3 POLY<br />
096 Sweep Pad 2 POLY<br />
097 Ice Rain 2 POLY<br />
098 Soundtrack 2 POLY<br />
099 Crystal 2 POLY<br />
100 Atmosphere 2 POLY<br />
101 Brightness 3 POLY<br />
102 Goblin 2 POLY<br />
103 Echo Drops 2 POLY<br />
104 Star Theme 2 POLY<br />
105 Sitar 1 POLY<br />
106 Banjo 1 POLY<br />
107 Shamisen 2 POLY<br />
108 Koto 1 POLY<br />
109 Kalimba 1 POLY<br />
110 Bag Pipe 3 POLY<br />
111 Fiddle 1 POLY<br />
112 Shanai 1 POLY<br />
113 Tinkle Bell 4 POLY<br />
114 Agogo 1 POLY<br />
115 Steel Drums 1 POLY<br />
116 Woodblock 1 POLY<br />
117 Taiko 4 POLY<br />
118 Melo. Tom 1 2 POLY<br />
119 Synth Drum 2 POLY<br />
120 Reverse Cym. 1 POLY *2<br />
121 Gt.FretNoise 1 POLY<br />
122 Breath Noise 2 POLY<br />
123 Seashore 3 POLY<br />
124 Bird 4 POLY<br />
125 Telephone 1 1 POLY<br />
126 Helicopter 2 POLY<br />
127 Applause 4 POLY<br />
128 Gun Shot 2 POLY<br />
PR-E (Preset E Group)<br />
No. Name Voice Key Assign<br />
001 Echo Piano 3 POLY<br />
002 Upright Pno 3 POLY<br />
003 RD-1000 3 POLY<br />
004 Player’s EP 2 POLY<br />
005 D-50 Rhodes 4 POLY<br />
006 Innocent EP 2 POLY<br />
007 Echo Rhodes 4 POLY<br />
008 See-Thru EP 3 POLY<br />
009 FM BellPiano 3 POLY<br />
010 Ring E.Piano 4 POLY<br />
011 Soap Opera 1 POLY<br />
012 Dirty Organ 3 POLY<br />
013 Surf’s Up! 2 POLY<br />
014 Organesque 3 POLY<br />
015 pp Harmonium 1 POLY<br />
016 PieceOfCheez 1 POLY<br />
017 Harpsy Clav 2 POLY<br />
018 Exotic Velo 4 POLY<br />
019 HolidayCheer 4 POLY<br />
020 Morning Lite 2 POLY<br />
021 Prefab Chime 3 POLY<br />
022 Belfry Chime 3 POLY<br />
023 Stacc.Heaven 4 POLY<br />
024 2.2 Bell Pad 4 POLY<br />
025 Far East 4 POLY<br />
026 Wire Pad 3 POLY<br />
027 PhaseBlipper 2 POLY<br />
028 Sweep Clav 3 POLY<br />
029 Glider 2 POLY<br />
030 Solo Steel 4 POLY<br />
031 DesertCrystl 4 POLY<br />
032 Clear Guitar 3 POLY<br />
033 Solo Strat 3 POLY<br />
034 Feed Me! 4 POLY<br />
035 Tube Smoke 2 POLY<br />
036 Creamy 2 POLY<br />
037 Blusey OD 2 POLY<br />
038 Grindstone 2 POLY<br />
039 OD 5ths 3 POLY<br />
040 East Europe 2 POLY<br />
041 Dulcitar 4 POLY<br />
042 Atmos Harp 4 POLY<br />
043 Pilgrimage 4 POLY<br />
044 202 Rude Bs 2 SOLO<br />
045 2pole Bass 2 SOLO<br />
046 4pole Bass 2 SOLO<br />
047 Phaser MC 2 POLY<br />
048 Miniphaser 2 POLY<br />
049 Acid TB 1 SOLO<br />
050 Full Orchest 4 POLY<br />
051 Str + Winds 4 POLY<br />
052 Flute 2080 2 POLY<br />
053 Scat Flute 2 POLY<br />
054 Sax Choir 4 POLY<br />
055 Ballad Trump 4 POLY<br />
056 Sm.Brass Grp 4 POLY<br />
057 Royale 4 POLY<br />
058 Brass Mutes 2 POLY<br />
059 Breathy Brs 3 POLY<br />
060 3 Osc Brass 3 POLY<br />
061 P5 Polymod 2 POLY<br />
062 Triumph Brs 3 POLY<br />
063 Techno Dream 3 POLY<br />
064 Organizer 3 POLY<br />
No. Name Voice Key Assign<br />
065 Civilization 3 POLY<br />
066 Mental Chord 4 SOLO<br />
067 House Chord 4 SOLO<br />
068 Sequalog 4 POLY<br />
069 Booster Bips 2 POLY<br />
070 VintagePlunk 4 SOLO<br />
071 Plik-Plok 2 POLY<br />
072 RingSequence 4 POLY<br />
073 Cyber Swing 4 POLY<br />
074 Keep :-) 2 POLY<br />
075 Resojuice 2 SOLO<br />
076 B’on d’moov! 3 POLY<br />
077 Dist TB-303 2 SOLO<br />
078 Temple of JV 4 POLY<br />
079 Planet Asia 4 POLY<br />
080 Afterlife 3 POLY<br />
081 Trancing Pad 2 POLY<br />
082 Pulsatronic 3 POLY<br />
083 Cyber Dreams 3 POLY<br />
084 Warm Pipe 1 SOLO<br />
085 Pure Pipe 2 POLY<br />
086 SH-2000 2 SOLO<br />
087 X..? Whistle 3 POLY<br />
088 Jay Vee Solo 3 POLY<br />
089 Progresso Ld 4 SOLO<br />
090 Adrenaline 4 POLY<br />
091 Enlighten 4 POLY<br />
092 Glass Blower 3 POLY<br />
093 Earth Blow 2 POLY<br />
094 JX SqrCarpet 2 POLY<br />
095 Dimensional 2 POLY<br />
096 Jupiterings 2 POLY<br />
097 Analog Drama 3 POLY<br />
098 Rich Dynapad 4 POLY<br />
099 Silky Way 2 POLY<br />
100 Gluey Pad 3 POLY<br />
101 BandPass Mod 2 POLY<br />
102 Soundtraque 2 POLY<br />
103 Translucence 4 POLY<br />
104 Darkshine 4 POLY<br />
105 D’light 2 POLY<br />
106 December Sky 4 POLY<br />
107 Octapad 3 POLY<br />
108 JUNO Power! 4 POLY<br />
109 Spectrum Mod 4 POLY<br />
110 Stringsheen 3 POLY<br />
111 GR500 TmpDly 2 POLY<br />
112 Mod DirtyWav 3 POLY<br />
113 Silicon Str 4 POLY<br />
114 D50FantaPerc 3 POLY<br />
115 Rotodreams 3 POLY<br />
116 Blue Notes 4 POLY<br />
117 RiversOfTime 4 POLY<br />
118 Phobos 2 POLY<br />
119 2 0 8 0 4 POLY<br />
120 Unearthly 4 POLY<br />
121 Glistening 4 POLY<br />
122 Sci-Fi Str 3 POLY<br />
123 Shadows 4 POLY<br />
124 Helium Queen 4 SOLO<br />
125 Sci-Fi FX x4 1 POLY<br />
126 Perky Noize 3 POLY<br />
127 Droplet 3 POLY<br />
128 Rain Forest 4 POLY<br />
Voice: number of voice
Patch List<br />
XP-A (WAVE EXPANSION A: Session)<br />
No. Name Voice<br />
001 St.Concert 4<br />
002 9ft.Grand 1 4<br />
003 9ft.Grand 2 4<br />
004 Euro Classic 2<br />
005 St.Pno & Str 4<br />
006 Compress Pno 1<br />
007 LA Session 4<br />
008 Water Piano 4<br />
009 Vibra Rhodes 3<br />
010 Stack Rhodes 4<br />
011 ArcoEnsemble 2<br />
012 Vienna Strgs 3<br />
013 Str Adagio 2<br />
014 Oct Strings 3<br />
015 Silky Filter 2<br />
016 Soft Strings 2<br />
017 SlowStr.Sect 2<br />
018 GiantStrings 4<br />
019 Str+Choir 1 4<br />
020 Str+Choir 2 4<br />
021 Str+Choir 3 4<br />
022 Breathy Humz 2<br />
023 Dream Voices 2<br />
024 Mmmms 2<br />
025 Chorale 1<br />
026 Space Men 3<br />
027 Choir Mm+Aah 4<br />
028 Ivory Mist 4<br />
029 PercussiVox 4<br />
030 Mysteriouso 3<br />
031 Phase Mmhs 3<br />
032 AmbientStory 4<br />
033 Venus 3<br />
034 SessionBrass 4<br />
035 Port.Tpts 2<br />
036 R&R Brass 3<br />
037 Echo Brass 4<br />
038 E.Coast Brs 4<br />
039 Bop Soli 2<br />
040 Soft Saxes 4<br />
041 Orchestral 4<br />
042 Octalog Hrn 2<br />
043 Tpt Soloist 1<br />
044 Legato Tpt 2<br />
045 Dyno Trumpet 2<br />
046 Ethno-Trumps 2<br />
047 Super Tenor 3<br />
048 TenorExpress 2<br />
049 T.Sax f 1<br />
050 Legato Flute 2<br />
051 Touch Flute 2<br />
052 NewAge Flute 1<br />
053 Flute inMist 2<br />
054 Hybrid Flute 2<br />
055 Flute & Cla 3<br />
056 ChristmasFlt 2<br />
057 Fifth Flute 2<br />
058 Cosmic Flute 2<br />
059 Acc.de Paris 2<br />
060 Paris 50’s 4<br />
061 Musette Ens 4<br />
062 Montmartre 2<br />
063 Sad Akordion 3<br />
064 Fr.Accordion 1<br />
No. Name Voice<br />
065 Fr.Accord 2 2<br />
066 Troubadour 3<br />
067 SessionNylon 3<br />
068 Solo Nylon 1 3<br />
069 Solo Nylon 2 2<br />
070 Nylon & Str 4<br />
071 Nylon & Flt 3<br />
072 Nylon Chord 3<br />
073 Stratar 2<br />
074 Clean Tele 4<br />
075 Nashville 1<br />
076 Super Trem 4<br />
077 SpaghettiGtr 2<br />
078 Duanne’sTone 2<br />
079 Big Hair Ld 2<br />
080 Metal Solo 4<br />
081 Crunch Tone 1<br />
082 Overdriven 1<br />
083 Blues Tele 4<br />
084 Tube Double 2<br />
085 Neil’s Rust 4<br />
086 Short Crunch 4<br />
087 X-Fade Metal 4<br />
088 Velo Power 4<br />
089 Phazy Chunk 4<br />
090 Reso Tele 1<br />
091 Wah Wah BPM 4<br />
092 Rock P.Bass1 1<br />
093 Rock P.Bass2 2<br />
094 Rock P.Bass3 4<br />
095 Big Jazz Bs 3<br />
096 BriteJazz Bs 1<br />
097 Ch.Jazz Bs 2<br />
098 Mellow Jz Bs 2<br />
099 Mute E.Bs 1<br />
100 Octabahn Bs 4<br />
101 Slobbery Bs 2<br />
102 Phase Worm 2<br />
103 Euro Rave Bs 2<br />
104 Pumpin’ Bs 3<br />
105 Tech NoBase 2<br />
106 Bad Acid Bs 2<br />
107 CheepEcho Bs 3<br />
108 Manic Bs 4<br />
109 JP6 Sqr Key 2<br />
110 Square drops 1<br />
111 Celestial 3<br />
112 Heavenly Eko 4<br />
113 JD-800 Nomad 3<br />
114 Vibrolater 4<br />
115 MartianChime 4<br />
116 Big Wet Blip 4<br />
117 Amazing Echo 4<br />
118 DelaySession 4<br />
119 Deletex 4<br />
120 Tarlia 3<br />
121 Mahoroba 4<br />
122 Eurotek Clav 2<br />
123 Dope Resoclv 1<br />
124 Tekno Juno 2<br />
125 Buzzzzzzzzzz 2<br />
126 Slop-a-rama 2<br />
127 Isn’t Pretty 3<br />
128 Polywasp 1<br />
No. Name Voice<br />
129 Quixelate 4<br />
130 Trangoa Wave 2<br />
131 Spiked Cheez 3<br />
132 Glassy Cheez 3<br />
133 Super 808Cow 4<br />
134 Arpeggiatoid 4<br />
135 Euro Hit 1 4<br />
136 Euro Hit 2 2<br />
137 Rave Slice 1<br />
138 Str Torture 2<br />
139 Juno Harpsi 3<br />
140 Big Mess Pad 4<br />
141 Harpsichoir 4<br />
142 Echo Juno 3<br />
143 Phazerave 2<br />
144 DanceStack 1 3<br />
145 DanceStack 2 4<br />
146 DanceStack 3 4<br />
147 DanceStack 4 3<br />
148 DanceStack 5 4<br />
149 DanceStack 6 3<br />
150 DanceStack 7 4<br />
151 DanceStack 8 4<br />
152 Eurotek Brs 4<br />
153 Synergy Brs 4<br />
154 PortaSynthex 3<br />
155 Razor VCOs 4<br />
156 Big PWM 2<br />
157 Flutey Stack 2<br />
158 Wobbly 5th 4<br />
159 Tekno Square 3<br />
160 Trance VoXxX 4<br />
161 Random Rave 3<br />
162 Raver Circus 4<br />
163 Resorave 2<br />
164 Flangomatic 2<br />
165 O-Zu-Nu 4<br />
166 Sub Divided 1<br />
167 Ancient Sqr 2<br />
168 Fat Flange 2<br />
169 Phaze NRG 1<br />
170 Phase Vox 3<br />
171 Systekno 4<br />
172 On the move! 2<br />
173 XP’ration 2<br />
174 Big Ensemble 4<br />
175 Lazerette 3<br />
176 Fazed String 4<br />
177 Combing Slow 3<br />
178 Jet Stack 4<br />
179 Phazeslopad 4<br />
180 Rize Mass 3<br />
181 Portent 2<br />
182 DCO Sweeper 3<br />
183 Sweep Rain 4<br />
184 Sweep Stack 3<br />
185 Big Vectors 4<br />
186 Poly Swell 2<br />
187 Alchemy 3<br />
188 Soli-na 2<br />
189 90s Str Mach 4<br />
190 Ultra Cheez 2<br />
191 Juno-60 Pad 3<br />
192 Progressive 2<br />
No. Name Voice<br />
193 Build-Up Syn 3<br />
194 Atlantis 2 4<br />
195 Perelandra 4<br />
196 Plutonium 4<br />
197 Nautilus 2<br />
198 Metal Dreams 2<br />
199 Glass Clouds 4<br />
200 Harmonicloud 4<br />
201 Shining Veil 3<br />
202 Ethereal JX 2<br />
203 Striking 5th 4<br />
204 Meow 5ths 2<br />
205 Stepflanger 3<br />
206 Happy LFOs 4<br />
207 Aero Insect 3<br />
208 Beat Sweeper 2<br />
209 Wormy Lead 3<br />
210 Atmo Lead 3<br />
211 Caliolead 3<br />
212 Tweedles 2<br />
213 Raw PWM 2<br />
214 Voc Solo 5th 4<br />
215 Dirty Lead 2<br />
216 Boostweeper1 2<br />
217 Boostweeper2 2<br />
218 B3 Filth 4<br />
219 Phazed Organ 3<br />
220 VSw Vibrafon 3<br />
221 SA Vibe 1<br />
222 Rich Vibes 2<br />
223 SpaceGamelan 4<br />
224 Toy Vibe 3<br />
225 Analog Bomb 2<br />
226 Seashore 2 4<br />
227 Creation 4<br />
228 Cyberjunkie 4<br />
229 Sci-Fi Bells 3<br />
230 Shine on 1<br />
231 DEMO Piano1 4<br />
232 DEMO Piano2 4<br />
233 DEMO PnoVox 3<br />
234 DEMO Str 1 2<br />
235 DEMO Str 2 2<br />
236 DEMO Str 3 2<br />
237 DEMO SynPuls 2<br />
238 DEMO 5thPad 4<br />
239 DEMO Choir 2<br />
240 DEMO Brass 1<br />
241 DEMO Tenor 3<br />
242 DEMO Tpt 1<br />
243 DEMO Flute 2<br />
244 DEMO Nylon 4<br />
245 DEMO PhaseGt 4<br />
246 DEMO DistGt1 4<br />
247 DEMO DistGt2 3<br />
248 DEMO Strat 3<br />
249 DEMO SlapBs 2<br />
250 DEMO P.Bass 1<br />
251 DEMO SynBs 2<br />
252 DEMO SynLead 4<br />
253 DEMO Insect 4<br />
254 DEMO Buzzzzz 2<br />
255 DEMO Crowd 4<br />
Appendices<br />
Voice: number of voice<br />
171
Patch List<br />
XP-B (WAVE EXPANSION B: Orchestral)<br />
No. Name Voice<br />
001 Warm Violins 3<br />
002 Slow Vlns 1 3<br />
003 Vlns+Vlas 1 4<br />
004 Vl Sect mono 2<br />
005 Arco Violins 4<br />
006 Marcato Vls1 4<br />
007 Vlns+Vlas 2 2<br />
008 Agitato Vls1 4<br />
009 Rosin Pad 1 2<br />
010 Dry Mid-High 4<br />
011 Natural Vlns 2<br />
012 Sad Vln Sect 2<br />
013 Marcato Vas 2<br />
014 Arco Violas 2<br />
015 Thick Violas 2<br />
016 Va Sect f 1<br />
017 Va Small Sec 3<br />
018 Agitato Vas1 4<br />
019 Sad Violas 2<br />
020 Fast Cellos1 4<br />
021 Vcs Legato 1 1<br />
022 Marcato Vcs1 3<br />
023 Small Vc Sec 2<br />
024 Agitato Vcs1 4<br />
025 Small Cellos 1<br />
026 Sad CelloSec 2<br />
027 Cb Sect ff 4<br />
028 Wide Basses 2<br />
029 mf Basses 1<br />
030 Agitato Cbs1 4<br />
031 Vcs+Cbs 2<br />
032 2 Basses 2<br />
033 Euro Strings 4<br />
034 Rich Strings 4<br />
035 Multi Strs 1 2<br />
036 VlsVasVcsCbs 4<br />
037 Bright Strs 4<br />
038 Classicl Str 3<br />
039 Full Strings 4<br />
040 Med Str Sec 2<br />
041 Small Strngs 1<br />
042 Strings Arco 4<br />
043 Vivace Strs 4<br />
044 Agitato STR1 4<br />
045 LowSTR Attak 4<br />
046 Bad Guy STR 3<br />
047 Ominous 4<br />
048 Lo Express 4<br />
049 DramaStrings 4<br />
050 Solo Vln 1 / 4<br />
051 Solo Vln 2 2<br />
052 Chorus Vln 2<br />
053 Stereo Vln 3<br />
054 Agitato Vln1 2<br />
055 Solo Vla 1 / 3<br />
056 Solo Vla 2 2<br />
057 Chorus Viola 2<br />
058 Stereo Viola 3<br />
059 Agitato Vla 2<br />
060 Solo Vc 1 / 3<br />
061 Solo Vc 2 2<br />
062 Stereo Cello 3<br />
063 Chorus Cello 2<br />
064 Marcato Vc 1 1<br />
No. Name Voice<br />
065 Solo Cb 1 / 3<br />
066 Solo Cb 2 2<br />
067 Marcato Cb 1 1<br />
068 Chamber Ens1 1<br />
069 Chamber Ens2 2<br />
070 Vln+Vla Dble 2<br />
071 Vln+Vc Dbl1 2<br />
072 Vla+Vc Dbl2 2<br />
073 Vla+Vc Dble 2<br />
074 Pizzicato 1 3<br />
075 Mono Pizz 1<br />
076 Pizzicato 2 2<br />
077 Room Pizz 1<br />
078 Hall Pizz 4<br />
079 Tight Pizz 3<br />
080 Short Pizz 2<br />
081 STR Marcato1 2<br />
082 Oct Marcato 4<br />
083 Lower Marc!! 4<br />
084 Big Marc! 4<br />
085 STR Spiccato 3<br />
086 Fast Attacks 4<br />
087 Flute 1<br />
088 Flute V-Sw 4<br />
089 Piccolo 1<br />
090 Piccolo Flt 2<br />
091 Recorder 1<br />
092 Oboe 1 2<br />
093 Oboe 2 2<br />
094 Oboe 3 2<br />
095 Oboe 4 2<br />
096 Oboe 5 2<br />
097 English Hrn1 1<br />
098 English Hrn2 1<br />
099 English Hrn3 1<br />
100 Bassoon 1 1<br />
101 Bassoon 2 1<br />
102 Clarinet 1 1<br />
103 Clarinet 2 2<br />
104 Bs Clarinet1 2<br />
105 Bs Clarinet2 2<br />
106 Trumpet 1 1<br />
107 Trumpet 2 3<br />
108 Trumpet 3 2<br />
109 Flugelhorn 1 2<br />
110 Flugelhorn 2 1<br />
111 Cornet 1 1<br />
112 Cornet 2 2<br />
113 Solo Tb 1 1<br />
114 Solo Tb 2 1<br />
115 Solo Tb 3 / 4<br />
116 Solo Tb 4 / 2<br />
117 Bs Tb 1 1<br />
118 Bs Tb 2 / 2<br />
119 Harmon Mute1 1<br />
120 Harmon Mute2 2<br />
121 Tuba 1 2<br />
122 Tuba 2 2<br />
123 Solo F.Horn1 1<br />
124 Solo F.Horn2 1<br />
125 Sml F.Hrn sc 3<br />
126 Horn Sect 1/ 4<br />
127 F.Horn sc x4 1<br />
128 Fr.Horn sfz 2<br />
No. Name Voice<br />
129 F.Hrn Sect2/ 2<br />
130 F.Hrn Sect3 2<br />
131 F.Hrn Sect4 4<br />
132 F.Hrn Sect5/ 3<br />
133 F.Hrn Sect6 2<br />
134 F.Hrn Sect7 4<br />
135 F.Hrn Sect8 2<br />
136 MuteHrn Sect 1<br />
137 Horn+Wood 1 4<br />
138 Horn+Wood 2 4<br />
139 Horn+Wood 3 3<br />
140 Wood Sect 1 3<br />
141 Wood Sect 2 4<br />
142 Wood Sect 3 3<br />
143 Wood Sect 4 3<br />
144 2 Oboes 2<br />
145 Oboe + Cla 2<br />
146 Flt + Piccl 2<br />
147 Flute + Cla 2<br />
148 Bassoon+EHrn 3<br />
149 Hi Woodwinds 4<br />
150 WoodwindSplt 2<br />
151 Multi Reed 1<br />
152 4Trombones 2<br />
153 Tb Sect 1 3<br />
154 Tb + Tp 2<br />
155 4Trumpets 4<br />
156 3 Trumpets 3<br />
157 Brass ff 1 2<br />
158 Brass ff 2 3<br />
159 Brass ff 3 4<br />
160 McArthur Brs 4<br />
161 Big Bones 4<br />
162 BassBoneSect 3<br />
163 Brass Swell1 3<br />
164 Full Brs 1 4<br />
165 Brass Sect1/ 4<br />
166 Brass Ens 1 3<br />
167 Brass Ens 2 3<br />
168 Brass Ens 3 3<br />
169 Brass Ens 4 3<br />
170 Brass Ens 5 3<br />
171 Brass Ens 6 3<br />
172 Brass Ens 7 3<br />
173 Brass Ens 8 3<br />
174 Horn Strings 4<br />
175 Full Orch.1 2<br />
176 Full Orch.2 4<br />
177 Full Orch.3 4<br />
178 Full Orch.4 4<br />
179 Maj Hit 1 4<br />
180 Min Hit 1 4<br />
181 Dim Hit 1 4<br />
182 Major Stab! 4<br />
183 Maj Hit 2 4<br />
184 Min Hit 2 4<br />
185 Classical Gt 3<br />
186 Harp 1 1<br />
187 Harp 2 2<br />
188 Plucked Harp 3<br />
189 Harp StrumMj 4<br />
190 Harp StrumMn 4<br />
191 Water Harp 3<br />
192 ClasclPiano1 2<br />
No. Name Voice<br />
193 ClasclPiano2 3<br />
194 ClasclPiano3 2<br />
195 ClasclPiano4 2<br />
196 Harpsichord1 2<br />
197 Harpsichord2 3<br />
198 Harpsichord3 4<br />
199 Harpsichord4 3<br />
200 Celesta 1 1<br />
201 Celesta 2 2<br />
202 Celesta 3 1<br />
203 Glockenleste 2<br />
204 Marimba 1<br />
205 BassMarimba1 2<br />
206 BassMarimba2 1<br />
207 Vibe 1<br />
208 Xylophone 1 2<br />
209 Xylophone 2 3<br />
210 Xylophone 3 1<br />
211 Glocken 1 1<br />
212 Glocken 2 1<br />
213 ChurchBells1 3<br />
214 ChurchBells2 4<br />
215 ChurchBells3 3<br />
216 TubulaBells1 2<br />
217 TubulaBells2 2<br />
218 Big Tubulars 4<br />
219 Dawning 4<br />
220 MalletStack1 4<br />
221 MalletStack2 3<br />
222 MalletStack3 4<br />
223 MalletStack4 4<br />
224 MalletStack5 4<br />
225 MalletStack6 4<br />
226 MalletStack7 4<br />
227 Choir 1 3<br />
228 Choir 2 1<br />
229 Snare Drum 2<br />
230 ConcertSNR1/ 4<br />
231 ConcertSNR2/ 3<br />
232 SNR Roll / 4<br />
233 Concert BD1 3<br />
234 Concert BD2/ 3<br />
235 BD Roll / 3<br />
236 Timpani 1 / 2<br />
237 Timpani 2 / 4<br />
238 Timpani 3 4<br />
239 Timpani 4 / 3<br />
240 Tam Tam 2<br />
241 Gong 2<br />
242 Piatti!! 2<br />
243 Sleigh Bells 1<br />
244 Slapstick / 3<br />
245 Wind Chimes1 1<br />
246 Wind Chimes2 3<br />
247 Tambourine / 2<br />
248 Castanets / 2<br />
249 Rhythm Set 3<br />
250 Perc Hit 1 4<br />
251 Perc Hit 2 / 4<br />
252 Perc Hit 3 3<br />
253 Presenting! 4<br />
254 Presto! 4<br />
255 Christmas!!! 3<br />
Voice: number of voice<br />
172
Patch List<br />
XP-C (WAVE EXPANSION C: Techno Collection)<br />
No. Name Voice<br />
001 Teknoperator(132) 4<br />
002 Transmission(144) 4<br />
003 X-Tronic Jam(120) 4<br />
004 Dirt Jungle(160) 2<br />
005 DJ Spinnin(151) 4<br />
006 Zipper Beat(151) 4<br />
007 Tribal House(151) 3<br />
008 Obsession(144) 4<br />
009 Sonic Empire(144) 4<br />
010 Double Dutch(140) 4<br />
011 E-tronicBoom(116) 3<br />
012 Chillout =->(116) 4<br />
013 MecaTrip-Hop( 90) 4<br />
014 Hero Beat( 90) 4<br />
015 Hit House(120) 4<br />
016 Voco Groove(122) 4<br />
017 Hell Fire(151) 4<br />
018 Lo:BD Hi:HH(144) 2<br />
019 Detroit+Perc(132) 2<br />
020 Crossfader(120) 2<br />
021 Soft & Hard(120) 2<br />
022 Space Shake(130) 4<br />
023 Under Ether( 85) 2<br />
024 Confusion(147) 4<br />
025 Amsterdamer(184) 2<br />
026 House that?(120) 4<br />
027 Phrase Menu 1<br />
028 Cyber-Trance 3<br />
029 Creator 3<br />
030 Etherality 4<br />
031 Unplugged 4<br />
032 Acid Melt 3<br />
033 Brain Waves 4<br />
034 1Shot Groove 1<br />
035 FirstContact 2<br />
036 Ambient S/H 4<br />
037 Deep Machine 2<br />
038 Big Blue 2<br />
039 TeeBee V/Sw 4<br />
040 303 Agressor 2<br />
041 TB or not TB 3<br />
042 HiLo303ModSw 2<br />
043 2Square Bass 2<br />
044 303 HollowBS 2<br />
045 303 Bass 2<br />
046 TB Saw Bass 1<br />
047 303 Ow Bass 1<br />
048 TB Square 1 2<br />
049 TB Square 2 2<br />
050 TB Square 3 2<br />
051 Solid Bass 1 2<br />
052 Solid Bass 2 1<br />
053 FM Tube Bass 3<br />
054 Drum’n’Bass 3<br />
055 Sub Bass 1<br />
056 Dirty Bass 2<br />
057 Gate Me Buzz 1<br />
058 Comprex Bass 1<br />
059 Bass Invader 2<br />
060 Ovdrive Bass 1<br />
061 Housy Bella 4<br />
062 Bassic Needs 2<br />
063 Raver Bass 1 2<br />
064 Raver Bass 2 2<br />
No. Name Voice<br />
065 Jericho Bass 2<br />
066 Slippy Bass 2<br />
067 Rise Bass 2<br />
068 Cyber Bass 2<br />
069 SH-2000 Bass 2<br />
070 FM Bass 1<br />
071 Razor Bass 2<br />
072 SquelchyBass 2<br />
073 RaversBass 4<br />
074 Compu Bass 2<br />
075 Jump Bass 2<br />
076 VocoBass 2<br />
077 Vocoder Menu 1<br />
078 1.2.3.4. BPM 4<br />
079 TeknoMusic 3<br />
080 Retrocoder 2<br />
081 u/i/e/o V/Sw 4<br />
082 Talk Box 1 3<br />
083 Talk Box 2 1<br />
084 VT Vox 2<br />
085 Artificial 4<br />
086 BariVoise 1<br />
087 After D ! 4<br />
088 ARPsychea 4<br />
089 Vintage Call 4<br />
090 HarmoChimer 2<br />
091 Ring Bell 2<br />
092 260 & JUNO 3<br />
093 260 MIDI 1<br />
094 SquareKeys 2 1<br />
095 Pure Sine 1<br />
096 Ambient ORG 2<br />
097 JX Planet 1<br />
098 Clavi-Club 2<br />
099 Sweep Clav 2 3<br />
100 SquareTek 2<br />
101 Retro Party 3<br />
102 Rave Nature 2<br />
103 Alias Square 2<br />
104 Dirty Stack 1<br />
105 Phenomena 4<br />
106 Music Hi 1<br />
107 Euro-Dance 1 3<br />
108 Euro-Dance 2 3<br />
109 Dance Stack 4<br />
110 Raver Blade 4<br />
111 White Gloves 1<br />
112 Touchdown 4<br />
113 Rave Station 2<br />
114 Time Warp 3<br />
115 Thin Rave 4<br />
116 Igor Circus 3<br />
117 Alpha Zone 4<br />
118 Stars March 4<br />
119 JP Velo-Saw 2<br />
120 Rich Teeth 4<br />
121 After Saw 4<br />
122 Saw Cocktail 3<br />
123 Poly Message 2<br />
124 Xpressive 4<br />
125 Earblower 3<br />
126 Cutting Edge 4<br />
127 Stalactica 4<br />
128 LA Heaven 4<br />
No. Name Voice<br />
129 Euforia 3<br />
130 Labo-Feedbak 4<br />
131 Banded Jupe 1<br />
132 Killer Pad 1<br />
133 Mystic Pad 4<br />
134 D-Mention 4<br />
135 X-hale 4<br />
136 Sirena 4<br />
137 After’s Pad 3<br />
138 Warmer Pad 2<br />
139 Phatt Pad 2<br />
140 OB Sweep Pad 3<br />
141 Murk Pad 4<br />
142 Dense Floor 4<br />
143 SecretMelody 4<br />
144 Vaporish 4<br />
145 Vintage Revo 3<br />
146 Liquid Sky 4<br />
147 Exploration 3<br />
148 Drama Pad 4<br />
149 Vapor Style 4<br />
150 JP-6 Stack 1<br />
151 Obilator 1<br />
152 Glamour 3<br />
153 Medium Solo 3<br />
154 Singing’Mini 1<br />
155 Analog Flute 1<br />
156 SH-5 Bs/Lead 2<br />
157 Classy Pulse 1<br />
158 Jupiter-6 Ld 2<br />
159 Just Lovely 1<br />
160 DJ Devil 1<br />
161 Simply June 1<br />
162 Mr.Raw SAW 1<br />
163 Crispy Lead 4<br />
164 Dirty Lead 2 3<br />
165 Disto Stack 4<br />
166 Velo Cheese 3<br />
167 Noiz Mania 4<br />
168 Power Mutes 2<br />
169 V-Beep 1<br />
170 Freaky Fry 1<br />
171 SQ Formule 1<br />
172 DirtyOrgan 2 2<br />
173 Oldies Organ 2<br />
174 Edgy Organ 4<br />
175 Juno Organ 2<br />
176 Space Org X 3<br />
177 Cabin Organ 2<br />
178 Dream Organ 3<br />
179 Club Organ 2<br />
180 Perc. Organ 2<br />
181 Organ Stabs 2<br />
182 Techno Pizz 1<br />
183 Captain Pizz 4<br />
184 Pizzatek 2<br />
185 Sleepless 4<br />
186 Mega 5th 2 2<br />
187 Chord maj7th 4<br />
188 Chord min7th 4<br />
189 5thDimension 4<br />
190 StateXLChord 4<br />
191 Sixth Sense 4<br />
192 Garage Chord 4<br />
* The numbers in parenthesis following the Patch name represent the B.P.M. (tempo) when played at the C4 key.<br />
* Note that the Release Time has been set to a fairly long value for some of the patches. As a result, if your sound generator has been set<br />
so “Patch Remain” is “ON,” the release portion of a previously sounding patch may continue to be heard even after switching to a new<br />
No. Name Voice<br />
193 Chordmaj7/5- 4<br />
194 Planet EKNO 3<br />
195 Optimum Rave 4<br />
196 Arpege Me 2<br />
197 VTransformer 4<br />
198 Analog Attax 4<br />
199 Maxi Fuzzy ! 2<br />
200 Only by FXM 3<br />
201 Hit & Run 4<br />
202 Photon Attak 4<br />
203 Predator 4<br />
204 Village Hit 4<br />
205 Hardcore Hit 4<br />
206 Short Chord 4<br />
207 ShortCircuit 4<br />
208 SonofaPitch 4<br />
209 Flutish SQUR 4<br />
210 FazzyCow 808 3<br />
211 Blurpy 3<br />
212 Static Hit 3<br />
213 Hi Attack 3<br />
214 TonalTension 4<br />
215 Jungle Stabs 2<br />
216 Buzz Machine 2<br />
217 Zapper 1<br />
218 Blip 1<br />
219 Iron Hit 2<br />
220 Headz Direct 1<br />
221 Scratchy Hit 2<br />
222 Hit&IndsMenu 3<br />
223 GTR FX Menu 1<br />
224 GTR Power 1 1<br />
225 GTR Power 2 1<br />
226 Snr Menu 1 3<br />
227 Snr Menu 2 2<br />
228 Kick Menu 2<br />
229 Hi Hat Menu 4<br />
230 Perc Menu 4<br />
231 Tom&Cym Menu 2<br />
232 Metal Dream 4<br />
233 System D 4<br />
234 Mayday Ring 2<br />
235 Industrial 4<br />
236 Tranceporter 3<br />
237 Acid Copter 1<br />
238 Roll Over 4<br />
239 Gimme aBreak 4<br />
240 RadicalAbuse 2<br />
241 Echodrome 1<br />
242 Trance Chime 2<br />
243 Altamira 2<br />
244 Locko Motif 1<br />
245 SpaceFactory 2<br />
246 Get Busy 4<br />
247 Ayers Rock 4<br />
248 Altern Saw 1<br />
249 JP-6 Sync 1<br />
250 Cold JX 1<br />
251 Fancy Pad 1<br />
252 Tune Breath 2<br />
253 OrchestraGTR 2<br />
254 Gtr Sweep 2<br />
255 Trilly 2<br />
256 Good Bye Spk 4<br />
Voice: number of voice<br />
Appendices<br />
173
Patch List<br />
■ B.P.M. CONVERSION TABLE<br />
By changing the pitch, you can change the B.P.M. (tempo).<br />
The B.P.M. used when sampling the original (Original B.P.M.) is reproduced by<br />
the C4 key when both “c.t.” (Coarse Tune) and “f.t.” (Fine Tune) are at “0.”<br />
If you want to obtain twice the tempo of the original B.P.M., either play the C5 key<br />
(key one octave above), or set “c.t.” (Coarse Tune) to +12 and play the C4 key.<br />
For specifics, refer to the separate B.P.M. Conversion Table.<br />
How to Read the Table<br />
● B.P.M. Conversion When Creating Patches<br />
The Original B.P.M. is the B.P.M. obtained when the Waveform is played by the<br />
C4 key (when both Coarse and Fine Tune are at “0”).<br />
(Marked with in table.)<br />
For example, to play a B.P.M. 116 Waveform at B.P.M. 120:<br />
dst key c.t f.t<br />
116 C 4 00 00<br />
: : : :<br />
120 C# 4 +01 -41<br />
Method 1: Look up the “f.t.” (Fine Tune) parameter in the table, and you will see<br />
that the setting for “f.t.” should be -41 and that the C#4 key should be<br />
played.<br />
Method 2: Look up the “c.t.”(Coarse Tune) and “f.t.” (Fine Tune) parameters in<br />
the table, and you will see that the setting for “c.t.”should be +1, and<br />
that for “f.t.” should be -41, and that the C4 key should be played.<br />
So, as you can see from the above example, the settings you should make<br />
change depending on whether you want to play using the same key or not.<br />
● B.P.M. Conversion When Creating Rhythm Sets<br />
Given that the Original Pitch for the Rhythm Set is C4, you need to set<br />
“c.t.”(Coarse Tune) for the range C-1 through G9.<br />
To play a Phrase Loop Waveform at the Original B.P.M., set “c.t.” (Coarse Tune)<br />
to C4, and “f.t.” (Fine Tune) to “0.”<br />
To change the B.P.M. for a Phrase Loop Waveform in a Rhythm Set, look up<br />
“key” and “f.t.” (Fine Tune) in the table, and make the necessary settings.<br />
Original B.P.M. 116<br />
dst key c.t f.t<br />
41 F# 2 -18 -01<br />
42 F# 2 -18 +41<br />
43 G 2 -17 -18<br />
44 G 2 -17 +22<br />
45 G# 2 -16 -39<br />
46 G# 2 -16 -01<br />
47 G# 2 -16 +36<br />
48 A 2 -15 -28<br />
49 A 2 -15 +08<br />
50 A 2 -15 +43<br />
51 A# 2 -14 -23<br />
52 A# 2 -14 +11<br />
53 A# 2 -14 +44<br />
54 B 2 -13 -24<br />
55 B 2 -13 +08<br />
56 B 2 -13 +39<br />
57 C 3 -12 -30<br />
58 C 3 -12 00<br />
59 C 3 -12 +30<br />
60 C# 3 -11 -41<br />
61 C# 3 -11 -13<br />
62 C# 3 -11 +15<br />
63 C# 3 -11 +43<br />
64 D 3 -10 -30<br />
65 D 3 -10 -03<br />
66 D 3 -10 +24<br />
67 D 3 -10 +50<br />
68 D# 3 -09 -25<br />
69 D# 3 -09 +01<br />
70 D# 3 -09 +26<br />
71 E 3 -08 -50<br />
72 E 3 -08 -26<br />
73 E 3 -08 -02<br />
74 E 3 -08 +22<br />
75 E 3 -08 +45<br />
76 F 3 -07 -32<br />
77 F 3 -07 -09<br />
78 F 3 -07 +13<br />
79 F 3 -07 +35<br />
80 F# 3 -06 -43<br />
81 F# 3 -06 -22<br />
82 F# 3 -06 -01<br />
83 F# 3 -06 +20<br />
84 F# 3 -06 +41<br />
85 G 3 -05 -38<br />
86 G 3 -05 -18<br />
87 G 3 -05 +02<br />
88 G 3 -05 +22<br />
89 G 3 -05 +41<br />
90 G# 3 -04 -39<br />
91 G# 3 -04 -20<br />
92 G# 3 -04 -01<br />
93 G# 3 -04 +17<br />
94 G# 3 -04 +36<br />
95 A 3 -03 -46<br />
96 A 3 -03 -28<br />
97 A 3 -03 -10<br />
98 A 3 -03 +08<br />
99 A 3 -03 +26<br />
100 A 3 -03 +43<br />
101 A# 3 -02 -40<br />
102 A# 3 -02 -23<br />
103 A# 3 -02 -06<br />
104 A# 3 -02 +11<br />
105 A# 3 -02 +28<br />
106 A# 3 -02 +44<br />
107 B 3 -01 -40<br />
108 B 3 -01 -24<br />
109 B 3 -01 -08<br />
110 B 3 -01 +08<br />
111 B 3 -01 +24<br />
112 B 3 -01 +39<br />
113 C 4 00 -45<br />
114 C 4 00 -30<br />
115 C 4 00 -15<br />
116 C 4 00 00<br />
117 C 4 00 +15<br />
118 C 4 00 +30<br />
119 C 4 00 +44<br />
120 C# 4 +01 -41<br />
121 C# 4 +01 -27<br />
122 C# 4 +01 -13<br />
123 C# 4 +01 +01<br />
124 C# 4 +01 +15<br />
125 C# 4 +01 +29<br />
126 C# 4 +01 +43<br />
127 D 4 +02 -43<br />
128 D 4 +02 -30<br />
129 D 4 +02 -16<br />
130 D 4 +02 -03<br />
131 D 4 +02 +11<br />
132 D 4 +02 +24<br />
133 D 4 +02 +37<br />
134 D 4 +02 +50<br />
135 D# 4 +03 -37<br />
136 D# 4 +03 -25<br />
137 D# 4 +03 -12<br />
138 D# 4 +03 +01<br />
139 D# 4 +03 +13<br />
140 D# 4 +03 +26<br />
dst key c.t f.t<br />
141 D# 4 +03 +38<br />
142 E 4 +04 -50<br />
143 E 4 +04 -38<br />
144 E 4 +04 -26<br />
145 E 4 +04 -14<br />
146 E 4 +04 -02<br />
147 E 4 +04 +10<br />
148 E 4 +04 +22<br />
149 E 4 +04 +33<br />
150 E 4 +04 +45<br />
151 F 4 +05 -43<br />
152 F 4 +05 -32<br />
153 F 4 +05 -21<br />
154 F 4 +05 -09<br />
155 F 4 +05 +02<br />
156 F 4 +05 +13<br />
157 F 4 +05 +24<br />
158 F 4 +05 +35<br />
159 F 4 +05 +46<br />
160 F# 4 +06 -43<br />
161 F# 4 +06 -32<br />
162 F# 4 +06 -22<br />
163 F# 4 +06 -11<br />
164 F# 4 +06 -01<br />
165 F# 4 +06 +10<br />
166 F# 4 +06 +20<br />
167 F# 4 +06 +31<br />
168 F# 4 +06 +41<br />
169 G 4 +07 -49<br />
170 G 4 +07 -38<br />
171 G 4 +07 -28<br />
172 G 4 +07 -18<br />
173 G 4 +07 -08<br />
174 G 4 +07 +02<br />
175 G 4 +07 +12<br />
176 G 4 +07 +22<br />
177 G 4 +07 +32<br />
178 G 4 +07 +41<br />
179 G# 4 +08 -49<br />
180 G# 4 +08 -39<br />
181 G# 4 +08 -30<br />
182 G# 4 +08 -20<br />
183 G# 4 +08 -11<br />
184 G# 4 +08 -01<br />
185 G# 4 +08 +08<br />
186 G# 4 +08 +17<br />
187 G# 4 +08 +27<br />
188 G# 4 +08 +36<br />
189 G# 4 +08 +45<br />
190 A 4 +09 -46<br />
191 A 4 +09 -37<br />
192 A 4 +09 -28<br />
193 A 4 +09 -19<br />
194 A 4 +09 -10<br />
195 A 4 +09 -01<br />
196 A 4 +09 +08<br />
197 A 4 +09 +17<br />
198 A 4 +09 +26<br />
199 A 4 +09 +34<br />
200 A 4 +09 +43<br />
201 A# 4 +10 -48<br />
202 A# 4 +10 -40<br />
203 A# 4 +10 -31<br />
204 A# 4 +10 -23<br />
205 A# 4 +10 -14<br />
206 A# 4 +10 -06<br />
207 A# 4 +10 +03<br />
208 A# 4 +10 +11<br />
209 A# 4 +10 +19<br />
210 A# 4 +10 +28<br />
211 A# 4 +10 +36<br />
212 A# 4 +10 +44<br />
213 B 4 +11 -48<br />
214 B 4 +11 -40<br />
215 B 4 +11 -32<br />
216 B 4 +11 -24<br />
217 B 4 +11 -16<br />
218 B 4 +11 -08<br />
219 B 4 +11 00<br />
220 B 4 +11 +08<br />
221 B 4 +11 +16<br />
222 B 4 +11 +24<br />
223 B 4 +11 +32<br />
224 B 4 +11 +39<br />
225 B 4 +11 +47<br />
226 C 5 +12 -45<br />
227 C 5 +12 -38<br />
228 C 5 +12 -30<br />
229 C 5 +12 -23<br />
230 C 5 +12 -15<br />
231 C 5 +12 -07<br />
232 C 5 +12 00<br />
233 C 5 +12 +07<br />
234 C 5 +12 +15<br />
235 C 5 +12 +22<br />
236 C 5 +12 +30<br />
237 C 5 +12 +37<br />
238 C 5 +12 +44<br />
239 C# 5 +13 -49<br />
240 C# 5 +13 -41<br />
174
Patch List<br />
Original B.P.M. 120 Original B.P.M. 132 Original B.P.M. 138<br />
dst key c.t f.t<br />
41 F 2 -19 +41<br />
42 F# 2 -18 -17<br />
43 F# 2 -18 +23<br />
44 G 2 -17 -37<br />
45 G 2 -17 +02<br />
46 G 2 -17 +40<br />
47 G# 2 -16 -23<br />
48 G# 2 -16 +14<br />
49 G# 2 -16 +49<br />
50 A 2 -15 -16<br />
51 A 2 -15 +19<br />
52 A# 2 -14 -48<br />
53 A# 2 -14 -15<br />
54 A# 2 -14 +18<br />
55 A# 2 -14 +49<br />
56 B 2 -13 -19<br />
57 B 2 -13 +11<br />
58 B 2 -13 +41<br />
59 C 3 -12 -29<br />
60 C 3 -12 00<br />
61 C 3 -12 +29<br />
62 C# 3 -11 -43<br />
63 C# 3 -11 -16<br />
64 C# 3 -11 +12<br />
65 C# 3 -11 +39<br />
66 D 3 -10 -35<br />
67 D 3 -10 -09<br />
68 D 3 -10 +17<br />
69 D 3 -10 +42<br />
70 D# 3 -09 -33<br />
71 D# 3 -09 -09<br />
72 D# 3 -09 +16<br />
73 D# 3 -09 +40<br />
74 E 3 -08 -37<br />
75 E 3 -08 -14<br />
76 E 3 -08 +09<br />
77 E 3 -08 +32<br />
78 F 3 -07 -46<br />
79 F 3 -07 -24<br />
80 F 3 -07 -02<br />
81 F 3 -07 +20<br />
82 F 3 -07 +41<br />
83 F# 3 -06 -38<br />
84 F# 3 -06 -17<br />
85 F# 3 -06 +03<br />
86 F# 3 -06 +23<br />
87 F# 3 -06 +43<br />
88 G 3 -05 -37<br />
89 G 3 -05 -17<br />
90 G 3 -05 +02<br />
91 G 3 -05 +21<br />
92 G 3 -05 +40<br />
93 G# 3 -04 -41<br />
94 G# 3 -04 -23<br />
95 G# 3 -04 -04<br />
96 G# 3 -04 +14<br />
97 G# 3 -04 +32<br />
98 G# 3 -04 +49<br />
99 A 3 -03 -33<br />
100 A 3 -03 -16<br />
101 A 3 -03 +02<br />
102 A 3 -03 +19<br />
103 A 3 -03 +36<br />
104 A# 3 -02 -48<br />
105 A# 3 -02 -31<br />
106 A# 3 -02 -15<br />
107 A# 3 -02 +01<br />
108 A# 3 -02 +18<br />
109 A# 3 -02 +34<br />
110 A# 3 -02 +49<br />
111 B 3 -01 -35<br />
112 B 3 -01 -19<br />
113 B 3 -01 -04<br />
114 B 3 -01 +11<br />
115 B 3 -01 +26<br />
116 B 3 -01 +41<br />
117 C 4 00 -44<br />
118 C 4 00 -29<br />
119 C 4 00 -14<br />
120 C 4 00 00<br />
121 C 4 00 +14<br />
122 C 4 00 +29<br />
123 C 4 00 +43<br />
124 C# 4 +01 -43<br />
125 C# 4 +01 -29<br />
126 C# 4 +01 -16<br />
127 C# 4 +01 -02<br />
128 C# 4 +01 +12<br />
129 C# 4 +01 +25<br />
130 C# 4 +01 +39<br />
131 D 4 +02 -48<br />
132 D 4 +02 -35<br />
133 D 4 +02 -22<br />
134 D 4 +02 -09<br />
135 D 4 +02 +04<br />
136 D 4 +02 +17<br />
137 D 4 +02 +29<br />
138 D 4 +02 +42<br />
139 D# 4 +03 -46<br />
140 D# 4 +03 -33<br />
dst key c.t f.t<br />
141 D# 4 +03 -21<br />
142 D# 4 +03 -09<br />
143 D# 4 +03 +04<br />
144 D# 4 +03 +16<br />
145 D# 4 +03 +28<br />
146 D# 4 +03 +40<br />
147 E 4 +04 -49<br />
148 E 4 +04 -37<br />
149 E 4 +04 -25<br />
150 E 4 +04 -14<br />
151 E 4 +04 -02<br />
152 E 4 +04 +09<br />
153 E 4 +04 +21<br />
154 E 4 +04 +32<br />
155 E 4 +04 +43<br />
156 F 4 +05 -46<br />
157 F 4 +05 -35<br />
158 F 4 +05 -24<br />
159 F 4 +05 -13<br />
160 F 4 +05 -02<br />
161 F 4 +05 +09<br />
162 F 4 +05 +20<br />
163 F 4 +05 +30<br />
164 F 4 +05 +41<br />
165 F# 4 +06 -49<br />
166 F# 4 +06 -38<br />
167 F# 4 +06 -28<br />
168 F# 4 +06 -17<br />
169 F# 4 +06 -07<br />
170 F# 4 +06 +03<br />
171 F# 4 +06 +13<br />
172 F# 4 +06 +23<br />
173 F# 4 +06 +33<br />
174 F# 4 +06 +43<br />
175 G 4 +07 -47<br />
176 G 4 +07 -37<br />
177 G 4 +07 -27<br />
178 G 4 +07 -17<br />
179 G 4 +07 -08<br />
180 G 4 +07 +02<br />
181 G 4 +07 +12<br />
182 G 4 +07 +21<br />
183 G 4 +07 +31<br />
184 G 4 +07 +40<br />
185 G 4 +07 +49<br />
186 G# 4 +08 -41<br />
187 G# 4 +08 -32<br />
188 G# 4 +08 -23<br />
189 G# 4 +08 -14<br />
190 G# 4 +08 -04<br />
191 G# 4 +08 +05<br />
192 G# 4 +08 +14<br />
193 G# 4 +08 +23<br />
194 G# 4 +08 +32<br />
195 G# 4 +08 +41<br />
196 G# 4 +08 +49<br />
197 A 4 +09 -42<br />
198 A 4 +09 -33<br />
199 A 4 +09 -24<br />
200 A 4 +09 -16<br />
201 A 4 +09 -07<br />
202 A 4 +09 +02<br />
203 A 4 +09 +10<br />
204 A 4 +09 +19<br />
205 A 4 +09 +27<br />
206 A 4 +09 +36<br />
207 A 4 +09 +44<br />
208 A# 4 +10 -48<br />
209 A# 4 +10 -39<br />
210 A# 4 +10 -31<br />
211 A# 4 +10 -23<br />
212 A# 4 +10 -15<br />
213 A# 4 +10 -07<br />
214 A# 4 +10 +01<br />
215 A# 4 +10 +10<br />
216 A# 4 +10 +18<br />
217 A# 4 +10 +26<br />
218 A# 4 +10 +34<br />
219 A# 4 +10 +41<br />
220 A# 4 +10 +49<br />
221 B 4 +11 -43<br />
222 B 4 +11 -35<br />
223 B 4 +11 -27<br />
224 B 4 +11 -19<br />
225 B 4 +11 -12<br />
226 B 4 +11 -04<br />
227 B 4 +11 +04<br />
228 B 4 +11 +11<br />
229 B 4 +11 +19<br />
230 B 4 +11 +26<br />
231 B 4 +11 +34<br />
232 B 4 +11 +41<br />
233 B 4 +11 +49<br />
234 C 5 +12 -44<br />
235 C 5 +12 -36<br />
236 C 5 +12 -29<br />
237 C 5 +12 -22<br />
238 C 5 +12 -14<br />
239 C 5 +12 -07<br />
240 C 5 +12 00<br />
dst key c.t f.t<br />
41 E 2 -20 -24<br />
42 E 2 -20 +18<br />
43 F 2 -19 -42<br />
44 F 2 -19 -02<br />
45 F 2 -19 +37<br />
46 F# 2 -18 -25<br />
47 F# 2 -18 +12<br />
48 F# 2 -18 +49<br />
49 G 2 -17 -16<br />
50 G 2 -17 +19<br />
51 G# 2 -16 -46<br />
52 G# 2 -16 -13<br />
53 G# 2 -16 +20<br />
54 A 2 -15 -47<br />
55 A 2 -15 -16<br />
56 A 2 -15 +16<br />
57 A 2 -15 +46<br />
58 A# 2 -14 -24<br />
59 A# 2 -14 +06<br />
60 A# 2 -14 +35<br />
61 B 2 -13 -36<br />
62 B 2 -13 -08<br />
63 B 2 -13 +19<br />
64 B 2 -13 +47<br />
65 C 3 -12 -26<br />
66 C 3 -12 00<br />
67 C 3 -12 +26<br />
68 C# 3 -11 -48<br />
69 C# 3 -11 -23<br />
70 C# 3 -11 +02<br />
71 C# 3 -11 +26<br />
72 D 3 -10 -49<br />
73 D 3 -10 -25<br />
74 D 3 -10 -02<br />
75 D 3 -10 +21<br />
76 D 3 -10 +44<br />
77 D# 3 -09 -33<br />
78 D# 3 -09 -11<br />
79 D# 3 -09 +11<br />
80 D# 3 -09 +33<br />
81 E 3 -08 -45<br />
82 E 3 -08 -24<br />
83 E 3 -08 -03<br />
84 E 3 -08 +18<br />
85 E 3 -08 +38<br />
86 F 3 -07 -42<br />
87 F 3 -07 -22<br />
88 F 3 -07 -02<br />
89 F 3 -07 +18<br />
90 F 3 -07 +37<br />
91 F# 3 -06 -44<br />
92 F# 3 -06 -25<br />
93 F# 3 -06 -06<br />
94 F# 3 -06 +12<br />
95 F# 3 -06 +31<br />
96 F# 3 -06 +49<br />
97 G 3 -05 -33<br />
98 G 3 -05 -16<br />
99 G 3 -05 +02<br />
100 G 3 -05 +19<br />
101 G 3 -05 +37<br />
102 G# 3 -04 -46<br />
103 G# 3 -04 -29<br />
104 G# 3 -04 -13<br />
105 G# 3 -04 +04<br />
106 G# 3 -04 +20<br />
107 G# 3 -04 +36<br />
108 A 3 -03 -47<br />
109 A 3 -03 -31<br />
110 A 3 -03 -16<br />
111 A 3 -03 00<br />
112 A 3 -03 +16<br />
113 A 3 -03 +31<br />
114 A 3 -03 +46<br />
115 A# 3 -02 -39<br />
116 A# 3 -02 -24<br />
117 A# 3 -02 -09<br />
118 A# 3 -02 +06<br />
119 A# 3 -02 +21<br />
120 A# 3 -02 +35<br />
121 A# 3 -02 +49<br />
122 B 3 -01 -36<br />
123 B 3 -01 -22<br />
124 B 3 -01 -08<br />
125 B 3 -01 +06<br />
126 B 3 -01 +19<br />
127 B 3 -01 +33<br />
128 B 3 -01 +47<br />
129 C 4 00 -40<br />
130 C 4 00 -26<br />
131 C 4 00 -13<br />
132 C 4 00 00<br />
133 C 4 00 +13<br />
134 C 4 00 +26<br />
135 C 4 00 +39<br />
136 C# 4 +01 -48<br />
137 C# 4 +01 -36<br />
138 C# 4 +01 -23<br />
139 C# 4 +01 -11<br />
140 C# 4 +01 +02<br />
dst key c.t f.t<br />
141 C# 4 +01 +14<br />
142 C# 4 +01 +26<br />
143 C# 4 +01 +39<br />
144 D 4 +02 -49<br />
145 D 4 +02 -37<br />
146 D 4 +02 -25<br />
147 D 4 +02 -14<br />
148 D 4 +02 -02<br />
149 D 4 +02 +10<br />
150 D 4 +02 +21<br />
151 D 4 +02 +33<br />
152 D 4 +02 +44<br />
153 D# 4 +03 -44<br />
154 D# 4 +03 -33<br />
155 D# 4 +03 -22<br />
156 D# 4 +03 -11<br />
157 D# 4 +03 00<br />
158 D# 4 +03 +11<br />
159 D# 4 +03 +22<br />
160 D# 4 +03 +33<br />
161 D# 4 +03 +44<br />
162 E 4 +04 -45<br />
163 E 4 +04 -35<br />
164 E 4 +04 -24<br />
165 E 4 +04 -14<br />
166 E 4 +04 -03<br />
167 E 4 +04 +07<br />
168 E 4 +04 +18<br />
169 E 4 +04 +28<br />
170 E 4 +04 +38<br />
171 E 4 +04 +48<br />
172 F 4 +05 -42<br />
173 F 4 +05 -32<br />
174 F 4 +05 -22<br />
175 F 4 +05 -12<br />
176 F 4 +05 -02<br />
177 F 4 +05 +08<br />
178 F 4 +05 +18<br />
179 F 4 +05 +27<br />
180 F 4 +05 +37<br />
181 F 4 +05 +47<br />
182 F# 4 +06 -44<br />
183 F# 4 +06 -34<br />
184 F# 4 +06 -25<br />
185 F# 4 +06 -16<br />
186 F# 4 +06 -06<br />
187 F# 4 +06 +03<br />
188 F# 4 +06 +12<br />
189 F# 4 +06 +21<br />
190 F# 4 +06 +31<br />
191 F# 4 +06 +40<br />
192 F# 4 +06 +49<br />
193 G 4 +07 -42<br />
194 G 4 +07 -33<br />
195 G 4 +07 -24<br />
196 G 4 +07 -16<br />
197 G 4 +07 -07<br />
198 G 4 +07 +02<br />
199 G 4 +07 +11<br />
200 G 4 +07 +19<br />
201 G 4 +07 +28<br />
202 G 4 +07 +37<br />
203 G 4 +07 +45<br />
204 G# 4 +08 -46<br />
205 G# 4 +08 -38<br />
206 G# 4 +08 -29<br />
207 G# 4 +08 -21<br />
208 G# 4 +08 -13<br />
209 G# 4 +08 -04<br />
210 G# 4 +08 +04<br />
211 G# 4 +08 +12<br />
212 G# 4 +08 +20<br />
213 G# 4 +08 +28<br />
214 G# 4 +08 +36<br />
215 G# 4 +08 +45<br />
216 A 4 +09 -47<br />
217 A 4 +09 -39<br />
218 A 4 +09 -31<br />
219 A 4 +09 -24<br />
220 A 4 +09 -16<br />
221 A 4 +09 -08<br />
222 A 4 +09 00<br />
223 A 4 +09 +08<br />
224 A 4 +09 +16<br />
225 A 4 +09 +23<br />
226 A 4 +09 +31<br />
227 A 4 +09 +39<br />
228 A 4 +09 +46<br />
229 A# 4 +10 -46<br />
230 A# 4 +10 -39<br />
231 A# 4 +10 -31<br />
232 A# 4 +10 -24<br />
233 A# 4 +10 -16<br />
234 A# 4 +10 -09<br />
235 A# 4 +10 -01<br />
236 A# 4 +10 +06<br />
237 A# 4 +10 +13<br />
238 A# 4 +10 +21<br />
239 A# 4 +10 +28<br />
240 A# 4 +10 +35<br />
dst key c.t f.t<br />
41 D# 2 -21 -01<br />
42 D# 2 -21 +41<br />
43 E 2 -20 -19<br />
44 E 2 -20 +21<br />
45 F 2 -19 -40<br />
46 F 2 -19 -02<br />
47 F 2 -19 +35<br />
48 F# 2 -18 -28<br />
49 F# 2 -18 +07<br />
50 F# 2 -18 +42<br />
51 G 2 -17 -23<br />
52 G 2 -17 +10<br />
53 G 2 -17 +43<br />
54 G# 2 -16 -24<br />
55 G# 2 -16 +07<br />
56 G# 2 -16 +39<br />
57 A 2 -15 -31<br />
58 A 2 -15 -01<br />
59 A 2 -15 +29<br />
60 A# 2 -14 -42<br />
61 A# 2 -14 -13<br />
62 A# 2 -14 +15<br />
63 A# 2 -14 +43<br />
64 B 2 -13 -30<br />
65 B 2 -13 -03<br />
66 B 2 -13 +23<br />
67 B 2 -13 +49<br />
68 C 3 -12 -25<br />
69 C 3 -12 00<br />
70 C 3 -12 +25<br />
71 C 3 -12 +49<br />
72 C# 3 -11 -26<br />
73 C# 3 -11 -02<br />
74 C# 3 -11 +21<br />
75 C# 3 -11 +44<br />
76 D 3 -10 -33<br />
77 D 3 -10 -10<br />
78 D 3 -10 +12<br />
79 D 3 -10 +34<br />
80 D# 3 -09 -44<br />
81 D# 3 -09 -22<br />
82 D# 3 -09 -01<br />
83 D# 3 -09 +20<br />
84 D# 3 -09 +41<br />
85 E 3 -08 -39<br />
86 E 3 -08 -19<br />
87 E 3 -08 +01<br />
88 E 3 -08 +21<br />
89 E 3 -08 +41<br />
90 F 3 -07 -40<br />
91 F 3 -07 -21<br />
92 F 3 -07 -02<br />
93 F 3 -07 +17<br />
94 F 3 -07 +35<br />
95 F# 3 -06 -46<br />
96 F# 3 -06 -28<br />
97 F# 3 -06 -10<br />
98 F# 3 -06 +07<br />
99 F# 3 -06 +25<br />
100 F# 3 -06 +42<br />
101 G 3 -05 -40<br />
102 G 3 -05 -23<br />
103 G 3 -05 -06<br />
104 G 3 -05 +10<br />
105 G 3 -05 +27<br />
106 G 3 -05 +43<br />
107 G# 3 -04 -40<br />
108 G# 3 -04 -24<br />
109 G# 3 -04 -08<br />
110 G# 3 -04 +07<br />
111 G# 3 -04 +23<br />
112 G# 3 -04 +39<br />
113 A 3 -03 -46<br />
114 A 3 -03 -31<br />
115 A 3 -03 -16<br />
116 A 3 -03 -01<br />
117 A 3 -03 +14<br />
118 A 3 -03 +29<br />
119 A 3 -03 +44<br />
120 A# 3 -02 -42<br />
121 A# 3 -02 -28<br />
122 A# 3 -02 -13<br />
123 A# 3 -02 +01<br />
124 A# 3 -02 +15<br />
125 A# 3 -02 +29<br />
126 A# 3 -02 +43<br />
127 B 3 -01 -44<br />
128 B 3 -01 -30<br />
129 B 3 -01 -17<br />
130 B 3 -01 -03<br />
131 B 3 -01 +10<br />
132 B 3 -01 +23<br />
133 B 3 -01 +36<br />
134 B 3 -01 +49<br />
135 C 4 00 -38<br />
136 C 4 00 -25<br />
137 C 4 00 -13<br />
138 C 4 00 00<br />
139 C 4 00 +12<br />
140 C 4 00 +25<br />
dst key c.t f.t<br />
141 C 4 00 +37<br />
142 C 4 00 +49<br />
143 C# 4 +01 -38<br />
144 C# 4 +01 -26<br />
145 C# 4 +01 -14<br />
146 C# 4 +01 -02<br />
147 C# 4 +01 +09<br />
148 C# 4 +01 +21<br />
149 C# 4 +01 +33<br />
150 C# 4 +01 +44<br />
151 D 4 +02 -44<br />
152 D 4 +02 -33<br />
153 D 4 +02 -21<br />
154 D 4 +02 -10<br />
155 D 4 +02 +01<br />
156 D 4 +02 +12<br />
157 D 4 +02 +23<br />
158 D 4 +02 +34<br />
159 D 4 +02 +45<br />
160 D# 4 +03 -44<br />
161 D# 4 +03 -33<br />
162 D# 4 +03 -22<br />
163 D# 4 +03 -12<br />
164 D# 4 +03 -01<br />
165 D# 4 +03 +09<br />
166 D# 4 +03 +20<br />
167 D# 4 +03 +30<br />
168 D# 4 +03 +41<br />
169 E 4 +04 -49<br />
170 E 4 +04 -39<br />
171 E 4 +04 -29<br />
172 E 4 +04 -19<br />
173 E 4 +04 -09<br />
174 E 4 +04 +01<br />
175 E 4 +04 +11<br />
176 E 4 +04 +21<br />
177 E 4 +04 +31<br />
178 E 4 +04 +41<br />
179 F 4 +05 -50<br />
180 F 4 +05 -40<br />
181 F 4 +05 -30<br />
182 F 4 +05 -21<br />
183 F 4 +05 -11<br />
184 F 4 +05 -02<br />
185 F 4 +05 +07<br />
186 F 4 +05 +17<br />
187 F 4 +05 +26<br />
188 F 4 +05 +35<br />
189 F 4 +05 +44<br />
190 F# 4 +06 -46<br />
191 F# 4 +06 -37<br />
192 F# 4 +06 -28<br />
193 F# 4 +06 -19<br />
194 F# 4 +06 -10<br />
195 F# 4 +06 -01<br />
196 F# 4 +06 +07<br />
197 F# 4 +06 +16<br />
198 F# 4 +06 +25<br />
199 F# 4 +06 +34<br />
200 F# 4 +06 +42<br />
201 G 4 +07 -49<br />
202 G 4 +07 -40<br />
203 G 4 +07 -32<br />
204 G 4 +07 -23<br />
205 G 4 +07 -15<br />
206 G 4 +07 -06<br />
207 G 4 +07 +02<br />
208 G 4 +07 +10<br />
209 G 4 +07 +19<br />
210 G 4 +07 +27<br />
211 G 4 +07 +35<br />
212 G 4 +07 +43<br />
213 G# 4 +08 -49<br />
214 G# 4 +08 -40<br />
215 G# 4 +08 -32<br />
216 G# 4 +08 -24<br />
217 G# 4 +08 -16<br />
218 G# 4 +08 -08<br />
219 G# 4 +08 00<br />
220 G# 4 +08 +07<br />
221 G# 4 +08 +15<br />
222 G# 4 +08 +23<br />
223 G# 4 +08 +31<br />
224 G# 4 +08 +39<br />
225 G# 4 +08 +46<br />
226 A 4 +09 -46<br />
227 A 4 +09 -38<br />
228 A 4 +09 -31<br />
229 A 4 +09 -23<br />
230 A 4 +09 -16<br />
231 A 4 +09 -08<br />
232 A 4 +09 -01<br />
233 A 4 +09 +07<br />
234 A 4 +09 +14<br />
235 A 4 +09 +22<br />
236 A 4 +09 +29<br />
237 A 4 +09 +36<br />
238 A 4 +09 +44<br />
239 A# 4 +10 -49<br />
240 A# 4 +10 -42<br />
Appendices<br />
175
Patch List<br />
Original B.P.M. 144 Original B.P.M. 160 Original B.P.M. 184<br />
dst key c.t f.t<br />
41 D 2 -22 +25<br />
42 D# 2 -21 -33<br />
43 D# 2 -21 +08<br />
44 D# 2 21 +47<br />
45 E 2 -20 -14<br />
46 E 2 -20 +24<br />
47 F 2 -19 -38<br />
48 F 2 -19 -02<br />
49 F 2 -19 +34<br />
50 F# 2 -18 -31<br />
51 F# 2 -18 +03<br />
52 F# 2 -18 +37<br />
53 G 2 -17 -30<br />
54 G 2 -17 +02<br />
55 G 2 -17 +34<br />
56 G# 2 -16 -35<br />
57 G# 2 -16 -04<br />
58 G# 2 -16 +26<br />
59 A 2 -15 -45<br />
60 A 2 -15 -16<br />
61 A 2 -15 +13<br />
62 A 2 -15 +41<br />
63 A# 2 -14 -31<br />
64 A# 2 -14 -04<br />
65 A# 2 -14 +23<br />
66 A# 2 -14 +49<br />
67 B 2 -13 -25<br />
68 B 2 -13 +01<br />
69 B 2 -13 +26<br />
70 C 3 -12 -49<br />
71 C 3 -12 -24<br />
72 C 3 -12 00<br />
73 C 3 -12 +24<br />
74 C 3 -12 +47<br />
75 C# 3 -11 -29<br />
76 C# 3 -11 -06<br />
77 C# 3 -11 +16<br />
78 C# 3 -11 +39<br />
79 D 3 -10 -39<br />
80 D 3 -10 -18<br />
81 D 3 -10 +04<br />
82 D 3 -10 +25<br />
83 D 3 -10 +46<br />
84 D# 3 -09 -33<br />
85 D# 3 -09 -13<br />
86 D# 3 -09 +08<br />
87 D# 3 -09 +28<br />
88 D# 3 -09 +47<br />
89 E 3 -08 -33<br />
90 E 3 -08 -14<br />
91 E 3 -08 +05<br />
92 E 3 -08 +24<br />
93 E 3 -08 +43<br />
94 F 3 -07 -38<br />
95 F 3 -07 -20<br />
96 F 3 -07 -02<br />
97 F 3 -07 +16<br />
98 F 3 -07 +34<br />
99 F# 3 -06 -49<br />
100 F# 3 -06 -31<br />
101 F# 3 -06 -14<br />
102 F# 3 -06 +03<br />
103 F# 3 -06 +20<br />
104 F# 3 -06 +37<br />
105 G 3 -05 -47<br />
106 G 3 -05 -30<br />
107 G 3 -05 -14<br />
108 G 3 -05 +02<br />
109 G 3 -05 +18<br />
110 G 3 -05 +34<br />
111 G 3 -05 +49<br />
112 G# 3 -04 -35<br />
113 G# 3 -04 -20<br />
114 G# 3 -04 -04<br />
115 G# 3 -04 +11<br />
116 G# 3 -04 +26<br />
117 G# 3 -04 +41<br />
118 A 3 -03 -45<br />
119 A 3 -03 -30<br />
120 A 3 -03 -16<br />
121 A 3 -03 -01<br />
122 A 3 -03 +13<br />
123 A 3 -03 +27<br />
124 A 3 -03 +41<br />
125 A# 3 -02 -45<br />
126 A# 3 -02 -31<br />
127 A# 3 -02 -17<br />
128 A# 3 -02 -04<br />
129 A# 3 -02 +10<br />
130 A# 3 -02 +23<br />
131 A# 3 -02 +36<br />
132 A# 3 -02 +49<br />
133 B 3 -01 -38<br />
134 B 3 -01 -25<br />
135 B 3 -01 -12<br />
136 B 3 -01 +01<br />
137 B 3 -01 +14<br />
138 B 3 -01 +26<br />
139 B 3 -01 +39<br />
140 C 4 00 -49<br />
dst key c.t f.t<br />
141 C 4 00 -36<br />
142 C 4 00 -24<br />
143 C 4 00 -12<br />
144 C 4 00 00<br />
145 C 4 00 +12<br />
146 C 4 00 +24<br />
147 C 4 00 +36<br />
148 C 4 00 +47<br />
149 C# 4 +01 -41<br />
150 C# 4 +01 -29<br />
151 C# 4 +01 -18<br />
152 C# 4 +01 -06<br />
153 C# 4 +01 +05<br />
154 C# 4 +01 +16<br />
155 C# 4 +01 +27<br />
156 C# 4 +01 +39<br />
157 C# 4 +01 +50<br />
158 D 4 +02 -39<br />
159 D 4 +02 -28<br />
160 D 4 +02 -18<br />
161 D 4 +02 -07<br />
162 D 4 +02 +04<br />
163 D 4 +02 +15<br />
164 D 4 +02 +25<br />
165 D 4 +02 +36<br />
166 D 4 +02 +46<br />
167 D# 4 +03 -43<br />
168 D# 4 +03 -33<br />
169 D# 4 +03 -23<br />
170 D# 4 +03 -13<br />
171 D# 4 +03 -02<br />
172 D# 4 +03 +08<br />
173 D# 4 +03 +18<br />
174 D# 4 +03 +28<br />
175 D# 4 +03 +38<br />
176 D# 4 +03 +47<br />
177 E 4 +04 -43<br />
178 E 4 +04 -33<br />
179 E 4 +04 -23<br />
180 E 4 +04 -14<br />
181 E 4 +04 -04<br />
182 E 4 +04 +05<br />
183 E 4 +04 +15<br />
184 E 4 +04 +24<br />
185 E 4 +04 +34<br />
186 E 4 +04 +43<br />
187 F 4 +05 -48<br />
188 F 4 +05 -38<br />
189 F 4 +05 -29<br />
190 F 4 +05 -20<br />
191 F 4 +05 -11<br />
192 F 4 +05 -02<br />
193 F 4 +05 +07<br />
194 F 4 +05 +16<br />
195 F 4 +05 +25<br />
196 F 4 +05 +34<br />
197 F 4 +05 +43<br />
198 F# 4 +06 -49<br />
199 F# 4 +06 -40<br />
200 F# 4 +06 -31<br />
201 F# 4 +06 -23<br />
202 F# 4 +06 -14<br />
203 F# 4 +06 -06<br />
204 F# 4 +06 +03<br />
205 F# 4 +06 +11<br />
206 F# 4 +06 +20<br />
207 F# 4 +06 +28<br />
208 F# 4 +06 +37<br />
209 F# 4 +06 +45<br />
210 G 4 +07 -47<br />
211 G 4 +07 -39<br />
212 G 4 +07 -30<br />
213 G 4 +07 -22<br />
214 G 4 +07 -14<br />
215 G 4 +07 -06<br />
216 G 4 +07 +02<br />
217 G 4 +07 +10<br />
218 G 4 +07 +18<br />
219 G 4 +07 +26<br />
220 G 4 +07 +34<br />
221 G 4 +07 +42<br />
222 G 4 +07 +49<br />
223 G# 4 +08 -43<br />
224 G# 4 +08 -35<br />
225 G# 4 +08 -27<br />
226 G# 4 +08 -20<br />
227 G# 4 +08 -12<br />
228 G# 4 +08 -04<br />
229 G# 4 +08 +03<br />
230 G# 4 +08 +11<br />
231 G# 4 +08 +18<br />
232 G# 4 +08 +26<br />
233 G# 4 +08 +33<br />
234 G# 4 +08 +41<br />
235 G# 4 +08 +48<br />
236 A 4 +09 -45<br />
237 A 4 +09 -37<br />
238 A 4 +09 -30<br />
239 A 4 +09 -23<br />
240 A 4 +09 -16<br />
dst key c.t f.t<br />
41 C 2 -24 +43<br />
42 C# 2 -23 -16<br />
43 C# 2 -23 +25<br />
44 D 2 -22 -35<br />
45 D 2 -22 +04<br />
46 D 2 -22 +42<br />
47 D# 2 -21 -21<br />
48 D# 2 -21 +16<br />
49 E 2 -20 -49<br />
50 E 2 -20 -14<br />
51 E 2 -20 +21<br />
52 F 2 -19 -46<br />
53 F 2 -19 -13<br />
54 F 2 -19 +20<br />
55 F# 2 -18 -49<br />
56 F# 2 -18 -17<br />
57 F# 2 -18 +13<br />
58 F# 2 -18 +43<br />
59 G 2 -17 -27<br />
60 G 2 -17 +02<br />
61 G 2 -17 +31<br />
62 G# 2 -16 -41<br />
63 G# 2 -16 -14<br />
64 G# 2 -16 +14<br />
65 G# 2 -16 +41<br />
66 A 2 -15 -33<br />
67 A 2 -15 -07<br />
68 A 2 -15 +19<br />
69 A 2 -15 +44<br />
70 A# 2 -14 -31<br />
71 A# 2 -14 -07<br />
72 A# 2 -14 +18<br />
73 A# 2 -14 +41<br />
74 B 2 -13 -35<br />
75 B 2 -13 -12<br />
76 B 2 -13 +11<br />
77 B 2 -13 +34<br />
78 C 3 -12 -44<br />
79 C 3 -12 -22<br />
80 C 3 -12 00<br />
81 C 3 -12 +22<br />
82 C 3 -12 +43<br />
83 C# 3 -11 -36<br />
84 C# 3 -11 -16<br />
85 C# 3 -11 +05<br />
86 C# 3 -11 +25<br />
87 C# 3 -11 +45<br />
88 D 3 -10 -35<br />
89 D 3 -10 -15<br />
90 D 3 -10 +04<br />
91 D 3 -10 +23<br />
92 D 3 -10 +42<br />
93 D# 3 -09 -39<br />
94 D# 3 -09 -21<br />
95 D# 3 -09 -02<br />
96 D# 3 -09 +16<br />
97 D# 3 -09 +34<br />
98 E 3 -08 -49<br />
99 E 3 -08 -31<br />
100 E 3 -08 -14<br />
101 E 3 -08 +04<br />
102 E 3 -08 +21<br />
103 E 3 -08 +37<br />
104 F 3 -07 -46<br />
105 F 3 -07 -29<br />
106 F 3 -07 -13<br />
107 F 3 -07 +03<br />
108 F 3 -07 +20<br />
109 F 3 -07 +36<br />
110 F# 3 -06 -49<br />
111 F# 3 -06 -33<br />
112 F# 3 -06 -17<br />
113 F# 3 -06 -02<br />
114 F# 3 -06 +13<br />
115 F# 3 -06 +28<br />
116 F# 3 -06 +43<br />
117 G 3 -05 -42<br />
118 G 3 -05 -27<br />
119 G 3 -05 -13<br />
120 G 3 -05 +02<br />
121 G 3 -05 +16<br />
122 G 3 -05 +31<br />
123 G 3 -05 +45<br />
124 G# 3 -04 -41<br />
125 G# 3 -04 -27<br />
126 G# 3 -04 -14<br />
127 G# 3 -04 00<br />
128 G# 3 -04 +14<br />
129 G# 3 -04 +27<br />
130 G# 3 -04 +41<br />
131 A 3 -03 -46<br />
132 A 3 -03 -33<br />
133 A 3 -03 -20<br />
134 A 3 -03 -07<br />
135 A 3 -03 +06<br />
136 A 3 -03 +19<br />
137 A 3 -03 +31<br />
138 A 3 -03 +44<br />
139 A# 3 -02 -44<br />
140 A# 3 -02 -31<br />
dst key c.t f.t<br />
141 A# 3 -02 -19<br />
142 A# 3 -02 -07<br />
143 A# 3 -02 +06<br />
144 A# 3 -02 +18<br />
145 A# 3 -02 +30<br />
146 A# 3 -02 +41<br />
147 B 3 -01 -47<br />
148 B 3 -01 -35<br />
149 B 3 -01 -23<br />
150 B 3 -01 -12<br />
151 B 3 -01 00<br />
152 B 3 -01 +11<br />
153 B 3 -01 +23<br />
154 B 3 -01 +34<br />
155 B 3 -01 +45<br />
156 C 4 00 -44<br />
157 C 4 00 -33<br />
158 C 4 00 -22<br />
159 C 4 00 -11<br />
160 C 4 00 00<br />
161 C 4 00 +11<br />
162 C 4 00 +22<br />
163 C 4 00 +32<br />
164 C 4 00 +43<br />
165 C# 4 +01 -47<br />
166 C# 4 +01 -36<br />
167 C# 4 +01 -26<br />
168 C# 4 +01 -16<br />
169 C# 4 +01 -05<br />
170 C# 4 +01 +05<br />
171 C# 4 +01 +15<br />
172 C# 4 +01 +25<br />
173 C# 4 +01 +35<br />
174 C# 4 +01 +45<br />
175 D 4 +02 -45<br />
176 D 4 +02 -35<br />
177 D 4 +02 -25<br />
178 D 4 +02 -15<br />
179 D 4 +02 -06<br />
180 D 4 +02 +04<br />
181 D 4 +02 +14<br />
182 D 4 +02 +23<br />
183 D 4 +02 +33<br />
184 D 4 +02 +42<br />
185 D# 4 +03 -49<br />
186 D# 4 +03 -39<br />
187 D# 4 +03 -30<br />
188 D# 4 +03 -21<br />
189 D# 4 +03 -12<br />
190 D# 4 +03 -02<br />
191 D# 4 +03 +07<br />
192 D# 4 +03 +16<br />
193 D# 4 +03 +25<br />
194 D# 4 +03 +34<br />
195 D# 4 +03 +42<br />
196 E 4 +04 -49<br />
197 E 4 +04 -40<br />
198 E 4 +04 -31<br />
199 E 4 +04 -22<br />
200 E 4 +04 -14<br />
201 E 4 +04 -05<br />
202 E 4 +04 +04<br />
203 E 4 +04 +12<br />
204 E 4 +04 +21<br />
205 E 4 +04 +29<br />
206 E 4 +04 +37<br />
207 E 4 +04 +46<br />
208 F 4 +05 -46<br />
209 F 4 +05 -37<br />
210 F 4 +05 -29<br />
211 F 4 +05 -21<br />
212 F 4 +05 -13<br />
213 F 4 +05 -05<br />
214 F 4 +05 +03<br />
215 F 4 +05 +12<br />
216 F 4 +05 +20<br />
217 F 4 +05 +28<br />
218 F 4 +05 +36<br />
219 F 4 +05 +43<br />
220 F# 4 +06 -49<br />
221 F# 4 +06 -41<br />
222 F# 4 +06 -33<br />
223 F# 4 +06 -25<br />
224 F# 4 +06 -17<br />
225 F# 4 +06 -10<br />
226 F# 4 +06 -02<br />
227 F# 4 +06 +06<br />
228 F# 4 +06 +13<br />
229 F# 4 +06 +21<br />
230 F# 4 +06 +28<br />
231 F# 4 +06 +36<br />
232 F# 4 +06 +43<br />
233 G 4 +07 -49<br />
234 G 4 +07 -42<br />
235 G 4 +07 -34<br />
236 G 4 +07 -27<br />
237 G 4 +07 -20<br />
238 G 4 +07 -13<br />
239 G 4 +07 -05<br />
240 G 4 +07 +02<br />
dst key c.t f.t<br />
41 A# 1 -26 +01<br />
42 A# 1 -26 +43<br />
43 B 1 -25 -17<br />
44 B 1 -25 +23<br />
45 C 2 -24 -38<br />
46 C 2 -24 00<br />
47 C 2 -24 +37<br />
48 C# 2 -23 -26<br />
49 C# 2 -23 +09<br />
50 C# 2 -23 +44<br />
51 D 2 -22 -21<br />
52 D 2 -22 +12<br />
53 D 2 -22 +45<br />
54 D# 2 -21 -22<br />
55 D# 2 -21 +09<br />
56 D# 2 -21 +41<br />
57 E 2 -20 -29<br />
58 E 2 -20 +01<br />
59 E 2 -20 +31<br />
60 F 2 -19 -40<br />
61 F 2 -19 -11<br />
62 F 2 -19 +17<br />
63 F 2 -19 +44<br />
64 F# 2 -18 -28<br />
65 F# 2 -18 -01<br />
66 F# 2 -18 +25<br />
67 G 2 -17 -49<br />
68 G 2 -17 -23<br />
69 G 2 -17 +02<br />
70 G 2 -17 +27<br />
71 G# 2 -16 -49<br />
72 G# 2 -16 -24<br />
73 G# 2 -16 00<br />
74 G# 2 -16 +23<br />
75 G# 2 -16 +46<br />
76 A 2 -15 -31<br />
77 A 2 -15 -08<br />
78 A 2 -15 +14<br />
79 A 2 -15 +36<br />
80 A# 2 -14 -42<br />
81 A# 2 -14 -20<br />
82 A# 2 -14 +01<br />
83 A# 2 -14 +22<br />
84 A# 2 -14 +43<br />
85 B 2 -13 -37<br />
86 B 2 -13 -17<br />
87 B 2 -13 +03<br />
88 B 2 -13 +23<br />
89 B 2 -13 +43<br />
90 C 3 -12 -38<br />
91 C 3 -12 -19<br />
92 C 3 -12 00<br />
93 C 3 -12 +19<br />
94 C 3 -12 +37<br />
95 C# 3 -11 -44<br />
96 C# 3 -11 -26<br />
97 C# 3 -11 -08<br />
98 C# 3 -11 +09<br />
99 C# 3 -11 +27<br />
100 C# 3 -11 +44<br />
101 D 3 -10 -38<br />
102 D 3 -10 -21<br />
103 D 3 -10 -04<br />
104 D 3 -10 +12<br />
105 D 3 -10 +29<br />
106 D 3 -10 +45<br />
107 D# 3 -09 -39<br />
108 D# 3 -09 -22<br />
109 D# 3 -09 -06<br />
110 D# 3 -09 +09<br />
111 D# 3 -09 +25<br />
112 D# 3 -09 +41<br />
113 E 3 -08 -44<br />
114 E 3 -08 -29<br />
115 E 3 -08 -14<br />
116 E 3 -08 +01<br />
117 E 3 -08 +16<br />
118 E 3 -08 +31<br />
119 E 3 -08 +46<br />
120 F 3 -07 -40<br />
121 F 3 -07 -26<br />
122 F 3 -07 -11<br />
123 F 3 -07 +03<br />
124 F 3 -07 +17<br />
125 F 3 -07 +31<br />
126 F 3 -07 +44<br />
127 F# 3 -06 -42<br />
128 F# 3 -06 -28<br />
129 F# 3 -06 -15<br />
130 F# 3 -06 -01<br />
131 F# 3 -06 +12<br />
132 F# 3 -06 +25<br />
133 F# 3 -06 +38<br />
134 G 3 -05 -49<br />
135 G 3 -05 -36<br />
136 G 3 -05 -23<br />
137 G 3 -05 -11<br />
138 G 3 -05 +02<br />
139 G 3 -05 +14<br />
140 G 3 -05 +27<br />
dst key c.t f.t<br />
141 G 3 -05 +39<br />
142 G# 3 -04 -49<br />
143 G# 3 -04 -36<br />
144 G# 3 -04 -24<br />
145 G# 3 -04 -12<br />
146 G# 3 -04 00<br />
147 G# 3 -04 +11<br />
148 G# 3 -04 +23<br />
149 G# 3 -04 +35<br />
150 G# 3 -04 +46<br />
151 A 3 -03 -42<br />
152 A 3 -03 -31<br />
153 A 3 -03 -19<br />
154 A 3 -03 -08<br />
155 A 3 -03 +03<br />
156 A 3 -03 +14<br />
157 A 3 -03 +25<br />
158 A 3 -03 +36<br />
159 A 3 -03 +47<br />
160 A# 3 -02 -42<br />
161 A# 3 -02 -31<br />
162 A# 3 -02 -20<br />
163 A# 3 -02 -10<br />
164 A# 3 -02 +01<br />
165 A# 3 -02 +11<br />
166 A# 3 -02 +22<br />
167 A# 3 -02 +32<br />
168 A# 3 -02 +43<br />
169 B 3 -01 -47<br />
170 B 3 -01 -37<br />
171 B 3 -01 -27<br />
172 B 3 -01 -17<br />
173 B 3 -01 -07<br />
174 B 3 -01 +03<br />
175 B 3 -01 +13<br />
176 B 3 -01 +23<br />
177 B 3 -01 +33<br />
178 B 3 -01 +43<br />
179 C 4 00 -48<br />
180 C 4 00 -38<br />
181 C 4 00 -28<br />
182 C 4 00 -19<br />
183 C 4 00 -09<br />
184 C 4 00 00<br />
185 C 4 00 +09<br />
186 C 4 00 +19<br />
187 C 4 00 +28<br />
188 C 4 00 +37<br />
189 C 4 00 +46<br />
190 C# 4 +01 -44<br />
191 C# 4 +01 -35<br />
192 C# 4 +01 -26<br />
193 C# 4 +01 -17<br />
194 C# 4 +01 -08<br />
195 C# 4 +01 +01<br />
196 C# 4 +01 +09<br />
197 C# 4 +01 +18<br />
198 C# 4 +01 +27<br />
199 C# 4 +01 +36<br />
200 C# 4 +01 +44<br />
201 D 4 +02 -47<br />
202 D 4 +02 -38<br />
203 D 4 +02 -30<br />
204 D 4 +02 -21<br />
205 D 4 +02 -13<br />
206 D 4 +02 -04<br />
207 D 4 +02 +04<br />
208 D 4 +02 +12<br />
209 D 4 +02 +21<br />
210 D 4 +02 +29<br />
211 D 4 +02 +37<br />
212 D 4 +02 +45<br />
213 D# 4 +03 -47<br />
214 D# 4 +03 -39<br />
215 D# 4 +03 -30<br />
216 D# 4 +03 -22<br />
217 D# 4 +03 -14<br />
218 D# 4 +03 -06<br />
219 D# 4 +03 +01<br />
220 D# 4 +03 +09<br />
221 D# 4 +03 +17<br />
222 D# 4 +03 +25<br />
223 D# 4 +03 +33<br />
224 D# 4 +03 +41<br />
225 D# 4 +03 +48<br />
226 E 4 +04 -44<br />
227 E 4 +04 -36<br />
228 E 4 +04 -29<br />
229 E 4 +04 -21<br />
230 E 4 +04 -14<br />
231 E 4 +04 -06<br />
232 E 4 +04 +01<br />
233 E 4 +04 +09<br />
234 E 4 +04 +16<br />
235 E 4 +04 +24<br />
236 E 4 +04 +31<br />
237 E 4 +04 +38<br />
238 E 4 +04 +46<br />
239 F 4 +05 -47<br />
240 F 4 +05 -40<br />
176
Rhythm Set List<br />
Note No.<br />
35<br />
C2 36<br />
37<br />
38<br />
39<br />
40<br />
41<br />
42<br />
43<br />
44<br />
45<br />
46<br />
47<br />
C3 48<br />
49<br />
50<br />
51<br />
52<br />
53<br />
54<br />
55<br />
56<br />
57<br />
58<br />
59<br />
C4 60<br />
61<br />
62<br />
63<br />
64<br />
65<br />
66<br />
67<br />
68<br />
69<br />
70<br />
71<br />
C5 72<br />
73<br />
74<br />
75<br />
76<br />
77<br />
78<br />
79<br />
80<br />
81<br />
82<br />
83<br />
C6 84<br />
85<br />
86<br />
87<br />
88<br />
89<br />
90<br />
91<br />
92<br />
93<br />
94<br />
95<br />
C7 96<br />
98 97<br />
USER (User) PR-A (Preset A Group) PR-B (Preset B Group)<br />
001<br />
HouseDrumSet 1<br />
Scratch 1<br />
808 SN<br />
Dry Stick<br />
808 SN<br />
808 Claps<br />
808 SN<br />
808 Kick<br />
606 HiHat Cl<br />
808 SN<br />
606 HiHat Cl<br />
808 Kick<br />
606 HiHat Op<br />
808 SN<br />
808 Kick<br />
Crash 1<br />
808 SN<br />
Ride 2<br />
REV Crash 1<br />
Ride Bell 1<br />
Tambourine<br />
Crash 1<br />
Cowbell 1<br />
Crash 1<br />
Vibraslap<br />
Ride 2<br />
Bongo Hi<br />
Bongo Lo<br />
Cga Mute Hi<br />
Cga Open Hi<br />
Cga Open Lo<br />
Timbale<br />
Timbale<br />
Agogo<br />
Agogo<br />
Cabasa Cut<br />
Maracas<br />
Soft Pad B<br />
Soft Pad A<br />
Long Guiro<br />
Long Guiro<br />
Claves<br />
Wood Block<br />
Wood Block<br />
Cuica<br />
Cuica<br />
Open Triangl<br />
Open Triangl<br />
Cabasa Cut<br />
Tambourine<br />
Old Kick<br />
Scratch 1<br />
Piccolo SN<br />
Scratch 3<br />
White Noise<br />
Synth Saw 1<br />
Synth Pulse1<br />
Back Hit<br />
Tekno Hit<br />
Orch. Hit<br />
Philly Hit<br />
REV Back Hit<br />
MC500 Beep 1<br />
R8 Click<br />
MC500 Beep 2<br />
002<br />
JazzDrumSet1<br />
Hybrid Kick2<br />
Hybrid Kick1<br />
Side Stick<br />
Ballad SN<br />
Brush Slap<br />
Brush Swish<br />
Verb Tom Lo<br />
Cl HiHat 1<br />
Verb Tom Lo<br />
Pedal HiHat<br />
Verb Tom Hi<br />
Op HiHat<br />
Verb Tom Hi<br />
Verb Tom Hi<br />
Crash 1<br />
Verb Tom Hi<br />
Ride 2<br />
China Cym<br />
Ride Bell 1<br />
Tambourine<br />
Crash 1<br />
Cowbell 1<br />
Crash 1<br />
Vibraslap<br />
Ride 2<br />
Bongo Hi<br />
Bongo Lo<br />
Cga Mute Hi<br />
Cga Open Hi<br />
Cga Open Lo<br />
Timbale<br />
Timbale<br />
Agogo<br />
Agogo<br />
Cabasa Up<br />
Maracas<br />
Soft Pad B<br />
Soft Pad A<br />
Long Guiro<br />
Long Guiro<br />
Claves<br />
Wood Block<br />
Wood Block<br />
Cuica<br />
Cuica<br />
Open Triangl<br />
Open Triangl<br />
Cabasa Cut<br />
Spectrum<br />
Wind Chimes<br />
Wood Block<br />
Cga Slap<br />
Dry Tom Lo<br />
Lite Kick<br />
Hybrid Kick2<br />
Old Kick<br />
808 Kick<br />
Natural SN1<br />
Natural SN2<br />
SN Roll<br />
Natural SN2<br />
Metronome 2<br />
R8 Click<br />
Metronome 1<br />
001<br />
PopDrumSet 1<br />
Verb Kick<br />
Hybrid Kick1<br />
Side Stick<br />
Natural SN2<br />
808 Claps<br />
SN Roll<br />
Verb Tom Lo<br />
Cl HiHat 1<br />
Verb Tom Lo<br />
Cl HiHat 2<br />
Verb Tom Hi<br />
Op HiHat<br />
Verb Tom Hi<br />
Verb Tom Hi<br />
Crash 1<br />
Verb Tom Hi<br />
Ride 2<br />
China Cym<br />
Ride Bell 1<br />
Tambourine<br />
Crash 1<br />
Cowbell 1<br />
Crash 1<br />
Cowbell 1<br />
Ride Bell 1<br />
Cga Mute Hi<br />
Cga Mute Lo<br />
Cga Slap<br />
Cga Open Hi<br />
Cga Open Lo<br />
Timbale<br />
Timbale<br />
Agogo<br />
Agogo<br />
Cabasa Up<br />
Maracas<br />
Soft Pad A<br />
Soft Pad B<br />
Long Guiro<br />
Long Guiro<br />
Claves<br />
Wood Block<br />
Wood Block<br />
Cuica<br />
Cuica<br />
Open Triangl<br />
Open Triangl<br />
Cabasa Cut<br />
Spectrum<br />
Wind Chimes<br />
Wood Block<br />
Cga Slap<br />
Dry Tom Lo<br />
Lite Kick<br />
Hybrid Kick2<br />
Old Kick<br />
Pop Voice<br />
Wind Agogo<br />
Op HiHat<br />
Anklungs<br />
Op HiHat<br />
Metronome 2<br />
R8 Click<br />
Metronome 1<br />
002<br />
PopDrumSet 2<br />
Hybrid Kick1<br />
Round Kick<br />
Dry Stick<br />
Piccolo SN<br />
Hand Claps<br />
Piccolo SN<br />
Verb Tom Lo<br />
Cl HiHat 1<br />
Verb Tom Lo<br />
Cl HiHat 2<br />
Verb Tom Hi<br />
Op HiHat<br />
Verb Tom Hi<br />
Verb Tom Hi<br />
Crash 1<br />
Verb Tom Hi<br />
Ride 1<br />
China Cym<br />
Ride Bell 1<br />
Tambourine<br />
Crash 1<br />
Cowbell 1<br />
Crash 1<br />
Cowbell 1<br />
Ride Bell 1<br />
Cga Mute Hi<br />
Cga Mute Lo<br />
Cga Slap<br />
Cga Open Hi<br />
Cga Open Lo<br />
Timbale<br />
Timbale<br />
Agogo<br />
Agogo<br />
Cabasa Up<br />
Maracas<br />
Cabasa Down<br />
Cabasa Cut<br />
808 Kick<br />
808 SN<br />
DIGI Bell 1<br />
808 SN<br />
808 Kick<br />
Spectrum<br />
808 Kick<br />
Spectrum<br />
808 Kick<br />
Spectrum<br />
808 Kick<br />
808 Kick<br />
Feedbackwave<br />
808 Kick<br />
Feedbackwave<br />
Pop Voice<br />
Pop Voice<br />
Wind Agogo<br />
Pop Voice<br />
Wind Agogo<br />
Op HiHat<br />
Anklungs<br />
Op HiHat<br />
Metronome 2<br />
R8 Click<br />
Metronome 1<br />
001<br />
PowerDrumSet<br />
Verb Kick<br />
Round Kick<br />
Dry Stick<br />
Piccolo SN<br />
808 Claps<br />
Natural SN2<br />
Verb Tom Lo<br />
Cl HiHat 1<br />
Verb Tom Lo<br />
Pedal HiHat<br />
Verb Tom Lo<br />
Op HiHat<br />
Verb Tom Lo<br />
Verb Tom Hi<br />
Crash 1<br />
Verb Tom Hi<br />
Ride 1<br />
China Cym<br />
Ride Bell 1<br />
Tambourine<br />
Crash 1<br />
Cowbell 1<br />
Crash 1<br />
Vibraslap<br />
Ride 1<br />
Bongo Hi<br />
Bongo Lo<br />
Cga Mute Hi<br />
Cga Open Hi<br />
Cga Open Lo<br />
Timbale<br />
Timbale<br />
Agogo<br />
Agogo<br />
Cabasa Up<br />
Maracas<br />
Soft Pad A<br />
Soft Pad B<br />
Long Guiro<br />
Long Guiro<br />
Claves<br />
Wood Block<br />
Wood Block<br />
Cuica<br />
Cuica<br />
Open Triangl<br />
Open Triangl<br />
Maracas<br />
Ice Rain<br />
Wind Chimes<br />
Claves<br />
808 SN<br />
Verb Tom Hi<br />
Piccolo SN<br />
Scratch 3<br />
Tin Wave<br />
Spectrum<br />
REV Steel DR<br />
REV Tin Wave<br />
REV PiccloSN<br />
REV Crash 1<br />
Metronome 2<br />
R8 Click<br />
Metronome 1<br />
002<br />
RaveDrumSet<br />
808 Kick<br />
Round Kick<br />
Side Stick<br />
808 SN<br />
808 Claps<br />
808 SN<br />
808 Kick<br />
606 HiHat Cl<br />
Tekno Hit<br />
606 HiHat Cl<br />
808 Kick<br />
606 HiHat Op<br />
Tekno Hit<br />
808 Kick<br />
Crash 1<br />
Tekno Hit<br />
Voice Breath<br />
MC500 Beep 1<br />
MC500 Beep 2<br />
R8 Click<br />
Pizz<br />
DIGI Bell 1<br />
Rattles<br />
Ride Bell 1<br />
REV Tamb<br />
2.2 Vibwave<br />
Low Pink NZ<br />
Kalimba<br />
Metal Wind<br />
Lead Wave<br />
Tin Wave<br />
Agogo<br />
Lite Kick<br />
Agogo<br />
Lite Kick<br />
Agogo<br />
Gtr Harm A<br />
Gtr Harm A<br />
Piano Thump<br />
Natural SN1<br />
Hand Claps<br />
Natural SN1<br />
808 SN<br />
PowerChord B<br />
Hybrid Kick2<br />
PowerChord B<br />
Gt.FretNoise<br />
Banjo B<br />
Slap Bass 1<br />
Oboe mf A<br />
Shakuhachi<br />
Pizz<br />
Syn Vox 1<br />
Voice Aahs A<br />
Voice Oohs2A<br />
Pop Voice<br />
Male Ooh A<br />
Voice Breath<br />
Org Vox C<br />
Vox Noise<br />
Vox Noise<br />
Applause<br />
R8 Click<br />
Metronome 2<br />
Appendices<br />
177
Rhythm Set List<br />
Note No.<br />
35<br />
C2 36<br />
37<br />
38<br />
39<br />
40<br />
41<br />
42<br />
43<br />
44<br />
45<br />
46<br />
47<br />
C3 48<br />
49<br />
50<br />
51<br />
52<br />
53<br />
54<br />
55<br />
56<br />
57<br />
58<br />
59<br />
C4 60<br />
61<br />
62<br />
63<br />
64<br />
65<br />
66<br />
67<br />
68<br />
69<br />
70<br />
71<br />
C5 72<br />
73<br />
74<br />
75<br />
76<br />
77<br />
78<br />
79<br />
80<br />
81<br />
82<br />
83<br />
C6 84<br />
85<br />
86<br />
87<br />
88<br />
89<br />
90<br />
91<br />
92<br />
93<br />
94<br />
95<br />
C7 96<br />
98 97<br />
PR-C (Preset C Group) PR-D (GM Group) PR-E (Preset E Group)<br />
001<br />
JazzDrumSet2<br />
Round Kick<br />
Old Kick<br />
Side Stick<br />
Ballad SN<br />
Hand Claps<br />
SN Roll<br />
Verb Tom Lo<br />
Cl HiHat 2<br />
Dry Tom Lo<br />
Pedal HiHat<br />
Verb Tom Lo<br />
Op HiHat<br />
Dry Tom Lo<br />
Verb Tom Hi<br />
Crash 1<br />
Dry Tom Hi<br />
Ride 2<br />
China Cym<br />
Ride Bell 1<br />
Tambourine<br />
Crash 1<br />
Cowbell 1<br />
Crash 1<br />
Vibraslap<br />
Ride 2<br />
Bongo Hi<br />
Bongo Lo<br />
Cga Mute Hi<br />
Cga Open Hi<br />
Cga Open Lo<br />
Timbale<br />
Timbale<br />
Agogo<br />
Agogo<br />
Cabasa Up<br />
Maracas<br />
Soft Pad A<br />
Brush Swish<br />
Long Guiro<br />
Long Guiro<br />
Claves<br />
Wood Block<br />
Metronome 2<br />
Cuica<br />
Cuica<br />
Open Triangl<br />
Open Triangl<br />
Cabasa Cut<br />
Spectrum<br />
Wind Chimes<br />
Wood Block<br />
Cga Slap<br />
Dry Tom Lo<br />
Lite Kick<br />
Hybrid Kick2<br />
Old Kick<br />
Natural SN2<br />
Natural SN1<br />
Brush Swish<br />
Brush Roll<br />
Brush Slap<br />
Metronome 2<br />
R8 Click<br />
Metronome 1<br />
002<br />
OrchDrumSet<br />
Old Kick<br />
Round Kick<br />
Side Stick<br />
Ballad SN<br />
808 Claps<br />
SN Roll<br />
Timpani<br />
Timpani<br />
Timpani<br />
Timpani<br />
Timpani<br />
Timpani<br />
Timpani<br />
Timpani<br />
Timpani<br />
Timpani<br />
Timpani<br />
Timpani<br />
Timpani<br />
Tambourine<br />
Crash 1<br />
Cowbell 1<br />
Crash 1<br />
Ride 1<br />
Ride 2<br />
Bongo Hi<br />
Bongo Lo<br />
Cga Mute Hi<br />
Cga Open Hi<br />
Cga Open Lo<br />
Timbale<br />
Timbale<br />
Agogo<br />
Agogo<br />
Cabasa Up<br />
Maracas<br />
Soft Pad A<br />
Soft Pad B<br />
Long Guiro<br />
Long Guiro<br />
Claves<br />
Wood Block<br />
Wood Block<br />
Cuica<br />
Cuica<br />
Open Triangl<br />
Open Triangl<br />
Cabasa Cut<br />
Spectrum<br />
Wind Chimes<br />
Wood Block<br />
Cga Slap<br />
Dry Tom Lo<br />
Applause<br />
Hybrid Kick2<br />
Cl HiHat 1<br />
Round Kick<br />
Pedal HiHat<br />
Natural SN2<br />
Op HiHat<br />
Brush Slap<br />
Brush Swish<br />
Brush Roll<br />
SN Roll<br />
001<br />
GM Drum Set<br />
Verb Kick<br />
Hybrid Kick1<br />
Side Stick<br />
Ballad SN<br />
808 Claps<br />
Piccolo SN<br />
Verb Tom Lo<br />
Cl HiHat 1<br />
Verb Tom Lo<br />
Pedal HiHat<br />
Verb Tom Hi<br />
Op HiHat<br />
Verb Tom Hi<br />
Verb Tom Hi<br />
Crash 1<br />
Verb Tom Hi<br />
Ride 2<br />
China Cym<br />
Ride Bell 1<br />
Tambourine<br />
Crash 1<br />
Cowbell 1<br />
Crash 1<br />
Vibraslap<br />
Ride 2<br />
Bongo Hi<br />
Bongo Lo<br />
Cga Mute Hi<br />
Cga Open Hi<br />
Cga Open Lo<br />
Timbale<br />
Timbale<br />
Agogo<br />
Agogo<br />
Cabasa Up<br />
Maracas<br />
Soft Pad A<br />
Soft Pad B<br />
Long Guiro<br />
Long Guiro<br />
Claves<br />
Wood Block<br />
Wood Block<br />
Cuica<br />
Cuica<br />
Open Triangl<br />
Open Triangl<br />
Cabasa Cut<br />
Spectrum<br />
Wind Chimes<br />
Wood Block<br />
Cga Slap<br />
Dry Tom Lo<br />
Lite Kick<br />
Hybrid Kick2<br />
Old Kick<br />
808 Kick<br />
Natural SN1<br />
Natural SN2<br />
808 SN<br />
Brush Slap<br />
Brush Swish<br />
Brush Roll<br />
SN Roll<br />
002<br />
BrushDrumSet<br />
Hybrid Kick2<br />
Hybrid Kick1<br />
Side Stick<br />
Brush Swish<br />
Brush Slap<br />
Brush Roll<br />
Dry Tom Lo<br />
Cl HiHat 1<br />
Dry Tom Lo<br />
Pedal HiHat<br />
Dry Tom Hi<br />
Op HiHat<br />
Dry Tom Hi<br />
Dry Tom Hi<br />
Crash 1<br />
Dry Tom Hi<br />
Ride 2<br />
China Cym<br />
Ride Bell 1<br />
Tambourine<br />
Crash 1<br />
Cowbell 1<br />
Crash 1<br />
Vibraslap<br />
Ride 2<br />
Cga Mute Hi<br />
Cga Mute Lo<br />
Cga Slap<br />
Cga Open Hi<br />
Cga Open Lo<br />
Timbale<br />
Timbale<br />
Agogo<br />
Agogo<br />
Cabasa Up<br />
Maracas<br />
Soft Pad A<br />
Soft Pad B<br />
Long Guiro<br />
Long Guiro<br />
Claves<br />
Wood Block<br />
Wood Block<br />
Cuica<br />
Cuica<br />
Open Triangl<br />
Open Triangl<br />
Cabasa Cut<br />
Spectrum<br />
Wind Chimes<br />
Wood Block<br />
Cga Slap<br />
Dry Tom Lo<br />
Lite Kick<br />
Hybrid Kick2<br />
Old Kick<br />
808 Kick<br />
Natural SN1<br />
Natural SN2<br />
SN Roll<br />
Brush Slap<br />
Metronome 2<br />
R8 Click<br />
Metronome 1<br />
001<br />
PowerDrmSet2<br />
Verb Kick<br />
Round Kick<br />
Dry Stick<br />
Piccolo SN<br />
808 Claps<br />
SN Roll<br />
Verb Tom Lo<br />
Cl HiHat 1<br />
Verb Tom Lo<br />
Pedal HiHat<br />
Verb Tom Lo<br />
Op HiHat<br />
Verb Tom Lo<br />
Verb Tom Hi<br />
Crash 1<br />
Verb Tom Hi<br />
Ride 1<br />
China Cym<br />
Ride Bell 1<br />
Tambourine<br />
Crash 1<br />
Cowbell 1<br />
Crash 1<br />
Vibraslap<br />
Ride 1<br />
Bongo Hi<br />
Bongo Lo<br />
Cga Mute Hi<br />
Cga Open Hi<br />
Cga Open Lo<br />
Timbale<br />
Timbale<br />
Agogo<br />
Agogo<br />
Cabasa Up<br />
Maracas<br />
Soft Pad A<br />
Soft Pad B<br />
Long Guiro<br />
Long Guiro<br />
Claves<br />
Wood Block<br />
Wood Block<br />
Cuica<br />
Cuica<br />
Open Triangl<br />
Open Triangl<br />
Maracas<br />
Ice Rain<br />
Wind Chimes<br />
Claves<br />
808 SN<br />
Verb Tom Hi<br />
Piccolo SN<br />
Scratch 3<br />
Tin Wave<br />
Spectrum<br />
REV Steel DR<br />
REV Tin Wave<br />
REV PiccloSN<br />
REV Crash 1<br />
Metronome 2<br />
R8 Click<br />
Metronome 1<br />
002<br />
PowerRaveSet<br />
Verb Kick<br />
Round Kick<br />
Dry Stick<br />
Piccolo SN<br />
808 Claps<br />
Natural SN2<br />
Verb Tom Lo<br />
Cl HiHat 1<br />
Verb Tom Lo<br />
Pedal HiHat<br />
Verb Tom Lo<br />
Op HiHat<br />
Verb Tom Lo<br />
Verb Tom Hi<br />
Crash 1<br />
Verb Tom Hi<br />
Ride 1<br />
China Cym<br />
Ride Bell 1<br />
Tambourine<br />
Crash 1<br />
Cowbell 1<br />
Crash 1<br />
Vibraslap<br />
Ride 1<br />
Bongo Hi<br />
Bongo Lo<br />
Cga Mute Hi<br />
Cga Open Hi<br />
Cga Open Lo<br />
Timbale<br />
Timbale<br />
Agogo<br />
Agogo<br />
Agogo<br />
Maracas<br />
606 HiHat Cl<br />
606 HiHat Cl<br />
606 HiHat Op<br />
Long Guiro<br />
Claves<br />
Wood Block<br />
Wood Block<br />
Pizz<br />
Syn Vox 1<br />
Voice Aahs A<br />
Voice Oohs2A<br />
Male Ooh A<br />
Ice Rain<br />
808 SN<br />
808 SN<br />
808 SN<br />
Hand Claps<br />
Voice Breath<br />
Scratch 3<br />
Tin Wave<br />
Crash 1<br />
Ride Bell 1<br />
REV Tin Wave<br />
DIGI Bell 1<br />
Metal Wind<br />
Applause<br />
R8 Click<br />
Metronome 1<br />
178
Rhythm Set List<br />
XP-A (WAVE EXPANSION A: Session)<br />
Note No.<br />
35<br />
C2 36<br />
37<br />
38<br />
39<br />
40<br />
41<br />
42<br />
43<br />
44<br />
45<br />
46<br />
47<br />
C3 48<br />
49<br />
50<br />
51<br />
52<br />
53<br />
54<br />
55<br />
56<br />
57<br />
58<br />
59<br />
C4 60<br />
61<br />
62<br />
63<br />
64<br />
65<br />
66<br />
67<br />
68<br />
69<br />
70<br />
71<br />
C5 72<br />
73<br />
74<br />
75<br />
76<br />
77<br />
78<br />
79<br />
80<br />
81<br />
82<br />
83<br />
C6 84<br />
85<br />
86<br />
87<br />
88<br />
89<br />
90<br />
91<br />
92<br />
93<br />
94<br />
95<br />
C7 96<br />
98 97<br />
001<br />
SessionSet 1<br />
Deep Kick 3<br />
Mix Kick<br />
Side Stick<br />
Solo Snr<br />
HC2 Claps 1<br />
90’s Snare<br />
Verb Tom Lo<br />
Cl HiHat 1<br />
Verb Tom Lo<br />
Cl HiHat 2<br />
Verb Tom Hi<br />
Op HiHat<br />
Verb Tom Hi<br />
Verb Tom Hi<br />
Crash 1<br />
Verb Tom Hi<br />
Ride 2<br />
China Cym<br />
Ride Bell 1<br />
Tamb.Long<br />
Crash 1<br />
Cowbell 1<br />
Crash 1<br />
Cowbell 1<br />
Ride Bell 1<br />
Bongo3 High<br />
Bongo3 Low<br />
Cga Slap<br />
Cga Open Hi<br />
Cga Open Lo<br />
Timbale<br />
Timbale<br />
Agogo<br />
Agogo<br />
Shaker 4<br />
Shaker 5<br />
Soft Pad A<br />
Soft Pad B<br />
Long Guiro<br />
Long Guiro<br />
Claves<br />
Wood Block<br />
Wood Block<br />
Cuica<br />
Cuica<br />
Open Triangl<br />
Open Triangl<br />
Cabasa Cut<br />
Auhvox<br />
Tekno Hit 3<br />
Tekno Hit 3<br />
Tekno Hit 2<br />
Tekno Hit 2<br />
FX Bell 2fw<br />
FX Bell 1fw<br />
FX Bomb<br />
Sm.Club fw<br />
HC2 Claps 2<br />
Gtr Scrap<br />
707 Claps<br />
Gtr Slid Nz<br />
Gtr Cut Nz<br />
R8 Click<br />
Gtr Slap<br />
002<br />
SessionSet 2<br />
Mix Kick<br />
Deep Kick 3<br />
Side Stick<br />
Loose Snr<br />
HC2 Claps 1<br />
Ring Snr<br />
Verb Tom Lo<br />
Cl HiHat 1<br />
Verb Tom Lo<br />
Cl HiHat 2<br />
Verb Tom Hi<br />
Op HiHat<br />
Verb Tom Hi<br />
Verb Tom Hi<br />
Crash 1<br />
Verb Tom Hi<br />
Ride 2<br />
China Cym<br />
Ride Bell 1<br />
Tamb.Long<br />
Crash 1<br />
Cowbell 1<br />
Crash 1<br />
Cowbell 1<br />
Ride Bell 1<br />
Bongo3 High<br />
Bongo3 Low<br />
Cga Slap<br />
Cga Open Hi<br />
Cga Open Lo<br />
Timbale<br />
Timbale<br />
Agogo<br />
Agogo<br />
Shaker 4<br />
Shaker 5<br />
Soft Pad A<br />
Soft Pad B<br />
Long Guiro<br />
Long Guiro<br />
Claves<br />
Wood Block<br />
Wood Block<br />
Cuica<br />
Cuica<br />
Open Triangl<br />
Open Triangl<br />
Cabasa Cut<br />
Auhvox<br />
Gtr Feedback<br />
Gtr Scrap<br />
Gtr Slid Nz<br />
Gtr Cut Nz<br />
Gtr Slap<br />
Wah Down 1<br />
Wah Up 1<br />
Wah Down 2<br />
Wah Up 2<br />
Sm.Club<br />
Sm.Club fw<br />
FX Bell 1fw<br />
FX Bell 2fw<br />
R8 Click<br />
REV Snr Buzz<br />
003<br />
SessionSet 3<br />
Deep Kick 3<br />
TD7 Kick<br />
Side Stick<br />
Rap Snr<br />
707 Claps<br />
House Snr<br />
Verb Tom Lo<br />
Cl HiHat 1<br />
Verb Tom Lo<br />
Cl HiHat 2<br />
Verb Tom Hi<br />
Op HiHat<br />
Verb Tom Hi<br />
Verb Tom Hi<br />
Crash 1<br />
Verb Tom Hi<br />
Ride 2<br />
China Cym<br />
Ride Bell 1<br />
Tamb.Long<br />
Crash 1<br />
Cowbell 1<br />
Crash 1<br />
Cowbell 1<br />
Ride Bell 1<br />
Bongo3 High<br />
Bongo3 Low<br />
Cga Slap<br />
Cga Open Hi<br />
Cga Open Lo<br />
Timbale<br />
Timbale<br />
Agogo<br />
Agogo<br />
Shaker 4<br />
Shaker 5<br />
Soft Pad A<br />
Soft Pad B<br />
Long Guiro<br />
Long Guiro<br />
Claves<br />
Wood Block<br />
Wood Block<br />
Cuica<br />
Cuica<br />
Open Triangl<br />
Open Triangl<br />
Cabasa Cut<br />
REV Gt Scrap<br />
REV Gt SldNz<br />
REV Gt CutNz<br />
REV Gt Slap<br />
REV TeknHit2<br />
REV TeknHit3<br />
REV Dance K3<br />
REV 909 Snr2<br />
REV 909 Snr3<br />
REV Rap Snr<br />
REV Talk Snr<br />
REV JinglSnr<br />
REV HouseSnr<br />
REV Mute Snr<br />
R8 Click<br />
REV 909 Rim2<br />
004<br />
SessionSet 4<br />
Dance Kick 2<br />
Dance Kick 3<br />
909 Rim 2<br />
909 Snr 2<br />
909 Claps 2<br />
808 Snr 2<br />
909 Tom 2<br />
606 HiHat Cl<br />
Verb Tom Lo<br />
606 HiHat Op<br />
909 Tom 2<br />
606 HiHat Op<br />
Verb Tom Hi<br />
909 Tom 2<br />
Crash 1<br />
Verb Tom Hi<br />
Ride 2<br />
China Cym<br />
Ride Bell 1<br />
CR78 Tamb.<br />
Crash 1<br />
Cowbell 1<br />
Crash 1<br />
Cowbell 1<br />
Ride Bell 1<br />
Bongo3 High<br />
Bongo3 Low<br />
Cga Slap<br />
Cga Open Hi<br />
Cga Open Lo<br />
Timbale<br />
Timbale<br />
Agogo<br />
Agogo<br />
Shaker 4<br />
Shaker 5<br />
Soft Pad A<br />
Soft Pad B<br />
Long Guiro<br />
Long Guiro<br />
Claves<br />
Wood Block<br />
Wood Block<br />
Cuica<br />
Cuica<br />
Open Triangl<br />
Open Triangl<br />
Cabasa Cut<br />
Auhvox<br />
Tekno Hit 3<br />
Tekno Hit 3<br />
Tekno Hit 2<br />
Tekno Hit 2<br />
FX Bell 2fw<br />
FX Bell 1fw<br />
FX Bomb<br />
Sm.Club fw<br />
HC2 Claps 2<br />
FingerSnaps2<br />
707 Claps<br />
626 Shaker<br />
Tamb.Short<br />
R8 Click<br />
Tamb.Long<br />
005<br />
SessionSet 5<br />
Kick Ghost<br />
Dance Kick 3<br />
909 Rim 2<br />
909 Snr 3<br />
HC2 Claps 2<br />
Talk Snr<br />
909 Tom 2<br />
606 HiHat Cl<br />
Verb Tom Lo<br />
606 HiHat Op<br />
909 Tom 2<br />
606 HiHat Op<br />
Verb Tom Hi<br />
909 Tom 2<br />
Crash 1<br />
Verb Tom Hi<br />
Ride 2<br />
China Cym<br />
Ride Bell 1<br />
CR78 Tamb.<br />
Crash 1<br />
Cowbell 1<br />
Crash 1<br />
Cowbell 1<br />
Ride Bell 1<br />
Bongo3 High<br />
Bongo3 Low<br />
Cga Slap<br />
Cga Open Hi<br />
Cga Open Lo<br />
Timbale<br />
Timbale<br />
Agogo<br />
Agogo<br />
626 Shaker<br />
Shaker 4<br />
Soft Pad A<br />
Soft Pad B<br />
Long Guiro<br />
Long Guiro<br />
Claves<br />
Wood Block<br />
Wood Block<br />
Cuica<br />
Cuica<br />
Open Triangl<br />
Open Triangl<br />
Cabasa Cut<br />
Auhvox<br />
Tekno Hit 3<br />
Tekno Hit 3<br />
Tekno Hit 2<br />
Tekno Hit 2<br />
REV Dance K3<br />
REV TeknHit3<br />
REV TeknHit3<br />
REV TeknHit2<br />
REV TeknHit2<br />
REV 808 Snr2<br />
REV 909 Snr2<br />
REV 909 Snr3<br />
REV HC2 Clp1<br />
R8 Click<br />
REV 707 Clps<br />
006<br />
SessionSet 6<br />
Dance Kick 3<br />
Dance Kick 2<br />
Mute Snr<br />
Jingle Snr<br />
HC2 Claps 2<br />
Tiny Snr 2<br />
909 Tom 2<br />
606 HiHat Cl<br />
Verb Tom Lo<br />
606 HiHat Op<br />
909 Tom 2<br />
606 HiHat Op<br />
Verb Tom Hi<br />
909 Tom 2<br />
Crash 1<br />
Verb Tom Hi<br />
Ride 2<br />
China Cym<br />
Ride Bell 1<br />
CR78 Tamb.<br />
Crash 1<br />
Cowbell 1<br />
Crash 1<br />
Cowbell 1<br />
Ride Bell 1<br />
Bongo3 High<br />
Bongo3 Low<br />
Cga Slap<br />
Cga Open Hi<br />
Cga Open Lo<br />
Timbale<br />
Timbale<br />
Agogo<br />
Agogo<br />
626 Shaker<br />
Shaker 4<br />
Soft Pad A<br />
Soft Pad B<br />
Long Guiro<br />
Long Guiro<br />
Claves<br />
Wood Block<br />
Wood Block<br />
Cuica<br />
Cuica<br />
Open Triangl<br />
Open Triangl<br />
Cabasa Cut<br />
Auhvox<br />
Tekno Hit 3<br />
Tekno Hit 3<br />
Tekno Hit 2<br />
Tekno Hit 2<br />
Tekno Loop<br />
REV TeknHit3<br />
REV TeknHit3<br />
REV TeknHit2<br />
REV TeknHit2<br />
Blaster A<br />
Juno Rave A<br />
Hard 5ths A<br />
CR78 Tamb.<br />
R8 Click<br />
FingerSnap 3<br />
007<br />
SessionSet 7<br />
Deep Kick 3<br />
Mix Kick<br />
Side Stick<br />
Solo Snr<br />
707 Claps<br />
Ring Snr<br />
909 Tom 2<br />
606 HiHat Cl<br />
Verb Tom Lo<br />
606 HiHat Cl<br />
909 Tom 2<br />
606 HiHat Op<br />
Verb Tom Hi<br />
909 Tom 2<br />
Crash 1<br />
Verb Tom Hi<br />
Ride 2<br />
China Cym<br />
Ride Bell 1<br />
CR78 Tamb.<br />
Crash 1<br />
Cowbell 1<br />
Crash 1<br />
Cowbell 1<br />
Ride Bell 1<br />
Bongo3 High<br />
Bongo3 Low<br />
Cga Slap<br />
Cga Open Hi<br />
Cga Open Lo<br />
Timbale<br />
Timbale<br />
Agogo<br />
Agogo<br />
626 Shaker<br />
Shaker 4<br />
Soft Pad A<br />
Soft Pad B<br />
Long Guiro<br />
Long Guiro<br />
Claves<br />
Wood Block<br />
Wood Block<br />
Cuica<br />
Cuica<br />
Open Triangl<br />
Open Triangl<br />
Cabasa Cut<br />
REV Shaker 5<br />
REV Shaker 4<br />
REV Shaker 3<br />
REV 626Shakr<br />
REV CR78Tamb<br />
REV Tamb.Lng<br />
REV Tamb.Sht<br />
REV Bongo3 H<br />
REV Bongo3 L<br />
REV F.Snap 3<br />
REV F.Snaps2<br />
REV HC2 Clp2<br />
REV 707 Clps<br />
REV HC2 Clp1<br />
R8 Click<br />
REV 909 Clp2<br />
008<br />
Demo Drum<br />
Old Kick<br />
Hybrid Kick1<br />
Side Stick<br />
Loose Snr<br />
Tambrin MENU<br />
Natural SN2<br />
Verb Tom Lo<br />
Cl HiHat 1<br />
Verb Tom Lo<br />
Pedal HiHat<br />
Verb Tom Hi<br />
Op HiHat<br />
Verb Tom Hi<br />
Verb Tom Hi<br />
Crash 1<br />
Verb Tom Hi<br />
Ride 1<br />
China Cym<br />
Ride Bell 1<br />
Tamb.Long<br />
Crash 1<br />
Cowbell 1<br />
Crash 1<br />
Vibraslap<br />
Ride 2<br />
Bongo Hi<br />
Bongo Lo<br />
Cga Mute Hi<br />
Cga Open Hi<br />
Cga Open Lo<br />
Timbale<br />
Timbale<br />
Agogo<br />
Agogo<br />
Cabasa Up<br />
Maracas<br />
Soft Pad A<br />
Soft Pad B<br />
Long Guiro<br />
Long Guiro<br />
Claves<br />
Wood Block<br />
Wood Block<br />
Shaker 3<br />
Cuica<br />
606 HiHat Cl<br />
Open Triangl<br />
606 HiHat Op<br />
Ride 2<br />
Dance Kick 2<br />
Dance Kick 2<br />
House Snr<br />
Tiny Snr 2<br />
Tiny Snr 2<br />
Hybrid Kick2<br />
Old Kick<br />
Dance Kick 2<br />
Loose Snr<br />
Natural SN2<br />
Tiny Snr 2<br />
Wind Chimes<br />
Dry Tom Lo<br />
Piccolo SN<br />
Dry Tom Lo<br />
Appendices<br />
179
Rhythm Set List<br />
XP-C (WAVE EXPANSION C: Techno Collection)<br />
Note No.<br />
35<br />
C2 36<br />
37<br />
38<br />
39<br />
40<br />
41<br />
42<br />
43<br />
44<br />
45<br />
46<br />
47<br />
C3 48<br />
49<br />
50<br />
51<br />
52<br />
53<br />
54<br />
55<br />
56<br />
57<br />
58<br />
59<br />
C4 60<br />
61<br />
62<br />
63<br />
64<br />
65<br />
66<br />
67<br />
68<br />
69<br />
70<br />
71<br />
C5 72<br />
73<br />
74<br />
75<br />
76<br />
77<br />
78<br />
79<br />
80<br />
81<br />
82<br />
83<br />
C6 84<br />
85<br />
86<br />
87<br />
88<br />
89<br />
90<br />
91<br />
92<br />
93<br />
94<br />
95<br />
C7 96<br />
98 97<br />
001<br />
TR-909 SET<br />
Plastic BD 1<br />
TR909 Kick 1<br />
TR909 Rim<br />
TR909 Snr 5<br />
TR909 Clap<br />
TR909 Snr 1<br />
TR909 DstTom<br />
TR909 CHH 3<br />
TR909 Tom<br />
TR909 OHH 3<br />
TR909 DstTom<br />
TR909 OHH 3<br />
TR909 Tom<br />
TR909 DstTom<br />
TR909 Crash<br />
TR909 Tom<br />
TR909 Ride<br />
TR909 Crash<br />
TR909 Ride<br />
Tambourine 2<br />
TR909DsCrash<br />
TR808Cowbell<br />
TR606 Cym 1<br />
PC-2 Machine<br />
TR707 Ride<br />
Mental Perc<br />
Dr.Beat<br />
Cga Open Hi<br />
Cga Mute Hi<br />
Cga Open Lo<br />
Timbale<br />
PC-2 Spacers<br />
TR727 Agogo<br />
TR727 Agogo<br />
TMB&SKR MENU<br />
TMB&SKR MENU<br />
Plastic BD 2<br />
TR909 Kick 2<br />
TR808 Rim<br />
TR909 Snr 1<br />
CLAP MENU<br />
TR909 Snr 6<br />
TR707 Tom<br />
TR909 CHH 3<br />
TR707 Tom<br />
TR909 PHH 2<br />
TR707 Tom<br />
TR909 OHH 1<br />
Beam HiQ<br />
HIT MENU 1<br />
May Day Perc<br />
Techno Scene<br />
Air Gun<br />
Tekno Hit<br />
Organ Hit 2<br />
Analog Bird<br />
Retro UFO<br />
ElectronFall<br />
JP8000 FBK<br />
SNR MENU 2<br />
TR808 Kick 1<br />
KICK MENU 2<br />
MC500 Beep 1<br />
MC500 Beep 2<br />
002<br />
TR-808 SET<br />
TR808 Kick 1<br />
TR808 Kick 1<br />
TR808 Rim<br />
TR808 Snr 1<br />
Clap Stop<br />
TR808 Snr 3<br />
TR808 Tom<br />
TR808 CHH 1<br />
TR808 Tom<br />
TR808 CHH 2<br />
TR808 Tom<br />
OHH MENU<br />
TR808 Tom<br />
TR808 Tom<br />
TR606 Cym 1<br />
TR808 Tom<br />
TR606 Cym 1<br />
TR909 Crash<br />
TR909 Ride<br />
Tambourine 2<br />
TR909 Crash<br />
TR808Cowbell<br />
TR606 Cym 1<br />
TMB&SKR MENU<br />
TR707 Ride<br />
Mental Perc<br />
Dr.Beat<br />
Cga Open Hi<br />
Cga Mute Hi<br />
Cga Open Lo<br />
Timbale<br />
PC-2 Spacers<br />
TR727 Agogo<br />
TR727 Agogo<br />
Cabasa Up<br />
TMB&SKR MENU<br />
TR808 Kick 3<br />
TR808 Kick 2<br />
TR808 RimLng<br />
TR808 Snr 2<br />
Clap Stop<br />
TR808 Snr 4<br />
TR606 Tom<br />
TR808 CHH 2<br />
TR606 Tom<br />
PHH MENU<br />
TR606 Tom<br />
OHH MENU<br />
Beam HiQ<br />
HIT MENU 1<br />
May Day Perc<br />
Techno Scene<br />
Air Gun<br />
Tekno Hit<br />
White Noise<br />
ElectricDunk<br />
TR808 PHH<br />
SNR MENU 2<br />
JP8000 FBK<br />
VOCODER MENU<br />
TR808 Kick 1<br />
KICK MENU 2<br />
MC500 Beep 1<br />
MC500 Beep 2<br />
003<br />
TR-606 SET<br />
KICK MENU 1<br />
TR606 Kick 1<br />
TR808 Rim<br />
TR606 Snr 2<br />
HC2 Dry Clap<br />
TR606 Snr 1<br />
TR606 Tom<br />
TR606 CHH<br />
TR606 Tom<br />
PHH MENU<br />
TR606 Tom<br />
TR606 DstOHH<br />
TR606 Tom<br />
TR606 Tom<br />
TR606 Cym 2<br />
TR606 Tom<br />
TR909 Ride<br />
TR606 Cym 1<br />
TR707 Ride<br />
Tambourine<br />
TR909 Crash<br />
TR808Cowbell<br />
TR909 Crash<br />
TMB&SKR MENU<br />
TR707 Ride<br />
Mental Perc<br />
Dr.Beat<br />
Cga Open Hi<br />
Cga Mute Hi<br />
Cga Open Lo<br />
Timbale<br />
PC-2 Spacers<br />
TR727 Agogo<br />
TR727 Agogo<br />
Cabasa Up<br />
TMB&SKR MENU<br />
Plastic BD 1<br />
Culture Kick<br />
TR808 Rim<br />
CR78 Snare<br />
TS Clap<br />
TR606 Snr 3<br />
TR606 CmpTom<br />
CR78 CHH<br />
TR606 CmpTom<br />
TR606 PHH<br />
TR606 CmpTom<br />
CR78 OHH<br />
Beam HiQ<br />
HIT MENU 1<br />
May Day Perc<br />
Techno Scene<br />
Air Gun<br />
Tekno Hit<br />
Organ Hit 2<br />
Analog Bird<br />
Retro UFO<br />
ElectronFall<br />
JP8000 FBK<br />
SNR MENU 2<br />
TR808 Kick 1<br />
KICK MENU 2<br />
MC500 Beep 1<br />
MC500 Beep 2<br />
004<br />
Techno SET<br />
Plastic BD 1<br />
TR909 Kick 1<br />
TR909 Rim<br />
TR909 Snr 5<br />
CLAP MENU<br />
TR909 Snr 6<br />
TR909 Tom<br />
TR909 CHH 1<br />
TR909 Tom<br />
TR909 PHH 2<br />
TR909 Tom<br />
OHH MENU<br />
TR909 Tom<br />
TR909 Tom<br />
TR909 Crash<br />
TR909 Tom<br />
TR707 Ride<br />
TR909 Crash<br />
China Cym<br />
Tambourine 2<br />
TR909 Crash<br />
TR707Cowbell<br />
TR606 Cym 1<br />
TR808Cowbell<br />
TR606 Cym 1<br />
PERCUSS MENU<br />
PERCUSS MENU<br />
PERCUSS MENU<br />
PERCUSS MENU<br />
PERCUSS MENU<br />
PERCUSS MENU<br />
PERCUSS MENU<br />
HIT MENU 1<br />
HIT MENU 1<br />
TechnoShaker<br />
Dance Shaker<br />
TR909 Kick 2<br />
Plastic BD 2<br />
COW&RIM MENU<br />
TR909 Snr 3<br />
TR909 Clap<br />
TR909 Snr 4<br />
TR909 DstTom<br />
TR909 CHH 3<br />
TR909 DstTom<br />
TR909 PHH 1<br />
TR909 DstTom<br />
TR909 OHH 3<br />
Air Gun<br />
VOCODER MENU<br />
Beam HiQ<br />
VOCODER MENU<br />
May Day Perc<br />
VOCODER MENU<br />
VOCODER MENU<br />
Techno Scene<br />
VOCODER MENU<br />
Analog Bird<br />
VOCODER MENU<br />
144:TeknoHAT<br />
144:Tekno BD<br />
120:TeknoBNG<br />
MC500 Beep 1<br />
MC500 Beep 2<br />
005<br />
House SET<br />
TR909 Kick 1<br />
Tekno Kick<br />
TR909 Rim<br />
DJ Snare<br />
TR909 Clap<br />
TR909 Snr 5<br />
TR707 Tom<br />
TR909 CHH 1<br />
TR707 Tom<br />
TR909 PHH 1<br />
TR707 Tom<br />
OHH MENU<br />
TR707 Tom<br />
TR707 Tom<br />
TR909 Crash<br />
TR707 Tom<br />
TR909 Ride<br />
TR909 Crash<br />
Rattle Tamb<br />
Tambourine 2<br />
TR909 Crash<br />
TR707Cowbell<br />
Crash 1<br />
TR808Cowbell<br />
TR606 Cym 1<br />
PERCUSS MENU<br />
PERCUSS MENU<br />
PERCUSS MENU<br />
PERCUSS MENU<br />
PERCUSS MENU<br />
PERCUSS MENU<br />
PERCUSS MENU<br />
HIT MENU 1<br />
HIT MENU 1<br />
Cabasa Up<br />
TechnoShaker<br />
Wet Kick<br />
Plastic BD 2<br />
TR808 Rim<br />
SNR MENU 2<br />
CLAP MENU<br />
SNR MENU 1<br />
TR808 Tom<br />
TR707 CHH<br />
TR808 Tom<br />
TR707 PHH<br />
TR808 Tom<br />
OHH MENU<br />
Beam HiQ<br />
GTR FX MENU<br />
Org Chord<br />
GTR FX MENU<br />
Noisy 101<br />
Claptail<br />
VOCODER MENU<br />
VOCODER MENU<br />
VOCODER MENU<br />
VOCODER MENU<br />
120:House 1<br />
120:House 2<br />
120:House 3<br />
120:TeknoBNG<br />
MC500 Beep 1<br />
MC500 Beep 2<br />
006<br />
Jungle SET<br />
Tekno Kick<br />
JungleKick 2<br />
Lo-Fi Snare<br />
Urban Snare<br />
SNR MENU 5<br />
Jungle Snr 4<br />
TR606 CmpTom<br />
CHH MENU 2<br />
TR606 CmpTom<br />
Rattle Tamb<br />
TR606 CmpTom<br />
TR909 DstOHH<br />
TR606 CmpTom<br />
TR606 CmpTom<br />
R8 OHH<br />
TR606 CmpTom<br />
TR707 Ride<br />
TR909 Crash<br />
China Cym<br />
Tambourine 2<br />
TR606 Cym 1<br />
Cowbell 1<br />
TR909 Crash<br />
MachineShout<br />
TR606 DstOHH<br />
PERCUSS MENU<br />
PERCUSS MENU<br />
PERCUSS MENU<br />
PERCUSS MENU<br />
PERCUSS MENU<br />
PERCUSS MENU<br />
PERCUSS MENU<br />
Surdo open<br />
Surdo mute<br />
TechnoShaker<br />
Dance Shaker<br />
KICK MENU 1<br />
JungleKick 1<br />
SideStiker<br />
MC Snare<br />
Comp Clap<br />
Ragga Snr 2<br />
Jungle Snr 5<br />
TR909 CHH 3<br />
Jungle Snr 5<br />
Tambourine 2<br />
Jungle Snr 5<br />
Cym OHH<br />
Beam HiQ<br />
HIT MENU 1<br />
Thin Beef<br />
Analog Bird<br />
HIT MENU 2<br />
Scratch Clap<br />
Emergency<br />
TR808Cowbell<br />
Talkbox<br />
Jungle Beep<br />
TR808 Kick 1<br />
Roll Snare<br />
Roll Kick<br />
160:Drum’nBs<br />
MC500 Beep 1<br />
MC500 Beep 2<br />
007<br />
Gabba SET<br />
Amsterdam BD<br />
TR909 Dst BD<br />
TR808 RimLng<br />
SNR MENU 1<br />
Comp Clap<br />
SNR MENU 1<br />
TR909 DstTom<br />
TR909 PHH 1<br />
TR909 DstTom<br />
TR909 PHH 2<br />
TR909 DstTom<br />
TR909 DstOHH<br />
TR909 DstTom<br />
TR909 DstTom<br />
TR909 Crash<br />
TR909 DstTom<br />
TR707 Ride<br />
TR909DsCrash<br />
China Cym<br />
CR78 CHH<br />
Crash 1<br />
TR808Cowbell<br />
TR909DsCrash<br />
MachineShout<br />
TR606 Cym 2<br />
PERCUSS MENU<br />
PERCUSS MENU<br />
PERCUSS MENU<br />
PERCUSS MENU<br />
PERCUSS MENU<br />
PERCUSS MENU<br />
PERCUSS MENU<br />
TR727 Agogo<br />
TR727 Agogo<br />
TechnoShaker<br />
Dance Shaker<br />
TR909 Dst BD<br />
KICK MENU 2<br />
SideStiker<br />
Jungle Snr 4<br />
CLAP MENU<br />
TR909 Snr 5<br />
TR606 CmpTom<br />
TR909 CHH 3<br />
TR606 CmpTom<br />
TR909 PHH 1<br />
TR606 CmpTom<br />
TR909 OHH 1<br />
Beam HiQ<br />
Air Gun<br />
ElectricDunk<br />
Thin Beef<br />
Drill Hit<br />
TAO Hit<br />
Daft Wave<br />
Thrill<br />
Emergency<br />
Dist TekGtr1<br />
Dist Synth<br />
120:House 1<br />
120:House 3<br />
184:Gabba<br />
MC500 Beep 1<br />
MC500 Beep 2<br />
008<br />
Indust. SET<br />
INDUST. MENU<br />
INDUST. MENU<br />
Thrill<br />
PCM Press<br />
Air Gun<br />
PCM Press<br />
TekRok Snare<br />
TR909 CHH 3<br />
TekRok Snare<br />
TR909 PHH 1<br />
TekRok Snare<br />
TR909 DstOHH<br />
TekRok Snare<br />
TekRok Snare<br />
Indus Snare<br />
TekRok Snare<br />
TR909 Ride<br />
Drill Hit<br />
ElectricDunk<br />
PCM Press<br />
TR606 Cym 1<br />
PC-2 Machine<br />
TR909 Crash<br />
Crash 1<br />
TR606 DstCym<br />
PERCUSS MENU<br />
PERCUSS MENU<br />
PERCUSS MENU<br />
PERCUSS MENU<br />
PERCUSS MENU<br />
PERCUSS MENU<br />
PERCUSS MENU<br />
Analog Bird<br />
Analog Bird<br />
TechnoShaker<br />
Dance Shaker<br />
TR909 Dst BD<br />
Turbo Kick<br />
Drill Hit<br />
SNR MENU 3<br />
INDUST. MENU<br />
Rage Snare<br />
Can Tom<br />
HIT MENU 1<br />
Can Tom<br />
Beam HiQ<br />
Can Tom<br />
TR909 DstOHH<br />
Beam HiQ<br />
VOCODER MENU<br />
TR606 Cym 1<br />
VOCODER MENU<br />
CLAP MENU<br />
VOCODER MENU<br />
VOCODER MENU<br />
Roll Kick<br />
Organ Hit 2<br />
Roll Snare<br />
TR909 DstOHH<br />
Roll Kick<br />
TR909DsCrash<br />
CLAP MENU<br />
MC500 Beep 1<br />
MC500 Beep 2<br />
180
Performance List<br />
USER (User Group) PR-A (Preset A Group) PR-B (Preset B Group)<br />
No. Name Key Mode<br />
01 EasternSplit LAYER<br />
02 Opening Orch LAYER<br />
03 Feedback EP LAYER<br />
04 Humming Vox LAYER<br />
05 Tekno Loop 1 LAYER<br />
06 Fr.Horn Sect LAYER<br />
07 SpaceCarrier LAYER<br />
08 Orchestral LAYER<br />
09 Nebular Vox LAYER<br />
10 Terminator LAYER<br />
11 Flying Jazz LAYER<br />
12 Sweeper LAYER<br />
13 Rave Split LAYER<br />
14 Multi Sax LAYER<br />
15 Cosmic Dawn LAYER<br />
16 Bass / Lead LAYER<br />
17 S&H / Pad LAYER<br />
18 AcPiano+Pad LAYER<br />
19 Kicks Attack LAYER<br />
20 Step Brass LAYER<br />
21 Drone / Pipe LAYER<br />
22 Chime Dreams LAYER<br />
23 Tekno Loop 2 LAYER<br />
24 Big Band LAYER<br />
25 Labyrinth LAYER<br />
26 White Hole LAYER<br />
27 Cyber Sweep LAYER<br />
28 Tekno Asia LAYER<br />
29 1080 Fantasy LAYER<br />
30 Pop Ballad LAYER<br />
31 Rhythmatic LAYER<br />
32 Power JV LAYER<br />
No. Name Key Mode<br />
01 House Set SINGLE<br />
02 Analectro SINGLE<br />
03 Anatronic SINGLE<br />
04 Tekno Pop 1 SINGLE<br />
05 Tekno Pop 2 SINGLE<br />
06 Hard Core SINGLE<br />
07 Hi Energy SINGLE<br />
08 Pop Dance SINGLE<br />
09 Acid Set SINGLE<br />
10 Ambient Set SINGLE<br />
11 Electro Pop SINGLE<br />
12 Pop Set 1 SINGLE<br />
13 Pop Set 2 SINGLE<br />
14 Pop Set 3 SINGLE<br />
15 Pop Set 4 SINGLE<br />
16 L.A. Ballad SINGLE<br />
17 Hip Hop Set SINGLE<br />
18 Funk Rock SINGLE<br />
19 Funk Fusion SINGLE<br />
20 Heavy Metal SINGLE<br />
21 Heavy Kids LAYER<br />
22 Latin Set SINGLE<br />
23 BrazilianSet SINGLE<br />
24 New Age 1 SINGLE<br />
25 New Age 2 SINGLE<br />
26 Orchestra SINGLE<br />
27 Concerto SINGLE<br />
28 Film Score 1 SINGLE<br />
29 Film Score 2 SINGLE<br />
30 Symphonic SINGLE<br />
31 Chamber Set SINGLE<br />
32 Baroque Set SINGLE<br />
No. Name Key Mode<br />
01 Africa SINGLE<br />
02 World Ethnic SINGLE<br />
03 Asian Ethnic SINGLE<br />
04 Asian Band SINGLE<br />
05 60’s Set SINGLE<br />
06 Blues Band SINGLE<br />
07 Country Band SINGLE<br />
08 Folk Set SINGLE<br />
09 Reggae Band SINGLE<br />
10 FunkWah Band SINGLE<br />
11 Funkin’Phaze SINGLE<br />
12 Zydeco Band SINGLE<br />
13 New Orleans SINGLE<br />
14 Dixieland SINGLE<br />
15 Big Band Set SINGLE<br />
16 Cont.Jazz 1 SINGLE<br />
17 Cont.Jazz 2 SINGLE<br />
18 Ac.Jazz Set SINGLE<br />
19 Gospel Set SINGLE<br />
20 All Strings SINGLE<br />
21 All Brass SINGLE<br />
22 All Piano 1 SINGLE<br />
23 All Piano 2 SINGLE<br />
24 All Keyboard SINGLE<br />
25 All Organ SINGLE<br />
26 All Winds SINGLE<br />
27 All Bells LAYER<br />
28 Mlt & Perc SINGLE<br />
29 All Seq SINGLE<br />
30 All Bass SINGLE<br />
31 All Pad SINGLE<br />
32 All FX SINGLE<br />
Appendices<br />
181
Arpeggio Style List<br />
Style Motif Beat Pattern Accent Rate Shuffle Rate<br />
1/4 all 1/ 4 0–100% 50–90%<br />
1/6 all 1/ 6 0–100% 50–90%<br />
1/8 all 1/ 8 0–100% 50–90%<br />
1/12 all 1/12 0–100% 50–90%<br />
1/16 all 1/16 1–3 0–100% 50–90%<br />
1/32 SINGLE UP, SINGLE DOWN, SINGLE UP&DOWN, 1/32 1–3 0–100% 50–90%<br />
SINGLE RANDOM, DUAL UP, DUAL DOWN, DUAL UP&DOWN,<br />
DUAL RANDOM, NOTE ORDER, GLISSANDO, BASS+UP 1–8,<br />
BASS+RANDOM 1–3, TOP+UP 1–6<br />
PORTAMENTO A all PORTA-A 01–11 0–100% 50–90%<br />
PORTAMENTO B all PORTA-B 01–15 0–100% 50–90%<br />
GLISSANDO GLISSANDO 1/16 1–3, 1/32 1–3 0–100% 50–90%<br />
SEQUENCE A all SEQ-A 1–7 0–100% 50–90%<br />
SEQUENCE B all SEQ-B 1–5 0–100% 50–90%<br />
SEQUENCE C SINGLE UP, SINGLE DOWN, SINGLE UP&DOWN, SEQ-C 1–2 0–100% 50–90%<br />
SINGLE RANDOM, DUAL UP, DUAL DOWN, DUAL UP&DOWN,<br />
DUAL RANDOM, NOTE ORDER, GLISSANDO, BASS+UP 1–8,<br />
BASS+RANDOM 1–3, TOP+UP 1–6<br />
SEQUENCE D all SEQ-D 1–8 0–100% 50–90%<br />
ECHO SINGLE UP, SINGLE DOWN, SINGLE UP&DOWN, ECHO 1–3 0–100% 50–90%<br />
SINGLE RANDOM, DUAL UP, DUAL DOWN, DUAL UP&DOWN,<br />
DUAL RANDOM, NOTE ORDER<br />
SYNTH BASS BASS+UP 2 SEQ-A 1, SEQ-C 1 0–100% 50–90%<br />
SLAP BASS A BASS+UP 5, TOP+UP 5 MUTE 02, 03 0–100% 50–90%<br />
SLAP BASS B BASS+UP 5, TOP+UP 5 MUTE 02, 03 0–100% 50–90%<br />
WALK BASS SINGLE UP, SINGLE DOWN, SINGLE UP&DOWN, WALKBS, REFRAIN 1 0–100% 50–90%<br />
SINGLE RANDOM, NOTE ORDER, GLISSANDO<br />
RHYTHM GTR A SINGLE UP, SINGLE DOWN, SINGLE UP&DOWN, MUTE 01,04 0–100% 50–90%<br />
SINGLE RANDOM, DUAL UP, DUAL DOWN, DUAL UP&DOWN,<br />
DUAL RANDOM, NOTE ORDER, BASS+UP 1–8,<br />
BASS+RANDOM 1–3, TOP+UP 1–6<br />
RHYTHM GTR B CHORD MUTE 07, 13, 14 0–100% 50–90%<br />
RHYTHM GTR C CHORD MUTE 08, 12, 15 0–100% 50–90%<br />
RHYTHM GTR D CHORD MUTE 09, 10, 11, 16 0–100% 50–90%<br />
RHYTHM GTR E SINGLE UP, SINGLE DOWN STRUM 1–6 0–100% 50–90%<br />
3 FINGER GTR BASS+UP+TOP SEQ-A 7 0–100% 50–90%<br />
STRUMMING GTR SINGLE UP, SINGLE DOWN STRUM 7, 8 0–100% 50–90%<br />
KBD COMPING A CHORD MUTE 12, REFRAIN 2 0–100% 50–90%<br />
KBD COMPING B BASS+CHORD 4, BASS+CHORD 5 MUTE 05, 06 0–100% 50–90%<br />
KBD COMPING C BASS+CHORD 2, BASS+UP 2, BASS+RANDOM 2, TOP+UP 2 1/ 6, 1/12 0–100% 50–90%<br />
KBD COMPING D BASS+CHORD 2, BASS+UP 2, BASS+RANDOM 2, TOP+UP 2 1/16 1–3 0–100% 50–90%<br />
KBD COMPING E CHORD, BASS+CHORD 1 REGGAE1–2 0–100% 50–90%<br />
PERCUSSION SINGLE UP, SINGLE DOWN, SINGLE UP&DOWN, PERC1–4 0–100% 50–90%<br />
SINGLE RANDOM, DUAL UP, DUAL DOWN, DUAL UP&DOWN,<br />
DUAL RANDOM, NOTE ORDER, BASS+UP 1–8,<br />
BASS+RANDOM 1–3, TOP+UP 1–6<br />
HARP SINGLE UP, SINGLE DOWN, SINGLE UP&DOWN, GLISSANDO HARP 0–100% 50–90%<br />
SHAMISEN TOP+UP 4–6 SEQ-A 2 0–100% 50–90%<br />
BOUND BALL SINGLE UP, SINGLE DOWN, SINGLE UP&DOWN, BOUND 0–100% 50–90%<br />
SINGLE RANDOM, DUAL UP, DUAL DOWN, DUAL UP&DOWN,<br />
DUAL RANDOM, NOTE ORDER, GLISSANDO<br />
RANDOM SINGLE RANDOM, DUAL RANDOM, BASS+RANDOM 1–3 1/ 4, 1/6, 1/8, 1/12, 1/16 1–3, 0–100% 50–90%<br />
1/32 1–3, RANDOM<br />
BOSSA NOVA all BOSSA NOVA 0–100% 50–90%<br />
SALSA all SALSA 1–4 0–100% 50–90%<br />
MAMBO all MAMBO 1–2 0–100% 50–90%<br />
LATIN PERCUSSION SINGLE UP, SINGLE DOWN, SINGLE UP&DOWN, CLAVE, REV CLA, GUIRO, AGOGO 0–100% 50–90%<br />
SINGLE RANDOM, DUAL UP, DUAL DOWN, DUAL UP&DOWN,<br />
DUAL RANDOM, NOTE ORDER, GLISSANDO<br />
SAMBA all SAMBA 0–100% 50–90%<br />
TANGO all TANGO 1–4 0–100% 50–90%<br />
HOUSE all HOUSE 1–2 0–100% 50–90%<br />
LIMITLESS all all 0–100% 50–90%<br />
all: there is no restriction on the value which can be set<br />
182
MIDI Implementation<br />
Model: XP-30 (64 Voice Expandable Synthesizer)<br />
Version: 1.00<br />
Date: Jan. 18 1999<br />
1. Data Reception (sound source section)<br />
■ Channel Voice Messages<br />
● Note Off<br />
status 2nd byte 3rd byte<br />
8nH kkH vvH<br />
9nH kkH 00H<br />
n=MIDI channel number: 0H - FH (ch.1 - ch.16)<br />
kk=note number: 00H - 7FH (0 - 127)<br />
vv=Note Off velocity: 00H - 7FH (0 - 127)<br />
* The Patches corresponding to each Bank Select are as follows.<br />
Bank Select | Program No | Group<br />
Patch No.<br />
MSB | LSB | |<br />
——————+—————+————————————+————————————————————————————————————————<br />
80 | 0 | 0 - 127 | User 1 - 128<br />
81 | 0 | 0 - 127 | PR-A 1 - 128<br />
81 | 1 | 0 - 127 | PR-B 1 - 128<br />
81 | 2 | 0 - 127 | PR-C 1 - 128<br />
81 | 3 | 0 - 127 | GM 1 - 128<br />
81 | 4 | 0 - 127 | PR-E 1 - 128<br />
84 | 0 | 0 - 127 | XP-A (Session) 1 - 128<br />
84 | 1 | 0 - 126 | XP-A 129 - 255<br />
84 | 2 | 0 - 127 | XP-B (Orchestral) 1 - 128<br />
84 | 3 | 0 - 126 | XP-B 129 - 255<br />
84 | 4 | 0 - 127 | XP-C (Techno Collection) 1 - 128<br />
84 | 5 | 0 - 127 | XP-C 129 - 256<br />
84 | 6 | 0 - 127 | XP-D 1 - 128<br />
84 | 7 | 0 - 127 | XP-D 129 - 256<br />
84 | 8 | 0 - 127 | XP-E 1 - 128<br />
84 | 9 | 0 - 127 | XP-E 129 - 256<br />
* The Performance corresponding to each Bank Select are as follows.<br />
* Not received in Performance mode when the Rx parameter (PERFORM/MIDI/MIDI) is<br />
OFF.<br />
* Not received by the Rhythm Part (Part 10) when the Env Mode parameter (RHYTHM/<br />
CONTROL/CONTROL) is NO-SUS.<br />
● Note On<br />
status 2nd byte 3rd byte<br />
9nH kkH vvH<br />
n=MIDI channel number: 0H - FH (ch.1 - ch.16)<br />
kk=note number: 00H - 7FH (0 - 127)<br />
vv=Note On velocity: 01H - 7FH (1 - 127)<br />
* Not received in Performance mode when the Rx parameter (PERFORM/MIDI/MIDI) is<br />
OFF.<br />
● Polyphonic Aftertouch<br />
status 2nd byte 3rd byte<br />
AnH kkH vvH<br />
n=MIDI channel number: 0H - FH (ch.1 - ch.16)<br />
kk=note number: 00H - 7FH (0 - 127)<br />
vv=Aftertouch: 00H - 7FH (0 - 127)<br />
* This message is received if the Aftertouch parameter (SYSTEM/CONTROL/CONTROL<br />
SOURCE) is POLY or CH&POLY.<br />
* Not received in Performance mode when the Rx parameter (PERFORM/MIDI/MIDI) is<br />
OFF.<br />
* Not received in GM mode.<br />
● Control Change<br />
* If the corresponding Controller number is selected for the Control 2 or Control 3<br />
parameter (PATCH/CONTROL/CONTROL SOURCE), the corresponding effect will<br />
occur.<br />
* If a Controller number that corresponds to the Control 1 parameter or Control 2<br />
parameter (SYSTEM/CONTROL/SYS-CTRL ASSIGN) is selected, the specified effect<br />
will apply if Control 2 parameter or Control 3 parameter (PATCH/CONTROL/<br />
CONTROL SOURCE) is set to SYS-CTRL1 or SYS-CTRL2.<br />
* Not received in Performance mode when the Rx parameter (PERFORM/MIDI/MIDI) or<br />
the Control Change Receive Switch is OFF.<br />
❍Bank Select (Controller number 0,32)<br />
status 2nd byte 3rd byte<br />
BnH 00H mmH<br />
BnH 20H llH<br />
n=MIDI channel number: 0H - FH (ch.1 - ch.16)<br />
mm,ll=Bank number: 00 00H - 7F 7FH (bank.1 - bank.16384)<br />
* Not received when the Program Change parameter or Bank Select parameter (SYSTEM/<br />
MIDI/RECEIVE MIDI) is OFF.<br />
* Not received in GM mode.<br />
Bank Select | Program No | Group<br />
Performance No.<br />
MSB | LSB | |<br />
——————+—————+————————————+————————————————————————————————————————<br />
80 | 0 | 0 - 31 | User 1 - 32<br />
81 | 0 | 0 - 31 | PR-A 1 - 32<br />
81 | 1 | 0 - 31 | PR-B 1 - 32<br />
* The Rhythm set corresponding to each Bank Select are as follows.<br />
Bank Select | Program No | Group<br />
Rhythm set No.<br />
MSB | LSB | |<br />
——————+—————+————————————+————————————————————————————————————————<br />
80 | 0 | 0 - 1 | User 1 - 2<br />
81 | 0 | 0 - 1 | PR-A 1 - 2<br />
81 | 1 | 0 - 1 | PR-B 1 - 2<br />
81 | 2 | 0 - 1 | PR-C 1 - 2<br />
81 | 3 | 0 - 1 | GM 1 - 2<br />
81 | 4 | 0 - 1 | PR-E 1 - 2<br />
84 | 0 | 0 - 7 | XP-A (Session) 1 - 8<br />
84 | 4 | 0 - 7 | XP-C (Techno Collection) 1 - 8<br />
84 | 6 | 0 - 127 | XP-D 1 - 128<br />
84 | 7 | 0 - 127 | XP-D 129 - 256<br />
84 | 8 | 0 - 127 | XP-E 1 - 128<br />
84 | 9 | 0 - 127 | XP-E 129 - 256<br />
❍Modulation (Controller number 1)<br />
status 2nd byte 3rd byte<br />
BnH 01H vvH<br />
n=MIDI channel number: 0H - FH (ch.1 - ch.16)<br />
vv=Modulation depth: 00H - 7FH (0 - 127)<br />
❍Breath Type (Controller number 2)<br />
status 2nd byte 3rd byte<br />
BnH 02H vvH<br />
n=MIDI channel number: 0H - FH (ch.1 - ch.16)<br />
vv=control value: 00H - 7FH (0 - 127)<br />
❍Foot Type (Controller number 4)<br />
status 2nd byte 3rd byte<br />
BnH 04H vvH<br />
n=MIDI channel number: 0H - FH (ch.1 - ch.16)<br />
vv=control value: 00H - 7FH (0 - 127)<br />
❍Portamento Time (Controller number 5)<br />
status 2nd byte 3rd byte<br />
BnH 05H vvH<br />
n=MIDI channel number: 0H - FH (ch.1 - ch.16)<br />
vv=Portamento Time: 00H - 7FH (0 - 127)<br />
* The Time parameter (PATCH/CONTROL/PORTAMENTO) will change.<br />
❍Data Entry (Controller number 6, 38)<br />
status 2nd byte 3rd byte<br />
BnH 06H mmH<br />
BnH 26H llH<br />
n=MIDI channel number: 0H - FH (ch.1 - ch.16)<br />
mm,ll= the value of the parameter specified by RPN/NRPN<br />
mm=MSB, ll=LSB<br />
❍Volume (Controller number 7)<br />
status 2nd byte 3rd byte<br />
BnH 07H vvH<br />
n=MIDI channel number: 0H - FH (ch.1 - ch.16)<br />
vv=Volume: 00H - 7FH (0 - 127)<br />
Appendices<br />
183
MIDI Implementation<br />
❍Balance (Controller number 8)<br />
status 2nd byte 3rd byte<br />
BnH 08H vvH<br />
n=MIDI channel number: 0H - FH (ch.1 - ch.16)<br />
vv=Balance: 00H - 7FH (0 - 127)<br />
❍Panpot (Controller number 10)<br />
status 2nd byte 3rd byte<br />
BnH 0AH vvH<br />
n=MIDI channel number: 0H - FH (ch.1 - ch.16)<br />
vv=Panpot:<br />
00H - 40H - 7FH (left - center - right)<br />
* Adjust the stereo location over 128 steps, where 0 is far left, 64 is center, and 127 is far<br />
right. However this is not received when the Pan parameter (PATCH/CONTROL/<br />
RxSWITCH) is OFF.<br />
❍Expression (Controller number 11)<br />
status 2nd byte 3rd byte<br />
BnH 0BH vvH<br />
n=MIDI channel number: 0H - FH (ch.1 - ch.16)<br />
vv=Expression: 00H - 7FH (0 - 127)<br />
* If the Volume parameter (SYSTEM/CONTROL/CONTROL SOURCE) is set to<br />
VOL&EXP, the volume of the Part corresponding to the MIDI channel of the received<br />
message will be adjusted. However this is not received if the Volume parameter<br />
(PATCH/CONTROL/RxSWITCH) is OFF.<br />
* In GM mode, the volume can always be controlled.<br />
❍Hold 1 (Controller number 64)<br />
status 2nd byte 3rd byte<br />
BnH 40H vvH<br />
n=MIDI channel number: 0H - FH (ch.1 - ch.16)<br />
vv=control value:<br />
00H - 7FH (0 - 127) 0-63=OFF, 64-127=ON<br />
* Not received when the Hold-1 RxSwitch parameter (PATCH/CONTROL/DAMPER) is<br />
OFF.<br />
❍Portamento (Controller number 65)<br />
status 2nd byte 3rd byte<br />
BnH 41H vvH<br />
n=MIDI channel number: 0H - FH (ch.1 - ch.16)<br />
vv=control value:<br />
00H - 7FH (0 - 127) 0-63=OFF, 64-127=ON<br />
* The Sw parameter (PATCH/CONTROL/PORTAMENTO) will change.<br />
❍Sostenuto (Controller number 66)<br />
status 2nd byte 3rd byte<br />
BnH 42H vvH<br />
n=MIDI channel number: 0H - FH (ch.1 - ch.16)<br />
vv=control value:<br />
00H - 7FH (0 - 127) 0-63=OFF, 64-127=ON<br />
❍Soft (Controller number 67)<br />
status 2nd byte 3rd byte<br />
BnH 43H vvH<br />
n=MIDI channel number: 0H - FH (ch.1 - ch.16)<br />
vv=control value:<br />
00H - 7FH (0 - 127) 0-63=OFF, 64-127=ON<br />
❍Hold 2 (Controller number 69)<br />
status 2nd byte 3rd byte<br />
BnH 45H vvH<br />
n=MIDI channel number: 0H - FH (ch.1 - ch.16)<br />
vv=control value: 00H - 7FH (0 - 127)<br />
* A hold movement isn't done.<br />
❍Sound Controller 2 (Controller number 71)<br />
status 2nd byte 3rd byte<br />
BnH 47H vvH<br />
n=MIDI channel number: 0H - FH (ch.1 - ch.16)<br />
vv=control value: 00H - 40H - 7FH (-128 - 0 - +126)<br />
* The Res parameter (PATCH/TVF/FILTER) will change relatively.<br />
❍Sound Controller 3 (Controller number 72)<br />
status 2nd byte 3rd byte<br />
BnH 48H vvH<br />
n=MIDI channel number: 0H - FH (ch.1 - ch.16)<br />
vv=control value: 00H - 40H - 7FH (-128 - 0 - +126)<br />
* The T2–4 parameter (PATCH/TVF/TVF ENVELOPE), The T2–4 parameter (PATCH/<br />
TVA/TVA ENVELOPE) will change relatively.<br />
❍Sound Controller 4 (Controller number 73)<br />
status 2nd byte 3rd byte<br />
BnH 49H vvH<br />
n=MIDI channel number: 0H - FH (ch.1 - ch.16)<br />
vv=control value: 00H - 40H - 7FH (-128 - 0 - +126)<br />
* The T1 parameter (PATCH/TVF/TVF ENVELOPE), The T1 parameter (PATCH/TVA/<br />
TVA ENVELOPE) will change relatively.<br />
❍Sound Controller 5 (Controller number 74)<br />
status 2nd byte 3rd byte<br />
BnH 4AH vvH<br />
n=MIDI channel number: 0H - FH (ch.1 - ch.16)<br />
vv=control value: 00H - 40H - 7FH (-64 - 0 - +63)<br />
* The Cut parameter (PATCH/TVF/FILTER) will change relatively.<br />
❍General Purpose Controller 5 (Controller number 80)<br />
status 2nd byte 3rd byte<br />
BnH 50H vvH<br />
n=MIDI channel number: 0H - FH (ch.1 - ch.16)<br />
vv=control value: 00H - 40H - 7FH (-128 - 0 - +126)<br />
* The L1–3 parameter (PATCH/TVA/TVA ENVELOPE) of Tone 1 will change relatively.<br />
❍General Purpose Controller 6 (Controller number 81)<br />
status 2nd byte 3rd byte<br />
BnH 51H vvH<br />
n=MIDI channel number: 0H - FH (ch.1 - ch.16)<br />
vv=control value: 00H - 40H - 7FH (-128 - 0 - +126)<br />
* The L1–3 parameter (PATCH/TVA/TVA ENVELOPE) of Tone 2 will change relatively.<br />
❍General Purpose Controller 7 (Controller number 82)<br />
status 2nd byte 3rd byte<br />
BnH 52H vvH<br />
n=MIDI channel number: 0H - FH (ch.1 - ch.16)<br />
vv=control value: 00H - 40H - 7FH (-128 - 0 - +126)<br />
* The L1–3 parameter (PATCH/TVA/TVA ENVELOPE) of Tone 3 will change relatively.<br />
❍General Purpose Controller 8 (Controller number 83)<br />
status 2nd byte 3rd byte<br />
BnH 53H vvH<br />
n=MIDI channel number: 0H - FH (ch.1 - ch.16)<br />
vv=control value: 00H - 40H - 7FH (-128 - 0 - +126)<br />
* The L1–3 parameter (PATCH/TVA/TVA ENVELOPE) of Tone 4 will change relatively.<br />
❍Portamento Control (Controller number 84)<br />
status 2nd byte 3rd byte<br />
BnH 54H kkH<br />
n=MIDI channel number: 0H - FH (ch.1 - ch.16)<br />
kk=source note number: 00H - 7FH (0 - 127)<br />
* A Note On message received immediately after a Portamento control will be sounded<br />
with the pitch changing smoothly from the source note number. If a voice is already<br />
sounding at the same note number as the source note number, that voice will change<br />
pitch to the pitch of the newly received Note On, and continue sounding (i.e., will be<br />
played legato).<br />
* The speed of the pitch change caused by Portamento is determined by the Time<br />
parameter (PATCH/CONTROL/PORTAMENTO) value.<br />
184
MIDI Implementation<br />
❍Effect 1 (Reverb Send Level) (Controller number 91)<br />
status 2nd byte 3rd byte<br />
BnH 5BH vvH<br />
n=MIDI channel number: 0H - FH (ch.1 - ch.16)<br />
vv=Reverb Send Level: 00H - 7FH (0 - 127)<br />
● Program Change<br />
status<br />
2nd byte<br />
CnH<br />
ppH<br />
n=MIDI channel number: 0H - FH (ch.1 - ch.16)<br />
pp=Program number: 00H - 7FH (prog.1 - prog.128)<br />
* In Performance mode, the Reverb Send Level parameter of each Part will change.<br />
❍Effect 3 (Chorus Send Level) (Controller number 93)<br />
status 2nd byte 3rd byte<br />
BnH 5DH vvH<br />
n=MIDI channel number: 0H - FH (ch.1 - ch.16)<br />
vv=Chorus Send Level: 00H - 7FH (0 - 127)<br />
* In Performance mode, the Chorus Send Level parameter of each Part will change.<br />
❍RPN MSB/LSB (Controller number 100, 101)<br />
status 2nd byte 3rd byte<br />
BnH 65H mmH<br />
BnH 64H llH<br />
n=MIDI channel number: 0H - FH (ch.1 - ch.16)<br />
mm=MSB of the parameter number specified by RPN<br />
ll=LSB of the parameter number specified by RPN<br />
><br />
Control Changes include RPN (Registered Parameter Numbers), which are extended<br />
parameters whose function is defined in the MIDI specification.<br />
When using RPNs, first the RPN (Controller numbers 100 and 101; they can be sent in any<br />
order) is transmitted to specify the parameter you wish to control. Then, Data Entry<br />
messages (Controller numbers 6 and 38) are used to set the value of the specified parameter.<br />
Once a RPN parameter has been specified, all further Data Entry messages on that channel<br />
are considered to apply to that specified parameter. In order to prevent accidents, when the<br />
desired setting has been made for the parameter, it is recommended that RPN be set to Null.<br />
* Not received when the Program Change parameter (SYSTEM/MIDI/RECEIVE MIDI) is<br />
OFF.<br />
* When received on the Control channel, the Performance will change.<br />
* Not received in Performance mode when the Rx parameter (PERFORM/MIDI/MIDI) is<br />
OFF.<br />
● Channel Aftertouch<br />
status<br />
2nd byte<br />
DnH<br />
vvH<br />
n=MIDI channel number: 0H - FH (ch.1 - ch.16)<br />
vv=Channel Aftertouch: 00H - 7FH (0 - 127)<br />
* Not received in Performance mode when the Rx parameter (PERFORM/MIDI/MIDI) is<br />
OFF.<br />
● Pitch Bend Change<br />
status 2nd byte 3rd byte<br />
EnH llH mmH<br />
n=MIDI channel number: 0H - FH (ch.1 - ch.16)<br />
mm,ll=Pitch Bend value: 00 00H - 40 00H - 7F 7FH (-8192 - 0 - +8191)<br />
* Not received in Performance mode when the Rx parameter (PERFORM/MIDI/MIDI) is<br />
OFF.<br />
■ Channel Mode Messages<br />
This device receives the following RPNs.<br />
RPN<br />
Data entry<br />
MSB LSB MSB LSB Notes<br />
00H 00H mmH - Pitch Bend Sensitivity<br />
mm : 00H - 0CH (0 - 12 semitones)<br />
ll : ignored (processed as 00H)<br />
Up to 1 octave can be specified in semitone steps.<br />
*The Bend Range parameter (PATCH/<br />
CONTROL/KEY MODE & BENDER) will<br />
also be changed.<br />
*Not received by the Rhythm Part (Part 10).<br />
00H 01H mmH llH Channel Fine Tuning<br />
mm, ll : 20 00H - 40 00H - 60 00H<br />
( -4096 x 100 / 8192 - 0 - +4096 x 100 / 8192 cent )<br />
*In Patch mode, the Master parameter<br />
(SYSTEM/TUNE/TUNE) will change.<br />
*In Performance mode, the Fine parameter<br />
(PERFORM/PART/SETTING) of each Part<br />
will change. When received on the Control<br />
channel, the Master parameter (SYSTEM/<br />
TUNE/TUNE) will change.<br />
00H 02H mmH - Channel Coarse Tuning<br />
mm : 10H - 40H - 70H (-48 - 0 - +48 semitones)<br />
ll : ignored (processed as 00H)<br />
*Not received in Patch mode.<br />
*In Performance mode, the Coarse parameter<br />
(PERFORM/PART/SETTING) of each Part<br />
will change.<br />
7FH 7FH - - RPN null<br />
RPN and NRPN will be set as “unspecified.”<br />
Once this setting has been made, subsequent<br />
Data Entry messages will be ignored. (It is not<br />
necessary to transmit Data Entry for RPN Null<br />
settings.<br />
Parameter values that were previously set will<br />
not change.<br />
mm, ll: ignored<br />
● All Sound Off (Controller number 120)<br />
status 2nd byte 3rd byte<br />
BnH 78H 00H<br />
n=MIDI channel:<br />
0H - FH (ch.1 - ch.16)<br />
* When this message is received, all notes currently sounding on the corresponding<br />
channel will be turned off.<br />
* Not received in Performance mode when the Rx parameter (PERFORM/MIDI/MIDI) is<br />
OFF.<br />
● Reset All Controllers (Controller number 121)<br />
status 2nd byte 3rd byte<br />
BnH 79H 00H<br />
n=MIDI channel number: 0H - FH (ch.1 - ch.16)<br />
* Not received in Performance mode when the Rx parameter (PERFORM/MIDI/MIDI) is<br />
OFF.<br />
* When this message is received, the following controllers will be set to their reset values.<br />
Controller<br />
Pitch Bend Change<br />
Polyphonic Key Pressure<br />
Channel Pressure<br />
Modulation<br />
Breath type<br />
Expression<br />
Hold 1<br />
Sostenuto<br />
Soft<br />
Hold 2<br />
RPN<br />
NRPN<br />
System General purpose controller 10<br />
System General purpose controller 20<br />
Reset value<br />
[+-]0 (center)<br />
0 (off)<br />
0 (off)<br />
0 (off)<br />
0 (minimum)<br />
127 (maximum)<br />
However the controller will be at minimum.<br />
0 (off)<br />
0 (off)<br />
0 (off)<br />
0 (off)<br />
Unset. Previously set data will not change.<br />
Unset. Previously set data will not change.<br />
(minimum)<br />
(minimum)<br />
Appendices<br />
185
MIDI Implementation<br />
● All Note Off (Controller number 123)<br />
status 2nd byte 3rd byte<br />
BnH 7BH 00H<br />
n=MIDI channel number: 0H - FH (ch.1 - ch.16)<br />
* When All Note Off is received, all currently sounding notes of the corresponding<br />
channel will be turned off. However if Hold 1 or Sostenuto are on, the sound will be held<br />
until these are turned off.<br />
* Not received in Performance mode if Rx parameter (PERFORM/MIDI/MIDI) is OFF.<br />
● Omni Off (Controller number 124)<br />
status 2nd byte 3rd byte<br />
BnH 7CH 00H<br />
n=MIDI channel number: 0H - FH (ch.1 - ch.16)<br />
* The same processing as when All Note Off is received will be done.<br />
* Not received in Performance mode if Rx parameter (PERFORM/MIDI/MIDI) is OFF.<br />
● Omni On (Controller number 125)<br />
status 2nd byte 3rd byte<br />
BnH 7DH 00H<br />
n=MIDI channel number: 0H - FH (ch.1 - ch.16)<br />
* The same processing as when All Note Off is received will be done. The instrument will<br />
not be set to OMNI ON.<br />
* Not received in Performance mode if Rx parameter (PERFORM/MIDI/MIDI) is OFF.<br />
● Mono (Controller number 126)<br />
status 2nd byte 3rd byte<br />
BnH 7EH mmH<br />
n=MIDI channel number: 0H - FH (ch.1 - ch.16)<br />
mm=Mono number: 00H - 10H (0 - 16)<br />
* The same processing as when All Note Off is received will be done, and the Assign<br />
parameter (PATCH/CONTROL/KEY MODE & BENDER) will be set to SOLO.<br />
* Not received in Performance mode if Rx parameter (PERFORM/MIDI/MIDI) is OFF.<br />
● Poly (Controller number 127)<br />
status 2nd byte 3rd byte<br />
BnH 7FH 00H<br />
n=MIDI channel number:0H - FH (ch.1 - ch.16)<br />
* The same processing as when All Note Off is received will be done, and the Assign<br />
parameter (PATCH/CONTROL/KEY MODE & BENDER) will be set to POLY.<br />
* Not received in Performance mode if Rx parameter (PERFORM/MIDI/MIDI) is OFF.<br />
■ System Realtime Messages<br />
● Timing Clock<br />
status<br />
F8H<br />
* This message will be received if the Clock Source parameter (SYSTEM/SETUP/SYSTEM<br />
SETUP) is MIDI (p. 129).<br />
● Active Sensing<br />
status<br />
FEH<br />
* When an Active Sensing message is received, the unit will begin monitoring the interval<br />
at which MIDI messages are received. During monitoring, if more than 420 ms passes<br />
without a message being received, the same processing will be done as when All Sound<br />
Off, All Note Off, and Reset All Controllers messages are received. Then monitoring will<br />
be halted.<br />
■ System Exclusive Messages<br />
status data byte status<br />
F0H iiH, ddH, ......, eeH F7H<br />
F0H:<br />
System Exclusive message status<br />
ii = ID number: This is the ID number (manufacturer ID) that specifies the<br />
manufacturer whose exclusive message this is. <strong>Roland</strong>'s manufacturer<br />
ID is 41H.ID numbers 7EH and 7FH are defined in an expansion of the<br />
MIDI standard as Universal Non-realtime messages (7EH) and<br />
Universal Realtime Messages (7FH).<br />
dd,..., ee = data: 00H - 7FH (0 - 127)<br />
F7H:<br />
EOX (End Of Exclusive)<br />
Of the System Exclusive messages received by this device, the Universal Non-realtime<br />
messages and the Universal Realtime messages and the Data Request (RQ1) messages and<br />
the Data Set (DT1) messages will be set automatically.<br />
● Universal Non-realtime System Exclusive Messages<br />
❍Identity Request Message<br />
When this message is received, Identity Reply message (p. 189) will be transmitted.<br />
status data byte status<br />
F0H<br />
7EH, dev, 06H, 01H F7H<br />
Byte<br />
Remarks<br />
F0H<br />
Exclusive status<br />
7EH ID number (Universal Non-realtime message)<br />
dev device ID (dev: 10H - 1FH)<br />
06H sub ID#1 (General Information)<br />
01H sub ID#2 (Identity Request)<br />
F7H EOX (End Of Exclusive)<br />
* The “dev” is own device number or 7FH (Broadcast).<br />
❍GM System On<br />
“GM System On” is a command message that resets the internal settings of the instrument<br />
to the GM initial state (General MIDI System - Level 1). A GM instrument that receives this<br />
message will automatically enter a state in which it can correctly perform a GM score.<br />
status data byte status<br />
F0H<br />
7EH, 7FH, 09H, 01H F7H<br />
Byte<br />
Remarks<br />
F0H<br />
Exclusive status<br />
7EH ID number (Universal Non-realtime message)<br />
7FH device ID (Broadcast)<br />
09H sub ID#1 (General MIDI Message)<br />
01H sub ID#2 (General MIDI On)<br />
F7H EOX (End Of Exclusive)<br />
* Not received when the Rx.GM parameter (SYSTEM/MIDI/SYS-EXC MIDI) is OFF.<br />
❍GM System Off<br />
When this messages is received, this instrument will return to the performance mode.<br />
status data byte status<br />
F0H<br />
7EH, 7FH, 09H, 02H F7H<br />
Byte<br />
Remarks<br />
F0H<br />
Exclusive status<br />
7EH ID number (Universal Non-realtime message)<br />
7FH device ID (Broadcast)<br />
09H sub ID#1 (General MIDI Message)<br />
02H sub ID#2 (General MIDI Off)<br />
F7H EOX (End Of Exclusive)<br />
* Not received when the Rx.GM parameter (SYSTEM/MIDI/SYS-EXC MIDI) is OFF.<br />
186
MIDI Implementation<br />
● Universal Realtime System Exclusive messages<br />
❍Master Volume<br />
status data byte status<br />
F0H 7FH, 7FH, 04H, 01H, llH, mmH F7H<br />
❍Data Set 1<br />
DT1<br />
This message transmits the actual data, and is used when you wish to set the data of the<br />
receiving device.<br />
status data byte status<br />
F0H 41H, dev, 6AH, 12H, aaH, bbH, F7H<br />
ccH, ddH, eeH, ... ffH, sum<br />
Byte<br />
Remarks<br />
F0H<br />
Exclusive status<br />
7FH ID number (Universal Realtime message)<br />
7FH device ID (Broadcast)<br />
04H sub ID#1 (Device Control Message)<br />
01H sub ID#2 (Master Volume)<br />
llH<br />
LSB of Master Volume<br />
mmH<br />
MSB of Master Volume<br />
F7H EOX (End Of Exclusive)<br />
* LSB of Master Volume (llH) is processed as 00H.<br />
* This message is not received if the Rx.Exc parameter (SYSTEM/MIDI/SYS-EXC MIDI) is<br />
OFF.<br />
* This message is not received in GM mode.<br />
● Data Transmission<br />
This instrument can use exclusive messages to exchange many varieties of internal settings<br />
with other devices.<br />
The model ID of the exclusive messages used by this instrument is 6AH.<br />
❍Data Request 1 RQ1<br />
This message requests the other device to transmit data. The address and size indicate the<br />
type and amount of data that is requested.<br />
When a Data Request message is received, if the device is in a state in which it is able to<br />
transmit data, and if the address and size are appropriate, the requested data is transmitted<br />
as a Data Set 1 (DT1) message. If the conditions are not met, nothing is transmitted.<br />
status data byte status<br />
F0H 41H, dev, 6AH, 11H, aaH, bbH, F7H<br />
ccH, ddH, ssH, ttH, uuH, vvH, sum<br />
Byte<br />
Remarks<br />
F0H<br />
Exclusive status<br />
41H ID number (<strong>Roland</strong>)<br />
dev device ID (dev: 10H - 1FH)<br />
6AH model ID (XP-30)<br />
11H command ID (RQ1)<br />
aaH<br />
address MSB<br />
bbH<br />
address<br />
ccH<br />
address<br />
ddH<br />
address LSB<br />
ssH<br />
size MSB<br />
ttH<br />
size<br />
uuH<br />
size<br />
vvH<br />
size LSB<br />
sum<br />
checksum<br />
F7H EOX (End Of Exclusive)<br />
* The size of data that can be transmitted at one time is fixed for each type of data. and<br />
data requests must be made with a fixed starting address and size. Refer to the address<br />
and size given in “Parameter Address Map” (p. 190).<br />
* For the checksum, refer to (p. 204).<br />
* This message is not received if the Rx.Exc parameter (SYSTEM/MIDI/SYS-EXC MIDI) is<br />
OFF.<br />
* This message is not received in GM mode.<br />
Byte<br />
Remarks<br />
F0H<br />
Exclusive status<br />
41H ID number (<strong>Roland</strong>)<br />
dev device ID (dev: 10H - 1FH)<br />
6AH model ID (XP-30)<br />
12H command ID (DT1)<br />
aaH<br />
address MSB<br />
bbH<br />
address<br />
ccH<br />
address<br />
ddH<br />
address LSB<br />
eeH data: The actual data to be transmitted. Multi-byte<br />
data is transmitted in the order of the address.<br />
: :<br />
ffH<br />
data<br />
sum<br />
checksum<br />
F7H EOX (End Of Exclusive)<br />
* The amount of data that is transmitted at one time is fixed for the type of data, and only<br />
data of the fixed starting address and size will be transmitted. Refer to the address and<br />
size given in “Parameter Address Map” (p. 190).<br />
* Data whose size is greater than 128 bytes should be divided into packets of 128 bytes or<br />
less and transmitted. Successive “Data Set 1” messages should have at least 20 ms of<br />
time interval between them.<br />
* For the checksum, refer to (p. 204).<br />
* This message is not received if Rx.Exc parameter (SYSTEM/MIDI/SYS-EXC MIDI) is<br />
OFF.<br />
* This message is not received in GM mode.<br />
This device is able to receive GS Exclusive messages only for Scale Tune settings.<br />
❍Data Set 1<br />
DT1<br />
This message transmits the actual data, and is used when you wish to set the data of the<br />
receiving device.<br />
status data byte status<br />
F0H 41H, dev, 42H, 12H, aaH, bbH, F7H<br />
ccH, ddH, ... eeH, sum<br />
Byte<br />
Remarks<br />
F0H<br />
Exclusive status<br />
41H ID number (<strong>Roland</strong>)<br />
dev device ID (dev: 10H - 1FH)<br />
42H model ID (GS)<br />
12H command ID (DT1)<br />
aaH<br />
address MSB<br />
bbH<br />
address middle byte<br />
ccH<br />
address LSB<br />
ddH data: The actual data to be transmitted. Multi-byte<br />
data is transmitted in the address order.<br />
: :<br />
eeH<br />
data<br />
sum<br />
checksum<br />
F7H EOX (End Of Exclusive)<br />
* This message is not received when the Rx.Exc parameter (SYSTEM/MIDI/SYS-EXC<br />
MIDI) is OFF.<br />
* This message is not received in GM mode.<br />
Appendices<br />
187
MIDI Implementation<br />
2. Data transmission (sound source section)<br />
■ Channel Voice Messages<br />
● Note Off<br />
status 2nd byte 3rd byte<br />
8nH kkH vvH<br />
n=MIDI channel:<br />
0H - FH (ch.1 - ch.16)<br />
kk=Note Number: 00H - 7FH (0 - 127)<br />
vv=Note Off Velocity: 00H - 7FH (0 - 127)<br />
● Note On<br />
status 2nd byte 3rd byte<br />
9nH kkH vvH<br />
n=MIDI channel number: 0H - FH (ch.1 - ch.16)<br />
kk=note number: 00H - 7FH (0 - 127)<br />
vv=Note On velocity: 01H - 7FH (1 - 127)<br />
● Control Change<br />
* By selecting a controller number that corresponds to the setting of the Assign parameter<br />
(SYSTEM/CONTROL/CONTROL PEDAL) or each Assign parameter of C1–4 Slider<br />
(SYSTEM/CONTROL/ASSIGN), you can transmit any desired control change.<br />
❍Bank Select (Controller number 0,32)<br />
status 2nd byte 3rd byte<br />
BnH 00H mmH<br />
BnH 20H llH<br />
n=MIDI channel number: 0H - FH (ch.1 - ch.16)<br />
mm,ll=Bank number: 00 00H - 7F 7FH (bank.1 - bank.16384)<br />
* This message is not transmitted if Program parameter (SYSTEM/MIDI/TRANSMIT<br />
MIDI) or Bank Sel parameter (SYSTEM/MIDI/TRANSMIT MIDI) is OFF.<br />
* For the Bank Select that corresponds to each Patch, refer to section 1.<br />
* This message is not transmitted in GM mode<br />
❍Modulation (Controller number 1)<br />
status 2nd byte 3rd byte<br />
BnH 01H vvH<br />
n=MIDI channel number: 0H - FH (ch.1 - ch.16)<br />
vv=Modulation Depth: 00H - 7FH (0 - 127)<br />
❍Breath type (Controller number 2)<br />
status 2nd byte 3rd byte<br />
BnH 02H vvH<br />
n=MIDI channel number: 0H - FH (ch.1 - ch.16)<br />
vv=control value: 00H - 7FH (0 - 127)<br />
❍Foot Type (Controller number 4)<br />
status 2nd byte 3rd byte<br />
BnH 04H vvH<br />
n=MIDI channel number: 0H - FH (ch.1 - ch.16)<br />
vv=control value: 00H - 7FH (0 - 127)<br />
❍Portamento Time (Controller number 5)<br />
status 2nd byte 3rd byte<br />
BnH 05H vvH<br />
n=MIDI channel number: 0H - FH (ch.1 - ch.16)<br />
vv=Portamento Time: 00H - 7FH (0 - 127)<br />
❍Volume (Controller number 7)<br />
status 2nd byte 3rd byte<br />
BnH 07H vvH<br />
n=MIDI channel number: 0H - FH (ch.1 - ch.16)<br />
vv=Volume: 00H - 7FH (0 - 127)<br />
❍Balance (Controller number 8)<br />
status 2nd byte 3rd byte<br />
BnH 08H vvH<br />
n=MIDI channel number: 0H - FH (ch.1 - ch.16)<br />
vv=Balance: 00H - 7FH (0 - 127)<br />
❍Panpot (Controller number 10)<br />
status 2nd byte 3rd byte<br />
BnH 0AH vvH<br />
n=MIDI channel number: 0H - FH (ch.1 - ch.16)<br />
vv=panpot:<br />
00H - 40H - 7FH (left - center - right)<br />
❍Expression (Controller number 11)<br />
status 2nd byte 3rd byte<br />
BnH 0BH vvH<br />
n=MIDI channel number: 0H - FH (ch.1 - ch.16)<br />
vv=Expression: 00H - 7FH (0 - 127)<br />
❍Hold 1 (Controller number 64)<br />
status 2nd byte 3rd byte<br />
BnH 40H vvH<br />
n=MIDI channel number: 0H - FH (ch.1 - ch.16)<br />
vv=control value:<br />
00H - 7FH (0 - 127) 0-63=OFF, 64-127=ON<br />
❍Portamento (Controller number 65)<br />
status 2nd byte 3rd byte<br />
BnH 41H vvH<br />
n=MIDI channel number: 0H - FH (ch.1 - ch.16)<br />
vv=control value:<br />
00H - 7FH (0 - 127) 0-63=OFF, 64-127=ON<br />
❍Sostenuto (Controller number 66)<br />
status 2nd byte 3rd byte<br />
BnH 42H vvH<br />
n=MIDI channel number: 0H - FH (ch.1 - ch.16)<br />
vv=control value:<br />
00H - 7FH (0 - 127) 0-63=OFF, 64-127=ON<br />
❍Soft (Controller number 67)<br />
status 2nd byte 3rd byte<br />
BnH 43H vvH<br />
n=MIDI channel number: 0H - FH (ch.1 - ch.16)<br />
vv=control value:<br />
00H - 7FH (0 - 127) 0-63=OFF, 64-127=ON<br />
❍ Hold 2 (Controller number 69)<br />
status 2nd byte 3rd byte<br />
BnH 45H vvH<br />
n=MIDI channel number: 0H - FH (ch.1 - ch.16)<br />
vv=control value: 00H - 7FH (0 - 127)<br />
❍Sound Controller 2 (Controller number 71)<br />
status 2nd byte 3rd byte<br />
BnH 47H vvH<br />
n=MIDI channel number: 0H - FH (ch.1 - ch.16)<br />
vv=control value: 00H - 40H - 7FH (-128 - 0 - +126)<br />
❍Sound Controller 3 (Controller number 72)<br />
status 2nd byte 3rd byte<br />
BnH 48H vvH<br />
n=MIDI channel number: 0H - FH (ch.1 - ch.16)<br />
vv=control value: 00H - 40H - 7FH (-128 - 0 - +126)<br />
❍Sound Controller 4 (Controller number 73)<br />
status 2nd byte 3rd byte<br />
BnH 49H vvH<br />
n=MIDI channel number: 0H - FH (ch.1 - ch.16)<br />
vv=control value: 00H - 40H - 7FH (-128 - 0 - +126)<br />
❍Sound Controller 5 (Controller number 74)<br />
status 2nd byte 3rd byte<br />
BnH 4AH vvH<br />
n=MIDI channel number: 0H - FH (ch.1 - ch.16)<br />
vv=control value: 00H - 40H - 7FH (-64 - 0 - +63)<br />
❍General Purpose Controller 5 (Controller number 80)<br />
status 2nd byte 3rd byte<br />
BnH 50H vvH<br />
n=MIDI channel number: 0H - FH (ch.1 - ch.16)<br />
vv=control value: 00H - 40H - 7FH (-128 - 0 - +126)<br />
188
MIDI Implementation<br />
❍General Purpose Controller 6 (Controller number 81)<br />
status 2nd byte 3rd byte<br />
BnH 51H vvH<br />
n=MIDI channel number: 0H - FH (ch.1 - ch.16)<br />
vv=control value: 00H - 40H - 7FH (-128 - 0 - +126)<br />
❍General Purpose Controller 7 (Controller number 82)<br />
status 2nd byte 3rd byte<br />
BnH 52H vvH<br />
n=MIDI channel number: 0H - FH (ch.1 - ch.16)<br />
vv=control value: 00H - 40H - 7FH (-128 - 0 - +126)<br />
❍General Purpose Controller 8 (Controller number 83)<br />
status 2nd byte 3rd byte<br />
BnH 53H vvH<br />
n=MIDI channel number: 0H - FH (ch.1 - ch.16)<br />
vv=control value: 00H - 40H - 7FH (-128 - 0 - +126)<br />
● Pitch Bend Change<br />
status 2nd byte 3rd byte<br />
EnH llH mmH<br />
n=MIDI channel number: 0H - FH (ch.1 - ch.16)<br />
mm,ll=Pitch Bend value: 00 00H - 40 00H - 7F 7FH (-8192 - 0 - +8191)<br />
■ System Realtime Messages<br />
● Active Sensing<br />
status<br />
FEH<br />
* Transmitted at intervals of approximately 250ms.<br />
* Not transmitted if the Active Sensing parameter (SYSTEM/MIDI/TRANSMIT MIDI) is<br />
OFF.<br />
❍Portamento Control (Controller number 84)<br />
status 2nd byte 3rd byte<br />
BnH 54H kkH<br />
n=MIDI channel number: 0H - FH (ch.1 - ch.16)<br />
kk=source note number: 00H - 7FH (0 - 127)<br />
❍Effect 1 (Reverb Send Level) (Controller number 91)<br />
status 2nd byte 3rd byte<br />
BnH 5BH vvH<br />
n=MIDI channel number: 0H - FH (ch.1 - ch.16)<br />
vv=Reverb Send Level: 00H - 7FH (0 - 127)<br />
❍Effect 3 (Chorus Send Level) (Controller number 93)<br />
status 2nd byte 3rd byte<br />
BnH 5DH vvH<br />
n=MIDI channel:<br />
0H - FH (ch.1 - ch.16)<br />
vv=Chorus Send Level: 00H - 7FH (0 - 127)<br />
❍RPN MSB/LSB (Controller number 100,101)<br />
status 2nd byte 3rd byte<br />
BnH 65H mmH<br />
BnH 64H llH<br />
n=MIDI channel number: 0H - FH (ch.1 - ch.16)<br />
mm=MSB of the parameter number specified by RPN<br />
ll=LSB of the parameter number specified by RPN<br />
This device transmits the following RPNs.<br />
■ System Exclusive Messages<br />
There is a kind of the Universal Non-realtime messages and the Data Set (DT1) messages in<br />
the System Exclusive messages transmitted by this device.<br />
● Universal Non-realtime System Exclusive Messages<br />
❍Identity Reply Message<br />
When Identity Request message (p. 186) is received, this message will be transmitted.<br />
status data byte status<br />
F0H 7EH, dev, 06H, 02H, 41H, 6AH, 00H, F7H<br />
04H, 00H, 00H, 01H, 00H, 00H<br />
Byte<br />
Remarks<br />
F0H<br />
Exclusive status<br />
7EH ID number (Universal Non-realtime message)<br />
dev device ID (dev: 10H - 1FH)<br />
06H sub ID#1 (General Information)<br />
02H sub ID#2 (Identity Reply)<br />
41H ID number (<strong>Roland</strong>)<br />
6AH 00H<br />
Device family code<br />
04H 00H<br />
Device family number code<br />
00H 01H 00H 00H Software revision level<br />
F7H EOX (End Of Exclusive)<br />
● Data Transmission<br />
RPN<br />
Data entry<br />
MSB LSB MSB LSB Notes<br />
00H 00H mmH - Pitch Bend Sensitivity<br />
mm : 00H - 0CH (0 - 12 semitones)<br />
ll : 00H<br />
❍Data Set1<br />
DT1<br />
status data byte status<br />
F0H 41H, dev, 6AH, 12H, aaH, bbH, F7H<br />
ccH, ddH, eeH, ... ffH, sum<br />
00H 01H mmH llH Channel Fine Tuning<br />
mm, ll : 20 00H - 40 00H - 60 00H<br />
( -4096 x 100 / 8192 - 0 - +4096 x 100 / 8192 cent )<br />
00H 02H mmH - Channel Coarse Tuning<br />
mm : 10H - 40H - 70H (-48 - 0 - +48 semitones)<br />
ll : 00H<br />
● Program Change<br />
status<br />
2nd byte<br />
CnH<br />
ppH<br />
n=MIDI channel:<br />
0H - FH (ch.1 - ch.16)<br />
pp=Program number: 00H - 7FH (prog.1 - prog.128)<br />
* This message is not transmitted when the Program parameter (SYSTEM/MIDI/<br />
TRANSMIT MIDI) is OFF.<br />
● Channel Aftertouch<br />
status<br />
2nd byte<br />
DnH<br />
vvH<br />
n=MIDI channel:<br />
0H - FH (ch.1 - ch.16)<br />
vv=Channel Aftertouch: 00H - 7FH (1 - 128)<br />
Byte<br />
Remarks<br />
F0H<br />
Exclusive status<br />
41H ID number (<strong>Roland</strong>)<br />
dev device ID (dev: 10H - 1FH)<br />
6AH model ID (XP-30)<br />
12H command ID (DT1)<br />
aaH<br />
address MSB<br />
bbH<br />
address<br />
ccH<br />
address<br />
ddH<br />
address LSB<br />
eeH data: The actual data to be transmitted. Multi-byte<br />
data is transmitted in the address order.<br />
: :<br />
ffH<br />
data<br />
sum<br />
checksum<br />
F7H EOX (End Of Exclusive)<br />
* The amount of data transmitted at one time is fixed for the type of data, and the data will<br />
be transmitted with the fixed starting address and size. Refer to the address and size<br />
given in “Parameter Address Map” (p. 190).<br />
* Large amounts of data must be divided into packets of 128 bytes or less, and transmitted<br />
at intervals of approximately 20 ms.<br />
* For the checksum, refer to (p. 204).<br />
Appendices<br />
189
MIDI Implementation<br />
3. Parameter Address Map<br />
1. XP-30 (Model ID=6AH)<br />
* For addresses marked by a #, the data must be divided into 2 parts for transmission. For example, data with the hexadecimal value ABH would be divided into 0AH and 0BH, and transmitted<br />
in that order.<br />
* Parameter values enclosed in < > are for the JV-1010 / JV-1080 / JV-2080 / XP-50 / XP-60 / XP-80, and will be ignored if received by the XP-30.<br />
+——————————————————————————————————————————————————————————————————————————————+<br />
| Start | |<br />
| Address | Description |<br />
|—————————————+————————————————————————————————————————————————————————————————|<br />
| 00 00 00 00 | System 1-1 |<br />
|—————————————+————————————————————————————————————————————————————————————————|<br />
| 01 00 00 00 | Temporary Performance 1-2 |<br />
| 02 00 00 00 | Performance Mode Temporary Patch(part 1) 1-3 |<br />
| 02 01 00 00 | Performance Mode Temporary Patch(part 2) |<br />
| : | |<br />
| 02 08 00 00 | Performance Mode Temporary Patch(part 9) |<br />
| 02 09 00 00 | Temporary Rhythm Setup 1-4 |<br />
| 02 0A 00 00 | Performance Mode Temporary Patch(part 11) 1-3 |<br />
| : | |<br />
| 02 0F 00 00 | Performance Mode Temporary Patch(part 16) |<br />
| 03 00 00 00 | Patch Mode Temporary Patch 1-3 |<br />
|—————————————+————————————————————————————————————————————————————————————————|<br />
| 10 00 00 00 | User Performance USER:01 1-2 |<br />
| 10 01 00 00 | User Performance USER:02 |<br />
| : | |<br />
| 10 1F 00 00 | User Performance USER:32 |<br />
| 10 40 00 00 | User Rhythm Setup USER:1 1-4 |<br />
| 10 41 00 00 | User Rhythm Setup USER:2 |<br />
| 11 00 00 00 | User Patch USER:001 1-3 |<br />
| 11 01 00 00 | User Patch USER:002 |<br />
| : | |<br />
| 11 7F 00 00 | User Patch USER:128 |<br />
+——————————————————————————————————————————————————————————————————————————————+<br />
● 1-1.System<br />
+——————————————————————————————————————————————————————————————————————————————+<br />
| Offset | |<br />
| Address | Description |<br />
|—————————————+————————————————————————————————————————————————————————————————|<br />
| 00 00 | System Common 1-1-1 |<br />
| 10 00 | Part 1 Scale Tune 1-1-2 |<br />
| 11 00 | Part 2 Scale Tune |<br />
| : | |<br />
| 1F 00 | Part 16 Scale Tune |<br />
| 20 00 | Patch Mode Scale Tune 1-1-2 |<br />
+——————————————————————————————————————————————————————————————————————————————+<br />
● 1-1-1.System Common<br />
+——————————————————————————————————————————————————————————————————————————————+<br />
| Offset | |<br />
| Address | Size | Description Data (Value) |<br />
|—————————————+————————————————————————————————————————————————————————————————|<br />
| 00 00 | 0000 00aa | Sound Mode 0 - 2 *1 |<br />
| 00 01 | 0aaa aaaa | Performance Number 0 - 127 *2 | +———————————————————————————————————————————————————————————+<br />
| 00 02 | 0000 00aa | Patch Group Type 0 - 2 *3 -> | | Patch Group | Group Type | Group ID | Number (value) |<br />
| 00 03 | 0aaa aaaa | Patch Group ID 0 - 127 -> | |—————————————+————————————+——————————+—————————————————————|<br />
|# 00 04 | 0000 aaaa | Patch Number 0 - 255 -> | | USER | 0 | 1 | 0 - 127 (001 - 128) |<br />
| | 0000 bbbb | (001 - 256) | | |<br />
| 00 06 | 0aaa aaaa | Master Tune 0 - 126 *4 | | PR-A | 0 | 3 | 0 - 127 (001 - 128) |<br />
| 00 07 | 0000 000a | Scale Tune Switch 0 - 1 (OFF,ON) | | PR-B | 0 | 4 | 0 - 127 (001 - 128) |<br />
| 00 08 | 0000 000a | EFX Switch 0 - 1 (OFF,ON) | | PR-C | 0 | 5 | 0 - 127 (001 - 128) |<br />
| 00 09 | 0000 000a | Chorus Switch 0 - 1 (OFF,ON) | | PR-D | 0 | 6 | 0 - 127 (001 - 128) |<br />
| 00 0A | 0000 000a | Reverb Switch 0 - 1 (OFF,ON) | | PR-E | 0 | 7 | 0 - 127 (001 - 128) |<br />
| 00 0B | 0000 000a | Patch Remain 0 - 1 (OFF,ON) | | |<br />
| 00 0C | 0000 000a | Clock Source 0 - 1 (INT,MIDI) | |XP-A(Session)| 2 | 9 | 0 - 254 (001 - 255) |<br />
| 00 0D | 0000 0aaa | TAP Control Source 0 - 4 *5 | | XP-B(Orch.) | 2 | 2 | 0 - 254 (001 - 255) |<br />
| 00 0E | 0000 0aaa | Hold Control Source 0 - 4 *6 | | XP-C(Techno)| 2 | 11 | 0 - 255 (001 - 256) |<br />
| 00 0F | 0000 0aaa | Peak Control Source 0 - 4 *6 | | XP-D | 2 | 1 - 127 | 0 - 255 (001 - 256) |<br />
| 00 10 | 0000 000a | Volume Control Source 0 - 1 *7 | | XP-E | 2 | 1 - 127 | 0 - 255 (001 - 256) |<br />
| 00 11 | 0000 00aa | Aftertouch Source 0 - 2 *8 | +-----------------------------------------------------------+<br />
| 00 12 | 0aaa aaaa | System Control Source 1 1 - 97 *9 |<br />
| 00 13 | 0aaa aaaa | System Control Source 2 1 - 97 *9 |<br />
|—————————————+———————————+————————————————————————————————————————————————————|<br />
| 00 14 | 0000 000a | Receive Program Change 0 - 1 (OFF,ON) |<br />
| 00 15 | 0000 000a | Receive Bank Select 0 - 1 (OFF,ON) |<br />
| 00 16 | 0000 000a | Receive Control Change 0 - 1 () |<br />
| 00 17 | 0000 000a | Receive Modulation 0 - 1 () |<br />
| 00 18 | 0000 000a | Receive Volume 0 - 1 () |<br />
| 00 19 | 0000 000a | Receive Hold-1 0 - 1 () |<br />
| 00 1A | 0000 000a | Receive Pitch Bend 0 - 1 () |<br />
| 00 1B | 0000 000a | Receive Aftertouch 0 - 1 () |<br />
| 00 1C | 000a aaaa | Control Channel 0 - 16 (1 - 16,OFF)|<br />
| 00 1D | 0000 aaaa | Patch Receive Channel 0 - 15 (1 - 16) |<br />
| 00 1E | 0000 000a | Rhythm Edit Source 0 - 1 *10 |<br />
|—————————————+———————————+————————————————————————————————————————————————————|<br />
| 00 1F | 0000 00aa | Preview Sound Mode 0 - 2 *11 |<br />
| 00 20 | 0aaa aaaa | Preview Note Set 1 0 - 127 (C-1 - G9) |<br />
| 00 21 | 0aaa aaaa | Preview Velocity Set 1 0 - 127 *12 |<br />
| 00 22 | 0aaa aaaa | Preview Note Set 2 0 - 127 (C-1 - G9) |<br />
| 00 23 | 0aaa aaaa | Preview Velocity Set 2 0 - 127 *12 |<br />
| 00 24 | 0aaa aaaa | Preview Note Set 3 0 - 127 (C-1 - G9) |<br />
| 00 25 | 0aaa aaaa | Preview Velocity Set 3 0 - 127 *12 |<br />
| 00 26 | 0aaa aaaa | Preview Note Set 4 0 - 127 (C-1 - G9) |<br />
| 00 27 | 0aaa aaaa | Preview Velocity Set 4 0 - 127 *12 |<br />
|—————————————+———————————+————————————————————————————————————————————————————|<br />
| 00 28 | 0000 000a | Transmit Program Change 0 - 1 (OFF,ON) |<br />
| 00 29 | 0000 000a | Transmit Bank Select 0 - 1 (OFF,ON) |<br />
| 00 2A | 000a aaaa | Patch Transmit Channel 0 - 17 *13 |<br />
|—————————————+———————————+————————————————————————————————————————————————————|<br />
| 00 2B | 0000 000a | Transpose Switch 0 - 1 (OFF,ON) |<br />
| 00 2C | 0000 aaaa | Transpose Value 0 - 11 (-5 - +6) |<br />
| 00 2D | 0000 0aaa | Octave Shift 0 - 6 (-3 - +3) |<br />
| 00 2E | 0aaa aaaa | Keyboard Velocity 0 - 127 *14 |<br />
| 00 2F | 0000 00aa | Keyboard Sens 0 - 2 *15 |<br />
| 00 30 | 0aaa aaaa | Aftertouch Sens 0 - 100 |<br />
| 00 31 | 0aaa aaaa | Pedal(1) Assign 1 - 104 *16 |<br />
| 00 32 | 0000 00aa | Pedal(1) Output Mode 0 - 3 *18 |<br />
190
MIDI Implementation<br />
| 00 33 | 0000 000a | Pedal(1) Polarity 0 - 1 *20 |<br />
| 00 34 | 0aaa aaaa | Pedal2 Assign 1 - 104 *17 |<br />
| 00 35 | 0000 00aa | Pedal2 Output Mode 0 - 3 *19 |<br />
| 00 36 | 0000 000a | Pedal2 Polarity 0 - 1 *21 |<br />
| 00 37 | 0aaa aaaa | C1 Assign 1 - 97 *9 |<br />
| 00 38 | 0000 00aa | C1 Output Mode 0 - 3 *18 |<br />
| 00 39 | 0aaa aaaa | C2 Assign 1 - 97 *9 |<br />
| 00 3A | 0000 00aa | C2 Output Mode 0 - 3 *18 |<br />
| 00 3B | 0000 00aa | Hold Pedal Output Mode 0 - 3 *18 |<br />
| 00 3C | 0000 000a | Hold Pedal Polarity 0 - 1 *20 |<br />
|—————————————+———————————+————————————————————————————————————————————————————|<br />
| 00 3D | 0000 000a | Bank Select Group1 Switch 0 - 1 (OFF,ON) |<br />
| 00 3E | 0aaa aaaa | Bank Select Group1 MSB 0 - 127 |<br />
| 00 3F | 0aaa aaaa | Bank Select Group1 LSB 0 - 127 |<br />
| 00 40 | 0000 000a | Bank Select Group2 Switch 0 - 1 (OFF,ON) |<br />
| 00 41 | 0aaa aaaa | Bank Select Group2 MSB 0 - 127 |<br />
| 00 42 | 0aaa aaaa | Bank Select Group2 LSB 0 - 127 |<br />
| 00 43 | 0000 000a | Bank Select Group3 Switch 0 - 1 (OFF,ON) |<br />
| 00 44 | 0aaa aaaa | Bank Select Group3 MSB 0 - 127 |<br />
| 00 45 | 0aaa aaaa | Bank Select Group3 LSB 0 - 127 |<br />
| 00 46 | 0000 000a | Bank Select Group4 Switch 0 - 1 (OFF,ON) |<br />
| 00 47 | 0aaa aaaa | Bank Select Group4 MSB 0 - 127 |<br />
| 00 48 | 0aaa aaaa | Bank Select Group4 LSB 0 - 127 |<br />
| 00 49 | 0000 000a | Bank Select Group5 Switch 0 - 1 (OFF,ON) |<br />
| 00 4A | 0aaa aaaa | Bank Select Group5 MSB 0 - 127 |<br />
| 00 4B | 0aaa aaaa | Bank Select Group5 LSB 0 - 127 |<br />
| 00 4C | 0000 000a | Bank Select Group6 Switch 0 - 1 (OFF,ON) |<br />
| 00 4D | 0aaa aaaa | Bank Select Group6 MSB 0 - 127 |<br />
| 00 4E | 0aaa aaaa | Bank Select Group6 LSB 0 - 127 |<br />
| 00 4F | 0000 000a | Bank Select Group7 Switch 0 - 1 (OFF,ON) |<br />
| 00 50 | 0aaa aaaa | Bank Select Group7 MSB 0 - 127 |<br />
| 00 51 | 0aaa aaaa | Bank Select Group7 LSB 0 - 127 |<br />
|—————————————+———————————+————————————————————————————————————————————————————|<br />
| 00 52 | 0aaa aaaa | Pedal3 Assign 1 - 104 *17 |<br />
| 00 53 | 0000 00aa | Pedal3 Output Mode 0 - 3 *19 |<br />
| 00 54 | 0000 000a | Pedal3 Polarity 0 - 1 *21 |<br />
| 00 55 | 0aaa aaaa | Pedal4 Assign 1 - 104 *17 |<br />
| 00 56 | 0000 00aa | Pedal4 Output Mode 0 - 3 *19 |<br />
| 00 57 | 0000 000a | Pedal4 Polarity 0 - 1 *21 |<br />
|—————————————+———————————+————————————————————————————————————————————————————|<br />
| 00 58 | 00aa aaaa | Arpeggio Style 0 - 42 (1 - 43) |<br />
| 00 59 | 00aa aaaa | Arpeggio Motif 0 - 37 (1 - 38) |<br />
| 00 5A | 0aaa aaaa | Arpeggio Beat Pattern 0 - 114 (1 - 115) |<br />
| 00 5B | 0aaa aaaa | Arpeggio Accent Rate 0 - 100 |<br />
| 00 5C | 0aaa aaaa | Arpeggio Shuffle Rate 50 - 90 |<br />
| 00 5D | 0aaa aaaa | Arpeggio Keyboard Velocity 0 - 127 *14 |<br />
| 00 5E | 0000 0aaa | Arpeggio Octave Range 0 - 6 (-3 - +3) |<br />
| 00 5F | 0000 aaaa | Arpeggio Part Number 0 - 15 *22 |<br />
|—————————————+———————————+————————————————————————————————————————————————————|<br />
|# 00 60 | 0000 aaaa | System Tempo 20 - 250 |<br />
| | 0000 bbbb | |<br />
|—————————————+———————————+————————————————————————————————————————————————————|<br />
| 00 62 | 0aaa aaaa | C3 Assign 1 - 97 *9 |<br />
| 00 63 | 0000 00aa | C3 Output Mode 0 - 3 *18 |<br />
| 00 64 | 0aaa aaaa | C4 Assign 1 - 97 *9 |<br />
| 00 65 | 0000 00aa | C4 Output Mode 0 - 3 *18 |<br />
|—————————————+————————————————————————————————————————————————————————————————|<br />
|Total size | 00 00 00 66 |<br />
+——————————————————————————————————————————————————————————————————————————————+<br />
*1 PERFORMANCE, PATCH, GM<br />
*2 USER:01–USER:32, , PR-A:01–PR-A:32, PR-B:01–PR-B:32<br />
*3 USER&PRESET, , EXP<br />
*4 427.4–452.6<br />
*5 <br />
*6 OFF, HOLD-1, SOSTENUTO, SOFT, HOLD-2<br />
*7 VOLUME, VOLUME&EXPRESSION<br />
*8 CHANNEL, POLY, CH&POLY<br />
*9 CC01–CC05, CC07–CC31, CC64–CC95, PITCH BEND, AFTERTOUCH<br />
*10 <br />
*11 SINGLE, CHORD, PHRASE<br />
*12 OFF, 1–127<br />
*13 1–16, RX-CH, OFF<br />
*14 REAL, 1–127<br />
*15 LIGHT, MEDIUM, HEAVY<br />
*16 CC01–CC05, CC07–CC31, CC64–CC95, PITCH BEND, AFTERTOUCH, PROG-UP, PROG-DOWN, , , TAP-TEMPO, OCTAVE-UP, OCTAVE-DOWN<br />
*17 <br />
*18 OFF, INT, MIDI, INT&MIDI<br />
*19 <br />
*20 STANDARD, REVERSE<br />
*21 <br />
*22 PART1–PART16<br />
● 1-1-2.Scale Tune<br />
+——————————————————————————————————————————————————————————————————————————————+<br />
| Offset | |<br />
| Address | Size | Description Data (Value) |<br />
|—————————————+————————————————————————————————————————————————————————————————|<br />
| 00 00 | 0aaa aaaa | Scale Tune for C 0 - 127 (-64 - +63)|<br />
| 00 01 | 0aaa aaaa | Scale Tune for C# 0 - 127 (-64 - +63)|<br />
| 00 02 | 0aaa aaaa | Scale Tune for D 0 - 127 (-64 - +63)|<br />
| 00 03 | 0aaa aaaa | Scale Tune for D# 0 - 127 (-64 - +63)|<br />
| 00 04 | 0aaa aaaa | Scale Tune for E 0 - 127 (-64 - +63)|<br />
| 00 05 | 0aaa aaaa | Scale Tune for F 0 - 127 (-64 - +63)|<br />
| 00 06 | 0aaa aaaa | Scale Tune for F# 0 - 127 (-64 - +63)|<br />
| 00 07 | 0aaa aaaa | Scale Tune for G 0 - 127 (-64 - +63)|<br />
| 00 08 | 0aaa aaaa | Scale Tune for G# 0 - 127 (-64 - +63)|<br />
| 00 09 | 0aaa aaaa | Scale Tune for A 0 - 127 (-64 - +63)|<br />
| 00 0A | 0aaa aaaa | Scale Tune for A# 0 - 127 (-64 - +63)|<br />
| 00 0B | 0aaa aaaa | Scale Tune for B 0 - 127 (-64 - +63)|<br />
|—————————————+————————————————————————————————————————————————————————————————|<br />
|Total size | 00 00 00 0C |<br />
+——————————————————————————————————————————————————————————————————————————————+<br />
Appendices<br />
191
MIDI Implementation<br />
● 1-2.Performance<br />
+——————————————————————————————————————————————————————————————————————————————+<br />
| Offset | |<br />
| Address | Description |<br />
|—————————————+————————————————————————————————————————————————————————————————|<br />
| 00 00 | Performance Common 1-2-1 |<br />
| 10 00 | Performance Part 1 1-2-2 |<br />
| 11 00 | Performance Part 2 |<br />
| : | |<br />
| 1F 00 | Performance Part 16 |<br />
+——————————————————————————————————————————————————————————————————————————————+<br />
● 1-2-1.Performance Common<br />
+——————————————————————————————————————————————————————————————————————————————+<br />
| Offset | |<br />
| Address | Size | Description Data (Value) |<br />
|—————————————+————————————————————————————————————————————————————————————————|<br />
| 00 00 | 0aaa aaaa | Performance Name 1 32 - 127 |<br />
| 00 01 | 0aaa aaaa | Performance Name 2 32 - 127 |<br />
| 00 02 | 0aaa aaaa | Performance Name 3 32 - 127 |<br />
| 00 03 | 0aaa aaaa | Performance Name 4 32 - 127 |<br />
| 00 04 | 0aaa aaaa | Performance Name 5 32 - 127 |<br />
| 00 05 | 0aaa aaaa | Performance Name 6 32 - 127 |<br />
| 00 06 | 0aaa aaaa | Performance Name 7 32 - 127 |<br />
| 00 07 | 0aaa aaaa | Performance Name 8 32 - 127 |<br />
| 00 08 | 0aaa aaaa | Performance Name 9 32 - 127 |<br />
| 00 09 | 0aaa aaaa | Performance Name 10 32 - 127 |<br />
| 00 0A | 0aaa aaaa | Performance Name 11 32 - 127 |<br />
| 00 0B | 0aaa aaaa | Performance Name 12 32 - 127 |<br />
|—————————————+———————————+————————————————————————————————————————————————————|<br />
| 00 0C | 0000 aaaa | EFX Source 0 - 15 *1 |<br />
| 00 0D | 00aa aaaa | EFX Type 0 - 39 (1 - 40) |<br />
| 00 0E | 0aaa aaaa | EFX Parameter 1 0 - 127 |<br />
| 00 0F | 0aaa aaaa | EFX Parameter 2 0 - 127 |<br />
| 00 10 | 0aaa aaaa | EFX Parameter 3 0 - 127 |<br />
| 00 11 | 0aaa aaaa | EFX Parameter 4 0 - 127 |<br />
| 00 12 | 0aaa aaaa | EFX Parameter 5 0 - 127 |<br />
| 00 13 | 0aaa aaaa | EFX Parameter 6 0 - 127 |<br />
| 00 14 | 0aaa aaaa | EFX Parameter 7 0 - 127 |<br />
| 00 15 | 0aaa aaaa | EFX Parameter 8 0 - 127 |<br />
| 00 16 | 0aaa aaaa | EFX Parameter 9 0 - 127 |<br />
| 00 17 | 0aaa aaaa | EFX Parameter 10 0 - 127 |<br />
| 00 18 | 0aaa aaaa | EFX Parameter 11 0 - 127 |<br />
| 00 19 | 0aaa aaaa | EFX Parameter 12 0 - 127 |<br />
| 00 1A | 0000 00aa | EFX Output Assign 0 - 2 *2 |<br />
| 00 1B | 0aaa aaaa | EFX Mix Out Send Level 0 - 127 |<br />
| 00 1C | 0aaa aaaa | EFX Chorus Send Level 0 - 127 |<br />
| 00 1D | 0aaa aaaa | EFX Reverb Send Level 0 - 127 |<br />
| 00 1E | 0000 aaaa | EFX Control Source 1 0 - 10 *3 |<br />
| 00 1F | 0aaa aaaa | EFX Control Depth 1 0 - 126 (-63 - +63)|<br />
| 00 20 | 0000 aaaa | EFX Control Source 2 0 - 10 *3 |<br />
| 00 21 | 0aaa aaaa | EFX Control Depth 2 0 - 126 (-63 - +63)|<br />
| 00 22 | 0aaa aaaa | Chorus Level 0 - 127 |<br />
| 00 23 | 0aaa aaaa | Chorus Rate 0 - 127 |<br />
| 00 24 | 0aaa aaaa | Chorus Depth 0 - 127 |<br />
| 00 25 | 0aaa aaaa | Chorus Pre-Delay 0 - 127 |<br />
| 00 26 | 0aaa aaaa | Chorus Feedback 0 - 127 |<br />
| 00 27 | 0000 00aa | Chorus Output 0 - 2 *4 |<br />
| 00 28 | 0000 0aaa | Reverb Type 0 - 7 *5 |<br />
| 00 29 | 0aaa aaaa | Reverb Level 0 - 127 |<br />
| 00 2A | 0aaa aaaa | Reverb Time 0 - 127 |<br />
| 00 2B | 000a aaaa | Reverb HF Damp 0 - 17 *6 |<br />
| 00 2C | 0aaa aaaa | Delay Feedback 0 - 127 |<br />
|—————————————+———————————+————————————————————————————————————————————————————|<br />
|# 00 2D | 0000 aaaa | Performance Tempo 20 - 250 |<br />
| | 0000 bbbb | |<br />
| 00 2F | 0000 000a | Keyboard Range Switch 0 - 1 (OFF,ON) |<br />
|—————————————+———————————+————————————————————————————————————————————————————|<br />
| 00 30 | 0aaa aaaa | Voice Reserve 1 0 - 64 |<br />
| 00 31 | 0aaa aaaa | Voice Reserve 2 0 - 64 |<br />
| 00 32 | 0aaa aaaa | Voice Reserve 3 0 - 64 |<br />
| 00 33 | 0aaa aaaa | Voice Reserve 4 0 - 64 |<br />
| 00 34 | 0aaa aaaa | Voice Reserve 5 0 - 64 |<br />
| 00 35 | 0aaa aaaa | Voice Reserve 6 0 - 64 |<br />
| 00 36 | 0aaa aaaa | Voice Reserve 7 0 - 64 |<br />
| 00 37 | 0aaa aaaa | Voice Reserve 8 0 - 64 |<br />
| 00 38 | 0aaa aaaa | Voice Reserve 9 0 - 64 |<br />
| 00 39 | 0aaa aaaa | Voice Reserve 10 0 - 64 |<br />
| 00 3A | 0aaa aaaa | Voice Reserve 11 0 - 64 |<br />
| 00 3B | 0aaa aaaa | Voice Reserve 12 0 - 64 |<br />
| 00 3C | 0aaa aaaa | Voice Reserve 13 0 - 64 |<br />
| 00 3D | 0aaa aaaa | Voice Reserve 14 0 - 64 |<br />
| 00 3E | 0aaa aaaa | Voice Reserve 15 0 - 64 |<br />
| 00 3F | 0aaa aaaa | Voice Reserve 16 0 - 64 |<br />
|—————————————+———————————+————————————————————————————————————————————————————|<br />
| 00 40 | 0000 000a | Keyboard Mode 0 - 1 *7 |<br />
| 00 41 | 0000 000a | Clock Source 0 - 1 *8 |<br />
|—————————————+————————————————————————————————————————————————————————————————|<br />
|Total size | 00 00 00 42 |<br />
+——————————————————————————————————————————————————————————————————————————————+<br />
*1 PERFORM, 1–9, 11–16<br />
*2 MIX, , <br />
*3 OFF, SYS-CTRL1, SYS-CTRL2, MODULATION, BREATH, FOOT, VOLUME, PAN, EXPRESSION, PITCH BEND, AFTERTOUCH<br />
*4 MIX, REV, MIX+REV<br />
*5 ROOM1, ROOM2, STAGE1, STAGE2, HALL1, HALL2, DELAY, PAN-DLY<br />
*6 200, 250, 315, 400, 500, 630, 800, 1000, 1250, 1600, 2000, 2500, 3150, 4000, 5000, 6300, 8000, BYPASS<br />
*7 LAYER, SINGLE<br />
*8 PERFORMANCE, SYSTEM<br />
192
MIDI Implementation<br />
● 1-2-2.Performance Part<br />
+——————————————————————————————————————————————————————————————————————————————+<br />
| Offset | |<br />
| Address | Size | Description Data (Value) |<br />
|—————————————+————————————————————————————————————————————————————————————————|<br />
| 00 00 | 0000 000a | Receive Switch 0 - 1 (OFF,ON) |<br />
| 00 01 | 0000 aaaa | MIDI Channel 0 - 15 (1 - 16) |<br />
|—————————————+———————————+————————————————————————————————————————————————————| +———————————————————————————————————————————————————————————+<br />
| 00 02 | 0000 00aa | Patch Group Type 0 - 2 *1 -> | | Patch Group | Group Type | Group ID | Number (value) |<br />
| 00 03 | 0aaa aaaa | Patch Group ID 0 - 127 -> | |—————————————+————————————+——————————+—————————————————————|<br />
|# 00 04 | 0000 aaaa | Patch Number 0 - 255 -> | | USER | 0 | 1 | 0 - 127 (001 - 128) |<br />
| | 0000 bbbb | (001 - 256)| | |<br />
| 00 06 | 0aaa aaaa | Part Level 0 - 127 | | PR-A | 0 | 3 | 0 - 127 (001 - 128) |<br />
| 00 07 | 0aaa aaaa | Part Pan 0 - 127 (L64 - 63R)| | PR-B | 0 | 4 | 0 - 127 (001 - 128) |<br />
| 00 08 | 0aaa aaaa | Part Coarse Tune 0 - 96 (-48 - +48)| | PR-C | 0 | 5 | 0 - 127 (001 - 128) |<br />
| 00 09 | 0aaa aaaa | Part Fine Tune 0 - 100 (-50 - +50)| | PR-D | 0 | 6 | 0 - 127 (001 - 128) |<br />
| 00 0A | 0000 0aaa | Output Assign 0 - 4 *2 | | PR-E | 0 | 7 | 0 - 127 (001 - 128) |<br />
| 00 0B | 0aaa aaaa | Mix/EFX Send Level 0 - 127 | | |<br />
| 00 0C | 0aaa aaaa | Chorus Send Level 0 - 127 | |XP-A(Session)| 2 | 9 | 0 - 254 (001 - 255) |<br />
| 00 0D | 0aaa aaaa | Reverb Send Level 0 - 127 | | XP-B(Orch.) | 2 | 2 | 0 - 254 (001 - 255) |<br />
| 00 0E | 0000 000a | Receive Program Change Switch 0 - 1 (OFF,ON) | | XP-C(Techno)| 2 | 11 | 0 - 255 (001 - 256) |<br />
| 00 0F | 0000 000a | Receive Volume Switch 0 - 1 (OFF,ON) | | XP-D | 2 | 1 - 127 | 0 - 255 (001 - 256) |<br />
| 00 10 | 0000 000a | Receive Hold-1 Switch 0 - 1 (OFF,ON) | | XP-E | 2 | 1 - 127 | 0 - 255 (001 - 256) |<br />
| 00 11 | 0aaa aaaa | Keyboard Range Lower 0 - 127 *3 | +———————————————————————————————————————————————————————————+<br />
| 00 12 | 0aaa aaaa | Keyboard Range Upper 0 - 127 *4 |<br />
|—————————————+———————————+————————————————————————————————————————————————————|<br />
| 00 13 | 0000 0aaa | Octave Shift 0 - 6 (-3 - +3) |<br />
| 00 14 | 0000 000a | Local Switch 0 - 1 (OFF,ON) |<br />
| 00 15 | 0000 000a | Transmit Switch 0 - 1 (OFF,ON) |<br />
| 00 16 | 0000 0aaa | Transmit Bank Select Group 0 - 7 *5 |<br />
|# 00 17 | 0000 aaaa | Transmit Volume 0 - 128 |<br />
| | 0000 bbbb | (0 - 127,OFF) |<br />
|—————————————+————————————————————————————————————————————————————————————————|<br />
|Total size | 00 00 00 19 |<br />
+——————————————————————————————————————————————————————————————————————————————+<br />
*1 USER&PRESET, , EXP<br />
*2 MIX, EFX, , , PATCH<br />
*3 C-1–Upper<br />
*4 Lower–G9<br />
*5 PATCH, GROUP1–GROUP7<br />
● 1-3.Patch<br />
+——————————————————————————————————————————————————————————————————————————————+<br />
| Offset | |<br />
| Address | Description |<br />
|—————————————+————————————————————————————————————————————————————————————————|<br />
| 00 00 | Patch Common 1-3-1 |<br />
| 10 00 | Patch Tone 1 1-3-2 |<br />
| 12 00 | Patch Tone 2 |<br />
| 14 00 | Patch Tone 3 |<br />
| 16 00 | Patch Tone 4 |<br />
+——————————————————————————————————————————————————————————————————————————————+<br />
● 1-3-1.Patch Common<br />
+——————————————————————————————————————————————————————————————————————————————+<br />
| Offset | |<br />
| Address | Size | Description Data (Value) |<br />
|—————————————+————————————————————————————————————————————————————————————————|<br />
| 00 00 | 0aaa aaaa | Patch Name 1 32 - 127 |<br />
| 00 01 | 0aaa aaaa | Patch Name 2 32 - 127 |<br />
| 00 02 | 0aaa aaaa | Patch Name 3 32 - 127 |<br />
| 00 03 | 0aaa aaaa | Patch Name 4 32 - 127 |<br />
| 00 04 | 0aaa aaaa | Patch Name 5 32 - 127 |<br />
| 00 05 | 0aaa aaaa | Patch Name 6 32 - 127 |<br />
| 00 06 | 0aaa aaaa | Patch Name 7 32 - 127 |<br />
| 00 07 | 0aaa aaaa | Patch Name 8 32 - 127 |<br />
| 00 08 | 0aaa aaaa | Patch Name 9 32 - 127 |<br />
| 00 09 | 0aaa aaaa | Patch Name 10 32 - 127 |<br />
| 00 0A | 0aaa aaaa | Patch Name 11 32 - 127 |<br />
| 00 0B | 0aaa aaaa | Patch Name 12 32 - 127 |<br />
|—————————————+———————————+————————————————————————————————————————————————————|<br />
| 00 0C | 00aa aaaa | EFX Type 0 - 39 (1 - 40) |<br />
| 00 0D | 0aaa aaaa | EFX Parameter 1 0 - 127 |<br />
| 00 0E | 0aaa aaaa | EFX Parameter 2 0 - 127 |<br />
| 00 0F | 0aaa aaaa | EFX Parameter 3 0 - 127 |<br />
| 00 10 | 0aaa aaaa | EFX Parameter 4 0 - 127 |<br />
| 00 11 | 0aaa aaaa | EFX Parameter 5 0 - 127 |<br />
| 00 12 | 0aaa aaaa | EFX Parameter 6 0 - 127 |<br />
| 00 13 | 0aaa aaaa | EFX Parameter 7 0 - 127 |<br />
| 00 14 | 0aaa aaaa | EFX Parameter 8 0 - 127 |<br />
| 00 15 | 0aaa aaaa | EFX Parameter 9 0 - 127 |<br />
| 00 16 | 0aaa aaaa | EFX Parameter 10 0 - 127 |<br />
| 00 17 | 0aaa aaaa | EFX Parameter 11 0 - 127 |<br />
| 00 18 | 0aaa aaaa | EFX Parameter 12 0 - 127 |<br />
| 00 19 | 0000 00aa | EFX Output Assign 0 - 2 *1 |<br />
| 00 1A | 0aaa aaaa | EFX Mix Out Send Level 0 - 127 |<br />
| 00 1B | 0aaa aaaa | EFX Chorus Send Level 0 - 127 |<br />
| 00 1C | 0aaa aaaa | EFX Reverb Send Level 0 - 127 |<br />
| 00 1D | 0000 aaaa | EFX Control Source 1 0 - 10 *2 |<br />
| 00 1E | 0aaa aaaa | EFX Control Depth 1 0 - 126 (-63 - +63)|<br />
| 00 1F | 0000 aaaa | EFX Control Source 2 0 - 10 |<br />
| 00 20 | 0aaa aaaa | EFX Control Depth 2 0 - 126 (-63 - +63)|<br />
| 00 21 | 0aaa aaaa | Chorus Level 0 - 127 |<br />
| 00 22 | 0aaa aaaa | Chorus Rate 0 - 127 |<br />
| 00 23 | 0aaa aaaa | Chorus Depth 0 - 127 |<br />
| 00 24 | 0aaa aaaa | Chorus Pre-Delay 0 - 127 |<br />
| 00 25 | 0aaa aaaa | Chorus Feedback 0 - 127 |<br />
| 00 26 | 0000 00aa | Chorus Output 0 - 2 *3 |<br />
| 00 27 | 0000 0aaa | Reverb Type 0 - 7 *4 |<br />
| 00 28 | 0aaa aaaa | Reverb Level 0 - 127 |<br />
| 00 29 | 0aaa aaaa | Reverb Time 0 - 127 |<br />
| 00 2A | 000a aaaa | Reverb HF Damp 0 - 17 *5 |<br />
| 00 2B | 0aaa aaaa | Delay Feedback 0 - 127 |<br />
Appendices<br />
193
MIDI Implementation<br />
|—————————————+———————————+————————————————————————————————————————————————————|<br />
|# 00 2C | 0000 aaaa | Patch Tempo 20 - 250 |<br />
| | 0000 bbbb | |<br />
| 00 2E | 0aaa aaaa | Patch Level 0 - 127 |<br />
| 00 2F | 0aaa aaaa | Patch Pan 0 - 127 (L64 - 63R)|<br />
| 00 30 | 0aaa aaaa | Analog Feel 0 - 127 |<br />
| 00 31 | 0000 aaaa | Bend Range Up 0 - 12 |<br />
| 00 32 | 00aa aaaa | Bend Range Down 0 - 48 (0 - -48) |<br />
| 00 33 | 0000 000a | Key Assign Mode 0 - 1 (POLY,SOLO)|<br />
| 00 34 | 0000 000a | Solo Legato 0 - 1 (OFF,ON) |<br />
| 00 35 | 0000 000a | Portamento Switch 0 - 1 (OFF,ON) |<br />
| 00 36 | 0000 000a | Portamento Mode 0 - 1 *6 |<br />
| 00 37 | 0000 000a | Portamento Type 0 - 1 (RATE,TIME)|<br />
| 00 38 | 0000 000a | Portamento Start 0 - 1 *7 |<br />
| 00 39 | 0aaa aaaa | Portamento Time 0 - 127 |<br />
| 00 3A | 0000 aaaa | Patch Control Source 2 0 - 15 *8 |<br />
| 00 3B | 0000 aaaa | Patch Control Source 3 0 - 15 *8 |<br />
| 00 3C | 0000 00aa | EFX Control Hold/Peak 0 - 2 *9 |<br />
| 00 3D | 0000 00aa | Control 1 Hold/Peak 0 - 2 *9 |<br />
| 00 3E | 0000 00aa | Control 2 Hold/Peak 0 - 2 *9 |<br />
| 00 3F | 0000 00aa | Control 3 Hold/Peak 0 - 2 *9 |<br />
| 00 40 | 0000 000a | Velocity Range Switch 0 - 1 (OFF,ON) |<br />
| 00 41 | 0000 0aaa | Octave Shift 0 - 6 (-3 - +3) |<br />
| 00 42 | 0000 00aa | Stretch Tune Depth 0 - 3 (OFF,1 - 3)|<br />
| 00 43 | 0000 000a | Voice Priority 0 - 1 *10 |<br />
|—————————————+———————————+————————————————————————————————————————————————————|<br />
| 00 44 | 0000 aaaa | Structure Type 1&2 0 - 9 (1 - 10) |<br />
| 00 45 | 0000 00aa | Booster 1&2 0 - 3 *11 |<br />
| 00 46 | 0000 aaaa | Structure Type 3&4 0 - 9 (1 - 10) |<br />
| 00 47 | 0000 00aa | Booster 3&4 0 - 3 *11 |<br />
|—————————————+———————————+————————————————————————————————————————————————————|<br />
| 00 48 | 0000 000a | Clock Source 0 - 1 *12 |<br />
| 00 49 | 0aaa aaaa | Patch Category 0 - 127 *13 |<br />
|—————————————+————————————————————————————————————————————————————————————————|<br />
|Total size | 00 00 00 4A |<br />
+——————————————————————————————————————————————————————————————————————————————+<br />
*1 MIX, , <br />
*2 OFF, SYS-CTRL1, SYS-CTRL2, MODULATION, BREATH, FOOT, VOLUME, PAN, EXPRESSION, PITCH BEND, AFTERTOUCH<br />
*3 MIX, REV, MIX+REV<br />
*4 ROOM1, ROOM2, STAGE1, STAGE2, HALL1, HALL2, DELAY, PAN-DLY<br />
*5 200, 250, 315, 400, 500, 630, 800, 1000, 1250, 1600, 2000, 2500, 3150, 4000, 5000, 6300, 8000, BYPASS<br />
*6 NORMAL, LEGATO<br />
*7 PITCH, NOTE<br />
*8 OFF, SYS-CTRL1, SYS-CTRL2, MODULATION, BREATH, FOOT, VOLUME, PAN, EXPRESSION, PITCH BEND, AFTERTOUCH, LFO1, LFO2, VELOCITY, KEYFOLLOW, PLAYMATE<br />
*9 OFF, HOLD, PEAK<br />
*10 LAST, LOUDEST<br />
*11 0, +6, +12, +18<br />
*12 PATCH, SYSTEM<br />
*13 NO ASSIGN, AC.PIANO, EL.PIANO, KEYBOARDS, BELL, MALLET, ORGAN, ACCORDION, HARMONICA, AC.GUITAR, EL.GUITAR, DIST.GUITAR, BASS, SYNTH BASS, STRINGS,<br />
ORCHESTRA, HIT&STAB, WIND, FLUTE, AC.BRASS, SYNTH BRASS, SAX, HARD LEAD, SOFT LEAD, TECHNO SYNTH, PULSATING, SYNTH FX, OTHER SYNTH, BRIGHT PAD,<br />
SOFT PAD, VOX, PLUCKED, ETHNIC, FRETTED, PERCUSSION, SOUND FX, BEAT&GROOVE, DRUMS, COMBINATION (0–38)<br />
● 1-3-2.Patch Tone<br />
+——————————————————————————————————————————————————————————————————————————————+<br />
| Offset | |<br />
| Address | Size | Description Data (Value) |<br />
|—————————————+————————————————————————————————————————————————————————————————|<br />
| 00 00 | 0000 000a | Tone Switch 0 - 1 (OFF,ON) | +———————————————————————————————————————————————————————————+<br />
| 00 01 | 0000 00aa | Wave Group Type 0 - 2 *1 -> | | Wave Group | Group Type | Group ID | Number (value) |<br />
| 00 02 | 0aaa aaaa | Wave Group ID 0 - 127 -> | |—————————————+————————————+——————————+—————————————————————|<br />
|# 00 03 | 0000 aaaa | Wave Number 0 - 254 -> | | INT-A | 0 | 1 | 0 - 254 (001 - 255) |<br />
| | 0000 bbbb | (001 - 255)| | INT-B | 0 | 2 | 0 - 192 (001 - 193) |<br />
| 00 05 | 0000 00aa | Wave Gain 0 - 3 *2 | | |<br />
| 00 06 | 0000 000a | FXM Switch 0 - 1 (OFF,ON) | |XP-A(Session)| 2 | 9 | 0 - 205 (001 - 206) |<br />
| 00 07 | 0000 00aa | FXM Color 0 - 3 (1 - 4) | | XP-B(Orch.) | 2 | 2 | 0 - 173 (001 - 174) |<br />
| 00 08 | 0000 aaaa | FXM Depth 0 - 15 (1 - 16) | | XP-C(Techno)| 2 | 11 | 0 - 254 (001 - 255) |<br />
| 00 09 | 0000 0aaa | Tone Delay Mode 0 - 7 *3 | | XP-D | 2 | 1 - 127 | 0 - 254 (001 - 255) |<br />
| 00 0A | 0aaa aaaa | Tone Delay Time 0 - 127 | | XP-E | 2 | 1 - 127 | 0 - 254 (001 - 255) |<br />
|—————————————+———————————+————————————————————————————————————————————————————| +———————————————————————————————————————————————————————————+<br />
| 00 0B | 0aaa aaaa | Velocity Cross Fade 0 - 127 |<br />
| 00 0C | 0aaa aaaa | Velocity Range Lower 1 - 127 *4 |<br />
| 00 0D | 0aaa aaaa | Velocity Range Upper 1 - 127 *5 |<br />
| 00 0E | 0aaa aaaa | Keyboard Range Lower 0 - 127 *6 |<br />
| 00 0F | 0aaa aaaa | Keyboard Range Upper 0 - 127 *7 |<br />
| 00 10 | 0000 000a | Redamper Control Switch 0 - 1 (OFF,ON) |<br />
| 00 11 | 0000 000a | Volume Control Switch 0 - 1 (OFF,ON) |<br />
| 00 12 | 0000 000a | Hold-1 Control Switch 0 - 1 (OFF,ON) |<br />
| 00 13 | 0000 000a | Pitch Bend Control Switch 0 - 1 (OFF,ON) |<br />
| 00 14 | 0000 00aa | Pan Control Switch 0 - 2 *8 |<br />
| 00 15 | 000a aaaa | Controller 1 Destination 1 0 - 18 *9 |<br />
| 00 16 | 0aaa aaaa | Controller 1 Depth 1 0 - 126 (-63 - +63)|<br />
| 00 17 | 000a aaaa | Controller 1 Destination 2 0 - 18 *9 |<br />
| 00 18 | 0aaa aaaa | Controller 1 Depth 2 0 - 126 (-63 - +63)|<br />
| 00 19 | 000a aaaa | Controller 1 Destination 3 0 - 18 *9 |<br />
| 00 1A | 0aaa aaaa | Controller 1 Depth 3 0 - 126 (-63 - +63)|<br />
| 00 1B | 000a aaaa | Controller 1 Destination 4 0 - 18 *9 |<br />
| 00 1C | 0aaa aaaa | Controller 1 Depth 4 0 - 126 (-63 - +63)|<br />
| 00 1D | 000a aaaa | Controller 2 Destination 1 0 - 18 *9 |<br />
| 00 1E | 0aaa aaaa | Controller 2 Depth 1 0 - 126 (-63 - +63)|<br />
| 00 1F | 000a aaaa | Controller 2 Destination 2 0 - 18 *9 |<br />
| 00 20 | 0aaa aaaa | Controller 2 Depth 2 0 - 126 (-63 - +63)|<br />
| 00 21 | 000a aaaa | Controller 2 Destination 3 0 - 18 *9 |<br />
| 00 22 | 0aaa aaaa | Controller 2 Depth 3 0 - 126 (-63 - +63)|<br />
| 00 23 | 000a aaaa | Controller 2 Destination 4 0 - 18 *9 |<br />
| 00 24 | 0aaa aaaa | Controller 2 Depth 4 0 - 126 (-63 - +63)|<br />
| 00 25 | 000a aaaa | Controller 3 Destination 1 0 - 18 *9 |<br />
| 00 26 | 0aaa aaaa | Controller 3 Depth 1 0 - 126 (-63 - +63)|<br />
| 00 27 | 000a aaaa | Controller 3 Destination 2 0 - 18 *9 |<br />
| 00 28 | 0aaa aaaa | Controller 3 Depth 2 0 - 126 (-63 - +63)|<br />
| 00 29 | 000a aaaa | Controller 3 Destination 3 0 - 18 *9 |<br />
| 00 2A | 0aaa aaaa | Controller 3 Depth 3 0 - 126 (-63 - +63)|<br />
| 00 2B | 000a aaaa | Controller 3 Destination 4 0 - 18 *9 |<br />
| 00 2C | 0aaa aaaa | Controller 3 Depth 4 0 - 126 (-63 - +63)|<br />
194
MIDI Implementation<br />
|—————————————+———————————+————————————————————————————————————————————————————|<br />
| 00 2D | 0000 0aaa | LFO1 Waveform 0 - 7 *10 |<br />
| 00 2E | 0000 000a | LFO1 Key Sync 0 - 1 (OFF,ON) |<br />
| 00 2F | 0aaa aaaa | LFO1 Rate 0 - 127 |<br />
| 00 30 | 0000 0aaa | LFO1 Offset 0 - 4 *11 |<br />
| 00 31 | 0aaa aaaa | LFO1 Delay Time 0 - 127 |<br />
| 00 32 | 0000 00aa | LFO1 Fade Mode 0 - 3 *12 |<br />
| 00 33 | 0aaa aaaa | LFO1 Fade Time 0 - 127 |<br />
| 00 34 | 0000 00aa | LFO1 External Sync 0 - 2 *13 |<br />
| 00 35 | 0000 0aaa | LFO2 Waveform 0 - 7 *10 |<br />
| 00 36 | 0000 000a | LFO2 Key Sync 0 - 1 (OFF,ON) |<br />
| 00 37 | 0aaa aaaa | LFO2 Rate 0 - 127 |<br />
| 00 38 | 0000 0aaa | LFO2 Offset 0 - 4 *11 |<br />
| 00 39 | 0aaa aaaa | LFO2 Delay Time 0 - 127 |<br />
| 00 3A | 0000 00aa | LFO2 Fade Mode 0 - 3 *12 |<br />
| 00 3B | 0aaa aaaa | LFO2 Fade Time 0 - 127 |<br />
| 00 3C | 0000 00aa | LFO2 External Sync 0 - 2 *13 |<br />
|—————————————+———————————+————————————————————————————————————————————————————|<br />
| 00 3D | 0aaa aaaa | Coarse Tune 0 - 96 (-48 - +48)|<br />
| 00 3E | 0aaa aaaa | Fine Tune 0 - 100 (-50 - +50)|<br />
| 00 3F | 000a aaaa | Random Pitch Depth 0 - 30 *14 |<br />
| 00 40 | 0000 aaaa | Pitch Keyfollow 0 - 15 *15 |<br />
| 00 41 | 000a aaaa | Pitch Envelope Depth 0 - 24 (-12 - +12)|<br />
| 00 42 | 0aaa aaaa | Pitch Envelope Velocity Sens 0 - 125 *16 |<br />
| 00 43 | 0000 aaaa | Pitch Envelope Velocity Time1 0 - 14 *17 |<br />
| 00 44 | 0000 aaaa | Pitch Envelope Velocity Time4 0 - 14 *17 |<br />
| 00 45 | 0000 aaaa | Pitch Envelope Time Keyfollow 0 - 14 *17 |<br />
| 00 46 | 0aaa aaaa | Pitch Envelope Time 1 0 - 127 |<br />
| 00 47 | 0aaa aaaa | Pitch Envelope Time 2 0 - 127 |<br />
| 00 48 | 0aaa aaaa | Pitch Envelope Time 3 0 - 127 |<br />
| 00 49 | 0aaa aaaa | Pitch Envelope Time 4 0 - 127 |<br />
| 00 4A | 0aaa aaaa | Pitch Envelope Level 1 0 - 126 (-63 - +63)|<br />
| 00 4B | 0aaa aaaa | Pitch Envelope Level 2 0 - 126 (-63 - +63)|<br />
| 00 4C | 0aaa aaaa | Pitch Envelope Level 3 0 - 126 (-63 - +63)|<br />
| 00 4D | 0aaa aaaa | Pitch Envelope Level 4 0 - 126 (-63 - +63)|<br />
| 00 4E | 0aaa aaaa | Pitch LFO1 Depth 0 - 126 (-63 - +63)|<br />
| 00 4F | 0aaa aaaa | Pitch LFO2 Depth 0 - 126 (-63 - +63)|<br />
|—————————————+———————————+————————————————————————————————————————————————————|<br />
| 00 50 | 0000 0aaa | Filter Type 0 - 4 *18 |<br />
| 00 51 | 0aaa aaaa | Cutoff Frequency 0 - 127 |<br />
| 00 52 | 0000 aaaa | Cutoff Keyfollow 0 - 15 *15 |<br />
| 00 53 | 0aaa aaaa | Resonance 0 - 127 |<br />
| 00 54 | 0aaa aaaa | Resonance Velocity Sens 0 - 125 *16 |<br />
| 00 55 | 0aaa aaaa | Filter Envelope Depth 0 - 126 (-63 - +63)|<br />
| 00 56 | 0000 0aaa | Filter Envelope Velocity Curve 0 - 6 (1 - 7) |<br />
| 00 57 | 0aaa aaaa | Filter Envelope Velocity Sens 0 - 125 *16 |<br />
| 00 58 | 0000 aaaa | Filter Envelope Velocity Time1 0 - 14 *17 |<br />
| 00 59 | 0000 aaaa | Filter Envelope Velocity Time4 0 - 14 *17 |<br />
| 00 5A | 0000 aaaa | Filter Envelope Time Keyfollow 0 - 14 *17 |<br />
| 00 5B | 0aaa aaaa | Filter Envelope Time 1 0 - 127 |<br />
| 00 5C | 0aaa aaaa | Filter Envelope Time 2 0 - 127 |<br />
| 00 5D | 0aaa aaaa | Filter Envelope Time 3 0 - 127 |<br />
| 00 5E | 0aaa aaaa | Filter Envelope Time 4 0 - 127 |<br />
| 00 5F | 0aaa aaaa | Filter Envelope Level 1 0 - 127 |<br />
| 00 60 | 0aaa aaaa | Filter Envelope Level 2 0 - 127 |<br />
| 00 61 | 0aaa aaaa | Filter Envelope Level 3 0 - 127 |<br />
| 00 62 | 0aaa aaaa | Filter Envelope Level 4 0 - 127 |<br />
| 00 63 | 0aaa aaaa | Filter LFO1 Depth 0 - 126 (-63 - +63)|<br />
| 00 64 | 0aaa aaaa | Filter LFO2 Depth 0 - 126 (-63 - +63)|<br />
|—————————————+———————————+————————————————————————————————————————————————————|<br />
| 00 65 | 0aaa aaaa | Tone Level 0 - 127 |<br />
| 00 66 | 0000 00aa | Bias Direction 0 - 3 *19 |<br />
| 00 67 | 0aaa aaaa | Bias Position 0 - 127 (C-1 - G9) |<br />
| 00 68 | 0000 aaaa | Bias Level 0 - 14 *17 |<br />
| 00 69 | 0000 0aaa | Level Envelope Velocity Curve 0 - 6 (1 - 7) |<br />
| 00 6A | 0aaa aaaa | Level Envelope Velocity Sens 0 - 125 *16 |<br />
| 00 6B | 0000 aaaa | Level Envelope Velocity Time1 0 - 14 *17 |<br />
| 00 6C | 0000 aaaa | Level Envelope Velocity Time4 0 - 14 *17 |<br />
| 00 6D | 0000 aaaa | Level Envelope Time Keyfollow 0 - 14 *17 |<br />
| 00 6E | 0aaa aaaa | Level Envelope Time 1 0 - 127 |<br />
| 00 6F | 0aaa aaaa | Level Envelope Time 2 0 - 127 |<br />
| 00 70 | 0aaa aaaa | Level Envelope Time 3 0 - 127 |<br />
| 00 71 | 0aaa aaaa | Level Envelope Time 4 0 - 127 |<br />
| 00 72 | 0aaa aaaa | Level Envelope Level 1 0 - 127 |<br />
| 00 73 | 0aaa aaaa | Level Envelope Level 2 0 - 127 |<br />
| 00 74 | 0aaa aaaa | Level Envelope Level 3 0 - 127 |<br />
| 00 75 | 0aaa aaaa | Level LFO1 Depth 0 - 126 (-63 - +63)|<br />
| 00 76 | 0aaa aaaa | Level LFO2 Depth 0 - 126 (-63 - +63)|<br />
| 00 77 | 0aaa aaaa | Tone Pan 0 - 127 (L64 - 63R)|<br />
| 00 78 | 0000 aaaa | Pan Keyfollow 0 - 14 *17 |<br />
| 00 79 | 00aa aaaa | Random Pan Depth 0 - 63 |<br />
| 00 7A | 0aaa aaaa | Alternate Pan Depth 1 - 127 (L63 - 63R)|<br />
| 00 7B | 0aaa aaaa | Pan LFO1 Depth 0 - 126 (L63 - 63R)|<br />
| 00 7C | 0aaa aaaa | Pan LFO2 Depth 0 - 126 (L63 - 63R)|<br />
|—————————————+———————————+————————————————————————————————————————————————————|<br />
| 00 7D | 0000 00aa | Output Assign 0 - 3 *20 |<br />
| 00 7E | 0aaa aaaa | Mix/EFX Send Level 0 - 127 |<br />
| 00 7F | 0aaa aaaa | Chorus Send Level 0 - 127 |<br />
| 01 00 | 0aaa aaaa | Reverb Send Level 0 - 127 |<br />
|—————————————+————————————————————————————————————————————————————————————————|<br />
|Total size | 00 00 01 01 |<br />
+——————————————————————————————————————————————————————————————————————————————+<br />
*1 INT, , EXP<br />
*2 -6, 0, +6, +12<br />
*3 NORMAL, HOLD, PLAYMATE, CLOCK-SYNC, , KEY-OFF-N, KEY-OFF-D, TEMPO-SYNC<br />
*4 1–Upper<br />
*5 Lower–127<br />
*6 C-1–Upper<br />
*7 Lower–G9<br />
*8 OFF, CONTINUOUS, KEY-ON<br />
*9 OFF, PCH, CUT, RES, LEV, PAN, MIX, CHO, REV, PL1, PL2, FL1, FL2, AL1, AL2, pL1, pL2, L1R, L2R<br />
*10 TRI, SIN, SAW, SQR, TRP, S&H, RND, CHS<br />
*11 -100, -50, 0, +50, +100<br />
*12 KEY-ON-IN, KEY-ON-OUT, KEY-OFF-IN, KEY-OFF-OUT<br />
*13 OFF, CLOCK, <br />
*14 0, 1, 2, 3, 4, 5, 6, 7, 8, 9, 10, 20, 30, 40, 50, 60, 70, 80, 90, 100, 200, 300, 400, 500, 600, 700, 800, 900, 1000, 1100, 1200<br />
*15 -100, -70, -50, -30, -10, 0, +10, +20, +30, +40, +50, +70, +100, +120, +150, +200<br />
Appendices<br />
195
MIDI Implementation<br />
*16 -100–+150<br />
*17 -100, -70, -50, -40, -30, -20, -10, 0, +10, +20, +30, +40, +50, +70, +100<br />
*18 OFF, LPF, BPF, HPF, PKG<br />
*19 LOWER, UPPER, LOWER&UPPER, ALL<br />
*20 MIX, EFX, , <br />
● 1-4.Rhythm Setup<br />
+——————————————————————————————————————————————————————————————————————————————+<br />
| Offset | |<br />
| Address | Description |<br />
|—————————————+————————————————————————————————————————————————————————————————|<br />
| 00 00 | Rhythm Common 1-4-1 |<br />
| 23 00 | Rhythm Note for Key# 35 1-4-2 |<br />
| 24 00 | Rhythm Note for Key# 36 |<br />
| : | |<br />
| 62 00 | Rhythm Note for Key# 98 |<br />
+——————————————————————————————————————————————————————————————————————————————+<br />
● 1-4-1.Rhythm Common<br />
+——————————————————————————————————————————————————————————————————————————————+<br />
| Offset | |<br />
| Address | Size | Description Data (Value) |<br />
|—————————————+————————————————————————————————————————————————————————————————|<br />
| 00 00 | 0aaa aaaa | Rhythm Name 1 32 - 127 |<br />
| 00 01 | 0aaa aaaa | Rhythm Name 2 32 - 127 |<br />
| 00 02 | 0aaa aaaa | Rhythm Name 3 32 - 127 |<br />
| 00 03 | 0aaa aaaa | Rhythm Name 4 32 - 127 |<br />
| 00 04 | 0aaa aaaa | Rhythm Name 5 32 - 127 |<br />
| 00 05 | 0aaa aaaa | Rhythm Name 6 32 - 127 |<br />
| 00 06 | 0aaa aaaa | Rhythm Name 7 32 - 127 |<br />
| 00 07 | 0aaa aaaa | Rhythm Name 8 32 - 127 |<br />
| 00 08 | 0aaa aaaa | Rhythm Name 9 32 - 127 |<br />
| 00 09 | 0aaa aaaa | Rhythm Name 10 32 - 127 |<br />
| 00 0A | 0aaa aaaa | Rhythm Name 11 32 - 127 |<br />
| 00 0B | 0aaa aaaa | Rhythm Name 12 32 - 127 |<br />
|—————————————+————————————————————————————————————————————————————————————————|<br />
|Total size | 00 00 00 0C |<br />
+——————————————————————————————————————————————————————————————————————————————+<br />
● 1-4-2.Rhythm Note<br />
+——————————————————————————————————————————————————————————————————————————————+<br />
| Offset | |<br />
| Address | Size | Description Data (Value) |<br />
|—————————————+————————————————————————————————————————————————————————————————|<br />
| 00 00 | 0000 000a | Tone Switch 0 - 1 (OFF,ON) | +———————————————————————————————————————————————————————————+<br />
| 00 01 | 0000 00aa | Wave Group Type 0 - 2 *1 -> | | Wave Group | Group Type | Group ID | Number (value) |<br />
| 00 02 | 0aaa aaaa | Wave Group ID 0 - 127 -> | |—————————————+————————————+——————————+—————————————————————|<br />
|# 00 03 | 0000 aaaa | Wave Number 0 - 254 -> | | INT-A | 0 | 1 | 0 - 254 (001 - 255) |<br />
| | 0000 bbbb | (001 - 255) | | INT-B | 0 | 2 | 0 - 192 (001 - 193) |<br />
| 00 05 | 0000 00aa | Wave Gain 0 - 3 *2 | | |<br />
| 00 06 | 0000 aaaa | Bend Range 0 - 12 | |XP-A(Session)| 2 | 9 | 0 - 205 (001 - 206) |<br />
| 00 07 | 000a aaaa | Mute Group 0 - 31 (OFF,1 - 31)| | XP-B(Orch.) | 2 | 2 | 0 - 173 (001 - 174) |<br />
| 00 08 | 0000 000a | Envelope Mode 0 - 1 *3 | | XP-C(Techno)| 2 | 11 | 0 - 254 (001 - 255) |<br />
| 00 09 | 0000 000a | Volume Control Switch 0 - 1 (OFF,ON) | | XP-D | 2 | 1 - 127 | 0 - 254 (001 - 255) |<br />
| 00 0A | 0000 000a | Hold-1 Control Switch 0 - 1 (OFF,ON) | | XP-E | 2 | 1 - 127 | 0 - 254 (001 - 255) |<br />
| 00 0B | 0000 00aa | Pan Control Switch 0 - 2 *4 | +———————————————————————————————————————————————————————————+<br />
|—————————————+———————————+————————————————————————————————————————————————————|<br />
| 00 0C | 0aaa aaaa | Coarse Tune 0 - 127 (C-1 - G9) |<br />
| 00 0D | 0aaa aaaa | Fine Tune 0 - 100 (-50 - +50)|<br />
| 00 0E | 000a aaaa | Random Pitch Depth 0 - 30 *5 |<br />
| 00 0F | 000a aaaa | Pitch Envelope Depth 0 - 24 (-12 - +12)|<br />
| 00 10 | 0aaa aaaa | Pitch Envelope Velocity Sens 0 - 125 *6 |<br />
| 00 11 | 0000 aaaa | Pitch Envelope Velocity Time 0 - 14 *7 |<br />
| 00 12 | 0aaa aaaa | Pitch Envelope Time 1 0 - 127 |<br />
| 00 13 | 0aaa aaaa | Pitch Envelope Time 2 0 - 127 |<br />
| 00 14 | 0aaa aaaa | Pitch Envelope Time 3 0 - 127 |<br />
| 00 15 | 0aaa aaaa | Pitch Envelope Time 4 0 - 127 |<br />
| 00 16 | 0aaa aaaa | Pitch Envelope Level 1 0 - 126 (-63 - +63)|<br />
| 00 17 | 0aaa aaaa | Pitch Envelope Level 2 0 - 126 (-63 - +63)|<br />
| 00 18 | 0aaa aaaa | Pitch Envelope Level 3 0 - 126 (-63 - +63)|<br />
| 00 19 | 0aaa aaaa | Pitch Envelope Level 4 0 - 126 (-63 - +63)|<br />
|—————————————+———————————+————————————————————————————————————————————————————|<br />
| 00 1A | 0000 0aaa | Filter Type 0 - 4 *8 |<br />
| 00 1B | 0aaa aaaa | Cutoff Frequency 0 - 127 |<br />
| 00 1C | 0aaa aaaa | Resonance 0 - 127 |<br />
| 00 1D | 0aaa aaaa | Resonance Velocity Sens 0 - 125 *6 |<br />
| 00 1E | 0aaa aaaa | Filter Envelope Depth 0 - 126 (-63 - +63)|<br />
| 00 1F | 0aaa aaaa | Filter Envelope Velocity Sens 0 - 125 *6 |<br />
| 00 20 | 0000 aaaa | Filter Envelope Velocity Time 0 - 14 *7 |<br />
| 00 21 | 0aaa aaaa | Filter Envelope Time 1 0 - 127 |<br />
| 00 22 | 0aaa aaaa | Filter Envelope Time 2 0 - 127 |<br />
| 00 23 | 0aaa aaaa | Filter Envelope Time 3 0 - 127 |<br />
| 00 24 | 0aaa aaaa | Filter Envelope Time 4 0 - 127 |<br />
| 00 25 | 0aaa aaaa | Filter Envelope Level 1 0 - 127 |<br />
| 00 26 | 0aaa aaaa | Filter Envelope Level 2 0 - 127 |<br />
| 00 27 | 0aaa aaaa | Filter Envelope Level 3 0 - 127 |<br />
| 00 28 | 0aaa aaaa | Filter Envelope Level 4 0 - 127 |<br />
|—————————————+———————————+————————————————————————————————————————————————————|<br />
| 00 29 | 0aaa aaaa | Tone Level 0 - 127 |<br />
| 00 2A | 0aaa aaaa | Level Envelope Velocity Sens 0 - 125 *6 |<br />
| 00 2B | 0000 aaaa | Level Envelope Velocity Time 0 - 14 *7 |<br />
| 00 2C | 0aaa aaaa | Level Envelope Time 1 0 - 127 |<br />
| 00 2D | 0aaa aaaa | Level Envelope Time 2 0 - 127 |<br />
| 00 2E | 0aaa aaaa | Level Envelope Time 3 0 - 127 |<br />
| 00 2F | 0aaa aaaa | Level Envelope Time 4 0 - 127 |<br />
| 00 30 | 0aaa aaaa | Level Envelope Level 1 0 - 127 |<br />
| 00 31 | 0aaa aaaa | Level Envelope Level 2 0 - 127 |<br />
| 00 32 | 0aaa aaaa | Level Envelope Level 3 0 - 127 |<br />
| 00 33 | 0aaa aaaa | Tone Pan 0 - 127 (L64 - 63R)|<br />
| 00 34 | 00aa aaaa | Random Pan Depth 0 - 63 |<br />
| 00 35 | 0aaa aaaa | Alternate Pan Depth 1 - 127 (L63 - 63R)|<br />
|—————————————+———————————+————————————————————————————————————————————————————|<br />
| 00 36 | 0000 00aa | Output Assign 0 - 3 *9 |<br />
| 00 37 | 0aaa aaaa | Mix/EFX Send Level 0 - 127 |<br />
| 00 38 | 0aaa aaaa | Chorus Send Level 0 - 127 |<br />
| 00 39 | 0aaa aaaa | Reverb Send Level 0 - 127 |<br />
|—————————————+————————————————————————————————————————————————————————————————|<br />
|Total size | 00 00 00 3A |<br />
+——————————————————————————————————————————————————————————————————————————————+<br />
196
MIDI Implementation<br />
*1 INT, , EXP<br />
*2 -6, 0, +6, +12<br />
*3 NO-SUS, SUSTAIN<br />
*4 OFF, CONTINUOUS, KEY-ON<br />
*5 0, 1, 2, 3, 4, 5, 6, 7, 8, 9, 10, 20, 30, 40, 50, 60, 70, 80, 90, 100, 200, 300, 400, 500, 600, 700, 800, 900, 1000, 1100, 1200<br />
*6 -100–+150<br />
*7 -100, -70, -50, -40, -30, -20, -10, 0, +10, +20, +30, +40, +50, +70, +100<br />
*8 OFF, LPF, BPF, HPF, PKG<br />
*9 MIX, EFX, , <br />
■ Address Block Map<br />
The following is an outline of the address map for Exclusive messages.<br />
Address(H) Block Sub Block Reference<br />
=========== ==================== =========================== =========<br />
00 00 00 00 +——————————————————+......................................+———————+<br />
| System common | | 1-1-1 |<br />
+——————————————————+......................................+———————+<br />
+——————————————————+.....+——————————+.....................+———————+<br />
|Scale tune | | Part 1 | | 1-1-2 |<br />
+——————————————————+. +——————————+.....................+———————+<br />
: : . | : |<br />
: : . +——————————+<br />
: : . | Part 16 |<br />
: : . +——————————+<br />
: : . +——————————+<br />
: : . | Patch |<br />
: : .+——————————+<br />
01 00 00 00 +——————————————————+.....+——————————+.....................+———————+<br />
| Temporary | | Common | | 1-2-1 |<br />
| performance | +——————————+.....................+———————+<br />
+——————————————————+. +——————————+.....................+———————+<br />
: : . | Part 1 | | 1-2-2 |<br />
: : . +——————————+.....................+———————+<br />
: : . | : |<br />
: : . +——————————+<br />
: : . | Part 16 |<br />
: : .+——————————+<br />
02 00 00 00 +——————————————————+.....+——————————+.....+——————————+....+———————+<br />
| Performance mode | | Part 1 | | Common | | 1-3-1 |<br />
| temporary patch | +——————————+. +——————————+....+———————+<br />
+——————————————————+.. | : | . +——————————+....+———————+<br />
: : . +——————————+ . | Tone 1 | | 1—3—2 |<br />
: : . | Part 9 | . +——————————+....+———————+<br />
: : .+——————————+ . | : |<br />
: : . +——————————+<br />
: : . | Tone 4 |<br />
: : .+——————————+<br />
02 09 00 00 +——————————————————+.....+——————————+.....................+———————+<br />
| Temporary | | Common | | 1-4-1 |<br />
| rhythm setup | +——————————+.....................+———————+<br />
+——————————————————+. +——————————+.....................+———————+<br />
: : . | Note# 35 | | 1-4-2 |<br />
: : . +——————————+.....................+———————+<br />
: : . | : |<br />
: : . +——————————+<br />
: : . | Note# 98 |<br />
: : .+——————————+<br />
02 0A 00 00 +——————————————————+.....+——————————+.....+——————————+....+———————+<br />
| Performance mode | | Part 11 | | Common | | 1-3-1 |<br />
| temporary patch | +——————————+. +——————————+....+———————+<br />
+——————————————————+.. | : | . +——————————+....+———————+<br />
: : . +——————————+ . | Tone 1 | | 1—3—2 |<br />
: : . | Part 16 | . +——————————+....+———————+<br />
: : .+——————————+ . | : |<br />
: : . +——————————+<br />
: : . | Tone 4 |<br />
: : .+——————————+<br />
03 00 00 00 +——————————————————+.....+——————————+.....................+———————+<br />
| Patch mode | | Common | | 1-3-1 |<br />
| temporary patch | +——————————+.....................+———————+<br />
+——————————————————+. +——————————+.....................+———————+<br />
: : . | Tone 1 | | 1-3-2 |<br />
: : . +——————————+.....................+———————+<br />
: : . | : |<br />
: : . +——————————+<br />
: : . | Tone 4 |<br />
: : .+——————————+<br />
10 00 00 00 +——————————————————+.....+——————————+.....+——————————+....+———————+<br />
| User | | USER:01 | | Common | | 1-2-1 |<br />
| performance | +——————————+. +——————————+....+———————+<br />
+——————————————————+.. | : | . +——————————+....+———————+<br />
: : . +——————————+ . | Part 1 | | 1—2—2 |<br />
: : . | USER:32 | . +——————————+....+———————+<br />
: : .+——————————+ . | : |<br />
: : . +——————————+<br />
: : . | Part 16 |<br />
: : .+——————————+<br />
10 40 00 00 +——————————————————+.....+——————————+.....+——————————+....+———————+<br />
| User | | USER:1 | | Common | | 1-4-1 |<br />
| rhythm setup | +——————————+. +——————————+....+———————+<br />
+——————————————————+... +——————————+ . +——————————+....+———————+<br />
: : . | USER:2 | . | Note# 35 | | 1-4-2 |<br />
: : +——————————+ . +——————————+....+———————+<br />
: : . | : |<br />
: : . +——————————+<br />
: : . | Note# 98 |<br />
: : .+——————————+<br />
11 00 00 00 +——————————————————+.....+——————————+.....+——————————+....+———————+<br />
| User | | USER:001 | | Common | | 1-3-1 |<br />
| patch | +——————————+. +——————————+....+———————+<br />
+——————————————————+.. | : | . +——————————+....+———————+<br />
: : . +——————————+ . | Tone 1 | | 1—3—2 |<br />
: : . | USER:128 | . +——————————+....+———————+<br />
: : .+——————————+ . | : |<br />
: : . +——————————+<br />
: : . | Tone 4 |<br />
: : .+——————————+<br />
Appendices<br />
197
MIDI Implementation<br />
2. GS (Model ID = 42H)<br />
+—————————————————————————————————————————————————————————————————————————————+<br />
| Start | |<br />
| address | Description |<br />
|—————————————+———————————————————————————————————————————————————————————————|<br />
| 40 10 00 | Scale Tune Part10 2-1 |<br />
| 40 11 00 | : Part1 |<br />
| 40 12 00 | : Part2 |<br />
| 40 13 00 | : Part3 |<br />
| 40 14 00 | : Part4 |<br />
| 40 15 00 | : Part5 |<br />
| 40 16 00 | : Part6 |<br />
| 40 17 00 | : Part7 |<br />
| 40 18 00 | : Part8 |<br />
| 40 19 00 | : Part9 |<br />
| 40 1A 00 | : Part11 |<br />
| 40 1B 00 | : Part12 |<br />
| 40 1C 00 | : Part13 |<br />
| 40 1D 00 | : Part14 |<br />
| 40 1E 00 | : Part15 |<br />
| 40 1F 00 | : Part16 |<br />
+—————————————————————————————————————————————————————————————————————————————+<br />
● 2-1.Scale Tune<br />
+—————————————————————————————————————————————————————————————————————————————+<br />
| Offset | |<br />
| Address | Description |<br />
|—————————————+———————————————————————————————————————————————————————————————|<br />
| 40 | 0aaa aaaa | Scale Tune for C 0 - 127 |<br />
| | | (-64 - +63) |<br />
| 41 | 0aaa aaaa | Scale Tune for C# 0 - 127 |<br />
| | | (-64 - +63) |<br />
| 42 | 0aaa aaaa | Scale Tune for D 0 - 127 |<br />
| | | (-64 - +63) |<br />
| 43 | 0aaa aaaa | Scale Tune for D# 0 - 127 |<br />
| | | (-64 - +63) |<br />
| 44 | 0aaa aaaa | Scale Tune for E 0 - 127 |<br />
| | | (-64 - +63) |<br />
| 45 | 0aaa aaaa | Scale Tune for F 0 - 127 |<br />
| | | (-64 - +63) |<br />
| 46 | 0aaa aaaa | Scale Tune for F# 0 - 127 |<br />
| | | (-64 - +63) |<br />
| 47 | 0aaa aaaa | Scale Tune for G 0 - 127 |<br />
| | | (-64 - +63) |<br />
| 48 | 0aaa aaaa | Scale Tune for G# 0 - 127 |<br />
| | | (-64 - +63) |<br />
| 49 | 0aaa aaaa | Scale Tune for A 0 - 127 |<br />
| | | (-64 - +63) |<br />
| 4A | 0aaa aaaa | Scale Tune for A# 0 - 127 |<br />
| | | (-64 - +63) |<br />
| 4B | 0aaa aaaa | Scale Tune for B 0 - 127 |<br />
| | | (-64 - +63) |<br />
|—————————————+———————————————————————————————————————————————————————————————|<br />
|Total Size | 00 00 0C |<br />
+—————————————————————————————————————————————————————————————————————————————+<br />
* In order for a GS Exclusive message to be correctly received by the XP-30, the starting address of the message must be the Start address of each Part (the address of Scale Tune C, i.e., offset 40).<br />
198
MIDI Implementation<br />
4. Supplementary Material<br />
■ Correspondence of the EFX Algorithm and<br />
Exclusive Address (EFX Parameter 1–12)<br />
EFX | Parameter | Value<br />
———————+————————————————————————————————+———————————————————————<br />
● Type01: STEREO-EQ<br />
———————+————————————————————————————————+———————————————————————<br />
prm1 | Low Frequency | 0 - 1<br />
prm2 | Low Gain | 0 - 30<br />
prm3 | High Frequency | 0 - 1<br />
prm4 | High Gain | 0 - 30<br />
prm5 | Peaking1 Frequency | 0 - 16<br />
prm6 | Peaking1 Q | 0 - 4<br />
prm7 | Peaking1 Gain | 0 - 30<br />
prm8 | Peaking2 Frequency | 0 - 16<br />
prm9 | Peaking2 Q | 0 - 4<br />
prm10 | Peaking2 Gain | 0 - 30<br />
prm11 | Level | 0 - 127<br />
● Type02: OVERDRIVE<br />
———————+————————————————————————————————+———————————————————————<br />
prm1 | Drive | 0 - 127<br />
prm2 | Output Pan | 0 - 127<br />
prm3 | Amp Simulator Type | 0 - 3<br />
prm4 | Low Gain | 0 - 30<br />
prm5 | High Gain | 0 - 30<br />
prm6 | Output Level | 0 - 127<br />
● Type03: DISTORTION<br />
———————+————————————————————————————————+———————————————————————<br />
prm1 | Drive | 0 - 127<br />
prm2 | Output Pan | 0 - 127<br />
prm3 | Amp Simulator Type | 0 - 3<br />
prm4 | Low Gain | 0 - 30<br />
prm5 | High Gain | 0 - 30<br />
prm6 | Output Level | 0 - 127<br />
● Type04: PHASER<br />
———————+————————————————————————————————+———————————————————————<br />
prm1 | Manual | 0 - 125<br />
prm2 | Rate | 0 - 125<br />
prm3 | Depth | 0 - 127<br />
prm4 | Resonance | 0 - 127<br />
prm5 | Mix Level | 0 - 127<br />
prm6 | Output Pan | 0 - 127<br />
prm7 | Output Level | 0 - 127<br />
● Type05: SPECTRUM<br />
———————+————————————————————————————————+———————————————————————<br />
prm1 | Band1 Gain | 0 - 30<br />
prm2 | Band2 Gain | 0 - 30<br />
prm3 | Band3 Gain | 0 - 30<br />
prm4 | Band4 Gain | 0 - 30<br />
prm5 | Band5 Gain | 0 - 30<br />
prm6 | Band6 Gain | 0 - 30<br />
prm7 | Band7 Gain | 0 - 30<br />
prm8 | Band8 Gain | 0 - 30<br />
prm9 | Q | 0 - 4<br />
prm10 | Output Pan | 0 - 127<br />
prm11 | Output Level | 0 - 127<br />
● Type09: COMPRESSOR<br />
———————+————————————————————————————————+———————————————————————<br />
prm1 | Sustain | 0 - 127<br />
prm2 | Attack | 0 - 127<br />
prm3 | Output Pan | 0 - 127<br />
prm4 | Post Gain | 0 - 3<br />
prm5 | Low Gain | 0 - 30<br />
prm6 | HiGH Gain | 0 - 30<br />
prm7 | Output Level | 0 - 127<br />
● Type10: LIMITER<br />
———————+————————————————————————————————+———————————————————————<br />
prm1 | Threshold Level | 0 - 127<br />
prm2 | Release Time | 0 - 127<br />
prm3 | Compression Ratio | 0 - 3<br />
prm4 | Output Pan | 0 - 127<br />
prm5 | Post Gain | 0 - 3<br />
prm6 | Low Gain | 0 - 30<br />
prm7 | High Gain | 0 - 30<br />
prm8 | Output Level | 0 - 127<br />
● Type11: HEXA-CHORUS<br />
———————+————————————————————————————————+———————————————————————<br />
prm1 | Pre Delay Time | 0 - 125<br />
prm2 | Rate | 0 - 125<br />
prm3 | Depth | 0 - 127<br />
prm4 | Pre Delay Deviation | 0 - 20<br />
prm5 | Depth Deviation | 0 - 40<br />
prm6 | Pan Deviation | 0 - 20<br />
prm7 | Effect Balance | 0 - 100<br />
prm8 | Output Level | 0 - 127<br />
● Type12: TREMOLO-CHORUS<br />
———————+————————————————————————————————+———————————————————————<br />
prm1 | Pre Delay Time | 0 - 125<br />
prm2 | Chorus Rate | 0 - 125<br />
prm3 | Chorus Depth | 0 - 127<br />
prm4 | Tremolo Rate | 0 - 125<br />
prm5 | Tremolo Separation | 0 - 127<br />
prm6 | Tremolo Phase | 0 - 90<br />
prm7 | Effect Balance | 0 - 100<br />
prm8 | Output Level | 0 - 127<br />
● Type13: SPACE-D<br />
———————+————————————————————————————————+———————————————————————<br />
prm1 | Pre Delay Time | 0 - 125<br />
prm2 | Rate | 0 - 125<br />
prm3 | Depth | 0 - 127<br />
prm4 | Phase | 0 - 90<br />
prm5 | Low Gain | 0 - 30<br />
prm6 | High Gain | 0 - 30<br />
prm7 | Effect Balance | 0 - 100<br />
prm8 | Output Level | 0 - 127<br />
● Type14: STEREO-CHORUS<br />
———————+————————————————————————————————+———————————————————————<br />
prm1 | Filter Type | 0 - 2<br />
prm2 | Cutoff Frequency | 0 - 16<br />
prm3 | Pre Delay Time | 0 - 125<br />
prm4 | Rate | 0 - 125<br />
prm5 | Depth | 0 - 127<br />
prm6 | Phase | 0 - 90<br />
prm7 | (not used) |<br />
prm8 | Low Gain | 0 - 30<br />
prm9 | High Gain | 0 - 30<br />
prm10 | Effect Balance | 0 - 100<br />
prm11 | Output Level | 0 - 127<br />
● Type06: ENHANCER<br />
———————+————————————————————————————————+———————————————————————<br />
prm1 | Sens | 0 - 127<br />
prm2 | Mix Level | 0 - 127<br />
prm3 | Low Gain | 0 - 30<br />
prm4 | High Gain | 0 - 30<br />
prm5 | Output Level | 0 - 127<br />
● Type07: AUTO-WAH<br />
———————+————————————————————————————————+———————————————————————<br />
prm1 | Filter Type | 0 - 1<br />
prm2 | Rate | 0 - 125<br />
prm3 | Depth | 0 - 127<br />
prm4 | Sens | 0 - 127<br />
prm5 | Manual | 0 - 127<br />
prm6 | Peak | 0 - 127<br />
prm7 | Output Level | 0 - 127<br />
● Type08: ROTARY<br />
———————+————————————————————————————————+———————————————————————<br />
prm1 | High Frequency Slow Rate | 0 - 125<br />
prm2 | Low Frequency Slow Rate | 0 - 125<br />
prm3 | High Frequency Fast Rate | 0 - 125<br />
prm4 | Low Frequency Fast Rate | 0 - 125<br />
prm5 | Speed | 0 - 1<br />
prm6 | High Frequency Acceleration | 0 - 15<br />
prm7 | Low Frequency Acceleration | 0 - 15<br />
prm8 | High Frequency Level | 0 - 127<br />
prm9 | Low Frequency Level | 0 - 127<br />
prm10 | Separation | 0 - 127<br />
prm11 | Output Level | 0 - 127<br />
● Type15: STEREO-FLANGER<br />
———————+————————————————————————————————+———————————————————————<br />
prm1 | Filter Type | 0 - 2<br />
prm2 | Cutoff Frequency | 0 - 16<br />
prm3 | Pre Delay Time | 0 - 125<br />
prm4 | Rate | 0 - 125<br />
prm5 | Depth | 0 - 127<br />
prm6 | Phase | 0 - 90<br />
prm7 | Feedback Level | 0 - 98<br />
prm8 | Low Gain | 0 - 30<br />
prm9 | High Gain | 0 - 30<br />
prm10 | Effect Balance | 0 - 100<br />
prm11 | Output Level | 0 - 127<br />
● Type16: STEP-FLANGER<br />
———————+————————————————————————————————+———————————————————————<br />
prm1 | Pre Delay Time | 0 - 125<br />
prm2 | Rate | 0 - 125<br />
prm3 | Depth | 0 - 127<br />
prm4 | Feedback Level | 0 - 98<br />
prm5 | Step Rate | 0 - 125<br />
prm6 | Phase | 0 - 90<br />
prm7 | Low Gain | 0 - 30<br />
prm8 | High Gain | 0 - 30<br />
prm9 | Effect Balance | 0 - 100<br />
prm10 | Output Level | 0 - 127<br />
Appendices<br />
199
MIDI Implementation<br />
● Type17: STEREO-DELAY<br />
———————+————————————————————————————————+———————————————————————<br />
prm1 | Feedback Mode | 0 - 1<br />
prm2 | Delay Time Left | 0 - 126<br />
prm3 | Delay Time Right | 0 - 126<br />
prm4 | Feedback Phase Left | 0 - 1<br />
prm5 | Feedback Phase Right | 0 - 1<br />
prm6 | Feedback Level | 0 - 98<br />
prm7 | HF Damp | 0 - 17<br />
prm8 | Low Gain | 0 - 30<br />
prm9 | High Gain | 0 - 30<br />
prm10 | Effect Balance | 0 - 100<br />
prm11 | Output Level | 0 - 127<br />
● Type18: MODULATION-DELAY<br />
———————+————————————————————————————————+———————————————————————<br />
prm1 | Feedback Mode | 0 - 1<br />
prm2 | Delay Time Left | 0 - 126<br />
prm3 | Delay Time Right | 0 - 126<br />
prm4 | Feedback Level | 0 - 98<br />
prm5 | HF Damp | 0 - 17<br />
prm6 | Rate | 0 - 125<br />
prm7 | Depth | 0 - 127<br />
prm8 | Phase | 0 - 90<br />
prm9 | Low Gain | 0 - 30<br />
prm10 | High Gain | 0 - 30<br />
prm11 | Effect Balance | 0 - 100<br />
prm12 | Output Level | 0 - 127<br />
● Type19: TRIPLE-TAP-DELAY<br />
———————+————————————————————————————————+———————————————————————<br />
prm1 | Delay Time Left | 0 - 125<br />
prm2 | Delay Time Right | 0 - 125<br />
prm3 | Delay Time Center | 0 - 125<br />
prm4 | Feedback Level | 0 - 98<br />
prm5 | HF Damp | 0 - 17<br />
prm6 | Left Level | 0 - 127<br />
prm7 | Right Level | 0 - 127<br />
prm8 | Center Level | 0 - 127<br />
prm9 | Low Gain | 0 - 30<br />
prm10 | High Gain | 0 - 30<br />
prm11 | Effect Balance | 0 - 100<br />
prm12 | Output Level | 0 - 127<br />
● Type20: QUADRUPLE-TAP-DELAY<br />
———————+————————————————————————————————+———————————————————————<br />
prm1 | Delay Time 1 | 0 - 125<br />
prm2 | Delay Time 2 | 0 - 125<br />
prm3 | Delay Time 3 | 0 - 125<br />
prm4 | Delay Time 4 | 0 - 125<br />
prm5 | Level 1 | 0 - 127<br />
prm6 | Level 2 | 0 - 127<br />
prm7 | Level 3 | 0 - 127<br />
prm8 | Level 4 | 0 - 127<br />
prm9 | Feedback Level | 0 - 98<br />
prm10 | HF Damp | 0 - 17<br />
prm11 | Effect Balance | 0 - 100<br />
prm12 | Output Level | 0 - 127<br />
● Type21: TIME-CONTROL-DELAY<br />
———————+————————————————————————————————+———————————————————————<br />
prm1 | Delay Time | 0 - 120<br />
prm2 | Feedback Level | 0 - 98<br />
prm3 | Acceleration | 0 - 15<br />
prm4 | HF Damp | 0 - 17<br />
prm5 | Output Pan | 0 - 127<br />
prm6 | Low Gain | 0 - 30<br />
prm7 | High Gain | 0 - 30<br />
prm8 | Effect Balance | 0 - 100<br />
prm9 | Output Level | 0 - 127<br />
● Type22: 2VOICE-PITCH-SHIFTER<br />
———————+————————————————————————————————+———————————————————————<br />
prm1 | Pitch Shifter Mode | 0 - 4<br />
prm2 | Coarse Pitch A | 0 - 36<br />
prm3 | Coarse Pitch B | 0 - 36<br />
prm4 | Fine Pitch A | 0 - 100<br />
prm5 | Fine Pitch B | 0 - 100<br />
prm6 | Pre Delay Time A | 0 - 126<br />
prm7 | Pre Delay Time B | 0 - 126<br />
prm8 | Output Pan A | 0 - 127<br />
prm9 | Output Pan B | 0 - 127<br />
prm10 | Level Balance | 0 - 100<br />
prm11 | Effect Balance | 0 - 100<br />
prm12 | Output Level | 0 - 127<br />
● Type23: FBK-PITCH-SHIFTER<br />
———————+————————————————————————————————+———————————————————————<br />
prm1 | Pitch Shifter Mode | 0 - 4<br />
prm2 | Coarse Pitch | 0 - 36<br />
prm3 | Fine Pitch | 0 - 100<br />
prm4 | Pre Delay Time | 0 - 126<br />
prm5 | Feedback Level | 0 - 98<br />
prm6 | Output Pan | 0 - 127<br />
prm7 | Low Gain | 0 - 30<br />
prm8 | High Gain | 0 - 30<br />
prm9 | Effect Balance | 0 - 100<br />
prm10 | Output Level | 0 - 127<br />
● Type24: REVERB<br />
———————+————————————————————————————————+———————————————————————<br />
prm1 | Reverb Type | 0 - 5<br />
prm2 | Pre Delay Time | 0 - 125<br />
prm3 | Gate Time | 0 - 127<br />
prm4 | HF Damp | 0 - 17<br />
prm5 | Low Gain | 0 - 30<br />
prm6 | High Gain | 0 - 30<br />
prm7 | Effect Balance | 0 - 100<br />
prm8 | Output Level | 0 - 127<br />
● Type25: GATE-REVERB<br />
———————+————————————————————————————————+———————————————————————<br />
prm1 | Gate-Reverb Type | 0 - 3<br />
prm2 | Pre Delay Time | 0 - 125<br />
prm3 | Gate Time | 0 - 99<br />
prm4 | Low Gain | 0 - 30<br />
prm5 | High Gain | 0 - 30<br />
prm6 | Effect Balance | 0 - 100<br />
prm7 | Output Level | 0 - 127<br />
● Type26: OVERDRIVE→CHORUS<br />
———————+————————————————————————————————+———————————————————————<br />
prm1 | Drive | 0 - 127<br />
prm2 | Over Drive Pan | 0 - 127<br />
prm3 | Chorus Pre Delay Time | 0 - 125<br />
prm4 | Chorus Rate | 0 - 125<br />
prm5 | Chorus Depth | 0 - 127<br />
prm6 | (not used) |<br />
prm7 | Chorus Balance | 0 - 100<br />
prm8 | Output Level | 0 - 127<br />
● Type27: OVERDRIVE→FLANGER (serial)<br />
———————+————————————————————————————————+———————————————————————<br />
prm1 | Drive | 0 - 127<br />
prm2 | Over Drive Pan | 0 - 127<br />
prm3 | Flanger Pre Delay Time | 0 - 125<br />
prm4 | Flanger Rate | 0 - 125<br />
prm5 | Flanger Depth | 0 - 127<br />
prm6 | Flanger Feedback Level | 0 - 98<br />
prm7 | Flanger Balance | 0 - 100<br />
prm8 | Output Level | 0 - 127<br />
● Type28: OVERDRIVE→DELAY (serial)<br />
———————+————————————————————————————————+———————————————————————<br />
prm1 | Drive | 0 - 127<br />
prm2 | Over Drive Pan | 0 - 127<br />
prm3 | Delay Time | 0 - 126<br />
prm4 | Delay Feedback Level | 0 - 98<br />
prm5 | Delay HF Damp | 0 - 17<br />
prm6 | Delay Balance | 0 - 100<br />
prm7 | Output Level | 0 - 127<br />
● Type29: DISTORTION→CHORUS (serial)<br />
———————+————————————————————————————————+———————————————————————<br />
prm1 | Distortion Drive | 0 - 127<br />
prm2 | Distortion Pan | 0 - 127<br />
prm3 | Chorus Pre Delay Time | 0 - 125<br />
prm4 | Chorus Rate | 0 - 125<br />
prm5 | Chorus Depth | 0 - 127<br />
prm6 | (not used) |<br />
prm7 | Chorus Balance | 0 - 100<br />
prm8 | Output Level | 0 - 127<br />
● Type30: DISTORTION→FLANGER (serial)<br />
———————+————————————————————————————————+———————————————————————<br />
prm1 | Distortion Drive | 0 - 127<br />
prm2 | Distortion Pan | 0 - 127<br />
prm3 | Flanger Pre Delay Time | 0 - 125<br />
prm4 | Flanger Rate | 0 - 125<br />
prm5 | Flanger Depth | 0 - 127<br />
prm6 | Flanger Feedback Level | 0 - 98<br />
prm7 | Flanger Balance | 0 - 100<br />
prm8 | Output Level | 0 - 127<br />
● Type31: DISTORTION→DELAY (serial)<br />
———————+————————————————————————————————+———————————————————————<br />
prm1 | Distortion Drive | 0 - 127<br />
prm2 | Distortion Pan | 0 - 127<br />
prm3 | Delay Time | 0 - 126<br />
prm4 | Delay Feedback Level | 0 - 98<br />
prm5 | Delay HF Damp | 0 - 17<br />
prm6 | Delay Balance | 0 - 100<br />
prm7 | Output Level | 0 - 127<br />
● Type32: ENHANCER→CHORUS (serial)<br />
———————+————————————————————————————————+———————————————————————<br />
prm1 | Enhancer Sens | 0 - 127<br />
prm2 | Enhancer Mix Level | 0 - 127<br />
prm3 | Chorus Pre Delay Time | 0 - 125<br />
prm4 | Chorus Rate | 0 - 125<br />
prm5 | Chorus Depth | 0 - 127<br />
prm6 | (not used) |<br />
prm7 | Chorus Balance | 0 - 100<br />
prm8 | Output Level | 0 - 127<br />
200
MIDI Implementation<br />
● Type33: ENHANCER→FLANGER (serial)<br />
———————+————————————————————————————————+———————————————————————<br />
prm1 | Enhancer Sens | 0 - 127<br />
prm2 | Enhancer Mix Level | 0 - 127<br />
prm3 | Flanger Pre Delay Time | 0 - 125<br />
prm4 | Flanger Rate | 0 - 125<br />
prm5 | Flanger Depth | 0 - 127<br />
prm6 | Flanger Feedback Level | 0 - 98<br />
prm7 | Flanger Balance | 0 - 100<br />
prm8 | Output Level | 0 - 127<br />
● Type34: ENHANCER→DELAY (serial)<br />
———————+————————————————————————————————+———————————————————————<br />
prm1 | Enhancer Sens | 0 - 127<br />
prm2 | Enhancer Mix Level | 0 - 127<br />
prm3 | Delay Time | 0 - 126<br />
prm4 | Delay Feedback Level | 0 - 98<br />
prm5 | Delay HF Damp | 0 - 17<br />
prm6 | (not used) |<br />
prm7 | Delay Balance | 0 - 100<br />
prm8 | Output Level | 0 - 127<br />
● Type35: CHORUS→DELAY (serial)<br />
———————+————————————————————————————————+———————————————————————<br />
prm1 | Chorus Pre Delay Time | 0 - 125<br />
prm2 | Chorus Rate | 0 - 125<br />
prm3 | Chorus Depth | 0 - 127<br />
prm4 | (not used) |<br />
prm5 | Chorus Balance | 0 - 100<br />
prm6 | Delay Time | 0 - 126<br />
prm7 | Delay Feedback Level | 0 - 98<br />
prm8 | Delay HF Damp | 0 - 17<br />
prm9 | Delay Balance | 0 - 100<br />
prm10 | Output Level | 0 - 127<br />
● Type36: FLANGER→DELAY (serial)<br />
———————+————————————————————————————————+———————————————————————<br />
prm1 | Flanger Pre Delay Time | 0 - 125<br />
prm2 | Flanger Rate | 0 - 125<br />
prm3 | Flanger Depth | 0 - 127<br />
prm4 | Flanger Feedback Level | 0 - 98<br />
prm5 | Flanger Balance | 0 - 100<br />
prm6 | Delay Time | 0 - 126<br />
prm7 | Delay Feedback Level | 0 - 98<br />
prm8 | Delay HF Damp | 0 - 17<br />
prm9 | Delay Balance | 0 - 100<br />
prm10 | Output Level | 0 - 127<br />
● Type37: CHORUS→FLANGER (serial)<br />
———————+————————————————————————————————+———————————————————————<br />
prm1 | Chorus Pre Delay Time | 0 - 125<br />
prm2 | Chorus Rate | 0 - 125<br />
prm3 | Chorus Depth | 0 - 127<br />
prm4 | Chorus Balance | 0 - 100<br />
prm5 | Flanger Pre Delay Time | 0 - 125<br />
prm6 | Flanger Rate | 0 - 125<br />
prm7 | Flanger Depth | 0 - 127<br />
prm8 | Flanger Feedback Level | 0 - 98<br />
prm9 | Flanger Balance | 0 - 100<br />
prm10 | Output Level | 0 - 127<br />
● Type38: CHORUS/DELAY (parallel)<br />
———————+————————————————————————————————+———————————————————————<br />
prm1 | Chorus Pre Delay Time | 0 - 125<br />
prm2 | Chorus Rate | 0 - 125<br />
prm3 | Chorus Depth | 0 - 127<br />
prm4 | (not used) |<br />
prm5 | Chorus Balance | 0 - 100<br />
prm6 | Delay Time | 0 - 126<br />
prm7 | Delay Feedback Level | 0 - 98<br />
prm8 | Delay HF Damp | 0 - 17<br />
prm9 | Delay Balance | 0 - 100<br />
prm10 | Output Level | 0 - 127<br />
● Type39: FLANGER/DELAY (parallel)<br />
———————+————————————————————————————————+———————————————————————<br />
prm1 | Flanger Pre Delay Time | 0 - 125<br />
prm2 | Flanger Rate | 0 - 125<br />
prm3 | Flanger Depth | 0 - 127<br />
prm4 | Flanger Feedback Level | 0 - 98<br />
prm5 | Flanger Balance | 0 - 100<br />
prm6 | Delay Time | 0 - 126<br />
prm7 | Delay Feedback Level | 0 - 98<br />
prm8 | Delay HF Damp | 0 - 17<br />
prm9 | Delay Balance | 0 - 100<br />
prm10 | Output Level | 0 - 127<br />
● Type40: CHORUS/FLANGER (parallel)<br />
———————+————————————————————————————————+———————————————————————<br />
prm1 | Chorus Pre Delay Time | 0 - 125<br />
prm2 | Chorus Rate | 0 - 125<br />
prm3 | Chorus Depth | 0 - 127<br />
prm4 | Chorus Balance | 0 - 100<br />
prm5 | Flanger Pre Delay Time | 0 - 125<br />
prm6 | Flanger Rate | 0 - 125<br />
prm7 | Flanger Depth | 0 - 127<br />
prm8 | Flanger Feedback Level | 0 - 98<br />
prm9 | Flanger Balance | 0 - 100<br />
prm10 | Output Level | 0 - 127<br />
Appendices<br />
201
MIDI Implementation<br />
■ List of the Arpeggio Parameter<br />
● Arpeggio Style<br />
+—————————————————————————+—————————————————————————+—————————————————————————+<br />
|value| parameter |value| parameter |value| parameter |<br />
+—————————————————————————+—————————————————————————+—————————————————————————+<br />
| 0 | 1/ 4 | 15 | RHYTHM GTR A | 30 | BOUND BOLL |<br />
| 1 | 1/ 6 | 16 | RHYTHM GTR B | 31 | RANDOM |<br />
| 2 | 1/ 8 | 17 | RHYTHM GTR C | 32 | LIMITLESS |<br />
| 3 | 1/12 | 18 | RHYTHM GTR D | 33 | PORTAMENTO A |<br />
| 4 | 1/16 | 19 | RHYTHM GTR E | 34 | PORTAMENTO B |<br />
| 5 | 1/32 | 20 | 3 FINGER GTR | 35 | SEQUENCE D |<br />
| 6 | GLISSANDO | 21 | STRUMMING GTR | 36 | BOSSA NOVA |<br />
| 7 | SEQUENCE A | 22 | KBD COMPING A | 37 | SALSA |<br />
| 8 | SEQUENCE B | 23 | KBD COMPING B | 38 | MAMBO |<br />
| 9 | SEQUENCE C | 24 | KBD COMPING C | 39 | LATIN PERCUSSION |<br />
| 10 | ECHO | 25 | KBD COMPING D | 40 | SAMBA |<br />
| 11 | SYNTH BASS | 26 | KBD COMPING E | 41 | TANGO |<br />
| 12 | SLAP BASS A | 27 | PERCUSSION | 42 | HOUSE |<br />
| 13 | SLAP BASS B | 28 | HARP | | |<br />
| 14 | WALK BASS | 29 | SHAMISEN | | |<br />
+—————————————————————————+—————————————————————————+—————————————————————————+<br />
● Arpeggio Motif<br />
+—————————————————————————+—————————————————————————+—————————————————————————+<br />
|value| parameter |value| parameter |value| parameter |<br />
+—————————————————————————+—————————————————————————+—————————————————————————+<br />
| 0 | SINGLE UP | 13 | BASS+CHORD 3 | 26 | BASS+RANDOM 3 |<br />
| 1 | SINGLE DOWN | 14 | BASS+CHORD 4 | 27 | TOP+UP 1 |<br />
| 2 | SINGLE UP&DOWN | 15 | BASS+CHORD 5 | 28 | TOP+UP 2 |<br />
| 3 | SINGLE RANDOM | 16 | BASS+UP 1 | 29 | TOP+UP 3 |<br />
| 4 | DUAL UP | 17 | BASS+UP 2 | 30 | TOP+UP 4 |<br />
| 5 | DUAL DOWN | 18 | BASS+UP 3 | 31 | TOP+UP 5 |<br />
| 6 | DUAL UP&DOWN | 19 | BASS+UP 4 | 32 | TOP+UP 6 |<br />
| 7 | DUAL RANDOM | 20 | BASS+UP 5 | 33 | BASS+UP+TOP |<br />
| 8 | NOTE ORDER | 21 | BASS+UP 6 | 34 | TRIPLE UP |<br />
| 9 | GLISSANDO | 22 | BASS+UP 7 | 35 | TRIPLE DOWN |<br />
| 10 | CHORD | 23 | BASS+UP 8 | 36 | TRIPLE UP&DOWN |<br />
| 11 | BASS+CHORD 1 | 24 | BASS+RANDOM 1 | 37 | TRIPLE RANDOM |<br />
| 12 | BASS+CHORD 2 | 25 | BASS+RANDOM 2 | | |<br />
+—————————————————————————+—————————————————————————+—————————————————————————+<br />
● Arpeggio Beat Pattern<br />
+—————————————————————————+—————————————————————————+—————————————————————————+<br />
|value| parameter |value| parameter |value| parameter |<br />
+—————————————————————————+—————————————————————————+—————————————————————————+<br />
| 0 | 1/ 4 | 40 | MUTE 15 | 80 | PORTA-B 09 |<br />
| 1 | 1/ 6 | 41 | MUTE 16 | 81 | PORTA-B 10 |<br />
| 2 | 1/ 8 | 42 | STRUM 1 | 82 | PORTA-B 11 |<br />
| 3 | 1/12 | 43 | STRUM 2 | 83 | PORTA-B 12 |<br />
| 4 | 1/16 1 | 44 | STRUM 3 | 84 | PORTA-B 13 |<br />
| 5 | 1/16 2 | 45 | STRUM 4 | 85 | PORTA-B 14 |<br />
| 6 | 1/16 3 | 46 | STRUM 5 | 86 | PORTA-B 15 |<br />
| 7 | 1/32 1 | 47 | STRUM 6 | 87 | SEQ-B 5 |<br />
| 8 | 1/32 2 | 48 | STRUM 7 | 88 | SEQ-D 1 |<br />
| 9 | 1/32 3 | 49 | STRUM 8 | 89 | SEQ-D 2 |<br />
| 10 | SEQ-A 1 | 50 | REGGAE1 | 90 | SEQ-D 3 |<br />
| 11 | SEQ-A 2 | 51 | REFRAIN1 | 91 | SEQ-D 4 |<br />
| 12 | SEQ-A 3 | 52 | REFRAIN2 | 92 | SEQ-D 5 |<br />
| 13 | SEQ-A 4 | 53 | PERC1 | 93 | SEQ-D 6 |<br />
| 14 | SEQ-A 5 | 54 | PERC2 | 94 | SEQ-D 7 |<br />
| 15 | SEQ-A 6 | 55 | PERC3 | 95 | SEQ-D 8 |<br />
| 16 | SEQ-A 7 | 56 | PERC4 | 96 | REGGAE2 |<br />
| 17 | SEQ-B 1 | 57 | WALKBS | 97 | BOSSA NOVA |<br />
| 18 | SEQ-B 2 | 58 | HARP | 98 | SALSA 1 |<br />
| 19 | SEQ-B 3 | 59 | BOUND | 99 | SALSA 2 |<br />
| 20 | SEQ-B 4 | 60 | RANDOM | 100 | SALSA 3 |<br />
| 21 | SEQ-C 1 | 61 | PORTA-A 01 | 101 | SALSA 4 |<br />
| 22 | SEQ-C 2 | 62 | PORTA-A 02 | 102 | MAMBO 1 |<br />
| 23 | ECHO 1 | 63 | PORTA-A 03 | 103 | MAMBO 2 |<br />
| 24 | ECHO 2 | 64 | PORTA-A 04 | 104 | CLAVE |<br />
| 25 | ECHO 3 | 65 | PORTA-A 05 | 105 | REV CLA |<br />
| 26 | MUTE 01 | 66 | PORTA-A 06 | 106 | GUIRO |<br />
| 27 | MUTE 02 | 67 | PORTA-A 07 | 107 | AGOGO |<br />
| 28 | MUTE 03 | 68 | PORTA-A 08 | 108 | SAMBA |<br />
| 29 | MUTE 04 | 69 | PORTA-A 09 | 109 | TANGO 1 |<br />
| 30 | MUTE 05 | 70 | PORTA-A 10 | 110 | TANGO 2 |<br />
| 31 | MUTE 06 | 71 | PORTA-A 11 | 111 | TANGO 3 |<br />
| 32 | MUTE 07 | 72 | PORTA-B 01 | 112 | TANGO 4 |<br />
| 33 | MUTE 08 | 73 | PORTA-B 02 | 113 | HOUSE 1 |<br />
| 34 | MUTE 09 | 74 | PORTA-B 03 | 114 | HOUSE 2 |<br />
| 35 | MUTE 10 | 75 | PORTA-B 04 | | |<br />
| 36 | MUTE 11 | 76 | PORTA-B 05 | | |<br />
| 37 | MUTE 12 | 77 | PORTA-B 06 | | |<br />
| 38 | MUTE 13 | 78 | PORTA-B 07 | | |<br />
| 39 | MUTE 14 | 79 | PORTA-B 08 | | |<br />
+—————————————————————————+—————————————————————————+—————————————————————————+<br />
202
MIDI Implementation<br />
■ Decimal/Hexadecimal Table (hexadecimal values<br />
are indicated by a following “H”)<br />
MIDI uses 7-bit hexadecimal values to indicate data values and the address and size of<br />
exclusive messages. The following table shows the correspondence between decimal and<br />
hexadecimal numbers.<br />
+——————+——————++——————+——————++——————+——————++——————+——————+<br />
| D | H || D | H || D | H || D | H |<br />
+——————+——————++——————+——————++——————+——————++——————+——————+<br />
| 0 | 00H || 32 | 20H || 64 | 40H || 96 | 60H |<br />
| 1 | 01H || 33 | 21H || 65 | 41H || 97 | 61H |<br />
| 2 | 02H || 34 | 22H || 66 | 42H || 98 | 62H |<br />
| 3 | 03H || 35 | 23H || 67 | 43H || 99 | 63H |<br />
| 4 | 04H || 36 | 24H || 68 | 44H || 100 | 64H |<br />
| 5 | 05H || 37 | 25H || 69 | 45H || 101 | 65H |<br />
| 6 | 06H || 38 | 26H || 70 | 46H || 102 | 66H |<br />
| 7 | 07H || 39 | 27H || 71 | 47H || 103 | 67H |<br />
| 8 | 08H || 40 | 28H || 72 | 48H || 104 | 68H |<br />
| 9 | 09H || 41 | 29H || 73 | 49H || 105 | 69H |<br />
| 10 | 0AH || 42 | 2AH || 74 | 4AH || 106 | 6AH |<br />
| 11 | 0BH || 43 | 2BH || 75 | 4BH || 107 | 6BH |<br />
| 12 | 0CH || 44 | 2CH || 76 | 4CH || 108 | 6CH |<br />
| 13 | 0DH || 45 | 2DH || 77 | 4DH || 109 | 6DH |<br />
| 14 | 0EH || 46 | 2EH || 78 | 4EH || 110 | 6EH |<br />
| 15 | 0FH || 47 | 2FH || 79 | 4FH || 111 | 6FH |<br />
| 16 | 10H || 48 | 30H || 80 | 50H || 112 | 70H |<br />
| 17 | 11H || 49 | 31H || 81 | 51H || 113 | 71H |<br />
| 18 | 12H || 50 | 32H || 82 | 52H || 114 | 72H |<br />
| 19 | 13H || 51 | 33H || 83 | 53H || 115 | 73H |<br />
| 20 | 14H || 52 | 34H || 84 | 54H || 116 | 74H |<br />
| 21 | 15H || 53 | 35H || 85 | 55H || 117 | 75H |<br />
| 22 | 16H || 54 | 36H || 86 | 56H || 118 | 76H |<br />
| 23 | 17H || 55 | 37H || 87 | 57H || 119 | 77H |<br />
| 24 | 18H || 56 | 38H || 88 | 58H || 120 | 78H |<br />
| 25 | 19H || 57 | 39H || 89 | 59H || 121 | 79H |<br />
| 26 | 1AH || 58 | 3AH || 90 | 5AH || 122 | 7AH |<br />
| 27 | 1BH || 59 | 3BH || 91 | 5BH || 123 | 7BH |<br />
| 28 | 1CH || 60 | 3CH || 92 | 5CH || 124 | 7CH |<br />
| 29 | 1DH || 61 | 3DH || 93 | 5DH || 125 | 7DH |<br />
| 30 | 1EH || 62 | 3EH || 94 | 5EH || 126 | 7EH |<br />
| 31 | 1FH || 63 | 3FH || 95 | 5FH || 127 | 7FH |<br />
+——————+——————++——————+——————++——————+——————++——————+——————+<br />
D: decimal<br />
H: hexadecimal<br />
* Decimal expressions such as used for MIDI channel, Bank Select, and Program Change<br />
will be the value 1 greater than the decimal value given in the above table.<br />
* Since each MIDI byte carries 7 significant data bits, each byte can express a maximum of<br />
128 different values. Data for which higher resolution is required must be transmitted<br />
using two or more bytes. For example a value indicated as a two-byte value of aa bbH<br />
would have a value of aa x 128 + bb.<br />
* For a signed number (+/-), 00H = -64, 40H = +/-0, and 7FH = +63. I.e., the decimal<br />
equivalent will be 64 less than the decimal value given in the above table. For a two-byte<br />
signed number, 00 00H = -8192, 40 00H = +/-0, and 7F 7FH = +8191. For example the<br />
decimal expression of aa bbH would be aa bbH - 40 00H = (aa x 128 + bb - 64 x 128.<br />
* Hexadecimal notation in two 4-bit units is used for data indicated as “nibbled”. The<br />
nibbled two-byte value of 0a 0b H would be a x 16 + b.<br />
What is the decimal equivalent of 5AH?<br />
From the above table, 5AH = 90.<br />
What is the decimal equivalent of the 7-bit hexadecimal values 12 34H?<br />
From the above table, 12H = 18 and 34H = 52<br />
Thus, 18 x 128 + 52 = 2356<br />
What is the decimal equivalent of the nibbled expression 0A 03 09 0DH?<br />
From the above table, 0AH = 10, 03H = 3, 09H = 9, 0DH = 13<br />
Thus, the result is ((10 x 16 + 3) x 16 + 9) x 16 + 13 = 41885<br />
■ Examples of Actual MIDI Messages<br />
92 3E 5F<br />
9n is the Note On status and `n' is the MIDI channel number. Since 2H = 2, 3EH = 62, and<br />
5FH = 95, this is a Note On message of MIDI CH = 3, note number 62 (note name D4) and<br />
velocity 95.<br />
CE 49<br />
CnH is the Program Change status and `n' is the MIDI channel number. Since EH = 14, and<br />
49H = 73, this is a Program Change message of MIDI CH = 15, Program number 74 (in the<br />
GS sound map, Flute).<br />
EA 00 28<br />
EnH is the Pitch Bend Change status and `n' is the MIDI channel number. The 2nd byte<br />
(00H=0) is the LSB of the Pitch Bend value, and the 3rd byte (28H=40) is the MSB. However<br />
since the Pitch Bend is a signed number with 0 at 40 00H ( = 64 x 128 + 0 = 8192), the Pitch<br />
Bend value in this case is<br />
28 00H - 40 00H = 40 x 128 + 0 - (64 x 128 + 0) = 5120 - 8192 = -3072<br />
If we assume that the Pitch Bend Sensitivity is set to two semitones, the pitch will change<br />
only -200 cents for a Pitch Bend value of -8192 (00 00H). Thus, this message is specifying a<br />
Pitch Bend of -200 x (-3072) / (-8192) = -75 cents on MIDI CH = 11.<br />
B3 64 00 65 00 06 0C 26 00 64 7F 65 7F<br />
BnH is the Control Change status, and `n' is the MIDI channel number. In Control Change<br />
messages, the 2nd byte is the controller number, and the 3rd byte is the parameter value.<br />
MIDI allows what is known as “running status,” when if messages of the the same status<br />
follow each other, it is permitted to omit the second and following status bytes. In the<br />
message above, running status is being used, meaning that the message has the following<br />
content.<br />
B3 64 00<br />
MIDI CH = 4, RPN parameter number LSB: 00H<br />
(B3) 65 00<br />
MIDI CH = 4, RPN parameter number MSB: 00H<br />
(B3) 06 0C MIDI CH = 4, parameter value MSB: 0CH<br />
(B3) 26 00<br />
MIDI CH = 4, parameter value LSB: 00H<br />
(B3) 64 7F<br />
MIDI CH = 4, RPN parameter number LSB: 7FH<br />
(B3) 65 7F<br />
MIDI CH = 4, RPN parameter number MSB: 7FH<br />
Thus, this message transmits a parameter value of 0C 00H to RPN parameter number 00<br />
00H on MIDI CH = 4, and then sets the RPN parameter number to 7F 7FH.<br />
The function assigned to RPN parameter number 00 00H is Pitch Bend Sensitivity, and the<br />
MSB of the parameter value indicates semitone steps. Since the MSB of this parameter value<br />
is 0CH = 12, the maximum width of pitch bend is being set to [+-]12 semitones (1 octave)<br />
(GS sound sources ignore the LSB of Pitch Bend Sensitivity, but it is best to transmit the LSB<br />
(parameter value 0) as well, so that the message can be correctly received by any device.<br />
Once the parameter number has been set for RPN or NRPN, all subsequent Data Entry<br />
messages on that channel will be effective. Thus, it is recommended that after you have<br />
made the change you want, you set the parameter number to 7F 7FH (an “unset” or “null”<br />
setting). The final (B3) 64 7F (B3) 65 7F is for this purpose.<br />
It is not a good idea to store many events within the data of a song (e.g., a Standard MIDI<br />
File song) using running status as shown in . When the song is paused, fastforwarded<br />
or rewound, the sequencer may not be able to transmit the proper status, causing<br />
the sound source to misinterpret the data. It is best to attach the proper status byte to all<br />
events.<br />
What is the nibbled equivalent of the decimal number 1258?<br />
16 ) 1258<br />
16 ) 78...10<br />
16 ) 4...14<br />
0... 4<br />
From the above table, 0=00H, 4=04H, 14=0EH, 10=0AH<br />
Thus the result is 00 04 0E 0AH<br />
It is also important to transmit RPN or NRPN parameter number settings and parameter<br />
values in the correct order. In some sequencers, data events recorded in the same clock (or a<br />
nearby clock) can sometimes be transmitted in an order other than the order in which they<br />
were recorded. It is best to record such events at an appropriate interval (1 tick at TPQN=96,<br />
or 5 ticks at TPQN=480).<br />
* TPQN: Ticks Per Quarter Note (i.e., the time resolution of the sequencer)<br />
Appendices<br />
203
MIDI Implementation<br />
■ Examples of Exclusive Messages and<br />
Calculating the Checksum<br />
<strong>Roland</strong> exclusive messages (RQ1, DT1) are transmitted with a checksum at the end of the<br />
data (before F7) to check that the data was received correctly. The value of the checksum is<br />
determined by the address and data (or size) of the exclusive message.<br />
● How to Calculate the Checksum<br />
(hexadecimal values are indicated by a “H”)<br />
The checksum consists of a value whose lower 7 bits are 0 when the address, size and<br />
checksum itself are added.<br />
The following formula shows how to calculate the checksum when the exclusive message to<br />
be transmitted has an address of aa bb cc ddH, and data or size of ee ffH.<br />
aa + bb + cc + dd + ee + ff = total<br />
total / 128 = quotient ... remainder<br />
128 - remainder = checksum<br />
Setting the Performance Common REVERB TYPE to DELAY (DT1)<br />
The “Parameter address map” indicates that the starting address of the Temporary<br />
Performance is 01 00 00 00H, that the Performance Common offset address is 00 00H, and<br />
that the REVERB TYPE address is 00 28H. Thus, the address is:<br />
01 00 00 00H<br />
00 00H<br />
+) 00 28H<br />
01 00 00 28H<br />
Since DELAY is parameter value 06H,<br />
F0 41 10 6A 12 01 00 00 28 06 ?? F7<br />
(1) (2) (3) (4) (5) address data checksum (6)<br />
(1) Exclusive status (2) ID number (<strong>Roland</strong>) (3) Device ID (17)<br />
(4) Model ID (XP-30) (5) Command ID (DT1) (6) EOX<br />
Next we calculate the checksum.<br />
01H + 00H + 00H + 28H + 06H = 1 + 0 + 0 + 40 + 6 = 47 (sum)<br />
47 (total) / 128 = 0 (quotient) ... 47 (remainder)<br />
checksum = 128 - 47 (quotient) = 81 = 51H<br />
This means that the message transmitted will be F0 41 10 6A 12 01 00 00 28 06 51 F7.<br />
Retrieving data for USER:03 Performance Part 3 (RQ1)<br />
The “Parameter Address Map” indicates that the starting address of USER:03 is 10 02 00<br />
00H, and that the offset address of Performance Part 3 is 12 00H. Thus, the address is:<br />
10 02 00 00H<br />
+) 12 00H<br />
10 02 12 00H<br />
Since the size of the Performance Part is 00 00 00 19H,<br />
F0 41 10 6A 11 10 02 12 00 00 00 00 19 ?? F7<br />
(1) (2) (3) (4) (5) address size checksum (6)<br />
(1) Exclusive status (2) ID number (<strong>Roland</strong>) (3) Device ID (17)<br />
(4) Model ID (XP-30) (5) Command ID (RQ1) (6) EOX<br />
Next we calculate the checksum.<br />
10H + 02H + 12H + 00H + 00H + 00H + 00H + 19H =<br />
16 + 2 + 18 + 0 + 0 + 0 + 0 + 25 = 61 (sum)<br />
61 (total) / 128 = 0 (product) ... 61 (remainder)<br />
checksum = 128 - 61 (remainder) = 67 = 43H<br />
Thus, a message of F0 41 10 6A 11 10 02 12 00 00 00 00 19 43 F7 would be transmitted.<br />
Retrieving data for Temporary Performance (RQ1)<br />
* When a data transfer is executed in Utility mode, data that is accessed will be the same<br />
as that which is transmitted when the Type parameter is set to PERFORM and the Source<br />
parameter is set to TEMP: -PATCH<br />
The “Parameter Address Map” gives the following start addresses for Temporary<br />
Performance data.<br />
01 00 00 00H Temporary Performance Common<br />
01 00 10 00H Temporary Performance Part 1<br />
:<br />
01 00 1F 00H Temporary Performance Part 16<br />
Since Performance Part has a size of 00 00 00 19H, we add that size to the start address of the<br />
Temporary Performance Part 16, resulting in:<br />
01 00 1F 00H<br />
+) 00 00 00 19H<br />
01 00 1F 19H<br />
Thus, the Size for the retrieved data will be:<br />
01 00 1F 19H<br />
-) 01 00 00 00H<br />
00 00 1F 19H<br />
F0 41 10 6A 11 01 00 00 00 00 00 1F 19 ?? F7<br />
(1) (2) (3) (4) (5) address size checksum (6)<br />
(1) Exclusive status (2) ID number (<strong>Roland</strong>) (3) Device ID (17)<br />
(4) Model ID (XP-30) (5) Command ID (RQ1) (6) EOX<br />
Calculating the checksum as shown in , we get a message of F0 41 10 6A 11 01<br />
00 00 00 00 00 1F 19 47 F7 to be transmitted.<br />
Retrieving the Temporary Performance data together with all Temporary<br />
Part and Rhythm Set data (RQ1)<br />
* When a data transfer is executed in Utility mode, the data that is accessed will be the<br />
same as that which is transmitted when the Type parameter is set to PERFORM and the<br />
Source parameter is set to TEMP: +PATCH<br />
The “Parameter Address Map” gives the following start addresses for Temporary<br />
Performance, Performance Mode Temporary Patch and Performance Mode Temporary<br />
Rhythm.<br />
01 00 00 00H Temporary Performance<br />
02 00 00 00H Performance Mode Temporary Patch(part 1)<br />
:<br />
02 08 00 00H Performance Mode Temporary Patch(part 9)<br />
02 09 00 00H Temporary Rhythm Setup<br />
02 0A 00 00H Performance Mode Temporary Patch(part 11)<br />
:<br />
02 0F 00 00H Performance Mode Temporary Patch(part 16)<br />
The Patch offset addresses are as follows.<br />
00 00H Patch Common<br />
10 00H Patch Tone 1<br />
:<br />
16 00H Patch Tone 4<br />
Since Patch Tone has a size of 00 00 01 01H, we add this size to the start address of<br />
Performance Mode Temporary Patch (Part 16) Tone 4, to get:<br />
02 0F 00 00H<br />
16 00H<br />
+) 00 00 01 01H<br />
02 0F 17 01H<br />
Thus, the size of the retrieved data will be:<br />
02 0F 17 01H<br />
-) 01 00 00 00H<br />
01 0F 17 01H<br />
F0 41 10 6A 11 01 00 00 00 01 0F 17 01 ?? F7<br />
(1) (2) (3) (4) (5) address size checksum (6)<br />
(1) Exclusive status (2) ID number (<strong>Roland</strong>) (3) Device ID (17)<br />
(4) Model ID (XP-30) (5) Command ID (RQ1) (6) EOX<br />
Calculating the checksum as shown in , we get a message of F0 41 10 6A 11 01<br />
00 00 00 01 0F 17 01 57 F7 to be transmitted.<br />
204
MIDI Implementation<br />
■ Scale Tune Function<br />
(Model ID : 42H (GS), address: 40 1x 40H)<br />
Scale Tune is a function that makes fine adjustments to the pitch of each note C-B. Settings<br />
are made for one octave, and applied to the notes of all octaves. By making Scale Tune<br />
settings you can use tunings and temperaments other than the standard Equal<br />
Temperament. Here we give three types of settings as examples.<br />
* Scale tune messages for any parts are recognized in the patch mode.<br />
❍Equal Temperament<br />
This temperament divides the octave into 12 equal steps, and is the temperament most<br />
frequently used today, especially in western music. Initially, the Scale Tune function of this<br />
instrument is set to Equal Temperament.<br />
❍Just Intonation (tonic of C)<br />
The primary triads sound more beautiful in just intonation than in equal temperament.<br />
However, this applies only in one key, and chords will be discordant if you play in a<br />
different key. The settings here are for a tonic of C.<br />
❍Arabian-type Scale<br />
The Scale Tune function allow you to use various tunings of ethnic music. Here is one of the<br />
Arabian scales.<br />
Setting Examples<br />
Note Equal Temp. Just (in C) Arabian-type Scale<br />
C 0 0 -6<br />
C# 0 -8 +45<br />
D 0 +4 -2<br />
Eb 0 +16 -12<br />
E 0 -14 -51<br />
F 0 -2 -8<br />
F# 0 -10 +43<br />
G 0 +2 -4<br />
G# 0 +14 +47<br />
A 0 -16 0<br />
Bb 0 +14 -10<br />
B 0 -12 -49<br />
■ ASCII Code Table<br />
On the XP-30, the following ASCII code set is used for processing data such as the Patch<br />
Name and the Performance Name.<br />
+——————+——————+——————++——————+——————+——————++——————+——————+——————+<br />
| D | H | Char || D | H | Char || D | H | Char |<br />
+——————+——————+——————++——————+——————+——————++——————+——————+——————+<br />
| 32 | 20H | SP || 64 | 40H | @ || 96 | 60H | ` |<br />
| 33 | 21H | ! || 65 | 41H | A || 97 | 61H | a |<br />
| 34 | 22H | " || 66 | 42H | B || 98 | 62H | b |<br />
| 35 | 23H | # || 67 | 43H | C || 99 | 63H | c |<br />
| 36 | 24H | $ || 68 | 44H | D || 100 | 64H | d |<br />
| 37 | 25H | % || 69 | 45H | E || 101 | 65H | e |<br />
| 38 | 26H | & || 70 | 46H | F || 102 | 66H | f |<br />
| 39 | 27H | ` || 71 | 47H | G || 103 | 67H | g |<br />
| 40 | 28H | ( || 72 | 48H | H || 104 | 68H | h |<br />
| 41 | 29H | ) || 73 | 49H | I || 105 | 69H | i |<br />
| 42 | 2AH | * || 74 | 4AH | J || 106 | 6AH | j |<br />
| 43 | 2BH | + || 75 | 4BH | K || 107 | 6BH | k |<br />
| 44 | 2CH | , || 76 | 4CH | L || 108 | 6CH | l |<br />
| 45 | 2DH | - || 77 | 4DH | M || 109 | 6DH | m |<br />
| 46 | 2EH | . || 78 | 4EH | N || 110 | 6EH | n |<br />
| 47 | 2FH | / || 79 | 4FH | O || 111 | 6FH | o |<br />
| 48 | 30H | 0 || 80 | 50H | P || 112 | 70H | p |<br />
| 49 | 31H | 1 || 81 | 51H | Q || 113 | 71H | q |<br />
| 50 | 32H | 2 || 82 | 52H | R || 114 | 72H | r |<br />
| 51 | 33H | 3 || 83 | 53H | S || 115 | 73H | s |<br />
| 52 | 34H | 4 || 84 | 54H | T || 116 | 74H | t |<br />
| 53 | 35H | 5 || 85 | 55H | U || 117 | 75H | u |<br />
| 54 | 36H | 6 || 86 | 56H | V || 118 | 76H | v |<br />
| 55 | 37H | 7 || 87 | 57H | W || 119 | 77H | w |<br />
| 56 | 38H | 8 || 88 | 58H | X || 120 | 78H | x |<br />
| 57 | 39H | 9 || 89 | 59H | Y || 121 | 79H | y |<br />
| 58 | 3AH | : || 90 | 5AH | Z || 122 | 7AH | z |<br />
| 59 | 3BH | ; || 91 | 5BH | [ || 123 | 7BH | { |<br />
| 60 | 3CH | < || 92 | 5CH | \ || 124 | 7CH | | |<br />
| 61 | 3DH | = || 93 | 5DH | ] || 125 | 7DH | } |<br />
| 62 | 3EH | > || 94 | 5EH | ^ |+——————+——————+——————+<br />
| 63 | 3FH | ? || 95 | 5FH | _ |<br />
+——————+——————+——————++——————+——————+——————+<br />
D: decimal<br />
H: hexadecimal<br />
Note:<br />
SP indicates “space”.<br />
The values in the above table are in units of 1 cent. Convert these values to hexadecimal,<br />
and transmit them as exclusive data. For example to set the Scale Tune of Part 1 to an<br />
Arabian-type scale, transmit the following data.<br />
F0 41 10 42 12 40 11 40 3A 6D 3E 34 0D 38 6B 3C 6F 40 36 0F 76 F7<br />
Appendices<br />
205
64 Voice Expandable Synthesizer<br />
Model XP-30<br />
MIDI Implementation Chart<br />
Date : Jan. 18, 1999<br />
Version : 1.00<br />
Function...<br />
Transmitted Recognized Remarks<br />
Basic<br />
Channel<br />
Default<br />
Changed<br />
X<br />
X<br />
1–16<br />
1–16<br />
Mode<br />
Default<br />
Messages<br />
Altered<br />
X<br />
X<br />
**************<br />
Mode 3<br />
Mode 3, 4 (M = 1)<br />
* 2<br />
Note<br />
Number :<br />
True Voice<br />
0<br />
**************<br />
0–127<br />
0–127<br />
Velocity<br />
Note On<br />
Note Off<br />
O<br />
O<br />
O<br />
O<br />
After<br />
Touch<br />
Key's<br />
Channel's<br />
X<br />
O<br />
O *1<br />
O *1<br />
Pitch Bend<br />
O<br />
O *1<br />
Control<br />
Change<br />
0, 32<br />
1245<br />
6, 38<br />
78<br />
10<br />
11<br />
64<br />
65<br />
66<br />
67<br />
69<br />
71<br />
72<br />
73<br />
74<br />
80<br />
81<br />
82<br />
83<br />
84<br />
91<br />
93<br />
1–5, 7–31, 64–95 *3<br />
1–5, 7–31, 64–95 *3<br />
98, 99<br />
100, 101<br />
O<br />
O<br />
O<br />
O<br />
O<br />
O<br />
O<br />
O<br />
O<br />
O<br />
O<br />
O<br />
O<br />
O<br />
O<br />
O<br />
O<br />
O<br />
O<br />
O<br />
O<br />
O<br />
O<br />
O<br />
O<br />
O<br />
O<br />
O<br />
X<br />
O<br />
*1 O<br />
O<br />
O<br />
O<br />
O<br />
O<br />
O<br />
O<br />
O<br />
O<br />
O<br />
O<br />
O<br />
O<br />
O<br />
O (Resonance)<br />
O (Decay Time)<br />
O (Attack Time)<br />
O (Cutoff)<br />
O (Tone 1 Level)<br />
O (Tone 2 Level)<br />
O (Tone 3 Level)<br />
O (Tone 4 Level)<br />
O<br />
O (Reverb)<br />
O (Chorus)<br />
O<br />
O<br />
X<br />
O<br />
*1<br />
*1<br />
*1<br />
*1<br />
*1<br />
*1<br />
*1<br />
*1<br />
*1<br />
*1<br />
*1<br />
*1<br />
*1<br />
*1<br />
*1<br />
*1<br />
*1<br />
*1<br />
*1<br />
*1<br />
*1<br />
*1<br />
*1<br />
*1<br />
*1<br />
*1<br />
*1<br />
*1<br />
*1<br />
Bank select<br />
Modulation<br />
Breath type<br />
Foot type<br />
Portamento time<br />
Data entry<br />
Volume<br />
Balance<br />
Panpot<br />
Expression<br />
Hold 1<br />
Portamento<br />
Sostenuto<br />
Soft<br />
Hold 2<br />
Sound Controller 2<br />
Sound Controller 3<br />
Sound Controller 4<br />
Sound Controller 5<br />
General Purpose Controller 5<br />
General Purpose Controller 6<br />
General Purpose Controller 7<br />
General Purpose Controller 8<br />
Portamento control<br />
General purpose effects 1<br />
General purpose effects 3<br />
CC1 (General purpose controller 1)<br />
CC2 (General purpose controller 2)<br />
NRPN LSB, MSB<br />
RPN LSB, MSB<br />
Program<br />
Change<br />
: True Number<br />
O *1<br />
**************<br />
O *1<br />
0–127<br />
Program No. 1–128<br />
System Exclusive<br />
O<br />
O *1<br />
System<br />
Common<br />
: Song Position<br />
: Song Select<br />
: Tune Request<br />
X<br />
X<br />
X<br />
X<br />
X<br />
X<br />
System<br />
Real Time<br />
: Clock<br />
: Commands<br />
X<br />
X<br />
O *1<br />
X<br />
Aux<br />
Messages<br />
Notes<br />
: All Sound Off<br />
: Reset All Controllers<br />
: Local On/Off<br />
: All Notes Off<br />
: Active Sensing<br />
: System Reset<br />
Mode 1 : OMNI ON, POLY<br />
Mode 3 : OMNI OFF, POLY<br />
X<br />
X<br />
X<br />
X<br />
O *1<br />
X<br />
O (120, 126, 127)<br />
O<br />
X<br />
O (123–127)<br />
O<br />
X<br />
* 1 O X is selectable.<br />
* 2 Recognized as M=1 even if M≠1.<br />
* 3 Can be changed settings.<br />
Mode 2 : OMNI ON, MONO<br />
Mode 4 : OMNI OFF, MONO<br />
O : Yes<br />
X : No<br />
206
Specifications<br />
XP-30: 64 Voice Expandable Synthesizer(Conforms to General MIDI System)<br />
● Keyboard<br />
61 keys (with velocity, channel aftertouch)<br />
● Number of Parts<br />
16 (Part 10 is Rhythm Part)<br />
● Maximum Polyphony<br />
64 voices<br />
● Effects<br />
EFX: 40 sets<br />
Reverb: 1 set (8 types)<br />
Chorus: 1 set<br />
● Preset Memory<br />
Patches: 1406 (640 same as the JV-2080 + 766 from “Session,”<br />
“Orchestral” and “Techno Collection”)<br />
Performances: 64<br />
Rhythm Sets: 26 (10 same as the JV-2080 + 16 from “Session”<br />
and “Techno Collection”")<br />
● User Memory<br />
Patches: 128<br />
Performances: 32<br />
Rhythm Sets: 2<br />
● Wave Expansion Boards (sold separately)<br />
Max. 2 Boards (D, E)<br />
* Each Wave Expansion Board includes Patches / Rhythm Sets<br />
that make use of the waves on the board.<br />
● Arpeggiator<br />
43 Styles<br />
● Display<br />
40 characters, 2 lines (backlit LCD)<br />
● Connectors<br />
Output Jacks (L (MONO), R)<br />
Headphones Jack<br />
MIDI Connectors (IN, OUT, THRU)<br />
Computer Connector (Mac, PC-1, PC-2, MIDI)<br />
Hold Pedal Jack<br />
Control Pedal Jack<br />
Memory Card Slot<br />
● Power Supply<br />
AC 117 V, AC 230 V, AC 240 V<br />
● Power Consumption<br />
10 W (AC 117 V), 10 W (AC 230 V), 10 W (AC 240 V)<br />
● Dimensions<br />
1011 (W) x 289 (D) x 88 (H) mm<br />
39-13/16 (W) x 11-7/16 (D) x 3-1/2 (H) inches<br />
● Weight<br />
7.8 kg / 17 lbs 4 oz (except Power cord)<br />
● Accessories<br />
Owner’s Manual<br />
Power Cable (Not included with XP-30 designed for 117 V<br />
power supply)<br />
CD-ROM (SoundDiver JV/XP)<br />
● Options<br />
Wave Expansion Boards: SR-JV80 series<br />
SmartMedia: S2M-5 (2M bytes), S4M-5 (4M bytes)<br />
*In the interest of product improvement, the specifications and/or appearance of this unit are subject to change without prior notice.<br />
207
Computer Cable Wiring Diagrams<br />
For Apple Macintosh (Sold separately: RSC-15APL)<br />
mini DIN, 8-pin, male<br />
mini DIN, 8-pin, male<br />
6 7 8<br />
mini DIN, 8-pin, male<br />
mini DIN, 8-pin, male<br />
678<br />
3 4 5<br />
1 2<br />
HSKo 1<br />
HSKi 2<br />
TXD- 3<br />
GND 4<br />
RXD- 5<br />
TXD+ 6<br />
GPi 7<br />
RXD+ 8<br />
1 HSKo<br />
2 HSKi<br />
3 TXD-<br />
4 GND<br />
5 RXD-<br />
6 TXD+<br />
7 GPi<br />
8 RXD+<br />
3 4 5<br />
1 2<br />
For PC (9-pin) (Sold separately: RSC-15AT)<br />
mini DIN, 8-pin, male<br />
6 7 8<br />
3 4 5<br />
1 2<br />
mini DIN, 8-pin, male<br />
HSKo 1<br />
HSKi 2<br />
TXD- 3<br />
GND 4<br />
RXD- 5<br />
D-sub, 9-pin, female<br />
7 RTS<br />
8 CTS<br />
3 TXD<br />
5 GND<br />
2 RXD<br />
D-sub, 9-pin, female<br />
5 1<br />
9 6<br />
For PC (25-pin)<br />
mini DIN, 8-pin, male<br />
6 7 8<br />
mini DIN, 8-pin, male<br />
D-sub, 25-pin, female<br />
3 4 5<br />
1 2<br />
HSKo 1<br />
HSKi 2<br />
TXD- 3<br />
GND 4<br />
RXD- 5<br />
4 RTS<br />
5 CTS<br />
2 TXD<br />
7 GND<br />
3 RXD<br />
D-sub, 25-pin, female<br />
13 1<br />
25 14<br />
208
Index<br />
Symbols<br />
[+OCT] .......................................................................12, 59<br />
[-OCT] ........................................................................12, 59<br />
Numerics<br />
[1–8/9–16] ........................................................................13<br />
2VOICE-PITCH-SHIFTER ..........................................102<br />
A<br />
AC inlet ............................................................................14<br />
AC power cable ..............................................................25<br />
Accent rate .....................................................................109<br />
Aftertouch .......................................................................34<br />
Aftertouch control source ...........................................111<br />
Aftertouch information .........................................87, 127<br />
Aftertouch sens .............................................................110<br />
Alternate pan depth .................................................82, 92<br />
Analog feel depth ...........................................................69<br />
Arabian scale .................................................................114<br />
ARP SELECT display ...............................................37, 56<br />
Arpeggiator ...............................................................36, 56<br />
[ARPEGGIO] .......................................................12, 36, 56<br />
Arpeggio ..................................................................36, 108<br />
arpeggio ...........................................................................56<br />
ARPEGGIO display .......................................................59<br />
Arpeggio part ................................................................110<br />
Arpeggio style ...............................................................182<br />
Audio cable .....................................................................25<br />
AUTO-WAH ...................................................................95<br />
B<br />
Back select transmit switch .........................................113<br />
Bank select group number ..........................................113<br />
Bank select LSB .............................................................113<br />
Bank select MSB ............................................................113<br />
Battery check .................................................................114<br />
Beat pattern ...................................................................109<br />
Bend range ................................................................73, 90<br />
Bender information ........................................................87<br />
Bias direction ..................................................................82<br />
Bias level ..........................................................................82<br />
Bias point .........................................................................82<br />
Booster gain .....................................................................71<br />
Breath information .................................................87, 127<br />
Bulk dump .....................................................................119<br />
C<br />
C1/C2/C3/C4 slider assign .......................................111<br />
C1/C2/C3/C4 slider output ......................................111<br />
C1–C4 slider ....................................................................34<br />
Card ................................................................................115<br />
[CATEGORY] ......................................................13, 32, 48<br />
Category ...............................................................32, 48–49<br />
Category group ...............................................................32<br />
Category select mode ...................................................108<br />
Chorus ..............................................................................61<br />
Chorus depth ..............................................72, 85, 89, 126<br />
Chorus feedback level ................................72, 85, 89, 126<br />
Chorus level ................................................72, 85, 89, 126<br />
Chorus output assign .................................72, 85, 89, 126<br />
Chorus pre delay ........................................72, 85, 89, 126<br />
Chorus rate ..................................................72, 85, 89, 126<br />
Chorus send level .................................71–72, 84, 88, 125<br />
CHORUS/DELAY .......................................................107<br />
CHORUS/FLANGER ..................................................107<br />
CHORUS→DELAY ......................................................106<br />
CHORUS→FLANGER ................................................107<br />
Clock source ..................................................................108<br />
Coarse tune ..................................................79, 87, 91, 127<br />
Compare function .................................................116, 118<br />
COMPRESSOR ...............................................................96<br />
Computer .......................................................................134<br />
Computer cable .....................................................134, 208<br />
COMPUTER connector ..........................................14, 135<br />
COMPUTER switch .......................................14, 134–135<br />
Connection ..............................................................24, 134<br />
Control 1 peak/hold ......................................................75<br />
Control 2 peak/hold ......................................................75<br />
Control 3 peak/hold ......................................................75<br />
CONTROL PEDAL jack ................................................14<br />
Control source 2 ..............................................................75<br />
Control source 3 ..............................................................75<br />
[CONTROLLER] .......................................................12, 34<br />
Controller .........................................................................40<br />
Copy ...............................................................................115<br />
Copying .................................................................117, 128<br />
Current part .....................................................................53<br />
Cursor ..............................................................................45<br />
Cursor button ............................................................13, 44<br />
Cutoff frequency .......................................................80, 91<br />
Cutoff frequency key follow .........................................80<br />
209
Index<br />
D<br />
Data transfer .................................................................115<br />
Data type .......................................................................120<br />
[DEC] ..........................................................................13, 45<br />
Delay feedback level ..................................73, 86, 90, 126<br />
[DEMO] ...........................................................................13<br />
Demo play .......................................................................28<br />
DEMO PLAY display ....................................................28<br />
Demo song ......................................................................28<br />
Depth 1–4 .........................................................................75<br />
Desktop music ..............................................................134<br />
Destination ............................................................120–121<br />
Destination 1–4 ...............................................................75<br />
[DIGIT HOLD] ................................................................13<br />
Digit hold .........................................................................48<br />
DISTORTION ..................................................................93<br />
DISTORTION→CHORUS ..........................................104<br />
DISTORTION→DELAY ..............................................105<br />
DISTORTION→FLANGER ........................................105<br />
E<br />
[EDIT] ...............................................................................13<br />
Effects ...............................................................................61<br />
[EFFECTS ON/OFF] ................................................12, 62<br />
EFFECTS ON/OFF display ..........................................62<br />
EFX control depth 1, 2 .......................................72, 85, 89<br />
EFX control peak/hold ..................................................75<br />
EFX control source 1, 2 ......................................72, 85, 89<br />
EFX output level .........................................72, 84, 88, 125<br />
EFX parameter ........................................................93, 154<br />
EFX source .................................................................84, 88<br />
EFX type ..............................................................71, 84, 88<br />
ENHANCER ...................................................................94<br />
ENHANCER→CHORUS ............................................105<br />
ENHANCER→DELAY ...............................................106<br />
ENHANCER→FLANGER ..........................................105<br />
[ENTER] ...........................................................................13<br />
Envelope mode ...............................................................90<br />
Equal temperament ......................................................114<br />
Error message ...............................................................142<br />
Exclusive device ID number .......................................113<br />
Exclusive protect ..........................................................121<br />
[EXIT] ...............................................................................13<br />
[EXP A] ......................................................................13, 31<br />
[EXP B] .......................................................................13, 31<br />
[EXP C] .......................................................................13, 31<br />
[EXP D] ......................................................................13, 31<br />
[EXP E] .......................................................................13, 31<br />
Expression information .........................................87, 127<br />
Expression pedal ......................................................25, 35<br />
External MIDI device ...........................................131–132<br />
F<br />
Factory default settings ...............................................123<br />
Factory reset ....................................................27, 115, 123<br />
FACTORY RESET display ............................................27<br />
FBK-PITCH-SHIFTER ..................................................102<br />
Filter type ...................................................................80, 91<br />
[FILTER/ENV] .............................................12, 36, 51, 54<br />
Fine tune ......................................................79, 87, 91, 127<br />
FLANGER/DELAY .....................................................107<br />
FLANGER→DELAY ....................................................106<br />
Foot information .....................................................87, 127<br />
Format ............................................................................122<br />
Front panel ......................................................................12<br />
Function button ........................................................13, 43<br />
FXM color ........................................................................76<br />
FXM depth .......................................................................76<br />
FXM switch ......................................................................76<br />
G<br />
GATE-REVERB .............................................................103<br />
General MIDI system .....................................................11<br />
[GM] .................................................................................12<br />
GM initialize ..................................................................128<br />
GM mode .................................................................43, 124<br />
GM mode parameter ....................................................153<br />
GM patch number ........................................................127<br />
GM PLAY display ........................................................124<br />
GM score data ...............................................................124<br />
GM sound module .......................................................124<br />
GM system on message ...............................................124<br />
H<br />
Headphones ....................................................................25<br />
HEXA-CHORUS .............................................................96<br />
Hold 1 information .................................................87, 127<br />
Hold control source ......................................................111<br />
Hold pedal .................................................................35, 58<br />
HOLD PEDAL jack ........................................................14<br />
I<br />
[INC] ...........................................................................13, 45<br />
Initial data ......................................................................119<br />
Initialize .........................................................................115<br />
Initialize mode ..............................................................119<br />
Initializing .............................................................119, 128<br />
Internal write protect .....................................68, 116, 121<br />
210
Index<br />
K<br />
Key assign mode ............................................................73<br />
KEY EFFECTS section ....................................................12<br />
Key mode .........................................................................83<br />
Key range lower .......................................................70, 83<br />
Key range switch ............................................................83<br />
Key range upper .......................................................70, 83<br />
Key scale ........................................................................114<br />
Key shift .........................................................................113<br />
Key switch .......................................................................90<br />
Key velocity ...................................................................109<br />
Keyboard sensitivity ....................................................110<br />
Keyboard velocity ........................................................110<br />
L<br />
Layer ................................................................................52<br />
Layer performance .........................................................51<br />
LCD contrast .................................................................108<br />
[LEVEL] .........................................................12, 36, 51, 54<br />
Level ...............................................................68, 81, 87, 92<br />
LFO ...................................................................................78<br />
LFO delay time ...............................................................79<br />
LFO external sync ...........................................................78<br />
LFO fade mode ...............................................................78<br />
LFO fade time .................................................................79<br />
LFO form .........................................................................78<br />
LFO key sync ..................................................................78<br />
LFO offset ........................................................................79<br />
LFO rate ...........................................................................78<br />
LIMITER ..........................................................................96<br />
Load ................................................................................115<br />
Local OFF ......................................................................137<br />
Local switch ............................................................86, 112<br />
Looped .............................................................................64<br />
M<br />
Master tune ...................................................................113<br />
Memory ...................................................................67, 115<br />
Memory card ...................................................67, 115, 121<br />
MEMORY CARD slot ....................................................14<br />
MIDI ...............................................................................112<br />
MIDI cable .......................................................................25<br />
MIDI channel ..................................................................86<br />
MIDI connectors (IN, OUT, THRU) ............................14<br />
MIDI information .........................................................127<br />
MIDI interface ...............................................................135<br />
MODE section .................................................................12<br />
Modulation ......................................................................34<br />
Modulation information ........................................87, 127<br />
MODULATION-DELAY ...............................................99<br />
Motif ...............................................................................109<br />
Multi-effects ..............................................................61, 93<br />
Multitimbral sound source .....................................41, 53<br />
Mute group .....................................................................90<br />
N<br />
Name ................................................................................46<br />
Number of simultaneous voices ..................................42<br />
Numeric Key .............................................................13, 45<br />
O<br />
Octave range .................................................................109<br />
Octave shift ..........................................................59, 69, 83<br />
One-shot ...........................................................................64<br />
Operating environment ...............................................108<br />
Orchestral ..................................................................31, 47<br />
Output assign/Output level .....................71, 84, 88, 125<br />
OUTPUT jacks (L (MONO), R) .....................................14<br />
OVERDRIVE ...................................................................93<br />
OVERDRIVE→DELAY ...............................................104<br />
OVERDRIVE→FLANGER ..........................................104<br />
P<br />
Page button .....................................................................13<br />
Palette display ...........................................................63, 65<br />
[PALETTE EDIT] ................................................13, 63, 65<br />
PALETTE section ............................................................12<br />
Pan ..........................................................69, 81, 87, 92, 127<br />
Pan information ......................................................87, 127<br />
Pan key follow ................................................................82<br />
Pan LFO depth 1, 2 .........................................................79<br />
[PANIC] ...........................................................................13<br />
Panic .................................................................................60<br />
Parameter .......................................................................147<br />
[PART] .............................................................................12<br />
Part ...................................................................................41<br />
Part button .......................................................................43<br />
[PATCH] ..............................................................12, 30, 47<br />
Patch .............................................................30, 41, 47, 168<br />
Patch category .................................................................68<br />
Patch clock source ..........................................................68<br />
Patch copy .....................................................................117<br />
Patch effects copy .........................................................117<br />
Patch group .....................................................................87<br />
Patch initialize ...............................................................119<br />
Patch mode ................................................................42, 47<br />
Patch mode receive channel ........................................112<br />
Patch mode transmit channel .....................................112<br />
Patch name ......................................................................68<br />
Patch name copy ...........................................................118<br />
Patch number ..................................................................87<br />
Patch parameter ......................................................68, 147<br />
PATCH PLAY display .............................................30, 47<br />
Patch remain switch .....................................................108<br />
Patch scale .....................................................................114<br />
Patch search function ...............................................32, 48<br />
Patch tempo .....................................................................68<br />
Patch tone copy .............................................................117<br />
Patch write .....................................................................116<br />
Peak control source ......................................................111<br />
Pedal assign ...................................................................110<br />
Pedal output ..................................................................110<br />
Pedal polarity ........................................................110–111<br />
211
Index<br />
Pedal switch ............................................................25, 131<br />
[PERFORM] ...............................................................12, 51<br />
PERFORM NAME ..........................................................83<br />
PERFORM PLAY display ..............................................51<br />
Performance ......................................................41, 51, 181<br />
Performance clock source .............................................83<br />
Performance control channel ......................................112<br />
Performance copy ........................................................117<br />
Performance effects copy ............................................117<br />
Performance initialize ..................................................119<br />
Performance mode ...................................................42, 51<br />
Performance name .........................................................83<br />
Performance name copy ..............................................117<br />
Performance parameter .........................................83, 150<br />
Performance part copy ................................................117<br />
Performance tempo ........................................................83<br />
Performance write ........................................................116<br />
PHASER ...........................................................................94<br />
PHONES jack ..................................................................14<br />
[PHRASE PREVIEW] .........................................12, 33, 49<br />
Phrase preview .................................................33, 49, 113<br />
Pitch bend ........................................................................34<br />
Pitch bend information ................................................127<br />
Pitch bend/Modulation lever .................................13, 34<br />
Pitch envelope depth ...............................................79, 91<br />
Pitch envelope level 1–4 ..........................................80, 91<br />
Pitch envelope time 1 velocity sensitivity ..................80<br />
Pitch envelope time 1–4 ...........................................80, 91<br />
Pitch envelope time 4 velocity sensitivity ..................80<br />
Pitch envelope time key follow ....................................80<br />
Pitch envelope time velocity sensitivity .....................91<br />
Pitch envelope velocity sensitivity ........................80, 91<br />
Pitch key follow ..............................................................79<br />
Pitch LFO depth 1, 2 ......................................................79<br />
[PORTAMENTO] ...............................................12, 35, 50<br />
Portamento ................................................................35, 50<br />
Portamento mode ...........................................................73<br />
Portamento start pitch ...................................................74<br />
Portamento switch .........................................................73<br />
Portamento time .............................................................73<br />
Portamento type .............................................................73<br />
Power switch .............................................................14, 26<br />
Power up mode ............................................................108<br />
Preset memory ................................................................67<br />
Preview note set 1–4 ....................................................113<br />
PREVIEW SELECT display ...........................................49<br />
Preview sound mode .............................................49, 113<br />
Preview velocity ...........................................................113<br />
Program change ............................................................114<br />
Pure temperament ........................................................114<br />
R<br />
Random pan depth ..................................................82, 92<br />
Random pitch depth ................................................79, 91<br />
Rear panel ........................................................................14<br />
Receive bank select switch ..........................................112<br />
Receive exclusive switch .............................................113<br />
Receive GM exclusive switch .....................................113<br />
Receive hold 1 switch ........................................74, 86, 90<br />
Receive pan control switch .....................................74, 90<br />
Receive pitch bend switch .............................................74<br />
Receive program change switch ..........................86, 112<br />
Receive switch ...........................................................86, 90<br />
Receive volume switch ......................................74, 86, 90<br />
Redamper switch ............................................................74<br />
Remote keyboard switch .............................................112<br />
Resonance ..................................................................80, 91<br />
Resonance velocity sensitivity ................................81, 92<br />
REVERB .........................................................................103<br />
Reverb ..............................................................................61<br />
Reverb send level .........................71–72, 84, 88, 125–126<br />
Reverb/Delay HF damp ...........................73, 86, 90, 126<br />
Reverb/Delay level ....................................73, 86, 90, 126<br />
Reverb/Delay time ....................................73, 85, 89, 126<br />
Reverb/Delay type .....................................73, 85, 89, 126<br />
[RHYTHM] ..........................................................12, 38, 55<br />
Rhythm key copy .........................................................118<br />
RHYTHM PLAY display .........................................38, 55<br />
Rhythm set ..................................................38, 41, 55, 177<br />
Rhythm set copy ...........................................................118<br />
Rhythm set initialize ....................................................119<br />
Rhythm set mode .....................................................42, 55<br />
Rhythm set name ............................................................88<br />
Rhythm set name copy ................................................118<br />
Rhythm set parameter ...........................................88, 151<br />
Rhythm set write ..........................................................116<br />
Ring modulator ...............................................................71<br />
ROTARY ..........................................................................95<br />
Q<br />
QUADRUPLE-TAP-DELAY .......................................101<br />
212
Index<br />
S<br />
Save ................................................................................115<br />
Scale tune switch ..........................................................113<br />
Session ..................................................................31, 47, 55<br />
[SHIFT] .............................................................................13<br />
Shuffle rate ....................................................................109<br />
Single performance ........................................................51<br />
Slots EXP-D and E ..................................................16, 114<br />
SmartMedia .....................................................................67<br />
[SOLO] .................................................................12, 35, 50<br />
Solo .............................................................................35, 50<br />
Solo legato switch ...........................................................73<br />
Sound palette ..................................................................36<br />
Sound palette function ............................................50, 54<br />
Sound source .............................................................40, 42<br />
Source block ..........................................................120–121<br />
SPACE-D .........................................................................97<br />
SPECTRUM .....................................................................94<br />
Split ..................................................................................52<br />
SR-JV80 series ...........................................................16, 67<br />
STEP-FLANGER .............................................................98<br />
STEREO-CHORUS .........................................................97<br />
STEREO-DELAY ............................................................99<br />
STEREO-EQ ....................................................................93<br />
STEREO-FLANGER .......................................................98<br />
Storing ............................................................................116<br />
Stretch tuning depth ......................................................69<br />
Stretched tuning .............................................................69<br />
Structure ..........................................................................70<br />
Structure type .................................................................70<br />
Style ................................................................................108<br />
[SYSTEM] ........................................................................12<br />
System control assign 1/2 ...........................................111<br />
System controller 1 information ...................................87<br />
System controller 2 information ...................................87<br />
System memory ..............................................................67<br />
System mode ...................................................................43<br />
System parameter .................................................108, 158<br />
System tempo ................................................................108<br />
T<br />
Techno ..............................................................................47<br />
Techno Collection ...............................................31, 47, 55<br />
Tempo ............................................................................110<br />
Temporary area ..............................................................67<br />
Thru function ................................................................137<br />
TIME-CONTROL-DELAY ..........................................101<br />
Tone ............................................................................40, 50<br />
Tone delay mode ............................................................76<br />
Tone delay time ..............................................................77<br />
[TONE SELECT] .............................................................44<br />
Tone select button ..........................................................44<br />
[TONE SWITCH] ............................................................44<br />
Tone switch .....................................................................76<br />
Tone switch button .........................................................44<br />
Transmit active sensing switch ..................................113<br />
Transmit bank select group ..........................................86<br />
Transmit bank select LSB ............................................114<br />
Transmit bank select MSB ...........................................114<br />
Transmit bank select switch ........................................112<br />
Transmit edit data switch ............................................113<br />
Transmit MIDI channel ...............................................114<br />
Transmit program change ...........................................114<br />
Transmit program change switch ..............................112<br />
Transmit switch ..............................................................86<br />
Transmit volume ............................................................87<br />
Transmitting ..........................................................119, 128<br />
[TRANSPOSE] ..........................................................12, 60<br />
Transpose .........................................................................60<br />
Transpose switch/value ..............................................110<br />
TREMOLO-CHORUS ....................................................97<br />
TRIPLE-TAP-DELAY ...................................................100<br />
Tuning ............................................................................113<br />
TVA ............................................................................81, 92<br />
TVA envelope 1–3 ..........................................................82<br />
TVA envelope 1–4 ..........................................................82<br />
TVA envelope level 1–3 .................................................92<br />
TVA envelope time 1–4 .................................................92<br />
TVA envelope time 4 velocity sensitivity ...................82<br />
TVA envelope time key follow .....................................82<br />
TVA envelope time velocity sensitivity ......................92<br />
TVA envelope velocity curve .......................................81<br />
TVA envelope velocity sensitivity .........................81, 92<br />
TVA LFO depth 1, 2 .......................................................79<br />
TVF .............................................................................80, 91<br />
TVF envelope depth .................................................80, 91<br />
TVF envelope level 1–4 ............................................81, 92<br />
TVF envelope time 1 velocity sensitivity ..............81–82<br />
TVF envelope time 1–4 ............................................81, 92<br />
TVF envelope time 4 velocity sensitivity ....................81<br />
TVF envelope time key follow .....................................81<br />
TVF envelope time velocity sensitivity .......................92<br />
TVF envelope velocity curve ........................................81<br />
TVF envelope velocity sensitivity ..........................81, 92<br />
TVF LFO depth 1, 2 ........................................................79<br />
213
Index<br />
U<br />
Undo .................................................................................45<br />
[UNDO/COMPARE] ..............................13, 45, 116, 118<br />
User memory ....................................................67–68, 116<br />
User memory protect ...................................................115<br />
UTIL 1 display ..........................................................27, 68<br />
UTIL 2 display ................................................................27<br />
[UTIL/CARD] ............................................12, 27, 68, 115<br />
Utility/Card mode .................................................43, 115<br />
V<br />
VALUE dial ...............................................................13, 45<br />
Velocity ............................................................................34<br />
Velocity cross fade .........................................................69<br />
Velocity range lower ......................................................69<br />
Velocity range switch ....................................................69<br />
Velocity range upper .....................................................69<br />
Voice information ...................................................87, 127<br />
Voice priority ..................................................................69<br />
Voice reserve .............................................................42, 87<br />
Volume ...........................................................................127<br />
Volume control source ................................................111<br />
Volume information ..............................................87, 127<br />
VOLUME slider ..............................................................26<br />
Volume slider ..................................................................12<br />
W<br />
Wave ................................................................................47<br />
Wave expansion board ........................16, 47, 55, 67, 114<br />
WAVE EXPANSION section ........................................13<br />
Wave gain ..................................................................76, 90<br />
Wave group ...............................................................76, 90<br />
Wave number ...........................................................76, 90<br />
Waveform ......................................................................160<br />
Write ...............................................................................115<br />
WRITE display ................................................................68<br />
214
For EU Countries<br />
Apparatus containing<br />
Lithium batteries<br />
ADVARSEL!<br />
Lithiumbatteri - Eksplosionsfare ved<br />
fejlagtig håndtering.<br />
Udskiftning må kun ske med batteri af<br />
samme fabrikat og type.<br />
Levér det brugte batteri tilbage til<br />
leverandøren.<br />
CAUTION<br />
Danger of explosion if battery is<br />
incorrectly replaced.<br />
Replace only with the same or<br />
equivalent type recommended by the<br />
manufacturer.<br />
Discard used batteries according to the<br />
manufacturer’s instructions.<br />
VARNING<br />
Explosionsfara vid felaktigt batteribyte.<br />
Använd samma batterityp eller en<br />
ekvivalent typ som rekommenderas av<br />
apparattillverkaren.<br />
Kassera använt batteri enligt<br />
fabrikantens instruktion.<br />
ADVARSEL<br />
Eksplosjonsfare ved feilaktig skifte av<br />
batteri.<br />
Benytt samme batteritype eller en<br />
tilsvarende type anbefalt av<br />
apparatfabrikanten.<br />
Brukte batterier kasseres i henhold til<br />
fabrikantens instruks joner.<br />
VAROITUS<br />
Paristo voi räjähtää, jos se on<br />
virheellisesti asennettu.<br />
Vaihda paristo ainoastaan<br />
laitevalmistajan suosittelemaan<br />
tyyppiin. Hävitä käytetty paristo<br />
valmistajan ohjeiden mukaisesti.<br />
For EU Countries<br />
This product complies with the requirements of European Directives EMC 89/336/EEC and LVD 73/23/EEC.<br />
FEDERAL COMMUNICATIONS COMMISSION<br />
RADIO FREQUENCY INTERFERENCE STATEMENT<br />
For the USA<br />
This equipment has been tested and found to comply with the limits for a Class B digital device, pursuant to Part 15 of the<br />
FCC Rules. These limits are designed to provide reasonable protection against harmful interference in a residential<br />
installation. This equipment generates, uses, and can radiate radio frequency energy and, if not installed and used in<br />
accordance with the instructions, may cause harmful interference to radio communications. However, there is no guarantee<br />
that interference will not occur in a particular installation. If this equipment does cause harmful interference to radio or<br />
television reception, which can be determined by turning the equipment off and on, the user is encouraged to try to correct the<br />
interference by one or more of the following measures:<br />
– Reorient or relocate the receiving antenna.<br />
– Increase the separation between the equipment and receiver.<br />
– Connect the equipment into an outlet on a circuit different from that to which the receiver is connected.<br />
– Consult the dealer or an experienced radio/TV technician for help.<br />
Unauthorized changes or modification to this system can void the users authority to operate this equipment.<br />
This equipment requires shielded interface cables in order to meet FCC class B Limit.<br />
NOTICE<br />
This Class B digital apparatus meets all requirements of the Canadian Interference-Causing Equipment Regulations.<br />
For Canada<br />
AVIS<br />
Cet appareil numérique de la classe B respecte toutes les exigences du Règlement sur le matériel brouilleur du Canada.
Information<br />
When you need repair service, call your nearest <strong>Roland</strong> Service Center or authorized <strong>Roland</strong> distributor in your country as<br />
shown below.<br />
AFRICA<br />
EGYPT<br />
Al Fanny Trading Office<br />
9, EBN Hagar A1 Askalany Street,<br />
ARD E1 Golf, Heliopolis,<br />
Cairo 11341, EGYPT<br />
TEL: 20-2-417-1828<br />
REUNION<br />
Maison FO - YAM Marcel<br />
25 Rue Jules Hermann,<br />
Chaudron - BP79 97 491<br />
Ste Clotilde Cedex,<br />
REUNION ISLAND<br />
TEL: (0262) 218-429<br />
SOUTH AFRICA<br />
That Other Music Shop<br />
(PTY) Ltd.<br />
11 Melle St., Braamfontein,<br />
Johannesbourg, SOUTH AFRICA<br />
P.O.Box 32918, Braamfontein 2017<br />
Johannesbourg, SOUTH AFRICA<br />
TEL: (011) 403 4105<br />
Paul Bothner (PTY) Ltd.<br />
17 Werdmuller Centre,<br />
Main Road, Claremont 7708<br />
SOUTH AFRICA<br />
P.O.BOX 23032, Claremont 7735,<br />
SOUTH AFRICA<br />
TEL: (021) 674 4030<br />
ASIA<br />
CHINA<br />
<strong>Roland</strong> Shanghai Electronics<br />
Co.,Ltd.<br />
5F. No.1500 Pingliang Road<br />
Shanghai, CHINA<br />
TEL: (021) 5580-0800<br />
<strong>Roland</strong> Shanghai Electronics<br />
Co.,Ltd.<br />
(BEIJING OFFICE)<br />
10F. No.18 Anhuaxili<br />
Chaoyang District, Beijing,<br />
CHINA<br />
TEL: (010) 6426-5050<br />
HONG KONG<br />
Tom Lee Music Co., Ltd.<br />
Service Division<br />
22-32 Pun Shan Street, Tsuen<br />
Wan, New Territories,<br />
HONG KONG<br />
TEL: 2415 0911<br />
INDIA<br />
Rivera Digitec (India) Pvt. Ltd.<br />
409, Nirman Kendra Mahalaxmi<br />
Flats Compound Off. Dr. Edwin<br />
Moses Road, Mumbai-400011,<br />
INDIA<br />
TEL: (022) 2493 9051<br />
INDONESIA<br />
PT Citra IntiRama<br />
J1. Cideng Timur No. 15J-150<br />
Jakarta Pusat<br />
INDONESIA<br />
TEL: (021) 6324170<br />
KOREA<br />
Cosmos Corporation<br />
1461-9, Seocho-Dong,<br />
Seocho Ku, Seoul, KOREA<br />
TEL: (02) 3486-8855<br />
MALAYSIA<br />
BENTLEY MUSIC SDN BHD<br />
140 & 142, Jalan Bukit Bintang<br />
55100 Kuala Lumpur,MALAYSIA<br />
TEL: (03) 2144-3333<br />
PHILIPPINES<br />
G.A. Yupangco & Co. Inc.<br />
339 Gil J. Puyat Avenue<br />
Makati, Metro Manila 1200,<br />
PHILIPPINES<br />
TEL: (02) 899 9801<br />
SINGAPORE<br />
Swee Lee Company<br />
150 Sims Drive,<br />
SINGAPORE 387381<br />
TEL: 6846-3676<br />
CRISTOFORI MUSIC PTE<br />
LTD<br />
Blk 3014, Bedok Industrial Park E,<br />
#02-2148, SINGAPORE 489980<br />
TEL: 6243-9555<br />
TAIWAN<br />
ROLAND TAIWAN<br />
ENTERPRISE CO., LTD.<br />
Room 5, 9fl. No. 112 Chung Shan<br />
N.Road Sec.2, Taipei, TAIWAN,<br />
R.O.C.<br />
TEL: (02) 2561 3339<br />
THAILAND<br />
Theera Music Co. , Ltd.<br />
330 Verng NakornKasem, Soi 2,<br />
Bangkok 10100, THAILAND<br />
TEL: (02) 2248821<br />
VIETNAM<br />
Saigon Music<br />
138 Tran Quang Khai St.,<br />
District 1<br />
Ho Chi Minh City<br />
VIETNAM<br />
TEL: (08) 844-4068<br />
AUSTRALIA/<br />
NEW ZEALAND<br />
AUSTRALIA<br />
<strong>Roland</strong> Corporation<br />
Australia Pty., Ltd.<br />
38 Campbell Avenue<br />
Dee Why West. NSW 2099<br />
AUSTRALIA<br />
TEL: (02) 9982 8266<br />
NEW ZEALAND<br />
<strong>Roland</strong> Corporation Ltd.<br />
32 Shaddock Street, Mount Eden,<br />
Auckland, NEW ZEALAND<br />
TEL: (09) 3098 715<br />
CENTRAL/LATIN<br />
AMERICA<br />
ARGENTINA<br />
Instrumentos Musicales S.A.<br />
Av.Santa Fe 2055<br />
(1123) Buenos Aires<br />
ARGENTINA<br />
TEL: (011) 4508-2700<br />
BRAZIL<br />
<strong>Roland</strong> Brasil Ltda<br />
Rua San Jose, 780 Sala B<br />
Parque Industrial San Jose<br />
Cotia - Sao Paulo - SP, BRAZIL<br />
TEL: (011) 4615 5666<br />
COSTA RICA<br />
JUAN Bansbach<br />
Instrumentos Musicales<br />
Ave.1. Calle 11, Apartado 10237,<br />
San Jose, COSTA RICA<br />
TEL: 258-0211<br />
CHILE<br />
Comercial Fancy S.A.<br />
Rut.: 96.919.420-1<br />
Nataniel Cox #739, 4th Floor<br />
Santiago - Centro, CHILE<br />
TEL: (02) 688-9540<br />
EL SALVADOR<br />
OMNI MUSIC<br />
75 Avenida Norte y Final<br />
Alameda Juan Pablo ,<br />
Edificio No.4010 San Salvador,<br />
EL SALVADOR<br />
TEL: 262-0788<br />
MEXICO<br />
Casa Veerkamp, s.a. de c.v.<br />
Av. Toluca No. 323, Col. Olivar<br />
de los Padres 01780 Mexico D.F.<br />
MEXICO<br />
TEL: (55) 5668-6699<br />
PANAMA<br />
SUPRO MUNDIAL, S.A.<br />
Boulevard Andrews, Albrook,<br />
Panama City, REP. DE PANAMA<br />
TEL: 315-0101<br />
PARAGUAY<br />
Distribuidora De<br />
Instrumentos Musicales<br />
J.E. Olear y ESQ. Manduvira<br />
Asuncion PARAGUAY<br />
TEL: (021) 492-124<br />
URUGUAY<br />
Todo Musica S.A.<br />
Francisco Acuna de Figueroa 1771<br />
C.P.: 11.800<br />
Montevideo, URUGUAY<br />
TEL: (02) 924-2335<br />
VENEZUELA<br />
Musicland Digital C.A.<br />
Av. Francisco de Miranda,<br />
Centro Parque de Cristal, Nivel<br />
C2 Local 20 Caracas<br />
VENEZUELA<br />
TEL: (212) 285-8586<br />
EUROPE<br />
AUSTRIA<br />
<strong>Roland</strong> Austria GES.M.B.H.<br />
Siemensstrasse 4, P.O. Box 74,<br />
A-6063 RUM, AUSTRIA<br />
TEL: (0512) 26 44 260<br />
BELGIUM/HOLLAND/<br />
LUXEMBOURG<br />
<strong>Roland</strong> Benelux N. V.<br />
Houtstraat 3, B-2260, Oevel<br />
(Westerlo) BELGIUM<br />
TEL: (014) 575811<br />
DENMARK<br />
<strong>Roland</strong> Scandinavia A/S<br />
Nordhavnsvej 7, Postbox 880,<br />
DK-2100 Copenhagen<br />
DENMARK<br />
TEL: 3916 6200<br />
FRANCE<br />
<strong>Roland</strong> France SA<br />
4, Rue Paul Henri SPAAK,<br />
Parc de l'Esplanade, F 77 462 St.<br />
Thibault, Lagny Cedex FRANCE<br />
TEL: 01 600 73 500<br />
FINLAND<br />
<strong>Roland</strong> Scandinavia As,<br />
Filial Finland<br />
Lauttasaarentie 54 B<br />
Fin-00201 Helsinki, FINLAND<br />
TEL: (0)9 68 24 020<br />
GERMANY<br />
<strong>Roland</strong> Elektronische<br />
Musikinstrumente HmbH.<br />
Oststrasse 96, 22844 Norderstedt,<br />
GERMANY<br />
TEL: (040) 52 60090<br />
GREECE<br />
STOLLAS S.A.<br />
Music Sound Light<br />
155, New National Road<br />
Patras 26442, GREECE<br />
TEL: 2610 435400<br />
HUNGARY<br />
<strong>Roland</strong> East Europe Ltd.<br />
Warehouse Area ‘DEPO’ Pf.83<br />
H-2046 Torokbalint, HUNGARY<br />
TEL: (23) 511011<br />
IRELAND<br />
<strong>Roland</strong> Ireland<br />
Audio House, Belmont Court,<br />
Donnybrook, Dublin 4.<br />
Republic of IRELAND<br />
TEL: (01) 2603501<br />
ITALY<br />
<strong>Roland</strong> Italy S. p. A.<br />
Viale delle Industrie 8,<br />
20020 Arese, Milano, ITALY<br />
TEL: (02) 937-78300<br />
NORWAY<br />
<strong>Roland</strong> Scandinavia Avd.<br />
Kontor Norge<br />
Lilleakerveien 2 Postboks 95<br />
Lilleaker N-0216 Oslo<br />
NORWAY<br />
TEL: 2273 0074<br />
POLAND<br />
P. P. H. Brzostowicz<br />
UL. Gibraltarska 4.<br />
PL-03664 Warszawa POLAND<br />
TEL: (022) 679 44 19<br />
PORTUGAL<br />
Tecnologias Musica e Audio,<br />
<strong>Roland</strong> Portugal, S.A.<br />
Cais Das Pedras, 8/9-1 Dto<br />
4050-465 PORTO<br />
PORTUGAL<br />
TEL: (022) 608 00 60<br />
ROMANIA<br />
FBS LINES<br />
Piata Libertatii 1,<br />
RO-4200 Gheorghehi<br />
TEL: (095) 169-5043<br />
RUSSIA<br />
MuTek<br />
3-Bogatyrskaya Str. 1.k.l<br />
107 564 Moscow, RUSSIA<br />
TEL: (095) 169 5043<br />
SPAIN<br />
<strong>Roland</strong> Electronics<br />
de España, S. A.<br />
Calle Bolivia 239, 08020<br />
Barcelona, SPAIN<br />
TEL: (93) 308 1000<br />
SWEDEN<br />
<strong>Roland</strong> Scandinavia A/S<br />
SWEDISH SALES OFFICE<br />
Danvik Center 28, 2 tr.<br />
S-131 30 Nacka SWEDEN<br />
TEL: (0)8 702 00 20<br />
SWITZERLAND<br />
<strong>Roland</strong> (Switzerland) AG<br />
Landstrasse 5, Postfach,<br />
CH-4452 Itingen,<br />
SWITZERLAND<br />
TEL: (061) 927-8383<br />
UKRAINE<br />
TIC-TAC<br />
Mira Str. 19/108<br />
P.O. Box 180<br />
295400 Munkachevo, UKRAINE<br />
TEL: (03131) 414-40<br />
UNITED KINGDOM<br />
<strong>Roland</strong> (U.K.) Ltd.<br />
Atlantic Close, Swansea<br />
Enterprise Park, SWANSEA<br />
SA7 9FJ,<br />
UNITED KINGDOM<br />
TEL: (01792) 700139<br />
MIDDLE EAST<br />
BAHRAIN<br />
Moon Stores<br />
No.16, Bab Al Bahrain Avenue,<br />
P.O.Box 247, Manama 304,<br />
State of BAHRAIN<br />
TEL: 211 005<br />
CYPRUS<br />
Radex Sound Equipment Ltd.<br />
17, Diagorou Street, Nicosia,<br />
CYPRUS<br />
TEL: (022) 66-9426<br />
ISRAEL<br />
Halilit P. Greenspoon &<br />
Sons Ltd.<br />
8 Retzif Ha'aliya Hashnya St.<br />
Tel-Aviv-Yafo ISRAEL<br />
TEL: (03) 6823666<br />
JORDAN<br />
AMMAN Trading Agency<br />
245 Prince Mohammad St.,<br />
Amman 1118, JORDAN<br />
TEL: (06) 464-1200<br />
KUWAIT<br />
Easa Husain Al Yousifi Est.<br />
Abdullah Salem Street,<br />
Safat, KUWAIT<br />
TEL: 243-6399<br />
LEBANON<br />
Chahine S.A.L.<br />
Gerge Zeidan St., Chahine Bldg.,<br />
Achrafieh, P.O.Box: 16-5857<br />
Beirut, LEBANON<br />
TEL: (01) 20-1441<br />
QATAR<br />
Al Emadi Co. (Badie Studio<br />
& Stores)<br />
P.O. Box 62,<br />
Doha, QATAR<br />
TEL: 4423-554<br />
SAUDI ARABIA<br />
aDawliah Universal<br />
Electronics APL<br />
Corniche Road, Aldossary Bldg.,<br />
1st Floor, Alkhobar,<br />
SAUDI ARABIA<br />
P.O.Box 2154, Alkhobar 31952<br />
SAUDI ARABIA<br />
TEL: (03) 898 2081<br />
SYRIA<br />
Technical Light & Sound<br />
Center<br />
Khaled Ebn Al Walid St.<br />
Bldg. No. 47, P.O.BOX 13520,<br />
Damascus, SYRIA<br />
TEL: (011) 223-5384<br />
TURKEY<br />
Barkat muzik aletleri ithalat<br />
ve ihracat Ltd Sti<br />
Siraselviler Caddesi Siraselviler<br />
Pasaji No:74/20<br />
Taksim - Istanbul, TURKEY<br />
TEL: (0212) 2499324<br />
U.A.E.<br />
Zak Electronics & Musical<br />
Instruments Co. L.L.C.<br />
Zabeel Road, Al Sherooq Bldg.,<br />
No. 14, Grand Floor, Dubai, U.A.E.<br />
TEL: (04) 3360715<br />
NORTH AMERICA<br />
CANADA<br />
<strong>Roland</strong> Canada Music Ltd.<br />
(Head Office)<br />
5480 Parkwood Way Richmond<br />
B. C., V6V 2M4 CANADA<br />
TEL: (604) 270 6626<br />
<strong>Roland</strong> Canada Music Ltd.<br />
(Toronto Office)<br />
170 Admiral Boulevard<br />
Mississauga On L5T 2N6<br />
CANADA<br />
TEL: (905) 362 9707<br />
U. S. A.<br />
<strong>Roland</strong> Corporation U.S.<br />
5100 S. Eastern Avenue<br />
Los Angeles, CA 90040-2938,<br />
U. S. A.<br />
TEL: (323) 890 3700<br />
IRAN<br />
MOCO, INC.<br />
No.41 Nike St., Dr.Shariyati Ave.,<br />
Roberoye Cerahe Mirdamad<br />
Tehran, IRAN<br />
TEL: (021) 285-4169<br />
As of December 1, 2002 (<strong>Roland</strong>)<br />
01783690 ’03-2-A2-81N