Lionel Animated Billboard Owner's Manual
Lionel Animated Billboard Owner's Manual
Lionel Animated Billboard Owner's Manual

You also want an ePaper? Increase the reach of your titles
YUMPU automatically turns print PDFs into web optimized ePapers that Google loves.
71-4159-250<br />
5/09<br />
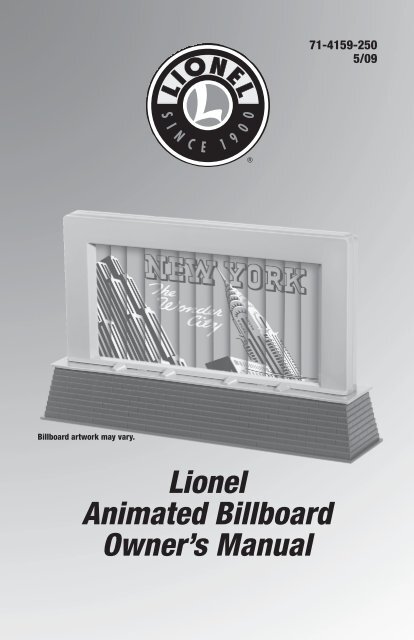
<strong>Billboard</strong> artwork may vary.<br />
<strong>Lionel</strong><br />
<strong>Animated</strong> <strong>Billboard</strong><br />
Owner’s <strong>Manual</strong>
Congratulations!<br />
Congratulations on your purchase of the <strong>Lionel</strong> <strong>Animated</strong> <strong>Billboard</strong>! This accessory<br />
alternates between two classic advertisements.<br />
Table of contents<br />
Wiring your <strong>Animated</strong> <strong>Billboard</strong> 3<br />
Wiring the accessory with the separate switch 4<br />
Installing your <strong>Animated</strong> <strong>Billboard</strong> 5<br />
Operating your <strong>Animated</strong> <strong>Billboard</strong> 5<br />
Installing your <strong>Animated</strong> <strong>Billboard</strong> with TrainMaster Command Control 6-7<br />
<strong>Lionel</strong> Limited Warranty Policy & Service 8<br />
The following <strong>Lionel</strong> marks may be used throughout this instruction manual and are protected under law. All<br />
rights reserved.<br />
<strong>Lionel</strong> ® , TrainMaster ® , Odyssey ® , RailSounds ® , CrewTalk , TowerCom , DynaChuff , StationSounds ,<br />
Pullmor ® , ElectroCoupler , Magne-Traction ® , CAB-1 ® Remote Controller, PowerMaster ® , <strong>Lionel</strong> ZW ® , ZW ® ,<br />
PowerHouse ® , TMCC ® , <strong>Lionel</strong>ville, Lockon ® , Wireless Tether , LionMaster ® , FatBoy , American Flyer ® ,<br />
TrainSounds , PowerMax , LEGACY , PowerMax Plus, Odyssey II , LEGACY RailSounds <br />
The name FasTrack ® is used with permission from Pitsco, Inc.
Wiring your <strong>Animated</strong> <strong>Billboard</strong><br />
Power your <strong>Animated</strong> <strong>Billboard</strong> with a separate accessory power supply, through the track<br />
with a <strong>Lionel</strong> Lockon (available separately, 6-62900), or a FasTrack Accessory Power Wire<br />
(available separately, 6-12053). Refer to figure 1 as you connect the accessory.<br />
Caution!<br />
To make the proper connections, the ends of the wires must be<br />
stripped back 1/4” to 3/8”. Use a pair of wire strippers or a sharp<br />
knife to strip the wires. Only an adult should perform this task!<br />
Always use care when stripping wires.<br />
1. Separate the two wires at the back of the <strong>Billboard</strong>.<br />
2. Connect one of the <strong>Billboard</strong> wires directly to a terminal on the power supply, <strong>Lionel</strong><br />
Lockon, or FasTrack Accessory Power Wire. When using the FasTrack Accessory Power<br />
Wire, twist one of the <strong>Billboard</strong> wires to one of the FasTrack Accessory Power Wires. We<br />
recommend using a wire nut (not included) to insulate the connection.<br />
Lockon users: To make the wire connections, press down on the top of the terminal clip so that a<br />
metal loop is formed. Slide the bare end of the wire into the exposed loop. Release pressure on the<br />
terminal clip, allowing the crimped metal to pinch the end of the wire in the metal loop. Give a little<br />
tug on the wire to check if the hold is secure.<br />
3. Connect the other <strong>Billboard</strong> wire to the remaining power supply terminal, Lockon<br />
terminal, or the FasTrack Accessory Power Wire. When using the FasTrack Accessory Power<br />
Wire, twist the remaining <strong>Billboard</strong> wire to the remaining FasTrack Accessory Power Wire.<br />
We recommend using a wire nut (not included) to insulate the connection.<br />
U<br />
POWER<br />
SUPPLY<br />
A<br />
OR<br />
LockOn<br />
U<br />
A<br />
OR<br />
U<br />
A<br />
FasTrack<br />
Accessory<br />
Power Wire<br />
Figure 1. Conventional power connections<br />
3
Wiring the accessory with the separate switch<br />
If you are placing this accessory at a location on your layout that is difficult to reach, we<br />
recommend that you connect the separate switch that is included with this accessory. Simply<br />
connect one of the <strong>Billboard</strong> wires to a switch terminal and connect the other switch terminal to<br />
a power supply terminal using an extra wire. Connect the remaining accessory wire directly to the<br />
other power supply terminal. Refer to Figure 2. Be sure that the switch on the back of the <strong>Billboard</strong> is<br />
in the ON position.<br />
POWER<br />
SUPPLY<br />
POWER/A COMMON/GROUND/U<br />
Figure 2. Power and switch connections<br />
4
Installing your <strong>Animated</strong> <strong>Billboard</strong><br />
Choose a visible location on your layout so you can show off your <strong>Animated</strong> <strong>Billboard</strong>! You<br />
may use the two tabs at the base of the accessory to secure your <strong>Billboard</strong> to your layout<br />
with two screws (not included).<br />
Operating your <strong>Animated</strong> <strong>Billboard</strong><br />
Switch the signs with the press of a button.<br />
1. Power up your <strong>Billboard</strong>.<br />
2. Locate the switch at the back of the <strong>Billboard</strong> and slide it to the ON<br />
position. If you have connected the separate switch, slide the switch to the<br />
ON position as well.<br />
3. Use your transformer to adjust the voltage. We recommend 13-18 volts<br />
(AC). If the power is set too high, the sign will change forcefully, jarring the <strong>Billboard</strong><br />
from side to side. If the power is set too low, the sign will not change completely.<br />
With the switch in the ON position and the accessory powered up, the <strong>Billboard</strong> will<br />
automatically alternate between the two advertisements at regular intervals.<br />
5
Installing your <strong>Animated</strong> <strong>Billboard</strong> with TrainMaster<br />
Command Control<br />
For operation in the TrainMaster Command Control environment, you may choose to<br />
wire your <strong>Billboard</strong> with an SC-2 Switch and Accessory Controller (available separately,<br />
6-22980) or the Accessory Switch Controller (available separately, 6-14182). Refer to these<br />
manuals for additional information.<br />
SC-2 wiring and operation<br />
Three wires are needed to connect your <strong>Animated</strong> <strong>Billboard</strong> to the SC-2 and a separate accessory<br />
transformer. Refer to Figure 3.<br />
1. Attach one wire to the Common/Ground/U terminal of the transformer and<br />
connect it to the accessory COMM (common) position on the SC-2.<br />
2. Attach one of the <strong>Billboard</strong> wires to the accessory toggle ON/OFF position<br />
on the SC-2.<br />
3. Finally, connect the remaining <strong>Billboard</strong> wire to the Power/A terminal on<br />
the transformer.<br />
Use the AUX1 button on your CAB-1 Remote Controller to switch the advertisements on<br />
display.<br />
Accessory<br />
Power<br />
Supply<br />
A<br />
U<br />
Figure 3. SC-2 connections<br />
6
Installing your <strong>Animated</strong> <strong>Billboard</strong> with TrainMaster<br />
Command Control (continued)<br />
Accessory Switch Controller wiring and operation<br />
Three wires are needed to connect your <strong>Animated</strong> <strong>Billboard</strong> to the Accessory Switch Controller (ASC)<br />
and a separate accessory transformer. Refer to Figure 4.<br />
1. Attach one wire to the Power/A terminal of the transformer and connect it<br />
to the COMM terminal on the ASC.<br />
2. Attach one of the <strong>Billboard</strong> wires to a numbered accessory terminal on<br />
the ASC.<br />
3. Finally, connect the remaining <strong>Billboard</strong> wire to the Common/Ground/U<br />
terminal on the transformer.<br />
Use the AUX2 button on your CAB-1 Remote Controller to switch the advertisements on<br />
display.<br />
Power/A<br />
Common/Ground/U<br />
Accessory<br />
Figure 4. ASC connections<br />
7
<strong>Lionel</strong> Limited Warranty Policy & Service<br />
This <strong>Lionel</strong> product, including all mechanical and electrical components, moving parts, motors and structural components,<br />
with the exception of LIGHT BULBS & LED’s are warranted to the original owner-purchaser for a period of one<br />
year from the original date of purchase against original defects in materials or workmanship when purchased<br />
through a <strong>Lionel</strong> Authorized Retailer*.<br />
This warranty does NOT cover the following: Normal wear and tear, Light bulbs or LED’s, Defects appearing in the course of<br />
commercial use, or Damage resulting from abuse/misuse of the product.<br />
Transfer of this product by the original owner-purchaser to another person voids this warranty in its entirety. Modification of<br />
this product in any way; visually mechanically or electronically, voids the warranty in its entirety.<br />
Any warranted product which is defective in original materials or workmanship and is delivered by the original ownerpurchaser<br />
(this warranty is non-transferrable) to <strong>Lionel</strong> LLC or any <strong>Lionel</strong> Authorized Service Station MUST be accompanied<br />
by the original receipt for purchase (or copy) from an <strong>Lionel</strong> Authorized Retailer*, will at the discretion of <strong>Lionel</strong> LLC,<br />
be repaired or replaced, without charge for parts or labor. In the event the defective product cannot be repaired, and a suitable<br />
replacement is not available, <strong>Lionel</strong> will offer to replace the product with a comparable model (determined by <strong>Lionel</strong><br />
LLC), if available. In the event a comparable model is not available the customer will be refunded the original purchase<br />
price (requires proof of purchase from the <strong>Lionel</strong> Authorized Retailer* it was originally purchased). Any products on<br />
which warranty service is sought must be sent freight or postage prepaid (<strong>Lionel</strong> will refuse any package when postage is due).<br />
Transportation and shipping charges are not covered as part of this warranty.<br />
NOTE: Products that require service that do not have a receipt from an LIONEL AUTHORIZED<br />
RETAILER* will be required to pay for all parts required to repair the product (labor will not incur<br />
a charge) providing the product is not older than 5 years from date of manufacture and is within 1<br />
year from date of purchase. A copy of the original sales receipt is required.<br />
In no event shall <strong>Lionel</strong> LLC be held liable for incidental or consequential damages.<br />
Some states do not allow the exclusion or limitation of incidental or consequential damages, so the above exclusion may not<br />
apply to you.<br />
This warranty gives you specific legal rights and you may have other rights which vary from state to state.<br />
Instructions for Obtaining Service<br />
If service for this <strong>Lionel</strong> LLC product is required; bring the item, along with your DATED sales receipt and completed warranty<br />
information (at the bottom of this page) to the nearest <strong>Lionel</strong> Authorized Service Station. Your nearest <strong>Lionel</strong> Service Station<br />
can be found by calling 1-800-4-LIONEL or by accessing the website at www.lionel.com.<br />
If you prefer to send your <strong>Lionel</strong> product directly to <strong>Lionel</strong>, for repair you must FIRST call 586-949-4100 extension 9105 or<br />
FAX <strong>Lionel</strong> at 586-949-5429 or write to Customer Service, 50625 Richard W. Blvd, Chesterfield, MI 48051-2493. Please have the<br />
6-digit <strong>Lionel</strong> product number, the date of original purchase, the dealer where the item was purchased and what seems to be<br />
the problem. You will receive a Verbal return authorization (RA) number to ensure your merchandise will be properly tracked<br />
and handled upon receipt at <strong>Lionel</strong> LLC.<br />
Once you have your Return Authorization (RA) number, make sure the item is packed in its original Styrofoam inner container<br />
which is placed inside the original outer display box (this will help prevent damage during shipping and handling).<br />
This shipment MUST be prepaid and we recommend that it be insured with the carrier of your choice.<br />
Please make sure you have followed all of the above instructions carefully before returning any merchandise for service. You<br />
may choose to have your product repaired by one of <strong>Lionel</strong> LLC’s Authorized Service Stations after its warranty has expired. A<br />
reasonable service fee should be expected once the product warranty has expired.<br />
Warranty Information<br />
Please complete the information below and keep it, along with your DATED ORIGINAL SALES RECEIPT. You MUST<br />
present this form AND your DATED SALES RECEIPT when requesting warranty service.<br />
*A complete listing of <strong>Lionel</strong> Authorized retailers can be found by calling 1-800-4-LIONEL or by visiting our website at<br />
www.lionel.com.<br />
Products that are more than 5 years old, from date of manufacture, are not applicable for warranty coverage, even<br />
if they have never been sold prior to this date. (Under no circumstance shall any components or labor be provided free<br />
of charge.)<br />
Name<br />
Address<br />
Place of Purchase <br />
Date of Purchase<br />
Product Number<br />
Product Description<br />
©2008 LIONEL L.L.C., CHESTERFIELD, MI 48051-2493<br />
UNITED STATES OF AMERICA<br />
PRINTED IN CHINA