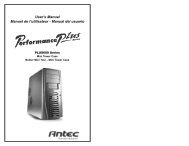
NSK2400 - Antec
NSK2400 - Antec
NSK2400 - Antec

Create successful ePaper yourself
Turn your PDF publications into a flip-book with our unique Google optimized e-Paper software.
Connecting the USB Ports<br />
You will find a single 10-pin connector on a cable attached to the front USB ports.<br />
This is an Intel standard connector, which is keyed so that it can’t be accidentally,<br />
reversed as long as it is connected to a proper Intel standard motherboard header.<br />
Connect the 10-pin connector to the motherboard headers so that the blocked pin<br />
fits over the missing header pin.<br />
Note: Please check the motherboard manual for the USB header pin layout and<br />
make sure it matches the attached table. If it does not match this Intel standard,<br />
please call <strong>Antec</strong> customer support at (800) 22ANTEC (North America) or at<br />
+31 (0) 10 462-2060 (Europe) to buy a USB adapter. This adapter will allow you<br />
to connect the front USB to the motherboard on a pin-by-pin basis.<br />
Motherboard Pin Layout<br />
1 2<br />
9<br />
10<br />
Pin Signal Names Pin Signal Names<br />
1 USB Power 1 2 USB Power 2<br />
3 Negative Signal 1 4 Negative Signal 2<br />
5 Positive Signal 1 6 Positive Signal 2<br />
7 Ground 1 8 Ground 2<br />
9 Key (No Connection) 10 Empty Pin<br />
Connecting the Audio Ports<br />
There is an Intel standard 10-pin connector (with 7 individual wires with connectors)<br />
coming out from the front panel speaker and microphone connection. If the<br />
motherboard supports Intel’s standard onboard audio connector, you can plug in<br />
the 10-pin connector directly onto the board. For non-Intel standard audio connection,<br />
you need to plug the 7 individual connectors to the motherboard. See instruction<br />
below:<br />
Locate the internal audio connectors from the motherboard or sound card. Consult<br />
the motherboard or sound card manual for the pin-out positions.<br />
1. Microphone Signal Pin: Connect the MIC connector to this pin.<br />
2. Microphone Power: Connect the MIC-BIAS connector to this pin.<br />
3. Ground Pin: Connect the AUD GND connector to this pin.<br />
4. Front Right Speaker Out Pin: Connect the FPOUT-R connector to this pin.<br />
5. Front Left Speaker Out Pin: Connect the FPOUT-L connector to this pin.<br />
6. Rear Right Speaker Out Pin: Connect the RET-R connector to this pin.<br />
7. Rear Left Speaker Out Pin: Connect RET-L connector to this pin.<br />
3