Room Air Conditioner SVC MANUAL(Exploded ... - Jordans Manuals
Room Air Conditioner SVC MANUAL(Exploded ... - Jordans Manuals
Room Air Conditioner SVC MANUAL(Exploded ... - Jordans Manuals

You also want an ePaper? Increase the reach of your titles
YUMPU automatically turns print PDFs into web optimized ePapers that Google loves.
Internal Use Only<br />
http://biz.lgservice.com<br />
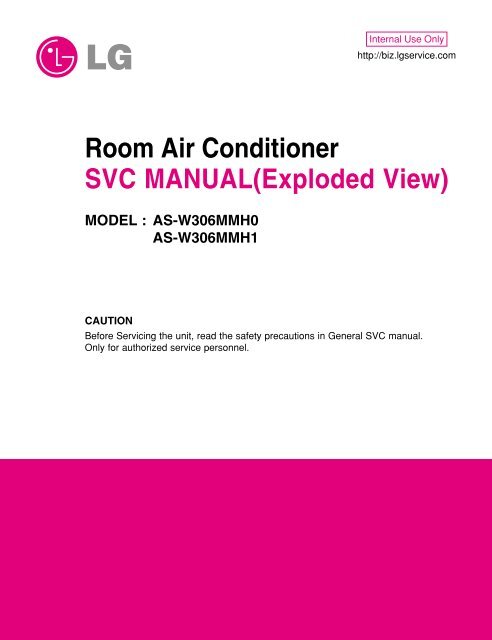
<strong>Room</strong> <strong>Air</strong> <strong>Conditioner</strong><br />
<strong>SVC</strong> <strong>MANUAL</strong>(<strong>Exploded</strong> View)<br />
MODEL : AS-W306MMH0<br />
AS-W306MMH1<br />
CAUTION<br />
Before Servicing the unit, read the safety precautions in General <strong>SVC</strong> manual.<br />
Only for authorized service personnel.
<strong>Air</strong> <strong>Conditioner</strong> Service Manual<br />
TABLE OF CONTENTS<br />
LG Model Name.................................................................................................................................3<br />
Safety Precautions ...........................................................................................................................5<br />
Dimensions .....................................................................................................................................10<br />
Product Specifications ..................................................................................................................12<br />
Installation.......................................................................................................................................14<br />
Flaring work and connection of piping.........................................................................................16<br />
Connecting the cable between indoor unit and outdoor unit.....................................................23<br />
Checking the drainage and forming the pipings .........................................................................25<br />
<strong>Air</strong> purging ......................................................................................................................................27<br />
Test running ....................................................................................................................................29<br />
Functions.........................................................................................................................................30<br />
Operation.........................................................................................................................................33<br />
Disassembly....................................................................................................................................40<br />
Schematic Diagram ........................................................................................................................44<br />
Troubleshooting Guide ..................................................................................................................48<br />
<strong>Exploded</strong> View ................................................................................................................................76<br />
Copyright ©2008 LG Electronics. Inc. All right reserved.<br />
Only for training and service purposes<br />
- 2 -<br />
LGE Internal Use Only
2003<br />
LG Model Name<br />
LG Model Name<br />
1 2 - 3 4 5 6 7 8 9 10<br />
Code Type Code of Model Meaning<br />
1 Producing Center, A~Z L: Chang-won R22 N: India<br />
Refrigerant A: Chang-won R410A Z: Brazil<br />
C: Chang-won R407C D: Indonesia<br />
T: China M: Mexico<br />
K: Turkey R22 V: Vietnam<br />
E: Turkey R410A S: Out Sourcing<br />
H: Thailand<br />
2 Product Type A~Z S: Split Type <strong>Air</strong> <strong>Conditioner</strong><br />
3 Cooling/Heating/Inverter A~Z C: Cooling only<br />
H: Heat pump<br />
X: C/O + E/Heater<br />
Z: H/P + E/Heater<br />
V: AC Inverter C/O<br />
N: AC Inverter H/P<br />
Q: DC Inverter C/O<br />
W: DC Inverter H/P<br />
4, 5 Capacity 0~9 Cooling/Heating Capacity<br />
Ex. "09" → 9,000 Btu/h<br />
6 Electric Range 1~9 1: 115V/60Hz, A: 220V, 50Hz, 3Phase<br />
A~Z 2: 220V/60Hz B: 208~230V, 60Hz, 3Phase<br />
3: 208-230V/60Hz C: 575V, 50Hz, 3Phase<br />
5: 200-220V/50Hz D: 440~460, 60Hz, 3Phase<br />
6: 220-240V/50Hz E: 265V, 60Hz<br />
7: 110V, 50/60Hz F: 200V, 50/60Hz<br />
8: 380-415V/50Hz<br />
9: 380-415V/60Hz<br />
7 Chassis A~Z Name of Chassis of Unit<br />
Ex. LSP → SP Chassis<br />
8 Look A~Z Look,<br />
Color (Artcool Model)<br />
9 Function A~Z Basic<br />
Basic+4Way<br />
Plasma Filter<br />
Plasma Filter+4 Way<br />
Tele+LCD<br />
Tele+LCD+Nano plasma+4Way<br />
Nano Plasma F+(A/changeove)+A/clean+Low A<br />
Nano Plasma F+(A/changeove)+A/clean+4way+Low A<br />
Tele+LED+4way<br />
Internet<br />
Plasma F+4Way+Oxy generator<br />
Nano Plasma F+(A/changeove)+A/clean<br />
Nano Plasma F+(A/changeove)+A/clean+4way<br />
Nano Plasma F+(A/changeove)+A/clean+PTC<br />
Nano Plasma F+(A/changeove)+Autoclean+4way+PTC<br />
Nano Plasma F+(A/changeove)+A/clean+4way+Low A+PTC<br />
Negative ION+A/Clean<br />
(Nano)Plasma+Negative ION+A/Clean<br />
4way+(Nano)Plasma F+Negative ION+Healthy dehumidification+A/Clean<br />
Nano Plasma F+4Way+(A/changeove)+A/clean+<br />
10 Serial No. 0~9 LG Model Development Serial No.<br />
* ARTCOOL COLOR<br />
R<br />
Mirror<br />
W<br />
White<br />
B<br />
Blue<br />
D<br />
Wood<br />
M<br />
Metal<br />
C<br />
Cherry<br />
A<br />
B<br />
C<br />
D<br />
E<br />
F<br />
G<br />
H<br />
I<br />
J<br />
K<br />
L<br />
M<br />
N<br />
P<br />
Q<br />
R<br />
S<br />
T<br />
U<br />
Copyright ©2008 LG Electronics. Inc. All right reserved.<br />
Only for training and service purposes<br />
- 3 -<br />
LGE Internal Use Only
LG Model Name<br />
2004~<br />
1 2 - 3 4 5 6 7 8 9 10<br />
Code Type Code of Model Meaning<br />
1 Producing Center, A~Z L Chang_won R22<br />
Refrigerant<br />
A Chang_won R410A<br />
C Chang_won R407C<br />
T China<br />
K Turkey R22<br />
E Turkey R410A<br />
H Thailand<br />
N India<br />
Z Brazil<br />
D Indonesia<br />
X Mexico<br />
V Vietnam<br />
S Out sourcing<br />
2 Product Type A~Z S: Split Type <strong>Air</strong> <strong>Conditioner</strong><br />
3 Cooling/Heating/Inverter A~Z C: Cooling only<br />
H: Heat pump<br />
X: C/O + E/Heater<br />
Z: H/P + E/Heater<br />
V: AC Inverter C/O<br />
N: AC Inverter H/P<br />
Q: DC Inverter C/O<br />
W: DC Inverter H/P<br />
4, 5 Capacity 0~9 Cooling/Heating Capacity<br />
Ex. "09" → 9,000 Btu/h<br />
6 Electric Range 1~9 1: 115V/60Hz, A: 220V, 50Hz, 3Phase<br />
A~Z 2: 220V/60Hz B: 208~230V, 60Hz, 3Phase<br />
3: 208-230V/60Hz C: 575V, 50Hz, 3Phase<br />
5: 200-220V/50Hz D: 440~460, 60Hz, 3Phase<br />
6: 220-240V/50Hz E: 265V, 60Hz<br />
7: 110V, 50/60Hz F: 200V, 50/60Hz<br />
8: 380-415V/50Hz<br />
9: 380-415V/60Hz<br />
7 Chassis A~Z Name of Chassis of Unit<br />
Ex. LSP → SP Chassis<br />
8 Look A~Z Look,<br />
Color (Artcool Model)<br />
CHASSIS<br />
S4/S5<br />
S6<br />
SQ<br />
SR<br />
ST<br />
Look<br />
D<br />
K<br />
L<br />
G<br />
M<br />
N<br />
D<br />
P<br />
Division<br />
Panel Type(Deluxe)<br />
Fighting 'Look'<br />
(LG1)<br />
(LG2)-SEMI PANEL<br />
OEM1<br />
OEM2<br />
Panel Type(Deluxe)<br />
LG3<br />
9 Function A~Z<br />
Basic<br />
A<br />
Basic+4Way<br />
B<br />
Plasma Filter<br />
C<br />
Plasma Filter+4 Way<br />
D<br />
Tele+LCD<br />
E<br />
Tele+LCD+Nano plasma+4Way<br />
F<br />
NBF F+(A/changeove)+A/clean+Low A<br />
G<br />
NBF F+(A/changeove)+A/clean+4way+Low A<br />
H<br />
Tele+LED+4way<br />
I<br />
Internet<br />
J<br />
Plasma F+4Way+Oxy generator<br />
K<br />
NBF F+(A/changeove)+A/clean<br />
L<br />
NBF F+(A/changeove)+A/clean+4way<br />
M<br />
NBF F+(A/changeove)+A/clean+PTC<br />
N<br />
NBF F+(A/changeove)+Autoclean+4way+PTC<br />
P<br />
NBF F+(A/changeove)+A/clean+4way+Low A+PTC<br />
Q<br />
(Nano)Plasma+ION+A/Clean<br />
S<br />
4way+(Nano)Plasma F+Negative ION+Healthy dehumidification+A/Clean T<br />
Nano Plasma F+4Way+(A/changeove)+A/clean+Oxy generator<br />
U<br />
4way+(Nano)Plasma F+Negative ION+Healthy dehumidification+A/Clean+Oxy generator V<br />
Dry contact<br />
W<br />
Wire remocon 8<br />
10 Serial No. 0~9 LG Model Development Serial No.<br />
* ARTCOOL COLOR<br />
R<br />
Mirror<br />
W<br />
White<br />
B<br />
Blue<br />
D<br />
Wood<br />
M<br />
Metal<br />
C<br />
Cherry<br />
Copyright ©2008 LG Electronics. Inc. All right reserved.<br />
Only for training and service purposes<br />
- 4 -<br />
LGE Internal Use Only
Safety Precautions<br />
Safety Precautions<br />
To prevent injury to the user or other people and property damage, the following instructions must<br />
be followed.<br />
■ Incorrect operation due to ignoring instruction will cause harm or damage. The seriousness is<br />
classified by the following indications.<br />
This symbol indicates the possibility of death or serious injury.<br />
This symbol indicates the possibility of injury or damage to properties only.<br />
■ Meanings of symbols used in this manual are as shown below.<br />
Be sure not to do.<br />
Be sure to follow the instruction.<br />
■ Installation<br />
Do not use damaged power cords, plugs, or a<br />
loose socket.<br />
• There is risk of fire of electric shock.<br />
Always use the power plug and socket with the<br />
ground terminal.<br />
• There is risk of electric shock.<br />
Install the panel and the cover of control box<br />
securely.<br />
Do not modify or extend the power cord.<br />
• There is risk of fire of electric shock.<br />
• No grounding may cause electric shock.<br />
Copyright ©2008 LG Electronics. Inc. All right reserved.<br />
Only for training and service purposes<br />
- 5 -<br />
LGE Internal Use Only
Safety Precautions<br />
For re-installation of the installed product,<br />
always contact a dealer or an authorized service<br />
center.<br />
• There is risk of fire, electric shock, explosion, or<br />
injury.<br />
Do not install, remove, or re-install the unit by<br />
yourself.<br />
• There is risk of fire, electric shock, explosion, or<br />
injury.<br />
Be cautious when unpacking and installing the<br />
product.<br />
• Sharp edges could cause injury. Be especially careful<br />
of the case edges and the fins on the condenser<br />
and evaporator.<br />
For installation, always contact the dealer or<br />
an Authorized service center<br />
• There is risk of fire, electric shock, explosion, or injury.<br />
Do not install the product on a defective installation<br />
stand.<br />
• It may cause injury, accident, or damage to the<br />
product.<br />
Be sure the installation area does not<br />
deteriorate with age.<br />
• If the base collapses, the air conditioner could fall<br />
with it, causing property damage, product failure,<br />
and personal injury.<br />
Copyright ©2008 LG Electronics. Inc. All right reserved.<br />
Only for training and service purposes<br />
- 6 -<br />
LGE Internal Use Only
Safety Precautions<br />
■ Operation<br />
Do not turn the air-conditioner ON or OFF by<br />
plugging or unplugging the power plug.<br />
• There is risk of fire or electrical shock.<br />
Use a dedicated outlet for this appliance.<br />
• There is risk of fire or electrical shock.<br />
Grasp the plug to remove the cord from the<br />
outlet. Do not touch it with wet hands.<br />
• There is risk of fire or electrical shock.<br />
Do not place a heater or other appliances near<br />
the power cable.<br />
• There is risk of fire and electric shock.<br />
Do not allow water to run into electrical parts.<br />
• There is risk of fire, failure of the product, or electric<br />
shock.<br />
Do not store or use flammable gas or combustibles<br />
near the air conditioner.<br />
• There is risk of fire or failure of product.<br />
Wax<br />
Thinner<br />
Copyright ©2008 LG Electronics. Inc. All right reserved.<br />
Only for training and service purposes<br />
- 7 -<br />
LGE Internal Use Only
Safety Precautions<br />
Unplug the unit if strange sounds, odors, or<br />
smoke comes from it.<br />
• There is risk of electric shock or fire.<br />
Be cautious that water could not enter the<br />
product.<br />
• There is risk of fire, electric shock, or product damage.<br />
■ Installation<br />
Always check for gas (refrigerant) leakage after<br />
installation or repair of product.<br />
• Low refrigerant levels may cause failure of product.<br />
Install the drain hose to ensure that water is<br />
drained away properly.<br />
• A bad connection may cause water leakage.<br />
Keep level even when installing the product.<br />
• To avoid vibration or water leakage.<br />
Use two or more people to lift and transport<br />
the air conditioner.<br />
• Avoid personal injury.<br />
90˚<br />
Copyright ©2008 LG Electronics. Inc. All right reserved.<br />
Only for training and service purposes<br />
- 8 -<br />
LGE Internal Use Only
Safety Precautions<br />
■ Operation<br />
Use a soft cloth to clean. Do not use harsh<br />
detergents, solvents, etc.<br />
• There is risk of fire, electric shock, or damage to the<br />
plastic parts of the product.<br />
Do not touch the metal parts of the product<br />
when removing the air filter. They are very<br />
sharp!<br />
• There is risk of personal injury.<br />
Wax<br />
Do not step on or put anyting on the product.<br />
(outdoor units)<br />
• There is risk of personal injury and failure of product.<br />
Do not insert hands or other objects through<br />
the air inlet or outlet while the air conditioner<br />
is plugged in.<br />
• There are sharp and moving parts that could cause<br />
personal injury.<br />
Copyright ©2008 LG Electronics. Inc. All right reserved.<br />
Only for training and service purposes<br />
- 9 -<br />
LGE Internal Use Only
Dimensions<br />
Dimensions<br />
Symbols Used in this Manual<br />
This symbol alerts you to the risk of electric shock.<br />
This symbol alerts you to hazards that could cause harm to the<br />
air conditioner.<br />
NOTICE<br />
This symbol indicates special notes.<br />
Indoor Unit<br />
H<br />
W<br />
D<br />
Installation Plate<br />
Model<br />
30k Btu Series<br />
Dimension<br />
W mm(inch) 1,259(49.6)<br />
H mm(inch) 349(13.7)<br />
D mm(inch) 205(8.1)<br />
Copyright ©2008 LG Electronics. Inc. All right reserved.<br />
Only for training and service purposes<br />
- 10 -<br />
LGE Internal Use Only
L4 L3<br />
H<br />
L2<br />
D<br />
L1<br />
Dimensions<br />
Outdoor Unit<br />
W<br />
D<br />
W<br />
H<br />
L6<br />
L5<br />
L7<br />
MODEL<br />
DIM<br />
unit<br />
30k Btu Series<br />
W mm 870<br />
H mm 1,060<br />
D mm 320<br />
L1 mm 360<br />
L2 mm 20<br />
L3 mm 1,040<br />
L4 mm 20<br />
L5 mm 550<br />
L6 mm 160<br />
L7 mm 165<br />
Copyright ©2008 LG Electronics. Inc. All right reserved.<br />
Only for training and service purposes<br />
- 11 -<br />
LGE Internal Use Only
Product Specifications<br />
Product Specifications<br />
Table-1<br />
Item<br />
MIN<br />
Model Name<br />
Unit<br />
W<br />
kcal/h.(W)<br />
Btu/h.<br />
W<br />
Cooling Capacity Type kcal/h.(W)<br />
Btu/h.<br />
W<br />
Max<br />
MIN<br />
kcal/h.(W)<br />
Btu/h.<br />
W<br />
kcal/h.(W)<br />
Btu/h.<br />
W<br />
Heating Capacity Type kcal/h.(W)<br />
Btu/h.<br />
W<br />
Max<br />
kcal/h.(W)<br />
Btu/h.<br />
IN:20°C,Out: -10°C(Heater ON) Btu/h.<br />
IN:20°C,Out: -10°C(Heater OFF) Btu/h.<br />
Power Input Cooling W<br />
Heating<br />
W<br />
Heating(-10°C,Heater ON) W<br />
Heating(-10°C,Heater OFF) W<br />
Running Current Cooling A<br />
Heating<br />
A<br />
Heating(-10°C,Heater ON) A<br />
Heating(-10°C,Heater OFF) A<br />
Starting Current Cooling A<br />
Heating<br />
A<br />
Cooling<br />
kcal/hW<br />
EER<br />
Btu/h.W<br />
Heating<br />
kcal/hW<br />
Btu/h.W<br />
COP Cooling W/W<br />
Heating<br />
W/W<br />
Power Supply<br />
Ø,V,Hz<br />
Power Factor %<br />
<strong>Air</strong> Circulation Indoor,Max m 3 /min(CFM)<br />
Outdoor,Max<br />
m 3 /min(CFM)<br />
Moisture Removal<br />
l/h.(pts/h.)<br />
Noise Level Indoor,High dB(A)±3<br />
(Sound Med. dB(A)±3<br />
Pressure,1m) Low dB(A)±3<br />
Outdoor,Max<br />
dB(A)±3<br />
Refrigerant(R410A)Charge<br />
Power Cord AWG#:P*mm 2<br />
Connecting Cable AWG#:P*mm 2<br />
Connecting Tube Liquid Side mm(in)<br />
(Ø. Socket Flare) Gas Side mm(in)<br />
Length,std<br />
m(in)<br />
Drain Hose (O.D , I.D) mm(in)<br />
Indoor<br />
mm<br />
Dimension<br />
inch<br />
(W*H*D) Outdoor mm<br />
inch<br />
Net Weight Indoor kg(lbs)<br />
Outdoor<br />
kg(lbs)<br />
AS-W306MMH0<br />
3,016<br />
2,594<br />
10,294<br />
8,000<br />
6,879<br />
27,297<br />
9,350<br />
8,041<br />
31,910<br />
2,670<br />
2,296<br />
9,113<br />
9,500<br />
8,169<br />
32,415<br />
10,223<br />
8,792<br />
34,890<br />
-<br />
-<br />
2,800<br />
3,710<br />
-<br />
-<br />
12.5<br />
16.3<br />
-<br />
-<br />
12.5<br />
16.3<br />
2.46<br />
9.75<br />
2.20<br />
8.73<br />
2.86<br />
2.56<br />
1,220-240,50<br />
97<br />
21(742)<br />
58(2,048)<br />
3.156.62)<br />
48<br />
46<br />
43<br />
54<br />
2,440<br />
12:3*2.5<br />
18:4*0.75<br />
6.35(1/4)<br />
15.88(5/8)<br />
7.5(295)<br />
32.5, 30(1.27, 1.18)<br />
1,259*205*349<br />
49.5*6.8*13.7<br />
870*1,038*320<br />
34.2*40.8*12.5<br />
20(44.1)<br />
80(176.4)<br />
Copyright ©2008 LG Electronics. Inc. All right reserved.<br />
Only for training and service purposes<br />
- 12 -<br />
LGE Internal Use Only
Product Specifications<br />
Table-2<br />
Buyer Models<br />
Item<br />
Unit<br />
Cooling Capacity Min W<br />
kcal/h<br />
Btu/h<br />
Rating<br />
W<br />
kcal/h<br />
Btu/h<br />
Max<br />
W<br />
kcal/h<br />
Btu/h<br />
Heating Capacity Min W<br />
kcal/h<br />
Btu/h<br />
Rating<br />
W<br />
kcal/h<br />
Btu/h<br />
Max<br />
W<br />
kcal/h<br />
Btu/h<br />
Power Input Cooling W<br />
Heating<br />
W<br />
Running Current Cooling A<br />
Heating<br />
A<br />
Starting Current Cooling A<br />
Heating<br />
A<br />
EER<br />
W/W<br />
Btu/h.W<br />
COP<br />
W/W<br />
Power Supply<br />
Ø,V,Hz<br />
<strong>Air</strong> Circulation Indoor,Max m 3 /min (l/s)<br />
Outdoor,Max<br />
m 3 /min (l/s)<br />
Moisture Removal<br />
l/h (pts/h)<br />
Noise Level Indoor,High dB(A)±3<br />
(Sound Low dB(A)±3<br />
Pressure,1m) Outdoor,Max dB(A)±3<br />
Refrigerant (R410A) Charge<br />
g (oz)<br />
Power Cord P*mm 2<br />
Connecting Cable P*mm 2<br />
Connecting Tube Liquid Side mm (in)<br />
(Ø. Socket Flare) Gas Side mm (in)<br />
Length,std<br />
m (in)<br />
Dimension Indoor mm<br />
(W*H*D)<br />
in.<br />
Outdoor<br />
mm<br />
in.<br />
Net Weight Indoor kg (lbs)<br />
Outdoor<br />
kg (lbs)<br />
Energy Labeling Capacity Cooling<br />
Heating<br />
Energy Consumption Cooling<br />
Heating<br />
Star Rating<br />
Cooling<br />
Heating<br />
Tool (IN/OUT)<br />
AS-W306MMH1<br />
3,016<br />
2,594<br />
10,294<br />
7,510<br />
6,457<br />
25,624<br />
9,350<br />
8,041<br />
31,910<br />
2,670<br />
2,296<br />
9,113<br />
9,500<br />
8,168<br />
32,414<br />
10,223<br />
8,792<br />
34,890<br />
2,840<br />
4,140<br />
12.5<br />
17.6<br />
12.5<br />
17.6<br />
2.64<br />
9.02<br />
2.29<br />
1,220-240,50<br />
21.0 (350)<br />
58 (966)<br />
3.1 (6.6)<br />
48<br />
43<br />
54<br />
2,100 (74.1)<br />
3*2.5<br />
4*0.75<br />
6.35(1/4)<br />
15.88((5/8)<br />
7.5(295)<br />
1259*205*349<br />
49.5*6.8*13.7<br />
1,038*870*320<br />
34.2*40.8*12.5<br />
20 (44.1)<br />
80 (176.4)<br />
7.51<br />
9.50<br />
2.84<br />
4.14<br />
2.5<br />
1.0<br />
SM+UE2<br />
Copyright ©2008 LG Electronics. Inc. All right reserved.<br />
Only for training and service purposes<br />
- 13 -<br />
LGE Internal Use Only
A<br />
Installation<br />
Installation<br />
Selection of the Best Location<br />
Indoor unit<br />
■ Do not have any heat or steam near the unit.<br />
■ Select a place where there are no obstacles in<br />
front of the unit.<br />
■ Make sure that condensation drainage can be<br />
conveniently routed away.<br />
■ Do not install near a doorway.<br />
■ Ensure that the space around the left and right of<br />
the unit is more than 30cm. The unit should be<br />
installed as high on the wall as possible, allowing<br />
a minimum of 12cm from ceiling.<br />
■ Use a stud finder to locate studs to prevent<br />
unnecessary damage to the wall.<br />
More than<br />
30cm<br />
More than 2.3m<br />
More than 12cm<br />
More than<br />
30cm<br />
More than 10cm<br />
More than 70cm<br />
30k<br />
More than 60cm<br />
More than 10cm<br />
More<br />
than 60cm<br />
■ Rooftop Installations:<br />
If the outdoor unit is installed on a roof structure, be<br />
sure to level the unit. Ensure the roof structure and<br />
anchoring method are adequate for the unit location.<br />
Consult local codes regarding rooftop mounting.<br />
If the outdoor unit is installed on root structures or walls,<br />
this may result in excessive noise and vibration, and<br />
maybe also classed as non serviceable installation.<br />
Piping Length and Elevation<br />
Pipe Size Standard Max. Max. Additional<br />
Capacity<br />
Install the indoor unit on the wall where the height<br />
Length Elevation length Refrigerant<br />
(Btu/h) GAS LIQUID (m) B (m) A (m) (g/m)<br />
from the floors more than 2.3 meters.<br />
A minimum pipe run of 7.5 meters is required to minimise<br />
vibration & excessive noise. 30k 5/8" 1/4" 7.5 15 30 35<br />
Outdoor unit<br />
■ If an awning is built over the unit to prevent direct sunlight<br />
or rain exposure, make sure that heat radiation<br />
from the condenser is not restricted.<br />
■ Ensure that the space around the back and sides is<br />
more than 10cm. The front of the unit should have<br />
more than 70cm of space.<br />
■ Do not place animals and plants in the path of the<br />
warm air.<br />
■ Take the air conditioner weight into account and select<br />
a place where noise and vibration are minimum.<br />
■ Select a place so that the warm air and noise from the<br />
air conditioner do not disturb neighbors.<br />
Indoor unit<br />
Outdoor unit<br />
Oil trap<br />
Indoor unit<br />
B<br />
In case more than 5m<br />
A<br />
Outdoor unit<br />
B<br />
• Capacity is based on standard length and maximum<br />
allowance length is on the basis of reliability.<br />
• Oil trap should be installed every 5~7 meters.<br />
Copyright ©2008 LG Electronics. Inc. All right reserved.<br />
Only for training and service purposes<br />
- 14 -<br />
LGE Internal Use Only
Installation<br />
How to Fix Installation Plate<br />
The wall you select should be strong and solid enough to prevent<br />
vibration<br />
1. Mount the installation plate on the wall with four<br />
type A screws. If mounting the unit on a concrete<br />
wall, use anchor bolts.<br />
Mount the installation plate horizontally by<br />
aligning the centerline using a level.<br />
Drill a Hole in the Wall<br />
■ Drill the piping hole with a ø70mm hole core drill.<br />
Drill the piping hole at either the right or the left<br />
with the hole slightly slanted to the outdoor side.<br />
Indoor<br />
WALL<br />
Outdoor<br />
Installation Plate<br />
5-7mm<br />
(0.2~0.3")<br />
Type "A" screw<br />
2. Measure the wall and mark the centerline. It is also<br />
important to use caution concerning the location<br />
of the installation plate-routing of the wiring to<br />
power outlets is through the walls typically.<br />
Drilling the hole through the wall for piping connections<br />
must be done safely.<br />
Left rear piping<br />
Right rear piping<br />
115mm<br />
50mm<br />
180mm<br />
ø70mm<br />
30k<br />
Copyright ©2008 LG Electronics. Inc. All right reserved.<br />
Only for training and service purposes<br />
- 15 -<br />
LGE Internal Use Only
Flaring work and connection of piping<br />
Flaring work and connection of piping<br />
Flaring work<br />
Main cause for gas leakage is due to defect in flaring<br />
work. Carry out correct flaring work in the following<br />
procedure.<br />
Cut the pipes and the cable.<br />
■ Use the piping kit accessory or the pipes<br />
purchased locally.<br />
■ Measure the distance between the indoor and the<br />
outdoor unit.<br />
■ Cut the pipes a little longer than measured<br />
distance.<br />
■ Cut the cable 1.5m longer than the pipe length.<br />
Copper<br />
pipe 90° Slanted Uneven Rough<br />
Flaring work<br />
■ Carry out flaring work using flaring tool as shown<br />
below.<br />
Outside diameter<br />
mm inch mm<br />
ø6.35 1/4 0 ~ 0.5<br />
ø9.52 3/8 0 ~ 0.5<br />
ø12.7 1/2 0 ~ 0.5<br />
ø15.88 5/8 0 ~ 1.0<br />
ø19.05 3/4 1.0 ~ 1.3<br />
Firmly hold copper pipe in a die in the dimension<br />
shown in the table above.<br />
A<br />
Burrs removal<br />
■ Completely remove all burrs from the cut cross<br />
section of pipe/tube.<br />
■ Put the end of the copper tube/pipe in a downward<br />
direction as you remove burrs in order to<br />
avoid dropping burrs into the tubing.<br />
Bar<br />
"A"<br />
Bar<br />
Copper pipe<br />
Clamp handle<br />
Handle<br />
Yoke<br />
Cone<br />
Red arrow mark<br />
Pipe<br />
Reamer<br />
Check<br />
Point down<br />
■ Compare the flared work with figure below.<br />
■ If flare is noted to be defective, cut off the flared<br />
section and do flaring work again.<br />
Putting nut on<br />
■ Remove flare nuts attached to indoor and outdoor<br />
unit, then put them on pipe/tube having completed<br />
burr removal.<br />
(not possible to put them on after flaring work)<br />
Flare nut<br />
Smooth all round<br />
Inside is shiny without scratches<br />
= Improper flaring =<br />
Copper tube<br />
Even length<br />
all round<br />
Inclined<br />
Surface<br />
damaged<br />
Cracked Uneven<br />
thickness<br />
Copyright ©2008 LG Electronics. Inc. All right reserved.<br />
Only for training and service purposes<br />
- 16 -<br />
LGE Internal Use Only
Flaring work and connection of piping<br />
Connection of piping -- Indoor<br />
1. Remove the 2 screws of right side panel.<br />
Right side panel<br />
When install, make sure that<br />
the remaining parts must be<br />
removed clearly so as not to<br />
damage the piping and drain<br />
hose, especially power cord<br />
and connecting cable.<br />
2. Remove the front right side panel by the arrow.<br />
■ The connector can be disconnected by pulling it<br />
while pressing the connector's hook.<br />
■ Remove the 1 screw for fixing lower panel.<br />
For left rear piping<br />
1. Route the indoor tubing and the drain hose in the<br />
direction of rear left.<br />
Main PCB<br />
Drain hose<br />
Lower panel<br />
3. Remove the lower panel by the arrow.<br />
■ Take care not to scratch the wall and mat to<br />
drop.<br />
2. Insert the connecting cable into the indoor unit<br />
from the outdoor unit through the piping hole.<br />
■ Do not connect the cable to the indoor unit.<br />
■ Make a small loop with the cable for easy<br />
connection later.<br />
Lower panel<br />
Press the lower left and right sides of the unit against the<br />
installation plate until the hooks engage into their slots(clicking<br />
sound).<br />
Copyright ©2008 LG Electronics. Inc. All right reserved.<br />
Only for training and service purposes<br />
- 17 -<br />
LGE Internal Use Only
Flaring work and connection of piping<br />
3. Tape the tubing, drain hose and the connecting<br />
cable. Be sure that the drain hose is located at the<br />
lowest side of the bundle. Locating at the upper side<br />
can cause drain pan to overflow inside the unit.<br />
5. Connecting the pipings to the indoor unit and drain<br />
hose to drain pipe.<br />
■ Align the center of the pipings and sufficiently<br />
tighten the flare nut by hand.<br />
Indoor unit tubing Flare nut Pipings<br />
■ Tighten the flare nut with a wrench.<br />
Loop<br />
Indoor unit tubing<br />
Connecting<br />
cable<br />
Drain hose<br />
Gas side<br />
piping<br />
Liquid side<br />
piping<br />
Connection pipe<br />
Flare nut<br />
Torque wrench<br />
NOTICE<br />
If the drain hose is routed inside the room, insulate<br />
the hose with an insulation material* so that dripping<br />
from "sweating"(condensation) will not damage furniture<br />
or floors.<br />
*Foamed polyethylene or equivalent is recommended.<br />
Spanner (fixed)<br />
Capacity<br />
Pipe Size[Torque]<br />
(Btu/h) GAS LIQUID<br />
30k 5/8"[6.6kg.m] 3/8"[4.2kg.m]<br />
4. Indoor unit installation<br />
■ Hook the indoor unit onto the upper portion of the<br />
installation plate.(Engage the three hooks of the<br />
rear top and rear lower of the indoor unit with the<br />
upper edge and lower edge of the installation<br />
plate.) Ensure that the hooks are properly seated<br />
on the installation plate by moving it left and right.<br />
Installation plate<br />
Setting line<br />
■ When extending the drain hose at the indoor unit,<br />
install the drain pipe.<br />
Drain pipe<br />
Indoor unit drain hose<br />
Adhesive<br />
Vinyl tape(narrow)<br />
Indoor unit<br />
Three upper<br />
hooks<br />
Installation<br />
plate<br />
Three lower<br />
hooks<br />
Copyright ©2008 LG Electronics. Inc. All right reserved.<br />
Only for training and service purposes<br />
- 18 -<br />
LGE Internal Use Only
Flaring work and connection of piping<br />
6. Wrap the insulation material around the connecting<br />
portion.<br />
■ Overlap the connection pipe insulation material and<br />
the indoor unit pipe insulation material. Bind them<br />
together with vinyl tape so that there is no gap.<br />
For right rear piping<br />
1. Route the indoor tubing and the drain hose to the<br />
required piping hole position.<br />
Plastic bands<br />
Insulation material<br />
Drain hose<br />
■ Wrap the area which accommodates the rear piping<br />
housing section with vinyl tape.<br />
2. Insert the piping, drain hose and the connecting<br />
cable into the piping hole.<br />
Connection<br />
pipe<br />
Vinyl tape<br />
(wide)<br />
Wrap with vinyl tape<br />
Indoor<br />
unit pipe<br />
Connecting cable<br />
Drain pipe<br />
Connecting cable<br />
Vinyl tape(narrow)<br />
Pipe<br />
3. Insert the connecting cable into the indoor unit.<br />
■ Don't connect the cable to the indoor unit.<br />
■ Make a small loop with the cable for easy<br />
connection later.<br />
■ Bundle the piping and drain hose together by<br />
wrapping them with vinyl tape over the range within<br />
which they fit into the rear piping housing section.<br />
4. Tape the drain hose and the connecting cable.<br />
• Connecting cable<br />
Wrap with vinyl tape<br />
Pipe<br />
Drain hose<br />
Vinyl tape(wide)<br />
Copyright ©2008 LG Electronics. Inc. All right reserved.<br />
Only for training and service purposes<br />
- 19 -<br />
LGE Internal Use Only
Flaring work and connection of piping<br />
5. Indoor unit installation<br />
■ Hook the indoor unit onto the upper portion of the<br />
installation plate.(Engage the three hooks of the<br />
rear top and rear lower of the indoor unit with the<br />
upper edge and lower edge of the installation<br />
plate.) Ensure that the hooks are properly seated<br />
on the installation plate by moving it left and right.<br />
■ When extending the drain hose at the indoor unit,<br />
install the drain pipe.<br />
Drain hose<br />
Installation plate<br />
Setting line<br />
Vinyl tape<br />
Adhesive<br />
Indoor unit drain hose<br />
(narrow)<br />
Indoor unit<br />
Three upper<br />
hooks<br />
Installation<br />
plate<br />
Three lower<br />
hooks<br />
7. Wrap the insulation material around the connecting<br />
portion.<br />
■ Overlap the connection pipe heat insulation and the<br />
indoor unit pipe heat insulation material. Bind them<br />
together with vinyl tape so that there is no gap.<br />
Plastic bands<br />
Insulation material<br />
6. Connecting the pipings to the indoor unit and the<br />
drain hose to drain pipe.<br />
■ Align the center of the pipings and sufficiently<br />
tighten the flare nut by hand.<br />
■ Wrap the area which accommodates the rear<br />
piping housing section with vinyl tape.<br />
Indoor unit tubing Flare nut Pipings<br />
■ Tighten the flare nut with a wrench.<br />
Connection<br />
pipe<br />
Vinyl tape<br />
(wide)<br />
Wrap with vinyl tape<br />
Indoor<br />
unit piping<br />
Spanner (fixed)<br />
Torque wrench<br />
Flare nut<br />
Connection pipe<br />
Connecting cable<br />
Pipe<br />
Vinyl tape(narrow)<br />
Indoor unit tubing<br />
Capacity<br />
Pipe Size[Torque]<br />
(Btu/h) GAS LIQUID<br />
30k 5/8"[6.6kg.m] 3/8"[4.2kg.m]<br />
Copyright ©2008 LG Electronics. Inc. All right reserved.<br />
Only for training and service purposes<br />
- 20 -<br />
LGE Internal Use Only
Flaring work and connection of piping<br />
■ Bundle the piping and drain hose together by<br />
wrapping them with cloth tape over the range<br />
within which they fit into the rear piping housing<br />
section.<br />
9. Reinstall the parts to the original position.<br />
■ Refix the lower panel to the original position.<br />
Drain hose<br />
Pipe<br />
Vinyl tape(narrow)<br />
Wrap with<br />
vinyl tape(wide) Lower panel<br />
■ Connect display conductor.<br />
8. Reroute the pipings and the drain hose across the<br />
back of the chassis.<br />
Main PCB<br />
Piping for<br />
passage through<br />
piping hole<br />
■ Refix the front right side panel to the original<br />
position with the two screws.<br />
Right side panel<br />
Copyright ©2008 LG Electronics. Inc. All right reserved.<br />
Only for training and service purposes<br />
- 21 -<br />
LGE Internal Use Only
Flaring work and connection of piping<br />
Connection of the drain hose<br />
■ The drain hose can be connected at two different<br />
positions. Use the most convenient position and, if<br />
necessary, exchange the position of the drain<br />
pan, rubber cap and the drain hose.<br />
➊ Drain pan<br />
➋ Rubber cap<br />
➌ Drain hose<br />
➍ Exchange if necessary<br />
■ Remove the drain hose.<br />
■ Securely insert both the rubber plug and drain<br />
hose into the drain outlets.<br />
Be sure the rubber the cap is securely fastened<br />
so that there is no leakage.<br />
2<br />
1<br />
4<br />
3<br />
Connection of piping-Outdoor<br />
1. Align the center of the pipings and sufficiently<br />
tighten the flare nut by hand.<br />
2. Finally, tighten the flare nut with torque wrench<br />
until the wrench clicks.<br />
■ When tightening the flare nut with torque wrench,<br />
ensure the direction for tightening follows the<br />
arrow on the wrench.<br />
Capacity<br />
Pipe Size[Torque]<br />
(Btu/h) GAS LIQUID<br />
30k 5/8"[6.6kg.m] 3/8"[4.2kg.m<br />
Outdoor unit<br />
Gas side piping<br />
(Bigger diameter)<br />
Liquid side<br />
piping<br />
(Smaller<br />
diameter)<br />
Torque wrench<br />
Copyright ©2008 LG Electronics. Inc. All right reserved.<br />
Only for training and service purposes<br />
- 22 -<br />
LGE Internal Use Only
Connect the cable to the Indoor unit.<br />
Connecting the cable between indoor unit and outdoor unit<br />
Connecting the cable between indoor unit and outdoor unit<br />
■ Connect the cable to the indoor unit by connecting<br />
the wires to the terminals on the control<br />
board individually according to the outdoor unit<br />
connection.(Ensure that the color of the wires of the<br />
outdoor unit and the terminal No. are the same as<br />
those of the indoor unit.)<br />
The power cord connected to the outdoor unit<br />
should be complied with the following<br />
specifications (Rubber insulation, type H05RN-F<br />
approved by HAR or SAA).<br />
Terminals on the indoor unit 1(L) 2(N) 3<br />
Color of Wires<br />
BROWN BLUE G/Y<br />
RED<br />
8.5mm<br />
GN/YL<br />
NORMAL<br />
CROSS-SECTIONAL<br />
AREA 2.5mm 2<br />
Color of Wires<br />
Terminals on the outdoor unit<br />
1(L) 2(N)<br />
BROWN BLUE G/Y<br />
RED<br />
1(L) 2(N) 3<br />
30k<br />
20mm<br />
POWER INPUT<br />
The connecting cable connected to the indoor<br />
and outdoor unit should be complied with the<br />
following specifications (Rubber insulation, type<br />
H07RN-F approved by HAR or SAA).<br />
If a power plug is not to be used,<br />
provide a circuit breaker between<br />
power source and the unit as<br />
shown below.<br />
7.5mm<br />
GN/YL<br />
20mm<br />
NORMAL<br />
CROSS-SECTIONAL<br />
AREA 0.75mm 2<br />
Main power source<br />
<strong>Air</strong><br />
<strong>Conditioner</strong><br />
Copyright ©2008 LG Electronics. Inc. All right reserved.<br />
Only for training and service purposes<br />
- 23 -<br />
LGE Internal Use Only
Connecting the cable between indoor unit and outdoor unit<br />
Connect the cable to the outdoor unit<br />
1. Remove the control cover from the unit by loosening<br />
the screw.<br />
Connect the wires to the terminals on the control<br />
board individually.<br />
2. Secure the cable onto the control board with the<br />
cord clamp.<br />
3. Refix the control cover to the original position with<br />
the screw.<br />
4. Use a recognized circuit breaker 30A (30k, 32k),<br />
35A (36k, 38k) between the power source and the<br />
unit. A disconnecting device to adequately disconnect<br />
all supply lines must be fitted.<br />
Main terminal board<br />
Control terminal board<br />
Cover control<br />
After the confirmation of the above conditions, prepare the wiring as follows:<br />
1) Never fail to have an individual power circuit specifically for the air conditioner. As for the method<br />
of wiring, be guided by the circuit diagram posted on the inside of control cover.<br />
2) The screw which fasten the wiring in the casing of electrical fittings are liable to come loose from<br />
vibrations to which the unit is subjected during the course of transportation. Check them and make<br />
sure that they are all tightly fastened. (If they are loose, it could cause burn-out of the wires.)<br />
3) Specification of power source.<br />
4) Confirm that electrical capacity is sufficient.<br />
5) See to that the starting voltage is maintained at more than 90 percent of the rated voltage marked on<br />
the name plate.<br />
6) Confirm that the cable thickness is as specified in the power source specification.<br />
(Particularly note the relation between cable length and thickness. (Refer to page 32))<br />
7) Always install an earth leakage circuit breaker in a wet or moist area.<br />
8) The following would be caused by voltage drop.<br />
• Vibration of a magnetic switch, which will damage the contact point, fuse breaking, disturbance of the normal<br />
function of the overload.<br />
9) The means for disconnection from a power supply shall be incorporated in the fixed wiring and have<br />
an air gap contact separation of at least 3mm in each active(phase) conductors.<br />
Copyright ©2008 LG Electronics. Inc. All right reserved.<br />
Only for training and service purposes<br />
- 24 -<br />
LGE Internal Use Only
Checking the drainage and forming the pipings<br />
Checking the drainage and forming the pipings<br />
Checking the drainage<br />
1. Remove the right side panel.<br />
Right side panel<br />
4. To check the drainage.<br />
■ Pour a glass of water on the drain pan.<br />
■ Ensure the water flows through the drain hose of<br />
the indoor unit without any leakage and goes out<br />
the drain exit.<br />
2. Remove the lower panel by the arrow.<br />
Lower panel<br />
3. Remove the left side panel.<br />
(Remove the two screws.)<br />
5. Drain piping<br />
■ The drain hose should point downward for easy<br />
drain flow.<br />
Downward slope<br />
■ Do not make drain piping.<br />
Do not raise<br />
Accumulated<br />
drain water<br />
<strong>Air</strong><br />
Left side panel<br />
Water<br />
leakage<br />
Water<br />
leakage<br />
Waving<br />
Tip of drain hose<br />
dipped in water<br />
Less than<br />
50mm gap<br />
Water<br />
leakage<br />
Ditch<br />
Copyright ©2008 LG Electronics. Inc. All right reserved.<br />
Only for training and service purposes<br />
- 25 -<br />
LGE Internal Use Only
Checking the drainage and forming the pipings<br />
Form the piping<br />
1. Form the piping by wrapping the connecting portion<br />
of the indoor unit with insulation material and<br />
secure it with two kinds of vinyl tapes.<br />
■ If you want to connect an additional drain hose,<br />
the end of the drain outlet should be routed above<br />
the ground. Secure the drain hose appropriately.<br />
2. In cases where the outdoor unit is installed below<br />
the indoor unit perform the following.<br />
■ Tape the piping, drain hose and connecting cable<br />
from down to up.<br />
■ Secure the tapped piping along the exterior wall<br />
using saddle or equivalent.<br />
3. In cases where the Outdoor unit is installed above<br />
the Indoor unit perform the following.<br />
■ Tape the piping and connecting cable from down<br />
to up.<br />
■ Secure the taped piping along the exterior wall.<br />
Form a trap to prevent water entering the room.<br />
■ Fix the piping onto the wall by saddle or equivalent.<br />
Seal a small opening<br />
around the pipings<br />
with gum type sealer.<br />
Trap<br />
Seal a small opening<br />
around the pipings<br />
with gum type sealer.<br />
Trap<br />
Drain hose<br />
Taping<br />
Pipings<br />
Connecting<br />
cable<br />
Power supply<br />
cord<br />
Trap is required to prevent water from entering<br />
into electrical parts.<br />
Copyright ©2008 LG Electronics. Inc. All right reserved.<br />
Only for training and service purposes<br />
- 26 -<br />
LGE Internal Use Only
<strong>Air</strong> purging<br />
<strong>Air</strong> Purging<br />
<strong>Air</strong> purging<br />
<strong>Air</strong> and moisture remaining in the refrigerant system<br />
have undesirable effects as indicated below.<br />
■ Pressure in the system rises.<br />
■ Operating current rises.<br />
■ Cooling(or heating) efficiency drops.<br />
■ Moisture in the refrigerant circuit may freeze and<br />
block capillary tubing.<br />
■ Water may lead to corrosion of parts in the refrigeration<br />
system.<br />
Therefore, the indoor unit and tubing between the<br />
indoor and outdoor unit must be leak tested and<br />
evacuated to remove any noncondensables and<br />
moisture from the system.<br />
■ Do a leak test of all joints of the tubing(both indoor<br />
and outdoor) and both gas and liquid side service<br />
valves.<br />
Bubbles indicate a leak. Be sure to wipe off the<br />
soap with a clean cloth.<br />
■ After the system is found to be free of leaks,<br />
relieve the nitrogen pressure by loosening the<br />
charge hose connector at the nitrogen cylinder.<br />
When the system pressure is reduced to normal,<br />
disconnect the hose from the cylinder.<br />
Indoor unit<br />
<strong>Air</strong> purging with vacuum pump<br />
Preparation<br />
■ Check that each tube(both liquid and gas side<br />
tubes) between the indoor and outdoor units have<br />
been properly connected and all wiring for the test<br />
run has been completed. Remove the service<br />
valve caps from both the gas and the liquid side<br />
on the outdoor unit. Note that both the liquid and<br />
the gas side service valves on the outdoor unit<br />
are kept closed at this stage.<br />
Leak test<br />
■ Connect the manifold valve(with pressure gauges)<br />
and dry nitrogen gas cylinder to this service port<br />
with charge hoses.<br />
Pressure<br />
gauge<br />
Manifold valve<br />
Lo<br />
Outdoor unit<br />
Hi<br />
Be sure to use a manifold valve for air purging. If it is not<br />
available, use a stop valve for this purpose. The "Hi"<br />
knob of the manifold valve must always be kept close.<br />
Charge hose<br />
■ Pressurize the system to no more than 150 P.S.I.G.<br />
with dry nitrogen gas and close the cylinder valve<br />
when the gauge reading reached 150 P.S.I.G.<br />
Next, test for leaks with liquid soap.<br />
Nitrogen gas<br />
cylinder(in vertical<br />
standing position)<br />
Copyright ©2008 LG Electronics. Inc. All right reserved.<br />
Only for training and service purposes<br />
- 27 -<br />
LGE Internal Use Only
<strong>Air</strong> purging<br />
Soap water method<br />
(1) Remove the caps from the gas side and liquid side valves.<br />
(2) Remove the service-port cap from the gas side valve.<br />
(3) To open the gas side valve turn the valve stem counterclockwise<br />
approximately 90°, wait for about 2~3 sec, and<br />
close it.<br />
(4) Apply a soap water or a liquid neutral detergent on the<br />
indoor unit connection or outdoor unit connections by a<br />
soft brush to check for leakage of the connecting points of<br />
the piping.<br />
(5) If bubbles come out, the pipes have leakage.<br />
3-way valve<br />
(Close)<br />
3-way valve<br />
(Open)<br />
Gas side<br />
Liquid side<br />
Evacuation<br />
■ Connect the charge hose end described in the<br />
preceding steps to the vacuum pump to evacuate<br />
the tubing and indoor unit.<br />
Confirm the "Lo" knob of the manifold valve is<br />
open. Then, run the vacuum pump.<br />
The operation time for evacuation varies with tubing<br />
length and capacity of the pump. The following<br />
table shows the time required for evacuation.<br />
Indoor unit<br />
Hexagonal wrench<br />
Cap<br />
Required time for evacuation<br />
when 30 gal/h vacuum pump is used<br />
If tubing length is less If tubing length is longer<br />
than 10m (33 ft). than 10m (33 ft).<br />
10 min. or more 15 min. or more<br />
■ When the desired vacuum is reached, close the<br />
"Lo" knob of the manifold valve and stop the<br />
vacuum pump.<br />
Finishing the job<br />
■ With a service valve wrench, turn the valve stem<br />
of liquid side valve counter-clockwise to fully<br />
open the valve.<br />
■ Turn the valve stem of gas side valve counterclockwise<br />
to fully open the valve.<br />
■ Loosen the charge hose connected to the gas<br />
side service port slightly to release the pressure,<br />
then remove the hose.<br />
■ Replace the flare nut and its bonnet on the gas<br />
side service port and fasten the flare nut securely<br />
with an adjustable wrench. This process is very<br />
important to prevent leakage from the system.<br />
■ Replace the valve caps at both gas and liquid<br />
side service valves and fasten them tight.<br />
This completes air purging with a vacuum pump.<br />
The air conditioner is now ready to test run.<br />
Pressure<br />
gauge<br />
Manifold valve<br />
Open<br />
Lo<br />
Outdoor unit<br />
Hi<br />
Close<br />
Vacuum pump<br />
Copyright ©2008 LG Electronics. Inc. All right reserved.<br />
Only for training and service purposes<br />
- 28 -<br />
LGE Internal Use Only
Test running<br />
Test Running<br />
1. Check that all tubing and wiring have been properly<br />
connected.<br />
2. Check that the gas and liquid side service valves<br />
are fully open.<br />
Prepare remote control<br />
Remove the battery cover<br />
by pulling it according to the<br />
arrow direction.<br />
Insert new batteries making<br />
sure that the (+) and (–) of<br />
battery are installed correctly.<br />
Reattach the cover by<br />
pushing it back into position.<br />
NOTICE<br />
• Use 2 AAA(1.5volt) batteries. Do not use rechargeable<br />
batteries.<br />
• Remove the batteries from the remote control if the<br />
system is not going to be used for a long time.<br />
Settlement of outdoor unit<br />
■ Anchor the outdoor unit with a bolt and<br />
nut(ø10mm) tightly and horizontally on a concrete<br />
or rigid mount.<br />
■ When installing on the wall, roof or rooftop, anchor<br />
the mounting base securely with a nail or wire<br />
assuming the influence of wind and earthquake.<br />
■ In the case when the vibration of the unit is conveyed<br />
to the hose, secure the unit with an<br />
anti-vibration rubber.<br />
Bolt<br />
Evaluation of the performance<br />
Tubing connection<br />
Operate unit for 15~20 minutes, then check the system<br />
refrigerant charge:<br />
1. Measure the pressure of the gas side service<br />
valve.<br />
2. Measure the temperature of the intake and discharge<br />
of air.<br />
3. Ensure the difference between the intake temperature<br />
and the discharge is more than 8°C<br />
(Cooling) or reversely (Heating).<br />
Discharge air<br />
Outside ambient TEMP<br />
35°C(95°F)<br />
The pressure of the gas side service valve<br />
NOTE: If the actual pressure are higher than shown,<br />
the system is most likely over-charged, and<br />
charge should be removed. If the actual pressure<br />
are lower than shown, the system is most<br />
likely undercharged, and charge should be<br />
added.<br />
The air conditioner is now ready for use.<br />
PUMP DOWN<br />
Intake temperature<br />
Discharge<br />
temperature<br />
4. For reference; the gas side pressure of optimum<br />
condition is as below.(Cooling)<br />
4~5kg/cm 2 G(56.8~71.0 P.S.I.G.)<br />
This is performed when the unit is to be relocated<br />
or the refrigerant circuit is serviced.<br />
Pump Down means collecting all refrigerant in the outdoor<br />
unit without loss in refrigerant gas.<br />
CAUTION:<br />
Be sure to perform Pump Down procedure with the<br />
unit cooling mode.<br />
Pump Down Procedure<br />
1. Connect a low-pressure gauge manifold hose to the<br />
charge port on the gas side service valve.<br />
2. Open the gas side service valve halfway and purge the<br />
air from the manifold hose using the refrigerant gas.<br />
3. Close the liquid side service valve(all the way in).<br />
4. Turn on the unit's operating switch and start the cooling<br />
operation.<br />
5. When the low-pressure gauge reading becomes 1 to<br />
0.5kg/cm 2 G(14.2 to 7.1 P.S.I.G.), fully close the gas<br />
side valve stem and then quickly turn off the unit. At<br />
that time, Pump Down has been completed and all<br />
refrigerant gas will have been collected in the outdoor<br />
unit.<br />
Copyright ©2008 LG Electronics. Inc. All right reserved.<br />
Only for training and service purposes<br />
- 29 -<br />
LGE Internal Use Only
Functions<br />
Functions<br />
Indoor Unit<br />
Cooling Mode Operation<br />
Healthy dehumidification Mode Operation<br />
Heating Mode Operation<br />
Jet Cool Mode Operation<br />
Jet Heat Mode Operation (Optional)<br />
Operation ON/OFF by Remote controller<br />
Sensing the <strong>Room</strong> Temperature<br />
• <strong>Room</strong> temperature sensor. (Thermistor)<br />
• Pipe temperature sensor. (Thermistor)<br />
<strong>Room</strong> Temperature Control<br />
• Maintain the room temperature in accordance with the Setting Temp.<br />
Starting the Current Control<br />
• Indoor fan is delayed for 5 sec at the starting.<br />
Time Delay Safety Control<br />
• Restarting is for approx. 3 minutes.<br />
Indoor Fan Speed Control<br />
• Super High, High, Med, Low<br />
Operation indication Lamps (LED)<br />
On/Off : Lights up during the system operation.<br />
Timer or : Lights up during Timer operation or<br />
Sleep Mode Sleep mode.<br />
Defrost Mode : Lights up during Defrost Mode or Hot<br />
Start operation. (Heat pump model only)<br />
Outdoor unit : Lights up during outdoor unit operation.<br />
operation (Cooling model only)<br />
Plasma Mode : Lights up during plasma-purification<br />
operation.(option)<br />
Auto Restart Mode : Lights up during if Restart Button<br />
is pressed.<br />
Auto Restart Button : In failure of electric power, if the<br />
button is pressed the unit runs as<br />
previous setting operation when<br />
power returns.<br />
Forced Operation Button : Operation starts, when this button<br />
is pressed and stops when you<br />
press the button again.<br />
Copyright ©2008 LG Electronics. Inc. All right reserved.<br />
Only for training and service purposes<br />
- 30 -<br />
LGE Internal Use Only
Functions<br />
Sleep Mode Auto Control<br />
• The fan is switched to low(Cooling), low(Heating) speed.<br />
• The unit will be stopped after 1, 2, 3, 4, 5, 6, 7 hours.<br />
Natural <strong>Air</strong> Control by New CHAOS Logic<br />
• The fan is switched to intermittent or irregular operation<br />
• The fan speed is automatically switched from high to low speed.<br />
<strong>Air</strong>flow Direction Control<br />
• The louver can be set at the desired position or swing up and down automatically.<br />
Auto Changeover<br />
Horizontal airflow Direction Control(Optional)<br />
Auto Clean(Optional)<br />
Plasma<br />
• The function will be operated while in any operation mode with selecting the function.<br />
• The function is to be stopped while it isoperating with selecting the function.<br />
Defrost(Deice) Control (Heating)<br />
• Both the indoor and outdoor fan stops during defrosting.<br />
Hot-start Control (Heating)<br />
• The indoor fan stops until the evaporator pipe temperature will be reached at 34°C.<br />
Copyright ©2008 LG Electronics. Inc. All right reserved.<br />
Only for training and service purposes<br />
- 31 -<br />
LGE Internal Use Only
Functions<br />
Function of Outdoor Unit<br />
Outdoor Unit<br />
Two Comp algorithm<br />
• Inverter Comp is first priority and then Constant Comp is turning on responding to load condtion.<br />
Operating Frequency<br />
• Inverter Frequency varies considering condition such as room temp,outdoor temp, operating room<br />
number,Temp gap between room temp and set temp and so on.<br />
LEV Control<br />
• LEV pulse is modulated to keep constant superheat or subcooling.<br />
Out door Fan Control<br />
• Outdoor fan operates at High/Low or Off to respond to the load condition.<br />
R/Valve Control<br />
• Convert R/Valve to change cooling to heating, heating to cooling.<br />
Comp Pre-Heat Logic<br />
• Checking outdoor temp, D-Pipe temp,Heat Sink Temp, operate compressor at low frequency upto<br />
5min to preheat oil.<br />
Defrost Function<br />
• After 35 min heating operation, check the defrost condition and if outdoor pipe temp is below -6°C and<br />
released from deice operation in case outdoor pipe temp is over 15°C or 7 min cooing mode.<br />
• To deice outdoor heat exchanger in low temp condtion, convert operating mode from heating to<br />
cooling, in this case, indoor and outdoor fan is off.<br />
Oil Return System<br />
• In heating operation, every 3 hours, changes from heating to cooling for 5 min to return the oil in piping<br />
to compressor.<br />
IPM Over Heat Protection<br />
• To protect IPM overheat, down comp Hz.<br />
Comp Overload Protection<br />
• To protect comp from being overload, down comp Hz.<br />
Low Pressure Protection<br />
• If cylce pressure is low (around 0.3kgf/cm2), turn off comp and outdoor fan.<br />
Copyright ©2008 LG Electronics. Inc. All right reserved.<br />
Only for training and service purposes<br />
- 32 -<br />
LGE Internal Use Only
Operation<br />
Operation<br />
Function of Controls<br />
1. MAIN UNIT FUNCTION<br />
• DISPLAY<br />
Operation Indicator<br />
• On while in appliance operation, off while in appliance pause<br />
• Flashing while in disconnection or short in Thermistor (3 sec off / 0.5 sec on)<br />
Timer/Sleep Timer Indicator<br />
• On while in sleep timer mode, off when sleep timer cancel or appliance operation pause<br />
Defrost Indicator<br />
• Off except when hot start during heating mode operation or while in defrost control<br />
Cooling Mode Operation<br />
• When the intake air temperature reaches 0.5°C below the setting temp, the compressor and the outdoor fan<br />
stop.<br />
• When it reaches 0.5°C above the setting temp, they start to operate again.<br />
Compressor ON Temp<br />
➲ Setting Temp+0.5°C<br />
Compressor OFF Temp<br />
➲ Setting Temp-0.5°C<br />
• While in compressor running, operating with the airflow speed set by the remote control. While compressor is<br />
off fan operates at low speed regardless of the setting.<br />
Healthy Dehumidification Mode Operation<br />
• When the dehumidification operation input by the remote control is received, the intake air temperature is<br />
detected and the setting temp is automatically set according to the intake air temperature.<br />
26°C ≤ Intake <strong>Air</strong> Temp ➲ 25°C<br />
24°C ≤ Intake Intake <strong>Air</strong> Temp
Operation<br />
Auto restarting operation<br />
• When the power is restarted after a sudden power failure while in appliance operation, the mode before the<br />
power failure is kept on the memory and the appliance automatically operates in the mode on the memory.<br />
• Operation mode that is kept on the memory<br />
- State of operation ON/OFF<br />
- Operation mode/setting temp./selected airflow speed<br />
- Sleep timer mode/remaining time of sleep timer<br />
- Chaos Swing<br />
Defrosting control<br />
• While in heating mode operation in order to protect the evaporator pipe of the outdoor unit from freezing,<br />
reversed to cooling cycle to defrost the evaporator pipe of the outdoor unit.<br />
• Defrosting control is available 50 minutes later since heating cycle started and the pipe temperature of outdoor<br />
unit reaches below -6°C.<br />
Operating<br />
Freq. of<br />
Comp.<br />
Minimum Time<br />
of Heating<br />
Setting Freq.<br />
Main Deice time<br />
Setting<br />
Freq.<br />
Fh<br />
min<br />
Fh<br />
min<br />
Fh<br />
min<br />
EEV<br />
Open step<br />
Setting<br />
Starting step<br />
4-Way<br />
ON<br />
ON<br />
Outdoor<br />
FAN<br />
Indoor<br />
FAN<br />
Setting<br />
Speed<br />
Setting<br />
Speed<br />
OFF<br />
OFF<br />
Hi Speed<br />
Hot<br />
Start<br />
Setting<br />
Speed<br />
Hot<br />
Starting<br />
Pre-Heat<br />
LED<br />
OFF<br />
ON<br />
OFF<br />
Deice STEP<br />
0 1 2 3 4 5 6<br />
Copyright ©2008 LG Electronics. Inc. All right reserved.<br />
Only for training and service purposes<br />
- 34 -<br />
LGE Internal Use Only
Operation<br />
Heating Mode Operation<br />
• When the intake air temp reaches +3°…above the setting temp, the compressor is turned off. When below<br />
the setting temp, the compressor is turned on.<br />
Compressor ON Temp. ➲ Setting Temp.<br />
Compressor OFF Temp. ➲ Setting Temp.+3°C<br />
• While compressor on, the indoor fan is off when the indoor pipe temp. is below 20°C, when above 27°C , it<br />
operates with the low or setting speed. When the indoor pipe temp is between 20°C and 27°C, it operates with<br />
Super-Low(while in sleep mode, with the medium airflow speed).<br />
• While compressor off, the indoor fan is off when the indoor pipe temp is below 33°C, when above 35°C , it<br />
operates with the low airflow speed.<br />
• While in defrost control, the indoor is outdoor fans are turned off.<br />
Defrost Control(Heating)<br />
• Defrost operation is controlled by timer and sensing temperature of outdoor pipe.<br />
• The first defrost starts only when the outdoor pipe temperature falls below -6°C after 35 minutes passed from<br />
starting of heating operation and more than 4 minutes operation of compressor.<br />
• Defrost ends after 12 minutes passed from starting of defrost operation when the outdoor pipe temperature<br />
rises over 15°C even before 12 minutes.<br />
• The second defrost starts only when the outdoor pipe temperature falls below -6°C after 35 minutes passed<br />
from ending of the first defrost and more than 4 minutes operation of compressor.<br />
Auto Changeover<br />
• The air conditioner changes the operation<br />
mode automatically to keep indoor temperature.<br />
• When room temperature vary over ±2°C with<br />
respect to setting temperature, air conditioner<br />
keeps the room temperature in ±2°C with<br />
respect to setting temperature by auto<br />
change mode.<br />
+2°C<br />
+1°C<br />
+0.5°C<br />
Set Temp.<br />
-0.5°C<br />
-1°C<br />
-2°C<br />
Outdoor temp.<br />
Indoor temp.<br />
Outdoor<br />
temp.<br />
30°C<br />
20°C<br />
Auto<br />
Change<br />
Mode.<br />
COOLING<br />
HEATING<br />
10°C<br />
Copyright ©2008 LG Electronics. Inc. All right reserved.<br />
Only for training and service purposes<br />
- 35 -<br />
LGE Internal Use Only
Operation<br />
<strong>Air</strong>flow Speed Selection<br />
• The airflow speed of the indoor fan is set to high, medium, low, or power (auto) by the input of the airflow<br />
speed selection key on the remote control.<br />
On-Timer Operation<br />
• When the set time is reached after the time is input by the remote control, the appliance starts to operate.<br />
• The timer LED is on when the on-timer is input. It is off when the time set by the timer is reached.<br />
• If the appliance is operating at the time set by the timer, the operation continues.<br />
While in Fuzzy operation, the airflow speed of the indoor fan is automatically selected according to the temperature.<br />
Off-Timer Operation<br />
• When the set time is reached after the time is input by the remote control, the appliance stops operating.<br />
• The timer LED is on when the off-timer is input. It is off when the time set by the timer is reached.<br />
• If the appliance is on pause at the time set by the timer, the pause continues.<br />
Off-Timer On-Timer Operation<br />
• When the set time is reached after the on/off time is input by the remote control, the on/off-timer operation is<br />
carried out according to the set time.<br />
Sleep Timer Operation<br />
• When the sleep time is reached after is input by the remote control while in appliance<br />
operation, the operation of the appliance stops.<br />
• While the appliance is on pause, the sleep timer mode cannot be input.<br />
• While in cooling mode operation, 30 min later since the start of the sleep timer, the setting temperature<br />
increases by 1°C. After another 30 min elapse, it increases by 1°C again.<br />
• When the sleep timer mode is input while in cooling cycle mode, the airflow speed of the indoor fan is set to<br />
the low.<br />
• When the sleep timer mode is input while in heating cycle mode, the airflow speed of the indoor fan is set to<br />
the medium.<br />
Chaos Swing Mode<br />
• By the Chaos Swing key input, the upper/lower vane automatically operates with the Chaos Swing or they are<br />
fixed to the desired direction.<br />
• While in Chaos Swing mode, the angles of cooling and heating cycle operations are different.<br />
Copyright ©2008 LG Electronics. Inc. All right reserved.<br />
Only for training and service purposes<br />
- 36 -<br />
LGE Internal Use Only
Operation<br />
Chaos Natural Wind Mode<br />
• When the Chaos Natural Wind mode is selected and then operated, the high, medium, or low speed of the airflow<br />
mode is operated for 2~15 sec. randomly by the Chaos Simulation.<br />
Jet Cool Mode operation<br />
• While in heating mode or Fuzzy operation, the Jet Cool key cannot be input. When it is input while in the<br />
other mode operation (cooling, dehumidification, ventilation), the Jet Cool mode is operated.<br />
• In the Jet Cool mode, the indoor fan is operated at super-high speed for 30 min at cooling mode operation.<br />
• In the Jet Cool mode operation, the room temperature is controlled to the setting temperature, 18°C.<br />
• When the sleep timer mode is input while in the Jet Cool mode operation, the Jet Cool mode has the priority.<br />
• When the Jet Cool key is input, the upper/lower vanes are reset to those of the initial cooling mode and then<br />
operated in order that the air outflow could reach further.<br />
Auto Restarting Operation<br />
• When the power is restored after a sudden power failure while in appliance operation, the mode before the<br />
power failure is kept on the memory and the appliance automatically operates in the mode on the memory.<br />
Forced Operation<br />
• To operate the appliance by force in case that the remote control is lost, the forced operation selection switch<br />
is on the main unit of the appliance to operate the appliance in the standard conditions.<br />
• When the power is supplied while the slide switch is on the forced operation position, or when the slide switch<br />
position is switched to the Auto Restarting (or test operation) position or switched from the remote control<br />
position to the forced operation position while the power is on, the forced operation is carried out.<br />
• When the slide switch position is switched from the forced operation position to the Auto Restarting position or<br />
the remote control position, the forced operation is canceled and the appliance stops operating.<br />
• In the forced operation mode, the indoor fan is operated at low speed for around 15 sec and then the operation<br />
condition is set according to the intake air temperature as follows.<br />
24°C≤Intake <strong>Air</strong> Temp ➲ Cooling Mode Operation, 22°C, High Speed<br />
21°C≤Intake <strong>Air</strong> Temp
Operation<br />
Display Function<br />
Signal Receptor<br />
Receives the signals from the remote control.(Signal receiving sound: two short beeps or one long beep.)<br />
Operation Indication Lamps<br />
On/Off<br />
Timer or Sleep Mode<br />
Defrost Mode<br />
: Lights up during the system operation.<br />
: Lights up during Timer operation or Sleep mode.<br />
: Lights up during Defrost Mode or Hot<br />
Start operation. (Heat pump model only)<br />
Outdoor unit operation : Lights up during outdoor unit operation. (Cooling model only)<br />
Plasma Mode<br />
: Lights up during plasma-purification operation.(option)<br />
Auto Restart Mode : Lights up during if Restart Button is pressed.<br />
Auto Restart Button : In failure of electric power, if the button is pressed the unit runs as previous<br />
setting operation when power returns.<br />
Forced Operation Button : Operation starts, when this button is pressed and stops when you press the<br />
button again.<br />
Self-diagnosis Function<br />
Error<br />
Code<br />
Error LED<br />
(Indoor body operation LED)<br />
Error contents<br />
<strong>SVC</strong> check point<br />
1<br />
(once)<br />
3sec 3sec 3sec<br />
• Indoor room temperature<br />
thermistor open/short<br />
• Indoor pipe temperature<br />
thermistor open/short.<br />
• Indoor TH assy check<br />
2<br />
(twice)<br />
3sec<br />
3sec<br />
• Outdoor pipe temperature<br />
thermistor open/short.<br />
• Outdoor TH assy check<br />
5<br />
(5times)<br />
3sec<br />
• Poor communication.<br />
• Communication line/circuit<br />
check<br />
Copyright ©2008 LG Electronics. Inc. All right reserved.<br />
Only for training and service purposes<br />
- 38 -<br />
LGE Internal Use Only
Operation<br />
Remote Control Operations<br />
The controls will look like the following.<br />
5<br />
6<br />
4<br />
2<br />
7<br />
11<br />
8<br />
13<br />
15<br />
ON<br />
OFF<br />
Operation Mode<br />
CANCEL<br />
SET<br />
AUTO CLEAN<br />
Cooling Operation<br />
Auto Operation or Auto Changeover<br />
Healthy Dehumidification Operation<br />
Heating Operation<br />
Signal transmitter<br />
1<br />
3<br />
10<br />
9<br />
12<br />
14<br />
16<br />
Flip-up door<br />
(opened)<br />
• Cooling Model( ), Heat Pump Model( )<br />
17<br />
1. START/STOP BUTTON<br />
Operation starts when this button is pressed and<br />
stops when the button is pressed again.<br />
2. OPERATION MODE SELECTION BUTTON<br />
Used to select the operation mode.<br />
3. ROOM TEMPERATURE SETTING BUTTONS<br />
Used to select the room temperature.<br />
4. INDOOR FAN SPEED SELECTOR<br />
Used to select fan speed in four steps<br />
low, medium, high and CHAOS.<br />
5. JET COOL/JET HEAT (OPTIONAL)<br />
Used to start or stop the speed cooling/heating.<br />
(speed cooling/heating operates super high fan speed in<br />
cooling/heating mode.)<br />
6. CHAOS SWING BUTTON<br />
Used to stop or start louver movement and set<br />
the desired up/down airflow direction.<br />
7. ON/OFF TIMER BUTTONS<br />
Used to set the time of starting and stopping operation.<br />
8. TIME SETTING BUTTONS<br />
Used to adjust the time.<br />
9. TIMER SET/CANCEL BUTTON<br />
Used to set the timer when the desired time is obtained<br />
and to cancel the Timer operation.<br />
10. SLEEP MODE AUTO BUTTON<br />
Used to set Sleep Mode Auto operation.<br />
11. AIR CIRCULATION BUTTON<br />
Used to circulate the room air without cooling or heating.<br />
12. ROOM TEMPERATURE CHECKING BUTTON<br />
Used to check the room temperature.<br />
13. PLASMA(OPTIONAL)<br />
Used to start or stop the plasma function.<br />
14. HORIZONTAL AIRFLOW DIRECTION CONTROL<br />
BUTTON (OPTIONAL)<br />
Used to set the desired horizontal airflow direction.<br />
15. RESET BUTTON<br />
Used prior to resetting time.<br />
16. 2ND F BUTTON<br />
Used prior to using modes printed in blue at the bottom of<br />
buttons.<br />
17. AUTO CLEAN (OPTIONAL)<br />
Used to set Auto Clean mode.<br />
Copyright ©2008 LG Electronics. Inc. All right reserved.<br />
Only for training and service purposes<br />
- 39 -<br />
LGE Internal Use Only
Disassembly<br />
Disassembly<br />
Indoor Unit<br />
Disconnect the unit from power supply before making<br />
any checks.<br />
Be sure the power switch is set to “OFF”.<br />
Right side panel<br />
1. To remove the Grille from the Chassis.<br />
➊ Remove the 2 screws of right side panel.<br />
➋ Remove the right side panel by the arrow.<br />
■ The connector can be disconnected by pulling it<br />
while pressing the connector's hook.<br />
■ Remove the 1 screw for fixing low panel.<br />
Main PCB<br />
Lower panel<br />
➌ Remove the lower panel by the arrow.<br />
■ Take care not to scratch the wall and mat to<br />
drop.<br />
Lower panel<br />
➍ Remove the left side panel.<br />
(Remove the 2 screws.)<br />
Left side panel<br />
Copyright ©2008 LG Electronics. Inc. All right reserved.<br />
Only for training and service purposes<br />
- 40 -<br />
LGE Internal Use Only
Disassembly<br />
➎ Remove the grille from the chassis.<br />
• Remove the 4 securing screws.(30k)<br />
• To remove the Grille, pull the lower left and right side<br />
of the grille toward you (slightly tilted) and lift it<br />
straight upward.<br />
➏ Separate the black lead wire from the white connector.<br />
BLACK<br />
WHITE<br />
2. To remove the sensor, housing connector, earth<br />
conductor and step motor conductor with sensor<br />
holder, Motor, Evaporator and P.C.B.<br />
Motor<br />
Conductor<br />
Earth<br />
Conductor<br />
Power<br />
Conductor<br />
Sensor<br />
Conductor<br />
Step Motor<br />
Conductor<br />
Copyright ©2008 LG Electronics. Inc. All right reserved.<br />
Only for training and service purposes<br />
- 41 -<br />
LGE Internal Use Only
Disassembly<br />
3. To remove the Control Box.<br />
• Remove the 5 securing screws.<br />
• Pull the control box out from the chassis<br />
carefully.<br />
Screw<br />
4. To remove the Discharge Grille.<br />
• Remove the 3 securing screw.<br />
• Pressing the right side of the discharge grille<br />
downward slightly, unhook the discharge grille.<br />
• Pull the discharge grille out from the chassis<br />
carefully.<br />
Screw<br />
5. To remove the Evaporator.<br />
• Remove 3 screws securing the evaporator(at the<br />
left 2EA, at the right 1EA).<br />
• Remove 2 screw securing the evaporator clamp.<br />
Screw<br />
Screw<br />
• Unhook the tab on the right inside of the chassis<br />
at the same time, slightly pull the evaporator<br />
toward you until the tab is clear of the slot.<br />
Copyright ©2008 LG Electronics. Inc. All right reserved.<br />
Only for training and service purposes<br />
- 42 -<br />
LGE Internal Use Only
Disassembly<br />
6. To remove the Fan motor<br />
• Loosen the screw securing the cross-flow fan to<br />
the fan motor (do not remove).<br />
Fan motor<br />
Screw<br />
• Loosen the screw securing the mount motor.<br />
Screw<br />
Mount motor<br />
• Separate the fan motor from the cross-flow fan.<br />
• Take care not to drop the motor.<br />
Fan motor<br />
7. To remove the Cross-Flow Fan<br />
• Loosen the screw securing the holder bearing.<br />
• Lift up the cross-flow fan.<br />
Holder bearing<br />
Screw<br />
Copyright ©2008 LG Electronics. Inc. All right reserved.<br />
Only for training and service purposes<br />
- 43 -<br />
LGE Internal Use Only
Schematic Diagram<br />
Schematic Diagram<br />
Wiring Diagram<br />
Indoor Unit<br />
Models: 30k Heat Pump Model<br />
Outdoor Unit<br />
Models: 30k Heat Pump Model<br />
Copyright ©2008 LG Electronics. Inc. All right reserved.<br />
Only for training and service purposes<br />
- 44 -<br />
LGE Internal Use Only
55<br />
10<br />
Schematic Diagram<br />
Components Location<br />
Main P.W.B Assembly<br />
30k Indoor<br />
• TOP VIEW<br />
C01N<br />
CN-L/R2<br />
CN-L/R1<br />
CN-U/D<br />
CN-12V<br />
CN-ION<br />
J10<br />
R01G<br />
R02G<br />
CN-DISP<br />
R05G<br />
R04G<br />
R03G<br />
CN-TH2<br />
R07H<br />
R08H<br />
R09H<br />
C03H<br />
JW06<br />
C01A<br />
R08N<br />
R07N<br />
R06N<br />
R04K<br />
EEPROM<br />
R02L<br />
R03A<br />
R02A<br />
Q01K<br />
J21<br />
J22<br />
D02D<br />
R06K<br />
R01A<br />
JW04<br />
C01X<br />
R03N<br />
R04F<br />
C02F<br />
JW05<br />
R05N<br />
R04N<br />
R01E<br />
R02E<br />
R02D<br />
R01D<br />
R01B<br />
C01L<br />
30<br />
25<br />
20<br />
JW03<br />
R10H<br />
OR02H<br />
C04H<br />
OR01H<br />
R05H<br />
C01K<br />
C02D<br />
R06D<br />
R06H<br />
JW02<br />
R03H<br />
C02H<br />
R04H<br />
C01H<br />
R07D<br />
R07K<br />
R03D<br />
JW01<br />
R02N<br />
R01N<br />
C01F<br />
33<br />
R11N<br />
R12N<br />
R13N<br />
R14N<br />
50<br />
R09N<br />
R10N<br />
R01K<br />
R02K<br />
R04D<br />
C03D<br />
1<br />
R11H<br />
R01H<br />
R02H<br />
1 16<br />
C10D<br />
16<br />
1 16<br />
ZD02D<br />
CN-TH1<br />
R05G<br />
R04G<br />
R03G<br />
R02G<br />
R01G<br />
R15N<br />
R16N<br />
60<br />
5<br />
R01L<br />
R03F<br />
CN-TH2<br />
45<br />
40<br />
35<br />
C02L<br />
CN-MOTOR<br />
ZNR01N<br />
FUSE 250V/T2A<br />
CN-POW<br />
12V<br />
J07<br />
J06<br />
J08<br />
J09<br />
CN-HVB(BL)<br />
CN-TH1<br />
P<br />
C05D<br />
J11<br />
IC02D<br />
ZD02D<br />
J12<br />
J13<br />
J14<br />
D01K<br />
N/F01N<br />
IC03D<br />
R04D<br />
IC04D<br />
J15<br />
R03K<br />
ZD01K<br />
R02K<br />
R01K<br />
R05K<br />
CY2<br />
C02N<br />
CY1<br />
WCN-NOISE<br />
ZNR01F<br />
S-TRANS<br />
SSR<br />
7 4<br />
C01D<br />
R05D<br />
C07D<br />
C08D<br />
5V<br />
J05<br />
J04<br />
PWB:6870A90203A<br />
ASSM:6871A20509<br />
J17<br />
J16<br />
J18<br />
BD01D<br />
3<br />
1<br />
D04D<br />
Q01D<br />
J02<br />
J01<br />
OR1H OR2H<br />
L1<br />
IC01K<br />
IC02K<br />
R01D<br />
R02D<br />
D01D<br />
NTC<br />
ZD01D<br />
BZ01E<br />
IC01A<br />
OSC01B<br />
J19<br />
IC01D<br />
D03D<br />
J22<br />
GND<br />
J21<br />
J03<br />
C01A<br />
J20<br />
EEPROM<br />
• BOTTOM VIEW<br />
CN-L/R1<br />
CN-L/R2<br />
CN-12V<br />
CN-DISP<br />
CN-U/D<br />
CN-ION<br />
R<br />
C02L<br />
J10<br />
CN-HVB(BL)<br />
J08<br />
12V<br />
CN-POW<br />
C01N<br />
ZNR01N<br />
FUSE<br />
C05D<br />
P<br />
CN-MOTOR<br />
J09<br />
J06<br />
J07<br />
C04D<br />
J11<br />
J14<br />
J13<br />
IC01G<br />
J12<br />
IC01M<br />
IC02M<br />
IC02D<br />
D01K<br />
J15<br />
J18<br />
J16<br />
R01F<br />
R02F<br />
J17<br />
16<br />
1<br />
RXD<br />
J05<br />
5V<br />
J04<br />
IC04D<br />
C08D<br />
C09D<br />
C07D<br />
R05D<br />
IC03D<br />
S-TRANS<br />
SSR<br />
ZNR01F<br />
C01D<br />
N/F01N<br />
C02N<br />
CY1<br />
WCN-NOISE<br />
BD01D<br />
CY2<br />
R05K<br />
ZD01K R03K<br />
J01<br />
J02<br />
D04D<br />
OSC01B<br />
MICOM<br />
Q01D<br />
BZ01E<br />
L1<br />
C06D<br />
D01D<br />
ZD01D<br />
IC02K<br />
IC01K<br />
J19<br />
J20<br />
IC01A<br />
D03D<br />
NTC<br />
IC01D<br />
J03<br />
TXD<br />
Copyright ©2008 LG Electronics. Inc. All right reserved.<br />
Only for training and service purposes<br />
- 45 -<br />
LGE Internal Use Only
- 46 -<br />
Copyright ©2008 LG Electronics. Inc. All right reserved.<br />
Only for training and service purposes<br />
LGE Internal Use Only<br />
30k Outdoor<br />
• BOTTOM VIEW<br />
• TOP VIEW<br />
Schematic Diagram<br />
CN_ADDR3<br />
R20K<br />
R01B<br />
C07K<br />
C06K<br />
15<br />
C05M<br />
R11M<br />
R04P<br />
R12P<br />
R11P<br />
C15Z<br />
C16Z<br />
R09P<br />
C03P<br />
R03P<br />
R02P<br />
R07P<br />
R05P<br />
C01P<br />
R01P<br />
C02P<br />
R16Z<br />
R17Z<br />
D03Z<br />
C12Z<br />
R20Z<br />
C13Z<br />
C11Z<br />
R19Z<br />
R18Z<br />
R10Z<br />
R12Z<br />
C06Z<br />
13<br />
14<br />
C14Z<br />
8<br />
9<br />
10<br />
11<br />
12<br />
6<br />
7<br />
C03Z<br />
C05Z<br />
R07Z<br />
R11Z C17Z<br />
1<br />
2<br />
3<br />
4<br />
5<br />
R21P<br />
7<br />
6<br />
V<br />
U<br />
V<br />
U<br />
28<br />
13<br />
12<br />
9<br />
8<br />
Nv 27<br />
Nw<br />
Nu<br />
25<br />
24<br />
26<br />
1<br />
3<br />
5<br />
SPM2<br />
CN_LEV5<br />
C07M<br />
C07D<br />
C03D<br />
IC04D<br />
IC01P<br />
C05P<br />
R13P<br />
CN_LEV1<br />
R10P<br />
R08P<br />
R06P<br />
R14P<br />
C04P<br />
CN_LEV3<br />
CN_LEV4<br />
C08M<br />
C09M<br />
IC07M<br />
CN_LEV2<br />
C11M<br />
D01D<br />
C04D<br />
C01D<br />
SMPS<br />
C02D<br />
C06D<br />
C10K<br />
C09K<br />
C08K<br />
C10M<br />
R16T<br />
IC09M<br />
IC08M<br />
C04M<br />
IC05M<br />
R10M<br />
IC04M<br />
C03M<br />
R09M<br />
L01D<br />
R15P<br />
R17P<br />
R16P<br />
R13T<br />
Q01T<br />
R11T<br />
R02T<br />
CN_CENTRAL<br />
CN_LEV6<br />
C06M<br />
R12T<br />
D07K<br />
D08K<br />
CN_JIG_PC<br />
R06T<br />
R05T<br />
L03D<br />
C01A<br />
CN_WRITER<br />
R01T<br />
R01A<br />
C03A<br />
C01L<br />
R09Z<br />
R10T<br />
C14K<br />
C12K C11K<br />
R17T<br />
R09T<br />
R06Z<br />
C15K<br />
C01T<br />
C13K<br />
R05Z<br />
R20P<br />
R19P<br />
R02Z<br />
R01Z<br />
C08P<br />
C07P<br />
C01Z<br />
R03Z<br />
CN_FLASH<br />
R04Z<br />
CN_TH2<br />
R24K<br />
R25K<br />
R21K<br />
C03H<br />
C02H<br />
R34K<br />
R36K<br />
R37K<br />
R35K<br />
IC01A<br />
R06F<br />
R11H<br />
R07F<br />
R03H<br />
R02H<br />
R02A<br />
R18P<br />
C06P<br />
R10H<br />
CN-COIL2<br />
C04S<br />
D01Z<br />
C08Z<br />
C07Z<br />
R13Z<br />
R15Z<br />
C10Z<br />
17<br />
16<br />
R14Z<br />
R08Z<br />
C04Z<br />
C02Z<br />
18<br />
19<br />
22<br />
23<br />
C09Z<br />
20<br />
21<br />
SPM2<br />
W<br />
P<br />
W<br />
D02Z<br />
R05S<br />
IC01S<br />
D01S<br />
IC02S<br />
C09S<br />
R03S<br />
R07S<br />
R06S<br />
C07S<br />
C09S<br />
R02S<br />
R01S<br />
C05S<br />
C19Z<br />
BD02S<br />
R05J<br />
R04S<br />
BD01S<br />
IGBT<br />
C10J<br />
Q03F<br />
ADDR_S/W<br />
Q01F<br />
R01F<br />
L02D<br />
C08D<br />
C05D<br />
R02D<br />
C01S<br />
C10D<br />
R08M<br />
R07M<br />
R06M<br />
C02M<br />
R05M<br />
R09K<br />
R08K<br />
R15T<br />
R04M<br />
R03M<br />
R02M<br />
C02F<br />
R02F<br />
Q02F<br />
R03F<br />
Q04F<br />
ZD01F<br />
IC06M<br />
R05F<br />
R04F<br />
R01M<br />
C01M<br />
CN_MOTOR<br />
C03S<br />
R01Y<br />
C02S<br />
LED02G<br />
IC02M<br />
C01F<br />
R02Y<br />
C05T<br />
R08T<br />
R07T<br />
C03T<br />
R21T<br />
C18Z<br />
C02C<br />
R07C<br />
JIG<br />
C12H<br />
C10H<br />
C07H<br />
R14T<br />
C01V<br />
C02T<br />
R08H<br />
C08S<br />
EEPROM<br />
R07H<br />
C11H<br />
C09H<br />
C08H<br />
IC02A<br />
1<br />
OSC01B<br />
R03A<br />
R02L<br />
R01L<br />
C17K<br />
C16K<br />
C02A<br />
CN_TH4<br />
C06H<br />
R18K<br />
R07K<br />
C05H<br />
R38K<br />
CN_TH1<br />
C04H<br />
C01H<br />
R19K<br />
R39K<br />
R40K<br />
R09H<br />
CN_ADDR2<br />
CN_TH3<br />
R23K<br />
R04H<br />
R22K<br />
CN_ADDR1<br />
R03Y<br />
D01Y<br />
C01Y<br />
R14H R06H<br />
R03N<br />
C02N<br />
R13H<br />
R12H<br />
R01H<br />
C09D<br />
C03F<br />
R18T<br />
R05H<br />
R01C<br />
BD01C<br />
R04C<br />
R03C<br />
R02C<br />
D01C<br />
C01C<br />
RY_C/COMP<br />
R02G<br />
R01G<br />
R16H<br />
Q01C<br />
R15H<br />
R04T<br />
SW1<br />
OR1<br />
IC01M<br />
LED01G<br />
R02N<br />
R01N<br />
BD01N<br />
D01N<br />
C06T<br />
R41K<br />
D01V<br />
R08V<br />
R06C<br />
R05C<br />
IC01V<br />
D02N<br />
D02C<br />
C03C<br />
R07V<br />
R11K<br />
R06K<br />
R20T<br />
R22T<br />
C01N<br />
CN_JIG_S<br />
R10K<br />
CN_HEATER<br />
RY_P/ICE<br />
CN_HOT GAS CN_4WAY<br />
RY_FAN(B)_L<br />
CN_FAN(B) CN_FAN(A)<br />
CN-COIL1<br />
RY_FAN(A)_H<br />
RY_FAN(A)_L<br />
RY_HEATER<br />
RY_HOT GAS<br />
RY_FAN(B)_H<br />
RY_4WAY<br />
CN_P/ICE<br />
TRANS1<br />
RY_OIL/S<br />
C09J<br />
R01V<br />
CT<br />
R06V<br />
R05V<br />
R04V<br />
R03V<br />
R02V<br />
CN_OIL/S<br />
CN_PRESS<br />
IC09K<br />
R28K<br />
D04K<br />
D03K<br />
D05K<br />
D06K<br />
CN_COM1<br />
CN_COM<br />
C01J<br />
FUSE<br />
R29K<br />
IC10K<br />
IC12K<br />
R14K<br />
R17K<br />
R16K<br />
R15K<br />
R30K<br />
R31K<br />
R32K<br />
R33K<br />
C03J C02J<br />
CN_CP(N)<br />
N<br />
L<br />
CN_CP(L)<br />
CN_GND1<br />
R01J<br />
R03J<br />
R02J<br />
J60<br />
ZD03K<br />
R26K<br />
R02K<br />
IC04K<br />
IC03K<br />
ZD06K<br />
R27K<br />
ZD07K<br />
ZD08K<br />
IC07K IC08K IC05K IC06K<br />
J59<br />
NF01J<br />
J57<br />
J56<br />
J55<br />
J54<br />
J53<br />
J58<br />
R04K<br />
J51<br />
J33<br />
J52<br />
C01K<br />
D01K<br />
C02K<br />
ZD05K<br />
R12K<br />
R01K<br />
IC11K<br />
R05K<br />
ZD02K<br />
ZD01K<br />
D02K<br />
R13K<br />
ZD04K<br />
IC01K IC02K<br />
ZNR02J ZNR01J<br />
R04J<br />
C06J C05J<br />
NTC01K<br />
R03K<br />
C04J<br />
J34<br />
SURGE<br />
CN_GND2<br />
PTC<br />
C07J<br />
RY_PWR<br />
J29<br />
J27<br />
NF02J<br />
J30<br />
J28<br />
J32<br />
J31<br />
J22<br />
J21<br />
J23<br />
J25<br />
J24<br />
C08J<br />
J26<br />
WCN_GND3<br />
C08K<br />
R35K<br />
(DISP_C)<br />
CN_TH4<br />
IC04K<br />
ASM:6871A20679<br />
C16Z<br />
R03P<br />
R02P<br />
R01P<br />
D03Z<br />
C12Z<br />
10<br />
13<br />
R17Z<br />
R16Z<br />
1<br />
5<br />
V<br />
U<br />
7<br />
28(NW)<br />
29(U)<br />
30(V)<br />
9<br />
8<br />
(BL)<br />
(RD)<br />
27(NV)<br />
R21P<br />
24<br />
25<br />
26(NU)<br />
5<br />
6<br />
13<br />
12<br />
1<br />
3<br />
R13Z<br />
D01Z<br />
22<br />
R15Z<br />
C10Z<br />
18<br />
20<br />
15<br />
W<br />
R04P<br />
31(W)<br />
32(P)<br />
(YL)<br />
R14Z<br />
D02Z<br />
D07K<br />
D08K<br />
R13P<br />
CN_LEV1<br />
R11P<br />
R12P<br />
R14P<br />
IC04D<br />
C03D<br />
CN_LEV4<br />
CN_LEV2<br />
Q01T<br />
CN_CENTRAL<br />
CN_LEV6<br />
2004.10.24. lab2<br />
CN_JIG_PC<br />
CN_LEV5<br />
C04D<br />
D01D<br />
C07D<br />
C06D<br />
SMPS<br />
PWB:6870A90154A<br />
CN_LEV3<br />
C01D<br />
C02D<br />
L01D<br />
ASM:6871A10117<br />
CN_MOTOR<br />
ADDR_S/W<br />
L02D<br />
C08D<br />
C05D<br />
R02D<br />
C10D<br />
C02F<br />
R08M<br />
R07M<br />
R06M<br />
R05M<br />
R04M<br />
R03M<br />
R02M<br />
R01M<br />
ZD01F<br />
R04F<br />
(AIR/PIPE)<br />
CN_TH2<br />
IC10K<br />
L03D<br />
C01A<br />
CN_FLASH<br />
R17P<br />
R16P<br />
C02H<br />
IC12K<br />
R34K<br />
R36K<br />
R37K<br />
CN_ADDR3<br />
IC01A<br />
R15P<br />
CN_WRITER<br />
EEPROM<br />
JIG<br />
C02C<br />
R07C<br />
OSC01B<br />
C06H<br />
IC03K<br />
C01Y<br />
C05H<br />
R03Y<br />
D01Y<br />
SUC/DISP_A<br />
(H/SINK)<br />
CN_TH1<br />
C01H<br />
IC08K<br />
CN_ADDR2<br />
C04H<br />
IC07K<br />
(SUC/DISP_I)<br />
CN_TH3<br />
IC05K<br />
IC06K<br />
CN_ADDR1<br />
C03H<br />
IC09K<br />
R06F<br />
C06S<br />
R02S<br />
R01S<br />
IC01S<br />
IC02S<br />
R05S<br />
D01S<br />
R03S<br />
C08Z<br />
C09S<br />
C19Z<br />
R05J<br />
IGBT<br />
R04S<br />
+<br />
C04S<br />
~<br />
~<br />
-<br />
+<br />
C10J<br />
BD01S<br />
BD02S<br />
CN_P/ICE<br />
CN_4WAY CN_HOT GAS CN_HEATER<br />
CN_FAN(A)<br />
RY_P/ICE<br />
RY_C/FAN<br />
R01Y<br />
C01S<br />
4<br />
C01F<br />
R02Y<br />
CN_HEATER2<br />
RY_FAN(B)_L<br />
CN-COIL1<br />
RY_FAN(A)_L<br />
RY_FAN(A)_H<br />
CN-COIL2<br />
CN_C/COMP2<br />
RY_HEATER<br />
RY_4WAY<br />
C02S<br />
RY_C/COMP2<br />
RY_HOT GAS<br />
C03S<br />
RY_HEATER2<br />
RY_FAN(B)_H<br />
BD01C<br />
R01C<br />
R04C<br />
R03C<br />
R02C<br />
D01C<br />
C01C<br />
3<br />
SW1<br />
Q01C<br />
NOMAL<br />
LONG<br />
PIPE LENGTH<br />
LED02G<br />
LED01G<br />
DISP_B<br />
R02N<br />
R01N<br />
BD01N<br />
R08V<br />
R06C<br />
IC01V<br />
D02N<br />
D02C<br />
D01N<br />
C03C<br />
CN_CT/SUB<br />
CN_TH5/D3<br />
IC11K<br />
R05C<br />
+<br />
-<br />
CN_JIG_S<br />
C01N<br />
IC01K IC02K<br />
TRANS1<br />
CN_C/FAN<br />
3<br />
RY_C/COMP<br />
RY_OIL/S 4<br />
C09J<br />
CT<br />
R06V<br />
R05V<br />
R04V<br />
R03V<br />
R02V<br />
D01V<br />
R01V<br />
1<br />
7<br />
CN_FAN(B)<br />
CN_OIL/S<br />
CN_PRESS<br />
D04K<br />
D03K<br />
D05K<br />
D06K<br />
CN_CP(N)<br />
CN_CP(L)<br />
C01J<br />
FUSE<br />
WCN_GND3<br />
C08K<br />
CN_COM<br />
CN_COM1<br />
20A<br />
15A<br />
(BL)<br />
WCN_P(N)<br />
L<br />
(BR)<br />
WCN_P(L)<br />
J59<br />
C03J<br />
R14K<br />
R17K<br />
R16K<br />
R15K<br />
R29K<br />
R31K<br />
R30K<br />
R32K<br />
R33K<br />
C02J<br />
NF01J<br />
ZD03K<br />
R02K<br />
R26K<br />
ZD06K<br />
R27K<br />
ZD07K<br />
ZD08K<br />
R28K<br />
R04K<br />
J57<br />
J56<br />
J55<br />
J54<br />
J53<br />
J52<br />
J51<br />
J33<br />
J58<br />
N<br />
(BK)<br />
CN_GND1<br />
R01J<br />
J60<br />
J34<br />
C07J<br />
J27<br />
ZD01K<br />
C02K<br />
ZD05K<br />
D01K<br />
ZD04K<br />
R13K<br />
R12K<br />
R01K<br />
ZNR02J<br />
ZNR01J<br />
R04J<br />
NTC01K<br />
R03K<br />
RY_PWR<br />
4<br />
3<br />
R05K<br />
ZD02K<br />
C01K<br />
D02K<br />
J25<br />
J24<br />
J23<br />
J22<br />
J21<br />
J31<br />
C06J<br />
C05J<br />
J29<br />
J28<br />
J32<br />
J30<br />
(BK)<br />
CN_GND2<br />
SURGE<br />
C04J<br />
R02J<br />
R03J<br />
J26<br />
PTC<br />
C08J<br />
NF02J<br />
+<br />
-<br />
- +
Schematic Diagram<br />
DISPLAY ASSEMBLY<br />
Copyright ©2008 LG Electronics. Inc. All right reserved.<br />
Only for training and service purposes<br />
- 47 -<br />
LGE Internal Use Only
Troubleshooting Guide<br />
Troubleshooting Guide<br />
Refrigeration Cycle Diagram<br />
Solenoid<br />
Valve(1)<br />
Solenoid<br />
Valve(2)<br />
Field Piping<br />
Gas<br />
Field Piping<br />
Liquid<br />
Refrigerant Flow<br />
Cooling<br />
Heating<br />
Accumulator<br />
LEV<br />
Check<br />
Valve(2)<br />
Constant<br />
Compressor<br />
Low Pressure<br />
S/W<br />
Drier<br />
Reversing<br />
Valve<br />
Check<br />
Valve(1)<br />
Oil<br />
Seperator<br />
Th2<br />
Th1<br />
Inverter<br />
Compressor<br />
Th3<br />
OUTDOOR UNIT<br />
Heat<br />
Exchanger<br />
Copyright ©2008 LG Electronics. Inc. All right reserved.<br />
Only for training and service purposes<br />
- 48 -<br />
LGE Internal Use Only
Troubleshooting Guide<br />
2-way, 3-way Valve<br />
2-way Valve (Liquid Side)<br />
3-way Valve (Gas Side)<br />
Flare nut<br />
To<br />
piping<br />
connection<br />
To outdoor unit<br />
Hexagonal wrench (4mm)<br />
Open position<br />
Closed position<br />
Flare nut<br />
To<br />
piping<br />
connection<br />
Valve cap<br />
Open position<br />
Closed position<br />
Service<br />
port cap<br />
To outdoor unit<br />
Pin<br />
Service<br />
port<br />
1.<br />
2.<br />
3.<br />
4.<br />
5.<br />
6.<br />
Works<br />
Shipping<br />
<strong>Air</strong> purging<br />
(Installation)<br />
Operation<br />
Pumping down<br />
(Transfering)<br />
Evacuation<br />
(Servicing)<br />
Gas charging<br />
(Servicing)<br />
Pressure check<br />
(Servicing)<br />
Gas releasing<br />
(Servicing)<br />
Shaft position Shaft position Service port<br />
Closed Closed Closed<br />
(with valve cap) (with valve cap) (with cap)<br />
Open Closed Open<br />
(counter-clockwise) (clockwise) (push-pin or with<br />
vacumm pump)<br />
Open Open Closed<br />
(with valve cap) (with valve cap) (with cap)<br />
Closed Open Open<br />
(clockwise) (counter-clockwise) (connected manifold<br />
gauge)<br />
Open Open Open<br />
(with charging<br />
cylinder)<br />
Open Open Open<br />
(with charging<br />
cylinder)<br />
Open<br />
Open<br />
Open<br />
Open<br />
Open<br />
(with charging cylinder)<br />
Open<br />
(with charging cylinder)<br />
Copyright ©2008 LG Electronics. Inc. All right reserved.<br />
Only for training and service purposes<br />
- 49 -<br />
LGE Internal Use Only
Troubleshooting Guide<br />
<strong>Air</strong> purging<br />
Required tools : hexagonal wrench, adjustable wrench,<br />
torque wrenches, wrench to hold the<br />
joints, and gas leak detector.<br />
The additional gas for air purging has been charged<br />
in the outdoor unit.<br />
However, if the flare connections have not be done<br />
correctly and there gas leaks, a gas cylinder and the<br />
charge set will be needed.<br />
The air in the indoor unit and in the piping must be<br />
purged. If air remains in the refrigeration pipes, it will<br />
affect the compressor, reduce to cooling capacity,<br />
and could lead to a malfunction.<br />
Indoor unit<br />
Liquid side<br />
Open<br />
2-way<br />
valve<br />
Outdoor unit<br />
Gas side<br />
3-way<br />
valve<br />
Clsed<br />
Service port nut:<br />
Be sure, using a torque wrench to tighten the service port nut (after using the service port), so that it prevents the<br />
gas leakage from the refrigeration cycle.<br />
CAUTION: Do not leak the gas in the air during <strong>Air</strong> purging.<br />
• Procedure<br />
(1) Recheck the piping connections.<br />
(2) Open the valve stem of the 2-way valve counterclockwise<br />
approximately 90°, wait 10 seconds,<br />
and then set it to closed position.<br />
– Be sure to use a hexagonal wrench to operate<br />
the valve stem.<br />
(3) Check for gas leakage.<br />
– Check the flare connections for gas leakage.<br />
(4) Purge the air from the system.<br />
– Set the 2-way valve to the open position and<br />
remove the cap from the 3-way valve’s service<br />
port.<br />
– Using the hexagonal wrench to press the valve<br />
core pin, discharge for three seconds and then<br />
wait for one minute. Repeat this three times.<br />
(5) Use torque wrench to tighten the service port<br />
nut to a torque of 1.8kg.cm.<br />
(6) Set the 3-way valve to the back seat.<br />
(7) Mount the valve stem nuts to the 2-way and 3-<br />
way valves.<br />
(8) Check for gas leakage.<br />
– At this time, especially check for gas leakage<br />
from the 2-way and 3-way valve’s stem nuts,<br />
and from the service port nut.<br />
CAUTION: If gas leakage are discovered<br />
in step (3) above, take the following<br />
mesures :<br />
If the gas leaks stop when the piping connections<br />
are tightened further, continue working from step (4).<br />
If the gas leaks do not stop when the connections<br />
are retightened, repair the location of the leak, discharge<br />
all of the gas through the service port, and<br />
then recharge with the specified amount of gas from<br />
a gas cylinder.<br />
Copyright ©2008 LG Electronics. Inc. All right reserved.<br />
Only for training and service purposes<br />
- 50 -<br />
LGE Internal Use Only
Troubleshooting Guide<br />
Pumping Down<br />
Indoor unit<br />
Liquid side<br />
2-Way<br />
valve<br />
Open<br />
Outdoor unit<br />
Gas side<br />
3-Way<br />
valve<br />
Closed<br />
CLOSE<br />
Purge the air<br />
Lo<br />
CLOSE<br />
• Procedure<br />
(1) Confirm that both the 2-way and 3-way valves<br />
are set to the open position.<br />
– Remove the valve stem caps and confirm that<br />
the valve stems are in the raised position.<br />
– Be sure to use a hexagonal wrench to operate<br />
the valve stems.<br />
(2) Operate the unit for 10 to 15 minutes.<br />
(3) Stop operation and wait for 3 minutes, then<br />
connect the charge set to the service port of<br />
the 3-way valve.<br />
– Connect the charge hose with the push pin to<br />
the service port.<br />
(6) Operate the air conditioner at the cooling<br />
cycle and stop it when the gauge indicates<br />
1kg/cm 2 g.<br />
(7) Immediately set the 3-way valve to the closed<br />
position.<br />
– Do this quickly so that the gauge ends up indicating<br />
3 to 5kg/cm 2 g.<br />
(8) Disconnect the charge set, and mount the 2-<br />
way and 3-way valve’s stem nuts and the service<br />
port nut.<br />
– Use torque wrench to tighten the service port<br />
nut to a torque of 1.8 kg.m.<br />
– Be sure to check for gas leakage.<br />
(4) <strong>Air</strong> purging of the charge hose.<br />
– Open the low-pressure valve on the charge set<br />
slightly to air purge from the charge hose.<br />
(5) Set the 2-way valve to the closed position.<br />
Copyright ©2008 LG Electronics. Inc. All right reserved.<br />
Only for training and service purposes<br />
- 51 -<br />
LGE Internal Use Only
Troubleshooting Guide<br />
Re-air Purging<br />
(Re-installation)<br />
Indoor unit<br />
Liquid side<br />
3-Way<br />
valve<br />
Closed<br />
Outdoor unit<br />
Gas cylinder<br />
Gas side<br />
3-Way<br />
valve<br />
Closed<br />
R22<br />
OPEN<br />
Lo<br />
CLOSE<br />
• Procedure<br />
(1) Confirm that both the liquid side valve and the<br />
gas side valve are set to the closed position.<br />
(2) Connect the charge set and a gas cylinder to<br />
the service port of the Gas side valve.<br />
– Leave the valve on the gas cylinder closed.<br />
(3) <strong>Air</strong> purging.<br />
– Open the valves on the gas cylinder and the<br />
charge set. Purge the air by loosening the flare<br />
nut on the liquid side valve approximately 45°<br />
for 3 seconds then closing it for 1 minute;<br />
repeat 3 times.<br />
– After purging the air, use a torque wrench to<br />
tighten the flare nut on liquid side valve.<br />
(6) Disconnect the charge set and the gas cylinder,<br />
and set the Liquid side and Gas side<br />
valves to the open position.<br />
– Be sure to use a hexagonal wrench to operate<br />
the valve stems.<br />
(7) Mount the valve stem nuts and the service<br />
port nut.<br />
– Use torque wrench to tighten the service port<br />
nut to a torque of 1.8 kg.m.<br />
– Be sure to check for gas leakage.<br />
CAUTION: Do not leak the gas in the air<br />
during <strong>Air</strong> Purging.<br />
(4) Check for gas leakage.<br />
– Check the flare connections for gas leakage.<br />
(5) Discharge the refrigerant.<br />
– Close the valve on the gas cylinder and discharge<br />
the refrigerant until the gauge indicates<br />
3 to 5 kg/cm 2 g.<br />
Copyright ©2008 LG Electronics. Inc. All right reserved.<br />
Only for training and service purposes<br />
- 52 -<br />
LGE Internal Use Only
Troubleshooting Guide<br />
Balance Refrigerant of the 3-way Valve<br />
(Gas leakage)<br />
Indoor unit<br />
Liquid side<br />
3-Way<br />
valve<br />
Open<br />
Outdoor unit<br />
Gas side<br />
3-Way<br />
valve<br />
Open<br />
OPEN<br />
Lo<br />
CLOSE<br />
• Procedure<br />
(1) Confirm that both the 2-way and 3-way valves<br />
are set to the back seat.<br />
(2) Connect the charge set to the 3-way valve’s<br />
port.<br />
– Leave the valve on the charge set closed.<br />
– Connect the charge hose to the service port.<br />
(3) Open the valve (Lo side) on the charge set and<br />
discharge the refrigerant until the gauge indicates<br />
0 kg/cm 2 G.<br />
– If there is no air in the refrigerant cycle (the<br />
pressure when the air conditioner is not running<br />
is higher than 1 kg/cm 2 G), discharge the refrigerant<br />
until the gauge indicates 0.5 to 1<br />
kg/cm 2 G. if this is the case, it will not be necessary<br />
to apply a evacuatin.<br />
– Discharge the refrigerant gradually; if it is discharged<br />
too suddenly, the refrigeration oil will<br />
also be discharged.<br />
Copyright ©2008 LG Electronics. Inc. All right reserved.<br />
Only for training and service purposes<br />
- 53 -<br />
LGE Internal Use Only
Troubleshooting Guide<br />
Evacuation<br />
(All amount of refrigerant leaked)<br />
Indoor unit<br />
Liquid side<br />
3-Way<br />
valve<br />
Open<br />
Outdoor unit<br />
Gas side<br />
3-Way<br />
valve<br />
Open<br />
Vacuum pump<br />
OPEN<br />
Lo<br />
CLOSE<br />
• Procedure<br />
(1) Connect the vacuum pump to the center hose<br />
of charge set center hose<br />
(2) Evacuation for approximately one hour.<br />
– Confirm that the gauge needle has moved<br />
toward -76 cmHg (vacuum of 4 mmHg or less).<br />
(3) Close the valve (Lo side) on the charge set,<br />
turn off the vacuum pump, and confirm that<br />
the gauge needle does not move (approximately<br />
5 minutes after turning off the vacuum<br />
pump).<br />
(4) Disconnect the charge hose from the vacuum<br />
pump.<br />
– Vacuum pump oil.<br />
If the vacuum pump oil becomes dirty or<br />
depleted, replenish as needed.<br />
Copyright ©2008 LG Electronics. Inc. All right reserved.<br />
Only for training and service purposes<br />
- 54 -<br />
LGE Internal Use Only
Troubleshooting Guide<br />
Gas Charging<br />
(After Evacuation)<br />
Indoor unit<br />
Liquid side<br />
3-Way<br />
valve<br />
Open<br />
Outdoor unit<br />
Gas side<br />
Charging<br />
cylinder<br />
Check valve<br />
3-Way<br />
valve<br />
Open<br />
Lo<br />
(1)<br />
OPEN<br />
CLOSE<br />
• Procedure<br />
(1) Connect the charge hose to the charging<br />
cylinder.<br />
– Connect the charge hose which you dis-connected<br />
from the vacuum pump to the valve at<br />
the bottom of the cylinder.<br />
– If you are using a gas cylinder, also use a<br />
scale and reverse the cylinder so that the system<br />
can be charged with liquid.<br />
(2) Purge the air from the charge hose.<br />
– Open the valve at the bottom of the cylinder<br />
and press the check valve on the charge set to<br />
purge the air. (Be careful of the liquid refrigerant).<br />
The procedure is the same if using a gas<br />
cylinder.<br />
(3) Open the valve (Lo side on the charge set and<br />
charge the system with liquid refrigerant.<br />
– If the system can not be charged with the specified<br />
amount of refrigerant, it can be charged<br />
with a little at a time (approximately 150g each<br />
time) while operating the air conditioner in the<br />
cooling cycle; however, one time is not sufficient,<br />
wait approximately 1 minute and then<br />
repeat the procedure (pumping down-pin).<br />
\<br />
This is different from previous procedures.<br />
Because you are charging with liquid refrigerant<br />
from the gas side, absolutely do not attempt to<br />
charge with larger amounts of liquid refrigerant<br />
while operating the air conditioner.<br />
(4) Immediately disconnect the charge hose from<br />
the 3-way valve’s service port.<br />
– Stopping partway will allow the gas to be discharged.<br />
– If the system has been charged with liquid<br />
refrigerant while operating the air conditioner<br />
turn off the air conditioner before disconnecting<br />
the hose.<br />
(5) Mount the valve stem nuts and the service<br />
port nut.<br />
– Use torque wrench to tighten the service port<br />
nut to a torque of 1.8 kg.m.<br />
– Be sure to check for gas leakage.<br />
Copyright ©2008 LG Electronics. Inc. All right reserved.<br />
Only for training and service purposes<br />
- 55 -<br />
LGE Internal Use Only
Troubleshooting Guide<br />
Self-diagnosis Function<br />
■ Error Indicator<br />
• The function is to self-diagnoisis airconditioner and express the troubles identifically if there is any trouble.<br />
• Error mark is ON/OFF for the operation LED of evaporator body in the same manner as the following table.<br />
• If more than two troubles occur simultaneously, primarily the highest trouble fo error code is expressed.<br />
• After error occurrence, if error is released, error LED is also released simultaneously.<br />
• To operate again on the occurrence of error code, be sure to turn off the power and then turn on.<br />
• Having or not of error code is different from Model.<br />
Indoor Error<br />
Error code Description INV TPS<br />
LED 1<br />
(Red)<br />
LED 2<br />
(Green)<br />
Indoor<br />
Status<br />
00 No Error ON<br />
01 Indoor <strong>Room</strong> themistor error 1time OFF<br />
02 Indoor in-piping sensor error 2times OFF<br />
05 Communcation error between in and out 5times OFF<br />
06 Indoor Out-Piping sensor error 6times OFF<br />
Outdoor Error<br />
Error Code Description INV TPS<br />
LED 1<br />
(Red)<br />
LED 2<br />
(Green)<br />
Indoor<br />
Status<br />
21 DC Peak (IPM Fault) 2times 1time OFF<br />
22 CT 2(Max CT) 2times 2times OFF<br />
23 DC Link Low Volt. 2times 3times OFF<br />
24 L_P/Heater Sink 2times 4times OFF<br />
25 Low voltage / Over voltage 2times 5times OFF<br />
26 DC Comp Position Error 2times 6times OFF<br />
27 PSC Fault Error 2times 7times OFF<br />
28 DC Link High Volt 2times 8times OFF<br />
32 D-Pipe High (INV) 3times 2times OFF<br />
33 D-Pipe High (Normal) 3times 3times OFF<br />
40 CT Sensor (Open/Short) 4times O OFF<br />
41 INV. D-PipeTh Error(Open/Short) 4times 1time OFF<br />
44 Outdoor air Th Error(Open/Short) 4times 4times OFF<br />
45 Cond. Pipe Th Error(Open/Short) 4times 5times OFF<br />
46 Suction Pipe Error(Open/Short) 4times 6times OFF<br />
47 Const D-pipe Th Error(Open/Short) 4times 7times OFF<br />
51 Capacity over 5times 1time OFF<br />
53 Signal error (Indoor ↔ Outdoor) 5times 3times OFF<br />
60 EEPROM Check Sum Error 6times O OFF<br />
61 Cond. Pipe High 6times 1time OFF<br />
62 Heatsink High 6times 2times OFF<br />
63 Cond. Pipe Low 6times 3times OFF<br />
65 Heatsoml Th error (Open/Short) 6times 5times OFF<br />
Copyright ©2008 LG Electronics. Inc. All right reserved.<br />
Only for training and service purposes<br />
- 56 -<br />
LGE Internal Use Only
Troubleshooting Guide<br />
Cycle Troubleshooting Guide<br />
Trouble analysis<br />
1. Check temperature difference between intake and discharge air, and operating current.<br />
Temp. Difference<br />
Operating Current<br />
Temp. difference : approx. 0°C<br />
Current<br />
: less than 80% of<br />
rated current<br />
Temp. difference : approx. 8°C<br />
Current<br />
: less than 80% of<br />
rated current<br />
Temp. difference : less than 8°C<br />
Current<br />
: near the rated<br />
current<br />
All amount of refrigerant leaked out.<br />
Check refrigeration cycle.<br />
Refrigerant leakage<br />
Clog of refrigeration cycle<br />
Defective compressor<br />
Excessive amount of refrigerant<br />
Temp. difference : over 8°C<br />
Normal<br />
NOTICE<br />
Temperature difference between intake and discharge air depends on room air humidity. When the room air<br />
humidity is relatively higher, temperature difference is smaller. When the room air humidity is relatively lower<br />
temperature difference is larger.<br />
2. Check temperature and pressure of refrigeration cycle.<br />
Suction pressure Temperature<br />
(Compared with (Compared with Cause of Trouble Description<br />
the normal value) the normal value)<br />
High Defective compressor Current is low.<br />
Higher<br />
Normal Excessive amount of High pressure does not quickly<br />
refrigerant<br />
rise at the beginning of operation.<br />
Insufficient amount of<br />
Lower Higher refrigerant(Leakage)<br />
Clogging<br />
Current is low.<br />
NOTICE<br />
1. The suction pressure is usually 4.5~6.0 kg/cm 2 G at normal condition.<br />
2. The temperature can be measured by attaching the thermometer to the low pressure tubing and wrap it with<br />
putty.<br />
Copyright ©2008 LG Electronics. Inc. All right reserved.<br />
Only for training and service purposes<br />
- 57 -<br />
LGE Internal Use Only
Troubleshooting Guide<br />
Electronic Parts Troubleshooting Guide<br />
1. AS-W306MMH0<br />
❇ Refer to electronic contorol device drawing & schematic diagram.<br />
Trouble 1<br />
The Product doesn’t operate at all.<br />
Turn off the main power and wait until LED on outdoor PCB is off.<br />
Turn on the main power again.<br />
Does "Beeping" sound is made from the indoor unit?<br />
NO<br />
Check the voltage of power(AC220V/AC240V, 50Hz).<br />
• The voltage of main power.<br />
• The voltage applied to the unit.<br />
• The connecting method of Indoor/Outdoor connecting cable (each color)<br />
• The P.W.B. Ass'y<br />
(Fuse, Noise Filter, Power Transformer, IC04D, etc.)<br />
YES<br />
• Primarily, the operating condition<br />
of Micom is O.K.<br />
• Check CN-DISP<br />
The operation check of the P.C.B. Ass'y<br />
Procedure<br />
1) The input voltage of power transformer.<br />
2) The output voltage of power<br />
transformer.<br />
3) IC04D(7805)<br />
4) IC01A(KIA7036)<br />
Specification<br />
1) AC230V ± 30V<br />
: Check the rated voltage<br />
2) 14V ± 3V<br />
3) DC5V<br />
4) The voltage of micom pin 21<br />
: DC4.5V↑<br />
Remedy<br />
1) Replace<br />
power transfomer.<br />
2) Replace<br />
power transfomer.<br />
3) Replace IC04D.<br />
4) Replace IC01A.<br />
Copyright ©2008 LG Electronics. Inc. All right reserved.<br />
Only for training and service purposes<br />
- 58 -<br />
LGE Internal Use Only
Troubleshooting Guide<br />
Trouble 2<br />
Product doesn't operate with the remote controller.<br />
Turn on main power.<br />
While the compressor has been stopped, the compressor does not operate<br />
owing to the delaying function for 3 minutes after stopped.<br />
When the compressor stopped Indoor Fan is driven by a low speed.<br />
At this point the wind speed is not controlled by the remote controller.<br />
(When operated in the Sleeping Mode, the wind speed is set to the low speed as force.)<br />
Caused by the remote controller.<br />
Caused by other parts except<br />
the remote controller<br />
When the mark ( ) is displayed in LCD<br />
screen, replace battery.<br />
Check the contact of CN-DISP 1 connector<br />
When the detect switch (double key) inside the<br />
remote controller door is fault, it is impossible to<br />
operate temperature regulating(▲ / ▼) and wind<br />
speed selecting.<br />
Check DISP PWB Ass'y<br />
-Voltage between CN1 ➀ - ➆ : DC +5V<br />
Check the Display PWB Ass'y<br />
• Check receiver ass'y<br />
Copyright ©2008 LG Electronics. Inc. All right reserved.<br />
Only for training and service purposes<br />
- 59 -<br />
LGE Internal Use Only
Troubleshooting Guide<br />
Trouble 3<br />
When indoor Fan does not operate.<br />
Turn off main power.<br />
Check the connection of CN-MOTOR.<br />
Check the Fan Motor.<br />
Check the Fuse(AC250V, T2A).<br />
Check the related circuit of indoor Fan Motor.<br />
• The pin No. 42 of micom and the part for driving SSR.(IC01M)<br />
• Check the related pattern.<br />
• Check the SSR.<br />
- SSR Open: Indoor Fan Motor never operate.<br />
- SSR short: Indoor Fan Motor always operates in case of ON or OFF.<br />
Turn on the main power<br />
Check the SSR high speed operation by remote control.<br />
(the Indoor Fan Motor is connected)<br />
The voltage of Pin No 1(orange) and 3(black) of CN-FAN.<br />
About AC 160V over<br />
About AC 50V over<br />
SSR is not damaged<br />
Check SSR<br />
Copyright ©2008 LG Electronics. Inc. All right reserved.<br />
Only for training and service purposes<br />
- 60 -<br />
LGE Internal Use Only
Troubleshooting Guide<br />
Trouble 4<br />
When the louver does not operate.<br />
• Confirm that the vertical louver is normally geared with the shaft of Stepping Motor.<br />
• If the regular torque is detected when rotating the vertical louver with hands ⇒ Normal<br />
• Check the connecting condition of CN-U/D or CN-L/R1 Connector<br />
• Check the soldering condition(on PCB) of CN-L/R1 or CN0L/R Connector<br />
Check the operating circuit of the vertical louver<br />
• Confirm that there is DC +12V between pin ➀ of CN-U/D, CN-L/R1 and GND.<br />
• Confirm that there is a soldering short at following terminals.<br />
- Between 33 , 34 , 35 and 36 of MICOM - Between 37 , 38 , 39 and 40 of MICOM<br />
- Between 4 , 5 , 6 and 7 of IC02M - Between 1 , 2 and 3 of IC02M<br />
If there are no problems after above checks.<br />
• Confirm the assembly condition that are catching and interfering parts in the link of the<br />
vertical louver<br />
Copyright ©2008 LG Electronics. Inc. All right reserved.<br />
Only for training and service purposes<br />
- 61 -<br />
LGE Internal Use Only
Troubleshooting Guide<br />
General Information<br />
■ Error Indicator (Indoor)<br />
• The function is to self-diagnosis air conditioner and express the troubles if there is any trouble.<br />
• Error mark is displayed on display window of indoor units and wired-remote controller, and LED of outdoor unit<br />
control board.<br />
• If more than two troubles occur simultaneously, lower number of error code is first displayed.<br />
• After error occurs, if error is released, error LED is also released simultaneously.<br />
1 digit<br />
10 digit<br />
■ Indoor Error<br />
Error<br />
code<br />
01<br />
Contents<br />
<strong>Air</strong> sensor (open/short)<br />
Case of error<br />
Open / Short<br />
Indoor<br />
Status<br />
Off<br />
02<br />
Inlet pipe sensor<br />
Open / Short<br />
Off<br />
05<br />
Communication(Indoor ↔ Outdoor)<br />
Communication Poorly<br />
Off<br />
06<br />
Outlet pipe sensor<br />
Open / Short<br />
Off<br />
Copyright ©2008 LG Electronics. Inc. All right reserved.<br />
Only for training and service purposes<br />
- 62 -<br />
LGE Internal Use Only
Troubleshooting Guide<br />
■ Error Indicator (Outdoor)<br />
Outdoor Error<br />
Ex) Error 21 (DC Peack)<br />
LED01G<br />
(RED)<br />
LED02G<br />
(GREEN)<br />
2 Times<br />
2 Times<br />
2 Times<br />
1 Sec.<br />
1 Sec. 1 Sec.<br />
1 Time 1 Time 1 Time<br />
2 Sec. 2 Sec.<br />
Error<br />
code<br />
Contents<br />
LED01G<br />
(Red)<br />
LED02G<br />
(Green)<br />
Case of error<br />
Outdoor<br />
Status<br />
21<br />
IPM Fault (Compressor Over current)<br />
2 times<br />
1 time<br />
Compressor malfunction,IPM Fault<br />
Off<br />
22<br />
CT 2(Max. Current)<br />
2 times<br />
2 times<br />
Current is 14A<br />
Off<br />
23<br />
DC Link Low Volt.<br />
2 times<br />
3 times<br />
DC Link volt. Is 140V<br />
Off<br />
24<br />
Low / High press<br />
2 times<br />
4 times<br />
Low / High press switch OPEN<br />
Off<br />
25<br />
AC Low / AC High Volt.<br />
2 times<br />
5 times<br />
Abnormal AC volt. Input.<br />
Off<br />
26<br />
DC Compressor Position<br />
2 times<br />
6 times<br />
Off<br />
27<br />
PSC Fault<br />
2 times<br />
7 times<br />
Off<br />
28<br />
DC Link High Volt<br />
2 times<br />
8 times<br />
Off<br />
Off<br />
32<br />
Discharge Pipe Temp. High (INV)<br />
3 times<br />
2 times<br />
Off<br />
Off<br />
33<br />
Discharge Pipe Temp. High (Cons.)<br />
3 times<br />
3 times<br />
Off<br />
Off<br />
Copyright ©2008 LG Electronics. Inc. All right reserved.<br />
Only for training and service purposes<br />
- 63 -<br />
LGE Internal Use Only
Troubleshooting Guide<br />
■ Error Indicator (Outdoor)<br />
Outdoor Error<br />
Error<br />
code<br />
Contents<br />
LED01G<br />
(Red)<br />
LED02G<br />
(Green)<br />
Case of error<br />
Outdoor<br />
Status<br />
40<br />
CT Circuit<br />
4 times<br />
CT Circuit malfunction<br />
Off<br />
41<br />
D-pipe sensor INV. (open/ short)<br />
4 times<br />
1 time<br />
Open / Short<br />
Off<br />
44<br />
<strong>Air</strong> sensor (open/ short)<br />
4 times<br />
4 times<br />
Open / Short<br />
Off<br />
45<br />
Cond. Pipe sensor (open/ short)<br />
4 times<br />
5 times<br />
Open / Short<br />
Off<br />
46<br />
Suction pipe sensor (open/ short)<br />
4 times<br />
6 times<br />
Open / Short<br />
Off<br />
47<br />
D-pipe sensor Cons. (open/ short)<br />
4 times<br />
7 times<br />
Open / Short<br />
Off<br />
51<br />
Over capacity<br />
5 times<br />
1 times<br />
Over combination<br />
Off<br />
53<br />
Communication (Indoor<br />
Outdoor)<br />
5 times<br />
3 times<br />
Communication Poorly<br />
Off<br />
60<br />
EEPROM check sum<br />
6 times<br />
Check sum mismatching<br />
Off<br />
61<br />
Cond. Pipe sensor temp. high<br />
6 times<br />
1 time<br />
Cond. Temp. high<br />
Off<br />
62<br />
Heat sink sensor temp. high<br />
6 times<br />
2 times<br />
Heat sink temp. high<br />
Off<br />
65<br />
Heat sink sensor (open/ short)<br />
6 times<br />
5 times<br />
Open / Short<br />
Off<br />
Copyright ©2008 LG Electronics. Inc. All right reserved.<br />
Only for training and service purposes<br />
- 64 -<br />
LGE Internal Use Only
Troubleshooting Guide<br />
1) Troubleshooting CH01, CH02, CH06<br />
Display<br />
code<br />
Title Cause of error Check point & Normal condition<br />
01<br />
Indoor air sensor<br />
• Open / Short<br />
• Soldered poorly<br />
• Internal circuit error<br />
Normal resistor : 10KΩ/ at 25°C (Unplugged)<br />
Normal voltage : 2.5Vdc / at 25°C (plugged)<br />
02<br />
Indoor inlet pipe sensor<br />
• Open / Short<br />
• Soldered poorly<br />
• Internal circuit error<br />
Normal resistor : 5KΩ/ at 25°C (Unplugged)<br />
Normal voltage : 2.5Vdc / at 25°C (plugged)<br />
06<br />
Indoor outlet pipe sensor<br />
• Open / Short<br />
• Soldered poorly<br />
• Internal circuit error<br />
Normal resistor : 5KΩ/ at 25°C (Unplugged)<br />
Normal voltage : 2.5Vdc / at 25°C (plugged)<br />
10kΩ<br />
2.5Vdc<br />
Ω<br />
V<br />
Check the resistance<br />
Check the voltage<br />
Check Point<br />
1. Unplug the sensor on Indoor unit PCB.<br />
2. Estimate the resistance of each sensor.<br />
3. If the resistance of the sensor is 10KΩ/ 5KΩ at 25°C, then sensor is normal.<br />
4. If the resistance of the sensor is 0 KΩ or ∞, then sensor is abnormal. → Change the sensor.<br />
5. Plug the sensor on Indoor unit PCB and Power ON.<br />
6. Estimate the voltage of each sensor.<br />
7. If the voltage of the sensor is 2.5Vdc at 25°C, then sensor is normal.<br />
8. If the resistance of the sensor is 0 or 5Vdc, then sensor is abnormal. → Repair or Change the PCB.<br />
Copyright ©2008 LG Electronics. Inc. All right reserved.<br />
Only for training and service purposes<br />
- 65 -<br />
LGE Internal Use Only
Troubleshooting Guide<br />
2) Troubleshooting CH05, CH53<br />
Display<br />
code<br />
04<br />
/<br />
53<br />
Title Cause of error Check point & Normal condition<br />
Communication<br />
(Indoor → Outdoor)<br />
• Communication poorly<br />
• Power input AC 230V. (Outdoor, Indoor)<br />
• The connector for transmission is disconnected.<br />
• The connecting wires are misconnected.<br />
• The GND1,2, 3 is not connected at main GND.<br />
• The communication line is shorted at GND.<br />
• Transmission circuit of outdoor PCB is abnormal.<br />
• Transmission circuit of indoor PCB is abnormal.<br />
Check Point<br />
1. Check the input power AC230V. (Outdoor, Indoor unit)<br />
2. Check the communication wires are correctly connected.<br />
→ Adjust the connection of wire<br />
→ Confirm the wire of “Live”, “Neutral”<br />
3. Check the resistance between communication line and<br />
GND. (Normal : Over 2MΩ)<br />
4. Check the connector for communication is correctly<br />
connected.<br />
5. Check the connection of GND1, GND2, GND3 and main<br />
GND.<br />
6. If one indoor unit is operated normally, outdoor PCB is no<br />
problem.<br />
→ Check the another indoor unit.<br />
* CH05 is displayed at indoor unit, CH53 is displayed at outdoor<br />
unit.<br />
Copyright ©2008 LG Electronics. Inc. All right reserved.<br />
Only for training and service purposes<br />
- 66 -<br />
LGE Internal Use Only
Troubleshooting Guide<br />
3) Troubleshooting CH21<br />
Display<br />
code<br />
21 DC Peak<br />
Title Cause of error Check point & Normal condition<br />
• Instant over current<br />
• Over Rated current<br />
• Poor insulation of IPM<br />
• An instant over current in the U,V,W phase<br />
- Comp lock<br />
- The abnormal connection of U,V,W<br />
• Over load condition<br />
- Overcharging of refrigerant<br />
- Pipe length.<br />
• Poor insulation of compressor<br />
Comp<br />
U<br />
Resistance(Ω) at 20°C<br />
V<br />
W<br />
Ω<br />
Terminal<br />
U-V<br />
V-W<br />
W-U<br />
Inverter<br />
comp.<br />
0.64<br />
0.64<br />
0.64<br />
Constant<br />
comp.<br />
0.8<br />
0.8<br />
0.8<br />
Comp<br />
Copper<br />
pipe<br />
Ω<br />
Resistance(Ω) at 20°C<br />
Terminal<br />
U-GND<br />
V-GND<br />
W-GND<br />
Inverter<br />
comp.<br />
2MΩ<br />
2MΩ<br />
2MΩ<br />
Constant<br />
comp.<br />
2MΩ<br />
2MΩ<br />
2MΩ<br />
Check Point<br />
1. Check the wire connection. (U,V,W)<br />
2. Check the load condition. (Refrigerant, Pipe length, …) → Adjust the load condition<br />
3. Check the electricity leakage of the compressor. → Normal : Over 2MΩ.<br />
4. Check the resistance of compressor. → Normal : 0.65Ω(INV), 0.8Ω(Cons.) → No difference at each terminal.<br />
5. Check the insulation from water at IPM part. → Check the trace of water.<br />
6. Check the IPM circuit.<br />
Copyright ©2008 LG Electronics. Inc. All right reserved.<br />
Only for training and service purposes<br />
- 67 -<br />
LGE Internal Use Only
Troubleshooting Guide<br />
4) Troubleshooting CH22<br />
Display<br />
code<br />
21<br />
Title Cause of error Check point & Normal condition<br />
Max. C/T<br />
Over current (13A )<br />
Malfunction of compressor<br />
Blocking of pipe<br />
Low voltage input<br />
Refrigerant, pipe length, blocked, …<br />
22<br />
C/T<br />
Internal circuit<br />
Initial current error<br />
Malfunction of current detection circuit.<br />
(Open / Short)<br />
The voltage of “C01N” Is 4.0Vdc(25A) .<br />
V<br />
Check Point<br />
1. Check the power source.<br />
2. Check the fan operation is right.<br />
3. Check the current.<br />
+ -<br />
+ -<br />
-<br />
+<br />
4. Check the install condition.<br />
5. Check the internal circuit. (C/T, Diode, Resistor)<br />
Copyright ©2008 LG Electronics. Inc. All right reserved.<br />
Only for training and service purposes<br />
- 68 -<br />
LGE Internal Use Only
Troubleshooting Guide<br />
5) Troubleshooting CH23, CH28<br />
Display<br />
code<br />
Title Cause of error Check point & Normal condition<br />
23<br />
DC Link<br />
Low voltage.<br />
• DC link volt. is<br />
140Vdc .<br />
• Check the power source.<br />
• Check the components.<br />
28<br />
DC Link<br />
High voltage<br />
• DC link volt. is<br />
420Vdc .<br />
• Check the power source.<br />
• Check the components.<br />
Check Point<br />
1. Check the power source.<br />
2. Check the components<br />
(B/Diode, Reactor, PSC Parts )<br />
V<br />
Copyright ©2008 LG Electronics. Inc. All right reserved.<br />
Only for training and service purposes<br />
- 69 -<br />
LGE Internal Use Only
Troubleshooting Guide<br />
6) Troubleshooting CH24, CH25<br />
Display<br />
code<br />
Title Cause of error Check point & Normal condition<br />
24<br />
Press S/W Open<br />
• Low / High press<br />
S/W open.<br />
• Check the connection of “CN_Press”.<br />
• Check the components.<br />
25<br />
Input voltage<br />
• Abnormal Input voltage<br />
(140Vac , 300Vac .<br />
• Check the power source.<br />
• Check the components.<br />
TRANS1<br />
50Hz, DC12V<br />
CN PRESS<br />
CN TRNAS1<br />
Check Point<br />
• CH 24<br />
1. Check the connection of “CN_PRESS”<br />
2. Check the install condition for over load.<br />
3. Check the <strong>SVC</strong> V/V open.<br />
4. Check the leakage of refrigerant.<br />
• CH 25<br />
1. Check the power source.<br />
2. Check the components<br />
(Trans1, B/Diode, Diode, Resistance)<br />
Copyright ©2008 LG Electronics. Inc. All right reserved.<br />
Only for training and service purposes<br />
- 70 -<br />
LGE Internal Use Only
Troubleshooting Guide<br />
7) Troubleshooting CH26, CH27<br />
Display<br />
code<br />
Title Cause of error Check point & Normal condition<br />
26<br />
DC Compressor<br />
Position<br />
• Compressor<br />
position detect error<br />
• Check the connection of comp wire “U,V,W”<br />
• Malfunction of compressor<br />
• Check the component of “IPM”, detection parts.<br />
27<br />
PSC Fault<br />
• Over current at “IGBT”<br />
• Check the component of “IGBT” .<br />
• Check the components.<br />
E<br />
C<br />
B<br />
C<br />
B<br />
E<br />
Check Point<br />
• CH 26<br />
1. Check the connection of “U,V,W”<br />
2. Check the insulation of IPM part.<br />
3. Check the compressor. (same with CH21)<br />
• CH 27<br />
1. Check the component of “IGBT”<br />
2. Check the components<br />
(IGBT, R04S, NF1, BD02S)<br />
Copyright ©2008 LG Electronics. Inc. All right reserved.<br />
Only for training and service purposes<br />
- 71 -<br />
LGE Internal Use Only
Troubleshooting Guide<br />
8) Troubleshooting CH32, CH33<br />
Display<br />
code<br />
32<br />
Title Cause of error Check point & Normal condition<br />
D-pipe (Inverter)<br />
temp. high<br />
(105°C )<br />
• Discharge sensor<br />
(Inverter) temp. high<br />
• Check the discharge pipe sensor for INV.<br />
• Check the install condition for over load.<br />
• Check the leakage of refrigerant.<br />
• Check the <strong>SVC</strong> V/V open.<br />
33<br />
D-pipe (Constant)<br />
temp. high<br />
(105°C )<br />
• Discharge sensor<br />
(Cons.) temp. high<br />
• Check the discharge pipe sensor for Cons.<br />
• Check the install condition for over load.<br />
• Check the leakage of refrigerant.<br />
• Check the <strong>SVC</strong> V/V open.<br />
D-Pipe temp.<br />
Toff(105) °C<br />
T2(95) °C<br />
T1(90) °C<br />
COMP Frequency<br />
(Hz)<br />
Normal<br />
Normal<br />
OFF<br />
LEV Openness<br />
(Pulse)<br />
Normal<br />
Normal<br />
OFF Control<br />
Check Point<br />
• CH 32<br />
1. Check the install condition for over load.<br />
2. Check the <strong>SVC</strong> V/V open.<br />
3. Check the leakage of refrigerant.<br />
• CH 33<br />
1. Check the install condition for over load.<br />
2. Check the <strong>SVC</strong> V/V open.<br />
3. Check the leakage of refrigerant.<br />
4. Check the constant compressor. (same with CH21)<br />
Copyright ©2008 LG Electronics. Inc. All right reserved.<br />
Only for training and service purposes<br />
- 72 -<br />
LGE Internal Use Only
Troubleshooting Guide<br />
9) Troubleshooting CH41, CH44, CH45, CH46, CH47, CH65<br />
Display<br />
code<br />
Title Cause of error Check point & Normal condition<br />
41<br />
D-pipe sensor (Inverter)<br />
• Open / Short<br />
• Soldered poorly<br />
• Internal circuit error<br />
• Normal resistor : 200KΩ / at 25°C (Unplugged)<br />
• Normal voltage : 4.5Vdc / at 25°C (plugged)<br />
44<br />
<strong>Air</strong> sensor<br />
• Open / Short<br />
• Soldered poorly<br />
• Internal circuit error<br />
• Normal resistor : 10KΩ / at 25°C (Unplugged)<br />
• Normal voltage : 2.5Vdc / at 25°C (plugged)<br />
45<br />
Condenser Pipe sensor<br />
• Open / Short<br />
• Soldered poorly<br />
• Internal circuit error<br />
• Normal resistor : 5KΩ / at 25°C (Unplugged)<br />
• Normal voltage : 2.5Vdc / at 25°C (plugged)<br />
46<br />
Suction Pipe sensor<br />
• Open / Short<br />
• Soldered poorly<br />
• Internal circuit error<br />
• Normal resistor : 5KΩ / at 25°C (Unplugged)<br />
• Normal voltage : 2.5Vdc / at 25°C (plugged)<br />
47<br />
D-pipe sensor (Constant)<br />
• Open / Short<br />
• Soldered poorly<br />
• Internal circuit error<br />
• Normal resistor : 200KΩ / at 25°C (Unplugged)<br />
• Normal voltage : 4.5Vdc / at 25°C (plugged)<br />
65<br />
Heat sink sensor<br />
• Open / Short<br />
• Soldered poorly<br />
• Internal circuit error<br />
• Normal resistor : 10KΩ / at 25°C (Unplugged)<br />
• Normal voltage : 2.5Vdc / at 25°C (plugged)<br />
Ω<br />
Check Point<br />
1. Estimate the resistance of each sensor.(Unplugged)<br />
2. Estimate the voltage of each sensor.(Plugged)<br />
3. If the resistance of the sensor is 0 kΩ or ∞, then sensor is abnormal.<br />
If the voltage of the sensor is 0 V or 5Vdc, then sensor is abnormal.<br />
Copyright ©2008 LG Electronics. Inc. All right reserved.<br />
Only for training and service purposes<br />
- 73 -<br />
LGE Internal Use Only
Troubleshooting Guide<br />
10) Troubleshooting CH51, CH60<br />
Display<br />
code<br />
Title Cause of error Check point & Normal condition<br />
51<br />
Over capacity<br />
• Over capacity<br />
Combination<br />
• Check the indoor unit capacity.<br />
• Check the combination table.<br />
60<br />
EEPROM<br />
Check sum<br />
• Check sum error<br />
• Check the PCB ASM P/No.<br />
• Check the poor soldering.<br />
Model Gross max. capacity Max. single indoor unit capacity<br />
ASUW306MMH0<br />
ASUW306MMH1<br />
30k<br />
30k<br />
Check Point<br />
• CH 51<br />
1. Check the indoor unit capacity.<br />
• CH 60<br />
1. Check the insertion condition of EEPROM.<br />
2. Check the poor soldering<br />
Copyright ©2008 LG Electronics. Inc. All right reserved.<br />
Only for training and service purposes<br />
- 74 -<br />
LGE Internal Use Only
Troubleshooting Guide<br />
11) Troubleshooting CH61, CH62<br />
Display<br />
code<br />
Title Cause of error Check point & Normal condition<br />
61<br />
Condenser<br />
pipe sensor<br />
temp. high<br />
• Condenser pipe sensor<br />
detected high<br />
temp.(65°C)<br />
• Check the load condition.<br />
• Check the sensor of Condenser pipe sensor.<br />
62<br />
Heat sink sensor<br />
temp. high<br />
• Heat sink sensor<br />
detected high<br />
temp.(85°C)<br />
• Check the fan is locked.<br />
• Check the sensor of heat sink.<br />
Heat Sink temp.<br />
Toff °C<br />
T2 °C<br />
T1 °C<br />
COMP Frequency<br />
(Hz)<br />
Normal<br />
Normal<br />
OFF<br />
Normal<br />
Check Point<br />
• CH 61<br />
1. Check the install condition for over load.<br />
(Refrigerant, Pipe length, Blocked, …)<br />
• CH 62<br />
1. Check the fan is locked.<br />
2. Check the Outdoor temp. is very high.<br />
Copyright ©2008 LG Electronics. Inc. All right reserved.<br />
Only for training and service purposes<br />
- 75 -<br />
LGE Internal Use Only
<strong>Exploded</strong> View<br />
<strong>Exploded</strong> View<br />
Indoor Unit: AS-W306MMH0, AS-W306MMH1<br />
342800A<br />
131410<br />
733010<br />
359011A<br />
159830<br />
135311<br />
342800B<br />
146811B<br />
354210<br />
359011B<br />
346810<br />
35211B<br />
352150<br />
268711B<br />
266090<br />
147581<br />
146811A<br />
263230A<br />
135313<br />
249951<br />
W0CZZA<br />
267110<br />
152302<br />
135314<br />
152313<br />
135316<br />
135315<br />
268711A<br />
152302<br />
Copyright ©2008 LG Electronics. Inc. All right reserved.<br />
Only for training and service purposes<br />
- 76 -<br />
LGE Internal Use Only
<strong>Exploded</strong> View<br />
Outdoor Unit: AS-W306MMH0, AS-W306MMH1<br />
349480<br />
435301<br />
566000<br />
552116<br />
435512<br />
558511<br />
548490<br />
552204<br />
559010<br />
437210<br />
552111<br />
546810A<br />
546810B<br />
447910<br />
430410<br />
349600<br />
649950<br />
554160A<br />
550140<br />
554031<br />
268711F<br />
549810<br />
137213A<br />
554160B<br />
552203B<br />
552203A<br />
435300<br />
137213B<br />
435511<br />
263230B<br />
263230C<br />
263230D<br />
Copyright ©2008 LG Electronics. Inc. All right reserved.<br />
Only for training and service purposes<br />
- 77 -<br />
LGE Internal Use Only
P/NO : 3828A20347G July, 2008