Infant Flow LP SiPAP Bonnet User Guide - CareFusion
Infant Flow LP SiPAP Bonnet User Guide - CareFusion
Infant Flow LP SiPAP Bonnet User Guide - CareFusion

Create successful ePaper yourself
Turn your PDF publications into a flip-book with our unique Google optimized e-Paper software.
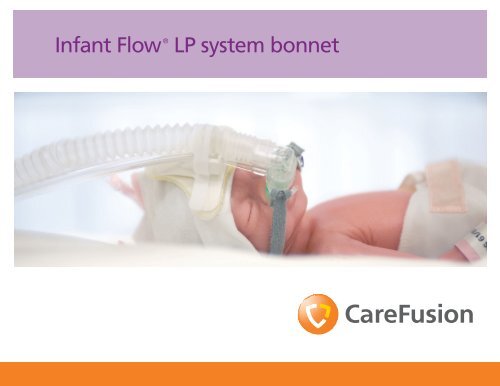
<strong>Infant</strong> <strong>Flow</strong> ®<br />
<strong>LP</strong> system bonnet
Table of contents<br />
Prepare <strong>Infant</strong> <strong>Flow</strong> <strong>LP</strong> <strong>SiPAP</strong> driver.................1<br />
<strong>Infant</strong> <strong>Flow</strong> <strong>LP</strong> components.............................2<br />
Generator components...................................3<br />
Low pressure generator..................................4<br />
Nasal prongs..................................................5<br />
Nasal mask.....................................................6<br />
Nasal prongs and mask sizing.........................7<br />
<strong>Bonnet</strong> sizing..................................................8<br />
Generator assembly application......................9<br />
Connect prongs or mask............................9<br />
Attach gray straps....................................10<br />
Apply the bonnet.....................................11<br />
Remove the support cradle.......................12<br />
Position the support cradle.......................13<br />
Align the generator..................................14<br />
Secure the generator ...............................15<br />
Attach the gray straps..............................16<br />
Adjust tension..........................................17<br />
Final check of generator assembly................18<br />
Check for proper application<br />
of generator and prongs...........................18<br />
Check placement of<br />
exhalation tube........................................19<br />
Verify proper nasal prongs position...........20<br />
Incorrect nasal prong position...................21<br />
Verify proper mask placement..................22<br />
Incorrect mask size—too large..................23<br />
Incorrect mask size—too small .................24<br />
Warnings and cautions.................................25<br />
Application tips............................................26<br />
Final check and routine inspection................27<br />
Notes......................................................28-29<br />
i
NCPAP/<br />
Pres Low<br />
L/min<br />
14<br />
12<br />
10<br />
8<br />
6<br />
4<br />
2<br />
<strong>Infant</strong> <strong>Flow</strong><br />
<strong>SiPAP</strong><br />
30<br />
XDCR<br />
40<br />
21<br />
50<br />
60<br />
70<br />
80<br />
90<br />
100<br />
P PROX<br />
Pres High<br />
L/min<br />
5<br />
4<br />
3<br />
2<br />
1<br />
Prepare <strong>Infant</strong> <strong>Flow</strong> <strong>LP</strong> <strong>SiPAP</strong> driver<br />
1. Attach the infant circuit to humidifier<br />
and nCPAP driver.<br />
2. Attach generator to the circuit.<br />
3. Perform oxygen sensor calibration<br />
and user verification.<br />
4. Enter desired settings.<br />
3 4<br />
1<br />
2<br />
1
<strong>Infant</strong> <strong>Flow</strong> <strong>LP</strong> components<br />
A. Masks and prongs<br />
B. Generator<br />
C. <strong>Bonnet</strong> sizing guide<br />
D. Mask/prong sizing guide<br />
E. Headgear<br />
F. <strong>Bonnet</strong><br />
A<br />
B<br />
E<br />
C<br />
D<br />
F<br />
2
Generator components<br />
A. Exhalation tube<br />
B. Securing strap<br />
C. Generator head<br />
D. Fixation tab<br />
B<br />
A<br />
E. Mask/prong<br />
receiver base<br />
F. Support cradle<br />
G. Pressure and drive lines<br />
C<br />
D<br />
E<br />
F<br />
G<br />
3
Low pressure generator<br />
• Lower drive pressure<br />
– Prevents pressure backup into the<br />
water auto-feed system<br />
• Pressure relief valve<br />
Pressure relief valve<br />
4
Nasal prongs<br />
Anatomically designed<br />
A. Flared tip<br />
B. Flexible bevel<br />
C. Base<br />
A<br />
B<br />
C<br />
D<br />
E<br />
D. Size indicator<br />
E. Key<br />
A<br />
B<br />
C<br />
D<br />
5
Nasal mask<br />
Anatomically designed<br />
A<br />
B<br />
A. Nasal bridge cushion<br />
B. Contour shape<br />
C. Key<br />
D. Flexible bellow<br />
E. Assessment window<br />
F. Size indicator<br />
C<br />
D<br />
E<br />
E<br />
D<br />
F<br />
6
Nasal prongs and mask sizing<br />
• Use sizing guide to determine appropriate<br />
mask/prong size<br />
• Nasal prongs: Choose dots that fill the<br />
nare space<br />
• If between sizes, choose the larger size<br />
• Nasal masks: Choose the triangle that fits<br />
over the nose<br />
7
<strong>Bonnet</strong> sizing<br />
• Measure from the center of the forehead to the nape of the neck back to the center of<br />
the forehead<br />
• The color squares and numbers correlate to bonnet size<br />
8
Generator assembly application<br />
Connect prongs or mask<br />
Align the notch on the prongs/mask to straddle the pressure lines (step 3).<br />
1.<br />
2.<br />
3.<br />
4.<br />
9
Attach gray straps<br />
Insert end of strap<br />
through the slit.<br />
Pull until a small<br />
loop is formed.<br />
1.<br />
2.<br />
Place loop over<br />
fixation arm.<br />
Pull tight<br />
and attach<br />
second strap.<br />
3. 4.<br />
10
Apply the bonnet<br />
1. Position the bonnet with the tip of support<br />
cradle pad in alignment with the center of the<br />
forehead and nose.<br />
2. Gently pull the bonnet down.<br />
1. 2.<br />
3. Make sure the ears are covered and in<br />
normal position.<br />
3.<br />
11
Remove the support cradle<br />
1. Expand the collapsible corrugated tubing.<br />
1.<br />
2. Remove the support cradle from the<br />
generator assembly.<br />
2.<br />
12
Position the support cradle<br />
1. Align center of bonnet<br />
with the midline of the<br />
forehead and nose.<br />
2. Center the support<br />
cradle on the pad.<br />
3. Press the three tabs<br />
down to secure.<br />
1. 2. 3.<br />
13
Align the generator<br />
1. Center the generator assembly over patient nose<br />
and support cradle.<br />
2. Use a gentle rocking motion to insert the<br />
nasal prongs.<br />
3. Place the drive line and pressure line into the<br />
support cradle with the exhaust tubing resting<br />
on top.<br />
1. 2. 3.<br />
14
Secure the generator<br />
4. Wrap the locking strap over the exhalation tubing<br />
and attach to the side of the support cradle.<br />
4.<br />
5. Position the small slit over the corrugate<br />
of the exhalation tube.<br />
5.<br />
15
Attach the gray straps<br />
1. Weave the gray strap<br />
through the bonnet<br />
holes, starting from<br />
the inside of the<br />
colored hole.<br />
2. Thread up through<br />
the colored hole.<br />
3. Continue threading<br />
through the third<br />
colored hole.<br />
1. 2. 3.<br />
16
Adjust tension<br />
1. Use the gray straps to adjust tension.<br />
1.<br />
2. Tie the ends of the bonnets (optional).<br />
3. Tuck strap ends under the bonnet folds.<br />
2. 3.<br />
17
Final check of generator assembly<br />
Check for proper application of generator and prongs<br />
• Generator assembly centered with nose<br />
• Side straps low on cheek<br />
• Bellows on prongs visible<br />
• Locking strap in place<br />
18
Check placement of exhalation tube<br />
Incorrect<br />
Correct<br />
19
Verify proper nasal prongs position<br />
• Bellows are visible<br />
• Septum is visible<br />
• Generator assembly has<br />
minimal contact with skin<br />
20
Incorrect nasal prongs position<br />
• Too tight,<br />
bevels compressed<br />
• Prong outside of nare<br />
• Base not seated on the<br />
generator head<br />
21
Verify proper mask placement<br />
• Mask covers nasal profile<br />
• Mask rests below the eye<br />
• Bellows not compressed<br />
• Side strap low on neck<br />
22
Incorrect mask size—too large<br />
• Mask cuts into the infant’s eye<br />
and sits high on the bridge of<br />
the nose<br />
• Bottom of the mask rests<br />
on upper lip<br />
23
Incorrect mask size—too small<br />
• Mask blocks the nares<br />
• Mask unable to cover nose<br />
24
Warnings and cautions<br />
WARNING:<br />
• Use this product only as directed in the product literature to reduce the risk of nasal irritation,<br />
septal distortion, skin irritation and pressure necrosis<br />
• To be used by a trained practitioner, under the direct supervision of a qualified physician<br />
• Only use the <strong>Infant</strong> <strong>Flow</strong> <strong>LP</strong> generator with variable flow nCPAP drivers<br />
• Do not over tighten the fixation straps<br />
25
Application tips<br />
• Select the appropriate size nasal mask to minimize leaks and dead space<br />
• Select the appropriate size nasal prongs; if between sizes, select the larger size<br />
• Application of an incorrectly sized prong, mask, bonnet or headgear will affect stability of<br />
the generator<br />
• Consider alternating the use of prong and mask interfaces at set intervals to change pressure<br />
points on the infant’s face<br />
• Continuously monitor patient’s respiratory status (respiratory rate, heart rate,<br />
oxygen saturation)<br />
• Cover both ears evenly; ensure the ears are not folded<br />
• Adjust the straps to stabilize the generator and maintain a seal at the nose using the least<br />
tension possible<br />
• Recommend humidification be used with nCPAP systems<br />
• The <strong>Infant</strong> <strong>Flow</strong> <strong>LP</strong> has a built in “pop-off” that is activated if the drive pressure exceeds<br />
60 cmH 2 O<br />
26
Final check and routine inspection<br />
Inspect the system at least every 3 to 4 hours to:<br />
• Ensure the patient is receiving the prescribed level of CPAP<br />
• Ensure the generator is stable, secure and not pulling upward on the nose<br />
• Check for deformation or irritation to the nose or surrounding tissue<br />
• Ensure the patient’s septum is clearly visible when using prongs<br />
• Ensure the patient’s eyes are clearly visible and the nares are not blocked when<br />
using masks<br />
• Inspect the fixation device and straps for proper tension and adjust as needed to maintain<br />
a proper fit<br />
• Monitor the patient for gastric insufflation and abdominal distension<br />
• Monitor for excessive condensation in circuit and generator<br />
27
Notes<br />
28
Notes<br />
29
WARNING—U.S. Federal Law restricts this device to sale by or on the order of a physician.<br />
<strong>CareFusion</strong><br />
22745 Savi Ranch Parkway<br />
Yorba Linda, CA 92887<br />
800.231.2466 toll-free<br />
714.283.2228 tel<br />
714.283.8493 fax<br />
<strong>CareFusion</strong> Germany 234 GmbH<br />
Leibnizstrasse 7<br />
97204 Hoechberg<br />
Germany<br />
+49 931 4972-0 tel<br />
+49 931 4972-423 fax<br />
carefusion.com<br />
© 2011 <strong>CareFusion</strong> Corporation or one of its subsidiaries. All rights reserved.<br />
<strong>Infant</strong> <strong>Flow</strong> is a trademark or registered trademark of <strong>CareFusion</strong> Corporation<br />
or one of its subsidiaries. RC2664 (0711/5000) L3415 Rev. A