Microsoft PowerPoint Tutorial - Biochemistry
Microsoft PowerPoint Tutorial - Biochemistry
Microsoft PowerPoint Tutorial - Biochemistry

Create successful ePaper yourself
Turn your PDF publications into a flip-book with our unique Google optimized e-Paper software.
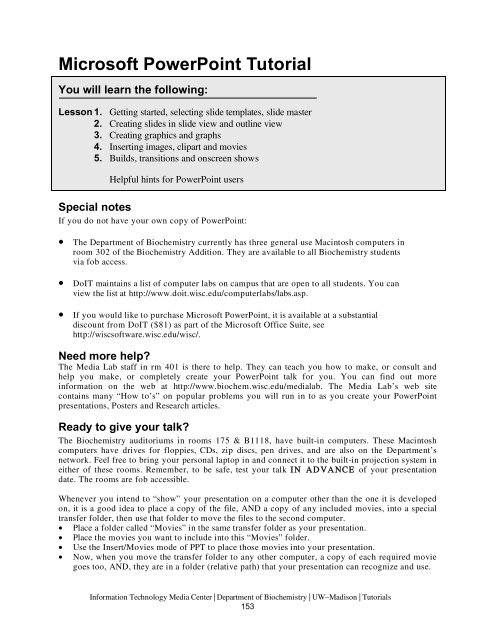
<strong>Microsoft</strong> <strong>PowerPoint</strong> <strong>Tutorial</strong><br />
You will learn the following:<br />
Lesson 1. Getting started, selecting slide templates, slide master<br />
2. Creating slides in slide view and outline view<br />
3. Creating graphics and graphs<br />
4. Inserting images, clipart and movies<br />
5. Builds, transitions and onscreen shows<br />
Helpful hints for <strong>PowerPoint</strong> users<br />
Special notes<br />
If you do not have your own copy of <strong>PowerPoint</strong>:<br />
The Department of <strong>Biochemistry</strong> currently has three general use Macintosh computers in<br />
room 302 of the <strong>Biochemistry</strong> Addition. They are available to all <strong>Biochemistry</strong> students<br />
via fob access.<br />
DoIT maintains a list of computer labs on campus that are open to all students. You can<br />
view the list at http://www.doit.wisc.edu/computerlabs/labs.asp.<br />
If you would like to purchase <strong>Microsoft</strong> <strong>PowerPoint</strong>, it is available at a substantial<br />
discount from DoIT ($81) as part of the <strong>Microsoft</strong> Office Suite, see<br />
http://wiscsoftware.wisc.edu/wisc/.<br />
Need more help?<br />
The Media Lab staff in rm 401 is there to help. They can teach you how to make, or consult and<br />
help you make, or completely create your <strong>PowerPoint</strong> talk for you. You can find out more<br />
information on the web at http://www.biochem.wisc.edu/medialab. The Media Lab’s web site<br />
contains many “How to’s” on popular problems you will run in to as you create your <strong>PowerPoint</strong><br />
presentations, Posters and Research articles.<br />
Ready to give your talk?<br />
The <strong>Biochemistry</strong> auditoriums in rooms 175 & B1118, have built-in computers. These Macintosh<br />
computers have drives for floppies, CDs, zip discs, pen drives, and are also on the Department’s<br />
network. Feel free to bring your personal laptop in and connect it to the built-in projection system in<br />
either of these rooms. Remember, to be safe, test your talk IN ADVANCE of your presentation<br />
date. The rooms are fob accessible.<br />
Whenever you intend to “show” your presentation on a computer other than the one it is developed<br />
on, it is a good idea to place a copy of the file, AND a copy of any included movies, into a special<br />
transfer folder, then use that folder to move the files to the second computer.<br />
Place a folder called “Movies” in the same transfer folder as your presentation.<br />
Place the movies you want to include into this “Movies” folder.<br />
Use the Insert/Movies mode of PPT to place those movies into your presentation.<br />
Now, when you move the transfer folder to any other computer, a copy of each required movie<br />
goes too, AND, they are in a folder (relative path) that your presentation can recognize and use.<br />
Information Technology Media Center | Department of <strong>Biochemistry</strong> | UW–Madison | <strong>Tutorial</strong>s<br />
153
For security reasons, the computers in rooms 175 and B1118 do not appear on the Macintosh<br />
Chooser Appletalk menu. Instead, there is a separate server called “Maitre d” in the <strong>Biochemistry</strong><br />
AppleTalk zone. Log on as “guest” via the chooser (no username or password required), or as<br />
“maitred.biochem.wisc.edu” via ftp (username: transfer, password: bioshow). Place a copy of your<br />
transfer folder (label with your name, please!) into the “pub” subdirectory of this server. You can<br />
retrieve it onto the auditorium Mac before your presentation. OR… go directly to one of the<br />
auditoriums and link to your computer from there and then transfer your files.<br />
Note:<br />
The images and screen dumps throughout this tutorial are from <strong>Microsoft</strong> Office X on a Macintosh.<br />
The specific screens you see on YOUR computer will depend upon the version of PPT you are<br />
running and the current preference settings… Don’t panic! The menus and options are pretty much<br />
similar for any PPT version on Mac and PC.<br />
Information Technology Media Center | Department of <strong>Biochemistry</strong> | UW–Madison | <strong>Tutorial</strong>s<br />
154
Lesson 1. Getting started Master & Template<br />
1) Open <strong>PowerPoint</strong>.<br />
Double click on the HardDrive folder icon<br />
Double click on the Applications folder then the <strong>Microsoft</strong> Office X folder<br />
Double click on the <strong>Microsoft</strong> <strong>PowerPoint</strong> program<br />
2) Starting a new<br />
presentation. When you first<br />
open PPT, the program will<br />
show you the project gallery,<br />
choose <strong>PowerPoint</strong> and a blank<br />
presentation will open.<br />
3) Selecting a slide<br />
layout. The next window to<br />
pop up will ask you about the<br />
general layout of the slides that<br />
you wish to use in this<br />
presentation. Although there are<br />
many options here (title slides,<br />
slides with or without additional<br />
text, slides with graphs, slides with clipart, etc) don’t let this bother you! Any particular slide can be<br />
changed later, and you can insert images, graphs, or movies at any stage on any kind of slide. You<br />
can see all 24 possible layouts by scrolling within this dialogue box.<br />
Select a generic slide layout with title and text called “Bulleted List”, as shown above.<br />
Click on the indicated slide template, then click OK. The chosen slide (blank) will now fill your<br />
screen.<br />
Note: depending upon how PPT is configured<br />
when first installed, and the settings in the PPT<br />
customize folder (Tools/customize), the various<br />
toolbars and menus may look different from<br />
platform to platform.<br />
Don’t panic! All PPT functions are available<br />
somewhere in the menus and toolbars, you may<br />
just have to hunt a bit to find them.<br />
Key point: PPT can “work” with text in several different modes. If text is added into the title<br />
object box (“click to add title”), the program will forever recognize the particular information you<br />
placed on this slide as a “title object”, which means that it and all other similar title objects can be<br />
collectively and uniformly formatted by the Master Slide (see below). Likewise, any outline text<br />
added to the “body object” box (“click to add text”) can be collectively formatted for style, color,<br />
bullets, etc, on the master slide.<br />
Information Technology Media Center | Department of <strong>Biochemistry</strong> | UW–Madison | <strong>Tutorial</strong>s<br />
155
4) Use the Master Slide!!! You may set the background color, text size, font and style for each<br />
slide in your presentation by using the various menus at the top of the screen but it is much easier to<br />
pick a common format by specifying your preferences on the Master slide. This format will<br />
automatically be followed for all slides in your presentation, unless you turn it off for particular<br />
slides or chose to change any elements for a particular slide.<br />
Choose the “View” menu, then “Master” then “Slide<br />
Master”<br />
Choose the “Format” menu, and then explore the<br />
various options in the “Master layout”, “Slide color<br />
scheme”, “Background” and “Apply design” menu.<br />
Install any of these “looks” as your Master Slide, or<br />
chose your own fonts, colors, backgrounds and styles<br />
from among the many selections (e.g., Format menu,<br />
Fonts).<br />
Contextual Menus are little menus that pop up when you click the mouse to show you many<br />
useful shortcuts. The Menu changes to fit whatever you click on.<br />
Windows users: The “right-click” on a Windows computer is achieved by clicking and holding<br />
down the control key on a Macintosh.<br />
Macintosh users: Start using the second mouse button! Hold down the control key and click on<br />
something with the mouse. You will find many useful shortcuts!<br />
Information Technology Media Center | Department of <strong>Biochemistry</strong> | UW–Madison | <strong>Tutorial</strong>s<br />
156
Lesson 2. Creating slides SlideView & OutlineView<br />
The presentation you are going to create is one that you and your colleague, Christopher Columbus,<br />
will use to convince Queen Isabella to finance your new venture, called New World Expeditions.<br />
There are three views one can use to create PPT slides: Normal, Outline and Slide. In Slide View you<br />
see one slide at a time as you type the text and draw the graphics. In Outline view you see the outline<br />
of all the text on your slide. In Normal View, you see the outline, the slide and a place for speaker<br />
notes.<br />
1) Return to the first blank slide in your presentation (NOT the Master slide), by clicking on<br />
the Slide icon in the views button in the lower left corner of your screen (or select Slides from the<br />
View menu)<br />
2) Type the title of the first slide into the title box<br />
Click in the title box, then type: We must act soon<br />
Click inside the Body text box, then type the following short list, pressing return as indicated:<br />
Favorable weather <br />
Increase in competition <br />
Available c rew (don’t press !)<br />
Note: within a body box, the key takes you to the next line, and also creates the bullet for the<br />
next outline entry. If you ended up with an extra bullet, place the cursor after it, then press the<br />
delete key.<br />
Click anywhere outside of the body or title boxes to deselect them.<br />
3) Save your work by choosing “Save” from the File menu, and selecting an appropriate file<br />
name (e.g. Practice_1.ppt).<br />
4) Now we will make 2 more slides from the Normal View. This method is a really slick<br />
way to enter lots of nicely formatted text. You can easily use it to create a lot of slides for a lecture.<br />
Information Technology Media Center | Department of <strong>Biochemistry</strong> | UW–Madison | <strong>Tutorial</strong>s<br />
157
Choose Normal from the View menu, or click the Normal icon in the lower left corner of the<br />
screen.<br />
Now click the New Slide button, or select New Slide from the Insert menu. This will create<br />
another “slide icon” in your outline and place the cursor next to it.<br />
Type the title of slide 2: Expedition plan then press <br />
Note: when you press return in Outline View, PPT moves to the next line, and keeps you at the<br />
same level in the outline in which you were working (in this case, since you are at the title level,<br />
PPT presents the new slide icon, and is ready for you to type a new title).<br />
Click the “Demote” arrow (see image), to indent, or demote one level in the outline.<br />
Type the two bullet items:<br />
Prepare a fleet of three ships <br />
Hand-select a staf f of able office rs and sailors (press Option + )<br />
Note: Option + is equivalent to the “Promote” button. If you had just hit return at this<br />
point, you could have added more bullets to slide 2, but now you are ready to begin slide 3,<br />
instead.<br />
Type in the following title for slide 3: Benefits to Spain <br />
Now press the Tab key to indent one level and type the following the same way you typed the<br />
bulleted items above.<br />
Information Technology Media Center | Department of <strong>Biochemistry</strong> | UW–Madison | <strong>Tutorial</strong>s<br />
158
Note: The Tab key is the keyboard equivalent of the “demote” function<br />
Significant rise in trade <br />
More revenue for the crown (don’t press !)<br />
Your outline should look something like this.<br />
5) Go back to Slide view to see the new slides you have made. If you click on the thick doublearrow<br />
icons at lower right of screen, you can shuffle back and forth among your slides.<br />
6) Reordering slides in SlideSorter view.<br />
Click on the SlideSorter icon (lower left), or select SlideSorter from the View menu.<br />
Click on the picture of slide 3, hold down the mouse button and drag this slide to position 2 of<br />
your presentation. Note how the slide content remains exactly the same but the slide order is now<br />
different.<br />
Information Technology Media Center | Department of <strong>Biochemistry</strong> | UW–Madison | <strong>Tutorial</strong>s<br />
159
Note: the SlideSorter view is an excellent way to cut and paste slides from one presentation into<br />
another, or to reorder and/or delete slides from within a presentation. Just remember that each<br />
presentation will take its master format from its own master slide, and if you transfer in slides from<br />
another PPT file, they will assume the new master’s format in font, size, color and background.<br />
Therefore, it may be a good idea to pick a layout and master slide “look” that you like, and stick<br />
with it for many of your (and your lab-group’s) presentations. That way, you can mix and match<br />
slides from various presentations without messing up their carefully chosen color schemes!<br />
Information Technology Media Center | Department of <strong>Biochemistry</strong> | UW–Madison | <strong>Tutorial</strong>s<br />
160
Lesson 3. Creating Graphics and Graphs<br />
PPT contains text and drawing tools so you can create your own graphics to illustrate your<br />
presentation. In these Lessons, we will draw some simple pictures, then create a graph for inclusion<br />
on a slide. In subsequent Lessons (D) we will expand these processes by importing pre-existing<br />
graphics that you might already have prepared in another graphics program, or perhaps downloaded<br />
from the web.<br />
1) Return to Slide view, then insert a new slide after slide 3.<br />
Click the New Slide button at the top of the screen (or Insert menu New Slide)<br />
Select a slide format “Title Only”, but with no other body or insert boxes (see next figure).<br />
2) Use the PPT drawing tools and drawing toolbars at the left or bottom of the screen to create<br />
some images that Christopher C. can use to help convince the Queen that his ships are seaworthy and<br />
can cross the ocean. These drawing tools are standard for most graphics programs. Explore a bit, and<br />
ask for help if you have NEVER done anything like this before. A sample slide is shown below.<br />
Information Technology Media Center | Department of <strong>Biochemistry</strong> | UW–Madison | <strong>Tutorial</strong>s<br />
161
Save your file again, so this elegant piece of work is properly enshrined on the hard drive.<br />
Special note: it is a GOOD piece of advice to save your file frequently, especially when working<br />
on irreplaceable artwork. Some systems can crash, and many a potential Picasso has ended up in<br />
electronic vapor-land, when the file wasn’t properly saved!<br />
3) Now insert another slide (#5), in which we will create a graph to show the Queen how her<br />
costs vs profits may stack up during the next 4 quarters of the fiscal year.<br />
Select “Text and Chart” from the new slide<br />
window.<br />
When the slide opens, click twice on the<br />
graph box, to initiate the<br />
spreadsheet/graphing power of PPT.<br />
Note: PPT contains several automatic graphing, clipart, and organizational chart functions that<br />
make it easy to create these types of aids in your presentation. The chart function essentially contains<br />
a small spreadsheet and the projected chart is drawn from the data in this sheet. If you wish, you may<br />
link the data to an external spreadsheet (preferably <strong>Microsoft</strong> Excel), or copy existing data into the<br />
PPT sheet. Either way, when you update the data in the spreadsheet, the displayed chart is<br />
automatically updated too. The chart menu bar which appears when you initiate a chart (Insert a new<br />
slide, with a chart function, or choose “Chart” from the Insert menu) allows you to choose the type<br />
of chart, color it, label the axis, title the graph, etc.<br />
Information Technology Media Center | Department of <strong>Biochemistry</strong> | UW–Madison | <strong>Tutorial</strong>s<br />
162
Change the default data in the chart spreadsheet to indicate how much profit in gold and silver the<br />
Queen might expect, vs her costs for this voyage. To do this, just select each spreadsheet cell in turn,<br />
and change its label or value. Note how the graph changes too, when you enter new values.<br />
(Example values, below left)<br />
When you are finished playing with the data and the chart, choose Quit (Command or<br />
Control Q) , to return to SlideView.<br />
Now you can add a title into the title box:<br />
Profit vs Costs<br />
Also add some text to the body box to explain your data:<br />
1st through 3rd Qtr costs may increase slightly until New World<br />
mines are operational <br />
Therea fter , the looted gold and silver should vastly exceed<br />
expedition costs.<br />
Note how the program automatically creates bullets to start each new body text object. If you wish<br />
to turn off the bullets, select the appropriate text with your mouse, then select the Bullet option in the<br />
Format Palette or Format menu. This is also how you can change the shape of the bullets, or their<br />
size and color.<br />
Information Technology Media Center | Department of <strong>Biochemistry</strong> | UW–Madison | <strong>Tutorial</strong>s<br />
163
Information Technology Media Center | Department of <strong>Biochemistry</strong> | UW–Madison | <strong>Tutorial</strong>s<br />
164
Lesson 4. Inserting Graphics, Clipart and Movies<br />
1) Inserting PPT clipart<br />
If you have not already done so, Save your file again.<br />
In Slide view, scroll back to the “My Ships” graphic slide you created earlier.<br />
In the Insert menu, select Picture then Clipart. The <strong>Microsoft</strong> Clipart Gallery will open.<br />
You may wish to explore the various categories and clipart figures so you know what is<br />
available here.<br />
Select the category “weather” then highlight “the storm” to add to your presentation. (This<br />
may help convince the Queen that your voyage will be exceedingly dangerous!).<br />
Your selected clipart will appear on the slide, and sometimes be too big or too small.<br />
To Resize click once on it to highlight it, then use the mouse to grab and move one of the corner<br />
boxes in or out. If you hold down the Shift key while doing this, the picture’s height and width<br />
proportions will remain unchanged.<br />
Alternatively, double-click the image and the Format Picture window will appear so you can scale<br />
your object by a defined percentage. Type 120 in the dialogue box (120% of current size) then<br />
“OK”. Your clipart will grow in proportion. Drag the storm with your mouse to a menacing<br />
position above your boats.<br />
Click once on the storm to select it. Then click and drag it with the mouse while you hold<br />
down the option key, the storm will duplicate when you let go of the mouse. When using<br />
the option drag you must begin dragging the object before you hold down the option key<br />
AND you must let go of the mouse button first and then the option key.<br />
Add a bunch of rain clouds, draw some lightning, create a thunderstorm on your slide!<br />
Note: as with most computer programs, pictures, clipart or movies inserted into PPT can be resized<br />
by clicking on their corner boxes and dragging to an appropriate shape. However, this method can<br />
distort the figure’s proportions, display the pixels of the image or in the case of movies or .pict files,<br />
can also impair their ability to be displayed in OnScreenShows. We recommend that you only use the<br />
Object/Scale method of resizing for clipart, NOT for images or movies. You may also use this<br />
feature to enlarge things by choosing a % that is >100 (e.g. 150%).<br />
Information Technology Media Center | Department of <strong>Biochemistry</strong> | UW–Madison | <strong>Tutorial</strong>s<br />
165
2) Inserting Movies<br />
Note: Ann Palmenberg has provided some sample QuickTime movies for use in your tutorial PPT<br />
presentation. Go to http://virology.wisc.edu/acp and click on Public Data, Class Resources to<br />
download a quicktime movie file.<br />
Note: If you highlight an inserted movie you can select Loop from the Movie tools in the<br />
formatting palette. This way your movie will play over and over during your onscreen show.<br />
Note: PPT will use the QuickTime movie player that is installed on your Macintosh or PC. It does<br />
NOT have its own internal movie player. Moreover, unlike images that can be inserted into your PPT<br />
presentation, when you tell PPT to insert a movie, the program only really inserts a pointer to the<br />
location of that movie on your harddrive. That is, PPT remembers where you told it to find that<br />
movie and goes back to that location whenever you want to play the movie. This is an IMPORTANT<br />
concept, because if you transfer your PPT presentation to another computer, you must also transfer<br />
the inserted movie files too, or the program can’t find them or play them.<br />
3) Inserting pictures into PPT is similar to the insertion of clipart.<br />
Create a new slides at the end of your presentation that contains only a title box. (Just like<br />
Lesson 3.1 above).<br />
Open this new slide in Slide view, then select “Picture/ From File” from the “Insert” menu. In<br />
the dialogue box choose an image from your hard drive or download one from the web.<br />
Select a file then click OK. The picture will appear in your slide, where it can be dragged to a<br />
favorable location.<br />
Note: You can insert many popular graphics formats into your PPT presentation: Joint<br />
Photographic Experts Group (JPEG), Macintosh Picture (PICT), Macintosh paint (PNTG), Portable<br />
Network Graphics (PNG), Windows Bitmap (BMP), Portable Document Format (PDF), Encapsulated<br />
postscript (EPS), Graphics Interchange Format (GIF), and Tagged Image File Format (TIFF).<br />
Note: Images should be inserted into PPT at the correct size. You should not have to scale them up<br />
or down in size. Scaling images up in size may show their pixels and scaling them down in size<br />
means the files are too large in size (bytes of information). There is a separate tutorial at<br />
http://www.biochem.wisc.edu/medialab under “How to” that goes over “getting images into PPT<br />
correctly”.<br />
Note: In the “Picture Palette” under “Tools” is a very useful element for working with pictures,<br />
called “Crop” ( ). Should you only require a small portion of a figure, the rest can be removed by<br />
judiciously cropping the edges of the inserted picture with this tool. You can also duplicate the<br />
picture and crop different portions from each image.<br />
Information Technology Media Center | Department of <strong>Biochemistry</strong> | UW–Madison | <strong>Tutorial</strong>s<br />
166
Lesson 5. Builds, Transitions & OnScreen Shows<br />
1) Slide to slide transitions.<br />
Use Slide View to go back to the first slide of your presentation. Then click on the “OnScreen” icon<br />
(the one that looks like a movie screen) in the lower left corner of your screen. The slide should<br />
FILL your Macintosh screen.<br />
Click , or click the mouse button, OR press the down-arrow key, to advance to the next slide.<br />
Note: There are 3 different ways to advance your slides sequentially during an “OnScreen” show:<br />
(1) by pressing the key, (2) by pressing the “down-arrow” key, and (3) by clicking on your<br />
mouse. As you advance through your presentation, you can reverse the direction with the up-arrow<br />
key. Remember, some of these slides contain a lot of material, and each time you advance by any of<br />
the 3 modes, the computer must think a bit. Be patient.<br />
When you reach your movie slide, click twice on the movie to make it play. When you reach the end<br />
of your presentation, PPT will kick you out of OnScreenView and place you back into SlideView.<br />
You can end the OnScreen show at any time, by pressing the Escape (esc) key. Fun, isn’t it!<br />
If you wish, rear range the order of your slides using the SortViewer .<br />
While you are in the SortView mode, you can easily add animated transitions for the slides, so they<br />
appear to morph into one another during your On Screen show. To do this, click on any slide, or<br />
group of slides to highlight it (them), then select a “Slide transition” from the SlideShow menu.<br />
Select “BoxIn” “Checkerboard” or whatever else seems interesting.<br />
Save your file, then run it through the OnScreenShow again, to see what effects the various<br />
transitions have.<br />
If you like, you may select a different transition between every slide... but if you actually do this for<br />
a REAL presentation, your audience will probably find it distracting to the information flow.<br />
Information Technology Media Center | Department of <strong>Biochemistry</strong> | UW–Madison | <strong>Tutorial</strong>s<br />
167
2) Building “body object” text.<br />
The entry of text into the “body-object” boxes that we practiced in Lesson 3, has two practical<br />
purposes. First, body-object text can be very easily entered in OutlineView, so it is directly formatted<br />
on new slides with almost no hassle. The second purpose for body text, is so text itself can be “built”<br />
or appear to be phased in, line by line, or point by point, during an OnScreenShow.<br />
Return to SlideView, and select any of the 1st three slides we made (the slide should include a title<br />
and also several lines of body-text). Click on the body text to highlight it.<br />
In the SlideShow menu, select Animation then Wipe Right or any other effect, then return to<br />
SlideView.<br />
Now rerun your OnScreenShow and watch what happens when you hit this slide. Each click of the<br />
mouse should have an effect.<br />
Note: When the text of a slide is “built” the first click of the mouse will launch the slide. The title<br />
and any graphics will appear according to the “transition” mode that is selected. The next click of the<br />
mouse will launch the first key point of the body text, and each subsequent click will launch the<br />
subsequent points, so they appear on the screen one at a time, even though in reality they are all part<br />
of the same slide.<br />
Information Technology Media Center | Department of <strong>Biochemistry</strong> | UW–Madison | <strong>Tutorial</strong>s<br />
168
3) Building graphics, movies and other objects.<br />
<strong>PowerPoint</strong> will also allow you to “animate” virtually any text, pictures, graphics, charts or movies<br />
on your slides and play them with desired effects during your presentations. If you have several<br />
objects you want to link as a unit, be sure to “group” them before doing the following Lesson.<br />
Go to any of your slides that contains a few items of text, and perhaps some graphics, like your boat<br />
slide.<br />
Open the SlideShow Custom animation menu.<br />
Choose an item on this slide (Group 3) that you wish to animate and then choose an Entry Effect:<br />
for that item.<br />
If you choose to animate more than one object make sure you select the order for each<br />
animation in the Order and Timing Tab. Decide whether you want that event to happen at a<br />
specified timed interval, or at the next sequential mouse click.<br />
Remember also that you can test the ef fects you have created, by clicking on the Play button.<br />
Information Technology Media Center | Department of <strong>Biochemistry</strong> | UW–Madison | <strong>Tutorial</strong>s<br />
169
Helpful hints for <strong>PowerPoint</strong> users<br />
1. Another way to “build” graphics is make successive slides, each with another part of the figure.<br />
Actually, it is easier to make the last slide (or the most complex slide) first, copy it successively in<br />
the Slide Sorter, then “erase” stuff from the initial slides so that it seems as if you are gradually<br />
adding more figures or text.<br />
2. Slide titles should never be less than 32 pt, for visibility. Text should never be less than 20 pt,<br />
and preferably larger.<br />
3. Remember the “Rule of 5 & 5”. In general, no more than five lines of text on a slide and no<br />
more than five words in each line of text on the slide! Think about it… if you use five lines of<br />
text and five words in each line that is 25 words for an audience to read and comprehend when<br />
they should be paying attention to you!<br />
4. Although PPT will allow the use of millions of colors, in truth there are few colors that make<br />
effective slides. Dark backgrounds (blue or black) are OK if the projection room is dark. In this<br />
case, yellow, white or light blue text will show up better. Other darker colors like green, orange,<br />
red may detract from your talk. Be careful if you use red text on a dark background. It may look<br />
fine on your computer but will project with poor contrast on the screen. Light backgrounds<br />
(white, grey) with dark text (black, dark blue, dark green), will always project nicely. Hint: the<br />
PPT default color schemes in Format/ Color Schemes are effective, attractive and easy to use.<br />
5. If your movies don’t play right. Delete them then reinsert them. Sometimes, the PPT path<br />
pointers get screwed up.<br />
6. OnScreenShows require an LCD projector that can hook up to your computer. Properly<br />
installed, whatever you then see on your computer screen will be projected for the audience.<br />
Several campus halls, including Biochem 175 and B1118 are equipped for this. If you are<br />
planning to do a presentation elsewhere though, make sure you check out the equipment ahead<br />
of time in the Media Lab (rm 401 Biochem 98 Addition)<br />
http://www.biochem.wisc.edu/medialab.<br />
Information Technology Media Center | Department of <strong>Biochemistry</strong> | UW–Madison | <strong>Tutorial</strong>s<br />
170