Saeco Lavazza 2210 Espresso Machine User Manual
Saeco Lavazza 2210 Espresso Machine User Manual
Saeco Lavazza 2210 Espresso Machine User Manual

Create successful ePaper yourself
Turn your PDF publications into a flip-book with our unique Google optimized e-Paper software.
ESPAÑOL FRANÇAIS ENGLISH<br />
LB<strong>2210</strong><br />
INSTRUCTIONS FOR INSTALLATION AND USE<br />
Read these instructions carefully before using the machine<br />
MANUEL D’INSTALLATION ET D’UTILISATION<br />
Lire attentivement ces instructions avant d’utiliser la machine.<br />
MANUAL DE INSTALACIÓN Y DE USO<br />
Leer atentamente las siguientes instrucciones de uso antes de utilizar la máquina<br />
COMMERCIAL USE
• 2 •
• 3 •
IMPORTANT SAFEGUARDS<br />
When using electrical appliances, basic safety precautions should<br />
always be followed to reduce the risk of fire, electric shock, and/or<br />
injury to persons, including the following:<br />
1 Read all instructions and information in this instruction book<br />
and any other literature included in this carton referring to this<br />
product before operating or using this appliance.<br />
2 Do not touch hot surfaces. Use handles or knobs.<br />
3 To protect against fire, electric shock and personal injury do not<br />
immerse cord, plugs or appliance in water or other liquid.<br />
4 Close supervision is necessary when any appliance is used by<br />
or near children.<br />
5 Unplug from outlet when not in use and before cleaning.<br />
Allow to cool before putting on or taking off parts, and before<br />
cleaning the appliance.<br />
6 Do not operate any appliance with a damaged cord or plug or<br />
after the appliance malfunctions or has been damaged in any<br />
way. Return appliance to the nearest authorized service centre<br />
for examination, repair or adjustment.<br />
7 The use of accessory attachments not recommended by the<br />
appliance manufacturer may result in fire, electric shock or<br />
personal injury.<br />
8 Do not use outdoors.<br />
9 Do not let cord hang over edge of table or counter, or touch hot<br />
surfaces.<br />
10 Do not place on or near a hot gas or electric burner, or in a<br />
heated oven.<br />
11 Always turn appliance “OFF”, then plug cord into the wall<br />
outlet. To disconnect, turn switch to “OFF”, then remove plug<br />
from wall outlet.<br />
12 Use extreme caution when using hot steam.<br />
SAVE THESE INSTRUCTIONS<br />
CAUTION<br />
This appliance is for commercial use. Any servicing, other than<br />
cleaning and user maintenance, should be performed by an<br />
authorized service centre. Do not immerse base in water. To<br />
reduce the risk of fire or electric shock, do not disassemble the<br />
base. There are no user serviceable parts inside. Repair should be<br />
done by authorized service personnel only.<br />
1 Check voltage to be sure that the voltage indicated on the<br />
nameplate agrees with your voltage.<br />
2 Never use warm or hot water to fill the water tank. Use cold<br />
water only.<br />
3 Keep your hands and the cord away from hot parts of the<br />
appliance during operation.<br />
4 Never clean with scouring powders or hard implements. Simply<br />
use a soft cloth dampened with water.<br />
5 To avoid your coffee maker scaling up, use purified or bottled<br />
water.<br />
6 Risk of fire and electric shock. Replace only with manufacturer’s<br />
cord set, part type SJO.<br />
INSTRUCTIONS FOR THE POWER<br />
SUPPLY CORD<br />
A A short power-supply cord is provided to reduce risks of getting<br />
tangled up or tripping over a longer cord.<br />
B Longer extension cords are available and may be used if care<br />
is exercised in their use.<br />
C If a long extension cord is used:<br />
1 the marked electrical rating of the extension cord should be at<br />
least as great as the electrical rating of the appliance.<br />
2 if the appliance is of the grounded type, the extension cord<br />
should be a grounding type<br />
3 the cable does not hang from the table to avoid the risk of<br />
getting caught up in it.<br />
• 4 •
1 GENERAL INFORMATION ....................................................5<br />
1.1 Intended use of the machine ...................................................5<br />
1.2 To facilitate interpretation ........................................................5<br />
1.3 How to use these operating instructions ...............................5<br />
1.4 <strong>Machine</strong> identification ..............................................................6<br />
1.5 Technical specifications ..........................................................6<br />
1.6 Residual risks ...........................................................................6<br />
2 SAFETY RULES .....................................................................6<br />
3 KEY TO MACHINE COMPONENTS ......................................7<br />
3.1 Description of control panel ....................................................7<br />
4 USING THE MACHINE ...........................................................7<br />
4.1 Switching on the machine .......................................................7<br />
4.2 Selecting the display language ...............................................7<br />
4.3 Using cups, mugs and glasses ...............................................7<br />
4.4 Inserting pods ...........................................................................7<br />
4.5 Coffee/beverage dispensing ....................................................8<br />
4.6 “STOP” dispensing coffee/beverage ......................................8<br />
4.7 Emptying the dreg drawer ......................................................8<br />
4.8 Dispensing steam .....................................................................9<br />
4.9 Using the coin mechanism (Optional)....................................9<br />
5 CLEANING .............................................................................9<br />
1 GENERAL INFORMATION<br />
1.1 Intended use of the machine<br />
This machine is designed for automatic dispensing of:<br />
- coffee and espresso brewed with LAVAZZA pods;<br />
- hot drinks prepared using special LAVAZZA pods.<br />
- steam for preparing hot drinks and cappuccino<br />
This elegantly styled machine is designed for use in small offices and institutions.<br />
Important.<br />
Improper use shall result in forfeiture of all warranty rights and release the<br />
Manufacturer from liability for injury or damage to persons and/or property.<br />
The following are to be considered improper use:<br />
- use for other than the intended purposes and/or employing methods<br />
other than those described herein;<br />
- any operation on the machine in contrast with the directions provided<br />
herein;<br />
- any use after machine components have been tampered with and/or<br />
safety devices have been modified;<br />
- use of pods other than those supplied by LAVAZZA;<br />
- outdoor installation of the machine.<br />
In such cases the user shall be charged for any repair work on the machine.<br />
1.2 To facilitate interpretation<br />
Different types of symbols are used herein to highlight the different hazard levels<br />
or indicate who is authorised to perform an operation.<br />
ENGLISH<br />
6 DESCALING ...........................................................................9<br />
7 MACHINE INDICATIONS AND WARNINGS ........................10<br />
A warning triangle draws attention to all the instructions<br />
that are important for user safety. Please<br />
carefully abide by these instructions to avoid serious<br />
injury!<br />
Different symbols are used herein to indicate which operations are to be performed<br />
by each user.<br />
8 HANDLING AND STORAGE ................................................11<br />
8.1 Handling ..................................................................................11<br />
8.2 Storage ....................................................................................11<br />
9 INSTALLATION ...................................................................11<br />
9.1 Safety rules .............................................................................11<br />
9.2. Stop functions ........................................................................11<br />
9.3. List of accessories supplied .................................................11<br />
9.4. Installation-Siting ...................................................................11<br />
9.5. Disposal of packing materials ...............................................12<br />
9.6. Electrical connection ............................................................12<br />
9.7. Filling the water tank ..............................................................12<br />
9.8 Setting the water hardness. ...................................................12<br />
10 MACHINE PROGRAMMING ................................................13<br />
10.1 Programming menu ................................................................13<br />
10.2 Service menu ..........................................................................13<br />
10.3 Programming commands ......................................................13<br />
10.4 Description of programming menu .......................................14<br />
10.5 Description of service menu .................................................14<br />
10.6 Changing a parameter ............................................................15<br />
10.7 Exiting the program mode .....................................................15<br />
11 CLEANING ..........................................................................15<br />
11.1 Frequency of cleaning ...........................................................15<br />
11.2 Cleaning the water tank .........................................................15<br />
11.3 Cleaning the dreg drawer ......................................................16<br />
11.4 Cleaning the pod loading tray ...............................................16<br />
11.5 Cleaning the steam wand ......................................................16<br />
11.6 Descaling ................................................................................16<br />
11.7 Brew group washing ..............................................................17<br />
12 DISPOSAL ............................................................................17<br />
<strong>User</strong>:<br />
a person who uses the machine to dispense beverages.<br />
<strong>User</strong>s are NOT allowed to carry out operations restricted to<br />
the Service Provider or specialised Technician. Should users<br />
detect any machine malfunctioning and/or faults, they must<br />
contact the Service Provider.<br />
Service provider: firm or person in charge of normal machine installation,<br />
start-up and stops, loading and internal and external cleaning.<br />
On detecting a machine malfunctioning, the Service Provider<br />
must request the assistance of a maintenance technician.<br />
Technician: personnel qualified to perform special maintenance and servicing<br />
on the machine.<br />
The technician can carry out all the operations described<br />
in this instruction book without requiring explicit authorisation.<br />
This symbol is used to highlight information that is especially important<br />
for ensuring optimal use of the machine.<br />
1.3 How to use these operating instructions<br />
This instruction book is an integral part of the machine and should<br />
be read carefully.<br />
It contains information regarding the installation, maintenance and correct<br />
use of the machine. Always refer to this instruction book before undertaking<br />
any operation.<br />
Keep these operating instructions in a safe place and make them available to<br />
anyone else who should use the coffee machine. If the instruction book is lost<br />
or in a deteriorated state, immediately request another copy from your service<br />
provider. For further information or an explanation of problems not completely<br />
• 5 •
or sufficiently addressed in these instructions, contact the service provider.<br />
1.4 <strong>Machine</strong> identification<br />
The machine is identified by the name of the model and the serial number<br />
shown on the identification plate.<br />
The plate includes the following information:<br />
• Manufacturer’s name<br />
• CE marking<br />
• machine model<br />
• Serial no.<br />
• year of manufacture<br />
• several engineering specifications:<br />
- voltage rating (V).<br />
- frequency rating (Hz).<br />
- electrical input (W).<br />
Note: when submitting any type of request to the Service Provider,<br />
always make reference to this plate and indicate the specific data<br />
shown on it.<br />
1.5 Technical specifications<br />
Voltage rating<br />
Power rating<br />
Power supply<br />
Casing material<br />
Size (w x h x d)<br />
Weight<br />
Cord length (mm)<br />
Water tank capacity<br />
Dreg drawer capacity<br />
Pod type<br />
Control panel<br />
See identification plate on the bottom of the appliance<br />
See identification plate on the bottom of the appliance<br />
See identification plate on the bottom of the appliance<br />
Weighted sound pressure level A:<br />
Pump pressure<br />
Thermoplastic<br />
327 x 391 x 473 (mm)<br />
10,5 kg (approx.)<br />
1200<br />
4 Litres<br />
25 pods<br />
<strong>Lavazza</strong><br />
Front<br />
Lower than 70dB<br />
Max 1.5MPA (15.0 bars)<br />
Operating conditions<br />
Minimum temperature: above 10°C<br />
Safety devices<br />
Maximum temperature: below 40°C<br />
Maximum humidity: below 95%<br />
Boiler pressure safety valve<br />
Termostato di sicurezza<br />
Subject to engineering and manufacturing changes as warranted by technological<br />
developments.<br />
<strong>Machine</strong> in conformity with European Directive 89/336/EEC (Italian Legislative<br />
Decree 476 of 04/12/92) concerning electromagnetic compatibility.<br />
1.6 Residual risks<br />
The dispensing area has no guards to prevent accidental contact between<br />
hands and coffee, hot drinks or steam.<br />
2 SAFETY RULES<br />
Never place live parts in contact with water: danger of short circuit! Hot<br />
water and steam can cause scalding!<br />
Intended use<br />
This coffee machine is designed for commercial use .<br />
Do not make any technical changes or use the machine for purposes other than<br />
those stated since this would create serious hazards!<br />
The machine may be used only by adults in full possession of their physical<br />
and mental capacities.<br />
Power supply<br />
The machine must be connected to mains power supply by the Service provider,<br />
in accordance with the electrical system specifications.<br />
Power cord<br />
Never use the machine if the power cord is defective.<br />
Immediately inform the service provider if the cord and/or plug show to be defective.<br />
Do not pass the cord around corners, over sharp edges or over hot objects and<br />
keep it away from oil. Do not use the power cord to carry or pull the machine.<br />
Do not pull out the plug by yanking at the power cord or touch it with wet hands.<br />
Do not let the power cord hang freely from tables or shelves.<br />
Protecting others<br />
Make sure that children are not allowed to play with the machine and/or with<br />
packing materials.<br />
Never direct the jet of steam toward yourself or others. Do not touch the steam<br />
wand directly with your hands, always use the handles or knobs provided.<br />
Danger of burns<br />
Avoid touching the steam wand and/or coffee/beverage brewing unit.<br />
Space for use and maintenance<br />
The machine must be installed by the service provider in accordance with the<br />
safety regulations in force at the time of installation.<br />
Only the service provider is authorised to move the machine.<br />
Do not use the machine outdoors.<br />
To prevent the casing from melting or being damaged, avoid bringing open<br />
flames and/or very hot objects near the machine.<br />
Do not use in places where the temperature may drop to a level equal to and/or<br />
less than 0°C; if the machine has been exposed to such conditions notify the<br />
service provider, who will have to carry out a safety check.<br />
Cleaning<br />
Before cleaning the machine, it is indispensable to put the main switch OFF (0)<br />
and remove the plug from the socket. Then wait for the machine to cool down.<br />
Never immerse the machine in water! It is strictly forbidden to attempt to access<br />
internal machine parts.<br />
Do not spray water onto the machine to clean it.<br />
Storing the machine<br />
If the machine is to remain out of use for a long time, switch it off and unplug<br />
it.<br />
Store it in a dry place out of children’s reach. Keep it protected from dust and<br />
dirt.<br />
Servicing / Maintenance<br />
In the event of a breakdown, fault or suspected damage after a fall, immediately<br />
unplug the machine and notify the service provider or specialised technician.<br />
Never attempt to operate a faulty machine.<br />
• 6 •
Only the service provider and/or a specialised technician are authorised to performing<br />
servicing and repairs.<br />
Fire safety<br />
In the event of a fire, use carbon dioxide (CO 2<br />
) extinguishers. Do not use water<br />
or powder extinguishers.<br />
Now the machine is ready to dispense the beverage.<br />
Note: if the machine is connected to a coin mechanism, in order to<br />
brew coffee or other beverages the user must first insert coins until<br />
reaching the required amount. For further explanation see section 4.9.<br />
ENGLISH<br />
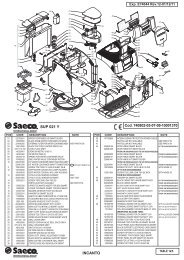
3 KEY TO MACHINE COMPONENTS (FIG.01)<br />
1 Control panel<br />
2 Pod loading tray<br />
3 Brew unit<br />
4 Steam wand<br />
5 Cup rest grill (small cups)<br />
6 Cup rest grill (large cups)<br />
7 Used pod drawer and drip tray<br />
8 Power cord<br />
9 Cup warmer always on<br />
10 ON/OFF switch<br />
3.1 Description of control panel (Fig.02)<br />
11 Large coffee<br />
button<br />
When this button is pressed the machine will<br />
brew a large coffee (quantity programmed by the<br />
service provider).<br />
4.2 Selecting the display language (Fig.04)<br />
The machine has been designed to display messages in different languages.<br />
To select the desired language, press the “LANGUAGE” button until the language<br />
you prefer appears on the display.<br />
Note: the display language can be changed at any time during machine<br />
operation.<br />
4.3 Using cups, mugs and glasses<br />
Warning! Do not use containers that stick out from the edge of the<br />
grills they are resting on.<br />
The machine is designed to correctly dispense beverages in small cups and/or<br />
larger-sized containers.<br />
The cups and/or mugs must be correctly positioned beneath the brew unit.<br />
12 “LANGUAGE”<br />
button<br />
13 <strong>Espresso</strong><br />
button<br />
14 <strong>Manual</strong> dispensing<br />
button<br />
15 Button<br />
1 - Steam<br />
It allows the user to display messages in the<br />
desired language<br />
When this button is pressed the machine will brew<br />
an espresso coffee (quantity programmed by the<br />
service provider).<br />
When this button is pressed the machine will dispense<br />
a quantity of product manually controlled<br />
by the user (the user must stop the machine by<br />
pressing the STOP button).<br />
When you press this button the machine will instantly<br />
dispense steam<br />
Note: if the cups and/or mugs are not correctly positioned beneath<br />
the brew unit, the beverage may spill out of its container.<br />
When dispensing in small cups, use the upper grill (Fig.05).<br />
When dispensing in larger cups, mugs and/or glasses, use the lower grill, turning<br />
the upper grill counterclockwise by hand to move it out of the way (Fig.06).<br />
4.4 Inserting pods<br />
Warning! To prepare the desired drinks, use only LAVAZZA pods<br />
supplied directly by the service provider. Each pod is designed<br />
and made to prepare a single serving.<br />
2 - Stop Pressing this button will stop flow when the machine<br />
is brewing coffee/other beverages or dispensing<br />
steam<br />
16 LCD Display It displays the machine status and any alarms as well<br />
as guiding the user in the operation of the machine.<br />
Do not use pods other than those supplied by the service provider,<br />
coffee beans, preground and/or freeze-dried coffee.<br />
Do not reuse the same pod to prepare two or more drinks.<br />
4 USING THE MACHINE<br />
4.1 Switching on the machine<br />
Warning! Only the service provider is authorised to make the connection<br />
to the mains power supply!<br />
Before switching on the machine, make sure the plug is properly inserted in<br />
the electric socket.<br />
To switch on the machine, move the ON/OFF switch on the back to “I” (Fig.03).<br />
The display will show:<br />
10:30 11 Feb 04<br />
Warming up<br />
Wait please...<br />
At this time the machine is warming up.<br />
When the machine reaches the right temperature for brewing the beverage,<br />
the display will show:<br />
10:30 11 Feb 04<br />
Ready<br />
To insert a pod, it is necessary to open the loading tray.<br />
To open the tray, pull it out all the way (Fig.07).<br />
The display will show:<br />
10:30 11 Feb 04<br />
Insert pod<br />
Close pod tray<br />
Warning! Do not attempt to force it out beyond the limit.<br />
Take a single pod by hand and place it on the outermost part of the slide (Fig.08).<br />
Warning! The pod must be positioned as shown in the picture.<br />
Gently push the pod into place inside the machine (Fig.09).<br />
Note: the pod must be fitted into place without using any further<br />
tools; after being inserted, the pod may no longer be extracted.<br />
When the pod is correctly positioned, close the tray (Fig.10).<br />
Insert pod<br />
• 7 •
The display will show:<br />
10:30 11 Feb 04<br />
Ready<br />
Select product<br />
Warning! If you meet with any resistance when closing the tray,<br />
check the position of the pod.<br />
It is forbidden to place fingers or any object other than a <strong>Lavazza</strong><br />
pod inside the tray.<br />
At this point the pod has been inserted and the user is prompted to select the<br />
desired drink.<br />
.<br />
4.7 Emptying the dreg drawer<br />
Note: the operator should perform the checking of coffee grounds.<br />
Sometimes it is not necessary to empty the dreg drawer as it is<br />
indicated in this section.<br />
Note: the dreg drawer may be emptied only when the machine is<br />
on.<br />
Note: every time the dreg drawer is removed for more than 5 seconds,<br />
the count of the capsules it contains is restarted.<br />
When removing the dreg drawer, always empty the used capsules into an<br />
appropriate container.<br />
4.5 Coffee/beverage dispensing<br />
Before dispensing a coffee/beverage make sure that:<br />
1 The machine is warmed up;<br />
2 the pod has been correctly positioned;<br />
3 a cup suitable for the selected product is placed beneath the dispensing<br />
tube.<br />
4 the required amount has been inserted (machines with coin mechanism only).<br />
Making espresso (Fig.12)<br />
Press the espresso button. The machine will automatically brew the coffee. On<br />
reaching the quantity programmed by the service provider, the machine will<br />
automatically stop dispensing coffee.<br />
Making a large coffee (Fig.13)<br />
Press the large coffee button. The machine will automatically brew the coffee.<br />
On reaching the quantity programmed by the service provider, the machine will<br />
automatically stop dispensing coffee.<br />
<strong>Manual</strong> dispensing (Fig.14)<br />
Press the manual dispensing button. The machine will automatically start dispensing<br />
the selected product; the machine must be stopped by pressing the<br />
“Stop” button.<br />
Note: if the stop button is not pressed, coffee may overflow from<br />
the cup; in any case, the machine will stop dispensing on reaching<br />
the maximum quantity programmed by the manufacturer.<br />
The machine will carry out a prebrewing cycle.<br />
The machine will signal when the dreg drawer has filled to capacity.<br />
The first message warns the user that the dreg drawer must be emptied but the<br />
machine will still allow coffee to be brewed; the display will show:<br />
10:30 11 Feb 04<br />
Ready<br />
Empty dregdrawer<br />
If the drawer is not emptied of used pods, after a few brewing cycles the machine<br />
will be disabled; in this case the display will show:<br />
10:30 11 Feb 04<br />
Empty dregdrawer<br />
Before coffee can be brewed again, the dreg drawer must be emptied of used<br />
pods (Fig17 - Fig.18).<br />
Note: the dreg drawer will also contain liquid residues as a result<br />
of dripping after coffee or other beverages have been dispensed;<br />
the liquids and pods must be disposed of separately, as appropriate.<br />
(Fig.19).<br />
The pod trap must be fitted back into the dreg drawer before the<br />
latter can be inserted in the machine.<br />
After emptying the dreg drawer, fit it back in place; the display will show:<br />
The display will show:<br />
10:30 11 Feb 04<br />
Prebrewing<br />
Wait please...<br />
10:30 11 Feb 04<br />
Ready<br />
Insert pod<br />
Note: the flow of coffee can be shut off at any time by pressing the<br />
“Stop “ button (see section 4.6).<br />
10:30 11 Feb 04<br />
Erogating Dose<br />
Stop to end<br />
On completion of the brewing operation<br />
the display will show:<br />
10:30 11 Feb 04<br />
Done<br />
Wait please...<br />
The machine will automatically discharge the used pod into the dreg drawer<br />
and be ready for the next brewing cycle.<br />
The machine is now ready to make coffee.<br />
Warning! The LAVAZZA pods used with the machine are singleserving<br />
pods to be used for the preparation of one drink only. Do<br />
not use the same pod to prepare more than one drink.<br />
Note: when pulling out the dreg drawer, do not grasp the lower<br />
grill; this should remain in contact with the machine.<br />
4.6 “STOP” dispensing coffee/beverage (Fig.15)<br />
The machine is programmed to automatically stop brewing coffee after it has<br />
dispensed the quantity programmed by the service provider for “espresso and<br />
large coffee”.<br />
To stop the flow of coffee ahead of time, press the “STOP” button (Fig.15).<br />
Warning! The flow must be manually stopped if the manual dispensing<br />
function has been selected.<br />
• 8 •
4.8 Dispensing steam (Fig.16)<br />
Steam can be used to froth milk for cappuccino and also to heat<br />
beverages.<br />
Danger of scalding! The steam may be preceded by brief sprays<br />
of hot water. The steam wand may reach high temperatures: avoid<br />
touching it directly with your hands.<br />
Before dispensing steam make sure that:<br />
1 the machine has warmed up;<br />
2 the steam wand is directed over the large cup rest grill.<br />
Press the steam button (Fig.15) for a few seconds to discharge any water left<br />
in the steam wand; shortly only steam will issue from the nozzle. The display<br />
will show:<br />
10:30 11 Feb 04<br />
Steam<br />
the desired coffee/beverage.<br />
Afterward the display will show:<br />
10:30 11 Feb 04<br />
Ready<br />
Insert pod<br />
At this point the user can brew coffee or another beverage as described in<br />
section 4.4 and below.<br />
Note: the manager establishes the amount to be inserted in the<br />
coin box to brew coffee or other beverages. The amount inserted<br />
can be shown on the display only if the coin mechanism features this option<br />
and/or the manager has enabled the function.<br />
The functions of the coin mechanism are managed by the latter and do<br />
not depend on the machine’s operation.<br />
ENGLISH<br />
Stop to end<br />
Press the button again (Fig.15) to stop flow.<br />
Position a cup containing the beverage under the steam nozzle (Fig.16); press<br />
the steam button (Fig.15).<br />
When preparing cappuccino, use only cold milk for best results.<br />
Move the cup slowly up and down in a circular fashion to heat and/or froth<br />
evenly.<br />
After heating/frothing for the desired amount of time, press the button (Fig. 15)<br />
to shut off steam.<br />
After this operation, wipe the steam wand clean with a damp cloth.<br />
4.9 Using the coin mechanism (Optional)<br />
The coin mechanism is an optional component that can be installed<br />
only by a specialised technician.<br />
If the machine is equipped with a coin mechanism, coins must be inserted in<br />
order to dispense beverages.<br />
5 CLEANING<br />
• Cleaning jobs may be carried out only when the machine is cold and disconnected<br />
from the power supply.<br />
• Use a soft cloth dampened with water to clean the appliance.<br />
• Do not immerse the machine in water nor place any of its components in a<br />
dishwasher.<br />
• Do not use sharp objects or harsh chemical products (solvents) for cleaning.<br />
• Never dry the machine and/or its components in a microwave or conventional<br />
oven.<br />
6 DESCALING<br />
Scale normally forms inside the appliance with use; when the machine needs<br />
descaling, the display will show:<br />
10:30 11 Feb 04<br />
Ready<br />
Please descale<br />
In this case the machine can still be used normally to make coffee. Notify the<br />
service provider, who will carry out a descaling treatment.<br />
Note: only the service provider is authorised to descale the machine.<br />
Note: no coins need to be inserted in order to dispense steam.<br />
The display will show:<br />
10:30 11 Feb 04<br />
Ready<br />
Insert credit<br />
Only after the amount shown has been inserted will the user be able to select<br />
• 9 •
7 MACHINE INDICATIONS AND WARNINGS<br />
This section describes all the messages the machine displays to the user and<br />
which actions can and/or must be performed by the user.<br />
Display Meaning Actions<br />
The machine is ready to You can dispense a coffee/<br />
10:30 11 Feb 04<br />
Ready<br />
brew coffee.<br />
beverage.<br />
Insert pod<br />
10:30 11 Feb 04<br />
Ready<br />
Insert credit<br />
10:30 11 Feb 04<br />
Insert pod<br />
Close pod tray<br />
The machine is equipped<br />
with a coin mechanism.<br />
The pod loading tray has<br />
been opened.<br />
To brew a beverage, insert<br />
the amount specified for coffee<br />
or other drinks.<br />
Position a LAVAZZA pod in<br />
the tray and close the tray.<br />
Close the tray empty.<br />
Display Meaning Actions<br />
10:30 11 Feb 04<br />
Ready<br />
Empty dregdrawer<br />
10:30 11 Feb 04<br />
Empty dregdrawer<br />
The machine warns of the<br />
need to empty the dreg<br />
drawer but still allows beverages<br />
to be dispensed. (If<br />
enabled)<br />
The dreg drawer must be<br />
emptied. (If enabled)<br />
It is no longer possible to<br />
dispense beverages.<br />
(If enabled)<br />
While the machine is<br />
switched on but not working,<br />
pull out the dreg drawer and<br />
empty it of used pods.<br />
While the machine is<br />
switched on but not working,<br />
pull out the dreg drawer and<br />
empty it of used pods.<br />
10:30 11 Feb 04<br />
Ready<br />
Select product<br />
10:30 11 Feb 04<br />
Steam<br />
Stop to end<br />
10:30 11 Feb 04<br />
Erogating Dose<br />
The tray has been closed<br />
with a LAVAZZA pod inserted.<br />
The machine is dispensing<br />
steam.<br />
The machine has started<br />
the brewing cycle.<br />
Dispense the beverage.<br />
Stop flow manually by pressing<br />
the STOP button.<br />
Wait until the machine automatically<br />
stops dispen-sing<br />
the beverage.<br />
Problems Causes Remedies<br />
The machine does not<br />
turn on<br />
The machine does not<br />
work<br />
The machine is not<br />
connected to the power<br />
supply.<br />
The ON/OFF switch has<br />
not been pressed.<br />
No message on the<br />
display.<br />
Contact the Service provider.<br />
Turn on the machine by<br />
pressing the ON/OFF switch.<br />
Contact the Service provider.<br />
Stop to end<br />
10:30 11 Feb 04<br />
Done<br />
Wait please...<br />
10:30 11 Feb 04<br />
The machine has finished<br />
dispensing the beverage<br />
and is being set in ideal<br />
conditions for carrying out<br />
the next brewing cycle.<br />
The dreg drawer has been<br />
removed from place.<br />
<strong>Manual</strong>ly shut off flow by<br />
pressing the STOP button.<br />
Insert the dreg drawer.<br />
Insert drawer<br />
10:30 11 Feb 04<br />
Fill with water<br />
The water tank is empty.<br />
Call the service provider,<br />
who will fill the machine water<br />
tank.<br />
10:30 11 Feb 04<br />
Out of service xx<br />
A machine fault has occurred.<br />
Call the service provider.<br />
Call service<br />
10:30 11 Feb 04<br />
Credit Low<br />
10:30 11 Feb 04<br />
No credit<br />
The machine is warning<br />
the user that the credit for<br />
dispensing product is about<br />
to run out.<br />
The supply of pods has run<br />
out so no beverages can be<br />
dispensed.<br />
Contact the service provider<br />
and purchase new pods.<br />
Contact the service provider<br />
and purchase new pods.<br />
10:30 11 Feb 04<br />
Ready<br />
Please descale<br />
The machine warns of the<br />
need to carry out a descaling<br />
cycle but still allows beverages<br />
to be dispensed.<br />
Call the service provider.<br />
• 10 •
8 HANDLING AND STORAGE<br />
All the operations described in section 8 must be performed exclusively<br />
by your service provider or a specialised technician,<br />
who must organise all the operating sequences and use suitable<br />
means to ensure strict compliance with current safety regulations.<br />
8.1 Handling<br />
During transport and handling, the machine must remain in an upright position<br />
according to the indications shown on the packing container.<br />
The machine must be lifted and positioned with care.<br />
Do not shake it.<br />
Make sure that no persons are standing within range of the load<br />
during lifting and handling operations.<br />
In difficult conditions, additional personnel should be assigned to oversee<br />
the manoeuvres to be carried out.<br />
the air;<br />
- Use the machine where there is a potential fire hazard;<br />
- Use the machine to dispense substances that are incompatible with the<br />
characteristics of the machine itself;<br />
• Before cleaning the machine, make sure it is unplugged. Do not wash it with<br />
petrol and/or solvents of any kind.<br />
• Do not place the machine near heating equipment (like stoves or radiators).<br />
• In the event of a fire, use carbon dioxide (CO 2<br />
) extinguishers. Do not use<br />
water or powder extinguishers.<br />
9.2. Stop functions<br />
The machine is stopped using the ON/OFF switch.<br />
9.3. List of accessories supplied<br />
<strong>Manual</strong>: Instructions for operating the machine.<br />
ENGLISH<br />
8.2 Storage<br />
The machine must be kept in the following storage conditions:<br />
- minimum temperature: above 4°C.<br />
- maximum temperature: below 40°C.<br />
- maximum humidity: below 95%<br />
The machine is packed in cardboard containers with expanded polystyrene.<br />
Water hardness test: quick test for determining the actual hardness of the<br />
water used to prepare beverages; this test is of fundamental importance for<br />
setting the water hardness in the machine.<br />
Warning. Given the total weight of the packing container, it is forbidden<br />
to stack more than three machines. The machine must be<br />
stored in its original packing in a NON-humid, NON-dusty place.<br />
9 INSTALLATION<br />
All the operations described in section 9 must be performed exclusively<br />
by your service provider or a specialised technician,<br />
who must organise all the operating sequences and use suitable<br />
means to ensure strict compliance with current safety regulations.<br />
9.1 Safety rules<br />
• Carefully read the entire instruction book.<br />
• The connection to the mains power supply must be made in accordance<br />
with the safety regulations in force in the user’s country.<br />
• The machine must be connected to a socket which is:<br />
- compatible with the type of plug installed on the machine;<br />
- suitably sized to comply with the ratings shown on the machine identification<br />
plate.<br />
- efficiently earthed.<br />
• The power cord must not:<br />
- come into contact with any type of liquid: danger of electric shocks and/<br />
or fire;<br />
- be crushed and/or placed in contact with sharp surfaces;<br />
- be used to move the machine;<br />
- be used if damaged;<br />
- be handled with damp or wet hands;<br />
- be wound in a coil when the machine is being operated.<br />
- be tampered with.<br />
• It is forbidden to:<br />
- Install the machine outdoors and other than as directed in Section 9.<br />
- Use the machine in proximity to inflammable and/or explosive substances.<br />
- Leave plastic bags, polystyrene, nails etc. within children’s reach, as<br />
they are sources of potential danger.<br />
- Allow children to play near the machine.<br />
- Use spare parts not recommended by the manufacturer.<br />
- Make any technical changes to the machine.<br />
- Immerse the machine in any type of liquid.<br />
- Wash the machine with a spray of water.<br />
- Use the machine in any manner other than as directed in this instruction<br />
book.<br />
- Install the machine on top of other appliances.<br />
- Use the machine in an explosive or aggressive atmosphere or where<br />
there is a high concentration of dust or oily substances suspended in<br />
Key for accessing water tank: it is used to prevent unauthorised personnel<br />
from accessing the water tank.<br />
“Aqua Prima” Filter: for perfect coffee, water is no less essential than the right<br />
roast level. It has to be clear and fresh.<br />
9.4. Installation-Siting<br />
It is forbidden to install the machine outdoors or in places where<br />
jets of water or steam are used.<br />
The presence of magnetic fields or vicinity of electrical equipment<br />
that generates disturbance may cause the machine electronic control<br />
system to malfunction.<br />
Important. As temperatures approach 0°C, the internal parts containing<br />
water are subject to freezing. Do not use the machine in<br />
such conditions.<br />
To ensure that the machine works properly and efficiently, the following conditions<br />
are recommended:<br />
• ambient temperature: 10°C ÷ 40°C<br />
• maximum humidity: 90%.<br />
• the site should be duly prepared for installation of the machine;<br />
• the machine should rest on a level, solid and firm surface; the surface the<br />
machine rests on should incline by no more than 2°;<br />
• the machine should be installed in an adequately lit, ventilated, hygienic<br />
location and the electric socket should be within easy reach.<br />
Adequate clearance must be provided to allow users to freely access<br />
the machine and plug and leave the area immediately in case<br />
of need.<br />
• 11 •
The illustration shows the minimum spaces for accessing:<br />
• the control panel on the front<br />
• the components that may require servicing in case of machine malfunctioning.<br />
400<br />
9.7 Setting the water hardness.<br />
This function allows you to set the degree of water hardness so that the machine<br />
will signal the need for a descaling treatment at the right time.<br />
Warning. To make this setting, carefully read the directions provided<br />
in section 10.<br />
The hardness of tap water may vary depending on the region.<br />
100 200<br />
200 200<br />
For this reason, the appliance can be set according to the water hardness in the<br />
place where it is to be used, expressed on a scale of 0 to 4.<br />
The appliance is factory set on a standard value (hardness 1).<br />
The setting should be adjusted according to the level of hardness of the water<br />
supply, which can be measured using the strip provided with the machine.<br />
After positioning the packing container near the installation site, proceed as<br />
follows:<br />
• make sure that the original packing container is closed and intact and has<br />
not been tampered with during transport;<br />
• open the packing;<br />
• check the condition and model of the packed machine;<br />
• check the contents of the bag of accessories enclosed with the machine<br />
(see “9.3 List of accessories supplied”);<br />
• remove the machine from its original packing container;<br />
• free it from any remaining packing materials;<br />
• then lift the machine and position it in the site prepared beforehand.<br />
9.5. Disposal of packing materials<br />
After the packing container has been opened, the packing materials should be<br />
segregated according to type and disposed of in accordance with the regulations<br />
in force in the user’s country.<br />
We recommend keeping the packing container for future conveyance<br />
or transport.<br />
9.6. Electrical connection<br />
Dimensions in mm<br />
This job may be performed only by specialised technical personnel<br />
or by the service provider.<br />
The machine is designed to work with single-phase voltage: the voltage rating<br />
is shown on the identification plate (1.4 <strong>Machine</strong> identification).<br />
Before plugging in the machine, make sure that the ON/OFF switch is positioned<br />
on “0”.<br />
The Service provider makes and is responsible for the electrical connection of<br />
the machine.<br />
The machine must be connected to the power supply line via the plug installed<br />
on the power cord, bearing in mind:<br />
• The laws and technical standards in force at the time of installation;<br />
• The technical data shown on the plate on the side of the machine.<br />
Briefly dip (1 second) the strip provided in water and shake it gently.<br />
After one minute the test results can be read on the strip.<br />
HARDNESS 4 (hard)<br />
HARDNESS 3 (medium)<br />
HARDNESS 2 (soft)<br />
HARDNESS 1 (very soft)<br />
HARDNESS 0 (descale control disabled)<br />
Hardness Durezza 4<br />
<br />
Hardness Durezza 3 <br />
Durezza 2<br />
Hardness 2 <br />
Durezza 1<br />
Hardness 1<br />
After completing the test, set the corresponding value on the machine.<br />
WARNING: before operating the coffee machine, you must install<br />
the Aqua Prima filter, supplied with, inside the water tank.<br />
9.8 “Aqua Prima” Filter and filling the water tank<br />
Properly check the water hardness level and install the “Aqua Prima” filter.<br />
For perfect coffee, water is no less essential than the right roast level.<br />
It has to be clear and fresh.<br />
Warning: The electrical socket to which the machine is connected<br />
must be situated within convenient reach of users, so that they can<br />
easily disconnect the machine from the mains power line when necessary.<br />
It is forbidden to:<br />
• Use extension cords of any type.<br />
• Replace the original plug.<br />
• Use adaptors.<br />
Thanks to its revolutionary system, the “Aqua Prima” filter purifies tap water,<br />
eliminating all harmful substances without holding back important minerals.<br />
• 12 •
The “Aqua Prima” filter must be replaced when the machine signals<br />
to do so.<br />
Before descaling, the “Aqua Prima” filter must be removed from<br />
the water tank.<br />
4 insert filter and push fully as you make light oscillating movements;<br />
ENGLISH<br />
In order to ensure a correct use of the “Aqua Prima” filter, please observe the<br />
following recommendations:<br />
1. Store the “Aqua prima” filter in a cool place away from the sun, at a temperature<br />
between +5°C and +40°C;<br />
2. Use in areas with temperature not higher than 60°C.<br />
3. It is advisable to wash the “Aqua prima” filter if the machine has been inactive<br />
for 3 days or more;<br />
4. Replace filter if the machine has been inactive for 20 days or more;<br />
5. To preserve a filter that has already been opened, place in a plastic airtight<br />
bag and store in the refrigerator; do not store in freezer, as this will alter the<br />
properties of the filter;<br />
6. Before using the filter, place in the water tank for 30 minutes;<br />
7. Once removed from its package, do not store filter in the open air;<br />
8. The filter must be replaced within 90 days after it has been removed from its<br />
package, or after it has filtered 60 litres of drinking water.<br />
To install the “Aqua Prima” filter, proceed as follows:<br />
1 using the key supplied with the machine, open the lid of the water tank and<br />
lift it off.<br />
5 fill the water tank with fresh drinking water and correctly place the tank back<br />
in the machine.<br />
Note: before using the filter, leave it immersed in water for about<br />
30 minutes, for its activation.<br />
2 Lift out the tank using the handle provided.<br />
Warning! The tank may be filled only with fresh drinking water. Hot<br />
or carbonated water or other liquids will damage the machine.<br />
When filling the tank, never exceed the maximum level.<br />
After filling the water tank, set it back in place, taking care to position it<br />
correctly; in this manner the valve situated at the bottom will open and allow<br />
the machine to work properly.<br />
Replace the lid on the water tank.<br />
Lock the lid in place using the key provided.<br />
6 go to the programming menu section 10.1 and enable the filter replacement<br />
control (2.6. Filter warning);<br />
3 take the “Aqua Prima” filter from its package and insert it into the tank; position<br />
the reference mark so that it corresponds to the slot;<br />
Go to the service menu as directed in section 10.2 and display the filter activation<br />
menu.<br />
5.<br />
Enable filter<br />
Using the appropriate controls, select “Yes” to perform filter activation.<br />
5.<br />
Enable filter<br />
Yes<br />
• 13 •
Note: the activation cycle cannot and must not be interrupted.<br />
The machine brings the brew group to the working position and dispenses<br />
water from the coffee spout. The display will show:<br />
10.2 Service menu<br />
To access the service menu, proceed as follows:<br />
1 Turn off the machine by pressing the ON/OFF switch,<br />
2 Press the “STOP” button and simultaneously turn the machine back on by<br />
pressing the ON/OFF switch.<br />
Enable filter<br />
in progress<br />
Wait please ...<br />
The machine dispenses a preset quantity of water for correct activation of<br />
the new “Aqua Prima” filter.<br />
When the cycle is complete, the display will show:<br />
5.<br />
Enable filter<br />
Exit the service menu. The machine will go back into the normal operating<br />
mode.<br />
Empty the dreg drawer of the filter rinse water.<br />
Note: set machine to the water hardness value which is immediately<br />
below the measured value. If 3 squares changed in colour,<br />
then the value to be set is 2.<br />
Section 10.5 lists all the functions available in this menu.<br />
The menu must be PASSWORD protected.<br />
The PASSWORD must be set during the machine initialisation<br />
phase to prevent access of unauthorised personnel.<br />
10.3 Programming commands<br />
When you access the machine programming or service menu, the keys take<br />
on different functions.<br />
Now the machine is ready to be switched on and to dispense drinks.<br />
10 MACHINE PROGRAMMING<br />
All the operations described in section 10 must be performed<br />
exclusively by your service provider or a specialised technician,<br />
who must organise all the operating sequences and use suitable<br />
means to ensure strict compliance with current safety regulations.<br />
“Page up/edit”<br />
This key enables you to:<br />
1 browse the pages of a menu;<br />
2 change parameters once they<br />
have been made editable with<br />
the ENTER key.<br />
The specialised technician or service provider can change some machine operating<br />
parameters according to the personal needs of users.<br />
There are two menus that can be used:<br />
1 Programming menu;<br />
2 Service menu.<br />
10.1 Programming menu<br />
To access the programming menu, proceed as follows:<br />
1 Turn off the machine by pressing the ON/OFF switch,<br />
2 Press the “large coffee” button and simultaneously turn the machine back<br />
on by pressing the ON/OFF switch.<br />
“Page down/edit”<br />
This key enables you to:<br />
1 browse the pages of a menu;<br />
2 change parameters once they have<br />
been made editable with the ENTER<br />
key.<br />
“Select/confirm” (ENTER)<br />
This key enables you to:<br />
1 select the function displayed;<br />
2 make a parameter/value edita-ble;<br />
3 confirm a parameter/value once it<br />
has been made editable.<br />
Section 10.4 lists all the functions available in this menu.<br />
The menu must be PASSWORD protected.<br />
The PASSWORD must be set during the machine initialisation<br />
phase to prevent access of unauthorised personnel.<br />
“ESC”<br />
This key can be pressed to exit without<br />
saving changes to the edited or selected<br />
parameter.<br />
• 14 •
10.4 Description of programming menu 10.5 Description of service menu<br />
Menu<br />
Notes<br />
Password Required only if other than 0.<br />
1. Identification 1.1. <strong>Machine</strong> code <strong>Machine</strong> identification code.<br />
1.2. Model Read only.<br />
1.3. Version Read only.<br />
1.4. Asset Number Service provider identification code.<br />
2. Setup 2.1. Temperatures<br />
2.1.1. Std. temperature<br />
Default: 100°C<br />
Operating temperature when machine is<br />
“warmed up”.<br />
Menu<br />
Notes<br />
Password Required only if other than 0<br />
1. Date & Time 1.1. Time Sets the current time<br />
1.2. Date<br />
1.2.1. Day<br />
1.2.2. Month<br />
1.2.3. Year<br />
1.2.4. Day of the week<br />
ENGLISH<br />
2.2. Programme doses<br />
2.2.1. Dose water short<br />
Default: 165<br />
2.2.2. Dose water long<br />
Default: 275<br />
2.3. Prebrewing<br />
Default: Medium<br />
2.4. Ventilate<br />
Default: No<br />
2.5. Descale<br />
2.5.1. Water hardness<br />
Default: 1<br />
2.5.2. Descal. warning<br />
Default: Yes<br />
2.6. Filter warning<br />
Default: No<br />
2.7. Credits<br />
2.7.1. Credit control<br />
Default: No<br />
2.7.2. Credits warning<br />
Default: No<br />
2.8. Payment method<br />
2.8.1. Enable system<br />
Default: No<br />
2.8.2. Display credit<br />
Default: No<br />
2.9 Grounds control<br />
Default: Yes<br />
3. Save energy 3.1. Stand-by enabled<br />
Default: No<br />
3.2. Ritardo stand-by<br />
Default: 10<br />
3.3. Monday<br />
3.3.1. Switch on time<br />
Default: 08.00<br />
3.3.2. Switch off time<br />
Default: 20.00<br />
3.4. Tuesday<br />
3.4.1. Switch on time<br />
3.4.2. Switch off time<br />
3.5. Wednesday<br />
3.5.1. Switch on time<br />
3.5.2. Switch off time<br />
3.6. Thursday<br />
3.6.1. Switch on time<br />
3.6.2. Switch off time<br />
3.7. Friday<br />
3.7.1. Switch on time<br />
3.7.2. Switch off time<br />
3.8. Saturday<br />
3.8.1. Switch on time<br />
3.8.2. Switch off time<br />
3.9. Sunday<br />
3.9.1. Switch on time<br />
3.9.2. Switch off time<br />
4. Security 4.1. Password<br />
Default: 000000<br />
4.2. Service password<br />
Default: 0000<br />
Qty. small drink (it is a numerical parameter<br />
without any physical equivalent, e.g. cc).<br />
Qty. large drink (it is a numerical parameter<br />
without any physical equivalent e.g. cc).<br />
Prebrewing time.<br />
Enables/disables rinse cycle when machine is<br />
switched on (this function will only be performed<br />
when the machine is cold).<br />
Range: 0-4 - Water hardness setting to<br />
determine the quantity of water after which the<br />
machine will signal a descaling alarm.<br />
0 = disables the descale control function.<br />
Enables/Disables display of descaling alarm.<br />
Enables/Disables display of an alarm message<br />
indicating that the filter needs replacing.<br />
Enable/Disable the dispensing control via credit<br />
management.<br />
Enable/Disable the display of alarms “Credit<br />
low” and “No credit”<br />
Enables/Disables brewing/dispensing by<br />
means of an external coin mechanism.<br />
Enables/Disables display of the amount inserted<br />
in the coin box.<br />
It enables/disables the machine to brew without<br />
checking the number of used pods in the dump<br />
box.<br />
Enables/disables stand-by function.<br />
Elapsed time in minutes since last use before machine<br />
switches off when in the Stand-by time band.<br />
It enables you to program the machine ON/OFF<br />
times for Monday.<br />
It enables you to program the machine ON/OFF<br />
times for Tuesday.<br />
It enables you to program the machine ON/OFF<br />
times for Wednesday.<br />
It enables you to program the machine ON/OFF<br />
times for Thursday.<br />
It enables you to program the machine ON/OFF<br />
times for Friday.<br />
It enables you to program the machine ON/OFF<br />
times for Saturday.<br />
It enables you to program the machine ON/OFF<br />
times for Sunday.<br />
sets the password for accessing the<br />
programming menu (6 digits)<br />
sets the password for accessing the service<br />
menu (4 digits)<br />
5. Reset to default selecting “Yes” will restore all default settings<br />
6. Exit Press ENTER to quit.<br />
2. Audit 2.1. Total from reset<br />
2.1.1. Total from reset<br />
2.1.2. P1 from reset<br />
2.1.3. P2 from reset<br />
2.1.4. P3 from reset<br />
2.1.5. Last Reset<br />
2.1.6 Reset Audit<br />
2.2. Total from init<br />
2.2.1. Total from init<br />
2.2.2. P1 from init<br />
2.2.3. P2 from init<br />
2.2.4. Pr3 from init<br />
2.2.5. Last init<br />
Number of total products since last reset<br />
Number of type 1 products (espresso) since<br />
last reset<br />
Number of type 2 products (long coffee) since<br />
last reset<br />
Number of type 3 products (free cycle) since<br />
last reset<br />
Read only - Date and time of last reset<br />
Selecting “Yes” will clear all partial counters<br />
Number of product totals since the beginning<br />
of the machine’s life<br />
Number of type 1 products (espresso) since<br />
the beginning of the machine’s life<br />
Number of type 2 products (long coffee) since<br />
the beginning of the machine’s life<br />
Number of type 3 products (free cycle) since<br />
the beginning of the machine’s life<br />
Read only - Date and time of last initialization<br />
3. Brew unit wash Washing of the brew group is performed<br />
4. Descale 4.1. Qty till descale<br />
4.2. Final descale<br />
4.3. Do it now<br />
Remaining quantity of water to be dispensed<br />
before having to perform next decalcification<br />
(expressed in litres).<br />
Date and time of last descaling.<br />
Pressing “Enter” will launch a descaling cycle.<br />
5. Enable filter The new filter installed in the machine<br />
undergoes a rinse cycle.<br />
6. Errors 6.1. Error log<br />
6.1.1. Display of errors<br />
with up/down keys<br />
6.2. Reset log<br />
6.3. Errors reset<br />
7. Credits 7.1. Add credits<br />
7.2. Zero credits<br />
7.3. Alarm level<br />
0<br />
Default: No<br />
0<br />
The last N errors can be displayed: index 0<br />
= error of oldest date. May be accessed<br />
only if there is at least one error.<br />
Selecting “Yes” will delete the list of the last<br />
errors.<br />
Selecting “Yes” will cancel any Out-of-Service<br />
conditions that do not automatically reset.<br />
The value indicates the number of credits that<br />
are to be added to those already in the<br />
machine.<br />
Select “Yes” to zero all credits in the machine.<br />
The value indicates the quantity of residual<br />
credits below which the message “Credit<br />
low” is displayed<br />
Note: the message is only displayed if<br />
enabled.<br />
8. Exit Press ENTER to quit.<br />
• 15 •
10.6 Changing a parameter<br />
All editable parameters can be very easily changed.<br />
When the page containing the value you wish to change is displayed, press “Enter”.<br />
2.1.2<br />
Std temperature<br />
100<br />
Warning! When you change a machine operating parameter, you<br />
should be aware that you are changing an operating parameter set<br />
by the manufacturer for the purpose of ensuring optimal machine performance.<br />
The value will become editable and the “ ” symbol will appear beneath the digit<br />
to be changed.<br />
2.1.2<br />
Std temperature<br />
100<br />
Press the up/down keys to change the value.<br />
When the desired value is displayed, press “ENTER” to confirm.<br />
The value will be memorised and the next digit will become available for editing.<br />
2.1.2<br />
Std temperature<br />
100<br />
When the desired value is displayed, press “ENTER”.<br />
11 CLEANING<br />
All the operations described in section 11 must be performed<br />
exclusively by your service provider or a specialised technician,<br />
who must organise all the operating sequences and use suitable<br />
means to ensure strict compliance with current safety regulations.<br />
Warning. Before undertaking any maintenance and/or cleaning jobs,<br />
switch off the machine, unplug it and wait for it to cool down.<br />
To ensure that the machine delivers optimal performance and dispenses drinks<br />
of the best quality, carefully abide by the instructions contained herein.<br />
Unless otherwise specified, non-removable components and the<br />
machine itself should be cleaned only with cold or lukewarm water<br />
using non-abrasive sponges and damp cloths (do not attempt to clean<br />
exposed electrical parts in this manner).<br />
• Do not use any detergent or solvent which could impair the machine’s form<br />
or functionality.<br />
• Do not immerse the machine in water or other liquids: this will damage the<br />
machine.<br />
• Do not wash any of the machine components in a dishwasher.<br />
• Always dry machine components by hand, without placing them in a conventional<br />
or microwave oven.<br />
• Do not spray water directly onto the machine.<br />
• All the parts requiring cleaning are easily accessible so no tools are needed.<br />
• Regular maintenance and cleaning will preserve the machine and keep it<br />
performing efficiently for a longer time as well as ensuring compliance with<br />
basic standards of hygiene.<br />
Important. The machine should undergo maintenance at the frequencies<br />
shown in the routine maintenance table in section 11.1<br />
of this instruction book.<br />
11.1 Frequency of cleaning<br />
To ensure that the appliance performs efficiently, it is recommended to carry out<br />
the cleaning and maintenance operations described in the table below.<br />
The value will be memorised and the next digit will become available for editing.<br />
2.1.2<br />
Std temperature<br />
100<br />
Operation to be performed<br />
Empty out clean the dreg<br />
drawer.<br />
Clean the pod loading<br />
slide.<br />
When<br />
signalled<br />
At every<br />
refill<br />
After<br />
2 refill<br />
When the desired value is displayed, press “ENTER”.<br />
Clean the water tank.<br />
Steam wand<br />
The “ ” symbol will disappear and the settings will take effect only when you<br />
exit the program mode.<br />
10.7 Exiting the program mode<br />
11.2 Cleaning the water tank<br />
The water tank must be cleaned every time it is to be refilled.<br />
To quit the program mode, the following page must be displayed.<br />
When the message appears on the display, press “ENTER”.<br />
8<br />
Exit<br />
• 16 •<br />
The number contained in the screen to exit the program mode can<br />
vary according to the selected menu.
On such occasions the condition of the filter inside the tank must also be checked.<br />
The filter can be cleaned with warm water.<br />
Turn slightly to fit the filter back in place.<br />
11.3 Cleaning the dreg drawer<br />
The dreg drawer must be emptied and cleaned every time the machine indicates<br />
to do so.<br />
For directions on how to carry out this operation see section 4.7.<br />
Check the condition of the steam wand (4) and wipe it clean with a damp<br />
cloth.<br />
11.6 Descaling<br />
Warning.<br />
Never use vinegar, as this would cause damage to the machine!<br />
Before descaling, the “Aqua Prima” filter must be removed from<br />
the water tank.<br />
ENGLISH<br />
In addition, whenever maintenance is performed on the machine it is a good<br />
idea to remove and clean the dreg drawer accordingly.<br />
A<br />
Descaling serves to remove limescale deposits from surfaces and openings in<br />
the water circuit, thereby keeping the valves, heating controls and other important<br />
elements in perfect working order.<br />
Important. Given the complexity of the machine water circuit, the<br />
descaling procedure described below is not able to reach all components.<br />
In fact, components such as the brew unit and the plastic pin/valve connecting<br />
it are excluded from the cycle.<br />
The descaling procedure must be carried out regularly, every 3 – 4 months. In<br />
areas where the water hardness is very high, we recommend more frequent<br />
descaling.<br />
On such occasions it is also recommended to clean the grills on which the small<br />
and large cups rest.<br />
Check that the cup rest (A) can turn freely without impediments.<br />
11.4 Cleaning the pod loading tray<br />
Check the condition of the pod tray and if necessary clean it using a cloth<br />
dampened with water.<br />
Warning. Do not use detergents to clean the tray, as it may be difficult<br />
to remove detergent residues.<br />
Should the user not decalcify the machine at the recommended intervals, this<br />
machine is equipped with a special counter that (if activated via the appropriate<br />
menu), according to the quantity of water dispensed, warns of the necessity to<br />
carry out this operation urgently.<br />
In such a case the display will show this message.<br />
10:30 11 Feb 04<br />
Ready<br />
Please descale<br />
When this message appears, the machine will continue to work but should be<br />
descaled as soon as possible.<br />
Go to the service menu as directed in section 10.2 and display the descaling<br />
menu.<br />
4.<br />
Descale<br />
Using the appropriate commands, select “Do it now” to launch the descaling<br />
cycle.<br />
Check that the tray slides smoothly and easily<br />
4.3.<br />
Do it now<br />
11.5 Cleaning the steam wand<br />
Note: the descaling cycle cannot and must not be interrupted.<br />
The machine heats the boiler to the correct temperature for carrying out the decalcification<br />
cycle properly. If the machine has just been switched on, the boiler<br />
is preheated. If the machine is hot, an automatic cooling cycle is performed,<br />
dispensing water into the drip tray.<br />
Descale<br />
Warming up<br />
Wait please...<br />
• 17 •
Mix the descaling agent with water as directed on the product package.<br />
Note: it is advisable to use up to 1 litre of the prepared solution for<br />
the decalcifying process.<br />
Descale<br />
Insert descal.<br />
Ent. to start<br />
Warning. Use only a non-toxic, non-harmful descaling product<br />
specific for coffee machines.<br />
Pour the descaling solution into the tank and then place the tank in the machine.<br />
The descaling solution will be discharged into the dreg drawer/drip<br />
tray; empty the dreg drawer before starting the descaling cycle.<br />
Press “ENTER” to start the descaling cycle. The machine will launch an automatic<br />
descaling cycle.<br />
Empty the rinse water from the dreg drawer/drip tray before resuming<br />
normal machine operation.<br />
Note: the descale counters reset automatically.<br />
Exit the service menu. The machine will go back into the normal operating<br />
mode.<br />
11.7 Brew group washing<br />
The brew group can only be cleaned following the instructions in<br />
this paragraph.<br />
This program enables the cleaning of all parts involved in coffee brewing.<br />
Go to the service menu as described in section 10.2 of the instruction manual<br />
and display the menu for group washing.<br />
3<br />
Brew unit wash<br />
Descale<br />
in progress<br />
Wait please...<br />
Descale<br />
in progress<br />
Ventilate<br />
Fill with water<br />
When this message appears, it means that the machine has used up the descaling<br />
solution inside the water tank.<br />
Take out the tank, wash it thoroughly and refill it with fresh drinking water.<br />
Place the tank back in the machine.<br />
Empty the descaling solution from the dreg drawer/drip tray before<br />
starting the rinse cycle.<br />
Descale<br />
in progress<br />
Ventilate<br />
Ent. to start<br />
Press “ENTER” to start the cycle for rinsing out the internal circuit; the machine<br />
will launch the automatic rinse cycle.<br />
Descale<br />
in progress<br />
Ventilate<br />
Wait please...<br />
When this message appears, it means that the machine has completed the<br />
automatic rinse cycle.<br />
Select the “Yes” option by using the appropriate controls.<br />
3<br />
Brew unit wash<br />
Yes<br />
Confirm the option to start the brew group washing. The display shows:<br />
Brew unit wash<br />
in progress<br />
Wait please ...<br />
The machine washes the brew group by dispensing water from the spout.<br />
When washing has ended, exit the service menu.<br />
12 DISPOSAL<br />
The waste materials resulting from the dismantlement of the machine must be<br />
disposed of in such a way as to safeguard the environment and avoid polluting<br />
soil, water and air.<br />
In all cases it will be necessary to comply with the applicable local laws.<br />
Render the machine unusable by cutting the power supply cord.<br />
At the end of its life take the machine to a suitable waste collection facility.<br />
Important.<br />
The battery on the electronic card must be removed prior to disposal<br />
of the appliance.<br />
The batteries must be safely disposed of.<br />
Descale<br />
executed<br />
• 18 •