100 Watt Convertible™ Amp - Seymour Duncan
100 Watt Convertible™ Amp - Seymour Duncan
100 Watt Convertible™ Amp - Seymour Duncan

Create successful ePaper yourself
Turn your PDF publications into a flip-book with our unique Google optimized e-Paper software.
CHANGING MODULES<br />
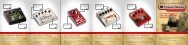
The five factory installed preamp modules are located directly under the Quick AccessTM<br />
module system plate on the top of the amp. Changing modules is quick and easy.<br />
Dramatic tone changes are possible just by rearranging your present module<br />
configuration. To replace or rearrange the modules, just follow these easy steps.<br />
TO REMOVE:<br />
1. UNPLUG YOUR AMPLIFIER from the power outlet.<br />
2. Turn the Quick Access plate screws counter-clockwise - they<br />
will POP UP<br />
3. Remove the plate.<br />
4. Looking down inside the amplifier, firmly grasp the module you<br />
want to replace by its handle and lift slowly. When the module<br />
is free from its receptacle, continue to lift upward. You may<br />
have to turn the module sideways to clear the module opening.<br />
TO REPLACE: 1. MAKE SURE THE AMPLIFIER IS STILL UNPLUGGED.<br />
2. Choose the module you want to install and grasp by its handle.<br />
3. Insert the module to be installed through the Quick Access<br />
module system opening. It may be necessary to turn the<br />
module sideways before it will fit through the module opening.<br />
4. Align the module plug to be installed over the receptacle in the<br />
module position you have chosen.<br />
5. Slowly insert the module into the receptacle. Apply moderate<br />
pressure until you feel the module is seated snugly.<br />
6. Repeat steps 2 thru 5 for each module you want to replace/<br />
rearrange. When you have finished changing modules, doublecheck<br />
all modules to ensure they are still snug in their receptacles.<br />
7. Align the module system plate with the holes in the top of the<br />
amplifier cabinet and then secure.<br />
8. Make sure that the Volume and Variable Power controls are at<br />
a low setting and Standby switch is place in the ON position.<br />
9. Plug the power cord from the amplifier into the 110-120Vac wall<br />
outlet and place the <strong>Amp</strong> Power switch in the ON position.<br />
10. After a one-minute warm-up, flip Standby switch on the rear<br />
panel to the "ON" position and you're ready to play.