©CAPCOM CO., LTD. 2012 ALL RIGHTS RESERVED ... - Xbox
©CAPCOM CO., LTD. 2012 ALL RIGHTS RESERVED ... - Xbox
©CAPCOM CO., LTD. 2012 ALL RIGHTS RESERVED ... - Xbox

Create successful ePaper yourself
Turn your PDF publications into a flip-book with our unique Google optimized e-Paper software.
©CAP<strong>CO</strong>M <strong>CO</strong>., <strong>LTD</strong>. <strong>2012</strong> <strong>ALL</strong> <strong>RIGHTS</strong> <strong>RESERVED</strong>. Resident Evil, CAP<strong>CO</strong>M and the<br />
CAP<strong>CO</strong>M LOGO are registered trademarks of CAP<strong>CO</strong>M <strong>CO</strong>., <strong>LTD</strong>. Kinect , <strong>Xbox</strong>, <strong>Xbox</strong><br />
360, <strong>Xbox</strong> LIVE, and the <strong>Xbox</strong> logos are trademarks of the Microsoft group of companies and<br />
are used under license from Microsoft.
警 告<br />
在 您 開 始 玩 遊 戲 之 前 , 請 詳 讀 <strong>Xbox</strong> 360 ® 主 機 說 明 、<strong>Xbox</strong> 360 Kinect ® 感 應 器 手<br />
冊 、 以 及 其 他 任 何 周 邊 裝 置 手 冊 上 的 重 要 安 全 與 健 康 須 知 。 請 妥 善 保 留 所 有 手 冊 ,<br />
以 供 日 後 參 考 之 用 。 如 需 替 換 硬 體 手 冊 , 請 前 往 www.xbox.com/support。<br />
光 刺 激 誘 發 癲 癇 症<br />
進 行 視 訊 遊 戲 的 重 要 健 康 警 告<br />
有 極 少 數 的 人 在 觀 看 一 些 視 覺 影 像 時 可 能 會 突 然 癲 癇 發 作 , 這 些 影 像 包 括 電 玩 遊 戲<br />
中 出 現 的 閃 光 或 圖 形 。 甚 且 連 沒 有 突 然 發 病 或 癲 癇 史 者 也 可 能 在 進 行 電 玩 遊 戲 時 ,<br />
出 現 類 似 癲 癇 症 狀 , 這 類 未 經 診 斷 的 症 狀 稱 為 「 光 刺 激 誘 發 癲 癇 症 」。<br />
癲 癇 症 狀 包 括 頭 昏 眼 花 、 視 幻 覺 、 眼 部 或 臉 部 抽 搐 、 手 腳 痙 攣 、 暫 失 方 向 感 、 精 神<br />
混 淆 或 者 暫 時 失 去 意 識 。 癲 癇 發 作 時 可 能 因 為 失 去 意 識 或 抽 筋 之 故 , 跌 落 地 面 而 受<br />
傷 或 碰 撞 到 周 遭 物 品 。<br />
若 出 現 以 上 所 述 任 何 症 狀 , 請 立 即 停 止 該 遊 戲 並 送 醫 診 斷 。 家 長 應 該 在 場 看 顧 或 者<br />
詢 問 其 是 否 有 以 上 症 狀 , 相 較 於 成 人 , 兒 童 及 青 少 年 更 有 可 能 發 生 此 類 癲 癇 症 。 若<br />
要 降 低 誘 發 光 刺 激 誘 發 癲 癇 症 的 風 險 , 可 以 進 行 下 列 預 防 措 施 :<br />
- 待 在 距 離 螢 幕 較 遠 的 地 方<br />
- 使 用 較 小 的 螢 幕<br />
- 在 照 明 充 足 的 室 內 進 行 遊 戲<br />
- 不 要 在 感 覺 疲 累 或 倦 怠 時 進 行 遊 戲<br />
如 果 您 自 己 或 您 的 親 友 有 癲 癇 史 , 請 在 進 行 遊 戲 之 前 先 與 醫 師 諮 詢 。<br />
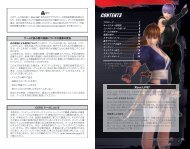
story contents<br />
02<br />
04<br />
05<br />
06<br />
07<br />
08<br />
09<br />
<strong>CO</strong>NTROLS<br />
MAIN MENU<br />
NEW GAME / SAVING & LOADING<br />
GAME SCREEN<br />
GAME RULES<br />
ITEM SLOT<br />
RE<strong>CO</strong>VERY / ROUTE GUIDE<br />
SKILL SETTINGS<br />
MULTIPLAYER<br />
EXTRA <strong>CO</strong>NTENT<br />
PLAYER ACTIONS<br />
PARTNER ACTIONS<br />
Bioterror continues to grip the world in fear. A new B.O.W. called “J’avo”<br />
has been spotted on the front lines of the Eastern European conflict. And<br />
as the U.S. president prepares to meet the challenges head on, a horribly<br />
cruel fate awaits him and the college town of Tall Oaks.<br />
Seven heroes will rise to meet this deadly new threat. They begin on<br />
separate paths, but their fates will intertwine as they all head towards<br />
the final conclusion...<br />
At least 144KB of free space is required to save your game in Resident Evil ® 6.<br />
This game supports Dolby ® Digital 5.1. In order to enjoy Dolby Digital 5.1 Surround<br />
Sound you must connect your Microsoft <strong>Xbox</strong> 360 console to a surround sound<br />
system that supports Dolby Digital using an optical digital cable, while using an<br />
<strong>Xbox</strong> 360 Component HD AV Cable, <strong>Xbox</strong> 360 VGA HD AV Cable or <strong>Xbox</strong> 360<br />
S-Video AV Cable. If your <strong>Xbox</strong> 360 console has a HDMI AV port you can also use<br />
the <strong>Xbox</strong> 360 HDMI AV Cable. Then, go to the <strong>Xbox</strong> 360 Dashboard and select<br />
“System,” then “System Settings,” Audio Settings,” “Digital Output Settings” and<br />
finally “Dolby Digital 5.1.”<br />
10<br />
11<br />
13<br />
14<br />
16<br />
WARNING Before playing this game, read the <strong>Xbox</strong> 360 ® console,<br />
<strong>Xbox</strong> 360 Kinect ® Sensor, and accessory manuals for important safety and health<br />
information.www.xbox.com/support.<br />
This game supports HDTV resolutions. In order to enjoy HDTV video output,<br />
you must connect your Microsoft <strong>Xbox</strong> 360 console to an High Definition<br />
television (HDTV).<br />
IMPORTANT HEALTH WARNING: PHOTOSENSITIVE SEIZURES<br />
A very small percentage of people may experience a seizure when exposed to<br />
certain visual images, including flashing lights or patterns that may appear in<br />
video games. Even people with no history of seizures or epilepsy may have an<br />
undiagnosed condition that can cause “photosensitive epileptic seizures” while<br />
watching video games. Symptoms can include light-headedness, altered vision,<br />
eye or face twitching, jerking or shaking of arms or legs, disorientation, confusion,<br />
momentary loss of awareness, and loss of consciousness or convulsions that can<br />
lead to injury from falling down or striking nearby objects. Immediately stop<br />
playing and consult a doctor if you experience any of these symptoms.<br />
Parents, watch for or ask children about these symptoms— children and teenagers<br />
are more likely to experience these seizures. The risk may be reduced by being<br />
farther from the screen; using a smaller screen; playing in a well-lit room, and not<br />
playing when drowsy or fatigued. If you or any relatives have a history of seizures<br />
or epilepsy, consult a doctor before playing.<br />
01
controls<br />
Using the <strong>Xbox</strong> 360 Controller<br />
Hold down w button & press x<br />
button to attack<br />
x Button<br />
Physical Attack<br />
Ready your weapon<br />
QUICK SHOT P.15<br />
Press w button & x button<br />
simultaneously<br />
Ready your weapon / Cover<br />
w Button<br />
Hide behind walls, etc<br />
Perform regular attack with x<br />
button. When the enemy attacks,<br />
press x button to counter attack<br />
< BACK Button<br />
<strong>CO</strong>MS Device Menu / Skip cut scenes<br />
>START Button<br />
Pause game (offline)<br />
z Button<br />
Health Tablet (Recovery P.09 )<br />
y Button<br />
Display route guide<br />
HEALTH TABLET AUTO-RELOAD – When you<br />
have herbs, press z button & X button<br />
ESCAPE – Hold down w button,<br />
press A button & move the L<br />
left stick<br />
Y Button<br />
Item Slot<br />
P.08<br />
B Button<br />
Partner Action<br />
P.16<br />
/ Cancel<br />
L Left Stick<br />
Move<br />
<strong>Xbox</strong> Guide Button<br />
Look in partner’s direction /<br />
Call – Hold down B button<br />
Set Attack Tag – Ready weapon with<br />
w button lock, aim on enemy, & press<br />
B button<br />
SLIDING – Press w<br />
button during a Dash<br />
DASH – L Left stick<br />
and A button<br />
C Right Stick<br />
Aim / Control camera<br />
A Button<br />
X Button<br />
Action / Confirm<br />
Reload / Pick up item<br />
* These are the default<br />
controls. They can<br />
be changed in <strong>CO</strong>MS<br />
Device Menu or from<br />
the <strong>CO</strong>MS Device Menu<br />
within the game. P.04<br />
Directional Pad<br />
Swap equipment / Select items<br />
Up / Down – Swap hand<br />
grenades, first aid spray, etc<br />
Left / Right – Swap weapons<br />
h Button<br />
Switch left / right hand<br />
To use the vibration feature, press the <strong>Xbox</strong> Guide Button, then go to<br />
Settings / Preferences / Vibration and activate the feature.<br />
Pausing the Game<br />
The game can only be paused if you are playing offline. The BACK button<br />
will bring up the <strong>CO</strong>MS Device Menu, but the game will still be in progress.<br />
02 03
main menu<br />
new game / saving & loading<br />
play game<br />
campaign<br />
new game P.05 Start a game from the beginning.<br />
If there is any saved data, this will not be displayed.<br />
continue If there is any saved data, “Continue” will<br />
be displayed. Choose this to continue with the existing game.<br />
chapter select Select the chapter you would<br />
like to play and start the game.<br />
join game<br />
play online.<br />
skill settings<br />
dog tags<br />
extra content<br />
options<br />
credits<br />
records<br />
P.11<br />
special features<br />
<strong>Xbox</strong> LIVE Marketplace<br />
Use the network to enjoy co-op<br />
P.10<br />
P.13<br />
Buy and customize skills.<br />
Customize the dog tag<br />
attached to your account.<br />
Enjoy additional game<br />
modes here.<br />
Change the in-game settings.<br />
View the staff credits.<br />
View a variety of records.<br />
View special content.<br />
Download additional content.<br />
new game<br />
After choosing NEW GAME or CHAPTER SELECT, you can adjust the<br />
various settings.<br />
campaign select<br />
Choose the campaign you want to play.<br />
difficulty<br />
Choose the difficulty level.<br />
screen mode<br />
Choose between “Single” for one player & “Split” for two players.<br />
character select<br />
Choose the player character.<br />
system settings<br />
Adjust the settings for online and offline play.<br />
co-op lobby<br />
In the lobby you can wait for another player to join you in co-op play.<br />
After a player joins your game, press START to begin play.<br />
You can also press START button before another player comes to<br />
start the game without waiting.<br />
* Another player may still join your game in-progress.<br />
* Not displayed when “Partner Join” is set to “Don’t Allow” on the System<br />
Settings screen.<br />
saving & loading<br />
This game features an auto-save function. The game will also be<br />
saved when you quit the game from the <strong>CO</strong>MS Device Menu. Saved<br />
data will be loaded upon pressing the START button at the title<br />
screen.<br />
* At least 144KB of free space is required to save game data.<br />
* If you begin the game with CHAPTER SELECT or JOIN GAME, data from the<br />
game in progress prior to that point will be lost.<br />
about disc 2<br />
Disc 2 is the installation disc for additional voice data. If you would like to enjoy the<br />
game featuring French, Italian, German, or Spanish voices, please insert disc 2 into the<br />
tray and follow the on-screen instructions to install the data onto your storage device.<br />
*At least 2.8GB of free disk space on the storage device is necessary for installation.<br />
*No installation is necessary for English voices.<br />
04 05
game screen<br />
game rules<br />
Player<br />
Direction &<br />
distance to target<br />
Partner<br />
dying<br />
Action button<br />
Vitality Gauge<br />
Displays the player’s<br />
vitality; decreases when<br />
damage is incurred.<br />
When less<br />
than one<br />
block of<br />
damage has<br />
been incurred, the<br />
damage will regenerate<br />
over time.<br />
Physical Combat Gauge<br />
Performing physical attacks or<br />
quick shots will use up some of<br />
the gauge P.15 . The gauge<br />
will regenerate over time.<br />
Chris<br />
Dropped item<br />
Jake<br />
<strong>CO</strong>MS Device<br />
Tablets Remaining<br />
Ammo for Equipped<br />
Weapon / Remaining<br />
Rounds<br />
Number of<br />
Weapon Reloads<br />
Weapon Function Switch<br />
Displayed when you have<br />
equipped a weapon that has<br />
multiple functionality. Press the<br />
Y button while in ready state.<br />
Tip<br />
The design of the <strong>CO</strong>MS device will<br />
vary depending on the character.<br />
When the player’s Vitality<br />
Gauge reaches zero, they enter<br />
the Dying state, and the Dying<br />
Gauge is displayed. In this state<br />
many actions are restricted,<br />
and it will be game over if more<br />
damage is incurred. The Dying<br />
Gauge is replenished after a<br />
set time, and when it becomes<br />
full, the player can return to the<br />
game again.<br />
game over / continue<br />
Tip<br />
Dying Gauge<br />
You can only use the weapon you had equipped when<br />
you enter the Dying state. You will not be able to reload,<br />
change weapons, or use any items.<br />
Another way to recover is with your<br />
partner’s help. P.17<br />
It’s game over when any of the following occurs:<br />
• The player or their partner suffers more damage when in the<br />
Dying state.<br />
• Failed to accomplish your objectives, or failed certain QTE’s.<br />
After a game over, you can restart the game from the previous<br />
checkpoint by selecting “Continue.”<br />
06 07
item slot<br />
Press the Y button during the game to open the Item Slot &<br />
view the items you have or discard items you no longer need.<br />
Move Cursor<br />
Right Stick<br />
or Directional pad<br />
Weapons Screen<br />
Currently Equipped Weapon<br />
Cursor<br />
Item Slot Screen<br />
Cursor<br />
Item Name<br />
Item Inventory (Number Possessed)<br />
Switch screens with z button<br />
Switch Weapon<br />
Inventory Display<br />
Item Menu<br />
Right<br />
Stick up /<br />
down or<br />
Directional<br />
pad up /<br />
down<br />
Use the cursor to choose<br />
an item & press the A button.<br />
recovery / route guide<br />
recovery<br />
In this game, herbs are used in tablet form.<br />
Use health tablets and first aid spray to<br />
replenish your Vitality and PC Gauges.<br />
Health Tablets<br />
Use one tablet with each press of the<br />
z button. With one tablet, the Vitality<br />
Gauge recovers by one block and the<br />
PC Gauge recovers completely. You<br />
need to convert the herbs into tablet<br />
form beforehand. Select an herb in the<br />
Item Slot and press the A button to<br />
store in your tablet case.<br />
Tip<br />
Hold down z button and press the<br />
X button to prepare and convert tablets<br />
automatically without opening the Item Slot.<br />
route guide<br />
Tip<br />
Preparing several herbs at once<br />
& then converting them into tablets<br />
results in a greater number of tablets.<br />
Tip<br />
First Aid Spray<br />
Equip from Weapons<br />
Screen, x button<br />
If you use health tablets or first aid spray near your<br />
partner, their Vitality Gauge and PC Gauge are<br />
replenished at the same time as yours.<br />
Press y button during the game to display the route guide.<br />
Using the route guide you can confirm your current objectives as<br />
well as view a marker that shows the direction you should head in.<br />
08 09
skill settings<br />
multiplayer<br />
Skills can be equipped in<br />
skill sets. You can equip up to<br />
three skills in one set.<br />
When you clear a campaign,<br />
the number of skill sets you<br />
can have will increase to<br />
eight.<br />
Skill sets can be changed<br />
at any time during the game<br />
from the options menu (BACK<br />
button).<br />
* Certain skills are specific to the<br />
campaign or extra content<br />
and can only be equipped in that<br />
particular mode.etc, and must be<br />
equipped specially in each mode.<br />
Skill sets can be changed at<br />
any time during the game from<br />
the <strong>CO</strong>MS Device Menu (BACK<br />
button).<br />
Tip<br />
P.13<br />
Prepare several favorite skill sets so that you<br />
can use different ones depending on your play<br />
style and the game circumstances.<br />
Skill points can be acquired<br />
by defeating enemies and at<br />
various points throughout the<br />
game. These points can be used<br />
to purchase skills that will be<br />
useful as you proceed through<br />
the game.<br />
There are various multiplayer options in this game, including<br />
co-op play and competitive online modes.<br />
Online Co-Op Multiplayer<br />
As Host<br />
On the System Settings screen in<br />
the Campaign P.05 and Create<br />
Game (Duo) in The Mercenaries<br />
Mode P.13 , use the onscreen<br />
menus to incorporate multiplayer<br />
into your game.<br />
NETWORK SELECTION<br />
Select something other<br />
than “Offline.”<br />
PARTNER JOIN<br />
If you would like to accept a<br />
partner, make sure this is not set<br />
to “Don’t Allow.”<br />
AGENT HUNT SETTINGS<br />
(Campaign Mode): If you would<br />
like to take part in an Agent Hunt,<br />
set this to “Allow.”<br />
As Guest<br />
You can join games that other users have created or are<br />
currently playing. In each mode, select “Join Game” and follow<br />
the onscreen instructions to set up online multi-play.<br />
Typical Settings<br />
QUICK MATCH<br />
Games you can join are<br />
automatically selected.<br />
CUSTOM MATCH<br />
Specify the types of games<br />
you would like to join.<br />
Typical Settings<br />
PRIVATE SLOTS<br />
(The Mercenaries Mode): If you<br />
would like to take on a guest, set<br />
this to “1.”<br />
10 11<br />
P.13<br />
TO ENJOY ONLINE MULTIPLAYER:<br />
• Use <strong>Xbox</strong> LIVE ® to engage in multi-play with users<br />
from around the world. You will need a broadband<br />
connection in order to access the <strong>Xbox</strong> LIVE<br />
service. <strong>Xbox</strong> LIVE Gold Membership is also<br />
required. To view membership details, please see<br />
http://www.xbox.com/live.<br />
• Engage in multi-play via a system link. To find out<br />
how to set up a system link, please refer to your<br />
<strong>Xbox</strong> 360 console instructions.
multiplayer<br />
extra content<br />
story intersection co-op multiplayer<br />
In certain stages in the CAMPAIGN, it’s possible for up to four<br />
people to play together at story intersections.<br />
Two players in Leon’s Campaign<br />
Split-Screen Multiplayer<br />
Example of Story Intersection Co-Op<br />
Four players<br />
working together at the<br />
story intersection!<br />
Two players in Jake’s<br />
Campaign Online Co-Op<br />
the mercenaries<br />
In this mode, you aim to<br />
score points by defeating as<br />
many enemies in a stage as<br />
possible within a set time.<br />
A maximum of two people can play<br />
at the same time. Split-screen is also<br />
possible.<br />
Points are displayed on the leaderboards.<br />
In The Mercenaries X Skill Settings,<br />
you can buy and equip special skills<br />
unique to this mode.<br />
Skills equipped under Skill Settings in<br />
the campaign will not be equipped in<br />
The Mercenaries.<br />
* To play with other players during story intersections, change your session<br />
settings to public. P.11<br />
split-screen offline co-op<br />
With two or more controllers connected<br />
to your <strong>Xbox</strong> 360, select “Split” from the<br />
SCREEN MODE P.05 to experience<br />
co-op play split over two screens. Start<br />
the game by pressing the START button on<br />
controller 2 during Character Selection.<br />
* Split screen play is only possible in Campaign Mode and The<br />
Mercenaries Mode. P.13<br />
Agent hunt<br />
In this mode, you can join<br />
other players’ games as<br />
an enemy creature, and<br />
compete to defeat as many<br />
players (agents) as possible.<br />
This mode must first be unlocked by<br />
clearing one of the campaigns.<br />
If the agent is defeated in a stage,<br />
the victory falls to the creature.<br />
Even if you are defeated, you can<br />
recover indefinitely as long as the<br />
agent doesn’t clear the stage.<br />
The number of agents defeated is<br />
displayed on a special leaderboard.<br />
The type of creature character you<br />
control is decided randomly. Each<br />
creature has various different actions.<br />
In Agent Hunt X Skill Select,<br />
you can buy & equip special skills<br />
unique to this mode.<br />
12 13
player actions<br />
action buttons<br />
Action buttons are displayed at various points during the game.<br />
Be careful, as failing to press them correctly may mean you<br />
lose the game.<br />
* If the difficulty level is set to “Amateur”, action buttons that make the difference<br />
between life and death will be pressed automatically (Except for certain areas).<br />
quick shot<br />
Press w button & x button simultaneously.<br />
A fast attack that automatically targets nearby enemies.<br />
Tip<br />
An enemy hit with a Quick Shot will always<br />
be thrown off guard. This is a great time to<br />
perform a martial physical attack!<br />
physical attack<br />
x button<br />
When the PC Gauge is empty, you<br />
can only perform weak attacks that<br />
will leave you vulnerable.<br />
One Way to Take Down Enemies<br />
Aim for a weak<br />
point!<br />
Hit the button within<br />
the time limit!<br />
Enemy is stunned!<br />
Press the button<br />
with the correct timing!<br />
Perform the<br />
coup de grâce!<br />
escape<br />
Holding down the<br />
w button, move the<br />
left stick (up/down/<br />
left/right) & press<br />
A button<br />
After escaping, continue pressing w<br />
button to ready your weapon while in<br />
prone position.<br />
cover<br />
Press the w button near walls or other<br />
objects that may be used for cover. (Press<br />
w button and A button at the same time<br />
to duck behind objects such as tables or<br />
crates.) When hiding behind cover and<br />
holding down w button, you can use the<br />
left stick to move around and edge out from<br />
your hiding place to make attacks.<br />
counter<br />
Press the x<br />
button at the<br />
instant the<br />
enemy attacks.<br />
14 15
partner actions<br />
partner actions<br />
Partner Action B button<br />
dying rescue<br />
There are many situations in the game where you will need the<br />
help of a partner.<br />
rescue<br />
Tip<br />
While waiting, press and hold down the<br />
B button to check your partner’s status.<br />
When you come to a location<br />
where you will need to work<br />
with your partner, press<br />
the B button to activate<br />
the partner prompt. Your<br />
character will wait for your<br />
partner’s response (this can<br />
be cancelled by pressing the<br />
A button.)<br />
If your partner has been captured they’ll enter Help status. Press<br />
the B button in close vicinity to help them escape.<br />
When your partner is in the Dying state, the Dying<br />
icon is displayed onscreen. You can help your<br />
partner by doing the following:<br />
B button: TREATMENT<br />
Their Vitality Gauge will not be replenished.<br />
z button: REVIVAL*<br />
Use your health tablets to free your partner<br />
from the Dying state and replenish their Vitality<br />
Gauge at the same time. * Health tablets required.<br />
call<br />
Hold down the B button and press y button<br />
or z button or the directional pad: You can<br />
convey simple messages to your partner, including<br />
thanks & instructions.<br />
Hold down the w button, lock aim on the<br />
enemy, & press the B button to issue an attack<br />
command (set an attack tag).<br />
Use your laser sight to attack a tag to an enemy. Your<br />
partner will then target these enemies first.<br />
(You can remove the tag by holding down w button &<br />
pressing the B button when the enemy is not in your laser<br />
sight.)<br />
B button<br />
passing items<br />
(Only during Split-screen play)<br />
During Split-screen play, you can pass items such as herbs and ammunition<br />
from your Item Slot to your partner.<br />
16 17
CAP<strong>CO</strong>M ASIA <strong>CO</strong>., <strong>LTD</strong>.<br />
©CAP<strong>CO</strong>M <strong>CO</strong>., <strong>LTD</strong>. <strong>2012</strong> <strong>ALL</strong> <strong>RIGHTS</strong><br />
<strong>RESERVED</strong>. Resident Evil, CAP<strong>CO</strong>M and the<br />
CAP<strong>CO</strong>M LOGO are registered trademarks of<br />
CAP<strong>CO</strong>M <strong>CO</strong>., <strong>LTD</strong>. KINECT, <strong>Xbox</strong>, <strong>Xbox</strong> 360, <strong>Xbox</strong><br />
LIVE, and the <strong>Xbox</strong> logos are trademarks of the<br />
Microsoft group of companies and are used under<br />
license from Microsoft. All other trademarks are<br />
owned by their respective owners.<br />
18 19