

Manual - Petit RC
Manual - Petit RC
Manual - Petit RC

Create successful ePaper yourself
Turn your PDF publications into a flip-book with our unique Google optimized e-Paper software.
Step 21<br />
Step 22<br />
1. Attach the battery retention plate to the 3 alloy stand<br />
offs with 3 4-40 x ¼” flat head screws.<br />
2. Assemble the IRS Nickel-Teflon Macro Shock as per<br />
the included instructions with 40wt silicon shock oil.<br />
3. Install the included center shock spring onto the<br />
shock and snap the shock in place.<br />
Trim both of the ball cups that thread onto the ends of<br />
the shock to .630” (16mm) in length. Thread the ball<br />
cups on the ends of the shock so the over all shock<br />
length is 3.11” (79mm). This length will give you the<br />
standard setting of 1.5mm of rear pod droop.<br />
Note:<br />
The spring in the production kit may not be blue.<br />
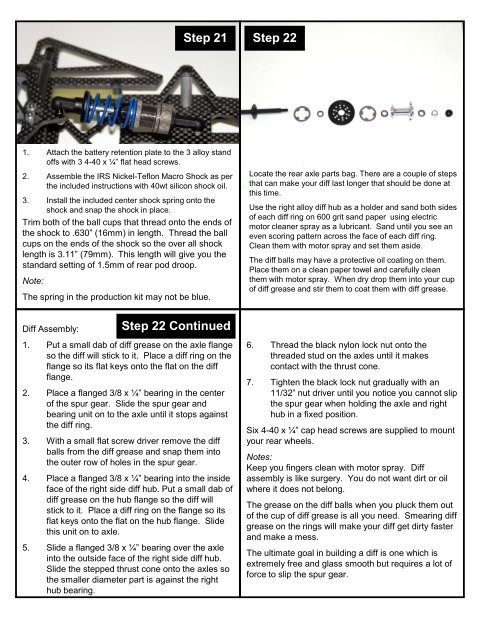
Locate the rear axle parts bag. There are a couple of steps<br />
that can make your diff last longer that should be done at<br />
this time.<br />
Use the right alloy diff hub as a holder and sand both sides<br />
of each diff ring on 600 grit sand paper using electric<br />
motor cleaner spray as a lubricant. Sand until you see an<br />
even scoring pattern across the face of each diff ring.<br />
Clean them with motor spray and set them aside.<br />
The diff balls may have a protective oil coating on them.<br />
Place them on a clean paper towel and carefully clean<br />
them with motor spray. When dry drop them into your cup<br />
of diff grease and stir them to coat them with diff grease.<br />
Diff Assembly:<br />
Step 22 Continued<br />
1. Put a small dab of diff grease on the axle flange<br />
so the diff will stick to it. Place a diff ring on the<br />
flange so its flat keys onto the flat on the diff<br />
flange.<br />
2. Place a flanged 3/8 x ¼” bearing in the center<br />
of the spur gear. Slide the spur gear and<br />
bearing unit on to the axle until it stops against<br />
the diff ring.<br />
3. With a small flat screw driver remove the diff<br />
balls from the diff grease and snap them into<br />
the outer row of holes in the spur gear.<br />
4. Place a flanged 3/8 x ¼” bearing into the inside<br />
face of the right side diff hub. Put a small dab of<br />
diff grease on the hub flange so the diff will<br />
stick to it. Place a diff ring on the flange so its<br />
flat keys onto the flat on the hub flange. Slide<br />
this unit on to axle.<br />
5. Slide a flanged 3/8 x ¼” bearing over the axle<br />
into the outside face of the right side diff hub.<br />
Slide the stepped thrust cone onto the axles so<br />
the smaller diameter part is against the right<br />
hub bearing.<br />
6. Thread the black nylon lock nut onto the<br />
threaded stud on the axles until it makes<br />
contact with the thrust cone.<br />
7. Tighten the black lock nut gradually with an<br />
11/32” nut driver until you notice you cannot slip<br />
the spur gear when holding the axle and right<br />
hub in a fixed position.<br />
Six 4-40 x ¼” cap head screws are supplied to mount<br />
your rear wheels.<br />
Notes:<br />
Keep you fingers clean with motor spray. Diff<br />
assembly is like surgery. You do not want dirt or oil<br />
where it does not belong.<br />
The grease on the diff balls when you pluck them out<br />
of the cup of diff grease is all you need. Smearing diff<br />
grease on the rings will make your diff get dirty faster<br />
and make a mess.<br />
The ultimate goal in building a diff is one which is<br />
extremely free and glass smooth but requires a lot of<br />
force to slip the spur gear.


