ar-5516s ar-5520s ar-5516 ar-5520 ar-5516d ar-5520d - Sharp
ar-5516s ar-5520s ar-5516 ar-5520 ar-5516d ar-5520d - Sharp
ar-5516s ar-5520s ar-5516 ar-5520 ar-5516d ar-5520d - Sharp

You also want an ePaper? Increase the reach of your titles
YUMPU automatically turns print PDFs into web optimized ePapers that Google loves.
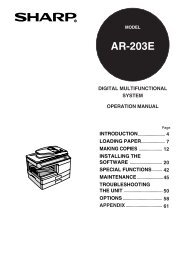
DIGITAL MULTIFUNCTIONAL SYSTEM<br />
START GUIDE<br />
MODEL: AR-<strong>5516</strong>S<br />
AR-<strong>5520</strong>S<br />
AR-<strong>5516</strong><br />
AR-<strong>5520</strong><br />
AR-<strong>5516</strong>D<br />
AR-<strong>5520</strong>D<br />
AR-<strong>5516</strong>N<br />
AR-<strong>5520</strong>N<br />
BEFORE USING<br />
This section provides the<br />
safety information to use<br />
the machine and explains<br />
how to use this manual.<br />
SETUP<br />
This section explains<br />
softw<strong>ar</strong>e installation and<br />
connection to a computer.<br />
APPENDIX<br />
This section includes the<br />
troubleshooting and<br />
specifications.<br />
Keep this manual close at hand for reference whenever needed.
CONTENTS<br />
BEFORE USING<br />
CAUTIONS......................................................... 2<br />
● CAUTIONS ON USING.....................................2<br />
● IMPORTANT POINTS WHEN SELECTING AN<br />
INSTALLATION SITE .......................................2<br />
● CAUTIONS ON HANDLING .............................3<br />
● CAUTIONS ON LASER ....................................3<br />
● ENVIRONMENTAL INFORMATION.................4<br />
USING THE MANUAL ....................................... 4<br />
● ABOUT THE MANUALS ...................................4<br />
HOW TO USE THE OPERATION GUIDE ......... 5<br />
● THE MEANING OF "R" IN ORIGINAL AND<br />
PAPER SIZE INDICATIONS.............................5<br />
● CONVENTIONS USED IN THIS MANUAL.......6<br />
● SPF (AR-<strong>5516</strong>S/AR-<strong>5520</strong>S, AR-<strong>5516</strong>/AR-<strong>5520</strong>) ......6<br />
● RSPF (AR-<strong>5516</strong>D/AR-<strong>5520</strong>D/AR-<strong>5516</strong>N/AR-<strong>5520</strong>N) ....6<br />
● DIFFERENCES BETWEEN MODELS..............6<br />
SETUP<br />
BEFORE SOFTWARE SETUP .......................... 7<br />
● SOFTWARE......................................................7<br />
● HARDWARE AND SOFTWARE<br />
REQUIREMENTS .............................................7<br />
● POWER ON THE MACHINE ............................7<br />
INSTALLING THE SOFTWARE<br />
(AR-<strong>5516</strong>S/AR-<strong>5520</strong>S/AR-<strong>5516</strong>/AR-<strong>5520</strong>/AR-<strong>5516</strong>D/<br />
AR-<strong>5520</strong>D) ................................................................ 8<br />
CONNECTING TO A COMPUTER<br />
(AR-<strong>5516</strong>S/AR-<strong>5520</strong>S/AR-<strong>5516</strong>/AR-<strong>5520</strong>/AR-<strong>5516</strong>D/<br />
AR-<strong>5520</strong>D) .............................................................. 10<br />
● CONNECTING A USB CABLE .......................10<br />
● USING THE MACHINE AS A SHARED<br />
PRINTER .......................................................11<br />
INSTALLING THE SOFTWARE<br />
(AR-<strong>5516</strong>N/AR-<strong>5520</strong>N) .................................... 12<br />
CONFIGURING THE PRINTER DRIVER ........ 18<br />
SETTING UP BUTTON MANAGER ................ 19<br />
APPENDIX<br />
TROUBLESHOOTING ..................................... 21<br />
SPECIFICATIONS ........................................... 23<br />
INFORMATION ON DISPOSAL ...................... 26<br />
1
BEFORE USING<br />
CAUTIONS<br />
Follow the cautions below when using this machine.<br />
CAUTIONS ON USING<br />
W<strong>ar</strong>ning:<br />
• The fusing <strong>ar</strong>ea is hot. Exercise c<strong>ar</strong>e in this <strong>ar</strong>ea when removing misfed paper.<br />
• Do not look directly at the light source. Doing so may damage your eyes.<br />
Caution:<br />
• Do not switch the machine rapidly on and off. After turning the machine off, wait 10 to 15 seconds before turning it<br />
back on.<br />
• Machine power must be turned off before installing any supplies.<br />
• Place the machine on a firm, level surface.<br />
• Do not install the machine in a humid or dusty location.<br />
• When the machine is not used for a long time, for example, during prolonged holidays, turn the power switch off<br />
and remove the power cord from the outlet.<br />
• When moving the machine, be sure to turn the power switch off and remove the power cord from the outlet.<br />
• Do not cover the machine with a dust cover, cloth or plastic film while the power is on. Doing so may prevent heat<br />
dissipation, damaging the machine.<br />
• Use of controls or adjustments or performance of procedures other than those specified herein may result in<br />
haz<strong>ar</strong>dous laser radiation exposure.<br />
• The socket-outlet should be installed ne<strong>ar</strong> the machine and should be easily accessible.<br />
IMPORTANT POINTS WHEN SELECTING AN<br />
INSTALLATION SITE<br />
Improper installation may damage the machine. Please note the following during initial installation and whenever the<br />
machine is moved.<br />
Caution<br />
If the machine is moved from a cool place to a w<strong>ar</strong>m place, condensation may form inside the machine. Operation<br />
in this condition will cause poor copy quality and malfunctions. Leave the machine at room temperature for at least<br />
2 hours before use.<br />
Do not install your machine in <strong>ar</strong>eas that <strong>ar</strong>e:<br />
• damp, humid, or very<br />
dusty<br />
• exposed to direct sunlight<br />
• poorly<br />
ventilated<br />
• subject to extreme<br />
temperature or humidity<br />
changes, e.g., ne<strong>ar</strong> an<br />
air conditioner or heater<br />
2
BEFORE USING<br />
The machine should be installed ne<strong>ar</strong> an accessible power outlet for easy connection and<br />
disconnection.<br />
Be sure to connect the power cord only to a power outlet that meets the specified voltage and<br />
current requirements. Also make certain the outlet is properly grounded.<br />
Note<br />
Connect the machine to a power outlet which is not used for other electric appliances. If a lighting fixture is<br />
connected to the same outlet, the light may flicker.<br />
Be sure to allow the required space <strong>ar</strong>ound the machine<br />
for servicing and proper ventilation.<br />
20 cm<br />
20 cm 20 cm<br />
A small amount of ozone is produced within the copier during operation. The emission level is insufficient to cause<br />
any health haz<strong>ar</strong>d.<br />
CAUTION:<br />
It is advisable to place the copier in a ventilated <strong>ar</strong>ea, since the small amount that is emitted may have an<br />
objectionable odor.<br />
CAUTIONS ON HANDLING<br />
Be c<strong>ar</strong>eful in handling the machine as follows to maintain the performance of this machine.<br />
Do not drop the machine, subject it to shock or strike it against any object.<br />
Store sp<strong>ar</strong>e toner c<strong>ar</strong>tridges in a cool dry place without removing from the package before use.<br />
• If they <strong>ar</strong>e exposed to direct sunlight or excessive heat, poor copies may result.<br />
Do not touch the photoconductive drum (green portion).<br />
• Scratches or smudges on the drum will cause dirty copies.<br />
CAUTIONS ON LASER<br />
Wave length<br />
Pulse times<br />
Output power<br />
785 nm ± 15 nm<br />
(10.32 μs ± 10.32 ns)/7 mm<br />
Max. 0.6 mW<br />
Caution<br />
Use of controls or adjustments or performance of procedures other than those specified herein may result in<br />
haz<strong>ar</strong>dous radiation exposure.<br />
This Digital Equipment is CLASS 1 LASER PRODUCT (IEC 60825-1 Edition 1.2-2001)<br />
Tradem<strong>ar</strong>k acknowledgements<br />
The following tradem<strong>ar</strong>ks and registered tradem<strong>ar</strong>ks <strong>ar</strong>e used in conjunction with the machine and its peripheral<br />
devices and accessories.<br />
• Microsoft ® , Windows ® , Windows ® 2000, Windows ® XP, and Windows Vista ® <strong>ar</strong>e registered tradem<strong>ar</strong>ks or<br />
tradem<strong>ar</strong>ks of Microsoft Corporation in the U.S.A. and other countries.<br />
• IBM, PC/AT, and PowerPC <strong>ar</strong>e tradem<strong>ar</strong>ks of International Business Machines Corporation.<br />
• Adobe, the Adobe logo, Acrobat, the Adobe PDF logo, and Reader <strong>ar</strong>e registered tradem<strong>ar</strong>ks or tradem<strong>ar</strong>ks of<br />
Adobe Systems Incorporated in the United States and other countries.<br />
• All other tradem<strong>ar</strong>ks and copyrights <strong>ar</strong>e the property of their respective owners.<br />
3
BEFORE USING<br />
ENVIRONMENTAL INFORMATION<br />
Products that have e<strong>ar</strong>ned the ENERGY STAR ® <strong>ar</strong>e designed to protect the environment<br />
through superior energy efficiency.<br />
The products that meet the ENERGY STAR ® guidelines c<strong>ar</strong>ry the logo shown above.<br />
The products without the logo may not meet the ENERGY STAR ® guidelines.<br />
USING THE MANUAL<br />
This machine has been designed to provide convenient copying features in a minimum amount of office space and<br />
with maximum operational ease. To get full use of all machine features, be sure to famili<strong>ar</strong>ise yourself with this<br />
manual and the machine. For quick reference during machine use, keep this manual in a handy location.<br />
ABOUT THE MANUALS<br />
The manuals for the machine <strong>ar</strong>e as follows:<br />
St<strong>ar</strong>t Guide (this manual)<br />
This manual explains:<br />
• How to install the softw<strong>ar</strong>e that allows the machine to be used as a printer and scanner for your computer<br />
• Troubleshooting for using the machine<br />
• Specifications<br />
• Cautions for using the machine in safety<br />
Operation Guide (on the accessory CD-ROM)<br />
This manual explains:<br />
• P<strong>ar</strong>t names of the machine<br />
• Available paper type for this machine<br />
• Basic copy procedure and advanced copy functions<br />
(For example: rotating the image 90 degrees, copying multiple originals onto a single sheet of paper)<br />
• Basic print procedure and other frequently used print functions<br />
(For example: fitting the printed image to the paper, enl<strong>ar</strong>ging/reducing the print image)<br />
• Scanning on the machine and from a computer<br />
• Toner c<strong>ar</strong>tridge replacement and peripheral devices<br />
Note<br />
• The display screens, messages, and key names shown in the manual may differ from those on the actual<br />
machine due to product improvements and modifications.<br />
• Where "AR-XXXX" appe<strong>ar</strong>s in this manual, please substitute the name of your model for "XXXX".<br />
SOFTWARE LICENSE<br />
The SOFTWARE LICENSE will appe<strong>ar</strong> when you install the softw<strong>ar</strong>e from the CD-ROM. By using all or any<br />
portion of the softw<strong>ar</strong>e on the CD-ROM or in the machine, you <strong>ar</strong>e agreeing to be bound by the terms of the<br />
SOFTWARE LICENSE.<br />
4
BEFORE USING<br />
HOW TO USE THE OPERATION<br />
GUIDE<br />
The Operation Guide provides detailed instructions for operating the machine. View the Operation Guide when you<br />
use the machine after the initial setup is completed.<br />
Viewing the manual<br />
The "CD-ROM" that accompanies the machine contains a manual in PDF format. To view the manual in PDF format,<br />
Acrobat Reader or Adobe Reader of Adobe Systems Incorporated is required. If neither program is installed on your<br />
computer, the programs can be downloaded from the following URL:<br />
http://www.adobe.com/<br />
1<br />
2<br />
3<br />
Turn on your computer.<br />
Insert the supplied CD-ROM into your<br />
CD-ROM drive.<br />
Click the "St<strong>ar</strong>t" button, click<br />
"Computer", and then double-click the<br />
CD-ROM icon ( ).<br />
• In Windows XP, click the "st<strong>ar</strong>t" button, click<br />
"My Computer", and then double-click the<br />
CD-ROM icon.<br />
• In Windows 2000, double-click "My Computer"<br />
and then double-click the CD-ROM icon.<br />
4<br />
5<br />
6<br />
7<br />
8<br />
9<br />
10<br />
11<br />
12<br />
Double-click the "Manual" folder,<br />
double-click the "English" folder, and<br />
then double-click the<br />
"AR_<strong>5516</strong>_<strong>5520</strong>.pdf" icon (for<br />
AR-<strong>5516</strong>S/<strong>5520</strong>S/<strong>5516</strong>/<strong>5520</strong>/<strong>5516</strong>D/<br />
<strong>5520</strong>D) or "AR_<strong>5516</strong>N_<strong>5520</strong>N.pdf (for<br />
"AR-<strong>5516</strong>N/<strong>5520</strong>N).<br />
Note<br />
• If you will be viewing the Operation Guide repeatedly, you may find it convenient to copy this Operation Guide<br />
file to your computer.<br />
• The Operation Guide can be printed out using Acrobat Reader. SHARP recommends printing out the sections<br />
which you refer to regul<strong>ar</strong>ly.<br />
• Refer to "Help" of Acrobat Reader for more details on how to use Acrobat Reader.<br />
THE MEANING OF "R" IN ORIGINAL AND PAPER SIZE<br />
INDICATIONS<br />
An "R" appe<strong>ar</strong>ing at the end of an original or paper size (A4R, etc.) indicates that the original or paper is oriented<br />
horizontally as shown below.<br />
<br />
Sizes that can be placed only in the horizontal (landscape) orientation (B4, A3) do not contain the "R" in their size<br />
indication.<br />
5
BEFORE USING<br />
CONVENTIONS USED IN THIS MANUAL<br />
W<strong>ar</strong>ning<br />
Caution<br />
Note<br />
W<strong>ar</strong>ns the user that injury may result if the contents of the w<strong>ar</strong>ning <strong>ar</strong>e not properly followed.<br />
Cautions the user that damage to the machine or one of its components may result if the contents<br />
of the caution <strong>ar</strong>e not properly followed.<br />
Notes provide information relevant to the machine reg<strong>ar</strong>ding specifications, functions,<br />
performance, operation and such, that may be useful to the user.<br />
SPF (AR-<strong>5516</strong>S/AR-<strong>5520</strong>S, AR-<strong>5516</strong>/AR-<strong>5520</strong>)<br />
This manual refers to the Single Pass Feeder as the "SPF".<br />
RSPF (AR-<strong>5516</strong>D/AR-<strong>5520</strong>D/AR-<strong>5516</strong>N/AR-<strong>5520</strong>N)<br />
This manual refers to the Reversing Single Pass Feeder as the "RSPF".<br />
DIFFERENCES BETWEEN MODELS<br />
This manual covers the following models.<br />
Model AR-<strong>5520</strong>S/AR-<strong>5520</strong>/AR-<strong>5520</strong>D/AR-<strong>5520</strong>N AR-<strong>5516</strong>S/AR-<strong>5516</strong>/AR-<strong>5516</strong>D/AR-<strong>5516</strong>N<br />
(With optional SPF/RSPF installed) (With optional SPF/RSPF installed)<br />
Appe<strong>ar</strong>ance<br />
The above illustration is used in<br />
instances where a function<br />
and/or the operation of the<br />
machine is the same on both<br />
models.<br />
Copy speed 20CPM 16CPM<br />
Paper trays Two (250 x 2) One (250 x 1)<br />
6
SETUP<br />
BEFORE SOFTWARE SETUP<br />
This chapter explains how to install and configure the softw<strong>ar</strong>e that is required for the printer and scanner functions of the machine.<br />
Note<br />
• The scanner function is not available on the AR-<strong>5516</strong>S/AR-<strong>5520</strong>S.<br />
• This manual refers to the CD-ROM that accompanied the machine simply as "CD-ROM".<br />
SOFTWARE<br />
The CD-ROM that accompanies the machine contains the following softw<strong>ar</strong>e:<br />
AR-<strong>5516</strong>S/AR-<strong>5520</strong>S<br />
Printer driver<br />
The printer driver enables you to use the printer function of the<br />
machine.<br />
The printer driver includes the Print Status Window. This is a<br />
utility that monitors the machine and informs you of the printing<br />
status, the name of the document currently being printed, and<br />
error messages.<br />
AR-<strong>5516</strong>/AR-<strong>5520</strong>, AR-<strong>5516</strong>D/AR-<strong>5520</strong>D<br />
MFP driver<br />
Printer driver<br />
The printer driver enables you to use the printer function of the<br />
machine.<br />
The printer driver includes the Print Status Window. This is a<br />
utility that monitors the machine and informs you of the printing<br />
status, the name of the document currently being printed, and<br />
error messages.<br />
Scanner driver<br />
The scanner driver allows you to use the scanning function of the<br />
machine with TWAIN-compliant and WIA-compliant applications.<br />
Button Manager<br />
Button Manager allows you to use the scanner menus on the<br />
machine to scan a document.<br />
AR-<strong>5516</strong>N/AR-<strong>5520</strong>N<br />
Printer driver<br />
The printer driver enables you to use the printer function of<br />
the machine.<br />
Scanner driver<br />
The scanner driver allows you to use the scanning function<br />
of the machine with TWAIN-compliant and WIA-compliant<br />
applications.<br />
Button Manager<br />
Button Manager allows you to use the scanner menus on the<br />
machine to scan a document.<br />
HARDWARE AND SOFTWARE REQUIREMENTS<br />
Check the following h<strong>ar</strong>dw<strong>ar</strong>e and softw<strong>ar</strong>e requirements before installing the softw<strong>ar</strong>e.<br />
Computer type<br />
Operating system* 3<br />
Other h<strong>ar</strong>dw<strong>ar</strong>e requirements<br />
AR-<strong>5516</strong>S/AR-<strong>5520</strong>S/AR-<strong>5516</strong>/AR-<strong>5520</strong>/AR-<strong>5516</strong>D/AR-<strong>5520</strong>D :<br />
IBM PC/AT or compatible computer equipped with a USB 2.0* 1 /1.1* 2<br />
AR-<strong>5516</strong>N/AR-<strong>5520</strong>N :<br />
IBM PC/AT or compatible computer equipped with a 10BASE-T/100BASE-TX LAN connector<br />
Windows 2000 Professional, Windows XP Professional, Windows XP Home Edition, Windows Vista<br />
An environment on which any of the operating systems listed above can fully operate<br />
*1 The machine's USB 2.0 port will transfer data at the speed specified by the USB 2.0 (Hi-Speed) only if the Microsoft USB 2.0 driver is<br />
preinstalled in the computer, or if the USB 2.0 driver for Windows 2000 Professional/XP/Vista that Microsoft provides through its<br />
"Windows Update" is installed.<br />
*2 Compatible with Windows 2000 Professional, Windows XP Professional, Windows XP Home Edition, or Windows Vista preinstalled<br />
models equipped with a USB interface as stand<strong>ar</strong>d.<br />
*3 • The machine does not support printing from a Macintosh environment.<br />
• Administrator’s rights <strong>ar</strong>e required to install the softw<strong>ar</strong>e using the installer.<br />
POWER ON THE MACHINE<br />
The power switch is located on the left side of the machine.<br />
Turn the power switch to the "ON" position.<br />
7
SETUP<br />
INSTALLING THE SOFTWARE<br />
(AR-<strong>5516</strong>S/AR-<strong>5520</strong>S/AR-<strong>5516</strong>/AR-<strong>5520</strong>/AR-<strong>5516</strong>D/AR-<strong>5520</strong>D)<br />
Note<br />
• The screen images in this manual <strong>ar</strong>e mainly for Windows Vista. With other versions of Windows, some screen<br />
images may be different from those in this manual.<br />
• If an error message appe<strong>ar</strong>s, follow the instructions on the screen to solve the problem. After the problem is<br />
solved, the installation procedure will continue. Depending on the problem, you may have to click the "Cancel"<br />
button to exit the installer. In this case, reinstall the softw<strong>ar</strong>e from the beginning after solving the problem.<br />
1<br />
2<br />
3<br />
The USB cable must not be connected<br />
to the machine. Make sure that the<br />
cable is not connected before<br />
proceeding.<br />
If the cable is connected, a Plug and Play window<br />
will appe<strong>ar</strong>. If this happens, click the "Cancel" button<br />
to close the window and disconnect the cable.<br />
Note<br />
The cable will be connected in step 12.<br />
Insert the CD-ROM into your CD-ROM<br />
drive.<br />
Click the "St<strong>ar</strong>t" button, click<br />
"Computer", and then double-click the<br />
CD-ROM icon ( ).<br />
• In Windows XP, click the "st<strong>ar</strong>t" button, click<br />
"My Computer", and then double-click the<br />
CD-ROM icon.<br />
• In Windows 2000, double-click "My Computer",<br />
and then double-click the CD-ROM icon.<br />
7<br />
8<br />
To install all of the softw<strong>ar</strong>e, click the<br />
"Stand<strong>ar</strong>d" button and go to step 11.<br />
To install p<strong>ar</strong>ticul<strong>ar</strong> packages, click<br />
the "Custom" button and go to the<br />
next step.<br />
For AR-<strong>5516</strong>S/AR-<strong>5520</strong>S<br />
To connect the machine and a computer directly<br />
via a USB cable, normally click the "Stand<strong>ar</strong>d"<br />
button and go to step 11. When you click the<br />
"Custom" button, go to the next step.<br />
Click the "MFP Driver" button.<br />
4<br />
Double-click the "Setup" icon ( ).<br />
In Windows Vista, if a message screen appe<strong>ar</strong>s<br />
asking you for confirmation, click "Allow".<br />
Click the "Display Readme" button to show<br />
information on packages that <strong>ar</strong>e selected.<br />
5<br />
The "SOFTWARE LICENSE" window<br />
will appe<strong>ar</strong>. Make sure that you<br />
understand the contents of the<br />
softw<strong>ar</strong>e license, and then click the<br />
"Yes" button.<br />
For AR-<strong>5516</strong>S/AR-<strong>5520</strong>S<br />
Click the "Printer Driver" button.<br />
Note<br />
You can show the "SOFTWARE LICENSE" in<br />
a different language by selecting the desired<br />
language from the language menu. To install<br />
the softw<strong>ar</strong>e in the selected language,<br />
continue the installation with that language<br />
selected.<br />
Click the "Display Readme" button to show<br />
information on packages that <strong>ar</strong>e selected.<br />
6<br />
Read the message in the "Welcome"<br />
window and then click the "Next"<br />
button.<br />
8
SETUP<br />
9<br />
Select "Connected to this computer"<br />
and click the "Next" button.<br />
11<br />
When installing is finished, click the<br />
"Close" button.<br />
10<br />
Follow the on-screen instructions.<br />
When "The installation of the SHARP softw<strong>ar</strong>e is<br />
complete." appe<strong>ar</strong>s, click the "OK" button.<br />
For AR-<strong>5516</strong>S/AR-<strong>5520</strong>S<br />
When "The installation of the SHARP softw<strong>ar</strong>e is<br />
complete." appe<strong>ar</strong>s, click the "OK" button and go<br />
to step 11.<br />
Caution<br />
• If you <strong>ar</strong>e using Windows Vista and a<br />
security w<strong>ar</strong>ning window appe<strong>ar</strong>s, be sure<br />
to click "Install this driver softw<strong>ar</strong>e anyway".<br />
• If you <strong>ar</strong>e running Windows 2000/XP and a<br />
w<strong>ar</strong>ning message appe<strong>ar</strong>s reg<strong>ar</strong>ding the<br />
Windows logo test or digital signature, be<br />
sure to click "Continue Anyway" or "Yes".<br />
You will return to the window of step<br />
8. If you wish to install Button<br />
Manager, click the "Button Manager"<br />
button.<br />
If you do not wish to install the Button Manager,<br />
go to step 11.<br />
12<br />
13<br />
Caution<br />
A message will appe<strong>ar</strong> instructing you to connect<br />
the machine to your computer. Click the "OK"<br />
button.<br />
Note<br />
Make sure that the power of the<br />
machine is turned on, and then<br />
connect the USB cable (p.10).<br />
Windows will detect the machine and a Plug and<br />
Play window will appe<strong>ar</strong>.<br />
Follow the instructions in the Plug<br />
and Play window to install the driver.<br />
Follow the on-screen instructions.<br />
Caution<br />
• If you <strong>ar</strong>e using Windows Vista and a<br />
security w<strong>ar</strong>ning window appe<strong>ar</strong>s, be sure<br />
to click "Install this driver softw<strong>ar</strong>e anyway".<br />
• If you <strong>ar</strong>e running Windows 2000/XP and a<br />
w<strong>ar</strong>ning message appe<strong>ar</strong>s reg<strong>ar</strong>ding the<br />
Windows logo test or digital signature, be<br />
sure to click "Continue Anyway" or "Yes".<br />
After the installation, a message prompting<br />
you to rest<strong>ar</strong>t your computer may appe<strong>ar</strong>. In<br />
this case, click the "Yes" button to rest<strong>ar</strong>t your<br />
computer.<br />
• If you <strong>ar</strong>e using Windows Vista and a<br />
security w<strong>ar</strong>ning window appe<strong>ar</strong>s, be sure<br />
to click "Install this driver softw<strong>ar</strong>e anyway".<br />
• If you <strong>ar</strong>e running Windows 2000/XP and a<br />
w<strong>ar</strong>ning message appe<strong>ar</strong>s reg<strong>ar</strong>ding the<br />
Windows logo test or digital signature, be<br />
sure to click "Continue Anyway" or "Yes".<br />
This completes the installation of the softw<strong>ar</strong>e.<br />
• If you installed Button Manager, set up Button Manager<br />
as explained in "SETTING UP BUTTON MANAGER"<br />
(p.19).<br />
Follow the on-screen instructions.<br />
Note<br />
After the installation, a message prompting<br />
you to rest<strong>ar</strong>t your computer may appe<strong>ar</strong>. In<br />
this case, click the "Yes" button to rest<strong>ar</strong>t your<br />
computer.<br />
9
SETUP<br />
CONNECTING TO A COMPUTER<br />
(AR-<strong>5516</strong>S/AR-<strong>5520</strong>S/AR-<strong>5516</strong>/AR-<strong>5520</strong>/AR-<strong>5516</strong>D/AR-<strong>5520</strong>D)<br />
Follow the procedure below to connect the machine to your computer.<br />
A USB cable for connecting the machine to your computer is not included with the machine. Please purchase the<br />
appropriate cable for your computer.<br />
Interface cable<br />
USB cable<br />
Shielded twisted pair cable, high-speed transmission equivalent (3 m max.)<br />
If the machine will be connected using a USB 2.0 interface, please purchase a USB cable that supports USB 2.0.<br />
Caution<br />
• USB is available with a PC/AT compatible computer that was originally equipped with USB and had Windows<br />
2000 Professional, Windows XP Professional, Windows XP Home Edition or Windows Vista preinstalled.<br />
• Do not connect the USB cable before installing the Printer/MFP driver. The USB cable should be connected<br />
during installation of the Printer/MFP driver.<br />
CONNECTING A USB CABLE<br />
1<br />
Insert the cable into the USB connector on<br />
the machine.<br />
2<br />
3<br />
4<br />
5<br />
6<br />
7<br />
8<br />
9<br />
10<br />
11<br />
12<br />
13<br />
14<br />
Insert the other end of the cable into<br />
your computer's USB connector.<br />
System requirements for USB 2.0 (Hi-Speed mode)<br />
• The machine's USB 2.0 connector will transfer data at the speed specified by the USB 2.0 (Hi-Speed) only if the<br />
Microsoft USB 2.0 driver is preinstalled in the computer, or if the USB 2.0 driver for Windows 2000<br />
Professional/XP/Vista that Microsoft provides through its "Windows Update" Web page is installed.<br />
• Even when the Microsoft USB 2.0 driver is used, it may not be possible to obtain full USB 2.0 speed if a PC c<strong>ar</strong>d<br />
supporting USB 2.0 is used. To obtain the latest driver (which may enable a higher speed), contact the<br />
manufacturer of your PC c<strong>ar</strong>d.<br />
• Connection is also possible using a USB 1.1 port on your computer. However, the specifications will be USB 1.1<br />
specifications (Full-Speed).<br />
• If your computer is not compatible with USB 2.0 (Hi-Speed), the "USB 2.0 mode switching" setting in the<br />
machine's system setting must be set to "Full-Speed". For more information, see "SYSTEM SETTINGS" in the<br />
Operation Guide.<br />
10
SETUP<br />
USING THE MACHINE AS A SHARED PRINTER<br />
If the machine will be used as a sh<strong>ar</strong>ed printer on a Windows network, follow these steps to install the printer driver<br />
in the client computer.<br />
Note<br />
To configure the appropriate settings in the print server, see the operation manual or help file of your operating<br />
system.<br />
1<br />
2<br />
Perform steps 2 through 6 in<br />
"INSTALLING THE SOFTWARE<br />
(AR-<strong>5516</strong>S/AR-<strong>5520</strong>S/AR-<strong>5516</strong>/AR-<strong>5520</strong>/<br />
AR-<strong>5516</strong>D/AR-<strong>5520</strong>D)" (p.8).<br />
Click the "Custom" button.<br />
5<br />
Select the printer name (configured as<br />
a sh<strong>ar</strong>ed printer on a print server)<br />
from the list.<br />
In Windows 2000/XP, you can also click the "Add<br />
Network Port" button displayed below the list and<br />
select the printer to be sh<strong>ar</strong>ed by browsing the<br />
network in the window that appe<strong>ar</strong>s.<br />
3<br />
Click the "MFP Driver" button.<br />
6<br />
Click the "Next" button.<br />
Follow the on-screen instructions.<br />
Note<br />
If the sh<strong>ar</strong>ed printer does not appe<strong>ar</strong> in the<br />
list, check the settings on the print server.<br />
Click the "Display Readme" button to show<br />
information on packages that <strong>ar</strong>e selected.<br />
For AR-<strong>5516</strong>S/AR-<strong>5520</strong>S<br />
Click the "Printer Driver" button.<br />
7<br />
Caution<br />
• If you <strong>ar</strong>e using Windows Vista and a<br />
security w<strong>ar</strong>ning window appe<strong>ar</strong>s, be sure<br />
to click "Install this driver softw<strong>ar</strong>e anyway".<br />
• If you <strong>ar</strong>e running Windows 2000/XP and a<br />
w<strong>ar</strong>ning message appe<strong>ar</strong>s reg<strong>ar</strong>ding the<br />
Windows logo test or digital signature, be<br />
sure to click "Continue Anyway" or "Yes".<br />
You will return to the window of step 3.<br />
Click the "Close" button.<br />
Note<br />
After the installation, a message prompting<br />
you to rest<strong>ar</strong>t your computer may appe<strong>ar</strong>. In<br />
this case, click the "Yes" button to rest<strong>ar</strong>t your<br />
computer.<br />
This completes the installation of the softw<strong>ar</strong>e.<br />
Click the "Display Readme" button to show<br />
information on packages that <strong>ar</strong>e selected.<br />
4<br />
Select "Connected via the network"<br />
and click the "Next" button.<br />
11
SETUP<br />
INSTALLING THE SOFTWARE<br />
(AR-<strong>5516</strong>N/AR-<strong>5520</strong>N)<br />
Note<br />
• The screen images in this manual <strong>ar</strong>e mainly for Windows Vista. With other versions of Windows, some screen<br />
images may be different from those in this manual.<br />
• If an error message appe<strong>ar</strong>s, follow the instructions on the screen to solve the problem. After the problem is<br />
solved, the installation procedure will continue. Depending on the problem, you may have to click the "Cancel"<br />
button to exit the installer. In this case, reinstall the softw<strong>ar</strong>e from the beginning after solving the problem.<br />
Set the IP Address<br />
1<br />
Insert the LAN cable into the LAN<br />
connector on the machine.<br />
Use a network cable that is shielded.<br />
6<br />
7<br />
Read the message in the "Welcome"<br />
window and then click the "Next"<br />
button.<br />
Click the "Set the IP Address" button.<br />
2<br />
Insert the CD-ROM into your CD-ROM<br />
drive.<br />
3<br />
4<br />
Click the "St<strong>ar</strong>t" button, click<br />
"Computer", and then double-click the<br />
CD-ROM icon ( ).<br />
• In Windows XP, click the "st<strong>ar</strong>t" button, click<br />
"My Computer", and then double-click the<br />
CD-ROM icon.<br />
• In Windows 2000, double-click "My Computer",<br />
and then double-click the CD-ROM icon.<br />
Double-click the "Setup" icon ( ).<br />
In Windows Vista, if a message screen appe<strong>ar</strong>s<br />
asking you for confirmation, click "Allow".<br />
8<br />
When the softw<strong>ar</strong>e selection screen<br />
appe<strong>ar</strong>s, click the "Set the IP<br />
Address" button.<br />
5<br />
The "SOFTWARE LICENSE" window<br />
will appe<strong>ar</strong>. Make sure that you<br />
understand the contents of the<br />
softw<strong>ar</strong>e license, and then click the<br />
"Yes" button.<br />
Note<br />
You can show the "SOFTWARE LICENSE" in<br />
a different language by selecting the desired<br />
language from the language menu. To install<br />
the softw<strong>ar</strong>e in the selected language,<br />
continue the installation with that language<br />
selected.<br />
12
SETUP<br />
9<br />
The printer or printers connected to<br />
the network will be detected. Click the<br />
printer to be configured (the machine)<br />
and click the "Next" button.<br />
10Enter the IP address, subnet mask,<br />
and default gateway.<br />
The settings in the window below <strong>ar</strong>e examples.<br />
Be sure to ask your network administrator for the<br />
correct IP address, subnet mask, and default<br />
gateway to be entered.<br />
If a message appe<strong>ar</strong>s reg<strong>ar</strong>ding the Windows<br />
firewall, click the "Yes" button.<br />
Note<br />
• The "Ethernet Address" is indicated on the<br />
left side of the machine ne<strong>ar</strong> the LAN<br />
connector.<br />
• If the machine can not be recognised, enter<br />
the Ethernet Address and click the<br />
"Initialize" button to initialise the IP address.<br />
Follow the on-screen instructions to click<br />
the "OK" button and then the "Se<strong>ar</strong>ch"<br />
button. If the machine is still not recognised,<br />
disable your computer's firewall and then<br />
repeat the installation from the beginning.<br />
11<br />
12<br />
Note<br />
When "Get IP Address Automatically" is<br />
selected, the IP address may at times change<br />
automatically. This will prevent printing. In this<br />
event, select "Assign IP Address" and enter<br />
the IP address.<br />
Click the "Next" button.<br />
When the "Finish" screen appe<strong>ar</strong>s,<br />
click the "Close" button.<br />
This completes setting the IP Address.<br />
• To install all of the softw<strong>ar</strong>e, go to "Install all of<br />
the softw<strong>ar</strong>e" (p.14).<br />
• To install p<strong>ar</strong>ticul<strong>ar</strong> packages, go to "Choose<br />
the option you want to install" (p.15).<br />
13
SETUP<br />
Install all of the softw<strong>ar</strong>e<br />
If you have not set the IP Address yet, go to "Set the IP<br />
Address" (p.12).<br />
1<br />
2<br />
Perform step 4 through 7 in "Set the IP<br />
Address" (p.12).<br />
Click the "Stand<strong>ar</strong>d" button.<br />
4<br />
In the window for setting the<br />
destination print port name, make<br />
sure that ":lp" appe<strong>ar</strong>s at the end of<br />
the IP address and click the "Next"<br />
button.<br />
Note<br />
Any name can be entered in "Printer Port<br />
Name" (maximum of 63 ch<strong>ar</strong>acters).<br />
3<br />
The printer or printers connected to<br />
the network will be detected. Click the<br />
printer to be configured (the machine)<br />
and click the "Next" button.<br />
5<br />
A window appe<strong>ar</strong>s to let you check<br />
your entries. Make sure that the<br />
entries <strong>ar</strong>e correct and then click the<br />
"Finish" button.<br />
If any of the entries <strong>ar</strong>e incorrect, click the "Back"<br />
button to return to the appropriate window and<br />
correct the entry.<br />
Note<br />
If the machine's IP address cannot be found,<br />
make sure the machine is powered on, make<br />
sure the network cable is connected correctly,<br />
and then click the "Se<strong>ar</strong>ch" button.<br />
14
SETUP<br />
6<br />
7<br />
Select the model that you will be<br />
using, and click the "Next" button.<br />
Caution<br />
• If you <strong>ar</strong>e using Windows Vista and a<br />
security w<strong>ar</strong>ning window appe<strong>ar</strong>s, be sure<br />
to click "Install this driver softw<strong>ar</strong>e anyway".<br />
• If you <strong>ar</strong>e running Windows 2000/XP and a<br />
w<strong>ar</strong>ning message appe<strong>ar</strong>s reg<strong>ar</strong>ding the<br />
Windows logo test or digital signature, be<br />
sure to click "Continue Anyway" or "Yes".<br />
If a message appe<strong>ar</strong>s reg<strong>ar</strong>ding the Windows<br />
firewall, click the "Yes" button.<br />
When the "Finish" screen appe<strong>ar</strong>s,<br />
click the "Close" button to finish the<br />
installation.<br />
Choose the option you want to<br />
install<br />
If you have not set the IP Address yet, go to "Set the IP<br />
Address" (p.12).<br />
1<br />
2<br />
3<br />
Perform step 4 through 7 in "Set the IP<br />
Address" (p.12).<br />
Click the "Custom" button.<br />
Click the "Printer Driver" button.<br />
Note<br />
To use the scanner driver, you need to<br />
connect to the scanner function using<br />
SC-Scan A (see "CONNECTING TO AND<br />
DISCONNECTING FROM THE SCANNER<br />
FUNCTION USING SC-Scan A" in the<br />
Operation Guide).<br />
This completes the installation of the softw<strong>ar</strong>e.<br />
• If you installed Button Manager, set up Button<br />
Manager as explained in "SETTING UP BUTTON<br />
MANAGER" (p.19).<br />
4<br />
Select "LPR Direct Print", click the<br />
"Next" button and go to the next step.<br />
15
SETUP<br />
If the machine will be used as a sh<strong>ar</strong>ed printer<br />
on a network, select "Sh<strong>ar</strong>ed Printer" and<br />
click the "Next" button.<br />
• For the port to be used, select the printer name set as<br />
a sh<strong>ar</strong>ed printer, and click the "Next" button.<br />
• In Windows 2000/XP, you can also click the "Add<br />
Network Port" button and select the printer to be<br />
sh<strong>ar</strong>ed (the machine) by browsing the network in the<br />
window that appe<strong>ar</strong>s.<br />
6<br />
In the window for setting the<br />
destination print port name, make<br />
sure that ":lp" appe<strong>ar</strong>s at the end of<br />
the IP address and click the "Next"<br />
button.<br />
Note<br />
If the sh<strong>ar</strong>ed printer does not appe<strong>ar</strong> in the<br />
list, check the settings in the printer server.<br />
5<br />
Caution<br />
• If you <strong>ar</strong>e using Windows Vista and a<br />
security w<strong>ar</strong>ning window appe<strong>ar</strong>s, be sure<br />
to click "Install this driver softw<strong>ar</strong>e anyway".<br />
• If you <strong>ar</strong>e running Windows 2000/XP and a<br />
w<strong>ar</strong>ning message appe<strong>ar</strong>s reg<strong>ar</strong>ding the<br />
Windows logo test or digital signature, be<br />
sure to click "Continue Anyway" or "Yes".<br />
Follow the on-screen instructions and go to step<br />
8.<br />
The printer or printers connected to<br />
the network will be detected. Click the<br />
printer to be configured (the machine)<br />
and click the "Next" button.<br />
7<br />
Note<br />
Any name can be entered in "Printer Port<br />
Name" (maximum of 63 ch<strong>ar</strong>acters).<br />
A window appe<strong>ar</strong>s to let you check<br />
your entries. Make sure that the<br />
entries <strong>ar</strong>e correct and then click the<br />
"Finish" button.<br />
If any of the entries <strong>ar</strong>e incorrect, click the "Back"<br />
button to return to the appropriate window and<br />
correct the entry.<br />
Note<br />
If the machine's IP address cannot be found,<br />
make sure the machine is powered on, make<br />
sure the network cable is connected correctly,<br />
and then click the "Se<strong>ar</strong>ch" button.<br />
16
SETUP<br />
8<br />
9<br />
10<br />
11<br />
12<br />
13<br />
Select the model that you will be<br />
using, and click the "Next" button.<br />
Select whether or not you wish the<br />
printer to be your default printer and<br />
click the "Next" button.<br />
Follow the on-screen instructions.<br />
Caution<br />
• If you <strong>ar</strong>e using Windows Vista and a<br />
security w<strong>ar</strong>ning window appe<strong>ar</strong>s, be sure<br />
to click "Install this driver softw<strong>ar</strong>e anyway".<br />
• If you <strong>ar</strong>e running Windows 2000/XP and a<br />
w<strong>ar</strong>ning message appe<strong>ar</strong>s reg<strong>ar</strong>ding the<br />
Windows logo test or digital signature, be<br />
sure to click "Continue Anyway" or "Yes".<br />
When "The installation of the SHARP<br />
softw<strong>ar</strong>e is complete." appe<strong>ar</strong>s, click<br />
the "OK" button.<br />
You will return to the window of step 3<br />
on page 15.<br />
• To install the Scanner Driver, go to step 12.<br />
• To install the Button Manager, go to step 16.<br />
• If you do not want to install the Scanner Driver or the<br />
Button Manager, go to step 19.<br />
Click the "Scanner Driver (TWAIN)"<br />
button.<br />
Click the "Yes" button.<br />
14<br />
15<br />
16<br />
17<br />
18<br />
19<br />
When "The installation of the SHARP<br />
softw<strong>ar</strong>e is complete." appe<strong>ar</strong>s, click<br />
the "OK" button.<br />
You will return to the window of step 3<br />
on page 11.<br />
• If you want to install the Button Manager<br />
continuously, go to the next step.<br />
• If you want to end the installation, go to step 19.<br />
Click the "Button Manager" button.<br />
Follow the on-screen instructions.<br />
When "The installation of the<br />
Softw<strong>ar</strong>e is complete." appe<strong>ar</strong>s, click<br />
the "Finish" button.<br />
You will return to the window of step 3<br />
on page 11.<br />
Click the "Close" button to finish the<br />
installation.<br />
Note<br />
To use the scanner driver, you need to<br />
connect to the scanner function using<br />
SC-Scan A (see "CONNECTING TO AND<br />
DISCONNECTING FROM THE SCANNER<br />
FUNCTION USING SC-Scan A" in the<br />
Operation Guide).<br />
This completes the installation of the softw<strong>ar</strong>e.<br />
• If you installed Button Manager, set up Button<br />
Manager as explained in "SETTING UP BUTTON<br />
MANAGER" (p.19).<br />
Caution<br />
• If you <strong>ar</strong>e using Windows Vista and a<br />
security w<strong>ar</strong>ning window appe<strong>ar</strong>s, be sure<br />
to click "Install this driver softw<strong>ar</strong>e anyway".<br />
• If you <strong>ar</strong>e running Windows 2000/XP and a<br />
w<strong>ar</strong>ning message appe<strong>ar</strong>s reg<strong>ar</strong>ding the<br />
Windows logo test or digital signature, be<br />
sure to click "Continue Anyway" or "Yes".<br />
If a message appe<strong>ar</strong>s reg<strong>ar</strong>ding the Windows<br />
firewall, click the "Yes" button.<br />
17
SETUP<br />
CONFIGURING THE PRINTER<br />
DRIVER<br />
After installing the printer driver, you must configure the printer driver settings appropriately for the number of paper<br />
trays on the machine and the size of paper loaded in each.<br />
1<br />
Click the "St<strong>ar</strong>t" button, click "Control<br />
Panel", and then click "Printer".<br />
• In Windows XP, click the "st<strong>ar</strong>t" button and click<br />
"Printers and Faxes".<br />
• In Windows 2000, click the "St<strong>ar</strong>t" button, select<br />
"Settings", and then click "Printers".<br />
4<br />
Click the "Set Tray Status" button and select<br />
the size of paper that is loaded in each tray.<br />
Select a tray in the "Paper Source" menu, and<br />
select the size of paper loaded in that tray from the<br />
"Set Paper Size" menu. Repeat for each tray.<br />
Note<br />
In Windows XP, if "Printers and Faxes" does<br />
not appe<strong>ar</strong> in the "st<strong>ar</strong>t" menu, select "Control<br />
Panel", select "Printers and Other H<strong>ar</strong>dw<strong>ar</strong>e",<br />
and then select "Printers and Faxes".<br />
2<br />
Click the "SHARP AR-XXXX" printer<br />
driver icon and select "Properties"<br />
from the "Organize" menu.<br />
In Windows XP/2000, select "Properties" from the<br />
"File" menu.<br />
3<br />
Click the "Configuration" tab and set<br />
the printer configuration based on the<br />
options that have been installed.<br />
Set the printer configuration properly. If not,<br />
printing may not take place correctly.<br />
5<br />
Click the "OK" button in the "Set Tray<br />
Status" window.<br />
6<br />
Click the "OK" button in the printer<br />
properties window.<br />
Printer driver screen for AR-<strong>5520</strong>/AR-<strong>5520</strong>D<br />
18
SETUP<br />
SETTING UP BUTTON MANAGER<br />
Button Manager is a softw<strong>ar</strong>e program that works with the scanner driver to enable scanning from the machine.<br />
To scan using the machine, Button Manager must be linked with the scan menu on the machine. Follow the steps<br />
below to link Button Manager to scanner events.<br />
When using AR-<strong>5516</strong>N/<strong>5520</strong>N, note that you need to connect to the scanner function using SC-Scan A previously<br />
(see "CONNECTING TO AND DISCONNECTING FROM THE SCANNER FUNCTION USING SC-Scan A" in the<br />
Operation Guide).<br />
Windows XP/Vista<br />
1<br />
Click the "St<strong>ar</strong>t" button, click "Control<br />
Panel", click "H<strong>ar</strong>dw<strong>ar</strong>e and Sound",<br />
and then click "Scanners and<br />
Cameras".<br />
In Windows XP, click the "st<strong>ar</strong>t" button, select<br />
"Control Panel" and click "Printers and Other<br />
H<strong>ar</strong>dw<strong>ar</strong>e", and then click "Scanners and<br />
Cameras".<br />
5<br />
Select "St<strong>ar</strong>t this program" and then<br />
select "Sh<strong>ar</strong>p Button Manager U" from<br />
the pull-down menu.<br />
2<br />
Click the "SHARP AR-XXXX" icon and<br />
select "Properties".<br />
In Windows XP, select "Properties" from the<br />
"File" menu.<br />
3<br />
4<br />
In the "Properties" screen, click the<br />
"Events" tab.<br />
Select "ScanMenu SC1" from the<br />
"Select an event" pull-down menu.<br />
6<br />
Repeat Steps 4 and 5 to link Button<br />
Manager to "ScanMenu SC2" through<br />
"ScanMenu SC6".<br />
Select "ScanMenu SC2" from the "Select an<br />
event" pull-down menu. Select "St<strong>ar</strong>t this<br />
program", select "Sh<strong>ar</strong>p Button Manager U" from<br />
the pull-down menu. Do the same for each<br />
ScanMenu through "ScanMenu SC6".<br />
7<br />
Click the "OK" button.<br />
Button Manager is now linked to the scan menu<br />
(1 through 6).<br />
The scan settings for each of scan menu 1<br />
through 6 can be changed with the setting<br />
window of Button Manager.<br />
For the factory default settings of the scan menu<br />
and the procedures for configuring Button<br />
Manager settings, see "BUTTON MANAGER<br />
SETTINGS" in the Operation Guide.<br />
19
SETUP<br />
Windows 2000<br />
1<br />
Click the "St<strong>ar</strong>t" button, select<br />
"Settings", and then click "Control<br />
Panel".<br />
6<br />
Select "Sh<strong>ar</strong>p Button Manager U" in<br />
"Send to this application".<br />
2<br />
Double-click the "Scanners and Cameras"<br />
icon.<br />
ScanMenu SC1<br />
3<br />
Select "SHARP AR-XXXX" and click<br />
the "Properties" button.<br />
U<br />
4<br />
In the "Properties" screen, click the<br />
"Events" tab.<br />
5<br />
Select "ScanMenu SC1" from the<br />
"Scanner events" pull-down menu.<br />
Note<br />
If other applications <strong>ar</strong>e shown, deselect the<br />
checkboxes for the other applications and<br />
leave only the Button Manager checkbox<br />
selected.<br />
7<br />
Click the "Apply" button.<br />
ScanMenu SC1<br />
U<br />
8<br />
Repeat Steps 5 through 7 to link<br />
Button Manager to "ScanMenu SC2"<br />
through "ScanMenu SC6".<br />
Select "ScanMenu SC2" from the "Scanner<br />
events" pull-down menu. Select "Sh<strong>ar</strong>p Button<br />
Manager U" in "Send to this application" and click<br />
the "Apply" button. Do the same for each<br />
ScanMenu through "ScanMenu SC6".<br />
When the settings have been completed, click the<br />
"OK" button to close the screen.<br />
Button Manager is now linked to the scan menu<br />
(1 through 6).<br />
The scan settings for each of scan menu 1<br />
through 6 can be changed with the setting<br />
window of Button Manager.<br />
For the factory default settings of the scan menu<br />
and the procedures for configuring Button<br />
Manager settings, see "BUTTON MANAGER<br />
SETTINGS" in the Operation Guide.<br />
20
APPENDIX<br />
TROUBLESHOOTING<br />
If the softw<strong>ar</strong>e is not installed correctly, check the following items on your computer.<br />
The driver cannot be installed<br />
(Windows 2000/XP)<br />
If the driver cannot be installed in Windows 2000/XP,<br />
follow these steps to check your computer's settings.<br />
1<br />
2<br />
3<br />
4<br />
Click the "st<strong>ar</strong>t" button and then click<br />
"Control Panel".<br />
In Windows 2000, click the "St<strong>ar</strong>t" button, select<br />
"Settings", and then click "Control Panel".<br />
Click "Performance and Maintenance",<br />
and then click "System".<br />
In Windows 2000, double-click the "System" icon.<br />
Click the "H<strong>ar</strong>dw<strong>ar</strong>e" tab and then<br />
click the "Driver Signing" button.<br />
Check "What action do you want<br />
Windows to take?" ("File signature<br />
verification" in Windows 2000).<br />
Plug and Play window does not appe<strong>ar</strong><br />
(AR-<strong>5516</strong>S/AR-<strong>5520</strong>S/AR-<strong>5516</strong>/AR-<strong>5520</strong>/<br />
AR-<strong>5516</strong>D/AR-<strong>5520</strong>D)<br />
If the Plug and Play window does not appe<strong>ar</strong> after you<br />
connect the machine to your computer with a USB<br />
cable and turn on the machine, follow the steps below<br />
to verify that the USB port is available.<br />
1<br />
2<br />
3<br />
Click the "St<strong>ar</strong>t" button, select<br />
"Control Panel", and then click<br />
"System and Maintenance".<br />
• In Windows XP, click the "st<strong>ar</strong>t" button, click<br />
"Control Panel", and then click "Performance<br />
and Maintenance".<br />
• In Windows 2000, click the "St<strong>ar</strong>t" button, select<br />
"Settings", and then click "Control Panel".<br />
Click "Device Manager", and if a<br />
message screen appe<strong>ar</strong>s asking you<br />
for confirmation, click "Continue".<br />
"Universal Serial Bus controllers" will appe<strong>ar</strong> in<br />
the list of devices.<br />
• In Windows XP, click "System", click the<br />
"H<strong>ar</strong>dw<strong>ar</strong>e" tab, and click the "Device<br />
Manager" button.<br />
• In Windows 2000, double-click the "System"<br />
icon, click the "H<strong>ar</strong>dw<strong>ar</strong>e" tab, and click the<br />
"Device Manager" button.<br />
Click the icon beside "Universal<br />
Serial Bus controllers".<br />
If the option "Block" has been selected, it will not be<br />
possible to install the driver. Select the option "W<strong>ar</strong>n"<br />
and then install the driver as explained in<br />
"INSTALLING THE SOFTWARE<br />
(AR-<strong>5516</strong>S/AR-<strong>5520</strong>S/AR-<strong>5516</strong>/AR-<strong>5520</strong>/AR-<strong>5516</strong>D/<br />
AR-<strong>5520</strong>D)" (p.8).<br />
4<br />
Two items should appe<strong>ar</strong>: your controller chipset<br />
type and Root Hub. If these items appe<strong>ar</strong>, you<br />
can use the USB port. If the "Universal Serial Bus<br />
controllers" shows a yellow exclamation point or<br />
does not appe<strong>ar</strong>, you must check your computer<br />
manual for USB troubleshooting or contact your<br />
computer manufacturer.<br />
Once you have verified that the USB<br />
port is enabled, install the softw<strong>ar</strong>e as<br />
explained in "INSTALLING THE<br />
SOFTWARE<br />
(AR-<strong>5516</strong>S/AR-<strong>5520</strong>S/AR-<strong>5516</strong>/AR-<strong>5520</strong>/<br />
AR-<strong>5516</strong>D/AR-<strong>5520</strong>D)" (p.8).<br />
21
APPENDIX<br />
The driver cannot be correctly<br />
installed by Plug and Play<br />
(AR-<strong>5516</strong>S/AR-<strong>5520</strong>S/AR-<strong>5516</strong>/AR-<strong>5520</strong>/<br />
AR-<strong>5516</strong>D/AR-<strong>5520</strong>D)<br />
If the driver cannot be correctly installed by Plug and<br />
Play (for example, Plug and Play takes place without<br />
copying the required files for the driver installation),<br />
follow these steps to remove unneeded devices and<br />
then install the driver as explained in "INSTALLING<br />
THE SOFTWARE<br />
(AR-<strong>5516</strong>S/AR-<strong>5520</strong>S/AR-<strong>5516</strong>/AR-<strong>5520</strong>/AR-<strong>5516</strong>D/<br />
AR-<strong>5520</strong>D)" (p.8).<br />
1<br />
2<br />
3<br />
Click the "St<strong>ar</strong>t" button, select<br />
"Control Panel", and then click<br />
"System and Maintenance".<br />
• In Windows XP, click the "st<strong>ar</strong>t" button, click<br />
"Control Panel", and then click "Performance<br />
and Maintenance".<br />
• In Windows 2000, click the "St<strong>ar</strong>t" button, select<br />
"Settings", and then click "Control Panel".<br />
Click "Device Manager", and if a<br />
message screen appe<strong>ar</strong>s asking you<br />
for confirmation, click "Continue".<br />
• In Windows XP, click "System", click the<br />
"H<strong>ar</strong>dw<strong>ar</strong>e" tab, and click the "Device<br />
Manager" button.<br />
• In Windows 2000, double-click the "System"<br />
icon, click the "H<strong>ar</strong>dw<strong>ar</strong>e" tab, and click the<br />
"Device Manager" button.<br />
Click the icon beside "Other<br />
devices".<br />
Removing the softw<strong>ar</strong>e<br />
If you need to remove the softw<strong>ar</strong>e, follow these steps.<br />
1<br />
2<br />
3<br />
4<br />
Click the "St<strong>ar</strong>t" button, and then click<br />
"Control Panel".<br />
• In Windows XP, click the "st<strong>ar</strong>t" button and then<br />
click "Control Panel".<br />
• In Windows 2000, click the "St<strong>ar</strong>t" button, select<br />
"Settings", and then click "Control Panel".<br />
Click "Uninstall a program".<br />
• In Windows XP, click "Add or Remove<br />
Programs".<br />
• In Windows 2000, double-click the<br />
"Add/Remove Programs" icon.<br />
Select the driver from the list, and<br />
remove the softw<strong>ar</strong>e.<br />
For more information, refer to your operating<br />
manual or to the help files for your operating<br />
system.<br />
Rest<strong>ar</strong>t your computer.<br />
If "SHARP AR-XXXX" appe<strong>ar</strong>s, select and delete<br />
the item.<br />
Note<br />
If "Other devices" does not appe<strong>ar</strong>, close the<br />
"Device Manager" window.<br />
4<br />
Install the softw<strong>ar</strong>e as explained in<br />
"INSTALLING THE SOFTWARE<br />
(AR-<strong>5516</strong>S/AR-<strong>5520</strong>S/AR-<strong>5516</strong>/AR-552<br />
0/AR-<strong>5516</strong>D/AR-<strong>5520</strong>D)" (p.8).<br />
22
APPENDIX<br />
SPECIFICATIONS<br />
Model AR-<strong>5516</strong>S/AR-<strong>5516</strong>/AR-<strong>5516</strong>D/AR-<strong>5516</strong>N AR-<strong>5520</strong>S/AR-<strong>5520</strong>/AR-<strong>5520</strong>D/AR-<strong>5520</strong>N<br />
Type<br />
Photoconductive type<br />
Document glass type<br />
Copy system<br />
Originals<br />
Original sizes<br />
Copy size<br />
Copying speed<br />
(one-sided copying at<br />
100% copy ratio)<br />
Continuous copy<br />
First-copy time*<br />
W<strong>ar</strong>m-up time<br />
Copy ratio<br />
Exposure system<br />
Paper feed<br />
Fusing system<br />
Developing system<br />
Light source<br />
Resolution<br />
Gradation<br />
Power supply<br />
Power consumption<br />
Typical electricity<br />
consumption<br />
Digital Multifunctional System, Desktop<br />
OPC drum<br />
Fixed<br />
Dry, electrostatic transfer<br />
Sheets, bound documents<br />
Max. A3<br />
Max. A3<br />
Min. A6 (A6 must be fed from the bypass tray)<br />
Image loss: Max. 4 mm (leading and trailing edges)<br />
Max. 4.5 mm (along other edges in total)<br />
9 copies/min.<br />
10 copies/min.<br />
12 copies/min.<br />
14 copies/min.<br />
16 copies/min.<br />
A3<br />
B4<br />
A4R<br />
B5R<br />
A4, B5, A5<br />
Max. 999 copies; subtractive counter<br />
Approx. 7.2 sec. or less<br />
Approx. 45 sec.<br />
11 copies/min.<br />
12 copies/min.<br />
14 copies/min.<br />
16 copies/min.<br />
20 copies/min.<br />
V<strong>ar</strong>iable: 25% to 400%, in 1% increments (total 376 steps)<br />
(50% to 200% when SPF/RSPF is used.)<br />
Fixed preset: 50%, 70%, 81%, 86%, 100%, 115%, 122%, 141%, 200%<br />
A3<br />
B4<br />
A4R<br />
B5R<br />
A4, B5, A5<br />
Document glass: Moving optical source, slit exposure (station<strong>ar</strong>y platen) with<br />
automatic exposure<br />
SPF/RSPF: Moving original<br />
One automatic feeding paper tray (250<br />
sheets) + bypass tray (100 sheets)<br />
Heat rollers<br />
Dry-type two-component magnetic brush development<br />
Cold cathode fluorescent lamp<br />
(AUTO/TEXT mode)<br />
Scan: 600 x 300 dpi (Factory default), 600 x 600 dpi<br />
Output: 600 x 600 dpi<br />
(PHOTO mode)<br />
Scan: 600 x 600 dpi<br />
Output: 600 x 600 dpi<br />
Scanning: 256<br />
Printing: 2 value<br />
Two automatic feeding paper trays (250<br />
sheets each) + bypass tray (100 sheets)<br />
Local voltage ±10% (For this machine's power supply requirements, see the name<br />
plate located on the back of the machine.)<br />
Max. 1.2 kW<br />
1.71 kWh/week<br />
1.95 kWh/week (AR-<strong>5516</strong>N)<br />
2.03 kWh/week<br />
2.24 kWh/week (AR-<strong>5520</strong>N)<br />
23
APPENDIX<br />
Weight<br />
Approx. 28.2 kg<br />
Approx. 28.4 kg (AR-<strong>5516</strong>N)<br />
Approx. 33.1kg<br />
Approx. 33.3 kg (AR-<strong>5520</strong>N)<br />
Dimensions 590 mm (W) x 550 mm (D) x 470 mm (H) 590 mm (W) x 550 mm (D) x 555 mm (H)<br />
* First-copy time is measured with original on the document glass with the following settings made, in fully ready condition with<br />
fuser at operating temperature and mirror motor at operating speed, actual time may v<strong>ar</strong>y based on environment conditions.<br />
•A4 size paper is fed from paper tray 1<br />
•Exposure mode is AUTO<br />
•Scanning resolution is 600 x 300 dpi<br />
Acoustic noise emission (measurement according to ISO7779)<br />
Sound power level LwA<br />
Printing mode (continuous printing)<br />
Standby mode<br />
Sound pressure level LpA (actual measurement)<br />
Bystander positions<br />
Printing mode<br />
Operator positions<br />
Bystander positions<br />
Standby mode<br />
Operator positions<br />
6.5 B<br />
3.3 B<br />
48 dB (A)<br />
49 dB (A)<br />
18 dB (A)<br />
17 dB (A)<br />
Ambient environment<br />
(Humidity)<br />
85%<br />
60%<br />
20%<br />
10°C<br />
(54°F)<br />
30°C 35°C (Temperature)<br />
(86°F) (91°F)<br />
24
APPENDIX<br />
Peripheral Devices<br />
The following peripheral devices can be connected to the machine. For details, see "PERIPHERAL DEVICES AND<br />
SUPPLIES" in the Operation Guide.<br />
Product name<br />
250-sheet paper feed unit<br />
Model<br />
AR-D34<br />
2 x 250-sheet paper feed unit AR-D35<br />
Single pass feeder AR-SP10* 1<br />
Reversing Single pass feeder AR-RP10* 2<br />
*1 AR-<strong>5516</strong>S/AR-<strong>5520</strong>S/AR-<strong>5516</strong>/AR-<strong>5520</strong><br />
*2 AR-<strong>5516</strong>D/AR-<strong>5520</strong>D/AR-<strong>5516</strong>N/AR-<strong>5520</strong>N<br />
Printer Function<br />
Print speed*<br />
Resolution<br />
Memory<br />
Emulation<br />
Interface connector<br />
Interface cables<br />
AR-<strong>5516</strong>S/AR-<strong>5516</strong>/AR-<strong>5516</strong>D/AR-<strong>5516</strong>N Max. 16 ppm<br />
AR-<strong>5520</strong>S/AR-<strong>5520</strong>/AR-<strong>5520</strong>D/AR-<strong>5520</strong>N Max. 20 ppm<br />
600 dpi<br />
AR-<strong>5516</strong>S/AR-<strong>5520</strong>S 16 MB<br />
AR-<strong>5516</strong>/AR-<strong>5520</strong>, AR-<strong>5516</strong>D/AR-<strong>5520</strong>D, AR-<strong>5516</strong>N/AR-<strong>5520</strong>N 64 MB<br />
SHARP SPLC (Sh<strong>ar</strong>p Printer Language with Compression)<br />
AR-<strong>5516</strong>S/AR-<strong>5520</strong>S/AR-<strong>5516</strong>/AR-<strong>5520</strong>/AR-<strong>5516</strong>D/AR-<strong>5520</strong>D : USB connector (USB 2.0)<br />
AR-<strong>5516</strong>N/AR-<strong>5520</strong>N : 10BASE-T/100BASE-TX<br />
AR-<strong>5516</strong>S/AR-<strong>5520</strong>S/AR-<strong>5516</strong>/AR-<strong>5520</strong>/AR-<strong>5516</strong>D/AR-<strong>5520</strong>D :<br />
[USB cable]<br />
Shielded twisted pair cable (max. length 3 m, must support USB 2.0)<br />
Please purchase a commercially available USB cable.<br />
AR-<strong>5516</strong>N/AR-<strong>5520</strong>N :<br />
[network cable]<br />
Shielded network cable that supports 10BASE-T/100BASE-TX<br />
Please purchase a commercially available shielded network cable.<br />
* Print speed during printing of the second sheet and following sheets when using A4 plain paper and performing continuous<br />
one-sided printing of the same page.<br />
Scanner Function (AR-<strong>5516</strong>/AR-<strong>5520</strong>, AR-<strong>5516</strong>D/AR-<strong>5520</strong>D, AR-<strong>5516</strong>N/AR-<strong>5520</strong>N)<br />
Type<br />
Scanning method<br />
Light source<br />
Resolution<br />
Original types<br />
Effective scanning <strong>ar</strong>ea<br />
Scanning speed<br />
Input Data<br />
Output Data<br />
Scanning colours<br />
Protocol<br />
Interface<br />
Drop out colour<br />
Supported operating<br />
systems<br />
Void <strong>ar</strong>ea<br />
Interface cables<br />
Scanner utilities<br />
Flatbed scanner<br />
Document glass/SPF/RSPF<br />
Cold cathode fluorescent lamp<br />
Factory default: 150 dpi<br />
Setting range: 50 dpi - 9600 dpi<br />
Sheets, bound documents<br />
Approx. 297 mm (Lengthwise) x 431 mm (Width)<br />
0.962 msec/line (300 dpi)<br />
1 bit or 12 bit<br />
1 bit or 8 bit<br />
Black and white 2 value, Greyscale<br />
TWAIN, WIA (Windows XP/Vista), STI<br />
AR-<strong>5516</strong>S/AR-<strong>5520</strong>S/AR-<strong>5516</strong>/AR-<strong>5520</strong>/AR-<strong>5516</strong>D/AR-<strong>5520</strong>D :<br />
USB 2.0 (Full-Speed/Hi-Speed compatible interface)<br />
AR-<strong>5516</strong>N/AR-<strong>5520</strong>N :<br />
10BASE-T/100BASE-TX<br />
No<br />
Windows 2000/XP/Vista<br />
(Detailed information can be found in "HARDWARE AND SOFTWARE REQUIREMENTS" (p.7))<br />
Max. 2.5 mm (leading and trailing edges)<br />
Max. 3.0 mm (along other edges in total)<br />
AR-<strong>5516</strong>S/AR-<strong>5520</strong>S/AR-<strong>5516</strong>/AR-<strong>5520</strong>/AR-<strong>5516</strong>D/AR-<strong>5520</strong>D :<br />
[USB cable]<br />
Shielded twisted pair cable (max. length 3 m, must support USB 2.0)<br />
Please purchase a commercially available USB cable.<br />
AR-<strong>5516</strong>N/AR-<strong>5520</strong>N :<br />
[network cable]<br />
Shielded network cable that supports 10BASE-T/100BASE-TX<br />
Please purchase a commercially available shielded cable.<br />
Button Manager<br />
Note<br />
As a p<strong>ar</strong>t of our policy of continuous improvement, SHARP reserves the right to make design and specification changes<br />
for product improvement without prior notice. The performance specification figures indicated <strong>ar</strong>e nominal values of<br />
production units. There may be some deviations from these values in individual units.<br />
25
APPENDIX<br />
INFORMATION ON DISPOSAL<br />
A. Information on Disposal for Users (private households)<br />
1. In the European Union<br />
Attention: If you want to dispose of this equipment, please do not use the<br />
ordin<strong>ar</strong>y dust bin!<br />
Used electrical and electronic equipment must be treated sep<strong>ar</strong>ately and in<br />
accordance with legislation that requires proper treatment, recovery and<br />
recycling of used electrical and electronic equipment.<br />
Following the implementation by member states, private households within<br />
the EU states may return their used electrical and electronic equipment to<br />
designated collection facilities free of ch<strong>ar</strong>ge*. In some countries* your local<br />
retailer may also take back your old product free of ch<strong>ar</strong>ge if you purchase a<br />
simil<strong>ar</strong> new one.<br />
*) Please contact your local authority for further details.<br />
If your used electrical or electronic equipment has batteries or<br />
accumulators, please dispose of these sep<strong>ar</strong>ately beforehand according to<br />
local requirements.<br />
By disposing of this product correctly you will help ensure that the waste<br />
undergoes the necess<strong>ar</strong>y treatment, recovery and recycling and thus<br />
prevent potential negative effects on the environment and human health<br />
which could otherwise <strong>ar</strong>ise due to inappropriate waste handling.<br />
2. In other Countries outside the EU<br />
If you wish to disc<strong>ar</strong>d this product, please contact your local authorities and ask for the correct method of disposal.<br />
For Switzerland: Used electrical or electronic equipment can be returned free of ch<strong>ar</strong>ge to the dealer, even if you don't purchase<br />
a new product. Further collection facilities <strong>ar</strong>e listed on the homepage of www.swico.ch or www.sens.ch.<br />
B. Information on Disposal for Business Users.<br />
Attention: Your product is<br />
m<strong>ar</strong>ked with this symbol. It<br />
means that used electrical<br />
and electronic products<br />
should not be mixed with<br />
general household waste.<br />
There is a sep<strong>ar</strong>ate<br />
collection system for these<br />
products.<br />
1. In the European Union<br />
If the product is used for business purposes and you want to disc<strong>ar</strong>d it:<br />
Please contact your SHARP dealer who will inform you about the take-back of the product. You might be ch<strong>ar</strong>ged for the costs<br />
<strong>ar</strong>ising from take-back and recycling. Small products (and small amounts) might be taken back by your local collection facilities.<br />
For Spain: Please contact the established collection system or your local authority for take-back of your used products.<br />
2. In other Countries outside the EU<br />
If you wish to disc<strong>ar</strong>d of this product, please contact your local authorities and ask for the correct method of disposal.<br />
26
LUOKAN 1 LASERLAITE<br />
KLASS 1 LASERAPPARAT<br />
The above label is affixed to the laser unit inside the machine.<br />
SHARP ELECTRONICS (Europe) GmbH<br />
Sonninstraße 3, D-20097 Hamburg
PRINTED IN FRANCE<br />
TINSE1936TSZ1<br />
AR-<strong>5516</strong>S/AR-<strong>5520</strong>S/AR-<strong>5516</strong>/AR-<strong>5520</strong>/AR-<strong>5516</strong>D/AR-<strong>5520</strong>D/AR-<strong>5516</strong>N/AR-<strong>5520</strong>N START GUIDE