
You also want an ePaper? Increase the reach of your titles
YUMPU automatically turns print PDFs into web optimized ePapers that Google loves.
InstallatIon<br />
28<br />
InstallatIon InstallatIon<br />
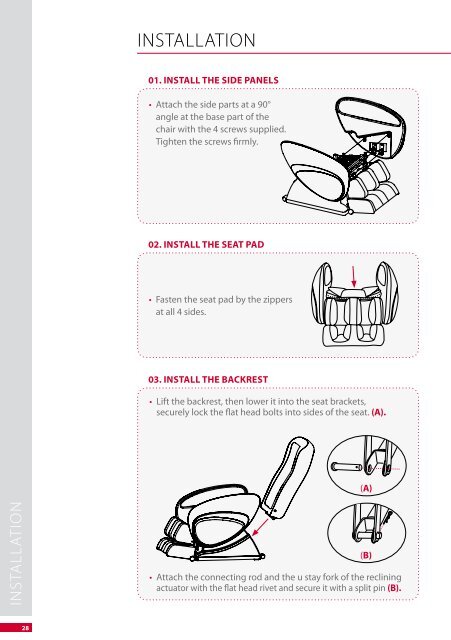
01. instAll the side pAnels<br />
• Attach the side parts at a 90°<br />
angle at the base part of the<br />
chair with the 4 screws supplied.<br />
Tighten the screws firmly.<br />
02. instAll the seAt pAd<br />
• Fasten the seat pad by the zippers<br />
at all 4 sides.<br />
03. instAll the BAckrest<br />
• Lift the backrest, then lower it into the seat brackets,<br />
securely lock the flat head bolts into sides of the seat. (A).<br />
• Attach the connecting rod and the u stay fork of the reclining<br />
actuator with the flat head rivet and secure it with a split pin (B).<br />
(A)<br />
(B)<br />
04. connect the plugs<br />
• Insert the plugs all the way into the corresponding place in the<br />
seat part according to the marks given.<br />
05. unfold the BAckrest<br />
• Unfold the backrest carefully until you hear it click into place.<br />
06. AttAch the BAchrest pAd And the pillow pAd<br />
• Attach the backrest pad with the zipper (A).<br />
• Attach the pillow pad using the hook and loop fasteners (B).<br />
(A)<br />
(B)<br />
Grau Schwarz<br />
Grau<br />
Schwarz<br />
InstallatIon<br />
InhaltsVerzeIchnIs<br />
29