Surgical Technique
Surgical Technique
Surgical Technique

You also want an ePaper? Increase the reach of your titles
YUMPU automatically turns print PDFs into web optimized ePapers that Google loves.
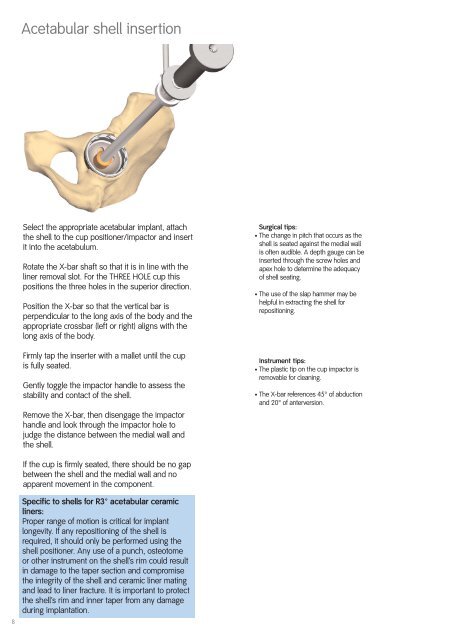
Acetabular shell insertion<br />
Select the appropriate acetabular implant, attach<br />
the shell to the cup positioner/impactor and insert<br />
it into the acetabulum.<br />
Rotate the X-bar shaft so that it is in line with the<br />
liner removal slot. For the THREE HOLE cup this<br />
positions the three holes in the superior direction.<br />
Position the X-bar so that the vertical bar is<br />
perpendicular to the long axis of the body and the<br />
appropriate crossbar (left or right) aligns with the<br />
long axis of the body.<br />
Firmly tap the inserter with a mallet until the cup<br />
is fully seated.<br />
Gently toggle the impactor handle to assess the<br />
stability and contact of the shell.<br />
Remove the X-bar, then disengage the impactor<br />
handle and look through the impactor hole to<br />
judge the distance between the medial wall and<br />
the shell.<br />
<strong>Surgical</strong> tips:<br />
• The change in pitch that occurs as the<br />
shell is seated against the medial wall<br />
is often audible. A depth gauge can be<br />
inserted through the screw holes and<br />
apex hole to determine the adequacy<br />
of shell seating.<br />
• The use of the slap hammer may be<br />
helpful in extracting the shell for<br />
repositioning.<br />
Instrument tips:<br />
• The plastic tip on the cup impactor is<br />
removable for cleaning.<br />
• The X-bar references 45° of abduction<br />
and 20° of anterversion.<br />
If the cup is firmly seated, there should be no gap<br />
between the shell and the medial wall and no<br />
apparent movement in the component.<br />
8<br />
Specific to shells for R3 acetabular ceramic<br />
liners:<br />
Proper range of motion is critical for implant<br />
longevity. If any repositioning of the shell is<br />
required, it should only be performed using the<br />
shell positioner. Any use of a punch, osteotome<br />
or other instrument on the shell’s rim could result<br />
in damage to the taper section and compromise<br />
the integrity of the shell and ceramic liner mating<br />
and lead to liner fracture. It is important to protect<br />
the shell’s rim and inner taper from any damage<br />
during implantation.