MTUBE-8 - Soundstream
MTUBE-8 - Soundstream
MTUBE-8 - Soundstream

You also want an ePaper? Increase the reach of your titles
YUMPU automatically turns print PDFs into web optimized ePapers that Google loves.
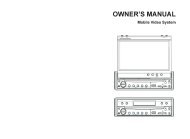
<strong>MTUBE</strong>-8<br />
Professional Dual-VaIveITu be<br />
Pre-Amplifier-Driver Unit<br />
Owner's Manual<br />
and<br />
Installation Guide
You now own the <strong>Soundstream</strong> <strong>MTUBE</strong>-8 Pre-Amplifier, the product of<br />
uncompromising design and engineering philosophy. Your <strong>Soundstream</strong> MTUB<br />
Pre-Amplifier Will outperform any other parametricequalizer in the world.<br />
To maximize the performance of your system, we recommend that you thoroug<br />
acquaint yourself with its capabilities and features. Please retain this manual a<br />
your sales receipt for future reference.<br />
<strong>Soundstream</strong> Pre-Amplifier is the result of American innovation and<br />
highest quality control standard. When properly installed, they will provide y<br />
with many years of listening pleasure. Should your Pre-Amplifier ever ne<br />
service or replacement due to the theft, please record the following informa<br />
which will help protect your investment.<br />
Model and Serial #<br />
Dealer's Name<br />
Date of Purchase<br />
Installation Shop<br />
Installation Date<br />
CAUTION!<br />
Prolonged listening at extremely high levels may result in hearing<br />
loss. Even though your car audio system with your new<br />
<strong>Soundstream</strong> <strong>MTUBE</strong>-8 Pre-Amplifier sounds better than<br />
anything you've ever heard, exercise caution to prevent hearing<br />
damage.
I<br />
USING THE M-TUBE TO ITS WITHOUT FULLEST POTENTIAL<br />
In order to utilize the full capacity of this unit$ is suggested that you<br />
1<br />
1<br />
read this section from beginning to End and then if you still have<br />
questions,our Tech assist department personnel can help.<br />
The M-TUBE is a very unique device. Not only does it provide you<br />
with extended range audio,faithfully preserving and reproducing all of<br />
the original detail & nuances but it also has some pretty unique<br />
features.With this device,you have the ability to either[a] maintain<br />
separate FRONT[Line] and REAR [aux] inputs and outputs or[b]<br />
utilize either of the line /aux.inputs,to obtain outputs on both Front &<br />
Rear plus Sub,with full fader control.Please see the expanded<br />
functional descriptions below.<br />
A] Using the line input only [place linelaux switch in<br />
" IN"<br />
position1,the following is realized -there would be no output on the<br />
Rear channels but there would be outputs on both Front & Sub<br />
sections. At this time the input " select " switch is in the " IN"<br />
position,moving this switch to the out position,will produce an output<br />
on the Rear channels as well.The fader control functions in favour of<br />
"F" or Front.<br />
B] Using the Auxiliary input only [place line / aux switch in the<br />
" OUT" position] ; the following is realized-there would be no output<br />
on the Front channels but there would be outputs on the Rear & Sub<br />
sections. At this time, the " select" switch is in the " IN" position;<br />
moving this switch to the out position, will cause ALL outputs to be<br />
turned-off, there'd be no output whatsoever on any channels. The<br />
fader control functions in the favour of " R" or Rear. .. but there's no<br />
I<br />
i<br />
USING THE M-TUBE TO ITS WITHOUT FULLEST POTENTIAL<br />
C] Using two sets of inputs on both line and auxiliary [the linelaux<br />
switch can be either in or out],the following is realized-the program<br />
material [music or other audio] presented on the aux. input will be<br />
available on the Rear & Sub channels, while the materials presented<br />
to the line inputs will be available on the Front channels exclusively. At<br />
thistime, both switches line & aux are in the "IN" position, if the<br />
" select" switch [only] is now placed in the " OUT" position, the<br />
line- input channels' program material, will now be available on ALL<br />
outputs , thereby effectively switching off or canceling the aux. inputs.<br />
The fader control functions to " balance" between line or " F"<br />
and auxiliary or "R" .<br />
What are the benefits of the above features you may ask: Well, for the<br />
first time, you can incorporate a preamplifier to enhance the entire<br />
system but still maintain a separation between the Front channels and<br />
the Rear channels , if this is your preference. That way, you can add<br />
pre or post equalization and or crossover functions to either Front<br />
and/or Rear without affecting the other! This is just one example, the<br />
only limit here is your imagination..note that while equalization can be<br />
added pre or post the preamplifier's processing we suggest that<br />
crossover functions be added after or post preamplifier processing.
FEATURES<br />
FRONT PANEL CONTROLS<br />
I<br />
The subwoofer output is an additional convenience when you<br />
wish to add subwoofers to your audio system to<br />
greatly enrich the bass sound.<br />
It will perform with any unit operating in a 12 volt negative ground<br />
electrical system.<br />
Professional Dual-Valve 1 Tube Pre-Amplifier - Driver<br />
Exceptionally high co-channel separation<br />
Harmonic feed-back loop control circuitry<br />
Double sided low resistance copper-clad PCB<br />
Cool-glow, dual color tube window<br />
Dedicated line input - Front output<br />
Assignable auxiliary input - Front / Rear output<br />
Variable phase /time-lag control (0-1 80)<br />
Separate Sub volume control (30 HZ - 160 HZ)<br />
Master volume control<br />
Platinum input & output RCA connectors<br />
3 position selectable (-) audio reference.<br />
Independently variable Left & Right (post source) input<br />
controls<br />
I<br />
1<br />
1. FADER CONTROL<br />
This control adjusts the volume between<br />
the front and rear speakers in a 4 speaker system.<br />
2. VOLUME CONTROL<br />
This control adjusts the output level<br />
3. SUBWOOFER VOLUME<br />
This control adjusts output level of subwoofer.<br />
4. SUBWOOFER FREQ.<br />
This control select subwoofer frequency<br />
40 or 150 Hz<br />
5. INPUT SELECTOR SWITCH<br />
This switch select the LINE input or AUX<br />
input<br />
6. TWO CHANNEL OR FOUR CHANNEL<br />
Two Channel or Four Channel select switch<br />
This switch select,Two Channel or Four<br />
Channel ouput.<br />
7. PHASE INVERTER CONTROL<br />
Setting this knob to the 180 position and shifts the<br />
subwoofer outputs signals 180 degrees out-of-phase<br />
relative to the front and rear output signals.
ELECTRICAL INSTALLATION<br />
MECHANICAL INSTALLATiON<br />
I_Y_ (mas h l<br />
Bkk to Car Chassk<br />
Real<br />
Mm amplmer lor<br />
ruh-mler output I I I I<br />
Fmn<br />
rpsarr<br />
1. Select the desired location to mount unit under the dash<br />
board.<br />
2. Drill (4) 4.2 mm diameter holes. Fix the mounting bracket<br />
underdash or hump with (4) 4 x 15 mm tapping screw. Be<br />
careful when drilling so as not to damage existing<br />
wiringunder the dash board.<br />
3. Mount unit to the mounting bracket with (4) 3 x 6 mm<br />
machine screw.<br />
Rear Dutpul<br />
NOTES: Set your source volume at one -half to three quarter<br />
up and leave it.<br />
Always use your volume as a master(main) volume control. It<br />
has better electronics, higher SIN ratio and is more linear than<br />
any source unit volume available. If engine noise is audible, try<br />
raising the volume on the source unit, and/or check the ground<br />
connection on the unit.<br />
SCREW<br />
~.O'SPRM WASCSR
SPECIFICATIONS:<br />
SUBWOOFER FREQUENCY RANGE: 30 - 160 HZ<br />
SUBWOOFER SIGNAL OUT: 10 VOLTS RMSl14V PEAK<br />
RMS OUTPUT FRONTIREAR 10V RMSI 14V PEAK<br />
OPERATION VOLTAGE: 1 1-1 6V NEGATIVE GROUND<br />
THD +N: 0.0021%<br />
SIN RATIO: 110 dB REF 1V INPUT<br />
FREQUENCY RESPONSE: 15 HZ - 55K HZ, +I- 1dB<br />
STEREO SEPERATION: 92 dB 1 100 Hz - 1 KHz<br />
OUTPUT IMPEDANCE: 470 Ohms<br />
BOOST /CUT: 18 dB<br />
INPUT IMPEDANCE: 470k Ohms<br />
INPUT SENSITIVITY: ADJUSTABLE 50mv - 5V RMS<br />
HEADROOM: 20 dB<br />
OPERATION<br />
1. When the LINE cassette or CD player connected to this<br />
unit is turned ON, the unit turns ON and the in dicator<br />
lights up.<br />
2. With the 4 speaker system, use the fader control to adjust<br />
the sound balance between the front and rear speakers.<br />
3. Rotate the graphic equalizer controls to obtain the preferred<br />
sound quality.<br />
4. Use the subwoofer output level control on the front to adjust<br />
the sound level heard from the subwoofer.<br />
SOUNDSTREAM TECHNOLOGIES<br />
WWW.SOUNDSTREAM.COM