A4 sider BL2.indd - abo - center
A4 sider BL2.indd - abo - center
A4 sider BL2.indd - abo - center

You also want an ePaper? Increase the reach of your titles
YUMPU automatically turns print PDFs into web optimized ePapers that Google loves.
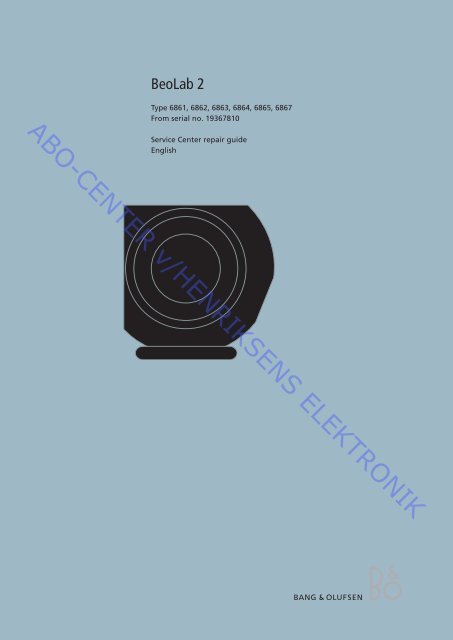
BeoLab 2<br />
ABO-CENTER v/HENRIKSENS ELEKTRONIK<br />
Type 6861, 6862, 6863, 6864, 6865, 6867<br />
From serial no. 19367810<br />
Service Center repair guide<br />
English
How to service, English 1.1<br />
HOW TO SERVICE<br />
Big efforts have been made to introduce the highest quality and a low call rate.<br />
Therefore this product is suitable for the new Service Strategy which benefits the<br />
customer. In a service situation where there is an electrical fault in a BeoLab 2, the<br />
fault can be removed during one visit to the customer’s home if you bring a Backup<br />
suitcase with you. If it is a mechanical fault, the particular part can be replaced<br />
in the customer’s home.<br />
When the necessary part(s) arrive from service stock, the visit to the customer’s<br />
home can be arranged.<br />
ABO-CENTER v/HENRIKSENS ELEKTRONIK<br />
Front line service<br />
The BeoLab 2 must be serviced in the customer’s home when dealing with electrical<br />
faulty or the exchange of mechanical parts. In this way, you avoid having to<br />
transport the heavy subwoofer (18kg) back and forth from the customer (box size:<br />
L 310 x W 260 x H 315 mm).<br />
In the customer’s home, it is possible to exchange the driver and slave units, the<br />
electrical chassis or transformer, as well as exchange the cabinet and foot.<br />
Replacement of the cabinet can be done easily at the customer’s home as it<br />
contains all the necessary parts. Only the loudspeaker units, the electrical chassis<br />
and the transformer must be put into the new cabinet.<br />
Electrical parts<br />
For front line service we offer a Back-up suitcase (also applies to BeoLab 1). All the<br />
needed electrical parts are located in the Back-up suitcase (loudspeaker units and<br />
electronics).<br />
That means the BeoLab 2 Back-up suitcase must be ordered and returned.<br />
Service documentation<br />
Service documentation for the BeoLab 2 is this guide (with part numbers for the<br />
Back-up suitcase and mechanical parts) and the User’s Guide.
Specification guidelines for service use 1.9<br />
SPECIFICATION GUIDELINE FOR SERVICE USE BeoLab 2<br />
Type no.<br />
See type survey<br />
Dimensions W x H x D / Weight<br />
260 x 315 x 310 mm / 17.7 kg<br />
Cabinet finish<br />
Aluminium, structure painted, grey<br />
Power Consumption<br />
Typical: 15 watts<br />
IEC65: 62W<br />
Stand-by: 0.4 watts<br />
Maximum Sound Pressure Level<br />
110 dB<br />
Power amplifiers 1<br />
Long-term maximum output power<br />
850 watts<br />
Effective Frequency range<br />
23 - 120 Hz<br />
Cabinet principle<br />
Double balanced passive radiator system<br />
Magnetically shielded<br />
Yes<br />
ABO-CENTER v/HENRIKSENS ELEKTRONIK<br />
Woofer<br />
Passive radiators<br />
Net volume<br />
Bass equalization<br />
Switch for loudspeaker position<br />
Input sensitivity<br />
1 x 9” (250 mm) flat diaphragm<br />
2 x 9” (250 mm) flat diaphragm<br />
13 litres<br />
ABL (Adaptive Bass Linearization)<br />
Free, Wall or Corner<br />
Adjustable by three position switch<br />
Corresponding to 83 dB, 88 dB or 91 dB for main speakers<br />
Connections<br />
Power Link - Input 1<br />
Power Link - Output 2<br />
Mains 1<br />
Power Link plug<br />
Pin 1 Loop through, Power Link plugs<br />
Pin 2 Signal GND<br />
Pin 3 Audio Left 0V - 2V RMS<br />
Pin 4 Power Link speaker ON = > 0.5V, OFF = < 0.5V<br />
Pin 5 Audio Right 0V - 2V RMS<br />
Pin 6 Loop through, Power Link plugs<br />
Pin 7 Loop through, Power Link plugs<br />
Pin 8 Loop through, Power Link plugs<br />
Mains Plug<br />
Subject to change without notice<br />
Warning<br />
STATIC ELECTRICITY<br />
MAY DESTROY THE<br />
PRODUCT<br />
Static electricity may destroy the product!<br />
A static-protective field service kit must always be used when replacement of the<br />
modules takes place. Use the ESD mat area for both the new and old modules.
1.10 Type survey<br />
TYPE SURVEY<br />
To change voltage supply, e.g. when moving between two countries, it may be<br />
necessary to order a new electrical chassis, mains trafo and mains cable.<br />
E.g.:<br />
Moving from EU (type 6861) to Japan (type 6864); order 3 part nos. for Japan type<br />
6864 (electrical chassis - mains trafo - mains cable).<br />
ABO-CENTER v/HENRIKSENS ELEKTRONIK<br />
TYPENÜBERSICHT<br />
Zur Änderung der Spannungsversorgung, z.B. beim Umzug in ein anderes Land,<br />
kann die Bestellung eines neuen elektrischen Chassis, Netztrafos und Netzkabels<br />
erforderlich sein.<br />
D.h.:<br />
Beim Umzug aus der EU (Typ 6861) nach Japan (Typ 6864) müssen drei Posten für<br />
den japanischen Typ 6864 bestellt werden (elektrisches Chassis - Netztrafo - Netzkabel).<br />
RECHERCHE DE TYPE<br />
Pour changer de tension d’alimentation, par ex. en déménageant vers un autre<br />
pays, il peut être nécessaire de commander un nouveau châssis électrique, un<br />
nouveau transformateur secteur et un nouveau câble secteur.<br />
Exemple :<br />
Pour un déménagement de l’Union européenne (type 6861) vers le Japon (type<br />
6864), il faut commander 3 références correspondant au type japonais 6864<br />
(châssis électrique - transformateur secteur - câble secteur).<br />
ESAME TIPOLOGICO<br />
Per cambiare l’alimentazione elettrica, per esempio in occasione di uno spostamento<br />
all’estero, può essere necessario ordinare un nuovo quadro elettrico, trafo di<br />
alimentazione e cavo di alimentazione.<br />
Per esempio.:<br />
In caso di spostamento da un paese dell’UE (tipo 6861) al Giappone (tipo 6864),<br />
ordinare 3 parti per il Giappone tipo 6864 (quadro elettrico - trafo di alimentazione -<br />
cavo di alimentazione).<br />
INSPECCIÓN DEL MODELO<br />
Por ejemplo cuando se viaja entre dos países, puede que haya que solicitar un<br />
chasis eléctrico, un transformador y un cable de red nuevos para cambiar la fuente<br />
de alimentación.<br />
Por ejemplo:<br />
Si se viaja de Europa (modelo 6861) a Japón (modelo 6864), hay que solicitar los<br />
3 números de referencia para el modelo 6864 de Japón (chasis eléctrico -<br />
transformador de red - cable de red).<br />
TYPE OVERSIGT<br />
For at skifte spændingsforsyning, f.eks. ved flytning til et andet land, kan det være<br />
nødvendigt at bestille et nyt el-chassis, en ny nettransformer og en ny netledning.<br />
Eksempel:<br />
Ved flytning fra EU (type 6861) til Japan (type 6864) bestilles 3 varenumre til den<br />
japanske type 6864 (el-chassis - nettransformer - netledning).
Type survey 1.11<br />
TYPE-OVERZICHT<br />
Om een voedingseenheid te vervangen, bijv. bij een verhuizing naar een ander land,<br />
is het soms nodig om een nieuw elektrisch chassis, een nieuwe transformator en<br />
een nieuw netsnoer te bestellen.<br />
Bijvoorbeeld:<br />
Bij een verhuizing vanuit de Europese Unie (type 6861) naar Japan (type 6864)<br />
bestelt u voor het Japanse type 6864 drie artikelnummers (elektrisch chassis,<br />
transformator en netsnoer).<br />
ABO-CENTER v/HENRIKSENS ELEKTRONIK<br />
Type no. El-chassis Mains Mains cable Mains Used in<br />
999 Module trafo voltage<br />
6861 3358459 8013610 6100245 (1.8m) 230V EU<br />
6862 3358459 8013610 6100401 (1.8m/7.5A) 230V GB<br />
6863 3358422 8013612 6100306 (1.8m) 120V USA/TWN/CND<br />
6864 3358423 8013611 6100247 (1.8m) 100V JAP<br />
6865 3358459 8013613 6100248 (1.8m) 240V AUS<br />
6867 3358459 8013610 6100386 (3m) 220V KOR
2.1 Brief operation guide, English<br />
BRIEF OPERATION GUIDE<br />
Setting the POSITION switch<br />
Use the POSITION switch is to ensure that the bass response suits the placement of<br />
BeoLab 2, and thus the surroundings.<br />
Which switch setting to choose depends on the distance from BeoLab 2 to the<br />
walls and corners of the room.<br />
ABO-CENTER v/HENRIKSENS ELEKTRONIK<br />
The POSITION switch has three settings:<br />
CORNER: Use this setting if BeoLab 2 is placed in a corner – shown by the dark<br />
grey areas in the illustration.<br />
WALL: Use this setting if BeoLab 2 is placed closer than approx. 50 cm (20”) to a<br />
wall, and no closer to a corner than approx. 150 cm (60”) – shown by the medium<br />
grey areas along the walls in the illustration.<br />
FREE: Use this setting if BeoLab 2 is placed more than approx. 50 cm (20”) from the<br />
wall – shown by the light grey area in the illustration.<br />
~ 50 cm<br />
20"<br />
~ 150 cm<br />
60"<br />
CORNER<br />
WALL<br />
FREE<br />
Never place BeoLab 2 behind your listening position. We recommend that you avoid placing any of<br />
your loudspeakers in the area inside the thin dotted line.<br />
Setup examples<br />
Dolby Digital system<br />
- Connect one end of the cable to the socket marked IN on BeoLab 2, and the other<br />
end to the socket marked SUBWOOFER on your Bang & Olufsen system.<br />
- Connect your front set of speakers to the sockets marked FRONT on your Bang &<br />
Olufsen system.<br />
- Connect your rear set of speakers to the sockets marked REAR on your Bang &<br />
Olufsen system.<br />
'Dolby Digital system'<br />
IN<br />
SUBWOOFER<br />
L<br />
FRONT<br />
FRONT<br />
R<br />
REAR<br />
REAR<br />
L<br />
R
Brief operation guide, English 2.2<br />
Dolby ProLogic system<br />
- Connect one end of the cable to the socket marked IN on BeoLab 2, and the other<br />
end to one of the sockets marked FRONT on your Bang & Olufsen system.<br />
- Connect your front set of speakers to the sockets marked OUT on BeoLab 2.<br />
- Connect your rear set of speakers to the sockets marked REAR on your Bang &<br />
Olufsen system.<br />
ABO-CENTER v/HENRIKSENS ELEKTRONIK<br />
'Dolby ProLogic system'<br />
OUT<br />
OUT<br />
IN<br />
L<br />
FRONT<br />
R<br />
REAR<br />
REAR<br />
L<br />
R<br />
Stereo system<br />
- Connect one end of the cable to the socket marked IN on BeoLab 2, and the other<br />
end to one of the speaker sockets on your Bang & Olufsen system.<br />
- Connect your left and right set of speakers to the sockets marked OUT on BeoLab 2.<br />
'Stereo system'<br />
OUT<br />
OUT<br />
IN<br />
L<br />
R
2.3 Brief operation guide, English<br />
USA<br />
Connect loudspeakers with BeoSystem 1<br />
Using the cables enclosed with the loud-speakers, connect the speakers to the<br />
BeoSystem 1 rear connection panel. The front, <strong>center</strong> and rear sets of loudspeakers<br />
must be from the Bang & Olufsen range of Power Link speakers. However, you are<br />
not restricted to the speaker models shown in the illustration. For more information<br />
concerning sockets on BeoSystem 1, please refer to Connection panels on<br />
BeoSystem 1 in the User Guide.<br />
- Connect the two front loudspeakers to the sockets marked FRONT.<br />
- Connect the two rear loudspeakers to the sockets marked REAR.<br />
- Connect both centre speakers to the socket marked CENTRE in the following<br />
manner: Connect one loudspeaker to its counterpart, and connect the second<br />
loudspeaker to the CENTRE socket on BeoSystem 1. You can also use this looping<br />
method when connecting your front or rear loudspeakers. Refer to the guide<br />
enclosed with your speakers for more information <strong>abo</strong>ut ‘looping’ your<br />
loudspeakers.<br />
- You can connect a subwoofer to the socket marked SUBWOOFER.<br />
ABO-CENTER v/HENRIKSENS ELEKTRONIK<br />
L<br />
R<br />
SUBWOOFER<br />
FRONT<br />
REAR<br />
CENTRE<br />
L<br />
R<br />
Regardless of which method you use when connecting your speakers, remember to set the<br />
L • R • LINE switch on the speakers to L and R (left and right channel), respectively.
3.1 Wiring diagram<br />
WIRING DIAGRAM<br />
02<br />
LED<br />
ABO-CENTER v/HENRIKSENS ELEKTRONIK<br />
01<br />
LF/SUPPLY<br />
05<br />
NTC<br />
03<br />
ICE1000AM<br />
0T1
BLOCK DIAGRAM<br />
Block diagram 3.2 3.2 Block diagram<br />
3.2<br />
ABO-CENTER v/HENRIKSENS ELEKTRONIK
4.1<br />
List of available parts 4.1<br />
4.1 List of available parts<br />
9005<br />
1<br />
1<br />
9006<br />
9007<br />
1<br />
Incl. pos. nos. 9001 and 9009<br />
9008<br />
9006<br />
1<br />
999 incl. PCB02<br />
9001<br />
9002<br />
02<br />
8<br />
9<br />
9<br />
1<br />
1<br />
9005<br />
9009<br />
3<br />
4<br />
6<br />
5<br />
7<br />
6<br />
5<br />
7<br />
ABO-CENTER v/HENRIKSENS ELEKTRONIK<br />
LIST OF AVAILABLE PARTS<br />
BeoLab 2<br />
9<br />
1<br />
10<br />
9 10<br />
9<br />
9010<br />
05<br />
4<br />
9003<br />
2<br />
1<br />
0T1<br />
1<br />
1<br />
9004<br />
1<br />
9005
List of available parts 4.2<br />
BeoLab 2 9001 2623008 Cup f/handle<br />
9002 6150027 Optical fibre w/O-ring for PCB02<br />
9003 2620132 Washer<br />
9004 8480329 Bass unit<br />
9005 2954028 Bezel<br />
9006 8480330 Passive radiator<br />
9007 6100245 Mains cable 1.8m - EU 230V<br />
6100401 Mains cable 1.8m/7.5A - GB 230V<br />
6100306 Mains cable 1.8m - USA/TWN/CND 120V<br />
6100247 Mains cable 1.8m - JAP 100V<br />
6100248 Mains cable 1.8m - AUS 240V<br />
6100386 Mains cable 3m - KOR 220V<br />
9008 2569632 Cabinet, grey incl. cup and rubber foot<br />
9009 2752080 Rubber foot<br />
9010 3340201 Gasket f/socket panel<br />
ABO-CENTER v/HENRIKSENS ELEKTRONIK<br />
0T1<br />
8013610 Mains trafo - EU, GB, KOR<br />
8013612 Mains trafo - USA, TWN, CND<br />
8013611 Mains trafo - JAP<br />
8013613 Mains trafo - AUS<br />
02Module 8000434 PCB02, LED<br />
05Module 8000433 PCB05, NTC<br />
999Module 3358459 El-chassis (LF/Supply, ICE1000A, LED) - EU, GB, AUS, KOR<br />
3358422 El-chassis (LF/Supply, ICE1000A, LED) - USA, TWN, CND<br />
3358423 El-chassis (LF/Supply, ICE1000A, LED) - JAP<br />
Survey of screws and washers 1 2054035 Screw 50 x 14mm<br />
2 2056009 Screw 3.5 x 10mm<br />
3 2058038 Screw 8 x 95mm<br />
4 2054030 Screw 50 x 56mm<br />
5 2624072 Washer<br />
6 2054029 Screw<br />
7 2624073 Washer<br />
8 2054026 Screw 30 x 12mm<br />
9 2015174 Screw 4 x 14mm<br />
10 2622546 Washer<br />
Parts not shown 6277524 Set of wires<br />
3375257 Product cover<br />
3629144 Special tool f/bezel<br />
3395304 Back-up suit case f/EU, GB, AUS, KOR type 6861, 6862, 6865, 6867<br />
3395179 Back-up suit case f/USA, TWA, CND type 6863<br />
3395180 Back-up suit case f/JAP type 6864<br />
Packing 3392658 Carton<br />
3396105 Foam packing (1 set consists of 2pcs.)<br />
3346038 Foam<br />
2777037 Handle (holder sheet)<br />
2777038 Handle (strap)<br />
User’s Guide 3506312 Danish<br />
3506313 Swedish<br />
3506314 Finnish<br />
3506315 English<br />
3506316 German<br />
3506317 Dutch<br />
3506318 French<br />
3506319 Italian<br />
3506320 Spanish<br />
3506321 Portuguese<br />
3506322 Greek<br />
3506323 Brazilian<br />
3506324 Polish<br />
3506325 Russian<br />
3506326 Hebrew<br />
3506327 Japanese<br />
3506328 Korean<br />
3506329 Taiwanese
4.3<br />
ABO-CENTER v/HENRIKSENS ELEKTRONIK
Repair tips & cleaning, English 5.1<br />
STATIC ELECTRICITY<br />
MAY DESTROY THE<br />
PRODUCT<br />
Static electricity may destroy the product!<br />
ABO-CENTER v/HENRIKSENS ELEKTRONIK<br />
REPAIR TIPS<br />
Service position<br />
Disassemble the BeoLab 2 see section 6.<br />
Extend the Power Link cable to the BeoLab 2, if necessary, with the cable from the<br />
Back-up suitcase.<br />
The BeoLab 2 cannot switch to ON mode without a signal transmitted from source<br />
through the Power Link.<br />
Dismantle the NTC-PCB from the bass unit and connect it to the chassis.<br />
If the NTC-PCB is not connected, the BeoLab 2 will go in protection mode.<br />
It is possible to switch the BeoLab 2 to ON mode without connecting the bass unit.<br />
It is now possible to measure at the test points, see page 5.9.<br />
What to exchange<br />
If all voltages are 0V and the fuses have not blown, there may be an interruption<br />
of the power supply in the mains trafo.<br />
If it is possible to switch the BeoLab 2 to ON mode, but the sound is distorted/<br />
missing exchange the bass unit.<br />
If the mains supply is present but it is still not possible to switch the BeoLab 2 to<br />
ON mode exchange the electrical-chassis.<br />
If the fuses are blown, exchange of the electrical-chassis is necessary because the<br />
failure may be intermittent.<br />
Note!<br />
A thermal overload shuts down the BeoLab 2. Disconnect the mains for a few<br />
second to reset the BeoLab 2.<br />
CLEANING<br />
Clean the surfaces of BeoLab 2 using a soft, lint-free cloth which is wrung firmly in<br />
a solution of lukewarm water containing a few drops of e.g. dish washing<br />
detergent.<br />
The speaker units may be cleaned with a vacuum cleaner, set to the lowest level.<br />
Never use alcohol or other solvents to clean any part of the BeoLab 2!
Measuring points 5.9<br />
MEASURING POINTS<br />
STATIC ELECTRICITY<br />
MAY DESTROY THE<br />
PRODUCT<br />
ABO-CENTER v/HENRIKSENS ELEKTRONIK<br />
WARNING!<br />
The mechanical limit for the driver is easily reached when the vacuum tightness in<br />
BeoLab 2 is broken.<br />
Note!<br />
All measurements have to be done with the NTC module connected !<br />
Trafo fuse for type 6864<br />
Mains supply<br />
2x75 VAC<br />
110 VDC<br />
Trafo fuse for type 6861,<br />
6862, 6863, 6865, 6867<br />
5 VDC<br />
25 VAC<br />
Th. fuse<br />
Mains fuse<br />
12 VDC<br />
NTC<br />
GND<br />
-15 VDC<br />
15 VDC
6.1 Disassembly<br />
DISASSEMBLY<br />
The bezels on the units are easily pulled off using the special tool from the Back-up<br />
suitcase.<br />
To protect the paintwork while disassembling the BeoLab 2, place the BeoLab 2 on<br />
the extra rubber foot from the Back-up suitcase.<br />
ABO-CENTER v/HENRIKSENS ELEKTRONIK<br />
DEMONTAGE<br />
Die Verschlüsse der Einheiten können mit dem Spezialwerkzeug aus dem Servicekoffer<br />
leicht herausgezogen werden.<br />
Zum Lackschutz während der Demontage des BeoLab 2 stellen Sie den BeoLab 2<br />
auf den zusätzlichen Gummifuß aus dem Servicekoffer.<br />
DEMONTAGE<br />
Les biseaux des haut-parleurs sont faciles à retirer à l’aide de l’outil spécial de la<br />
valise de remplacement.<br />
Pour protéger la peinture au moment du démontage du BeoLab 2, placez le<br />
BeoLab 2 sur le pied supplémentaire en caoutchouc de la valise de remplacement.<br />
SMONTAGGIO<br />
Le cornici delle unità possono essere facilmente rimosse per mezzo dell’apposito<br />
utensile in dotazione con la valigetta di servizio.<br />
Per proteggere il rivestimento in vernice durante lo smontaggio di BeoLab 2,<br />
posizionare l’apparecchio sui piedini supplementari in gomma in dotazione con la<br />
valigetta di servizio.<br />
DESMONTAJE<br />
Los biseles de las unidades se extraen fácilmente con la herramienta especial<br />
incluida en la maleta de soporte.<br />
Para proteger la pintura durante el desmontaje del BeoLab 2, colóquelo sobre el<br />
pie de goma adicional de la maleta de soporte.<br />
ADSKILLELSE<br />
Det er let at trække pyntekransen på enhederne af med specialværktøjet fra<br />
back-up kufferten.<br />
Når du adskiller BeoLab 2, kan du anbringe højttaleren på den ekstra gummifod<br />
fra back-up kufferten for at beskytte lakeringen.<br />
DEMONTAGE<br />
In de back-upkoffer zit een speciaal gereedschap waarmee u de vattingen van de<br />
luidsprekerunits gemakkelijk kunt lostrekken.<br />
Plaats de BeoLab 2 op de extra rubberen voet uit de back-upkoffer om bij het<br />
demonteren van de BeoLab 2 het lakwerk te beschermen.<br />
<br />
<br />
<br />
BeoLab 2
Disassembly 6.2 6.2 Disassembly<br />
6.2<br />
DISASSEMBLY<br />
STATIC ELECTRICITY<br />
MAY DESTROY THE<br />
PRODUCT<br />
WARNING!<br />
The mechanical limit for the driver<br />
is easily reached when the vacuum<br />
tightness in BeoLab 2 is broken<br />
1<br />
2<br />
7<br />
8<br />
Left<br />
Special<br />
bezel-tool<br />
PUSH<br />
Right<br />
Left<br />
Extra rubber foot from<br />
the back-up suitcase<br />
3 4<br />
9<br />
10<br />
ALLEN<br />
KEY 5<br />
ALLEN<br />
KEY 5<br />
Left<br />
TORX 25<br />
Left<br />
TORX 25<br />
TORX 25 TORX 25<br />
Right<br />
TORX 25<br />
TORX 25<br />
Extra rubber foot from<br />
the back-up suitcase<br />
5<br />
6<br />
11<br />
TORX 25 TORX 25<br />
Front<br />
Left<br />
x2<br />
Disconnect<br />
1 plug for<br />
NTC PCB<br />
ABO-CENTER v/HENRIKSENS ELEKTRONIK<br />
The NTC-PCB must be connected<br />
when the chassis is in service position<br />
ready for voltage measuring
6.3<br />
6.3<br />
6.3<br />
ABO-CENTER v/HENRIKSENS ELEKTRONIK
Insulation test, English 7.1<br />
INSULATION TEST<br />
BeoLab 2 must be insulation tested if it has been dismantled.<br />
Make the test when the BeoLab 2 is reassembled and is ready to be returned to<br />
the customer.<br />
ABO-CENTER v/HENRIKSENS ELEKTRONIK<br />
Insulation test at the Service <strong>center</strong><br />
Short-circuit the two pins of the mains plug and connect them to one of the<br />
terminals of the Insulation tester. Connect the other terminal of the insulation<br />
tester to ground on the Power Link socket.<br />
To avoid damaging the BeoLab 2, it is essential to ensure that both terminals of<br />
the insulation tester have good contact.<br />
Slowly turn up the voltage control of the insulation tester until a voltage of 2.5kV(ac) is<br />
obtained.<br />
Maintain that voltage level for one second, then slowly turn it down again.<br />
During the testing the current must not exceed 10mA.<br />
Insulation test at the customer<br />
Remove the mains cable from the wall outlet.<br />
Place a jumper across the two AC plug prongs.<br />
Use a multi-meter, set for measurements in the Ohm-area.<br />
Place one lead from the multi-meter on the AC plug and place the other lead on<br />
ground at the Power Link plug.<br />
The resistance during this measurement must be of 1 Mega Ohm or more.<br />
Resistance measured below 1 Mega Ohm indicates an abnormal situation and<br />
corrective action must be taken.<br />
Please note:<br />
Avoid all skin contact with the AC plug and all other metal parts while performing<br />
the test, as this contact may influence the measurement.
ABO-CENTER v/HENRIKSENS ELEKTRONIK<br />
Bang & Olufsen<br />
DK-7600 Struer<br />
Denmark<br />
Phone +45 96 84 11 22*<br />
Fax +45 97 85 39 11<br />
3538051 06-06