Room Temperature Tensile Testing - NPL Publications Database ...
Room Temperature Tensile Testing - NPL Publications Database ...
Room Temperature Tensile Testing - NPL Publications Database ...
Create successful ePaper yourself
Turn your PDF publications into a flip-book with our unique Google optimized e-Paper software.
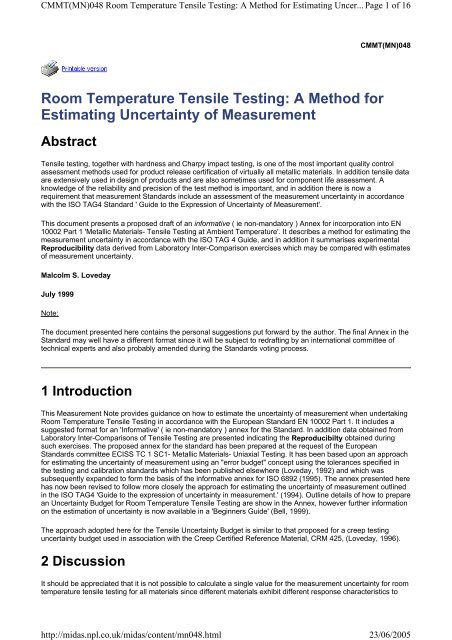
CMMT(MN)048 <strong>Room</strong> <strong>Temperature</strong> <strong>Tensile</strong> <strong>Testing</strong>: A Method for Estimating Uncer... Page 1 of 16<br />
http://midas.npl.co.uk/midas/content/mn048.html<br />
23/06/2005<br />
CMMT(MN)048<br />
<strong>Room</strong> <strong>Temperature</strong> <strong>Tensile</strong> <strong>Testing</strong>: A Method for<br />
Estimating Uncertainty of Measurement<br />
Abstract<br />
<strong>Tensile</strong> testing, together with hardness and Charpy impact testing, is one of the most important quality control<br />
assessment methods used for product release certification of virtually all metallic materials. In addition tensile data<br />
are extensively used in design of products and are also sometimes used for component life assessment. A<br />
knowledge of the reliability and precision of the test method is important, and in addition there is now a<br />
requirement that measurement Standards include an assessment of the measurement uncertainty in accordance<br />
with the ISO TAG4 Standard ' Guide to the Expression of Uncertainty of Measurement'.<br />
This document presents a proposed draft of an informative ( ie non-mandatory ) Annex for incorporation into EN<br />
10002 Part 1 'Metallic Materials- <strong>Tensile</strong> <strong>Testing</strong> at Ambient <strong>Temperature</strong>'. It describes a method for estimating the<br />
measurement uncertainty in accordance with the ISO TAG 4 Guide, and in addition it summarises experimental<br />
Reproducibility data derived from Laboratory Inter-Comparison exercises which may be compared with estimates<br />
of measurement uncertainty.<br />
Malcolm S. Loveday<br />
July 1999<br />
Note:<br />
The document presented here contains the personal suggestions put forward by the author. The final Annex in the<br />
Standard may well have a different format since it will be subject to redrafting by an international committee of<br />
technical experts and also probably amended during the Standards voting process.<br />
1 Introduction<br />
This Measurement Note provides guidance on how to estimate the uncertainty of measurement when undertaking<br />
<strong>Room</strong> <strong>Temperature</strong> <strong>Tensile</strong> <strong>Testing</strong> in accordance with the European Standard EN 10002 Part 1. It includes a<br />
suggested format for an 'Informative' ( ie non-mandatory ) annex for the Standard. In addition data obtained from<br />
Laboratory Inter-Comparisons of <strong>Tensile</strong> <strong>Testing</strong> are presented indicating the Reproducibilty obtained during<br />
such exercises. The proposed annex for the standard has been prepared at the request of the European<br />
Standards committee ECISS TC 1 SC1- Metallic Materials- Uniaxial <strong>Testing</strong>. It has been based upon an approach<br />
for estimating the uncertainty of measurement using an "error budget" concept using the tolerances specified in<br />
the testing and calibration standards which has been published elsewhere (Loveday, 1992) and which was<br />
subsequently expanded to form the basis of the informative annex for ISO 6892 (1995). The annex presented here<br />
has now been revised to follow more closely the approach for estimating the uncertainty of measurement outlined<br />
in the ISO TAG4 'Guide to the expression of uncertainty in measurement.' (1994). Outline details of how to prepare<br />
an Uncertainty Budget for <strong>Room</strong> <strong>Temperature</strong> <strong>Tensile</strong> <strong>Testing</strong> are show in the Annex, however further information<br />
on the estimation of uncertainty is now available in a 'Beginners Guide' (Bell, 1999).<br />
The approach adopted here for the <strong>Tensile</strong> Uncertainty Budget is similar to that proposed for a creep testing<br />
uncertainty budget used in association with the Creep Certified Reference Material, CRM 425, (Loveday, 1996).<br />
2 Discussion<br />
It should be appreciated that it is not possible to calculate a single value for the measurement uncertainty for room<br />
temperature tensile testing for all materials since different materials exhibit different response characteristics to
CMMT(MN)048 <strong>Room</strong> <strong>Temperature</strong> <strong>Tensile</strong> <strong>Testing</strong>: A Method for Estimating Uncer... Page 2 of 16<br />
http://midas.npl.co.uk/midas/content/mn048.html<br />
23/06/2005<br />
some of the specified control parameters, eg straining rate or stressing rate, and at present only limited systematic<br />
data are available over the testing parameters tolerances ranges specified in the Standard. Estimates of the<br />
measurement uncertainty for yield stress are given in the Annex for five materials, viz. two ferritic steels, an<br />
austenitic stainless steel and two nickel base alloys using material property data published elsewhere, (Loveday<br />
1992). The 'Expanded Uncertainty' calculated at approximately the 95% confidence level are shown graphically in<br />
Figure 1, with a simple power law trend line plotted through the data. Thus it can be seen that the estimated<br />
measurement uncertainties range from ±2.3% up to ±4.6% at approximately the 95% confidence level. Thus two<br />
laboratories testing in accordance with EN10002 Part1, but controlling their machines at the extreme ends of the<br />
permitted tolerance ranges, may produce tensile results with differences up to 4.6 - 9.2% depending upon the<br />
material being tested. The estimated uncertainties do not take into account the inherent scatter attributable to<br />
material inhomogeneity.<br />
Results from a number of laboratory inter-comparison exercises have been reported in the literature, and results<br />
from such exercises are presented here in graphical form as shown in Figure 2. The values for the 'Reproducibility'<br />
have been express as a percentage at the 95% confidence level so that they may be directly compared with the<br />
Estimated Measurement uncertainties. The Reproducibility has been calculated by multiplying the standard<br />
deviation of the scatter in the results by a factor of x2 to give values equivalent to the 95% confidence levels,<br />
dividing by the mean value the parameter being measured and expressing the result as a percentage. A simple<br />
trend line has been included on the graphs merely to indicate that there appears to be a general decrease in the<br />
reproducibility as the measured parameters increase in magnitude. It should be noted that in general during intercomparison<br />
exercises all the laboratories aim to carry out the testing under similar conditions, i.e. the strain rate is<br />
at a specified value rather than anywhere in the range permitted in the Standard, and the material tested is usually<br />
selected from single bars or taken from adjacent pieces of plate so as to minimise the scatter attributable to<br />
material inhomogeneity. In the case of the Nimonic 75 which has been characterised as a Certified Reference<br />
Material, ( CRM661 ), testpieces were tested from bars representing the extreme ends of the material property<br />
spectrum of the two hundred bars obtained from the one ton master melt. (Loveday & Ingelbrecht, 2000). If the<br />
inter-laboratory reproducibility for individual bars were considered, then the reproducibility for any parameter was<br />
typically a factor of 4 smaller than that for the entire bar stock, ie the Yield Strength reproducibility for a single bar<br />
was ~1% whereas for the entire bar stock it was ~4.0%.<br />
Figure 1. Expanded Measurement Uncertainties at the 95% confidence level for Proof or Yield Strengths<br />
selected materials tested in accordance with EN 10002 Part 1
CMMT(MN)048 <strong>Room</strong> <strong>Temperature</strong> <strong>Tensile</strong> <strong>Testing</strong>: A Method for Estimating Uncer... Page 3 of 16<br />
http://midas.npl.co.uk/midas/content/mn048.html<br />
23/06/2005<br />
Figure 2. Values of Reproducibility from Laboratory Inter-Comparison Exercises<br />
3 Recommendations<br />
Using the procedures outlined in this Note and the attached Annex it should be possible to estimate measurement
CMMT(MN)048 <strong>Room</strong> <strong>Temperature</strong> <strong>Tensile</strong> <strong>Testing</strong>: A Method for Estimating Uncer... Page 4 of 16<br />
http://midas.npl.co.uk/midas/content/mn048.html<br />
23/06/2005<br />
uncertainty associated with room temperature tensile testing. If the material's response to variations in strain rate<br />
over the range specified in the testing Standard is not known, then an estimate of the Reproducibility of tensile<br />
properties may be obtained by comparison with data from laboratory inter-comparison exercises.<br />
4 Acknowledgements<br />
The UK Department of Trade and Industry, EID Division, is acknowledged for financial support under the 'Support<br />
for Materials Metrology' programme.<br />
Dr Nigel Jennett of CMMT, Mr Andrew Knott of CMAM( M) and Dr Simone Taylor of CMMT are thanked for their<br />
constructive comments on the draft manuscript.<br />
5 References<br />
• Bell, Stephanie. (1999) 'A beginners guide to uncertainty of measurement' <strong>NPL</strong> Good Practice Guide No.<br />
11. ISSN 1386-6550.<br />
• Loveday. M S (1996), "Creep <strong>Testing</strong>: Reference Materials and Uncertainty of Measurement". pp 277-293<br />
in 'The Donald McLean Symposium - Structural Materials: Engineering Applications Through Scientific<br />
Insight.' Ed. E D Hondros & M McLean. Pub: Inst. of Materials, London.<br />
• Loveday, M.S. (1992) 'Towards a tensile reference material', Chapter 7, 111-153 in 'Harmonisation of<br />
<strong>Testing</strong> Practice for High <strong>Temperature</strong> Materials', Ed M S Loveday and T B Gibbons. Pub. Kleuwer<br />
(formerly published by Elsevier Applied Science).<br />
• Loveday, M.S. & Ingelbrecht,C. (2000) 'Certification of a <strong>Room</strong> <strong>Temperature</strong> <strong>Tensile</strong> Reference Material',<br />
EU Report ( to be published )<br />
Appendix: Precision of <strong>Tensile</strong> <strong>Testing</strong> and Estimation<br />
of Uncertainty of Measurement<br />
EN 10002 Part1 : Metallic Materials - <strong>Tensile</strong> <strong>Testing</strong> at<br />
Ambient <strong>Temperature</strong><br />
Annex J ( Informative )<br />
Precision of <strong>Tensile</strong> <strong>Testing</strong> and Estimation of the<br />
Uncertainty of Measurement<br />
K1 Introduction<br />
This annex gives guidance of how to estimate the uncertainty of the measurements undertaken in accordance with<br />
this standard using a material with known tensile properties. It should be noted that it is not possible to give an<br />
absolute statement of uncertainty for this test method because there are both material dependent and material<br />
independent contributions to the uncertainty statement. Hence it is necessary to have a prior knowledge of a<br />
material's tensile response to straining or stressing rate before being able to calculate the measurement<br />
uncertainty.<br />
An approach for estimating the uncertainty of measurement using the "error budget" concept based upon the<br />
tolerances specified in the testing and calibration standards has been presented elsewhere (Loveday, 1992) and<br />
was subsequently expanded to form the basis of the informative annex for ISO 6892 (1995). This annex has now<br />
been revised to follow more closely the approach for estimating the uncertainty of measurement outlined in the<br />
ISO TAG 4 'Guide to the expression of uncertainty in measurement.' (1994).
CMMT(MN)048 <strong>Room</strong> <strong>Temperature</strong> <strong>Tensile</strong> <strong>Testing</strong>: A Method for Estimating Uncer... Page 5 of 16<br />
http://midas.npl.co.uk/midas/content/mn048.html<br />
23/06/2005<br />
The precision of the test results from a tensile test is dependent upon factors related to the material being tested,<br />
the test piece geometry and machining, the testing machine, the test procedure and the methods used to calculate<br />
the specified material properties. Ideally all the following factors should be considered:<br />
• measurement of the testpiece dimensions, gauge-length marking, extensometer gauge-length<br />
• measurement of force and extension<br />
• test temperature and loading rates in the successive stages of the test,<br />
• the method of gripping the testpiece and the axiality of the application of the force<br />
• the testing machine characteristics (stiffness, drive, control and method of operation)<br />
• human and software errors associated with the determination of the tensile properties<br />
• the material inhomogeneity which exists even within a single processed batch obtained from a single melt<br />
of material.<br />
In practice the requirements and tolerances of the present standard do not allow all the effects to be quantified, but<br />
interlaboratory tests may be used to determine the overall uncertainty of results under conditions close to those<br />
used at industrial laboratories. However such tests do not separate effects related to the material inhomogeneity<br />
from those attributable to the testing method.<br />
It should be appreciated that it is not possible to calculate a single value for the measurement uncertainty for all<br />
materials since different materials exhibit different response characteristics to some of the specified control<br />
parameters, eg straining rate or stressing rate (Loveday 1992). The uncertainty budget presented here could be<br />
regarded as an upper bound to the measurement uncertainty for a laboratory undertaking testing in compliance<br />
with EN 10002 Pt1 since it is possible that a laboratory could actually control some of the testing parameters to a<br />
better level of precision than that demanded by the standard, eg the force might be measured to ± 0.5% (ie, a<br />
Class 0.5 machine) whereas the testing standard EN 10002 Pt1 only requires that the force shall be measured to<br />
better than ± 1%. Alternatively, the actual value of the Uncertainty of the Force Measurement system, determined<br />
during the verification of the machine in accordance Annex D of ISO 7500 Pt1, could be used in the uncertainty<br />
budget.<br />
It should be noted that when evaluating the total scatter in experimental results the uncertainty in measurement<br />
should be considered in addition to the inherent scatter due to material inhomogeneity. A statistical approach to<br />
the analysis of intercomparison exercises ('Round Robin' experiments) does not separate out the two contributing<br />
causes of the scatter, but never the less gives a useful indication of the likely range of tensile results measured by<br />
different laboratories using similar material. Typical results from various inter-comparision exercises are given in<br />
Section K5.<br />
K2 An Overview of Uncertainty Estimation Based Upon the GUM<br />
The: "Guide to the expression of uncertainty in measurement", was published jointly by several authoritative<br />
standards bodies, namely BIPM, IEC, IFCC, ISO, IUPAC, IUPAP and OIML which will be referred to hereafter as<br />
GUM (Guide to Uncertainty in Measurement). It is a comprehensive document of over 90 pages based upon<br />
rigorous statistical methods for the summation of uncertainties from various sources. Its complexity has provided<br />
the driving force for a number of organisations to produce simplified versions of the GUM, eg the National Institute<br />
of Science and Technology (NIST) in the USA (Taylor and Kuyatt), the National Measurement Accreditation<br />
Service (NAMAS) in the UK (NIS 80 and NIS 3003). These various documents all give guidance of how to<br />
estimate uncertainty of measurement based upon an "uncertainty budget" concept.<br />
The total uncertainty of a measurement is determined by summing all the contributing components in an<br />
appropriate manner. It is necessary to quantify all the contributions, and at the preliminary evaluation stage to<br />
decide whether some contributions are negligible and therefore not worth including in the subsequent calculations.<br />
For most practical measurements, in the materials field the definition of negligible may be taken as a component<br />
smaller than one-fifth of the largest component. The GUM categorises two ways of evaluating uncertainties, A and<br />
B. Type A determinations is by repeat observations and provided sufficient readings are available, say greater<br />
than 9, then conventional statistical analysis can be used to determine the standard deviation s(q k ).
CMMT(MN)048 <strong>Room</strong> <strong>Temperature</strong> <strong>Tensile</strong> <strong>Testing</strong>: A Method for Estimating Uncer... Page 6 of 16<br />
http://midas.npl.co.uk/midas/content/mn048.html<br />
23/06/2005<br />
Table K1. GUM: Outline of Procedure for Estimation of Uncertainty<br />
Type B evaluation is by means other than Type A and makes use of, for example, tolerances specified in<br />
standards, measured data, manufacturers specifications, calibration certificates and in most cases a knowledge of<br />
a simple model of the relationship between the various components, and of the likely distribution model of the<br />
components. If for example the tolerance specified in a Standard is ± a, then in absence of any other knowledge, it<br />
may be appropriate to assume a rectangular distribution model in which case, the uncertainty becomes<br />
[1].<br />
If better knowledge is available it may be that a triangular distribution would be more appropriate, then<br />
[2], (see GUM), where us denotes a Standard Uncertainty obtained by multiplying U by an<br />
appropriate factor. The next step is to determine the Combined Standard Uncertainty, u c<br />
by summing the<br />
standard uncertainties, usually by using the root sum square method. The Expanded Uncertainty U E , is then<br />
obtained by multiplying u c by a coverage factor, k, where k = 2 for approximately 95% confidence level, thus,<br />
U E = 2u c ; this procedure is shown schematically in Table K2.
CMMT(MN)048 <strong>Room</strong> <strong>Temperature</strong> <strong>Tensile</strong> <strong>Testing</strong>: A Method for Estimating Uncer... Page 7 of 16<br />
http://midas.npl.co.uk/midas/content/mn048.html<br />
23/06/2005<br />
Table K2 Procedure for estimating uncertainty in accordance with the GUM<br />
K3 <strong>Tensile</strong> <strong>Testing</strong> : Uncertainty Estimation<br />
K3.3 Material Independent Parameters<br />
The tolerances for the various testing parameters for tensile properties specified in EN 10002 Pt1. are given in<br />
Table K3. Because of the shape of the stress-strain curve, some of the tensile properties in principle can be<br />
determined with a higher degree of precision than others, eg, the upper yield stress, R eh is only dependent on the<br />
tolerances for measurement of force and cross sectional area, whilst proof stress, R p , is dependent on force, strain<br />
(displacement), gauge length and cross-sectional area. In the case of reduction in area, Z, the measurement<br />
tolerance for cross sectional area both before and after fracture need to be considered.<br />
<strong>Tensile</strong> Properties, % Error<br />
Parameter R eh R eL R m R p A Z<br />
Force 1 1 1 1 - -<br />
Strain *<br />
(Displacement)<br />
Gauge *<br />
Length, Lo<br />
- - - 1 1 -<br />
- - - 1 1 -<br />
So 1 1 1 1 - 1
CMMT(MN)048 <strong>Room</strong> <strong>Temperature</strong> <strong>Tensile</strong> <strong>Testing</strong>: A Method for Estimating Uncer... Page 8 of 16<br />
http://midas.npl.co.uk/midas/content/mn048.html<br />
23/06/2005<br />
Su - - - - - 2<br />
* Assuming a Class 1 extensometer calibrated in accordance with EN 10002 Part 4.<br />
Table K3. Measurement uncertainty for tensile testing based upon material independent parameters, using<br />
tolerances specified in EN 10002 Part 1.<br />
In the GUM two types of uncertainty are categorised. Type A and B. A type A evaluation of uncertainty may be<br />
based on any valid statistical method for treating data. A type B evaluation is based on some other means thus the<br />
use of tolerances specified in a standard comes under the type B category. The tolerances shown above for<br />
tensile testing represent maximum bound values, ie all the values must lie within the specified tolerance viz,<br />
a = ± 1%, and thus the model distribution corresponds to a rectangular probability distribution specified in the<br />
GUM, hence the standard uncertainty values for the individual parameters are given by [3]. To fully comply<br />
with the assessment of uncertainty it would be necessary to consider all the possible sources of uncertainty<br />
contributing to the measurements including those due to uncertainties in the devices used in the calibration chain,<br />
ie the force proving devices and the extensometer calibrators. In practice, such sources of error are second order<br />
effects and for the purposes of this paper a simplified approach will be adopted using the concepts outlined in the<br />
GUM. This the combined uncertainty of the material independent parameters for R eh , R eL , R m and A is<br />
[4], and for R p is [5]; using a<br />
root mean-squares summation approach.<br />
K3.2 Material Dependent Parameters<br />
For room temperature tensile testing the only tensile properties significantly dependent upon the materials<br />
response to the straining-rate (or stressing-rate) control parameters are R eh , R eL and R p . <strong>Tensile</strong> strength, R m ,<br />
can also be strain rate dependent, however in practice it is usually determined at a much higher straining-rate than<br />
R p and is generally relatively insensitive to variations in the rapid strain-rates.<br />
In principle it will be necessary to determine any materials strain rate response before the total error budget can be<br />
calculated. Some limited data is available and the following examples may be used to estimate uncertainty for<br />
some classes of materials.<br />
A typical example of data set used to determine materials response over the strain rate range specified in<br />
EN10002 Pt1 is shown in Figure K1 and a summary of materials response for proof stress for a number of<br />
materials measured under strain rate control is given in Table K4. Earlier data on a variety of steels measured<br />
under a set stressing rate are given in the seminal paper by Johnson and Murray (1966).<br />
Since the equivalent tolerances, a, are based on measured data, using a simple least mean squares fit to the data,<br />
it is necessary to decide what distribution model of the uncertainties is appropriate in accordance with the GUM. If<br />
it is assumed that the model is a normal distribution with upper and lower limits +a and -a, such that the best<br />
estimate of the quantity is (a + + a - )/2 and that there is a 2 out of 3 chance (ie a 67% probability) that the value of<br />
the quantity lies in the interval a - to a + , then the uncertainty U = a. [Note: if it was assumed that the probability was<br />
50%, then u =1.48a] (See Taylor and Kuyatt, 1993).<br />
Material<br />
Nominal<br />
Composition<br />
R P0.2<br />
MPa<br />
Proof<br />
Stress/<br />
Strain-<br />
Rate<br />
Variation<br />
%<br />
Equivalent<br />
Tolerance<br />
± %<br />
Ferritic Steel<br />
Pipe steel Cr-Mo-V-Fe( bal) 680 0.1 0.05<br />
Plate steel<br />
(BS 4360 Grade 43E)<br />
C-Mn-Fe (bal) 315 1.8 0.9<br />
Austenitic Steel<br />
316 Stainless 17 Cr; 11 Ni-Fe (bal) 235 6.8 3.4
CMMT(MN)048 <strong>Room</strong> <strong>Temperature</strong> <strong>Tensile</strong> <strong>Testing</strong>: A Method for Estimating Uncer... Page 9 of 16<br />
http://midas.npl.co.uk/midas/content/mn048.html<br />
23/06/2005<br />
Nickel Base Alloys<br />
Nimonic 75 18 Cr, 5 Fe, 2 Co-Ni (bal) 325 2.8 1.4<br />
Nimonic 101 24 Cr, 20 Co, 3 Ti, 1.5 Mo, 1.5 Al-Ni (bal). 790 1.9 0.95<br />
Table K4. Variation in room temperature proof stress over the strain rate range permitted in EN10002 Pt1.<br />
K3.3 Combined standard measured uncertainty<br />
The material dependent response of proof stress over the permitted strain rate range specified in the standard<br />
given in Table K4 may be combined with the standard uncertainties derived from material independent parameters<br />
specified in Table K3 to give the Combined Uncertainty, u C for the various materials indicated, as shown in<br />
Table K5.<br />
For the purpose of this analysis the total value of the variation in proof stress over the strain-rate range permitted<br />
in the standard has been halved and expressed as an equivalent tolerance, ie for 316 stainless steel, the proof<br />
stress can vary by 6.8% over the permitted strain-rate range so it is equivalent to a tolerance of ± 3.4%, which<br />
should be divided by √3, ie 1.963 and then added to the combined uncertainty of the material independent<br />
parameters using the root mean square method.. Therefore for 316 stainless steel the combined standard<br />
uncertainty is given by:<br />
[6] (2)<br />
Material<br />
Standard uncertainty<br />
from material<br />
independent<br />
parameters<br />
± %<br />
Material<br />
Dependent<br />
Standard<br />
Uncertainty<br />
± %<br />
Combined Standard<br />
Uncertainty<br />
± %<br />
Expanded<br />
Uncertainties at<br />
95% Confidence<br />
±%<br />
Ferritic Steel<br />
Pipe steel 1.15 0.03 [7] 2.3<br />
Plate<br />
steel<br />
1.15 0.52 [8] 2.5<br />
Austenitic Steel<br />
316<br />
Stainless<br />
1.15 1.96 [9] 4.6<br />
Nickel Base Alloys<br />
Nimonic<br />
75<br />
Nimonic<br />
101<br />
1.15 0.81 [10] 2.8<br />
1.15 0.55 [11] 2.7<br />
Table K5. Combined standard measurement uncertainty for room temperature proof stress determined in<br />
accordance with En 10002 Pt1.<br />
K3.4 Expanded Uncertainity<br />
In accordance with the ISO TAG 4 Guide, the total Expanded Uncertainties are obtained by multiplying the<br />
Combined Standard Uncertainties by a coverage function, k. For approximately 95% level of confidence, k = 2 and<br />
the corresponding Expanded Uncertainties are also listed in Table K5.
CMMT(MN)048 <strong>Room</strong> <strong>Temperature</strong> <strong>Tensile</strong> <strong>Testing</strong>: A Method for Estimating Un...<br />
http://midas.npl.co.uk/midas/content/mn048.html<br />
Page 10 of 16<br />
23/06/2005<br />
K4 Discussion<br />
A method of calculating the measurement uncertainty for room temperature tensile testing using an "Uncertainty<br />
Budget" concept has been outlined and examples given for a few materials where the material response to the<br />
testing parameters is known. It should be noted that the Expanded Uncertainties have been calculated using a<br />
simplified approach based on the GUM. In addition there are other factors that can affect the measurement of<br />
tensile properties such as testpiece bending, methods of gripping the testpiece, or the testing machine control<br />
mode, ie. extensometer control or load/crosshead control which may affect the measured tensile properties, (Gray<br />
and Sharp, 1988), however since there is insufficient quantitative data available it is not possible to include their<br />
effects in error budgets at present. It should also be recognised that this uncertainty budget approach only gives<br />
an estimate of the uncertainty due to the measurement technique and does not make an allowance for the<br />
inherent scatter in experimental results attributable to material inhomogeneity.<br />
An indication of the scatter in experimental results attributable to inhomogeneity in material ie material scatter<br />
may be determined by undertaking repeat testing on the same testing machine, under the identical testing<br />
conditions, ie same operator, same strain-rate etc., thereby determining the repeatability. An example of such<br />
data for Nimonic 75, which is now available as a Certified Reference Material for <strong>Room</strong> <strong>Temperature</strong> <strong>Tensile</strong><br />
<strong>Testing</strong>, CRM661*, is given in Table K6 where it can be seen that the repeatability for the 0.2% room temperature<br />
proof stress is ± 2.5% with approximately 95% confidence limit. The standard deviation + is ± 1.25% and this may<br />
be added to the combined measurement uncertainty (± 3.6%, see Table K3) using the least mean squares<br />
approach and multiplying by K = 2 to give the total Expanded Uncertainty at approximately the 95% confidence<br />
level, i.e.<br />
Total Expanded Uncertainty = 2√ [(3.6) 2 + (1.25) 2 ] = ± 3.8% [12].<br />
This implies that differences of up to 7.6% between two laboratories measuring the proof stress of Nimonic 75,<br />
should not be regarded as being statistically significant at the 95% confidence level, assuming that both<br />
laboratories are able to demonstrate repeatability of ± 2.5%, and both are undertaking the measurements within<br />
the tolerances specified in the testing standard.<br />
Testpiece number<br />
GAN 96<br />
97<br />
99<br />
100<br />
122<br />
124<br />
127<br />
128<br />
129<br />
142<br />
143<br />
150<br />
n = 12<br />
R P0.2<br />
MPa<br />
315.3<br />
313.9<br />
313.1<br />
316.1<br />
304.3<br />
310.0<br />
315.0<br />
319.3<br />
311.7<br />
318.5<br />
314.4<br />
316.0<br />
=314.0
CMMT(MN)048 <strong>Room</strong> <strong>Temperature</strong> <strong>Tensile</strong> <strong>Testing</strong>: A Method for Estimating Un...<br />
http://midas.npl.co.uk/midas/content/mn048.html<br />
Page 11 of 16<br />
23/06/2005<br />
s = 4.0<br />
Repeatability = [13]<br />
(95% Confidence)<br />
Table K6. <strong>Room</strong> temperature 0.2% Proof stress data, R P0.2 , for Nimonic 75 measured at a strain rate of<br />
2 x 10 -3 min -1 .<br />
K5 Interlaboratory Scatter<br />
An indication of the typical scatter in tensile test results for a variety of materials that have been observed during<br />
laboratory intercomparison exercises, which include both material scatter and measurement uncertainty are shown<br />
in Tables K7a-d. The results for the Reproducibility are expressed in % calculated by multiplying the standard<br />
deviation by 2 and dividing the result by the mean, thereby giving values which represent the 95% confidence<br />
level, in accordance with the recommendations given in the GUM, and which may be directly compared with the<br />
Expanded Uncertainty values given above.<br />
Material<br />
Code<br />
Yield Strength<br />
MPa<br />
Reproducibility<br />
+/- U E , % Reference<br />
Aluminium EC-H 19 158.4 8.1 ASTM Report, 1994<br />
Steel<br />
2024-T 351 362.9 3.0 ASTM Report, 1994<br />
Low Carbon, Plate.<br />
AISI 105.<br />
Bar.<br />
High Strength.<br />
Austenitic stainless.<br />
Austenitic stainless.<br />
AISI 316.<br />
HR3<br />
C22<br />
Fe510C<br />
X2Cr13<br />
30NiCrMo16<br />
X2CrNi18-10<br />
X2CrNiMo18-10<br />
X5CrNiMo17-12-2<br />
228.6<br />
402.4<br />
367.4<br />
967.5<br />
1039.9<br />
303.8<br />
353.3<br />
480.1<br />
8.2<br />
8.9<br />
5.0<br />
3.2<br />
2.0<br />
6.5<br />
7.8<br />
8.1<br />
Roesch et al, 1993.<br />
ASTM Report, 1994.<br />
Roesch et al, 1993.<br />
ASTM Report, 1994.<br />
Roesch et al, 1993.<br />
Roesch et al, 1993.<br />
Roesch et al, 1993.<br />
ASTM Report, 1994.<br />
Nickel Alloys<br />
INCONEL 600<br />
NiCr15Fe8<br />
Nimonic 75, (CRM661)<br />
268.3<br />
298.1<br />
4.4<br />
4.0<br />
ASTM Report, 1994.<br />
Loveday,1999.<br />
Table K7a: Yield Strengths (0.2% Proof Strengths or Upper Yield Strengths): Reproducibility from<br />
laboratory Intercomparison exercises.<br />
Material<br />
Code<br />
<strong>Tensile</strong> Strength<br />
MPa<br />
Reproducibility<br />
+/- U E , % Reference<br />
Aluminium EC-H 19 176.9 not reported ASTM Report, 1994<br />
2024-T 351 491.3 2.6 ASTM Report, 1994
CMMT(MN)048 <strong>Room</strong> <strong>Temperature</strong> <strong>Tensile</strong> <strong>Testing</strong>: A Method for Estimating Un...<br />
http://midas.npl.co.uk/midas/content/mn048.html<br />
Page 12 of 16<br />
23/06/2005<br />
Steel<br />
Low Carbon, Plate.<br />
AISI 105.<br />
Bar.<br />
High Strength.<br />
Austenitic stainless.<br />
Austenitic stainless.<br />
AISI 316.<br />
HR3<br />
C22<br />
Fe510C<br />
X2Cr13<br />
30NiCrMo16<br />
X2CrNi18-10<br />
X2CrNiMo18-10<br />
X5CrNiMo17-12-2<br />
335.2<br />
596.9<br />
552.4<br />
1253<br />
1167.8<br />
594.0<br />
622.5<br />
694.6<br />
5.0<br />
2.8<br />
2.0<br />
1.2<br />
1.5<br />
3.0<br />
3.0<br />
2.4<br />
Roesch et al, 1993.<br />
ASTM Report, 1994.<br />
Roesch et al, 1993.<br />
ASTM Report, 1994.<br />
Roesch et al, 1993.<br />
Roesch et al, 1993.<br />
Roesch et al, 1993.<br />
ASTM Report, 1994.<br />
Nickel Alloys<br />
INCONEL 600.<br />
NiCr15Fe8<br />
Nimonic 75, (CRM661)<br />
695.9<br />
749.6<br />
1.4<br />
1.9<br />
ASTM Report, 1994.<br />
Loveday, 1999.<br />
Table K7b: <strong>Tensile</strong> Strengths, R m : Reproducibility from laboratory Intercomparison exercises.<br />
Material<br />
Code<br />
Reduction in Area, Z<br />
%<br />
Reproducibility<br />
+/- U E , % Reference<br />
Aluminium EC-H 19 79.1 5.1 ASTM Report, 1994.<br />
Steel<br />
2024-T 351 30.3 23.7 ASTM Report, 1994.<br />
C22<br />
65.6<br />
3.6<br />
ASTM Report, 1994.<br />
Fe510C<br />
71.4<br />
2.7<br />
Roesch et al, 1993.<br />
X2Cr13<br />
50,5<br />
15.6<br />
ASTM Report, 1994.<br />
30NiCrMo16<br />
65.6<br />
3.2<br />
Roesch et al, 1993.<br />
X2CrNiMo18-10<br />
77.9<br />
5.6<br />
Roesch et al, 1993.<br />
X5CrNiMo17-12-2<br />
71.5<br />
4.5<br />
ASTM Report, 1994.<br />
Nickel Alloys<br />
NiCr15Fe8<br />
Nimonic 75, (CRM661)<br />
59.3<br />
59.0<br />
2.4<br />
8.8<br />
ASTM Report, 1994<br />
Loveday, 1999<br />
Table K7c: Reduction in Area: Reproducibility from laboratory Intercomparison exercises.<br />
Material<br />
Code<br />
Elongation at fracture, A<br />
%<br />
Reproducibility<br />
+/- U E , % Reference<br />
Aluminium EC-H 19 14.6 9.1 ASTM Report, 1994.<br />
2024-T 351 18.0 18.9 ASTM Report, 1994.
CMMT(MN)048 <strong>Room</strong> <strong>Temperature</strong> <strong>Tensile</strong> <strong>Testing</strong>: A Method for Estimating Un...<br />
http://midas.npl.co.uk/midas/content/mn048.html<br />
Page 13 of 16<br />
23/06/2005<br />
Steel<br />
C22<br />
25.6<br />
10.1<br />
ASTM Report, 1994.<br />
Fe510C<br />
31.4<br />
14<br />
Roesch et al, 1993.<br />
X2Cr13<br />
12.4<br />
15.5<br />
ASTM Report, 1994.<br />
30NiCrMo16<br />
16.7<br />
13.2<br />
Roesch et al, 1993.<br />
X2CrNiMo18-10<br />
51.9<br />
13.6<br />
Roesch et al, 1993.<br />
X5CrNiMo17-12-2<br />
35.9<br />
14.9<br />
ASTM Report, 1994.<br />
Nickel Alloys<br />
NiCr15Fe8<br />
Nimonic 75, (CRM661)<br />
41.6<br />
41.0<br />
7.7<br />
3.3<br />
ASTM Report, 1994<br />
Loveday, 1999<br />
Table K7d: Elongation after fracture: Reproducibility from laboratory Intercomparison exercises.<br />
K6 References<br />
Standards<br />
ISO (TAG4)(1993) 'Guide to the expression of uncertainty in measurement.' BIMP/IEC/IFCC/ISO/<br />
IIUPAC/IUPAP/OIML<br />
ISO 5725:Accuracy (trueness and precision) of measurement methods and results. Part 1 General principle and<br />
definitions.<br />
Papers<br />
ASTM Report (1994) Reseach Report RR E-28 1004 Round Robin Results of Interlaboratory <strong>Tensile</strong> Tests.<br />
CAMPION, P.J., BURNS, J.E and WILLIAMS, A (1980). "A Code of Practice for the detailed statement of<br />
accuracy" Pub. National Physical Laboratory, ISBN 0 950 4496 6 0.<br />
GRAY, T.G.F and SHARP, J. (1988). "Influence of machine type and strain-rate interaction in tensile testing"<br />
ASTM Symposium on Precision of Mechanical Tests, STP 1025.<br />
JOHNSON, R.F and MURRAY, J.D. (1966). "The effect of rate of straining on the 0.2% proof stress and lower<br />
yield stress of steel", Symposium on High <strong>Temperature</strong> Performance of Steels", Eastbourne 1966, Pub. Iron &<br />
Steel Institute, 1967.<br />
LOVEDAY, M.S. (1992). "Towards a tensile reference material", Chapter 7, 111-153 in 'Harmonisation of <strong>Testing</strong><br />
Practice for High <strong>Temperature</strong> Materials', Ed M S Loveday and T B Gibbons. Pub. Kleuwer (formerly published by<br />
Elsevier Applied Science).<br />
LOVEDAY, M.S. (1999) " Certification of a <strong>Room</strong> <strong>Temperature</strong> <strong>Tensile</strong> Reference Material" EU Report ( to be<br />
published )<br />
NIS 80. "Guide to the expression of uncertainty in testing. Pub. NAMAS. 1994.<br />
NIS 3003. The Expression of Uncertainty and Confidence in Measurement. Pub. NAMAS. 1995.<br />
ROESCH, L., COUE,N., VITALL,J. and FANT, M Di. (1993) ' Results of an Interlaboratory Test Programme on<br />
<strong>Room</strong> <strong>Temperature</strong> <strong>Tensile</strong> Properties ' IRSID Report NDT 93310<br />
TAYLOR, B.N and KUYATT, C.E (1993). Guidelines for Evaluating and Expressing the Uncertainty of NIST
CMMT(MN)048 <strong>Room</strong> <strong>Temperature</strong> <strong>Tensile</strong> <strong>Testing</strong>: A Method for Estimating Un...<br />
http://midas.npl.co.uk/midas/content/mn048.html<br />
Page 14 of 16<br />
23/06/2005<br />
Measurement Results. NIST Technical Note 1297.<br />
Figure J.1 - Variation of lower yield strength (R eL ) at room temperature as a function of strain rate, for<br />
plate steel [6]<br />
Figure J.2 - <strong>Tensile</strong> test data at 22°C for Ni Cr 20 Ti<br />
Footnotes
CMMT(MN)048 <strong>Room</strong> <strong>Temperature</strong> <strong>Tensile</strong> <strong>Testing</strong>: A Method for Estimating Un...<br />
http://midas.npl.co.uk/midas/content/mn048.html<br />
Page 15 of 16<br />
23/06/2005<br />
* Available from the Institute for Reference Materials and Measurements, (IRMM), Joint Research Centre,<br />
Retieseweg, B 2440, Geel, Belgium.<br />
+ Note: The full value of the standard deviation is used since in the case of a destructive test as performed on a<br />
tensile testpiece, n = 1, hence the standard deviation of the mean is given by s/√n.<br />
For further information contact:<br />
Malcolm S Loveday<br />
Centre for Materials Measurement and Technology<br />
Tel: 020 8943 6900<br />
Email: Malcolm.Loveday@npl.co.uk<br />
Experts<br />
For Further Information about <strong>Testing</strong> Standards or Materials Measurement Techniques please contact:<br />
Centre for Materials Measurement & Technology<br />
National Physical Laboratory<br />
Queens Road<br />
Teddington<br />
Middlesex<br />
United Kingdom<br />
TW11 0LW<br />
Tel: 020 8977 3222<br />
Fax: 020 8943 6458<br />
Email: materials@npl.co.uk<br />
Centre for Materials Measurement & Technology<br />
The Centre primarily develops methods for materials measurement in support of UK industry and trade. The<br />
results of the research are channelled into European and International standards organisations to produce<br />
standards and codes of practice for the efficient and competitive use of advanced engineering materials and<br />
processes.<br />
The Centre is one of the UK's most advanced laboratories for materials measurement with extensive facilities for<br />
characterising metals, polymers, adhesives, ceramics, composites and for assessing materials behaviour and<br />
performance.<br />
Particular expertise includes:<br />
• mechanical testing<br />
• physical properties measurements<br />
• modelling<br />
• corrosion and environmental degradation of materials<br />
• processing and process control<br />
• surface analysis<br />
• surface engineering<br />
• thermodynamic prediction<br />
Visit our home page: http://www.npl.co.uk/npl/cmmt
CMMT(MN)048 <strong>Room</strong> <strong>Temperature</strong> <strong>Tensile</strong> <strong>Testing</strong>: A Method for Estimating Un...<br />
http://midas.npl.co.uk/midas/content/mn048.html<br />
Page 16 of 16<br />
23/06/2005<br />
CMMT(MN)048<br />
<strong>Room</strong> <strong>Temperature</strong> <strong>Tensile</strong> <strong>Testing</strong>: A Method for Estimating Uncertainty of Measurement<br />
July 1999<br />
© Crown Copyright 1999. Reproduced by permission of the Controller of HMSO.


