Improving The Outcome Of Denture Relining - Removable ...
Improving The Outcome Of Denture Relining - Removable ...
Improving The Outcome Of Denture Relining - Removable ...

Create successful ePaper yourself
Turn your PDF publications into a flip-book with our unique Google optimized e-Paper software.
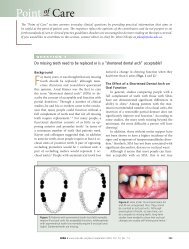
–––– Clinical Showcase ––––<br />
Figure 2: <strong>Denture</strong> positioning errors. (a) Pre-impression relationship of teeth,<br />
denture base and tissues. <strong>The</strong> red line indicates the horizontal plane through the<br />
original position of the incisal edge, and the green line indicates the angle of the<br />
original occlusal plane. (b) Insufficient vertical seating lengthens the incisors and<br />
positions them facially. (c) Excess relining material in the anterior region may displace<br />
the denture facially and may alter the angle of the occlusal plane. (d) Excess<br />
relining material in the posterior region may change the angle of the occlusal<br />
plane and the incisal inclination and can cause an anterior open bite.<br />
technique and the functional impression<br />
technique. No matter which relining<br />
technique is used, it is virtually<br />
impossible to place a denture filled<br />
with impression material in exactly the<br />
correct position. 18 Failure to properly<br />
position the denture in 3 dimensions<br />
can result in unwanted changes in the<br />
amount of incisal display, the degree of<br />
lip support and/or the occlusal contact<br />
relationships. <strong>The</strong> most common errors<br />
tend to be having the denture seated<br />
too far anteriorly or inferiorly when<br />
making the impression, 18 which results<br />
in an increase in vertical dimension<br />
and/or change in denture orientation<br />
(Fig. 2). <strong>The</strong>se errors can be minimized<br />
by using a low-viscosity elastomeric<br />
impression material or tissue<br />
conditioner. 18<br />
<strong>Relining</strong> Tips<br />
<strong>The</strong> following tips can help to improve the results of relining<br />
procedures, regardless of technique (Figs. 3–12).<br />
Figure 3: As the first step in a relining procedure, clean the denture.<br />
For maximal bond strength, use an ultrasonic cleaner and/or pumice<br />
and tin oxide on a rag wheel or brush to ensure that new acrylic will<br />
not be applied over calculus or plaque. A denture that may appear<br />
free of calculus when damp (at left) may exhibit residual calculus<br />
when thoroughly dried (at right).<br />
Figure 4: Failure to properly orient the denture during the<br />
impression stage of the relining procedure may cause lengthening<br />
of the incisors, increased display of gingival acrylic<br />
and a shift in the midline; see top photo. <strong>The</strong>refore, before<br />
relining, measure the vertical incisal display at rest and the<br />
occlusal vertical dimension. After the relining impression<br />
has been taken, confirm that these measurements have<br />
not changed significantly, unless a change is desired. <strong>The</strong>se<br />
measurements will help to ensure proper orientation of the<br />
denture (see bottom photo).<br />
588 www.cda-adc.ca/jcda • September 2007, Vol. 73, No. 7 •