M3000 Manual English - TC Electronic
M3000 Manual English - TC Electronic
M3000 Manual English - TC Electronic

You also want an ePaper? Increase the reach of your titles
YUMPU automatically turns print PDFs into web optimized ePapers that Google loves.
USERS MANUAL<br />
<strong>M3000</strong><br />
STUDIO REVERB PROCESSOR
IMPORTANT SAFETY INSTRUCTIONS<br />
The lightning flash with an arrowhead symbol<br />
within an equilateral triangle, is intended to alert<br />
the user to the presence of uninsulated<br />
"dangerous voltage" within the product's enclosure<br />
that may be of sufficient magnitude to constitute a<br />
risk of electric shock to persons.<br />
The exclamation point within an equilateral<br />
triangle is intended to alert the user to the<br />
presence of important operating and maintenance<br />
(servicing) instructions in the literature<br />
accompanying the product.<br />
1 Read these instructions.<br />
2 Keep these instructions.<br />
3 Heed all warnings.<br />
4 Follow all instructions.<br />
5 Do not use this apparatus near water.<br />
6 Clean only with dry cloth.<br />
7 Do not block any ventilation openings.<br />
Install in accordance with the manufacturer's<br />
instructions.<br />
8 Do not install near any heat sources such as radiators,<br />
heat registers, stoves, or other apparatus (including<br />
amplifiers) that produce heat.<br />
9 Do not defeat the safety purpose of the polarized or<br />
grounding-type plug. A polarized plug has two blades<br />
with one wider than the other. A grounding type plug<br />
has two blades and a third grounding prong. The wide<br />
blade or the third prong are provided for your safety. If<br />
the provided plug does not fit into your outlet, consult<br />
an electrician for replacement of the obsolete outlet.<br />
10 Protect the power cord from being walked on or<br />
pinched particularly at plugs, convenience receptacles,<br />
and the point where they exit from the apparatus.<br />
11 Only use attachments/accessories specified by the<br />
manufacturer.<br />
12 Unplug this apparatus during lightning storms or when<br />
unused for long periods of time.<br />
13 Refer all servicing to qualified service personnel.<br />
Servicing is required when the apparatus has been<br />
damaged in any way, such as power-supply cord or<br />
plug is damaged, liquid has been spilled or objects<br />
have fallen into the apparatus, the apparatus has been<br />
exposed to rain or moisture, does not operate normally,<br />
or has been dropped.<br />
WARNING<br />
• To reduce the risk of fire or electric shock, do not<br />
expose this apparatus to rain or moisture.<br />
• This apparatus must be earthed.<br />
• Use a three wire grounding type line cord like the one<br />
supplied with the product.<br />
• Be advised that different operating voltages require the<br />
use of different types of line cord and attachment plugs.<br />
• Check the voltage in your area and use the<br />
correct type. See table below:<br />
Voltage Line plug according to<br />
standard.<br />
110-125V UL817 and CSA C22.2 no 42.<br />
220-230V CEE 7 page VII, SR section<br />
107-2-D1/IEC 83 page C4.<br />
240V BS 1363 of 1984.<br />
Specification for 13A fused<br />
plugs and switched and<br />
unswitched socket outlets.<br />
• This equipment should be installed near the socket<br />
outlet and disconnection of the device should be easily<br />
accessible.<br />
• Do not install in a confined space.<br />
• Do not open the unit - risk of electric shock inside.<br />
Caution:<br />
You are cautioned that any change or modifications not<br />
expressly approved in this manual could void your authority<br />
to operate this equipment.<br />
Service<br />
• There are no user-serviceable parts inside.<br />
• All service must be performed by qualified personnel.<br />
a
NOTE<br />
EMC / EMI.<br />
This equipment has been tested and found to comply with<br />
the limits for a Class B Digital device, pursuant to part 15 of<br />
the FCC rules.<br />
These limits are designed to provide reasonable protection<br />
against harmful interference in residential installations. This<br />
equipment generates, uses and can radiate radio<br />
frequency energy and, if not installed and used in<br />
accordance with the instructions, may cause harmful<br />
interference to radio communications. However, there is no<br />
guarantee that interference will not occur in a particular<br />
installation. If this equipment does cause harmful<br />
interference to radio or television reception, which can be<br />
determined by turning the equipment off and on. The user<br />
is encouraged to try to correct the interference by one or<br />
more of the following measures:<br />
• Reorient or relocate the receiving antenna.<br />
• Increase the separation between the equipment and<br />
receiver.<br />
• Connect the equipment into an outlet on a circuit<br />
different from that to which the receiver is connected.<br />
• Consult the dealer or an experienced radio/TV<br />
technician for help.<br />
For the customers in Canada:<br />
This Class B digital apparatus complies with Canadian<br />
ICES-003.<br />
Cet appareil numérique de la classe B est conforme à la<br />
norme NMB-003 du Canada.<br />
Certificate Of Conformity<br />
<strong>TC</strong> <strong>Electronic</strong> A/S, Sindalsvej 34, 8240 Risskov, Denmark,<br />
hereby declares on own responsibility that following<br />
product:<br />
<strong>M3000</strong> Digital Signal Processor<br />
That is covered by this certificate and marked with CE-label<br />
conforms with following standards:<br />
EN 60065<br />
(IEC 60065)<br />
EN 55103-1<br />
EN 55103-2<br />
Safety requirements for mains<br />
operated electronic and related<br />
apparatus for household and similar<br />
general use<br />
Product family standard for audio,<br />
video, audio-visual and entertainment<br />
lighting control apparatus for<br />
professional use.<br />
Part 1: Emission.<br />
Product family standard for audio,<br />
video, audio-visual and entertainment<br />
lighting control apparatus for<br />
professional use.<br />
Part 2: Immunity.<br />
With reference to regulations in following directives:<br />
73/23/EEC, 89/336/EEC<br />
Issued in Risskov, December 2002<br />
Anders Fauerskov<br />
Managing Director<br />
b
TABLE OF CONTENTS<br />
SAFETY &<br />
CERTIFICATE OF CONFORMITY<br />
a-b<br />
INTRODUCTION<br />
Table of contents 3<br />
Introduction 5<br />
The Front Panel 6<br />
The Rear Panel 8<br />
The Signal Flow 9<br />
BASIC OPERATION<br />
Recall 10<br />
Recall & Snapshots 12<br />
Store 13<br />
The Reverb Wizard 14<br />
I/O - The Signal Page 15<br />
Levels Menu 17<br />
Routing 18<br />
Routing & Studio Setup Examples 19<br />
Utility and MIDI 20<br />
MIDI Monitor 22<br />
Full MIDI Implementation 22<br />
Tempo 23<br />
Edit 24<br />
Dynamic Morphing 25<br />
ADDITIONAL EFFECTS<br />
Delay 47<br />
Pitch 47<br />
EQ 48<br />
Chorus-Flanger 49<br />
Tremolo 50<br />
Phaser 51<br />
Expander/Gate 51<br />
Compressor 52<br />
De-esser 53<br />
APPENDIX<br />
The Reset Page 54<br />
Self Test 55<br />
Troubleshooting 56<br />
Glossary 57<br />
Technical Specifications 58<br />
MIDI Implementation Chart 59<br />
Soldering Instructions 60<br />
PRESET LIST 61<br />
REVERB<br />
VSS Introduction 26<br />
VSSFP - Film and Post 30<br />
VSSSR - Surround 32<br />
Reverb programs<br />
VSS3 33<br />
VSS Gate 35<br />
VSS FP 39<br />
VSS SR 42<br />
C.O.R.E 45<br />
REV 3 46<br />
<strong>TC</strong> <strong>Electronic</strong>, Sindalsvej 34, DK-8240 Risskov - tcdk@tcelectronic.com <strong>English</strong> version Rev 3 - SW - V 2.04<br />
Prod. No: 606067513<br />
3
INTRODUCTION<br />
Congratulations on the purchase of your new <strong>M3000</strong>.<br />
We hope, that you will have as much pleasure using it as we had making it.<br />
The objective of the <strong>M3000</strong> has been to make the best reverb unit ever heard.<br />
Utilizing the existing reverb technology to its limit didn’t satisfy the developers at <strong>TC</strong>, and we had to come up with an entirely new way of<br />
thinking about reverb. This is now known as the VSS Technology.<br />
The <strong>M3000</strong> is first and foremost a reverb unit, but we have also included a long list of well-known, tested and loved algorithms from other<br />
<strong>TC</strong> products as listed below.<br />
- The <strong>M3000</strong> is based on <strong>TC</strong>’s award-winning Dual Processing system, which gives you numerous options of combining the different<br />
preset-algorithms.<br />
- See the <strong>M3000</strong> as two separate machines connected via a flexible routing system. The routings are; Serial, Parallel, Dual Input,<br />
Dual Mono, Linked and Pre-Glide.<br />
- The <strong>M3000</strong> comes with 600 high grade factory presets (500 Single and 100 Combined), using our new VSS technology in<br />
combination with well known algorithms from other <strong>TC</strong> Products.<br />
- Store your favorite presets in the internal RAM bank. Up to 250 Single and 50 Combined user presets can be stored.<br />
- Store your favorite presets on a standard PCMCIA-card, and you have your own “tools” with you wherever a <strong>M3000</strong> is<br />
available. Depending on the size of the card you can store up to 250 Single and 50 Combined presets.<br />
Main Features :<br />
The algorithms in the <strong>M3000</strong> are :<br />
VSS technology giving you<br />
- Real room simulation - giving the ability to simulate<br />
the response of actual rooms.<br />
- Spaciousness - the ability to create a wide and natural<br />
sonic image and avoid the massive “wall of reverb”.<br />
- Piano correctness - the ability to keep the signal in<br />
100% correct pitch, even when engaging extensive<br />
effects processing.<br />
- Modulation Free - the ability to keep the signal<br />
100% free of sound deteriorating modulation.<br />
- Add Modulation - the option to add modulation to the<br />
tail of the reverb in order to add life and feel to the<br />
sound.<br />
- With control of the Early Reflections you have the<br />
ability to simulate all relevant parameters of<br />
true ambience.<br />
Reverbs<br />
- VSS3<br />
- VSSGate<br />
- VSSFP<br />
- VSSSR<br />
- C.O.R.E.<br />
- Rev 3<br />
Additional Effects<br />
- Delay<br />
- Pitch<br />
- EQ<br />
- Expander<br />
- Compressor<br />
- Chorus/Flanger<br />
- Tremolo/Panner<br />
- Phaser<br />
- De-esser<br />
5
THE FRONT PANEL<br />
POWER + MEMORY CARD<br />
POWER SWI<strong>TC</strong>H<br />
Turn on the machine with a<br />
single light touch. To turn off<br />
the machine you must press<br />
and hold down the POWER<br />
key approx. 3 seconds, until<br />
the display reads <strong>M3000</strong>.<br />
This delay time is to avoid<br />
switching off the device by<br />
accident.<br />
PCMCIA-CARD<br />
Copy presets to/from a<br />
standard memory card.<br />
CARD TYPES<br />
S-RAM type 1 PCMCIA<br />
cards, with a minimum of<br />
64KB and a maximum of<br />
2MB memory.<br />
PPM + INDICATORS<br />
PPM METERS<br />
Ranging from -40dB to 0dB.<br />
OVERLOAD<br />
Indicates if internal overload<br />
occurs.<br />
SAMPLE RATE INDICATOR<br />
48000Hz<br />
44100Hz<br />
32000Hz<br />
MIDI IN<br />
MIDI receive indicator.<br />
CARD<br />
Indicates presence of a valid<br />
memory card.<br />
TEMPO<br />
Beats per minute indicator.<br />
MORPHING<br />
Indicates on-going morphing<br />
between the two Engines.<br />
SETUP SECTION<br />
I/O<br />
Input/Output.<br />
Sample Rate.<br />
Select Status bit Output.<br />
Dithering.<br />
ROUTING<br />
Setup the internal routing<br />
of the 2 Engines.<br />
LEVELS<br />
Input/Output Analog levels.<br />
Digital/Input level.<br />
UTIL/MIDI<br />
Adjust the viewing angle of the display<br />
for better comfort.<br />
Security lock.<br />
Glide Time setting.<br />
Card handling.<br />
Pedal Input.<br />
MIDI.<br />
SECONDARY FUNCTIONS<br />
Help (online help function)<br />
MIDI Monitor (Monitors all MIDI ch. at the same time)<br />
6
THE FRONT PANEL<br />
ENGINE 1 OR 2<br />
COMBINED 1+2<br />
CONTROL SECTION<br />
RECALL<br />
Recall/activate the program<br />
you have selected.<br />
STORE<br />
Save and name your<br />
current preset. The <strong>M3000</strong><br />
holds 500 single factory<br />
presets and up to 250<br />
Single user presets.<br />
EDIT<br />
Enter the edit mode.<br />
BYPASS<br />
Individual bypass key for<br />
each Engine.<br />
Secondary functions<br />
(with SHIFT activated)<br />
Recall Wizard<br />
Find a preset that matches your application<br />
Delete preset<br />
The fast (and only) way to delete presets<br />
RECALL<br />
Recall/activate Combined<br />
presets.<br />
STORE<br />
Save and name Combined<br />
presets. The <strong>M3000</strong> holds<br />
100 Combined factory<br />
presets and up to 50<br />
Combined user presets.<br />
EDIT<br />
Engine out level.<br />
Dynamic Morphing.<br />
BYPASS<br />
Bypasses the entire device.<br />
SNAPSHOTS 1-4<br />
Quick Store/Recall of<br />
Combined presets.<br />
Secondary functions<br />
(with SHIFT activated)<br />
Recall Wizard.<br />
Delete preset.<br />
OK<br />
Confirm operations.<br />
SHIFT<br />
Press to access secondary<br />
functions<br />
(Text below the buttons).<br />
CURSORS<br />
Move between parameters.<br />
ADJUST wheel<br />
Set parameter values<br />
and preset numbers.<br />
Secondary functions<br />
(with SHIFT activated)<br />
Cancel<br />
Jump to the top or the bottom<br />
of the present displayed<br />
parameter list.<br />
7
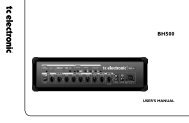
THE REAR PANEL<br />
Main<br />
Power<br />
Switch<br />
Power<br />
Input<br />
Balanced<br />
XLR<br />
Analog<br />
Inputs<br />
Balanced<br />
XLR<br />
Analog<br />
Outputs<br />
Serial<br />
no.<br />
Digital<br />
In/Out<br />
ADAT<br />
Tos-link<br />
Wordclock<br />
RCA<br />
Digital<br />
In/Out<br />
AES/EBU<br />
S/PDIF<br />
MIDI<br />
In,Thru,Out<br />
External<br />
Control<br />
Input<br />
Notes:<br />
To accommodate international regulations, we have also added a back panel power switch.<br />
You do not need to use the POWER switch on the rear panel. Leave this POWER switch on and use our<br />
Easy-Touch POWER switch on the front.<br />
Be sure to select Channel Input in the I/O display when only one Input is used.<br />
Pin 2 is »hot« on all XLR’s (AES Regulations).<br />
If you are connecting the <strong>M3000</strong> to unbalanced equipment, you must tie pins 1 and 3 together in the cable<br />
ends away from the <strong>M3000</strong>. (Please see Soldering Instructions on page 61).<br />
By connecting a momentary pedal to the External Control Input, you can control any one of four different<br />
features: Engine 1 bypass, Engine 2 bypass, Engine 1+2 bypass or Tap Tempo.<br />
8
THE SIGNAL FLOW<br />
Notes regarding the signal flow:<br />
As shown in the block diagram signals are present on all Outputs all the time.<br />
You can dither to 22, 20, 18, 16,or 8 bit. (See the I/O section on page 15).<br />
The Digital Input gain circuit is capable of »lifting« the signal level. This is a very useful feature if you e.g.<br />
are feeding the <strong>M3000</strong> with a DAT recording that is not fully leveled to 0dB.<br />
9
RECALL<br />
The Recall Displays<br />
The Recall displays are the "homepage" of the <strong>M3000</strong>. Whenever you exit any other display this is where you return to.<br />
As illustrated below the Recall display holds a few of the most important parameters for each of the two Engines at the same time.<br />
Engine 1 is always displayed in the upper section and Engine 2 in the lower.<br />
The "Edited flag" shows an E when you have changed a parameter in the preset. (See ill.)<br />
Recall Display<br />
Algorithm type Primary parameter Edited flag Preset number<br />
Engine 1<br />
Bank indicator<br />
(RAM/ROM/CARD)<br />
Preset name<br />
Engine 2<br />
Primary parameters<br />
Combined Recall Display<br />
Routing mode<br />
Recalling a Preset<br />
Press the RECALL key on Engine 1 or 2 and scroll<br />
through the presets using the ADJUST wheel.<br />
Press OK to recall when you find the desired preset.<br />
You are able to search for another preset before recalling it. This<br />
is called previewing.<br />
Until you press OK you are previewing. At this point your<br />
OK key is blinking, indicating that the preset displayed is not yet<br />
recalled (active).<br />
Use the CURSOR keys (or the other RECALL key) to access the<br />
other Engine.<br />
You can also use the Wizard to recall presets.<br />
(See "The Wizard" on page 14).<br />
If you wish to return to the original preset after<br />
editing various parameters without storing your<br />
changes, simply press the RECALL key on the<br />
appropriate Engine followed by OK.<br />
10
RECALL<br />
Combined Recall<br />
A Combined preset consists of a specific preset in Engine 1;<br />
a specific preset in Engine 2 and the routing between them.<br />
SINGLE<br />
Get acquainted with the different routings of<br />
the two Engines. Routing is an important<br />
setting when using both Engines.<br />
(See "Routing" page 18).<br />
As the standard Recall display, the Combined Recall display<br />
holds a few important parameters: The preset name; the Decay<br />
time for the two presets and the selected routing.<br />
To Recall a Combined preset:<br />
Press the Combined RECALL key and scroll through<br />
the presets using the ADJUST wheel. Press OK to<br />
recall when you find the preset you wish to use.<br />
The preset number and the OK key will blink while you are previewing,<br />
indicating that the shown preset is not yet recalled.<br />
Factory/User Presets<br />
500 ROM<br />
PRESETS<br />
250 RAM<br />
PRESETS<br />
250 CARD<br />
PRESETS<br />
Preset banks<br />
COMBINED<br />
100 ROM<br />
PRESETS<br />
50 RAM<br />
PRESETS<br />
50 CARD<br />
PRESETS<br />
Factory presets<br />
Your own presets<br />
Your own card presets<br />
The <strong>M3000</strong> contains four different preset banks plus<br />
two additional Card banks.<br />
Single ROM bank:<br />
This bank contains 500 Single factory presets. The presets are<br />
available from Engine 1 and Engine 2.<br />
Combined ROM bank:<br />
The Combined bank contains 100 Combined factory presets.<br />
The presets are available from the Combined Recall.<br />
Single RAM bank:<br />
This bank can hold up to 250 of your Single presets.<br />
Combined RAM bank:<br />
The Combined RAM bank can hold up to 50 of your Combined<br />
presets (see Combined presets).<br />
The RAM banks are located after the corresponding ROM banks.<br />
Scroll through the 500/100 ROM presets to enter the RAM bank.<br />
Note! Until you have stored one or more presets in the RAM bank<br />
the RAM bank will not be accessible.<br />
Card banks:<br />
Use a standard PCMCIA and you have a portable RAM bank<br />
containing up to 250 Single presets and 50 Combined presets.<br />
Use a S-RAM Type 1 PCMCIA with min. 64KB and max. 2MB<br />
of memory.<br />
Press SHIFT and turn the ADJUST wheel one<br />
click clockwise or counter-clockwise to jump to<br />
the next preset section.<br />
Example:<br />
You have recalled any ROM preset between 1 and 250.<br />
Press SHIFT and turn the ADJUST wheel clockwise one<br />
click and you are now previewing preset 251.<br />
Press SHIFT again and turn the ADJUST wheel<br />
clockwise one more click.<br />
You are now previewing ROM preset 500.<br />
Opposit moves are possible by pressing SHIFT and<br />
turning the ADJUST wheel counter-clockwise.<br />
11
RECALL & SNAPSHOTS<br />
Exercise 1:<br />
How to recall a preset<br />
Select Engine 1 or 2 or the Combined 1+2 by pressing the corresponding<br />
RECALL key.<br />
Turn the ADJUST wheel to scroll through the presets. While<br />
scrolling you will see both the preset number in the display and<br />
the LED of the OK key is blinking. At this point the preset is not<br />
yet recalled (active). Select ROM preset #5 and press OK to<br />
Confirm. Preset #5 is now recalled.<br />
Exercise 2:<br />
How to take a Snapshot<br />
Press the Engine 1 RECALL key. Select e.g. preset #26<br />
using the ADJUST wheel.<br />
Press OK to confirm.<br />
Press the Engine 2 RECALL key. Select e.g. preset #28<br />
using the ADJUST wheel.<br />
Press OK to confirm.<br />
Press SHIFT followed by SNAPSHOT STORE key #1.<br />
Your Snapshot is now stored.<br />
To see that it works:<br />
Recall two different presets in Engine 1 and 2.<br />
Now press SNAPSHOT key #1, and once again you have<br />
recalled preset #26 into Engine 1 and preset #28 into Engine 2.<br />
Snapshots<br />
The SNAPSHOT keys, located between the Combined<br />
1+2 and the control section, are actually four fast<br />
RECALL keys. Switch between your favorite Single<br />
presets or Combined presets with the touch of a single<br />
key or use the SNAPSHOTS as four compare keys.<br />
A Snapshot will always include both presets and their Routing<br />
just like a Combined preset.<br />
With the Snapshots you are able to switch between completely<br />
different configurations with the touch of a single key.<br />
Store a Snapshot<br />
When you want to store a Snapshot of your <strong>M3000</strong> setup, press<br />
SHIFT followed by one of the four SNAPSHOT keys.<br />
Recalling a Snapshot<br />
Recall of a Snapshot is very easy as well: Simply press the<br />
relevant SNAPSHOT key and the <strong>M3000</strong> has recalled the entire<br />
setup.<br />
Index feature in the Recall Mode<br />
Press and hold down the RECALL key on either Engine 1 or 2. A preset index display will pop up.<br />
This feature gives you an overview over the Single ROM presets and enables you to quickly access the desired<br />
type of presets.<br />
If the current recalled preset is in the range of 1 - 250,<br />
the overview will cover this range only.<br />
If the current recalled preset is in the range of 251 - 500<br />
the overview will cover this range only.<br />
12
STORE<br />
Storing a User preset and handling preset names.<br />
Storing a RAM preset with the same name:<br />
- Press the relevant STORE key (Engine 1, 2 or Combined 1+2)<br />
- Use the ADJUST wheel to select a location for your new preset. (You can store your preset in the RAM bank).<br />
- Press OK to store.<br />
Storing a RAM preset with a new name:<br />
- Press the relevant STORE key (Engine 1, 2 or Combined 1+2)<br />
- Select a location for your new preset using the ADJUST wheel. (You can store your preset in the RAM bank<br />
- Move the cursor to the new name line and write the new preset name.<br />
(Select letters with the ADJUST wheel and confirm each letter with OK)<br />
- Select DONE and press the OK key to store name and preset.<br />
CAPS LOCK<br />
Indicator<br />
Store location<br />
New preset name<br />
Letterbox<br />
Place cursor here and press OK<br />
to finalize store operation<br />
Cursor arrows<br />
Exercise 3 :<br />
Entering a new name step by step using the Letterbox<br />
Changing the name of a preset is a part of the store operation.<br />
For this exercise select Engine 1 by pressing its RECALL key.<br />
- Press the STORE key and you will see the display similar<br />
to the one illustrated above.<br />
- The <strong>M3000</strong> automatically suggests a RAM location where<br />
you can store the preset. Choose one yourself by turning the<br />
ADJUST wheel.<br />
- Use the CURSOR keys to select the name line. Use the<br />
ADJUST wheel to select a letter and press the OK key to<br />
confirm each letter. To change caps select CAP and<br />
press OK.<br />
- Finish the operation by selecting DONE in the letterbox and<br />
press OK to store.<br />
Combined Store<br />
The procedure of storing a Combined preset is exactly the same<br />
as when you store a normal preset.<br />
Note: A Combined preset stores the routing of the Engines along<br />
with the preset.<br />
Using a Memory Card:<br />
When inserting a memory card you gain access to the card bank.<br />
You can store up to 250 Single and 50 Combined user presets on<br />
a card depending on the size of the card.<br />
By using the card handling features in the UTIL/MIDI menu you<br />
are able to copy a selection or an entire preset bank to a card or<br />
the other way around.<br />
Card types<br />
S-RAM Type 1 PCMCIA cards, with a minimum of 64 KB and a<br />
maximum of 2 MB memory.<br />
NOTE ! If the card holds other information than <strong>M3000</strong> presets<br />
info, the card will automatically be formatted the first time you<br />
save or dump to the card.<br />
13
THE REVERB WIZARD<br />
The Reverb Wizard is a unique guide that helps you<br />
find the optimal factory preset for your program material.<br />
By selecting an algorithm and the instrument type<br />
you wish to apply the reverb to, the Reverb Wizard<br />
suggests a selection of relevant presets.<br />
The Wizard is easy to access and simple to use.<br />
Try the Wizard and listen what presets our creative<br />
staff suggests for your specific application.<br />
The Wizard Display<br />
Press SHIFT and WIZARD to enter The Reverb Wizard.<br />
Engine 1 or 2 or 1+2<br />
Select between Music or Post<br />
production application<br />
Select instrument or environment<br />
Select the size of the reverb<br />
Dial to select between the<br />
presets that utilize the search<br />
criteria. And press OK to recall<br />
Name of the selected preset<br />
Number of presets<br />
utilizing the search<br />
criteria<br />
Press SHIFT and WIZARD to enter the Wizard function.<br />
Use the CURSOR keys to select the different filters<br />
and the ADJUST wheel to select filter parameters.<br />
Set the three different categories as you desire and try out the<br />
proposed presets. The Reverb Wizard will show the name and<br />
number of the proposed preset.<br />
Scroll through the presets using the ADJUST wheel and press OK to<br />
recall.<br />
At first you might think of this feature as “too easy” or a feature for<br />
users less than professionals. Please don’t! If the presets suggested by<br />
the Wizard are not the perfect choices in your opinion, they will at<br />
least give you a very good starting point.<br />
14
I/O - THE SIGNAL PAGE<br />
Press the I/O key to setup various I/O parameters.<br />
Move the marker using the CURSOR keys and turn the ADJUST wheel to change values.<br />
Here you can freeze mix to 100%<br />
Input selector<br />
Channel select<br />
Sample Rate:<br />
44100Hz,<br />
48000Hz or<br />
from Digital Inputs<br />
Dither from 8-22 bits<br />
on Digital Outputs.<br />
Signal will be present on all<br />
Outputs, all the time<br />
Select Status Bit Output:<br />
S/PDIF or AES/EBU standard<br />
The Signal page<br />
In the Signal page you select the Input source plus other features.<br />
Use the CURSOR keys to change cursor position, and the<br />
ADJUST wheel to change values.<br />
Input<br />
Select Input source Analog or Digital format.<br />
AES/EBU - Digital AES/EBU can run up to 24 bits. Use the<br />
balanced XLR Digital Input/Output for this connection.<br />
AES/EBU should run balanced 110 Ohm cables. If the “Digital”<br />
Sample Rate LEDs on the front panel are blinking, no clock is<br />
present or the <strong>M3000</strong> cannot lock to the incoming Clock.<br />
S/PDIF - S/PDIF are sometimes limited to 20 bits. All <strong>TC</strong> equipment<br />
output 24 bit on SPDIF outputs, and process 24 bit from<br />
SPDIF inputs. Use the RCA jacks Input/Output for this connection.<br />
S/PDIF should run unbalanced 75ohm cables. If the<br />
“Digital” Sample Rate LEDs on the front panel are blinking, no<br />
clock is present or the <strong>M3000</strong> cannot lock to the incoming clock.<br />
Tos-link - Optical Tos-link uses the S/PDIF Digital format. Use<br />
the Optical Input/Output for this connection. Tos-link uses<br />
fiberoptic cables. If the “Digital” Sample Rate LEDs on the front<br />
panel are blinking, no clock is present or the <strong>M3000</strong> cannot lock<br />
to the incoming clock.<br />
ADAT - When setting ADAT channels, use the CURSOR keys to<br />
change position and the ADJUST wheel to select channel<br />
number. It is possible to select two ADAT channels, process them<br />
and send them out on two different ADAT channels.<br />
If the “Digital” Sample Rate LEDs on the front panel is blinking,<br />
no clock is present or the <strong>M3000</strong> cannot lock to the incoming<br />
clock.<br />
Note: The 4-6 unprocessed channels of the ADAT are not passed<br />
through the <strong>M3000</strong>.<br />
Optical Thru<br />
When the Optical parameter is set to Thru the Digital Input signal<br />
(DI) will pass directly and unprocessed to the Digital Output (DO).<br />
Clock/Sample Rate<br />
The Clock parameter determines what source the <strong>M3000</strong> is using<br />
as Digital clock. The <strong>M3000</strong> can use:<br />
- Internal 44.1kHz<br />
- Internal 48kHz<br />
- Sync. - the <strong>M3000</strong> will lock to the incoming Digital<br />
Sample Rate (from the selected Digital Input) or the<br />
External Sync (word clock).<br />
- Clock - which means that the <strong>M3000</strong> is will lock to the<br />
selected input format.<br />
- Digital - If AES/EBU or S/PDIF is selected as your Input<br />
source, the <strong>M3000</strong> will automatically switch the<br />
Clock parameter to Digital.<br />
The <strong>M3000</strong> is capable of using its own internal clock while using<br />
audio from the Digital Input. This means that you can use the<br />
<strong>M3000</strong> as master clock when working in a Digital setup. The<br />
<strong>M3000</strong> will automatically switch to the appropriate clock when<br />
you select Input source.<br />
Note: The External Sync Input recognizes standard Word Clock<br />
from 32kHz to 48kHz.<br />
15
I/O - THE SIGNAL PAGE<br />
The setting of MIX and CH (channel) parameters,<br />
combined with the selected Routing mode (see page 18-<br />
19), should be carefully considered to match the<br />
situation in which you use the <strong>M3000</strong>.<br />
CH (Channel)<br />
The Channel parameter selects which channels the <strong>M3000</strong> are<br />
using for Input. The three possibilities are:<br />
Stereo (STE) - Signals on both Left and Right Input will be<br />
processed.<br />
Left Input (L) - Only the signal present on the Left Input will<br />
be processed.<br />
Right Input (R) - Only the signal present on the Right Input will<br />
be processed.<br />
Dither<br />
The <strong>M3000</strong> can output dither from 8 through 22 bit resolution to<br />
off. The dither type is TPDF (Triangular Probability Density<br />
Function).<br />
The <strong>M3000</strong> is using internal 24 bit resolution and 24 bit<br />
A/D-D/A converters and dither is therefore only present on the<br />
Digital Outputs. It is recommendable to avoid using dither until<br />
the final stage of a production.<br />
Usually you would put the finishing touch on your production<br />
with a <strong>TC</strong> Finalizer. If this is the case dither should be applied<br />
with the Finalizer - not the <strong>M3000</strong>.<br />
MIX<br />
MIX - 100%. The Mix parameter of all presets will be 100%,<br />
meaning that no direct signal will pass through the <strong>M3000</strong>.<br />
The BYPASS keys will in this case work as mute in this case.<br />
MIX - MIX. With this setting you can combine the dry signal<br />
with the effects. In this case the BYPASS key will work as a<br />
dry/wet switch.<br />
Note: When the Engines are set to Serial Routing, the Mix<br />
parameter at Engine 1 will still be adjustable.<br />
Status Bit<br />
This selector changes the Channel Status bits of the Digital<br />
Output between professional and consumer format. When AES is<br />
selected, the <strong>M3000</strong> will output the professional AES/EBU<br />
standard, and when S/PDIF is selected, the <strong>M3000</strong> will output<br />
the S/PDIF consumer standard.<br />
The default setting is AES/EBU but some Digital consumer<br />
products refuse to accept this professional standard.<br />
In that case change to the S/PDIF consumer standard.<br />
Example: If you are using a non-professional DAT machine as a<br />
receiver of the <strong>M3000</strong> Digital Output, and you cannot make it<br />
accept the Digital Input, change the Status bit Output format<br />
from AES/EBU to S/PDIF.<br />
Note: The different Status Bit standards do not affect the quality<br />
of the Audio Output from the <strong>M3000</strong>.<br />
16
LEVELS MENU<br />
Press the LEVELS key to access this menu.<br />
To achieve optimal performance of the 24 bit A/D converters in the <strong>M3000</strong>, the correct setting of these levels is important.<br />
Please check the technical specifications of the connected device. The Input Peak meter should read approximately -6 to -3dB for<br />
maximum performance.<br />
As illustrated below the Input/Output levels are displayed in dB as well as in two more visually oriented "bars".<br />
The levels for the right and left channel can be adjusted individually or simultaneously.<br />
Use the CURSOR keys to select either the L or R channel, and the ADJUST wheel to change value.<br />
Placing the cursor between the L and the R enables you to adjust the left/right levels simultaneously.<br />
Note! The Digital In level is capable of gaining +6dB.<br />
Input gain<br />
and sensitivity<br />
(Consumer/PRO)<br />
Output gain<br />
and level<br />
(Consumer/PRO)<br />
Digital Input gain<br />
Place cursor between L and R to adjust simultaneously<br />
Ranges<br />
Analog Inputs<br />
Consumer range:<br />
Professional range:<br />
-16dBu to +10dBu<br />
-6dBv to +16dBv<br />
Analog Outputs<br />
Consumer range: -10dBu to +16dBu<br />
Professional range: -16dBv to +6dBv<br />
Digital Input Level<br />
Adjust the Digital Input from: -16dB to +6dB.<br />
17
ROUTING<br />
Press the ROUTING key in the "Setup section" to choose between six different routings. Use the CURSOR keys to<br />
select a new routing followed by the OK key to confirm your choice. A small pop-up window will tell you that the<br />
routing has changed.<br />
Please note that how the selected Routing works, is highly affected by the settings of the Channel and MIX<br />
parameters in the I/O display. (Please see page 16).<br />
Serial<br />
The serial mode is a stereo Input/Output<br />
routing. It gives you two independent<br />
effects in the same signal path. Please<br />
understand that the entire Output from Engine 1 is fed into the<br />
Input of Engine 2.<br />
A common use of this particular routing could be<br />
selecting a De-esser; a Compressor or a Chorus in<br />
Engine 1 and a reverb or delay in Engine 2.<br />
Parallel<br />
The Parallel mode is a stereo Input/Output routing. Both Engines<br />
will work as stereo effects and their Output<br />
will be mixed down to a stereo signal. With<br />
this routing, the <strong>M3000</strong> can be used as two<br />
parallel effects on the same stereo source.<br />
You may also set the I/O menu to left Input to get two<br />
independent stereo out effects on the <strong>M3000</strong> from a single send on<br />
the mixer.<br />
Dual Mono<br />
Linked<br />
Using this mode you actually split the<br />
<strong>M3000</strong> into two independent mono effect<br />
units. Use left Input/Output to connect<br />
Engine 1, and right Input/Output to<br />
connect Engine 2.<br />
When you select the Linked Routing, the<br />
two Engines will link together. This<br />
means that the preset in Engine 1 will be<br />
copied into Engine 2 and the Edit pages<br />
will lock together. The Linked Routing is indicated by the two<br />
EDIT LEDs which will be lit simultaneously. Left and Right<br />
channel audio paths are completely separated in this routing.<br />
Use this routing when you need e.g. two similar EQs,<br />
De-essers or Compressors.<br />
18
ROUTING & STUDIO SETUP EXAMPLES<br />
Dual Input (Split mode)<br />
The Dual Input mode is a Dual Mono<br />
In/Stereo Out routing. Left In is always<br />
attached to ENGINE 1 and Right In is<br />
attached to ENGINE 2. Using this<br />
routing enables you to get two different effects with separated<br />
Inputs; e.g. connect Aux 1 from your Mixer to Left In and Aux 2<br />
to Right In. You now have access to two separate effects with a<br />
common stereo Output. Set the individual preset Output volumes<br />
to achieve the correct balance of the effects.<br />
Preset Glide<br />
When the Preset Glide Routing is<br />
selected, the <strong>M3000</strong> will perform preset<br />
changes by crossfading the current effect<br />
and the new preset. This gives you a very smooth change of<br />
effects, e.g. allowing a Delay to keep repeating while a Chorus is<br />
being faded in.<br />
The Glide time is located in the Utility menu (see UTIL/MIDI).<br />
Note: Only one Engine is available while the <strong>M3000</strong> is in the<br />
Preset Glide Mode.<br />
Use two sends on your mixing console<br />
Dual Input mode<br />
Recall two different effects. Try recalling a gated reverb for, let’s say a snaredrum, in Engine 1<br />
and a nice long hall type reverb for vocals in Engine 2. Using two different sends on your mixing<br />
console, you can now use the <strong>M3000</strong> as two effect units sharing the same output.<br />
And - not to forget - you are saving a set of return channels.<br />
Create your own Vocal Reverb<br />
Serial mode<br />
You probably always wanted to have a long bright reverb on your lead vocal without “esses«<br />
hanging for seconds. You can do this with the <strong>M3000</strong>. You simply connect a<br />
“De-esser” and your favorite reverb in serial. The De-esser will cut away all sharp transients<br />
in the signal.<br />
If you want your vocal to have a unique “live feel”, or the reverberated signal to be slightly<br />
detuned, simply connect the Pitch Shifter or Chorus in series with the reverb.<br />
There are numerous applications in this mode - try them out.<br />
Two individual inserts on your mixing console<br />
Dual Mono mode<br />
In the Dual Mono mode you are able to use two completely separate mono effects at the<br />
same time. It can be Equalizers, Compressors, a De-esser or whatever you can imagine.<br />
19
UTILITY/MIDI<br />
How to move around<br />
In the UTIL/MIDI menu you always move by pressing<br />
the CURSOR keys and change values by dialing the<br />
ADJUST wheel.<br />
Display<br />
Viewing Angle:<br />
Adjust for best contrast on the LCD display.<br />
Preset glide:<br />
Glide time<br />
This parameter sets the Glide time of the incoming preset. The<br />
parameter is only active when Preset Glide routing is selected<br />
(See Routing on page 18).<br />
In the MIDI section you are able to see the MIDI setup<br />
of both Engine 1, Engine 2 and the Combined section<br />
at the same time.<br />
MIDI Input<br />
Channel<br />
Sets the Channel of which the current Engine will respond to.<br />
When set to Omni, the <strong>M3000</strong> will respond to all channels.<br />
When set to Off, no MIDI will be received.<br />
Filter<br />
Sets whether the current section of the <strong>M3000</strong> should respond to<br />
MIDI Control changes (CTRL) and MIDI Program changes<br />
(PROG) or not e.g. when Filter is set to PROG the <strong>M3000</strong> will<br />
only respond to MIDI Program changes.<br />
PrgOffset<br />
With this parameter, you are able to add to or subtract from the<br />
incoming Program change; e.g. if the incoming Program change<br />
is 123, and the Offset is set to +1, the Program change will now<br />
be 124.<br />
20
UTILITY/MIDI<br />
Program Bank Change<br />
<strong>M3000</strong> holds 500+100 presets. Standard MIDI Program changes<br />
range from 1-128. Therefore you must assign the incoming<br />
Program changes to one of the following banks:<br />
ROM 1 : 1-128 RAM 1 : 1-128<br />
ROM 2 : 129-256 RAM 2 : 129-250<br />
ROM 3 : 257-384 Card 1 : 1-128<br />
ROM 4 : 385-500 Card 2 : 129-250.<br />
When set to “external”, all banks can be accessed through the use<br />
of controller 0 which acts as bank selector.<br />
Sys-Ex ID<br />
Sets the Sys-Ex ID number of the <strong>M3000</strong>.<br />
Note: The <strong>M3000</strong> is always ready to receive information via<br />
MIDI dump from an external device. Be aware of this and avoid<br />
overwriting your presets by accident.<br />
MIDI Output<br />
Channel<br />
Sets the sending MIDI channel of the <strong>M3000</strong>.<br />
Filter<br />
Sets whether the current section of the <strong>M3000</strong> should send out<br />
MIDI Control changes (CTRL) and MIDI Program changes<br />
(PROG) or not. e.g. when Filter is set to PROG the <strong>M3000</strong> will<br />
only send out MIDI Program changes.<br />
Offset<br />
With this parameter you are able to add to or subtract from the<br />
outgoing Program change. e.g. the outgoing Program change is<br />
preset 123, and the Offset is set to +1 the outgoing Program<br />
change will now be 124.<br />
Security<br />
Security Lock<br />
Press OK while this parameter is selected to security lock the<br />
<strong>M3000</strong>. When locked, you will have to dial the PIN-Code shown<br />
below to access the <strong>M3000</strong>.<br />
Your PIN-CODE<br />
Set your own PIN-code for the Security lock by dialing the<br />
ADJUST wheel.<br />
Note: If you should forget your PIN-code, please enter the Reset<br />
page (see page 54). This will release the <strong>M3000</strong> from the locked<br />
state. (You do not have to run any of the reset functions).<br />
Memory Backup<br />
Format Card<br />
This function will format and erase the inserted PCMCIA card.<br />
Press OK twice to confirm this action.<br />
Warning: This action will overwrite ALL existing presets on the<br />
current card.<br />
Memory Copy<br />
Copy From<br />
Decide where you want to copy from and to.<br />
“Single to Card” copies from the Single preset RAM bank to the<br />
card. Card to Single copies the other way around. “Comb. to<br />
Card” copies from the Combined preset RAM bank to Card, and<br />
“Card to Comb.” copies the other way around.<br />
RAM start<br />
Select the preset number you want to start to copy from in the<br />
selected RAM bank (Single or Combined).<br />
Card Start<br />
Select the preset number you want to start to copy from to the<br />
card.<br />
No of Presets<br />
This parameter sets the number of presets to be copied<br />
Execute Copy<br />
Select this parameter and press OK twice to carry out the<br />
selected copy action.<br />
Memory to MIDI<br />
Press OK to dump the all presets to a MIDI device such as a<br />
sequencer.<br />
External Control Input<br />
When connecting a momentary pedal to the External Control<br />
Input, you can use it to control any one of four different features:<br />
Engine 1 Bypass, Engine 2 Bypass, Engine 1+2 Bypass, or Tap<br />
Tempo.<br />
21
MIDI MONITOR & MIDI IMPLEMENTATION<br />
»MIDI MONITOR SCREEN«<br />
Program changes<br />
Note on/off<br />
Controllers<br />
System exclusive<br />
Channel pointer<br />
MIDI Monitor<br />
Press SHIFT followed by UTIL/MIDI to access MIDI<br />
Monitor.<br />
In the MIDI Monitor, you are able to see all MIDI messages<br />
received by the <strong>M3000</strong>. The actions are displayed according to<br />
the current channels.<br />
Prog.<br />
Note<br />
Ctrl<br />
Sys-x<br />
Chan<br />
Displays program changes.<br />
Displays Note On/Off.<br />
Displays Control changes<br />
Displays System exclusive commands<br />
Displays the MIDI channels<br />
Press any key to exit MIDI Monitor.<br />
ll MIDI Implementation<br />
The <strong>M3000</strong> features full MIDI implementation giving<br />
you control of all parameters via an external<br />
MIDI controller.<br />
For a complete list of MIDI controller numbers please<br />
visit our web site at www.tcelectronic.com and go to<br />
the download section.<br />
This is useful in numerous situations. Here is a post<br />
production example showing you how to utilize the full<br />
MIDI implementation of the <strong>M3000</strong>.<br />
Exercise 4:<br />
Two persons have a conversation in an elevator. The elevator<br />
stops, and the two persons step out into a hall still talking.<br />
You want to use a preset with a short decay time for the<br />
“elevator-scene” and another with a longer decay time for for the<br />
“hall-scene”. To simulate the surroundings of the two rooms you<br />
need two presets simulating the two rooms.<br />
To simulate the transition between the rooms you wish to lower<br />
the Output of the first preset while increasing the Output of the<br />
second preset. For this scenario you can use a MIDI remote<br />
device with manual faders. E.g. a Peavey PC 1600.<br />
- Use the <strong>M3000</strong> in an aux. setup with a mixer.<br />
- Use the Parallel or Dual Input routing mode.<br />
- Press I/O to enter the I/O display and select Mix=100%<br />
- Recall the presets you wish to use in the two Engines.<br />
- Go to the MIDI input section in the UTIL/MIDI menu and<br />
select MIDI channel 1 for Engine 1 and MIDI channel 2 for<br />
Engine 2. (Any channels could be used).<br />
- Setup the two faders you wish to use on the MIDI controller.<br />
Assign e.g. fader 1 to MIDI channel 1 and MIDI fader 2<br />
to channel 2.<br />
- The MIDI range on fader 1 should be: 127-70 and on<br />
Fader 2 the range should be set to: 70-127. Setting up the<br />
faders this way lets you decrease the Output of Engine 1<br />
while increasing the Output of Engine 2. We found that for<br />
this specific operation the value of 70 gives a smooth<br />
cross-fade, but experiment with this setting according to<br />
your application.<br />
- The MIDI controller number for the Output is 11 and<br />
therefore both faders should naturally be assigned to<br />
controller no. 11.<br />
Now you can perform a manual smooth fade between the two<br />
engines that exactly applies the scenario.<br />
22
TEMPO<br />
Tapped or dialed BPM<br />
Which Engine to work on<br />
Define subdivision beat<br />
Tapped time in ms.<br />
Tapped time in ms.<br />
corrected with<br />
the subdivision factor.<br />
Tap Tempo<br />
The <strong>M3000</strong> TAP TEMPO key can control various parameters:<br />
Delay time, Decay time, Chorus speed, etc. When you press the<br />
TAP key, a Tempo menu pops up. The Tempo menu will<br />
disappear a few seconds after the last adjustment has been<br />
processed. The TAP key is attached to a default parameter in<br />
each effect type. This means that the function of the TAP key<br />
changes along with the presets. (See the default list later in this<br />
section).<br />
The Tempo Menu<br />
The tempo you tap is always measured in BPM (Beats Per<br />
Minute). The Tempo menu is able to recalculate the tapped time<br />
into subdivisions of the BPM. Simply set the Tempo menu to the<br />
Subdivision you like and tap the BPM on the TAP TEMPO key.<br />
You also have the possibility of changing the tempo using the<br />
BPM parameter in the Tempo menu. When a preset has been<br />
“Tapped”, the parameter attached to the Tap function will be displayed<br />
in BPM in the Tempo Menu.<br />
Tap/Subdivision<br />
These are read only parameters displaying the Tapped time and<br />
the Subdivided time in milliseconds. Tap Time Subdivision is<br />
corresponding to the parameter in your preset.<br />
The parameters controlled by the Tap key :<br />
Reverb Decay parameter<br />
Delay Delay time<br />
Chorus Speed<br />
Flanger Speed<br />
Phaser Speed<br />
Tremolo Speed<br />
Press and hold TAP for 3 seconds to learn MIDI<br />
tempo (MIDI-Clock).<br />
Tempo BPM<br />
The BPM will display the tapped tempo (BPM is equal to the 1/4<br />
Subdivision). You can also set your tempo with this parameter<br />
using the ADJUST wheel.<br />
Subdivision<br />
Sets the subdivision of the tempo. If the subdivision is set to 1/8,<br />
the actual tempo will be twice as fast as the tapped time, etc.<br />
The following subdivisions are possible:<br />
1 ,1/2 ,1/4 ,1/4T ,1/8 ,1/8T ,1/16 ,1/16T ,1/32 ,1/32T<br />
(T for triplets).<br />
23
EDIT<br />
Preset name<br />
CURSOR<br />
Parameter<br />
names<br />
Parameter<br />
value<br />
Edit<br />
In the Edit display you use the CURSOR keys to select<br />
parameters and the ADJUST wheel to change values.<br />
In the VSS algorithm presets there are two Edit<br />
modes: User and Expert.<br />
Easy mode<br />
The first time you edit a VSS preset, this is the mode you<br />
enter. The Easy mode holds the most important parameters such<br />
as Decay.<br />
Expert mode<br />
Select the Expert mode by placing the cursor at the Expert mode<br />
line and press OK.<br />
The Expert mode allows you to edit a long variety of parameters,<br />
not available in the normal Edit mode.<br />
Note: Since the two Edit modes are not compatible, it is not possible<br />
to return to the User Edit mode once you have stored a preset<br />
using the Expert mode.<br />
Combined Edit<br />
The relative Output levels of the two Engines can be adjusted in<br />
this display.<br />
The range is: Off - 0.0dB.<br />
These levels affect both the Analog and Digital Outputs.<br />
The Output levels for Engine1 and 2 can be adjusted individually<br />
or simultaneously.<br />
Use the CURSOR keys to select either Engine 1 or Engine 2, and<br />
the ADJUST wheel to change value.<br />
Placing the cursor between the L and the R allows you to adjust<br />
the L/R levels simultaneously.<br />
The Engine Out Levels are identical with the Out Level parameter<br />
in the Edit page and will always be corresponding with these.<br />
Exercise 5 :<br />
How to edit a preset<br />
- Select Engine 1 by pressing its RECALL key. Use the<br />
ADJUST wheel and select ROM preset #2.<br />
- Press the OK key to confirm and recall the preset.<br />
- Press the EDIT key in the Engine 1 section. You are now in<br />
the User Edit mode.<br />
- Use the CURSOR keys to select the parameter you wish to edit.<br />
- Select e.g. Decay. Change the value using the VALUE key.<br />
Press the STORE key (still in the Engine 1 section), and select<br />
the location where you want the preset to be stored by turning<br />
the ADJUST wheel.<br />
- Press OK to confirm. In this process you can also change the<br />
name of the preset (see the “Store” chapter on page 13).<br />
24
DYNAMIC MORPHING<br />
Engine Output levels [mix]<br />
Dynamic Morphing section<br />
Engine Output levels<br />
Morphing on/off and<br />
morphing direction<br />
Morphing speed<br />
Morphing Threshold<br />
Dynamic Morphing<br />
Press EDIT in the Combined section to enter Dynamic Morphing.<br />
The Dynamic Morphing function is a great new way of letting<br />
your effect interact with your source signal.<br />
Note: The Dynamic Morphing function is only available when<br />
routing is set to Parallel.<br />
When activated, the <strong>M3000</strong> will morph between the two Engines<br />
Outputs according to your Input level. This is a function for<br />
quick seamless changes of an effect.<br />
Imagine the situation where you have the vocal in a ballad being<br />
soft and subtle during the verse and then rising to heartbreaking<br />
heights in the Chorus. Now imagine the reverb automatically<br />
changing along with it, from a small discreet Room type in the<br />
verse, to a Big Bright Hall in the Chorus. This can be achieve by<br />
using Dynamic Morphing.<br />
Simply select the two presets in the two Engines and then activate<br />
the Dynamic Morphing function. Set the Threshold and the<br />
speed of the Dynamic Morphing and check out the result.<br />
Morph direction 1-2:<br />
If this box is selected, Engine 1 will be active while the Input is<br />
below Threshold and Engine 2 when it’s above.<br />
Morph direction 2-1:<br />
If this box is selected, Engine 2 will be active while the Input is<br />
below Threshold and Engine 1 when it is a above.<br />
Note! The max. level of the Engines is set by the Engine Out bars<br />
above Dynamic Morphing.<br />
The Dynamic Morphing is stored along with Combined presets.<br />
25
VSS INTRODUCTION<br />
Constructing a Reverb Preset with the VSS algorithms<br />
The following few paragraphs are thoughts about the usage of the VSS algorithm.<br />
They should be taken as guidelines rather than fact.<br />
The relationship of Early Reflections and the Reverb tail is very important in this algorithm.<br />
Adjusting the balance between the Early Lev and the Rev Lev parameters is one of the easier ways<br />
to make a HUGE difference in the sound of your reverb!<br />
When you start building your preset you should try this:<br />
- First turn the Rev Lev all the way down and then turn the MIX level up to between 60% and<br />
70% if you are in mix mode, or push the return faders up on your console if you are in 100%<br />
wet mode (see I/O- The Signal Page on page15).<br />
- Then begin changing the Early Type and Early Size parameters until you select a room shape<br />
that compliments the program material.<br />
- Re-adjust the wet/dry balance until it is pleasing, then bring up the Rev Lev until the tail of the<br />
reverb becomes audible.<br />
- Add just enough tail to make it work together.<br />
- Adjust the Decay time accordingly.<br />
On some presets you may choose to have very little Early Reflections or none at all.<br />
Certain “ambience” style presets might have little or no “tail”. That is up to you.<br />
The <strong>M3000</strong> was designed to have the smoothest Reverb tail ever developed but it is the Early<br />
Reflections that define the “personality” of the room, so try to experiment with this relationship!<br />
By using these parameters correctly you can create a BIG sound without having a mix swimming in<br />
reverb wash.<br />
Note: When using small room sizes and short Decay times on percussive signals, the Reverb level<br />
and Early level must have an approx. level difference of 4dB in order to prevent a slap effect.<br />
Getting the most out of the Early Reflection Patterns of the <strong>M3000</strong><br />
Early Reflections defines the actual feel of the room, where the Reverb tail is the less defined<br />
”bowl” of reflections that follows. The major part of the Early Reflection patterns of the <strong>M3000</strong> are<br />
simulations of existing rooms and are based on a large number of reflections (40-100), which have<br />
been processed through an advanced algorithm.<br />
There are a number of different types and sizes covering a lot of different acoustic spaces that you<br />
need for music and post production.<br />
As the patterns are simulations of real rooms, the delay times of the first reflections are sonic and<br />
spatially “connected” to the direct signal. Using Pre Delay together with Early Reflections should<br />
therefore be considered very carefully, as the acoustic space created by the pattern tends to<br />
“collapse” if too much Pre Delay is added. If you want the well known slap back reverb effect, you<br />
should use Rev Delay on the Reverb tail instead and reduce the level of the Early Reflections.<br />
26
VSS INTRODUCTION<br />
Finding the right Early Type & Size for your track :<br />
Select Early Type and Early Size in the Expert mode.<br />
- Turn the Rev Level to -100dB.<br />
- Turn the EarlyLevel to 0dB.<br />
- Select an appropriate size. (Note that some sizes of the different types may overlap, e.g.<br />
Church Small is bigger than Conc Hall medium etc.)<br />
- Switch between the different types until it matches the signal and the illusion that you wish<br />
to create.<br />
Generally it is advisable to use small room sizes for drums and perc; medium sizes for piano, guitar<br />
& horns and large sizes for vocals & strings.<br />
Large Church and Venue simulate very big rooms and can therefore be used to create an<br />
“echo like” effect if turned up loud.<br />
Many of the patterns can be used as a “Doubling” effect if the Reverb tail is not added.<br />
Using the Hi Color and Lo Cut parameter in the Early Reflection-Expert mode<br />
Once you have selected the desired type and size you can use the Hi Color and the Lo Cut controls<br />
to filter the Early Reflections. The Hi Color parameter is an advanced Hi Cut function.<br />
Please note that in most real rooms the reflections are generally much softer than the direct signal.<br />
Often it can be advisable to use the Hi Color parameter in the range between -4 to -9 to make the<br />
Early Reflections blend properly with the direct signal rather than competing with it.<br />
The Lo Cut filter is very useful if you want to reduce the Early Reflections in the area between<br />
125-400Hz. Try this if the Early Reflections seem to make the sound too full.<br />
To use the <strong>M3000</strong> as a Stereo Reverb:<br />
The VSS algorithm is basically a mono-input/stereo-output algorithm, but by using both Engines<br />
it is possible to turn the <strong>M3000</strong> into a input/output Stereo Reverb.<br />
To justify the entire discussion of stereo reverb the source material must derive from two points.<br />
E.g. a grand piano would normally be miked up with two mics. When you hear the actual<br />
piano there will be a small delay due to the distance between the mics. To simulate this try the following<br />
example:<br />
- select the same preset in both Engines.<br />
- use approx. 10-20ms. of Pre Delay in Engine 1.<br />
- use the same amount of Rev Delay in Engine 2.<br />
This action is to ensure the Reverb tail has the same starting point in both Engines/channels.<br />
- set the Mix parameter to 100% in the Edit menu of both Engines or select MIX=100% in the<br />
I/O section.<br />
- use the Dual Input Routing.<br />
- pan the Reverb in Engine 1 to the left, and the Reverb in Engine 2 to the right, using<br />
the RevBal parameter in the Expert mode.<br />
Try out the Combined factory stereo presets no. 47 and 48, and investigate the parameter<br />
settings to learn more about using the <strong>M3000</strong> as a Stereo Reverb.<br />
27
VSS INTRODUCTION<br />
28
VSS INTRODUCTION<br />
Overview of the VSS Reverb Section<br />
On the opposite page you have a graphical overview of how the VSS Reverb algorithm is<br />
constructed. To fully utilize the possibilities of Early Reflections and the Reverb tail you should<br />
understand the relationship of these sections, and be able to control the most important parameters.<br />
As this is just an introduction on how to work the VSS Reverb we will only direct your attention<br />
to a few of the sections. For explanations of all the parameters you should refer to the complete algorithm<br />
descriptions on the following pages.<br />
Please note that the illustration only covers one Engine. So the <strong>M3000</strong> has two of the illustrated elements.<br />
Hearing the terms ”Early Reflections” and ”Reverb tail”, might lead you to believe that these two<br />
sections are placed in a line, with the Early Reflections first followed by the Reverb tail section.<br />
This is as you can see not the case. The two sections run parallel.<br />
Pre Delay versus Rev Delay<br />
The first two points we would like to bring to your attention is the Pre Delay and the Rev Delay.<br />
The Rev Delay moves the Reverb tail away from the source material. This is listed in many other<br />
reverb units as Pre Delay. In the <strong>M3000</strong> the Pre Delay is the parameter that moves the entire Reverb<br />
section; Early Reflections as well as tail. We recommend using the Rev Delay as your first choice<br />
when moving the Reverb tail from the direct signal.<br />
The Early Reflections take place in the first few hundred milliseconds and is what you hear before<br />
the more randomly calculated tail. Therefore the idea of delaying the Early reflections with the<br />
Pre Delay parameter should be carefully considered, and as the Early Reflection patterns are of a<br />
very complex and precisely calculated structure, adding too much Pre Delay can give you a feeling<br />
of less precision and might sound ”out of phase”.<br />
Mixing the Reverb Out Levels<br />
We recommend careful considerations concerning the level parameter on both the Early Reflections<br />
(Early Lev) and the Reverb tail (Rev Lev).<br />
To emphasize either the Early Reflections or the Reverb tail, try setting the Early level and the Rev<br />
level with a difference of 6dB.<br />
Modulation of the Reverb Tail<br />
The <strong>M3000</strong> is capable of producing an optimal precise clean Reverb tail. However in some situations<br />
you might experience that the tail is too clean/perfect. This is why we’ve added the modulation<br />
features. With Space Modulation and Reverb Modulation, you can tweak the tail in different directions.<br />
As shown in the illustration the Space Modulation is a separate block that works on the very Output<br />
of the Reverb, where the Reverb Modulation is an integrated part of the complex reverb<br />
calculations that works specifically on the tail.<br />
29
VSS FOR FILM AND POST PRODUCTION<br />
VSSFP & VSSSR<br />
With the VSSFP and VSSSR algorithms for film- and post-production our main focus has been realistically sounding rooms, no<br />
matter how harsh, hard or grindy they sometimes are.<br />
With standard Reverb units it has often been a tiresome and unsatisfying task in post production to match the sound of the room to the<br />
picture.<br />
Once again, this is because the general main objective for Reverb units was to be able to create excellent sounding reverbs for musical<br />
production. Their focus has been the diffuse field of the Reverb rather than the important Early Reflections that define the sound of the<br />
room.<br />
While developing the <strong>M3000</strong> VSSFP and VSSSR algorithms; tests, analysis and measurements have been made in three<br />
dimensional models of different rooms, to obtain knowledge of the reflections. The results have been used to recreate all these reflections<br />
with the Early Reflection patterns.<br />
To get a grip of the complexity of how the sound behaves at its initial stage, and why this cannot be ignored, please take a look at the<br />
illustrations below.<br />
Bathroom<br />
Car<br />
The drawing of the Bathroom is an example of a very<br />
small room with hard surfaces. The lines represent the<br />
complex reflections made by the sound source.<br />
A car is an example of the ultimate small room with<br />
both hard and soft surfaces, and extremely short<br />
distance between source and listener. The sound of<br />
this type of room has until today been very difficult to<br />
reproduce realistically.<br />
By using the VSSFP in the <strong>M3000</strong> high quality small<br />
room simulations are now extremely easy.<br />
30
VSSFP - FILM AND POST<br />
Stereo VSSFP<br />
Diagram overview of the VSSFP reverb with Early Reflection generator and stereo<br />
reverb generator in parallel.<br />
For further details please see the illustration on page 28, and read the descriptions of<br />
the algorithms on the following pages.<br />
31
VSSSR - SURROUND<br />
VSSSR (Surround)<br />
The VSSSR (Surround) algorithm is a unique room simulator with new facilities for surround production. The diffused field of the<br />
simulation is turned into a Front/Rear composition with separate Decay, Level and Predelay parameters for front and rear.<br />
The composite output of the simulator is compatible with mono, stereo and surround reproduction. When used for surround production a<br />
surround encoder is not needed, but monitoring should be done through a Dolby SR compatible decoding system.<br />
Surround VSSSR<br />
On top of the Early Reflections<br />
generator, each Engine may process<br />
two completely independent reverb<br />
systems, hereby enabling the operator<br />
to set separate Delay and Decay times<br />
in front and rear channels.<br />
<strong>M3000</strong> and Surround decoder setup.<br />
One or both <strong>M3000</strong> engines may run<br />
VSSSR surround algorithms. When<br />
monitored through a ProLogic or<br />
other 4:2:4 surround decoders,<br />
convincing surround environments are<br />
generated. The VSSSR algorithm is<br />
fully mono and stereo compatible.<br />
32
VSS3<br />
Reverb Programs<br />
VSS3, VSSGate, VSSFP, VSSSR,<br />
C.O.R.E. and Rev 3.<br />
These are the basic reverb algorithms in the <strong>M3000</strong>.<br />
VSS3 Reverb<br />
The VSS Reverb is a multipurpose algorithm, that with the<br />
comprehensive amount of parameters in both the Early<br />
Reflection parts; the Reverb tail and the Modulation, makes<br />
it possible to tweak the sound in a lot of different directions.<br />
The user interface is split into two levels: Easy mode, which<br />
gives access to the most common parameters, and the Expert<br />
mode with additional parameters available.<br />
Decay<br />
(.01 - 20s) The Decay time of the Reverb. Usually<br />
associated with the time it takes the Reverb tail to decay<br />
60dB. This is the overall Master Decay for the four band<br />
Decay parameters (found in the REVERB section below)<br />
which are multiples of this base Reverb time.<br />
Early Lev<br />
(-100dB - 0dB) The Output level of the Early Reflections.<br />
When Early Lev is set all the way off, the Reverb effect will<br />
consist entirely of Reverb tail.<br />
Rev Lev<br />
(-100dB - 0dB) The Output level of the Reverb tail. When<br />
Rev Lev is set all the way off, the effect will consist entirely<br />
of Early Reflections.<br />
Mix<br />
(0% - 100%) Wet/Dry mix. Can be frozen at 100% on the<br />
I/O menu.<br />
Out Level<br />
(-100dB - 0dB) The overall Output level of the Reverb.<br />
This is mostly used when the two Engines are used in serial<br />
mode, or used in the Combined Mode.<br />
Rev Delay<br />
(0 - 200ms) A delay to the tail of the reverb. Adds<br />
additional time between the Early Reflections and the onset<br />
of the "tail" of the reverb.<br />
Pre Delay<br />
(0 - 200ms) A delay placed at the Input of the algorithm. This<br />
sets how long after the dry sound the Early Reflections will<br />
begin.<br />
Hi Color (available in easy mode only):<br />
Adjusts the spectral balance in the high end frequencies.<br />
This is actually a simple way of adjusting a complex selection of<br />
frequencies.<br />
Lo Color (available in easy mode only):<br />
Adjusting the spectral balance in the low end frequencies.<br />
A simple way of adjusting a complex selection of frequencies.<br />
Expert mode<br />
Press OK to gain access to the following additional parameters.<br />
Note: Hi Color and Lo Color are not available in this mode.<br />
Early Reflections<br />
Early Type<br />
(Several types) Pick the type that best compliments your<br />
material or best represents the effect you are going for.<br />
Early Size<br />
(Small, Medium, Large) Changes the size of the Early Type<br />
parameter.<br />
Note: Some of the Early Types are only one size.<br />
Early Bal<br />
(-100dB R, Center, -100dB L) the left/right balance of the<br />
Early Reflections. Allows you to offset the Early Reflections<br />
from the normal center position.<br />
Hi Color<br />
(±50) Adjusts the spectral balance of the Early Type.<br />
The Color parameter is actually an advanced Hi Cut parameter.<br />
The default setting of this parameter is customized to each of the<br />
Early Types.<br />
Lo Cut<br />
(20Hz - 400Hz) This adjustable filter removes low frequencies<br />
for the Early Reflections.<br />
33
VSS3<br />
Reverb (tail)<br />
Rev Type<br />
(Smooth, Natural, Alive, Fast St., Fast Wd.)<br />
Adjust this parameter with the Early Lev turned all the way<br />
off and the Rev Lev all the way up. Change the type to get a<br />
feel of what each one sounds like.<br />
Diffuse<br />
(±50) This parameter gives you more or less diffusion than<br />
the algorithm designer intended for the given Decay time.<br />
For optimum performance the diffusion is automatically<br />
adjusted behind the scenes whenever you change decay<br />
times. This parameter gives you the added control to vary the<br />
diffusion around this automatic setting.<br />
Rev Bal<br />
(-100dB R, center, -100dB L) The left/right balance of the<br />
Reverb tail. Allows you to offset the tail from the normal<br />
center position.<br />
Hi Cut<br />
(1kHz - 20kHz) Rolls off the top end as it enters the Reverb<br />
tail. Used in conjunction with Hi Soften and Hi Decay to<br />
"darken" a room.<br />
Hi Soften<br />
(+/-50) Hi Soften is a special filter used to "soften" the high<br />
frequencies of Reverb tail. This is not a simple Hi Cut filter<br />
but a complex set of filters working together to remove those<br />
frequencies that make a reverb sound "brittle" or harsh<br />
sounding. Hi Soften is scaled/linked to the Hi Cut and<br />
Hi Decay parameters.<br />
Hi Decay<br />
(0.1 - 2.5) Multiplier for the frequencies above the Hi Xover<br />
frequency. Example: If the main Decay parameter is set to<br />
2.0sec and the Hi Decay parameter is set to 1.5, frequencies<br />
above the Hi-Xover will decay for 3.0 sec. Conversely if this<br />
parameter is set to 0.5 the Decay time above the Hi Xover<br />
point will be 1 sec.<br />
Hi Xover<br />
(1kHz - 20KHZ) sets the frequency at which the transition<br />
from the mid frequencies to the high frequencies takes place.<br />
Mid Decay<br />
(0.01 - 2.5) The Ratio control multiplier for the mid<br />
frequencies. This parameter is normally set to 1.0 as it is the<br />
main parameter adjusted by the main Decay parameter. This<br />
mid-range decay control would normally be omitted,<br />
however, <strong>TC</strong> Engineers felt you could use this parameter as a<br />
fine adjustment tool to “tweak” a preset to sound just right<br />
without having to adjust the master Decay parameter.<br />
Mid Xover<br />
(200Hz - 2kHz) Sets the frequency at which the transition<br />
from the low-mid to the mid frequencies takes place.<br />
Lo mid Decay<br />
(0.1 - 2.5) The Ratio control multiplier for the low-mid<br />
frequencies<br />
Lo Xover<br />
(20Hz - 500Hz) Sets the frequency at which the transition<br />
from the low to the low-mid frequencies takes place.<br />
Lo Decay<br />
(0.1 - 2.5) The Ratio control multiplier for the low<br />
frequencies.<br />
Lo Damp Freq<br />
(20Hz - 200Hz) Sets the Lo Cut frequency for the next<br />
parameter, Lo Damp. Use these two parameters to take away<br />
any objectionable low frequencies entering the Reverb tail<br />
processor.<br />
Lo Damp<br />
(-18dB - 0dB) Sets the amount of cut in dBs. Used with the<br />
previous parameter, Lo Damp Freq.<br />
Modulation<br />
The Reverb Mod and the Space Mod work on the tail of the<br />
reverb and gives you the ability to tweak the tail in different<br />
ways.<br />
To isolate and listen only to the tail you should turn the Early<br />
level off; set the mix to 100% and then turn the Depth<br />
parameter all the way up.<br />
Try changing the Type of Modulation and listen to its effect<br />
on the tail. Be aware that by using extensive modulation of<br />
the tail you might get a detuning effect of the source material.<br />
In that case reduce the Width and Depth.<br />
34
VSSGATE<br />
Reverb Mod<br />
Type<br />
(Off, Smooth 1, Smooth 2, Perc, Wow, Vintage, Wild)<br />
Adjusts the type of modulation.<br />
Rate<br />
(-100, default, +100) Allows you to offset the speed of the<br />
LFO from the factory default assigned to each Type.<br />
Width<br />
(0% - 200%) Sets the Width of the modulation.<br />
Space Mod<br />
This group of parameters sets the way the sound moves about<br />
the room.<br />
Type<br />
(Off, Normal, Fast, Slow, MidFreq, Sync).<br />
Rate<br />
(-100, default, +100) Allows you to offset the speed of the<br />
LFO from the factory default assigned to each type.<br />
Width<br />
(0% - 100%) Sets the width of the modulation.<br />
Depth<br />
(-50, default, +50) Allows you to offset the amount of space<br />
modulation from the factory default.<br />
VSSGate<br />
The VSS algorithm with Gate parameters added. The Gate<br />
function is very comprehensive, and opens up a lot of<br />
opportunities in combination with the reverb.<br />
The user interface is split into two levels: Easy mode, which<br />
gives access to the most common parameters, and<br />
Expert mode with additional parameters available.<br />
Threshold<br />
When the Input signal falls below this Threshold, the Gate<br />
starts working. This means that the higher Threshold the<br />
more expansion you will get.<br />
Attack<br />
The Attack is the time that the Gate uses for<br />
bringing the reduced signal to 1:1, when the signal exceeds<br />
the Threshold.<br />
Hold<br />
Is the time that the Gate will keep the Ratio at 1:1 below the<br />
Threshold, before the Release time sets in.<br />
Release<br />
The Release time is the fallback time that the Gate uses to<br />
close.<br />
Retrig<br />
(On/off) When set to ON the gate works as a normal gate,<br />
when set to OFF the gate will run the whole “Attack, Hold,<br />
Release” time-cycle before it will be possible to retrig the<br />
gate again. This feature is very useful when working with<br />
percussive material.<br />
Gate Decay<br />
(0.10 - 1.00) From the Release point, the gate takes down the<br />
Output level, but at the same time it’s possible to roll-off the<br />
Decay Time in the tail (See the GateType parameter). This<br />
parameter is a multiplier on the Decay time that sets in from<br />
the start of the Release time. This allows you to “empty” the<br />
tail at the Release time so no leftovers are heard when the<br />
gate opens again.<br />
Max Att<br />
(0dB - 100dB) Max attenuation of the Gate.<br />
35
VSSGATE<br />
Gate Type<br />
(Level, Decay, Both) Selects what the Gate shall work on:<br />
Level takes down the Output level like a normal gate. Decay<br />
rolls off the Decay time according to the Gate Decay setting,<br />
but leaves the Output level unattached. Both will do Output<br />
level roll off and Decay roll off at the same time.<br />
Decay<br />
(0.01 - 20s) The Decay time of the Reverb. Usually<br />
associated with the time it takes the Reverb tail to decay<br />
60dB. This is the overall Master Decay for the four band<br />
Decay parameters. (found in the REVERB section below)<br />
who are multiples of this base Reverb time.<br />
Early Lev<br />
(-100dB - 0dB) The Output level of the Early Reflections.<br />
When Early Lev is set to off the Reverb effect will consist<br />
entirely of Reverb “tail”.<br />
Rev Lev<br />
(-100dB - 0dB) The Output level of the Reverb tail. When<br />
Rev Lev is set all the way off the effect will consist entirely<br />
of early reflections.<br />
Mix<br />
(0% - 100%) Wet/Dry mix. Can be frozen at 100% on the I/O<br />
menu.<br />
Out Level<br />
(-100dB - 0dB) The overall Output level of the entire Reverb.<br />
This is mostly used when the two Engines are set in serial<br />
mode, or used in the Combined mode.<br />
Rev Delay<br />
(0 - 200ms) A delay to the tail of the Reverb. Adds additional<br />
time between the Early Reflections and the onset of the “tail”<br />
of the reverb.<br />
Hi Color (available in easy mode only)<br />
Adjusts the spectral balance in the high end frequencies<br />
This is actually a simple way of adjusting a complex selection<br />
of frequencies.<br />
Lo Color (available in easy mode only)<br />
Adjusts the spectral balance in the low-end frequencies<br />
A simple way of adjusting a complex selection of frequencies.<br />
Expert mode<br />
Press OK to gain access to the following additional<br />
parameters.<br />
Note: Hi Color and Lo Color is not available in this mode.<br />
Early Reflections<br />
Early Type<br />
(Several types) Pick the type that best compliments your<br />
material or best represents the effect you are going for.<br />
Early Bal<br />
(-100dB R, center, -100dB L) The left/right balance of the<br />
Early Reflections. Allows you to offset the Early<br />
Reflections from the normal center position.<br />
Color<br />
(±50) Adjust the spectral balance of the Early Type.<br />
Low Cut<br />
(20Hz - 400Hz) This adjustable filter removes low<br />
frequencies for the Early Reflections.<br />
Pre Delay<br />
(0-200ms) A delay placed at the Input of the algorithm. This<br />
sets how long after the dry sound the Early Reflections will<br />
begin.<br />
36
VSSGATE<br />
Reverb (tail)<br />
Rev Type:<br />
(Smooth, Natural, Alive) Adjust this parameter with the<br />
Early Lev turned all the way off and the Rev Lev all the way<br />
up. Change the type to get a feel for what each one sounds<br />
like.<br />
Diffuse:<br />
(±50) This parameter gives you more or less diffusion than<br />
the algorithm designer intended for the given Decay time.<br />
For optimum performance the diffusion is automatically<br />
adjusted behind the scenes whenever you change decay<br />
times. This parameter gives you the added control to vary<br />
the diffusion around this automatic setting.<br />
RevBal:<br />
(-100dB R, center, -100dB L) The left/right balance of the<br />
Reverb tail. Allows you to offset the tail from the normal<br />
center position.<br />
Hi Cut:<br />
(1kHz - 20kHz) Rolls off the top end as it enters the<br />
Reverb tail. Used in conjunction with Hi Soften and<br />
Hi Decay to “darken” a room.<br />
Hi Soften:<br />
(+/-50) Hi soften is a special filter used to “soften” the high<br />
frequencies of Reverb tail. This is not a simple high cut filter<br />
but a complex set of filters working together to remove<br />
those frequencies that make a reverb sound “brittle” or harsh<br />
sounding. Hi Soften is scaled/linked to the Hi Cut and<br />
Hi Decay parameters.<br />
Hi Decay:<br />
(0.01 - 2.5) Multiplier for the frequencies above the Hi<br />
Xover frequency. Example: If the main Decay parameter is<br />
set to 2.0sec and the Hi Decay parameter is set to 1.5,<br />
frequencies above the Hi Xover will decay for 3.0sec. On<br />
the other hand if this parameter is set to 0.5 the decay time<br />
above the<br />
Hi-Xover point will be 1sec.<br />
Mid Decay:<br />
(0.01 - 2.5) The Ratio control multiplier for the mid<br />
frequencies. This parameter is normally set to 1.0 as it is the<br />
main parameter adjusted by the main Decay parameter. This<br />
midrange Decay control would normally be omitted, however<br />
<strong>TC</strong> Engineers felt you could use this parameter as a fine<br />
adjustment tool to “tweak” a preset to sound just right<br />
without having to adjust the master Decay parameter.<br />
Mid Xover:<br />
(200Hz - 2kHz) Sets the frequency at which the transition<br />
from the low-mid to the mid frequencies takes place.<br />
Lmid Decay:<br />
(0.01 - 2.5) The Ratio control multiplier for the low-mid<br />
frequencies.<br />
Low Xover:<br />
(20Hz - 500Hz) Sets the frequency at which the transition<br />
from the low to the low-mid frequencies takes place.<br />
Low Decay:<br />
0.01 - 2.5) The Ratio control multiplier for the low<br />
frequencies.<br />
Lo Damp Freq:<br />
(20Hz - 200Hz) Sets the Lo Cut frequency for the next<br />
parameter, Lo Damp. Use these two parameters to take away<br />
any objectionable low frequencies entering the Reverb tail<br />
processor.<br />
Lo Damp:<br />
(-18dB - 0dB) Sets the amount of cut in dB. Used with the<br />
previous parameter, Lo Damp Freq.<br />
Hi Xover:<br />
(1kHz - 20KHZ) Sets the frequency at which the transition<br />
from the mid frequencies to the high frequencies takes place.<br />
37
VSSGATE<br />
Reverb Modulation<br />
Type:<br />
(Off, Smooth1, Smooth2, Perc, Wow, Vintage, Wild)<br />
Adjusts the type of modulation. Try all of them. First turn<br />
the Depth all the way up and turn the Early Lev off and the<br />
MIX to 100% so you are only listening to the tail of the<br />
verb. Then change the Type of Mod and listen to its affect<br />
on the tail. Pick the one you like if you are going for that<br />
“Famous Sound”. Sounds cool but beware the tuning of the<br />
instruments can get a little strange. Listen on a grand piano<br />
to hear the changes, back off if the detuning gets too strange.<br />
Rate:<br />
(-100, default, +100) Allows you to offset the speed of the<br />
LFO from the factory default assigned to each type.<br />
Width:<br />
(0% - 200%) Sets the width of the modulation.<br />
38
VSSFP - FILM & POST<br />
VSSFP<br />
The VSSFP (Film & Post-Production) reverb algorithm is a<br />
special version of VSS3, incorporating dedicated Early<br />
Reflection types for motion picture use, e.g. Car, Bathroom<br />
and Conference Rooms.<br />
VSSFP Reverb<br />
Decay<br />
(0.01 - 20s) The Decay time of the Reverb. Usually<br />
associated with the time it takes the Reverb tail to decay<br />
60dB. This is the overall Master Decay for the four band<br />
Decay parameters (found in the REVERB section below)<br />
which are multiples of this base Reverb time.<br />
Hi Color (available in easy mode only)<br />
Adjusts the spectral balance in the high end frequencies.<br />
This is actually a simple way of adjusting a complex<br />
selection of frequencies.<br />
Lo Color (available in easy mode only)<br />
Adjusting the spectral balance in the low end frequencies.<br />
A simple way of adjusting a complex selection of<br />
frequencies.<br />
Position (available in easy mode only)<br />
Changes the distance from the listener to the source.<br />
The characteristics of the room are preserved, only the<br />
perceived distance changes.<br />
Note: To obtain the intended effect, please do not use a 100%<br />
wet mix, but include some dry signal.<br />
Early Lev<br />
(-100dB - 0dB) The Output level of the Early Reflections.<br />
When Early Lev is set to off the Reverb effect will consist<br />
entirely of Reverb “tail”.<br />
Rev Lev<br />
(-100dB - 0dB) The Output level of the Reverb tail. When<br />
Rev Lev is set all the way off, the effect will consist entirely<br />
of Early Reflections.<br />
Rev Delay<br />
(0 - 200ms) A delay to the tail of the reverb. Adds<br />
additional time between the Early Reflections and the onset<br />
of the "tail" of the reverb.<br />
Pre Delay<br />
(0 - 100ms) A delay placed at the Input of the algorithm. This<br />
sets how long after the dry sound the Early Reflections will<br />
begin.<br />
Mix<br />
(0% - 100%) Wet/Dry mix. Can be frozen at 100% on the I/O<br />
menu.<br />
Out Level<br />
(-100dB - 0dB) The overall Output level of the Reverb.<br />
This is mostly used when the two Engines are used in serial<br />
mode, or used in the Combined Mode.<br />
Expert mode<br />
Press OK to gain access to the following additional<br />
parameters.<br />
Note: Hi Color, Lo Color and Position are not available in<br />
this mode.<br />
Early Reflections<br />
Early Type<br />
(Several types)<br />
Pick the type that best compliments your material or best<br />
represents the effect you are going for.<br />
Early Size<br />
(Small, Medium, Large)<br />
Changes the size of the Early Type parameter.<br />
Note: Some of the Early Types are only one size.<br />
Early Pos<br />
Here you can select between a Close and a Distant setting.<br />
This enables you to change the distance between the listening<br />
position and the source in the same Early Reflection pattern.<br />
Note that some of the Early Types only have one position<br />
available.<br />
39
VSSFP - FILM & POST<br />
Early Bal<br />
(-100dB R, Center, -100dB L) the left/right balance of the<br />
Early Reflections. Allows you to offset the Early Reflections<br />
from the normal center position.<br />
Hi Color:<br />
Adjusts the spectral balance in the high end frequencies.<br />
This is actually a simple way of adjusting a complex selection<br />
of frequencies.<br />
Low Cut<br />
(20Hz - 400Hz) This adjustable filter removes low<br />
frequencies for the Early Reflections.<br />
Reverb Tail<br />
Rev Type<br />
(Smooth, Natural, Alive, Fast, Fast Wd, Alive Wd)<br />
Adjust this parameter with the Early Lev turned all the way<br />
off and the Rev Lev all the way up. Change the type to get a<br />
feel of what each one sounds like.<br />
Rev Width<br />
With this parameter you can change the width of the reverb<br />
tail. The Mono setting is where the left and right reverb tails<br />
are completely identical, the Center setting opens a bit up in<br />
the middle, Stereo is the normal stereo image width and Wide<br />
are on the outside of the stereo image.<br />
Note: The RevTypes: Fast Wd and Alive Wd only have one<br />
width (extremely wide).<br />
Diffuse<br />
(±50) This parameter gives you more or less diffusion than<br />
the algorithm designer intended for the given Decay time.<br />
For optimum performance the diffusion is automatically<br />
adjusted behind the scenes whenever you change decay<br />
times. This parameter gives you the added control to vary the<br />
diffusion around this automatic setting.<br />
Rev Bal<br />
(-100dB R, center, -100dB L) The left/right balance of the<br />
Reverb tail. Allows you to offset the tail from the normal<br />
center position.<br />
Hi Cut<br />
(20Hz-20kHz) Rolls off the top end as it enters the Reverb<br />
tail. Used in conjunction with Hi Soften and Hi Decay to<br />
"darken" a room.<br />
Hi Soften<br />
(+/-50) Hi Soften is a special filter used to "soften" the high<br />
frequencies of Reverb tail. This is not a simple Hi Cut filter<br />
but a complex set of filters working together to remove those<br />
frequencies that make a reverb sound "brittle" or harsh<br />
sounding. Hi Soften is scaled/linked to the Hi Cut and<br />
Hi Decay parameters.<br />
Hi Decay<br />
(0.01 - 2.5) Multiplier for the frequencies above the Hi Xover<br />
frequency. Example: If the main Decay parameter is set to<br />
2.0sec and the Hi Decay parameter is set to 1.5, frequencies<br />
above the Hi-Xover will decay for 3.0 sec. Conversely if this<br />
parameter is set to 0.5 the Decay time above the Hi Xover<br />
point will be 1 sec.<br />
Hi Xover<br />
(500Hz - 20KHZ) sets the frequency at which the transition<br />
from the mid frequencies to the high frequencies takes place.<br />
Mid Decay<br />
(0.01 - 2.5) The Ratio control multiplier for the mid<br />
frequencies. This parameter is normally set to 1.0 as it is the<br />
main parameter adjusted by the main Decay parameter. This<br />
mid-range decay control would normally be omitted,<br />
however, <strong>TC</strong> Engineers felt you could use this parameter as a<br />
fine adjustment tool to “tweak” a preset to sound just right<br />
without having to adjust the master Decay parameter.<br />
Mid Xover<br />
(200Hz - 2kHz) Sets the frequency at which the transition<br />
from the low-mid to the mid frequencies takes place.<br />
Lo mid Decay<br />
(0.01 - 2.5) The Ratio control multiplier for the low-mid<br />
frequencies<br />
Lo Xover<br />
(20Hz - 500Hz) Sets the frequency at which the transition<br />
from the low to the low-mid frequencies takes place.<br />
Lo Decay<br />
(0.01 - 2.5) The Ratio control multiplier for the low<br />
frequencies.<br />
40
VSSFP - FILM & POST<br />
Lo Damp Freq<br />
(20Hz - 200Hz) Sets the Lo Cut frequency for the next<br />
parameter, Lo Damp. Use these two parameters to take away<br />
any objectionable low frequencies entering the Reverb tail<br />
processor.<br />
Lo Damp<br />
(-18dB - 0dB) Sets the amount of cut in dBs. Used with the<br />
previous parameter, Lo Damp Freq.<br />
Modulation<br />
The Reverb Mod and the Space Mod work on the tail of the<br />
reverb and give you the ability to tweak the tail in different<br />
ways.<br />
To isolate and listen only to the tail you should turn the Early<br />
level off; set the mix to 100% and then turn the Depth<br />
parameter all the way up.<br />
Try changing the Type of Modulation and listen to its effect<br />
on the tail. Be aware that by using extensive modulation of<br />
the tail you might get a detuning effect of the source material.<br />
In that case reduce the Width and Depth.<br />
Space Mod<br />
This group of parameters sets the way the sound moves about<br />
the room.<br />
Type<br />
(Off, Normal, Fast, Slow, MidFreq, Sync).<br />
Rate<br />
(-100, default, +100) Allows you to offset the speed of the<br />
LFO from the factory default assigned to each type.<br />
Width<br />
(0% - 100%) Sets the width of the modulation.<br />
Depth<br />
(-50, default, +50) Allows you to offset the amount of space<br />
modulation from the factory default.<br />
Reverb Mod<br />
Type<br />
(Off, Smooth 1, Smooth 2, Perc, Wow, Vintage, Wild)<br />
Adjusts the type of modulation.<br />
Rate<br />
(-100, default, +100) Allows you to offset the speed of the<br />
LFO from the factory default assigned to each Type.<br />
Width<br />
(0% - 200%) Sets the Width of the modulation.<br />
41
VSSSR - SURROUND<br />
VSSSR (Surround)<br />
The VSSSR (Surround) algorithm is a unique room<br />
simulator with new facilities for surround production. The<br />
diffused field of the simulation is turned into a Front/Rear<br />
composition with separate Decay, Level and Predelay<br />
parameters for front and rear.<br />
The composite output of the simulator is compatible with<br />
mono, stereo and surround reproduction.<br />
When used for surround production a surround encoder is not<br />
needed, but monitoring should be done through a Dolby SR<br />
compatible decoding system.<br />
Front Decay<br />
(0.01 - 20) Changes the Decay time at the mono information<br />
in the signal.<br />
Rear Decay<br />
(0.01 - 20) Changes the Decay time at the stereo information<br />
in the signal.<br />
Front Level<br />
(-10dB - 0dB) Changes the level of the Front/center<br />
information in the signal.<br />
Rear Level<br />
(-10dB - 0dB) Changes the level of the Rear/surround<br />
information in the signal.<br />
Early Lev<br />
(-100dB - 0dB) The Output level of the Early Reflections.<br />
When Early Lev is set all the way off, the Reverb effect will<br />
consist entirely of Reverb tail.<br />
Hi Color (available in easy mode only)<br />
Adjusts the spectral balance in the high frequencies.<br />
This is actually a simple way of adjusting a complex<br />
selection of frequencies.<br />
Lo Color (available in easy mode only)<br />
Adjusting the spectral balance in the low frequencies.<br />
A simple way of adjusting a complex selection of<br />
frequencies.<br />
Front Delay<br />
(0 - 200ms) Changes the reverb feed delay time of the<br />
Front/center information in the signal.<br />
Rear Delay<br />
Changes the reverb feed delay time of the Rear/surround<br />
information in the signal.<br />
Pre Delay<br />
(0 - 100ms) A delay placed at the Input of the algorithm. This<br />
sets how long after the dry sound the Early Reflections will<br />
begin.<br />
Mix<br />
(0% - 100%) Wet/Dry mix. Can be frozen at 100% on the I/O<br />
menu.<br />
Out Level<br />
(-100dB - 0dB) The overall Output level of the Reverb.<br />
This is mostly used when the two Engines are used in serial<br />
mode, or used in the Combined Mode.<br />
Expert mode<br />
Press OK to gain access to the following additional<br />
parameters.<br />
Note: Hi Color and Lo Color are not available in this mode.<br />
Early Reflections<br />
Early Type<br />
(Several types) Pick the type that best compliments your<br />
material or best represents the effect you are going for.<br />
Early Size<br />
(Small, Medium, Large) Changes the size of the Early Type<br />
parameter.<br />
Note: Some of the Early Types are only one size.<br />
Early Pos<br />
Here you can select between a Close and a Distant setting.<br />
This enables you to change the distance between the listening<br />
position and the source in the same Early Reflection pattern.<br />
Note that some of the Early Types only have one position<br />
available.<br />
42
VSSSR - SURROUND<br />
Early Bal<br />
(-100dB R, Center, -100dB L) the left/right balance of the<br />
Early Reflections. Allows you to offset the Early Reflections<br />
from the normal center position.<br />
Hi Color<br />
(±50) Adjusts the spectral balance of the Early Type.<br />
The Hi Color parameter is actually an advanced Hi Cut<br />
parameter. The default setting of this parameter is customized<br />
to each of the Early Types.<br />
Lo Cut<br />
(20 - 400Hz) This adjustable filter removes low frequencies<br />
for the Early Reflections.<br />
Reverb Tail<br />
Rev Type<br />
(Smooth, Natural, Metal, Fast, Fast WD) Adjust this<br />
parameter with the Early Lev turned all the way off and the<br />
Rev Lev all the way up. Change the type to get a feel of what<br />
each one sounds like.<br />
Rev Depth<br />
With this parameter you can change the depth of the reverb<br />
tail.<br />
Diffuse<br />
(±50) This parameter gives you more or less diffusion than<br />
the algorithm designer intended for the given Decay time.<br />
For optimum performance the diffusion is automatically<br />
adjusted behind the scenes whenever you change decay<br />
times. This parameter gives you the added control to vary the<br />
diffusion around this automatic setting.<br />
Hi Cut<br />
(20 - 20kHz) Rolls off the top end as it enters the Reverb tail.<br />
Used in conjunction with Hi Soften and Hi Decay to<br />
"darken" a room.<br />
Hi Soften<br />
(+/-50) Hi Soften is a special filter used to "soften" the high<br />
frequencies of Reverb tail. This is not a simple Hi Cut filter<br />
but a complex set of filters working together to remove those<br />
frequencies that make a reverb sound "brittle" or harsh<br />
sounding. Hi Soften is scaled/linked to the Hi Cut and<br />
Hi Decay parameters.<br />
Hi Decay<br />
(0.01 - 2.5) Multiplier for the frequencies above the Hi Xover<br />
frequency. Example: If the main Decay parameter is set to<br />
2.0 sec and the Hi Decay parameter is set to 1.5, frequencies<br />
above the Hi-Xover will decay for 3.0 sec. Conversely if this<br />
parameter is set to 0.5 the Decay time above the Hi Xover<br />
point will be 1 sec.<br />
Hi Xover<br />
(500Hz - 20kHz) sets the frequency at which the transition<br />
from the mid frequencies to the high frequencies takes place.<br />
Mid Decay<br />
(0.01 - 2.5) The Ratio control multiplier for the mid<br />
frequencies. This parameter is normally set to 1.0 as it is the<br />
main parameter adjusted by the main Decay parameter. This<br />
mid-range decay control would normally be omitted,<br />
however, <strong>TC</strong> Engineers felt you could use this parameter as a<br />
fine adjustment tool to “tweak” a preset to sound just right<br />
without having to adjust the master Decay parameter.<br />
Mid Xover<br />
(200Hz - 2kHz) Sets the frequency at which the transition<br />
from the low-mid to the mid frequencies takes place.<br />
Lo mid Decay<br />
(0.01 - 2.5) The Ratio control multiplier for the low-mid<br />
frequencies<br />
Lo Xover<br />
(20Hz - 500Hz) Sets the frequency at which the transition<br />
from the low to the low-mid frequencies takes place.<br />
Lo Decay<br />
(0.01 - 2.5) The Ratio control multiplier for the low<br />
frequencies.<br />
Lo Damp Freq<br />
(20Hz - 200Hz) Sets the Lo Cut frequency for the next<br />
parameter, Lo Damp. Use these two parameters to take away<br />
any objectionable low frequencies entering the Reverb tail<br />
processor.<br />
Lo Damp<br />
(-18dB - 0dB) Sets the amount of cut in dBs. Used with the<br />
previous parameter, Lo Damp Freq.<br />
43
VSSSR - SURROUND<br />
Reverb Mod<br />
Type<br />
(Off, Smooth 1, Smooth 2, Perc, Wow, Vintage, Wild)<br />
Adjusts the type of modulation.<br />
Rate<br />
(-100, default, +100) Allows you to offset the speed of the<br />
LFO from the factory default assigned to each Type.<br />
Width<br />
(0% - 200%) Sets the Width of the modulation.<br />
Space Mod<br />
This group of parameters sets the way the sound moves about<br />
the room.<br />
Type<br />
(Off, Normal, Fast, Slow, MidFreq, Sync).<br />
Rate<br />
(-100, default, +100) Allows you to offset the speed of the<br />
LFO from the factory default assigned to each type.<br />
Width<br />
(0% - 100%) Sets the width of the modulation.<br />
Depth<br />
(-50, default, +50) Allows you to offset the amount of space<br />
modulation from the factory default.<br />
44
C.O.R.E.<br />
C.O.R.E.<br />
The C.O.R.E. algorithm is a well-known <strong>TC</strong> Reverb from the<br />
M5000, and is very good on short to medium decay times.<br />
C.O.R.E. has all parameters present at first layer (meaning no<br />
Expert mode).<br />
Try e.g. presets 69, 89 and 189 to experience the C.O.R.E<br />
algorithm.<br />
Decay<br />
Sets the Decay time. The value indicates the time to where<br />
the Reverb tail is damped to -60dB.<br />
Early Level<br />
Sets the Early Reflection level.<br />
Reverb Level<br />
Level of the Reverb tail.<br />
Mix<br />
Mix between direct and effect.<br />
Out Level<br />
Adjusts Output level. Use this parameter to match levels<br />
between presets.<br />
Rev Delay<br />
Determines how fast the reverberation will build up.<br />
Pre Delay<br />
The time to arrival of the first reflection.<br />
Reflections<br />
Imposes the characteristics of the Early Reflections on the<br />
later reverberation.<br />
Rev diff 2<br />
Imposes the characteristics of the Early Reflections on the<br />
later reverberation.<br />
Rev width<br />
This parameter adjusts the stereo width of the Reverb tail.<br />
Hi Cut level<br />
Damping Ratio in dB of the Hi Cut filter.<br />
Hi Damp<br />
(0.01 - 2.5) Multiplier for the frequencies above the<br />
Hi Crossover frequency. Example: If the main Decay<br />
parameter is set to 2.0sec and the Hi Decay parameter is set<br />
to 1.5, frequencies above the Hi Xover will decay for 3.0sec.<br />
Conversely if this parameter is set to 0.5 the Decay time<br />
above the Hi Xover point will be 1sec.<br />
Hi Decay<br />
Adjusts the high frequency reverberation time.<br />
Hi Crossover<br />
Crossover frequency between mid and high band<br />
reverberation filter.<br />
Lo Decay<br />
Adjusts the low frequency reverberation time.<br />
Lo Crossover<br />
Crossover frequency between low and mid band<br />
reverberation filter.<br />
Room shape<br />
Here you can choose between different room shapes.<br />
Changing the room shape will change the Early Reflections.<br />
Size<br />
Size multiplication factor. With this parameter you can<br />
change the size of the room. Only the Early Reflections are<br />
influenced by this factor.<br />
Rev diff 1<br />
45
REV-3<br />
Rev-3 :<br />
Reverb 3 is a well known <strong>TC</strong> algorithm from the M5000, and<br />
is very good at medium decay times. Rev-3 has all parameters<br />
present in the first layer (meaning no Expert mode).<br />
Try e.g. presets 77, 81, 83 and 84 to experience the Rev-3<br />
algorithm.<br />
Pre Delay<br />
The time to arrival of the first reflection.<br />
Decay<br />
Sets the Decay time. The value indicates the time to where<br />
the Reverb tail is damped to -60dB.<br />
Distance<br />
The relative distance control varies the mix relations between<br />
early and later reflections. Simulating how far away you are<br />
from the sound source.<br />
Mix<br />
Mix between direct and effect.<br />
Out Level<br />
Adjusts Output level. Use this parameter to match levels<br />
between presets.<br />
Diffuser type<br />
The natural room mode peak frequencies and the smoothness<br />
of the tail are affected by this parameter.<br />
Diffuse<br />
This parameter sets the degree of wall diffusion. Increasing<br />
the value will result in a more dense Reverberation tail.<br />
Do not set the value too high, as it will result in an unnatural<br />
sounding Reverberation tail.<br />
Hi Decay<br />
Adjusts the high frequency Reverberation time.<br />
Hi Crossover<br />
Crossover frequency between mid and high band<br />
Reverberation filter.<br />
Mid Crossover<br />
Crossover frequency between low-mid and high-mid band<br />
Reverberation filter.<br />
Lo Mid Decay<br />
Adjusts the mid frequency Reverberation time.<br />
Lo Crossover<br />
Crossover frequency between low and mid-band<br />
Reverberation filter.<br />
Lo Decay<br />
Adjusts the low frequency Reverberation time.<br />
Modulation<br />
Rate<br />
The Mod Rate varies the Rate of modulation of the<br />
recirculating delay paths simulating the Reverb tail.<br />
Depth<br />
Controls the amount of Delay Path Modulation or “wander”<br />
in the reverb.<br />
Hi Cut freq.<br />
Sets the cut-off frequency of the Hi Cut filter.<br />
Hi Damp<br />
(0.01 - 2.5) Multiplier for the frequencies above the<br />
Hi Crossover frequency. Example: If the main Decay<br />
parameter is set to 2.0sec. and the Hi Decay parameter is set<br />
to 1.5, frequencies above the Hi Xover will decay for 3.0sec.<br />
Conversely if this parameter is set to 0.5 the Decay time<br />
above the Hi Xover point will be 1sec.<br />
46
ADDITIONAL EFFECTS - DELAY & PI<strong>TC</strong>H<br />
Delay<br />
The Delay presets are capable of performing up to 1350ms<br />
delay. The Feedback filters make it possible to control both<br />
high and low frequency feedback.<br />
Pitch<br />
The Pitch presets are capable of performing 6 pitched Voices<br />
at the same time. This makes it possible to produce<br />
a true Chorus effect.<br />
Delay time<br />
Controls the length of delay time.<br />
Feedback<br />
Controls the amount of effect signal routed back to the Input.<br />
Hi Cut Freq<br />
Feedback Hi Cut-off frequency. Signal is damped 6dB/oct<br />
above this frequency.<br />
Hi Cut Level<br />
Sets maximum depth of cut above the Hi Cut shelving<br />
frequency.<br />
Hi Cut Freq (Feedback filter)<br />
Hicut shelving type filter (-6dB/oct) at the feedback loop.<br />
Lo Cut Freq (Feedback filter)<br />
Locut shelving type filter (-6dB/oct) at the feedback loop.<br />
Mix<br />
Mix between direct signal and effect.<br />
Out Level<br />
Adjusts Output level. Use this parameter to match levels<br />
between presets.<br />
Voice<br />
Sets which voice you are editing.<br />
Pitch<br />
Sets the pitch of the current Voice (0-1200).<br />
Level<br />
Sets the level of the current Voice.<br />
Pan<br />
Sets the panning of the current Voice.<br />
Delay<br />
Sets the delay of the current Voice.<br />
Mix<br />
Mix between direct signal and effect.<br />
Out Level<br />
Adjusts Output level. Use this parameter to match levels<br />
between presets.<br />
47
ADDITIONAL EFFECTS - EQ<br />
EQ<br />
The EQ programs are all 3 band parametric types with<br />
separate high and low shelving bands.<br />
Frequency<br />
Low shelving filter ranging from 20Hz to 5kHz.<br />
High shelving filter ranging from 500Hz to 20kHz.<br />
Three band filters ranging from 20Hz to 20kHz.<br />
Band width<br />
Low and high shelving filters have 2 different slopes.<br />
The bandwidth of the 3 bandfilters are:<br />
1) 0.10 octave<br />
2) 0.63 octave<br />
3) 4.00 octaves<br />
Level<br />
All filters range +/-12dB.<br />
EQ level<br />
Adjustable +/-12dB.<br />
48
ADDITIONAL EFFECTS - CHORUS & FLANGER<br />
Chorus<br />
These presets are capable of producing a smooth natural<br />
sounding stereo Chorus effect. The Hi Cut filter gives you<br />
the ability to make the Chorus very warm.<br />
An LFO phase change causes a small delay in one of the<br />
waveform starting points. This means that left and right<br />
Outputs start the current waveform at two different points.<br />
Example: If LFO phase is set to 180º, left and right will be<br />
exactly opposite.<br />
Speed<br />
The speed of the Chorus, also known as Rate.<br />
90 phase<br />
change<br />
Depth<br />
Adjusts the depth of the Chorus, also known as Intensity.<br />
Delay<br />
As described earlier, a Chorus/Flanger is basically a Delay<br />
being modulated by an LFO. This parameter makes it<br />
possible to change the length of that Delay. A typical Chorus<br />
uses delays at approximately 10ms, while a Flanger uses<br />
delays at around 5ms.<br />
Flanger<br />
The Feedback filters in this algorithm are capable of controlling<br />
both high frequency and low frequency feedback, which<br />
makes it very flexible and versatile.<br />
Mix<br />
Mix between direct sound and effect.<br />
Out level<br />
Adjusts the Output level of the Chorus.<br />
Golden ratio<br />
Sets the Golden Ratio between Speed and Depth On/Off. If<br />
you want to create wild Chorus sounds you may want to turn<br />
the Golden Ratio off.<br />
Phase Reversed<br />
Reverses the phase of the right channel, but only on the<br />
effect signal. This function makes the stereo image much<br />
wider.<br />
LFO Curve<br />
Sets the curve of the LFO. Choose between Sine or Triangle.<br />
The most commonly used waveform in Chorus is Sine.<br />
(see curve figures in Tremolo).<br />
LFO Phase<br />
Speed<br />
The speed of the Flanger, also known as Rate.<br />
Depth<br />
Adjusts the depth of the Flanger, also known as Intensity.<br />
Delay<br />
As described earlier, a Chorus/Flanger is basically a Delay<br />
being modulated by an LFO. This parameter makes it<br />
possible to change the length of that Delay. A typical Chorus<br />
uses delays at approximately 10ms, while a Flanger uses<br />
delays at around 5ms.<br />
Mix<br />
49
ADDITIONAL EFFECTS - FLANGER & TREMOLO<br />
Mix between direct sound and effect.<br />
Out Level<br />
Controls the Output level of the block.<br />
Feedback<br />
Controls the amount of feedback in the Flanger.<br />
Note that this parameter can be negative, e.g. feedback in<br />
reversed phase.<br />
Cross Feedback<br />
Controls the amount of feedback between the two channels.<br />
Note that the Crossfeed can be negative, e.g. Crossfeed in<br />
reversed phase.<br />
Golden Ratio<br />
Sets the Golden Ratio between Speed and Depth On/Off.<br />
If you want to create wild Flanger sounds you may want to<br />
turn the Golden Ratio off.<br />
Phase Reversed<br />
Reverses the phase of the right channel, but only on the<br />
effected signal. This function makes the stereo image much<br />
wider.<br />
LFO Curve<br />
Sets the curve of the LFO. Choose between: Sine or Triangle.<br />
The most commonly used waveform in Flanging is Sine.<br />
(See curve figures in Tremolo).<br />
LFO Phase<br />
An LFO phase change causes a small delay in one of the<br />
waveform starting points. This means that left and right<br />
Outputs start the current waveform at two different points.<br />
Example: If LFO is set to 180º, left and right will be exactly<br />
opposite.<br />
(See the LFO phase figure in the Chorus section).<br />
Tremolo<br />
Speed<br />
Controls the how fast the Tremolo is pulsing.<br />
Depth<br />
Will set the intensity of the Tremolo, or how deep it sweeps.<br />
Mix<br />
Mix between direct sound and effect.<br />
Out Level<br />
Controls the Output level of the block.<br />
Curve (only in Advanced mode)<br />
Sets the curve of the LFO. Choose between:<br />
Square, Sine, or Triangle.<br />
The most common LFO curve in Tremolo is Triangle.<br />
Square<br />
Triangle<br />
Sine<br />
Try the Square waveform with 100% Depth, to get<br />
holes in your sound (called Transforming).<br />
Pulsewidth (only in Advanced)<br />
Controls the division of the upper and lower part of the current<br />
waveform, e.g. if Pulsewidth is set to 75%, the upper half of<br />
the waveform will be on for 75% of the time.<br />
Pulsewidth<br />
LFO Phase (0, 90 or 180º)<br />
An LFO phase change causes a small delay in one of the<br />
waveform starting points. This means that left and right<br />
Outputs start the current waveform at two different points.<br />
Use the Tremolo as a Panner by setting the LFO phase<br />
to 180º.<br />
50
ADDITIONAL EFFECTS - PHASER & EXPANDER/GATE<br />
Phaser<br />
A Phaser in general is a group of comb filters that are swept<br />
back and forth by an LFO within a certain frequency range.<br />
When the comb filter sound is mixed with the direct signal,<br />
the moving phasing sound is created due to the constant<br />
moving phase cancelation of the combfilter frequencies in the<br />
direct signal.<br />
EXPANDER/GATE<br />
Threshold<br />
When the Input signal falls below the Threshold, the<br />
Expander/Gate starts working. This means that the higher<br />
Threshold the more expansion or gating you will get.<br />
PHASER<br />
Speed<br />
Controls the speed of the moving filters in the Phaser.<br />
Depth<br />
Adjusts the depth of the phasing filters.<br />
Mix<br />
Mixes between direct sound and phaser sound.<br />
Out Level<br />
Controls the Output level of the block.<br />
Order<br />
Choose between 4th, 8th or 12th order.<br />
FB Level<br />
Controls the Level of the Feedback.<br />
Range<br />
Choose between Low or High.<br />
Expander/Gate<br />
The Expander/Gate performs Downward Expansion.<br />
Downward Expansion in general means that below a certain<br />
Threshold the Input signals gain is reduced on the Output<br />
according to a specific ratio. Expanders and gates are often<br />
used to reduce or eliminate noise.<br />
EXPANDER/GATE<br />
Ratio<br />
This is the Ratio of the gain reduction. If the Ratio is set to<br />
4:1 it means that for every 1dB the Input signal decreases, the<br />
Output will decrease by 4dB.<br />
When the Ratio is set to Infinite:1, it means that when the<br />
Input signal falls below the Threshold, the Output is turned<br />
all the way down. This is also known as Gating.<br />
Attack<br />
The Attack time is the fallback time that the Expander/Gate<br />
uses to reach the gain reduction specified by the Ratio<br />
parameter.<br />
Example: If the Input signal suddenly drops 4dB below<br />
Threshold in no time, with the Ratio set to 4:1 and the Attack<br />
set to 20ms, the <strong>M3000</strong> will use 20ms to reach a total gain<br />
reduction of 16dB.<br />
Release<br />
The Release is the rise time that the Expander/Gate uses to<br />
release the gain reduction when the signal exceeds the<br />
Threshold.<br />
Out Level<br />
Controls the Output level of the Expander/Gate.<br />
51
ADDITIONAL EFFECTS - COMPRESSOR<br />
Compressor<br />
A Compressor is meant to reduce the dynamic content of the<br />
Input signal, and thereby keep a more constant level. When<br />
the Input signal exceeds the Threshold, the Compressor starts<br />
to reduce the signal according to the ratio. The Ratio<br />
describes how much the signal is reduced, e.g. a Ratio at 2:1<br />
means that for every 2dB the signal exceeds the Threshold,<br />
only 1dB comes out.<br />
Release<br />
Release sets the fallback time from when the Input signal<br />
falls below Threshold until the Compressor reaches no gain<br />
reduction.<br />
Out Gain<br />
The Gain parameter makes it possible to compensate for the<br />
loss of level in the Compressor. This is also known as<br />
“Makeup” gain.<br />
Out Level<br />
Controls the Output level of the block.<br />
COMPRESSOR<br />
Threshold<br />
When the Input level exceeds the Threshold, the Compressor<br />
will be activated. This means that the lower the Threshold,<br />
the more compression you will get.<br />
COMPRESSOR<br />
Ratio<br />
The Ratio of the gain reduction. Example: When the Ratio is<br />
set to 4:1 it means that for every 4dB the Input level rises,<br />
the Output level increases by only 1dB.<br />
Attack<br />
Attack is the amount of time the Compressor uses to reach<br />
the gain reduction specified by the Ratio parameter.<br />
Example: The Input signal rises to 4dB above Threshold in<br />
no time, with the Ratio set to 4:1 and the Attack set to 20ms.<br />
The Compressor will now use 20ms to reach a 3dB gain<br />
reduction - giving you 1dB on the output side for every 4dB<br />
the signal rises above the Threshold point.<br />
52
ADDITIONAL EFFECTS - DE-ESSER<br />
De-esser<br />
A De-esser is used for removing the sibilant sounds from<br />
instruments and especially voices. This is done dynamically,<br />
which means that it’s not a static EQ filter but a dynamic<br />
filter that only cuts into the sound when the high frequencies<br />
are loud in the material.<br />
Threshold<br />
When the Input level exceeds the Threshold, the De-esser<br />
will be activated, according to the Mode parameter.<br />
Monitor<br />
Monitor the Sidechain signal, and hear what the De-esser<br />
actually removes from the main signal.<br />
Ratio<br />
The Ratio of the gain reduction.When the Ratio is set to 4:1<br />
it means that for every 4dB the defined frequency range rises,<br />
the Output level increases by only 1dB.<br />
Attack<br />
The Attack time is the response time that the De-esser uses to<br />
reach the gain reduction specified by the Ratio parameter.<br />
Example: If the Input signal suddenly increases to 4dB above<br />
Threshold with the Ratio set to 4:1 and the Attack set to<br />
20ms, the De-esser will use 20ms to reach the gain reduction<br />
of 3dB.<br />
Release<br />
Release sets the fallback time of the De-esser, after the signal<br />
drops below the Threshold.<br />
Freq<br />
Sets the center frequency of the range the De-esser should<br />
work in.<br />
Curve<br />
Sets the bandwidth or Lo/Hi shelf setting of the range the<br />
De-esser should work in.<br />
Mode<br />
Decides how the Threshold shall react. When set to Relative,<br />
the Threshold will be relative to the average level of the<br />
signal. This means that also soft signals are processed. For<br />
signals where the average level is determined by signals<br />
outside the frequency range set, e.g. a vocal with<br />
sibilance, the Relative setting is useful and very musical.<br />
When Mode is set to Absolute, the Threshold set refers to<br />
full scale (0dB) and is therefore well suited for limiting the<br />
maximum level in a specified frequency range, e.g. the bass.<br />
53
APPENDIX - THE RESET PAGE<br />
Store and load your own<br />
default settings<br />
Enter User Data page<br />
Reset system parameters<br />
Clear all user presets<br />
Test Programs<br />
Type your name here<br />
Type your phone number<br />
Place cursor here<br />
and press OK to<br />
finalize session.<br />
To enter the Reset page:<br />
Hold down one of the 3 Bypass keys pressed while<br />
powering up the unit.<br />
Move the marker using the the CURSOR keys and<br />
press OK to select the desired Reset type.<br />
Load User Default<br />
This will reset all system parameters back to a Default setup<br />
defined by you (see Store User Def below). This reset will NOT<br />
delete the User presets of the <strong>M3000</strong>.<br />
Store User Def<br />
When you have a perfect setup of your <strong>M3000</strong>, you are able to<br />
store this as your own Default setup. This function is very useful,<br />
for example when you have finished a special production and<br />
wish to return to normal setup. When you have the perfect setup<br />
of your <strong>M3000</strong>, simply select this function and press OK to store<br />
your Default settings.<br />
Set User Name<br />
This function makes it possible to write your Name and Phone<br />
number into the <strong>M3000</strong>. Press OK to access the User data menu.<br />
Use the ADJUST wheel and the CURSOR keys to write your<br />
Name and Phone number into the <strong>M3000</strong>. Press OK to accept.<br />
Your Name and Phone number will be displayed during<br />
power-up.<br />
Reset System Parameters<br />
This will reset all system parameters back to the Factory Default.<br />
This reset will NOT delete the User presets of the <strong>M3000</strong>.<br />
Reset all presets<br />
This will clear all RAM presets .<br />
54
APPENDIX - SELF TEST<br />
PRESS ONE OF THE 3 BYPASS KEYS, WHILE<br />
POWERING UP, TO ACCESS THE RESET MENU AND<br />
SELECT »RUN TEST PROGRAM«<br />
Turn the ADJUST wheel to scroll through Self tests<br />
Key test<br />
Select Key test by pressing OK.<br />
The keys must be pressed in the order they are requested by the<br />
<strong>M3000</strong> to pass the test.<br />
Press CANCEL (OK with SHIFT activated) to exit Key test.<br />
ADJUST wheel test<br />
Select ADJUST wheel test by pressing OK.<br />
Turn the ADJUST wheel to 30 and back to 0 to pass test.<br />
Press CANCEL to exit the ADJUST wheel test.<br />
LED test<br />
Select LED test by pressing OK<br />
Turn ADJUST wheel to test the LED. The test is “ok” when all<br />
LEDs are lit.<br />
Press CANCEL to exit LED test.<br />
Display test<br />
Select Display test by pressing OK.<br />
Press OK to check that all pixels are lit. Press any key to leave<br />
the pixel test.<br />
Analog I/O test<br />
Select Analog I/O test by pressing OK.<br />
Connect an <strong>M3000</strong> Analog Output directly to the<br />
<strong>M3000</strong> Analog Input, which has to be tested and press OK.<br />
Use a balanced cable.<br />
Press CANCEL to exit Analog I/O test<br />
Digital I/O test<br />
Select Digital I/O test by pressing OK.<br />
Connect the <strong>M3000</strong> AES/EBU Output to the<br />
<strong>M3000</strong> AES/EBU Input.<br />
Connect the <strong>M3000</strong> S/PDIF Output to the <strong>M3000</strong> S/PDIF Input.<br />
Connect the <strong>M3000</strong> ADAT Output to the <strong>M3000</strong> ADAT Input.<br />
PPM must show 0dB to pass test.<br />
Press CANCEL to exit Digital I/O test.<br />
MIDI I/O test<br />
Select MIDI I/O test by pressing OK.<br />
Connect the <strong>M3000</strong> MIDI Output to the <strong>M3000</strong> MIDI Input.<br />
Prg. change 1-128 is send out on MIDI Thru. Connect this socket<br />
to a MIDI compatible device and confirm the Program changes.<br />
Press CANCEL to exit MIDI I/O test.<br />
Pedal test<br />
Select Pedal test by pressing OK.<br />
Connect a momentary pedal to the External Control In.<br />
When pressing the pedal, the result should be OK.<br />
When released the result should be Not OK.<br />
Press CANCEL to exit Pedal test.<br />
PCMCIA test<br />
Select PCMCIA test by pressing OK.<br />
Insert PCMCIA card. Note that all data on PCMCIA card will be<br />
destroyed.<br />
Press OK to test.<br />
Result reads:<br />
Low battery - Time to change battery in your PCMCIA card.<br />
Not OK - Try the test using another PCMCIA card.<br />
Press CANCEL to exit PCMCIA test.<br />
Battery test<br />
Select Battery test by pressing OK.<br />
Confirm that Result is “ok”.<br />
Press CANCEL to exit Battery test.<br />
System test<br />
Select System test by pressing OK.<br />
Confirm that Result is “ok”.<br />
Result reads:<br />
EEPROM Not Ok - The unit will most likely work ok, the<br />
message is for service matters only.<br />
Ex. RAM is bad - , the memory will not work.<br />
Contact your local dealer.<br />
Press CANCEL (OK with SHIFT activated) to exit System test.<br />
Power Off - On to start standard software.<br />
Service note<br />
In case of the unlikely event that the unit needs to be sent in for<br />
service, please pack the unit in the original box AND an outer<br />
box before sending it.<br />
55
APPENDIX - TROUBLESHOOTING<br />
You press the POWER switch but there is no light.<br />
- The POWER switch on the rear panel is switched off.<br />
The Input PPM meters don’t peak out.<br />
- You are using Analog Inputs, but the Input selector in the I/O menu is set to Digital in.<br />
- The Analog Input level is set too low.<br />
No sound through the <strong>M3000</strong>.<br />
- You are using Analog Inputs, but the Input selector in the I/O menu is set to Digital in.<br />
You can not turn off the power.<br />
- Hold the POWER switch pressed for at least 3 seconds.<br />
All programs sound “phased”.<br />
- You are using the <strong>M3000</strong> in combination with a mixing console (send/return), but have not set Mix to 100%. You can do this permanently<br />
in the I/O page.<br />
Noise on Digital Outputs.<br />
- If you experience Digital noise (much like “white noise”) or a hiss, you have probably set the dither to 8 bit. Unless you specifically want<br />
to dither to 8 bit please set dither to relevant value in the I/O page.<br />
Input only present in one channel.<br />
- If the Input meters indicates that signal is only present on either the Left or the Right side, you should check the Channel parameter in the<br />
I/O page. Appropriate setting should be selected. The options are L, R or Stereo.<br />
56
APPENDIX - GLOSSARY<br />
AES/EBU<br />
Professional digital In/Out standard, using balanced XLR cables.<br />
S/PDIF<br />
Consumer digital In/Out standard, normally using coaxial<br />
phono type cables.<br />
DITHERING<br />
Dithering is a method to optimize the quality of a digital audio<br />
signal at low levels when truncation is taking place. E.g. going<br />
from a 24 bit format to 16 bit. A small amount of filtered noise is<br />
added to the signal, giving you a less distorted low level<br />
signal. If you are using digital outputs, the equipment you feed<br />
determines the number of bits. A signal going to a DAT or CDR<br />
recorder should always be dithered to 16 bit.<br />
PRO/CONS LEVELS<br />
Depending on which equipment you are using along with the<br />
<strong>M3000</strong>, you must set the PRO/CON parameters correctly in the<br />
I/O setup menu.<br />
<strong>M3000</strong> Analog Inputs:<br />
Consumer range: -16dB to +10dB, nominal level = -10dB<br />
Professional range: -6dB to +16dB, nominal level = +4dB<br />
<strong>M3000</strong> Analog Outputs:<br />
Consumer range: -10dB to +16dB<br />
Professional range: -16dB to +6dB<br />
The levels are either listed in the technical specifications or<br />
printed on the rear panel of the connected devices.<br />
DE-ESSING<br />
An algorithm that removes unwanted “esses” from a vocal<br />
material.<br />
SYSTEM EXCLUSIVE MIDI COMMANDS<br />
Device-dependent MIDI commands, normally used for remote<br />
controlling machines.<br />
57
APPENDIX - TECHNICAL SPECIFICATIONS<br />
Digital Inputs and Outputs<br />
Connectors:<br />
Formats:<br />
Output Dither:<br />
Sample Rates:<br />
Processing Delay:<br />
Frequency Response DIO:<br />
Analog Inputs<br />
Connectors:<br />
Impedance:<br />
Max. Input Level:<br />
Min. Input Level (for 0 dBFS):<br />
Sensitivity:<br />
A to D Conversion:<br />
A to D Delay:<br />
Dynamic Range:<br />
THD:<br />
Frequency Response:<br />
Crosstalk:<br />
Analog Outputs<br />
Connectors:<br />
Impedance:<br />
Max. Output Level:<br />
Full Scale Output Range:<br />
D to A Conversion:<br />
D to A Delay:<br />
Dynamic Range:<br />
THD:<br />
Frequency Response:<br />
Crosstalk:<br />
EMC<br />
Complies with:<br />
Safety<br />
Certified to:<br />
Environment<br />
Operating Temperature:<br />
Storage Temperature:<br />
Humidity:<br />
PCMCIA Interface<br />
Connector:<br />
Standards:<br />
Card Format:<br />
Control Interface<br />
MIDI:<br />
GPI, Pedal, Fader:<br />
General<br />
Finish:<br />
Dimensions:<br />
Weight:<br />
Mains Voltage:<br />
Power Consumption:<br />
Backup Battery Life:<br />
Warranty Parts and labor:<br />
XLR (AES/EBU), RCA Phono (S/PDIF), Optical (Tos-link, ADAT)<br />
AES/EBU (24 bit), S/PDIF (24 bit), EIAJ CP-340, IEC 958, EIAJ Optical (Tos-link), ADAT Lite pipe<br />
HPF TPDF dither 8 to 24 bit<br />
44.1 kHz, 48 kHz<br />
0.2ms @ 48 kHz<br />
20 Hz to 23.9 kHz ± 0.01/-0.1 dB @ 48 kHz<br />
XLR balanced (pin 2 hot)<br />
20 kohm<br />
+22 dBu (balanced)<br />
-10 dBu<br />
@ 12 dB headroom: -22 dBu to +10 dBu<br />
24 bit (1 bit, 128 times oversampling)<br />
0.8 ms @ 48 kHz<br />
>103 dB (unweighted), >106 dB (A)<br />
-95 dB (0,0018 %) @ 1kHz, -6 dBFS (FS @ +16 dBu)<br />
10 Hz to 20 kHz: +0/-0.2 dB<br />
100 dB (unweighted), >104 dB(A)<br />
-86 dB (0.005 %) @ 1 kHz, -6 dBFS (FS @ +16 dBu)<br />
10 Hz to 20 kHz: +0/-0.5 dB<br />
APPENDIX - MIDI IMPLEMENTATION CHART<br />
STUDIO EFFECTS PROCESSOR <strong>M3000</strong> - NOVEMBER 1 - 1998<br />
Function Transmitted Recognized Remarks<br />
Basic Channel Default 1-3 1-3 Eng1: 1, Eng2: 2, Com: 3<br />
Changed 1-16 1-16<br />
Mode<br />
Default<br />
Messages X X<br />
Altered<br />
Note Number X X<br />
True Voice X X<br />
Velocity Note ON X X<br />
Note OFF X X<br />
After Touch Key’s X X<br />
Ch’s X X<br />
Pitch Bend X X<br />
Control Change from 10 and up from 10 and up Cntrl.#10: Mix (If available)<br />
Cntrl.#11: Output Level<br />
Cntrl.#12: First Param. on Edit page.<br />
Cntrl.#13: Second Param. on Edit page.<br />
Cntrl.#14: Third ....<br />
Cntrl.#15: ...<br />
Cntrl.#16: ...<br />
Cntrl.#17: ...<br />
Prog Change O O<br />
True# 0-127 0-127<br />
System Exclusive O O<br />
Common :Song Pos X X<br />
:Song Sel X X<br />
:Tune X X<br />
System real time :Clock X O<br />
:Commands X X<br />
Aux Messages :Local ON/OFF X X<br />
:All Notes OFF X X<br />
:Active Sense X X<br />
:Reset X X<br />
Notes<br />
All Controllers are single byte type,<br />
scaled to parameter range.<br />
O:YES Mode1: OMNI ON, POLY Mode 2: OMNI ON, MONO<br />
X:NO Mode 3: OMNI OFF, POLY Mode 4: OMNI OFF, MONO<br />
For complete <strong>M3000</strong> MIDI specifications, please visit our Internet Site at: www.tcelectronic.com<br />
59
APPENDIX Soldering instructions<br />
MIDI Cable<br />
DIN CONNECTOR<br />
5POLE - MALE<br />
45 degrees<br />
max. 10m<br />
DIN CONNECTOR<br />
5POLE - MALE<br />
45 degrees<br />
SHIELDED CABLE (3 or 5 wires + screen)<br />
Note<br />
Note<br />
NOTE!<br />
On <strong>TC</strong> units with RS485 interface pins 1 and 3 on the DIN connectors are reserved for RS485 connection. Therefore, if you are connecting the<br />
unit to other equipment that use these pins, please make sure to use 3-wire standard MIDI type cable (not a five wire MIDI-PLUS type).<br />
Pedal Cable<br />
JACK PLUG<br />
Mono - male<br />
Ø 6.35mm, 1/4”<br />
max. 100m<br />
PEDAL SWI<strong>TC</strong>H or similar<br />
2 wires<br />
Shield/ground<br />
Tip<br />
Switch must be<br />
momentary type<br />
XLR - XLR Jack (unbalanced) - XLR Jack (balanced) - XLR<br />
Pin 1 - Pin 1 (Ground)<br />
Pin 2 - Pin 2 (Hot)<br />
Pin 3 - Pin 3 (Cold)<br />
Sleeve - Pin 1 (Ground)<br />
Tip - Pin 2 (Hot)<br />
Sleeve - Pin 3 (Cold)<br />
TIP<br />
GND<br />
Sleeve - Pin 1 (Ground)<br />
Tip - Pin 2 (Hot)<br />
Ring - Pin 3 (Cold)<br />
TIP<br />
RING<br />
GND<br />
60
<strong>M3000</strong> PRESET LIST<br />
This is the preset list of all factory presets in the<br />
<strong>M3000</strong>. The <strong>M3000</strong> holds 500 Single Engine and 100<br />
Combined Engine presets.<br />
When you press and hold down the RECALL key on<br />
Engine 1 or Engine 2, an index display pops up.<br />
This feature gives you an overview over the Single<br />
ROM presets enabling you to quickly access the<br />
desired type of presets.<br />
Please note:<br />
If the current recalled preset is in the range of<br />
1 - 250, the overview will cover this range only.<br />
If the current recalled preset is in the range of<br />
251 - 500 the overview will cover this range only.<br />
The categories<br />
Range 1 - 250<br />
Top 20 Presets<br />
The first 20 presets are a special “highlight” selection<br />
of the different preset types, covering Halls, Rooms,<br />
Plates, Gated Reverbs and Post Production presets.<br />
1 Hall Large Warm<br />
2 Studio 40x40ft<br />
3 Queens Arena<br />
4 Warm Cathedral<br />
5 Singing In The Abbey<br />
6 Stage And Hall<br />
7 251 All Up<br />
8 Vocal Bright<br />
9 Space Hall<br />
10 Overhead Mics<br />
11 Bright Space<br />
12 Small Wood Room<br />
13 Band Rehearsal Room<br />
Range 251 - 500<br />
14 RMX Snare Room<br />
15 Bright Plate<br />
16 Piano Plate<br />
17 Gated Reverb VSS Gate<br />
18 Empty Arena<br />
19 Warehouse<br />
Note - Where nothing else is specified, the VSS3<br />
algorithm is used.<br />
20 The Mens Room<br />
61
<strong>M3000</strong> PRESET LIST<br />
Halls<br />
Preset #21 to 136.<br />
A group of presets covering probably the most used reverbs in<br />
music production. This preset-group is divided into a Natural<br />
section from #21 to #63, which are the most realistic and natural<br />
sounding reverbs, and a Super-natural part from #64 to #136,<br />
which are more like effect reverb presets. Both groups are sorted<br />
from short to long decay times.<br />
21 Small Dense Hall<br />
22 Puk Drum Ambience<br />
23 Ambient Hall<br />
24 Nice 4 Strings<br />
25 Smokey Sax<br />
26 Acoustic Gtr Space<br />
27 Full Gymnasium<br />
28 Drews Small Hall<br />
29 Coffee House<br />
30 Big Dense Studio<br />
31 Bright Theatre<br />
32 Really True Hall<br />
33 Queens Arena Full<br />
34 The Club<br />
35 Venue Clear<br />
36 Venue Warm 1<br />
37 Nice Hall 1<br />
38 Venue Warm 2<br />
39 Concert Arena<br />
40 Vocal Hall 1<br />
41 Spacey Clear Hall<br />
42 Concert Piano<br />
43 Piano Hall 1st Row<br />
44 Hall Medium Warm<br />
45 Echo Hall<br />
46 Ballad Vocal Hall<br />
47 Vocal Hall 2<br />
48 Vocal Deep Male<br />
49 Modulated Hall<br />
50 Grand Vocal Hall<br />
51 Empty Gymnasium<br />
52 Lively Hall<br />
53 Church<br />
54 Hall Large Warm Wide<br />
55 Hall Large ClearWide<br />
56 Bright Hall<br />
57 Nice Hall 2<br />
58 Big Modulated Hall<br />
59 Church Clear<br />
60 Church Warm<br />
61 Cathedral Strings<br />
62 Cathedral<br />
63 Cathedral Clear<br />
62
<strong>M3000</strong> PRESET LIST<br />
64 Club Carib<br />
65 Kinky Chinks<br />
66 Bassed On What<br />
67 Snare Room Bright<br />
68 Slap Back Sax<br />
69 1 Bar Snare Tap C.O.R.E.<br />
70 Drum Tile Space<br />
71 Dickey Dickey<br />
72 Smooth Garage<br />
73 Space Chamber<br />
74 Drums Big<br />
75 Wide Space<br />
76 Leader Of The band<br />
77 Medium Guitar Hall REV 3<br />
78 Medium Vocal Hall<br />
79 Big Empty Club<br />
80 Lap Dance Snare<br />
81 Lonely Organ REV 3<br />
82 Slap Back Vox 1<br />
83 Bright Strings REV 3<br />
84 Bass Fishing REV 3<br />
85 Big Empty Space<br />
86 Medium Bright Hall REV 3<br />
87 Bright Guitar Hall<br />
88 Bright Slap Reverb REV 3<br />
89 Lounge Lizard C.O.R.E.<br />
90 Slap Back Vox 2<br />
91 Clear Hall<br />
92 Blind BG Vocals REV 3<br />
93 Perc Modulation<br />
94 Perc Straight Tail<br />
95 Perc 1978<br />
96 Perc Straight<br />
97 Vocal Ballad<br />
98 The 799A1 Sound<br />
99 Damped Hall<br />
100 251 Long Pre Dly<br />
101 Ballad Drums<br />
102 Vocal For Thin Voice<br />
103 251<br />
104 Bright Male Vox<br />
105 Vocal Female<br />
106 Fiddle Heaven<br />
107 Gospel verb 1<br />
108 Slap Back Reverb<br />
109 Shimmer Mod Lite REV 3<br />
110 Bright Large Gym<br />
111 Hall Large<br />
63
<strong>M3000</strong> PRESET LIST<br />
112 Nose Bleed Seats<br />
113 Big Ballad Vocal 2<br />
114 Sweet Basil Vocal C.O.R.E.<br />
115 Blackface Amp<br />
116 Large Hall Clear<br />
117 Soupy Ballad Verb<br />
118 Ringy Wash<br />
119 Modulated Backwall<br />
120 Big Vocal 2<br />
121 Crystal Clear XXL<br />
122 12 String Reverb<br />
123 Big Guitar Verb<br />
124 Windamish<br />
125 Over Yonder Hill<br />
126 Wild Modulation<br />
127 Church Piano<br />
128 String Bikini Atoll<br />
129 In The Clouds<br />
130 Perc 1980<br />
131 Perc 1984<br />
132 Freak Modulation 1<br />
133 Vox Canyon<br />
134 Warped Space<br />
135 Long And Smooth<br />
136 Sweeping Weirdverb<br />
Rooms<br />
Preset #137 to 190.<br />
Smaller and generally more tight rooms. The Natural sounding<br />
part of the presets are from #137 to #162, and the Super-natural<br />
part goes from #163 to 190. Both groups are sorted from short to<br />
long decay-times.<br />
137 Vocal Doubler<br />
138 Small Booth<br />
139 Minimum Booth<br />
140 Rhodes Thicken<br />
141 Lively Small Room<br />
142 12 String Doubler<br />
143 Studio 10x10ft<br />
144 Small Natural Room<br />
145 Small Perc Room<br />
146 Studio 20x20ft<br />
147 Soft Medium Room<br />
148 Small clear room<br />
149 Nice Perc Ambience<br />
150 Live Wooden Room<br />
151 Puk Drum Ambience S<br />
152 Acc Guitar Ambience<br />
153 Wide Ambient Chamber<br />
154 Tight N Clear<br />
64
<strong>M3000</strong> PRESET LIST<br />
155 Real Room<br />
156 Lucho 2016 Good room<br />
157 Close Small Room<br />
158 Recital Room<br />
159 A Real Room<br />
160 Soft Guitar Ambience<br />
161 Big Soft Room<br />
162 The Studio<br />
163 Drum Stuff<br />
164 Tight vocal 1<br />
165 Kick Bass Ambience<br />
166 Amb Rock Lead Gtr<br />
167 RMX Ambience<br />
168 Snare Room Long<br />
169 Drum Trash Stuff<br />
170 Drummin Up Business<br />
171 Vocal BG Fat<br />
172 Thick Space<br />
173 Crazy Phasey<br />
174 Filtered Vocal Dbl 1<br />
175 Freak Modulation 2<br />
176 Dance Snare<br />
177 Drum Room Xpander<br />
178 3 Car Garage<br />
179 In A Cylinder<br />
180 RMX Ambience Wide<br />
181 Small Guitar Room REV 3<br />
182 Clear Guitar Room<br />
183 Dark Snare Hall<br />
184 Dark snare 2<br />
185 Slap Back Guitar<br />
186 Tom Tom Reverb<br />
187 Clear Room<br />
188 Slap Back Piano<br />
189 Bossa Nova Perc Room C.O.R.E.<br />
190 Delayed Hall<br />
Plates<br />
Preset #191 to 204.<br />
Reverb-simulations of vintage plate-reverbs. These presets are<br />
organised from short to long decay times.<br />
191 Drum Booth<br />
192 Drum Plate Stuff<br />
193 Drum Wood Plate<br />
194 Stairway Plate<br />
195 Piano Plate<br />
196 Slap Back Plate<br />
197 Mac Perc<br />
198 Ambient Plate<br />
199 Silky Gold Plate<br />
65
<strong>M3000</strong> PRESET LIST<br />
200 Bright Plate<br />
201 Drums Perc Soft1<br />
202 Drum Perc Soft2<br />
203 Oil Drum<br />
204 Drum Perc Soft3<br />
Gated Reverb Presets<br />
Preset #205 to 211.<br />
The VSS-Gate algorithm is a very extensive type of gated reverb.<br />
Preset #205 to #211 are some examples on this. Here you find<br />
presets for both drums and vocal.<br />
205 Thick Drum Gate VSSGATE<br />
206 Short Perc Gate VSSGATE<br />
207 Microuzi Gate VSSGATE<br />
208 Backing Vocal Gate VSSGATE<br />
209 Snare Gate VSSGATE<br />
210 GittinJiggyWiddit VSSGATE<br />
211 Medium Band Room VSSGATE<br />
Clubs<br />
Preset #212 to 225.<br />
A group of very small and tight presets mainly made for drums<br />
and other percussive material.<br />
212 Real Drum Booth<br />
213 Small Wood Chamber<br />
214 Vintage Snare Room 1<br />
215 Vintage Snare Room 2<br />
216 Studio Drum Ambience<br />
217 Acoustic Space<br />
218 Snare Booth Bright<br />
219 Hard Drum Space<br />
220 Dance Snare<br />
221 Modulated Perc<br />
222 Dark Snare Chamber<br />
223 Tiny Booth<br />
224 Small Space<br />
225 Clear Space<br />
Other Algorithms<br />
Preset #226 to 250.<br />
A selection of non-reverb Single presets, to be used alone or in<br />
any combination.<br />
226 Slap Back Delay<br />
227 Tap Delay<br />
228 Detune Pitch<br />
229 Up N Down<br />
230 EQ Flat<br />
231 Expander<br />
232 Fast gate<br />
233 Vox Comp<br />
234 Allround Comp<br />
235 Chorus<br />
236 Wide Chorus<br />
66
<strong>M3000</strong> PRESET LIST<br />
237 SRV Chorus<br />
238 Flanger<br />
239 Wild Flanger<br />
240 Slow Tremolo<br />
241 Wild Tremolo<br />
242 Slow Panner<br />
243 Fast Panner Wide<br />
244 Old Phaser<br />
245 Standard Phaser<br />
246 Weird Phaser<br />
247 Vocal De-esser<br />
248 Dynamic Hi Cut<br />
249 Dynamic Lo Cut<br />
250 Muted Engine<br />
Presets 251-500 uses the VSSFP and VSSSR<br />
algorithms. The se presets are dedicated to<br />
Film and Post production, and they are made by<br />
high-end film and post-production professionals from<br />
leading facilities in US and Europe. We believe it is the<br />
most extensive collection of film and post-production<br />
presets yet available.<br />
The special thing about reverb for film and post<br />
production is that it has to sound natural and realistic.<br />
This doesn't necessarily mean nice and smooth - as it<br />
often does in music applications - but that it has to be<br />
trustworthy and fit into the scenes.<br />
We have arranged the 250 presets in several blocks for<br />
different applications.<br />
Note - VSSFP is used for presets 251 to 469<br />
VSSSR is used for presets 470 to 500<br />
VSSFP Presets<br />
Ultra small reverb presets (Indoor Mini)<br />
Presets #251 to 259.<br />
A selection of very small and tight sounding reverb settings. The<br />
characteristics of these presets are they are made almost entirely<br />
of Early Reflection patterns, because the reverb tail in such small<br />
spaces is almost non-existent.<br />
251 Closet With Clothes<br />
252 Walk In Closet<br />
253 Too Small Mens Room<br />
254 Phonebooth Tight<br />
255 Phonebooth<br />
256 Claustrophobia<br />
257 Under A Blanket<br />
258 Near The Wall<br />
259 Meat Locker<br />
67
<strong>M3000</strong> PRESET LIST<br />
Small rooms and spaces (Indoor Small)<br />
Presets #260 to 289.<br />
A selection of extremely natural and realistic small rooms.<br />
Domestic rooms like kitchens and living rooms, and more public<br />
rooms like offices are represented here.<br />
E.g. try preset 266 which is a preset simulating a standard small<br />
furnished living room.<br />
260 A Small Room<br />
261 The 2nd Bedroom<br />
262 Drapes And Curtains<br />
263 Dense Centered Room<br />
264 Room Conversation<br />
265 Chamber<br />
266 Furnished Room<br />
267 Living Room<br />
268 Real Living Room<br />
269 Dining Room<br />
270 Corridor<br />
271 Small Bathroom<br />
272 Bathroom Blue<br />
273 In The Kitchen<br />
274 Interior Kitchen<br />
275 Kitchen<br />
276 ConfRoom Damped<br />
277 Shrinks Office<br />
278 Reception Area<br />
279 Wooden Office<br />
280 Store Room<br />
281 Live VO Booth<br />
282 Recording Booth<br />
283 Studio Small<br />
284 Standard Dialogue<br />
285 Dialog 1<br />
286 Open Mics<br />
287 Close Breathing<br />
288 Semifurnished Qntec<br />
289 Small Foley Blue<br />
Medium sized rooms and spaces (Indoor Medium)<br />
Presets #290 to 319.<br />
Domestic rooms and spaces are the dominant part of this preset<br />
block, but also public rooms are represented.<br />
290 Furnished Room<br />
291 Unfurnished Room<br />
292 Locker Room<br />
293 Livingroom Blue<br />
294 Wood Floor<br />
295 Natural Wood Room<br />
296 Livingroom<br />
297 Room With A View<br />
298 Hallway<br />
68
<strong>M3000</strong> PRESET LIST<br />
299 Basement 1<br />
300 Furnished Basement<br />
301 Wine Cellar<br />
302 Toilet Stall<br />
303 In The Shower<br />
304 Bathroom Stall<br />
305 Wide Garage<br />
306 Right Side Garage<br />
307 Conference Room<br />
308 Glass Office<br />
309 Large Office<br />
310 Office<br />
311 Empty Classroom<br />
312 Classroom<br />
313 Back Of The Glass<br />
314 Watch-Tower Inside<br />
315 Dialog 2<br />
316 Dialog 3<br />
317 Dialog 4<br />
318 In The Air Vent<br />
319 Kellars Cell Blue<br />
Large rooms and spaces (Indoor XL)<br />
Presets #320 to 369.<br />
This section covers a wide range of presets from large domestic<br />
rooms to extra large indoor public areas.<br />
320 Big Room<br />
321 Empty Corridor<br />
322 Plasterwalls<br />
323 Centered Hallway<br />
324 What A Basement<br />
325 Basement 2<br />
326 Basement Large<br />
327 Empty Basement<br />
328 Empty Stairwell<br />
329 Small Stairway<br />
330 Big Stairway<br />
331 Home Garage<br />
332 Modern Kitchen<br />
333 Big Toilet<br />
334 What A Toilet<br />
335 Public Mens Room<br />
336 Empty Store<br />
337 Empty Nightclub<br />
338 Storage Room<br />
339 Recital Room<br />
340 Hotel Lobby<br />
69
<strong>M3000</strong> PRESET LIST<br />
341 Band Practice Room<br />
342 Down The Hall<br />
343 Factory<br />
344 Dance Studio<br />
345 Empty Restaurant<br />
346 Tijuana Cantina<br />
347 Store Room<br />
348 Louvre Pyramid Hall<br />
349 Pentagon Corridor<br />
350 Airport PA<br />
351 Grand Ballroom<br />
352 Parking Garage Small<br />
353 Garage<br />
354 Mine Corridor<br />
355 Mine Chamber<br />
356 Tight+Natural<br />
357 Tight+Smooth<br />
358 Scoring Stage 1<br />
359 Scoring Stage 2<br />
360 Scoring Stage 3<br />
361 Dialog 5<br />
362 Dialog 6<br />
363 Dialog 7<br />
364 Party Chit Chat<br />
365 Large+Stage Blue<br />
366 Down The Hatch<br />
367 In The Sewer<br />
368 Scissorhands Parlor<br />
369 In The Room<br />
The largest indoor halls and areas (Indoor XXL)<br />
Presets #370 to 399.<br />
The largest indoor areas imaginable. This includes only public<br />
areas, like e.g. railway-stations and parking garage buildings.<br />
370 Elevator Shaft<br />
371 Big Stairwell<br />
372 Large Lockerroom<br />
373 Empty Auditorium<br />
374 AES Show Lobby<br />
375 Brill Building Lobby<br />
376 Boston Garden Hall<br />
377 Warehouse Blue<br />
378 Soft Warehouse<br />
379 Long Swimming Pool<br />
380 Swim Distant<br />
381 Empty Indoor Pool<br />
382 Frankfurt Hbf<br />
383 Budapest WestRailwSt<br />
384 LaGuardia Terminal<br />
385 Subway Platform 1<br />
70
<strong>M3000</strong> PRESET LIST<br />
386 Subway Platform 2<br />
387 Subway Tunnel<br />
388 Parking Distant<br />
389 Parking Garage Talk<br />
390 Parking Garage Ugly<br />
391 Parking Garage<br />
392 Indoor Parking Lot<br />
393 Public Toilet<br />
394 The Abbey<br />
395 Medium Church<br />
396 Concrete Maze<br />
397 Dark Tunnel<br />
398 Back There<br />
399 Really Smooth Hall<br />
Cars<br />
Presets #400 to 409.<br />
Reverb settings simulating one of the most difficult rooms. The<br />
car with its extremely small room and mixture of very soft and<br />
hard surfaces makes it very difficult to make a trustworthy<br />
replacement for the real thing: Everybody knows how it sounds<br />
inside a car !!!<br />
400 Beetle Interior<br />
401 Limo Interior<br />
402 BMW Limo<br />
403 Car Frontseat Dialog<br />
404 Car Front 2 Backseat<br />
405 Van Interior<br />
406 A Van<br />
407 Inside truck<br />
408 Car Interior Blue<br />
409 Cardoor At Midnight<br />
Large outdoor presets (Outdoor XL)<br />
Presets #416 to 429.<br />
Typical larger outdoor areas, like backyards and reverb between<br />
buildings at the street.<br />
410 Courtyard<br />
411 Market<br />
412 Alley<br />
413 HarlemStreetAtNight<br />
414 Stone Garden<br />
415 Boat Trip In Venice<br />
416 Backyard<br />
417 Backyard Qntec Wide<br />
418 On The Street<br />
419 Street<br />
420 Dog In The Alley<br />
421 Alleyway<br />
422 Between Skyscrapers<br />
423 Between Buildings 1<br />
424 Between Buildings 2<br />
425 Under The Bridge<br />
71
<strong>M3000</strong> PRESET LIST<br />
426 Dock<br />
427 Long Cave<br />
428 Backyard Qntc<br />
429 Racetrack PA<br />
Very large outdoor settings (Outdoor XXL)<br />
Presets #430 to #439 give you a selection of very large outdoor<br />
places such as Empty Arenas and different courts.<br />
430 Slap Alley<br />
431 City Foot Chase<br />
432 Empty Arena XXL<br />
433 Racquetball Court<br />
434 Wide Jail court<br />
435 Across The Plaza<br />
436 Large Citypark<br />
437 Big City<br />
438 Down The Tunnel<br />
439 Jump Off Thee Bridge<br />
Mother Nature presets (Nature)<br />
Presets #440 to 459.<br />
A block of dedicated nature area reverbs.<br />
440 Green Forest<br />
441 Forest In Winter<br />
442 Forest In Autumn<br />
443 Forest On The Hill<br />
444 Forest Reverb 1<br />
445 Forest Reverb 2<br />
446 Forest<br />
447 In The Valley<br />
448 Valley In Winter<br />
449 Deep Valley<br />
450 Back Canyon<br />
451 Distance In Jungle<br />
452 Jungle<br />
453 Alpine Atmosphere<br />
454 Stoneriver In Vitosa<br />
455 Stone-Quarry<br />
456 Cave Corridor<br />
457 Cave-Dwelling<br />
458 Rocks At See<br />
459 Mountains<br />
72
<strong>M3000</strong> PRESET LIST<br />
Effect reverb settings<br />
Presets #460 to 469.<br />
A small block of special reverb settings that cannot be categorized<br />
into any real-world application. These presets can be used<br />
for sound effect purposes.<br />
460 Speaker In A Room<br />
461 Stinger 1<br />
462 Stinger 2<br />
463 Stinger 3<br />
464 What Dreams May Go<br />
465 Clausto-Phonebooth<br />
466 Enhancer Verb 2<br />
467 Dialog+Music Slap<br />
468 Enhancer Stereo<br />
469 Watch Them Scatter<br />
VSSSR algorithm presets<br />
Preset #470 to 500.<br />
The special VSSSR surround algorithm offers you a so far<br />
unseen possibility to create reverb. You have control over Front<br />
and Rear Decay time, and when the signal is send through a<br />
surround sound decoder this creates very realistic threedimensional<br />
rooms.<br />
470 Dining Room SR<br />
471 Real Living Room SR<br />
472 Kitchen SR<br />
473 Unfurnished Room SR<br />
474 Room With A View SR<br />
475 Hallway SR<br />
476 Basement SR<br />
477 Claustrophobia SR<br />
478 Meat Locker SR<br />
479 Live VO Booth SR<br />
480 Large Office SR<br />
481 LouvrePyramidHall SR<br />
482 Museum SR<br />
483 Railwaystation 1 SR<br />
484 Railwaystation 2 SR<br />
485 LaGuardiaTerminal SR<br />
486 Empty Arena XXL SR<br />
487 Swimmingpool SR<br />
488 Between Buildings SR<br />
489 Cemetery SR<br />
490 Street SR<br />
491 Stadium Rear SR<br />
492 Alpine Atmosph SR<br />
493 Rocks At The Sea SR<br />
494 Jungle SR<br />
495 Forest SR<br />
496 Canyon SR<br />
497 Arboretum SR<br />
498 Mine Corridor SR<br />
499 Mine Chamber SR<br />
500 Cave Long SR<br />
73
<strong>M3000</strong> PRESET LIST<br />
Combined presets<br />
Presets #1 to 100.<br />
The combined preset bank offers a variety of suggestions on how<br />
to gain full benefit from the two-engine structure of the <strong>M3000</strong>.<br />
A lot of really unique reverb effects can be obtained.<br />
The categorization is not as strict as with the Single presets due<br />
to the many different applications these settings are designed for.<br />
Please note that presets #96 to 100 are made from the<br />
VSSSurround algorithm.<br />
1 70s Style<br />
2 Panned Reverb<br />
3 Giant Space<br />
4 XXL-Tone<br />
5 Twang Reverb<br />
6 Wide In Your Face<br />
7 Techno Wave<br />
8 Comp Reverb<br />
9 Dual Delay<br />
10 Thick Ambience<br />
11 Double Ambience<br />
12 Slap Reverb<br />
13 Drum Rev+Amb<br />
14 Ambience<br />
15 Morphing Rev-Delay<br />
16 De-ess Hall<br />
17 Linked Delay<br />
18 Linked Pitch<br />
19 Linked Parametric EQ<br />
20 Linked Expander<br />
21 Linked Vox Comp<br />
22 Linked Inst Comp<br />
23 Linked Chorus<br />
24 Linked Flanger<br />
25 Linked Tremolo<br />
26 Linked Panner<br />
27 Linked Phaser<br />
28 Linked De-esser<br />
29 De-ess-Delay<br />
30 Phaser-Delay<br />
31 Phased Delay<br />
32 Chorus Delay<br />
33 Delay Reverb Morphed<br />
34 All Around<br />
35 Phaseman<br />
36 Speaker<br />
37 Machine Voice<br />
38 Floating Ambience<br />
39 Small Speaker<br />
40 Doubler Reverb<br />
41 Party Next Door<br />
74
<strong>M3000</strong> PRESET LIST<br />
42 Rev Phased Delay<br />
43 Flanged Reverb<br />
44 De-essed Medium Hall<br />
45 Stereo Hall Large<br />
46 Stereo Studio 20x20<br />
47 Stereo Studio 40x40<br />
48 Stereo Large Hall<br />
49 De-essed Small Room<br />
50 Stereo Venue Clear<br />
51 Machine Room Tiny<br />
52 Submarine Very small<br />
53 Submarine Small<br />
54 De-S Wood Chamber 1<br />
55 Stairway Wood 1<br />
56 Wood Hall 1<br />
57 Wood Hall 2<br />
58 Court 1<br />
59 Court 2<br />
60 Submarine Big<br />
61 De-S Wood Chamber 2<br />
62 Stairway Wood 2<br />
63 Elevator on 3th<br />
64 Elevator on 5th<br />
65 Elevator on 9th<br />
66 Castle Normal<br />
67 Machine Room Large 1<br />
68 Machine Room Large 2<br />
69 Machine Room Large 3<br />
70 Submarine Corridor<br />
71 Castle Big<br />
72 In The Louvre<br />
73 Glass Church<br />
74 Hybrid Cathedral<br />
75 Skating Ring<br />
76 Stereo Church<br />
77 Stereo Expo Hall<br />
78 Harbor<br />
79 Hippodrome<br />
80 Deep Forest<br />
81 Very Deep forest<br />
82 Valley In Colorado<br />
83 Boating On Amazonas<br />
84 Deep Jungle<br />
85 Night On Lochness<br />
86 In The Pipe 1<br />
87 In The Pipe 2<br />
88 Computer Voice 1<br />
89 Computer Voice 2<br />
75
<strong>M3000</strong> PRESET LIST<br />
90 Computer Voice 3<br />
91 Computer in Space 1<br />
92 Computer in Space 2<br />
93 Reverb for Isato<br />
94 Pantheon<br />
95 Sewage System<br />
96 Military Base SR<br />
97 POW Camp SR<br />
98 Football Ground SR<br />
99 Seaside SR<br />
100 Large Cave SR<br />
76