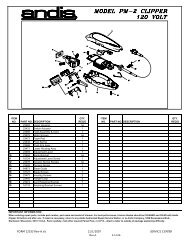
Detachable Plus® MODEL AG Clipper - Andis
Detachable Plus® MODEL AG Clipper - Andis
Detachable Plus® MODEL AG Clipper - Andis

Create successful ePaper yourself
Turn your PDF publications into a flip-book with our unique Google optimized e-Paper software.
changing the blade assembly<br />
If your clipper blades no longer cut properly (be sure to try<br />
more than one blade, since blade currently being used may<br />
be dull), it could be that your blade drive assembly needs<br />
replacement.<br />
To change the blade drive assembly:<br />
1. Unplug your clipper.<br />
2. Remove blade set.<br />
3. Remove four housing<br />
screws with philips<br />
screwdriver.<br />
4. Turn clipper over and<br />
remove cover.<br />
5. Before attempting to<br />
remove the blade drive<br />
assembly, you must<br />
remove the blade hinge<br />
first. Remove the<br />
two blade hinge screws<br />
(Diagram H). When<br />
removing the blade hinge,<br />
you will notice a small<br />
spring set in between<br />
the hinge and the lower<br />
housing (Diagram I).<br />
Make sure that this part<br />
does not get lost when<br />
replacing the blade drive<br />
assembly.<br />
6. Remove blade drive<br />
mounting screws<br />
(Diagram J).<br />
7. NOTE: Before removing<br />
blade drive assembly,<br />
note the way it is positioned<br />
(this will help you in<br />
reassembly). Remove<br />
blade drive assembly<br />
(Diagram K).<br />
8. Drive bearing should be at<br />
its lowest position, if not,<br />
move it with your finger<br />
to lowest position<br />
(Diagrams L and M).<br />
HINGE<br />
SCREWS<br />
DI<strong>AG</strong>RAM H<br />
DI<strong>AG</strong>RAM I<br />
DI<strong>AG</strong>RAM O<br />
SPRING<br />
9. Align screw holes of new<br />
blade drive assembly and<br />
press down level at the<br />
screw holes (Diagram N).<br />
10. Reassemble blade drive<br />
mounting screws<br />
(Diagram J).<br />
11. Be sure the hinge spring<br />
is in its place before<br />
attempting to replace the<br />
blade hinge and screws<br />
(Diagram O). When replacing<br />
the hinge screws,<br />
place screw in the screw<br />
hole and slowly turn<br />
counter-clockwise until<br />
you feel the screw drop<br />
into place. This assures<br />
the screw is properly<br />
aligned within the hole<br />
threads. Turn screw clockwise<br />
to tighten, just until<br />
snug. DO NOT OVER-<br />
TIGHTEN.<br />
12. Replace cover and turn<br />
clipper over.<br />
13. Replace housing screws<br />
(Short screws in back by<br />
cord—long screws in<br />
front by blade).<br />
HINGE<br />
SCREWS<br />
DI<strong>AG</strong>RAM H<br />
DI<strong>AG</strong>RAM I<br />
DI<strong>AG</strong>RAM O<br />
SPRING<br />
factory repair service<br />
When the blades of your <strong>Andis</strong> <strong>Clipper</strong> become dull after<br />
repeated use, it is advised to send your blades to an <strong>Andis</strong><br />
Authorized Service Station mentioned below for resharpening.<br />
If you wish your clipper to be serviced as well, they<br />
should be carefully packed and mailed either Parcel Post<br />
Insured, or U.P.S.<br />
To find an Authorized Service Station near you log on<br />
to www.andis.com or contact our customer service<br />
department: 1-800-558-9441 (U.S.)<br />
1-800-335-4092 (Canada)<br />
LIMITED WARRANTY<br />
This <strong>Andis</strong> product is warranted against defective material or<br />
workmanship for one year from the date of purchase. All implied<br />
warranties arising and by virtue of State law shall also be limited<br />
to one year. Any <strong>Andis</strong> product determined to be defective in<br />
material or workmanship during the warranty period will be<br />
repaired or replaced without cost to the consumer for parts and<br />
labor. The defective product must be returned with proof of<br />
purchase and $6.50 to cover cost of handling, to any Authorized<br />
<strong>Andis</strong> Repair Station or to: <strong>Andis</strong>, 1800 Renaissance Blvd., P.O.<br />
Box 085005, Racine WI 53408-5005 USA or IN CANADA to:<br />
A & <strong>AG</strong> <strong>AG</strong>ENCIES (CANADA), INC. 10050 Côte de Liesse,<br />
Lachine, Québec, H8T 1A3 CANADA. Enclose or attach a letter<br />
describing the nature of the problem. Due to foreign matter<br />
sometimes found in hair, clipper blades or resharpening of<br />
blades are not subject to the one year warranty. The blade set<br />
has a 10 Day Limited Warranty. If the blade set fails to cut, it will<br />
be resharpened free of charge if returned within 10 days of<br />
purchase. Send your blade set postage prepaid with the original<br />
purchase receipt to: ANDIS COMPANY, ATTENTION: Service<br />
Department, 1800 Renaissance Blvd, Sturtevant, Wisconsin<br />
53177 (U.S. & Canada only). <strong>Andis</strong> will not be liable under this<br />
warranty for any defect, failure or malfunction of any of its<br />
products caused by normal wear, abuse, misuse, unauthorized<br />
adjustments or disassembling. <strong>Andis</strong> will not be liable for any<br />
consequential damages resulting from any defect in material or<br />
workmanship of any of its products. Some States do not allow<br />
limitations on how long an implied warranty lasts or exclusion<br />
or limitation of incidental or consequential damages, so the<br />
above limitations or exclusions may not apply to you. The<br />
Warranty gives you specific legal rights, and you may also have<br />
other rights which may vary from State to State.<br />
Date Purchased ––––––––––––––––––– Model ––––––––––––<br />
<strong>Detachable</strong> Plus ®<br />
<strong>MODEL</strong> <strong>AG</strong><br />
<strong>Clipper</strong><br />
<strong>Andis</strong> Model <strong>AG</strong><br />
<strong>Detachable</strong> Blades<br />
are compatible with<br />
Oster Model A5<br />
®<br />
keep this for your records<br />
Form # 27074 Rev. P ©2007 <strong>Andis</strong> Company, USA Printed in U.S.A.<br />
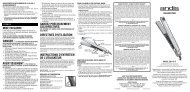
Congratulations –<br />
you just went First Class when you bought<br />
this <strong>Andis</strong> <strong>Clipper</strong>. Careful workmanship and<br />
quality design have been the hallmarks of<br />
<strong>Andis</strong> products since 1922.
important safeguards<br />
When using an electrical appliance, basic precautions<br />
should always be followed, including the following:<br />
Read all instructions before using the <strong>Andis</strong> <strong>Clipper</strong>.<br />
DANGER: To reduce the risk of electric shock:<br />
1. Do not reach for an appliance that has fallen into<br />
water. Unplug immediately.<br />
2. Do not use while bathing or in a shower.<br />
3. Do not place or store appliance where it can fall or be<br />
pulled into a tub or sink. Do not place in or drop into<br />
water or other liquid.<br />
4. Always unplug this appliance from the electrical outlet<br />
immediately after using.<br />
5. Unplug this appliance before cleaning, removing or<br />
assembling parts.<br />
warning: To reduce the risk of burns, fire<br />
electric shock, or injury to persons:<br />
1. An appliance should never be left unattended when<br />
plugged in.<br />
2. Close supervision is necessary when this appliance is<br />
used by, on or near children or individuals with certain<br />
disabilities.<br />
3. Use this appliance only for its intended use as<br />
described in this manual. Do not use attachments not<br />
recommended by <strong>Andis</strong>.<br />
4. Never operate this appliance if it has a damaged cord<br />
or plug, if it is not working properly, if it has been<br />
dropped or damaged, or dropped into water. Return the<br />
appliance to an <strong>Andis</strong> Service Center for examination<br />
and repair.<br />
5. Keep the cord away from heated surfaces.<br />
6. Never drop or insert any object into any opening.<br />
7. Do not use outdoors or operate with aerosol (spray)<br />
products are being used or where<br />
oxygen is being administered.<br />
8. Do not use this appliance with a damaged comb or<br />
broken blade, as injury to the skin may occur.<br />
9. To disconnect turn control to “off” then remove plug<br />
from outlet.<br />
10. WARNING: During use, do not place or leave appliance<br />
where it may be (1) damaged by an animal or (2)<br />
exposed to weather.<br />
save these instructions<br />
This product is intended for Commercial Use<br />
servicing of a double-insulated clipper<br />
In a double-insulated clipper, two systems of insulation are<br />
provided instead of grounding. No grounding means is provided<br />
on a double-insulated clipper, nor should a means for<br />
grounding be added. Servicing a double-insulated clipper<br />
requires extreme care and knowledge of the system, and<br />
should be done only by an <strong>Andis</strong> Authorized Service Station.<br />
Replacement parts must be identical to those parts being<br />
replaced. A double-insulated clipper is marked by the words<br />
“double insulation” or “double insulated”. The<br />
symbol may also be marked on the appliance.<br />
operating instructions<br />
Please read the following instructions before using your new<br />
<strong>Andis</strong> Trimmer. Give it the care that a fine precision built instrument<br />
deserves and it will give you years of service. Before<br />
starting your clipper remove the blade guard (some models<br />
may not have a blade guard). Plug cord into electrical outlet,<br />
operate 120 volt, 60 cycle AC electrical current or as noted on<br />
unit. To start clipper move switch button to on position, to<br />
stop, move switch button back to original position. After using<br />
your <strong>Andis</strong> <strong>Clipper</strong>, rewrap cord, and store in a safe place.<br />
removing blade set<br />
To remove blade set, first<br />
make sure your clipper<br />
motor is switched off,<br />
then push down on blade<br />
with both thumbs<br />
(Diagram A) and slide<br />
blade off blade hinge. If<br />
your blade hinge should<br />
snap closed and is flush<br />
with the clipper, use a<br />
small standard screwdriver<br />
to pry the tongue<br />
of the hinge out<br />
(Diagram B).<br />
NOTE: Hair may accumulate<br />
in the front cavity of<br />
the housing under the<br />
blade. If this happens,<br />
you can clean out the<br />
hair by brushing out the<br />
cavity with a small brush<br />
or an old toothbrush<br />
while the blade is off the<br />
clipper (See Diagram B<br />
for location of cavity<br />
being referenced).<br />
replacing or changing blade set<br />
To replace or change your blade set, slide the blade bracket<br />
onto the hinge of the clipper (Diagram C) and with the clipper<br />
turned on, push the blade towards the clipper to lock<br />
into position.<br />
user maintenance<br />
The internal mechanism of your motor clipper has been<br />
permanently lubricated at the factory. Other than the recommended<br />
maintenance described in this manual, no other<br />
maintenance should be performed, except by <strong>Andis</strong><br />
Company or an <strong>Andis</strong> Authorized Repair Service Station.<br />
care and servicing of your andis clipper blades<br />
Blades should be oiled<br />
before, during, and after<br />
OIL<br />
use. If your clipper<br />
blades leave streaks or<br />
slow down, it’s a sure<br />
sign blades need oil.<br />
Place a few drops of<br />
<strong>Andis</strong> <strong>Clipper</strong> Oil on<br />
the front and side of<br />
the cutter blades<br />
OIL<br />
DI<strong>AG</strong>RAM D<br />
OIL<br />
(Diagram D). Wipe excess oil off blades with a soft dry<br />
cloth. Spray lubricants contain insufficient oil for good lubrication,<br />
but are an excellent clipper blade coolant. Always<br />
replace broken or nicked blades to prevent injury. You can<br />
clean the excess hair from your blades by using a small<br />
brush or worn out toothbrush.<br />
To clean the blades we<br />
suggest to immerse the<br />
blades only into a<br />
shallow pan of <strong>Andis</strong><br />
<strong>Clipper</strong> Oil, while the<br />
clipper is running. Any<br />
excess hair and dirt that<br />
has accumulated between<br />
the blades should come DI<strong>AG</strong>RAM E<br />
out. After cleaning, turn<br />
your clipper off and dry blades with a clean dry cloth and<br />
start clipping again. If upon cleaning your blades you find<br />
that the blades will still not cut, there may be a few fine<br />
pieces of hair trapped between the upper and lower blade. If<br />
this happens, you will need to snap the blade off the clipper.<br />
Proceed to slide the upper blade to one side, without loosening<br />
the tension spring or moving the upper blade completely<br />
out from under the tension spring (See Diagram E<br />
for position of blade). Wipe the surface between the blades<br />
clean with a dry cloth, then place a drop of clipper oil where<br />
the upper and lower blades meet and also in the guide slot<br />
of the tension spring (Diagram E). Now slide the upper<br />
blade to the opposite side of the lower blade and repeat this<br />
process. After completing this cleaning procedure, slide the<br />
upper blade centering it over the lower blade. Handle or<br />
store your <strong>Andis</strong> <strong>Clipper</strong> with the blades down so excess oil<br />
will not run into the clipper case.<br />
CAUTION: Never handle your <strong>Andis</strong> clipper while you are<br />
operating a water faucet or in water. There is danger of<br />
electrical shock and damage to your clipper. ANDIS<br />
COMPANY will not be responsible in case of injury due<br />
to this carelessness.<br />
replacement of carbon brushes<br />
warning: <strong>Clipper</strong> must<br />
be unplugged before<br />
removing carbon brush<br />
caps or performing any<br />
maintenance, as electrical<br />
shock may occur.<br />
The carbon brushes of<br />
your clipper should be<br />
checked every three to<br />
six months. Carbon brush replacement should be performed<br />
when the carbon brushes reach no less than 1/16” in length.<br />
To replace the carbon brushes, unscrew brush caps with a<br />
standard screwdriver. Do one side at a time.<br />
Caution: The carbon brushes are spring loaded. Take precaution<br />
when unscrewing the brush caps from the unit<br />
(Diagram F). The brush spring should be in plain view upon<br />
removing the cap. Pull out the spring and brush from its<br />
canal, then remove old carbon brush. Tip the clipper to one<br />
side so the carbon brush slides out. Be sure to note the way<br />
the brush is inserted so that if it does not need replacing, it<br />
may be re-inserted in exactly the same position.<br />
DI<strong>AG</strong>RAM G<br />
TOP OF CLIPPER<br />
INSERT BEVEL SIDE FIRST<br />
DI<strong>AG</strong>RAM F<br />
BEVEL<br />
CARBON BRUSH CANAL<br />
CARBON BRUSH<br />
SPRING<br />
When placing a new carbon brush into the carbon brush<br />
canal, make sure to align the curvature on the end of the<br />
carbon brush with the curve of the commutator seen at the<br />
bottom of the canal (Diagram G). When aligned properly, the<br />
two beveled edges of the carbon brush will be located in the<br />
upper right and lower left corners. Be sure to insert the beveled<br />
end of the carbon brush into the canal first. Failure to<br />
perform this procedure correctly may cause the carbon<br />
brushes to not seat themselves properly against the commutator.<br />
Replace the carbon brush spring into the brush<br />
cavity after the carbon brush has been installed, then<br />
replace carbon brush cap with a standard size screwdriver.<br />
Turn clockwise only until you feel the brush cap stop. If the<br />
brush cap is tightened too tightly, it will force the brush<br />
spring past the carbon brush and will cause damage to the<br />
commutator.<br />
CAP