Remington HC5015 User Manual
Remington HC5015 User Manual
Remington HC5015 User Manual

Create successful ePaper yourself
Turn your PDF publications into a flip-book with our unique Google optimized e-Paper software.
All technical modifications reserved. 09/08. TSC 08.0634<br />
<br />
<br />
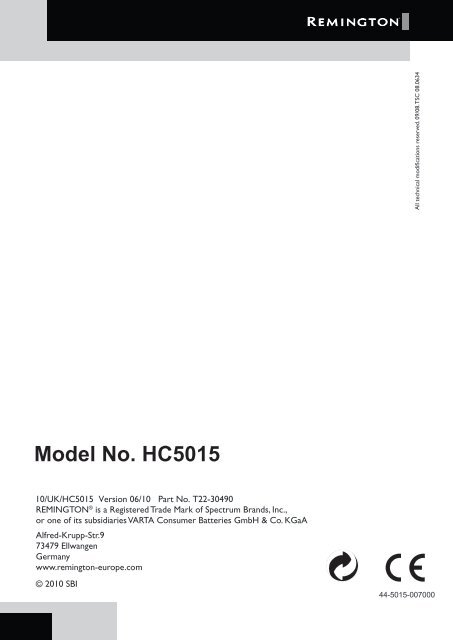
REMINGTON ® is a Registered Trade Mark of Spectrum Brands, Inc.,<br />
or one of its subsidiaries VARTA Consumer Batteries GmbH & Co. KGaA<br />
Alfred-Krupp-Str.9<br />
73479 Ellwangen<br />
Germany<br />
www.remington-europe.com<br />
<br />
44-5015-007000<br />
090251_REM_IFU_HC240_ INT_ 22L.indd 1
All technical modifications reserved. 05/09. TSC 09.0251<br />
Hair Clipper<br />
<br />
HC240C<br />
<br />
090251_REM_IFU_HC240_ INT_ 22L.indd 2<br />
15:00:04|05.05.09 Guido Krölls
2.<br />
1.<br />
240C<br />
3.<br />
090251_REM_IFU_HC240_ INT_ 22L.indd 3<br />
15:00:05|05.05.09 Guido Krölls
1. 2.<br />
4.<br />
5.<br />
090251_REM_IFU_HC240_ INT_ 22L.indd 4<br />
15:00:05|05.05.09 Guido Krölls
INT<br />
ČES<br />
IREL<br />
MAG<br />
POL<br />
РОС<br />
TÜR<br />
CRO<br />
CYP<br />
ROM<br />
SLO<br />
ISRA<br />
3.<br />
GER<br />
BEN<br />
FRA<br />
DEN<br />
ITAL<br />
SCA<br />
AUS<br />
SWI<br />
POR<br />
SPA<br />
MAL<br />
GRE<br />
UNI<br />
U.A<br />
090251_REM_IFU_HC240_ INT_ 22L.indd 5<br />
15:00:05|05.05.09 _ServiceCentre_22L<br />
Guido Krölls
REMINGTON ® SERVICE HOTLINE<br />
United Kingdom<br />
+44 0800 212 438 (free call)<br />
Rayovac Europe Ltd,<br />
Watermans House, Kingsbury Crescent,<br />
The Causeway, Staines, Middlesex,<br />
TW18 3BA, UNITED KINGDOM<br />
www.remington.co.uk<br />
_ServiceCentre_22L.indd 1<br />
28.10.2008 10:50:14 Uh
090251_REM_IFU_HC240_ INT_ 22L.indd 7<br />
15:00:06|05.05.09 Guido Krölls
english<br />
Thank you for choosing <strong>Remington</strong> ® . Our products are designed to meet the<br />
highest standard of quality, functionality and design. We hope you enjoy using<br />
your new <strong>Remington</strong> ® product.<br />
D<br />
Please read the instructions for use carefully and keep in a safe place for future<br />
reference.<br />
CAUTION<br />
Use this appliance only for its intended use as described in this manual.<br />
Do not use attachments not recommended by <strong>Remington</strong> ® .<br />
Do not use this product if it is not working correctly, if it has been dropped or damaged,<br />
or dropped into water.<br />
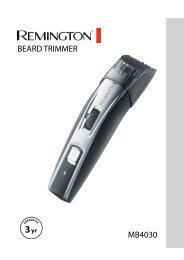
Description<br />
1. On/Off switch<br />
2. Advanced Steel blade set<br />
3. 5 attachment guide combs<br />
1<br />
090251_REM_IFU_HC240_ INT_ 22L.indd 1<br />
15:00:06|05.05.09 Guido Krölls
english englisH<br />
How to use<br />
Before starting the cut<br />
Inspect the clipper making sure that it is free from hair and dirt.<br />
Seat the person so that their head is approximately at your eye level.<br />
Before cutting, always comb the hair so it is tangle free and dry.<br />
To attach a comb<br />
Hold the comb with its teeth upward<br />
Slide it onto and along the clipper blade until the front of the comb firmly sits against the<br />
clipper blade.<br />
To remove the comb<br />
Holding the clipper with the blades facing away from you, firmly push the comb upward<br />
and away from the blades.<br />
Comb Attachments Hair Lenghth<br />
Each comb attachment is marked accordingly on its outside middle surface (3mm, 6mm,<br />
9 mm, 12mm , 18mm, 25mm<br />
).<br />
0.5mm length is achieved without any combs.<br />
INSTRUCTIONS FOR HAIR CUTTING<br />
STEP 1 – Nape of the neck – PICTURE 1<br />
Use 3mm or 6mm guide comb.<br />
Hold the clipper with the blade teeth pointing upwards. Begin starting at the centre of the<br />
head at the base of the neck.<br />
Slowly lift the clipper, working upwards and outwards through the hair, trimming just a<br />
little at a time.<br />
STEP 2 – Back of the head – PICTURE 2<br />
With the 12 mm guide comb attached, cut the hair at the back of the head.<br />
STEP 3 – Side of the head – PICTURE 3<br />
With the 3mm or 6mm guide comb attached, trim sideburns. Then change to the longer<br />
9mm or 12mm guide comb and continue to cut to the top of the head.<br />
STEP 4 – Top of the head – PICTURE 4<br />
With the 12 mm, 18mm guide comb attached, cut hair on top of the head<br />
against the direction in which the hair normally grows.<br />
For longer hair on top, use without a guide comb. Lift the hair on top of the head with a<br />
small hand comb. Cut over the hand comb with the hair lifted or hold the hair between the<br />
fingers to lift it and cut it to the desired length.<br />
Always work from the back of the head.<br />
2<br />
090251_REM_IFU_HC240_ INT_ 22L.indd 2<br />
15:00:06|05.05.09 Guido Krölls
english<br />
STEP 5 – The finishing touches – PICTURE 5<br />
Use the clipper without an attachment comb for close trimming around the base and sides<br />
of the neck.<br />
To produce a clean straight line at the sideburns, reverse the hair clipper. Place the<br />
reversed clipper at right angles to the head, tips of the blades lightly touching the skin and<br />
then work downwards.<br />
Care for your hairclipper<br />
Your clipper is fitted with high quality blades that are premanently lubricated. To<br />
ensure long lasting performance of your clipper, clean the blades and unit regularly. Always<br />
keep the protective cap on the trimmer blade.<br />
AFTER EACH USE<br />
Ensure the clipper is switched off and disconnected from the mains.<br />
Brush the accumulated hair from the blades. Do not submerge the clipper in water.<br />
To clean the unit, wipe with a damp cloth and dry immediately.<br />
Note: Ensure that the clipper is turned off when cleaning.<br />
EVERY SIX MONTHS<br />
At regular intervals the blade set should be removed and cleaned.<br />
Remove the 2 screws retaining the fixed blade with a screwdriver. Do not remove blade set.<br />
Brush out hairs from between the blades with soft cleaning brush. Do not remove the<br />
lubricating grease from the blades. Do not remove the small moving blade.<br />
<br />
Note that if the blades are not correctly aligned then cutting efficiency will be impaired.<br />
CAUTION:<br />
Do not use liquid cleaners on the blades or harsh or corrosive chemicals on the blade<br />
casing. Always use a soft brush to remove the accumulated hairs.<br />
Always store this appliance in a moisture-free area.<br />
Do not wrap the cord around the appliance.<br />
3<br />
090251_REM_IFU_HC240_ INT_ 22L.indd 3<br />
15:00:06|05.05.09 Guido Krölls
englisH<br />
iMPORTAnT sAFeTy insTRUCTiOns<br />
WARning – TO ReDUCe THe RisK OF BURns, eleCTROCUTiOn, FiRe, OR<br />
inJURy TO PeRsOns:<br />
An appliance should never be left unattended when plugged into a power outlet.<br />
Keep the power plug and cord away from heated surfaces.<br />
Make sure the power plug and cord do not get wet.<br />
Do not plug or unplug the shaver with wet hands.<br />
Do not use the product with a damaged cord.<br />
Use and store the product at a temperature between 15°C and 35°C.<br />
Always unplug from the mains when cleaning.<br />
Only use the parts supplied with the appliance.<br />
Keep this product out of reach of children. The use of this appliance by persons with<br />
reduced physical, sensory or mental capabilities or lack of experience and knowledge can<br />
give cause to hazards. Persons responsible for their safety should give explicit instructions<br />
or supervise the use of the appliance.<br />
PROTeCT THe enViROnMenT<br />
Do not dispose the trimmer in household waste at the end of its useful life. Disposal can<br />
take place at our service centres or appropriate collection sites.<br />
For further information on recycling see www.remington-europe.com<br />
4<br />
090251_REM_IFU_HC240_ INT_ 22L.indd 4<br />
15:00:06|05.05.09 Guido Krölls
english<br />
SERVICE AND WARRANTY<br />
This product has been checked and is free of defects. We warrant this product against any<br />
defects that are due to faulty material or workmanship for a 3 year period from the original<br />
date of consumer purchase. If the product should become defective within the warranty<br />
period, we will repair any such defect or elect to replace the product or any part of it<br />
without charge provided there is proof of purchase. This does not mean an extension of the<br />
warranty period.<br />
In the case of a warranty simply call the REMINGTON ® Service Center in your region.<br />
This warranty is offered over and above your normal statutory rights.<br />
The warranty shall apply in all countries in which our product was sold via an authorised<br />
dealer.<br />
This warranty does not include cutters which are consumable parts. Also not covered is<br />
damage to the product by accident or misuse, abuse, alteration to the product or use inconsistent<br />
with the technical and/or safety instructions required. This warranty shall not apply if<br />
the product has been dismantled or repaired by a person not authorised by us.<br />
5<br />
090251_REM_IFU_HC240_ INT_ 22L.indd 5<br />
15:00:06|05.05.09 Guido Krölls