
You also want an ePaper? Increase the reach of your titles
YUMPU automatically turns print PDFs into web optimized ePapers that Google loves.
Instruction Manu a l<br />
<strong>Thane</strong> International, Inc.<br />
La Quinta, CA 92253<br />
www.thane.com<br />
<strong>Thane</strong> Direct Canada, Inc.<br />
Toronto, ON Canada<br />
www.thane.ca<br />
<strong>Thane</strong> Direct UK Ltd.<br />
Admail ADM 3996<br />
London W1T 1ZU<br />
www.thanedirect.co.uk
BLANK PAGE
22<br />
General<br />
3<br />
Contents:<br />
Trouble Shooting<br />
Problem/Symptom<br />
No power<br />
No display<br />
Time and Intensity do not work<br />
Solution<br />
Is the power plug connected power socket?<br />
Is the network cable connected to socket?<br />
Check the AC main fuse.<br />
Please try to program function as below<br />
procedure:<br />
Switch Power on<br />
* Don't press the mode button *<br />
Press the time button<br />
Press the Intensity button<br />
Press Start (Red key button)<br />
I. Information<br />
Introducing your <strong>Total</strong> <strong>Vibes</strong> 4<br />
Safety instructions 5<br />
Environmental protection 7<br />
Packaging 7<br />
Disposal 7<br />
Parts list 8<br />
Optional items 8<br />
II.<br />
Assembly<br />
Assembling the equipment 9<br />
Set-up 9<br />
Attaching the hand straps 11<br />
Program function does not start<br />
Intensity function does not work<br />
Can not turn back the time<br />
Can not turn back intensity<br />
Can not turn back time and<br />
intensity<br />
Please try to program function as below<br />
procedure:<br />
Switch Power on<br />
Press the program button once or twice<br />
Press Start (Red key button)<br />
Please try to program function as below<br />
procedure:<br />
Switch Power on<br />
* Don't press the mode button *<br />
Press the Intensity button<br />
Press the time button<br />
Press Start (Red key button)<br />
Switch Power on (Manual mode)<br />
* Don't press the mode button *<br />
Try to set time and intensity button<br />
Press start/stop button<br />
III.<br />
IV.<br />
Training<br />
Training advice 12<br />
The aims of training 12<br />
Points for training success 12<br />
Who can benefit from <strong>Total</strong> <strong>Vibes</strong>? 12<br />
Loads 13<br />
Important 13<br />
Tips for successful and healthy training 13<br />
Warming up 14<br />
Settings 15<br />
Switching the equipment on 15<br />
Program 16<br />
Training modes 17<br />
Basic exercises 17<br />
Workout for optional items 18<br />
General<br />
What happens if? 20<br />
Storage 20<br />
Care and maintenance 21<br />
Trouble Shooting 22
4<br />
Information<br />
General 21<br />
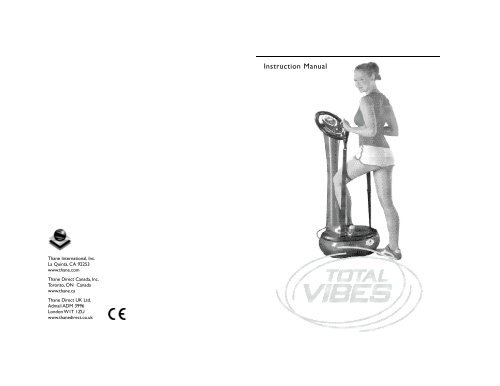
Introducing your <strong>Total</strong> <strong>Vibes</strong><br />
With <strong>Total</strong> <strong>Vibes</strong> you’re on the threshold of a totally new form of training.<br />
“Whole Body Vibration Training” is a revolutionary advancement in exercise<br />
science. <strong>Total</strong> <strong>Vibes</strong> is the ultimate 5 in 1 fitness machine for strength training,<br />
muscle toning, calorie burning, flexibility and relaxing massage.<br />
The <strong>Total</strong> <strong>Vibes</strong> base plate vibrates many times each second, so that muscular<br />
reflexes are activated throughout the entire body, contributing to a tighter and<br />
more toned physique.With its 15 controllable speed levels and frequencies ranging<br />
from 23 Hz to 43 Hz, including five programs, <strong>Total</strong> <strong>Vibes</strong> offers a wide range of<br />
options, from a light, relaxing massage right through to a more powerful massage.<br />
Technical data<br />
Please make sure to check that the electrical power outlet in your home or office<br />
corresponds to the voltage indicated on the rating label of the equipment.<br />
Model name<br />
<strong>Total</strong> <strong>Vibes</strong><br />
Input voltage<br />
120V 60 Hz or 220-240V 50/60 Hz<br />
Max. power input 50-250W<br />
Max. load<br />
275 lbs/125kgs<br />
Care and maintenance<br />
Always unplug the <strong>Total</strong> <strong>Vibes</strong> from the main power supply when it is not in<br />
use.<br />
If you wish to clean the equipment, only do so using a damp cloth and a mild<br />
cleaning fluid. In order to avoid damaging the surfaces never use abrasive cleaning<br />
or scouring agents.<br />
Attention<br />
Never permit water to enter the internal workings of the equipment (danger of<br />
a fatal electric shock).<br />
It is only possible to ensure that the equipment remains safe to use if checks for<br />
damage are carried out on a regular basis. Defective parts must be replaced by an<br />
expert immediately.The equipment should not be used until proper maintenance<br />
has been carried out.
20<br />
General Information 5<br />
What happens if?<br />
The equipment does not switch on or the power on the LCD display<br />
does not illuminate?<br />
• The network cable is not plugged in at the wall socket<br />
• The main switch has not been turned on<br />
• The program time must be set before the vibration plate can be switched<br />
on in standard operation.<br />
• Once the program time has passed the vibration plate will switch off<br />
automatically. Only once a new program time has been selected can the<br />
vibration plate be switched on again.<br />
• The equipment has been fitted with overload protection. If the circuit breaker<br />
is tripped, reset the circuit breaker. If the problem persists, please contact an<br />
electrician.<br />
• In the event that the plate vibrations have caused the connections,<br />
cable ties etc. to loosen, check all connections and cable ties and where<br />
necessary, tighten them.<br />
• The internal cable is not correctly attached.<br />
Storage<br />
Store <strong>Total</strong> <strong>Vibes</strong> in a safe and dry place. Ensure that no one is able to injure<br />
themselves on the equipment. Do not leave the equipment accessible to children.<br />
Safety Instructions<br />
Please observe these instructions or you may risk fatal injury.<br />
• The MAXIMUM WEIGHT CAPACITY of “<strong>Total</strong> <strong>Vibes</strong>” is 275 lbs (125 kgs).<br />
Persons whose body weight exceeds this limit should NOT use this equipment.<br />
• This equipment is not intended for use by persons (including children) with<br />
reduced physical, sensory or mental capabilities, or lack of experience and<br />
knowledge, unless they have been given supervision or instruction<br />
concerning use of the appliance by a person responsible for their safety.<br />
• Keep the packaging away from children (danger of suffocation).<br />
• Before assembling the equipment read the assembly instructions through<br />
carefully. Please observe the precise assembly sequence.<br />
• In the interest of your own safety check the equipment for damage (cracks,<br />
holes, loose screw fittings, missing cable ties etc.) before each use. In case of any<br />
damage do not use “<strong>Total</strong> <strong>Vibes</strong>” until it has been repaired by an expert. If the<br />
supply cord is damaged, it must be replaced by the manufacturer, its service agent<br />
or qualified technician in order to avoid a hazard.<br />
• Once you have finished training always disconnect the equipment from the mains<br />
power supply.<br />
• This equipment is intended for normal household use. It should never be used<br />
outdoors.<br />
• “<strong>Total</strong> <strong>Vibes</strong>” is not suitable for commercial use.<br />
• The guarantee does not include any damage that has been caused by incorrect<br />
handling, or any wear or attempted repairs instigated by third parties.<br />
• Only use the training equipment once it has been completely assembled and is<br />
fully functional!<br />
• Ensure that the room in which you are training is well ventilated for the duration<br />
of your exercises.A draft during training can quickly lead to a cold.<br />
• If you ever sell your “<strong>Total</strong> <strong>Vibes</strong>” or pass it on to another user, please ensure<br />
that you also provide the new owner with these instructions. Only with these<br />
instructions can the new owner use the equipment in complete safety.<br />
• When disconnecting from the mains power supply never pull on the power<br />
cable. Instead always apply light pressure to the plug housing.<br />
• Children should not use the equipment. Children should be supervised to<br />
ensure that they do not play with the equipment.<br />
• Store the equipment away from children.<br />
• Never jump onto the vibration plate.<br />
• The equipment is fitted with overload protection. If the circuit breaker should be
6<br />
Information Training 19<br />
tripped, please wait until the equipment is made ready for operation again before<br />
recommencing training.<br />
• Never use the equipment if visible damage is present on the equipment itself,<br />
or on its cables or plug.<br />
• Never attempt to repair any damage yourself.Always ask an expert or contact<br />
the nearest customer services.<br />
• Never leave the equipment unattended when it is switched on.<br />
• Ensure that connected cables do not present a stumbling hazard.<br />
• Always unplug the equipment before cleaning it or carrying out maintenance.<br />
• Abrasive cleaning fluids may leave marks on the equipment.<br />
• This equipment is intended for fitness and conditioning training.The equipment is<br />
not suitable for use in a studio (for professional and / or commercial use) and<br />
should not be used in any special training function, either in a competitive<br />
environment or within the context of any permanent sports activity.<br />
• This equipment is not intended for use as part of any therapy!<br />
• Only use this equipment for the purpose intended!<br />
• Protect the floor or carpet with a mat or similar covering before removing the<br />
equipment from the packaging, as well as during assembly and training.<br />
• If you are using the equipment on a carpeted floor, ensure that the ventilation<br />
holes on the underside of the equipment are not covered at any time.<br />
• B e fo re each use, place the equipment on a solid, l evel and non-slip base.A lw ays<br />
e n s u re that sufficient free space is available around the equipment on all sides, so<br />
that it is not possible for you to fall against a wall, f u r n i t u re etc during training.<br />
• Wear suitable clothing during training.<br />
• A lw ays warm up befo re using the training equipment. S t a rt at a slow tempo and<br />
i n c rease the intensity of your exe rcises step-by-step until they reach a level that<br />
suits yo u . Please take note of the advice in the exe rcise section of these instructions.<br />
We stro n g ly advise you that it is possible to suffer serious damages to health if the<br />
equipment is used incorre c t ly or if training takes place at too high an intensity.<br />
• Please ensure that the hand straps are fitter correctly<br />
• No more than one person should train on the equipment at any one time.<br />
• Please consult your doctor before using this equipment if you fall into a high risk<br />
category as a result of your health. Discuss the training programme with your<br />
doctor before commencing training.<br />
• Expectant mothers should not use this equipment, or should consult their<br />
doctor before training with it.<br />
• Attention! This equipment is able to bear a maximum permissible body<br />
load of 125 kgs.<br />
• Attention! Stop training immediately if you feel faint or light-headed.<br />
Seek advice from your doctor immediately if you suffer nausea, chest pains,<br />
pains in the arms or legs or any other symptoms of discomfort.<br />
Pad<br />
Abdominal crunch<br />
Works abdominals<br />
• Place the pad on the base,<br />
lay with back on base and<br />
feet in air, knees bent at<br />
90 degrees<br />
• Crunch the abdominal<br />
muscles while gently flexing<br />
spine<br />
• Support the neck if<br />
necessary while maintaining<br />
spinal control<br />
Bench<br />
Lunge<br />
Works quads, glutes,<br />
hamstrings & calves<br />
• Place one foot on bench,<br />
one on base<br />
• Keeping spinal alignment,<br />
bend at hips and knees<br />
• Bend only as far as hip,<br />
knee and ankle alignment<br />
allows<br />
Single arm pectoral<br />
Works chest<br />
& anterior shoulders<br />
• Place pad on the base.<br />
While kneeling on floor with<br />
side parallel to base, position<br />
one arm on the base.<br />
• Elbow is bent to<br />
90 degrees while the<br />
opposite hand is flat on floor<br />
• Keeping shoulders parallel<br />
to the floor, gradually stretch<br />
body to floor<br />
Tricep dip<br />
Works triceps & shoulders<br />
• Sit with back to base, place<br />
hands shoulder width apart on<br />
the edge of the base<br />
• With feet planted on the bench<br />
and knees bent, lift hips and<br />
torso while bending elbows<br />
to 90 degrees<br />
• Keep hips close to plate and<br />
maintain neutral spinal alignment<br />
Lower back massage<br />
Relaxes lower back<br />
• Sitting on the floor with<br />
back against the base, place<br />
the pad between you and<br />
the base<br />
• Position lower back<br />
against the base, adjusting<br />
position to relax lower<br />
back muscles<br />
Pelvic bridge<br />
Works core,<br />
glutes & hamstrings<br />
• Lay on the bench and<br />
place feet on the <strong>Total</strong><br />
<strong>Vibes</strong> base with knees<br />
bent at 90 degrees<br />
• Slowly push hips up<br />
while pressing feet down
18 Training<br />
Information 7<br />
Workout for optional items:<br />
Handle<br />
Push up<br />
Static<br />
Works chest,<br />
shoulder, arms<br />
& core<br />
• Holding the handles<br />
and placing them shoulder<br />
width apart on the<br />
base, kneel on floor<br />
• Slowly lower body by<br />
bending elbows<br />
• Maintain neutral spinal<br />
alignment<br />
Push up<br />
Static<br />
Push up<br />
Dynamic<br />
Works chest,<br />
shoulder, arms & core<br />
• Holding the handles and<br />
placing them shoulder width<br />
apart on the base, body fully<br />
extended, feet on floor<br />
• Slowly lower body by<br />
bending elbows<br />
• Add up and down push-up<br />
motion<br />
• Maintain neutral spinal<br />
alignment<br />
Lat dip<br />
Push up<br />
Power dynamic<br />
Works chest,<br />
shoulder, arms & core<br />
• Holding the handles and<br />
placing them shoulder width<br />
apart on the base, extend<br />
body fully, stack one foot on<br />
the other to intensify the<br />
movement or raise up one<br />
leg while maintaining a<br />
balanced hold.<br />
• Add up and down push-up<br />
motion<br />
• Maintain neutral spinal<br />
alignment<br />
• Please consult your doctor before using this equipment if you have not<br />
participated in sport for a longer period of time, or if you have orthopaedic<br />
problems, or problems with your heart or circulation. Inform your doctor that<br />
you wish to train using “<strong>Total</strong> <strong>Vibes</strong>” and request a general fitness assessment.<br />
• Do not use the equipment whilst eating, drinking or smoking.<br />
• Ensure that the cable is not bent or trapped by the housing parts.<br />
• The equipment should only be connected to the main power supply once it has<br />
been fully assembled.<br />
• Protect light-coloured or delicate floorings with a cover before positioning the<br />
equipment.<br />
• Delicate textiles such as white socks or trousers, which come into contact with<br />
the vibration mat, should be protected due to the intense vibrations.<br />
Environmental protection<br />
It is important to protect the environment<br />
The packaging materials comprise of:<br />
PE (polyethylene) cardboard<br />
EPS<br />
PP (polypropylene)<br />
If you have sufficient storage space, we would recommend<br />
that you keep the packaging material for the duration of the<br />
guarantee period.<br />
Works chest,<br />
shoulder, arms & core<br />
• Holding the handles and placing them<br />
shoulder width apart on the floor,<br />
extend body fully, place feet on base.<br />
• Add up and down push-up motion<br />
• Maintain neutral spine alignment<br />
throughout motion<br />
Works chest, shoulder, arms & core<br />
• Seated at edge of the base, position handles<br />
shoulder width apart on the base<br />
• Keeping feet on floor with knees bent, lift<br />
hips off base, ensuring arms are straight while<br />
pushing shoulders down<br />
• Maintain neutral spine alignment<br />
throughout motion<br />
Disposal:<br />
If you wish to dispose of the packaging please ensure that you do so in an<br />
environmentally responsible manner.<br />
If you need to dispose of the <strong>Total</strong> <strong>Vibes</strong> equipment for any reason, please<br />
also do so in an environmentally responsible manner. It should not be disposed of<br />
alongside general household waste. Contact your local waste collection office or<br />
recycling centre for recycling recommendations.
8<br />
Information Training 17<br />
Parts list<br />
Training modes<br />
Basic exercises:<br />
Stand on the equipment and ensure that you are familiar with the control panel.<br />
Relax your body and keep your arms and legs loose.Take hold of the handgrip and<br />
face straight ahead. Switch the equipment on and select the desired training<br />
program. Choose a vibration speed that you find comfortable<br />
You will be able to feel the vibrating motion throughout all areas of your body.<br />
You may change the speed or the complete program at any time. Remember to<br />
relax your body during all exercises.This will ensure greater training success as<br />
muscles are exercised.<br />
In order to provide you with a more accurate idea of the training options<br />
available, we have enclosed a training poster with these user instructions.<br />
Refer to the workout chart to determine what massage speed works best for you.<br />
Part no. Description<br />
1 Control panel<br />
2 Handles with massage nodes<br />
3 Upper section<br />
4 Lower section<br />
5 Vibration plate<br />
6 Motor housing<br />
7 Eyelets for hand straps<br />
8 Hand straps<br />
9 Control panel connection cable<br />
10 Network cable<br />
11 Fuse<br />
Optional items:<br />
Pad Handle Bench
16<br />
Training Assembly 9<br />
Program:<br />
• Warm Up<br />
level 1 / 20 sec level 2 / 20 sec level 3 / 20 sec level 4 / 20 sec<br />
level 5 / 20 sec level 6 / 20 sec total 120 sec<br />
• Beginners Workout<br />
level 2 / 10 sec level 3 / 10 sec level 4 / 10 sec level 5 / 10 sec<br />
level 6 / 10 sec level 7 / 10 sec total 60 sec<br />
• Intermediate Workout<br />
level 7 / 15 sec level 8 / 15 sec level 9 / 15 sec level 10 / 15 sec<br />
level 11 / 15 sec level 12 / 15 sec total 90 sec<br />
• Advanced Workout<br />
level 10 / 20 sec level 11 / 20 sec level 12 / 20 sec level 13 / 20 sec<br />
level 14 / 20 sec level 15 / 20 sec total 120 sec<br />
• Massage<br />
level 13 / 20 sec level 15 / 20 sec level 13 / 20 sec level 15 / 20 sec<br />
level 14 / 20 sec level 15 / 20 sec total 120 sec<br />
In Manual mode:<br />
Time and Intensity are only adjustable in Manual mode. If Time and Intensity is not<br />
set, the program will not start.The program will start once the start / stop button<br />
has been pre s s e d . Time and Intensity up/down function key will no longer respond if<br />
mode is changed to Warm up/ Beg wo r kout/ Int. wo r kout/ Adv wo r kout/ Massage.<br />
In Warm up/ Beg wo rkout/ Int. wo rkout/ Adv wo rkout/ Massage Mode:<br />
The program will start once the start / stop button has been pressed. Once the<br />
program has started in either Warm up/ Beg workout/ Int. workout/ Adv workout<br />
/ Massage mode, the Time and Intensity is not adjustable. (Only use Start/Stop<br />
button for Start/Stop function).<br />
Standard operation:<br />
Select the desired program length. In order to do this, press the “Timer” switch.<br />
Every time you press the switch the time will be increased and this will be shown<br />
in the program time display.<br />
Press on the “+ “or “- “speed button to set the required vibration speed. Every<br />
time you press on the button the speed will be either increased or decreased by<br />
one level.The actual speed of vibration will be shown in the corresponding display.<br />
Important: If you do not set a program length it is not possible to select a<br />
program, meaning that you will not be able to begin training!<br />
Assembling the equipment<br />
Set-up<br />
Remove all of the parts from the packaging and lay them carefully on a level<br />
surface. Place a protective cover underneath them in order to avoid damaging any<br />
delicate surfaces.<br />
Remove the protective padding and plastic packaging. Check that you have all parts<br />
and that none have been damaged during transportation. Follow these assembly<br />
instructions step-by-step in order to avoid incorrect assembly.<br />
Please remove the transportation lock<br />
before first use.<br />
To do this please re m ove both of the safety bolts using the<br />
w rench prov i d e d . S t o re these bolts somew h e re safe and<br />
reattach them should you wish to move the machine.<br />
To replace the bolts simply screw into place and hand<br />
t i g h t e n .<br />
Important:<br />
• Ensure that the cable is not bent or trapped by the housing parts.<br />
• Only connect the equipment to the main power supply once it is completely<br />
assembled.<br />
• Protect flooring on which the equipment is to be placed by covering with a mat.<br />
• Ensure that the cable is not a trip hazard by securing it.<br />
• It is advisable to place <strong>Total</strong> <strong>Vibes</strong> in a location where children will not be able<br />
to access it.<br />
Lay the motor housing next to the lower section, as<br />
shown in the diagram.<br />
Note:<br />
The bore holes in the lower section must point<br />
downwards. In order to simplify the next stage in<br />
assembly, hold the parts in position on their side.<br />
This is shown in the diagram.<br />
To this end, push the four threaded rods on the lower<br />
section into the four corresponding holes in the base<br />
plate. Ensure that the lower section lies flush with the<br />
base plate.
10<br />
Assembly Training 15<br />
Once you have placed the lower section on the motor<br />
housing, place the four washers and four nuts on the<br />
threaded rods.Turn the nuts to thread them onto the<br />
rods.<br />
Turn all of the nuts until they are hand tight, using an<br />
open-end spanner.<br />
Note:<br />
Ensure that all of the nuts are tightened using equal<br />
pressure, otherwise the lower section may tilt once<br />
standing.<br />
Settings<br />
Switching the equipment on:<br />
1. Plug the power cable into a wall socket with the<br />
voltage corresponding to the rating label of the unit.<br />
2.Turn the main switch to ON.<br />
You now have a variety of setting options:<br />
Now stand the equipment up, as shown in the<br />
diagram. Insert the motor housing connector into<br />
the corresponding socket in the lower section.<br />
Ensure that the connector is fitted correctly into<br />
the socket.<br />
Turn the cable fixture in a clockwise direction to<br />
tighten it.This will ensure that the cable cannot<br />
come loose as a result of any vibrations.<br />
Take the upper section in your hand and insert the<br />
motor housing connector into the corresponding<br />
socket in the lower section, as described above.<br />
1 ON/OFF switch<br />
2 Start/Stop<br />
3 Time<br />
4 Intensity<br />
5 Program
14<br />
Training Assembly 11<br />
Warming up:<br />
Warming up is an essential part of every sporting activity and should always be<br />
included as part of your exercise program. Do some stretching to warm up your<br />
muscles before using the machine.This increases blood flow to your muscles and<br />
reduces the likelihood of any injury.<br />
Push the two sections together until they slot fully into<br />
place. Ensure that the sides with the bore holes face to<br />
the rear.Also make sure that the cable is not trapped<br />
when you push the two sections together.<br />
Push the four hexagon socket screws, with the four<br />
serrated lock washers into the corresponding bore<br />
holes in the lower section, directly beneath the upper<br />
section.<br />
Turn the screws using a hexagon headed screwdriver,<br />
until they are hand tight.<br />
Attaching the hand straps<br />
The hand straps enclosed are specifically intended for<br />
use and support when engaged in training exercises for<br />
arms and shoulders, neck and chest muscles. In order to<br />
attach the hand straps please follow these instructions:<br />
First, take the strap end with the Velcro fastening and<br />
pull this through one of the eyelets located on the right<br />
hand side of the vibration plate.Take the other hand<br />
strap and thread this through an eyelet on the left<br />
hand side.<br />
Bring both parts of the Velcro together and press<br />
on them firmly to close the fastening. Check that the<br />
straps do not come loose in the event of a sudden<br />
pulling action.
12<br />
Training Training 13<br />
Training advice<br />
By purchasing this training equipment you have taken the first step towards physical<br />
fitness.This equipment can help you to train your muscles in the convenience of<br />
your home whenever it suits your schedule.<br />
<strong>Total</strong> <strong>Vibes</strong> works on the scientifically proven principle of Whole Body Vibration.<br />
The <strong>Total</strong> <strong>Vibes</strong> cushioned base plate vibrates at a rate of up to 50 times<br />
per second, creating “micro destabilization”.Your muscles naturally reflex for<br />
balance - up to 3000 times a minute! Just stand on the vibrating plate and<br />
<strong>Total</strong> <strong>Vibes</strong> does all the work for you. It engages up to 97% of the muscles in<br />
your body, improving muscle strength, burning calories, building stamina and<br />
increasing flexibility with no negative impact at all.The vibrating motion destabilizes<br />
the body and forces it to react with reflective muscle action for natural balance.<br />
The aims of training:<br />
Strengthening muscles<br />
Improvement of overall fitness<br />
Endurance<br />
Sense of well-being<br />
Points for training success:<br />
Keep these important points in mind when engaging in a physical training program:<br />
Maintain a consistent schedule for training sessions<br />
Ensure you keep a balanced diet<br />
Start slowly and build –up your training progress in increments to<br />
avoid any discomfort or injury<br />
Who can benefit from <strong>Total</strong> <strong>Vibes</strong>?<br />
Any able-bodied individual in reasonable health is able to embark on a fitness<br />
training plan regardless of his/her age. If in doubt, please check with your doctor<br />
before you start any kind of exercise program.<br />
Loads:<br />
The body, and in particular the heart and circulatory system, require sufficient time<br />
to adjust to the changes that take place as a result of physical training. For this<br />
reason it is very important that the loads placed on the body are increased at a<br />
slow rate and that sufficient breaks are incorporated into the regime, both during<br />
training and afterwards.<br />
Begin initial training at a rate that does not require you to overexert yourself.<br />
Ensure that you begin exercising at a pace that you find comfortable. Once you<br />
have been training regularly for some time you will be able to slowly increase the<br />
duration of your exercise as well as raising the difficulty level at which the<br />
equipment is set.<br />
Important:<br />
You should not start or end your training abruptly.You should always warm up at<br />
a slow tempo and with reduced effort before starting the actual training exercises.<br />
After you have finished training, take a few minutes to cool down. Following this,<br />
you should also carry out a few stretching exercises.<br />
Tips for successful and healthy training:<br />
• Do not forget that training on exercise equipment can be of great benefit to your<br />
health, as long as you pay attention to a few rules. It is not just about carrying<br />
out a few quick exercises, but about training regularly and on a long-term basis.<br />
• Always wear clothing suitable for training (e.g. a tracksuit). It is important that the<br />
clothing is both comfortable and well ventilated.<br />
• Never train on a full stomach.Avoid eating for one hour to two hours before<br />
training.<br />
• Do not train if you are already feeling tired.<br />
• Always remember that your body requires additional fluids when you are<br />
involved in any sports activity. Bear this in mind and increase your fluid intake<br />
while you are training.