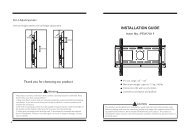
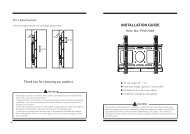
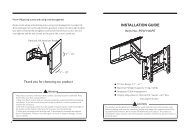
Instruction Manual for the "23inch-42inch tilting mount ... - Loctek
Instruction Manual for the "23inch-42inch tilting mount ... - Loctek
Instruction Manual for the "23inch-42inch tilting mount ... - Loctek

Create successful ePaper yourself
Turn your PDF publications into a flip-book with our unique Google optimized e-Paper software.
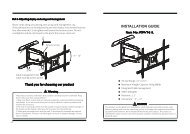
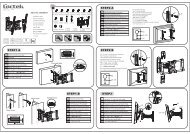
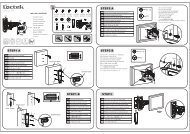
Part 2b-Attaching brackets to screen with recessed back<br />
Center brackets vertically on back of screen. Select <strong>the</strong> medium(E) or large(F)<br />
screws. Attach brackets to screen using four selected screws,four square<br />
washers(G) and four spacers(K) at <strong>the</strong> top and bottom of each bracket.<br />
Tighten screws firmly. Do not overtighten.<br />
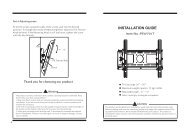
Part 1a-Wood Stud Mounting<br />
Usewallplate(1)asatemplate,makesureitislevel,andmarkfour<strong>mount</strong>ing<br />
holes along <strong>the</strong> center lines of <strong>the</strong> wood studs. Drill four 3/16”<br />
(5mm)dia.<br />
holes 2 ” (50mm) deep. Level wall plate(1) and attach to wall with four long<br />
bolts(H) and four washers(J ).Tighten screws firmly. Do not overtighten.<br />
Square washer(G)<br />
Large hole <strong>for</strong><br />
M6 screws<br />
K<br />
2”(<br />
50mm)<br />
Medium hole<br />
<strong>for</strong>M5screws<br />
E/F<br />
Φ3/16 ”(5mm)<br />
G<br />
Wood stud<br />
UP<br />
UP<br />
J<br />
H<br />
Bubble level<br />
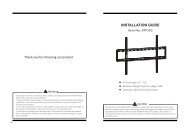
TILT ADJUSTER<br />
KNOB MUST<br />
FACE OUT<br />
-6- -3-