Pantographs & Groovy Boards - Handi Quilter
Pantographs & Groovy Boards - Handi Quilter
Pantographs & Groovy Boards - Handi Quilter
Create successful ePaper yourself
Turn your PDF publications into a flip-book with our unique Google optimized e-Paper software.
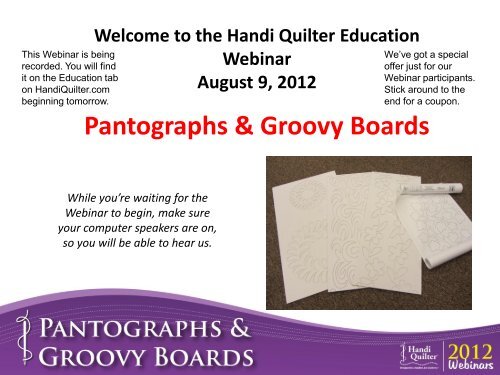
This Webinar is being<br />
recorded. You will find<br />
it on the Education tab<br />
on <strong>Handi</strong><strong>Quilter</strong>.com<br />
beginning tomorrow.<br />
Welcome to the <strong>Handi</strong> <strong>Quilter</strong> Education<br />
Webinar<br />
August 9, 2012<br />
<strong>Pantographs</strong> & <strong>Groovy</strong> <strong>Boards</strong><br />
We’ve got a special<br />
offer just for our<br />
Webinar participants.<br />
Stick around to the<br />
end for a coupon.<br />
While you’re waiting for the<br />
Webinar to begin, make sure<br />
your computer speakers are on,<br />
so you will be able to hear us.
Your presenter today is<br />
Marie Eldredge<br />
<strong>Handi</strong> <strong>Quilter</strong><br />
Studio Educator
Edge to Edge Quilting (E2E)<br />
• What is Edge to Edge<br />
quilting?<br />
Photo of E2E<br />
quilt<br />
• Why would you use it?<br />
• How can it be<br />
accomplished?
Edge to Edge Quilting (E2E)<br />
• What is Edge to Edge<br />
quilting?<br />
Edge to edge is quilting<br />
from one edge of the quilt<br />
to the other with one<br />
design.<br />
Photo of E2E<br />
quilt
Edge to Edge Quilting (E2E)<br />
• Why would you use Edge<br />
to Edge?<br />
1. Because the fabric in the quilt is<br />
too busy to do custom quilting.<br />
2. There is NO definite pattern for<br />
custom quilting.<br />
3. You want to get it quilted fast.<br />
4. Skill level<br />
5. Choice by customer<br />
Photo of E2E<br />
quilt
Edge to Edge Quilting (E2E)<br />
• How can it be<br />
accomplished?<br />
1. <strong>Pantographs</strong><br />
2. <strong>Groovy</strong> <strong>Boards</strong><br />
3. Digital patterns with a<br />
computerized system such<br />
as the HQ Pro-Stitcher
Edge to Edge Quilting (E2E)<br />
• We have some choices to<br />
make before we quilt
Edge to Edge Quilting (E2E)<br />
• Choice of patterns<br />
Theme of the pieced quilt<br />
a) Traditional or modern<br />
b) Juvenile<br />
c) Seasonal<br />
d) Masculine<br />
e) Nature or floral<br />
f) Animal<br />
g) It just doesn’t matter…<br />
because it just won’t show
Edge to Edge Quilting (E2E)<br />
• Choice of patterns<br />
Size of quilt<br />
Use a smaller pattern when<br />
quilting a baby quilt, wall hanging, or<br />
table runner.<br />
Use a larger design on a lap,<br />
twin, queen, full or king size quilt
Edge to Edge Quilting (E2E)<br />
• Choice of patterns<br />
Customer or personal quilting<br />
• Customer Preference<br />
• Cost<br />
• Personal Preference<br />
• Time
Edge to Edge Quilting (E2E)<br />
• Choice of patterns<br />
Durability of quilt<br />
1. Is it just decorative?<br />
2. Will it be a bedspread?<br />
3. Functional or nonfunctional?<br />
4. Will it be washed a lot?<br />
5. Children or dorm rooms?
Edge to Edge Quilting (E2E)<br />
• Choice of patterns<br />
Orientation<br />
Directional Pieced Top<br />
Directional Back Fabric<br />
Directional Design
Edge to Edge Quilting (E2E)<br />
• Choice of patterns<br />
Skill level of the quilter<br />
Beginners:<br />
Choose simple smaller designs<br />
Intermediate:<br />
Don’t be afraid, try something<br />
new
Edge to Edge Quilting (E2E)<br />
• Choice of patterns<br />
Purpose:<br />
Charity<br />
• Time is a consideration<br />
• Opportunity for Practice<br />
Show Quilts
Edge to Edge Quilting (E2E)<br />
• Choice of patterns<br />
Quilting Professionals consider<br />
Edge to Edge Quilting their<br />
“Bread and Butter” which<br />
means they like toast…ha ha<br />
Or they can make a lot of quilts<br />
fast.
Edge to Edge Quilting (E2E)<br />
• Choices<br />
Other considerations:<br />
• Thread choices<br />
• Audition thread on quilt<br />
• A good rule is:<br />
• Thin to blend<br />
• Thick to show
Edge to Edge Quilting (E2E)<br />
• <strong>Pantographs</strong><br />
What is a Pantograph?<br />
Patterns that are 10 to 12 feet<br />
long and the pattern repeats<br />
across the paper.
Edge to Edge Quilting (E2E)<br />
• <strong>Pantographs</strong><br />
• <strong>Pantographs</strong> come in<br />
various widths.<br />
• Choose a size according to<br />
the throat size of your<br />
machine
Edge to Edge Quilting (E2E)<br />
• <strong>Pantographs</strong><br />
• If you have an HQ Sixteen<br />
machine or a throat space<br />
of 16 inches, and a quilting<br />
space of 13 inches, use<br />
pantographs no larger<br />
than 11 inches.
Edge to Edge Quilting (E2E)<br />
• <strong>Pantographs</strong><br />
• If you have an HQ 18 Avanté,<br />
or a throat space of 18 inches,<br />
with a quilting space of 15<br />
inches, use pantographs no<br />
larger than 13 inches.
Edge to Edge Quilting (E2E)<br />
• <strong>Pantographs</strong><br />
• If you have an HQ 24 Fusion or<br />
a throat space of 24 inches,<br />
with a quilting space of 20<br />
inches, use pantographs no<br />
larger than 18 inches.
Edge to Edge Quilting (E2E)<br />
• <strong>Pantographs</strong><br />
Audition your pantograph on your<br />
quilt top.<br />
• Page protectors
Edge to Edge Quilting (E2E)<br />
• <strong>Pantographs</strong><br />
Audition your pantograph on your<br />
quilt top.<br />
• <strong>Quilter</strong>’s Touch Preview Paper<br />
from <strong>Handi</strong> <strong>Quilter</strong>
Edge to Edge Quilting (E2E)<br />
• <strong>Pantographs</strong><br />
Prepare the Pantograph<br />
1. Prepare your pantograph by<br />
drawing a horizontal line across<br />
the lowest point on the pattern.<br />
2. Draw a vertical line at the<br />
position you want to start the<br />
quilting on the right side.
Edge to Edge Quilting (E2E)<br />
• <strong>Pantographs</strong><br />
Prepare the pantograph<br />
• By placing these two lines on<br />
the paper pattern you create a<br />
right angle at the right corner.<br />
• This right angle is for<br />
positioning the pattern to the<br />
top left corner of the quilt.
Edge to Edge Quilting (E2E)<br />
• <strong>Pantographs</strong><br />
Preparing the Quilt<br />
• Using the channel lock, stitch a<br />
horizontal line across the top of<br />
the batting/backing.
Edge to Edge Quilting (E2E)<br />
• <strong>Pantographs</strong><br />
Preparing the Quilt<br />
• Move your quilt top up to stitch line.
Edge to Edge Quilting (E2E)<br />
• <strong>Pantographs</strong><br />
Preparing the Quilt<br />
• Apply a wiggle stitch on the top,<br />
within a ¼ inch of top edge of fabric.<br />
• It will hold the fabric in place and<br />
avoid “fold over” when stitching the<br />
pattern.<br />
• Wiggle stitch down the throat space<br />
of both side edges as you advance.
Edge to Edge Quilting (E2E)<br />
• <strong>Pantographs</strong><br />
Preparing the Laser<br />
• Screw the laser post on<br />
the machine with the<br />
washer against the<br />
machine.<br />
• Place the laser on the<br />
post.
Edge to Edge Quilting (E2E)<br />
• <strong>Pantographs</strong><br />
Preparing the Laser<br />
• The laser light has an<br />
adjustable lens that allows<br />
you to focus the beam on<br />
your pantograph pattern.<br />
• Use a wide screwdriver to<br />
adjust.
Edge to Edge Quilting (E2E)<br />
• <strong>Pantographs</strong><br />
Preparing the Laser<br />
• There are two places to<br />
install the laser post.<br />
• If you are standing at the<br />
back of the machine, install<br />
the post in the back position.
Edge to Edge Quilting (E2E)<br />
• <strong>Pantographs</strong><br />
Preparing the Laser<br />
• If you are standing at the<br />
front of the machine to do<br />
blocks, install the post at the<br />
front position.
Edge to Edge Quilting (E2E)<br />
• <strong>Pantographs</strong><br />
Placing the pantograph<br />
• Move the machine to the<br />
top left corner and lower<br />
the needle into the fabric.<br />
• TIP: Position the needle<br />
½” to 1” outside the<br />
fabric on the top and left<br />
side.
Edge to Edge Quilting (E2E)<br />
• <strong>Pantographs</strong><br />
Placing the pantograph<br />
• Place the pantograph<br />
pattern on the table with<br />
the right end close to the<br />
carriage.<br />
• Place a weight such as a<br />
ruler to keep the<br />
pantograph from rolling.
Edge to Edge Quilting (E2E)<br />
• <strong>Pantographs</strong><br />
Placing the pantograph<br />
• Position the laser light to the right<br />
angle that you drew on the<br />
pantograph.<br />
• This represents the top left corner<br />
of the quilt.<br />
• Use painters tape to secure<br />
pantograph to table.
Edge to Edge Quilting (E2E)<br />
• <strong>Pantographs</strong><br />
Placing the pantograph<br />
• Tip: We found a great<br />
tape for pantographs<br />
Scotch blue Painter’s Tape,<br />
Advanced Delicate Surface<br />
from the hardware store
Edge to Edge Quilting (E2E)<br />
Tip<br />
WHERE THE NEEDLE IS—THE LASER IS.<br />
WHERE THE LASER IS—THE NEEDLE IS.<br />
THEY MUST BOTH BE IN THE SAME PLACE TO HAVE<br />
THE PATTERN STITCH CORRECTLY
Edge to Edge Quilting (E2E)<br />
Quilting<br />
Tips:<br />
• Look at the pattern and<br />
mark the stop and start<br />
points<br />
• Finger trace to make<br />
yourself familiar with the<br />
path of the design.
Edge to Edge Quilting (E2E)<br />
Quilting<br />
Tips:<br />
• Position the laser to a 45<br />
degree angle and the light<br />
about two inches to the<br />
left of the carriage.
Edge to Edge Quilting (E2E)<br />
Quilting<br />
Tips:<br />
• Before quilting trace some of<br />
the pattern with the laser.<br />
• Check the highest points at the<br />
top of the pattern, and the<br />
lowest points, at the bottom of<br />
the pattern. This makes sure<br />
that you don’t hit the poles or<br />
the track and that the pattern<br />
fits between the poles.
Edge to Edge Quilting (E2E)<br />
Quilting<br />
Tips:<br />
• Pause at the points.<br />
• Flow vs. slow<br />
• Accuracy comes with practice.<br />
• The design does not go home<br />
with the quilt.<br />
• Look ahead of the design as you<br />
quilt.<br />
• If you have to stop, it is best to<br />
stop at a point.
Edge to Edge Quilting (E2E)<br />
Quilting<br />
Tips:<br />
• Pay attention occasionally to the<br />
thread as it is feeding off the<br />
cone to make sure it is stitching.<br />
• Try not to death grip the handles.<br />
• Lightly lock your arms against<br />
your body.<br />
• Stand with your feet hip width<br />
apart. This gives your body<br />
stability.<br />
• Rotate with your ankles.
Edge to Edge Quilting (E2E)<br />
Quilting<br />
• If your laser gets bumped, and<br />
you lose your positioning,<br />
move your machine needle to<br />
the start point of the row and<br />
position laser to start point on<br />
pattern.<br />
• You are now ready to<br />
continue quilting.
Edge to Edge Quilting (E2E)<br />
Quilting<br />
Tips:<br />
• Notice this quilt has been<br />
stitched off all four edges.<br />
• We meant to do this. That<br />
makes all of the sides<br />
cropped.<br />
• Breathe! Blink! Enjoy!
Edge to Edge Quilting (E2E)<br />
How do I plan the spacing<br />
between one pass and the next?<br />
• After completing the first pass,<br />
place the needle on a point on<br />
the stitched line.<br />
• With the needle down in the<br />
fabric, gently roll the quilt until<br />
the laser is on the corresponding<br />
dotted line at the bottom of the<br />
pantograph.
Edge to Edge Quilting (E2E)<br />
TIP:<br />
If you leave too much space<br />
between passes, rather than leave<br />
the open space, go back in and<br />
mimic, or echo along the lines so<br />
you don’t leave negative space.
Edge to Edge Quilting (E2E)<br />
• <strong>Groovy</strong> <strong>Boards</strong><br />
• Over 25 designs to<br />
choose from<br />
• Borders<br />
• Blocks<br />
• Edge to Edge<br />
To find all the <strong>Groovy</strong> Board designs go to:<br />
http://www.handiquilter.com/category/hq_groovy_boards/
Edge to Edge Quilting (E2E)<br />
• <strong>Groovy</strong> <strong>Boards</strong><br />
Adaptor and stylus for:<br />
HQ 18 Avanté and HQ 24 Fusion
Edge to Edge Quilting (E2E)<br />
• <strong>Groovy</strong> <strong>Boards</strong><br />
Adaptor and stylus<br />
for HQ Sixteen
Edge to Edge Quilting (E2E)<br />
• <strong>Groovy</strong> <strong>Boards</strong><br />
The stylus has a tip that fits<br />
into the groove of the boards
Edge to Edge Quilting (E2E)<br />
• <strong>Groovy</strong> <strong>Boards</strong><br />
• To position the stylus,<br />
adjust the wing nuts and<br />
slide the stylus bracket.<br />
• This will line up the quilt<br />
with the board.
Edge to Edge Quilting (E2E)<br />
• <strong>Groovy</strong> <strong>Boards</strong><br />
• Check the top of the board<br />
• Check the bottom of the board<br />
• This assures the machine can move<br />
around the design with no<br />
interference with the track or the<br />
poles<br />
• If there is a problem, this is where<br />
you loosen the wing nuts and<br />
adjust the slider
Edge to Edge Quilting (E2E)<br />
• <strong>Groovy</strong> <strong>Boards</strong><br />
• The groove in the board is<br />
slightly larger than the tip<br />
to allow for movement<br />
without binding.
Edge to Edge Quilting (E2E)<br />
• <strong>Groovy</strong> <strong>Boards</strong><br />
• The boards come with a<br />
rubber grip on the back to<br />
grip the table top
Edge to Edge Quilting (E2E)<br />
• <strong>Groovy</strong> <strong>Boards</strong><br />
• On the back of each board<br />
you will find two rings that<br />
secure the boards together
Edge to Edge Quilting (E2E)<br />
• <strong>Groovy</strong> <strong>Boards</strong><br />
• On the back of each board<br />
you will find two rings that<br />
secure the boards together
Edge to Edge Quilting (E2E)<br />
• <strong>Groovy</strong> <strong>Boards</strong><br />
• Use Painters tape to secure<br />
the boards to the table<br />
frame
Edge to Edge Quilting (E2E)<br />
• <strong>Groovy</strong> <strong>Boards</strong><br />
• How many boards of each<br />
design should you<br />
purchase?<br />
• At least two for borders or<br />
continuous design<br />
• Some designs have part of<br />
the pattern stitch on to<br />
board two and then back to<br />
board one
Edge to Edge Quilting (E2E)<br />
• <strong>Groovy</strong> <strong>Boards</strong><br />
• If you choose to purchase<br />
only two and “leap frog”<br />
them, place a piece of tape<br />
at the end of each board<br />
on the table.<br />
• This helps in repositioning<br />
as you move the board
Edge to Edge Quilting (E2E)<br />
• <strong>Groovy</strong> <strong>Boards</strong><br />
• For Dueling Circles use a<br />
permanent marker to color<br />
each circle to designate ½”<br />
intervals.
Edge to Edge Quilting (E2E)<br />
• <strong>Groovy</strong> <strong>Boards</strong><br />
Look what Dueling Circles can do!
Edge to Edge Quilting (E2E)<br />
• <strong>Groovy</strong> <strong>Boards</strong><br />
Look what Fallen Leaves can do!
Edge to Edge Quilting (E2E)<br />
• <strong>Groovy</strong> <strong>Boards</strong>-Edge to Edge<br />
Reference points or lines
Edge to Edge Quilting (E2E)<br />
• <strong>Groovy</strong> <strong>Boards</strong>-Edge to Edge<br />
Reference points or lines<br />
Reference line, not a stitching<br />
line
Edge to Edge Quilting (E2E)<br />
• <strong>Groovy</strong> <strong>Boards</strong>-Borders<br />
Lots of border designs available
Edge to Edge Quilting (E2E)<br />
• <strong>Groovy</strong> <strong>Boards</strong><br />
More border designs
Edge to Edge Quilting (E2E)<br />
• <strong>Groovy</strong> <strong>Boards</strong>-Feathers<br />
Border designs available<br />
with corners or matching<br />
blocks
Edge to Edge Quilting (E2E)<br />
• <strong>Groovy</strong> <strong>Boards</strong><br />
More border designs or use it as edge to edge
Edge to Edge Quilting (E2E)<br />
• <strong>Groovy</strong> <strong>Boards</strong><br />
Edge to Edge design
Edge to Edge Quilting (E2E)<br />
• <strong>Groovy</strong> <strong>Boards</strong><br />
Edge to Edge design or use for border
Edge to Edge Quilting (E2E)<br />
• <strong>Groovy</strong> <strong>Boards</strong><br />
Feathers
Edge to Edge Quilting (E2E)<br />
• Digital Quilting<br />
with the HQ<br />
Pro-Stitcher
You don’t have to. A copy of this<br />
webinar will be on the<br />
<strong>Handi</strong><strong>Quilter</strong>.com website under the<br />
Education tab. Just click on Webinars.<br />
The next Education Webinar will be<br />
offered September 13 at 11:00 a.m.<br />
Mountain Daylight Time.<br />
The topic will be Updates for the<br />
HQ Pro-Stitcher
Thanks for attending!<br />
We have some great deals to share with you.<br />
Take 20% off ANY Pantograph on GoldenThreads.com<br />
Take 20% off ANY <strong>Groovy</strong> Board on <strong>Handi</strong><strong>Quilter</strong>.com<br />
Both deals are valid August 9-10 only.<br />
Just enter the following codes in the discount box at checkout.<br />
For GoldenThreads.com<br />
Panto20<br />
For <strong>Handi</strong><strong>Quilter</strong>.com<br />
<strong>Groovy</strong>20


