RelyX⢠ARC Adhesive Resin Cement - Dale Dental
RelyX⢠ARC Adhesive Resin Cement - Dale Dental
RelyX⢠ARC Adhesive Resin Cement - Dale Dental

Create successful ePaper yourself
Turn your PDF publications into a flip-book with our unique Google optimized e-Paper software.
1<br />
RelyX<br />
<strong>ARC</strong><br />
<strong>Adhesive</strong> <strong>Resin</strong> <strong>Cement</strong> System<br />
Technical Product Profile
Table of Contents<br />
3<br />
Description of System .................................................................................................5<br />
3M Clicker Dispenser Operation .................................................................6<br />
3M Line of <strong>Cement</strong> Products: Indications for Use.....................................................7<br />
3M RelyX <strong>ARC</strong> <strong>Adhesive</strong> <strong>Resin</strong> <strong>Cement</strong> ....................................................7<br />
3M RelyX Luting <strong>Cement</strong> (Vitremer Luting <strong>Cement</strong>) ................................8<br />
3M Opal Luting Composite .............................................................................8<br />
3M Scotchbond <strong>Resin</strong> <strong>Cement</strong> ....................................................................9<br />
Composition ..............................................................................................................10<br />
RelyX <strong>ARC</strong> <strong>Resin</strong> <strong>Cement</strong> ................................................................................10<br />
3M Single Bond <strong>Dental</strong> <strong>Adhesive</strong> System ....................................................10<br />
3M RelyX Ceramic Primer ........................................................................10<br />
Properties................................................................................................................... 11<br />
Bond Strength Testing........................................................................................ 11<br />
Adhesion to Tooth Structure ..............................................................................12<br />
Adhesion to Various Types of Core Build-up....................................................13<br />
Adhesion of Amalgam to Tooth Structure .........................................................16<br />
Compressive and Diametral Tensile Strengths ..................................................17<br />
Wear Rate ...........................................................................................................18<br />
Film Thickness ...................................................................................................19<br />
Radiopacity ........................................................................................................20<br />
Work and Set Time.............................................................................................20<br />
Viscosity vs. Shear Rate.....................................................................................21<br />
Technique Guides ......................................................................................................22<br />
Crown and Bridge <strong>Cement</strong>ation ........................................................................22<br />
Inlay/Onlay <strong>Cement</strong>ation ...................................................................................23<br />
Bonding Amalgam .............................................................................................24<br />
<strong>Cement</strong>ing Endodontic Posts .............................................................................25<br />
References Cited .......................................................................................................26<br />
Questions and Answers .............................................................................................26<br />
Instructions ................................................................................................................28
Description of System<br />
5<br />
3M RelyX <strong>ARC</strong> <strong>Adhesive</strong> <strong>Resin</strong> <strong>Cement</strong> is a permanent, dual-cure, paste-paste resin<br />
cement developed to be used with the 3M Single Bond dental adhesive system. Used in<br />
this combination, the system is indicated for bonding indirect restorations such as crowns,<br />
bridges, Maryland (adhesive) bridges, inlays, onlays, and for endodontic post cementation.<br />
These indirect restorations may be composed of porcelain, ceramic, precured composite,<br />
metal or porcelain-fused-to-metal (PFM). The system can also be used for adhesive<br />
(bonded) amalgam restorations.<br />
RelyX <strong>ARC</strong> resin cement provides a dual-cure system that has approximately 2 minutes of<br />
work time. It has a self-cure set time of 10 minutes from the start of mix. The material can<br />
also be light cured to accelerate the set time of the reaction for applications where light is<br />
accessible to the cement.<br />
RelyX <strong>ARC</strong> resin cement offers a material with high physical strength, high wear resistance,<br />
high adhesive strengths to a variety of substrates and a combined low film thickness<br />
when used with the Single Bond adhesive. The esthetic properties, shading and<br />
opacity, were determined through dentist input. RelyX <strong>ARC</strong> resin cement is available<br />
in a Transparent (A1) and a Universal (A3) shade.<br />
In addition, RelyX <strong>ARC</strong> resin cement provides improved handling properties. RelyX<br />
<strong>ARC</strong> resin cement was formulated through customer input to determine the optimal handling<br />
characteristics to provide an easy to mix, easy to seat and easy to clean-up cement.<br />
To provide these desired characteristics, RelyX <strong>ARC</strong> resin cement contains a new polymeric<br />
component for which a patent has been applied. The new component is a dimethacrylate<br />
polymer that modifies the rheology or handling of the material and allows for the<br />
following benefits:<br />
• The cement flows easily for crown loading but does not run out upon inversion<br />
of the crown.<br />
• The cement flows during crown seating when subjected to shear forces but stops<br />
when the crown is seated. It then forms a collar of excess cement that enables a<br />
well-sealed margin and easy access to the material for cleanup.<br />
• The excess cement forms an intermediate gel phase in approximately 2-3<br />
minutes that allows the cement to be easily cleaned up with an instrument.<br />
• The cement is brushable for easier application as an amalgam adhesive.<br />
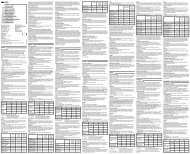
Figure 1 illustrates the easy “flick” cleanup of the excess cement 1 .<br />
Figure 1.
6<br />
3M RelyX <strong>ARC</strong> <strong>Resin</strong> <strong>Cement</strong> is packaged in the new delivery device called the<br />
3M Clicker Dispenser. The Clicker dispenser is similar in construction to a doublebarreled<br />
syringe. Its side-by-side cartridges contain the A and B pastes of the cement.<br />
When actuated by the lever, the device simultaneously and precisely dispenses equal<br />
amounts of each paste onto a mixing pad. The Clicker dispenser allows for easy, convenient<br />
and consistent dispensing of the cement components. It is less messy and stays<br />
cleaner throughout than typical syringes or powder/liquid systems. There is also less<br />
wasted cement left on the pad. When full, the Clicker dispenser contains 4.5g or approximately<br />
80 clicks of RelyX <strong>ARC</strong> resin cement. The dispenser incorporates a gauge that<br />
indicates the number of clicks remaining in the dispenser. The number of clicks required<br />
for each application will vary but the following will provide a guideline for the average<br />
number of clicks required for various applications:<br />
• Bonded amalgam, small inlay 2 Clicks<br />
• Posts, large inlay, small onlay, anterior crown, 3 Clicks<br />
abutment for anterior bridge<br />
• Large onlay, Maryland bridge, posterior crown, 4 Clicks<br />
abutment for posterior bridge<br />
3M Clicker Dispenser Operation<br />
The basic procedure for using the Clicker dispenser is shown here.<br />
Operation<br />
Replace Cap:<br />
Remove Cap:<br />
• Press and hold cap lever<br />
to unlock cap.<br />
• Hold the sides of the cartridge<br />
and slide cap into place until<br />
securely latched as indicated<br />
by an audible click.<br />
1<br />
• Slide cap off dispenser.<br />
5<br />
Precautions<br />
• Do not depress the dispenser<br />
lever during cap removal and/<br />
or replacement.<br />
2<br />
Dispense:<br />
• Fully depress lever to dispense<br />
material from each<br />
side of cartridge onto pad.<br />
6<br />
• Do not advance the dispenser<br />
plunger during cap removal<br />
and/or replacement.<br />
• Release lever.<br />
3<br />
7<br />
Clean:<br />
• Wipe the cartridge tips with<br />
an alcohol-dampened gauze.<br />
4
3M Line of <strong>Cement</strong> Products: Indications for Use<br />
7<br />
A wide variety of permanent cements are available to the dentist for cementing various<br />
types of restorations. Examples of these types of permanent cements include resin<br />
cements, resin reinforced glass ionomers, compomers, traditional glass ionomers, polycarboxylates<br />
and zinc phosphates. This product profile will focus primarily on the resin cements,<br />
however 3M <strong>Dental</strong> Products does manufacture several cement products and the<br />
differences and indications for each should be clarified to avoid confusion. The following<br />
discussion and Table 1 are intended to illustrate the options offered by 3M <strong>Dental</strong> Products.<br />
While overlaps of indications can occur, each has been targeted for specific indications.<br />
3M RelyX <strong>ARC</strong> <strong>Adhesive</strong> <strong>Resin</strong> <strong>Cement</strong><br />
RelyX <strong>ARC</strong> resin cement is designed to be used with 3M Single Bond <strong>Dental</strong> <strong>Adhesive</strong>.<br />
Single Bond adhesive is initially placed and light-cured prior to the seating of the restoration.<br />
The cured Single Bond adhesive layer has a low film thickness of about 10 microns<br />
and will not interfere with the seating of the restoration when used properly 2 . Care is<br />
required when placing the light-cured adhesive for use under indirect restorations<br />
and for endodontic posts. Do not apply extra layers of adhesive and avoid pooling in<br />
areas of the preparation that could affect the fit of the restoration. Paper points<br />
are recommended to remove excess adhesive in the root canals prior to light-curing<br />
for the placement of endodontic posts or cast post and core. The use of Single Bond<br />
adhesive with RelyX <strong>ARC</strong> resin cement allows for a simplified procedure versus traditional<br />
systems that utilize dual cure adhesive systems that typically have more steps and<br />
require longer placement time. The use of Single Bond adhesive with RelyX <strong>ARC</strong> resin<br />
cement allows for high bond strengths to the tooth and the restoration.<br />
RelyX <strong>ARC</strong> resin cement system is indicated for cementing esthetic indirect restorations composed<br />
of porcelain, ceramics or precured composite. The two shades and opacity were determined<br />
through dentist input to provide the desired esthetic results for these restorations.<br />
RelyX <strong>ARC</strong> resin cement system is also indicated for cementing indirect restorations<br />
composed of metal or PFM where minimal tooth structure remains and additional retention<br />
is required. The system provides high bond strengths to the tooth and the restoration<br />
to allow for the needed retention.<br />
In addition to the indirect restorations mentioned above, the RelyX <strong>ARC</strong> resin cement<br />
system is indicated for cementing endodontic posts and for adhesive (bonded) amalgam<br />
restorations. While RelyX <strong>ARC</strong> resin cement is capable of bonding veneers, the reduced<br />
number of shading options and lower viscosity minimizes its versatility for the application.<br />
3M Opal Luting Composite is designed specifically for veneer bonding and is<br />
therefore recommended for this application.
8<br />
3M RelyX Luting <strong>Cement</strong> (Vitremer Luting <strong>Cement</strong>)<br />
RelyX Luting cement is the new name for Vitremer Luting cement. RelyX Luting cement<br />
is a hybrid glass ionomer cement that is indicated for luting metal and porcelain-fused-tometal<br />
(PFM) crowns and bridges, metal inlays, onlays, crowns, posts, and orthodontic<br />
bands. RelyX Luting cement is not indicated for composite, porcelain, or ceramic inlays,<br />
onlays, crowns or bridges. RelyX Luting cement is used for applications that typically<br />
would have been cemented using zinc phosphate, polycarboxylate or traditional glass<br />
ionomer cements. The advantages of RelyX Luting cement include a simple application<br />
with no pretreatment or adhesives required, and easy cleanup. RelyX Luting cement is<br />
ideal for routine crown and bridge applications. However, for instances where the<br />
preparation has minimal retention left, the use of 3M RelyX <strong>ARC</strong> <strong>Adhesive</strong> <strong>Resin</strong><br />
<strong>Cement</strong> with 3M Single Bond <strong>Adhesive</strong> is advised to maximize the bond strength to<br />
the tooth structure.<br />
RelyX Luting cement is the first choice for routine metal and PFM crown and bridge<br />
applications.<br />
3M Opal Luting Composite<br />
Opal luting composite is a resin cement designed with a higher consistency and wider<br />
shade range specifically for cementing porcelain veneers. Opal luting composite is used<br />
with the Single Bond adhesive or 3M Scotchbond Multi-Purpose <strong>Adhesive</strong> Systems<br />
for bonding the luting composite to the tooth and to the veneer.<br />
To insure that optimal color stability is maintained, Opal luting composite must be<br />
used with a 3M light-cure dental adhesive.<br />
Opal luting composite consists of an A and B paste. The Paste A is a light-cure cement<br />
used for direct bonding of the veneers to the tooth. The Paste B is a try-in paste to determine<br />
which shade of Paste A should be used for the final bonding of the veneer.<br />
Opal luting composite was originally recommended for indirect applications such as<br />
inlays and onlays, however, the high viscosity of the material may not be preferred for<br />
these applications. Also, because of the high viscosity, Opal luting composite is not recommended<br />
and does not have regulatory approval for its use in bonding porcelain, ceramic<br />
or composite crowns. RelyX <strong>ARC</strong> resin cement has a lower viscosity that is<br />
ideal for bonding these restorations and is therefore recommended.
3M Scotchbond <strong>Resin</strong> <strong>Cement</strong><br />
Scotchbond resin cement is used in combination with the 3M Scotchbond Multi-<br />
Purpose Plus <strong>Adhesive</strong> System. It is packaged in standard syringes and is only available<br />
in one shade. Scotchbond resin cement is indicated for the same applications as 3M<br />
RelyX <strong>ARC</strong> <strong>Adhesive</strong> <strong>Resin</strong> <strong>Cement</strong> with the exception of amalgam bonding.<br />
9<br />
The RelyX <strong>ARC</strong> resin cement system offers a broader range of application, a simplified<br />
bonding procedure, an easier to use dispensing device, two shades and is easier to clean up<br />
excess material. Based on these attributes, RelyX <strong>ARC</strong> resin cement is intended to replace<br />
the existing Scotchbond resin cement.<br />
Table 1.<br />
Recommended<br />
Indications for<br />
the 3M Line of<br />
<strong>Cement</strong> Products<br />
Metal/PFM<br />
Inlays/Onlays<br />
Crowns<br />
Bridges<br />
Endodontic Posts<br />
Maryland Bridge<br />
3M RelyX <strong>ARC</strong> 3M Scotchbond 3M RelyX (Vitremer) 3MOpal<br />
<strong>Resin</strong> <strong>Cement</strong> <strong>Resin</strong> <strong>Cement</strong> Luting <strong>Cement</strong> Luting Composite<br />
Porcelain/Ceramic<br />
Crowns<br />
Bridges<br />
Inlays/Onlays<br />
Veneers<br />
Composite<br />
Crowns<br />
Inlays/Onlays<br />
Amalgam<br />
Bonding<br />
Recommended product. Designed specifically for stated application.<br />
Secondary recommendation where the preparation has left minimal tooth structure<br />
and added retention is required.<br />
(Blank) Not recommended or indicated.
10<br />
Composition<br />
3M RelyX <strong>ARC</strong> <strong>Adhesive</strong> <strong>Resin</strong> <strong>Cement</strong><br />
RelyX <strong>ARC</strong> resin cement is a methacrylate resin-based luting material designed to<br />
be used with the 3M Single Bond dental adhesive system. RelyX <strong>ARC</strong> resin cement<br />
is a two-part system consisting of an A and B paste packaged in the 3M Clicker<br />
Dispenser. Equal amounts by weight of each paste are dispensed and mixed. The Clicker<br />
dispenser contains 4.5g of RelyX <strong>ARC</strong> resin cement.<br />
The resin is composed of bisphenol-A-diglycidylether dimethacrylate (BisGMA) and<br />
triethylene glycol dimethacrylate (TEGDMA) polymer. Zirconia/silica filler is used to<br />
impart radiopacity, wear resistance and physical strength. Filler loading of the mixed<br />
RelyX <strong>ARC</strong> cement is approximately 67.5% by weight. The average particle size for<br />
the filler is approximately 1.5µm.<br />
RelyX <strong>ARC</strong> resin cement also contains a new component for which a patent has been<br />
applied. The new component is a dimethacrylate polymer that modifies the rheology<br />
of the material and allows for the improved handling and easy cleanup characteristics.<br />
Paste A of RelyX <strong>ARC</strong> resin cement is filled to approximately 68% by weight of the<br />
zirconia/silica filler. Paste A contains the pigments for the two shades. Paste A also contains<br />
the amine and photoinitiator system. The photoinitiator will allow for light-curing<br />
when exposed to visible blue light in the 400-500 nanometer range. The amine will react<br />
with the peroxide of the Paste B to initiate the self-cure reaction.<br />
Paste B of RelyX <strong>ARC</strong> resin cement is filled to approximately 67% by weight of the<br />
zirconia/silica filler. Paste B contains the peroxide portion of the self-cure chemistry.<br />
Benzoyl peroxide will react with the amine of Paste A to initiate the self-cure reaction.<br />
The Single Bond <strong>Dental</strong> <strong>Adhesive</strong> System<br />
The Single Bond dental adhesive system consists of Single Bond adhesive and 3M<br />
Scotchbond Etchant. Scotchbond etchant is a 35% by weight phosphoric acid gel. It<br />
has a pH of about 0.6. Its purpose is to etch dentin and enamel.<br />
Single Bond dental adhesive is a one-bottle adhesive containing ethanol, 2-hydroxyethyl<br />
methacrylate (HEMA), BisGMA, other dimethacrylate resins, methacrylate-modified<br />
polycarboxylic acid copolymer, a small amount of water and a patented photoinitiator<br />
system. Additional technical information on the adhesive system can be found in the<br />
Single Bond dental adhesive system instructions and technical product profile.<br />
3M RelyX Ceramic Primer<br />
RelyX ceramic primer is the new name for 3M Scotchbond ceramic primer. RelyX<br />
ceramic primer is a patented and stable solution of a prehydrolyzed silane-coupling agent,<br />
alcohol and water. RelyX ceramic primer is specifically designed to enhance the bond to<br />
porcelain and ceramics. Test results have also suggested some benefit of application to<br />
metals. The primer should be applied to the bonding surfaces of the indirect restorations<br />
to be cemented with RelyX <strong>ARC</strong> resin cement.
Properties<br />
11<br />
A variety of physical property testing was performed on 3M RelyX <strong>ARC</strong> <strong>Adhesive</strong><br />
<strong>Resin</strong> <strong>Cement</strong>. Currently, there is no specification that regulates resin cements. There is<br />
a new ISO 4049 specification under proposal for the resin cement category. At this time,<br />
the ISO specification has not been issued but is in the final draft form and can be identified<br />
as ISO/DIS 4049:1998. The proposed standard will include tests such as film thickness,<br />
flexural strength, solubility, water sorption, work and set time, and if claimed by<br />
the product, radiopacity and color stability. Some of the data from the test standard will<br />
be referenced in the properties sections and additional data will follow when the standard<br />
issues. Internal test method data is provided for adhesion, wear resistance, compressive<br />
and diametral tensile strengths in both the light-cure and self-cure mode and viscosity vs.<br />
shear rate.<br />
Bond Strength Testing<br />
Shear bond strength tests were conducted to simulate the conditions of bonding indirect<br />
restorations and amalgam to tooth structure and various core build-up materials. Bonding<br />
was conducted by adhering cylinders of the test materials (metal, amalgam, porcelain, or<br />
precured composite) to polished enamel, dentin, metals, set amalgam, composite and GI<br />
core build up materials that were embedded in acrylic plugs. All testing was conducted<br />
with the 3M Single Bond <strong>Adhesive</strong> being light-cured and RelyX <strong>ARC</strong> resin cement<br />
allowed to self-cure. Porcelain surfaces were etched using hydrofluoric acid and then silanetreated<br />
with 3M RelyX ceramic primer. Metal surfaces were abraded using 50 grit aluminum<br />
oxide. Composite samples were fabricated using 3M Restorative Z-100 which was<br />
precured for 40 seconds and then abraded with 320 silicon carbide to yield a flat bonding<br />
surface.<br />
Bond values obtained for several indirect and amalgam bonding systems are presented<br />
in Figures 2-16. 3M Scotchbond <strong>Resin</strong> <strong>Cement</strong> with 3M Scotchbond Multi-<br />
Purpose Plus (SBRC/SBMP+) <strong>Adhesive</strong> was tested as a control with the RelyX <strong>ARC</strong><br />
resin cement system. The shear bond strength tests indicate that RelyX <strong>ARC</strong> resin cement<br />
provides high bond strengths to a variety of substrates with a variety of indirect materials.<br />
All shear bond strength values were determined from a sample size of 10 for each combination<br />
tested. The compositions of the various components used in the adhesion testing<br />
are as follows:<br />
• High Noble Metal: 62% Gold, 3% Palladium, 9% Copper, 25% Silver<br />
• Noble Metal: 80% Palladium, 2-5% Gold, 1.5% Silver<br />
• Base Metal: 74-78% Nickel, 12-15% Chromium, 4-6% Molybdenum,<br />
1.8% Beryllium<br />
• Porcelain: Crystar®, Vintage Body A3<br />
• Composite: 3M Z-100 Restorative<br />
• Amalgam: Tytin®, Dispersalloy®
12<br />
Adhesion to Tooth Structure<br />
Figure 2.<br />
24-Hour Shear Bond<br />
Strengths (MPa) of<br />
Metals to Dentin<br />
RelyX <strong>ARC</strong>/Single Bond<br />
SBRC/SBMP+<br />
<strong>Resin</strong>omer/ONE-STEP<br />
High Noble<br />
Noble<br />
Base Metal<br />
EnForce/Prime & Bond 2.1 Dual Cure<br />
C&B Metabond®<br />
Panavia® 21<br />
Variolink® II/Syntac<br />
0 5 10 15 20 25 30<br />
Shear Bond Strength, MPa<br />
Figure 3.<br />
24-Hour Shear Bond<br />
Strengths (MPa) of<br />
Metals to Enamel<br />
RelyX <strong>ARC</strong>/Single Bond<br />
SBRC/SBMP+<br />
<strong>Resin</strong>omer/ONE-STEP<br />
High Nobles<br />
Nobles<br />
Base Metals<br />
EnForce/Prime & Bond 2.1 Dual Cure<br />
C&B Metabond®<br />
Panavia® 21<br />
Variolink® II/Syntac<br />
0 5 10 15 20 25 30 35 40<br />
Shear Bond Strength, MPa<br />
Figure 4.<br />
24-Hour Shear Bond<br />
Strengths (MPa) of<br />
Porcelain to Dentin<br />
and Enamel<br />
RelyX <strong>ARC</strong>/Single Bond<br />
SBRC/SBMP+<br />
ONE-STEP/Duo-Link<br />
Dentin<br />
Enamel<br />
EnForce/Prime & Bond 2.1 Dual Cure<br />
C&B Metabond®<br />
Panavia® 21<br />
Variolink® II/Syntac<br />
0 5 10 15 20 25 30 35 40<br />
Shear Bond Strength, MPa
Figure 5.<br />
24-Hour Shear Bond<br />
Strengths (MPa) of<br />
Pre-cured Composite<br />
to Dentin and Enamel<br />
RelyX <strong>ARC</strong>/Single Bond<br />
SBRC/SBMP+<br />
Duo-Link/ONE-STEP<br />
Dentin<br />
Enamel<br />
13<br />
EnForce/Prime & Bond 2.1 Dual Cure<br />
Amalgambond Plus®<br />
Panavia® 21<br />
Variolink® II/Syntac<br />
0 5 10 15 20 25 30 35<br />
Shear Bond Strength, MPa<br />
Figure 6.<br />
15-Minute vs. 24-Hour<br />
Shear Bond Strengths<br />
(MPa) of Pre-cured<br />
Composite to Dentin<br />
RelyX <strong>ARC</strong><br />
15 Minute<br />
24-Hour<br />
Panavia® 21<br />
Variolink® II/Syntac<br />
0 5 10 15 20 25<br />
Shear Bond Strength, MPa<br />
Adhesion to Various Types of Core Build-up<br />
Figure 7.<br />
24-Hour Shear Bond<br />
Strengths (MPa) of<br />
Metals to Set<br />
Amalgam<br />
(Dispersalloy®)<br />
RelyX <strong>ARC</strong>/Single Bond<br />
High Noble<br />
Noble<br />
Base Metal<br />
SBRC/SBMP+<br />
<strong>Resin</strong>omer/ONE-STEP<br />
0 5 10 15 20<br />
Shear Bond Strength, MPa
14<br />
Figure 8.<br />
24-Hour Shear Bond<br />
Strengths (MPa) of<br />
Amalgam (Tytin®),<br />
Porcelain and<br />
Precured Composite<br />
to Set Amalgam<br />
(Dispersalloy®)<br />
RelyX <strong>ARC</strong>/Single Bond<br />
Amalgam<br />
Porcelain<br />
Precured<br />
Composite<br />
SBRC/SBMP+<br />
0 5 10 15 20 25 30<br />
Shear Bond Strength, MPa<br />
Figure 9.<br />
24-Hour Shear Bond<br />
Strengths (MPa) of<br />
Metal to Metals<br />
RelyX <strong>ARC</strong>/Single Bond<br />
High Noble<br />
Noble<br />
Base Metal<br />
SBRC/SBMP+<br />
<strong>Resin</strong>omer/ONE-STEP<br />
0 5 10 15 20 25 30 35<br />
Shear Bond Strength, MPa<br />
Figure 10.<br />
24-Hour Shear Bond<br />
Strengths (MPa) of<br />
Porcelain to Metals<br />
RelyX <strong>ARC</strong>/Single Bond<br />
High Noble<br />
Noble<br />
Base Metal<br />
SBRC/ SBMP+<br />
0 5 10 15 20 25 30 35<br />
Shear Bond Strength, MPa
Figure 11.<br />
24-Hour Shear Bond<br />
Strengths (MPa) of<br />
Precured Composite<br />
to Metals<br />
RelyX <strong>ARC</strong>/Single Bond<br />
High Noble<br />
Noble<br />
Base Metal<br />
15<br />
SBRC/SBMP+<br />
Duo-Link/ONE-STEP<br />
0 5 10 15 20 25 30 35<br />
Shear Bond Strength, MPa<br />
Figure 12.<br />
24-Hour Shear Bond<br />
Strengths (MPa) of<br />
Porcelain and<br />
Precured Composite<br />
to Composite<br />
RelyX <strong>ARC</strong>/Single Bond<br />
Porcelain<br />
Precured<br />
Composite<br />
SBRC/SBMP+<br />
Duo-Link/ONE-STEP<br />
0 5 10 15 20 25 30 35<br />
Shear Bond Strength, MPa<br />
Figure 13<br />
24-Hour Shear Bond<br />
Strengths (MPa) of<br />
Metals to Composite<br />
RelyX <strong>ARC</strong>/Single Bond<br />
High Noble<br />
Noble<br />
Base Metal<br />
SBRC/SBMP+<br />
<strong>Resin</strong>omer/ONE-STEP<br />
0 5 10 15 20 25 30<br />
Shear Bond Strength, MPa
16<br />
Figure 14.<br />
24-Hour Shear Bond<br />
Strengths (MPa) of<br />
Porcelain and<br />
Precured Composite<br />
to Glass Ionomer<br />
Core Build-up<br />
RelyX <strong>ARC</strong>/Single Bond<br />
Precured<br />
Composite<br />
Porcelain<br />
SBRC/SBMP+<br />
0 5 10 15 20 25 30 35<br />
Shear Bond Strength, MPa<br />
Figure 15.<br />
24-Hour Shear Bond<br />
Strengths (MPa) of<br />
Metals to Glass<br />
Ionomer Core Build-up<br />
RelyX <strong>ARC</strong>/Single Bond<br />
High Noble<br />
Noble<br />
Base Metal<br />
SBRC/SBMP+<br />
<strong>Resin</strong>omer/ONE-STEP<br />
0 5 10 15 20 25 30 35<br />
Shear Bond Strength, MPa<br />
Adhesion of Amalgam to Tooth Structure<br />
Figure 16.<br />
24-Hour Shear Bond<br />
Strengths (MPa) of<br />
Tytin Amalgam<br />
to Tooth<br />
RelyX <strong>ARC</strong>/Single Bond<br />
SBMP Plus<br />
<strong>Resin</strong>omer/ONE-STEP<br />
Enamel<br />
Dentin<br />
Amalgambond Plus®<br />
Amalgambond Plus® w/HPA Powder<br />
Prime & Bond 2.1 Dual Cure*<br />
Optibond SOLO<br />
0 5 10 15 20<br />
Shear Bond Strength, MPa<br />
*with amalgam bonding adhesive and<br />
self-cure activator components
Compressive and Diametral Tensile Strengths<br />
Compressive and diametral tensile are two common measurements of cement strength.<br />
In this test, cylinders of the cement are fabricated, cured (either self-cured or light-cured),<br />
and sectioned to yield either an elongated vertical cylinder or a disc. The elongated cylinders<br />
are compressed to failure along the long axis. The discs are compressed along the<br />
diameter until failure.<br />
17<br />
The values reported in Figures 17 and 18 show the diametral tensile and compressive<br />
strengths for samples that were light-cured and self-cured. Although slight differences<br />
are noted between the light-cured and self-cured samples, the values were high for both<br />
conditions. Sample size for each group tested is six. Values are reported in MPa. (Note:<br />
to convert these values in MPa to their corresponding values in psi, multiply by 145.0).<br />
Figure 17.<br />
24-Hour LC and SC<br />
Compressive Strengths<br />
RelyX <strong>ARC</strong><br />
Scotchbond <strong>Resin</strong> <strong>Cement</strong><br />
LC<br />
SC<br />
<strong>Resin</strong>omer<br />
Variolink® II<br />
C&B Metabond®*<br />
Panavia® 21*<br />
0 50 100 150 200 250 300 350 400 450<br />
Compressive Strength, MPa<br />
*Material is self-cure only.<br />
Figure 18.<br />
24-Hour LC and SC<br />
Diametral Tensile Strengths<br />
RelyX <strong>ARC</strong><br />
Scotchbond <strong>Resin</strong> <strong>Cement</strong><br />
LC<br />
SC<br />
<strong>Resin</strong>omer<br />
Variolink® II<br />
C&B Metabond®*<br />
Panavia® 21*<br />
0 20 40 60 80<br />
Diametral Tensile Strength, MPa<br />
*Material is self-cure only.
18<br />
Wear Rate<br />
The occlusal margins of inlay restorations can be exposed to wear. In-vitro wear of<br />
3M RelyX <strong>ARC</strong> <strong>Adhesive</strong> <strong>Resin</strong> <strong>Cement</strong> was compared with other materials in the<br />
ACTA wear machine, a three-body abrasion testing instrument. The machine has two<br />
motor-driven wheels that roll against each other in the presence of a third body abrasive<br />
material. One of the wheels accommodates the test materials and the other contacts it<br />
acting as an “antagonistic cusp.” As the wheels rotate, the third body abrasive material is<br />
dragged between them creating three-body abrasion. Following wear cycles, volume loss<br />
of the test materials is measured by profilometry.<br />
Wear measurements were made at 10,000 cycle increments for a total of 100,000 cycles.<br />
The wear results are illustrated in Figure 19. RelyX <strong>ARC</strong> resin cement, 3M Scotchbond<br />
<strong>Resin</strong> <strong>Cement</strong> and Variolink® II resin cement displayed very low wear rates<br />
compared to the other materials tested. All samples were light-cured with the exception<br />
of Panavia® 21 and C&B Metabond®, both products are self-cure materials.<br />
Figure 19.<br />
In-vitro Wear Measurements<br />
per 10,000 cycles, µm<br />
RelyX <strong>ARC</strong><br />
Scotchbond <strong>Resin</strong> <strong>Cement</strong><br />
Panavia® 21<br />
Variolink® II<br />
C&B Metabond®<br />
<strong>Resin</strong>omer®<br />
0 5 10 15<br />
Wear Measurements per 10,000 cycles, µm
Film Thickness<br />
The film thickness of the cement system plays an important role in determining how well<br />
a precision indirect restoration will fit. Film thickness is determined by placing the mixed<br />
cement between two plates and placing a load on top of the plate to see how thin the<br />
cement layer can get. A material with a low film thickness has the ability to allow a very<br />
tight fitting indirect restoration to seat completely. If a material has a high film thickness,<br />
a tight fitting restoration may not seat completely leaving the margins open and the occlusion<br />
out of alignment. While no specification exists for maximum film thickness for resin<br />
cements, the proposed ISO resin cement specification specifies a test method with a 50µm<br />
film thickness limit. Figure 20 provides the average film thickness results of 5 samples for<br />
various materials per the proposed ISO/DIS 4049:1998 test method. 3M RelyX <strong>ARC</strong><br />
<strong>Adhesive</strong> <strong>Resin</strong> <strong>Cement</strong> has a very low film thickness compared to the other materials.<br />
19<br />
Figure 20.<br />
Film Thickness (µm)<br />
RelyX <strong>ARC</strong><br />
Scotchbond <strong>Resin</strong> <strong>Cement</strong><br />
Panavia® 21<br />
C&B Metabond®<br />
Variolink® II<br />
<strong>Resin</strong>omer®<br />
0 5 10 15 20 25 30 35 40 45 50<br />
Film Thickness, µm<br />
For resin cement systems that utilize an adhesive, the film thickness contribution of the<br />
adhesive must be taken into consideration. It is of particular concern with any adhesive<br />
system that is not self-curing and requires the adhesive layer to be light-cured prior to<br />
seating the indirect restoration. <strong>Adhesive</strong> systems such as 3M Scotchbond Multi-<br />
Purpose Plus provide for a film thickness of about 5µm or less when allowed to self-cure<br />
under a resin cement 3 . However, if the Scotchbond multi-purpose plus adhesive was lightcured<br />
prior to seating, the resulting film thickness would be approximately 50µm and<br />
would therefore not be acceptable for use under an indirect restoration. The 3M Single<br />
Bond <strong>Dental</strong> <strong>Adhesive</strong> System has an advanced chemistry system that incorporates a<br />
unique solvent and photoinitiator system that allows for a much thinner film of adhesive<br />
to be placed on the tooth, light-cured and still provide high bond strengths. Scanning<br />
Electron Microscopy (SEM) analysis of bonded restorations show that the cured Single<br />
Bond adhesive layer has an approximate 10µm film thickness 2 . Care is required when<br />
placing the light-cured adhesive for use under indirect restorations and for endodontic<br />
posts. Do not apply extra layers of adhesive and avoid pooling in areas of the<br />
preparation that could affect the fit of the restoration. Paper points are recommended<br />
to remove excess adhesive in the root canals prior to light-curing for the<br />
placement of endodontic posts or cast post and core.
20<br />
Figure 21 shows SEM photographs of two individual restorations bonded using 3M<br />
Single Bond <strong>Adhesive</strong> and 3M RelyX <strong>ARC</strong> <strong>Adhesive</strong> <strong>Resin</strong> <strong>Cement</strong>. The film thickness<br />
of the Single Bond layer is about 10µm under the cement. The thickness of the cement<br />
will vary for each restoration depending on the gap between the tooth and restoration.<br />
The gap thickness is dependent on the amount of die spacer used during the fabrication<br />
of the restoration.<br />
The combination of RelyX <strong>ARC</strong> resin cement and Single Bond dental adhesive results<br />
in a very low film thickness.<br />
Figure 21.<br />
<strong>Cement</strong><br />
<strong>Cement</strong><br />
<strong>Adhesive</strong><br />
Dentin<br />
Enamel<br />
Radiopacity<br />
The high filler loading of zirconia silica filler allows RelyX <strong>ARC</strong> resin cement to display<br />
a high degree of radiopacity. The radiopacity of a material is determined by comparing<br />
the optical density of a radiograph of a sample of the cured material to that of an aluminum<br />
block of the same thickness. Aluminum was chosen because it has a similar optical<br />
density to tooth structure on a radiograph. If the optical density of the test sample image<br />
is less than that of the aluminum image, the material is considered radiopaque. The radiopacity<br />
is reported as the ratio of the optical density of the aluminum sample to that of the<br />
test sample. Ratio values of greater than 1 are considered to be radiopaque. Ratio values<br />
less than 1 are not considered radiopaque. By this test method, RelyX <strong>ARC</strong> resin cement<br />
is radiopaque.<br />
Work and Set Time<br />
The timing of the dual-cure reaction for RelyX <strong>ARC</strong> resin cement is important to understand<br />
to insure that the restoration can be seated properly and that the restoration will be<br />
completely retained. The work time is determined from the proposed ISO/DIS 4049:1998<br />
specification test method at room temperature. The work time is determined from the start<br />
of mix and indicates the amount of time available to load the restoration or apply the<br />
cement to the tooth and perform any adjustments once the restoration is seated. The ISO/<br />
DIS 4049:1998 test method indicates that the work time of RelyX <strong>ARC</strong> resin cement is<br />
3.5 minutes. Since the work time of a material is accelerated by higher mouth temperatures,<br />
the actual clinical work time is about 2 minutes in the instructions to make sure<br />
that the dentist has the restoration seated in plenty of time.<br />
The set time of RelyX <strong>ARC</strong> resin cement is determined by rheometric and IR spectroscopy<br />
data as well as per the ISO/DIS 4049:1998 test method. The set time of the material<br />
is 6.5 minutes per the ISO test method. However, IR data indicates that a more complete<br />
set of the material occurs 10 minutes from start of mix. For restorations that require the<br />
cement to self-cure, it is recommended to leave the restoration undisturbed, with the exception<br />
of the margin cleanup, for 10 minutes from start of mix.
Viscosity vs. Shear Rate: Handling Properties<br />
As a shear force such as mixing, seating or brushing is applied to a cement, the viscosity<br />
of the cement decreases and becomes more fluid. Once this shear force is removed, such<br />
as when mixing is stopped or after a crown is seated, it would be ideal for the cement to<br />
return to its original viscosity. If the cement does not immediately return to the original<br />
viscosity, it could have a tendency to be runny or slump. A material that runs or slumps<br />
could be difficult to keep in the crown when loaded and inverted or result in a messy<br />
cleanup after the crown is seated.<br />
21<br />
Figure 22 illustrates how the viscosity decreases due to increased shear for 3M RelyX<br />
<strong>ARC</strong> <strong>Adhesive</strong> <strong>Resin</strong> <strong>Cement</strong> (Curve A). The decreased viscosity provides for a more<br />
fluid material that facilitates loading the cement into the crown and decreases seating<br />
pressure. When the mixing or seating action is stopped, the viscosity of RelyX <strong>ARC</strong><br />
resin cement quickly returns to nearly its original value (Curve B). The rapid return to<br />
the higher viscosity could prevent slumping and running resulting in a more manageable<br />
material.<br />
Curve C illustrates how Panavia® 21 behaves after the shear force has been applied and<br />
removed. While the viscosity decreases as expected under an increasing shear rate, once<br />
the force is removed, the viscosity goes to a more fluid state. This could provide for a<br />
runny material that would be difficult to handle.<br />
Figure 22.<br />
Viscosity vs.<br />
Shear Rate<br />
1400<br />
1200<br />
1000<br />
B<br />
JB<br />
B RelyX <strong>ARC</strong> Increased Shear Rate (Curve A)<br />
J RelyX <strong>ARC</strong> Reversed Shear Rate (Curve B)<br />
H Panavia® 21 Reversed Shear Rate (Curve C)<br />
800<br />
B<br />
J<br />
Viscosity (Pa•s)<br />
600<br />
400<br />
200<br />
B<br />
J<br />
B<br />
JH<br />
H<br />
J<br />
H HH<br />
H<br />
B<br />
J<br />
H<br />
B<br />
J<br />
H<br />
H<br />
H<br />
B<br />
B<br />
J J BJ<br />
0<br />
0 5 10 15 20 25<br />
Shear Rate (1/s)
22<br />
Technique Guides<br />
CROWN AND BRIDGE CEMENTATION<br />
RelyX <strong>ARC</strong><br />
Indications: This system is indicated for final cementation of PFM crowns and bridges, crowns<br />
with minimal tooth structure, Maryland bridges (resin bonded bridges), or ceramic/porcelain<br />
crowns and bridges. In cases where core material is present, roughen the core material and apply<br />
all solutions indicated for enamel and dentin.<br />
Step 1 - Etchant:<br />
• Apply 3M Scotchbond Etchant to enamel and dentin - wait 15 seconds.<br />
• Rinse for 10 seconds.<br />
• Blot excess water leaving tooth moist.*<br />
* Note: A 3M mini-sponge (#7522S) or a moist cotton pellet may be used<br />
for blotting.<br />
Step 2 - <strong>Adhesive</strong>:<br />
• Apply 2 consecutive coats of 3M Single Bond <strong>Adhesive</strong> to enamel<br />
and dentin.<br />
• Dry for 5 seconds.<br />
Avoid excess adhesive on all prepared surfaces.<br />
Step 3 - Light-Cure:<br />
• Light-cure for 10 seconds per bonding surface.<br />
Step 4 - Bonding<br />
Surface Preparation:<br />
• Roughen the bonding surfaces of indirect composite crowns with air<br />
abrasion or diamond.<br />
• Apply 3M RelyX ceramic primer (#2721) to etched porcelain and<br />
roughened metal surfaces.<br />
• Dry for 5 seconds.<br />
Step 5 - Apply <strong>Cement</strong>:<br />
• Dispense cement onto a mixing pad and mix for 10 seconds.<br />
• Apply a thin layer of cement to the bonding surface of the crown.<br />
Step 6 - Placement:<br />
• Slowly seat the crown.<br />
• Remove excess cement approximately 3-5 minutes after seating. Optional: If<br />
excess cement is removed immediately after seating, light-cure margins for<br />
40 seconds after clean-up.<br />
Step 7 - Light-Cure:<br />
• Once the crown is seated, margins may be light-cured for 40 seconds or<br />
allowed to self-cure for 10 minutes.<br />
Note: For porcelain and pre-cured composite crowns, margins must be lightcured<br />
for 40 seconds.<br />
Please refer to instructions for more detailed information as well as precautionary and warranty<br />
information. 3M Customer Hotline 1-800-634-2249 ©3M 1998
23<br />
INLAY/ONLAY CEMENTATION<br />
RelyX <strong>ARC</strong><br />
Indications: This system is indicated for final cementation of metal, ceramic, porcelain or precured<br />
composite inlays and onlays. Tight fitting metal restorations should be relieved internally to<br />
facilitate complete seating.<br />
Step 1 - Etchant:<br />
• Apply 3M Scotchbond Etchant to enamel and dentin - wait 15 seconds.<br />
• Rinse for 10 seconds.<br />
• Blot excess water leaving tooth moist.*<br />
* Note: A 3M mini-sponge (#7522S) or a moist cotton pellet may be<br />
used for blotting.<br />
Step 2 - <strong>Adhesive</strong>:<br />
• Apply 2 consecutive coats of 3M Single Bond <strong>Adhesive</strong> to enamel<br />
and dentin.<br />
• Dry for 5 seconds.<br />
Avoid excess adhesive on all prepared surfaces and line angles.<br />
Step 3 - Light-Cure:<br />
• Light-cure for 10 seconds.<br />
Bonding Surface Preparation:<br />
• Roughen the bonding surfaces of indirect composite inlays/onlays<br />
with air abrasion or a diamond.<br />
• Apply 3M RelyX ceramic primer (#2721) to etched porcelain<br />
and roughened metal surfaces.<br />
• Dry for 5 seconds.<br />
Step 4 - Apply <strong>Cement</strong>:<br />
• Dispense cement onto a mixing pad and mix for 10 seconds.<br />
• Apply a thin layer of cement onto the preparation.<br />
Step 5 - Placement:<br />
• Slowly seat the inlay/onlay.<br />
• While holding in place, remove excess cement immediately after seating.<br />
Step 6 - Light-Cure:<br />
• Light-cure margins for 40 seconds.<br />
Please refer to instructions for more detailed information as well as precautionary and warranty<br />
information. 3M Customer Hotline 1-800-634-2249 ©3M 1998
24<br />
BONDING AMALGAM<br />
RelyX <strong>ARC</strong><br />
Indications: This system is indicated for adhesive (bonded) amalgam restorations. Prepare a<br />
standard amalgam preparation. Roughen any existing amalgam or composite. Treat existing<br />
amalgam or composite using the same procedure outlined below for enamel and dentin. When<br />
bonding amalgam rub the inner surface of the matrix band with wax to prevent inadvertent bonding.<br />
Step 1 - Etchant:<br />
• Apply 3M Scotchbond Etchant to enamel and dentin - wait 15 seconds.<br />
• Rinse for 10 seconds.<br />
• Blot excess water leaving tooth moist.*<br />
* Note: A 3M mini-sponge (#7522S) or a moist cotton pellet may be<br />
used for blotting.<br />
Step 2 - <strong>Adhesive</strong>:<br />
• Apply 2 consecutive coats of 3M Single Bond <strong>Adhesive</strong> to enamel<br />
and dentin.<br />
• Dry gently for 2-5 seconds.<br />
Step 3 - Light-Cure:<br />
• Light-cure for 10 seconds.<br />
Step 4 - Apply <strong>Cement</strong>:<br />
• Dispense cement onto a mixing pad and mix for 10 seconds.<br />
• Using a brush, apply cement to the preparation.<br />
• Triturate amalgam while applying cement to the preparation.<br />
Step 5 - Completing the Restoration:<br />
• Condense and burnish the amalgam.<br />
Please refer to instructions for more detailed information as well as precautionary and warranty<br />
information. 3M Customer Hotline 1-800-634-2249 ©3M 1998
CEMENTING ENDODONTIC POSTS<br />
RelyX <strong>ARC</strong><br />
25<br />
Indications: This system is indicated for cementing endodontic posts. Paper points are<br />
recommended both for applying solutions and for removal of excess material after application.<br />
Trial fit and adjust post as needed.<br />
Step 1 -Etching:<br />
• Apply 3M Scotchbond Etchant to the canal - wait 15 seconds.<br />
• Rinse for 10 seconds.<br />
• Dry for 2 seconds. Remove excess moisture with a paper point.<br />
Step 2 - <strong>Adhesive</strong>:<br />
• Apply 3M Single Bond <strong>Adhesive</strong> to the canal.<br />
• Dry for 5 seconds.<br />
• Remove excess (if any) with a dry paper point.<br />
Step 3 - Light-Cure:<br />
• Light-cure for 10 seconds.<br />
Step 4 - Apply <strong>Cement</strong>:<br />
• Dispense cement onto a mixing pad and mix for 10 seconds.<br />
• Apply cement in and around canal using a periodontal probe.<br />
• Place a thin layer of mixed cement on post.<br />
Step 5 - Seat the Post and Light-Cure:<br />
• Seat the post.<br />
• Remove excess cement while holding post in place.<br />
• Light-cure for 40 seconds from an occlusal direction. The remaining<br />
cement will set via the self-cure reaction.<br />
• Core material can now be bonded to the post and tooth structure.<br />
Please refer to instructions for more detailed information as well as precautionary and warranty<br />
information. 3M Customer Hotline 1-800-634-2249 ©3M 1998
26<br />
References Cited<br />
1. Photographs courtesy of Dr. Robert Lowe.<br />
2. 3M <strong>Dental</strong> Products, (1996). Single Bond Technical Product Profile.<br />
3. 3M <strong>Dental</strong> Products, (1994). Scotchbond Multi-Purpose Plus Technical<br />
Product Profile.<br />
Questions and Answers<br />
Is it required to light-cure the 3M Single Bond <strong>Dental</strong> <strong>Adhesive</strong> layer prior to<br />
cementation?<br />
Yes. It is required to insure that the adhesive layer is cured to provide the high bond<br />
strengths and to properly seal the dentin. The only exception to this would be when Single<br />
Bond adhesive is used with 3M Opal Luting Composite for bonding veneers and the<br />
adhesive would be cured through the veneer.<br />
Will cured Single Bond adhesive interfere with the seating of the indirect restoration or<br />
endodontic post?<br />
No. A general perception exists that light-cured adhesives cannot be used under indirect<br />
restorations. It is true that with a conventional light-cured adhesive such as 3M Scotchbond<br />
Multi-Purpose adhesive gives a high film thickness when cured and cannot be<br />
used under indirect restorations. However, the chemistry of Single Bond adhesive with its<br />
unique photoinitiator and ethanol/water solvent system allows for a very thin film of<br />
adhesive to be placed. This provides for a low film thickness of cured adhesive that does<br />
not interfere with the seating of the restoration when used properly.<br />
NOTE: Care is required when placing the light-cured adhesive for use under indirect<br />
restorations and for endodontic posts. Do not apply extra layers of adhesive and<br />
avoid pooling in areas of the preparation that could affect the fit of the restoration.<br />
Paper points are recommended to remove excess adhesive in the root canals prior to<br />
light-curing for the placement of endodontic posts or cast post and cores.<br />
What is the combined film thickness of Single Bond adhesive with 3M RelyX <strong>ARC</strong><br />
<strong>Adhesive</strong> <strong>Resin</strong> <strong>Cement</strong>?<br />
Tests have shown that RelyX <strong>ARC</strong> resin cement has a minimum film thickness of approximately<br />
12-15 microns (refer to page 19). The resin cement will fill the gap between the<br />
tooth and the restoration. The gap can be quite variable depending on how the restoration<br />
was fabricated. As a result, the actual cured cement layer will vary for each restoration but<br />
can be as low as 12-15 microns. Testing has also shown the cured Single Bond adhesive<br />
layer has a film thickness of approximately 10 microns when used according to instructions<br />
(refer to pages 19-20). Therefore, the combined film thickness can be as low as 25<br />
microns but will vary depending on the restoration because the cement will fill the gap.<br />
Can RelyX <strong>ARC</strong> resin cement be used with Scotchbond multi-purpose plus adhesive?<br />
Yes, however RelyX <strong>ARC</strong> resin cement was designed to be used with the Single Bond<br />
adhesive system. The use of RelyX <strong>ARC</strong> resin cement with dual-cure adhesives, including<br />
Scotchbond multi-purpose plus, can cause significantly reduced work and set times.<br />
Therefore, when used with dual-cure adhesives, the cement should be placed on the restoration<br />
and not on the adhesive-coated tooth preparation. Final seating and adjusting<br />
should be done within 30 seconds of placement of the restoration onto the tooth.
Does the 3M Single Bond <strong>Adhesive</strong> System accelerate the setting reaction of 3M<br />
RelyX <strong>ARC</strong> resin cement?<br />
No, Single Bond adhesive does not have the chemical components in the resin like a dualcuring<br />
adhesive that would accelerate the work and set time of the cement. This allows the<br />
mixed cement to be placed directly on top of the Single Bond dental adhesive for procedures<br />
like amalgam bonding.<br />
27<br />
How many applications can I get out of RelyX <strong>ARC</strong> resin cement in the 3M Clicker<br />
Dispenser?<br />
The Clicker dispenser contains approximately 80 clicks worth of material. A bonded<br />
amalgam restoration requires approximately 2 clicks of material. A post, inlay or anterior<br />
crown requires approximately 3 clicks of material. An onlay or posterior crown requires<br />
approximately 4 clicks worth of material.<br />
How many shades are available for the RelyX <strong>ARC</strong> resin cement?<br />
Two. The cement is available in a Transparent/A1 and a Universal/A3. In 1-2mm bulk,<br />
the cured pastes are formulated to the A1 and A3 shades. In a thin film under a restoration,<br />
the Transparent shade will be essentially clear and the Universal shade will have a slight<br />
natural tooth color. If needed, the Translucent and Universal shades can be mixed together<br />
to form an intermediate A2-like shade.<br />
What can be used to clean the cartridge tips of the Clicker dispenser?<br />
A 2 × 2 gauze dampened with alcohol is the best choice.<br />
What is the shelf life of RelyX <strong>ARC</strong> resin cement?<br />
The shelf life of RelyX <strong>ARC</strong> resin cement is two years at room temperature. The shelf<br />
life of the Single Bond dental adhesive system is three years at room temperature.<br />
Can Single Bond dental adhesive be used for other non-cementing applications?<br />
Yes, Single Bond dental adhesive can be used for all restorative direct bonding procedures.<br />
Single Bond dental adhesive has been used successfully in clinics for 2 years<br />
for direct bonding procedures.<br />
Can I use the resin cleanup pads from the 3M Scotchbond <strong>Resin</strong> <strong>Cement</strong> Kit on<br />
RelyX <strong>ARC</strong> resin cement?<br />
Yes, since the base resin chemistries are similar, the pads can be used with RelyX <strong>ARC</strong><br />
resin cement. They are particularly helpful when immediately cleaning up the excess<br />
cement when seating inlays and onlays.
28<br />
Instructions<br />
3M RelyX <strong>ARC</strong> <strong>Adhesive</strong> <strong>Resin</strong> <strong>Cement</strong> System Instructions<br />
Indications for Use<br />
The RelyX <strong>ARC</strong> adhesive resin cement is a permanent dual-cure resin cement with an improved<br />
delivery system for cementation of indirect and amalgam restorations. It can be used for the final<br />
cementation of:<br />
• porcelain fused-to-metal crowns and bridges<br />
• metal crowns, bridges, inlays and onlays (high noble, noble, and base metals)<br />
• crowns and bridges with minimal tooth structure<br />
• Maryland bridges (resin bonded bridges)<br />
• all ceramic/porcelain and pre-cured composite crowns, bridges, inlays and onlays<br />
• endodontic posts<br />
• adhesive (bonded) amalgam restorations<br />
Note: For laboratory-fabricated veneers, use 3M Opal Luting Composite with<br />
a 3M dental adhesive system.<br />
Recommendations<br />
Light curing the marginal areas is recommended to provide maximum strength and wear resistance.<br />
Light curing time assumes the use of a 3M curing light or other dental visible curing light of comparable<br />
intensity. Curing lights should be checked often for proper output using a reliable light<br />
metering system.<br />
Air used during bonding procedure should be free of oil and water contamination.<br />
Mix cement with plastic mixing spatula or a high quality stainless steel spatula.<br />
Temporize with a non-eugenol containing cement.<br />
Working and Setting Times<br />
Mixing Time Working Time*<br />
@22°C/72°F @22°C/72°F<br />
(Room Temp.) Approximately<br />
10 seconds<br />
2 minutes<br />
Clean-up Time**<br />
@35°C/94°F<br />
(Oral Temp.)<br />
~3-5 minutes<br />
Set Time (self-cure)<br />
@35°C/94°F<br />
~10 minutes<br />
* To extend working time: mix for 10 seconds (longer mix times can shorten working time),<br />
spread cement into thin layer on mix pad; chill pad, spatula and/or prosthesis.<br />
** If excess cement is removed from margins immediately after seating, the margins must be<br />
light cured to minimize oxygen inhibition, which can lead to poorly sealed margins.<br />
RelyX <strong>ARC</strong> resin cement contains acrylate resins. A small percentage of the population is<br />
known to have an allergic response to acrylate resins. To reduce the risk of allergic response,<br />
minimize exposure to these materials. In particular, exposure to uncured resin should be<br />
avoided. Use of protective gloves and a no-touch technique is recommended. To remove resincontaminated<br />
brush tips, use a hemostat or cotton pliers. If cement contacts skin, wash immediately<br />
with soap and water. Acrylates may penetrate commonly-used gloves. If cement contacts<br />
glove, remove and discard glove, wash hands immediately with soap and water and then<br />
re-glove. <strong>Cement</strong> may cause eye irritation upon contact. Avoid contact with eyes. If accidental<br />
eye contact occurs, flush immediately with copious amounts of water. If irritation persists,<br />
consult a physician.<br />
Sensitivity<br />
Some patients may experience transitory post-operative sensitivity. The risk of sensitivity can<br />
be minimized by the following measures: remove minimal amount of tooth structure; use proper<br />
isolation; use a rubber dam; use adequate pulp protection; use 3M Vitrebond Light-Cure Glass<br />
Ionomer Liner/Base in areas of deep excavation; adjust occlusion carefully; check for hyperocclusion,<br />
particularly in lateral excursive contacts. Do not desiccate tooth during the bonding procedure.<br />
Do not overetch.
Instructions for Use<br />
3M RelyX <strong>ARC</strong> <strong>Adhesive</strong> <strong>Resin</strong> <strong>Cement</strong> was designed to be used in conjunction with the<br />
3M Single Bond <strong>Dental</strong> <strong>Adhesive</strong> System. Use only with Single Bond adhesive is strongly<br />
recommended, however it may work with other one-bottle bonding agents. Use with dual cure<br />
adhesives, including 3M Scotchbond Multi-Purpose Plus, can cause significantly reduced<br />
cement working and setting time. Note: The user is solely responsible for testing the cement for<br />
its suitability and use for any purpose not explicitly stated in these instructions, including use<br />
with any dental adhesive other than Single Bond.<br />
29<br />
Instructions for bonding crowns, bridges (including resin-bonded or Maryland bridges),<br />
inlays and onlays:<br />
1. Remove temporary restoration. Trial-fit the final restoration with light finger pressure to<br />
evaluate the fit, shade and marginal integrity. Adjust if necessary.<br />
2. Prepare the bonding surface of the indirect restoration and the core build up, if applicable.<br />
Porcelain bonding surfaces should have been etched with hydrofluoric acid by the dental<br />
laboratory. Metal and amalgam bonding surfaces should be roughened, preferably using an air<br />
abrasion system, diamond or bur. Any composite surfaces should be roughened with a diamond,<br />
bur or air abrasion system. Glass ionomer buildups should be pumiced with a slurry of<br />
plain flour of pumice.<br />
3. Silane treatment (porcelain or porcelain/metal indirect restorations): Apply 3M RelyX<br />
Ceramic Primer (#2721) to the bonding surface of the indirect restoration. Dry for 5 seconds.<br />
4. Clean the prepared teeth in preparation for seating and bonding using a plain flour of pumice<br />
slurry. Rinse and dry thoroughly, isolate from moisture and adjacent teeth.<br />
5. Etch preparation and apply Single Bond adhesive or 3M Scotchbond <strong>Dental</strong> <strong>Adhesive</strong><br />
System according to instructions.<br />
6. Dispense appropriate amount of cement onto a mixing pad and mix for 10 seconds.<br />
7. Apply and evenly distribute a thin layer of cement to the bonding surface of the indirect<br />
restoration.<br />
8. Slowly seat and hold restoration in proper occlusion. Begin cleanup of excess cement approximately<br />
3-5 minutes after seating. Optional: If excess cement is removed immediately after<br />
seating, each cement surface/margin must be light-cured for 40 seconds.<br />
9. Once the restoration is seated, each cement surface/margin may be light cured for 40 seconds<br />
or allowed to self-cure for 10 minutes. Note: For porcelain and pre-cured composite restorations,<br />
each cement surface/margin must be light-cured for 40 seconds.<br />
10. Instruct patient to avoid applying any pressure for 10-15 minutes.<br />
Instructions for Bonding Endodontic Posts:<br />
1. Prepare the endodontically treated tooth to receive the post (a root apex sealer and gutta<br />
percha filling approximately one third of the root canal are recommended). Trial fit and adjust<br />
post as needed. Bond to cast posts can be enhanced by using an air abrasion system and then<br />
applying RelyX ceramic primer. Dry for 5 seconds.<br />
2. Etch preparation and apply Single Bond adhesive or Scotchbond dental adhesive system<br />
according to instructions.<br />
3. Dispense appropriate amount of cement onto a mixing pad and mix for 10 seconds.<br />
4. Apply cement to the bonding surface of the preparation (in and around canal using an appropriate<br />
instrument). Place a thin layer of mixed cement on post.<br />
5. Seat the post. While holding in place remove excess cement. Light cure for 40 seconds from<br />
the occlusal surface to allow immediate placement of core build-up material.<br />
Instructions for Bonding Amalgam to Tooth Structure:<br />
1. Isolation: Rubber dam is the advocated method of isolation.<br />
2. Cavity preparation: Prepare a standard amalgam cavity preparation. Roughen residual restorative<br />
materials with an air abrasion system or a bur.<br />
3. Matrix application: Lightly lubricate the inner surface of the matrix band with hard wax or<br />
petroleum jelly before placement.<br />
4. Etch preparation and apply Single Bond adhesive or Scotchbond dental adhesive system<br />
according to instructions. Note: 3M Scotchbond Multi-Purpose Plus <strong>Adhesive</strong> does not<br />
require the use of a cement when bonding amalgam.
30<br />
5. Dispense appropriate amount of cement onto a mixing pad and mix for 10 seconds.<br />
6. Use a brush or appropriate applicator to place cement in adhesive sealed cavity preparation.<br />
Triturate amalgam during placement of cement.<br />
7. Condense and burnish amalgam in the usual way.<br />
8. Instruct patient to avoid applying any pressure for 10-15 minutes.<br />
Storage and Use:<br />
1. The 3M RelyX <strong>ARC</strong> <strong>Adhesive</strong> <strong>Resin</strong> <strong>Cement</strong> is designed to be used at room temperature<br />
of 21-24°C or 70-75°F.<br />
2. Shelf life in refrigerator or room temperature is 24 months. See outer package for expiration<br />
date. Storage in refrigerator ensures longest possible shelf life.<br />
3. Do not store in proximity to eugenol-containing products.<br />
4. Do not expose materials to elevated temperature or intense light.<br />
Notice to Purchaser<br />
3M will replace product that is proved to be defective. 3M does not accept liability for any loss<br />
or damage, direct or consequential, arising out of the use of or inability to use these products.<br />
Before using, the user must determine the suitability of the product for its intended use and user<br />
assumes all risk and liability whatsoever in connection with use of this product.<br />
3M Single Bond <strong>Dental</strong> <strong>Adhesive</strong> System Instructions<br />
General Information<br />
Single Bond dental adhesive system is a simple, wet bonding adhesive system that offers the dental<br />
practitioner a wide range of applications. These include bonding to all classes of direct composite<br />
restorations as well as procedures involving porcelain, composite, metal repair, set amalgam, root<br />
surface desensitization and bonding of porcelain veneers with 3M Opal Luting Composite and<br />
3M RelyX Ceramic Primer.<br />
After light-curing Single Bond adhesive, it may also be used for amalgam and indirect bonding<br />
procedures when combined with RelyX <strong>ARC</strong> resin cement. This is due to Single Bond adhesive’s<br />
low film thickness (approximately 10 mm).<br />
The system consists of two primary components, a vial of adhesive and two syringes of phosphoric<br />
acid etchant. Single Bond adhesive is activated by visible light curing. Use of etchant is critical for<br />
both enamel and dentin surfaces.<br />
Recommendations<br />
Use 3M Vitrebond Light Cure Glass Ionomer Liner/Base in areas of deep cavity excavation<br />
such as Class I and II restorations. If pulp exposure has occurred, use a minimum amount of calcium<br />
hydroxide followed by an application of Vitrebond liner/base. Single Bond adhesive will<br />
bond to Vitrebond liner/base whether or not the ionomer was treated with etchant.<br />
The Single Bond system includes an etch of enamel and dentin as a part of the procedure. It is<br />
recommended that the surfaces be left moist after rinsing. Excess surface moisture should be removed<br />
by blotting.<br />
Single Bond adhesive does not require agitation prior to use. It is applied in two consecutive layers<br />
after the etching step. After application of the second layer, the adhesive is dried gently for 2-5<br />
seconds and is then light cured for 10 seconds.<br />
Light curing time assumes the use of a 3M light curing unit or other dental visible curing light of<br />
comparable intensity. Curing lights should be checked often for proper output using a reliable light<br />
metering system.<br />
Air used for drying should be free of oil and water contaminants.<br />
Precautions for <strong>Dental</strong> Personnel and Patients:<br />
3M Scotchbond Etching Gel contains 35 weight % phosphoric acid.<br />
Protective eyewear for patients and dental staff is recommended when using etchants. Avoid contact<br />
with oral soft tissue, eyes and skin. If accidental eye contact occurs, flush immediately with<br />
large amounts of water. For eye contact consult a physician.<br />
Single Bond adhesive contains acrylates including HEMA (2-hydroxyethylmethacrylate). A small<br />
percentage of the population is known to have an allergic response to acrylate resins. To reduce the risk
of allergic response, minimize exposure to these materials. In particular, exposure to uncured resin<br />
should be avoided. Use of protective gloves and a no touch technique is recommended. If adhesive<br />
contacts skin, wash immediately with soap and water. Acrylates may penetrate commonly used<br />
gloves. If adhesive contacts glove, remove and discard glove, wash hands immediately with soap<br />
and water and then reglove. <strong>Adhesive</strong> may cause eye irritation upon contact. Avoid contact with<br />
eyes. If accidental contact occurs, flush immediately with large amounts of water. If irritation<br />
persists, consult a physician.<br />
31<br />
Sensitivity:<br />
Some patients may experience transitory postoperative sensitivity. The risk of sensitivity can be<br />
minimized by the following measures: Remove minimal amount of tooth structure. Use proper<br />
isolation. Use of a rubber dam is highly recommended. Use adequate pulp protection. Use a glass<br />
ionomer liner/base in areas of deep excavation. Place restorative material in increments, curing<br />
each increment separately. Adequately cure restorative according to instructions for shade and<br />
thickness of restorative and light exposure time. Adjust occlusion carefully. Check for hyperocclusion,<br />
particularly in lateral excursion contacts. Do not air dry tooth structure after etching. Do not<br />
overdry during the bonding procedure. Do not overetch.<br />
Etchant Syringe Assembly:<br />
1. Protective eyewear for patients and staff is recommended when using the delivery system.<br />
2. Prepare the delivery system: Remove cap from etching gel syringe and SAVE. Twist a blue<br />
disposable tip securely onto the syringe. Holding the tip away from the patient and any dental<br />
staff, express a small amount of etching gel onto a dispensing pad or a 2 × 2 gauze to assure<br />
that the delivery system in not clogged. If clogged, remove the dispensing tip and express a<br />
small amount of gel directly from the syringe. Remove any visible plug, if present, from the<br />
syringe opening. Replace dispensing tip and again express etching gel. If clog remains, discard<br />
dispensing tip and replace with a new one. Bend the dispensing tip to a desired angle. Place<br />
bend midway along tip. Do not bend dispensing tip at its hub as it may break free.<br />
3. Delivery system storage: Remove used dispensing tip and discard. Twist on storage cap. Storage<br />
of the delivery syringe with a used dispensing tip or without storage cap will allow<br />
drying of the etching gel and consequent clogging of the system. Replace storage cap with<br />
a new dispensing tip at next use.<br />
4. If desired, the etching gel may be extruded onto a dispensing pad and applied with a brush or<br />
other appropriate instrument.<br />
5. If a liquid etchant is desired, the etching gel may be dispensed into a dappen dish and stirred<br />
to increase its fluidity.<br />
6. Disinfection: Discard used dispensing tip. Replace syringe cap. Disinfect the capped syringe<br />
in the same manner as nonimmersible handpieces, air/water syringe and ultrasonic scalers<br />
following American <strong>Dental</strong> Association (ADA) and Centers for Disease Control (CDC) recommendations.<br />
(Council on <strong>Dental</strong> Materials, Instruments and Equipment and Council on<br />
<strong>Dental</strong> Therapeutics. Infection control recommendations for the dental office and the dental<br />
laboratory. JADA 116(2):241-248, 1988.)<br />
Instructions for Direct Light-Cure Restorations in Enamel and Dentin:<br />
1. Isolation: Rubber dam is the preferred method of isolation.<br />
2. Cavity preparation: Prepare cavity with minimal tooth reduction. Bevel cavosurface enamel<br />
margins.<br />
3. Etching: Apply 3M Scotchbond Etchant to enamel and dentin. Wait 15 seconds. Rinse for<br />
10 seconds. Blot excess water leaving tooth moist.<br />
4. <strong>Adhesive</strong>: Using a fully saturated brush tip for each coat, apply 2 consecutive coats of Single<br />
Bond adhesive to etched enamel and dentin. Dry gently for 2-5 seconds. Light-cure for 10<br />
seconds.<br />
5. Restorative placement, cure and finishing: Refer to manufacturer’s instructions for placement,<br />
cure and finishing of restorative materials.<br />
Instructions for Direct Light-Cure Restoration of Noncarious Cervical Lesions:<br />
To restore noncarious cervical lesions, clean the lesion and adjacent enamel with a plain pumice/<br />
water slurry. Do not use prophy pastes containing oils. Remove excess surface moisture by blotting.<br />
Leave dentin moist.
32<br />
Follow the procedural steps 1 through 5 above limiting step #2 to beveling enamel adjacent to the<br />
erosion.<br />
Instructions for Bonding Porcelain Veneers:<br />
1. Silane treatment: Porcelain bonding surfaces should have been etched using hydrofluoric acid<br />
by the dental laboratory. Apply 3M RelyX Ceramic Primer (No. 2721) to the bonding<br />
surface of the veneer. Dry for 5 seconds.<br />
2. Clean the prepared teeth in preparation for seating and bonding using a plain flour of pumice<br />
slurry. Rinse thoroughly and dry.<br />
3. Try-in veneer. After try-in, isolate from adjacent teeth with clear matrix strip.<br />
4 Etching: Apply 3M Scotchbond Etchant to both enamel and dentin. Wait 15 seconds.<br />
Rinse for 10 seconds. Blot excess water leaving tooth moist. An additional 15-second etch<br />
time may be appropriate for teeth that were not prepared using a diamond or bur. Residual<br />
organic matter can also require additional etch time.<br />
5 <strong>Adhesive</strong>: Using a fully saturated brush tip for each coat, apply 2 consecutive coats of Single<br />
Bond adhesive to etched enamel and dentin. Dry gently for 2-5 seconds. Do not light cure.<br />
6. <strong>Adhesive</strong> application to veneer: Apply 1 coat of adhesive to the acid etched, silane treated<br />
veneer. Dry thoroughly. Do not light cure.<br />
7. Luting material application to veneer: Apply 3M Opal Luting Composite to the bonding<br />
surface of veneer.<br />
8. Seating and curing: Carefully seat the veneer. Clean excess luting cement from the veneer<br />
margins. Cure each area of the veneer for times recommended by the luting cement manufacturer.<br />
We recommend curing the gingival margin first, followed by the body and the incisal<br />
margin. Avoid direct contact with the light-guide during initial curing.<br />
Instructions for Bonding to Composite and Set Amalgam:<br />
1. Isolation: Rubber dam is the preferred method of isolation.<br />
2. Roughen the existing material: Roughen the surface of existing amalgam or composite using<br />
either a bur, diamond or a sandblast technique.<br />
3. Etching: Apply Scotchbond etchant to enamel, dentin and existing restorative material. Wait<br />
15 seconds. Rinse for 10 seconds. Blot excess water leaving tooth moist.<br />
4. <strong>Adhesive</strong>: Using a fully saturated brush tip for each coat, apply 2 consecutive coats of Single<br />
Bond adhesive to enamel, dentin and existing restorative material. Dry gently for 2-5 seconds.<br />
Light-cure for 10 seconds.<br />
5. Masking: In the case of set amalgam, mask the metal surface with a thin layer (.25 - .5mm) of<br />
the appropriate 3M Masking Agent shade with a brush. Light cure each layer for 20 seconds.<br />
6. Restorative placement: Refer to manufacturer’s instructions for placement, cure and finishing<br />
of restorative material.<br />
Instructions for Porcelain Repair:<br />
1. Isolation: Rubber dam is the preferred method of isolation.<br />
2. Preparation: Clean the surface to be repaired with a slurry of plain flour of pumice. Rinse and<br />
dry thoroughly. Roughen the surface of existing metal or porcelain using either a bur, diamond<br />
or a sandblast technique. Be careful to remove all loose porcelain and bevel the margin. Remove<br />
surface glaze 1mm beyond the margin.<br />
3. Etching: Apply Scotchbond etchant to all substrates. Wait for 15 seconds. Rinse for 10 seconds.<br />
Dry 2-5 seconds.<br />
4. Silane treatment for porcelain and metal: Apply RelyX ceramic primer (No. 2721) to the<br />
etched surface and dry.<br />
5. <strong>Adhesive</strong>: Apply 2 consecutive coats of Single Bond adhesive to silane treated porcelain or<br />
metal. Dry gently for 2-5 seconds. Light-cure for 10 seconds.<br />
6. Masking: To opacify the metal before the final composite placement, mask the metal surface<br />
with a thin layer (.25 -.5mm) of the appropriate 3M masking agent shade using a brush. Lightcure<br />
each layer for 20 seconds.<br />
7. Restorative placement, cure and finishing: Refer to manufacturer’s instructions for placement,<br />
cure and finishing of restorative material.
Instructions for Root Surface Desensitization:<br />
1. Lightly clean the root surface with flour of pumice. Rinse and blot dry.<br />
2. Etching: Apply 3M Scotchbond Etchant to the etched dentin. Wait for 15 seconds. Rinse<br />
for 10 seconds. Blot excess water leaving tooth moist.<br />
3. <strong>Adhesive</strong>: Apply 2 consecutive coats of 3M Single Bond <strong>Adhesive</strong> to the dentin. Dry gently<br />
for 2 seconds. Light-cure for 10 seconds. Apply 2 additional coats of adhesive. Dry gently for<br />
2 seconds. Light-cure for 10 seconds.<br />
4. Remove the oxygen inhibited layer with a moistened gauze.<br />
Instructions for Amalgam and Indirect Bonding Procedures<br />
(using 3M RelyX <strong>ARC</strong> <strong>Adhesive</strong> <strong>Resin</strong> <strong>Cement</strong>):<br />
Physical properties of today’s esthetic indirect restorations require that they be bonded into place<br />
to maximize the strength of the restoration as well as the tooth. A general perception may exist that<br />
light cured adhesives could not be used for indirect restorations. It’s true that many conventional<br />
light-cured adhesive have a higher film thickness and can not be used under a fixed prosthesis.<br />
However, Single Bond adhesive is ethanol/water based, has a low film thickness (approximately<br />
10mm) and should not interfere with the seating of indirect restorations.<br />
33<br />
Note: Care is required with any bonding agent used beneath precision castings because added film<br />
thickness may preclude accurate seating. Avoid adhesive pooling in areas of the preparation that<br />
would effect the fit of any prosthetic device.<br />
Instructions for bonding crowns, bridges (including resin-bonded bridges), inlays<br />
and onlays:<br />
1. Remove temporary restoration. Trial-fit the final restoration with light finger pressure<br />
to evaluate the fit, shade and marginal integrity. Adjust if necessary.<br />
2. Prepare the bonding surface of the indirect restoration and the core build up, if applicable.<br />
Porcelain bonding surfaces should have been etched with hydrofluoric acid by the dental<br />
laboratory. Metal and amalgam bonding surfaces should be roughened, preferably using an<br />
air abrasion system, diamond or bur. Any composite surfaces should be roughened with a<br />
diamond, bur or air abrasion system. Glass ionomer build-ups should be pumiced with a<br />
slurry of plain flour of pumice.<br />
3. Silane treatment (porcelain or porcelain/metal indirect restorations): Apply 3M RelyX<br />
Ceramic Primer to the bonding surface of the indirect restoration. Dry for 5 seconds.<br />
4. Clean the prepared teeth in preparation for seating and bonding using a plain flour of pumice<br />
slurry. Rinse and dry thoroughly, isolate from moisture and adjacent teeth.<br />
5. Etching: Apply Scotchbond etchant to both enamel and dentin. Wait 15 seconds. Rinse for 10<br />
seconds. Blot excess water leaving tooth moist.<br />
6. <strong>Adhesive</strong>: Apply 2 consecutive coats of Single Bond adhesive to etched enamel and dentin.<br />
Dry for 5 seconds being careful to avoid excess adhesive on all prepared surfaces.<br />
7. Light cure preparation for 10 seconds per bonding surface.<br />
8. Dispense the appropriate amount of cement onto a mixing pad and mix for 10 seconds.<br />
9. Apply and evenly distribute a thin layer of cement to the bonding surface of the indirect restoration.<br />
10. Slowly seat and hold restoration in proper occlusion. Begin cleanup of excess cement approximately<br />
3-5 minutes after seating. Optional: if excess cement is removed immediately after<br />
seating, each cement surface/margin must be light-cured for 40 seconds.<br />
11. Once the restoration is seated, each cement surface/margin may be light cured for 40 seconds<br />
or allowed to self-cure for 10 minutes. Note: for porcelain and pre-cured composite restorations,<br />
each cement surface/margin must be light-cured for 40 seconds.<br />
12. Instruct patient to avoid applying any pressure for 10-15 minutes.<br />
Instructions for Bonding Endodontic Posts:<br />
1. Prepare the endodontically treated tooth to receive the post (a root apex sealer and gutta percha<br />
filling approximately one third of the root canal are recommended). Trial fit and adjust post as<br />
needed. Bond to cast posts can be enhanced by using an air abrasion system and then applying<br />
RelyX ceramic primer. Dry for 5 seconds.<br />
2. Etching: Apply Scotchbond etchant to the prepared tooth. Wait 15 seconds. Rinse for 10 seconds.<br />
Dry for 2 seconds. Remove excess moisture with an absorbent paper point.
34<br />
3. <strong>Adhesive</strong>: Apply a uniform coat to etched enamel and dentin. Remove excess pooled adhesive<br />
with absorbent paper point. Dry for 5 seconds.<br />
4. Light cure for 10 seconds. (A light transmitting post of appropriate size may be used for<br />
additional curing).<br />
5. Dispense the appropriate amount of cement onto a mixing pad and mix for 10 seconds.<br />
6. Apply cement to the bonding surface of the preparation (in and around canal using a periodontal<br />
probe). Place a thin layer of mixed cement on post.<br />
7. Seat the post. While holding in place remove excess cement. Light cure for 40 seconds from<br />
the occlusal surface to allow immediate placement of core build-up material<br />
Instructions for Bonding Amalgam to Tooth Structure:<br />
1. Isolation: Rubber dam is the recommended method of isolation.<br />
2. Cavity preparation: Prepare a standard amalgam cavity preparation. Roughen residual restorative<br />
materials with an air abrasion system or a bur.<br />
3. Matrix application: Lightly lubricate the inner surface of the matrix band with hard wax or<br />
petroleum jelly before placement.<br />
4. Etching: Apply 3M Scotchbond Etchant to enamel, dentin and any residual restorative.<br />
Wait for 15 seconds. Rinse for 10 seconds. Blot excess water leaving tooth moist.<br />
5. <strong>Adhesive</strong>: Using a fully saturated brush tip for each coat, apply 2 consecutive coats of 3M<br />
Single Bond <strong>Adhesive</strong> to etched enamel, dentin and any residual restorative material. Dry<br />
gently for 2-5 seconds.<br />
6. Light cure for 10 seconds.<br />
7. Dispense the appropriate amount of cement onto a mixing pad and mix for 10 seconds.<br />
8. Use a brush or appropriate applicator to place cement in adhesive-sealed preparation. Triturate<br />
amalgam during placement of cement.<br />
9. Condense and burnish amalgam in the usual way.<br />
10. Instruct patient to avoid applying any pressure for 10-15 minutes.<br />
Additional Notes:<br />
1. Brush handles can be disinfected in the same manner as nonimmersible handpieces, air/water<br />
syringe and ultrasonic scalers following American <strong>Dental</strong> Association (ADA) and Center for<br />
Disease Control (CDC) recommendations. (Council on <strong>Dental</strong> Materials, Instruments and<br />
Equipment and Council on <strong>Dental</strong> Therapeutics. Infection control recommendations for the<br />
dental office and the dental laboratory. JADA 116(2):241-248, 1988.)<br />
Storage and Use:<br />
1. Single Bond system can be stored at room temperature.<br />
2. Single Bond adhesive should be capped immediately after use to minimize evaporation.<br />
3. Do not expose materials to elevated temperature or intense light.<br />
4. Do not store products in proximity to eugenol containing products.<br />
5. This system is designed to be used at room temperature of approximately 21-24° C<br />
or 70-75° F.<br />
6. Shelf life at room temperature is 36 months. See outer package for expiry date.<br />
7. For cleanup, Scotchbond etchant can be removed with water, while the uncured adhesive can<br />
be removed with alcohol.<br />
Notice to Purchaser:<br />
3M will replace product that is proved to be defective. 3M does not accept liability for any loss<br />
or damage, direct or consequential, arising from the use of or inability to use these products.<br />
Before using, the user must determine the suitability of the product for its intended use and user<br />
assumes all risk and liability whatsoever in connection with use of this product.
Trademarks Cited<br />
RelyX <strong>ARC</strong> <strong>Adhesive</strong> <strong>Resin</strong> <strong>Cement</strong>, RelyX Luting <strong>Cement</strong>, RelyX Ceramic<br />
Primer, Scotchbond <strong>Resin</strong> <strong>Cement</strong>, Scotchbond Multi-Purpose Plus <strong>Adhesive</strong>,<br />
Scotchbond Etchant, Opal Luting Composite, Vitremer Luting <strong>Cement</strong>, Single<br />
Bond <strong>Dental</strong> <strong>Adhesive</strong>, Clicker Dispenser and Z100 Restorative are trademarks of<br />
3M. Amalgambond Plus® and C&B Metabond® are trademarks of Parkell Biomaterials<br />
Division. ONE-STEP, <strong>Resin</strong>omer Multi-Purpose <strong>Resin</strong> Ionomer, Duo-Link<br />
and Choice are trademarks of Bisco, Ltd. Prime & Bond 2.1, EnForce and<br />
Dispersalloy® are trademarks of Dentsply International. Nexus, Tytin® and OptiBond<br />
SOLO are trademarks of Kerr®, a subsidiary of SYBRON <strong>Dental</strong> Specialties, Inc.<br />
Panavia® 21 is a trademark of Kuraray Co., Ltd. Resiment® is a trademark of Septodont,<br />
Inc. Variolink® II and Syntac are trademarks of Vivadent Ets. Crystar® Vintage are<br />
trademarks of SHOFU, Inc.<br />
<strong>Dental</strong> Products Laboratory<br />
3M Center, Building 260-2B-13<br />
St. Paul, MN 55144-1000<br />
Printed in U. S. A.<br />
©1998 3M 70-2009-2044-8