RelyX⢠ARC Adhesive Resin Cement - Dale Dental
RelyX⢠ARC Adhesive Resin Cement - Dale Dental
RelyX⢠ARC Adhesive Resin Cement - Dale Dental

Create successful ePaper yourself
Turn your PDF publications into a flip-book with our unique Google optimized e-Paper software.
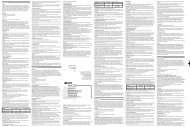
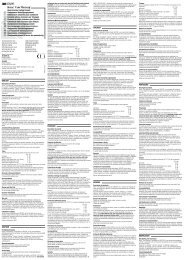
Instructions for Use<br />
3M RelyX <strong>ARC</strong> <strong>Adhesive</strong> <strong>Resin</strong> <strong>Cement</strong> was designed to be used in conjunction with the<br />
3M Single Bond <strong>Dental</strong> <strong>Adhesive</strong> System. Use only with Single Bond adhesive is strongly<br />
recommended, however it may work with other one-bottle bonding agents. Use with dual cure<br />
adhesives, including 3M Scotchbond Multi-Purpose Plus, can cause significantly reduced<br />
cement working and setting time. Note: The user is solely responsible for testing the cement for<br />
its suitability and use for any purpose not explicitly stated in these instructions, including use<br />
with any dental adhesive other than Single Bond.<br />
29<br />
Instructions for bonding crowns, bridges (including resin-bonded or Maryland bridges),<br />
inlays and onlays:<br />
1. Remove temporary restoration. Trial-fit the final restoration with light finger pressure to<br />
evaluate the fit, shade and marginal integrity. Adjust if necessary.<br />
2. Prepare the bonding surface of the indirect restoration and the core build up, if applicable.<br />
Porcelain bonding surfaces should have been etched with hydrofluoric acid by the dental<br />
laboratory. Metal and amalgam bonding surfaces should be roughened, preferably using an air<br />
abrasion system, diamond or bur. Any composite surfaces should be roughened with a diamond,<br />
bur or air abrasion system. Glass ionomer buildups should be pumiced with a slurry of<br />
plain flour of pumice.<br />
3. Silane treatment (porcelain or porcelain/metal indirect restorations): Apply 3M RelyX<br />
Ceramic Primer (#2721) to the bonding surface of the indirect restoration. Dry for 5 seconds.<br />
4. Clean the prepared teeth in preparation for seating and bonding using a plain flour of pumice<br />
slurry. Rinse and dry thoroughly, isolate from moisture and adjacent teeth.<br />
5. Etch preparation and apply Single Bond adhesive or 3M Scotchbond <strong>Dental</strong> <strong>Adhesive</strong><br />
System according to instructions.<br />
6. Dispense appropriate amount of cement onto a mixing pad and mix for 10 seconds.<br />
7. Apply and evenly distribute a thin layer of cement to the bonding surface of the indirect<br />
restoration.<br />
8. Slowly seat and hold restoration in proper occlusion. Begin cleanup of excess cement approximately<br />
3-5 minutes after seating. Optional: If excess cement is removed immediately after<br />
seating, each cement surface/margin must be light-cured for 40 seconds.<br />
9. Once the restoration is seated, each cement surface/margin may be light cured for 40 seconds<br />
or allowed to self-cure for 10 minutes. Note: For porcelain and pre-cured composite restorations,<br />
each cement surface/margin must be light-cured for 40 seconds.<br />
10. Instruct patient to avoid applying any pressure for 10-15 minutes.<br />
Instructions for Bonding Endodontic Posts:<br />
1. Prepare the endodontically treated tooth to receive the post (a root apex sealer and gutta<br />
percha filling approximately one third of the root canal are recommended). Trial fit and adjust<br />
post as needed. Bond to cast posts can be enhanced by using an air abrasion system and then<br />
applying RelyX ceramic primer. Dry for 5 seconds.<br />
2. Etch preparation and apply Single Bond adhesive or Scotchbond dental adhesive system<br />
according to instructions.<br />
3. Dispense appropriate amount of cement onto a mixing pad and mix for 10 seconds.<br />
4. Apply cement to the bonding surface of the preparation (in and around canal using an appropriate<br />
instrument). Place a thin layer of mixed cement on post.<br />
5. Seat the post. While holding in place remove excess cement. Light cure for 40 seconds from<br />
the occlusal surface to allow immediate placement of core build-up material.<br />
Instructions for Bonding Amalgam to Tooth Structure:<br />
1. Isolation: Rubber dam is the advocated method of isolation.<br />
2. Cavity preparation: Prepare a standard amalgam cavity preparation. Roughen residual restorative<br />
materials with an air abrasion system or a bur.<br />
3. Matrix application: Lightly lubricate the inner surface of the matrix band with hard wax or<br />
petroleum jelly before placement.<br />
4. Etch preparation and apply Single Bond adhesive or Scotchbond dental adhesive system<br />
according to instructions. Note: 3M Scotchbond Multi-Purpose Plus <strong>Adhesive</strong> does not<br />
require the use of a cement when bonding amalgam.