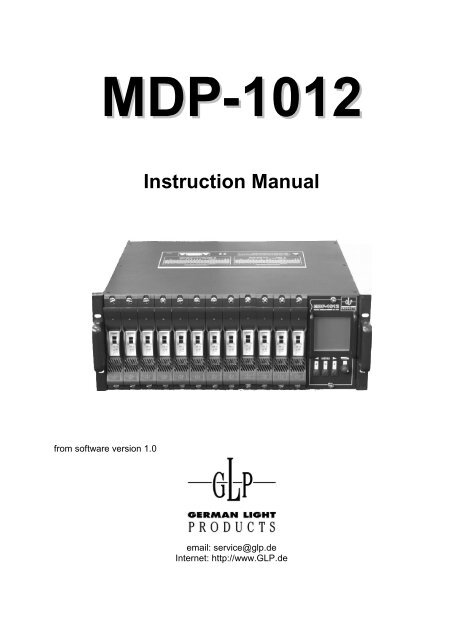
MDP-1012 Instruction Manual
MDP-1012 Instruction Manual
MDP-1012 Instruction Manual

You also want an ePaper? Increase the reach of your titles
YUMPU automatically turns print PDFs into web optimized ePapers that Google loves.
<strong>MDP</strong>-<strong>1012</strong><br />
<strong>Instruction</strong> <strong>Manual</strong><br />
from software version 1.0<br />
email: service@glp.de<br />
Internet: http://www.GLP.de
<strong>MDP</strong>-<strong>1012</strong> <br />
Table of contents<br />
1 General Overview ....................................................................................................3<br />
2 The Menu Structure.................................................................................................4<br />
3 The Menus................................................................................................................5<br />
3.1 The Main Menu.................................................................................................6<br />
3.2 The Channel Menu (2 nd Menu) .........................................................................7<br />
3.3 The Memory Menu (3 rd Menu) .........................................................................8<br />
3.3.1 The Chase-Edit Menu (3.1 Menu) ..........................................................9<br />
3.4 The Setup Menu .............................................................................................10<br />
3.4.1 DMX FAIL (reaction when DMX signal fails to come)...........................11<br />
3.4.2 DMX MODE (different DMX operating modes).....................................11<br />
3.4.3 DMX/MIDI (switch between DMX and MIDI input)................................12<br />
3.4.4 MIDI CHANNEL (set the MIDI channels)..............................................12<br />
3.4.5 PHASE Correction (activate phase angle correction)...........................12<br />
3.4.6 USER MODE (restrict the operation of the dimmer).............................12<br />
3.4.7 MASTER/SLAVE (coupling of dimmers) ..............................................13<br />
3.4.8 UNIT NO. (cannot be used yet)............................................................13<br />
3.4.9 und 3.4.10 CURVE USER 1/2 (User definable control curves) ...........13<br />
3.4.11 CLEAR CURVES .................................................................................14<br />
3.4.12 DELETE ALL........................................................................................14<br />
3.4.13 Software Version..................................................................................15<br />
4 Quick Set-up (DMX Patch) ....................................................................................15<br />
5 Connections and Initiation ...................................................................................16<br />
6 Safety <strong>Instruction</strong>s ................................................................................................17<br />
7 Appendix ................................................................................................................18<br />
GLP Š German Light Production (V1.2) 2
<strong>MDP</strong>-<strong>1012</strong> <br />
1 General Overview<br />
Illustration 1-1<br />
The GLP <strong>MDP</strong>-<strong>1012</strong> is a high-performance 12 channel digital dimmer with a big graphic<br />
display in a very solid housing. Each of the 12 channels is good up to 2.3 kW (10A).<br />
The dimmer can be controlled either via DMX 512, analog (0…10 volt) or MIDI signals.<br />
The new outstanding technology offers some very interesting possibilities:<br />
• Temperature controlled fan.<br />
• Big LCD graphical display with clear menus.<br />
• Easy operating of all functions.<br />
• Modular design of the dimmer channels<br />
• Also modular design of the DMX input-module (backside) and the LCD graphical<br />
display (data input).<br />
• Easy service by changing the modules.<br />
But now enjoy working with the GLP <strong>MDP</strong>-<strong>1012</strong>!<br />
GLP Š German Light Production (V1.2) 3
<strong>MDP</strong>-<strong>1012</strong> <br />
2 The Menu Structure<br />
The operating menu architecture is build up like a tree structure. You reach each next<br />
menu level by pressing the MENU-key. Every data input will be fed in with the encoder<br />
wheel and the two soft keys. The following "menu tree" shows the available menus.<br />
GLP Š German Light Production (V1.2) 4
<strong>MDP</strong>-<strong>1012</strong> <br />
3 The Menus<br />
In the following chapters you'll find explained every menu. To navigate through the<br />
menus and for the data input please use the two soft keys and the encoder wheel. By<br />
pressing the MENU-key you'll reach one after the other menu.<br />
After switching on the dimmer the "Top Menu" is shown in the display.<br />
General informations the read the following chapters:<br />
The symbolic icon for the left soft key under the display is: ({<br />
The symbolic icon for the right soft key under the display is: (y<br />
The symbolic icon for the middle soft key (MENU) under the display is: MENU<br />
For the data input you'll have to turn the encoder wheel wile simultaneous pressing one<br />
of the soft keys.<br />
Nr. Function / Operation<br />
1 LCD Display<br />
Shows the different menus.<br />
2 Left soft key ({<br />
E.g. hold pressed for the data input.<br />
3 MENU-key<br />
Press to reach the next menu level.<br />
4 Right soft key (y<br />
E.g. hold pressed for the data input.<br />
5 ENCODER wheel<br />
For the navigation through the menus and for<br />
the data input.<br />
6 Fastening screws<br />
Open these screws to change the display<br />
module. Dimmer must be disconnected from<br />
the mains!<br />
GLP Š German Light Production (V1.2) 5
<strong>MDP</strong>-<strong>1012</strong> <br />
3.1 The Main Menu<br />
After switching on the dimmer<br />
the main menu appears on the<br />
display.<br />
This menu is the standard menu<br />
during normal use. Here the<br />
status and error messages and<br />
the input monitors of the channels<br />
are displayed.<br />
1<br />
2<br />
3<br />
4<br />
5<br />
6<br />
11<br />
10<br />
9<br />
8<br />
7<br />
Nr. Function<br />
Operating<br />
1 Voltage measurements of the three phases L1, L2 and L3.<br />
2 Input level of the individual channels. (of external place e.g. light desk).<br />
3 Input level of the individual channels. (of internal place e.g. manual, Chaser,<br />
Preheat).<br />
4 Internal procedure. A Memory or a Chaser is activated.<br />
5 Announcement of the internal modulation of the respective channel (see 6).<br />
6 Selected channel / channel modulation<br />
(see 5).<br />
7 Preselection of the channel modulation.<br />
Select a channel with the encoder wheel.<br />
Than hold the ({) key an fed in the data<br />
again with the encoder wheel.<br />
Hold the (y NH\ DQG HQWHU WKH GHVLUHG<br />
value with the encoder wheel. A short press<br />
on the (yNH\ZLOOVHWWKHVHOHFWHGFKDQQHO<br />
(6) to the predefined value. Pressing again<br />
will switch it off. Additionally in the left soft<br />
key appears "CLEAR ALL" (6). By pressing<br />
both buttons ({yDOOFKDQQHOVDUHVHWWR<br />
%".<br />
Attention! The settings of the channels will not be stored permanently and will be<br />
cancelled when the dimmer is restarted (power down). Please use (e.g. for "booth<br />
lightning" on a fair) the internal Memories because these are stored permanently and<br />
will be recalled after power off. Do also not realize the Preheat with this function.<br />
8 Latest arriving DMX value of an external source, e.g. a light desk.<br />
9 Latest arriving DMX channel of an external source, e.g. a light desk. If no DMX<br />
signal lies close, this announcement is missing completely.<br />
GLP Š German Light Production (V1.2) 6
<strong>MDP</strong>-<strong>1012</strong> <br />
10 Loadcheck message: 9 = connected load<br />
X = loadcheck activated but no load connected or failure<br />
no message = loadcheck deactivated<br />
11 Channel numbers of the dimmer.<br />
3.2 The Channel Menu (2 nd Menu)<br />
Outgoing from the main menu you reaches<br />
the channel menu by pressing the MENUkey<br />
once. Each horizontal row represents<br />
a channel of the dimmer. In the columns<br />
the different functions are located. The<br />
actual selected value is black deposited<br />
represented.<br />
Navigation by the menu:<br />
Turning the Encoder wheel moves the<br />
cursor up/down (vertically).<br />
Hold the ({ NH\ DQG WXUQ WKH HQFRGHU<br />
wheel moves the cursor left/right (horizontal).<br />
Hold the (y NH\ DQG WXUQ WKH HQFRGHU<br />
wheel changes the selected value.<br />
9<br />
1 2 3 4 5 6<br />
8 7<br />
Nr. Function<br />
Operating<br />
1 Channel number and selection. Turn Encoder to scroll up/down.<br />
2 DMX- Address Enter the DMX address for the respective<br />
channel (patch).<br />
3 Dimmer curve selection: ⎯ = linear<br />
(see also Setup Menu) Cu1 = predefined curve No. 1<br />
Cu2 = predefined curve No. 2<br />
Swi = Switch Mode (dimmer only on/off)<br />
4 Preheat of the channels. Each channel can be preheated individually<br />
from 0% - 15%.<br />
5 Channel limitation. Each channel can be individually limited on<br />
a maximum value from 30% - 100%.<br />
GLP Š German Light Production (V1.2) 7
<strong>MDP</strong>-<strong>1012</strong> <br />
6 Loadcheck Switch on/off the loadcheck control.<br />
… = Loadcheck ON<br />
7 Entered value.<br />
8 Selected channel.<br />
à = Loadcheck OFF<br />
Note: By pressing the (yNH\LQWKHOHIWNH\DSSHDUVSET ALL" (not at DMX-Address<br />
(2)). By pressing both buttons ({y VLPXOWDQHRXVO\ DOO FKDQQHOV ZLOO EH VHW WR WKH<br />
same value.<br />
Attention! These settings will be stored permanently when a new channel is selected<br />
or the menu is changed.<br />
3.3 The Memory Menu (3 rd Menu)<br />
This menu appears after the channel<br />
menu, if the menu button is pressed<br />
(provided that the Supervisor mode is<br />
activated). In this menu 12 real level<br />
memories can be stored and recalled.<br />
Furthermore, a chase can be started<br />
containing the internal stored memories.<br />
The running speed, fadetime and<br />
the number of steps can be programmed.<br />
1<br />
4<br />
5<br />
6<br />
2<br />
3<br />
9<br />
8<br />
7<br />
The attitudes made here are always stored by pressing the GO (yRUSTORE (yNH\<br />
Nr. Function<br />
Operating<br />
1 Chaser or Memory switch off. Select line with the ENCODER and confirm<br />
with GO (y<br />
2 Chaser select or start.<br />
Will also indicated in the Main Menu (4).<br />
3 Memory select or start.<br />
Will also indicated in the Main Menu (4).<br />
Select line with the ENCODER and confirm<br />
with GO (y<br />
Select line with the ENCODER.<br />
Hold the ({ NH\ DQG VHOHFW WKH GHVLUHG<br />
memory by turning the ENCODER.<br />
Start the memory by pressing the GO (y<br />
key.<br />
GLP Š German Light Production (V1.2) 8
<strong>MDP</strong>-<strong>1012</strong> <br />
Prepare Memories:<br />
You can either transfer the actual scene of an external lighting desk or make your own<br />
manual settings in the main menu. If you use an external lighting desk the points 2 - 5<br />
can be dropped.<br />
1) Select the memory as described in (3) (a new or existing one).<br />
2) Change into the main menu by pressing the MENU-key once.<br />
3) Set the channel setting as described.<br />
4) Change back again into the memory menu by pressing the MENU-key twice.<br />
5) Select a desired memory to save (1).<br />
6) Only if you use an external lighting desk: Put on a scene.<br />
Press both ({yNH\VWRVDYHWKLVPHPRU\<br />
4 Indicates contents of the MEMORY which can be worked on at present.<br />
5 Indicates content of the actual Memory or Chaser on the output.<br />
6<br />
6a<br />
Fadetime of the actual selected<br />
Memory.<br />
(Fade in time for a Memory or fade out time for a<br />
Chaser)<br />
If a Chaser (2) is selected the field<br />
shows the notice "EDIT".<br />
7 Press the GO key (yWRVDYHWKHVHWWLQJV<br />
8 Channel number of the selected Memory/Chaser.<br />
Hold the ({ NH\ DQG DGMXVW WKH )DGHWLPH<br />
with the ENCODER.<br />
Press the ({ NH\ WR HQWHU WKH &KDVH-Edit<br />
submenu.<br />
9 Channel number of the Memory/Chaser which can be worked on at present.<br />
3.3.1 The Chase-Edit Menu (3.1 Menu)<br />
In this submenu of the Memory menu<br />
the Chaser with its parameters can be<br />
edited. You'll reach it as described<br />
1<br />
2<br />
3<br />
under point 6a (see above) by<br />
selection the Chasers and following<br />
pressures of the Edit key ({ %\<br />
turning the ENCODER you jump<br />
up/down. For the data input the ({<br />
key keep pressed and enter the value<br />
with the ENCODER.<br />
4 5<br />
GLP Š German Light Production (V1.2) 9
<strong>MDP</strong>-<strong>1012</strong> <br />
Nr. Function<br />
Operating<br />
1 Number of steps (up to 12). E.g. STEP 7 means that the Memory<br />
consists of the Memories 1 - 8. They must<br />
be prepared first.<br />
2 Fadetime of the steps, (0 - 100%) Fadetime in % of the prepared speed, (look<br />
at point 3).<br />
3 Speed (0,1 - 999s) Time between the steps. Valid for all steps.<br />
4 To save the setting please press the SAVE key ({<br />
5 Input by turning the ENCODER.<br />
You reaches the Main menu again by pressing the MENU-key.<br />
3.4 The Setup Menu<br />
This menu can be reached only by pressing the MENU key (middle button) for a<br />
minimum of 5 seconds. In this menu very important parameters can be controlled .<br />
Attention! In this menu drastic changes can be made, which can alter the function of<br />
the dimmer considerably (e.g. delete all).<br />
Controlling this menu: Turning the ENCODER selects the line, pressing the right<br />
button (y DQG VLPXOWDQHRXVO\ WXrning the ENCODER selects different functions or<br />
starts them. All functions are permanently stored when the menu is left.<br />
1<br />
3<br />
5<br />
7<br />
9<br />
11<br />
2<br />
4<br />
6<br />
8<br />
10<br />
12<br />
13<br />
GLP Š German Light Production (V1.2) 10
<strong>MDP</strong>-<strong>1012</strong> <br />
3.4.1 DMX FAIL (reaction when DMX signal fails to come)<br />
Here the reaction to failing DMX signal can be programmed (e.g. cable failure).<br />
Adjustment<br />
HOLD<br />
OFF<br />
CHA 1s<br />
M1 1s<br />
M2 1s<br />
M3 1s<br />
M4 ... M12<br />
CHA 9s<br />
M1 9s<br />
M2 9s<br />
M3 9s<br />
M4 ... M12<br />
Function<br />
Holds the last received DMX signal until a new DMX signal reaches the<br />
dimmer.<br />
Holds the last received DMX signal for 1 second and then switches off.<br />
Starts the internal chase after waiting for 1 second. Must be prepared.<br />
Calls the internal memory no.1 after waiting for 1 second. See above.<br />
Calls the internal memory no.2 after waiting for 1 second. See above.<br />
Calls the internal memory no.3 after waiting for 1 second. See above.<br />
and so on…<br />
Starts the internal chase after waiting for 9 second. See above.<br />
Calls the internal memory no.1 after waiting for 9 second. See above.<br />
Calls the internal memory no.2 after waiting for 9 second. See above.<br />
Calls the internal memory no.3 after waiting for 9 second. See above.<br />
and so on…<br />
The actual status will be displayed in the Top Menu (message: "NO DMX M01").<br />
3.4.2 DMX MODE (different DMX operating modes)<br />
Settings<br />
SINGLE<br />
BLOCK<br />
Function<br />
Means, that every dimmer channel can be patched to a freely selectable<br />
DMX address (Single-Mode, free patching).<br />
Means, that the complete dimmer (12 channels) has only one start<br />
address (Block Mode). Starting with the first dimmer channel, every next<br />
channel has a DMX address which is one number higher. The "Block"<br />
mode is the standard mode (default).<br />
2 CHA Means, that the 2-channel switch-mode is active. This mode is<br />
necessary, if only 2 single DMX channels control all 12 dimmer channels<br />
(switch on and off). This method economizes a lot of DMX channels.<br />
Mode of operation: The first DMX channel switches exactly 64 different<br />
combinations of dimmer no. 1...6 on and off depending on its value. The<br />
"Binary principle" is used. The 2nd DMX channel controls the dimmer<br />
channels 6...12. Examples and a table can be found in the appendix of<br />
this manual.<br />
GLP Š German Light Production (V1.2) 11
<strong>MDP</strong>-<strong>1012</strong> <br />
3.4.3 DMX/MIDI (switch between DMX and MIDI input)<br />
Here the digital serial input can be selected: DMX512 or MIDI. MIDI accepts "program<br />
change" commands 0...13. (e.g. used for a MIDI footswitch). The program change<br />
commands call up the internal memories, chase or "OFF".<br />
3.4.4 MIDI CHANNEL (set the MIDI channels)<br />
The MIDI channel can be selected between 1...16.<br />
3.4.5 PHASE Correction (activate phase angle correction)<br />
Usually this control parameter is set to "ON". It makes a brightness-linear light control<br />
possible. The normal non-linearity, produced by the SRC´s phase angle control, is<br />
thereby compensated. This function works in addition to the "User Curves". This<br />
function should only be deactivated ("NO"), when this correction is made internally by<br />
the control desk and cannot be switched off.<br />
3.4.6 USER MODE (restrict the operation of the dimmer)<br />
With this function the dimmer function can be restricted in 3 steps:<br />
Settings<br />
SUPER<br />
NORM<br />
LOCK<br />
Function<br />
„SUPERUSER“ means, that all functions can be used.<br />
"NORMAL USER" means, that in the Channel Menu only the DMX<br />
address can be programmed. The Memory Menu is switched off. This<br />
mode should be used, when the dimmer must be protected but the test<br />
function must remain usable and the DMX address must be<br />
programmable. (Quick-Rental / Tour).<br />
The dimmer is completely locked and can not be operated with the<br />
buttons or Encoder. The middle button is an exception because it allows<br />
the entry into the Setup Menu by pressing it for 5 seconds.<br />
Comment: The DMX as well as the analogue input works normally as<br />
before.<br />
GLP Š German Light Production (V1.2) 12
<strong>MDP</strong>-<strong>1012</strong> <br />
3.4.7 MASTER/SLAVE (coupling of dimmers)<br />
Function for coupling several dimmers. One dimmer can be defined as the MASTER, all<br />
other are SLAVE. E.g. The MASTER can define the DMX start-address an the SLAVES<br />
follow this setting.<br />
Attention! For this function a 5 wire DIN cable must be used; MIDI cables often have<br />
only 3 wires!<br />
3.4.8 UNIT NO. (cannot be used yet)<br />
This parameter makes it possible to send out DMX data of the dimmer and read them<br />
externally via the DMX interface. This function will only be usable when the new DMX<br />
norm is finished. Every dimmer will then need to have its own address (unit number).<br />
3.4.9 und 3.4.10 CURVE USER 1/2 (User definable control curves)<br />
Here the setup menu for the control curve 1 and 2 can be activated. Individual<br />
brightness curves can be programmed, just as necessary for a lamp. Later on these<br />
curves can be assigned to the dimmer channels.<br />
In the curve menu the Encoder changes the position of the cursor in the x-axis (input);<br />
when the right key (yLVSUHVVHGWKH\-axis (output) can be modified with the Encoder.<br />
GLP Š German Light Production (V1.2) 13
Nr. Function<br />
<strong>MDP</strong>-<strong>1012</strong> <br />
Operation<br />
1 Value of the dimmer output. Only display.<br />
2 Individual dimmer curve (Curve). Only display.<br />
3 To save the settings. Push the ({NH\WRVDYHWKHVHWWLQJV<br />
4 Actual position of the setting. You can adjust the DMX input by steps of 6<br />
%. Hold the (y NH\ DGGLWLRQDOO\ WR DGMXVW<br />
now the corresponding dimmer output<br />
value.<br />
5 Value of the DMX input. Only display.<br />
You reaches the Main Menu again by pressing the MENU key once.<br />
Examples:<br />
<br />
<br />
<br />
<br />
<br />
<br />
<br />
<br />
<br />
<br />
<br />
<br />
<br />
<br />
<br />
Standard = Linear<br />
Lamp does not react till input<br />
is at 50 %<br />
Logarithmic behaviour<br />
3.4.11 CLEAR CURVES<br />
Attention: Deletes both user defined Curves at one time.<br />
Hold the (yNH\DQGWXUQWKH(QFRGHUWRconfirm.<br />
3.4.12 DELETE ALL<br />
"Delete All" deletes all memories, chases, DMX addresses, curves, etc.<br />
Attention! All data will be deleted ! Be careful in using this function, because it may be<br />
hard work to reprogram all functions.<br />
The standard settings after "DELETE ALL" procedure are:<br />
DMX Address = 001<br />
BLOCK Mode = activated<br />
Limit = 100% Preheat = 0%<br />
GLP Š German Light Production (V1.2) 14
<strong>MDP</strong>-<strong>1012</strong> <br />
3.4.13 Software Version<br />
Shows the actual software version of the dimmer software (only display).<br />
4 Quick Set-up (DMX Patch)<br />
1) Before switching the dimmer on connect the load control cables and the lamps.<br />
2) Switch on the power (now you are in the MAIN menu).<br />
3) Enter the CHANNEL menu by pressing the MENU key (the middle one) once.<br />
4) Now you see al list of the 12 channels.<br />
5) Use the ENCODER wheel to scroll up/down the channels (vertical).<br />
6) Hold the left button ({ DQ XVH WKH (1&2'(5 ZKHHO DW D WLPH WR VFUROO IURP '0; WR<br />
CUR (Curve) to PRE (Preheat) and so on (horizontal).<br />
7) Hold the right button (y DQ XVH WKH (1&2'(5 ZKHHO DW D WLPH WR LQFUHDVH RU FKDQJH<br />
the settings of the desired channel.<br />
8) Make all your settings.<br />
9) Press the MENU key two times to save the settings and to return to the MAIN menu.<br />
GLP Š German Light Production (V1.2) 15
<strong>MDP</strong>-<strong>1012</strong> <br />
5 Connections and Initiation<br />
On the backside of the dimmer you'll find all usual standard connectors.<br />
3<br />
Nr.<br />
Function / Operation<br />
1<br />
2<br />
7<br />
6<br />
5<br />
4<br />
1 DMX OUT<br />
DMX out to looping through<br />
the signal to a further DMXunit.<br />
2 DMX IN<br />
Connect the DMX light controller<br />
here.<br />
PIN 1 = Ground<br />
PIN 2 = Data (-)<br />
PIN 3 = Data (+)<br />
3 Fastening screws<br />
Open these screws to change the input module.<br />
Attention: Dimmer must be disconnected from<br />
the mains!<br />
4 MIDI OUT<br />
5 MIDI THRU<br />
6 MIDI IN<br />
3<br />
7 Analog signal input<br />
Signal input for 0 - 10 V (older controllers).<br />
Nr.<br />
Function / Operation<br />
1 DMX input module.<br />
2 Channel Output (e.g. Harting).<br />
3 Channel out connection (1-<br />
12).<br />
4 Clamped connection (phase).<br />
5 Clamped connection (neutral).<br />
6 Clamped connection (earth).<br />
7 Cable connector / bushing.<br />
8 Fan 8temperature controlled).<br />
9 Channel dimmer slots (1-12).<br />
DMX module.<br />
GLP Š German Light Production (V1.2) 16
<strong>MDP</strong>-<strong>1012</strong> <br />
6 Safety <strong>Instruction</strong>s<br />
1. Read all the instructions in the user's manual.<br />
2. Keep the user's manual for later use.<br />
3. Follow all the instructions on the unit.<br />
4. Pull all plugs before cleaning the unit; don't use any liquid or spray cleaner. Clean<br />
with a damp cloth.<br />
5. Don't use the unit near water.<br />
6. Don't´ put the unit on unstable tables etc.. It might fall down and get damaged.<br />
7. There are slots in the case for aeration; don't cover these slots up because they<br />
guarantee the reliable use of the unit and protect it against overheating. Don't install<br />
the unit into a frame unless sufficient aeration is guaranteed.<br />
8. The unit is provided with a safety plug. This plug can only be used with safety<br />
sockets. These safety measures should by all means be followed. In case the plug<br />
doesn't fit into the socket (e.g. with old sockets), the socket should be replaced by<br />
an electrician.<br />
9. Don't put any objects on the wire and make sure nobody steps on it.<br />
10. In case you use an extension wire make sure the sum of the power consumption of<br />
the connected units does not exceed the maximum power of the wire.<br />
11. Don't spill any liquid over the unit. Don't put any objects through the slots of the unit,<br />
as these might get in contact with parts that are live or might cause short circuits.<br />
This may cause fires and shocks.<br />
12. Don't service the unit yourself as parts that are live might be exposed when you<br />
open the case; you run the risk of getting shocked. All services should only be<br />
carried out by a specialist.<br />
13. If one of the following conditions occurs, please pull the plug out and call the<br />
service:<br />
A. Wire or plug is damaged or worn.<br />
B. Liquid got into the unit.<br />
C. The unit was exposed to rain or got damp.<br />
D. The unit doesn't work properly even if you follow the instructions of the user's<br />
manual.<br />
E. The unit fell down and the case was damaged.<br />
14. Only use wires which are marked safety proof.<br />
15. Don't use any high-power walkie-talkies near the unit.<br />
GLP Š German Light Production (V1.2) 17
7 Appendix<br />
<strong>MDP</strong>-<strong>1012</strong> <br />
Table for the DMX-Mode "2Cha." -binary principle-<br />
Channel 1…6 DMX value in % Channel 1…6 DMX value in %<br />
000000 ....... 0 % ( 0.0000 % ... 1.5625 %) 100000 ....... 2 % ( 1.5625 % ... 3.1250 %)<br />
010000 ....... 4 % ( 3.1250 % ... 4.6875 %) 110000 ....... 5 % ( 4.6875 % ... 6.2500 %)<br />
001000 ....... 7 % ( 6.2500 % ... 7.8125 %) 101000 ....... 8 % ( 7.8125 % ... 9.3750 %)<br />
011000 ....... 10 % ( 9.3750 % ... 10.9375 %) 111000 ....... 12 % ( 10.9375 % ... 12.5000 %)<br />
000100 ....... 13 % ( 12.5000 % ... 14.0625 %) 100100 ....... 15 % ( 14.0625 % ... 15.6250 %)<br />
010100 ....... 16 % ( 15.6250 % ... 17.1875 %) 110100 ....... 18 % ( 17.1875 % ... 18.7500 %)<br />
001100 ....... 20 % ( 18.7500 % ... 20.3125 %) 101100 ....... 21 % ( 20.3125 % ... 21.8750 %)<br />
011100 ....... 23 % ( 21.8750 % ... 23.4375 %) 111100 ....... 24 % ( 23.4375 % ... 25.0000 %)<br />
000010 ....... 26 % ( 25.0000 % ... 26.5625 %) 100010 ....... 27 % ( 26.5625 % ... 28.1250 %)<br />
010010 ....... 29 % ( 28.1250 % ... 29.6875 %) 110010 ....... 30 % ( 29.6875 % ... 31.2500 %)<br />
001010 ....... 32 % ( 31.2500 % ... 32.8125 %) 101010 ....... 34 % ( 32.8125 % ... 34.3750 %)<br />
011010 ....... 35 % ( 34.3750 % ... 35.9375 %) 111010 ....... 37 % ( 35.9375 % ... 37.5000 %)<br />
000110 ....... 38 % ( 37.5000 % ... 39.0625 %) 100110 ....... 40 % ( 39.0625 % ... 40.6250 %)<br />
010110 ....... 41 % ( 40.6250 % ... 42.1875 %) 110110 ....... 43 % ( 42.1875 % ... 43.7500 %)<br />
001110 ....... 45 % ( 43.7500 % ... 45.3125 %) 101110 ....... 46 % ( 45.3125 % ... 46.8750 %)<br />
011110 ....... 48 % ( 46.8750 % ... 48.4375 %) 111110 ....... 49 % ( 48.4375 % ... 50.0000 %)<br />
000001 ....... 51 % ( 50.0000 % ... 51.5625 %) 100001 ....... 52 % ( 51.5625 % ... 53.1250 %)<br />
010001 ....... 54 % ( 53.1250 % ... 54.6875 %) 110001 ....... 55 % ( 54.6875 % ... 56.2500 %)<br />
001001 ....... 57 % ( 56.2500 % ... 57.8125 %) 101001 ....... 59 % ( 57.8125 % ... 59.3750 %)<br />
011001 ....... 60 % ( 59.3750 % ... 60.9375 %) 111001 ....... 62 % ( 60.9375 % ... 62.5000 %)<br />
000101 ....... 63 % ( 62.5000 % ... 64.0625 %) 100101 ....... 65 % ( 64.0625 % ... 65.6250 %)<br />
010101 ....... 66 % ( 65.6250 % ... 67.1875 %) 110101 ....... 68 % ( 67.1875 % ... 68.7500 %)<br />
001101 ....... 70 % ( 68.7500 % ... 70.3125 %) 101101 ....... 71 % ( 70.3125 % ... 71.8750 %)<br />
011101 ....... 73 % ( 71.8750 % ... 73.4375 %) 111101 ....... 74 % ( 73.4375 % ... 75.0000 %)<br />
000011 ....... 76 % ( 75.0000 % ... 76.5625 %) 100011 ....... 77 % ( 76.5625 % ... 78.1250 %)<br />
010011 ....... 79 % ( 78.1250 % ... 79.6875 %) 110011 ....... 80 % ( 79.6875 % ... 81.2500 %)<br />
001011 ....... 82 % ( 81.2500 % ... 82.8125 %) 101011 ....... 84 % ( 82.8125 % ... 84.3750 %)<br />
011011 ....... 85 % ( 84.3750 % ... 85.9375 %) 111011 ....... 87 % ( 85.9375 % ... 87.5000 %)<br />
000111 ....... 88 % ( 87.5000 % ... 89.0625 %) 100111 ....... 90 % ( 89.0625 % ... 90.6250 %)<br />
010111 ....... 91 % ( 90.6250 % ... 92.1875 %) 110111 ....... 93 % ( 92.1875 % ... 93.7500 %)<br />
001111 ....... 95 % ( 93.7500 % ... 95.3125 %) 101111 ....... 96 % ( 95.3125 % ... 96.8750 %)<br />
011111 ....... 98 % ( 96.8750 % ... 98.4375 %) 111111 ....... FF % ( 98.4375 % ..100.0000 %)<br />
GLP Š German Light Production (V1.2) 18
<strong>MDP</strong>-<strong>1012</strong> <br />
GLP Š German Light Production (V1.2) 19