Operating Instructions FRIAMAT® Fusion Units - Friatec
Operating Instructions FRIAMAT® Fusion Units - Friatec
Operating Instructions FRIAMAT® Fusion Units - Friatec

Create successful ePaper yourself
Turn your PDF publications into a flip-book with our unique Google optimized e-Paper software.
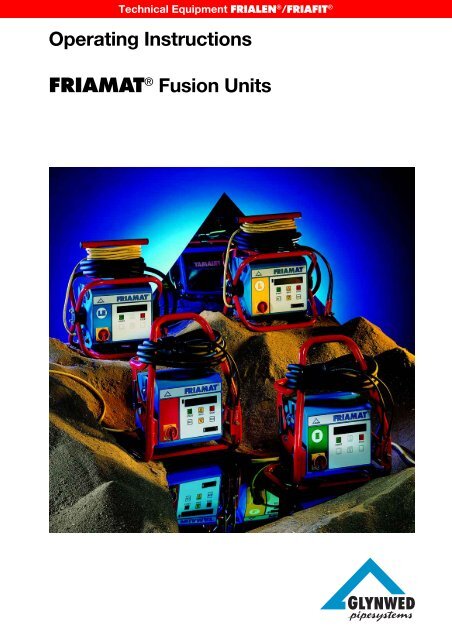
Technical Equipment FRIALEN ® /FRIAFIT ®<br />
<strong>Operating</strong> <strong>Instructions</strong><br />
FRIAMAT ® <strong>Fusion</strong> <strong>Units</strong><br />
37
Contents Page<br />
1. SAFETY 4<br />
1.1 Dangers 4<br />
1.2 Safety hints and tips 4<br />
1.3 Use in accordance with the requirements 5<br />
1.4 Sources of Danger 6<br />
1.5 Permitted users 6<br />
1.6 Dangers from electrical power 6<br />
1.7 Emissions 7<br />
1.8 Safety precautions on site 8<br />
1.9 Signal equipment 8<br />
1.10 Emergencies 8<br />
2. TECHNICAL DATA / TRANSPORT / COMMISSIONING 9<br />
2.1 Technical data 9<br />
2.2 Transport / storage / despatch 10<br />
2.3 Setting up / connection 10<br />
2.4 Putting into service 10<br />
3. BASIC SETTINGS 11<br />
3.1 Explanation of the function buttons 11<br />
3.2 Date and time 12<br />
3.3 Setting the signal volume 12<br />
3.4 Setting the language 13<br />
4. OPERATION 14<br />
4.1 Construction / components 14<br />
4.2 Functional principles 14<br />
4.3 <strong>Fusion</strong> operating procedure 14<br />
4.4 Preparation 14<br />
4.5 Reading in the bar code 15<br />
4.6 Starting the fusion process 16<br />
4.7 Display voltage and frequency 17<br />
2
5. AUXILIARY FUNCTION (ONLY FOR DOCUMENTATION UNITS) 18<br />
5.1 Documentation 18<br />
5.1.1 Switching on 18<br />
5.1.2 Switching off 18<br />
5.2 Operator’s Pass 19<br />
5.3 Commission Numbers 20<br />
5.3.1 Specifying and saving a commission number 20<br />
5.3.2 Selecting saved commission numbers 21<br />
5.3.3 Deleting saved commission numbers 21<br />
5.3.4 Altering currently set (activated) commission numbers 22<br />
5.3.5 Deactivating commission numbers 22<br />
5.4 Info-text 22<br />
5.5 <strong>Fusion</strong> Report 23<br />
5.5.1 Print / delete the whole content of the memory 23<br />
5.5.2 Printing out and deleting individual commission numbers 24<br />
5.5.3 Deleting data without printing out the logs. 25<br />
6. MAINTENANCE / TAKING OUT OF SERVICE 25<br />
6.1 Warranty 25<br />
6.2 Care and Maintenance instructions 25<br />
6.3 Checking the reader wand 26<br />
6.4 Taking out of service 26<br />
7. OPERATING FAULTS 26<br />
7.1 Faults when reading in the bar code 26<br />
7.2 Emergency Input 26<br />
7.3 Overheating 27<br />
7.4 <strong>Fusion</strong> interruption 27<br />
7.5 Fault messages / Warning messages 28<br />
8. APPENDIX 30<br />
8.1 Recommended accessories (options) 30<br />
8.2 Authorised Service Centres world-wide 31<br />
3
1. Safety<br />
1.1 Dangers<br />
The fusion units of the FRIAMAT ® Family are constructed using state of the<br />
art technology and in accordance with recognised safety rules, and are fitted<br />
with the appropriate protective equipment. In addition to this the fusion units<br />
of the FRIAMAT ® Family are entitled to carry the TÜV GS Test Symbol as a<br />
result of tests in line with the German Equipment Safety Law.<br />
The fusion units of the FRIAMAT ® Family have been checked for function and<br />
for safety before being delivered. Incorrect operation or misuse, however,<br />
can mean potential danger to<br />
- the health of the operator,<br />
- your FRIAMAT ® model or other property of the user,<br />
- the efficient operation of your FRIAMAT ® model<br />
All personnel who are in any way involved with the commissioning, operation,<br />
maintenance or repair of the FRIAMAT ® must<br />
- be suitably qualified and<br />
- comply precisely with these operating instructions.<br />
This affects YOUR safety !<br />
1.2 Safety hints and tips<br />
This operating instruction employs the following SYMBOLS with WARNING<br />
NOTES:<br />
DANGER ! Describes an impending threat of danger !<br />
Non-compliance with this instruction can result in severe damage to health<br />
and property.<br />
WARNING ! Describes a dangerous situation !<br />
Non-compliance with this instruction can cause slight injuries or damage to<br />
property<br />
IMPORTANT ! Designates user tips and other useful information<br />
4
1.3 Use in accordance with the requirements<br />
The fusion units of the FRIAMAT ® Family are exclusively for use in the fusion<br />
of<br />
- FRIALEN Safety Fittings with HD-PE pressure pipes (SDR 17-7)<br />
and<br />
- FRIAFIT Sewage Fittings with HD-PE sewage pipes (SDR 17 - 32)<br />
Your FRIAMAT ® model can also be used with fittings from other manufacturers<br />
as long as they have been provided by the manufacturer with a bar code 2/5<br />
interleaved to ANSI HM 10.8 M - 1983 or ISO CD 13950/08.94.<br />
Using in according with the requirements also includes observing<br />
- all the directions in this <strong>Operating</strong> Instruction and also<br />
- the guidelines from the DVGW Code of Practice, from the DVS, the UVV<br />
and the appropriate national and local regulations.<br />
IMPORTANT ! Any other usage does not comply with the requirements !<br />
FRIATEC AG accepts no liability for use which does not comply with the<br />
requirements:<br />
- Modifications or alterations are not permitted for safety reasons<br />
- The fusion units of the FRIAMAT ® Family must only be opened by an<br />
electrical specialist<br />
- <strong>Fusion</strong> with fusion units of the FRIAMAT ® Family whose lead seals are<br />
broken will render all claims for warranty and liability null and void.<br />
Other examples of uses which contravene the requirements:<br />
- use as a battery charger<br />
- use as a power supply for heaters of any type<br />
5
1.4 Sources of Danger<br />
- Damaged connection leads and extension cables must be replaced<br />
immediately<br />
- Do not either remove safety devices or put them out of action<br />
- Eliminate known faults immediately<br />
- Do not leave your FRIAMAT ® model unattended<br />
- Keep away from flammable liquids / gases<br />
- Do not operate in an Ex-environment<br />
1.5 Permitted users<br />
Only trained personnel may work with your FRIAMAT ® model. The operator is<br />
responsible for third parties in the working area The user must:<br />
- make the operating instruction available to the operator and<br />
- satisfy himself that the latter has read and understood them<br />
1.6 Dangers from electrical power<br />
- Do not use any damaged connecting cables<br />
- Check the connection leads for damage<br />
- Pull out the power supply plug before all care and maintenance work !<br />
- Only have servicing, maintenance and repairs carried out by authorised<br />
service centres<br />
- Only connect the fusion units of the FRIAMAT ® Family to the supply<br />
voltage stated on the rating plate<br />
WARNING ! Distribution points on the construction site: Comply with<br />
the regulations on circuit breakers<br />
Outdoors (on construction sites) sockets must be fitted with earth leakage<br />
circuit breakers. If using generators the DVGW Work Sheet GW 308 and<br />
VDE 0100 Part 728 must be complied with. The generator output rating<br />
required is dependent on the power requirements for the largest fitting being<br />
used, on connection conditions, ambient conditions and the actual generator<br />
type (its control characteristics). Since generators from different model ranges<br />
exhibit very different control characteristics the suitability of a generator<br />
cannot always be guaranteed by the specified rated output alone.<br />
6
In the event of doubt (e.g. when purchasing new) ask the authorised service<br />
centre or request the “Positive Generator List” from FRIATEC AG.<br />
Only use generators whose operating frequency lies within the range from<br />
45 - 66 Hz.<br />
First start the generator and let it run for half a minute. Set the off-load voltage<br />
if necessary and limit it to the voltage specified in the technical data. !<br />
Generator (mains) fuse max. 16 A (slow acting)<br />
IMPORTANT ! Before starting the fusion process always check the input<br />
voltage for your FRIAMAT ® model from the Technical<br />
Data (See Section 2.1 and 4.7)<br />
If using an extension cable make sure the cross section is adequate:<br />
- 2.5 mm 2 up to 50 m and<br />
- 4 mm 2 up to 100 m length.<br />
Always unroll the cable fully before use. ! Do not connect any other equipment<br />
to the same generator whilst fusion is taking place ! At the end of the fusion<br />
operation first disconnect the power cable to the generator and then shut off<br />
the generator.<br />
DANGER ! Risk to life ! Never open your FRIAMAT ® model whilst it is<br />
connected to the power supply !<br />
The fusion units of the FRIAMAT ® Family are must only be opened by<br />
specialist personnel from a recognised service centre !<br />
1.7 Emissions<br />
The (equivalent) continuous noise level from all fusion units of the FRIAMAT ®<br />
Family is below 70 dB(A). When working in a quiet environment the effect of<br />
the signal tone on the “Loud” setting is very loud. For this reason the signal<br />
tone is adjustable (loud / quiet)<br />
7
1.8 Safety precautions on site<br />
IMPORTANT ! All the fusion units of the FRIAMAT ® Family are splash<br />
proofed. They must not be, however, dipped in water.<br />
1.9 Signal equipment<br />
The fusion units of the FRIAMAT ® Family confirm certain operating processes<br />
with an acoustic signal tone (1, 2, 5 tones or a continuous tone). These<br />
signals have the following meanings:<br />
Signal tone x 1 means: Confirmation of reading in a bar code<br />
Signal tone x 2 means: <strong>Fusion</strong> process ended.<br />
Signal tone x 3 means: Supply voltage too low / too high.<br />
Signal tone x 5 means: Warning - Fault. Look at the display !<br />
1.10 Emergencies<br />
In an emergency switch the master switch to “OFF” immediately and<br />
disconnect your FRIAMAT ® model from the power supply ! The fusion units of<br />
the FRIAMAT ® Family can be stopped by:<br />
- operating the master switch<br />
- pulling out the power supply plug<br />
8
2. Technical data / Transport / Commissioning<br />
2.1 Technical data<br />
FRIAMAT ® FRIAMAT ® E FRIAMAT ® L FRIAMAT ® LE<br />
Input voltage range AC 200 V.-. 260 V AC 200 V.-. 260 V AC 200 V.-. 260 V AC 200 V.-. 260 V<br />
Frequency range 44 Hz... 66 Hz 44 Hz... 66 Hz 44 Hz... 66 Hz 44 Hz... 66 Hz<br />
Current consumption AC 16 A max. AC 16 A max. AC 16 A max. AC 16 A max.<br />
Power<br />
Generator rated output 1~<br />
3.5 kW 3.5 kW 3.0 kW 3.0 kW<br />
d20 - d160 AC 2.4 kW AC 2.4 kW AC 2.4 kW * AC 2.4 kW *<br />
d180 - d630<br />
(mechanical governor)<br />
AC 4.0 kW AC 4.0 kW<br />
d180 - d630<br />
(electronic governor)<br />
AC 4.0 kW AC 5.0 kW<br />
Equipment fuse 16 A slow acting 16 A slow acting 16 A slow acting 16 A slow acting<br />
Casing Enclosure class Enclosure class Enclosure class Enclosure class<br />
IP 54 DIN 40 050 IP 54 DIN 40 050 IP 54 DIN 40 050 IP 54 DIN 40 050<br />
Protection class I Protection class I Protection class I Protection class I<br />
DIN 57 700 DIN 57 700 DIN 57 700 DIN 57 700<br />
Connection cable 5 m with 5 m with 5 m with 5 m with<br />
contoured plug contoured plug contoured plug contoured plug<br />
<strong>Fusion</strong> cable 4 m with Ø 4 mm 4 m with Ø 4 mm 4 m with Ø 4 mm 4 m with Ø 4 mm<br />
fittings plug fittings plug fittings plug fittings plug<br />
Bar code Code 2/5 Code 2/5 Code 2/5 Code 2/5<br />
interleaved to interleaved to interleaved to interleaved to<br />
ANSI HM 10.8M - ANSI HM 10.8M - ANSI HM 10.8M - ANSI HM 10.8M -<br />
1983, ISO CD 1983, ISO CD 1983, ISO CD 1983, ISO CD<br />
13950/08.94 13950/08.94 13950/08.94 13950/08.94<br />
Working temperature range -20 °C ... +50 °C** -20 °C ... +50 °C** -20 °C ... +50 °C** -20 °C ... +50 °C**<br />
<strong>Fusion</strong> current monitoring Short circuit 110 A Short circuit 110 A Short circuit 110 A Short circuit 110 A<br />
Open circuit Open circuit Open circuit Open circuit<br />
0.25 x IN 0.25 x IN 0.25 x IN 0.25 x IN Printer interface Parallel - Parallel -<br />
(D-Sub 25) (D-Sub 25)<br />
<strong>Fusion</strong> voltage max. AC 48 V max. AC 48 V max. AC 48 V max. AC 48 V<br />
Dimensions<br />
W x D x H<br />
370x280x480 mm 370x280x480 mm 350x260x450 mm 350x260x450 mm<br />
Weight 19 kg 19 kg 14 kg 14 kg<br />
Weight with transport box 23 kg 23 kg 18 kg 18 kg<br />
*: The FRIAMAT ® L / LE is only suitable for domestic connections and distribution pipes up to<br />
d110, plus saddle components of all sizes<br />
** : When fusing fittings from other manufacturers always take heed of the details given on the<br />
working temperature range.<br />
9
2.2 Transport / storage / despatch<br />
Your FRIAMAT ® model is delivered in a transport box. There are no particular<br />
requirements for unpacking, or for (temporary) storage in the transport box.<br />
Storage temperature - 20 °C to + 70 °C<br />
WARNING ! Do not damage the front face of your FRIAMAT ® model !<br />
Always despatch in the transport box.<br />
2.3 Setting up / connection<br />
If protected from rain and wet your FRIAMAT ® model can be set up and<br />
operated out of doors.<br />
- Set up the FRIAMAT ® on level ground (as near horizontal as possible).<br />
- Ensure that generator is fused with a 16 A minimum (slow acting) fuse.<br />
- Plug the mains plug into the mains socket or connect to the generator.<br />
- If necessary use an extension cable, ensuring that the cross section is<br />
adequate (see section 2.1 “Technical Data”).<br />
- Always comply with the operating instructions for the generator.<br />
WARNING ! Always unroll the cable before use<br />
2.4 Putting into service<br />
WARNING ! Charring ! Dirty contacts can char the plug.<br />
The contact surfaces of the fitting and the fusion plug must always be clean.<br />
- Remove any existing deposits thoroughly<br />
- Protect the plug from contamination, replacing it if necessary<br />
- Check the fusion plugs and contact sockets on the fitting for dirt, and only<br />
then make the connection<br />
10
3. Basic Settings<br />
3.1 Explanation of the function buttons<br />
The fusion units of the FRIAMAT ® Family have 6 function buttons. Please take<br />
note of the diagram below and the basic explanation of the buttons,<br />
START INFO<br />
STOP<br />
SET MENU<br />
RES<br />
START: The START button is green in colour. It is used to start a fusion<br />
process, to confirm messages and to call up / select menu functions.<br />
The START button also moves the cursor in the display to the left<br />
when entering characters (e.g. entering notes, date).<br />
STOP: The STOP button is red in colour. It is used to cancel a fusion<br />
process, in some menus to select menu functions and generally to<br />
end menu functions. The STOP button also moves the cursor in the<br />
display to the right when entering characters (e.g. entering notes,<br />
date).<br />
INFO: The INFO button is yellow or grey in colour depending on the<br />
model. It is used to call up current information (voltage / frequency,<br />
date / time, ambient temperature, fusion operator, language) or to<br />
scroll through the individual menus. When entering characters (e.g.<br />
entering notes, date) the setting of the required character is made<br />
with the INFO button.<br />
SET: The SET button is grey in colour. It is used to save settings.<br />
MENU: The MENU button is yellow or grey in colour depending on the<br />
model. It is used to call up the main menu and to scroll through the<br />
individual menus. When entering characters (e.g. entering notes,<br />
date) the setting of the required character is made with the MENU<br />
button.<br />
RES: The RES button is grey in colour. It is used to cancel an input<br />
process.<br />
11
3.2 Date and time<br />
There are two ways of setting date and time.<br />
1. Through the main menu:<br />
12<br />
Go into the main menu by pressing the MENU button. Now press the<br />
MENU button as many times as it takes for the “Set Date / Time” setting<br />
menu to appear in the display. To set the date / time press the START<br />
button. “FRIAMAT” and the designation of your model will appear in the<br />
top line of the display, whilst the date and time will appear in the bottom<br />
line. The first character will flash. With the INFO / MENU button you can<br />
move one day forward / back. With the START / STOP button you can<br />
move left or right. With the SET button you can confirm and save the new<br />
Date / Time, and with the RES button you can break off without saving.<br />
After pressing the SET or RES button, press the STOP button at the end to<br />
cancel the menu selection.<br />
2. Reading in the TIMER bar code<br />
“FRIAMAT” and the designation of your model will appear in the top line of<br />
the display, whilst the date and time will appear in the bottom line. The first<br />
character (Day) will flash. With the INFO / MENU button you can move one<br />
day forward / back. With the START / STOP button you can move left or<br />
right. With the SET button you can confirm and save the new Date / Time,<br />
and with the RES button you can break off without saving.<br />
3.3 Setting the signal volume<br />
FRIAMAT<br />
01.Jul 1999 14:34<br />
Go into the main menu by pressing the MENU button. Now press the MENU<br />
button as many times as it takes for the “Signal Volume” setting menu to<br />
appear in the display. To set the signal volume press the START button.<br />
“Signal Volume” will appear in the top line of the display, whilst “loud” will<br />
appear on the left in the bottom line and “quiet” on the right. By pressing the<br />
START / STOP button you can adjust the signal volume to loud / quiet. Press<br />
the STOP button at the end to cancel the menu selection.
3.4 Setting the language<br />
Signal volume<br />
yes continue End<br />
Signal volume<br />
loud quiet<br />
Go into the main menu by pressing the MENU button. Now press the MENU<br />
button as many times as it takes for the “* Language *” setting menu to<br />
appear in the display (Meaning of the star : See IMPORTANT note in this<br />
section). To set the language press the START button. “* Language *” will<br />
appear in the top line of the display, whilst the actual language set will appear<br />
in the bottom line. Two stars will flash on the right and left to show that you<br />
are in the language setting menu. To change the language select the language<br />
you require with the INFO / MENU button. Press the SET button to end and<br />
save the settings. You can press the RES button to end without saving. Press<br />
the STOP button at the end to end the menu selection.<br />
* Language *<br />
yes continue End<br />
* Language *<br />
* German *<br />
IMPORTANT ! The setting of the language only refers to the one shown<br />
in the display. The language of the documentation<br />
(Report) remains English<br />
IMPORTANT ! In the language setting menu two stars appear, left and<br />
right, in the upper line. These are used to allow the<br />
language setting menu to be recognised when for<br />
example the language has accidentally been set wrongly.<br />
13
4. Operation<br />
4.1 Construction / components<br />
The electronics in your FRIAMAT ® model are housed in a splash-proof<br />
casing. The carrying frame is also used to hold the cables. The fusion units of<br />
the FRIAMAT ® Family are designed for a maximum fusion voltage of 48 V. The<br />
supply and fusion voltage are isolated from each other by a safety transformer.<br />
4.2 Functional principles<br />
Only electrofusion fittings with a bar code can be fused with the fusion units<br />
of the FRIAMAT ® Family : Each fitting is assigned a sticker with a bar code.<br />
This contains the information to ensure that fusion is carried out properly. The<br />
computerised command system of your FRIAMAT ® model:<br />
- is completely automatic in regulating and checking the metering of the<br />
electrical power<br />
- determines the fusion time depending on the ambient temperature. The<br />
temperature probe in the fusion cable continuously determines the ambient<br />
temperature.<br />
4.3 <strong>Fusion</strong> operating procedure<br />
So that the FRIALEN Safety Fittings and the FRIAFIT Sewage Fittings will be<br />
properly processed it is essential to adhere to the FRIALEN operating<br />
instructions.<br />
The same applies to fittings from other manufacturers.<br />
4.4 Preparation<br />
IMPORTANT ! Unroll the cable completely !<br />
14<br />
This applies to mains, fusion and, if applicable, extension<br />
leads. The contact surfaces of the fitting and of the<br />
fusion plugs must be clean; dirty contacts can cause<br />
overheating and charring of the plug. If necessary remove<br />
any existing deposits cleanly
Always protect the plug from contamination. If there is a<br />
deposit which cannot be completely removed, the fusion<br />
plugs must be replaced.<br />
- Prepare the fitting and pipes for fusion in accordance with the assembly<br />
instructions<br />
- Ensure that the contact pins on the fitting are accessible for connection of<br />
the fusion plugs<br />
- Connect up the power supply (mains or generator)<br />
- If using a generator start it up first and allow to warm up for 30 seconds<br />
- Switch on the master switch (1)<br />
- Connect the fusion plugs to the contact pins on the fitting<br />
4.5 Reading in the bar code<br />
IMPORTANT ! It is not acceptable to read in the bar code label from<br />
another sort of fitting instead. After ending the read-in<br />
process the reader wand must be replaced in the reader<br />
wand pouch immediately to avoid damage and contamination<br />
to the tip of the wand.<br />
If there is a bar code label stuck onto the fitting this should always be used.<br />
If the bar code label on the fitting being fused is illegible due to damage,<br />
an identical fitting from the same manufacturer with a legible bar code<br />
label should be used.<br />
Hold the reader wand slightly slanting and slightly inclined (like a pencil) and<br />
place it on the fitting in front of the bar code. Now move the reader wand<br />
quickly across the whole label and a little beyond. The reading can be done<br />
from left to right or from right to left. When this has been done correctly the<br />
machine will confirm it with a signal tone. If the reading in is not successful<br />
first time try again, if necessary at a different angle or speed.<br />
15
4.6 Starting the fusion process<br />
IMPORTANT ! If there is a malfunction in the fusion process hot molten<br />
PE can be expelled in rare cases.<br />
16<br />
So:<br />
Keep at a safe distance of at least 1 m from the fusion<br />
point during the fusion process ! Do not connect any<br />
other equipment during the fusion process !<br />
The fusion process can be broken off at any time by pressing the STOP<br />
button. When the fused area has cooled down (and the source of the fault<br />
eliminated if necessary) the fusion process can be repeated (depending on<br />
the fitting manufacturer; please comply with the instructions for use from the<br />
fitting manufacturer in question).<br />
<strong>Operating</strong> steps: (see also the visual representation on the next page):<br />
1. Press the START button to initiate the fusion process<br />
2. If applicable confirm the display “Pipe processed ?” with the START<br />
button. Next there will be an automatic display of the ambient temperature<br />
and a resistance check on the connected fitting. The fusion process will<br />
start. In the display you can follow the duration of the fusion process (the<br />
complete fusion time will be displayed and counted down to zero in<br />
seconds).<br />
3. Display “End of fusion” means: fusion process finished, ready for the next<br />
fusion. The displays “t:” and “tc:” mean required and actual fusion time<br />
and these must agree.<br />
4. Make a note of the fusion parameters onto the pipe / fitting. This will also<br />
avoid fusing twice<br />
5. To initiate a new fusion process press the START button.
FRIA MON 63 mm<br />
START Infotext<br />
FRIA MON 63 mm<br />
Pipe processed ?<br />
End of fusion<br />
t: 53 s tc: 53 s<br />
4.7 Display voltage and frequency<br />
Before or after the fusion: To display the voltage and frequency press the<br />
INFO button. The STOP button will take you back to the basic setting.<br />
During fusion: Pressing the INFO button will display the voltage and frequency,<br />
after 3 seconds the unit will automatically go back to the basic setting.<br />
Voltage: 221.3 V<br />
Frequency: 50.01 Hz<br />
WARNING ! Your FRIAMAT ® model is designed for an input voltage<br />
range of 200 - 260 volts. If you are working in the range<br />
from 150 - 200 volts or 260 - 320 volts the actual voltage<br />
and frequency will automatically appear on the display.<br />
You can ignore this warning note by pressing the STOP<br />
button and carry on working but there is a risk that<br />
you will damage the electronics of your FRIAMAT ® model.<br />
If the input voltage range is under 150 volts or above<br />
320 volts the actual voltage and frequency will likewise<br />
appear on the display. In this case, however, the warning<br />
indication will remain until you have regulated the input<br />
voltage back into the recommended range and have<br />
acknowledged with the STOP button.<br />
17
5. Auxiliary function (only for documentation units)<br />
5.1 Documentation<br />
Your FRIAMAT ® model is supplied with the documentation deactivated<br />
(switched off). The “Documentation” function is used to save the technical<br />
fusion parameters. These can in each case be assigned to a commission<br />
number and/or to an operator pass.<br />
5.1.1 Switching on<br />
This function is activated or deactivated by reading in a DOCUMENTATION<br />
bar code (see plastic card in the accessories pouch). When the function is<br />
activated the display will show the sequential number on the left and the<br />
number of fusions which can still be stored on the right (and if applicable,<br />
above these the appropriate commission number.)<br />
5.1.2 Switching off<br />
The DOCUMENTATION function can be deactivated by reading in the<br />
DOCUMENTATION bar code again. The safety question of whether this is<br />
required can be acknowledged by pressing the START button or rejected by<br />
pressing the STOP button (breaking off with the STOP button will bring about<br />
a return to the previous state).<br />
18<br />
FRIAMAT<br />
2 ➔ Code 499<br />
Switch off<br />
documentation ?
5.2 Operator’s Pass<br />
IMPORTANT ! The operator pass can only be read in with the documentation<br />
switched on<br />
Your FRIAMAT ® model can be set for use with an operator pass by reading in<br />
the bar code from an operator pass. The operator pass can be ordered from<br />
FRIATEC. When a user code has been read in for the first time all fusions<br />
which are then carried out will be saved under the code for this operator<br />
pass. If another operator pass is read in your FRIAMAT ® model will be<br />
switched over to suit.<br />
Your FRIAMAT ® model can be cleared for use without an operator pass by<br />
reading in the USER OFF bar code (see plastic card in the accessories<br />
pouch). The question “Deactivate operator?” then appears. This can be<br />
confirmed by pressing the START button or the process can be broken off by<br />
pressing the STOP button.<br />
IMPORTANT ! By means of the operator pass your FRIAMAT ® model<br />
can be blocked to protect it from unauthorised use. .<br />
After reading in the current operator pass again the<br />
query will appear “Block the unit?”. This can be confirmed<br />
by pressing the START button or the process can be<br />
broken off by pressing the STOP button. Your FRIAMAT ®<br />
model will be automatically blocked when the code for an<br />
operator pass is on file and time-wise a change of date<br />
takes place i.e. your FRIAMAT ® model will be blocked on<br />
the next day.<br />
Read in<br />
operator<br />
Block the<br />
unit ?<br />
Deactivate<br />
operator ?<br />
19
In both cases (manual or automatic blocking) the note “Read in Operator” will<br />
appear in the display. Your FRIAMAT ® model can be cleared for use by<br />
reading in an operator pass<br />
5.3 Commission Numbers<br />
For simple administration of up to 20 different commission numbers your<br />
FRIAMAT ® model has a commission number specification menu.<br />
5.3.1 Specifying and saving a commission number<br />
Go into the main menu by pressing the MENU button. Now press the MENU<br />
button as many times as it takes for the “commission no.” setting menu to<br />
appear in the display. To get into the “Change/Specify commission nos.”<br />
setting menu press the START button. By pressing the STOP button you will<br />
go into the specification setting menu in which you can enter and save up to<br />
20 commission nos. If you press the START button the current commission<br />
no. will appear. The first character of the commission no. will flash. This can<br />
be increased by pressing the INFO button or decreased by pressing the<br />
MENU button. With the START / STOP button you can move left or right<br />
within the commission no. With the SET button the commission no. set will be<br />
saved and taken into the Specification Menu, and with the RES button you<br />
can break off the process without saving.<br />
Another method for getting into the “Change/Specify Commission Nos.”<br />
setting menu is to read in the COMMISSION CODE (see plastic card in the<br />
accessories pouch).<br />
20<br />
Commission No.<br />
Change Specification<br />
Commission No.<br />
New Selection Delete<br />
Commission No.<br />
12 Dossenheimer Way
5.3.2 Selecting saved commission numbers<br />
As described in Section 5.3.1, go into the “Change/Specify commission<br />
nos.” setting menu.<br />
By pressing the STOP button you will go into the commission no. specification<br />
menu. If you press the INFO / MENU button the stored commission nos. will<br />
be displayed.<br />
The displayed commission no. is selected by pressing the START or SET<br />
button. The process can be broken off using the STOP or RES button.<br />
Pressing the STOP button again will take you back to the basic setting.<br />
Commission No.<br />
New Selection Delete<br />
5.3.3 Deleting saved commission numbers<br />
As described in Section 5.3.1, go into the “Change/Specify commission<br />
nos.” setting menu. By pressing the STOP button you will go into the<br />
commission no. specification menu. If you press the STOP button you will go<br />
into the Deletion menu.<br />
The displayed Commission No. will be deleted from the commission no.<br />
specification menu by pressing the START button. Pressing the STOP button<br />
will display the next commission no. The fusions which have been saved<br />
under this commission no. will be retained together with the commission no.,<br />
but the commission no. will no longer be available in the commission no.<br />
specification menu.<br />
To leave the Deletion menu press the STOP button as many times as it takes<br />
to get back to the basic setting.<br />
Commission No.<br />
12 Dossenheimer Way<br />
21
5.3.4 Altering currently set (activated) commission numbers<br />
As described in Section 5.3.1, go into the “Change/Specify commission<br />
nos.” setting menu.<br />
After you press the START button the currently set commission no. will<br />
appear. The first character will flash. This can be increased by pressing the<br />
INFO button or decreased by pressing the MENU button. With the START /<br />
STOP button you can move left or right within the commission no. With the<br />
SET button the commission no. set will be saved, and with the RES button<br />
you can break off the process without saving. By pressing the STOP button<br />
again you can go back to the basic setting.<br />
IMPORTANT ! The altered commission no. will not be available in the<br />
commission no specification menu.<br />
5.3.5 Deactivating Commission Nos.<br />
The “Commission No” option will be deactivated by reading in the<br />
COMMISSION OFF CODE (see plastic card in the accessories pouch).<br />
5.4 Info-text<br />
With the documentation switched on there is a facility to assign an individual<br />
additional text (2x16 characters) to each individual fusion process in the<br />
report. After reading in the fitting bar code press the INFO / MENU button.<br />
The last text entered will appear. The first character will flash. This can be<br />
increased by pressing the INFO button or decreased by pressing the MENU<br />
button. With the START / STOP button you can move left or right within the<br />
Info text. With the SET button the Info-text set will be saved and with the RES<br />
button you can break off the entry process.<br />
22<br />
Commission No.<br />
12 Dossenheimer Way<br />
FRIAMAT<br />
2 ➔ Code 498
IMPORTANT ! The additional text has to be newly entered for each<br />
fusion as otherwise no text will appear in the report. If the<br />
START button is pressed directly after reading in the<br />
fitting bar code no additional text will be appended to the<br />
fusion.<br />
5.5 <strong>Fusion</strong> Report<br />
FRIA MON 63 mm<br />
START Infotext<br />
Kuntz Generator<br />
Type 4500 xs<br />
5.5.1 Print / delete the whole content of the memory<br />
IMPORTANT ! Only printers with a parallel interface can be used. No<br />
printers must be connected during the fusion process.<br />
The fusion report stored in the memory can be printed out. For this the printer<br />
or the Memory Box (optional) has to be connected to the fusion unit. The<br />
printer must be set to “ON-LINE”.<br />
Go into the “Print” setting menu via the Main Menu. Alternatively you can get<br />
into this menu by reading in the PRINT code (see plastic card in the<br />
accessories pouch). After this there will be a query on whether individual, all<br />
or no fusions should be printed out. A complete print-out arranged in<br />
commission number order is started by pressing the START button. A new<br />
page is started for each commission number.<br />
When the complete print-out has finished there will be a query as to whether<br />
the report memory should be deleted. If you want to delete all data press the<br />
START button: the query “Are you sure?” will appear.<br />
23
IMPORTANT ! If the START button is pressed the data will be irretrievably<br />
deleted ! If the STOP button is pressed the data will not<br />
be deleted !<br />
5.5.2 Printing out and deleting individual commission numbers<br />
Go into the “Print” setting menu as described in Section 5.5.1. Pressing the<br />
STOP button will display the first commission number. The commission<br />
number displayed can be printed by pressing the START button and then the<br />
query will appear on whether the data is to be deleted. Pressing the START<br />
button will delete the data, pressing the STOP button will bypass the delete<br />
function and the next commission no. will be displayed. This procedure can<br />
be broken off with the RES button.<br />
24<br />
Print<br />
All None Selection<br />
Print<br />
All None Selection<br />
Delete<br />
Are you sure ?<br />
Print<br />
All None Selection<br />
12 Dossenheimer Way<br />
Print Next<br />
12 Dossenheimer Way<br />
Delete Next
5.5.3 Deleting data without printing out the reports.<br />
Go into the “Print” setting menu as described in Section 5.5.1. By pressing<br />
the INFO button bypass the Print Menu and go directly into the Delete Menu.<br />
The deletion of all or individual data is carried out as already described in<br />
Section 5.5.1. and 5.5.2.<br />
6. Maintenance / taking out of service<br />
We recommend that you have your FRIAMAT ® model serviced once a year<br />
(see list of all authorised Service Stations in section 8.2.). Include all<br />
connection adapters for checking at the maintenance intervals.<br />
6.1 Warranty<br />
Print<br />
All None Selection<br />
Delete<br />
All None Selection<br />
12 Dossenheimer Way<br />
Delete Next<br />
The warranty period for the fusion units of the FRIAMAT ® Family is 24 months<br />
provided that your FRIAMAT ® model undergoes a paid service within the first<br />
14 months. Otherwise the warranty period will be 12 months.<br />
6.2 Care and Maintenance instructions<br />
WHAT ? WHEN ? WHO ?<br />
Clean the reader wand and<br />
check for damage<br />
Daily Operator<br />
Check the function Weekly Operator<br />
Clean the contacts Weekly Operator<br />
Factory Maintenance Annually Authorised Service Centres<br />
(see section 8.2)<br />
25
6.3 Checking the reader wand<br />
If the reading is not confirmed after reading in a bar code several times<br />
the reader wand can be checked by reading in the TEST code (see plastic<br />
card in the accessories pouch). “TEST CODE” will appear in the display for<br />
4 seconds.<br />
6.4 Taking out of service<br />
IMPORTANT ! The fusion units of the FRIAMAT ® Family contain various<br />
components which make it necessary to ensure that it is<br />
disposed of properly. Your FRIAMAT ® model can be<br />
disposed of at the factory or at one of the Authorised<br />
Service Centres<br />
7. <strong>Operating</strong> faults<br />
7.1 Faults when reading in the bar code<br />
If the reading in is not confirmed by an acoustic signal the reader wand<br />
should be checked for dirt or physical damage. If the reader wand is<br />
defective there is still the facility to carry out the fusion using the Emergency<br />
Input Mode (see below).<br />
7.2 Emergency Input<br />
Go into the “Emergency Input” setting menu via the Main Menu. “Emergency<br />
Input” will appear in the top line of the display, whilst in the bottom line you<br />
will see “Yes” on the left, “Continue” in the centre and “End” on the right.<br />
When the START button is pressed “Code” and 24 characters will appear,<br />
with the first character flashing. This can be increased by pressing the INFO<br />
button or decreased by pressing the MENU button. With the START / STOP<br />
button you can move left or right within the Emergency Input menu. The<br />
figures to be entered should be read off the bar code of the fitting being<br />
fused. After entering the numbers for the bar code you have to confirm the<br />
entry by pressing the SET button - by pressing the RES button you can break<br />
off the process. The fusion process is started by pressing the START button.<br />
26<br />
Code: 36 18 09 01 06<br />
38 35 08 99 05 47 00
7.3 Overheating<br />
If used continuously for long periods your FRIAMAT ® model could overheat.<br />
To avoid damage to the unit a temperature monitor has been fitted, and on<br />
the basis of this your FRIAMAT ® model will calculate, before the fusion<br />
process, whether the temperature rise anticipated due to the fusion process<br />
is acceptable. If the calculated temperature does not lie within the permitted<br />
range the message “Allow the unit to cool down” will appear on the display.<br />
Since the power consumption of various electrofusion fittings will differ there<br />
may be a possibility of fusing a different fitting.<br />
7.4 <strong>Fusion</strong> interruption<br />
If the fusion is broken off because, e.g. the power supply has been interrupted<br />
during a fusion run, the fusion can be repeated after removing the cause of<br />
the problem and after allowing the fitting to cool down completely (this is<br />
dependent on the fitting manufacturer; always comply with the instructions<br />
for use from the fitting manufacturer in question).<br />
27
7.5 Fault messages / Warning messages<br />
If irregularities occur during the fusion process then your FRIAMAT ® model<br />
will show suitable fault messages in the display<br />
Fault messages<br />
No. Text in display Meaning / causes Remedy<br />
1 - - -<br />
2 Temperature Ambient temperature If necessary set up a tent<br />
outside range outside the permitted<br />
range<br />
3 Resistance Electrical resistance of Check contacts for firm<br />
outside tolerance the fitting is outside seating / dirt<br />
the tolerance Clean contacts if necessary<br />
If necessary replace fitting<br />
4 Fitting winding Short circuit in the wire Replace fitting, send in<br />
short circuit winding of the fitting for examination<br />
5 Fitting winding Current flow interrupted Check the connection of<br />
open circuit the fusion plug on the fitting.<br />
If OK replace the fitting and<br />
send in for examination<br />
6 Voltage outside Unacceptable deviation Inform Authorised Service<br />
tolerance of the fusion voltage Centre<br />
7 Fault in the Malfunction in the Make a note of the fault<br />
a..z operating system FRIAMAT ® hardware or classification (a...z) and<br />
software inform Authorised Service<br />
Centre<br />
8 Mains voltage Mains voltage outside Extension cable too long or<br />
outside range the permitted range its cross section too small.<br />
during fusion Check the voltage and<br />
connection conditions of<br />
the generator<br />
9 Frequency outside Frequency outside the Check the frequency of the<br />
range permitted range during<br />
fusion<br />
generator voltage<br />
10 <strong>Fusion</strong> interrupted <strong>Fusion</strong> broken off by<br />
pressing the STOP button<br />
-<br />
28
More Fault messages<br />
No. Text in display Meaning / causes Remedy<br />
11 - - -<br />
12 - - -<br />
13 Mains failure Supply voltage inter- Check connection<br />
rupted or too low conditions<br />
14 - - -<br />
15 Power rating Power consumption of -<br />
exceeded the fitting exceeds the<br />
rating of the FRIAMAT ®<br />
An example of what is shown on the display:<br />
By pressing the INFO button you will get information on the fault in plain<br />
language<br />
Warning messages :<br />
Fault 3 INFO ?<br />
Resistance<br />
outside tolerance<br />
Text in display Instruction / Remedy<br />
Faulty or damaged bar code Use a new bar code from an identical<br />
fitting or correct the manually entered code<br />
Memory full Print out the log<br />
Memory empty If the memory is empty no printout<br />
is possible<br />
Printer not ready Check whether the output device (printer,<br />
Memory Box, PC with FRIATOOL II) is<br />
connected correctly<br />
29
More warning messages :<br />
Text in display Instruction / Remedy<br />
Let the unit cool down Protective function which prevents<br />
overheating of the equipment. Switch off<br />
the unit and allow it to cool down until<br />
the warning message is no longer<br />
displayed after switching on.<br />
Service date exceeded Inform Authorised Service Centre.<br />
Have the equipment serviced.<br />
Voltage .... V; Frequency .... Hz Readjust generator then acknowledge<br />
with the STOP button (See Section 4.7)<br />
No text, just a continuous acoustic Supply voltage too low<br />
tone<br />
N.B. Double fusion If a fitting is to be fused twice the contact<br />
plugs of the fusion unit must be pulled off<br />
the fitting after the first fusion and the<br />
fitting allowed to cool down (see the<br />
instructions for use from the fitting<br />
manufacturer)<br />
8. Appendix<br />
8.1 Recommended accessories (options)<br />
- Memory Box to transfer fusion data<br />
- FRIATOOL II for electronic processing of the fusion data<br />
- Operator pass<br />
- Scanner<br />
- Remote start pass<br />
- <strong>Fusion</strong> cable extension<br />
- Infrared remote control<br />
30
8.2 Authorised Service Centres world-wide<br />
FRIATEC AG<br />
Niederlassung Mannheim<br />
Steinzeugstraße<br />
D-68229 Mannheim<br />
Tel.: 0621 / 486-1533<br />
Fax: 0621 / 486-2030<br />
FRIATEC AG Bohnenschäfer<br />
Niederlassung Wittenberg Westberger Weg 86a<br />
Waldstraße D-59065 Hamm<br />
D-06886 Wittenberg Tel.: 0 23 81 / 6 42 43<br />
Tel.:0 34 91 / 61 53 22 Fax: 0 23 81 / 6 08 41<br />
Fax: 0 34 91 / 61 53 12<br />
Axel Jülicher GmbH KS - Kirsch<br />
Hahnenstraße 19 Schweißtechnik<br />
D-28309 Bremen Reetzerstraße 12<br />
Tel.: 04 21 / 87 8-0 D-31515 Wunstorf<br />
Fax: 04 21 / 87 8 11 Tel.: 0 50 31 / 90 96 23<br />
Fax: 0 50 31 / 7 72 37<br />
Hansen & Reinders DIWA Schweißtechnik GmbH<br />
GmbH & Co. KG Heidelberger Straße 11<br />
Manderscheidtstraße 48 D-01189 Dresden<br />
D-45141 Essen Tel.: 03 51 / 4 01 65 37<br />
Tel.: 02 01 / 89 10 90 Fax: 03 51 / 4 01 65 17<br />
Fax: 02 01 / 21 62 10<br />
Friedrich Rütz Meyer Elektronic<br />
Reinbeker Redder 102 Elmendorfer Straße 9-10 A<br />
D-21031 Hamburg D-26160 Bad Zwischenahn<br />
Tel.: 0 40 / 7 39 21 60 Tel.: 04 40 3 / 97 15-0<br />
Fax: 0 40 / 7 30 40 41 Fax: 04 40 3 / 97 15 17<br />
FRIATEC GmbH FRIATEC S.A.R.L.<br />
Birostraße 13 Z.A. La Grande Borne<br />
A-1230 Wien F-77140 Darvault/Nemours<br />
Tel.: 00 43 / 61 057 Tel.: 00 33 1 64 45 23 33<br />
Fax: 00 43 / 61 057 5 Fax: 00 33 1 64 45 23 20<br />
31
FRIATEC S.A.U. IBERGAS-Comercio<br />
Cuesta del Rio, s/n Cabo Ruivo<br />
E-28860 Paracuellos del P-1800 Lisboa<br />
Jarama/Madrid Tel.: 00 35 1 1 8 68 72 06 18<br />
Tel.: 00 34 9 6 58 22 50 Fax: 00 35 1 1 8 68 45 71<br />
Fax: 00 34 9 6 58 27 53<br />
TUMAB Scanotherm<br />
Box 50 Møllebakken 4<br />
S-26821 Svalöv DK-6091 Bjert<br />
Tel.: 00 46 4 18 16 385 Tel.: 00 45 75 57 29 66<br />
Fax: 00 46 4 18 41 193 9 Fax: 00 45 75 57 24 95<br />
VIGOTEC SA FRIATEC B.V.<br />
Industrielaan 15 Steenpad 5<br />
B-1740 Ternat NL-4797 Willemstad<br />
Tel.: 00 32 2 58 27 11 0 Tel.: 00 31 168 47 36 51<br />
Fax: 00 32 2 58 22 0 32 Fax: 00 31 168 73 2 00<br />
FRIATEC s.r.o. FRIATEC Sp.z.o.o.<br />
V Korytech 23 ul. Gdanska 40<br />
CZ-10600 Praha 10 PL-70660 Szczecin<br />
Tel.: 00 42 0 2 72 76 03 36 Tel.: 00 48 91 46 23 245<br />
Fax: 00 42 0 2 72 76 45 69 Fax: 00 48 91 46 23 245<br />
FRIATEC s.r.o. FRIATEC-KFT<br />
Nitrianska 2 To 4.3.<br />
SK-91700 Trnava H-2045 Torokbalint<br />
Tel.: 00 42 18 05 55 14 626 Tel.: 00 36 23 33 78 41<br />
Fax: 00 42 18 05 55 13 307 Fax: 00 36 23 33 78 42<br />
MIVA spol. S.r.o. FRIATEC S.R.L.<br />
Teplicskà cesta 10 Via Aldo Moro, 10<br />
SK-05201 Spisska Nova ves I-20080 Carpiano<br />
Tel.: 00 42 96 54 21 590 Tel.: 00 39 2 98 50 90 34<br />
Fax: 00 42 96 54 21 590 Fax: 00 39 2 98 85 90 33<br />
FRIATEC Incorporated FRIATEC Plasmec Pty. Ltd.<br />
426 Fairforest Way 24 Appel Road<br />
Greenville, SC 29609/USA Kramerville, Sandton<br />
Tel.: 18 64 28 68 800 RSA-2144 Wendywood<br />
Fax: 18 64 23 42 050 Tel.: 00 27 11 444 13 21<br />
Fax: 00 27 11 444 28 40<br />
32
IPS Pty. Ltd. ETA Plus Ltd.<br />
Locked Bag 106 49 Cottle Park Drive<br />
AUS-Kingsgrove NSW 2208 NZ-Lower Hutt<br />
Tel.: 00 61 25 54 39 77 Tel.: 00 64 58 90 145<br />
Fax: 00 61 25 02 25 61 Fax: 00 64 58 90 146<br />
Jar Tai Trading Ltd. STR Marketing Ltee.<br />
8 Lane 402, Ming-Sheng Rd. P.O. Box 98<br />
Taichung / Taiwan Port Louis / Mauritius<br />
Tel.: 00 88 64 32 25 005 Tel.: 00 23 02 12 99 72<br />
Fax: 00 88 65 32 20 911 Fax: 00 23 02 12 99 98<br />
Ukrgasifikazia Yug UAB DS1<br />
3, Pedagogicheskaya Ul. Gedimino g 30<br />
270009 Odessa / Ukraine 4050 Trakai / Litauen<br />
Tel.: 00 38 04 82 68 54 83 Tel.: 00 37 03 85 23 16<br />
Fax: 00 38 04 85 68 40 05 Fax: 00 37 03 85 11 33<br />
Elektrakip Benapartner Sdn Bhd<br />
ul. Kabuschkina 80 No. 25, Jalan TPJ 8/1<br />
BY-220118 Minsk Taman Perindustrian Jaya<br />
Tel.: 00 37 00 17 22 40 95 38 47200 Subang Selangor<br />
Fax: 00 37 00 17 22 45 67 67 Darul Ehsan / Malaysia<br />
Tel.: 00 60 37 54 54 66<br />
Fax: 00 60 37 54 54 67<br />
T S J S U I<br />
Techniques in Safe Jointing Southern Gas Co. Ltd.<br />
Av. General Paz 62 State Life Building No.3<br />
RA-1702 Ciudadela Dr. Ziauddin Ahmed Road No. 318<br />
Buenos Aires 75530 Karachi / Pakistan<br />
Tel.: 00 54 14 88 94 87 Tel.: 00 92 25 73 134<br />
Fax: 00 54 16 57 45 02 Fax: 00 92 25 73 074<br />
Akfel Mühendislik Caldervale Technology Ltd.<br />
Ic Ve Dis. Tic Ltd. Sti Grange Road,<br />
Bagdat Cad. Hasan Amir SK. Batley<br />
Dursoy is Merkezi No. 4/13 GB-WF 17 6LN West Yorkshire<br />
TR-81030 Kiziltoprak Istanbul United Kingdom<br />
Tel.: 00 90 21 64 14 87 78 Tel.: 00 44 19 24 42 25 70<br />
Fax: 00 90 21 64 14 87 80 Fax: 00 44 19 24 42 25 85<br />
33
Plant & Site Ltd. Ferdinand Wehrli<br />
Gatehouse Warehousing Schulgasse 174<br />
2 Harper Lane CH-8215 Hallau<br />
Shenley Tel.: 00 41 / 5 26 81 18 87<br />
GB-Wd7 9 HA, St.Albans Herts Fax: 00 41 / 5 26 81 18 87<br />
United Kingdom<br />
Tel.: 00 44 17 27 82 66 93<br />
Fax: 00 44 17 27 82 27 31<br />
FRIATEC Rheinhütte do Brasil<br />
Av. Manoel Inácio Peixoto 2150<br />
BRA-36770 Cataguases MG<br />
Tel.: 00 55 32 69 46 207<br />
Fax: 00 55 32 69 46 241<br />
34
36<br />
Technical Equipment FRIALEN ® /FRIAFIT ®<br />
FRIATEC Aktiengesellschaft<br />
Technical Plastics Division<br />
P.O.B. 7102 61 · D-68222 Mannheim<br />
Phone (06 21) 486-0<br />
Fax (06 21) 479196<br />
Internet: http://www.friatec.de<br />
e-mail: info-frialen@friatec.de<br />
A member of GLYNWED Pipesystems