Instruction Manual Short Range - Valley Vet Supply
Instruction Manual Short Range - Valley Vet Supply
Instruction Manual Short Range - Valley Vet Supply

You also want an ePaper? Increase the reach of your titles
YUMPU automatically turns print PDFs into web optimized ePapers that Google loves.
EST. 1957<br />
OPERATING INSTRUCTIONS<br />
SHORT RANGE PROJECTOR<br />
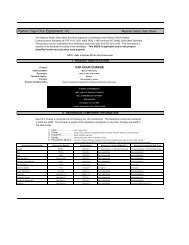
Palmer Cap-Chur Equipment Inc.<br />
421 Tidwell Road, Powder Springs, Ga. 30127<br />
P.O. Box 867, Douglasville, Ga. 30133<br />
Web Site: www.palmercap-chur.com<br />
Email: info@palmercap-chur.com<br />
Phone: 770-942-4395 or 800-294-9482<br />
Fax: 770-949-3562
Operating <strong>Instruction</strong>s For <strong>Short</strong> <strong>Range</strong> Projector<br />
A SYRINGE PROJECTOR IS POTENTIALLY DANGEROUS TO HUMAN LIFE.ALWAYS<br />
CHECK THAT THERE IS NO SYRINGE IN THE BARREL BEFORE ATTEMPTING TO<br />
CLEAN OR DISMANTLE THE PROJECTOR.NEVER POINT THE PROJECTOR AT ANY<br />
PERSON FOR ANY REASON. ALWAYS HANDLE THE PROJECTOR AS IF IT WERE<br />
FULLY LOADED. Note: All CO2 Projectors (Unless Noted) Are Shipped Under Pressure<br />
Ready To Use.<br />
To load a syringe into the projector:<br />
1. Place the Safety (Fig. 3) into the ‘On’ position by pushing it in from the left.<br />
2. Remove the Breech Bolt (Fig. 2), checking to make sure that the Barrel is clear.<br />
3. Insert the Syringe to be used, Needle forward, into the Barrel of the Projector using the Breech Bolt to<br />
push the Syringe into the barrel. Note: Never leave a Loaded Syringe in Barrel of Projector. Work the<br />
Breech Bolt in and out a couple of times to make sure the Tail Piece is not caught on the Breech Bolt.<br />
Place the Breech Bolt into the down, ‘Locked’ position (Fig. 3).<br />
4. Place the Cocking Knob into the ‘Cocked’ position (Fig. 3). The <strong>Short</strong> <strong>Range</strong> Projector has a Cocking<br />
Knob under the Barrel. The Cocking Knob has three settings. Pulling it to the first setting is for storage<br />
only. On the first setting the Projector will not fire. Pulling it to the second setting is for the ‘Low’ power.<br />
Pulling it to the third setting is for ‘Full’ power. Refer to the distance chart for a full range of distances<br />
that you can obtain with this Projector.<br />
5. Place the Safety (Fig. 3) into the ‘Off’ position by pushing it in from the right.<br />
6. The Projector is now ready to fire.<br />
7. To fire the Projector, aim at your target and pull the Trigger.<br />
Note: If you were to ‘Cock’ the Projector to ‘Full’ power setting when you only needed the ‘Low’ power<br />
setting, you may readjust to a lower setting. First, point the Projector in a safe direction, then pull back<br />
on the Cocking Knob and hold it. Do not let the Cocking Knob go. Pull the Trigger of the Projector and<br />
gently let the Cocking Knob move forward while continuing to hold the Cocking Knob. You may now<br />
‘Cock’ the Projector to the power setting you wish to use.<br />
To Exhaust CO2 From <strong>Short</strong> <strong>Range</strong> Projector:<br />
1. Remove Breech Bolt (Fig. 2) and make certain that there is no Syringe in the Barrel.<br />
2. Replace the Breech Bolt and put it into the ‘Locked’ position (Fig. 3).<br />
3. Place the Cocking Knob into the ‘Cocked’ position (Fig. 3) and fire the Projector repeatedly until the<br />
gas is exhausted from the chamber.<br />
To Unload Syringe From Projector<br />
1. Remove the Breech Bolt (Fig. 2).<br />
2. Insert a Cleaning Rod or some other round object (No more than 7/16” in diameter) into the Breech<br />
Bolt end of the Barrel and push the Syringe out of the Barrel just far enough to remove it by hand.<br />
To Charge Projector with CO2 Gas: See page 3<br />
1
Fig. 1<br />
<strong>Short</strong> <strong>Range</strong> Projectors are Shipped<br />
‘Under Pressure’ with CO2 (Unless Noted)<br />
Note: Danger Tags<br />
Fig. 2<br />
Breech Bolt Removed<br />
for Loading Syringe<br />
CO2 is positioned<br />
as shown<br />
Tube Cap<br />
Breech Bolt in<br />
‘Locked’ Position<br />
Cocking Knob in<br />
‘Cocked’ Position<br />
Fig. 3<br />
2<br />
Safety
Fig. 5<br />
Tube Cap<br />
Long <strong>Range</strong> Uses (2) CO2<br />
First goes Neck Down<br />
Second Goes Neck Up<br />
Tube Cap<br />
Mid-<strong>Range</strong> Uses (2) CO2<br />
First goes Neck Down<br />
Second goes Neck Up<br />
Tube Cap<br />
<strong>Short</strong> <strong>Range</strong> Uses (1) CO2<br />
Neck Down<br />
Replacing the CO2 Gaspaks on All Projectors<br />
1. Remove the Breech Bolt and make certain there is no Syringe in the Barrel of the Projector.<br />
2. Replace the Breech Bolt, placing it in the ‘Locked’ position (Fig. 2, 3 & 4).<br />
3. A. On the Mid and <strong>Short</strong> <strong>Range</strong> Projectors place the Cocking Knob in the ‘Cocked’ position and fire<br />
the Projector repeatedly until the gas is exhausted from the Chamber. B. On the Long <strong>Range</strong> Projector,<br />
with the Cocking Knob in the ‘Fired’ position, push the Cocking Knob forward until the gas is exhausted<br />
from the Chamber. If you are unable to push the Cocking Knob forward, place the Cocking Knob in the<br />
‘Cocked’ position (Fig. 2) and fire the Projector repeatedly until the gas is exhausted from the Chamber.<br />
4. Unscrew and remove the Knurled Tube Cap (Fig. 5). Note: Always check to make sure the projector<br />
is not under pressure. If you can not turn it by hand, repeat steps 1-3. Note: Do not attempt to remove the<br />
Tube Cap with pliers or other tools. This could mean the Projector is still under pressure.<br />
5. Hold the Projector Barrel end down and the expended Gaspaks will drop out.<br />
6. A. On the Mid and <strong>Short</strong> <strong>Range</strong> Projectors, place the Safety in the ‘On’ position by pushing it in<br />
from the left. B. On the Long <strong>Range</strong> Projector, place the Cocking Knob in the ‘Safe’ position (Fig. 4).<br />
7. Insert the CO2 Gaspaks into the Gas Tube (Fig. 5). The <strong>Short</strong> <strong>Range</strong> Projector uses one (1) CO2<br />
Gaspak inserted neck down. The Mid and Long <strong>Range</strong> Projectors use two (2) CO2 Gaspaks. The first is<br />
inserted neck down and the second is inserted neck up (Fig. 5).<br />
8. Screw the Tube Cap (Fig. 5) firmly in place by hand. On the Mid and Long <strong>Range</strong> Projectors, back off<br />
the tube cap ¼ to ½ of a turn, this will allow the gas from the second Gaspak to be completely released<br />
into the Chamber.<br />
9. ‘Cock’ and fire the Projector to pierce the CO2 Gaspak(s). By firing the Projector several times, the<br />
Gas Chamber will be allowed to fill with CO2 gas and seal. The Projector is now ready to use.<br />
3
Cap-Chur Charges<br />
What Does A Cap-Chur Charge Do?<br />
When a Syringe contacts the target animal, the Cap-Chur Charge is automatically triggered and the<br />
expanding gas generated drives the Rubber Plunger forward, injecting the animal with the liquid carried<br />
in the Syringe. Note: You must use a Cap-Chur Charge each time you fire the Syringe, you Do Not need<br />
to use a Cap-Chur Charge for Target Practice.<br />
There are three strengths of Cap-Chur Charges:<br />
50 Cap-Chur Charges<br />
For 1cc Thru 3cc Syringes Part # 2361<br />
Store in a cool, dry and safe place<br />
KEEP OUT OF REACH OF CHILDREN<br />
Manufactured in the USA by<br />
Palmer Cap-Chur Equipment<br />
421 Tidwell Rd, Powder Springs, Ga. 30127<br />
770-942-4395<br />
Cartridges for weapons, inert projectile-Class 1.4S<br />
1-3cc Cap-Chur Charges<br />
(Yellow/Black)<br />
50 Cap-Chur Charges<br />
For 4cc Thru 10cc Syringes Part # 2363<br />
Store in a cool, dry and safe place<br />
KEEP OUT OF REACH OF CHILDREN<br />
Manufactured in the USA by<br />
Palmer Cap-Chur Equipment<br />
421 Tidwell Rd, Powder Springs, Ga. 30127<br />
770-942-4395<br />
Cartridges for weapons, inert projectile-Class 1.4S<br />
4-10cc Cap-Chur Charges<br />
(Orange /Black)<br />
50 Cap-Chur Charges<br />
For 15cc & 20cc Syringes Part # 2365<br />
Store in a cool, dry and safe place<br />
KEEP OUT OF REACH OF CHILDREN<br />
Manufactured in the USA by<br />
Palmer Cap-Chur Equipment<br />
421 Tidwell Rd, Powder Springs, Ga. 30217<br />
770-942-4395<br />
Cartridges for weapons, inert projectile-Class 1.4S<br />
15cc Cap-Chur Charges<br />
(White/Red)<br />
Note that one end of the Cap-Chur Charge is solid with rounded ends. The other end also has a<br />
rounded end but the center can be pushed down (‘Swaged’ end). The solid end must be put into<br />
the Rubber Plunger for the Syringe to work properly. Note: Be careful not to use any object that<br />
will fit inside the charge. This could cause the firing pin to strike the primer.<br />
4
<strong>Instruction</strong>s for Loading the Cap-Chur Syringe<br />
Any time you are working with medication, use the correct protocol.<br />
(I.e. Rubber Gloves, Eye Protection, and Face Mask)<br />
1. Lubricate the Rubber Plunger with Silicone Lubricant (Plunger Lube). Note: Keeping Rubber<br />
Plungers pre-lubricated in small bag or jar saves time and they last longer.<br />
2. Using the clear plastic rod labeled ‘Positioner’, push the Rubber Plunger through the inside of the<br />
Syringe Barrel twice. Once the inside of the Syringe Barrel is properly lubricated you should get several<br />
shots before you will need to repeat this process.<br />
3. Place the Cap-Chur Charge into the Rubber Plunger. The solid end is inserted into the Rubber Plunger<br />
with the ‘Swaged’ end, the end that can be pushed in and out, pointing toward the Tail Piece (see page 5).<br />
The threads are the same on either end of the Syringe Barrels so it does not matter which end you place<br />
the Tail Piece or the Needle.<br />
4. Insert the Rubber Plunger containing the Cap-Chur Charge into the Syringe Barrel.<br />
5. Screw the Tail Piece onto the Syringe Barrel until the O-ring is at least half way into the Syringe<br />
Barrel or until it is tight (hand tight only). The Tail Piece will position the Rubber Plunger and Cap-Chur<br />
Charge inside the Syringe Barrel, so you do not have to guess how far to push the Rubber Plunger down<br />
into the Syringe Barrel.<br />
6. Holding the Syringe Barrel Tail Piece down you are now ready to load your medication. Do so by<br />
using a hand Syringe. Inject the amount of medication you will be using into the Syringe Barrel. If<br />
medication does not fill the Syringe to bottom of the threads, finish filling it with sterile water. Note:<br />
Always fill the Syringe to bottom of threads. Screw the Nose Plug and Needle onto the Syringe Barrel<br />
until the O-ring is at least ½ way into the Syringe Barrel or until it is tight (hand tight only).<br />
7. After you recover the Syringe, always remove the Tail Piece first to release any pressure remaining in<br />
the Syringe.<br />
5
<strong>Instruction</strong>s for Loading the Air Inject Syringe<br />
Any time you are working with medication, use the correct protocol.<br />
(I.e.: Rubber Gloves, Eye Protection, and Face Mask)<br />
1. Lubricate the Rubber Plunger with Silicone Lubricant (Plunger Lube). Note: Keeping Rubber<br />
Plungers pre-lubricated in small bag or jar saves time and they last longer.<br />
2. Using the clear plastic rod labeled ‘Positioner’, push the Rubber Plunger through the inside of the<br />
Syringe Barrel twice. Once the inside of the Syringe Barrel is properly lubricated you should get several<br />
shots before you will need to repeat this process.<br />
3. Replace the Rubber Plunger into the Syringe Barrel. Rotate the Tail Piece 180° from the picture above<br />
and use the end of the Tail Piece with the (orange) Syringe Tail Plug to push the Rubber Plunger into the<br />
Syringe Barrel. This will provide the space needed for the air pressure to empty the Syringe.<br />
4. Screw the Air Inject Tail Piece onto the end of the Syringe Barrel with the Rubber Plunger until the<br />
O-ring is at least half way into the Syringe Barrel or until it is tight (hand tight only).<br />
5. Using a Hand Syringe put the medication you will be using into the Syringe Barrel. If medication<br />
does not fill Syringe to bottom of threads, finish filling with sterile water. Note: Always fill the Syringe to<br />
bottom of threads. Screw the Needle onto the Syringe Barrel until the O-ring is at least half way into the<br />
Syringe Barrel or until it is tight (hand tight only). With the Air Inject Tail Piece you must use a Side Port<br />
Needle only. After you have put the Needle on the Syringe Barrel, slide the Side Port Needle Seal over<br />
the Side Port Needle holes. A little silicone makes the Side Port Needle Seal work better. Now you are<br />
ready to pressurize the Syringe.<br />
6. Remove the ‘orange’ Syringe Tail Plug from the Tail Piece. This is where you will pressurize the<br />
Syringe. Using a regular Hand Syringe (without a needle on it) put air into the Tail Piece. Note: Make<br />
sure you have the Hand Syringe plunger all the way back before you put it into the Tail Piece. It takes<br />
from 3-5 cc of air to empty 1cc, 2cc, 3cc and 4cc Syringes. With the 5cc and 7cc Syringes, you may need<br />
to put in 10cc of air Note: Before you pressurize the syringe, make sure you have the needle seal over the<br />
Side Port Needle holes and the tail piece is tight. Always point the syringe away from your face and away<br />
from anyone else when you are pressurizing the syringe. Replace the (orange) Syringe Tail Plug back into<br />
the rear of the Air Inject Tail Piece (where you put air into the Syringe). The Syringe is now loaded and<br />
ready to use. Note: The Syringe Tail Plug must be in place to protect the Air Valve from damage when the<br />
Syringe is shot from the Projector.<br />
7. After you recover the Syringe, always remove the Tail Piece first to release any pressure remaining in<br />
the Syringe.<br />
6