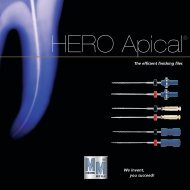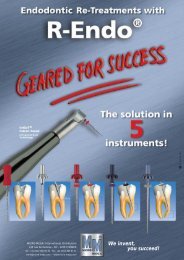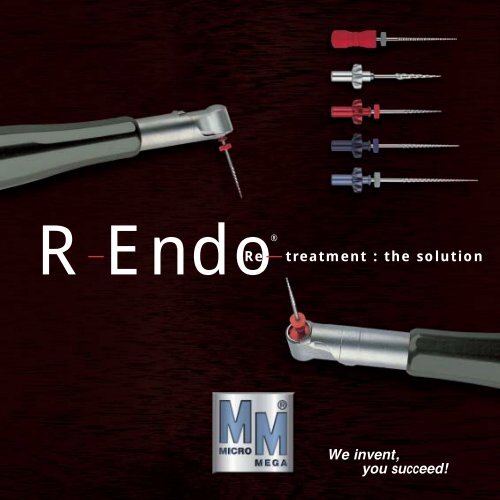
R—Endo® Re—treatment - Micro Mega
R—Endo® Re—treatment - Micro Mega
R—Endo® Re—treatment - Micro Mega

You also want an ePaper? Increase the reach of your titles
YUMPU automatically turns print PDFs into web optimized ePapers that Google loves.
<strong>R—Endo®</strong><br />
Re— treatment : the solution<br />
We invent,<br />
you succeed!
We invent R-Endo ® .<br />
You succeed your retreatments.<br />
Summary<br />
● Introduction . . . . . . . . . . . . . . . . . . . . . . . . . . . . . . . . . . . . . . . . . . . . . . . . . . . . . . . . . . . . . . . . . . . . . . . . page 4<br />
● Instruments . . . . . . . . . . . . . . . . . . . . . . . . . . . . . . . . . . . . . . . . . . . . . . . . . . . . . . . . . . . . . . . . . . . . . . . .page 6<br />
● Protocol . . . . . . . . . . . . . . . . . . . . . . . . . . . . . . . . . . . . . . . . . . . . . . . . . . . . . . . . . . . . . . . . . . . . . . . . . . . page 8<br />
● Benefits . . . . . . . . . . . . . . . . . . . . . . . . . . . . . . . . . . . . . . . . . . . . . . . . . . . . . . . . . . . . . . . . . . . . . . . . . . page 14<br />
● Frequently asked questions . . . . . . . . . . . . . . . . . . . . . . . . . . . . . . . . . . . . . . . . . . . . . . . . . . . . . . . . . page 16<br />
● Clinical cases . . . . . . . . . . . . . . . . . . . . . . . . . . . . . . . . . . . . . . . . . . . . . . . . . . . . . . . . . . . . . . . . . . . . . page 19
Introduction<br />
Endodontic Re-Treatment (ERT) is needed following the failure of an initial<br />
endodontic treatment due to an incomplete or inappropriate filling with or<br />
without apical periodontite, untreated canal, broken instrument, clinical<br />
and X-ray associated signs● The goal is the "ad integrum" healing of the<br />
existing pathology●<br />
This difficult procedure is done after clinical and radiographical analysis<br />
and from the moment that it can be implemented without any iatrogenic risk<br />
to the tooth● Any over treatment must be avoided●<br />
The ERT comprises two steps: coronal conditioning precedes re-preparation<br />
of the canal● The latter can be achieved with a specific sequence using<br />
NiTi rotary instruments called R-Endo ® , this is the first total concept<br />
dedicated to ERT●<br />
In the same way as for HERO 642 ® and HERO Shaper ® , the R-Endo ® sequence<br />
has been developed by the R&D Laboratory of MICRO-MEGA ® . It is adapted to<br />
the materials generally encountered during ERT such as gutta percha and<br />
filling pastes●<br />
Efficiency, flexibility, parietal cleaning of the canal, respect of the canal<br />
anatomy, safety and short procedural time are the major advantages●<br />
R-Endo ® files allow apical irrigation to aid the disinfection of the apical<br />
zone and ideal preparation of the canal for three-dimensional filling●
R-Endo ® / InGeT ®<br />
the first total<br />
R-Endo ® : first method<br />
for the endodontic retreatment<br />
●<br />
●<br />
●<br />
●<br />
A simple protocol with 5 instruments.<br />
Files especially dedicated to ERT:<br />
tapers, pitches and lengths are<br />
adapted to each zone of the canal<br />
space.<br />
Efficient removal of the previous<br />
filling material.<br />
Parietal cleaning of the root canal.<br />
●<br />
●<br />
●<br />
Clear and easy identification<br />
of the file: the colour of the handle<br />
gives its taper.<br />
Respect of the initial canal path.<br />
Reproducible results.<br />
● Canal preparation after R-Endo ®<br />
allows obturation with your usual<br />
filling method.<br />
4
concept for ERT<br />
Rm<br />
Re<br />
R1<br />
R2<br />
R3<br />
5
Innovative instr<br />
Simplicity<br />
Efficiency<br />
Comfort<br />
Rapidity<br />
Safety<br />
Serenity<br />
TECHNOLOGICAL ADVANCE:<br />
InGeT ® (Integrated Gear Technology)<br />
= The driving gear is part<br />
of the rotary file.<br />
Miniaturised head<br />
Ergonomics<br />
Extremely simple head mechanism<br />
Improved asepsis<br />
6
uments<br />
Rm File<br />
Hand file - Stainless steel<br />
.04 taper - n°25<br />
Red manual handle<br />
Grey rubber stop<br />
Re<br />
NiTi<br />
.12 taper - n°25<br />
12 mm<br />
17 mm<br />
10 mm<br />
15 mm<br />
R1<br />
NiTi<br />
.08 taper - n°25<br />
Red handle<br />
Red rubber stop<br />
15 mm<br />
8 mm<br />
R2<br />
NiTi<br />
.06 taper - n°25<br />
Black handle<br />
Black stop<br />
19 mm<br />
12 mm<br />
R3<br />
NiTi<br />
.04 taper - n°25<br />
Grey handle<br />
Grey rubber stop<br />
Rs Optional finishing file<br />
NiTi .04 taper - n°30<br />
Grey handle, blue ring<br />
Grey rubber stop<br />
23 mm<br />
16 mm<br />
7
Pre-operative analysis<br />
The procedure for canals filled with gutta percha, paste and cement.<br />
■ 1.<br />
■ 2.<br />
■ 3.<br />
■ 4.<br />
■ 5.<br />
■ 6.<br />
Pre-operative X-ray.<br />
Placing of rubber dam.<br />
Removal of coronal restorations<br />
and radiculare posts.<br />
Access re-opening.<br />
Visual and tactile analysis<br />
of filling material(s).<br />
Solvent choice.<br />
Advice<br />
& recommendations<br />
■ Medical examination / rubber dam / eye protection.<br />
■ Pre-operative analysis to decide the use of Rm and Re.<br />
■ NiTi rotary instrument technique must be mastered.<br />
■ Frequent solvent renewal.<br />
■ Use alternately solvent and NaOCI. The nearer you get to the apex<br />
use less solvent and more NaOCl.<br />
8
Operative sequence<br />
A protocol in 5 main steps.<br />
1 Rm hand file<br />
Place selected solvent in the pulp chamber.<br />
Operating procedure<br />
■ 1/4 turn with pressure<br />
directed towards apex.<br />
■ Removal.<br />
Function<br />
■ Used to dig or break the hard layer<br />
of filling material.<br />
■ Allows the centring and alignment<br />
of the next instrument.<br />
■ As soon as possible check the working length.<br />
■ If possible check the apical patency.<br />
■ At the end of the preparation, ensure the complete removal<br />
of the debris from the previous filling using an X-ray.<br />
■ In curved canals:<br />
- Same precaution as for any kind of NiTi instrument must be observed<br />
to avoid false canal creation.<br />
- Introduction of a pre-curved hand file MMC n°10 is necessary prior<br />
to penetration with R-Endo ® files.<br />
9
Operative sequence<br />
Rotation speed: 300 to 400 rpm.<br />
1-3 mm<br />
2<br />
Re<br />
Operating procedure<br />
■ Canal penetration: 1 to 3 mm<br />
under pulp chamber floor<br />
without having to force the<br />
instrument.<br />
■ Apical pressure control, stop<br />
as soon as instrument requires<br />
force to penetrate.<br />
■ Circumferential filing.<br />
Solvent renewal.<br />
Function<br />
■ Straightening the wall<br />
of the access cavity.<br />
■ Eliminating the possible<br />
interference or dentine<br />
overhang.<br />
■ Flaring the access space<br />
in order to increase<br />
the solvent quantity.<br />
■ Eliminating the initial<br />
constraints.<br />
Use the Rm file for the same reasons as previously.<br />
10
Operative sequence<br />
3<br />
R1<br />
Operating procedure<br />
■ Canal penetration through<br />
repeated limited pushing<br />
actions in apical direction<br />
(push and retain).<br />
■ Preparation from the<br />
coronal third to the<br />
beginning of the middle<br />
third.<br />
Function<br />
■ Eliminating the filling material<br />
in the coronal third.<br />
■ Clearing the canal in the coronal<br />
third.<br />
■ Canal shaping ready for<br />
the next instrument.<br />
Rinsing of the solvent with hypochlorite.<br />
Passage of a pre-curved MMC file n°10 21 mm.<br />
If apical limit is reached without forcing, measure<br />
the working length WL (X-ray and/or apex locator).<br />
To be made with hypochlorite. If necessary after<br />
evaluation use alternately solvent and hypochlorite.<br />
11
Operative sequence<br />
4<br />
R2<br />
Operating procedure<br />
■ Canal penetration through<br />
repeated limited pushing<br />
actions in apical direction<br />
(push and retain).<br />
■ Preparation from the middle<br />
third to the beginning of<br />
the apical third. Never pass<br />
the length reached with<br />
the MMC.<br />
Function<br />
■ Eliminating filling material<br />
and constraints in the middle<br />
third.<br />
■ Canal shaping ready for<br />
the next instrument.<br />
Rinsing with hypochlorite.<br />
Apical limit search with MMC file n°10.<br />
WL determination (if not reached previously).<br />
12
Operative sequence<br />
5 R3 Rinsing with hypochlorite.<br />
Operating procedure<br />
■ Canal penetration through<br />
repeated limited pushing<br />
actions in apical direction<br />
(push and retain).<br />
■ Insert R3 to WL or near WL<br />
according to the canal<br />
anatomy.<br />
Function<br />
■ Eliminating filling material<br />
in the apical third.<br />
■ Shaping of the apical third.<br />
13<br />
Circumferential filing movement from apical third to coronal third<br />
with R2 and/or R3. Finishing with Rs if required by the apical diameter.
Benefits<br />
A miniaturised head<br />
● Very compact head: 6.5 mm diameter and 7.5 mm high.<br />
● Increased visibility of the operative field.<br />
● Better visibility of the instrument when it is inserted<br />
in the canal and a better vision of the instrument working.<br />
This is particularly interesting when treatment is made<br />
under magnification (magnifying loupe or microscope).<br />
● Exceptional working comfort.<br />
Standard head<br />
InGeT ® <strong>Micro</strong> head<br />
Superimposed heads<br />
Standard head and<br />
InGeT ® <strong>Micro</strong> head<br />
Standard head<br />
InGeT ® <strong>Micro</strong> head<br />
Superimposed heads<br />
Standard head and<br />
InGeT ® <strong>Micro</strong> head<br />
14
Benefits<br />
Extremely simple<br />
head mechanism:<br />
● Less interfaces more reliability.<br />
● Reduced maintenance.<br />
● Less vibrations.<br />
● Greater ease of cleaning.<br />
● More safety.<br />
Improved asepsis<br />
● Easy fitting of the files<br />
on the contra-angle.<br />
● No contact between<br />
fingers and files.<br />
● A hollow head for<br />
a better hygiene.<br />
Ergonomics<br />
Excellent stability in the hand.<br />
Straight handle as an extension of the hand:<br />
● Better tactile sensibility.<br />
● Easy access to the operating field.<br />
● Better access to posterior teeth.<br />
● Increased working accuracy.<br />
A head angle especially designed for an excellent<br />
visibility and easier work in the most difficult<br />
access zones.<br />
Economy of movement due to the contra-angle /<br />
tray / files concept.<br />
15
Frequently asked questions<br />
■ Is the solvent essential?<br />
The solvent is essential when the filling paste is too hard to<br />
be easily broken with Rm file or eliminated with files R1 and<br />
R2. Solvent used must be limited in quantity in order to limit<br />
the creation of difficult to remove sludge. However the<br />
solvent must be renewed frequently. Solvent is placed in the<br />
pulp chamber with a pipette or with tweezers. To avoid<br />
irritation of the peri-apical zone solvent must be used only<br />
in the coronal 2/3.<br />
■ How do I choose the solvent?<br />
Initial examination of the X-ray prior to ERT and visual<br />
examination of the canal access further to the coronal<br />
re-preparation enable identification of the filling material to<br />
be removed (paste, gutta percha points, condensed gutta<br />
percha). Initial probing with the manual file Rm can help<br />
identify the type of paste, then the type of solvent which<br />
must be used.<br />
■ Do I have to use Re each time when beginning the<br />
ERT?<br />
Re is useful only when a dentinal overhang at the coronal<br />
entrance has to be removed. Re (.12 taper) prepares the<br />
passageway for the R1 file and allows it to work safely and<br />
efficiently.<br />
■ What must I do if R3 does not progress in canal<br />
after R2?<br />
In that case it is necessary to again use a pre-curved n°10<br />
MMC file beyond the R3 preparation to re-find the canal<br />
opening. If the latter is difficult, Rm can be used.<br />
■ When do I have to validate the WL?<br />
WL is measured as soon as possible according to the speed<br />
and ease with which the R-Endo ® files progress toward the<br />
apex.<br />
■ Why is the Rm file not made of Nickel-Titanium?<br />
To break the filling material at the canal entrance, Rm was<br />
designed to work like a dagger. Only stainless steel can<br />
satisfy this requirement due to its rigidity. Moreover the .04<br />
taper and the 0.25 mm tip diameter give enough rigidity to<br />
avoid easy bending of the file when the canal entrance is<br />
searched.<br />
■ How to measure WL?<br />
WL is measured with an apex locator as Apex Pointer TM or<br />
with an X-ray.<br />
■ Is it necessary to pass a MMC file between each<br />
R-Endo ® file?<br />
Passing a manual file allows it to lance the residual dentinal<br />
sludge so that sludge is easier to eliminate with NaOCl<br />
irrigation. It can check the canal is empty.<br />
16
Frequently asked questions<br />
■ Do I have to obtain and/or check the apical<br />
patency? And how to do it?<br />
If possible it is useful to obtain and check the apical patency<br />
at the end of the preparation. A MMC file n°10 lightly<br />
pre-curved is sufficient and non-aggressive to do so.<br />
■ Can I fill the canal after R3 if it has reached the<br />
WL?<br />
R3 prepares the canal at a .04 taper and a diameter of 0.25<br />
mm, so it is possible to obturate in most cases. According<br />
to the clinical situation, if the filling needs a larger diameter<br />
or taper Rs can be used.<br />
■ What is the goal of Rs?<br />
As already said, Rs is an HERO Shaper ® n°30 .04 taper.<br />
This is an optional finishing file which can be used when<br />
preparation larger than 0.25 mm is needed.<br />
■ With which R-Endo ® file, and when can I do the<br />
circumferential filing?<br />
Re and R3 (and to some extent R2) were designed for<br />
circumferential filing in stepping back. Circumferential<br />
filing will be done with Re as with ENDOFLARE ® . With R2<br />
and R3 it will be practiced respectively in the middle third<br />
and in the apical third.<br />
■ Do I have to push on the R-Endo ® files to search<br />
the canal?<br />
The R-Endo ® files have a non active tip. Excessive pressure<br />
does not allow the canal catheterism if the canal aperture<br />
is not opened. The risk of going the wrong way and of<br />
“screwing” effect are increased by excessive pressure on<br />
the wrong axis.<br />
■ What can I do if the R-Endo ® files are too short?<br />
Generally the access is sufficient due to the re-preparation<br />
of the coronal chamber and the removal of the previous<br />
restorations and dentinal curretage of recurring caries. The<br />
R-Endo ® files are designed to give working length adapted<br />
to the ERT with a maximum of efficiency for each taper. Re,<br />
R1 and R2 are shorter because they are used in the coronal<br />
and middle part. If the canal input is not accessible a<br />
coronal reduction will be made for better access.<br />
■ Is the recommended sequence of the R-Endo ® files<br />
rigid?<br />
Each file is designed to work in each part of the canal to<br />
be re-treated. Each file allows the passage of the next<br />
instrument and preparation in safe conditions.<br />
Nevertheless the clinical situation (eg very large and<br />
tapered canal) can justify a shortening of the R-Endo ®<br />
sequence.<br />
17
Frequently asked questions<br />
■ Can I use R-Endo ® for retreatment in canals filled<br />
with resin paste?<br />
ERT of resin paste filled canal is due to inappropriate initial<br />
treatment. Often the resin paste is present only in the first<br />
third or half of the canal. It is in this area that the most<br />
tapered files Re and R1 will work with high efficiency.<br />
Those files can be used at a higher speed, because in this<br />
zone the canal is larger and more tapered. Below this zone,<br />
the resin paste is generally less dense and less hard, so it<br />
is easier to remove. Rm can facilitate the preparation with<br />
the “ad hoc” solvent.<br />
■ Can I remove silver points with R-Endo ® files?<br />
Re can remove silver points when circumferential filing<br />
with drawing back movement is done. Nevertheless, it is<br />
necessary a n°10 MMC file has been passed beyond the<br />
point in order to totally eliminate it.<br />
■ How many canals can I re-treat with the R-Endo ®<br />
files?<br />
5 to 8 canals can be re-treated with the R-Endo ® files.<br />
Nevertheless, as for HERO 642 ® and HERO Shaper ® , in case<br />
of high stress, used files must be discarded. Scrupulous<br />
checking of the files after treatment is necessary. Discard<br />
any file showing a deformation (“unspiralisation”). Thus the<br />
number of canals you can treat depends on the stress<br />
applied to the instruments.<br />
■ Do I still need Gates Glidden?<br />
Gates Glidden are too rigid, they are not recommended for<br />
ERT. As the risk of creating a false canal, stripping and<br />
canal wall abrasion are increased due to their lack of<br />
flexibility. And their 0.70 mm diameter does not allow them<br />
to keep adequately dentine structures.<br />
■ Is it necessary to clean the files between 2<br />
passages?<br />
The grooves of the R-Endo ® files filled with residues of<br />
filling material will be less efficient. Moreover, risks of<br />
"unspiralisation" are high as the file can not make the parietal<br />
work efficiently. The R-Endo ® files can be cleaned with a<br />
NaOCl impregnated swab.<br />
■ Can I use R-Endo ® for an initial endodontic<br />
treatment?<br />
Using the R-Endo ® files for the initial endodontic treatment<br />
is extremely inadvisable. Each file (R1 R2 R3) has an adapted<br />
length coupled with a specific pitch and an innovative<br />
profile which allow them to work in semi solid filling<br />
materials such as gutta percha and pastes in order to better<br />
remove them.<br />
The initial endodontic treatment is best achieved using the<br />
HERO Shaper ® files which are less rigid and more adapted<br />
to the work on dentinal walls. They are designed to reach<br />
the apical zone using in most cases 2 instruments.<br />
18
Clinical cases<br />
ERT on 44 (LR4)<br />
Pre-operative X-ray.<br />
ERT on 44 (LR4)<br />
Post-operative X-ray.<br />
Initial endodontic<br />
treatment on 45 (LR5).<br />
Reproducibility ERT/Initial<br />
endodontic treatment is<br />
shown on these 2 premolars.<br />
ERT on 26 (UL6)<br />
and 27 (UL7)<br />
Pre-operative X-ray.<br />
ERT on 26 (UL6)<br />
Post-operative X-ray.<br />
ERT on 26 (UL6)<br />
and 27 (UL7)<br />
Post-operative X-ray<br />
after 1 month.<br />
ERT on 46 (LR6)<br />
Pre-operative X-ray.<br />
ERT on 46 (LR6)<br />
Control of the initial<br />
filling elimination.<br />
ERT on 46 (LR6)<br />
Filling after ERT.<br />
ERT on 46 (LR6)<br />
Post-operative control<br />
after 1 month.<br />
ERT on 46 (LR6)<br />
Post-operative control<br />
after 6 months.<br />
19<br />
Clinical cases: Dr J.Ph. Mallet et le Pr E. Deveaux.
• ENDODONTICS<br />
• HANDPIECES<br />
AND CONTRA-ANGLES<br />
• OBTURATION<br />
• AIR PROGRAMME<br />
• HYGIENE<br />
MICRO-MEGA ® International Distribution<br />
133, rue de Genève - CH - 1226 THÔNEX<br />
Tel. +41 (0)22 860 85 30<br />
Fax +41 (0)22 860 85 31<br />
Email: mmid@micro-mega.com<br />
www.micro-mega.com<br />
02/04 - Ref. 60301472 - MICRO-MEGA ® reserves the right to modify the characteristics of its instruments without notice.