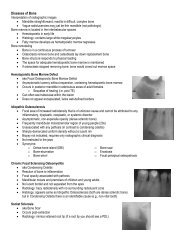
Pedo Competency.pdf
Pedo Competency.pdf
Pedo Competency.pdf

You also want an ePaper? Increase the reach of your titles
YUMPU automatically turns print PDFs into web optimized ePapers that Google loves.
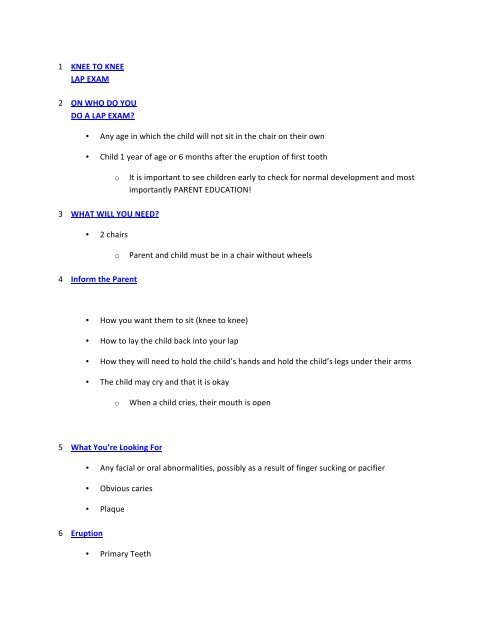
1 KNEE TO KNEE <br />
LAP EXAM <br />
2 ON WHO DO YOU <br />
DO A LAP EXAM? <br />
• Any age in which the child will not sit in the chair on their own <br />
• Child 1 year of age or 6 months after the eruption of first tooth <br />
o<br />
It is important to see children early to check for normal development and most <br />
importantly PARENT EDUCATION! <br />
3 WHAT WILL YOU NEED? <br />
• 2 chairs <br />
o<br />
Parent and child must be in a chair without wheels <br />
4 Inform the Parent <br />
• How you want them to sit (knee to knee) <br />
• How to lay the child back into your lap <br />
• How they will need to hold the child’s hands and hold the child’s legs under their arms <br />
• The child may cry and that it is okay <br />
o<br />
When a child cries, their mouth is open <br />
5 What You’re Looking For <br />
• Any facial or oral abnormalities, possibly as a result of finger sucking or pacifier <br />
• Obvious caries <br />
• Plaque <br />
6 Eruption <br />
• Primary Teeth
o<br />
o<br />
o<br />
20 in number (A-‐T) <br />
Erupt from 6 to 30 months <br />
Begin formation in utero <br />
<br />
as well as the 1 st permanent molar <br />
o<br />
Pattern: <br />
<br />
<br />
<br />
<br />
<br />
Mandibular centrals & laterals (n,o,p,q) <br />
Maxillary centrals & laterals (d,e,f,g) <br />
1 st primary molars (b,i,l,s) <br />
Canines (c,h,m,r) <br />
2 nd primary molars (a,j,k,t) <br />
7 Oral Hygiene Instruction <br />
• Talk with parent about: <br />
o<br />
Brushing & flossing the child’s teeth <br />
<br />
Needs to be done twice a day with a toothbrush or cloth <br />
<br />
Only use toothpaste if child is able to spit the toothpaste out and not <br />
swallow it. <br />
<br />
<br />
Toothbrush should be replaced every couple of months or when the bristles <br />
become flared <br />
Flossing should be done everyday <br />
<br />
<br />
Flossing cleans between teeth where a toothbrush can’t reach <br />
Flossing isn’t needed if all contacts are visually open <br />
o<br />
No bottles or breast feeding at bedtime or throughout the night <br />
<br />
This can lead to baby bottle decay and can form a bad habit for the child <br />
<br />
primarily seen on max anterior teeth <br />
<br />
Suggest using water instead of milk
8 Oral Hygiene Instruction <br />
o<br />
Avoiding sugared drinks and candy throughout the day <br />
<br />
<br />
Do not put sugared drinks in bottles or sippy cups <br />
Suggest that parent may limit the consumption of sugary drinks to meal times <br />
o<br />
Fluoride <br />
<br />
<br />
<br />
Can apply fluoride varnish if child is cooperative <br />
If incipient lesion found <br />
Discuss: <br />
<br />
<br />
<br />
<br />
Proper Fl amounts <br />
Dietary sources of Fl for infants and children <br />
Water fluoridation <br />
Mechanical action of Fluoride <br />
9 Fluoride Chart
10 After Exam <br />
• Give parent child’s home care kit, which should include <br />
o<br />
o<br />
o<br />
Age appropriate toothbrush <br />
Floss <br />
Toothpaste <br />
• Document everything that you and the parent talked about during the exam <br />
o<br />
o<br />
o<br />
OHI, response from parent, etc. <br />
Record detailed medical and dental histories <br />
Frankel Rating (1-‐4) <br />
<br />
4 being the best behavior <br />
• Place patient on 6 month recall <br />
• If caries found <br />
o<br />
provide treatment
o<br />
give appropriate referral
1 Class II Amalgams in the Primary Dentition <br />
• By: Yacoub Al-‐Abwah <br />
• Class of 2007 <br />
2 Class II amalgam restorations <br />
• Amalgam restorations are useful in children. <br />
• The technique is not as critical as when placing composites restorations . <br />
• It has been shown that the success rate is 70-‐80% when treating early to moderate <br />
interproximal lesions. <br />
3 Obtain adequate anesthesia and field isolation <br />
• This can be challenging in children when cooperation is an issue. <br />
• Rubber dam isolation helps in securing a better field of vision, as well as keeping the tongue <br />
out the way. <br />
• Do not start until the patient is profoundly anesthetized! <br />
4 Proceed with preparation <br />
• Prepare the occlusal surface using a 330, round diamond, or small pear shaped burs. <br />
• Do not extend to include all fissures but be sure to include all susceptible fissures and pit. <br />
• The depth should be 0.5 into dentin and make sure to include isthmus and dovetail for <br />
retention. <br />
• Gingival and buccolingual contacts should be just slightly open so the T-‐band can go through <br />
and can be placed firmly around the tooth. <br />
• Do not make the gingival wall too deep or you will have a narrow gingival seat because of the <br />
cervical constriction of the primary teeth. <br />
5 Preparation <br />
• Occlusal View <br />
6 Preparation <br />
7 Finishing the preparation
• Deep caries should be remove using a spoon excavator or slow speed handpiece with a <br />
round bur. <br />
• Be sure to bevel the axio-‐pulpal line angle and smooth the enamel walls. <br />
• Be sure the isthmus width is adequate as it is the most common site of amalgam failure. <br />
• If the preparation is moderately deep use of light-‐cured GI liner is indicated. <br />
• If preparation is close to the pulp chamber a liner should be used. <br />
8 Preparation consideration <br />
• The proximal box should be broader at the cervical than at the occlusal surface. <br />
• The axial wall of the proximal box should be 0.5mm into dentin(1mm mesiodistal width of <br />
the gingival seat) and should follow the same contour as the outer proximal contour. <br />
• No buccal or lingual retentive grooves are necessary in the proximal box. <br />
9 Proceed to Amalgam placement <br />
• The T-‐band should be adapted around the tooth. <br />
• Place wooden wedge beneath the gingival seat from the lingual embrasure. However, <br />
sometimes it is fine to place it from the facial to obtain solid contact. <br />
• Insert the amalgam incrementally, be sure to condense it well! <br />
• Use of a small condenser may help with condensation. <br />
10 Amalgam placement <br />
• T-‐Band and wedge <br />
11 Restoration adjustment <br />
• A slight overfill of the restoration may be helpful. <br />
• The occlusal should be carved using a small ball burnisher and cleoid-‐discoid carver. <br />
• An explorer may be used to obtain good form of the marginal ridge. <br />
• Remove the T-‐band and remove excess amalgam at the margins.
• Pass floss through to ensure solid contact and remove debris. <br />
12 Touch it up! <br />
• Final restoration <br />
13 Check Occlusion <br />
• Remove rubber dam. <br />
• Adjust occlusion after checking with articulating paper. <br />
14 Post operative instructions <br />
• Before dismissing the patient remember to give post operative instructions to the parent <br />
and the child. The following should be emphasized: <br />
• 1-‐anesthesia: avoid biting on the <br />
• anesthetized tissue. <br />
• 2-‐amalgam: avoid eating hard food on the <br />
• side where the amalgam was placed for the <br />
• rest of the day. <br />
•<br />
15 Thank you
1 Pulpotomy on Primary Teeth <br />
2 Pulpotomy on Primary Teeth <br />
• DEFINITION: It is a type of endodontic treatment, which involves the removal of the coronal part <br />
of the pulp. <br />
• The pulp contains connective tissue with cells, nerve fibers and blood vessels, encased by the <br />
dentinal tissue. <br />
• The pulp is contained in the inner root canals and pulp chamber. <br />
3 Pulpotomy on Primary Teeth Indications <br />
• Pulpal diagnosis: Reversible pulpitis. <br />
4 Reversible Pulpitis <br />
• Definition <br />
• Reversible inflammation of the pulp <br />
• Symptoms <br />
• Pain: Sharp, induced by stimuli cold/sweet <br />
• Duration: only while the stimuli present <br />
5 Reversible Pulpitis <br />
• Signs <br />
• Inspection: Caries / Erosion / Fracture <br />
• Palpation: WNL <br />
• Percussion: WNL <br />
• X-‐Ray: Caries in dentin / Fracture <br />
• Treatment <br />
• Remove cause, maintain the vitality of <br />
• the pulp
6 Contraindications for Pulpotomy <br />
7 Instruments Needed
8 Technique <br />
• Profound anesthesia for tooth and tissue. <br />
9 <br />
10 Technique <br />
• A rubber dam is a customized rubber sheet that fits over teeth held by a clamp and frame. <br />
Bacteria from the saliva will not get inside the teeth. This will provide an easier time cleaning <br />
out the bacteria and decay from inside the tooth. <br />
The patient is protected from debris or tiny instruments being swallowed. <br />
11 Technique <br />
• Amputate coronal pulp. <br />
• This is done by a round bur or <br />
• a spoon excavator. <br />
12 Technique
13 Technique <br />
• Apply dry cotton pellet to get hemostasis for 3-‐5 minutes. <br />
14 Technique <br />
15 Technique <br />
• Apply dampened formocresol pellet for 5 minutes to “mummify” or fix tissue. <br />
• Pulp stumps should appear dry after removing the cotton pellet. <br />
16 Technique <br />
17 Restore <br />
• Place IRM in amputated pulp space. Make sure to condense so the IRM fills the coronal chamber <br />
completely. <br />
18 Restore <br />
19 Restore <br />
• The elective type of restoration after a pulpotomy is a Stainless Steel Crown. <br />
20 Before & After Treatment Radiographs
21 Before & After Treatment Radiographs
22 Follow up of Pulpotomized Primary Teeth <br />
• Clinical and radiographic periodic observation of pulpotomized tooth are required. <br />
23 Works Cited <br />
• Ravel, Daniel. September 1995. “Pediatric Dental Health”. Retrieved from <br />
http://dentalresource.org/topic58pulpotomypulpectomy.html. <br />
• Pinkham, J.R., et al, 1999. Pediatric Dentistry: Infancy Through Adolescence, 3rd edition. <br />
1 Stainless Steel Crown <br />
on Primary Teeth <br />
2 Definition <br />
• Stainless Steel Crowns-‐ Silver colored crowns often used to restore heavily damaged primary <br />
teeth. A very sturdy restoration, and the teeth are shed normally in most cases. Also used as
interim restorations for adult molars when a permanent crown isn't feasible at the time. <br />
• Generally considered superior to large multisurface amalgam restorations <br />
• Longer clinical lifespan than two or three surface amalgam restorations <br />
• Manufactured in different sizes as a metal shell with some preformed anatomy and are <br />
trimmed and contoured as necessary to fit individual teeth <br />
3 Indications for SSC <br />
• Failure of other available restorative materials is likely to occur prior to the exfoliation of the <br />
tooth <br />
• Interproximal decay that extends into the dentin <br />
• Significant, observable cervical decalcification <br />
• Significant, observable developmental defects such as hypoplasia and hypocalcification <br />
• Following pulpotomy or pulpectomy procedure <br />
4 Indications for SSC, cont’d: <br />
• Restoring a primary tooth that is to be used as an abutment for a space maintainer <br />
• Fractured tooth <br />
• Restoration of teeth with hereditary anomalies such as dentinogenesis imperfecta or <br />
amelogenesis imperfecta <br />
• Restoration in disabled people or others in which oral hygiene is poor and failure of other <br />
materials is probable <br />
5 Contraindications for SSC <br />
• Decay is minimal and a class II restoration is more appropriate <br />
• Tooth is deemed unrestorable due to extensive decay <br />
• Tooth is going to exfoliate within a year <br />
6 Procedure <br />
• Evaluate preoperative occlusion <br />
o<br />
Note the cusp-‐fossa relationship bilaterally
7 Procedure <br />
• Anesthesia for tooth and surrounding soft tissue <br />
8 Procedure <br />
• Place rubber dam <br />
9 Procedure <br />
• Remove decay from tooth <br />
o<br />
Decay removed with a large, round bur in the slow-‐speed handpiece or with a spoon <br />
excavator <br />
10 Crown Preparation <br />
• Reduce occlusion 1.5mm with diamond bur on high-‐speed handpiece <br />
11 Crown Preparation <br />
• Break proximal contact with adjacent teeth <br />
• Contact must be broken both gingivally and buccolingually <br />
o<br />
This is done with a tapered diamond bur in the high-‐speed handpiece <br />
12 Crown Preparation <br />
• Gingival proximal margin should have a feather-‐edge finish line <br />
• Round all line angles <br />
13 Procedure <br />
• Select proper size stainless steel crown <br />
o<br />
o<br />
The proper size is the smallest crown that fits the tooth <br />
The crown margins should be 1mm subgingival <br />
14 Occlusion <br />
• Establish preliminary occlusal relationship <br />
o<br />
Compare crown to adjacent marginal ridges
• When seating crown, if blanching occurs, the crown is too long or is grossly overcontoured <br />
o<br />
o<br />
o<br />
Use sharp instrument to lightly mark gingival crest on crown <br />
Remove crown and trim to 1mm below the mark on the crown with crown and <br />
bridge scissors or a heatless wheel on the slow-‐speed handpiece <br />
Polish crown with rubber wheel to ensure smoothness and no rough edges <br />
15 SSC Adjustment <br />
(if there is blanching –lingual…. Touch up the crown dimensions with finishing burs and wheels…etc) <br />
16 SSC Adjustment <br />
17 Contour Crown <br />
• Contour and crimp the crown to form a tightly fitting crown <br />
• Firm resistance should be encountered when the crown is seated <br />
18 Occlusion <br />
• Remove rubber dam to do the final check of occlusion <br />
o<br />
o<br />
Examine occlusion bilaterally when patient is in centric occlusion <br />
Re-‐check for gingival blanching <br />
19 Cement Crown <br />
• Rinse and dry both crown and tooth <br />
• Place 2x2 inch gauze pad posterior to crown prep to prevent crown from dropping into <br />
oropharynx <br />
• Fill crown 2/3 full with cement <br />
o<br />
Glass ionomer or polycarboxylate cement work well <br />
20 Cement Crown <br />
• Use crown/band pusher to ensure complete seating <br />
• Have the patient bite down to assure that the occlusion has not been altered.
21 Cement Crown <br />
• Remove cement from gingival sulcus <br />
• Floss through contacts <br />
o<br />
Tie knot in floss and floss down through contacts and slide floss out <br />
22 Post-‐op Instructions <br />
• Explain to both parent and patient that the child is still numb and that they should not bite <br />
or pull on tissues under anesthesia <br />
• Give modified diet instructions <br />
o<br />
Child must stay away from sticky foods to avoid pulling stainless steel crown off <br />
23 References <br />
• Pinkham, J.R., et al, 1999. Pediatric Dentistry: Infancy Through Adolescence, 3rd edition. <br />
1 Maintenance of a Single Space With Band and Loop <br />
2 The Purposes of Band and Loop
• To maintain space… <br />
• When there is a missing primary molar unilaterally. <br />
• When there are missing lower primary molars bilaterally and when the lower permanent incisors have not eru<br />
permanent incisors are not present. <br />
3 The Purposes of Band and Loop <br />
• As a result: <br />
• Space will be maintained to prevent malocclusion such as ectopic eruption <br />
• Impaction of first or second premolars will be prevented due to the mesial drift of primary second molar or pe<br />
4 Indications of Space Maintainer <br />
• Some indications (in order of frequency): <br />
• Premature loss of primary tooth <br />
• Class I malocclusion <br />
• No permanent tooth to replace primary tooth and space maintenance is desired <br />
• Some class II and III <br />
• Ectopic eruption <br />
5 How is Space Lost Prematurely <br />
• Some examples of premature loss of primary teeth leading to loss of space: <br />
• Trauma <br />
• Severe decay that requires extraction <br />
• Missing primary teeth at birth <br />
• Ankylosis <br />
• Some diseases or conditions, including hypophosphatasia, diabetes and aggressive periodontitis <br />
6 Some Types of Band and Loop Space Maintainers <br />
• Bond the band directly on abutment tooth <br />
• Bond the band directly on stainless steel crowned abutment tooth
7 How to Choose the Correct Band <br />
• Choose the band that conforms to the anatomy of the tooth. <br />
• The band should fit the tooth tightly (finger pressure seating indicates loose fitting band). <br />
• Use band seater to seat the band (1 mm below marginal ridges). <br />
• Lack of interproximal space between teeth will require spacers for 7-‐10 days before fitting the band. <br />
8 So Many Sizes!!! <br />
9 Band and Loop Procedures (Laboratory Fabrication) <br />
• Choose a band that fits abutment tooth tightly <br />
• Seat the band(s) and take an impression of the quadrant or arch <br />
• Remove the bands intra-‐orally and place them accordingly into the impression <br />
• Put a staple or wire above the band to prevent movement when pouring up the impression with stone mixtur<br />
10 Band and Loop Procedures (Laboratory Fabrication) <br />
• Pour the impression with yellow stone and remove the wire from the impression before the model completel<br />
stone) <br />
• Separate the impression from stone after 45 minutes <br />
11 Yellow Stone Model with Band in Place <br />
• Occlusal view of band around the yellow stone model <br />
12 Band and Loop Bending Procedures <br />
•<br />
• Instruments Needed: <br />
Wire (0.030) <br />
• Wire cutters <br />
Band remover <br />
Band seater <br />
3-‐prong plier
Birdbeak plier <br />
13 Band and <br />
Loop Bending Procedures <br />
• 3 Prong pliers for contour <br />
14 Band and Loop Bending Procedures <br />
15 Band and Loop Bending Procedures <br />
16 Band and Loop Bending Procedures <br />
17 Band and Loop Bending Procedures <br />
18 Incorrect and Correct Contour and Adaptation of Band and Loop <br />
19 Pre-‐soldered Band and Loop with White Plaster <br />
20 Soldering Materials <br />
21 Soldering Method <br />
•<br />
• Clean the band and the metal solder pieces with alcohol. <br />
• Place one tiny drop of flux on top of band (flux will dissolve and absorb oxides. Oxides can prevent metal piece<br />
• Place a piece of metal solder on top of the band and then a drop of flux on top of the solder piece again (as pi<br />
• Heat the metal solder piece. It will form a ball and spread out to cover the entire loop surface (DO NOT REMO<br />
ELSE IT WOULD NOT SOLDER THE TWO METALS TOGETHER!) <br />
22 Soldered Band and Loop Post-‐heating <br />
23 The Model After Removal of Space Maintainer <br />
24 Polishing of Space Maintainer <br />
25 Criteria of a Polished Space Maintainer
26 What do you do after you polished it to a high shine? <br />
27 What do you do after you polished it to a high shine? <br />
28 When to Remove Space Maintainer <br />
• Remove space maintainer when permanent tooth erupts through the gingiva. <br />
• Over-‐retained space maintainer prevents eruption of the premolars. <br />
29 References <br />
• Pinkham et al. Pediatric Dentistry:Infancy Through Adolescence. Third Edition, 1999. <br />
• Dr. Claudia Lopez lecture notes at University of Missouri-‐Kansas City Dental School <br />
• http://www.aapd.org/upload/articles/croll-‐21-‐02.<strong>pdf</strong> <br />
• http://www.colgate.com/app/Colgate/US/OC/Information/ToothWhiteningCosDent/Orthodontics/Orthodont<br />
• http://www.columbia.edu/itc/hs/dental/d7710/client_edit/space-‐mgmt.<strong>pdf</strong> <br />
• http://cudental.creighton.edu/HTM/P_bls.htm <br />
• http://www.smilebright.org/spacemaintainer.htm <br />
30 Other Related Links <br />
• http://www.appliancetherapy.com/Global_Center/ <br />
• http://www.colgate.com/app/Colgate/US/OC/Information/ToothWhiteningCosDent/Orthodontics/Orthodont<br />
• http://cudental.creighton.edu/Lectures/bls_files/frame.htm <br />
• http://www.dentalgentlecare.com/space_maintainer.htm <br />
• http://www.denovodental.com/PDF/Catalog/ <br />
• http://dentapreg.com/en/doctors-‐and-‐technicians/pediatric/
• http://www.thejcdp.com/issue026/<strong>pdf</strong>s_web/yilmaz.<strong>pdf</strong>