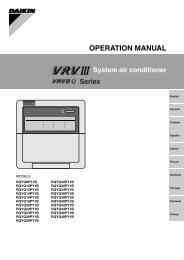
OPERATION MANUAL - Daikin
OPERATION MANUAL - Daikin
OPERATION MANUAL - Daikin

Create successful ePaper yourself
Turn your PDF publications into a flip-book with our unique Google optimized e-Paper software.
English<br />
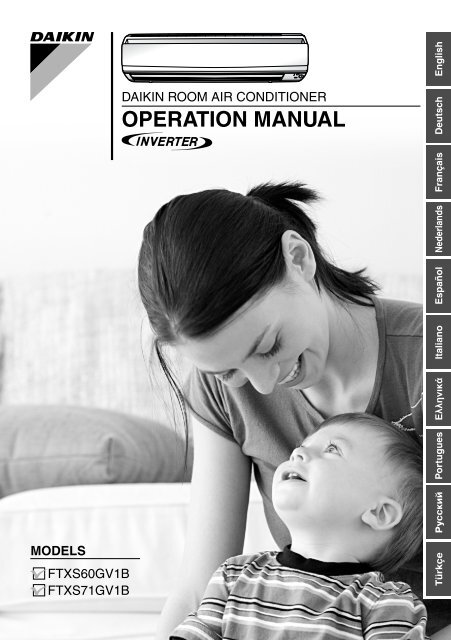
DAIKIN ROOM AIR CONDITIONER<br />
<strong>OPERATION</strong> <strong>MANUAL</strong><br />
Ðóññêèé<br />
Portugues<br />
Deutsch<br />
ÅëëçíéêÜ<br />
Italiano<br />
Español<br />
Nederlands<br />
Français<br />
MODELS<br />
Türkçe<br />
FTXS60GV1B<br />
FTXS71GV1B
CONTENTS<br />
READ BEFORE <strong>OPERATION</strong><br />
English<br />
Safety Precautions ......................................... 2<br />
Names of Parts .............................................. 4<br />
Preparation before Operation......................... 7<br />
<strong>OPERATION</strong><br />
AUTO · DRY · COOL · HEAT · FAN<br />
Operation ..................................................... 10<br />
Adjusting the Airflow Direction ..................... 12<br />
COMFORT AIRFLOW and<br />
INTELLIGENT EYE Operation ..................... 14<br />
POWERFUL Operation ................................ 17<br />
OUTDOOR UNIT QUIET Operation............. 18<br />
ECONO Operation ....................................... 19<br />
OFF TIMER Operation ................................. 20<br />
ON TIMER Operation................................... 21<br />
WEEKLY TIMER Operation ......................... 22<br />
Note for Multi System................................... 30<br />
CARE<br />
Care and Cleaning ....................................... 32<br />
TROUBLESHOOTING<br />
Troubleshooting ........................................... 36<br />
1
READ BEFORE <strong>OPERATION</strong><br />
Safety Precautions<br />
• Keep this manual where the operator can easily find them.<br />
• Read the precautions in this manual carefully before operating the unit.<br />
• The precautions described herein are classified as WARNING and CAUTION. They both contain<br />
important information regarding safety. Be sure to observe all precautions without fail.<br />
WARNING<br />
Failure to follow these instructions properly may<br />
result in personal injury or loss of life.<br />
CAUTION<br />
Failure to observe these instructions properly may<br />
result in property damage or personal injury, which<br />
may be serious depending on the circumstances.<br />
Never attempt.<br />
Be sure to follow the instructions.<br />
Be sure to establish an earth connection.<br />
Never touch the air conditioner nor the<br />
remote controller with wet hands.<br />
• After reading, keep this manual in a convenient place so that you can refer to it whenever necessary.<br />
If the equipment is transferred to a new user, be sure also to hand over the manual.<br />
WARNING<br />
Never wet the air conditioner nor the remote<br />
controller with water.<br />
• In order to avoid fire, explosion or injury, do not operate the unit when harmful, among which<br />
flammable or corrosive gases, are detected near the unit.<br />
• Be aware that prolonged, direct exposure to cool or warm air from the air conditioner, or to air<br />
that is too cool or too warm can be harmful to your physical condition and health.<br />
• Do not place objects, including rods, your fingers, etc., in the air inlet or outlet. Product malfunctioning,<br />
product or injury damage may result due to contact with the air conditioner’s high-speed fan blades.<br />
• Do not attempt to repair, dismantle reinstall or modify the air conditioner yourself as this may result in<br />
water leakage, electric shocks or fire hazards.<br />
• Do not use flammable spray near the air conditioner, or otherwise fire may result.<br />
• Beware of fire in case of refrigerant leakage. If the air conditioner is not operating correctly, i.e. not generating<br />
cool or warm air, refrigerant leakage could be the cause. Consult your dealer for assistance. The refrigerant<br />
within the air conditioner is safe and normally does not leak.<br />
However, in the event of a leakage, contact with a naked burner, heater or cooker may result in generation of noxious<br />
gas. Do not longer use the air conditioner until a qualified service person confirms that the leakage has been repaired.<br />
• Do not attempt to install or repair the air conditioner yourself. Improper workmanship may result in water leakage, electric<br />
shocks or fire hazards. Please contact your local dealer or qualified personnel for installation and maintenance work.<br />
• When the air conditioner is malfunctioning (giving off a burning odour, etc.) turn off power to the unit and contact your<br />
local dealer. Continued operation under such circumstances may result in a failure, electric shocks or fire hazards.<br />
• Be sure to install an earth leakage breaker. Failure to install an earth leakage breaker may result in electric shocks or fire.<br />
• Be sure to earth the unit. Do not earth the unit to a utility pipe, lightning conductor or<br />
telephone earth lead. Imperfect earthing may result in electric shocks.<br />
CAUTION<br />
• Do not use the air conditioner for purposes other than those for which it is intended. Do not use<br />
the air conditioner for cooling precision instruments, food, plants, animals or works of art as<br />
this may adversely affect the performance, quality and/or longevity of the object concerned.<br />
• Do not expose plants or animals directly to airflow from the unit as this may cause adverse effects.<br />
• Do not place appliances that produce naked flames in places exposed to the airflow from the unit as<br />
this may impair combustion of the burner.<br />
2
• Do not block air inlets nor outlets. Impaired airflow may result in insufficient performance or trouble.<br />
• Do not sit or place objects on the outdoor unit. Falling yourself or falling objects could cause injury.<br />
• Do not place objects that are susceptible to moisture directly beneath the indoor or outdoor units.<br />
Under certain conditions, condensation on the main unit or refrigerant pipes, air filter dirt or drain<br />
blockage may cause dripping, resulting in fouling or failure of the object concerned.<br />
• After prolonged use, check the unit stand and its mounts for damage. If left in a damaged condition,<br />
the unit may fall and cause injury.<br />
• To avoid injury, do not touch the air inlet or aluminium fins of the unit.<br />
• The appliance is not intended for use by unattended young children or infirm persons. Impairment of<br />
bodily functions and harm to health may result.<br />
• To avoid oxygen depletion, ensure that the room is adequately ventilated if equipment such as<br />
a burner is used together with the air conditioner.<br />
• Before cleaning, be sure to stop unit operation, turn the breaker off or remove the power cord.<br />
Otherwise, an electric shock and injury may result.<br />
• Only connect the air conditioner to the specified power supply circuit. Power supplies other than the<br />
one specified may result in electric shocks, overheating and fires.<br />
• Arrange the drain hose to ensure smooth drainage. Imperfect drainage may cause wetting of the building, furniture etc.<br />
• Do not place objects in direct proximity of the outdoor unit and do not let leaves and other debris<br />
accumulate around the unit. Leaves are a hotbed for small animals which can enter the unit. Once in<br />
the unit, such animals can cause malfunctions, smoke or fire when making contact with electrical parts.<br />
• Do not place objects around the indoor unit.<br />
Doing so may have an adverse influence on the performance, product quality, and life of the air conditioner.<br />
• This appliance is not intended to be used by persons with reduced physical, sensory or mental<br />
capabilities, or with lack of operation knowledge, unless they have been given supervision or<br />
instruction concerning the appliance use by person responsible for their safety.<br />
Keep out of children’s reach to ensure that they do not play with the appliance.<br />
• To avoid electric shocks, do not operate with wet hands.<br />
English<br />
• Do not wash the air conditioner with water, as this may result in electric shocks or fire.<br />
• Do not place water containers (flower etc.) above the unit, as this may result in electric<br />
shocks or fire hazards.<br />
Installation site.<br />
■ To install the air conditioner in the following types of environments, consult the dealer.<br />
• Places with an oily ambient or where steam or soot occurs.<br />
• Salty environment such as coastal areas.<br />
• Places where sulfide gas occurs such as hot springs.<br />
• Places where snow may block the outdoor unit.<br />
• The drain from the outdoor unit must be discharged to a place of good drainage.<br />
Consider nuisance to your neighbours from noises.<br />
■ For installation, choose a place as described below.<br />
• A place solid enough to bear the weight of the unit which does not amplify the operation noise or vibration.<br />
• A place from where the air discharged from the outdoor unit or the operation noise will not annoy your neighbours.<br />
Electrical work.<br />
• For power supply, be sure to use a separate power circuit dedicated to the air conditioner.<br />
System relocation.<br />
• Relocating the air conditioner requires specialized knowledge and skills. Please consult the dealer<br />
if relocation is necessary for moving or remodeling.<br />
3
Names of Parts<br />
■ Indoor Unit<br />
1 2 3 4 5<br />
11 10<br />
9<br />
12 6 7<br />
17<br />
8<br />
14<br />
15<br />
16<br />
13<br />
4
■ Outdoor Unit<br />
• Appearance of the outdoor unit may differ from some models.<br />
18 23<br />
22<br />
19<br />
20<br />
24<br />
21<br />
English<br />
■Indoor Unit<br />
1. Air filter<br />
2. Titanium apatite photocatalytic<br />
air-purifying filter:<br />
• These filters are attached to the inside of<br />
the air filters.<br />
3. Air inlet<br />
4. Front panel<br />
5. Panel tab<br />
6. Room temperature sensor:<br />
• It senses the air temperature around the<br />
unit.<br />
7. INTELLIGENT EYE sensor: (page 14.)<br />
8. Display<br />
9. Air outlet<br />
10. Flaps (horizontal blades): (page 12.)<br />
11. Louvers (vertical blades):<br />
• The louvers are inside of the air outlet.<br />
(page 12.)<br />
12. Model name plate<br />
■Outdoor Unit<br />
18. Air inlet (back and side)<br />
19. Refrigerant piping and inter-unit wiring<br />
20. Drain hose<br />
21. Earth terminal:<br />
• It is inside of this cover.<br />
13. Indoor unit ON/OFF switch:<br />
• Push this switch once to start operation.<br />
Push once again to stop it.<br />
• The operation mode refers to the following<br />
table.<br />
Model Mode Temperature Airflow<br />
setting rate<br />
COOLING<br />
COOL 22°C AUTO<br />
ONLY<br />
HEAT<br />
AUTO 25°C AUTO<br />
PUMP<br />
• This switch is useful when the remote<br />
controller is missing.<br />
14. <strong>OPERATION</strong> lamp (green)<br />
15. TIMER lamp (yellow): (page 20.)<br />
16. INTELLIGENT EYE lamp (green): (page 14.)<br />
17. Signal receiver:<br />
• It receives signals from the remote controller.<br />
• When the unit receives a signal, you will<br />
hear a beep sound.<br />
• Operation start .......... beep-beep<br />
• Settings changed....... beep<br />
• Operation stop ........... long beep<br />
22. Air outlet<br />
23. Outdoor temperature sensor (back)<br />
24. Model name plate<br />
5
Names of Parts<br />
■ Remote Controller<br />
1<br />
2<br />
9<br />
<br />
10<br />
3<br />
4<br />
5<br />
6<br />
7<br />
8<br />
13<br />
14<br />
15<br />
17<br />
11<br />
12<br />
16<br />
18<br />
<br />
1. Signal transmitter:<br />
• It sends signals to the indoor unit.<br />
2. Display (LCD):<br />
• It displays the current settings.<br />
(In this illustration, each section is shown with<br />
its displays on for the purpose of explanation.)<br />
3. FAN setting button:<br />
• It selects the airflow rate setting.<br />
4. POWERFUL button:<br />
POWERFUL operation (page 17.)<br />
5. ON/OFF button:<br />
• Press this button once to start operation.<br />
Press once again to stop it.<br />
6. TEMPERATURE adjustment buttons:<br />
• It changes the temperature setting.<br />
7. MODE selector button:<br />
• It selects the operation mode.<br />
(AUTO/DRY/COOL/HEAT/FAN) (page 10.)<br />
8. QUIET button:<br />
OUTDOOR UNIT QUIET operation (page 18.)<br />
9. ECONO button:<br />
ECONO operation (page 19.)<br />
10. SWING button:<br />
• Flaps (horizontal blades) (page 12.)<br />
11. SWING button:<br />
• Louvers (vertical blades) (page 12.)<br />
12. COMFORT/SENSOR button:<br />
• COMFORT AIRFLOW and INTELLIGENT<br />
EYE operation (page 14.)<br />
13. WEEKLY/PROGRAM/COPY/BACK/NEXT<br />
button:<br />
• WEEKLY TIMER operation (page 22.)<br />
14. SELECT button:<br />
• It changes the ON/OFF TIMER and<br />
WEEKLY TIMER settings. (page 20, 22.)<br />
15. OFF TIMER button: (page 20.)<br />
16. ON TIMER button: (page 21.)<br />
17. TIMER CANCEL button:<br />
• It cancels the timer setting. (page 20, 21.)<br />
• It cannot be used for the WEEKLY TIMER<br />
operation.<br />
18. CLOCK button: (page 8.)<br />
6
Preparation before Operation<br />
■ To set the batteries<br />
1. Slide the front cover to take it off.<br />
2. Set 2 dry batteries AAA.LR03 (alkaline).<br />
3. Set the front cover as before.<br />
1<br />
2<br />
Position + and<br />
– correctly!<br />
3<br />
English<br />
■ To operate the remote controller<br />
• To use the remote controller, aim the transmitter at the indoor<br />
unit. If there is anything to block signals between the unit and<br />
the remote controller, such as a curtain, the unit will not<br />
operate.<br />
• Do not drop the remote controller. Do not get it wet.<br />
• The maximum distance for communication is approx. 7m.<br />
Receiver<br />
■ To fix the remote controller holder<br />
on the wall<br />
Remote controller<br />
1. Choose a place from where the signals reach the unit.<br />
2. Fix the holder to a wall, a pillar, or similar<br />
location with the screws procured locally.<br />
3. Place the remote controller in the remote<br />
controller holder.<br />
NOTE<br />
Screws<br />
Remote<br />
controller holder<br />
■ Notes on batteries<br />
• When replacing the batteries, use batteries of the same type, and replace the 2 old batteries together.<br />
• When the system is not used for a long time, take the batteries out.<br />
• The batteries will last for approx. 1 year. If the remote controller display begins to fade and<br />
the degradation of reception performance occurs within a year, however, replace both<br />
2 batteries with new, size AAA.LR03 (alkaline).<br />
• The attached batteries are provided for the initial use of the system.<br />
The usable period of the batteries may be short depending on the manufactured date of the air conditioner.<br />
■ Notes on remote controller<br />
• Never expose the remote controller to direct sunlight.<br />
• Dust on the signal transmitter or receiver will reduce the sensitivity. Wipe off dust with soft cloth.<br />
• Signal communication may be disabled if an electronic-starter-type fluorescent lamp (such<br />
as inverter-type lamps) is in the room. Consult the shop if that is the case.<br />
• If the remote controller signals happen to operate another appliance, move that appliance<br />
to somewhere else, or consult the shop.<br />
7
Preparation before Operation<br />
■ To set the clock<br />
1. Press .<br />
• “ ” is displayed.<br />
• “ ” and “ ” blinks.<br />
2. Press to set the current day of the<br />
week.<br />
3. Press .<br />
• “<br />
” blinks.<br />
4. Press to set the clock to the present<br />
time.<br />
• Holding down or rapidly increases or decreases<br />
the time display.<br />
5. Press .<br />
• Always point the remote controller at the indoor unit<br />
when pushing the buttons when setting the indoor unit’s<br />
internal clock.<br />
•“ ” blinks.<br />
■ Turn the breaker on<br />
• Turning on the breaker opens once and closes the flaps. (This is a normal procedure.)<br />
NOTE<br />
■ Note on setting the clock<br />
• If the indoor unit’s internal clock is not set to the correct time, the WEEKLY TIMER will not<br />
operate punctually.<br />
8
■ Checks on remote controller settings<br />
• This remote controller is common to the heat pump model and<br />
cooling only model. Use the DIP switch on the remote controller<br />
to set the heat pump model or cooling only model.<br />
• Refer to the following explanation and make the setting as<br />
shown in the illustration.<br />
• For customers of heat pump model: Set to H/P<br />
• For customers of cooling only model: Set to C/O<br />
English<br />
DIP switch<br />
H/P<br />
C/O<br />
NOTE<br />
■ Tips for saving energy<br />
• Be careful not to cool (heat) the room too much.<br />
Keeping the temperature setting at a moderate<br />
level helps save energy.<br />
• Cover windows with a blind or a curtain.<br />
Blocking sunlight and air from outdoors<br />
increases the cooling (heating) effect.<br />
Recommended temperature setting<br />
For cooling: 26-28°C<br />
For heating: 20-24°C<br />
• Clogged air filters cause inefficient operation and waste energy. Clean them once in about<br />
every 2 weeks.<br />
■ Please note<br />
• The outdoor unit consumes some power to have its electric components work even while it<br />
is not operating.<br />
Connecting outdoor unit RXS60/71: 1-15W<br />
Other outdoor units: 15-20W<br />
The outdoor unit consumes 40 to 55W of power at the time of compressor preheating.<br />
• If you are not going to use the air conditioner for a long period, for example in spring or<br />
autumn, turn the breaker off.<br />
• Use the air conditioner in the following conditions.<br />
Mode Operating conditions If operation is continued out of this range<br />
COOL Outdoor temperature: 〈3/4/5MK(X)S〉 –10-46°C<br />
〈RK(X)S〉 –10-46°C<br />
Indoor temperature: 18-32°C<br />
Indoor humidity: 80% max.<br />
•A safety device may work to stop the operation.<br />
(In multi system, it may work to stop the operation of<br />
the outdoor unit only.)<br />
•Condensation may occur on the indoor unit and drip.<br />
HEAT Outdoor temperature: 〈3/4/5MXS〉 –15-24°C<br />
〈RXS〉 –15-24°C<br />
Indoor temperature: 10-30°C<br />
•A safety device may work to stop the operation.<br />
DRY<br />
Outdoor temperature: 〈3/4/5MK(X)S〉 –10-46°C<br />
〈RK(X)S〉 –10-46°C<br />
Indoor temperature: 18-32°C<br />
Indoor humidity: 80% max.<br />
•A safety device may work to stop the operation.<br />
•Condensation may occur on the indoor unit and drip.<br />
• Operation outside this humidity or temperature range may cause a safety device to disable<br />
the system.<br />
9
<strong>OPERATION</strong><br />
AUTO · DRY · COOL · HEAT · FAN Operation<br />
The air conditioner operates with the operation mode of your<br />
choice.<br />
From the next time on, the air conditioner will operate with the<br />
same operation mode.<br />
■ To start operation<br />
1. Press and select a operation<br />
mode.<br />
• Each pressing of the button advances the mode setting<br />
in sequence.<br />
: AUTO : HEAT<br />
: DRY : FAN<br />
: COOL<br />
COOLING ONLY<br />
model<br />
HEAT PUMP<br />
model<br />
2. Press .<br />
• “ ” is displayed on the LCD.<br />
• The <strong>OPERATION</strong> lamp lights up.<br />
■ To stop operation<br />
3. Press again.<br />
• “ ” disappears from the LCD.<br />
• Then <strong>OPERATION</strong> lamp goes off.<br />
■ To change the temperature setting<br />
4. Press or .<br />
AUTO or COOL or HEAT operation<br />
Press to raise the temperature and<br />
press to lower the temperature.<br />
Set to the temperature you like.<br />
DRY or FAN operation<br />
The temperature setting is not variable.<br />
10
■ To change the airflow rate setting<br />
English<br />
5. Press .<br />
AUTO or COOL or HEAT or FAN operation DRY operation<br />
5 levels of airflow rate setting<br />
from “ ” to “ ” plus “ ”<br />
The airflow rate setting is not variable.<br />
“ ” are available.<br />
• Indoor unit quiet operation<br />
When the airflow is set to “ ”, the noise from the indoor unit will become quieter.<br />
Use this when making the noise quieter.<br />
NOTE<br />
■ Notes on HEAT operation<br />
• Since this air conditioner heats the room by taking heat from outdoor air to indoors, the<br />
heating capacity becomes smaller in lower outdoor temperatures. If the heating effect is<br />
insufficient, it is recommended to use another heating appliance in combination with the air<br />
conditioner.<br />
• The heat pump system heats the room by circulating hot air around all parts of the room.<br />
After the start of heating operation, it takes some time before the room gets warmer.<br />
• In heating operation, frost may occur on the outdoor unit and lower the heating capacity. In<br />
that case, the system switches into defrosting operation to take away the frost.<br />
• During defrosting operation, hot air does not flow out of indoor unit.<br />
• A pinging sound may be heard during defrosting operation, which, however does not mean<br />
that the air conditioner has failures.<br />
■ Note on COOL operation<br />
• This air conditioner cools the room by blowing the hot air in the room outside, so if the<br />
outside temperature is high, the performance of the air conditioner drops.<br />
■ Note on DRY operation<br />
• The computer chip works to rid the room of humidity while maintaining the temperature as<br />
much as possible. It automatically controls temperature and airflow rate, so manual<br />
adjustment of these functions is unavailable.<br />
■ Notes on AUTO operation<br />
• In AUTO operation, the system selects a temperature setting and an appropriate operation<br />
mode (COOL or HEAT) based on the room temperature at the start of the operation.<br />
• The system automatically reselects setting at a regular interval to bring the room<br />
temperature to user-setting level.<br />
■ Note on FAN operation<br />
• This mode is valid for fan only.<br />
■ Note on airflow rate setting<br />
• At smaller airflow rates, the cooling (heating) effect is also smaller.<br />
11
Adjusting the Airflow Direction<br />
You can adjust the airflow direction to increase your comfort.<br />
■ To start auto swing<br />
Upper and lower airflow direction<br />
Press .<br />
• “ ” is displayed on the LCD.<br />
• The flaps (horizontal blades) will begin to swing.<br />
Right and left airflow direction<br />
Press .<br />
• “ ” is displayed on the LCD.<br />
• The louvers (vertical blades) will begin to swing.<br />
The 3-D airflow direction<br />
Press and .<br />
• “ ” and “ ” are displayed on the LCD.<br />
• The flaps and louvers move in turn.<br />
• To cancel 3-D airflow, press either<br />
again.<br />
The flaps or louvers will stop moving.<br />
or<br />
• The following illustrations show respective airflow directions.<br />
Upper/Lower Right/Left 3-D<br />
12
■ To set the flaps or louvers at desired position<br />
• This function is effective while flaps or louvers are in auto swing mode.<br />
English<br />
Press and when the flaps or louvers have reached the<br />
desired position.<br />
• In the 3-D airflow, the flaps and louvers move in turn.<br />
• “ ” or “ ” disappears from the LCD.<br />
CAUTION<br />
• Always use a remote controller to adjust the angles of the flaps and louvers. If you attempt to<br />
move it forcibly with hand when it is swinging, the mechanism may be broken.<br />
• Always use a remote controller to adjust the louvers angles. In side the air outlet, a fan is<br />
rotating at a high speed.<br />
NOTE<br />
■ Note on the angles of the flaps<br />
• The flaps swinging range depends on the<br />
operation. (See the figure.)<br />
■ Note on 3-D airflow<br />
• Using 3-D airflow circulates cold air, which<br />
tends to collected at the bottom of the room,<br />
and hot air, which tends to collect near the<br />
ceiling, throughout the room, preventing<br />
areas of cold and hot developing.<br />
In DRY operation or<br />
COOL operation<br />
COMFORT AIRFLOW 5˚<br />
(page 14.)<br />
15˚<br />
Upper limit 40˚<br />
Lower limit<br />
In HEAT operation<br />
Stop operation<br />
15˚<br />
Upper limit<br />
55˚<br />
Lower limit<br />
and COMFORT AIRFLOW (page 14.)<br />
In FAN operation<br />
Stop operation<br />
5˚<br />
Upper limit<br />
55˚<br />
Lower limit<br />
Stop operation<br />
13
COMFORT AIRFLOW and<br />
INTELLIGENT EYE Operation<br />
■ COMFORT AIRFLOW operation<br />
The flow of air will be in the upward direction while in COOL operation and in the downward<br />
direction while in HEAT operation, which will provide a comfortable wind that will not come in direct<br />
contact with people.<br />
COOL operation<br />
HEAT operation<br />
■ INTELLIGENT EYE operation<br />
“INTELLIGENT EYE” is the infrared sensor which detects the human movement.<br />
If nobody in the room for more than 20 minutes, the operation automatically changes to energy<br />
saving operation.<br />
[Example]<br />
When somebody in the<br />
room<br />
■ Normal operation<br />
• The air conditioner is in<br />
normal operation while the<br />
sensor is detecting the<br />
movement of people.<br />
• The INTELLIGENT EYE<br />
lamp lights up.<br />
When nobody in the room<br />
■ 20 minutes after, start<br />
energy saving<br />
operation.<br />
• The set temperature is<br />
shifted in ±2°C steps.<br />
• The INTELLIGENT EYE<br />
lamp is goes off.<br />
Somebody back in the<br />
room<br />
■ Back to normal<br />
operation.<br />
• The air conditioner will<br />
return to normal operation<br />
when the sensor detects the<br />
movement of people again.<br />
• The INTELLIGENT EYE<br />
lamp lights up again.<br />
■ To combine COMFORT AIRFLOW and INTELLIGENT<br />
EYE operation<br />
The air conditioner can go into operation with the COMFORT AIRFLOW and INTELLIGENT EYE<br />
operation combined.<br />
14
■ To start operation<br />
Press<br />
mode.<br />
and select the desired<br />
• Each time the is pressed a different setting<br />
option is displayed on the LCD.<br />
• By selecting “ ” from the following icons, the air<br />
conditioner will be in COMFORT AIRFLOW operation<br />
combined with INTELLIGENT EYE operation.<br />
English<br />
COMFORT<br />
AIRFLOW<br />
INTELLIGENT<br />
EYE<br />
Combination<br />
blank<br />
No Setting<br />
• When the flaps (horizontal blades) are swinging, the<br />
operating as above will stop movement of them.<br />
• The INTELLIGENT EYE lamp lights up.<br />
• The lamp will be lit while human movements are<br />
detected.<br />
■ To cancel operation<br />
Press and select “blank” on the<br />
LCD.<br />
INTELLIGENT EYE operation is useful for energy saving<br />
■ Energy saving operation<br />
• If no presence detected in the room for 20 minutes, the energy saving operation will start.<br />
• This operation changes the temperature –2°C in HEAT / +2°C in COOL / +2°C in DRY<br />
operation from set temperature.<br />
• This operation decreases the airflow rate slightly in FAN operation only.<br />
15
COMFORT AIRFLOW and<br />
INTELLIGENT EYE Operation<br />
NOTE<br />
■ Notes on COMFORT AIRFLOW operation<br />
• The flap position will change, preventing air from blowing directly on the occupants of the<br />
room.<br />
• POWERFUL operation and COMFORT AIRFLOW operation cannot be used at the same<br />
time.<br />
Priority is given to the function of whichever button is pressed last.<br />
• The airflow rate will be set to AUTO. If the upper and lower airflow direction is selected, the<br />
COMFORT AIRFLOW operation will be canceled.<br />
■ Notes on INTELLIGENT EYE operation<br />
• Application range is as follows.<br />
Vertical angle 90˚<br />
(Side view)<br />
Horizontal angle 110˚<br />
(Top view)<br />
7m<br />
90˚<br />
55˚ 55˚<br />
7m<br />
• Sensor may not detect moving objects further than 7m away. (Check the application range)<br />
• Sensor detection sensitivity changes according to indoor unit location, the speed of<br />
passersby, temperature range, etc.<br />
• The sensor also mistakenly detects pets, sunlight, fluttering curtains and light reflected off of<br />
mirrors as passersby.<br />
• INTELLIGENT EYE operation will not go on during POWERFUL operation.<br />
• NIGHT SET mode (page 20.) will not go on during use of INTELLIGENT EYE operation.<br />
■ Note on combination of COMFORT AIRFLOW operation and INTELLIGENT EYE<br />
operation<br />
• The airflow rate will be set to AUTO. If the upper and lower airflow direction is selected, the<br />
COMFORT AIRFLOW operation will be canceled.<br />
Priority is given to the function of whichever button is pressed last.<br />
CAUTION<br />
• Do not place large objects near the sensor.<br />
Also keep heating units or humidifiers outside the sensor’s detection area. This sensor can<br />
detect undesirable objects.<br />
• Do not hit or violently push the INTELLIGENT EYE sensor. This can lead to damage and<br />
malfunction.<br />
16
POWERFUL Operation<br />
POWERFUL operation quickly maximizes the cooling (heating)<br />
effect in any operation mode. You can get the maximum capacity.<br />
English<br />
■ To start POWERFUL operation<br />
1. Press .<br />
• POWERFUL operation ends in 20 minutes. Then the<br />
system automatically operates again with the previous<br />
settings which were used before POWERFUL operation.<br />
• “ ” is displayed on the LCD.<br />
■ To cancel POWERFUL operation<br />
2. Press again.<br />
• “<br />
” disappears from the LCD.<br />
NOTE<br />
■ Notes on POWERFUL operation<br />
• When using POWERFUL operation, there are some functions which are not available.<br />
• POWERFUL operation cannot be used together with ECONO, COMFORT AIRFLOW or OUTDOOR<br />
UNIT QUIET operation. Priority is given to the function of whichever button is pressed last.<br />
• POWERFUL operation can only be set when the unit is running.<br />
• POWERFUL operation will not increase the capacity of the air conditioner if the air<br />
conditioner is already in operation with its maximum capacity demonstrated.<br />
• In COOL and HEAT operation<br />
To maximize the cooling (heating) effect, the capacity of outdoor unit must be increased<br />
and the airflow rate be fixed to the maximum setting.<br />
The temperature and airflow settings are not variable.<br />
• In DRY operation<br />
The temperature setting is lowered by 2.5°C and the airflow rate is slightly increased.<br />
• In FAN operation<br />
The airflow rate is fixed to the maximum setting.<br />
• In AUTO operation<br />
To maximize the cooling (heating) effect, the capacity of outdoor unit must be increased<br />
and the airflow rate be fixed to the maximum setting.<br />
• When using priority room setting<br />
See note for multi system. (page 30.)<br />
17
OUTDOOR UNIT QUIET Operation<br />
OUTDOOR UNIT QUIET operation lowers the noise level of the<br />
outdoor unit by changing the frequency and fan speed on the<br />
outdoor unit. This function is convenient during night.<br />
■ To start OUTDOOR UNIT QUIET<br />
operation<br />
1. Press .<br />
• “<br />
” is displayed on the LCD.<br />
■ To cancel OUTDOOR UNIT<br />
QUIET operation<br />
2. Press again.<br />
• “<br />
” disappears from the LCD.<br />
NOTE<br />
■ Notes on OUTDOOR UNIT QUIET operation<br />
• If using a multi system, this function will work only when the OUTDOOR UNIT QUIET<br />
operation is set on all operated indoor units.<br />
However, if using priority room setting, see note for multi system. (page 30.)<br />
• This function is available in COOL, HEAT, and AUTO operation.<br />
(This is not available in FAN and DRY operation.)<br />
• POWERFUL operation and OUTDOOR UNIT QUIET operation cannot be used at the<br />
same time.<br />
Priority is given to the function of whichever button is pressed last.<br />
• Even the operation is stopped using the remote controller or the indoor unit ON/OFF switch<br />
when using OUTDOOR UNIT QUIET operation, “ ” will remain on the remote controller<br />
display.<br />
• OUTDOOR UNIT QUIET operation will drop neither the frequency nor fan speed if the<br />
frequency and fan speed have been already dropped low enough.<br />
18
ECONO Operation<br />
ECONO operation is a function which enables efficient operation<br />
by limiting the maximum power consumption value.<br />
This function is useful for cases in which attention should be paid<br />
to ensure a circuit breaker will not trip when the product runs<br />
alongside other appliances.<br />
■ To start ECONO operation<br />
English<br />
1. Press .<br />
• “ ” is displayed on the LCD.<br />
■ To cancel ECONO operation<br />
2. Press again.<br />
• “ ” disappears from the LCD.<br />
Running current and<br />
power consumption<br />
ECONO<br />
operation<br />
Normal<br />
operation<br />
Maximum during<br />
normal operation<br />
Maximum during<br />
ECONO operation<br />
From start up until set<br />
temperature is reached<br />
• This diagram is a representation for illustrative purposes only.<br />
* The maximum running current and power consumption of the air conditioner in ECONO<br />
operation vary with the connecting outdoor unit.<br />
Time<br />
NOTE<br />
■ Notes on ECONO operation<br />
• ECONO operation can only be set when the unit is running.<br />
• ECONO operation is a function which enables efficient operation by limiting the power<br />
consumption of the outdoor unit (operating frequency).<br />
• ECONO operation functions in AUTO, COOL, DRY and HEAT operation.<br />
• POWERFUL and ECONO operation cannot be used at the same time.<br />
Priority is given to the function of whichever button is pressed last.<br />
• If the level of power consumption is already low, ECONO operation will not drop the power<br />
consumption.<br />
19
OFF TIMER Operation<br />
Timer functions are useful for automatically switching the air<br />
conditioner on or off at night or in the morning. You can also use<br />
OFF TIMER and ON TIMER in combination.<br />
■ To use OFF TIMER operation<br />
• Check that the clock is correct.<br />
If not, set the clock to the present time. (page 8.)<br />
1. Press .<br />
• “<br />
• “<br />
•“<br />
” and setting time are displayed on the LCD.<br />
” is displayed on the LCD.<br />
” blinks.<br />
2. Press until the time setting reaches<br />
the point you like.<br />
• Each pressing of either button increases or decreases<br />
the time setting by 10 minutes. Holding down either<br />
button changes the setting rapidly.<br />
3. Press again.<br />
• The TIMER lamp lights up.<br />
■ To cancel the OFF TIMER<br />
Operation<br />
4. Press .<br />
• “ ” and setting time disappear from the LCD.<br />
• “ ” and day of the week are displayed on the LCD.<br />
• The TIMER lamp goes off.<br />
NOTE<br />
■ Notes on TIMER operation<br />
• When TIMER is set, the present time is not displayed.<br />
• Once you set ON/OFF TIMER, the time setting is kept in the memory. The memory is<br />
canceled when remote controller batteries are replaced.<br />
• When operating the unit via the ON/OFF TIMER, the actual length of operation may vary<br />
from the time entered by the user. (Maximum approx. 10 minutes)<br />
■ NIGHT SET mode<br />
When the OFF TIMER is set, the air conditioner automatically adjusts the temperature<br />
setting (0.5°C up in COOL, 2.0°C down in HEAT) to prevent excessive cooling (heating) for<br />
your pleasant sleep.<br />
20
ON TIMER Operation<br />
■ To use ON TIMER operation<br />
• Check that the clock is correct. If not, set the clock to the<br />
present time. (page 8.)<br />
English<br />
1. Press .<br />
• “<br />
• “<br />
•“<br />
” and setting time are displayed on the LCD.<br />
” is displayed on the LCD.<br />
” blinks.<br />
2. Press until the time setting reaches<br />
the point you like.<br />
• Each pressing of either button increases or decreases<br />
the time setting by 10 minutes. Holding down either<br />
button changes the setting rapidly.<br />
3. Press again.<br />
• The TIMER lamp lights up.<br />
■ To cancel ON TIMER operation<br />
4. Press .<br />
• “ ” and setting time disappear from the LCD.<br />
• “ ” and day of the week are displayed on the LCD.<br />
• The TIMER lamp goes off.<br />
■ To combine ON TIMER and OFF TIMER<br />
• A sample setting for combining the 2 timers is shown below.<br />
(Example)<br />
Present time: 23:00<br />
(The unit operating)<br />
OFF TIMER at 0:00<br />
ON TIMER at 14:00<br />
Combined<br />
Display<br />
NOTE<br />
■ In the following cases, set the timer again.<br />
• After a breaker has turned off.<br />
• After a power failure.<br />
• After replacing batteries in the remote controller.<br />
21
WEEKLY TIMER Operation<br />
Up to 4 timer settings can be saved for each day of the week. It is convenient if the WEEKLY TIMER is<br />
set according to the family’s life style.<br />
■ Using in these cases of WEEKLY TIMER<br />
An example of WEEKLY TIMER settings is shown below.<br />
Example: The same timer settings are made for the week from Monday through<br />
Friday while different timer settings are made for the weekend.<br />
[Monday]<br />
Make timer settings up to programs 1-4. (see page 23.)<br />
Program 1 Program 2 Program 3 Program 4<br />
ON OFF ON OFF<br />
25˚C<br />
27˚C<br />
6:00 8:30 17:30 22:00<br />
ON<br />
OFF<br />
ON<br />
OFF<br />
[Tuesday]<br />
to<br />
[Friday]<br />
[Saturday]<br />
[Sunday]<br />
Use the copy mode to make settings for Tuesday to Friday, because these<br />
settings are the same as those for Monday. (see page 26.)<br />
Program 1 Program 2 Program 3 Program 4<br />
ON OFF ON OFF<br />
25˚C<br />
27˚C<br />
6:00 8:30 17:30 22:00<br />
No timer settings<br />
Make timer settings up to programs 1-4. (see page 23.)<br />
Program 1 Program 2 Program 3 Program 4<br />
ON OFF OFF ON<br />
25˚C<br />
27˚C<br />
8:00 10:00 19:00 21:00<br />
27˚C<br />
ON<br />
OFF<br />
OFF<br />
ON<br />
• Up to 4 reservations per day and 28 reservations per week can be set in the WEEKLY TIMER.<br />
The effective use of the copy mode ensures ease of making reservations.<br />
• The use of ON-ON-ON-ON settings, for example, makes it possible to schedule operating mode<br />
and set temperature changes. Furthermore, by using OFF-OFF-OFF-OFF settings, only the turnoff<br />
time of each day can be set. This will turn off the air conditioner automatically if the user<br />
forgets to turn it off.<br />
22
■ To use WEEKLY TIMER operation<br />
English<br />
Setting mode<br />
• Make sure the day of the week and time are set. If not, set the<br />
day of the week and time. (page 8.)<br />
[Monday]<br />
Program 1 Program 2 Program 3 Program 4<br />
ON OFF ON OFF<br />
25˚C<br />
27˚C<br />
6:00 8:30 17:30 22:00<br />
1. Press .<br />
• The day of the week and the reservation number of the<br />
current day will be displayed.<br />
• 1 to 4 settings can be made per day.<br />
2. Press to select the desired day of the<br />
week and reservation number.<br />
• Pressing the<br />
changes the reservation number and<br />
the day of the week.<br />
3. Press .<br />
• The day of the week and reservation number will be set.<br />
• “ ” and “ ” blink.<br />
4. Press to select the desired mode.<br />
• Pressing the changes “ ” or “ ” setting in sequence.<br />
ON TIMER<br />
OFF TIMER<br />
blank<br />
• In case the reservation has already been set, selecting “blank” deletes the reservation.<br />
• Go to step 9 if “blank” is selected.<br />
5. Press .<br />
• The ON/OFF TIMER mode will be set.<br />
• “ ” and the time blink.<br />
23
WEEKLY TIMER Operation<br />
6. Press to select the desired time.<br />
• The time can be set between 0:00 and 23:50 in 10 minute<br />
intervals.<br />
• To return to the ON/OFF TIMER mode setting, press<br />
.<br />
• Go to step 9 when setting the OFF TIMER.<br />
7. Press .<br />
• The time will be set.<br />
• “ ” and the temperature blink.<br />
8. Press to select the desired<br />
temperature.<br />
• The temperature can be set between 10°C and 32°C.<br />
Cooling: The unit operates at 18°C even if it is set at 10 to<br />
17°C.<br />
Heating: The unit operates at 30°C even if it is set at 31 to<br />
32°C.<br />
• To return to the time setting, press .<br />
• The set temperature is only displayed when the mode<br />
setting is on.<br />
9. Press .<br />
• The temperature will be set and go to the next reservation<br />
setting.<br />
• To continue further settings, repeat the procedure from step 4.<br />
10. Press to complete the setting.<br />
• Be sure to direct the remote controller toward the indoor unit and check for a receiving tone<br />
and flashing the <strong>OPERATION</strong> lamp.<br />
• “ ” is displayed on the LCD and WEEKLY TIMER operation is activated.<br />
• The TIMER lamp lights up.<br />
• A reservation made once can be easily copied and the same settings used for another day of<br />
the week.<br />
Refer to copy mode. (page 26.)<br />
24
Setting Displays<br />
English<br />
Day and number ON/OFF Time Temperature<br />
NOTE<br />
■ Notes on WEEKLY TIMER operation<br />
• Do not forget to set the clock on the remote control first.<br />
• The day of the week, ON/OFF TIMER mode, time and set temperature (only for ON TIMER<br />
mode) can be set with WEEKLY TIMER. Other settings for ON TIMER are based on the<br />
settings just before the operation.<br />
• Both WEEKLY TIMER and ON/OFF TIMER operation cannot be used at the same time.<br />
The ON/OFF TIMER operation has priority if it is set while WEEKLY TIMER is still active.<br />
The WEEKLY TIMER will go into standby state, and “ ” will disappear from the<br />
LCD.<br />
When ON/OFF TIMER is up, the WEEKLY TIMER will automatically become active.<br />
• Only the time and set temperature set with the weekly timer are sent with the .<br />
Set the weekly timer only after setting the operation mode, the fan strength, and the fan<br />
direction ahead of time.<br />
• Shutting the breaker off, power failure, and other similar events will render operation of the<br />
indoor unit’s internal clock inaccurate. Reset the clock. (page 8.)<br />
• The can be used only for the time and temperature settings.<br />
It cannot be used to go back to the reservation number.<br />
25
WEEKLY TIMER Operation<br />
Copy mode<br />
• A reservation made once can be copied another day of the<br />
week. The whole reservation of the selected day of the week<br />
will be copied.<br />
[Monday]<br />
[Tuesday]<br />
to<br />
[Friday]<br />
Program 1 Program 2 Program 3 Program 4<br />
ON OFF ON OFF<br />
25˚C<br />
27˚C<br />
6:00 8:30 17:30 22:00<br />
COPY<br />
Program 1 Program 2 Program 3 Program 4<br />
ON OFF ON OFF<br />
25˚C<br />
27˚C<br />
6:00 8:30 17:30 22:00<br />
1. Press .<br />
2. Press to confirm the day of the week<br />
to be copied.<br />
3. Press to activate copy mode.<br />
• The whole reservation of the selected day of the week<br />
will be copied.<br />
4. Press to select the destination day of<br />
the week.<br />
26
5. Press .<br />
• The reservation will be copied to the selected day of the<br />
week. The whole reservation of the selected day of the<br />
week will be copied.<br />
• To continue copying the settings to other days of the<br />
week, repeat step 4 and step 5.<br />
English<br />
6. Press to complete the setting.<br />
• “ ” is displayed on the LCD and WEEKLY TIMER<br />
operation is activated.<br />
Setting Displays<br />
Confirmation Copy Paste Normal<br />
NOTE<br />
■ Note on COPY MODE<br />
• The entire reservation of the source day of the week is copied in the copy mode.<br />
In the case of making a reservation change for any day of the week individually after<br />
copying the content of weekly reservations, press and change the settings in the<br />
steps of setting mode. (page 23.)<br />
27
WEEKLY TIMER Operation<br />
■ Confirming a reservation<br />
• The reservation can be confirmed.<br />
1. Press .<br />
• The day of the week and the reservation number of the<br />
current day will be displayed.<br />
2. Press to select the day of the week and<br />
the reservation number to be confirmed.<br />
• Pressing the<br />
displays the reservation details.<br />
• To change the confirmed reserved settings, select the<br />
reservation number and press .<br />
The mode is switched to setting mode. Go to setting mode<br />
step 4. (page 23.)<br />
3. Press to exit confirming mode.<br />
• “ ” is displayed on the LCD and WEEKLY TIMER<br />
operation is activated.<br />
• The TIMER lamp lights up.<br />
Setting Displays<br />
Normal<br />
Confirmation<br />
■ To deactivate WEEKLY TIMER operation<br />
4. Press while “ ” is displayed on the LCD.<br />
• The “ ” will disappear from the LCD.<br />
• The TIMER lamp goes off.<br />
• To reactivate the WEEKLY TIMER operation, press the again.<br />
• If a reservation deactivated with is activated once again, the last reservation mode<br />
will be used.<br />
28
■ To delete reservations<br />
English<br />
The individual reservation<br />
• Refer to setting mode. (page 23.)<br />
When selecting desired mode at step 4 in setting mode,<br />
select “blank”. The reservation will be deleted.<br />
The reservations for each day of the week<br />
• This function can be used for deleting reservations for<br />
each day of the week.<br />
5. Press .<br />
6. Select the day of the week to be canceled<br />
with .<br />
7. Hold for 5 seconds.<br />
• The reservation of the selected day of the week will be<br />
deleted.<br />
All reservations<br />
8. Hold for 5 seconds while normal<br />
display.<br />
• Be sure to direct the remote control toward the main unit<br />
and check for a receiving tone.<br />
• This operation is not effective while WEEKLY TIMER is being set.<br />
• All reservations will be deleted.<br />
29
Note for Multi System<br />
This system has one outdoor unit connected to multiple<br />
indoor units.<br />
■ Selecting the operation mode<br />
1. With the priority room setting present<br />
but inactive or not present.<br />
When more than 1 indoor unit is operating, priority is<br />
given to the first unit that was turned on.<br />
In this case, set the units that are turned on later to<br />
the same operation mode as the first unit.<br />
Otherwise, they will enter the standby state, and the<br />
<strong>OPERATION</strong> lamp will flash: this does not indicate<br />
malfunction.<br />
A room<br />
C room<br />
B room<br />
D room<br />
Outdoor unit<br />
NOTE<br />
■ Notes on operation mode for multi system<br />
• COOL, DRY and FAN operation may be used at the same time.<br />
• AUTO operation automatically selects COOL operation or HEAT operation based on the<br />
room temperature.<br />
Therefore, AUTO operation is available when selecting the same operation mode as that of<br />
the room with the first unit to be turned on.<br />
CAUTION<br />
• Normally, the operation mode in the room where the unit is first run is given priority, but the<br />
following situations are exceptions, so please keep this in mind.<br />
If the operation mode of the first room is FAN operation, then using HEAT operation in any<br />
room after this will give priority to HEAT operation. In this situation, the air conditioner<br />
running in FAN operation will go on standby, and the <strong>OPERATION</strong> lamp will flash.<br />
2. With the priority room setting active.<br />
See “Priority room setting” on the next page.<br />
■ NIGHT QUIET mode<br />
(Available only for COOL operation)<br />
NIGHT QUIET mode requires initial programming during installation. Please consult your retailer or<br />
dealer for assistance.<br />
NIGHT QUIET mode reduces the operation noise of the outdoor unit during the night time hours to<br />
prevent annoyance to neighbors.<br />
• The NIGHT QUIET mode is activated when the temperature drops 5°C or more below the highest<br />
temperature recorded that day. Therefore, when the temperature difference is less than 5°C, this<br />
function will not be activated.<br />
• NIGHT QUIET mode reduces slightly the cooling (heating) efficiency of the unit.<br />
30
■ OUTDOOR UNIT QUIET operation (page 18.)<br />
1. With the priority room setting present but inactive or not present.<br />
When using the OUTDOOR UNIT QUIET operation feature with the Multi system, set all indoor<br />
units to OUTDOOR UNIT QUIET operation using their remote controllers.<br />
When clearing OUTDOOR UNIT QUIET operation, clear one of the operating indoor units using their remote controller.<br />
However OUTDOOR UNIT QUIET operation display remains on the remote controller for other rooms.<br />
We recommend you release all rooms using their remote controllers.<br />
2. With the priority room setting active.<br />
See “Priority room setting”.<br />
■ COOL/HEAT mode lock<br />
(Available only for heat pump models)<br />
The COOL/HEAT mode lock requires initial programming during installation. Please consult your authorized dealer<br />
for assistance. The COOL/HEAT mode lock sets the unit forcibly to either COOL or HEAT operation. This function<br />
is convenient when you wish to set all indoor units connected to the multi system to the same operation mode.<br />
NOTE<br />
• The COOL/HEAT mode lock cannot be activated together with the priority room setting.<br />
■ Priority room setting<br />
The priority room setting requires initial programming during installation. Please consult your retailer or dealer for assistance.<br />
The room designated as the priority room takes priority in the following situations;<br />
1. Operation mode priority.<br />
As the operation mode of the priority room takes precedence, the user can select a different operation mode from other rooms.<br />
* Room A is the priority room in the examples.<br />
〈Example〉<br />
When COOL operation is selected in room A while operating the following modes in room B, C and D:<br />
Operation mode in<br />
Status of room B, C and D when the unit<br />
room B, C and D<br />
in room A is in COOL operation<br />
COOL or DRY or FAN Current operation mode maintained<br />
HEAT<br />
The unit enters standby mode. Operation resumes when<br />
the room A unit stops operating.<br />
If the unit is set to COOL operation, it continues. If set to<br />
AUTO<br />
HEAT operation, it enters standby mode. Operation<br />
resumes when the room A unit stops operating.<br />
2. Priority when POWERFUL operation is used.<br />
* Room A is the priority room in the examples.<br />
〈Example〉<br />
The indoor units in rooms A, B, C and D are all operating. If the unit in room A enters<br />
POWERFUL operation, operation capacity will be concentrated in room A. In such a case, the<br />
cooling (heating) efficiency of the units in rooms B, C and D may be slightly reduced.<br />
3. Priority when using OUTDOOR UNIT QUIET operation.<br />
* Room A is the priority room in the examples.<br />
〈Example〉<br />
Just by setting the unit in room A to QUIET operation, the air conditioner starts OUTDOOR UNIT QUIET operation.<br />
You don’t have to set all the operated indoor units to QUIET operation.<br />
English<br />
31
CARE<br />
Care and Cleaning<br />
CAUTION<br />
Before cleaning, be sure to stop the operation and<br />
turn the breaker off.<br />
Units<br />
■ Indoor unit, outdoor unit and remote controller<br />
1. Wipe them with dry soft cloth.<br />
■ Front panel<br />
1. Open the front panel.<br />
• Hold the front panel by the panel tabs on the<br />
both sides and open it.<br />
2. Remove the front panel.<br />
• Slide the front panel to either the left or right and<br />
pulling it toward you.<br />
This will disconnect the rotation dowel on one side.<br />
• Disconnect the front panel shaft on the other side in<br />
the same manner.<br />
3. Clean the front panel.<br />
• Wipe it with a soft cloth soaked in water.<br />
• Only neutral detergent may be used.<br />
• In case of washing the panel with water, wipe it with<br />
dry soft cloth, dry it up in the shade after washing.<br />
4. Attach the front panel.<br />
• Align the front panel shaft on the left and right of the<br />
front panel with the slots, then push them all the way<br />
in.<br />
• Close the front panel slowly.<br />
(Press the panel at both sides and the center.)<br />
Front panel<br />
shaft<br />
2) Pull<br />
1) Slide<br />
Fit the key<br />
into the slot.<br />
CAUTION<br />
• Don’t touch the metal parts of the indoor unit. If you touch those parts, this may cause an<br />
injury.<br />
• When removing or attaching the front panel, use a robust and stable stool and watch your<br />
steps carefully.<br />
• When removing or attaching the front panel, support the panel securely with hand to prevent<br />
it from falling.<br />
• For cleaning, do not use hot water above 40°C, benzine, gasoline, thinner, nor other volatile<br />
oils, polishing compound, scrubbing brushes, nor other hand stuff.<br />
• After cleaning, make sure that the front panel is securely fixed.<br />
Slot<br />
32
Filters<br />
1. Pull out the air filters.<br />
• Open the front panel.<br />
• Push a little upwards the tab at the center of each air<br />
filter, then pull it down.<br />
1) Push<br />
English<br />
Air filter<br />
2) Pull down<br />
2. Take off the titanium apatite<br />
photocatalytic air-purifying filter.<br />
• Hold the recessed parts of the frame and unhook the<br />
4 claws.<br />
Filter frame<br />
Titanium apatite<br />
photocatalytic<br />
air-purifying filter<br />
3. Clean or replace each filter.<br />
3-1 Air filter<br />
3-1-1 Wash the air filters with water or clean<br />
them with vacuum cleaner.<br />
• If the dust does not come off easily, wash<br />
them with neutral detergent thinned with<br />
lukewarm water, then dry them up in the<br />
shade.<br />
• Be sure to remove the titanium apatite<br />
photocatalytic air-purifying filter.<br />
• It is recommended to clean the air filters<br />
every 2 weeks.<br />
Claw<br />
Air filter<br />
33
Care and Cleaning<br />
3-2 Titanium apatite photocatalytic air-purifying filter<br />
The titanium apatite photocatalytic air-purifying filter can be renewed by washing it with<br />
water once every 6 months. We recommend replacing it once every 3 years.<br />
[Maintenance]<br />
3-2-1 Vacuum dusts, and soak in warm water<br />
or water for about 10 to 15 minutes if dirt<br />
is heavy.<br />
• Do not remove the filter from frame when<br />
washing with water.<br />
3-2-2 After washing, shake off remaining<br />
water and dry in the shade.<br />
• Since the material is made out of<br />
polyester, do not wring out the filter when<br />
removing water from it.<br />
[Replacement]<br />
3-2-3 Remove the tabs on the filter frame and<br />
replace with a new filter.<br />
• Do not throw away the filter frame. Reuse<br />
the filter frame when replacing the<br />
titanium apatite photocatalytic airpurifying<br />
filter.<br />
• Dispose of the old filter as non-flammable<br />
waste.<br />
4. Set the air filter and titanium apatite<br />
photocatalytic air-purifying filter as they<br />
were and close the front panel.<br />
• Insert claws of the filters into slots of the front panel.<br />
Close the front panel slowly and push the panel at<br />
the 3 points. (One on each side and one in the<br />
middle.)<br />
Push<br />
NOTE<br />
• Operation with dirty filters:<br />
(1) cannot deodorize the air. (2) cannot clean the air.<br />
(3) results in poor heating or cooling. (4) may cause odour.<br />
• To order titanium apatite photocatalytic air-purifying filter contact to the service shop there<br />
you bought the air conditioner.<br />
• Dispose of the old filter as non-flammable waste.<br />
Item<br />
Titanium apatite photocatalytic air-purifying filter<br />
(without frame) 1 set<br />
Part No.<br />
KAF970A46<br />
34
Check<br />
Check that the base, stand and other fittings of the outdoor unit are not decayed or corroded.<br />
Check that nothing blocks the air inlets and the outlets of the indoor unit and the outdoor unit.<br />
Check that the drain comes smoothly out of the drain hose during COOL or DRY operation.<br />
• If no drain water is seen, water may be leaking from the indoor unit. Stop operation and<br />
consult the service shop if this is the case.<br />
English<br />
■ Before a long idle period<br />
1. Operate the FAN only for several hours on a fine day to dry out the<br />
inside.<br />
• Press<br />
and select FAN operation.<br />
• Press<br />
and start operation.<br />
2. After operation stops, turn off the breaker for the room air conditioner.<br />
3. Clean the air filters and set them again.<br />
4. Take out batteries from the remote controller.<br />
NOTE<br />
• When a multi outdoor unit is connected, make sure the HEAT operation is not used at the<br />
other room before you use the FAN operation. (page 30.)<br />
We recommend periodical maintenance.<br />
In certain operating conditions, the inside of the air conditioner may get foul after several seasons of<br />
use, resulting in poor performance. It is recommended to have periodical maintenance by a specialist<br />
aside from regular cleaning by the user. For specialist maintenance, contact the service shop where<br />
you bought the air conditioner.<br />
The maintenance cost must be born by the user.<br />
Important information regarding the refrigerant used.<br />
This product contains fluorinated greenhouse gases covered by the Kyoto Protocol.<br />
Refrigerant type:R410A<br />
GWP (1) value:1975<br />
(1) GWP = global warming potential<br />
Periodical inspections for refrigerant leaks may be required depending on European or local legislation.<br />
Please contact your local dealer for more information.<br />
35
TROUBLESHOOTING<br />
Troubleshooting<br />
• Troubleshooting measures are classified into the following two types on a remedial basis.<br />
Take an appropriate measure according to the symptom.<br />
Not trouble<br />
• These cases are not troubles.<br />
You may just continue using it.<br />
Check<br />
• Please check again before calling a repair person.<br />
The flaps does not start swing<br />
immediately.<br />
• The air conditioner is adjusting the flap<br />
position. The flap will start moving soon.<br />
The HEAT operation stops<br />
suddenly and a flowing sound is<br />
heard.<br />
• The system is taking away the frost on the<br />
outdoor unit. You should wait for about 4 to<br />
12 minutes.<br />
Operation does not start soon.<br />
■ When “ON/OFF” button was pressed<br />
soon after operation was stopped.<br />
■ When the mode was reselected.<br />
• This is to protect the air conditioner.<br />
You should wait for about 3 minutes.<br />
A sound is heard.<br />
■ A sound like a flow of water<br />
• This sound is generated because the<br />
refrigerant in the air conditioner is flowing.<br />
• This is a pumping sound of the water in the<br />
air conditioner and heard when the water is<br />
pumped out from the air conditioner in<br />
cooling or drying operation.<br />
• The refrigerant flows in the air conditioner<br />
even if the air conditioner is not working<br />
when the indoor units in other rooms are in<br />
operation.<br />
■ Blowing sound<br />
• This sound is generated when the flow of the<br />
refrigerant in the air conditioner is switched<br />
over.<br />
■ Pinging sound<br />
• This sound is generated when the size of the<br />
air conditioner slightly expands or shrinks as<br />
a result of temperature changes.<br />
■ Whistling sound<br />
• This sound is generated when refrigerant<br />
flows during defrosting operation.<br />
36
The outdoor unit emits water or<br />
steam.<br />
Operation stopped suddenly.<br />
(<strong>OPERATION</strong> lamp flashes.)<br />
English<br />
■ In HEAT operation<br />
• The frost on the outdoor unit melts into water<br />
or steam when the air conditioner is in<br />
defrost operation.<br />
■ In COOL or DRY operation<br />
• Moisture in the air condenses into water on<br />
the cool surface of outdoor unit piping and<br />
drips.<br />
The air conditioner does not<br />
operate.<br />
(<strong>OPERATION</strong> lamp is off.)<br />
• Hasn’t a breaker turned off or a fuse blown?<br />
• Isn’t it a power failure?<br />
• Are batteries set in the remote controller?<br />
• Is the timer setting correct?<br />
• Are the air filters clean?<br />
• Is there anything to block the air inlet or the<br />
outlet of the indoor and the outdoor units?<br />
• Clean the air filters or take all obstacles away<br />
and turn the breaker off. Then turn it on<br />
again and try operating the air conditioner<br />
with the remote controller. If the lamp still<br />
flashes, call the service shop where you<br />
bought the air conditioner.<br />
• Are operation modes all the same for indoor<br />
units connected to outdoor units in the multi<br />
system?<br />
If not, set all indoor units to the same<br />
operation mode and confirm that the lamps<br />
flash.<br />
Moreover, when the operation mode is in<br />
AUTO, set all indoor unit operation modes to<br />
COOL or HEAT for a moment and check<br />
again that the lamps are normal. If the lamps<br />
stop flashing after the above steps, there is<br />
no malfunction. (page 30.)<br />
Hot air does not flow out soon after<br />
the start of HEAT operation.<br />
• The air conditioner is warming up.<br />
You should wait for 1 to 4 minutes.<br />
(The system is designed to start discharging<br />
air only after it has reached a certain<br />
temperature.)<br />
37
Troubleshooting<br />
Operation stopped suddenly.<br />
(<strong>OPERATION</strong> lamp is on.)<br />
• For system protection, the air conditioner<br />
may stop operating on a sudden large<br />
voltage fluctuation. It automatically resumes<br />
operation in about 3 minutes.<br />
Mist comes out of the indoor unit.<br />
• This happens when the air in the room is<br />
cooled into mist by the cold airflow during<br />
COOL operation.<br />
• This is because the air in the room is cooled<br />
by the heat exchanger and becomes mist<br />
during defrost operation.<br />
Cooling (Heating) effect is poor.<br />
• Are the air filters clean?<br />
• Is there anything to block the air inlet or the<br />
outlet of the indoor and the outdoor units?<br />
• Is the temperature setting appropriate?<br />
• Are the windows and doors closed?<br />
• Are the airflow rate and the airflow direction<br />
set appropriately?<br />
Remote controller does not work<br />
properly.<br />
■ No remote controller signals are<br />
displayed.<br />
■ The remote controller sensitivity is low.<br />
■ The display is low in contrast or blacked<br />
out.<br />
■ The display runs out of control.<br />
• The batteries are dying and the remote<br />
controller is malfunctioning. Replace all the<br />
batteries with new, size AAA.LR03 (alkaline).<br />
For details, refer to “To set the batteries” of<br />
this manual. (page 7.)<br />
HEAT operation cannot be<br />
selected, even though the unit is<br />
heat pump model.<br />
• Slide the DIP switch to the left as shown in<br />
the illustration so that the HEAT operation<br />
can be selected with the “MODE” button.<br />
DIP switch<br />
38
The ON/OFF TIMER does not<br />
operate according to the settings.<br />
The outdoor fan rotates while the<br />
air conditioner is not in operation.<br />
English<br />
• Check if the ON/OFF TIMER and the<br />
WEEKLY TIMER are set to the same time.<br />
Change or deactivate the settings in the<br />
WEEKLY TIMER. (page 22.)<br />
The indoor unit gives out odour.<br />
• This happens when smells of the room,<br />
furniture, or cigarettes are absorbed into the<br />
unit and discharged with the airflow.<br />
(If this happens, we recommend you to have<br />
the indoor unit washed by a technician.<br />
Consult the service shop where you bought<br />
the air conditioner.)<br />
■ After operation is stopped<br />
• The outdoor fan continues rotating for<br />
another 60 seconds for system protection.<br />
■ While the air conditioner is not in<br />
operation<br />
• When the outdoor temperature is very high,<br />
the outdoor fan starts rotating for system<br />
protection.<br />
An abnormal functioning happens<br />
during operation.<br />
• The air conditioner may malfunction with<br />
lightning or radio waves. Turn the breaker off,<br />
turn it on again and try operating the air<br />
conditioner with the remote controller.<br />
39
Troubleshooting<br />
Call the service shop immediately.<br />
WARNING<br />
■ When an abnormality (such as a burning smell) occurs, stop operation and turn the breaker off.<br />
Continued operation in an abnormal condition may result in troubles, electric shocks or fire.<br />
Consult the service shop where you bought the air conditioner.<br />
■ Do not attempt to repair or modify the air conditioner by yourself.<br />
Incorrect work may result in electric shocks or fire.<br />
Consult the service shop where you bought the air conditioner.<br />
If one of the following symptoms takes place, call the service shop immediately.<br />
n The power cord is abnormally hot or damaged.<br />
n An abnormal sound is heard during operation.<br />
n The safety breaker, a fuse, or the earth leakage breaker<br />
cuts off the operation frequently.<br />
n A switch or a button often fails to work properly.<br />
n There is a burning smell.<br />
n Water leaks from the indoor unit.<br />
Turn the breaker<br />
off and call the<br />
service shop.<br />
■ After a power failure<br />
The air conditioner automatically resumes<br />
operation in about 3 minutes. You should just<br />
wait for a while.<br />
■ Lightning<br />
If lightning may strike the neighbouring area,<br />
stop operation and turn the breaker off for<br />
system protection.<br />
Disposal requirements<br />
Your product and the batteries supplied with the controller are marked with this symbol.<br />
This symbol means that electrical and electronic products and batteries shall not be<br />
mixed with unsorted household waste.<br />
For batteries, a chemical symbol can be printed beneath the symbol. This chemical<br />
symbol means that the battery contains a heavy metal above a certain concentration.<br />
Possible chemical symbols are:<br />
■ Pb: lead (>0.004%)<br />
Do not try to dismantle the system yourself: the dismantling of the product, treatment of the refrigerant,<br />
of oil and of other parts must be done by a qualified installer in accordance with relevant local and<br />
national legislation.<br />
Units and waste batteries must be treated at a specialized treatment facility for re-use, recycling and<br />
recovery.<br />
By ensuring correct disposal, you will help to prevent potential negative consequences for the<br />
environment and human health.<br />
Please contact the installer or local authority for more information.<br />
40
Fault diagnosis.<br />
Fault diagnosis by remote controller<br />
In the ARC452A series, the temperature display sections on the<br />
main unit indicate corresponding codes.<br />
1. When is held down for<br />
5 seconds, a “ ” indication flashes on the<br />
temperature display section.<br />
English<br />
2. Press repeatedly until a continuous<br />
beep is produced.<br />
• The code indication changes as shown below, and notifies<br />
with a long beep.<br />
SYSTEM<br />
INDOOR<br />
UNIT<br />
OUTDOOR<br />
UNIT<br />
NOTE<br />
CODE<br />
MEANING<br />
00 NORMAL<br />
UA<br />
INDOOR-OUTDOOR UNIT COMBINATION FAULT<br />
U0<br />
REFRIGERANT SHORTAGE<br />
U2<br />
DROP VOLTAGE OR MAIN CIRCUIT OVERVOLTAGE<br />
U4<br />
FAILURE OF TRANSMISSION (BETWEEN INDOOR UNIT AND OUTDOOR UNIT)<br />
A1<br />
A5<br />
A6<br />
C4<br />
C9<br />
EA<br />
E1<br />
E5<br />
E6<br />
E7<br />
E8<br />
F3<br />
F6<br />
H0<br />
H6<br />
H8<br />
H9<br />
J3<br />
J6<br />
L3<br />
L4<br />
L5<br />
P4<br />
INDOOR PCB DEFECTIVENESS<br />
HIGH PRESSURE CONTROL OR FREEZE-UP PROTECTOR<br />
FAN MOTOR FAULT<br />
FAULTY HEAT EXCHANGER TEMPERATURE SENSOR<br />
FAULTY SUCTION AIR TEMPERATURE SENSOR<br />
COOLING-HEATING SWITCHING ERROR<br />
CIRCUIT BOARD FAULT<br />
OL STARTED<br />
FAULTY COMPRESSOR START UP<br />
DC FAN MOTOR FAULT<br />
OVERCURRENT INPUT<br />
HIGH TEMPERATURE DISCHARGE PIPE CONTROL<br />
HIGH PRESSURE CONTROL (IN COOLING)<br />
SENSOR FAULT<br />
<strong>OPERATION</strong> HALT DUE TO FAULTY POSITION DETECTION SENSOR<br />
DC CURRENT SENSOR FAULT<br />
FAULTY SUCTION AIR TEMPERATURE SENSOR<br />
FAULTY DISCHARGE PIPE TEMPERATURE SENSOR<br />
FAULTY HEAT EXCHANGER TEMPERATURE SENSOR<br />
ELECTRICAL PARTS HEAT FAULT<br />
HIGH TEMPERATURE AT INVERTER CIRCUIT HEATSINK<br />
OUTPUT OVERCURRENT<br />
FAULTY INVERTER CIRCUIT HEATSINK TEMPERATURE SENSOR<br />
1. A short beep and 2 consecutive beeps indicate non-corresponding codes.<br />
2. To cancel the code display, hold the down for 5 seconds. The code display also<br />
cancel itself if the button is not pressed for 1 minute.<br />
41
Troubleshooting<br />
LED ON OUTDOOR UNIT PCB<br />
GREEN<br />
RED<br />
3MXS, 3MKS, 4MXS, 4MKS, 5MXS, 5MKS series<br />
MICROCOMPUTER<br />
NORMAL<br />
GREEN<br />
RED<br />
LED-A<br />
NORMALLY FLASHING<br />
NORMALLY OFF<br />
ON<br />
FLASHING<br />
OFF<br />
IRRELEVANT<br />
MALFUNCTION<br />
DETECTION<br />
LED1 LED2 LED3 LED4 LED5<br />
DIAGNOSIS<br />
NORMAL CHECK INDOOR UNIT<br />
HIGH PRESSURE PROTECTOR WORKED OR FREEZE-UP IN OPERATING UNIT OR STAND-BY UNIT<br />
∗ OVERLOAD RELAY WORKED OR HIGH DISCHARGE PIPE TEMPERATURE<br />
FAULTY COMPRESSOR START<br />
INPUT OVERCURRENT<br />
∗ THERMISTOR OR CT ABNORMALITY<br />
HIGH TEMPERATURE SWITCHBOX<br />
HIGH TEMPERATURE AT INVERTER CIRCUIT HEATSINK<br />
∗ OUTPUT OVERCURRENT<br />
∗ REFRIGERANT SHORTAGE<br />
LOW VOLTAGE TO MAIN CIRCUIT OR MOMENTARY VOLTAGE LOSS<br />
REVERSING SOLENOID VALVE SWITCHING FAILURE<br />
FAN MOTOR FAULT<br />
[NOTE 1]<br />
POWER SUPPLY FAULT OR [NOTE 2]<br />
NOTE: The LED5 is only available in the 5M series.<br />
NOTE<br />
1. Turn the power off and then on again. If the LED display recurs, the outdoor unit PCB is<br />
faulty.<br />
2. Diagnosis marked<br />
∗ Do not apply to some cases. For details, refer to the service guide.<br />
42
Two-dimensional bar code is a code<br />
for manufacturing.<br />
3P248442-3 M08B300 (0911) HT