SSD Flash Replacement Procedure - Tri-State Theatre Supply
SSD Flash Replacement Procedure - Tri-State Theatre Supply
SSD Flash Replacement Procedure - Tri-State Theatre Supply

You also want an ePaper? Increase the reach of your titles
YUMPU automatically turns print PDFs into web optimized ePapers that Google loves.
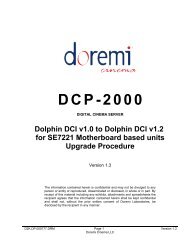
D C P - 2 0 0 0 / D C P - 2 K 4<br />
DIGITAL CINEMA SERVERS<br />
<strong>SSD</strong> <strong>Flash</strong><br />
<strong>Replacement</strong> <strong>Procedure</strong><br />
for SuperMicro X7SBE Motherboard fitted Units<br />
Version 1.0<br />
The information contained herein is confidential and may not be<br />
divulged to any person or entity or reproduced, disseminated or<br />
disclosed, in whole or in part. By receipt of this material including<br />
any exhibits, attachments and spreadsheets the recipient agrees<br />
that the information contained herein shall be kept confidential<br />
and shall not, without the prior written consent of Doremi<br />
Laboratories, be disclosed by the recipient in any manner.<br />
D2K.DP.000804.DRM Page 1 Version 1.0<br />
Doremi Cinema LLC Confidential
Table of Contents<br />
1 INTRODUCTION.........................................................................................................................3<br />
1.1 PURPOSE..................................................................................................................................3<br />
1.2 PROCEDURE APPLICABILITY...........................................................................................................3<br />
2 PARTS AND TOOLS...................................................................................................................4<br />
2.1 PART PROVIDED BY DOREMI.........................................................................................................4<br />
2.2 REQUIRED TOOL........................................................................................................................4<br />
3 REPLACEMENT PROCEDURE..................................................................................................5<br />
3.1 UNIT PREPARATION.....................................................................................................................5<br />
3.2 <strong>SSD</strong> FLASH LOCATION................................................................................................................7<br />
3.3 <strong>SSD</strong> FLASH REMOVAL................................................................................................................7<br />
3.4 NEW <strong>SSD</strong> FLASH INSTALLATION ...................................................................................................8<br />
4 LID CLOSING..............................................................................................................................9<br />
5 BIOS SETUP.............................................................................................................................10<br />
6 DOCUMENT REVISION HISTORY...........................................................................................11<br />
D2K.DP.000804.DRM Page 2 Version 1.0<br />
Doremi Cinema LLC Confidential
1 Introduction<br />
1.1 Purpose<br />
This document presents the procedure to apply in order to replace a <strong>SSD</strong> <strong>Flash</strong> in a<br />
DCP-2000 or a DCP-2K4 unit.<br />
The document is presented as a step-by-step procedure that must be followed as<br />
specific steps might require that previous steps were completed.<br />
CAUTION: The procedure presented in this document must ONLY be<br />
performed by a qualified technician, that is properly grounded in<br />
accordance to the ESD rules presented in ISO 9001 (2000).<br />
1.2 <strong>Procedure</strong> Applicability<br />
The procedure presented in this document ONLY applies to DCP-2000/DCP-2K4 units<br />
fitted with the motherboard X7SBE (SuperMicro) - this motherboard usage is flagged<br />
using a “D” at the end of the unit’s serial number on the rear side of the unit (e.g S/N:<br />
201235D).<br />
D2K.DP.000804.DRM Page 3 Version 1.0<br />
Doremi Cinema LLC Confidential
2 Parts and Tools<br />
2.1 Part Provided by Doremi<br />
CAUTION: Make sure you have the part listed below before starting to apply<br />
the upgrade procedure presented in this document.<br />
The following item, required to complete this procedure, is provided by Doremi:<br />
• <strong>SSD</strong> <strong>Flash</strong>:<br />
2.2 Required Tool<br />
Figure 1: <strong>SSD</strong> <strong>Flash</strong><br />
To be able to perform the procedure detailed in this document, one Phillips tip<br />
screwdriver is required:<br />
Figure 2: Phillips Tip Screwdriver Example<br />
D2K.DP.000804.DRM Page 4 Version 1.0<br />
Doremi Cinema LLC Confidential
3 <strong>Replacement</strong> <strong>Procedure</strong><br />
3.1 Unit Preparation<br />
CAUTION: During the procedure presented in this document, you will have<br />
to remove screws. Collect all removed screws, as you will have<br />
to re-use them when putting back the concerned components at<br />
a later stage of the procedure.<br />
For the upgrade procedure presented in this document, the server (DCP-2000 or DCP-<br />
2K4) unit must be removed from its operating location and put in a clean area (far from<br />
other devices and on a surface fitted with an antistatic mat) as presented below:<br />
1. Power off the unit by selecting SHUT DOWN from the LOGOUT menu: "Menu →<br />
Logout...” and select “Shutdown". Any other method might DAMAGE THE RAID<br />
and result in RAID FAILURE.<br />
2. Unplug the two power cables.<br />
CAUTION: The unit has a dual redundant power supply. Both power cables have to<br />
be removed.<br />
Note: Disconnect any other cables in order to put the unit in a proper place (fitted<br />
with antistatic setting) for this operation. In this case, you might want to put a<br />
label to identify each cable you remove to facilitate their re-installation at the<br />
end of the procedure (e.g. “AES cable”, “GPIO Cable”, …).<br />
3. Remove the server from its rack and place it in a location (e.g. a desk) where you<br />
have room to perform the procedure, while being grounded according to ESD rules<br />
presented in ISO 9001 (2000).<br />
4. Remove the lid according to the steps below:<br />
◦ Remove the six screws holding the lid (two on each side and two on the rear<br />
panel of the chassis) using the Phillips tip screwdriver:<br />
Rear panel screws<br />
Rear panel screws<br />
side screws<br />
Side screws<br />
side<br />
screws<br />
(a)<br />
(b)<br />
Figure 3: Lid Screws Locations – (a) DCP-2000, (b) DCP-2K4<br />
D2K.DP.000804.DRM Page 5 Version 1.0<br />
Doremi Cinema LLC Confidential
◦ Slide the lid from the front side to the rear side of the unit and lift it in order to<br />
remove it from the chassis, as shown on Figure 4:<br />
Slide the cover to the<br />
rear side of the<br />
chassis<br />
(a)<br />
(b)<br />
Figure 4: Lid Removal – (a) DCP-2000, (b) DCP-2K4<br />
D2K.DP.000804.DRM Page 6 Version 1.0<br />
Doremi Cinema LLC Confidential
3.2 <strong>SSD</strong> <strong>Flash</strong> Location<br />
The <strong>SSD</strong> flash is located on the front of the unit, beside the HDD, as presented below:<br />
HDDs<br />
Card holding the<br />
<strong>SSD</strong> flash<br />
HDDs<br />
(a)<br />
Figure 5: <strong>SSD</strong> <strong>Flash</strong> Location – (a) DCP-2000, (b) DCP-2K4<br />
The SDD flash is located on top of the USB hub, secured with a screws and connected<br />
with its IDE-10 connector plugged into the USB hub header.<br />
3.3 <strong>SSD</strong> <strong>Flash</strong> Removal<br />
Unscrew the <strong>SSD</strong> flash from its holding card using a Philips tip screwdriver as presented<br />
below:<br />
(b)<br />
Figure 6: <strong>SSD</strong> <strong>Flash</strong> Screw Removal<br />
Then, unplug gently the <strong>SSD</strong> flash from the card's connector by pulling on the <strong>SSD</strong> flash:<br />
Connector<br />
previously holding<br />
the SDD flash<br />
Figure 7: <strong>SSD</strong> <strong>Flash</strong> Removed<br />
D2K.DP.000804.DRM Page 7 Version 1.0<br />
Doremi Cinema LLC Confidential
3.4 New <strong>SSD</strong> <strong>Flash</strong> Installation<br />
Take the new <strong>SSD</strong> flash provided by Doremi and note the pin hole that is blocked – it will<br />
have to match the missing pin of the holding card's connector as presented below:<br />
Pin hole<br />
blocked<br />
Missing<br />
pin<br />
(a)<br />
Figure 8: <strong>SSD</strong> <strong>Flash</strong> Pin Hole Blocked – Card's Connector Missing Pin<br />
Plug the <strong>SSD</strong> flash into the card's dedicated connector by respecting the matching<br />
between the blocked pin hole and the connector missing pin. Then put back the screw<br />
holding the <strong>SSD</strong> flash to the card's stand-off as presented below:<br />
(b)<br />
stand-off<br />
<strong>SSD</strong> being<br />
attached to the<br />
card's stand-off<br />
Figure 9: <strong>SSD</strong> <strong>Flash</strong> Pin Hole Blocked – Card's Connector Missing Pin<br />
D2K.DP.000804.DRM Page 8 Version 1.0<br />
Doremi Cinema LLC Confidential
4 Lid Closing<br />
When the previous upgrade steps are completed, the DCP-2000 lid can be closed by<br />
sliding it from the rear panel to the front side – Make sure there are no wires caught by<br />
the lid.<br />
Slide the cover to<br />
the front side of the<br />
chassis<br />
(a)<br />
Figure 10: Lid Closing<br />
Tighten the 6 black screws that were removed at the beginning of the procedure, as<br />
presented below:<br />
(b)<br />
Rear panel screws<br />
Rear panel screws<br />
side screws<br />
side screws<br />
side<br />
screws<br />
(a)<br />
Figure 11: Lid Screws<br />
Then the unit can be put back into its rack – if any – and connected to power.<br />
CAUTION: In case for any reason the HDD were removed from the unit,<br />
insert them back BEFORE plugging the power cables.<br />
Note: Reconnect all the cables that were disconnected at the beginning of this<br />
procedure.<br />
(b)<br />
D2K.DP.000804.DRM Page 9 Version 1.0<br />
Doremi Cinema LLC Confidential
5 BIOS Setup<br />
The BIOS needs now to be checked to be sure it still has the proper boot order. Follow<br />
the steps below:<br />
• Start with the unit powered OFF.<br />
• Power ON the unit.<br />
• Press the “Delete” key on the keyboard when the SuperMicro load (splash)<br />
screen appears, in order to enter into the BIOS configuration.<br />
• In “Main” tab change the Time and Date to “GMT” time and date according to a<br />
GMT clock set to GMT +/- 1 minute.<br />
• Set the following:<br />
Native Mode Operation<br />
SATA RAID Enable<br />
SATA AHCI Enable<br />
SATA AHCI Legacy Enable<br />
[Serial ATA]<br />
[Disabled]<br />
[Enabled]<br />
[Disabled]<br />
• Go in “Advanced” menu, choose “Boot Features” and make sure that the<br />
following is set:<br />
Only USB Port #6 cab boot<br />
Power Loss Control<br />
[Enabled]<br />
[Last <strong>State</strong>]<br />
• Still within the “Advanced” menu, go to “Hardware Monitor” and make sure that<br />
the following is set:<br />
Fan Speed Control Mode [3-pin Server]<br />
• In the “Boot” menu:<br />
Press the key “3” to load Doremi boot order. You should read:<br />
Boot Priority Order:<br />
1. USB HDD: Intel Value <strong>SSD</strong> - (USB 1.1)<br />
Troubleshooting tips:<br />
If the USB HDD: Intel Value <strong>SSD</strong> – (USB 1.1) is not detected in “Boot<br />
Priority Order”: power the unit off, reconnect flash or check the cable and<br />
then power on the unit to check that it is now detected.<br />
• After Boot Priority is correctly set, press F10 and confirm by pressing .<br />
When completed, check mark the tag attached to the DCP-2000 at the “BIOS<br />
Configuration” position, indicating that this configuration was performed and successful.<br />
The SDD flash replacement procedure is now completed.<br />
Please contact our Technical Support department at 1-818-562-1101 or email<br />
support@doremicinema.com if you have any questions or are in need of assistance.<br />
Thank you.<br />
D2K.DP.000804.DRM Page 10 Version 1.0<br />
Doremi Cinema LLC Confidential
6 Document Revision History<br />
Date Version Description<br />
05/29/2009 1.0 First version<br />
D2K.DP.000804.DRM Page 11 Version 1.0<br />
Doremi Cinema LLC Confidential