198942 High Speed Centrifugal Fan INSTALLATION ... - Westeel
198942 High Speed Centrifugal Fan INSTALLATION ... - Westeel
198942 High Speed Centrifugal Fan INSTALLATION ... - Westeel

Create successful ePaper yourself
Turn your PDF publications into a flip-book with our unique Google optimized e-Paper software.
Part Number: <strong>198942</strong><br />
Revision 1<br />
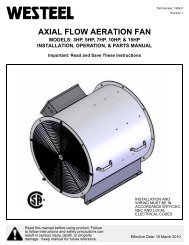
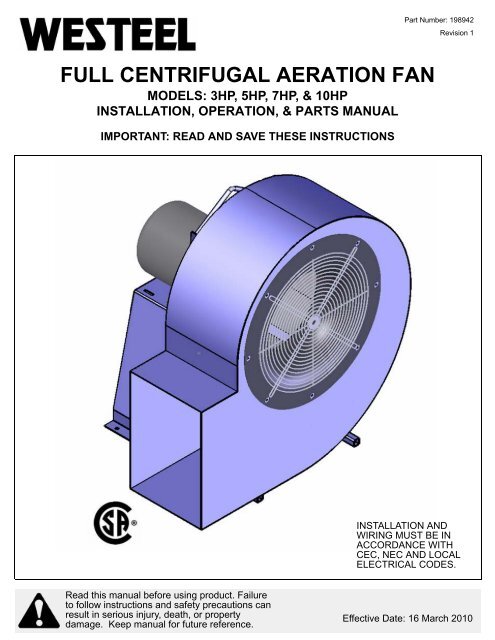
FULL CENTRIFUGAL AERATION FAN<br />
MODELS: 3HP, 5HP, 7HP, & 10HP<br />
<strong>INSTALLATION</strong>, OPERATION, & PARTS MANUAL<br />
IMPORTANT: READ AND SAVE THESE INSTRUCTIONS<br />
<strong>INSTALLATION</strong> AND<br />
WIRING MUST BE IN<br />
ACCORDANCE WITH<br />
CEC, NEC AND LOCAL<br />
ELECTRICAL CODES.<br />
Read this manual before using product. Failure<br />
to follow instructions and safety precautions can<br />
result in serious injury, death, or property<br />
damage. Keep manual for future reference.<br />
Effective Date: 16 March 2010
This product has been designed and constructed according to general engineering<br />
standards a . Other local regulations may apply and must be followed by the operator.<br />
We strongly recommend that all personnel associated with this equipment be trained<br />
in the correct operational and safety procedures required for this product. Periodic<br />
reviews of this manual with all employees should be standard practice. For your<br />
convenience, we include this sign-off sheet so you can record your periodic reviews.<br />
Date Employee Signature Employer Signature<br />
a. Standards include organizations such as the American Society of Agricultural and Biological Engineers,<br />
American National Standards Institute, Canadian Standards Association, International Organization for<br />
Standardization, and/or others.
WESTEEL - FULL CENTRIFUGAL AERATION FAN<br />
3HP, 5HP, 7HP, & 10HP<br />
TABLE OF CONTENTS<br />
1. Introduction .......................................................................................................................... 5<br />
2. Safety First............................................................................................................................ 7<br />
2.1. General Safety ......................................................................................................... 8<br />
2.2. Installation Safety ..................................................................................................... 9<br />
2.3. Operational & Maintenance Safety........................................................................... 9<br />
2.4. Bin Roof Safety ........................................................................................................ 9<br />
2.5. Safety Decal Locations........................................................................................... 10<br />
2.5.1. Decal Installation ...................................................................................... 10<br />
2.5.2. Decal Locations ........................................................................................ 10<br />
3. Installation .......................................................................................................................... 13<br />
3.1. Before You Begin ................................................................................................... 13<br />
3.2. Location & Mounting............................................................................................... 13<br />
3.3. Electric Motor Wiring .............................................................................................. 13<br />
4. Operation ............................................................................................................................ 15<br />
4.1. Start-Up .................................................................................................................. 15<br />
4.2. Break-In.................................................................................................................. 15<br />
4.3. Shutdown ............................................................................................................... 16<br />
4.4. Emergency Stop..................................................................................................... 16<br />
4.5. Application Requirements ...................................................................................... 17<br />
5. Maintenance & Storage...................................................................................................... 19<br />
5.1. Maintenance........................................................................................................... 19<br />
5.1.1. Cleaning ................................................................................................... 19<br />
5.1.2. Servicing & Part Replacement.................................................................. 19<br />
5.2. Storage................................................................................................................... 20<br />
6. Troubleshooting ................................................................................................................. 21<br />
7. Appendix............................................................................................................................. 23<br />
7.1. Parts Lists............................................................................................................... 23<br />
7.2. Electrical Schematics ............................................................................................. 28<br />
7.3. Aeration Tips .......................................................................................................... 30<br />
Warranty.................................................................................................................................. 33<br />
<strong>198942</strong> 3
WESTEEL - FULL CENTRIFUGAL AERATION FAN<br />
3HP, 5HP, 7HP, & 10HP<br />
4 <strong>198942</strong>
WESTEEL - FULL CENTRIFUGAL AERATION FAN<br />
3HP, 5HP, 7HP, & 10HP<br />
1. Introduction<br />
1. INTRODUCTION<br />
Thank you for your purchase. This aeration fan is an excellent addition to any bin<br />
and it will allow you to harvest in damp conditions, maintain stored grain in peak<br />
condition, and prevent mold growth and insect infestation. With proper care<br />
during and after installation, your fan will provide you with many years of troublefree<br />
service.<br />
Safe, efficient, and trouble-free operation of your fan requires that you, and<br />
anyone else who will be involved with this equipment, read and understand all<br />
safety instructions and procedures contained within this manual. A sign-off form<br />
is provided on the inside front cover for your convenience.<br />
Keep this manual handy for frequent reference and to review with new<br />
personnel. Call your local distributor or dealer if you need assistance or<br />
additional information.<br />
<strong>198942</strong> 5
1. INTRODUCTION WESTEEL - FULL CENTRIFUGAL AERATION FAN<br />
3HP, 5HP, 7HP, & 10HP<br />
6 <strong>198942</strong>
WESTEEL - FULL CENTRIFUGAL AERATION FAN<br />
3HP, 5HP, 7HP, & 10HP<br />
2. Safety First<br />
2. SAFETY FIRST<br />
The Safety Alert symbol to the left identifies important safety messages on the<br />
product and in the manual. When you see this symbol, be alert to the possibility<br />
of personal injury or death. Follow the instructions in the safety messages.<br />
Why is SAFETY important to you?<br />
Three big reasons:<br />
• Accidents disable and kill.<br />
• Accidents cost.<br />
• Accidents can be avoided.<br />
SIGNAL WORDS<br />
Note the use of the signal words DANGER, WARNING, CAUTION, and NOTICE<br />
with the safety messages. The appropriate signal word for each message has<br />
been selected using the definitions below as a guideline.<br />
The Safety Alert symbol means ATTENTION, BE ALERT!, YOUR SAFETY IS<br />
INVOLVED.<br />
DANGER<br />
Indicates an imminently hazardous situation<br />
that, if not avoided, will result in serious injury<br />
or death.<br />
WARNING<br />
Indicates a hazardous situation that, if not<br />
avoided, could result in serious injury or<br />
death.<br />
CAUTION<br />
Indicates a hazardous situation that, if not<br />
avoided, may result in minor or moderate<br />
injury.<br />
NOTICE<br />
Indicates a potentially hazardous situation that, if not<br />
avoided, may result in property damage.<br />
<strong>198942</strong> 7
2. SAFETY FIRST WESTEEL - FULL CENTRIFUGAL AERATION FAN<br />
2.1. GENERAL SAFETY 3HP, 5HP, 7HP, & 10HP<br />
2.1. GENERAL SAFETY<br />
Important:<br />
The general safety section includes instructions that apply to all safety practices.<br />
Any instructions specific to a certain safety practice (e.g., assembly safety), can<br />
be found in the appropriate section. Always read the complete instructional<br />
sections and not just these safety summaries before doing anything with the<br />
equipment.<br />
YOU are responsible for the SAFE use and maintenance of your equipment.<br />
YOU must ensure that you and anyone else who is going to work around the<br />
equipment understands all procedures and related SAFETY information<br />
contained in this manual.<br />
Remember, YOU are the key to safety. Good safety practices not only protect<br />
you, but also the people around you. Make these practices a working part of your<br />
safety program.<br />
• It is the equipment owner and the operator's responsibility to read and understand<br />
ALL safety instructions, safety decals, and manuals and follow them<br />
before assembling, operating, or maintaining the equipment. All accidents<br />
can be avoided.<br />
• Equipment owners must give instructions and review the information initially<br />
and anually with all personnel before allowing them to operate this product.<br />
Untrained users/operators expose themselves and bystanders to possible<br />
serious injury or death.<br />
• Use this equipment for its intended purposes only.<br />
• Do not modify the equipment in any way. Unauthorized modification may<br />
impair the function and/or safety, and could affect the life of the equipment.<br />
Any modification to the equipment voids the warranty.<br />
• Do not allow children, spectators, or bystanders within the work area.<br />
• Have a first-aid kit available for use should the need arise, and know how to<br />
use it.<br />
• Provide a fire extinguisher for use in case of an accident. Store in a highly visible<br />
place.<br />
• Wear appropriate protective gear. This list includes, but<br />
is not limited to:<br />
• a hard hat<br />
•gloves<br />
• protective shoes with slip-resistant soles<br />
• protective goggles<br />
• hearing protection<br />
• For Powered Equipment: before servicing, adjusting, or repairing powered<br />
equipment, unplug, place all controls in neutral or off position, stop the engine<br />
or motor, remove ignition key or lock out power source, and wait for all moving<br />
parts to stop.<br />
8 <strong>198942</strong>
WESTEEL - FULL CENTRIFUGAL AERATION FAN<br />
3HP, 5HP, 7HP, & 10HP<br />
2. SAFETY FIRST<br />
2.2. <strong>INSTALLATION</strong> SAFETY<br />
• Follow good shop practices:<br />
• keep service area clean and dry<br />
• be sure electrical outlets and tools are properly<br />
grounded<br />
• use adequate light for the job at hand<br />
• Think SAFETY! Work SAFELY!<br />
2.2. <strong>INSTALLATION</strong> SAFETY<br />
• Check all equipment for damage immediately upon arrival. Do not attempt to<br />
install a damaged item.<br />
• Have 2 people handle the heavy, bulky components.<br />
2.3. OPERATIONAL & MAINTENANCE SAFETY<br />
• Ensure that electrical cords are in good condition; replace if necessary.<br />
• Ensure the fan inlet is not plugged with any foreign material.<br />
• Keep inlet screen in place at all times.<br />
• Before resuming work, install and secure all guards. Keep guards in good<br />
working order.<br />
• Ensure parts are in good condition and installed properly.<br />
Storage Safety<br />
• Store the unit in a dry, clean area away from human activity.<br />
• Do not permit children to play on or around the stored machine.<br />
2.4. BIN ROOF SAFETY<br />
To prevent bin damage from aeration:<br />
• Roof vents should be sized at 1 ft 2 for every 1000 ft 3 /min of air to minimize<br />
condensation.<br />
• Operate fan as intended with positive pressure.<br />
• Positive pressure is shown in Figure 1.1, with air entering through the bottom<br />
and exiting out the top.<br />
• <strong>Fan</strong> pressure can be reversed and the fan can be operated with negative<br />
pressure if wiring is modified. However, reversing fan operation can damage<br />
the roof.<br />
• Roof vents may become partially or fully blocked with ice in temperatures<br />
below freezing with high humidity conditions. Discontinue operation of fan in<br />
these conditions or add supplemental heat.<br />
• Roof damage may occur to the bin if procedures in this manual are not properly<br />
followed. Operate fan only as described in this manual with positive pressure<br />
and using bin roof vents.<br />
Bin damage due to improper fan operation is not covered by warranty.<br />
<strong>198942</strong> 9
2. SAFETY FIRST WESTEEL - FULL CENTRIFUGAL AERATION FAN<br />
2.5. SAFETY DECAL LOCATIONS 3HP, 5HP, 7HP, & 10HP<br />
Figure 2.1<br />
2.5. SAFETY DECAL LOCATIONS<br />
• Keep safety decals clean and legible at all times.<br />
• Replace safety decals that are missing or have become illegible. See decal<br />
location figures below.<br />
• Replaced parts must display the same decal(s) as the original part.<br />
• Safety decals are available from your distributor, dealer, or factory.<br />
2.5.1. DECAL <strong>INSTALLATION</strong><br />
1. Decal area must be clean and dry, with a temperature above 10°C (50°F).<br />
2. Decide on the exact position before you remove the backing paper.<br />
3. Align the decal over the specified area and carefully press the small portion<br />
with the exposed sticky backing in place.<br />
4. Slowly peel back the remaining paper and carefully smooth the remaining<br />
portion of the decal in place.<br />
5. Small air pockets can be pierced with a pin and smoothed out using the sign<br />
backing paper.<br />
2.5.2. DECAL LOCATIONS<br />
Replicas of the safety decals that are attached to the equipment are shown<br />
below. Good safety requires that you familiarize yourself with the various safety<br />
decals and the areas or particular functions that the decals apply to as well as<br />
the safety precautions that must be taken to avoid serious, injury, death, or<br />
damage.<br />
10 <strong>198942</strong>
WESTEEL - FULL CENTRIFUGAL AERATION FAN<br />
3HP, 5HP, 7HP, & 10HP<br />
2. SAFETY FIRST<br />
2.5. SAFETY DECAL LOCATIONS<br />
Figure 2.2 Safety Decal Locations<br />
<strong>198942</strong> 11
2. SAFETY FIRST WESTEEL - FULL CENTRIFUGAL AERATION FAN<br />
2.5. SAFETY DECAL LOCATIONS 3HP, 5HP, 7HP, & 10HP<br />
Figure 2.3 Safety Decal Locations<br />
12 <strong>198942</strong>
WESTEEL - FULL CENTRIFUGAL AERATION FAN<br />
3HP, 5HP, 7HP, & 10HP<br />
3. Installation<br />
3. <strong>INSTALLATION</strong><br />
3.1. BEFORE YOU BEGIN<br />
Warning: Before continuing, please reread the safety information relevant to this section at<br />
the beginning of this manual. Failure to follow the safety instructions can result in serious<br />
injury, death, or property damage.<br />
3.1. BEFORE YOU BEGIN<br />
Important:<br />
All fan installation and maintenance must be done by a qualified electrician in<br />
accordance with all applicable local codes and standards.<br />
3.2. LOCATION & MOUNTING<br />
Flat Bottom Bins:<br />
• <strong>Fan</strong> must be mounted and attached to a flat, level concrete surface.<br />
• Ensure that the fan fits properly with the bin transition ducting.<br />
• <strong>Fan</strong> must be mounted as close to the bin as possible. Leave 12” to 18” or<br />
more between the fan and bin to allow for routine servicing and inspection.<br />
• Provide adequate drainage to protect the fan.<br />
Hopper Bottom Bins:<br />
• <strong>Fan</strong> must be properly mounted on a platform or braced in a similar manner<br />
to support the fan’s weight.<br />
3.3. ELECTRIC MOTOR WIRING<br />
NOTICE<br />
Damage will occur to the fan if not properly supported.<br />
• Voltage, amperage, and rpm’s are located on the specification plate on the<br />
fan housing.<br />
• A wiring diagram is located on the inside of the fan electrical box lid.<br />
• Use a separate circuit from the distribution panel for the fan.<br />
• Installing a time-delayed circuit breaker will allow for start up current (minimum<br />
requirement is 2.5 times the maximum running amperage on motor<br />
nameplate). Check with local electrical code for more details.<br />
• Ensure proper gauge of cable between power source and fan unit. See Table<br />
3.1.<br />
NOTICE<br />
Incorrect gauge of cable will result in low voltage supply to<br />
the motor causing premature failure.<br />
<strong>198942</strong> 13
3. <strong>INSTALLATION</strong> WESTEEL - FULL CENTRIFUGAL AERATION FAN<br />
3.3. ELECTRIC MOTOR WIRING 3HP, 5HP, 7HP, & 10HP<br />
Table 3.1 Conductor Sizes<br />
HP<br />
PHASE<br />
1<br />
5 3<br />
3<br />
1<br />
7.5 3<br />
3<br />
3<br />
10<br />
3<br />
3<br />
15<br />
3<br />
3<br />
20<br />
3<br />
3<br />
25<br />
3<br />
3<br />
30<br />
3<br />
Note:<br />
MOTOR<br />
VOLTS<br />
230<br />
230<br />
460<br />
230<br />
230<br />
460<br />
230<br />
460<br />
230<br />
460<br />
230<br />
460<br />
230<br />
460<br />
230<br />
CONDUCTOR SIZES (AWG) FOR VARIOUS MOTOR TO<br />
TRANSFORMER DISTANCES<br />
100 FT 150 FT 200 FT 300 FT 500 FT<br />
6<br />
10<br />
12<br />
6<br />
8<br />
12<br />
6<br />
12<br />
6<br />
12<br />
4<br />
10<br />
2<br />
8<br />
2<br />
4<br />
8<br />
12<br />
4<br />
6<br />
12<br />
4<br />
12<br />
4<br />
10<br />
2<br />
8<br />
2<br />
8<br />
1<br />
460 8<br />
6<br />
6<br />
4<br />
2<br />
All electrical connections and wiring must follow all applicable local codes and<br />
standards.<br />
4<br />
8<br />
12<br />
3<br />
6<br />
12<br />
4<br />
12<br />
4<br />
10<br />
8<br />
2<br />
2<br />
6<br />
1<br />
2<br />
6<br />
10<br />
1<br />
4<br />
10<br />
4<br />
10<br />
2<br />
8<br />
1<br />
6<br />
0<br />
6<br />
00<br />
0<br />
4<br />
8<br />
0<br />
2<br />
8<br />
1<br />
8<br />
0<br />
6<br />
000<br />
4<br />
000<br />
4<br />
0000<br />
14 <strong>198942</strong>
WESTEEL - FULL CENTRIFUGAL AERATION FAN<br />
3HP, 5HP, 7HP, & 10HP<br />
4. Operation<br />
4. OPERATION<br />
4.1. START-UP<br />
Warning: Before continuing, please reread the safety information relevant to this section at<br />
the beginning of this manual. Failure to follow the safety instructions can result in serious<br />
injury, death, or property damage.<br />
4.1. START-UP<br />
4.2. BREAK-IN<br />
1. Open bin roof vents.<br />
2. Turn on power to fan.<br />
3. For 230V models, move the toggle switch to the START position (this is the<br />
spring-loaded or momentary position of the switch). For 460V/575V models,<br />
press the green START button and hold momentarily until fan starts. <strong>Fan</strong><br />
should continue to run once green button is released.<br />
4. If the fan does not start or if it stops running, refer to the troubleshooting<br />
section.<br />
Although there are no operational restrictions on the machine when used for the<br />
first time, it is recommended that the following items be checked:<br />
BEFORE STARTING:<br />
• Read the power unit’s operation manual.<br />
• Ensure that the fan is properly attached to the grain bin and properly supported.<br />
• During the first few minutes of operation, ensure that the unit is running properly.<br />
AFTER OPERATING FOR 1/2 HOUR:<br />
• Check to see if there is excessive vibration in the fan. If there is, stop the fan<br />
and consult your local dealer or the factory.<br />
NOTICE<br />
Continual use of a vibrating fan will cause premature failure<br />
of motor and bearings. It will also cause metal fatigue in the<br />
fan wheel assembly and fan housing.<br />
• Check that all guards are installed and are working as intended.<br />
AFTER OPERATING FOR 5 AND 10 HOURS:<br />
• Check that all guards are installed and are working properly.<br />
• Check all bolts and other hardware to ensure that everything is tight and<br />
properly positioned.<br />
<strong>198942</strong> 15
4. OPERATION WESTEEL - FULL CENTRIFUGAL AERATION FAN<br />
4.3. SHUTDOWN 3HP, 5HP, 7HP, & 10HP<br />
4.3. SHUTDOWN<br />
1. For 230V models, move the toggle switch to the OFF position. For 460V/<br />
575V models, press the red STOP button.<br />
2. When shutting down the fan for extended periods of time, shut off the power<br />
at the disconnect/source to prevent any inadvertent start-up of the fan.<br />
3. Close bin roof vents.<br />
4.4. EMERGENCY STOP<br />
FOREIGN OBJECT OBSTRUCTION<br />
NOTICE<br />
Heating the air going into the aeration fan will damage the<br />
fan and its components, and will void the warranty.<br />
NOTICE<br />
Before operating fan, ensure that the fan inlet is not<br />
obstructed or restricted in any way.<br />
WARNING<br />
1. Immediately shut down fan and lock out power source.<br />
2. Remove obstruction.<br />
3. Inspect the inlet screen and fan wheel assembly for damage. Repair or<br />
replace as required.<br />
EXCESSIVE FAN VIBRATION OR NOISE<br />
To prevent serious injury, keep away from<br />
blade when fan is operating. Shut off and lock<br />
out or disconnect power before inspecting or<br />
servicing.<br />
Replace safety shield before operating.<br />
1. Immediately shut down and lock out power source.<br />
2. Inspect inlet for an obstruction, remove if necessary.<br />
3. Restart fan to see if it is still vibrating excessively. If it is, immediately shut off<br />
fan and lock out power source.<br />
4. Contact your local dealer for inspection of the fan wheel assembly.<br />
16 <strong>198942</strong>
WESTEEL - FULL CENTRIFUGAL AERATION FAN<br />
3HP, 5HP, 7HP, & 10HP<br />
4.5. APPLICATION REQUIREMENTS<br />
4. OPERATION<br />
4.4. EMERGENCY STOP<br />
This aeration fan must only be used for aeration and natural air drying of grain<br />
products.<br />
A downstream heater can be added if extra drying is required.<br />
<strong>198942</strong> 17
4. OPERATION WESTEEL - FULL CENTRIFUGAL AERATION FAN<br />
4.4. EMERGENCY STOP 3HP, 5HP, 7HP, & 10HP<br />
18 <strong>198942</strong>
WESTEEL - FULL CENTRIFUGAL AERATION FAN<br />
5. MAINTENANCE & STORAGE<br />
3HP, 5HP, 7HP, & 10HP<br />
5.1. MAINTENANCE<br />
5. Maintenance & Storage<br />
Warning: Before continuing, please reread the safety information relevant to this section at<br />
the beginning of this manual. Failure to follow the safety instructions can result in serious<br />
injury, death, or property damage.<br />
WARNING<br />
Before performing any maintenance on this<br />
unit, shut off and lock out power source.<br />
Note:<br />
If required, illustrations of the fan can be found in the appendix.<br />
5.1. MAINTENANCE<br />
5.1.1. CLEANING<br />
• Check housing and fan blade periodically for debris buildup drawn in by the<br />
airstream.<br />
• Remove safety screen and inlet to expose inner housing and fan blade.<br />
• Clean the exposed items with soapy water and a non-abrasive brush.<br />
• Replace all guards before using fan again.<br />
5.1.2. SERVICING & PART REPLACEMENT<br />
If there is any service/part replacement work required on the fan, it is important to<br />
reinstall the fan wheel assembly in exactly the same place. Failure to do so will<br />
cause premature wear, vibration, and part failure.<br />
Ensure the edge of the inlet cone (fit into the wheel cover) covers approximately<br />
1/2 of the lip on the face plate of the wheel.<br />
WARNING<br />
Failure to reinstall the inlet cone and screen<br />
before operating the fan may result in serious<br />
injury or death.<br />
<strong>198942</strong> 19
5. MAINTENANCE & STORAGE WESTEEL - FULL CENTRIFUGAL AERATION FAN<br />
5.1. MAINTENANCE 3HP, 5HP, 7HP, & 10HP<br />
5.2. STORAGE<br />
• Ensure that all foreign material is removed from the fan.<br />
• Inspect electrical wires and repair if necessary.<br />
• Inspect all parts and components and repair or replace as required.<br />
• If fan must be stored outside, it should be completely covered with a tarp to<br />
ensure that foreign material and the weather will not affect the fan.<br />
• If the fan is to be stored inside, it should be in a clean, dry location.<br />
20 <strong>198942</strong>
WESTEEL - FULL CENTRIFUGAL AERATION FAN<br />
3HP, 5HP, 7HP, & 10HP<br />
6. Troubleshooting<br />
6. TROUBLESHOOTING<br />
FAN RELATED PROBLEMS<br />
1. PROBLEM: <strong>Fan</strong> does not run.<br />
Cause<br />
Solution<br />
Blown fuse / tripped breaker Replace fuse or reset breaker<br />
No power at fan<br />
Turn power on at source<br />
Defective wiring/connection<br />
Follow wiring diagram and check for broken wires<br />
and loose connections<br />
Incorrect wire size<br />
Refer to wire sizing charts for correct size<br />
Defective motor<br />
Replace if necessary<br />
Defective magnetic starter Check contactor for proper function<br />
2. PROBLEM: <strong>Fan</strong> runs for a short time then shuts off.<br />
Cause<br />
Solution<br />
Undersize wiring<br />
Refer to wire sizing charts for correct size<br />
Low line voltage at fan<br />
If wire size is correct, call power company<br />
Let motor cool off then retry; if symptoms persist,<br />
Internal overload tripped<br />
check amperage draw; if high, correct, if not,<br />
thermal overload could be tripping out at incorrect<br />
temperature<br />
Undersize wiring<br />
Refer to wire sizing charts for correct size<br />
Low line voltage at fan<br />
If wire size is correct, call power company<br />
Defective magnetic contactor Replace contactor<br />
Defective start/stop switch Replace switch<br />
3. PROBLEM: <strong>Fan</strong> makes ticking sound.<br />
Cause<br />
Solution<br />
Turn off power to fan; rotate impellor slowly to see<br />
<strong>Fan</strong> impellor rubbing housing<br />
if impellor is rubbing the housing, if so, adjust<br />
motor positioning to obtain equal clearance all<br />
around the impellor<br />
Motor bearing defective<br />
Replace bearing<br />
4. PROBLEM: <strong>Fan</strong> vibrates excessively.<br />
Cause<br />
Solution<br />
<strong>Fan</strong> not level<br />
Level fan<br />
Dirt buildup on impellor<br />
Clean blade<br />
Bent motor shaft<br />
Replace motor<br />
Improperly mounted impellor Position impellor correctly<br />
Impellor out of balance<br />
Replace or have impellor rebalanced<br />
<strong>198942</strong> 21
6. TROUBLESHOOTING WESTEEL - FULL CENTRIFUGAL AERATION FAN<br />
3HP, 5HP, 7HP, & 10HP<br />
22 <strong>198942</strong>
WESTEEL - FULL CENTRIFUGAL AERATION FAN<br />
3HP, 5HP, 7HP, & 10HP<br />
7. Appendix<br />
7. APPENDIX<br />
7.1. PARTS LISTS<br />
7.1. PARTS LISTS<br />
FULL CENTRIFUGAL FAN 3HP<br />
ITEM PART NUMBER DESCRIPTION<br />
1 GGF-8014 MOTOR 3HP TEFC 3450RPM 1PH 230V<br />
GGF-8015 MOTOR 3HP TEFC 3450RPM 3PH 230/460V<br />
GGF-8016 MOTOR 3HP TEFC 3450RPM 3PH 575V<br />
2 GGF-8074 3HP HOUSING<br />
3 GGF-8064 3HP FAN WHEEL<br />
4 GGF-8065 3HP FC INLET CONE<br />
5 GGF-8066 INLET SCREEN 14"<br />
6 GGF-8054 ELECTRICAL BOX<br />
7 GGF-8063 ELECTRICAL BOX COVER<br />
8 GGF-8041 STARTER CONTACTOR 1PH 230V<br />
GGF-8044 STARTER CONTACTOR 3PH 230V C/W AUX<br />
GGF-8045 STARTER CONTACTOR 3PH 460V C/W AUX<br />
GGF-8047 STARTER CONTACTOR 3PH 575V C/W AUX<br />
9 GGF-8050 STARTER SWITCH 1PH 230V<br />
GGF-8052 STARTER SWITCH 3PH 460/575<br />
10 GGF-8051 BOOT COVER 1PH 230V<br />
GGF-8053 BOOT COVER 3PH 460/575<br />
<strong>198942</strong> 23
7. APPENDIX WESTEEL - FULL CENTRIFUGAL AERATION FAN<br />
7.1. PARTS LISTS 3HP, 5HP, 7HP, & 10HP<br />
FULL CENTRIFUGAL FAN 5HP<br />
ITEM PART NUMBER DESCRIPTION<br />
1 GGF-8017 MOTOR 5HP TEFC 3450RPM 1PH 230V<br />
GGF-8018 MOTOR 5HP TEFC 3450RPM 3PH 230/460V<br />
GGF-8019 MOTOR 5HP TEFC 3450RPM 3PH 575V<br />
2 GGF-8077 5HP HOUSING<br />
3 GGF-8068 5HP FAN WHEEL<br />
4 GGF-8069 5HP FC INLET CONE<br />
5 GGF-8066 INLET SCREEN 14"<br />
6 GGF-8054 ELECTRICAL BOX<br />
7 GGF-8063 ELECTRICAL BOX COVER<br />
8 GGF-8041 STARTER CONTACTOR 1PH 230V<br />
GGF-8044 STARTER CONTACTOR 3PH 230V C/W AUX<br />
GGF-8045 STARTER CONTACTOR 3PH 460V C/W AUX<br />
GGF-8047 STARTER CONTACTOR 3PH 575V C/W AUX<br />
9 GGF-8050 STARTER SWITCH 1PH 230V<br />
GGF-8052 STARTER SWITCH 3PH 460/575<br />
10 GGF-8051 BOOT COVER 1PH 230V<br />
GGF-8053 BOOT COVER 3PH 460/575<br />
24 <strong>198942</strong>
WESTEEL - FULL CENTRIFUGAL AERATION FAN<br />
3HP, 5HP, 7HP, & 10HP<br />
7. APPENDIX<br />
7.1. PARTS LISTS<br />
FULL CENTRIFUGAL FAN 7HP<br />
ITEM PART NUMBER DESCRIPTION<br />
1 GGF-8020 MOTOR 7HP TEFC 3450RPM 1PH 230V<br />
GGF-8021 MOTOR 7HP TEFC 3450RPM 3PH 230/460V<br />
GGF-8022 MOTOR 7HP TEFC 3450RPM 3PH 575V<br />
2 GGF-8080 7HP HOUSING<br />
3 GGF-8070 7HP FAN WHEEL<br />
4 GGF-8071 7HP FC INLET CONE<br />
5 GGF-8066 INLET SCREEN 14"<br />
6 GGF-8054 ELECTRICAL BOX<br />
7 GGF-8063 ELECTRICAL BOX COVER<br />
8 GGF-8042 STARTER CONTACTOR 1PH 230V<br />
GGF-8044 STARTER CONTACTOR 3PH 230V C/W AUX<br />
GGF-8045 STARTER CONTACTOR 3PH 460V C/W AUX<br />
GGF-8047 STARTER CONTACTOR 3PH 575V C/W AUX<br />
9 GGF-8050 STARTER SWITCH 1PH 230V<br />
GGF-8052 STARTER SWITCH 3PH 460/575<br />
10 GGF-8051 BOOT COVER 1PH 230V<br />
GGF-8053 BOOT COVER 3PH 460/575<br />
<strong>198942</strong> 25
7. APPENDIX WESTEEL - FULL CENTRIFUGAL AERATION FAN<br />
7.1. PARTS LISTS 3HP, 5HP, 7HP, & 10HP<br />
FULL CENTRIFUGAL FAN 10HP<br />
ITEM PART NUMBER DESCRIPTION<br />
1 GGF-8023 MOTOR 10HP TEFC 3450RPM 1PH 230V<br />
GGF-8024 MOTOR 10HP TEFC 3450RPM 3PH 230/460V<br />
GGF-8025 MOTOR 10HP TEFC 3450RPM 3PH 575V<br />
2 GGF-8083 10HP HOUSING<br />
3 GGF-8072 10HP FAN WHEEL<br />
4 GGF-8073 10HP FC INLET CONE<br />
5 GGF-8067 INLET SCREEN 18"<br />
6 GGF-8054 ELECTRICAL BOX<br />
7 GGF-8063 ELECTRICAL BOX COVER<br />
8 GGF-8043 STARTER CONTACTOR 1PH 230<br />
GGF-8049 STARTER CONTACTOR 3PH 230V C/W AUX<br />
GGF-8046 STARTER CONTACTOR 3PH 460V C/W AUX<br />
GGF-8048 STARTER CONTACTOR 3PH 575V C/W AUX<br />
9 GGF-8050 STARTER SWITCH 1PH 230V<br />
GGF-8052 STARTER SWITCH 3PH 460/575<br />
10 GGF-8051 BOOT COVER 1PH 230V<br />
GGF-8053 BOOT COVER 3PH 460/575<br />
26 <strong>198942</strong>
WESTEEL - FULL CENTRIFUGAL AERATION FAN<br />
3HP, 5HP, 7HP, & 10HP<br />
7. APPENDIX<br />
7.1. PARTS LISTS<br />
AERATION FAN PART NUMBERS AND DESCRIPTION<br />
Table 7.1 <strong>High</strong> <strong>Speed</strong> <strong>Centrifugal</strong> <strong>Fan</strong>s—with controls<br />
Part Number<br />
Product<br />
Description<br />
Volts<br />
HZ<br />
Lbs.<br />
Per<br />
Unit<br />
Air<br />
Outlet<br />
WF-8311 3 HP, 1 Phase 208/230 60 175 9" x 14"<br />
WF-8332 3 HP, 3 Phase 208/230 60 175 9" x 14"<br />
WF-8334 3 HP, 3 Phase 460/480 60 175 9" x 14"<br />
WF-8335 3 HP, 3 Phase 575/600 60 175 9" x 14"<br />
WF-8511 5 HP, 1 Phase 208/230 60 195 9" x 14"<br />
WF-8532 5 HP, 3 Phase 208/230 60 195 9" x 14"<br />
WF-8534 5 HP, 3 Phase 460/480 60 195 9" x 14"<br />
WF-8535 5 HP, 3 Phase 575/600 60 195 9" x 14"<br />
WF-8711 7.5 HP, 1 Phase 208/230 60 235 9" x 14"<br />
WF-8732 7.5 HP, 3 Phase 208/230 60 235 9" x 14"<br />
WF-8734 7.5 HP, 3 Phase 460/480 60 235 9" x 14"<br />
WF-8735 7.5 HP, 3 Phase 575/600 60 235 9" x 14"<br />
WF-8011 10 HP, 1 Phase 208/230 60 375 12" x 17"<br />
WF-8032 10 HP, 3 Phase 208/230 60 375 12" x 17"<br />
WF-8034 10 HP, 3 Phase 460/480 60 375 12" x 17"<br />
WF-8035 10 HP, 3 Phase 575/600 60 375 12" x 17"<br />
<strong>198942</strong> 27
7. APPENDIX WESTEEL - FULL CENTRIFUGAL AERATION FAN<br />
7.1. PARTS LISTS 3HP, 5HP, 7HP, & 10HP<br />
7.2. ELECTRICAL SCHEMATICS<br />
28 <strong>198942</strong>
WESTEEL - FULL CENTRIFUGAL AERATION FAN<br />
3HP, 5HP, 7HP, & 10HP<br />
7. APPENDIX<br />
7.1. PARTS LISTS<br />
This page has been intentionally left blank.<br />
<strong>198942</strong> 29
7. APPENDIX WESTEEL - FULL CENTRIFUGAL AERATION FAN<br />
7.1. PARTS LISTS 3HP, 5HP, 7HP, & 10HP<br />
7.3. AERATION TIPS<br />
Note:<br />
Relative<br />
Humidity<br />
of Air %<br />
• WHEN CAN I BEGIN TO HARVEST? With a complete aeration system in<br />
place, crops can be taken off at 4%–6% moisture above normal moisture content<br />
(example: wheat 18%–20%). Under warm, low, relative humidity conditions<br />
you should see 3/4–1% of drying taking place per day. This allows a 7–<br />
10 day advance on harvest time as well as more harvesting hours per day.<br />
Natural air drying should be used as a management tool and not as a late<br />
harvest emergency drying system. Late harvest conditions are cool and damp<br />
and will result in slow natural air drying.<br />
• AT WHAT TEMPERATURE DOES NATURAL AIR DRYING BEGIN? Grain<br />
drying begins at +10°C (50°F). Anything less than +10°C means the air is too<br />
cold and can only hold a small amount of moisture; therefore, moisture movement<br />
from grain will be very slow.<br />
• WHEN SHOULD I START MY FAN? In order to create a uniform drying front,<br />
the bin must be filled to the height of at least half of the bin's diameter above<br />
the aeration system. (Example: A 14' diameter bin needs to have a minimum<br />
of 7' of grain above the aeration system). The best uniform drying front can be<br />
produced by filling your bin and then turning on the fan. Turning your fan on<br />
too soon can cause uneven drying and negative results.<br />
Wheat Equilibrium<br />
Moisture Content %<br />
Canola Equilibrium<br />
Moisture Content %<br />
Corn Equilibrium Moisture<br />
Content %<br />
at 77ºF at 50ºC at 77ºC at 50°F at 77ºC at 50°F<br />
58 12 13 7.5 8.6 12.2 13.5<br />
64 13 14 8.2 9.4 13.0 14.4<br />
70 14 15 9.0 10.3 14.0 15.4<br />
75 15 16 9.8 11.1 15.0 16.4<br />
79 16 17 10.8 12.0 15.8 17.1<br />
83 17 18 12.0 13.2 16.9 18.2<br />
86 18 19 13.4 14.5 17.8 19.0<br />
• SHOULD I SHUT MY FAN OFF AT NIGHT OR WHEN IT RAINS? NO! <strong>High</strong><br />
moisture grain drying (16% - 20%) requires continuous air flow to prevent the<br />
drying front from crusting over and restricting airflow.<br />
• DOES FAN OPERATION AT NIGHT OR IN HIGH HUMIDITY CONDITIONS<br />
REVERSE THE DRYING PROCESS? We tend to think that a fan will force<br />
moisture back into a bin in high humidity conditions. However, it is much more<br />
difficult to put moisture back into the grain than it is to take it out. In fact, grain<br />
in the bottom of the bin that may be a little over-dried would benefit from taking<br />
on a little moisture. At 19% moisture, grain that hasn't been dried will<br />
remain constant as the 86% relative humidity moisture level in the air equals<br />
the moisture in the grain.<br />
• IF I ADD SUPPLEMENTAL HEAT, CAN I DRY IN HIGH HUMIDITY CONDI-<br />
TIONS? Adding supplemental heat (when available) to the aeration / drying<br />
process will reduce relative humidity and increase the rate of moisture movement.<br />
Therefore, a low temperature supplemental heater will increase the<br />
drying rate and reduce the drying time.<br />
• CAN LOW TEMPERATURE SUPPLEMENTAL HEAT CUT MY DRYING<br />
TIME WITHOUT INCREASING COSTS? A rule of thumb relating tempera-<br />
30 <strong>198942</strong>
WESTEEL - FULL CENTRIFUGAL AERATION FAN<br />
3HP, 5HP, 7HP, & 10HP<br />
7. APPENDIX<br />
7.1. PARTS LISTS<br />
ture increase to relative humidity decrease is: a temperature increase of <br />
10 °C (18°F) above outside air temperature will reduce the relative humidity<br />
by half.<br />
Note:<br />
Example:<br />
10°C and 70% relative humidity<br />
+ 10°C (increased by supplemental heat)<br />
= 20°C and 35% relative humidity<br />
• When low-temperature heat is added in high-humidity conditions, drying<br />
times can be reduced up to 8 days. By reducing operating time, overall costs<br />
are less than operating only the fan under these conditions.<br />
With the average harvest period generally 30–40 days, it's comforting to know<br />
you can depend on supplemental heat—not the weather—to get the job<br />
done.<br />
Care should be taken when operating a supplemental heater under low humidity<br />
conditions. This can cause severe over-drying at the bottom of the bin.<br />
• HOW DO I KNOW WHEN MY GRAIN IS DRY? Approximate drying chart<br />
based on a complete Aeration System:<br />
Approximate Condition Approximate Drying %<br />
Ideal warm days / dry conditions<br />
1% per day<br />
Warm days & cool nights<br />
1/2% per day<br />
Cool days & cool damp nights<br />
1/4% per day<br />
Cold days & cold nights<br />
0% per day<br />
Warm days & cool nights (supplemental<br />
heat added)<br />
3/4% per day<br />
Note:<br />
Note:<br />
If you add 1 or 2 loads of grain at 18% moisture into the bin, assume the bin to be<br />
at 18% average moisture—don't reduce the average if some loads are at a lower<br />
percentage.<br />
Do not count the first day in the drying process; it takes 14–16 hours for the bin to<br />
equalize its temperature.<br />
• WHEN SHOULD I SHUT MY FAN OFF? When bin samples show the grain is<br />
dry, turn off the fan.<br />
• WHAT CAN I DO WHEN THE AIR TEMPERATURE DOES NOT REACH<br />
+10°C? (late October - early November)<br />
There are a couple of options available at this point:<br />
a. You can dry the grain in a grain dryer and then cool it down with the<br />
Aeration system to maximize the grain dryer daily output.<br />
b. You can wait until the outside air temperature falls to -5 to -10°C and then<br />
run the fan for 24–48 hours to cool the entire grain mass to a storage state<br />
(see charts on next page). Once spring conditions return, you can resume<br />
the grain aeration / drying process.<br />
<strong>198942</strong> 31
7. APPENDIX WESTEEL - FULL CENTRIFUGAL AERATION FAN<br />
7.1. PARTS LISTS 3HP, 5HP, 7HP, & 10HP<br />
Figure 7.1 Grain Drying Charts<br />
32 <strong>198942</strong>
WARRANTY<br />
Except as expressly provided in this agreement, <strong>Westeel</strong> (hereinafter called the Manufacturer)<br />
excludes all express or implied warranties, conditions, and obligations of the Manufacturer,<br />
whether statutory or otherwise, concerning the quality of the units or their fitness for any purpose.<br />
Under no circumstances will the Manufacturer be liable for any kind of special, consequential,<br />
indirect, or incidental damages resulting from the use of its products, nor shall the Manufacturer's<br />
liability ever exceed the selling price of the product.<br />
The manufacturer warrants their products as follows:<br />
1. Goods free from defect:<br />
The unit shall be free from defects in materials and workmanship and shall operate properly in<br />
accordance with industry standards when employed in normal usage, provided the product has<br />
been properly installed for a period of: one (1) year from the original date of purchase.<br />
2. The warranty does not include:<br />
a. routine replacement of parts due to normal wear and tear arising from use.<br />
b. any defect attributable in whole or in part to misuse or improper installation.<br />
c. any damage or defect attributable to repair of the unit outside the Manufacturer's facilities<br />
or those of an authorized dealer, or the installation of unapproved parts on the unit, in the<br />
Manufacturer's judgment to affect it's performance or reliability, or which has been subject<br />
to misuse, negligence, or accident.<br />
d. Any damage attributable to accident or to lightning, power surge, brown out, leaking,<br />
damage, or connection to a power source having a greater rating than that specified in<br />
the unit specifications.<br />
3. Repair or Replacement<br />
Where any part of the unit fails during normal usage during the warranty period specified, the<br />
Manufacturer, or authorized dealer of the Manufacturer, shall repair or replace the defective part<br />
of the unit with a new or factory reconditioned part, such replacement or repair to be made without<br />
charge for parts or labor, F.O.B. the Manufacturer.<br />
4. Warranties shall not apply to any product made by the Manufacturer that has not been<br />
operated in accordance with the Manufacturer's printed instructions or shall have been<br />
operated beyond the rated capacity of the product or a use not intended.<br />
5. The Manufacturer reserves the right to make design or specification changes at any time,<br />
without contingent obligation to purchasers of products already sold.<br />
WARRANTY VOID IF NOT REGISTERED
450 Desautels Street, P.O. Box 792<br />
Winnipeg, Manitoba, CANADA R3C 2N5<br />
Phone: 204-233-7133 Fax: 204-235-0796