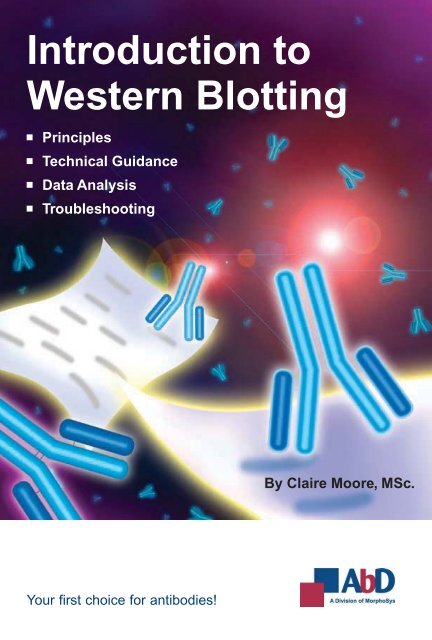
Introduction to Western Blotting
Introduction to Western Blotting
Introduction to Western Blotting

You also want an ePaper? Increase the reach of your titles
YUMPU automatically turns print PDFs into web optimized ePapers that Google loves.
<strong>Introduction</strong> <strong>to</strong><br />
<strong>Western</strong> <strong>Blotting</strong><br />
Principles<br />
Technical Guidance<br />
Data Analysis<br />
Troubleshooting<br />
By Claire Moore, MSc.<br />
Your first choice for antibodies!
Contents<br />
Chapter 1 <strong>Introduction</strong><br />
Overview ................................................. 5<br />
Why Use a <strong>Western</strong> Blot? . ................................... 6<br />
Antibody Considerations ..................................... 7<br />
Monoclonals vs. Polyclonals ............................ 8<br />
Genetically Engineered Antibodies ........................ 9<br />
Epi<strong>to</strong>pe Tags ........................................ 10<br />
Chapter 2 Samples, Gels, and <strong>Blotting</strong><br />
Overview ................................................ 11<br />
Sample Preparation. ....................................... 12<br />
Cell Lysates ........................................ 12<br />
Tissue Samples ..................................... 13<br />
Purified or Semi-purified Extracts ....................... 14<br />
Determining Protein Concentration....................... 14<br />
Loading Buffer. ...................................... 14<br />
Controls and Standards. ............................... 15<br />
Gel Electrophoresis ......................................... 16<br />
<strong>Blotting</strong> .................................................. 18<br />
<strong>Blotting</strong> Membranes .................................. 18<br />
Setting Up the Transfer ................................ 20<br />
Size of the Target Protein .............................. 20<br />
Confirming the Transfer. ............................... 20<br />
Chapter 3 Immunodetection<br />
Overview ................................................ 22<br />
Blocking ................................................ 23<br />
Antibody Incubation ....................................... 23<br />
Indirect vs. Direct Detection ................................. 24<br />
Detection with Substrate. ................................... 25<br />
Test Blots, Slot Blots, and Dot Blots. ............................ 27<br />
Chapter 4 Data Analysis<br />
Overview ................................................ 29<br />
Data .................................................... 29<br />
Quantitation ....................................... 29<br />
Normalization ....................................... 30<br />
Densi<strong>to</strong>meters and Analysis Software .................... 31<br />
<strong>Western</strong> Blot Examples ..................................... 31<br />
Detecting or Characterizing Protein Expression............. 31<br />
Demonstrating Antibody Specificity...................... 32<br />
Alternate Forms of a Protein – Prion Disease .............. 32<br />
Confirmation of HIV ................................. 34<br />
Chapter 5 Buffers and Pro<strong>to</strong>cols<br />
Overview ................................................ 35<br />
Buffers................................................... 35<br />
Pro<strong>to</strong>cols ................................................ 39<br />
Cell Lysis ........................................... 39<br />
Gel Electrophoresis & Protein Transfer by Electroblotting ..... 40<br />
Immunodetection – Indirect ............................ 41<br />
Immunodetection – Direct............................. 41<br />
Chapter 6 Troubleshooting<br />
Overview ................................................ 42<br />
Unusual or Unexpected Bands ............................... 43<br />
No Bands................................................. 44<br />
Faint Bands or Weak Signal.................................. 45<br />
High Background Signal on the Blot ........................... 46<br />
Patchy or Uneven Spots on the Blot ............................ 47<br />
References and Further Reading .................................. 48<br />
2<br />
Your first choice for antibodies! www.abdserotec.com 3
Preface<br />
Since <strong>Western</strong> blotting is one of the most prevalent labora<strong>to</strong>ry procedures<br />
in use <strong>to</strong>day, we have produced this handy reference guide <strong>to</strong> provide<br />
a basic overview of the key technical considerations that go in<strong>to</strong> performing<br />
successful <strong>Western</strong> blots. Beyond basic theory, we have included some<br />
typical experiments, as well as troubleshooting advice and time-saving<br />
pointers <strong>to</strong> make things go more smoothly. We hope you will find this<br />
manual useful, and would greatly appreciate your feedback <strong>to</strong><br />
marketing@abdserotec.com.<br />
For those who are not already familiar with our products, we specialize<br />
in antibodies, and have been manufacturing high-quality immunological<br />
reagents for over 25 years. As a result we think a lot about antibodies, not<br />
just how they are created, produced and used, but also what is so special<br />
about them. If you can imagine the difficulty of finding a single needle in<br />
haystack, you can begin <strong>to</strong> appreciate the task accomplished by the antibody<br />
as it successfully finds its corresponding antigen amongst the collection<br />
of other potential targets present in cellular materials.<br />
If you are choosy about your antibodies and want <strong>to</strong> find a perfect match for<br />
your experiment, then please give us a try. We focus on antibody production<br />
in small and large scale across a broad range of research areas, and for<br />
a variety of applications. We are so confident in our antibodies and in our<br />
ISO-certified production facilities, that we offer a performance guarantee for<br />
all the applications listed on our detailed datasheets. We are also available<br />
<strong>to</strong> help, offering technical support from trained scientists experienced in the<br />
use of antibodies. We can address queries that arise while carrying out your<br />
experiments, and can also assist in selecting the proper antibodies and<br />
controls. Please contact our technical team at tech.uk@abdserotec.com.<br />
Finally, if you do find yourself without access <strong>to</strong> the antibody you are seeking,<br />
remember that we are able <strong>to</strong> identify new specificities using the latest<br />
technology with our parent company MorphoSys. Our HuCAL ® recombinant<br />
antibodies are identified by screening over 45 billion potential specificities<br />
using highly sophisticated techniques <strong>to</strong> produce new monoclonals faster<br />
than with traditional methods.<br />
Please visit us at www.abdserotec.com/westernblot <strong>to</strong> learn more about our<br />
<strong>Western</strong> blotting products, and <strong>to</strong> search our catalog of over 14,000 antibodies.<br />
Overview<br />
FIGURE 1<br />
<strong>Introduction</strong><br />
M r (kDa)<br />
75<br />
50<br />
37<br />
25<br />
15<br />
Chapter<br />
<strong>Western</strong> blotting, also known as immunoblotting or protein blotting,<br />
is a core technique in cell and molecular biology. In most basic terms,<br />
it is used <strong>to</strong> detect the presence of a specific protein in a complex mixture<br />
extracted from cells. The <strong>Western</strong> blotting procedure relies upon three key<br />
elements <strong>to</strong> accomplish this task: the separation of protein mixtures by size<br />
using gel electrophoresis; the efficient transfer of separated proteins <strong>to</strong><br />
a solid support; and the specific detection of a target protein by appropriately<br />
matched antibodies. Once detected, the target protein will be visualized<br />
as a band on a blotting membrane, X-ray film, or an imaging system.<br />
Since <strong>Western</strong> blotting is accomplished rapidly, using simple equipment<br />
and inexpensive reagents, it is one of the most common labora<strong>to</strong>ry<br />
techniques. The results achieved are also easy <strong>to</strong> interpret, unique,<br />
and unambiguous. Therefore, it is routinely used on its own, or along<br />
with other immunoassays, in research and clinical settings. An overview<br />
of the technique is shown in the diagram below:<br />
1 2 3<br />
–<br />
+<br />
M r (kDa)<br />
75<br />
50<br />
37<br />
25<br />
15<br />
1 2 3<br />
1<br />
target<br />
protein<br />
Overview of <strong>Western</strong> <strong>Blotting</strong>. Separation of protein mixtures by electrophoresis;<br />
transfer <strong>to</strong> a blotting membrane; and detection of target protein, which only<br />
becomes visible in the final stage as a band similar <strong>to</strong> that shown in lane 3.<br />
Lane 1: Prestained molecular weight standards. Lanes 2&3: Protein mixtures.<br />
4<br />
Your first choice for antibodies! www.abdserotec.com Chapter 1 5
Why Use a <strong>Western</strong> Blot?<br />
<strong>Western</strong> blotting is an extremely powerful technique, despite its overall<br />
simplicity, because it provides additional information not readily gathered<br />
from other key immunological labora<strong>to</strong>ry techniques. Since proteins are<br />
separated by size during the gel electrophoresis stage, and then detected<br />
by a specifically directed antibody, the procedure essentially confirms the<br />
identity of a target protein. Furthermore, when data does not match<br />
expectations, there may be clues as <strong>to</strong> what should be investigated <strong>to</strong><br />
determine the reason. Is the band of lower or higher molecular weight than<br />
expected? Is there a single band, or are there several bands? A smaller than<br />
expected band could indicate that the protein has been cleaved or is degraded.<br />
Conversely, when bands are seen at higher levels than expected, this may<br />
indicate an actual increase in mass due <strong>to</strong> glycosylation or multimer formation.<br />
Alternate splicing may also cause unexpected size variations, as may the<br />
particular combination of charged amino acids found in the protein.<br />
In many cases, <strong>Western</strong> blots are used in combination with other key antibody<br />
based detection techniques, such as ELISAs or immunohis<strong>to</strong>chemistry.<br />
In these instances, <strong>Western</strong> blots provide confirmation of results both<br />
in research and diagnostic testing. For example, with HIV and prion disease,<br />
<strong>Western</strong>s are used as a key supplemental screen since their results are less<br />
ambiguous, and quicker, than other methods. Moving forward, <strong>Western</strong> blots<br />
continue <strong>to</strong> be of value in confirming results from antibody arrays, making<br />
them suitable for use in proteomics research. Specific results and data<br />
analysis will be addressed in further detail in Chapter 4.<br />
Antibody Considerations<br />
One of the critical features of any successful <strong>Western</strong> blot is the highly<br />
specific interaction between an antibody and an antigen. The antigen,<br />
usually a protein or peptide, is the target of the antibody. The precise point<br />
of interaction is between a small region of the antigen, an epi<strong>to</strong>pe,<br />
and the recognition sites found on the arms of the antibody molecule.<br />
M r (kDa)<br />
30<br />
22<br />
1 2 3<br />
Higher molecular weight<br />
than expected, often due<br />
<strong>to</strong> glycosylation or<br />
multimer formation.<br />
Lower molecular weight<br />
than expected, usually<br />
due <strong>to</strong> cleavage or<br />
degradation.<br />
Antigen<br />
Epi<strong>to</strong>pe<br />
Recognition sites<br />
FIGURE 2<br />
Expected vs. Actual Molecular Weight. Lane 1: Target protein band<br />
at the expected molecular weight. Lanes 2&3: Common alterations<br />
that modify the molecular weight.<br />
Antibody<br />
<strong>Western</strong> blots are in wide use across a broad range of scientific and clinical<br />
disciplines. Their ability <strong>to</strong> clearly show the presence of a specific protein both<br />
by size and through the binding of an antibody makes them well-suited for<br />
evaluating levels of protein expression in cells, and for moni<strong>to</strong>ring fractions<br />
during protein purification. Likewise, they are helpful for comparing expression<br />
of a target protein from various tissues, or seeing how a particular protein<br />
responds <strong>to</strong> disease or drug treatment.<br />
FIGURE 3<br />
Antibody-Antigen Interaction<br />
6<br />
Chapter 1<br />
Your first choice for antibodies! www.abdserotec.com Chapter 1 7
Antibodies selected for immunodetection should be <strong>Western</strong> blot tested<br />
if possible, with attention paid <strong>to</strong> the experimental conditions recommended<br />
by the antibody supplier. Usually, <strong>Western</strong> blot positive antibodies recognize<br />
a short linear sequence of amino acids found within the target protein that<br />
remains intact, or becomes visible, when the target protein is fully unraveled.<br />
This is because most <strong>Western</strong> blots are carried out under denaturing and<br />
reducing conditions which remove all higher order protein structure.<br />
In contrast, some epi<strong>to</strong>pes can be conformational, forming a threedimensional<br />
structural configuration of amino acids that will be lost upon<br />
denaturation of the protein. Thus, not all antibodies work in a typical <strong>Western</strong><br />
blot. Since <strong>Western</strong> blot procedures allow for flexibility in choosing gel<br />
electrophoresis and blotting conditions, it is possible <strong>to</strong> modify buffers<br />
<strong>to</strong> retain enough higher order protein structure for detection by some<br />
antibodies. The antibody datasheet should indicate which buffer conditions<br />
are best-suited <strong>to</strong> the particular antibody-antigen interaction.<br />
Monoclonals vs. Polyclonals<br />
The antibodies used <strong>to</strong> detect the target protein in a <strong>Western</strong> blot will<br />
be either monoclonal or polyclonal. Both types of antibody are typically<br />
created when an antigen, usually a protein or peptide, is injected in<strong>to</strong><br />
an animal and its immune system responds by producing antibodies<br />
specifically targeted against that antigen (or more precisely <strong>to</strong> various<br />
epi<strong>to</strong>pes found on that antigen). Polyclonal antibodies consist of a mixed<br />
pool of immunoglobulin molecules that bind <strong>to</strong> several different epi<strong>to</strong>pes<br />
found on a single antigen. Polyclonals are usually produced in rabbits,<br />
donkeys, sheep, and goats, and are purified from serum.<br />
In contrast, monoclonal antibodies bind <strong>to</strong> a single epi<strong>to</strong>pe within a target<br />
antigen. They are composed of homogeneous cloned immunoglobulin<br />
molecules, rather than the heterogeneous antibody mixture typical<br />
of polyclonals. Monoclonals are made by fusing antibody producing cells<br />
from the spleen of the immunized animal (usually a rat or mouse) with<br />
an immortalized cell line <strong>to</strong> produce single specificity antibodies that<br />
can be purified from tissue culture supernatant. Both monoclonals and<br />
polyclonals are used in <strong>Western</strong> blotting, and offer various advantages<br />
and disadvantages that are summarized in the accompanying table.<br />
Comparison of Monoclonal and Polyclonal Antibodies<br />
Monoclonal<br />
Specificity for a single epi<strong>to</strong>pe.<br />
Identifies whether a particular region<br />
of a protein is present.<br />
May cross-react with other proteins that<br />
share this epi<strong>to</strong>pe, such as isomers or<br />
common motifs.<br />
Usually less sensitive since only a single<br />
antibody molecule binds <strong>to</strong> each target.<br />
More expensive <strong>to</strong> produce initially,<br />
but available in an unlimited supply.<br />
Genetically Engineered Antibodies<br />
Polyclonal<br />
Varying specificities <strong>to</strong> multiple epi<strong>to</strong>pes.<br />
Identifies the entire target protein via binding<br />
at multiple sites. Since multiple epi<strong>to</strong>pes<br />
are targeted, there is a higher likelihood<br />
of detection of the target.<br />
Higher background and cross-reactivity possible<br />
due <strong>to</strong> detection of multiple epi<strong>to</strong>pes, any<br />
of which may be shared by related proteins.<br />
More sensitive because signal is amplified<br />
through the binding of several antibodies per<br />
target.<br />
Less expensive <strong>to</strong> produce initially, but supply<br />
is limited <strong>to</strong> immunized animal(s). There will<br />
be greater variability between preparations.<br />
In addition <strong>to</strong> traditional monoclonal and polyclonal antibodies targeted<br />
against specific proteins, there are other means of antibody generation and<br />
protein detection available as the result of numerous advances in genetic<br />
engineering technology.<br />
It is now possible <strong>to</strong> create and produce antibodies using fully in vitro techniques<br />
such as phage display in conjunction with highly complex libraries which<br />
represent the vast array of potential antibody binding regions. At AbD Serotec,<br />
we routinely produce human recombinant monoclonal antibodies for research,<br />
clinical, and diagnostic applications with our HuCAL ® Technology.<br />
8<br />
Chapter 1<br />
Your first choice for antibodies! www.abdserotec.com Chapter 1 9
Epi<strong>to</strong>pe Tags<br />
If there are no antibodies available <strong>to</strong> the protein of interest, it is still<br />
possible <strong>to</strong> carry out a range of immunodetection techniques, including <strong>Western</strong><br />
blotting, by using epi<strong>to</strong>pe tags and matched epi<strong>to</strong>pe tag antibodies.<br />
Samples, Gels, and <strong>Blotting</strong><br />
Chapter<br />
2<br />
A<br />
This elegant strategy works by adding a small sequence of DNA that codes<br />
for a known antigenic epi<strong>to</strong>pe during cloning of the protein of interest.<br />
Since matched antibodies already exist that will specifically bind <strong>to</strong> this epi<strong>to</strong>pe,<br />
the target protein can be detected because it also expresses the appropriate<br />
epi<strong>to</strong>pe. Therefore, immunodetection can be carried out quickly and without the<br />
need <strong>to</strong> wait for the generation of unique antibodies <strong>to</strong> a newly identified target<br />
protein. This technology is also of significant benefit when working in organisms<br />
where few specific antibodies are readily available. One downside <strong>to</strong> this<br />
technology is that the target protein is altered by the addition of tag,<br />
and thus it is not identical <strong>to</strong> native forms of the protein.<br />
There are a wide variety of epi<strong>to</strong>pe tag antibodies available, including:<br />
His-6 (MCA1396), V5 (MCA1360), c-myc (MCA2200), and others which are<br />
supplied by AbD Serotec. Epi<strong>to</strong>pe tag antibodies are available with a range<br />
of common antibody labels allowing one <strong>to</strong> switch experimental techniques<br />
or detection systems without having <strong>to</strong> modify the target protein. In the <strong>Western</strong><br />
blots shown below, myc-tagged KSR (Kinase Suppressor of Ras) is detected<br />
through the use of either an anti-myc antibody or an anti-KSR antibody.<br />
A: B:<br />
M r (kDa)<br />
160<br />
105<br />
75<br />
50<br />
35<br />
1 2 3 4<br />
B<br />
KSR<br />
Anti-KSR<br />
antibody<br />
Myc-tag<br />
Anti-myc<br />
antibody<br />
Overview<br />
A typical <strong>Western</strong> blot, or immunoblot, relies upon a purified, semi-purified,<br />
or crude extract of cellular proteins containing a target protein that can<br />
be detected by antibodies. Several key steps are required <strong>to</strong> take the sample<br />
from the cellular starting point <strong>to</strong> a detectible band on a <strong>Western</strong> blot.<br />
This chapter focuses on the preparative stages that are accomplished prior<br />
<strong>to</strong> immunodetection by antibodies. Throughout these processes it is essential<br />
that the cellular protein is prepared and s<strong>to</strong>red carefully, since this will<br />
significantly impact the experimental results.<br />
The three key preparative stages are:<br />
• Sample production by lysis or homogenization <strong>to</strong> solubilize<br />
and release cellular proteins.<br />
• Separation of protein mixtures using gel electrophoresis.<br />
• Transfer of separated proteins <strong>to</strong> a blotting membrane which<br />
can be manipulated more easily than a gel.<br />
M r (kDa)<br />
75<br />
50<br />
37<br />
25<br />
15<br />
1 2 3<br />
–<br />
+<br />
FIGURE 4<br />
<strong>Western</strong> Blot and Model of Myc-tagged KSR. PANEL A: Myc-tagged murine<br />
KSR expressed in COS cells is detected using either anti-KSR (MCA2106)<br />
in lanes 1&2, or anti-myc epi<strong>to</strong>pe (MCA2200) in lanes 3&4. Lanes 1&3: myc-KSR<br />
vec<strong>to</strong>r. Lanes 2&4: vec<strong>to</strong>r alone control. Note that an identical band is produced<br />
with both antibodies. PANEL B: KSR target protein with c-myc epi<strong>to</strong>pe tag.<br />
KSR-myc fusion is detectible by both anti-KSR antibodies and anti-myc antibodies.<br />
FIGURE 5<br />
Sample Preparation, Electrophoresis, and Transfer<br />
<strong>Western</strong> blots are effective in detecting low nanogram <strong>to</strong> low picogram<br />
amounts of target protein, depending on the antibodies used and the detection<br />
substrate chosen. If the target is suspected <strong>to</strong> be of very low abundance,<br />
or if there is no detectible signal on the blot, then it may be necessary<br />
<strong>to</strong> concentrate, immunoprecipitate, or fractionate the starting material.<br />
10<br />
Chapter 1<br />
Your first choice for antibodies! www.abdserotec.com Chapter 2 11
Sample Preparation<br />
Cell Lysates<br />
Crude cellular lysates are the most common direct source of starting material<br />
used in <strong>Western</strong> blotting. They can be prepared from immortalized cell lines<br />
known <strong>to</strong> express the target protein, or from transfected cells carrying a protein<br />
expression vec<strong>to</strong>r. Many different cell types (mammalian, insect, yeast,<br />
or bacteria) can be used <strong>to</strong> supply the protein needed with slight variations<br />
in the preparation procedure. In most cases, the cells are harvested, washed,<br />
and lysed <strong>to</strong> release the target protein. For best results, all these steps should<br />
be carried out in a cold room, or on ice. This will minimize proteolysis,<br />
dephosphorylation, and denaturation, since all begin <strong>to</strong> occur once the cells<br />
are disrupted. It is possible <strong>to</strong> simply lyse cells directly in gel loading buffer<br />
if a quick check is all that is required. However, sonication may be neccessary<br />
<strong>to</strong> disrupt the highly viscous cellular DNA. Usually, 20-50 mg of cellular lysate<br />
is loaded per lane for gel electrophoresis.<br />
The amount of lysis buffer is determined based upon a cell count,<br />
or else it is estimated based upon the size of the tissue culture vessel.<br />
The accompanying table provides some suggested starting points. Sometimes<br />
mechanical disruption, such as with sonication or dounce homogenization,<br />
is required <strong>to</strong> fully release proteins from certain cell and tissue samples.<br />
Sonication is also used <strong>to</strong> break down cellular DNA which can interfere either<br />
due <strong>to</strong> its high viscosity or via non-specific binding. After lysis and<br />
centrifugation, the amount of protein in each lysate is measured.<br />
Cell Lysis Volume Recommendations<br />
Type of cells Amount of material Volume of lysis buffer<br />
Tissue Culture<br />
10 7 cells or<br />
100 mm dish<br />
1 ml<br />
Whole Tissue 100 mg Add 2 ml and sonicate or<br />
dounce homogenize<br />
Harvest and wash<br />
cells on ice<br />
Lyse cells on ice<br />
<strong>to</strong> release proteins<br />
Bacteria Spin sample, estimate volume Add 10 volumes and vortex<br />
Yeast Spin sample, estimate volume Add 10 volumes, then sonicate<br />
or vortex with glass beads<br />
Tissue Samples<br />
FIGURE 6<br />
Cells are Harvested, Washed, and Lysed <strong>to</strong> Release Proteins<br />
Choosing the proper lysis buffer and determining an appropriate volume is often<br />
a trial and error process that is affected by the type of protein being isolated<br />
as well as the particular cells used as a source. Lysis buffers vary from very gentle<br />
ones with no detergent <strong>to</strong> harsher solutions such as RIPA (Radio Immuno<br />
Precipitation Assay) buffer, which is denaturing and contains multiple detergents.<br />
Typically, NP-40 (Nonidet P-40) lysis buffer, with a milder non-ionic detergent,<br />
is used for the isolation of soluble cy<strong>to</strong>plasmic proteins. At other times, RIPA<br />
buffer is chosen because it reduces background, and because sometimes multiple<br />
detergents are required <strong>to</strong> fully release membrane bound or nuclear proteins.<br />
Consideration should also be given <strong>to</strong> the antibody-antigen interaction which<br />
may be affected by the changes <strong>to</strong> the target protein during lysis.<br />
Tissue samples display a higher degree of structure than cultured cells and<br />
thus may require higher levels of mechanical intervention in order <strong>to</strong> release<br />
the protein of interest. They may also contain multiple cell types which are<br />
differentially responsive <strong>to</strong> the lysis buffer chosen. Smaller solid tissue samples<br />
(up <strong>to</strong> 100 mg) are placed in ice cold extraction buffer and homogenized<br />
on ice, usually with sonication or a douncing rod <strong>to</strong> facilitate cellular disruption.<br />
Alternatively, and more often with larger tissue samples, a blender is used<br />
<strong>to</strong> homogenize the tissue in PBS, and then cell lysis buffer is added. Once the<br />
tissue has been homogenized and lysed, the solubilized cellular components<br />
are clarified by centrifugation and tested for protein concentration prior<br />
<strong>to</strong> loading on a gel.<br />
12<br />
Chapter 2<br />
Your first choice for antibodies! www.abdserotec.com Chapter 2 13
Purified or Semi-purified Extracts<br />
The simplest source of starting material for <strong>Western</strong> blotting is purified<br />
or semi-purified protein samples that are produced in the course of protein<br />
purification. These samples rarely require any further manipulation and are<br />
simply mixed with gel electrophoresis loading buffer (Laemmli sample buffer).<br />
When using a purified or semi-purified protein preparation, it is possible <strong>to</strong><br />
load a much smaller amount of <strong>to</strong>tal protein on<strong>to</strong> the gel. Usually 0.5-1 mg<br />
of purified or semi-purified protein is sufficient <strong>to</strong> observe a strong signal.<br />
If unsure, results can be improved by loading several dilutions of the sample.<br />
Determining Protein Concentration<br />
To ensure that samples are in the proper range of detection for the assay,<br />
and so they can be compared on an equivalent basis, it is important <strong>to</strong> know<br />
the concentration of <strong>to</strong>tal protein in each sample. There are various methods<br />
available for determining protein concentration using in-house or commercially<br />
supplied kits and reagents. The simplest method entails measuring the<br />
absorbance of the lysate solution at 280 nm or 205 nm. Alternatively, several<br />
protein assays are available which rely upon the reduction of metal ions by<br />
the peptide bond, e.g. the Lowry and BCA assays; or by dye binding, as with<br />
the Bradford assay. In all instances, a color change results that is proportional<br />
<strong>to</strong> the amount of protein in the sample. Protein concentration is determined by<br />
comparison of the target samples <strong>to</strong> a known standard, such as BSA (Bovine<br />
Serum Albumin) diluted in lysis buffer. To get the most accurate measure of<br />
protein concentration, it is advisable <strong>to</strong> test a few dilutions of the sample<br />
ensuring that the results lie in the linear range of the protein assay.<br />
Loading Buffer<br />
Once the protein concentration has been determined, samples are diluted<br />
in gel loading buffer, also called 2x Laemmli sample buffer. This buffer contains<br />
glycerol so that the samples sink easily in<strong>to</strong> the wells of the gel, and a tracking<br />
dye (bromophenol blue) which migrates through the gel first <strong>to</strong> indicate how<br />
far the separation has progressed. For most routine <strong>Western</strong> blots, SDS (sodium<br />
dodecyl sulfate) and a reducing agent are also present in the gel loading/<br />
sample buffer <strong>to</strong> fully denature the protein and remove all higher order<br />
structure. See the accompanying table for the range of loading buffer options<br />
and the supplements they contain. Samples are heated in gel loading/sample<br />
buffer for either 5 minutes at 100°C, or 10 minutes at 70°C <strong>to</strong> aid in the<br />
denaturation. At this point, samples can remain at room temperature if they<br />
are <strong>to</strong> be used immediately, or placed at 4°C or -20°C for later analysis.<br />
Sample Buffer Conditions<br />
Gel Conditions SDS DTT or bME Comments<br />
Denaturing &<br />
Reducing<br />
+ + Removes all higher order structure,<br />
including disulfide bonds<br />
Denaturing + - Higher order structure is disrupted,<br />
but disulfide bonds are retained<br />
Reducing - + Disulfides are removed, but most<br />
higher order structure remains<br />
Native - - The protein retains higher order<br />
structure. Multimers and proteinprotein<br />
interactions can be detected<br />
Controls and Standards<br />
It can be very useful <strong>to</strong> include a positive and a negative control on the<br />
gel along with the samples that are being evaluated. For a positive control<br />
it is typical <strong>to</strong> use a known source of target protein, such as purified protein<br />
or a control lysate, under conditions where it will be detectible by the antibody<br />
used in the experiment. The positive control is important for confirming<br />
the identity of the target since it will produce a reference band on the blot<br />
showing the expected migration of the target protein and confirming the<br />
activity of the antibodies. Positive controls are also helpful for troubleshooting,<br />
and for comparing the data between separate blots. Premade cellular and tissue<br />
lysates are now commercially available from a number of suppliers, including<br />
AbD Serotec, and can be used as a convenient positive control. In addition,<br />
commercially supplied tissue and cell lysates are suitable for troubleshooting<br />
pro<strong>to</strong>cols. If possible, it is also helpful <strong>to</strong> include a negative sample control,<br />
such as known null cell line, as a means of confirming that the signal is specific<br />
<strong>to</strong> the desired protein.<br />
The final component required for the gel is a molecular weight standard since<br />
a key feature of <strong>Western</strong> blotting is <strong>to</strong> provide information on the size of the<br />
protein. Also known as molecular weight markers, these are premade mixtures<br />
of proteins with known molecular weights, usually 5-6 proteins spanning the<br />
range from 10 kDa <strong>to</strong> 200 kDa. Molecular weight standards come in a variety<br />
of formats, including unstained, prestained, multi-colored, or directly labeled<br />
for <strong>Western</strong> detection. They are an excellent means of moni<strong>to</strong>ring progress while<br />
the gel is running, of checking transfer efficiency, and for orienting the<br />
immunoblot. Care should be taken not <strong>to</strong> overload the standards since they<br />
may obscure signal from the target protein.<br />
14<br />
Chapter 2<br />
Your first choice for antibodies! www.abdserotec.com Chapter 2 15
Gel Electrophoresis<br />
After the samples have been prepared, they are separated by size using<br />
SDS-PAGE (sodium dodecyl sulfate polyacrylamide gel electrophoresis).<br />
Since the samples have been denatured in gel loading buffer containing<br />
SDS detergent, the protein is uniformly negatively charged and will now migrate<br />
in an electric field through the gel and <strong>to</strong>wards the positive electrode. Since<br />
the charge <strong>to</strong> mass ratio is equalized by the binding of SDS consistently along<br />
the length of the proteins, and higher structure has been removed, the proteins<br />
will be separated primarily by size. The key is <strong>to</strong> effect a separation such that<br />
the target protein will be properly resolved from the other components of the<br />
mixture. This makes it possible <strong>to</strong> clearly identify the target protein later through<br />
immunodetection with a specific antibody.<br />
Most often the gel is made and run under denaturing conditions (25 mM Tris<br />
base, 192 mM glycine, 0.1% SDS, at pH 8.3). However, alternative gel conditions<br />
can be used, depending upon the protein under investigation and the aims of<br />
the experiment. Options include: non-denaturing, non-reducing, native, twodimensional<br />
separations (by size and by isoelectric point), and buffer variations<br />
that are more suited <strong>to</strong> the separation of smaller or larger proteins. It is<br />
important <strong>to</strong> make sure that the buffer used is compatible with later steps in<br />
the procedure and the blotting materials.<br />
SDS-PAGE gels (commercially supplied or made in-house) usually consist<br />
of a main gel, which is poured between two glass or plastic plates, and which<br />
is sometimes <strong>to</strong>pped by a short stacking gel. Gels can be made with a uniform<br />
acrylamide percentage, or with a continuously varying gradient that yields<br />
improved resolution over a broader range of molecular weights. See the table<br />
below for some common gel percentages and their separation ranges.<br />
The percentage and the thickness of the gel will impact the transfer<br />
of proteins out of the gel in the blotting phase, so using a thinner gel,<br />
or a lower percentage of acrylamide, may improve transfer results.<br />
Once the gel sets, it is placed in<strong>to</strong> the running apparatus. Small volumes<br />
of protein (5-20 ml) dissolved in gel loading buffer are added <strong>to</strong> each<br />
individual well. The gel is then connected <strong>to</strong> a power supply and allowed<br />
<strong>to</strong> run for a few hours in a buffer tank <strong>to</strong> separate the proteins. If the gel<br />
is run at <strong>to</strong>o high a voltage it will overheat and dis<strong>to</strong>rt the bands.<br />
The accompanying gel shows cellular lysates which have been well-separated<br />
on a gradient gel, and stained with Coomassie dye <strong>to</strong> visualize all the<br />
separated protein bands.<br />
M r (kDa)<br />
M r (kDa)<br />
260<br />
160<br />
110<br />
80<br />
60<br />
50<br />
40<br />
30<br />
20<br />
15<br />
10<br />
3.5<br />
Polyacrylamide Gel Percentage Separation Ranges<br />
Acrylamide Concentration (%)<br />
Separation Range (kDa)<br />
FIGURE 7<br />
HeLa Cell Lysates (LYS001) Separated on a 4-12% Gradient Gel<br />
5 60-210<br />
7.5 35-95<br />
10 15-70<br />
15 4-45<br />
4-12 gradient 5-200<br />
4-20 gradient 4-200<br />
10-20 gradient 3.5-110<br />
16<br />
Chapter 2<br />
Your first choice for antibodies! www.abdserotec.com Chapter 2 17
<strong>Blotting</strong><br />
Following gel electrophoresis, the separated protein mixtures are transferred<br />
<strong>to</strong> a solid support for further analysis. While it is possible <strong>to</strong> use diffusion<br />
or vacuum assisted transfer, electroblotting (Towbin et al.,1979) is the method<br />
relied upon in most labora<strong>to</strong>ries, due <strong>to</strong> the speed and efficiency<br />
of transfer. The electric field used for the transfer is oriented perpendicular<br />
<strong>to</strong> the surface of the gel causing proteins <strong>to</strong> move out of the gel and on<strong>to</strong><br />
the blotting membrane, which sits between the gel surface and the positive<br />
electrode. The gel and blotting membrane are assembled in<strong>to</strong> a sandwich along<br />
with several sheets of filter paper which protect the gel and blotting membrane<br />
and help <strong>to</strong> ensure close contact between their surfaces. It is imperative that<br />
the membrane is placed between the gel and the positive electrode so that<br />
the negatively charged proteins migrate from the gel on<strong>to</strong> the membrane.<br />
The transfer buffer used for electroblotting is similar <strong>to</strong> gel running buffer<br />
with the addition of methanol which helps proteins bind <strong>to</strong> the blot.<br />
Electrophoretic transfer can be accomplished under wet or semi-dry conditions.<br />
In a wet transfer, the gel/blotting paper/filter paper sandwich is placed in<strong>to</strong><br />
a cassette along with protective fiber pads. The cassette is then immersed<br />
in a buffer tank and subjected <strong>to</strong> an electrical field. With semi-dry transfer,<br />
the gel/blotting paper/filter paper sandwich is assembled on large electrode<br />
plates which generate the electric field, and buffer is confined <strong>to</strong> the stack<br />
of wet filter papers.<br />
Transfer times vary from 1 hour (semi-dry transfer) <strong>to</strong> several hours or overnight<br />
(wet transfer). Wet transfer is usually considered <strong>to</strong> be more reliable because it is<br />
less likely <strong>to</strong> dry out the gel, and is often preferred for larger proteins. Since there<br />
will be significant variation in the chosen transfer system, it is best <strong>to</strong> consult the<br />
manufacturer of the equipment used for specific instructions.<br />
Proteins<br />
move<br />
Filter papers<br />
<strong>Blotting</strong> membrane<br />
Gel<br />
Filter papers<br />
+<br />
–<br />
+<br />
Fiber pad<br />
Wet transfer<br />
Semi-dry transfer<br />
–<br />
<strong>Blotting</strong> Membranes<br />
The solid support on<strong>to</strong> which the separated proteins are transferred is usually<br />
of two types, nitrocellulose or polyvinylidene fluoride (PVDF) membrane, both<br />
of which bind proteins with high affinity. Nitrocellulose has been in use for<br />
a long time, and is sometimes preferred because of its excellent protein binding<br />
and retention capabilities. However, nitrocellulose is brittle and thus it is usually<br />
less effective when blots need <strong>to</strong> be reused. PVDF demonstrates superior<br />
mechanical strength making it suitable for stripping/reprobing and for further<br />
protein characterization techniques, such as sequencing and proteolysis<br />
Sometimes higher background staining is seen with PVDF membranes,<br />
and extra care must be taken <strong>to</strong> prevent this from occurring.<br />
FIGURE 8<br />
<strong>Western</strong> Transfer Methods<br />
18<br />
Chapter 2<br />
Your first choice for antibodies! www.abdserotec.com Chapter 2 19
20<br />
Chapter 2<br />
Setting Up the Transfer<br />
While the gel equilibrates in transfer buffer, the blotting membrane<br />
is prepared. Often the blotting membrane is supplied precut <strong>to</strong> size, or else<br />
it is precisely cut <strong>to</strong> match the size of the gel. Since oils present on the hands<br />
will interfere with signal on the blotting membrane, it is advisable <strong>to</strong> wear<br />
gloves while handling the blotting membrane. Usually a corner is marked<br />
for later orientation, though this is not necessary when using pre-stained<br />
molecular weight markers in one of the side lanes. Prior <strong>to</strong> assembly in the<br />
transfer apparatus, the blotting membrane is prewetted. Nitrocellulose is<br />
prewetted by floating and then immersing in dH 2 0 or transfer buffer, and<br />
PVDF is prewetted in methanol. Both types of membrane are then soaked<br />
in transfer buffer and applied directly <strong>to</strong> the surface of the gel.<br />
It is extremely important that no air bubbles are allowed <strong>to</strong> remain between<br />
the gel surface and the blotting membrane, since air bubbles will disrupt the<br />
transfer of any proteins in that area dis<strong>to</strong>rting the results. Air bubbles can be<br />
easily removed by pushing gently across the surface with a spatula or rolling<br />
with a pipet. It is wise <strong>to</strong> double check the orientation of the gel and blotting<br />
membrane with regard <strong>to</strong> the positive electrode so that the proteins migrate<br />
in the proper direction.<br />
Size of the Target Protein<br />
The size of the target protein should be considered when choosing transfer<br />
conditions. Generally, smaller proteins will transfer out of the gel faster,<br />
and may actually transfer through the blotting membrane in<strong>to</strong> the filter papers<br />
beyond. <strong>Blotting</strong> membranes with a smaller pore size can be used for small<br />
proteins and peptides, and SDS can be reduced or eliminated from the transfer<br />
buffer <strong>to</strong> improve binding <strong>to</strong> the membrane. If there is a suspicion that the<br />
protein is transferring through the membrane, then a second membrane<br />
can be included behind the first <strong>to</strong> catch proteins that migrate through.<br />
In contrast, large proteins can be slower <strong>to</strong> elute and may be retained<br />
within the gel, so overnight wet transfer is usually preferred. Bolt et al.<br />
have developed buffer conditions which improve transfer efficiency across<br />
a range of protein sizes, including very large proteins.<br />
Confirming the Transfer<br />
Once the blotting step has been completed, the apparatus is carefully<br />
disassembled and the success of the transfer is evaluated. The simplest<br />
method of confirming the transfer involves noting the appearance<br />
FIGURE 9<br />
of prestained markers on the blot as compared <strong>to</strong> the gel. However,<br />
this is only a crude measure since it provides results for a single lane.<br />
A more reliable method of confirming transfer is through the use of<br />
a reversible stain which identifies the presence of protein bands directly<br />
on the membrane. Ponceau S, a red stain applied in an acidic solution,<br />
is typically relied upon for this purpose because it is compatible with all<br />
types of immunodetection labels and substrates. The procedure is very simple<br />
<strong>to</strong> use and yields results in about 10 minutes. When unlabeled molecular<br />
standards are used, it is necessary <strong>to</strong> mark the position of the molecular<br />
weight standards directly on the blot when they become visible with<br />
the Ponceau S dye since they will be needed for reference at a later point.<br />
The only negative aspect of Ponceau S staining is that it doesn’t always<br />
produce a good pho<strong>to</strong>graphic record because the bands can be diffuse.<br />
In the accompanying stained blot, it is possible <strong>to</strong> see differing quantities<br />
of cell lysates that have been transferred along with multi-colored molecular<br />
weight markers at the far left.<br />
Mr (kDa)<br />
M r (kDa)<br />
260<br />
160<br />
110<br />
80<br />
60<br />
50<br />
40<br />
30<br />
20<br />
15<br />
10<br />
Ponceau S Stained <strong>Western</strong> Blot of HeLa Cell Lysates (LYS001)<br />
There are several alternative methods that can be used in place of Ponceau S<br />
staining. One option is <strong>to</strong> use a metal ion stain, such as copper, or metal chelate<br />
stain. Another option is <strong>to</strong> stain the blot with India ink, which is very sensitive,<br />
inexpensive, and reliable. However, since India ink creates a permanent record<br />
it will obscure the signal from colorimetric detection reagents. Coomassie Blue<br />
stain is not typically used directly on a <strong>Western</strong> blot prior <strong>to</strong> immunodetection;<br />
instead, it is sometimes used <strong>to</strong> stain the gel after transfer in order <strong>to</strong> identify<br />
what remains behind.<br />
Your first choice for antibodies! www.abdserotec.com Chapter 2 21
Immunodetection<br />
Overview<br />
Chapter<br />
After blotting, the target protein will be detected using appropriately matched<br />
and labeled antibodies. The typical immunodetection stage involves a few<br />
basic steps:<br />
3<br />
Blocking<br />
Blocking is a very important step in the immunodetection phase of <strong>Western</strong><br />
blotting because it prevents non-specific binding of antibody <strong>to</strong> the blotting<br />
membrane. The most commonly used blocking solutions contain 3-5% BSA<br />
or non-fat dried milk (also known as Blot<strong>to</strong> or BLOTTO) in a solution of PBS<br />
(phosphate buffered saline) or TBS (tris buffered saline). Often, a small<br />
amount of Tween ® 20 detergent is added <strong>to</strong> blocking and washing solutions<br />
<strong>to</strong> reduce background staining, and the buffer is known as PBST or TBST.<br />
When choosing between these buffers, it is important <strong>to</strong> note that TBS/TBST<br />
is preferred with AP (Alkaline Phosphatase) labeled antibodies because PBS<br />
will interfere with the AP signal.<br />
FIGURE 10<br />
• Blocking - The blot containing the transferred protein bands is incubated<br />
with a protein or detergent solution which covers the entire surface<br />
so that antibodies do not bind non-specifically <strong>to</strong> the membrane.<br />
• Antibody incubation - Labeled antibody binds <strong>to</strong> the target protein<br />
band present on the blot in a one-step or two-step procedure.<br />
• Detection with substrate - The label attached <strong>to</strong> the antibody,<br />
usually an enzyme such as HRP (Horseradish Peroxidase), is detected<br />
using a substrate which produces a visible signal corresponding<br />
<strong>to</strong> the position of the target protein.<br />
Add<br />
antibodies<br />
M r (kDa)<br />
Add<br />
substrate 75<br />
50<br />
37<br />
25<br />
15<br />
1 2 3<br />
Immunodetection Overview. The <strong>Western</strong> blot is blocked, incubated with<br />
antibodies, and treated with substrate <strong>to</strong> make the target protein visible. Wash<br />
steps are carried out between incubations <strong>to</strong> remove excess unbound material<br />
and <strong>to</strong> minimize non-specific signal on the immunoblot.<br />
target<br />
protein<br />
Non-fat dried milk is considered <strong>to</strong> be a good starting point when selecting<br />
a blocking solution because it is inexpensive and in very wide use. However,<br />
milk proteins are not compatible with all detection labels, so care must be<br />
taken <strong>to</strong> choose the appropriate blocking solution for the antibodies, buffers,<br />
and detection reagents. For example, BSA blocking solutions are preferred<br />
with biotin and AP antibody labels, and anti-phosphoprotein antibodies.<br />
This is because milk solutions contain casein, which is itself a phosphoprotein,<br />
and biotin, thus it will interfere with the assay results. Commercially supplied<br />
blocking solutions, such as Block Ace (BUF029) from AbD Serotec, are very<br />
convenient <strong>to</strong> use and can improve consistency of results, especially when<br />
non-specific background signal is an issue. After blocking, the blot is rinsed<br />
in wash buffer, usually TBST, with gentle agitation and in sufficient volume<br />
<strong>to</strong> keep the blot submerged. Please refer <strong>to</strong> Chapter 5 for detailed pro<strong>to</strong>cols.<br />
Antibody Incubation<br />
After blocking and washing, the blot will be incubated in a dilute solution<br />
of antibody, usually for a few hours at room temperature or overnight<br />
at 4°C. The antibody is diluted in wash buffer (PBST or TBST) or a diluted<br />
blocking solution, the choice depends upon the antibody. At AbD Serotec,<br />
we offer a HISPEC assay diluent (BUF049A) which can be used with primary<br />
and or secondary antibodies <strong>to</strong> reduce cross-reactivity and minimize<br />
non-specific binding. Since antibody preparations vary in their levels of<br />
purity and specific binding properties, there will be differences in the level<br />
of dilution required. For example, purified antibodies are usually diluted<br />
<strong>to</strong> a 1-10 mg/ml final concentration. The manufacturer’s datasheet should<br />
provide dilution recommendations for a particular preparation. However,<br />
it is best <strong>to</strong> test a range of dilutions with each new antibody, optimizing<br />
conditions for the samples under consideration. Dot blots, slot blots,<br />
or test blots (see the end of this chapter) can be used for checking various<br />
22<br />
Chapter 3<br />
Your first choice for antibodies! www.abdserotec.com Chapter 3 23
antibody concentrations. It is critical that all immunodetection steps (blocking,<br />
antibody incubation, substrate incubation, and all intervening washes) have<br />
a sufficient volume and gentle agitation <strong>to</strong> keep the blot evenly exposed <strong>to</strong> the<br />
reagents without drying throughout the process.<br />
Indirect vs. Direct Detection<br />
Antibody detection of the target protein is accomplished using a one-step<br />
or two-step pro<strong>to</strong>col. The one-step procedure, direct detection, relies upon<br />
a single antibody which has been covalently joined <strong>to</strong> an easily detected label<br />
molecule (biotin, an enzyme, or a fluorescent dye). Labeled primary antibodies<br />
can be ordered directly from AbD Serotec or other commercial antibody suppliers.<br />
In addition, it is possible <strong>to</strong> directly label an antibody by using a commercially<br />
supplied labeling kit such as our LYNX Rapid Conjugation Kits ® , or with<br />
in-house reagents.<br />
Comparison of Direct and Indirect Detection Methods<br />
Direct Detection<br />
Advantages<br />
Faster overall, since there are fewer steps.<br />
Less chance of non-specific signal.<br />
Indirect Detection<br />
Advantages<br />
Often gives a stronger signal because<br />
multiple secondary antibodies bind<br />
<strong>to</strong> each primary antibody.<br />
Easy <strong>to</strong> change label type or detection<br />
methods for a new experiment<br />
by swapping secondaries.<br />
Saves labeling time and expense, especially<br />
when all primary antibodies are made in the<br />
same species.<br />
With indirect detection, two different antibodies are used in sequence<br />
for the detection step. First, the <strong>Western</strong> blot is incubated with an unlabeled<br />
primary antibody directed against the target protein. After washing,<br />
a labeled secondary antibody is used <strong>to</strong> detect the presence of the primary<br />
antibody, and thus the target protein. The labeled secondary antibody is typically<br />
directed against the immunoglobulin class or subclass of the primary antibody’s<br />
species. For example, one of our popular secondaries is STAR88P, a purified<br />
donkey antibody raised against goat/sheep immunoglobulin (IgG) which<br />
is coupled <strong>to</strong> an HRP label. Biotinylated primary antibodies also require<br />
a two-step detection procedure; however, the second step involves incubation<br />
with streptavidin, a bacterial protein, conjugated <strong>to</strong> HRP (or AP), rather than with<br />
a labeled antibody.<br />
Disadvantages<br />
Coupling of label <strong>to</strong> the primary antibody may<br />
affect the antibody’s ability <strong>to</strong> bind <strong>to</strong> the<br />
target protein.<br />
Labeling every primary antibody adds<br />
time and cost.<br />
Provides access <strong>to</strong> a wider range of labels.<br />
Disadvantages<br />
More non-specific signal can arise from<br />
the binding of the secondary antibody<br />
<strong>to</strong> other proteins on the blot.<br />
Extra incubation and wash steps add time<br />
<strong>to</strong> the experiment.<br />
Detection with Substrate<br />
FIGURE 11<br />
Direct detection uses a<br />
labeled primary antibody <strong>to</strong><br />
identify the target protein.<br />
Direct vs. Indirect Detection<br />
Indirect detection uses an<br />
unlabeled primary followed by<br />
labeled secondary antibodies.<br />
Now that the target protein has been specifically tagged with an appropriately<br />
labeled antibody, and excess antibody has been washed away, the label will<br />
be used <strong>to</strong> identify the location of the target protein on the blot. Some labels<br />
can be detected immediately, without any further processing. Fluorescent tags,<br />
for example, simply require the right equipment <strong>to</strong> observe and record the<br />
fluorescent signal. In Figure 12, a <strong>Western</strong> blot is probed with an anti-tubulin<br />
primary antibody and a DyLight ® 800 (STAR117D800) secondary antibody.<br />
It is then detected using the LI-COR ® Odyssey Infrared Imaging System. Note<br />
here that the molecular weight standards at the far left are labeled <strong>to</strong> produce<br />
a red signal allowing them <strong>to</strong> be easily distinguished from the samples. This<br />
highlights one of the advantages of fluorescent labels, which is that multiple<br />
labels can be seen on the same blot in the same experiment.<br />
24<br />
Chapter 3<br />
Your first choice for antibodies! www.abdserotec.com Chapter 3 25
FIGURE 12<br />
FIGURE 13<br />
M r (kDa)<br />
85<br />
54<br />
29<br />
20<br />
<strong>Western</strong> Detection of Tubulin using STAR117D800<br />
The most common antibody label used in <strong>Western</strong> blots is HRP, a small,<br />
stable enzyme with high specificity and rapid turnover. HRP is deactivated<br />
by sodium azide, so it is imperative that no azide is present in the blocking,<br />
dilution, or washing solutions. At AbD Serotec we offer a specialized buffer<br />
for the long term s<strong>to</strong>rage and dilution of HRP labeled antibodies, BUF052A,<br />
which can be used with all antibodies except those generated against rabbit<br />
immunoglobulins. The HRP label is detected when it is exposed <strong>to</strong> a substrate<br />
solution in the final step of the immunodetection procedure. Substrate<br />
solutions for <strong>Western</strong> blotting are chemical reagents that are acted upon<br />
by the enzyme <strong>to</strong> yield a signal that can be easily measured. HRP label is<br />
typically detected with either colorimetric or chemiluminescent substrates.<br />
Detectible<br />
signal<br />
Substrate<br />
Detection of the Antibody Label. The antibody label is exposed <strong>to</strong> substrate<br />
in the final stages, creating a visible band either on the surface of the blot<br />
(colorimetric substrates), or as light emission (ECL substrate) captured<br />
on X-ray film or with a CCD camera.<br />
Colorimetric substrates for HRP produce brown (DAB) or purple/black (4CN,<br />
TMB, NBT/BCIP) bands directly on the surface of the blot. These substrates are<br />
very easy <strong>to</strong> use and take from a few minutes <strong>to</strong> a few hours <strong>to</strong> produce<br />
visible bands. Detection limits for colorimetric substrates are in the low<br />
nanogram range. The colorimetric detection reaction proceeds until s<strong>to</strong>pped,<br />
leading <strong>to</strong> the risk of overdevelopment and less flexibility of results produced.<br />
The signal also tends <strong>to</strong> fade over time, so the record is less permanent.<br />
More routinely, HRP is used with ECL (enhanced chemiluminescence)<br />
detection. For ECL detection, the substrate is luminol which is oxidized by<br />
HRP in the presence of H 2 O 2 and an enhancer <strong>to</strong> produce light. The emitted<br />
light is detected by exposing the <strong>Western</strong> blot <strong>to</strong> X-ray film, or by using<br />
a CCD camera for light capture. The emitted light forms a band on the film,<br />
or on the screen of the imaging system, indicating where the HRP-labeled<br />
antibody has bound <strong>to</strong> the target protein.<br />
ECL detection of HRP is extraordinarily sensitive, allowing for the visualization<br />
of picogram <strong>to</strong> fem<strong>to</strong>gram amounts of target protein. Furthermore, since<br />
multiple film or CCD exposures can be made with ease, little effort is required<br />
<strong>to</strong> produce a suitable permanent record for analysis or publication. Detection<br />
times for ECL substrates range from a few seconds <strong>to</strong> about 30 minutes and<br />
can usually be done or redone over a period of several hours. Some molecular<br />
weight markers are designed <strong>to</strong> produce a signal during ECL detection<br />
yielding a visible ladder that is convenient for identifying the bands produced<br />
during immunodetection. A discussion of <strong>Western</strong> blotting results is found in<br />
the next chapter.<br />
Test Blots, Slot Blots, and Dot Blots<br />
Test blots, as their name implies, are very simple <strong>Western</strong> blots that are<br />
created for the express purpose of optimizing or troubleshooting experimental<br />
conditions. They are usually produced by running multiple lanes of the same<br />
lysate or purified protein solution on a gel, and after transfer cutting the blot<br />
in<strong>to</strong> strips <strong>to</strong> be tested individually. They provide a quick and efficient means<br />
of examining a range of antibody dilutions or detection substrates.<br />
Dot blots and slot blots are also a very useful variation on the typical <strong>Western</strong><br />
blot. They do not require gel electrophoresis, so there is no separation<br />
of proteins by size. Instead, the target protein or cell lysate mixture is added<br />
directly on<strong>to</strong> the surface of the nitrocellulose or PVDF membrane. Protein<br />
solutions can be applied directly in a small volume, or with a vacuum<br />
manifold <strong>to</strong> produce an orderly grid of samples similar <strong>to</strong> that seen in Figure<br />
14. Each dot or slot blot would contain known amounts of target protein<br />
26<br />
Chapter 3<br />
Your first choice for antibodies! www.abdserotec.com Chapter 3 27
or cell lysate. Once dry, dot blots and slot blots are subjected <strong>to</strong> the same<br />
immunodetection steps used for <strong>Western</strong> blotting, i.e. blocking, antibody<br />
incubation, and target detection with substrate. Grey and black spots on the<br />
figure below indicate which samples are positive for the target protein and<br />
correspond roughly <strong>to</strong> the bands produced on a <strong>Western</strong> blot.<br />
Data Analysis<br />
Chapter<br />
4<br />
1. Block<br />
2. Antibody Incubation<br />
3. Target Detection<br />
Overview<br />
The data produced with a <strong>Western</strong> blot is usually quite easy <strong>to</strong> interpret.<br />
In the majority of cases, bands corresponding <strong>to</strong> the target protein will<br />
become visible upon treatment of the blot with substrate. Their identity<br />
is confirmed by comparison <strong>to</strong> molecular weight markers (for size)<br />
and a positive control (size and signal). In some cases the data may<br />
be more complex, showing unexpected sizes, multiple bands,<br />
or alteration in bands following a particular treatment. The focus of this<br />
chapter is analysis and as such the data itself will be discussed along<br />
with examples of different types of <strong>Western</strong> blot data from research<br />
and clinical settings <strong>to</strong> demonstrate the flexibility of the technique.<br />
If there are no bands on the blot, or if there are unexplained blotches<br />
or uneven signal, troubleshooting advice is offered in Chapter 6.<br />
Data<br />
FIGURE 14<br />
Dot Blots and Slot Blots. The dot blots at the left represent a dilution series<br />
of a sample, with smaller lighter dots corresponding <strong>to</strong> lower concentrations<br />
of target protein. The slot blots represent a group of random samples,<br />
the intensity of the signal corresponds <strong>to</strong> the concentration of the target<br />
protein in that sample.<br />
By making a number of identical dots or slots of a single known protein<br />
sample, or a range of sample dilutions, one can quickly test several<br />
combinations and concentrations of primary and secondary antibodies.<br />
Dot blots and slot blots are also beneficial when screening a large number<br />
of samples, or if a simple answer will suffice. The main downside <strong>to</strong> slot<br />
blots/dot blots is that they provide no information about molecular weight.<br />
Thus, it is harder <strong>to</strong> detect false positive signals, or <strong>to</strong> tell whether modified<br />
forms of a protein are present.<br />
Quantitation<br />
It is very important <strong>to</strong> be aware that the data produced with a <strong>Western</strong><br />
blot is typically considered <strong>to</strong> be semi-quantitative. That is, it provides<br />
a relative comparison of protein levels, but not an absolute measure<br />
of quantity for a specific target protein in a particular experiment.<br />
The reason for this is two-fold: first, there will be variations in loading<br />
and transfer rates between the samples in separate lanes and on<br />
separate blots that will need <strong>to</strong> be normalized before a more precise<br />
comparison can be made; second, the signal generated will not be<br />
linear across the concentration range of samples due <strong>to</strong> substrate<br />
availability and linear responsiveness of the detection method. Since<br />
the signal produced is not linear, it should not be used <strong>to</strong> attach<br />
a precise concentration <strong>to</strong> a particular sample. ELISAs are more<br />
suitable for this purpose and generally more sensitive.<br />
28<br />
Chapter 3<br />
Your first choice for antibodies! www.abdserotec.com Chapter 4 29
Normalization<br />
In order <strong>to</strong> compare target protein expression levels between several different<br />
samples on the same blot or across blots, it is necessary <strong>to</strong> use a loading<br />
control <strong>to</strong> normalize the data. Loading controls are not actually anything<br />
that is loaded on<strong>to</strong> the gel; instead, they refer <strong>to</strong> a means of equalizing<br />
differences in gel loading and transfer rates between samples. They are not<br />
required for every gel that is run, but are necessary for publication quality work,<br />
and when the actual signal level between samples is compared. Typically,<br />
the blot is probed with an antibody <strong>to</strong> a well-characterized housekeeping gene<br />
which is used as a general measure of protein expression levels in the cells used<br />
as a source for a particular sample. Probing with the housekeeping gene<br />
antibody can be carried out along with the target antibody, separately<br />
by cutting a blot between the expected band locations, or later after the blot<br />
has been stripped of previously bound antibodies. Common loading controls<br />
measure the levels of GAPDH, beta actin, tubulin, and his<strong>to</strong>nes. These proteins<br />
vary in molecular weight and should be carefully chosen depending upon<br />
the target protein and experimental conditions since there can be some<br />
variation in their signal. In the <strong>Western</strong> blot below, Lnk (lymphocyte adap<strong>to</strong>r<br />
protein) expression is compared <strong>to</strong> non-infected cells and an unrelated protein<br />
as a negative control. The matched anti-tubulin probed section of the blot<br />
demonstrates that an equivalent amount of sample was loaded in each lane.<br />
68 kDa<br />
60 kDa<br />
1 2 3 4 5<br />
LnK<br />
Tubulin<br />
FIGURE 15 Lnk Expression in Endothelial Cells Following Treatment with TNF a.<br />
The <strong>Western</strong> blot was probed first with anti-Lnk antibody (AHP1003),<br />
showing an increase in Lnk expression over time in lanes 3-5. It was then<br />
stripped and reprobed with an anti-tubulin antibody <strong>to</strong> confirm loading<br />
equivalence. Lane 1: Non-infected cells. Lane 2: Negative transfection<br />
control-AdGFP. Lanes 3-5: 1, 2, and 3 hours post TNF treatment.<br />
ECL signal can also be detected with CCD cameras, which usually have a better<br />
linear range than film and associated analysis software. Consult the manual for<br />
the densi<strong>to</strong>meter or imaging system in use for specific instructions.<br />
<strong>Western</strong> Blot Examples<br />
Detecting or Characterizing Protein Expression<br />
One simple and common use for <strong>Western</strong> blotting is <strong>to</strong> identify whether<br />
a particular protein is present or absent in a sample by looking for a band<br />
of the correct size on a <strong>Western</strong> blot. This routine type of <strong>Western</strong> blot<br />
is used <strong>to</strong> either test for endogenous cellular expression of a target protein,<br />
or <strong>to</strong> examine transfected cell lines <strong>to</strong> see if expression has been conferred<br />
by the introduction of a DNA construct. It is also used with techniques such<br />
as protein purification and cellular fractionation <strong>to</strong> identify which samples have<br />
the target protein, and thus is an aid <strong>to</strong> deciding which samples <strong>to</strong> combine<br />
or discard. After immunodetection, a band corresponding <strong>to</strong> the size of the<br />
target protein should become visible in positive test samples and the positive<br />
control, in comparison <strong>to</strong> a known null cellular sample. In the figure below,<br />
HEK293 cells transfected with three isoforms of the Homer 1 protein and are<br />
compared <strong>to</strong> rat cortical extract as a positive control. The blot shows that the<br />
antibody used, AbD Serotec’s AHP737, recognizes Homer isoform 1c, but not 2b<br />
or 1a. The presence of untransfected cells (Lane 2) confirm that the signal is<br />
specific <strong>to</strong> transfection with the appropriate construct. The faint band seen in<br />
lane 4, is actually a small amount of spill over from lane 5.<br />
M r (kDa)<br />
97<br />
66<br />
45<br />
31<br />
1 2 3 4 5<br />
Densi<strong>to</strong>meters and Analysis Software<br />
In order <strong>to</strong> make a permanent record, or <strong>to</strong> get an objective measure of the<br />
signal generated on a <strong>Western</strong> blot, a densi<strong>to</strong>meter is used <strong>to</strong> scan the blot<br />
or film. Imaging software is then used <strong>to</strong> compare the signal generated<br />
by the bands detected on the <strong>Western</strong> blot.<br />
FIGURE 16<br />
Detection of Rat Homer Protein Isoforms. <strong>Western</strong> blot of Homer isoforms<br />
probed with anti-Homer [177-366] (AHP737) which detects the control and<br />
isoform 1c. Lane 1: control, 30 mg rat cortical extract. Lane 2: untransfected<br />
control. Lane 3: Isoform 1a. Lane 4: Isoform 2b. Lane 5: Isoform 1c.<br />
30<br />
Chapter 4<br />
Your first choice for antibodies! www.abdserotec.com Chapter 4 31
Demonstrating Antibody Specificity<br />
A simple way <strong>to</strong> demonstrate that the band seen on a <strong>Western</strong> blot is specific<br />
<strong>to</strong> the interaction between a target protein and a properly matched antibody<br />
is by blocking the antibody from binding <strong>to</strong> the target epi<strong>to</strong>pe through<br />
competition with a peptide that matches the sequence of the epi<strong>to</strong>pe.<br />
AbD Serotec offers a range of blocking peptides for this purpose.<br />
The experiment is carried out during the antibody incubation stage<br />
and compares antibody alone <strong>to</strong> antibody treated with the blocking<br />
peptide. If the peptide sequence correctly corresponds <strong>to</strong> the epi<strong>to</strong>pe<br />
then the antibody will bind <strong>to</strong> the peptide and will not be available <strong>to</strong> bind<br />
<strong>to</strong> the target protein on the blot. This technique would only be used with<br />
monoclonal antibodies, since they are directed against a single epi<strong>to</strong>pe,<br />
and when the epi<strong>to</strong>pe is known. In the example below, lane 2 has no signal<br />
because the peptide has effectively blocked the antibody from binding,<br />
whereas in lane 1 the band is visible as expected.<br />
M r (kDa)<br />
102<br />
81<br />
46<br />
1 2<br />
prion disease. There are several ways <strong>to</strong> identify the presence of the abnormal<br />
prion protein - a bioassay, immunohis<strong>to</strong>chemistry on diseased tissue samples,<br />
and with a faster, well-characterized, and sensitive <strong>Western</strong> blot.<br />
The <strong>Western</strong> blot below shows Scrapie infected sheep brain lysates (Lanes<br />
3&4) compared <strong>to</strong> normal sheep brain lysates (Lanes 1&2). The key <strong>to</strong> this<br />
particular <strong>Western</strong> assay is the use of Proteinase (PK) treatment on parallel<br />
sets of samples. Since the Scrapie associated form of the prion protein is<br />
resistant <strong>to</strong> digestion, it is possible <strong>to</strong> distinguish between normal cellular<br />
forms and abnormal prion protein in a sample based upon their sensitivity<br />
<strong>to</strong> PK. Thus, it is possible <strong>to</strong> discriminate diseased samples from normal ones<br />
quickly and unambiguously on a <strong>Western</strong> blot. The absence of bands in lane 2<br />
indicates that the normal form is present as compared <strong>to</strong> the bands visible in<br />
lane 4, which indicate the presence of the pathogenic form.<br />
M r (kDa)<br />
30<br />
25<br />
1 2 3 4<br />
33<br />
30<br />
12<br />
FIGURE 17<br />
Peptide Blocks Binding of Anti-CX3CR1 (AHP566) Antibody. Lane 1: THP-1<br />
cell lysate (LYS008). Lane 2: THP-1 cell lysate + peptide <strong>to</strong> aa175-189 of<br />
human CX3CR1.<br />
Alternate Forms of a Protein – Prion Disease<br />
Prion disease is a rare, progressive, neurodegenerative disorder that<br />
affects humans (vCJD, CJD), cows (BSE), sheep (Scrapie), and elk/deer (CWD).<br />
It leads <strong>to</strong> characteristic brain lesions and a rapid loss in neurological<br />
functions after a long latency period. The accumulation of an altered isoform<br />
of a normal cellular protein appears <strong>to</strong> be instrumental in the development of<br />
FIGURE 18<br />
Detection of Scrapie Infected Sheep Brain. Bands in lane 4 indicate that<br />
the protease resistant form of the prion protein is present in the sample<br />
as compared <strong>to</strong> normal tissue in lane 2. Lanes 1&2: Uninfected sheep brain<br />
homogenate. Lanes 3&4: Scrapie-infected sheep brain homogenate.<br />
Lanes 1&3: No PK added. Lanes 2&4: Digested with PK.<br />
32<br />
Chapter 4<br />
Your first choice for antibodies! www.abdserotec.com Chapter 4 33
Confirmation of HIV<br />
In the diagnosis of HIV infection in patients, an ELISA is used first because<br />
it demonstrates 99.5% specificity and is quick and easy <strong>to</strong> perform on<br />
a large number of samples. <strong>Western</strong> blotting is used as a supplementary<br />
assay because the ELISA is subject <strong>to</strong> false positives. In order <strong>to</strong> perform this<br />
assay, patient serum samples are used as the source of antibodies for<br />
immunodetection, and blots containing HIV antigens, proteins, viral lysates,<br />
or peptides are used as the source of target antigen on the <strong>Western</strong> blot.<br />
If the HIV target proteins on the blot are detected by the patient serum then<br />
it indicates that the patient sample is a true positive for HIV infection, since<br />
an immune response has been mounted by the patient. A similar strategy<br />
is also used in tests for Lyme disease and au<strong>to</strong>immune disease.<br />
Buffers and Pro<strong>to</strong>cols<br />
Overview<br />
Chapter<br />
5<br />
The following buffers and methods provide a general starting point for use<br />
with the majority of AbD Serotec reagents in <strong>Western</strong> blotting. When specific<br />
recommendations are provided on product datasheets, those instructions<br />
should always be used instead of the general guidance offered here.<br />
With specialized labora<strong>to</strong>ry equipment, such as for gel electrophoresis<br />
and electroblotting, it is advisable <strong>to</strong> follow the manufacturer’s instructions.<br />
If difficulties arise with any of our antibodies or related products, please feel<br />
free <strong>to</strong> contact tech.uk@abdserotec.com, as we may have additional<br />
information on file and can assist with troubleshooting.<br />
Buffers<br />
N.B. Azide should not be added <strong>to</strong> any buffers that will be used with<br />
HRP-labeled antibodies because it will inactivate the HRP enzyme.<br />
PBS<br />
8.0 g NaCl<br />
0.2 g KCl<br />
1.15 g Na 2 HPO 4<br />
0.2 g KH 2 PO 4<br />
Dissolve in 800 ml distilled water, adjust pH <strong>to</strong> 7.4, and then add more dH 2 0<br />
<strong>to</strong> a final volume of 1 liter. Sterilize by au<strong>to</strong>claving and s<strong>to</strong>re at room<br />
temperature (RT).<br />
TBS<br />
8.0 g NaCl<br />
0.2 g KCl<br />
3.0 g Tris base<br />
Dissolve in 800 ml distilled water, adjust pH <strong>to</strong> 8.0 with 1 M HCl, and then<br />
add more dH 2 0 <strong>to</strong> a final volume of 1 liter. Sterilize by au<strong>to</strong>claving and s<strong>to</strong>re at RT.<br />
34<br />
Chapter 4<br />
Your first choice for antibodies! www.abdserotec.com Chapter 5 35
10x TBS S<strong>to</strong>ck:<br />
500 mM Tris-HCl, pH 7.4<br />
1.5 M NaCl<br />
Cell Lysis Buffers<br />
NP-40 Lysis Buffer<br />
50 mM Tris, pH 8.0<br />
150 mM NaCl<br />
1% NP-40 (or Tri<strong>to</strong>n ® X-100)<br />
+ fresh protease inhibi<strong>to</strong>rs, see below<br />
RIPA (Radio Immuno Precipitation Assay) Buffer<br />
50 mM Tris, pH 8.0<br />
150 mM NaCl<br />
1% NP-40 (or Tri<strong>to</strong>n ® X-100)<br />
0.5% Sodium deoxycholate<br />
0.1% SDS<br />
+ fresh protease inhibi<strong>to</strong>rs, see below<br />
Proteases Inhibi<strong>to</strong>rs<br />
Various proteases inhibi<strong>to</strong>rs are often added <strong>to</strong> lysis buffer <strong>to</strong> maintain the<br />
integrity of the target protein when cells are disrupted. The following table<br />
provides some recommended working concentrations:<br />
Protease Inhibi<strong>to</strong>rs<br />
Inhibi<strong>to</strong>r Working Concentration Protease Inhibited<br />
Aprotinin 1-2 mg/ml Trypsin, Chymotrypsin,<br />
Plasmin, Kallikrein<br />
EDTA 1-2 mM Metalloproteases (Mg 2+<br />
and Mn 2+ )<br />
EGTA 1 mM Metalloproteases (Ca 2+ )<br />
Leupeptin 0.5-2 mg/ml Plasmin, Trypsin, Papain,<br />
Cathepsin B<br />
Pepstatin A 1 mg/ml Pepsin, Cathepsin D<br />
PMSF (highly <strong>to</strong>xic) 50-100 mg/ml Serine and Cysteine<br />
proteases<br />
Electrophoresis and Transfer Buffers<br />
Laemmli 2x Sample Buffer<br />
4% SDS<br />
20% Glycerol<br />
125 mM Tris, pH 6.8<br />
0.02% Bromophenol blue<br />
200 mM DTT or 10% bME<br />
For best results DTT or bME is added fresh, just before use.<br />
Gel Electrophoresis Running Buffer<br />
25 mM Tris base<br />
190 mM Glycine<br />
0.1% SDS<br />
Transfer Buffer<br />
50 mM Tris base<br />
380 mM Glycine<br />
0.1% SDS<br />
20% Methanol<br />
Ponceau S S<strong>to</strong>ck Solution<br />
2% Ponceau S<br />
30% Trichloroacetic acid<br />
30% Sulfosalicylic acid<br />
Dilute 10-fold in distilled water prior <strong>to</strong> use.<br />
Washing Buffers<br />
PBST<br />
PBS with 0.1% Tween ® 20<br />
TBST<br />
TBS with 0.1% Tween ® 20<br />
Block Ace Wash Buffer (BUF029)<br />
Reconstitute each 4 g vial in 100 ml distilled water. Dilute the reconstituted<br />
solution 10-fold, and add Tween ® 20 <strong>to</strong> a final concentration of 0.05-0.2% v/v.<br />
36<br />
Chapter 5<br />
Your first choice for antibodies! www.abdserotec.com Chapter 5 37
Blocking Buffers<br />
*Use BSA or Block Ace (BUF029) <strong>to</strong> block when probing with<br />
anti-phosphoprotein antibodies, or for biotinylated primary<br />
antibodies detected with an anti-biotin secondary.<br />
5% Nonfat Dried Milk in PBST or TBST (Blot<strong>to</strong>/BLOTTO)<br />
Add 5 g nonfat dried milk powder <strong>to</strong> 100 ml PBST or TBST.<br />
Dissolve with gentle stirring. S<strong>to</strong>re at 4°C.<br />
3% BSA in PBST or TBST<br />
Dissolve 3 g of BSA Fraction V in 100 ml PBST or TBST with gentle stirring.<br />
S<strong>to</strong>re at 4°C.<br />
Block Ace (BUF029)<br />
Reconstitute each 4 g vial in 100 ml distilled water, and use undiluted.<br />
Pro<strong>to</strong>cols<br />
Cell Lysis - Mammalian Cells<br />
*For yeast and bacterial cell lysis consult Sambrook et al., or Harlow<br />
and Lane.<br />
Adherent cells:<br />
1.Wash cells directly in the tissue culture flask or dish by adding cold PBS<br />
and rocking gently. Aspirate PBS and repeat. Keep tissue culture dish<br />
on ice throughout.<br />
2. Add appropriate volume ice cold lysis buffer (with fresh protease<br />
inhibi<strong>to</strong>rs), <strong>to</strong> the flask, approximately 1ml for a 100 mm tissue culture<br />
dish. (Alternatively, cells can be removed from the flask with Trypsin-EDTA<br />
and then prepared using the suspension cell instructions below).<br />
3. Incubate for 20 minutes on ice, and then scrape cells from the surface<br />
using a rubber spatula.<br />
4. Transfer <strong>to</strong> a microfuge tube and clarify the lysate by spinning<br />
for 10 minutes at 12,000 RPM, at 4°C.<br />
5. Transfer supernatant <strong>to</strong> a fresh tube and s<strong>to</strong>re on ice or frozen<br />
at -20°C or -80°C.<br />
38<br />
Chapter 5<br />
Suspension cells:<br />
1. Pipet cells in<strong>to</strong> a fresh conical tube and place on ice.<br />
2. Spin cells on low speed at 4°C, and aspirate off media.<br />
3. Add 10 ml ice cold PBS, and gently invert tube <strong>to</strong> wash cells.<br />
4. Spin cells on low speed, and aspirate off supernatant.<br />
5. Repeat wash and aspiration. Resuspend cells in 5 ml ice cold PBS.<br />
6. Count cells, and centrifuge on low speed at 4°C <strong>to</strong> form a cell pellet.<br />
Aspirate off liquid.<br />
7. Gently resuspend the cell pellet in ice cold cell lysis buffer (with fresh<br />
protease inhibi<strong>to</strong>rs), use 1 ml buffer for 10 7 cells.<br />
8. Incubate cells for 30 minutes on ice. If needed, sonicate the lysates<br />
on ice for 15-30 seconds <strong>to</strong> disrupt genomic DNA and cellular components.<br />
9. Transfer <strong>to</strong> a microfuge tube and clarify the lysate by spinning at 4°C,<br />
for 10 minutes at 12,000 RPM.<br />
Your first choice for antibodies! www.abdserotec.com Chapter 5 39
10. Decant the supernatant <strong>to</strong> a fresh tube, and discard cell pellet.<br />
S<strong>to</strong>re on ice for immediate use, or at -20°C or -80°C until needed.<br />
11. Measure protein concentration with BCA, Lowry, or Bradford assays,<br />
or by absorbance, prior <strong>to</strong> loading on a gel.<br />
Tissue samples:<br />
1. Tissue samples are rinsed in cold PBS and placed in a tube<br />
on ice immediately following dissection.<br />
2. For small samples (100 mg) chop in<strong>to</strong> pieces with clean dissecting<br />
instruments. Add tissue and 1-2 ml ice cold lysis buffer<br />
<strong>to</strong> dounce homogenizer, or sonicate in small tube. Homogenize<br />
or sonicate on ice.<br />
3. Clarify the lysate with a high speed spin in a microfuge at 4°C,<br />
for 10 minutes at 12,000 RPM.<br />
4. Transfer supernatant <strong>to</strong> a fresh tube and discard cell pellet.<br />
S<strong>to</strong>re on ice for immediate use, or at -20°C or -80°C until needed.<br />
5. Measure protein concentration with BCA, Lowry, or Bradford assays,<br />
or by absorbance, prior <strong>to</strong> loading on a gel.<br />
Gel Electrophoresis & Protein Transfer by Electroblotting<br />
* Detailed instructions for making gels in-house can be found in Sambrook et al.<br />
1. For standard denaturing and reducing conditions, mix sample 1:1 by volume<br />
with Laemmli 2x sample buffer.<br />
2. Heat <strong>to</strong> 100 o C for 5 minutes or 70 o C for 10 minutes.<br />
3. Load 20-50 mg sample per lane, along with suitable positive<br />
and negative controls.<br />
4. Run the gel and transfer <strong>to</strong> PVDF or nitrocellulose membrane according<br />
<strong>to</strong> the manufacturer’s instructions for the equipment and materials in use.<br />
5. Confirm protein transfer by staining for 1 minute with Ponceau S, followed<br />
by complete destain in distilled water.<br />
6. Mark position of molecular weight standards if they are unlabeled.<br />
(For our in-house <strong>Western</strong> blotting, we use NuPAGE ® Novex ® precast 4-12%<br />
gradient gels run in Tris-Acetate buffer and transferred <strong>to</strong> nitrocellulose using<br />
the Xcell SureLock TM II blot module from Invitrogen, as per the manufacturer’s<br />
instructions.)<br />
Immunodetection – Indirect<br />
1. Place membrane in<strong>to</strong> blocking solution for at least 2 hours at RT<br />
or overnight at 4°C. Use a sufficient volume <strong>to</strong> keep the blot fully covered,<br />
with gentle agitation throughout.<br />
2. Rinse the membrane briefly in washing buffer.<br />
3. Incubate with primary antibody diluted in wash buffer or blocking buffer<br />
(an antibody concentration of 1-10 µg/ml is generally acceptable).<br />
Incubate overnight at 4°C, or for 2 hours at room temperature.<br />
Use a sufficient volume <strong>to</strong> keep the blot fully covered, with gentle<br />
agitation throughout.<br />
4. Rinse the membrane in wash buffer (3x10 minutes), with gentle agitation<br />
and a sufficient volume <strong>to</strong> keep membrane well covered.<br />
5. Add appropriate enzyme conjugated secondary antibody diluted in wash<br />
buffer or blocking agent, and incubate for 1 hour at RT with gentle<br />
agitation in a sufficient volume <strong>to</strong> ensure coverage.<br />
(* No azide in the buffers if the secondary is labeled with HRP)<br />
6. Incubate the membrane with gentle agitation as follows: 4x5 minutes<br />
in wash buffer, followed by 2x5 minutes in PBS or TBS.<br />
7. Drain excess PBS/TBS from the membrane and transfer <strong>to</strong> appropriate<br />
enzyme substrate solution and incubate for time period recommended<br />
by manufacturer <strong>to</strong> visualize protein bands.<br />
Immunodetection – Direct<br />
1. Place membrane in<strong>to</strong> blocking solution for at least 2 hours at RT,<br />
or overnight at 4°C. Use a sufficient volume <strong>to</strong> keep the blot fully covered,<br />
with gentle agitation throughout.<br />
2. Rinse the membrane briefly in washing buffer and then incubate<br />
with labeled primary antibody diluted in wash buffer or blocking buffer<br />
(a concentration of 1-10 µg/ml is generally acceptable). Incubate overnight<br />
at 4°C, or for 2 hours at room temperature. Use a sufficient volume <strong>to</strong> keep<br />
the blot fully covered, with gentle agitation throughout.<br />
3. Wash the membrane in a sufficient volume and with gentle agitation<br />
as follows: 4x5 minutes in wash buffer and 2x5 minutes in PBS or TBS.<br />
4. Drain excess PBS/TBS from the membrane and transfer <strong>to</strong> appropriate<br />
enzyme substrate solution and incubate for time period recommended<br />
by manufacturer <strong>to</strong> visualize protein bands.<br />
40<br />
Chapter 5<br />
Your first choice for antibodies! www.abdserotec.com Chapter 5 41
42<br />
Troubleshooting<br />
Overview<br />
Chapter 6<br />
Chapter<br />
6<br />
While <strong>Western</strong> blotting is a relatively simple and straightforward technique,<br />
it does not always yield results that meet with expectations. When this<br />
occurs, it is useful <strong>to</strong> be able <strong>to</strong> quickly isolate the possible causes and<br />
<strong>to</strong> formulate an effective solution by troubleshooting the experiment. In this<br />
chapter, suggestions are offered <strong>to</strong> assist in identifying and resolving some<br />
frequently encountered problems that arise during the course of <strong>Western</strong><br />
blotting. Many of these problems can be avoided with careful attention<br />
<strong>to</strong> experimental pro<strong>to</strong>cols, and with optimization at key stages throughout<br />
the procedure. As mentioned at the end of Chapter 3, the proper antibody<br />
concentration can be determined with the use of dot blots and slot blots,<br />
significantly reducing the need for future troubleshooting. Additionally,<br />
the use of negative and positive controls are of great help in assessing where<br />
things have gone wrong, and eliminating some possible sources of error<br />
under consideration.<br />
Since one issue that commonly arises during <strong>Western</strong> blotting is the presence<br />
of unusual or unexpected bands on the blot, our troubleshooting section<br />
begins with a table describing some common reasons and potential solutions<br />
for addressing and evaluating this type of problem.<br />
In most cases, the rest of the troubleshooting issues can be grouped in<strong>to</strong><br />
three major types: no bands, faint bands, and signal on <strong>Western</strong> blots that<br />
interferes with bands. Therefore, the potential causes and solutions have been<br />
organized in this manner, and also with regard <strong>to</strong> potential problem sources,<br />
i.e. antibody, antigen, technique, or buffer related where applicable. For<br />
further assistance when using our products in <strong>Western</strong> blotting, contact<br />
tech.uk@abdserotec.com.<br />
Unusual or Unexpected Bands<br />
Difference seen Possible Cause Action/Solution<br />
Band(s) at lower<br />
molecular weight than<br />
expected<br />
Band(s) at slightly<br />
higher molecular<br />
weight than expected,<br />
and may be blurred<br />
Band(s) at significantly<br />
higher molecular<br />
weight than expected<br />
Multiple bands<br />
at various molecular<br />
weights<br />
Target protein has been cleaved<br />
or digested<br />
Splice variants exist<br />
Another protein bearing the<br />
same/similar epi<strong>to</strong>pe has been<br />
detected by antibody<br />
Protein may be glycosylated<br />
or otherwise modified at one<br />
or more amino acid residues<br />
Dimers, multimers, or proteinprotein<br />
interactions may be<br />
occurring because samples<br />
have not been fully reduced and<br />
denatured<br />
Primary antibody concentration<br />
may be <strong>to</strong>o high, or there<br />
is a cross-reactivity with similar<br />
epi<strong>to</strong>pes on other proteins<br />
Secondary antibody<br />
concentration is <strong>to</strong>o high leading<br />
<strong>to</strong> non-specific binding<br />
Use a fresh sample which has been<br />
kept on ice<br />
Add fresh protease inhibi<strong>to</strong>rs<br />
<strong>to</strong> the lysis buffer<br />
Try alternate antibody<br />
Use enzymes <strong>to</strong> remove suspected<br />
modification returning molecular<br />
weight closer <strong>to</strong> expected<br />
Check amino acid sequence<br />
and literature<br />
Add fresh DTT or bME <strong>to</strong> samples and<br />
reheat before repeating experiment<br />
Prepare new samples with fresh<br />
loading buffer<br />
Use an affinity-purified primary<br />
antibody<br />
Optimize primary antibody<br />
concentration<br />
Try another antibody<br />
Check antibody specificity with<br />
blocking peptide<br />
Decrease/optimize the concentration<br />
of the secondary antibody<br />
Use an affinity-purified secondary<br />
antibody<br />
Repeat immunodetection with<br />
secondary antibody alone <strong>to</strong> check<br />
for non-specific binding<br />
Check literature<br />
Protein exists in several different<br />
isoforms<br />
Bands are blurry Gel was run at <strong>to</strong>o high a voltage Repeat gel at lower voltage<br />
Incorrect running buffer<br />
Prepare fresh running buffer<br />
composition<br />
Trapped air bubble present<br />
during transfer<br />
Bands are smile<br />
shaped, not flat<br />
White (negative) bands<br />
on the film when using<br />
ECL detection<br />
Running conditions were <strong>to</strong>o fast<br />
so gel became over heated<br />
Too much protein has been<br />
loaded<br />
Antibody concentration<br />
is <strong>to</strong>o high<br />
Carefully remove air bubbles between<br />
the gel and the membrane before<br />
protein transfer<br />
Check and optimize gel<br />
electrophoresis conditions<br />
Run gel at 4°C<br />
Load less sample<br />
Repeat with dilution series of sample<br />
Reduce/optimize the antibody<br />
concentrations<br />
Your first choice for antibodies! www.abdserotec.com Chapter 6 43
No Bands<br />
Source of Problem Possible Cause Action/Solution<br />
Faint Bands or Weak Signal<br />
Source of Problem Possible Cause Action/Solution<br />
44<br />
Chapter 6<br />
Antibody related<br />
Antigen related<br />
Inappropriate secondary<br />
antibody used<br />
Wrong concentration of<br />
antibody or low affinity <strong>to</strong> the<br />
target protein<br />
Antibody not suitable<br />
for <strong>Western</strong> blotting<br />
Antibody has lost activity<br />
due <strong>to</strong> long term or improper<br />
s<strong>to</strong>rage<br />
Antigen not expressed<br />
in the source material<br />
Not enough antigen loaded<br />
on the gel<br />
Retrace steps <strong>to</strong> check compatibility<br />
between primary and secondary antibodies<br />
Reprobe with correct secondary or strip blot<br />
and reprobe if necessary<br />
Repeat experiment with the correct<br />
antibody combination<br />
Increase the antibody concentration<br />
2-4 fold higher than initially recommended<br />
Increase length of incubation<br />
Test/optimize antibody on dot blots<br />
Try another antibody<br />
Check datasheet for recommended conditions<br />
Test/optimize antibody on dot blots<br />
Try alternate antibody<br />
Test on a dot blot at several concentrations<br />
Use fresh aliquot of antibody that has been<br />
s<strong>to</strong>red at -20°C or below<br />
Use another source of target protein<br />
Check concentration of sample<br />
Increase the amount of source material<br />
Immunoprecipitate, fractionate,<br />
or concentrate the sample<br />
Technique related Transfer did not work properly Confirm protein transfer by staining the<br />
membrane with Ponceau S and/or the gel<br />
with Coomassie dye.<br />
Note how well any prestained molecular<br />
weight markers have transferred on<strong>to</strong> the blot<br />
Optimize/check transfer conditions and set<br />
up (especially orientation <strong>to</strong> electrodes)<br />
Repeat using two membranes in case<br />
protein has transferred through the first<br />
Washes are <strong>to</strong>o stringent Use fewer washers<br />
Reduce washing time<br />
Buffer related<br />
Blocking agent is interfering<br />
with signal<br />
Buffers may contain sodium<br />
azide which inactivates HRP<br />
Peroxide may be inactive<br />
reducing activity of peroxidase<br />
ECL detection reagents have<br />
been contaminated<br />
Try lower concentration<br />
Try alternate blocking agent<br />
Use azide free buffers<br />
Add fresh peroxide <strong>to</strong> substrate buffer<br />
Use fresh detection reagents<br />
Antibody related<br />
Antigen related<br />
Primary or secondary antibody<br />
concentrations were <strong>to</strong>o low<br />
Low antigen-antibody<br />
binding affinity<br />
Insufficient sample loaded on<br />
the gel<br />
Blot has been stripped<br />
and reprobed<br />
Repeat using higher concentration<br />
of antibody<br />
Optimize antibody concentration with<br />
dot blots<br />
Reduce the number of wash steps<br />
<strong>to</strong> a minimum<br />
Increase the antibody concentration<br />
2-4 fold higher than the recommended<br />
starting dilution<br />
Check concentration of sample<br />
Increase the amount of source material<br />
Immunoprecipitate, fractionate,<br />
or concentrate sample<br />
Redo blot since antigen may have been<br />
stripped off or damaged by stripping<br />
process<br />
Technique related Low transfer efficiency Confirm transfer with Ponceau S staining<br />
Optimize transfer conditions for target<br />
protein size<br />
Optimize transfer buffers for methanol<br />
and SDS concentrations<br />
Buffer related<br />
Film exposure time (ECL<br />
detection) was <strong>to</strong>o short<br />
Non-fat dry milk may mask<br />
some antigens<br />
Test different exposure times<br />
Decrease % of milk in the blocking<br />
and antibody solutions<br />
Try alternate blocking solution<br />
Your first choice for antibodies! www.abdserotec.com Chapter 6 45
High Background Signal on the Blot<br />
Source of Problem Possible Cause Action/Solution<br />
Patchy or Uneven Spots on the Blot<br />
Source of Problem Possible Cause Action/Solution<br />
Antibody related<br />
Concentration of primary and/or<br />
secondary antibody <strong>to</strong>o high<br />
Primary and/or secondary binds<br />
<strong>to</strong> the blocking agent<br />
Antibody has reduced activity due<br />
<strong>to</strong> long term or improper s<strong>to</strong>rage<br />
Phospho-specific antibody<br />
has reacted with casein<br />
(a phosphoprotein) in nonfat<br />
milk blocking agent<br />
Secondary antibody is binding<br />
<strong>to</strong> blocking agent<br />
Reduce/optimize the antibody<br />
concentrations<br />
Reduce/optimize incubation times<br />
Use affinity purified antibodies<br />
Use alternate blocking solution<br />
Use a fresh aliquot of antibody that<br />
has been s<strong>to</strong>red at -20°C or below<br />
Use alternate blocking solution- BSA<br />
or Block Ace (AbD Serotec BUF029)<br />
Try another blocking agent<br />
Reduce protein concentration<br />
of blocking agent<br />
Test secondary antibody alone on blot<br />
Try alternate form of secondary,<br />
Antibody related<br />
Technique related<br />
Buffer related<br />
HRP-linked secondary antibody<br />
has aggregated<br />
Not enough solution used during<br />
incubation and/or washing<br />
Spin secondary antibody and filter<br />
<strong>to</strong> remove aggregates<br />
Make sure the membrane is fully<br />
immersed and agitated throughout<br />
incubations<br />
Trapped air bubbles Carefully remove air bubbles between<br />
the gel and the membrane before<br />
protein transfer<br />
Uneven agitation during<br />
incubation<br />
Antibodies are binding <strong>to</strong> the<br />
blocking agent<br />
Use a shaker for all incubations<br />
Filter the blocking agent<br />
Try another blocking agent<br />
Antigen related<br />
Technique related<br />
Buffer related<br />
Non-specific interaction with<br />
genomic DNA in samples<br />
Membrane blocking is<br />
not sufficiant<br />
such as F(ab’) 2<br />
Sonicate the lysates<br />
Add DNAse <strong>to</strong> lysis buffer<br />
Confirm concentration matches<br />
that recommended in the pro<strong>to</strong>col<br />
Try other blocking agents<br />
Try alternate incubation temperatures,<br />
including room temperature<br />
Membrane has dried out Repeat procedure taking care that the<br />
blot does not dry out during any step<br />
by using sufficient volumes and<br />
agitation throughout<br />
PVDF membrane has higher Try nitrocellulose instead<br />
background<br />
Inadequate washing between Increase the length of washing steps<br />
incubations<br />
Use a larger volume of wash buffer<br />
Incubation temperature <strong>to</strong>o high Try alternate incubation temperatures<br />
such as 4°C<br />
Film over-exposed or blot<br />
developed for <strong>to</strong>o long<br />
Insufficient concentration<br />
of detergent in the buffers<br />
Transfer, incubation, or blocking<br />
solutions are contaminated<br />
Wait 5-10 minutes and then re-expose<br />
blot <strong>to</strong> film<br />
Reduce exposure and/or development<br />
times<br />
Use TBS containing >0.1% Tween ® 20<br />
Try stronger detergent, such as NP-40<br />
Use fresh buffers<br />
46<br />
Chapter 6<br />
Your first choice for antibodies! www.abdserotec.com Chapter 6 47
References and Further Reading<br />
Bolt, M. and Mahoney, P. (1997) High-efficiency blotting of proteins of diverse sizes<br />
following sodium dodecyl sulfate-polyacrylamide gel electrophoresis. Anal. Biochem.<br />
247, 185-192<br />
Burnette, W.N. (1981) “<strong>Western</strong> <strong>Blotting</strong>”: Electrophoretic transfer of proteins from sodium<br />
dodecyl sulfate--polyacrylamide gels <strong>to</strong> unmodified nitrocellulose and radiographic<br />
detection with antibody and radioiodinated protein A. Anal. Biochem. 112, 195-203<br />
Harlow, E. and Lane, D. (1988) Antibodies: A Labora<strong>to</strong>ry Manual, Cold Spring Harbor<br />
Labora<strong>to</strong>ry Press, Cold Spring Harbor, New York<br />
Sambrook et al., (1989) Molecular Cloning: A Labora<strong>to</strong>ry Manual, Cold Spring Harbor<br />
Labora<strong>to</strong>ry Press, Cold Spring Harbor, New York<br />
Towbin, H., et al., (1979) Electrophoretic transfer of proteins from polyacrylamide gels<br />
<strong>to</strong> nitrocellulose sheets: procedure and some applications. Proc. Natl. Acad. Sci. U.S.A.<br />
76, 4350-4354<br />
Towbin, H. and Gordon, J. (1984) Immunoblotting and dot immunobinding--current status<br />
and outlook. J. Immunol. Methods 72, 313-340<br />
Wadsworth, J. D. et al., (2001) Tissue distribution of protease resistant prion protein in<br />
variant Creutzfeldt-Jakob disease using a highly sensitive immunoblotting assay. Lancet<br />
358, 171-180<br />
Acknowledgements<br />
The author gratefully recognizes Joanne Martin, PhD., Clare Desforges,<br />
MSc., and Susan P. Fairchild, PhD. for their key contributions and valuable<br />
assistance.<br />
Thanks <strong>to</strong> the following for images and data:<br />
Figure 2 & 6: Joanne Martin, PhD., AbD Serotec, Oxford, UK<br />
Figure 7 & 9: Joanna Rowe, PhD., and John Woodley, AbD Serotec,<br />
Oxford, UK<br />
Figure 12: Dra. Ainoha García Claver, Unidad de Pa<strong>to</strong>logía Molecular,<br />
Hospital Virgen de la Salud, Toledo, Spain, and Dra. Barbara Meléndez,<br />
Hospital Virgen de la Salud, Toledo, Spain<br />
Figure 15: Juliette Fitau, Institut National de la Santé et de la Recherche<br />
Médicale (INSERM), and Institut de Transplantation et de Recherche en<br />
Transplantation (ITERT), Nantes, France<br />
Figure 16: Will Charles and Adam Podmore, Auckland UniServices Ltd.,<br />
Auckland, New Zealand<br />
Figure 18: Dr Sandra McCutcheon and Boon Chin Tan, Neuropathogenesis<br />
Division, The Roslin Institute, UK<br />
HuCAL ® and LYNX Rapid Conjugation Kit ® are registered trademarks of MorphoSys UK Ltd.<br />
HuCAL ® products are for in vitro use only. All AbD Serotec reagents are for research purposes<br />
only, not for therapeutic or diagnostic use.<br />
DyLight ® dyes are a registered trademark of Thermo Fisher Scientific and its subsidiaries. LI-COR ®<br />
and Odyssey ® Blocking Buffer are registered trademarks of LI-COR Biosciences. NuPAGE ®<br />
and Novex ® are registered trademarks of Invitrogen.<br />
48<br />
Your first choice for antibodies!<br />
www.abdserotec.com
Your first choice for antibodies!<br />
Over 14,000 performance-guaranteed reagents<br />
Primary and secondary antibodies<br />
Wide range of species, formats, and labels<br />
Accessory products for <strong>Western</strong> blotting<br />
Cell and tissue lysates<br />
Buffers and labeling kits<br />
Antibody production and conjugation<br />
From 10 mg <strong>to</strong> 10 g<br />
Formulated <strong>to</strong> your specifications<br />
Cus<strong>to</strong>m monoclonals in just 8 weeks<br />
Intelligent in vitro screening pro<strong>to</strong>cols<br />
"No antibody – No charge" guarantee<br />
www.abdserotec.com/westernblot<br />
North & South America Tel: +1 800 265 7376<br />
Fax: +1 919 878 3751<br />
Email: sales.us@abdserotec . .com<br />
Worldwide Tel: +44 1865 852 700<br />
Fax: +44 1865 852 739<br />
Email: sales@abdserotec . .com<br />
Europe Tel: 00800 CALL 4ABD<br />
(00800 2255 4223)<br />
Fax: 00800 2FAX 2ABD<br />
(00800 2329 2223)<br />
Email: sales.eu@abdserotec<br />
. .com<br />
LIT.CMR.2009.1 © MorphoSys UK Ltd 2009. All rights reserved. Published by MorphoSys UK Ltd.<br />
Endeavour House, Langford Business Park, Langford . Lane, Kidling<strong>to</strong>n, Oxford OX5 1GE, UK.